Polaris RZR 900XP Engine Rebuild Part 5: Bottom End Rebuild
Welcome to the fifth part of our Polaris RZR 900XP engine rebuild series, in which we work on rebuilding the bottom end of the Polaris side-by-side engine.
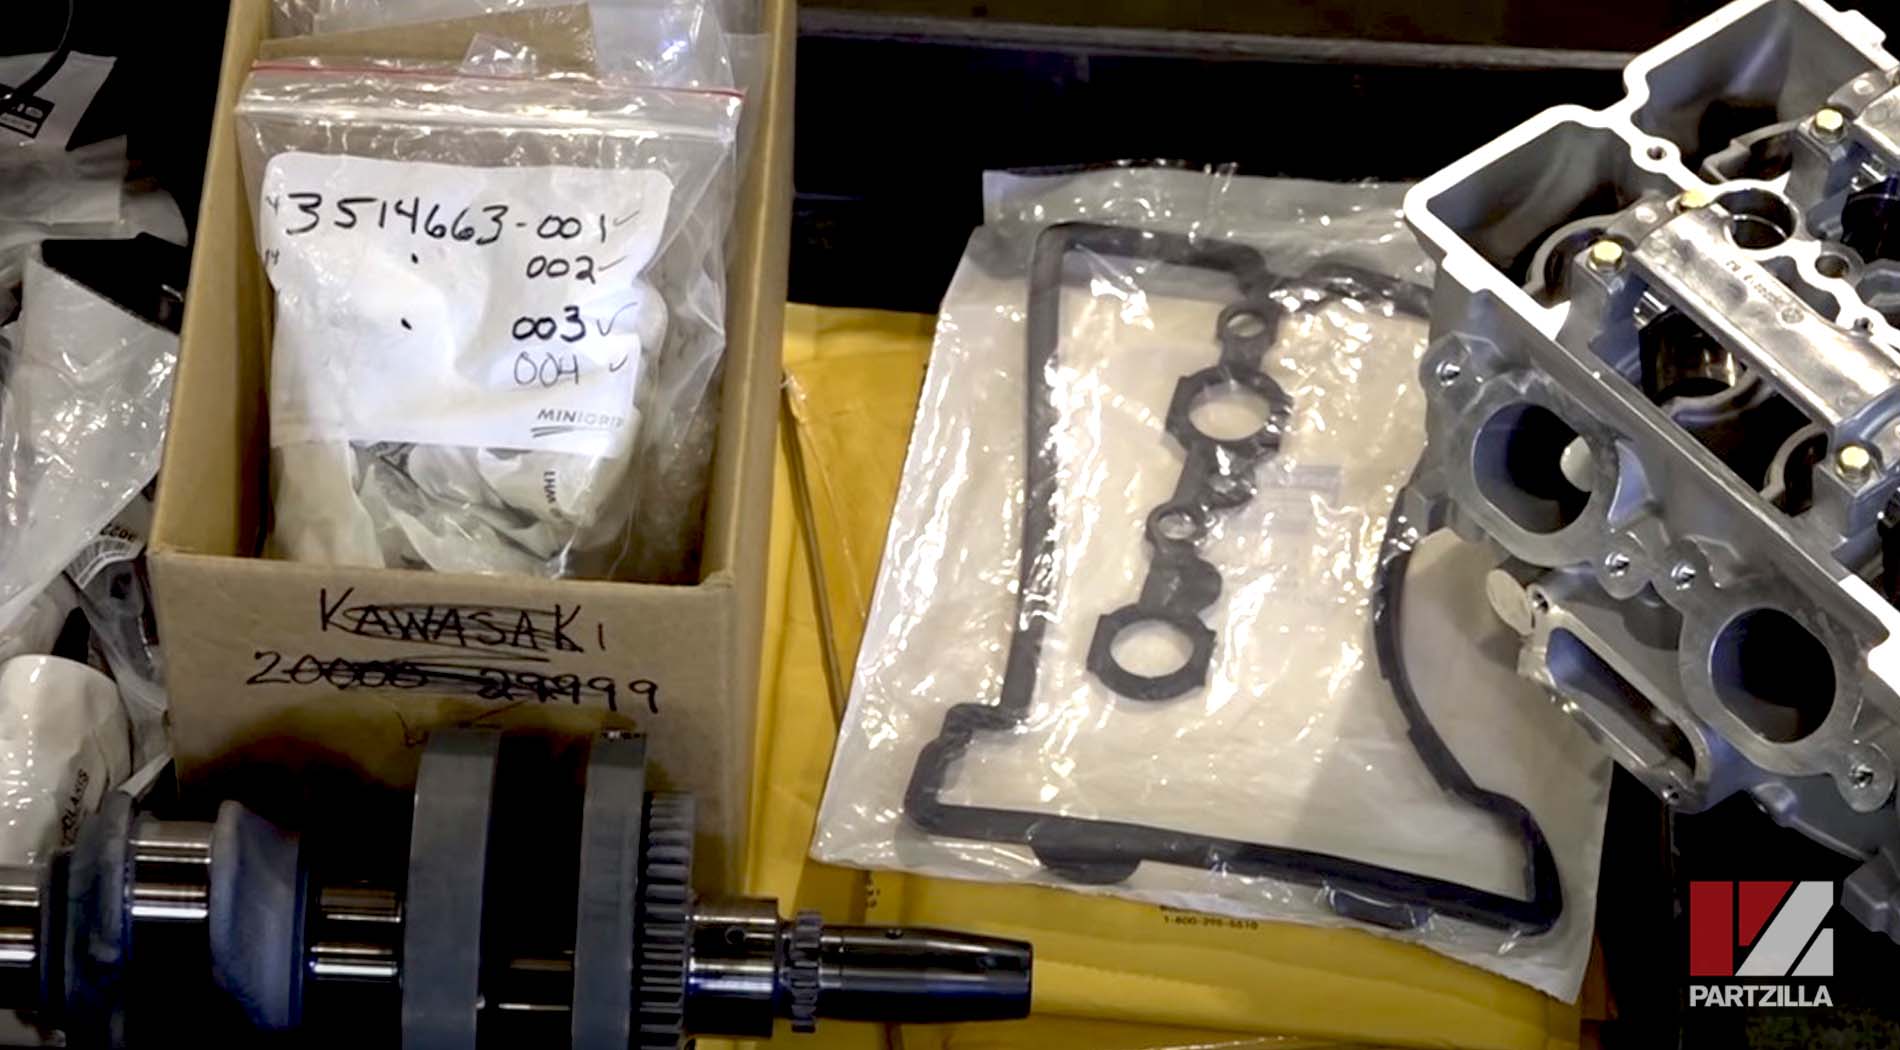
The block is the centerpiece of it all, and there are many other parts that came off of it. Some parts for this rebuild were reusable, and some weren’t, but we ordered an enormous amount of brand new parts for this Polaris RZR 900 engine rebuild.
Watch the video above or follow the steps below to learn how to do a bottom end rebuild on a Polaris RZR 900XP. Use our Polaris RZR 900XP exploded parts diagrams for additional reference.
Tools and Parts - Polaris RZR 900XP Bottom End Rebuild
- Ratchet and extensions
- Socket set
- Torque wrench
- Screwdrivers
- Oil
- Dead-blow hammer
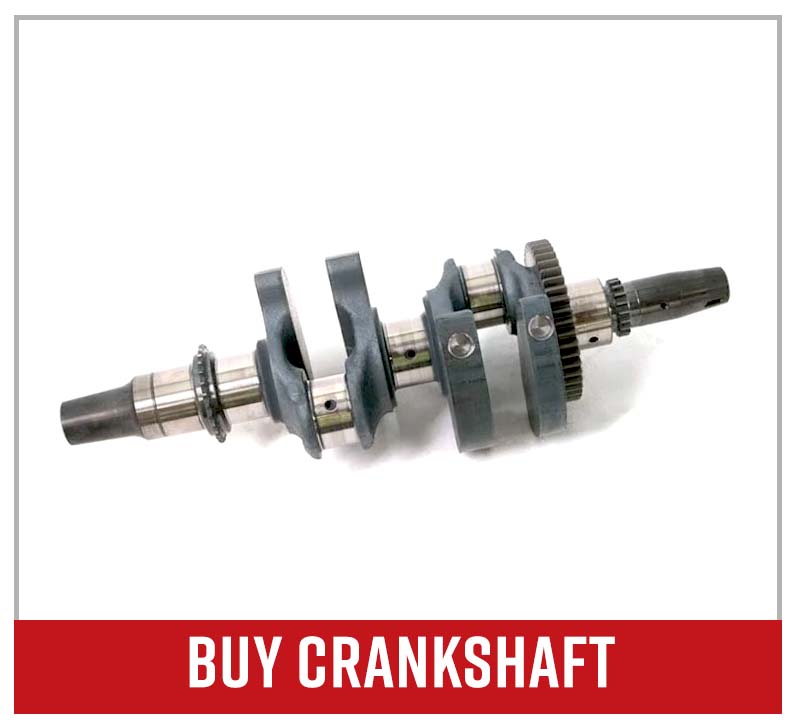
- Crankshaft
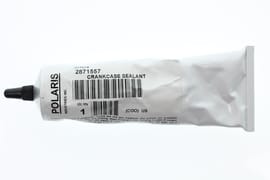
- Sealant
- Connector rod bolts
NOTE: The list of parts will vary depending on what needs to be replaced in your RZR's engine. The full list of parts used for this rebuild can be found here.
Sizing the Crankshaft and Connector Rod Bearings
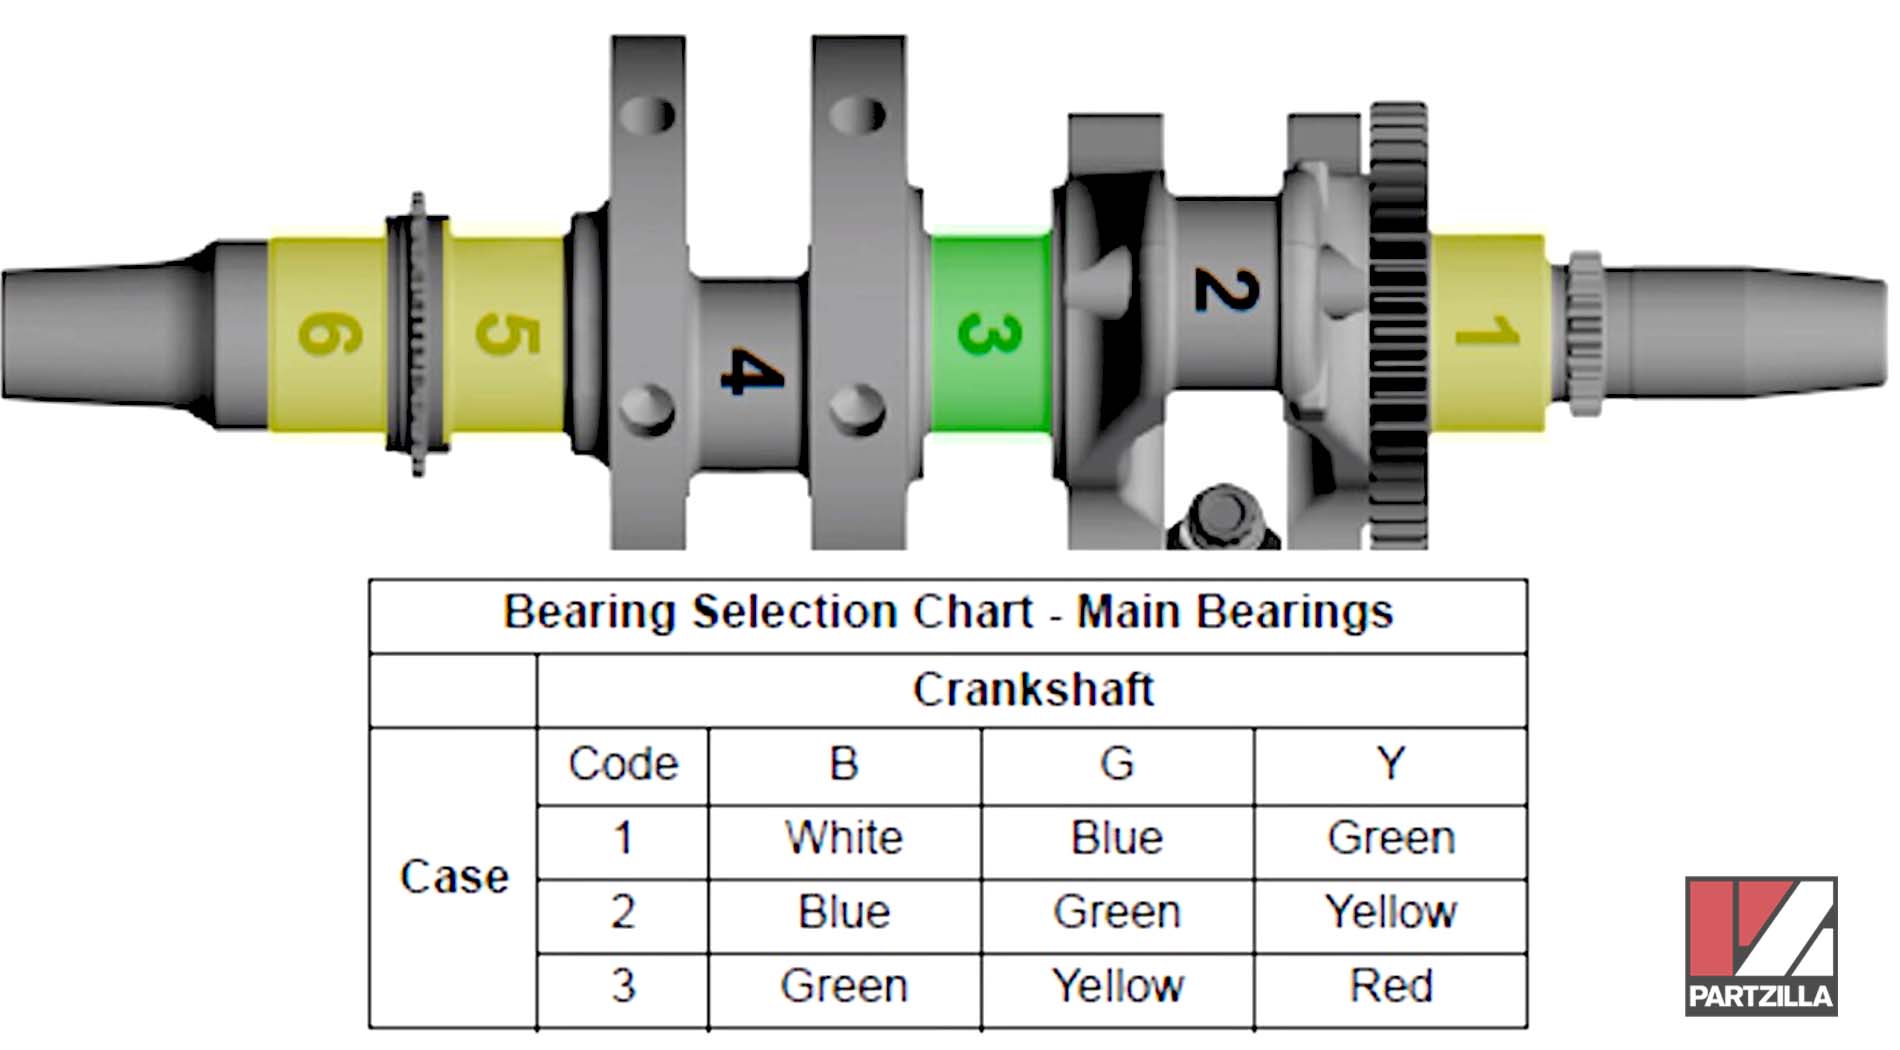
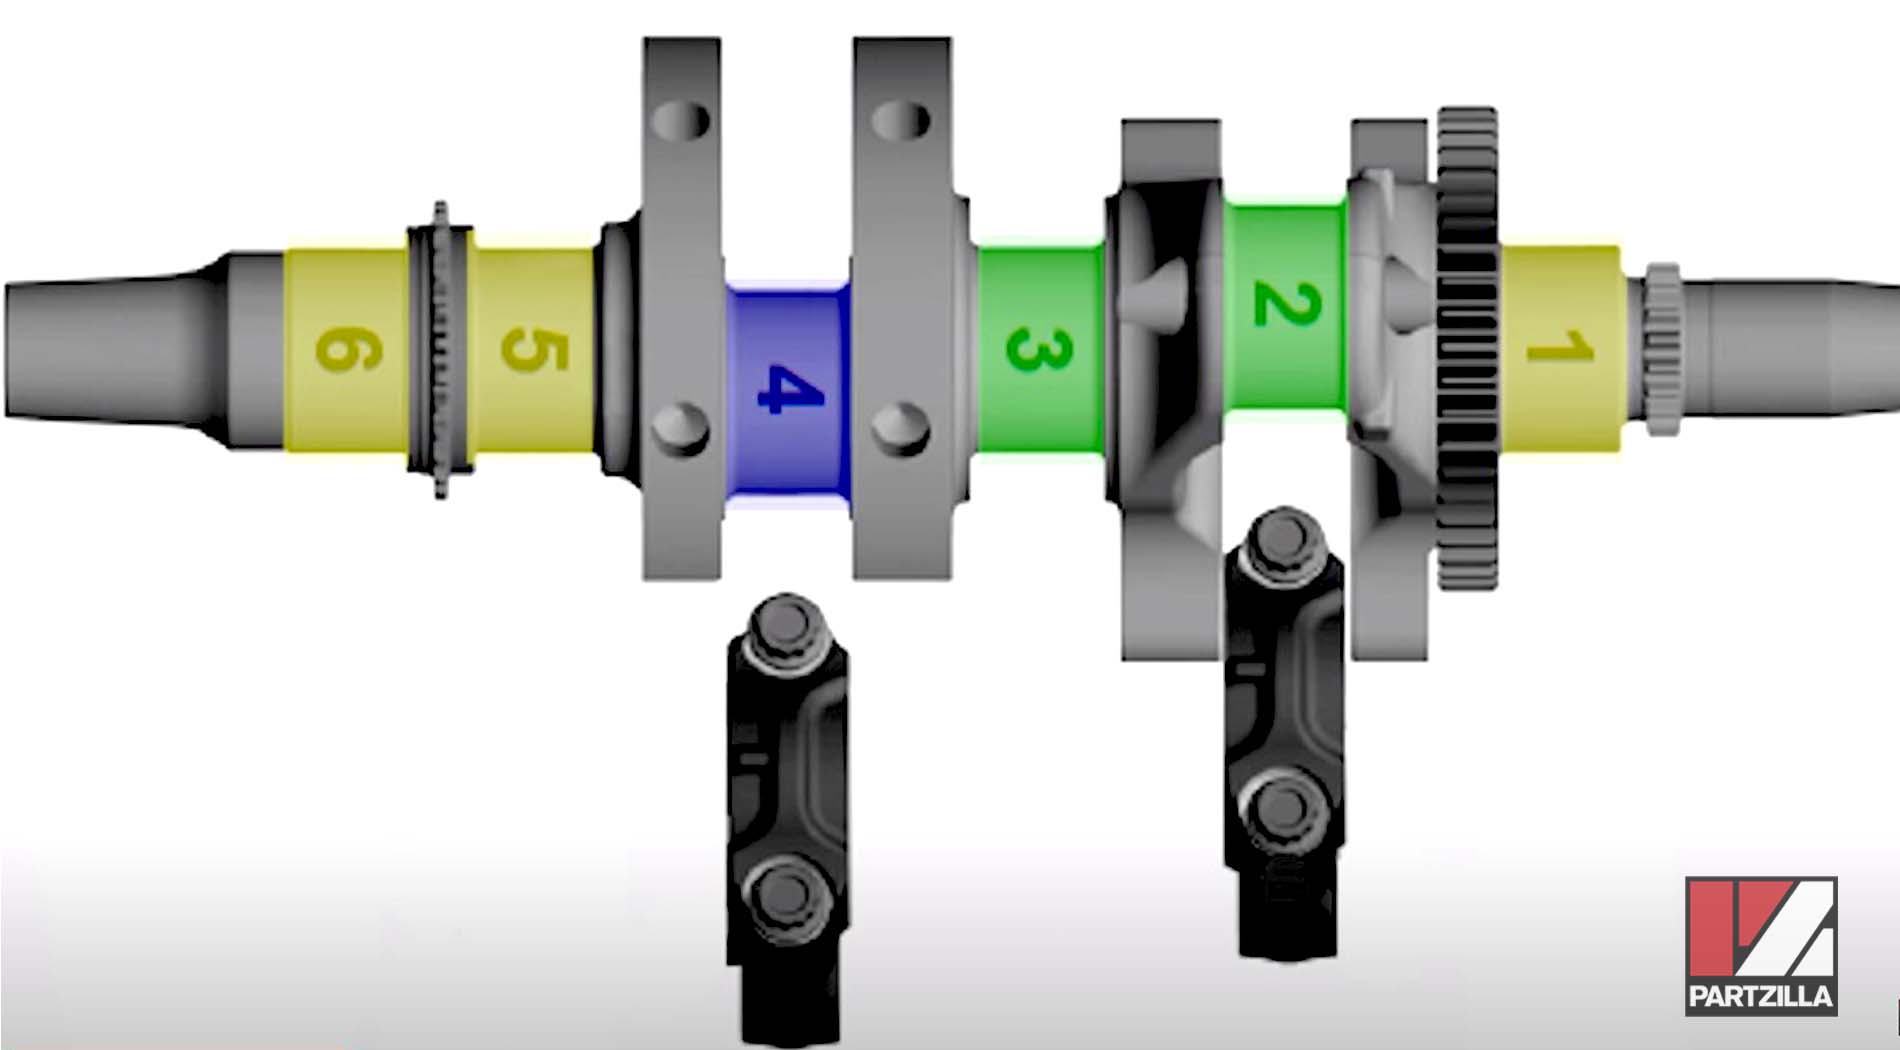
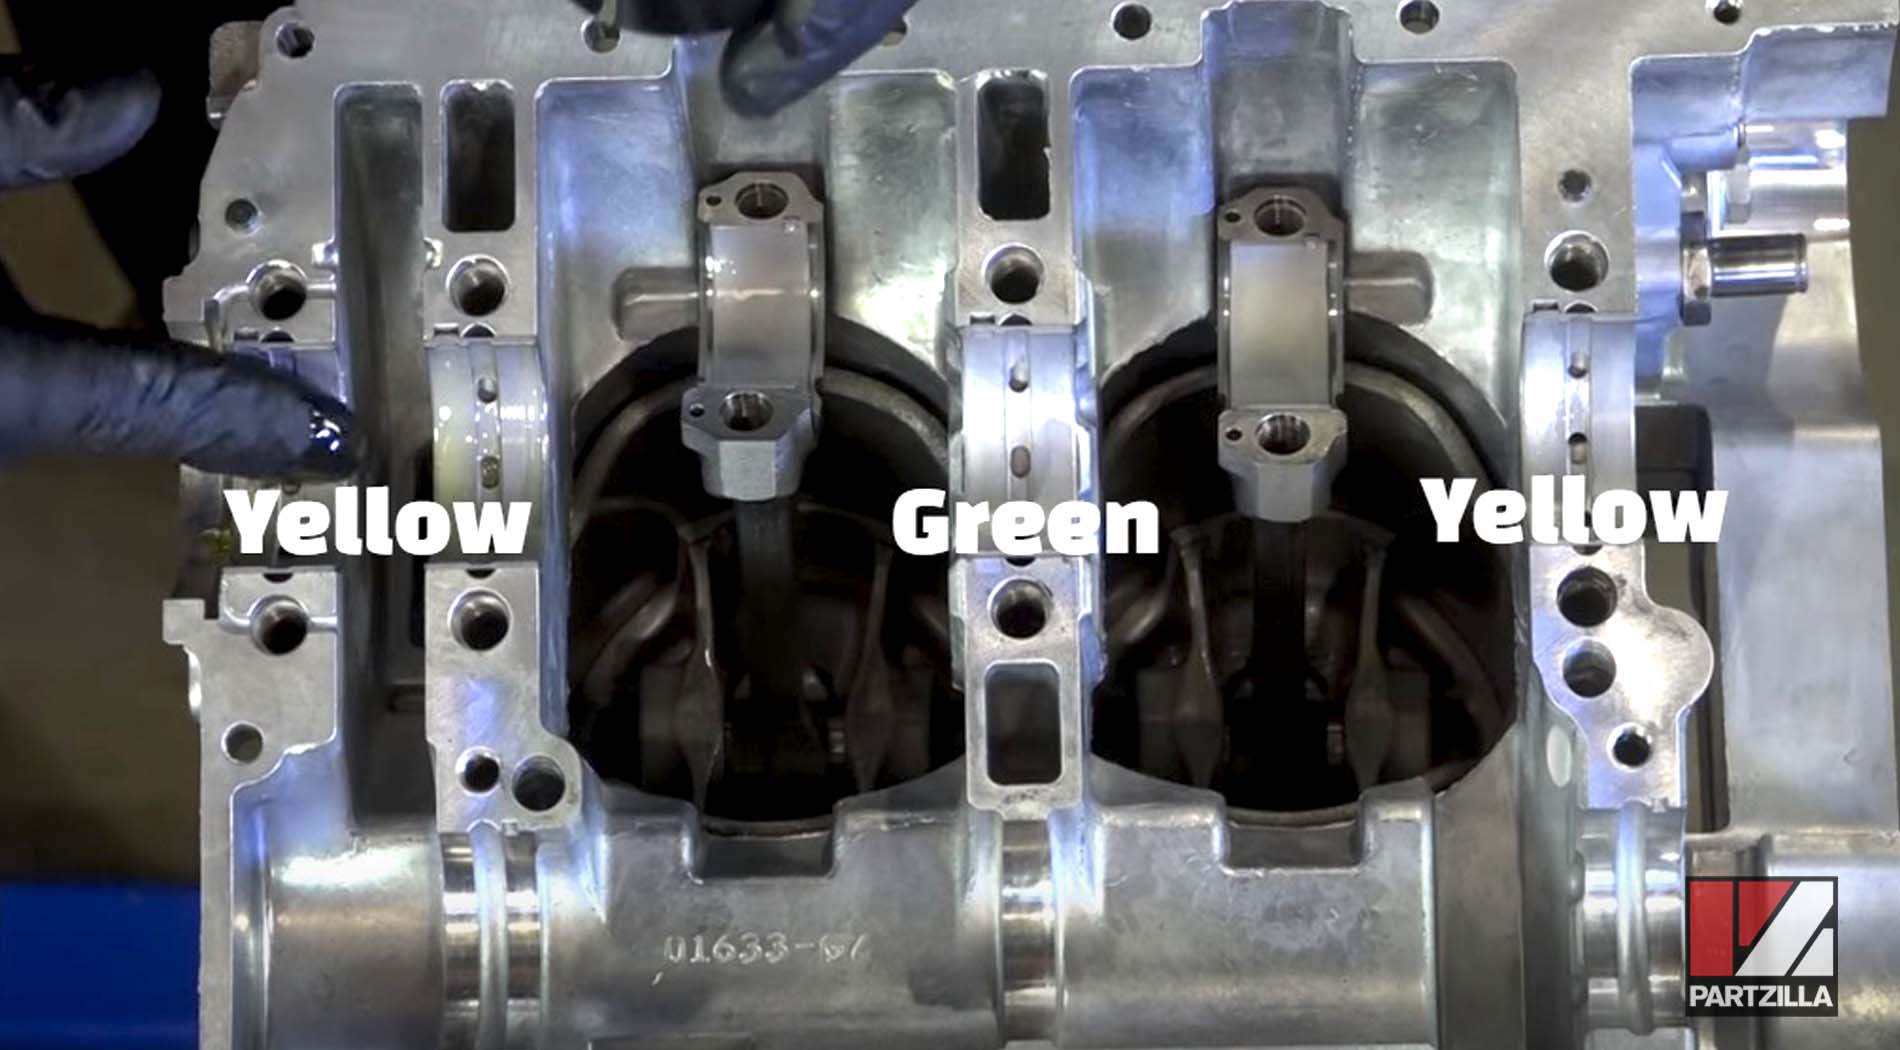
Before starting the rebuild process, get all of bearings sized correctly using the sizing chart inside of the Polaris manual. Start by sizing the main bearings first, using information off the block and the crankshaft. Stamped on the end of the block are six numbers you need to write down, plus six letters on the end of the crankshaft.
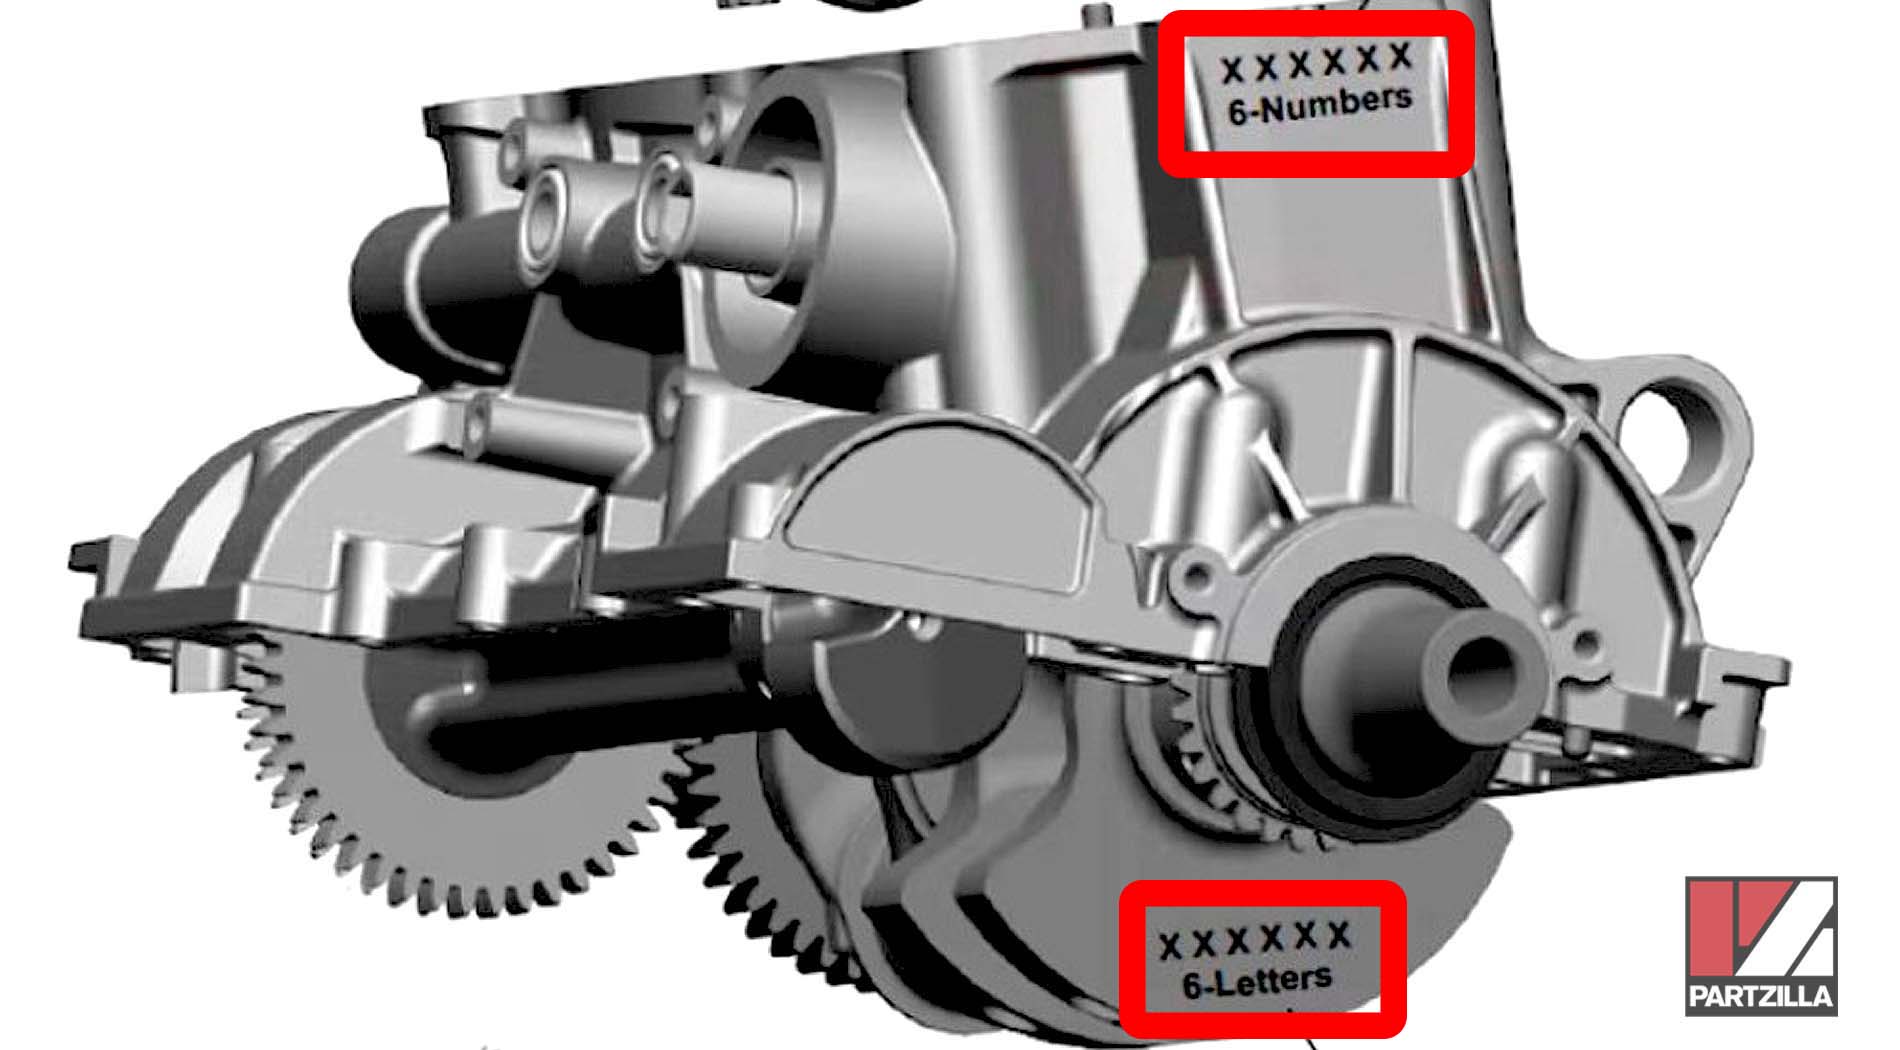
For the crankshaft on our Polaris RZR 900XP, the main bearings are G-B-G-G.
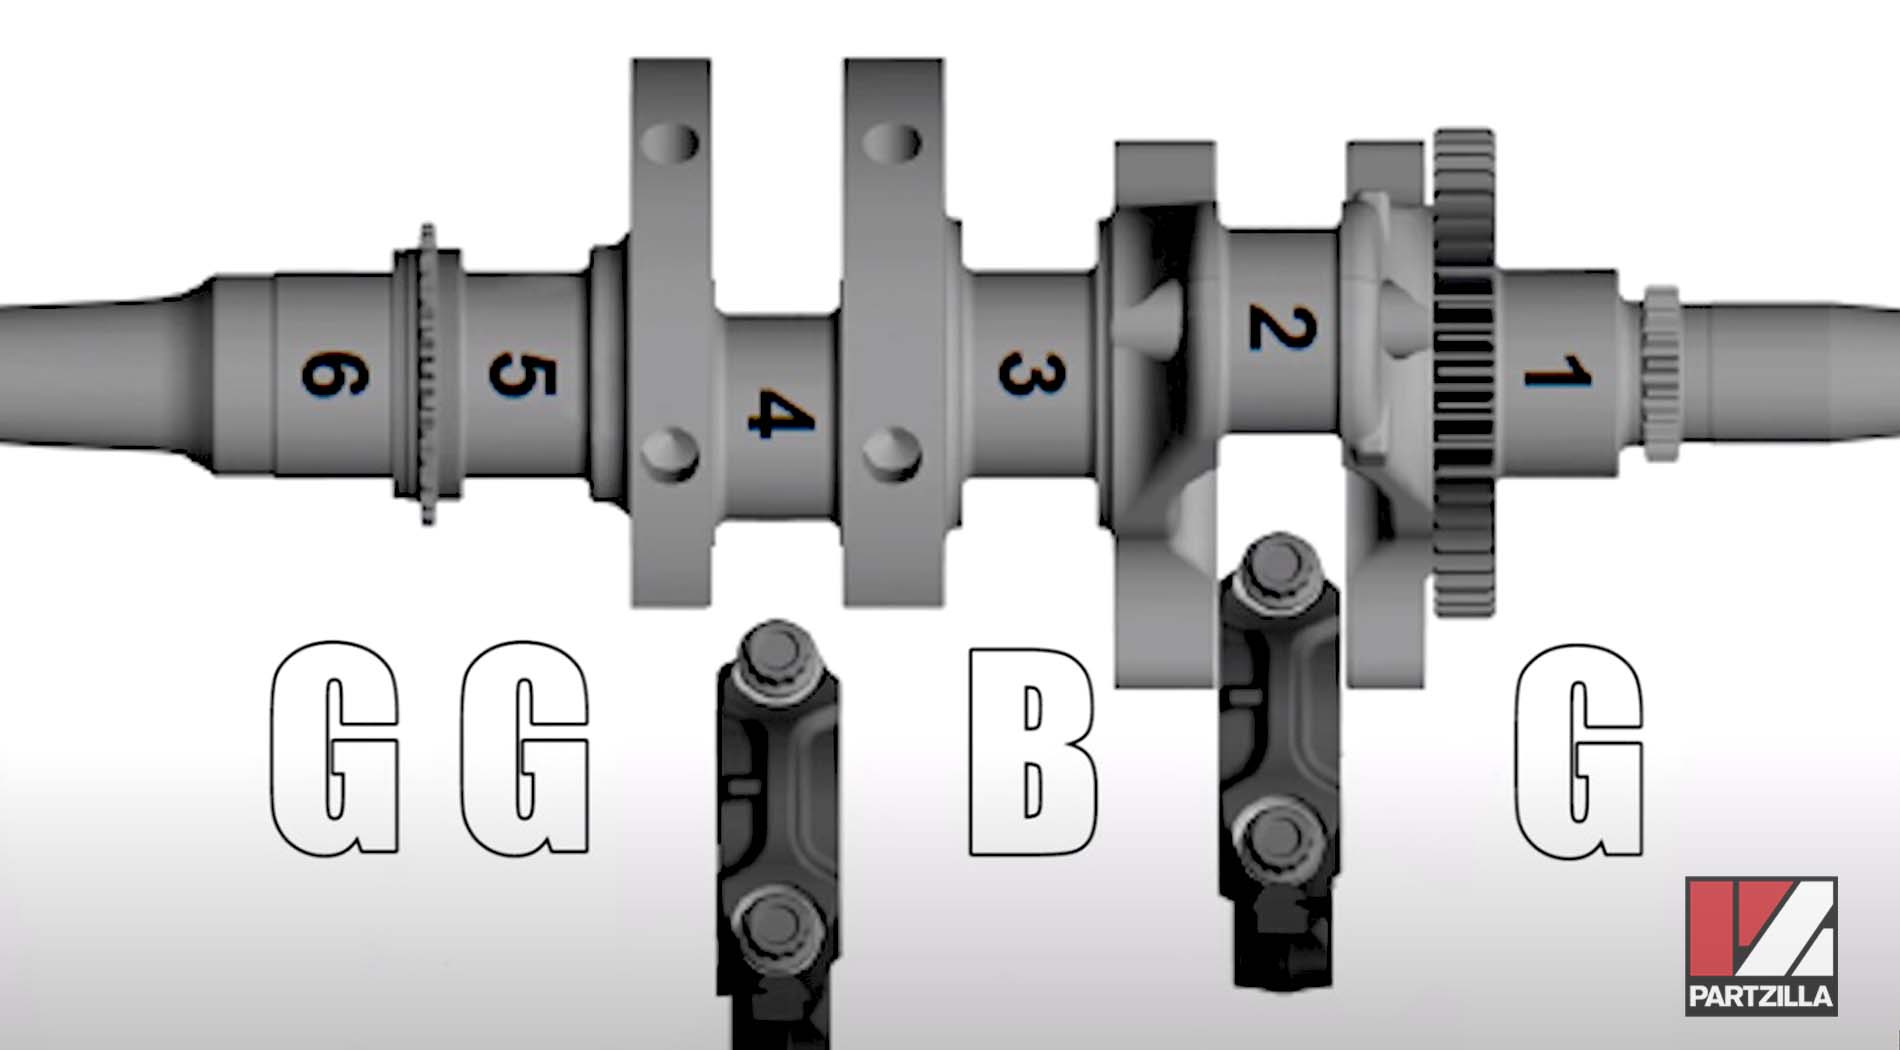
The numbers off the block are all 3’s. Using our chart for the main bearings, a G3 is yellow, and a B3 is green. In sequential order, we have one yellow (#1 in the diagram below), a green one (#3), and then two more yellows on the end (#5 and #6).
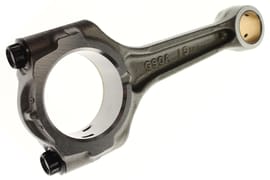
For sizing the connector rods, the one we're going to reuse has a number 3 on the end cap, and our new one has a 2.
The connector rod chart indicates that B2 is a blue bearing, and B3 is a green bearing.
Watch the clip below to see the bearing sizing segment of our Polaris RZR 900XP bottom end rebuild video.
Polaris RZR 900 Bottom End Rebuild
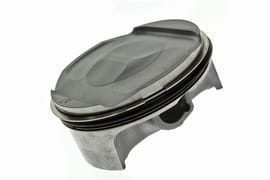
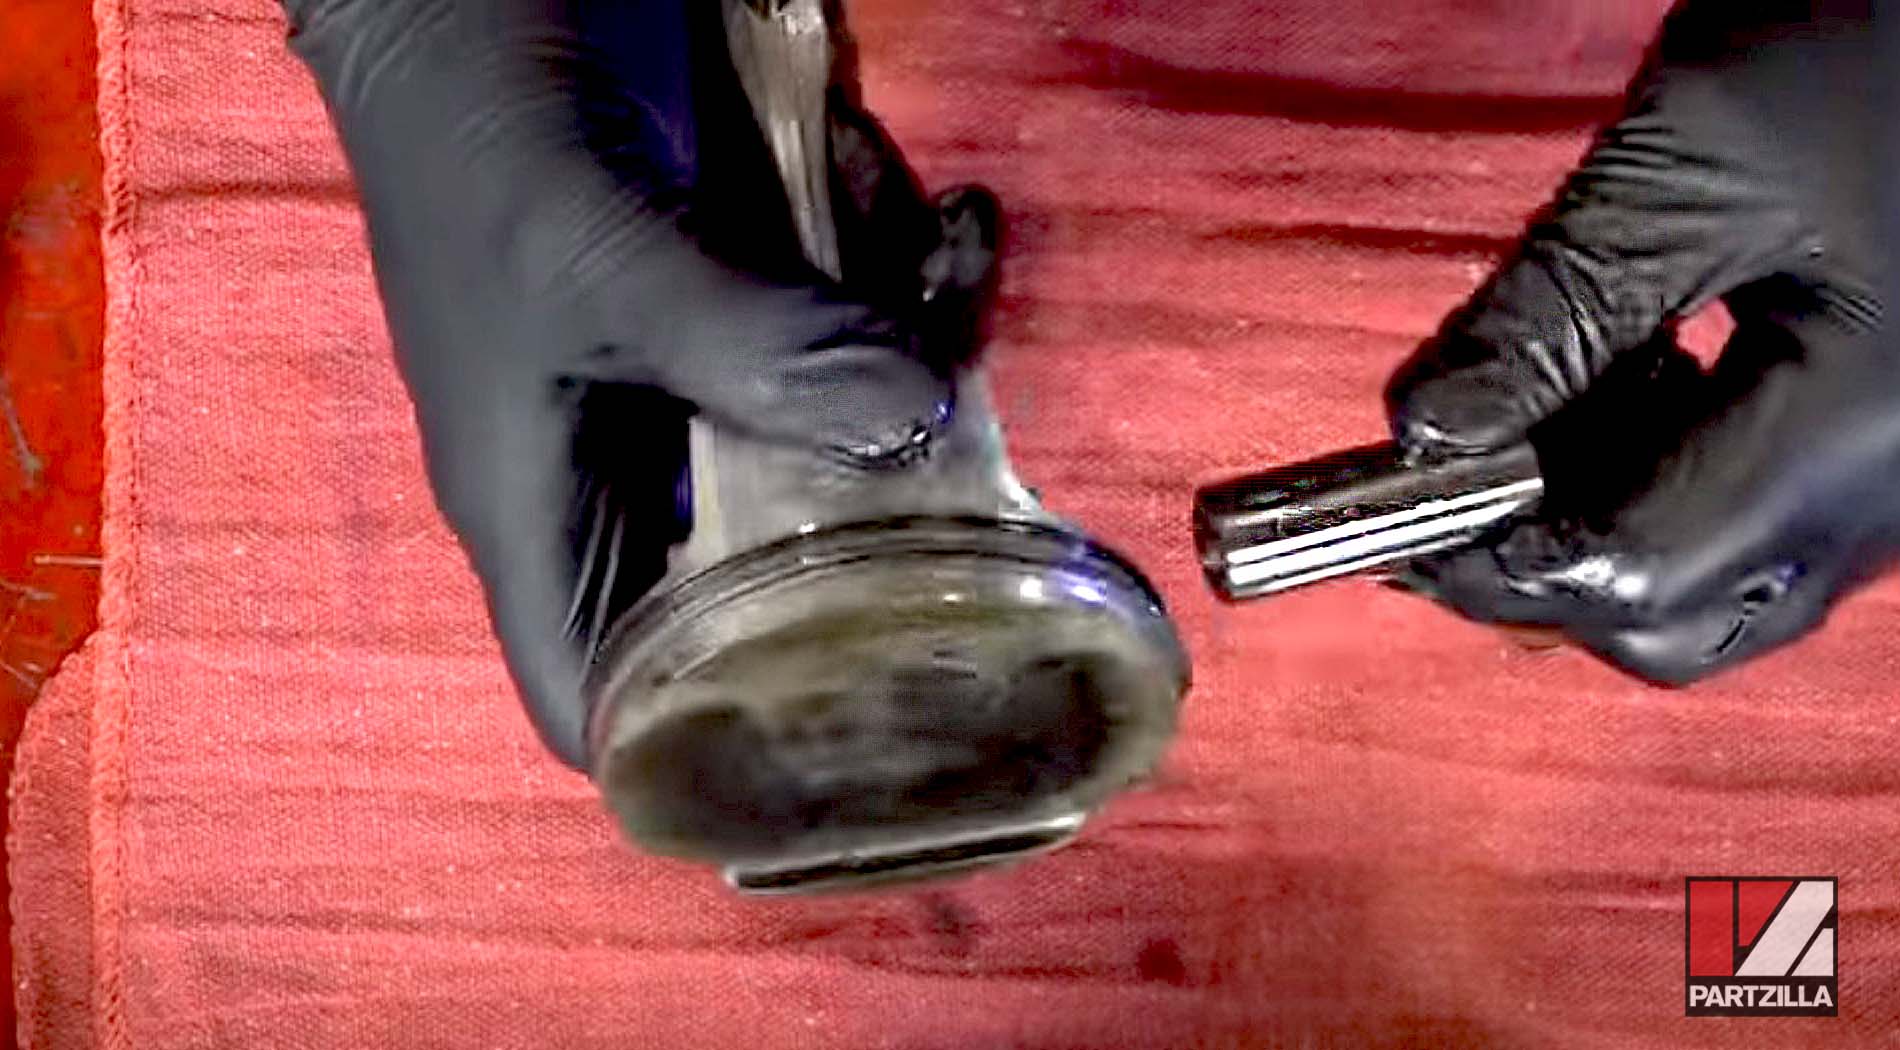
Step 1. Pull the piston and its connector rod out of the bore.
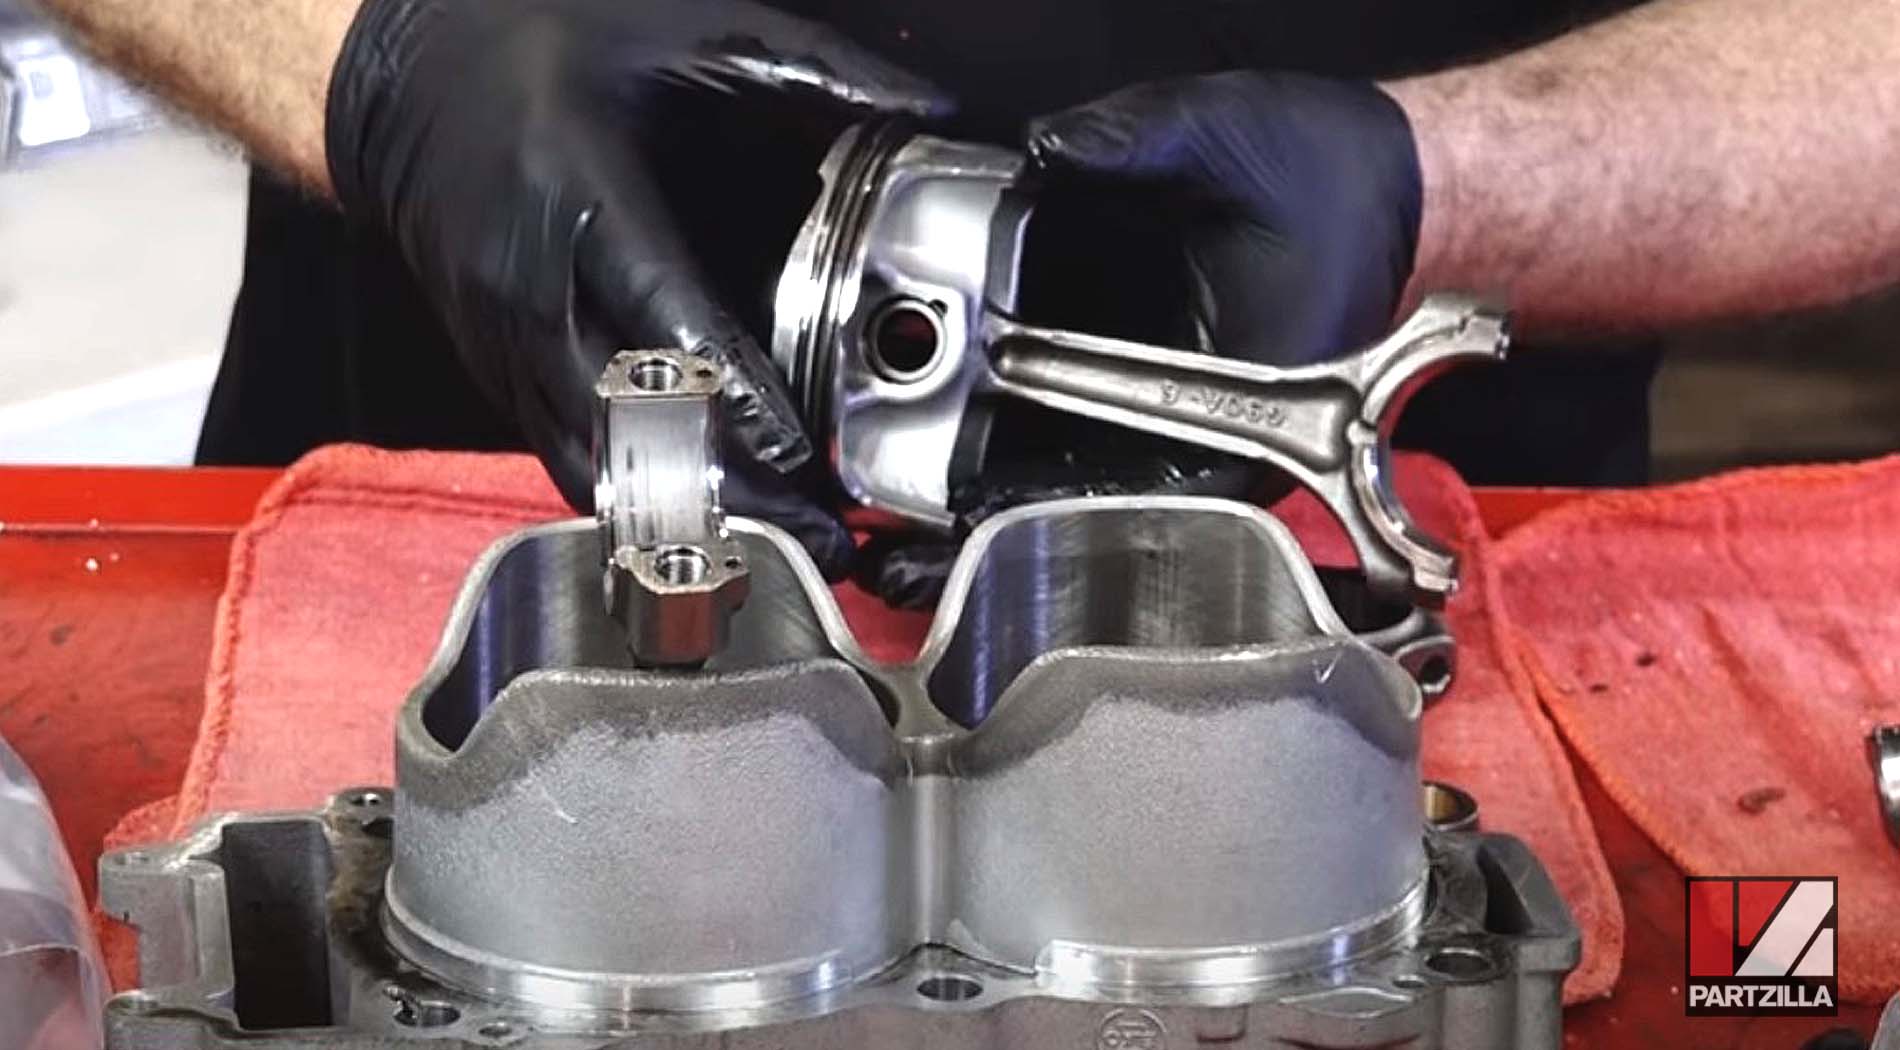
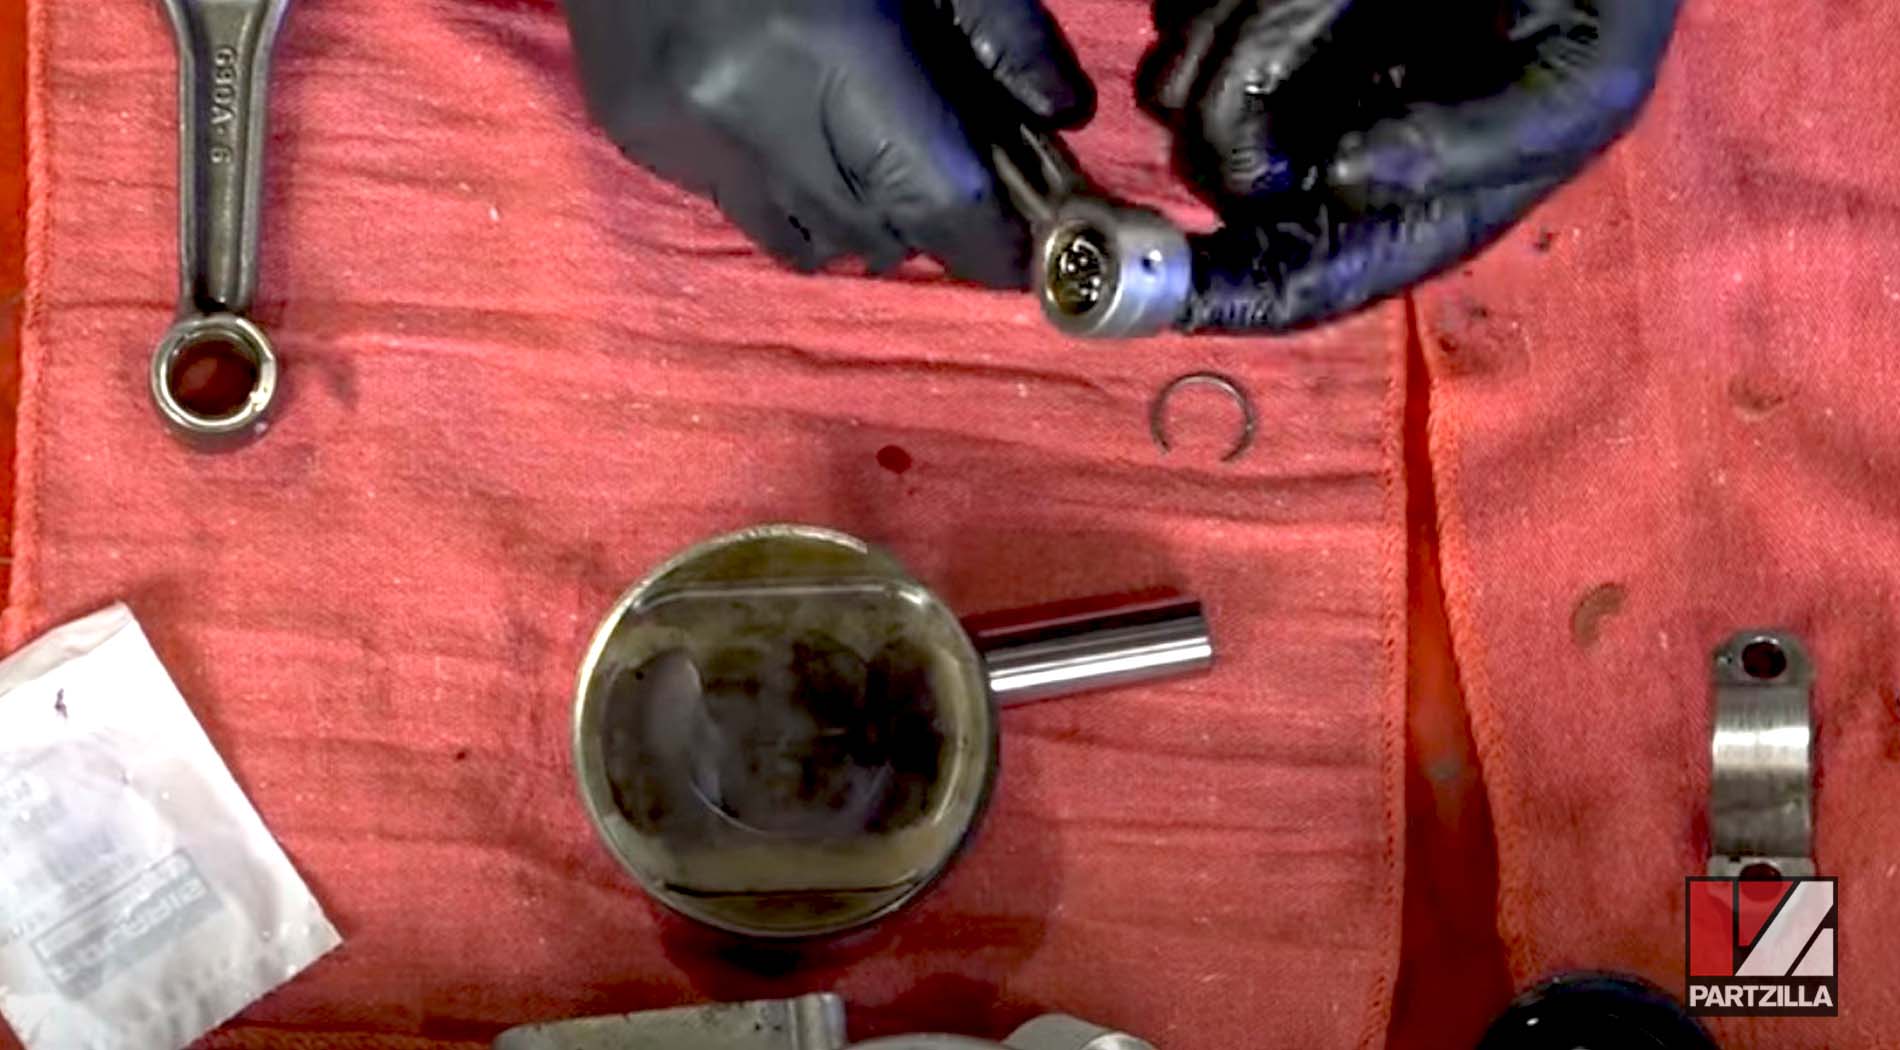
Step 2. Remove the circlip, the wrist pin and the old connector rod off from the piston.
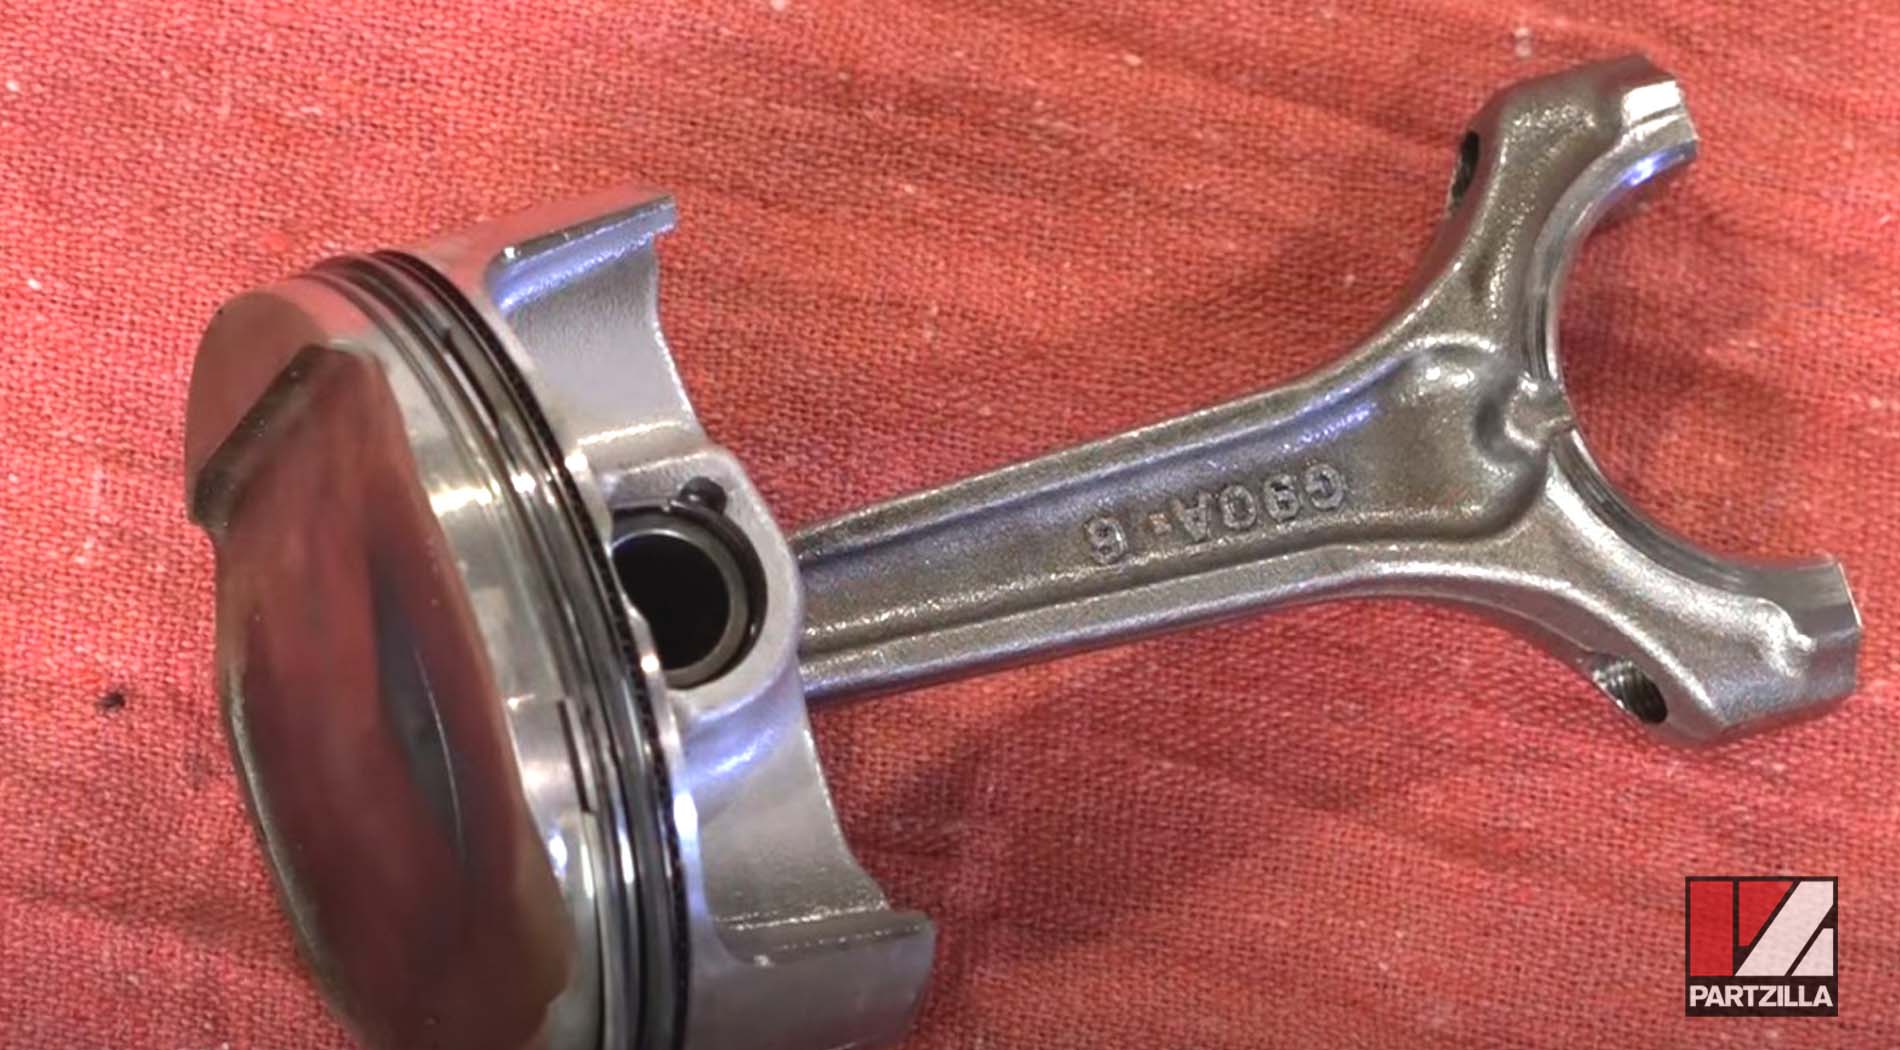
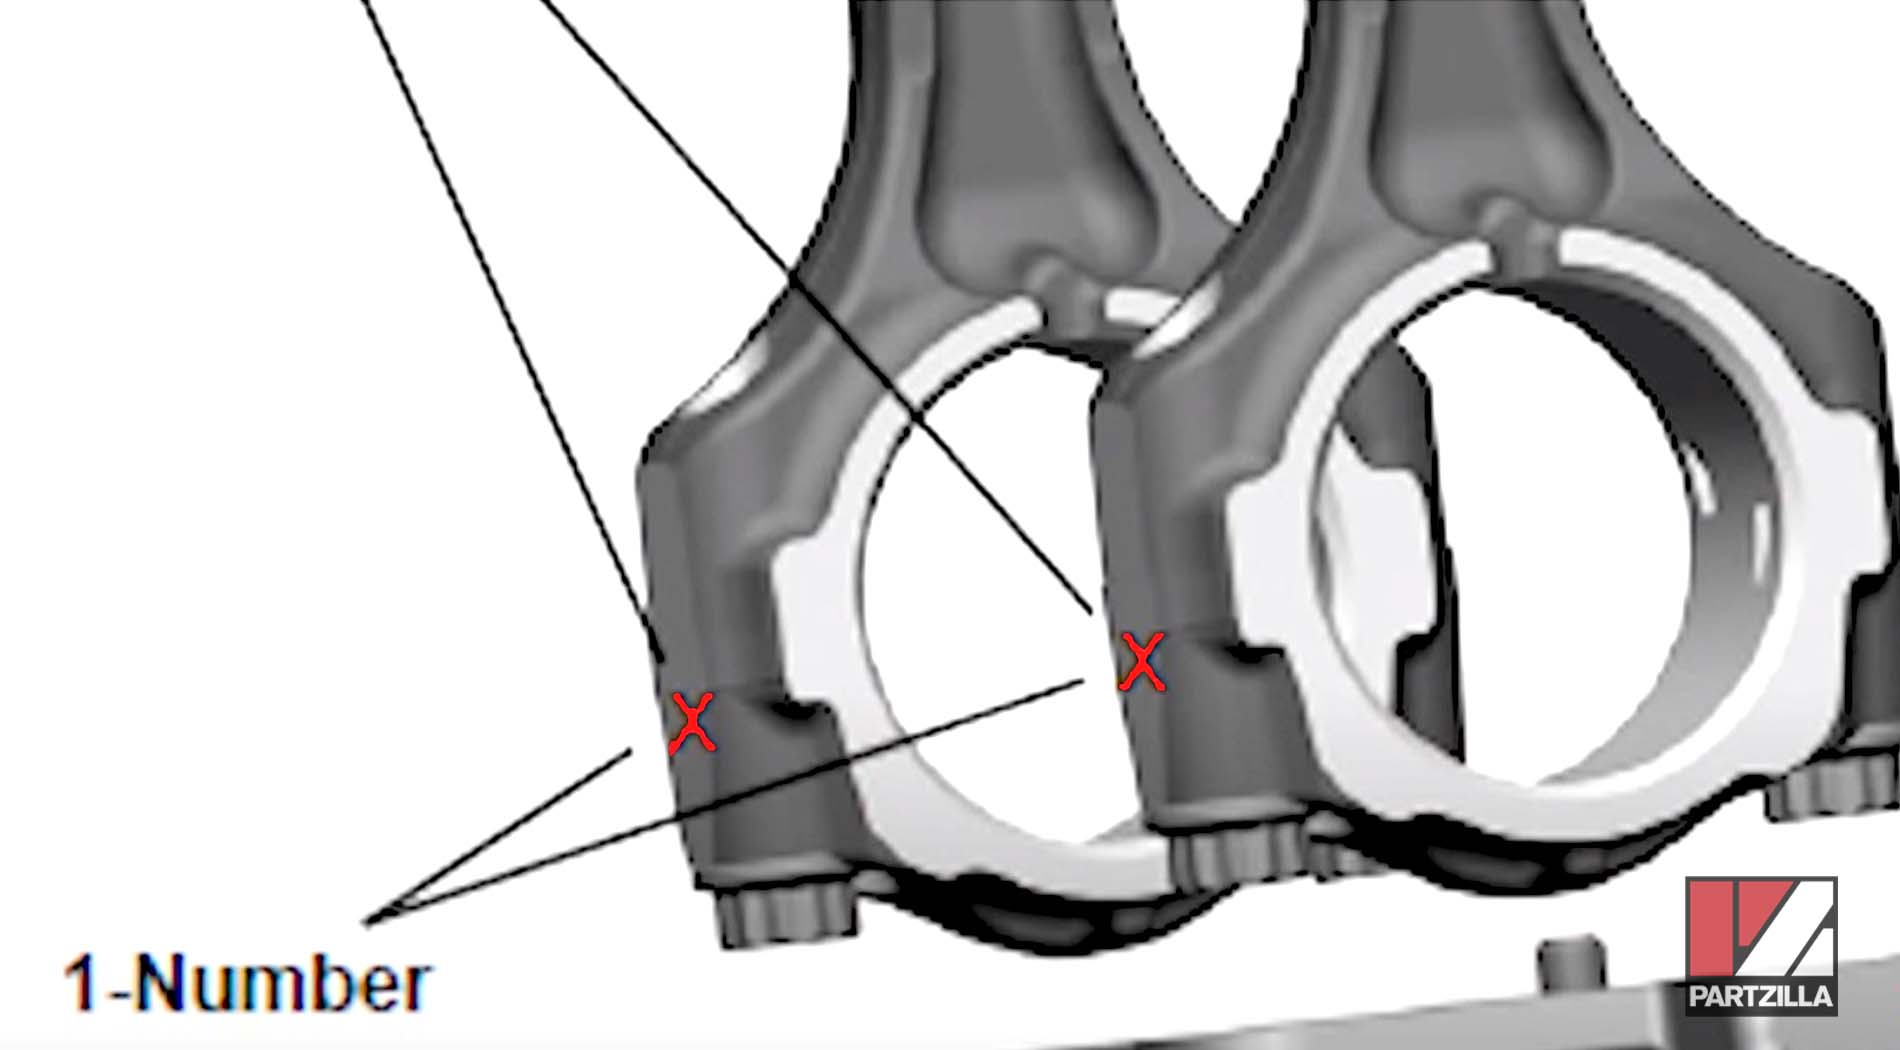
NOTE: Each connector rod has a serial number on the end of it, so make sure it goes back the same way it came off.
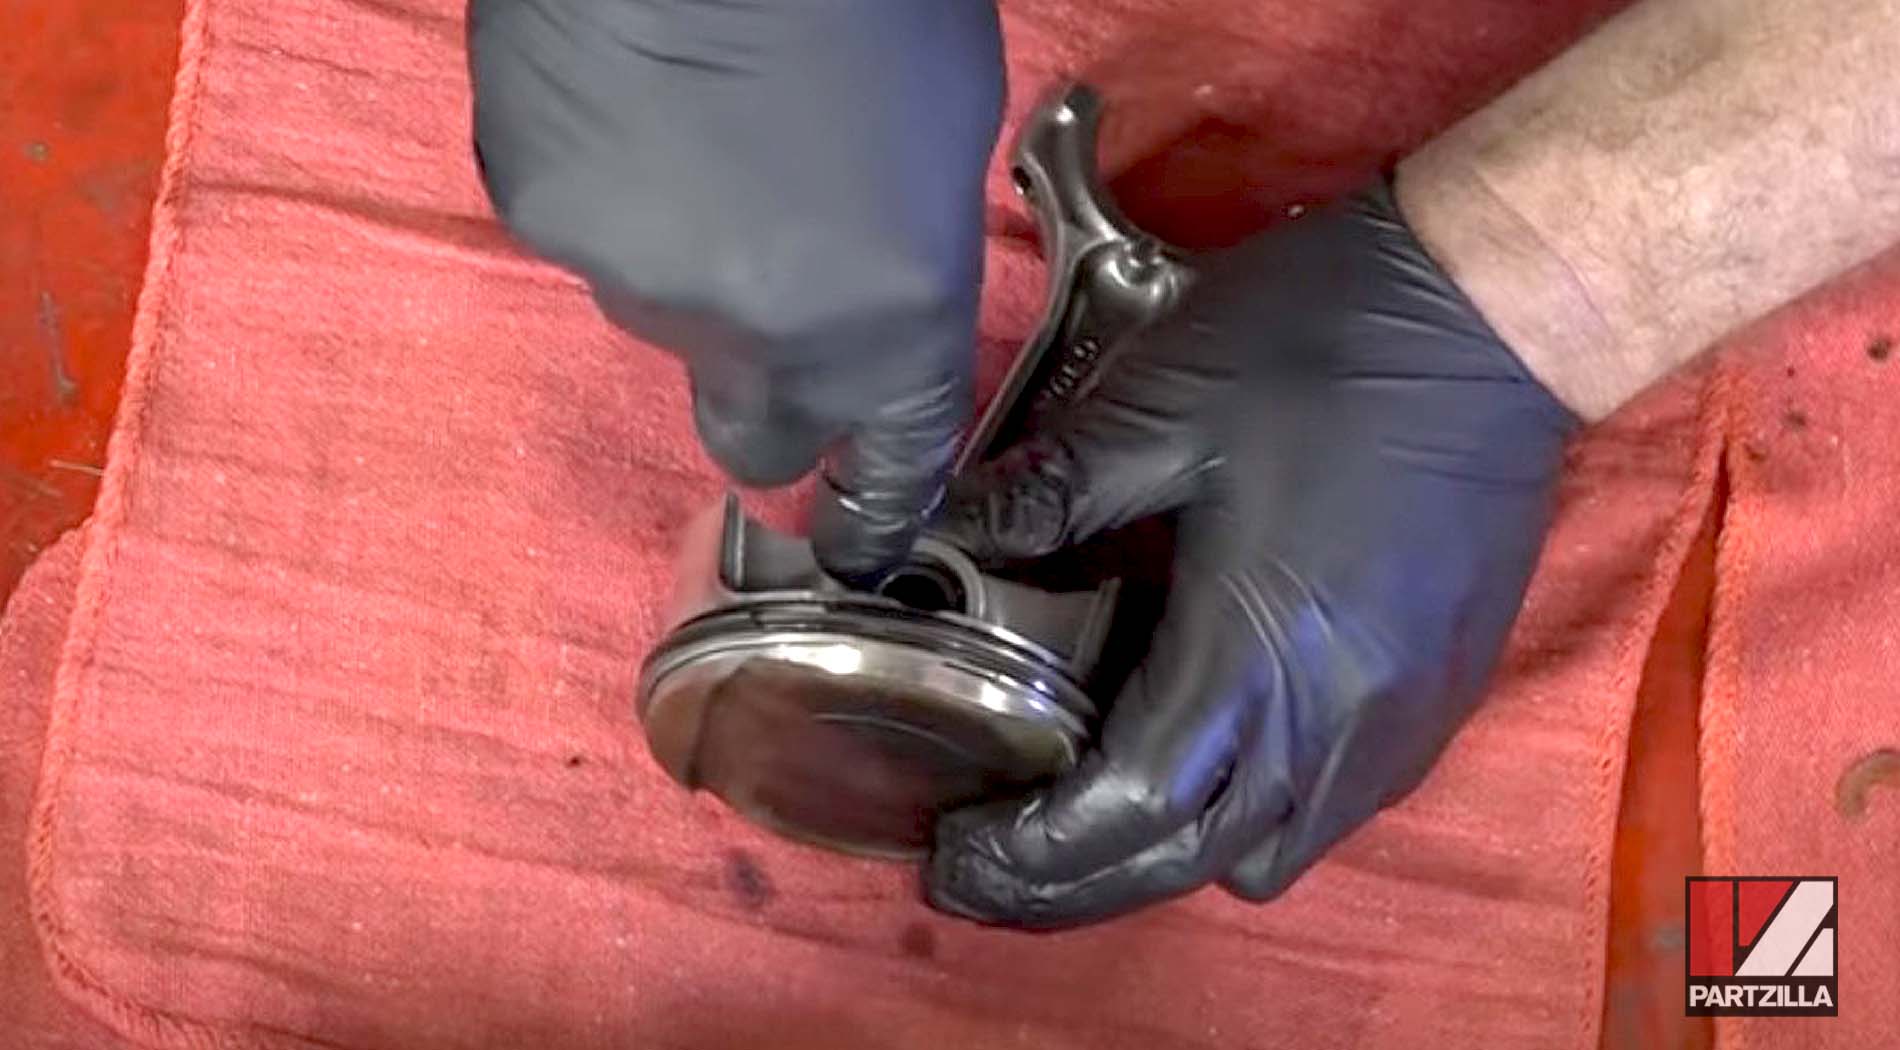
Step 3. Install the new circlip, followed by the wrist pin and the new connector rod with the serial number facing you. Put a little dab of oil in the wrist pin opening on the connector rod before installing it.
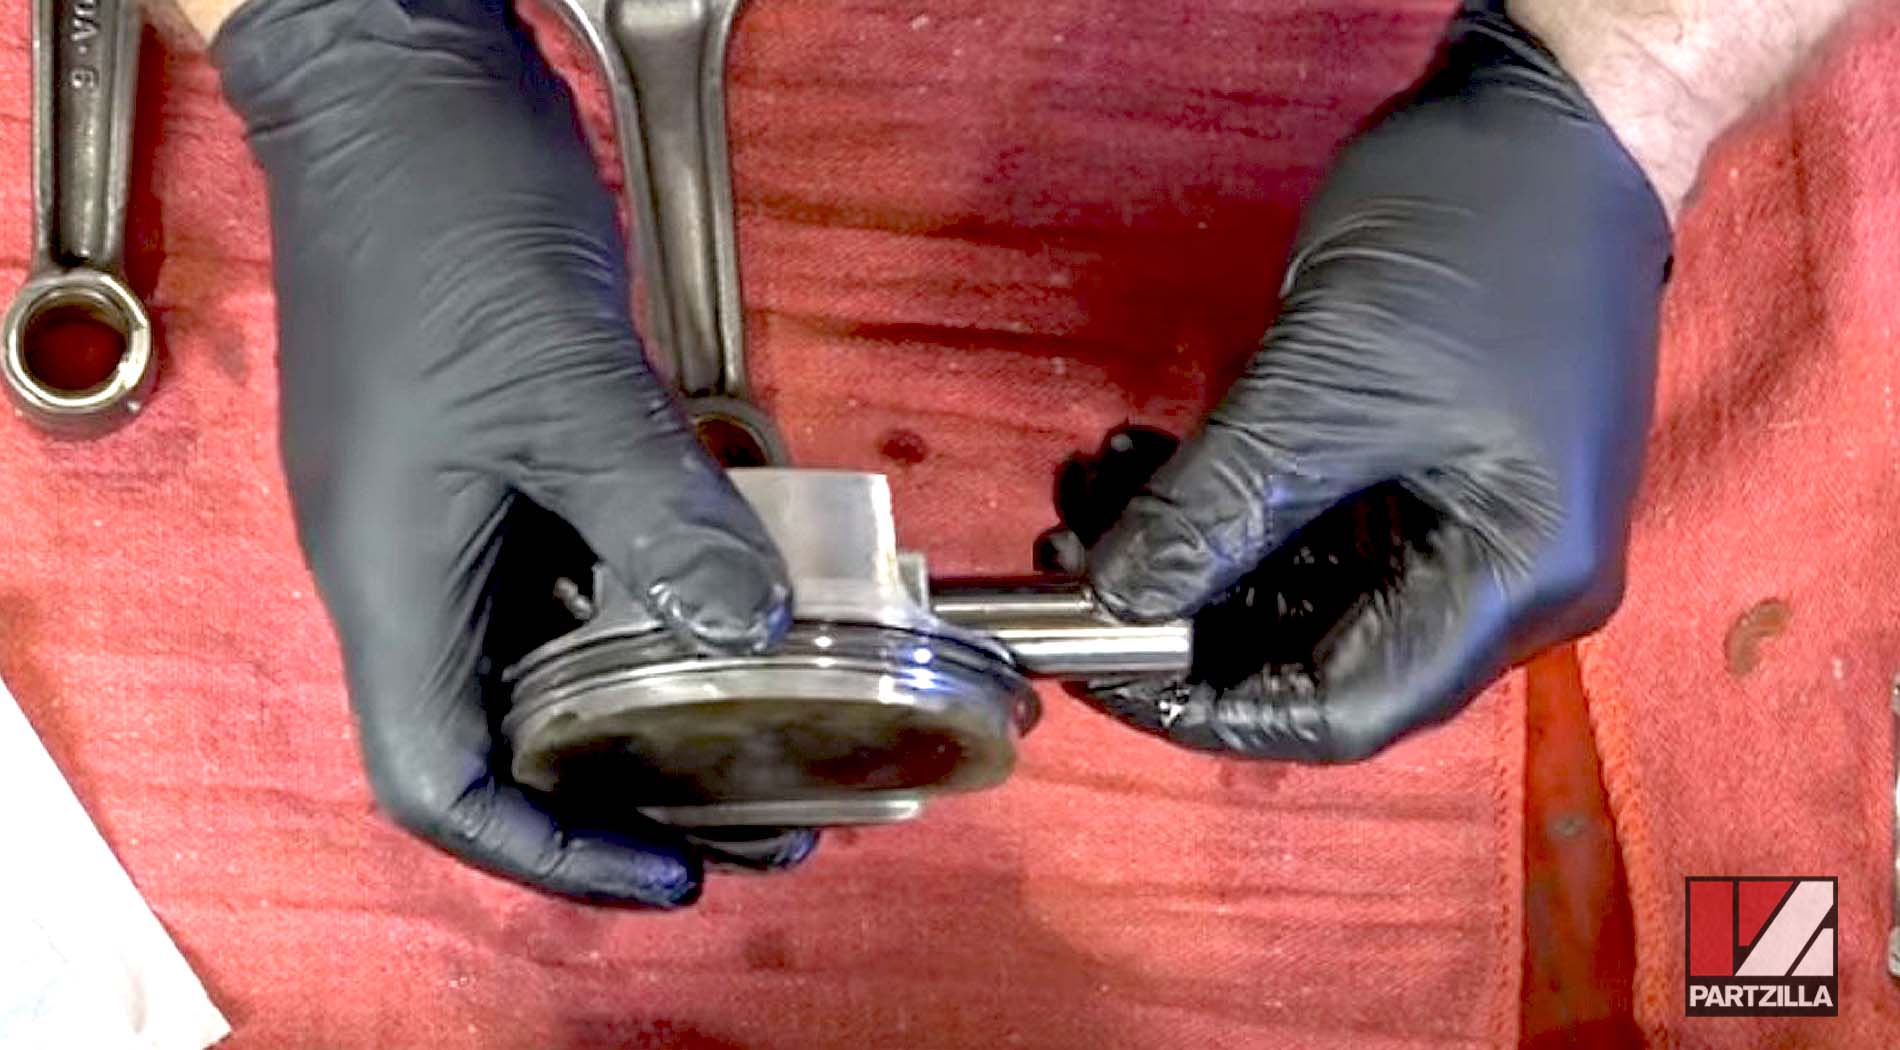
NOTE: The wrist pin for our piston had no wear on it, so we reused it.
PRO TIP: You can use a regular screwdriver to push in and get the circlip to snap in.
Watch the clip below to see connector rod replacement segment of our Polaris RZR 900XP bottom end rebuild video.
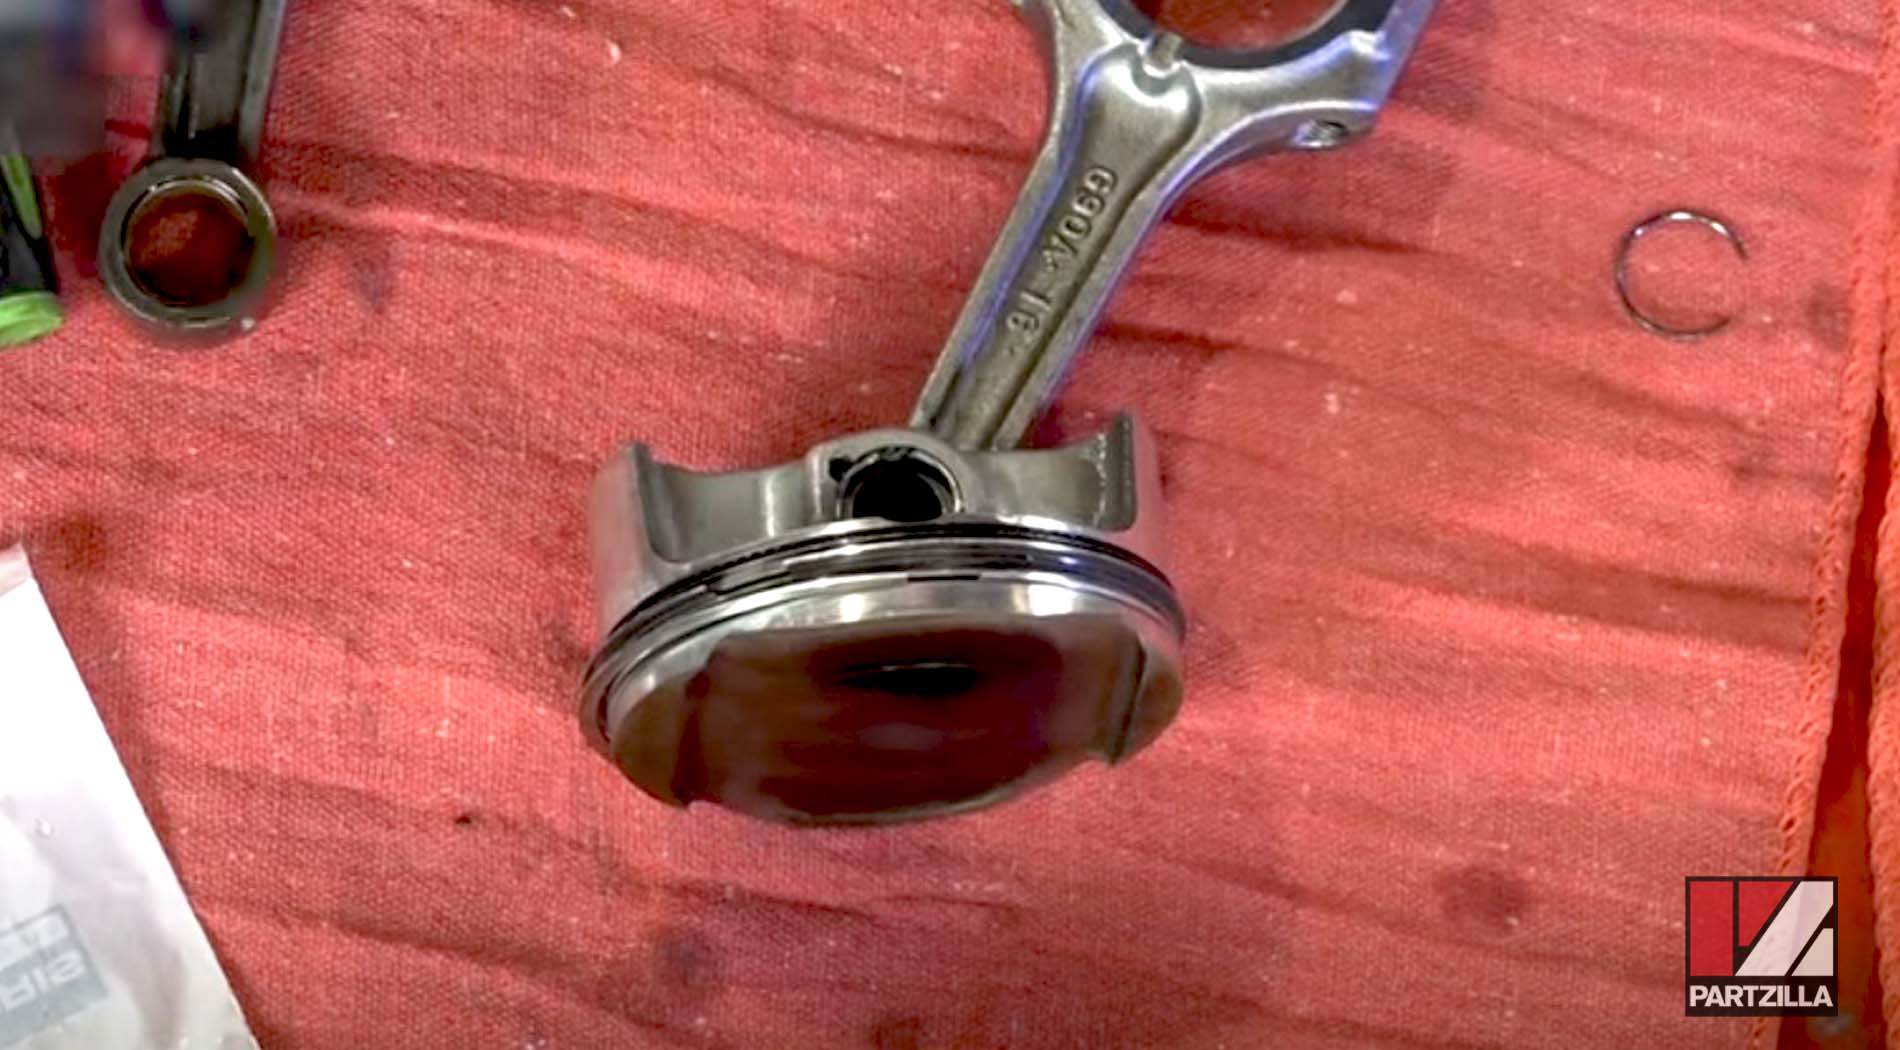
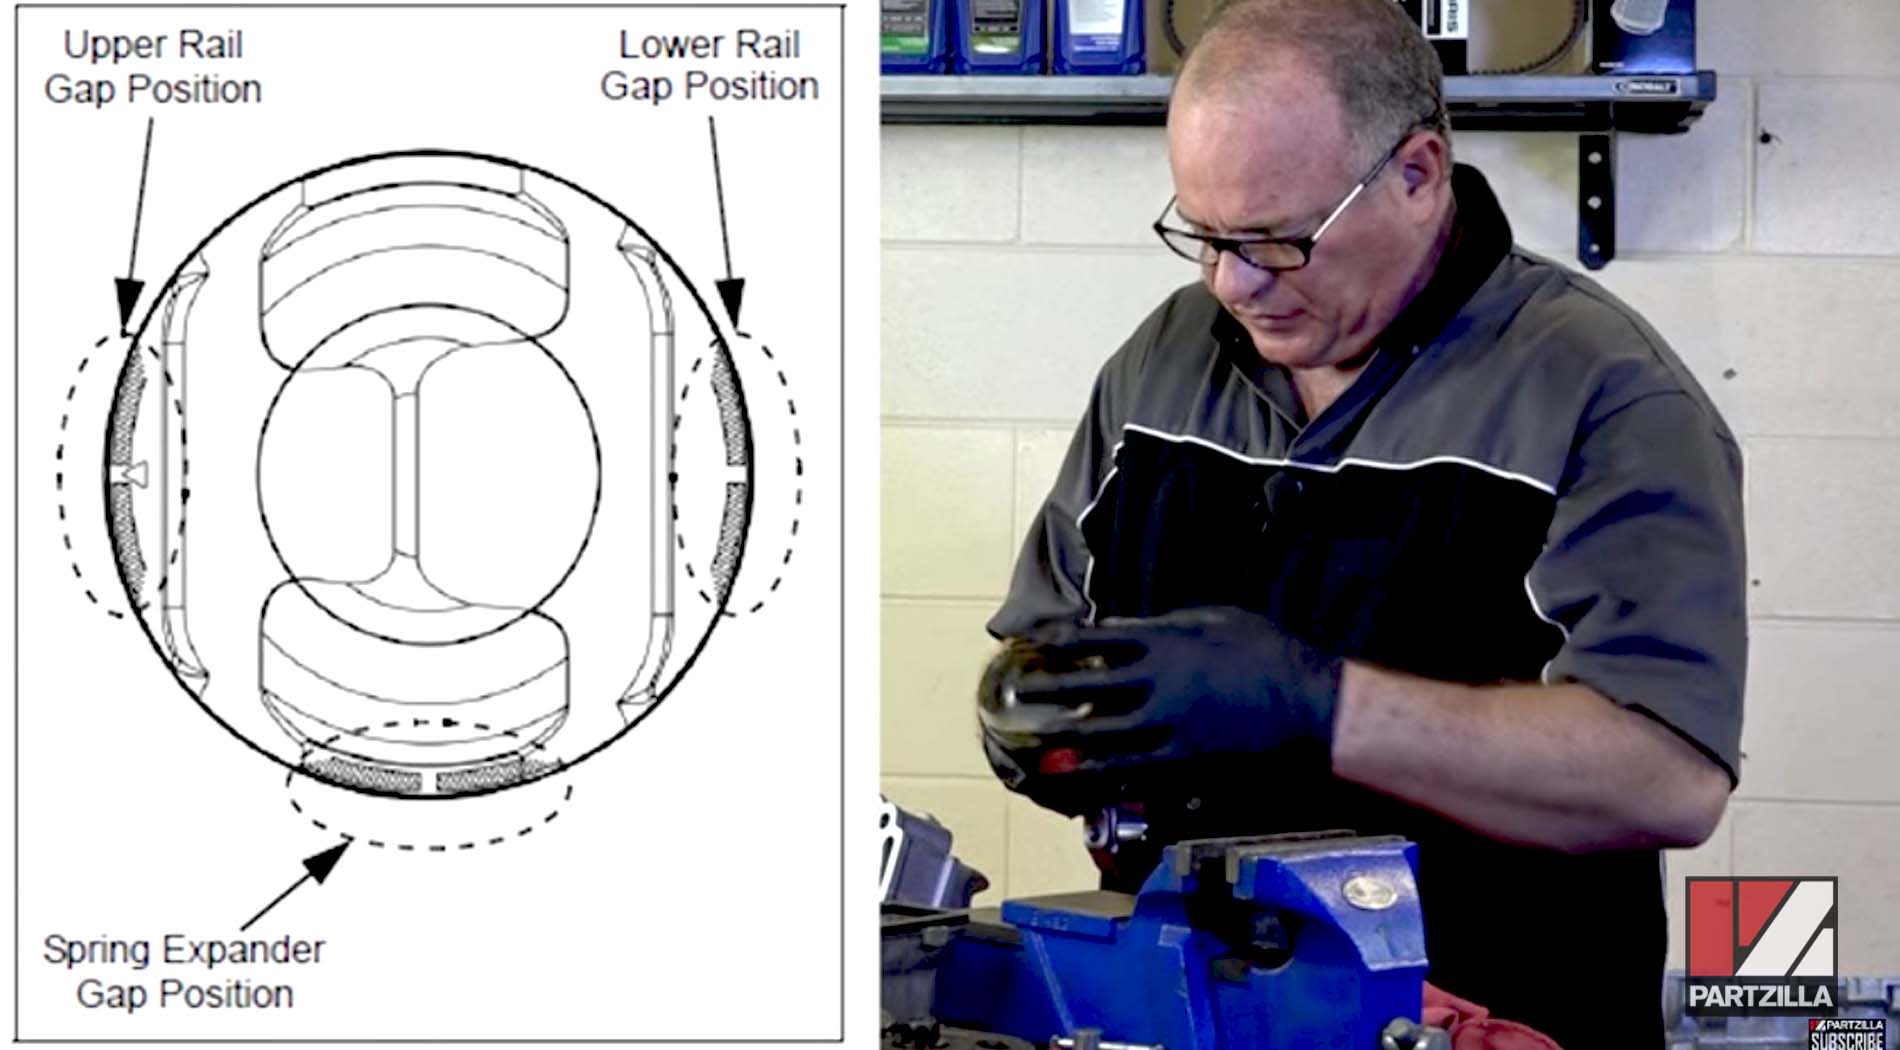
Step 4. Install the piston rings in the right orientation, which alternate back and forth going fore and aft on the piston as far as the rings go.
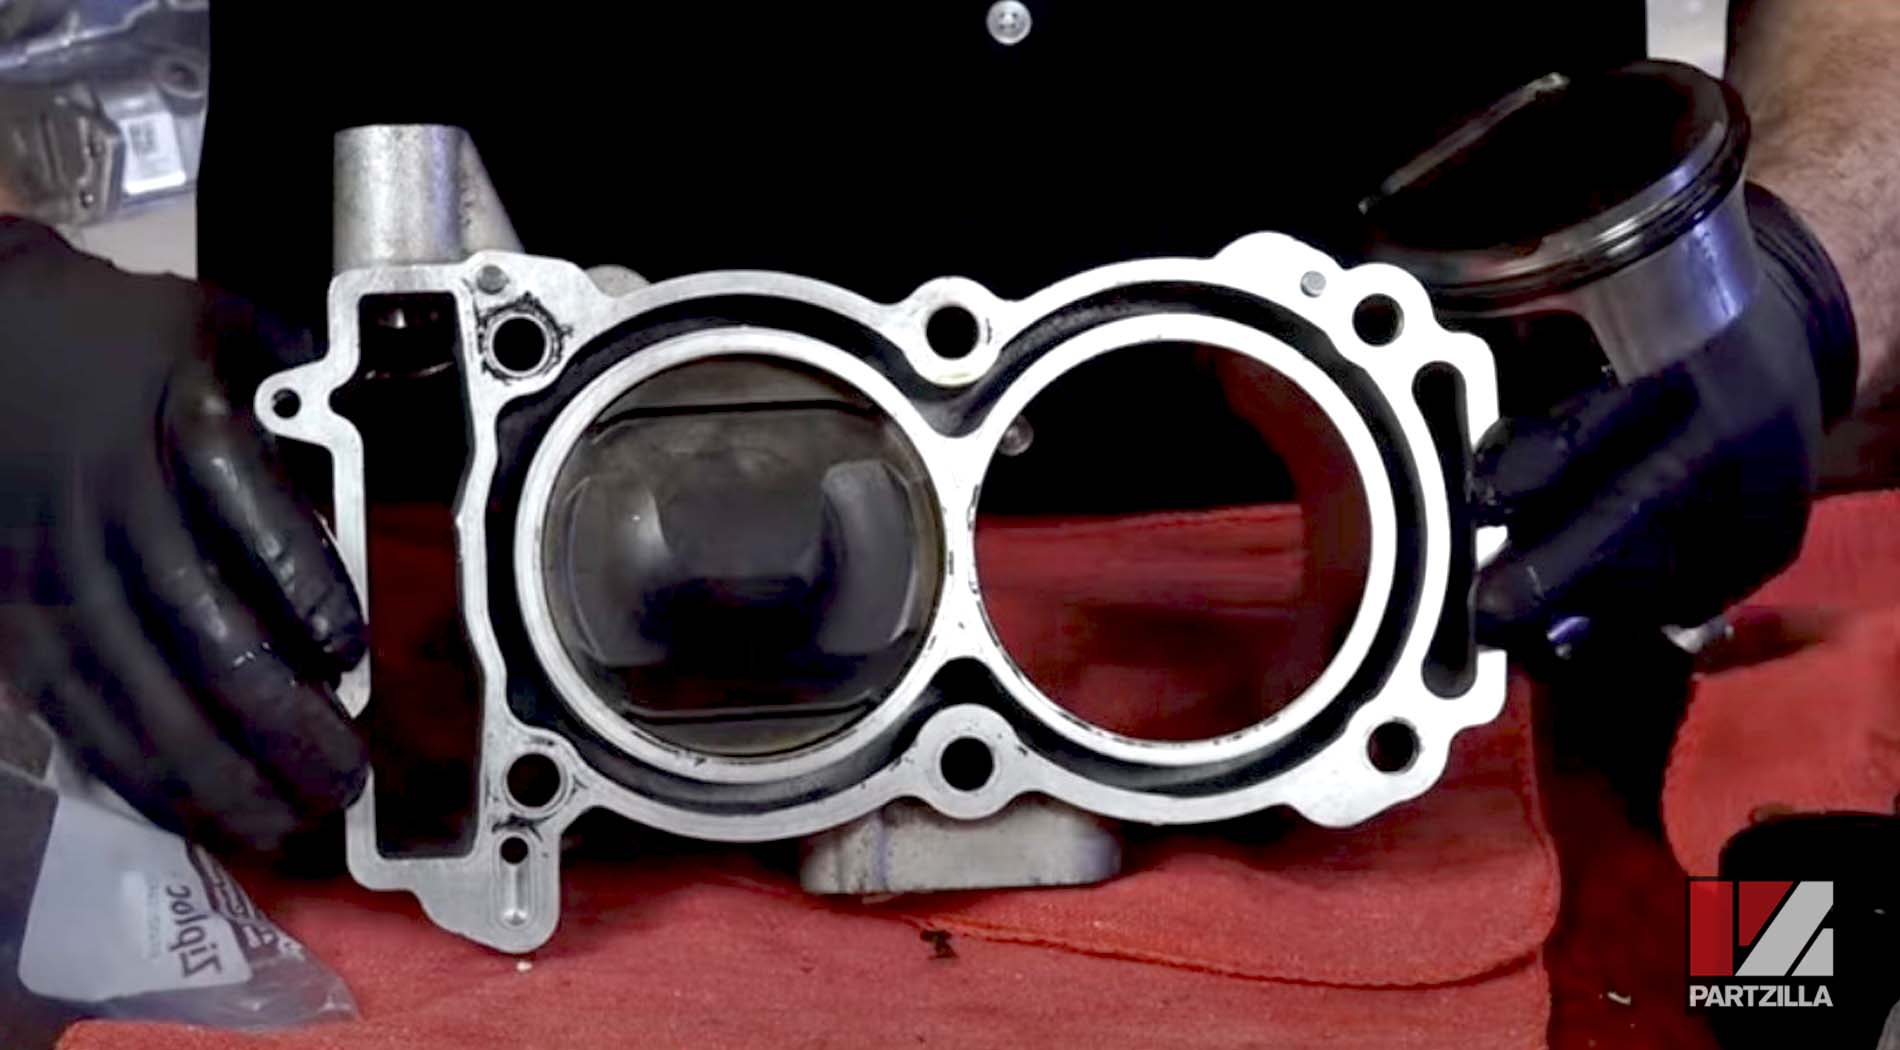
Step 5. Install the piston into the cylinder, with the delta T pointing to the exhaust side.
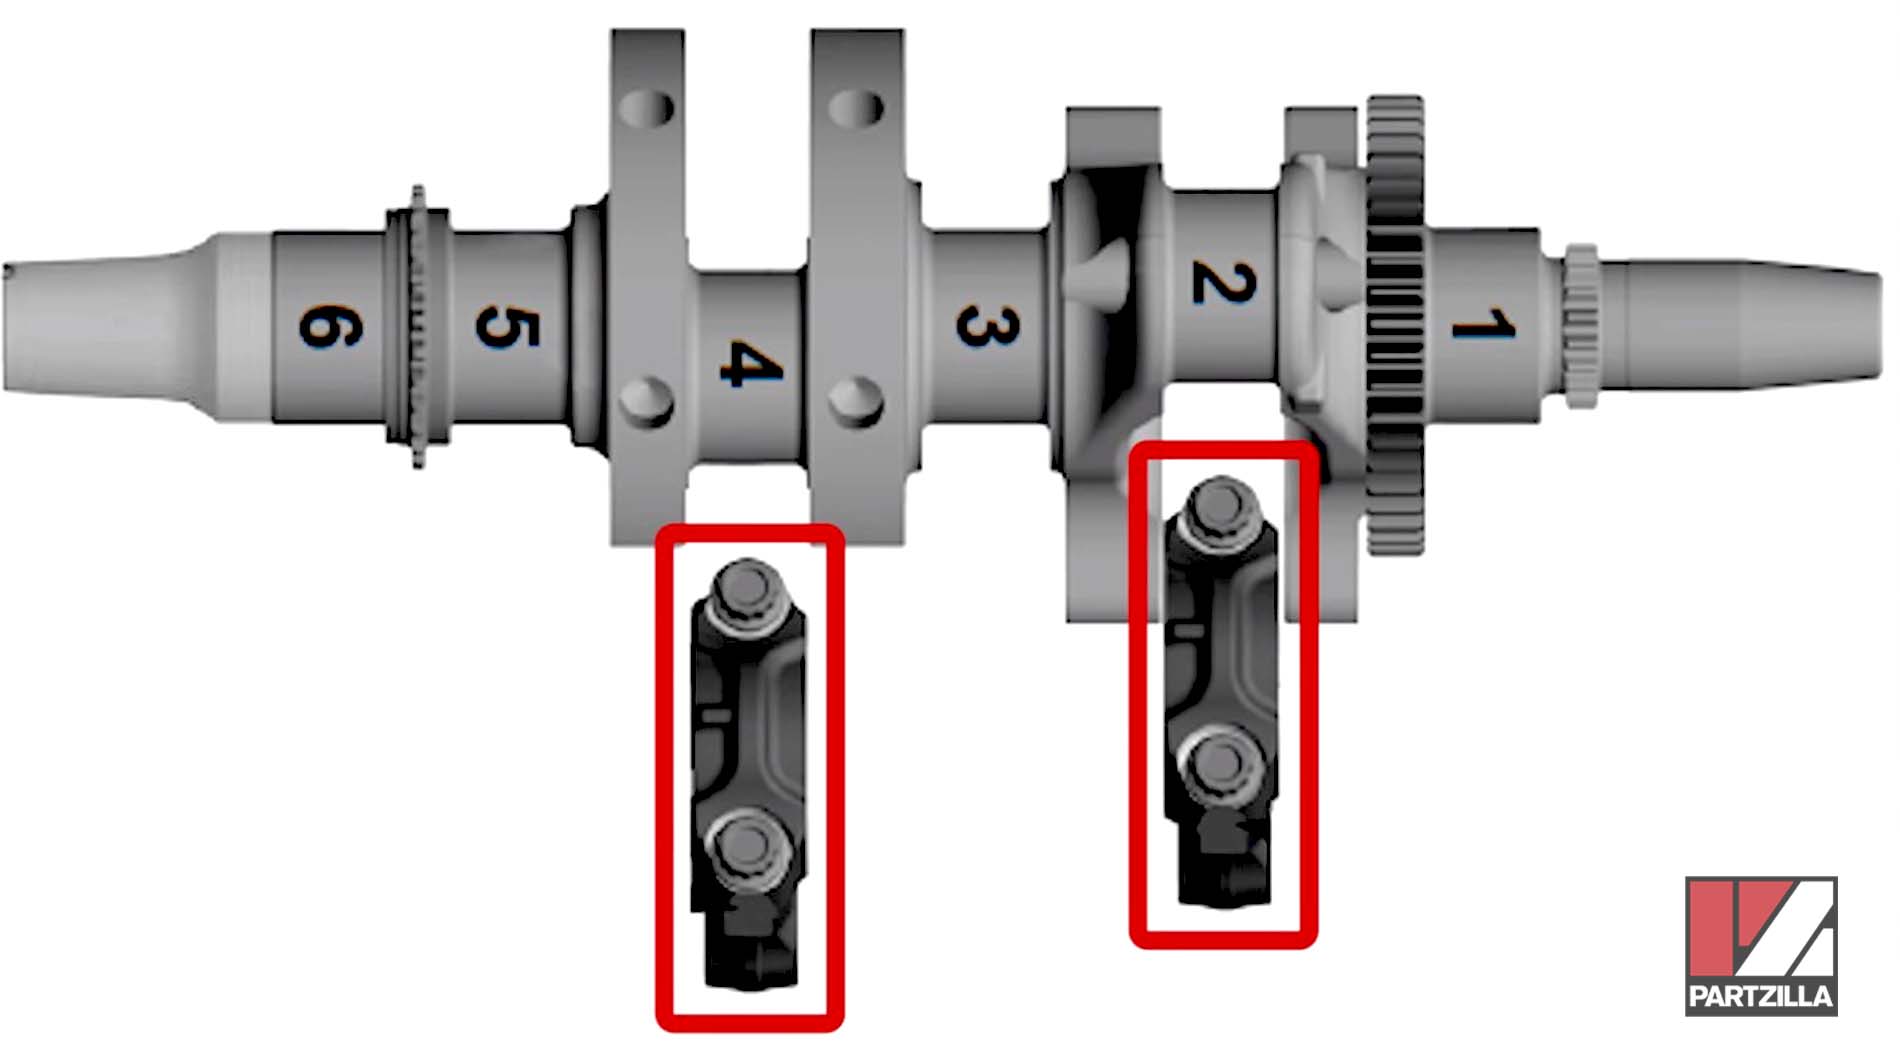
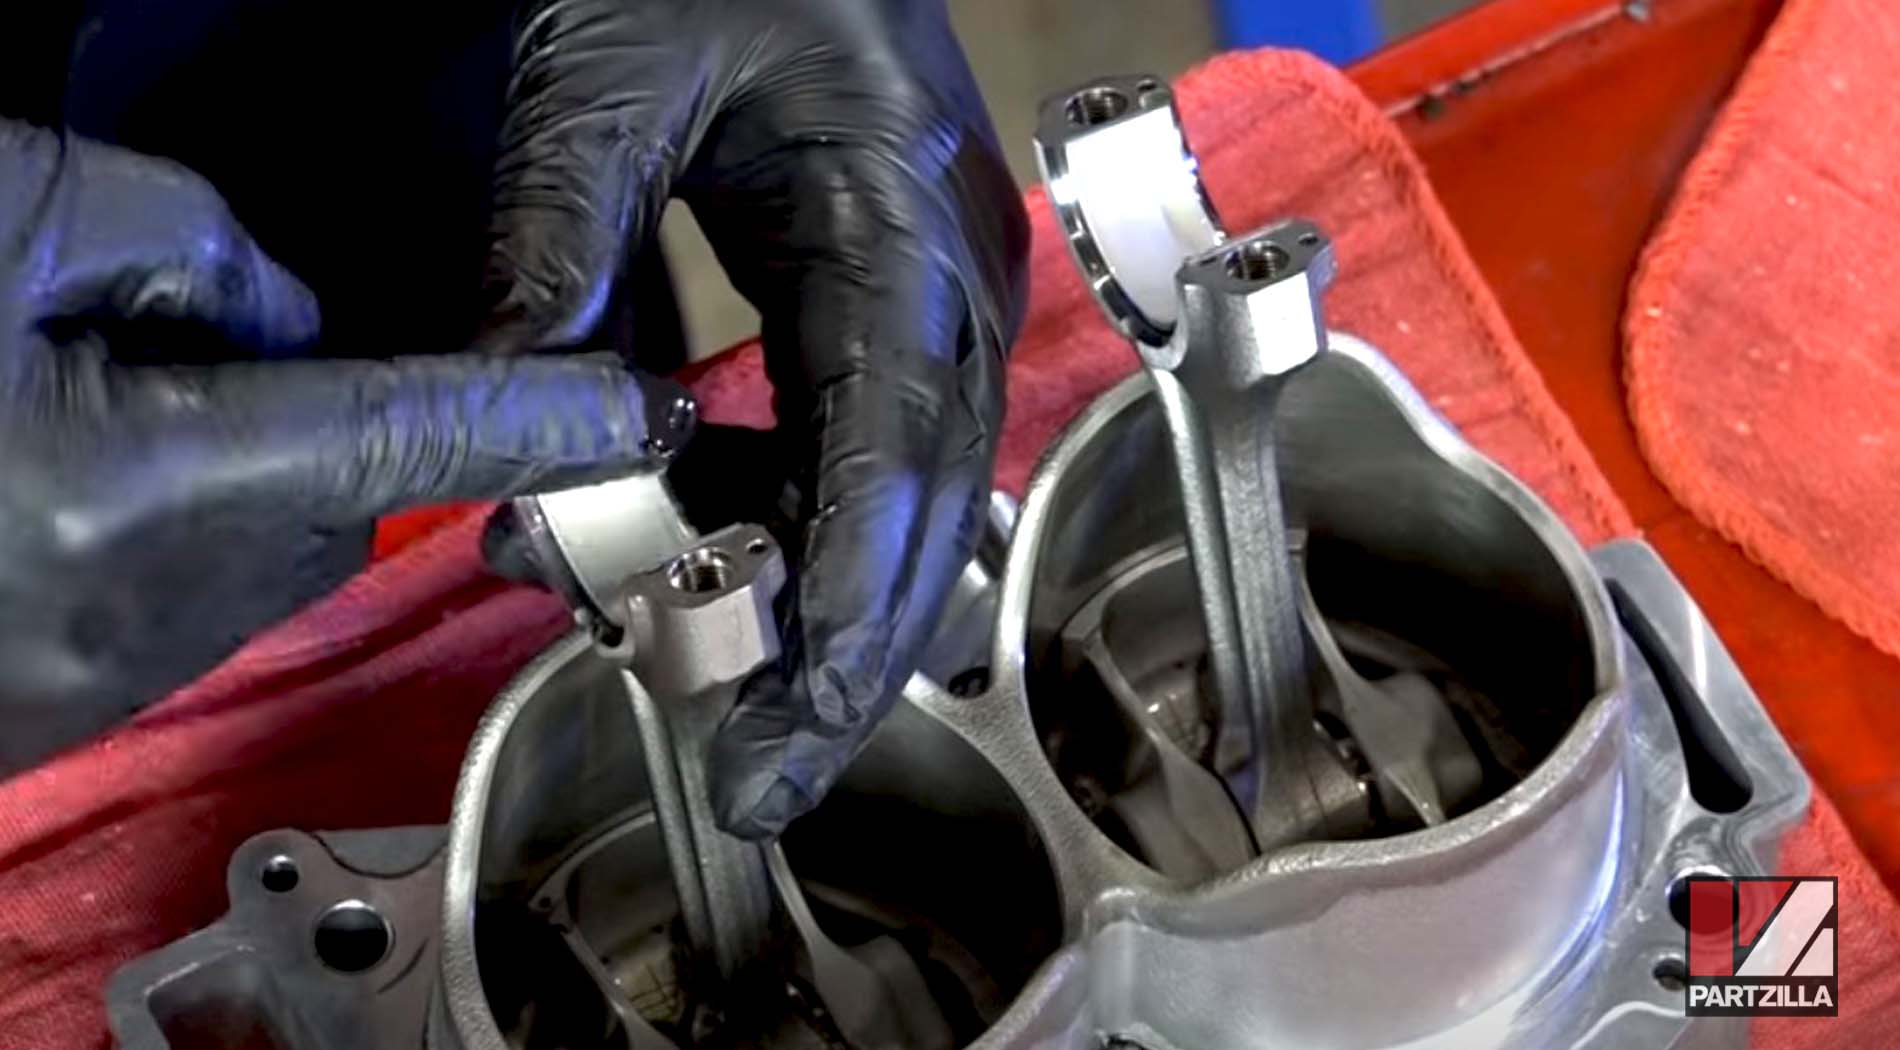
Step 6. Remove the piston connector rod end caps and connector rod bearings.
Watch the clip below to see the piston replacement segment of our Polaris RZR 900XP bottom end rebuild video.
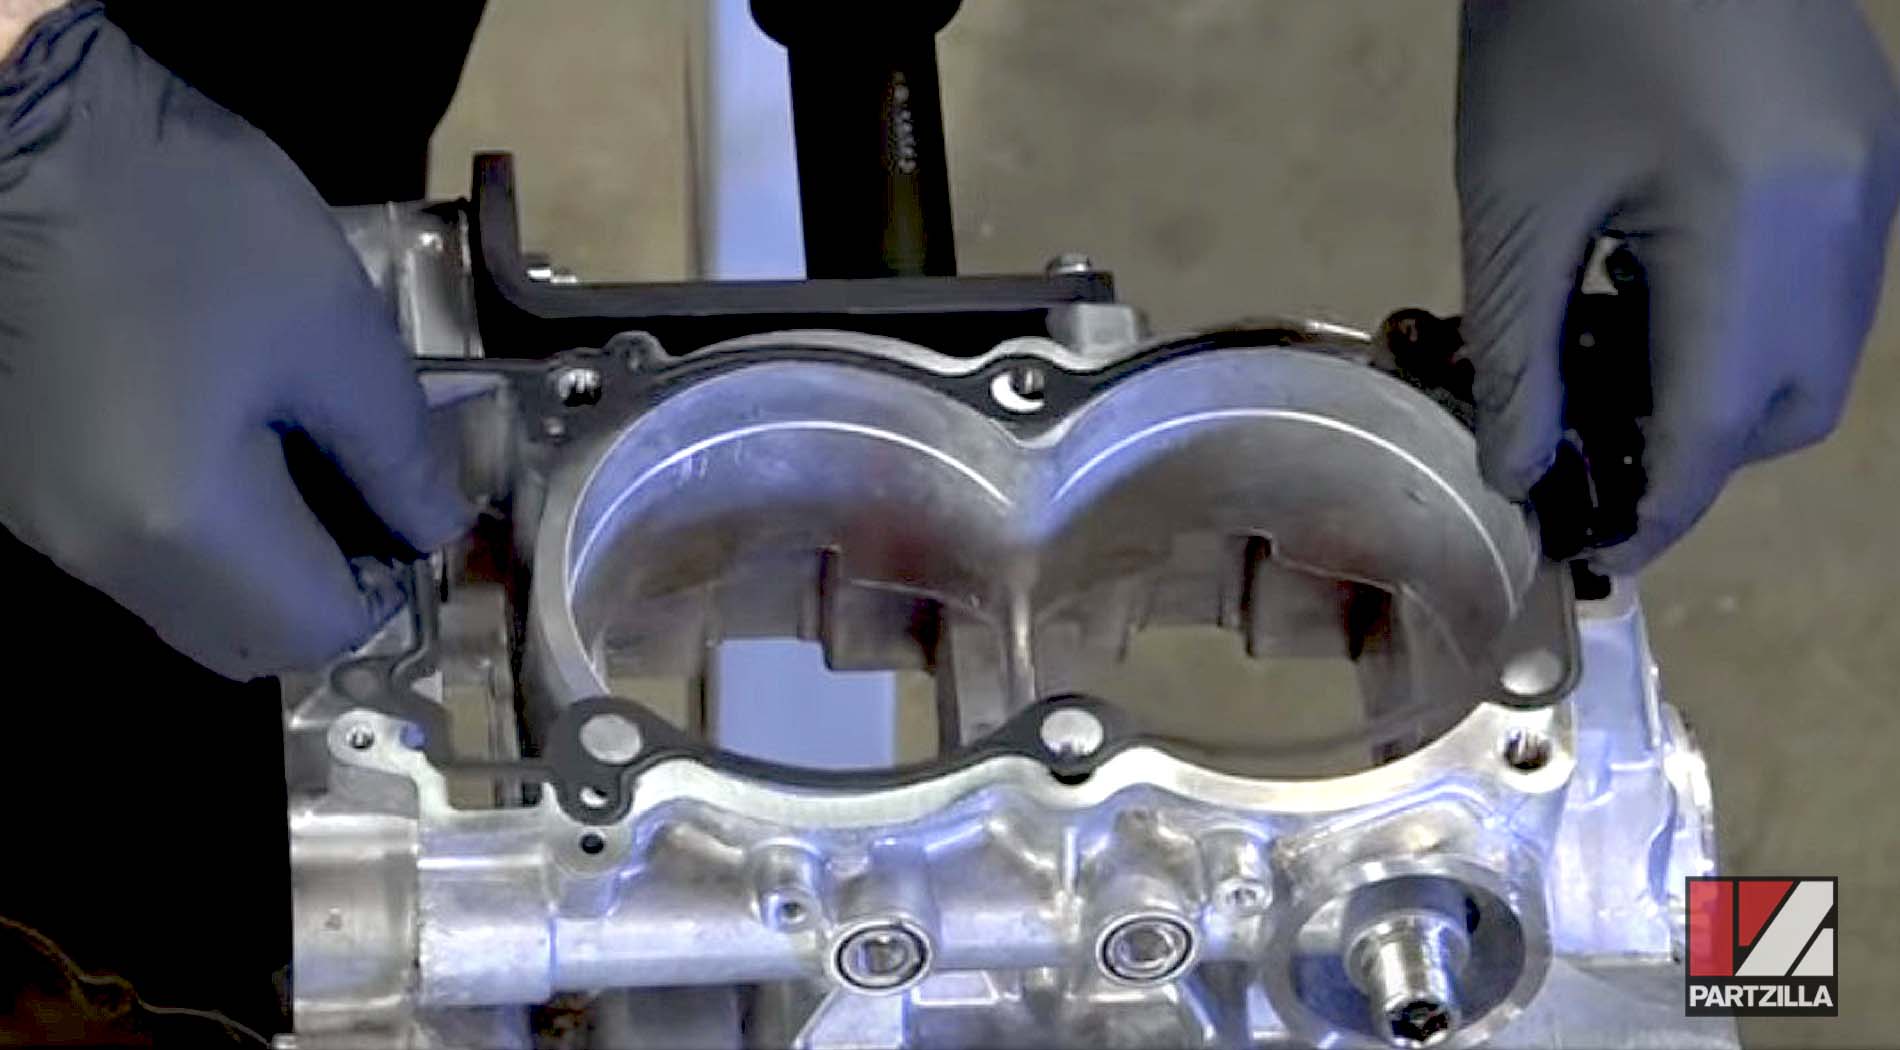
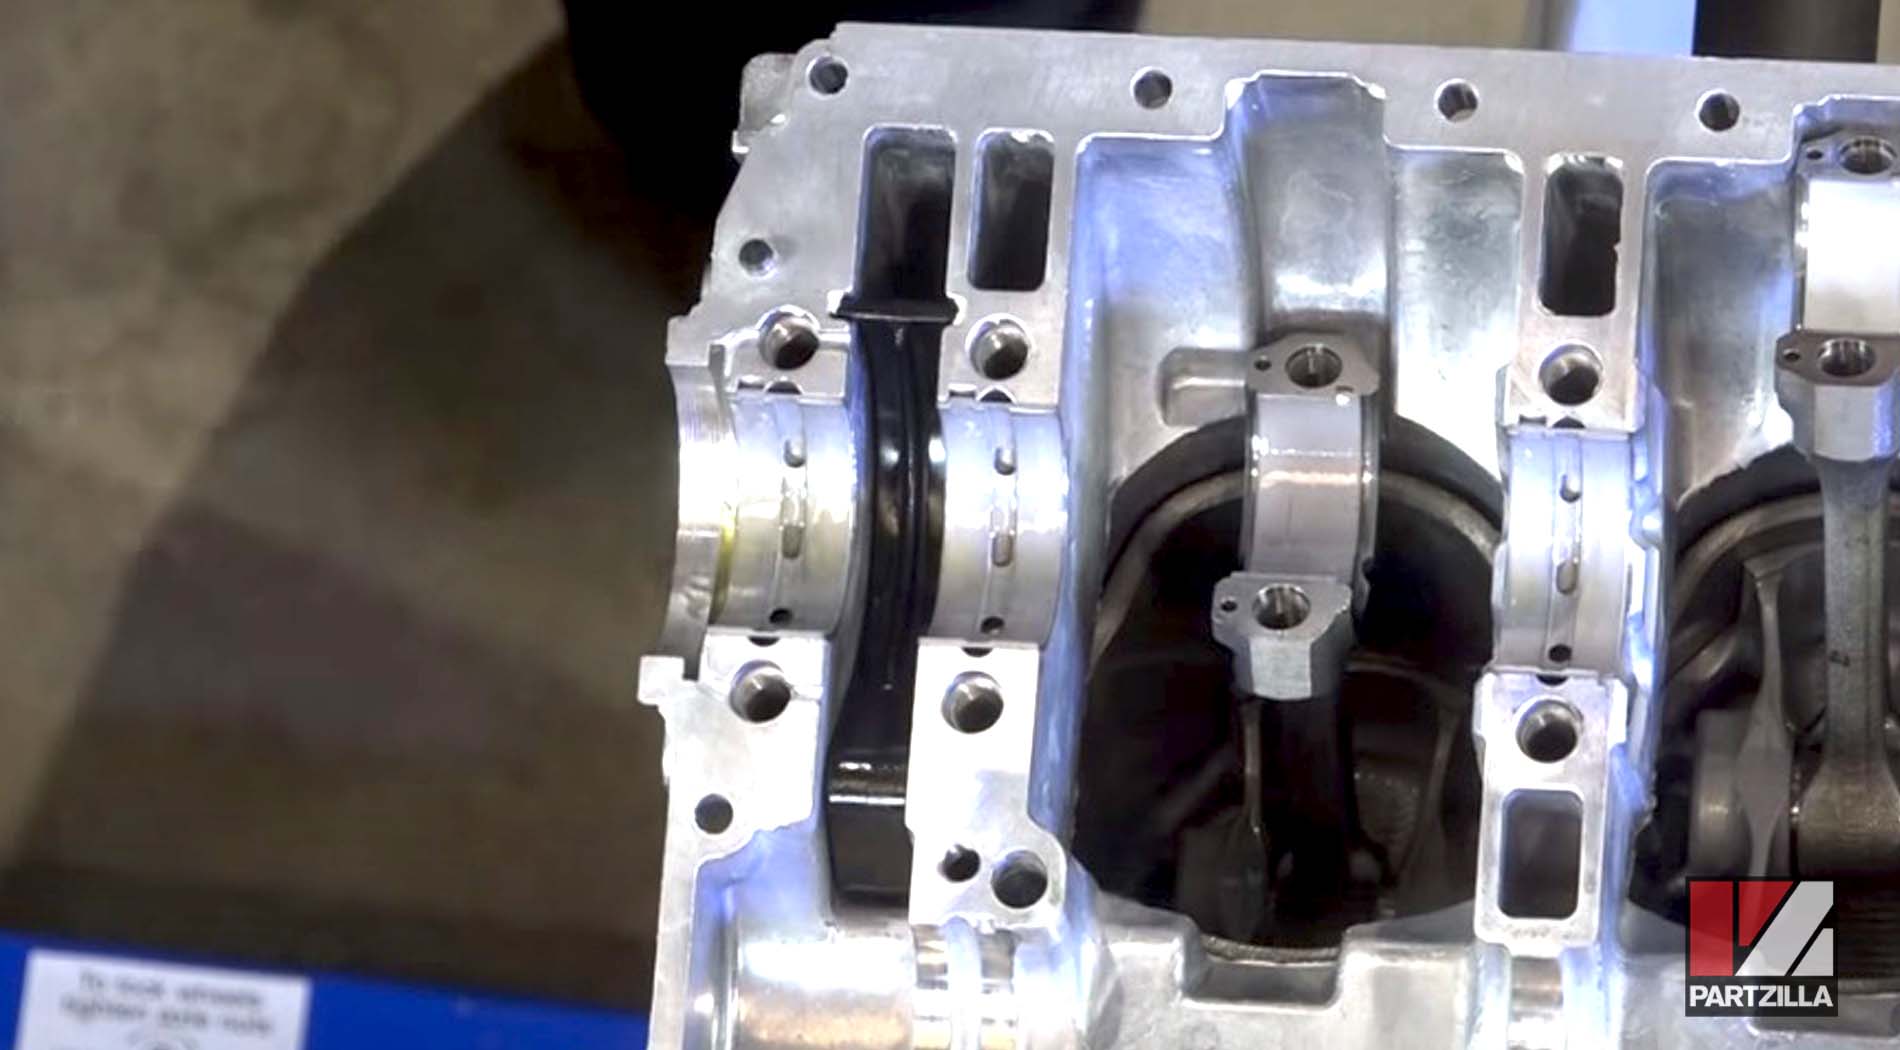
Step 7. Install the cylinder base gasket.
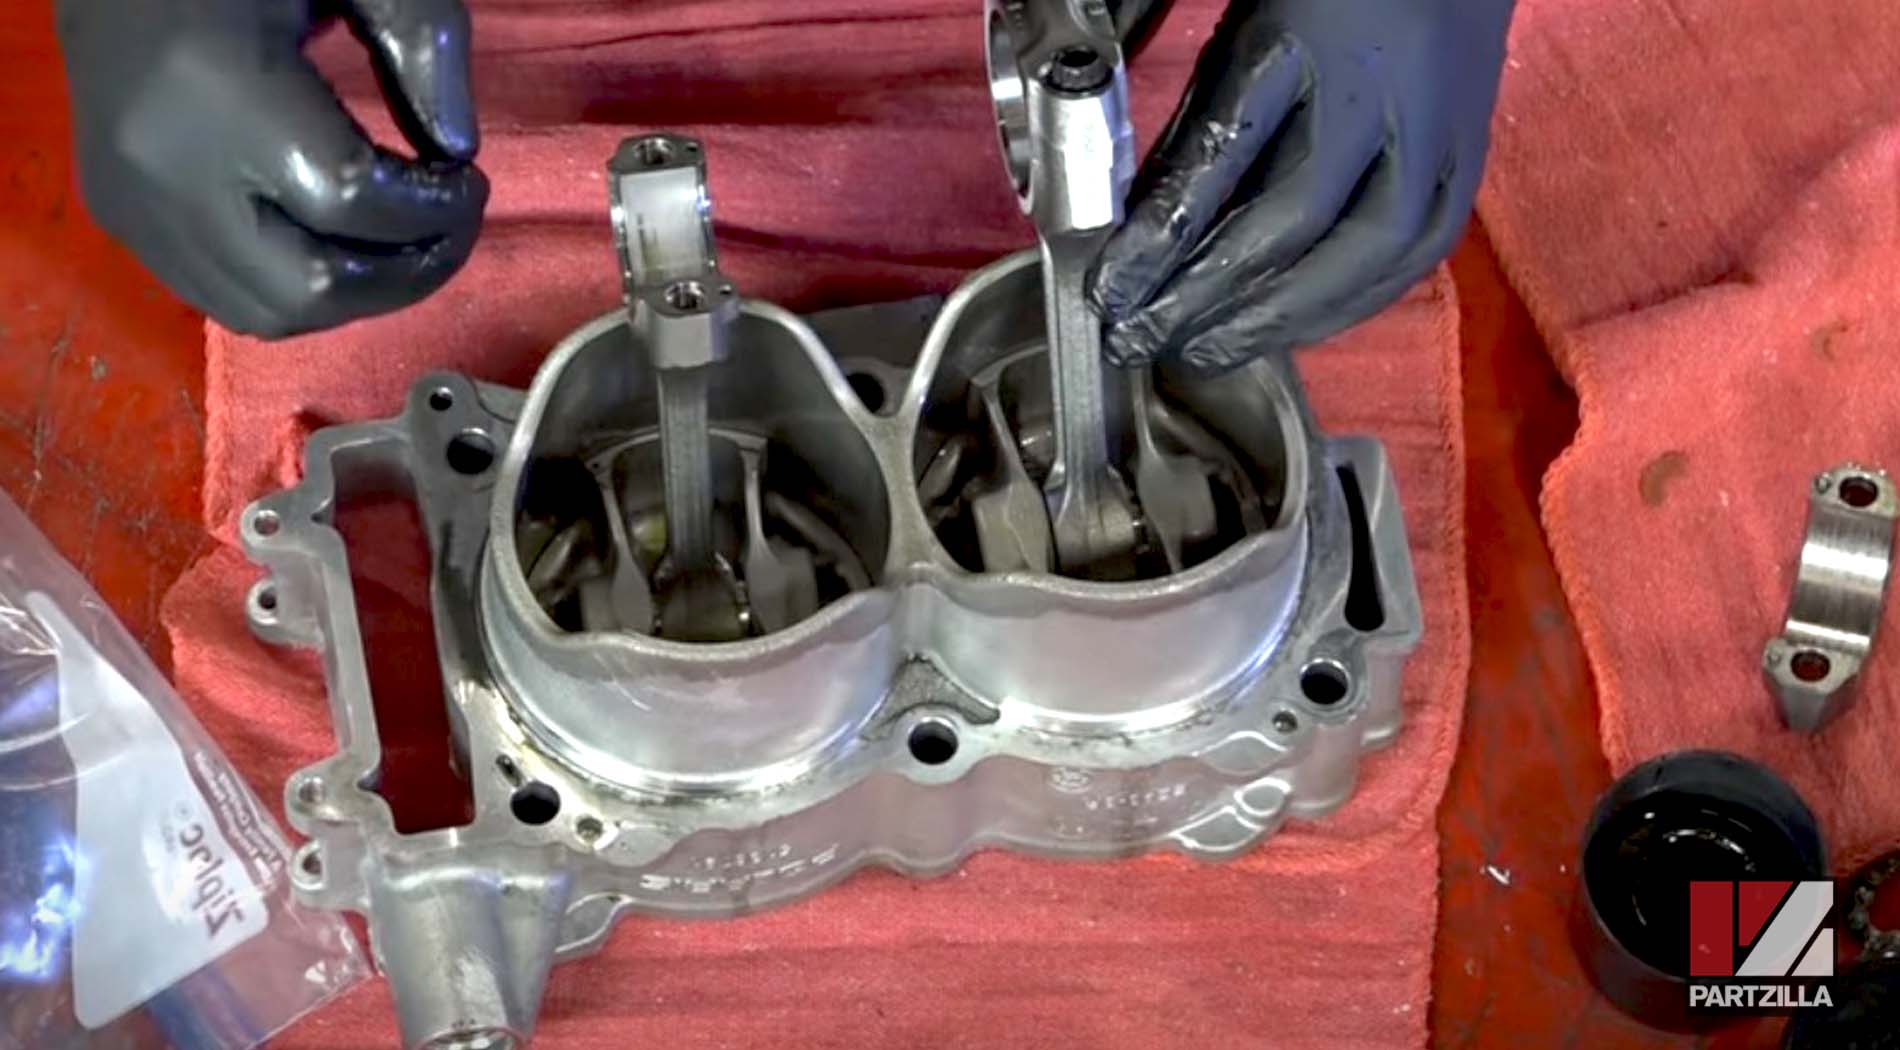
Step 8. Install one half of each connector rod bearing (see the crankshaft and piston parts diagram here) and dab a little oil on it.
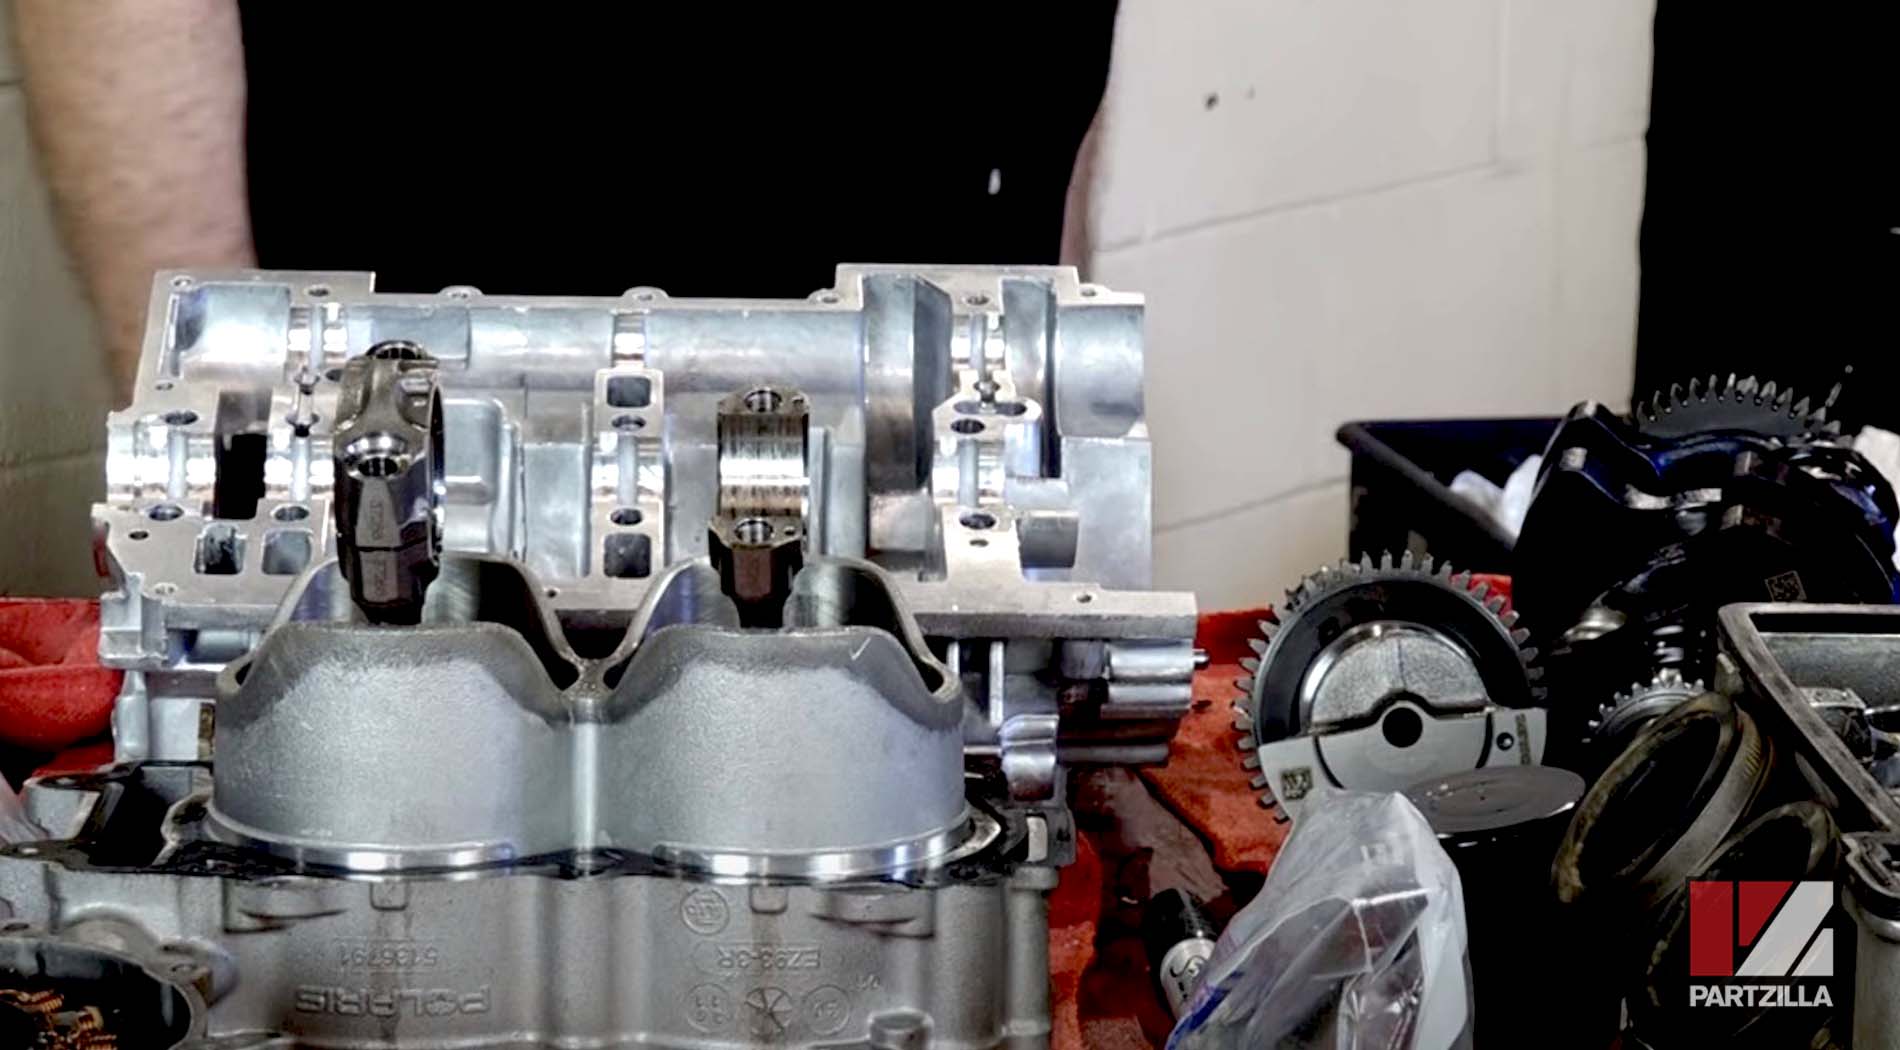
Step 9. Install the cylinder head onto the block.

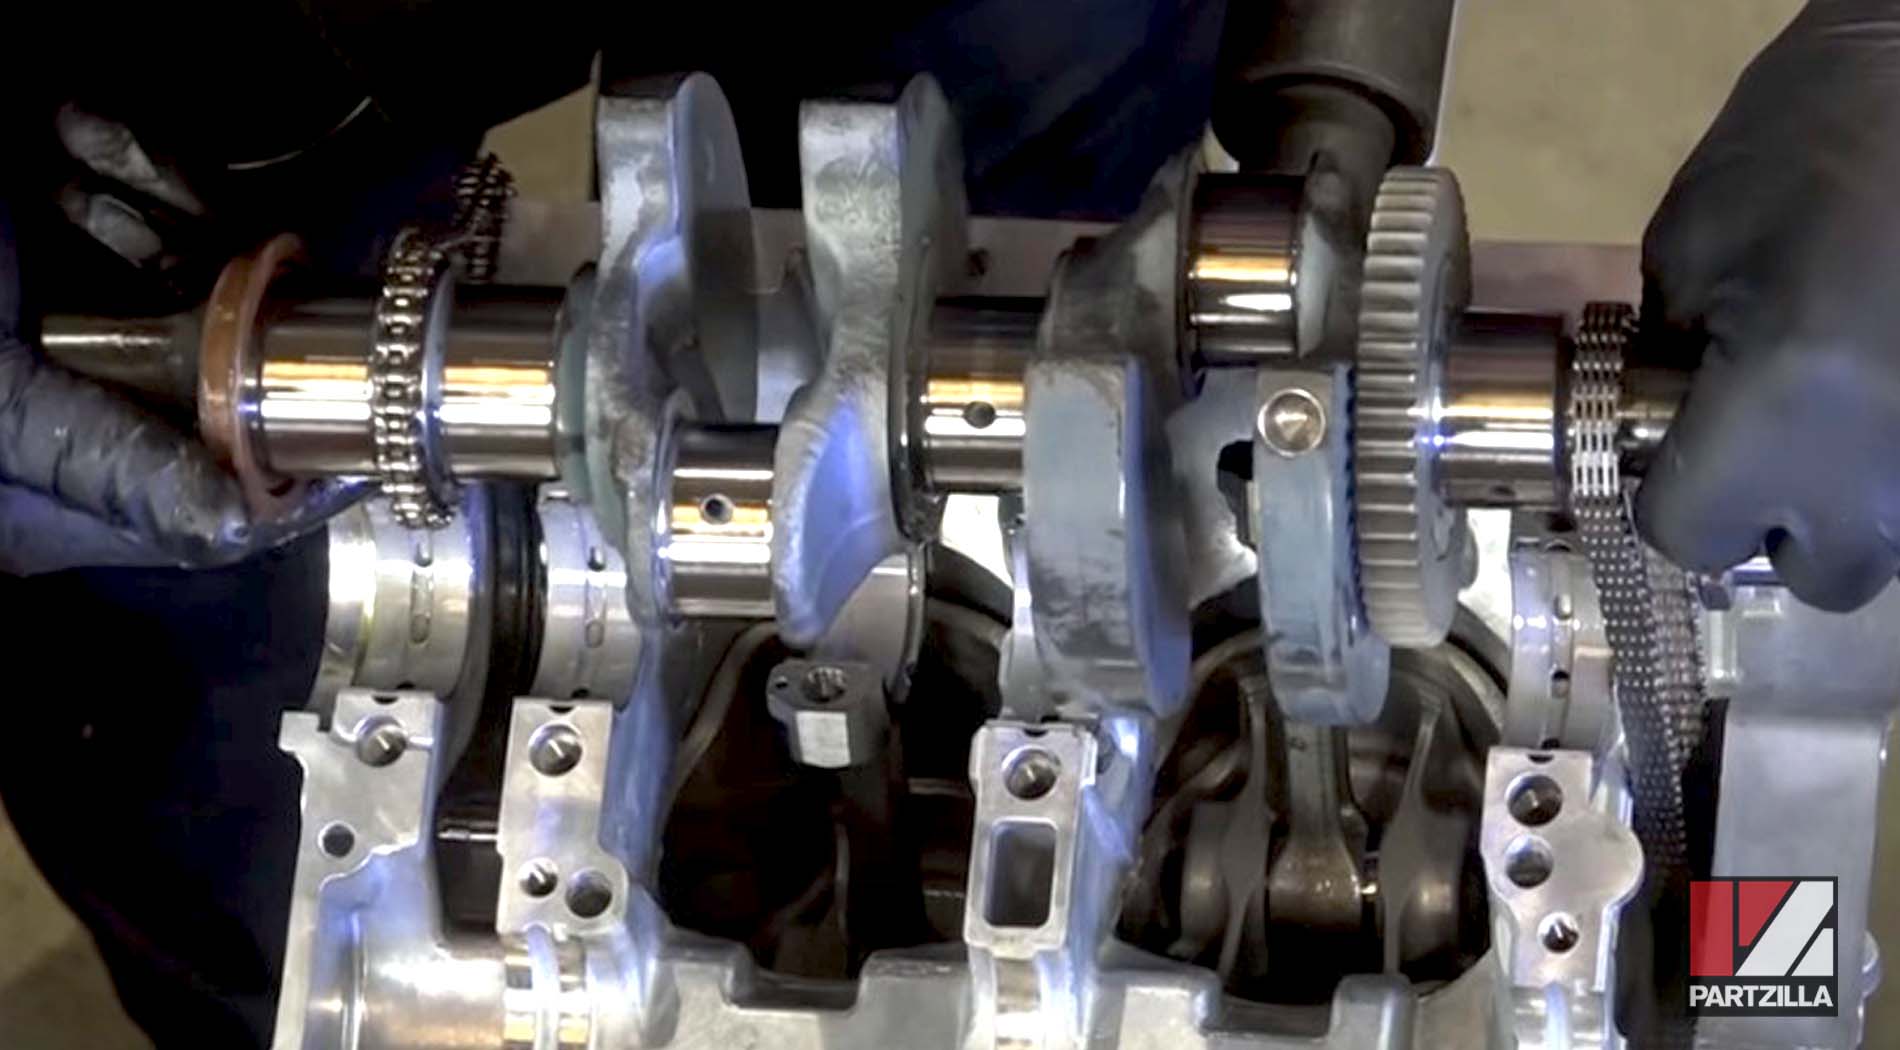
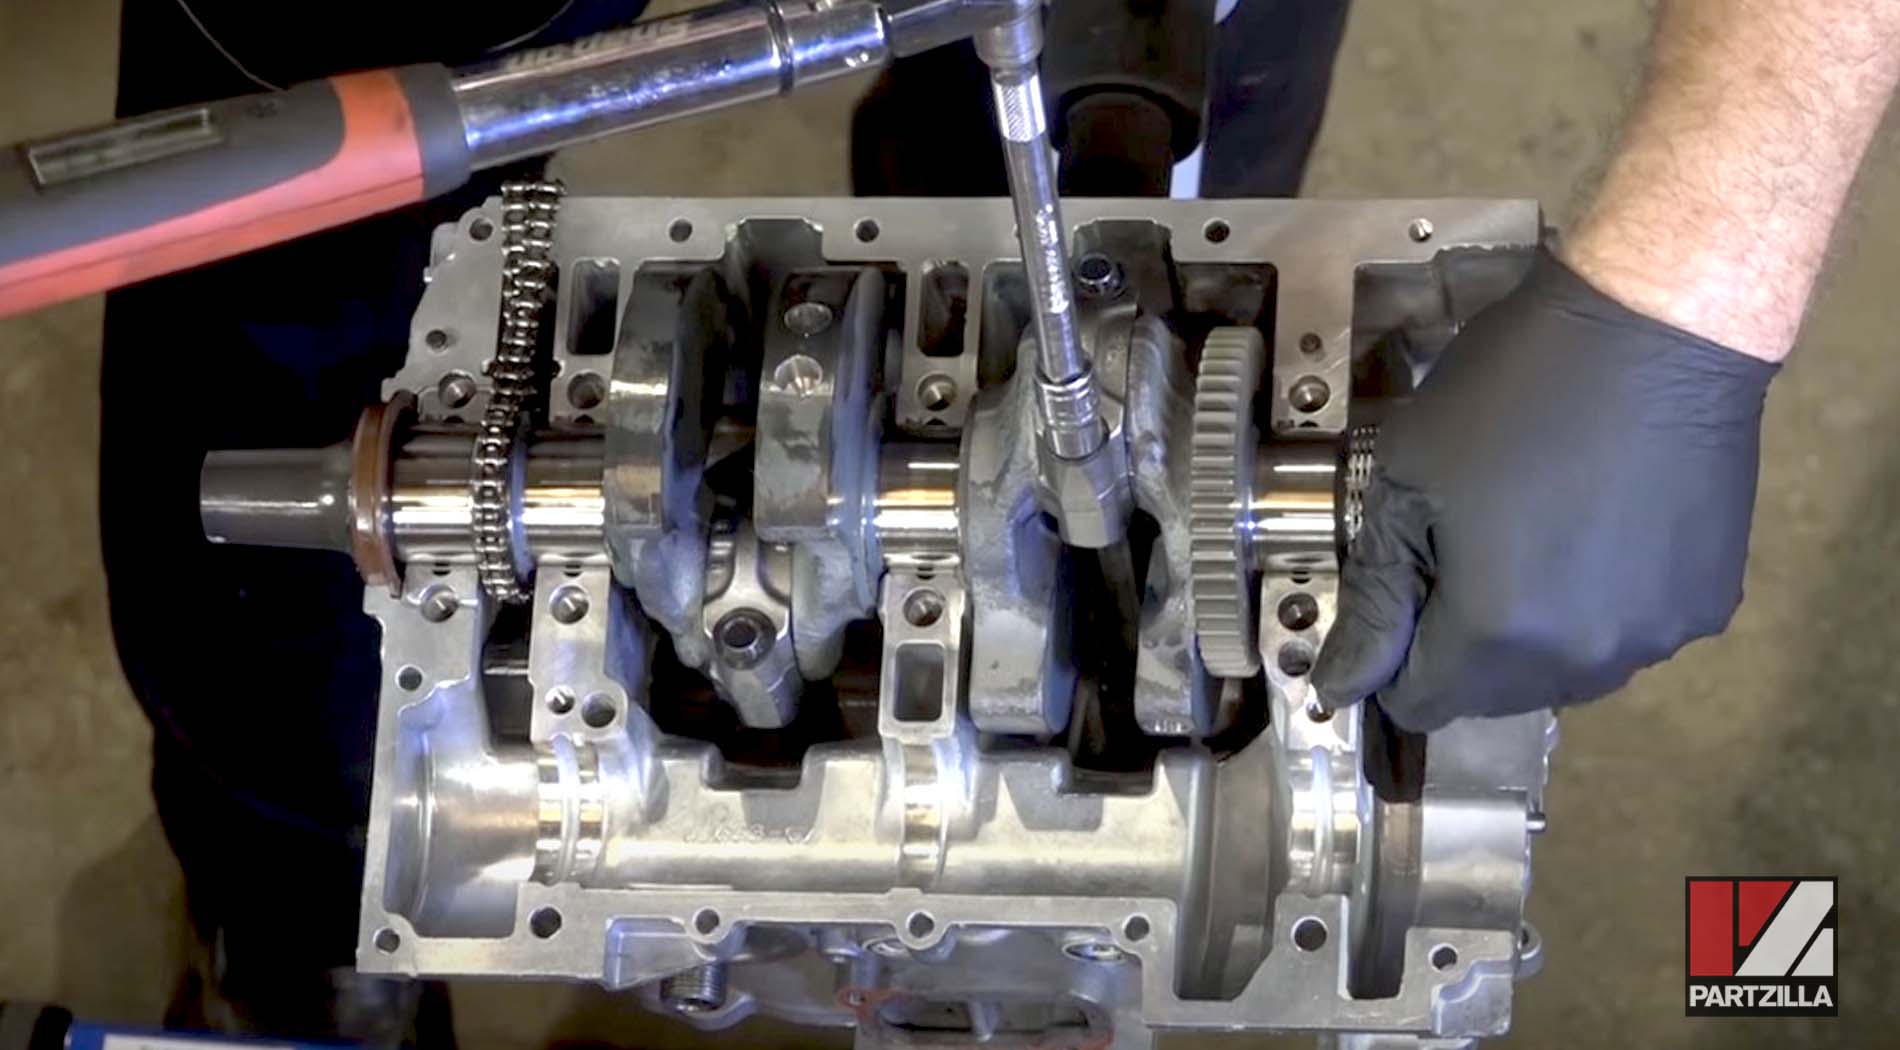
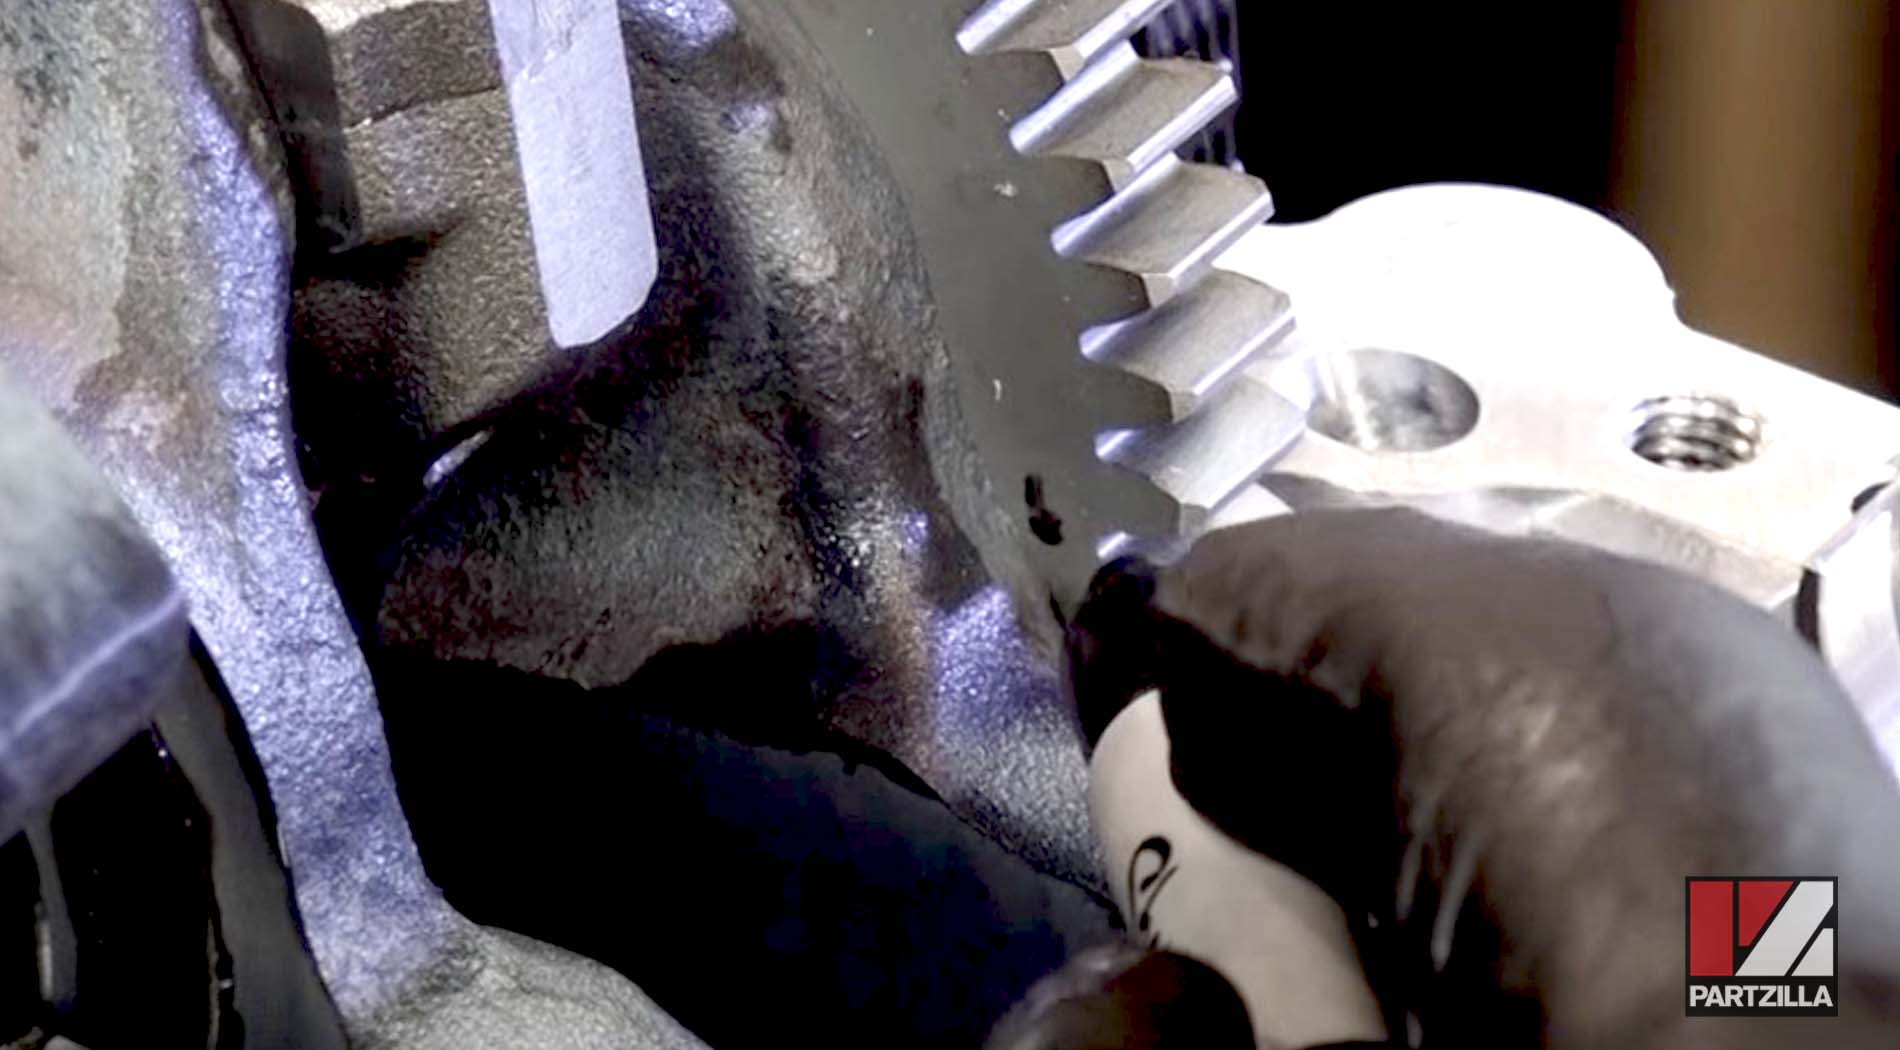
Step 10. Rotate the engine upside down to get the crankshaft in.
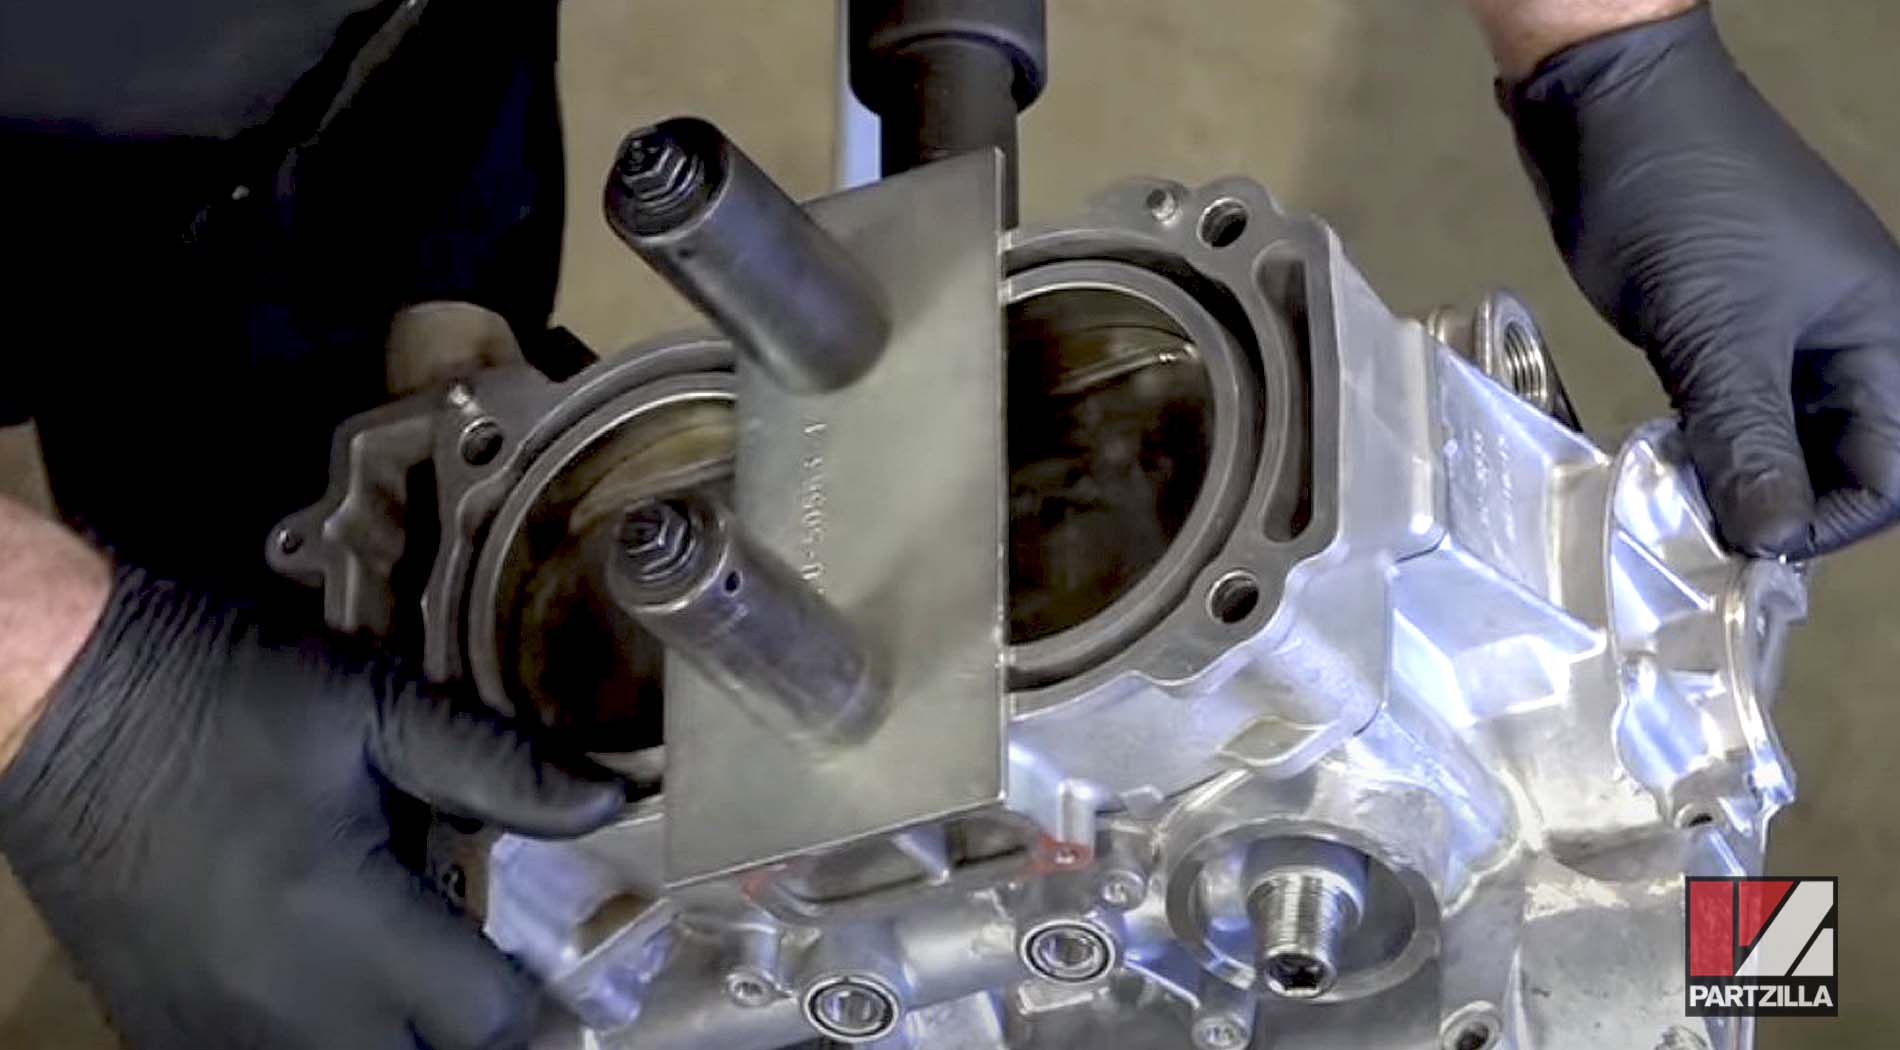
NOTE: We used a metal plate in the center and a couple of head bolts with some sockets as extensions, which we hand-tightened to hold it all in place so we could rotate the engine upside down to get the crankshaft in.
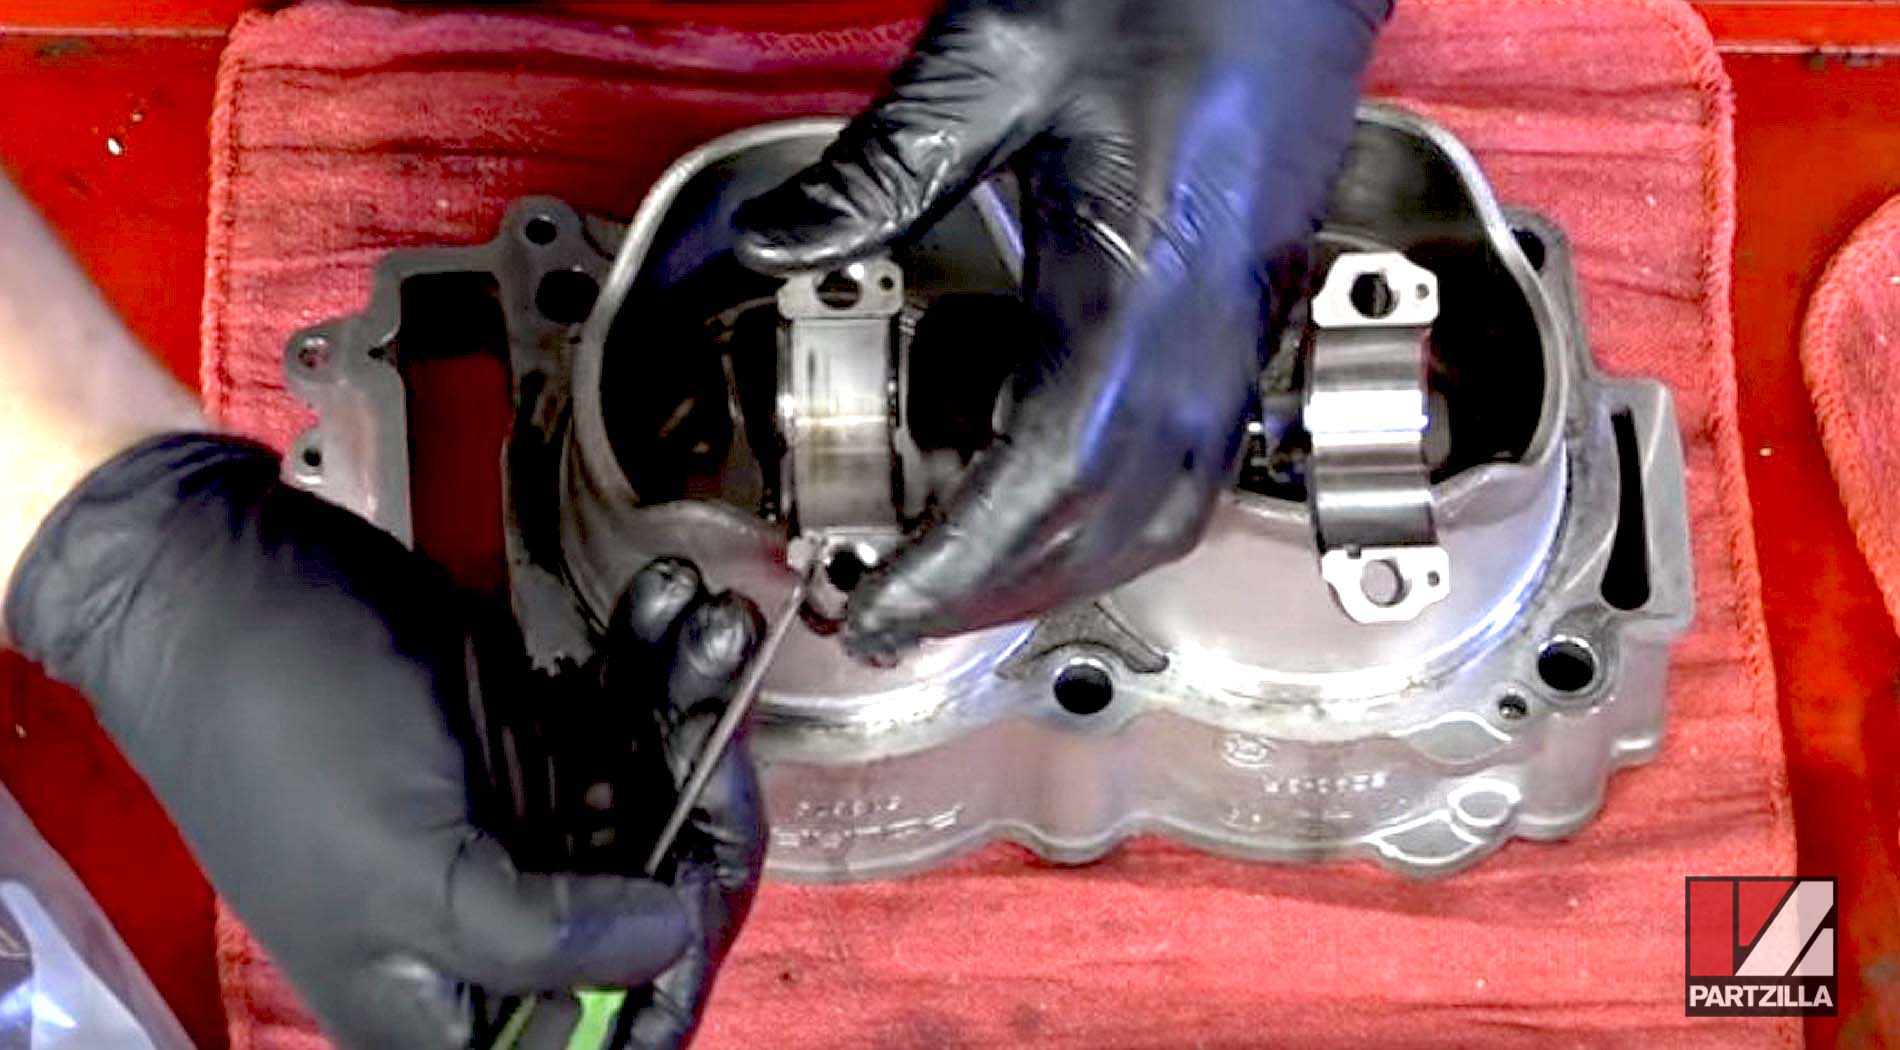
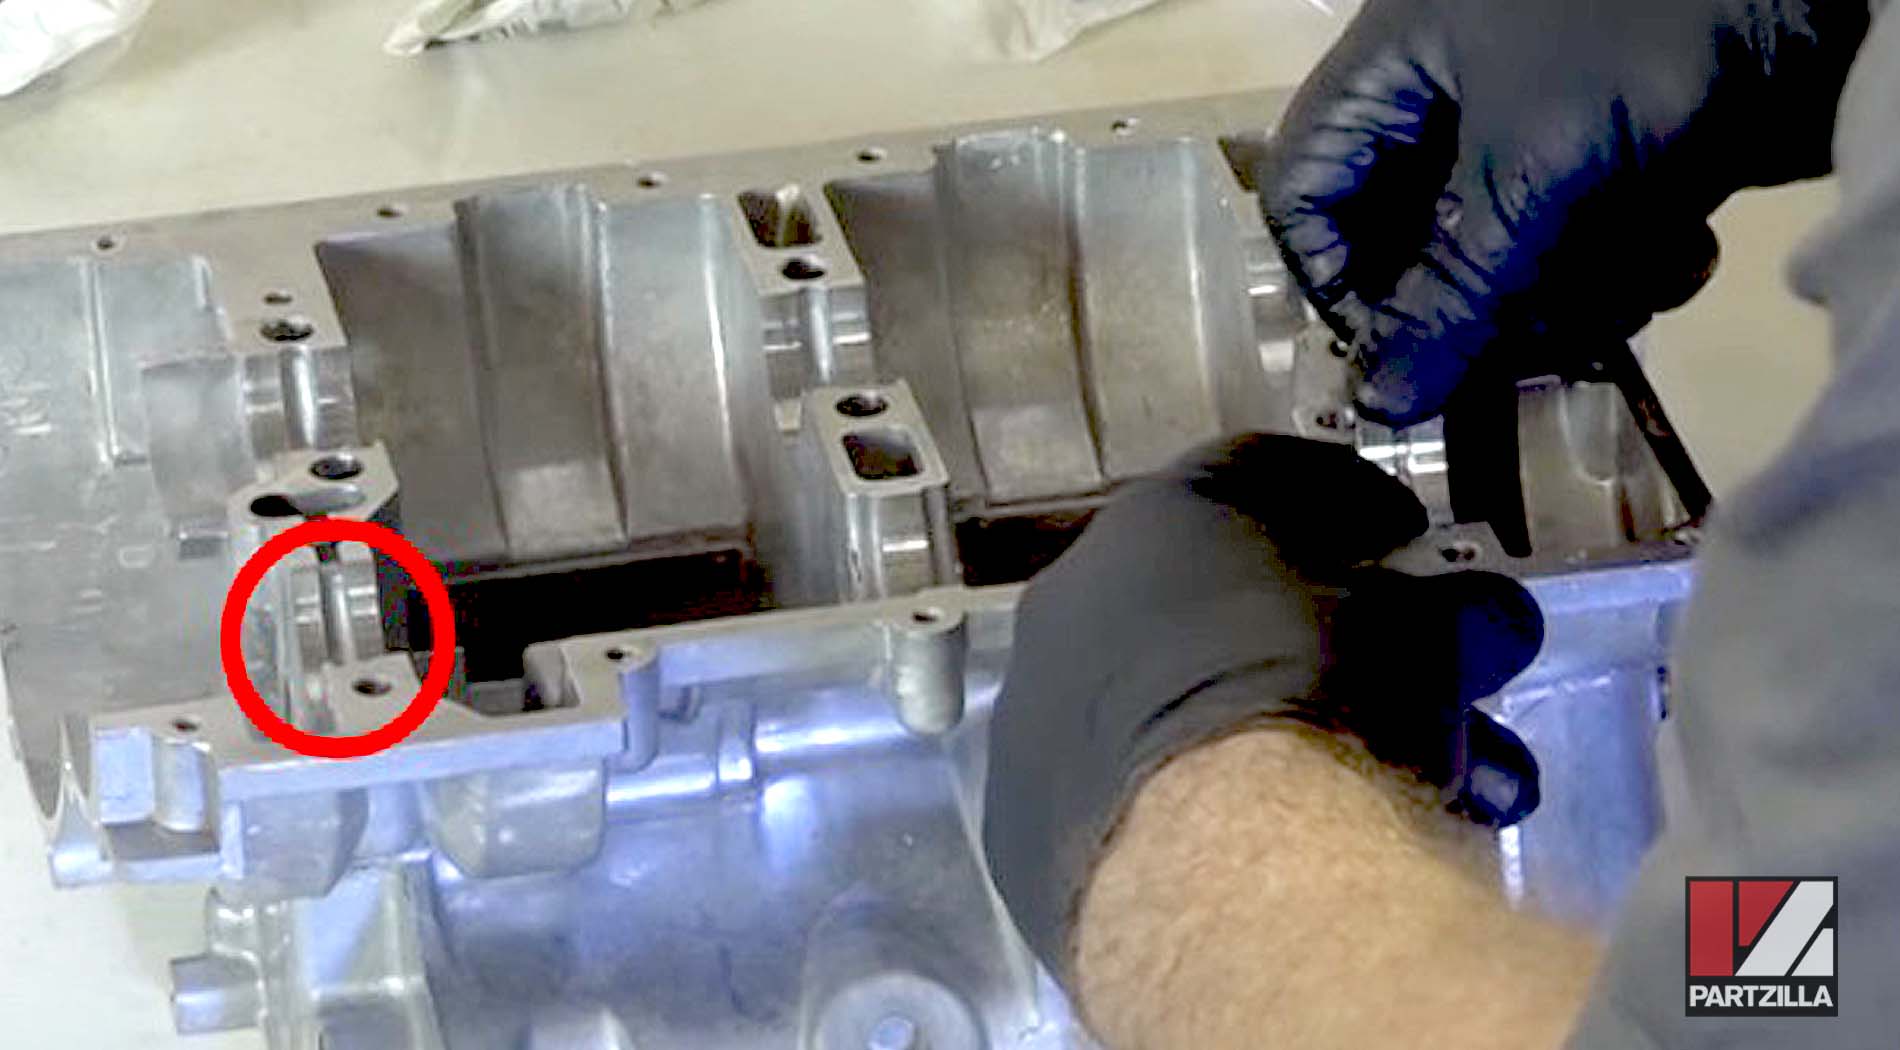
Step 11. Install the main crankshaft bearings for surfaces 1, 3, 5 and 6 (see diagram below).
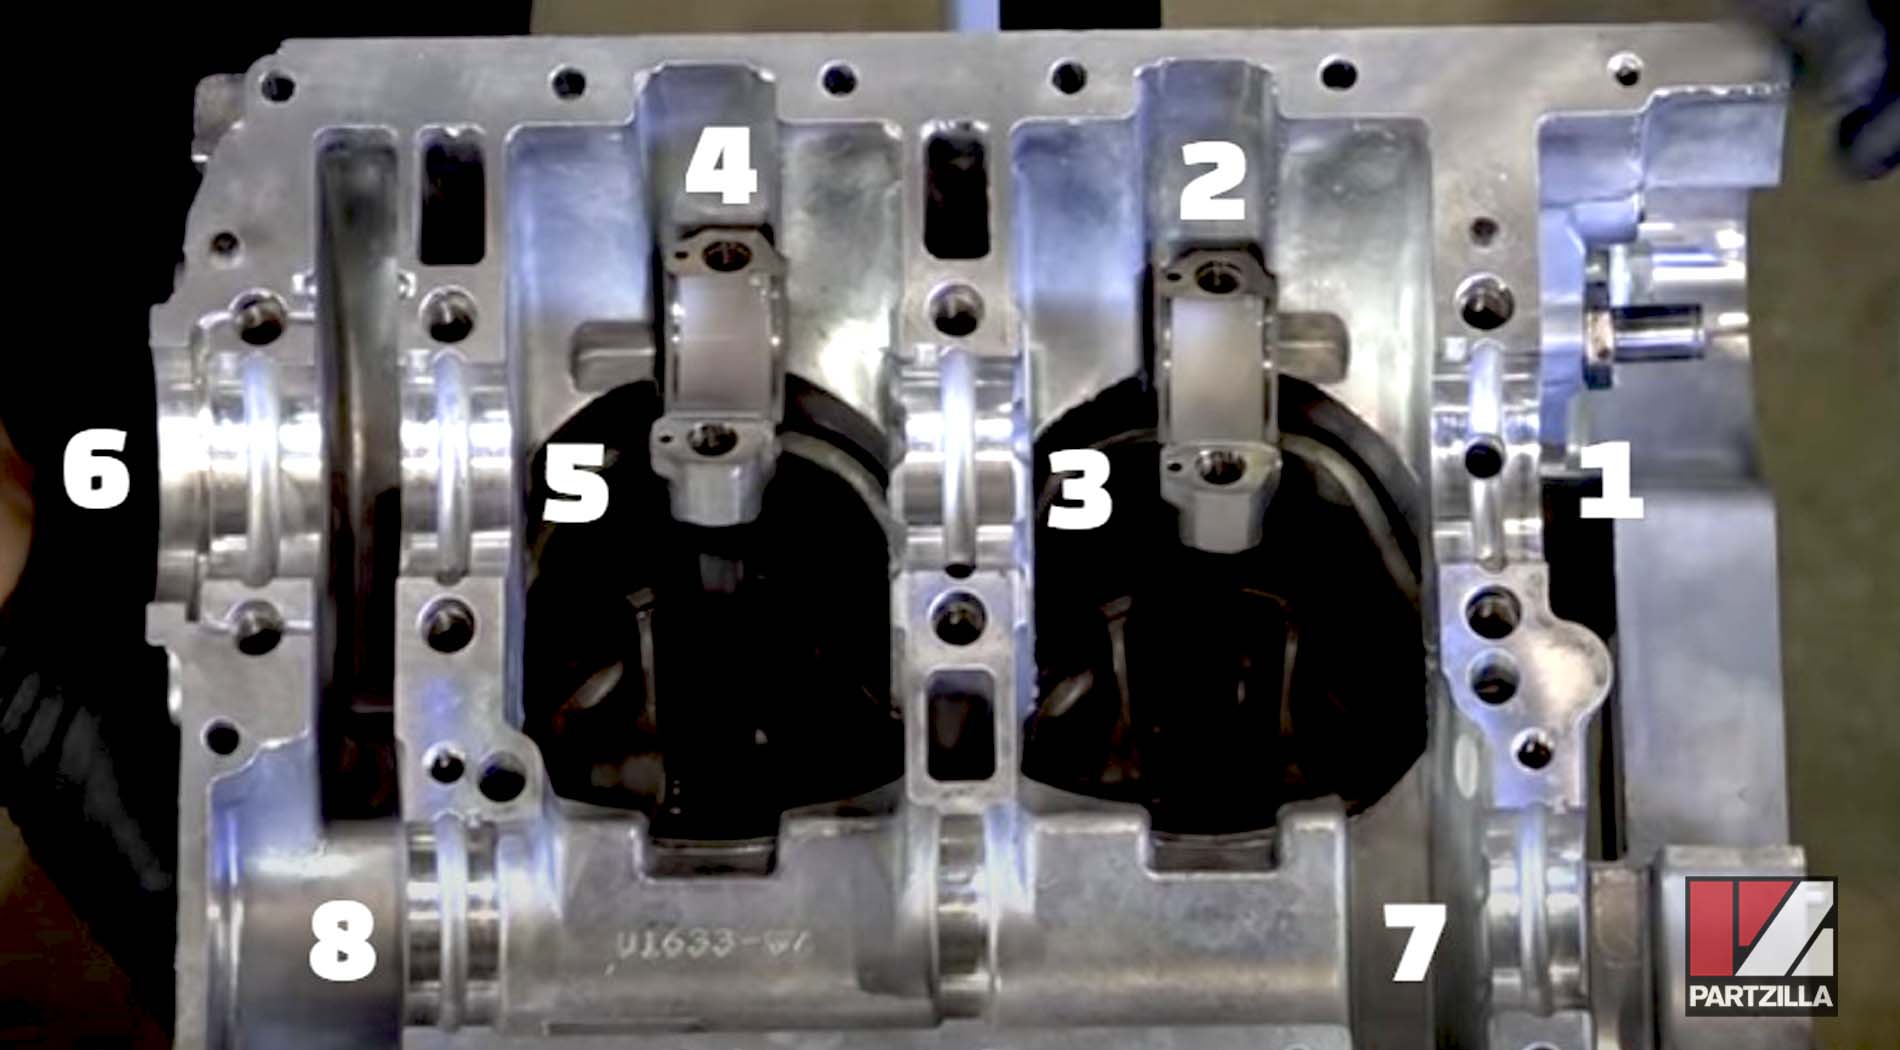
Based on the sizing charts, these bearings are Yellow (1), Green (3), Yellow and Yellow (5 and 6). Add a dab of oil to each one of those bearings after installing them.
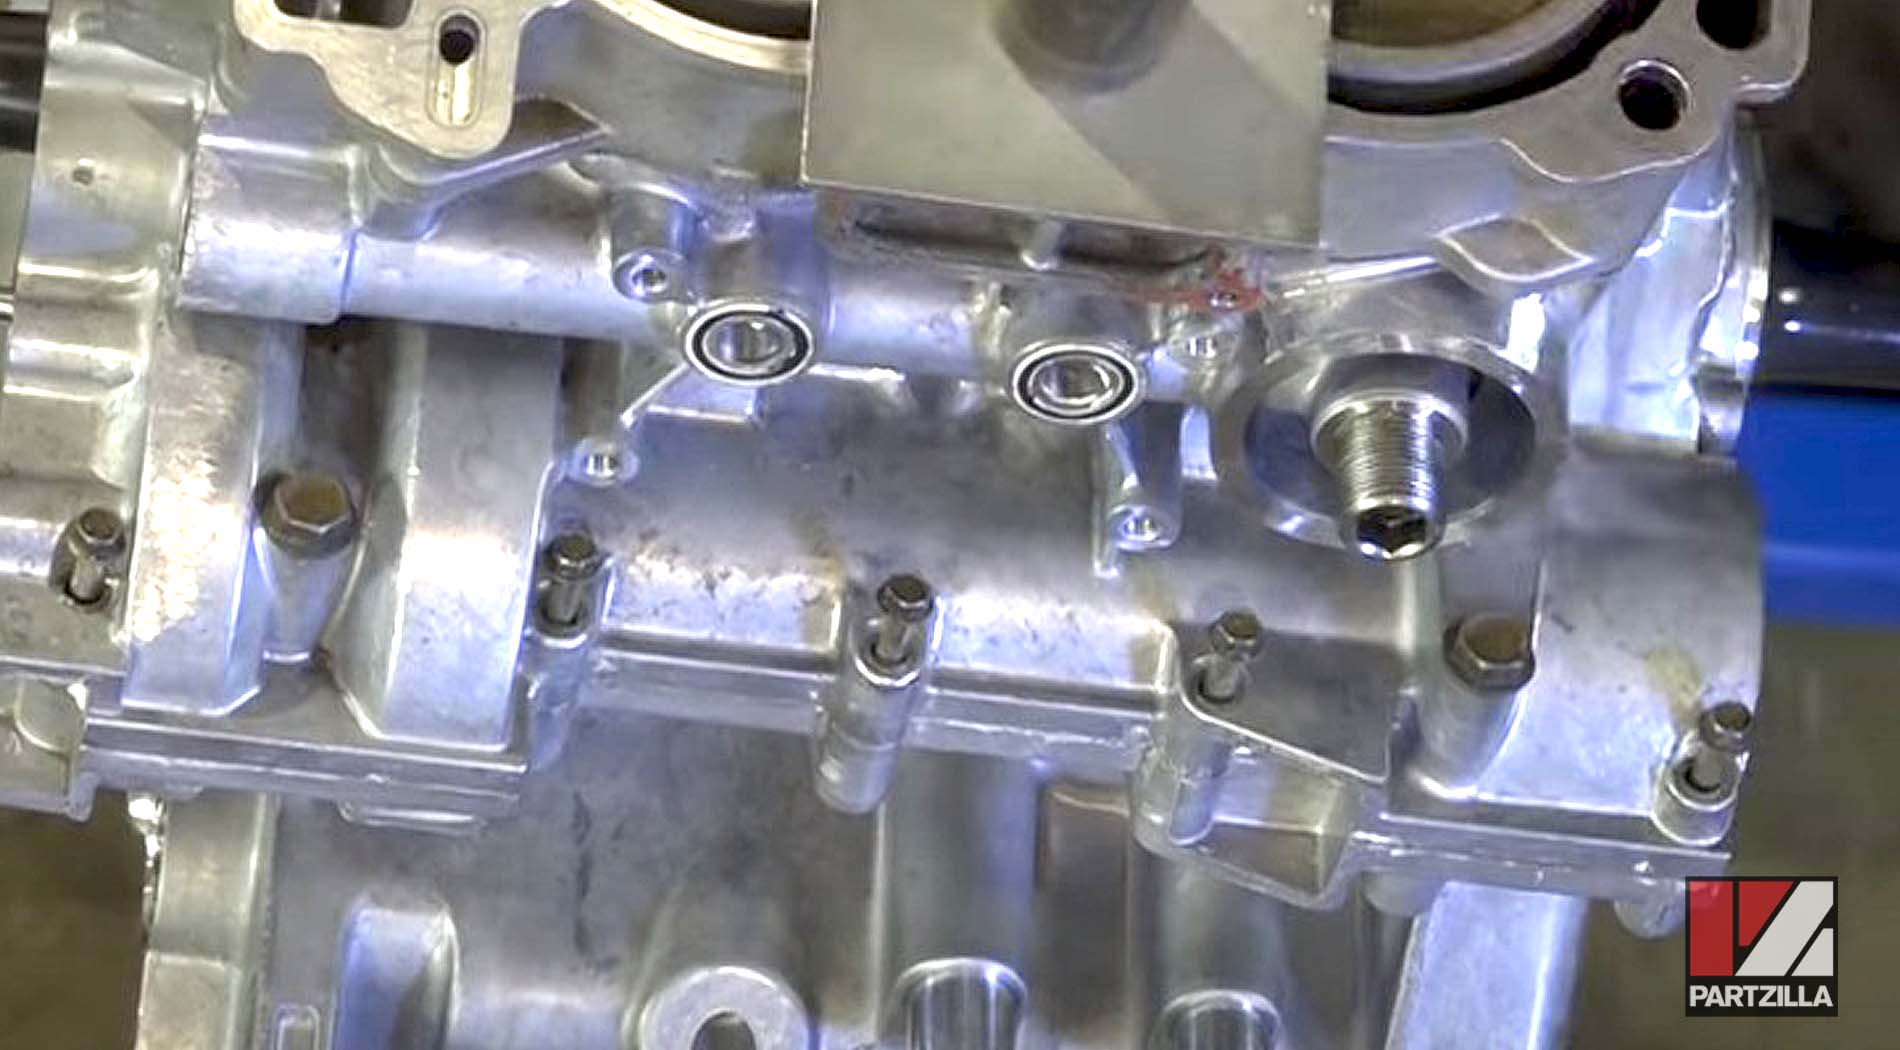
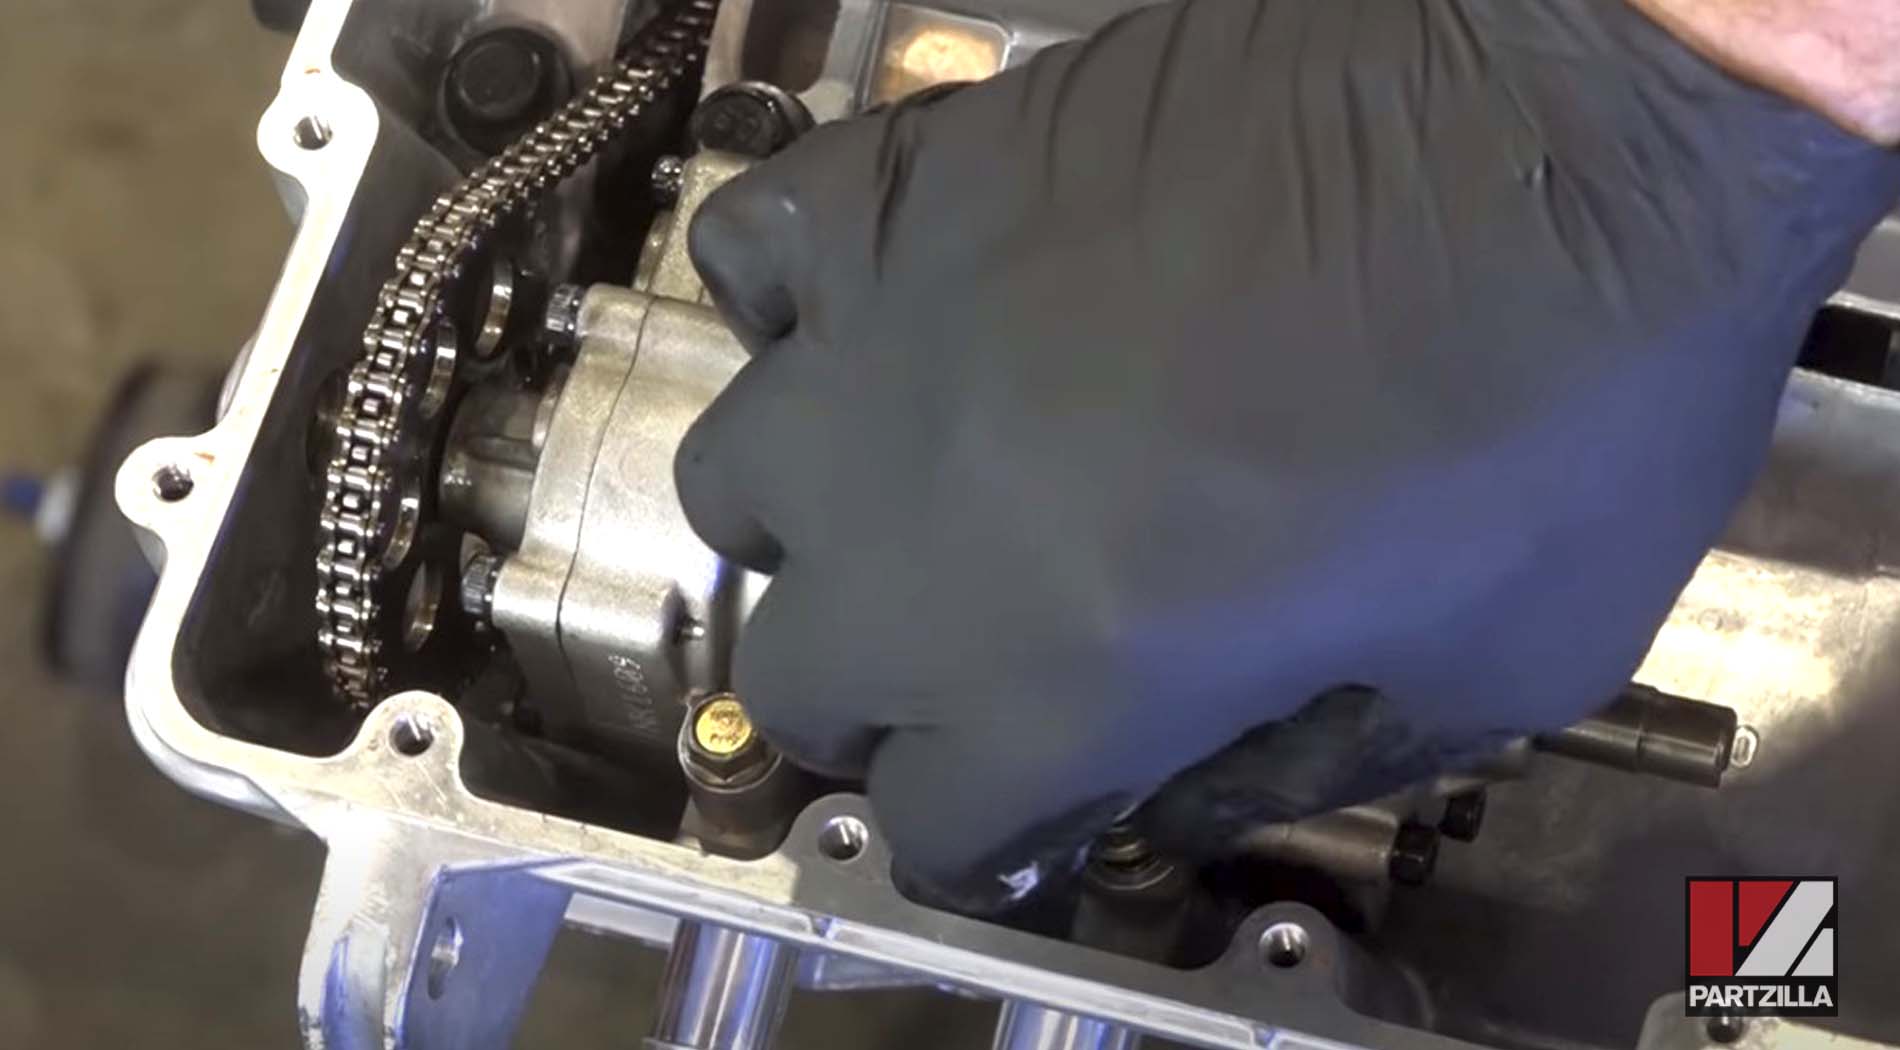
Step 12. Install the oil diverter, which slides right in.

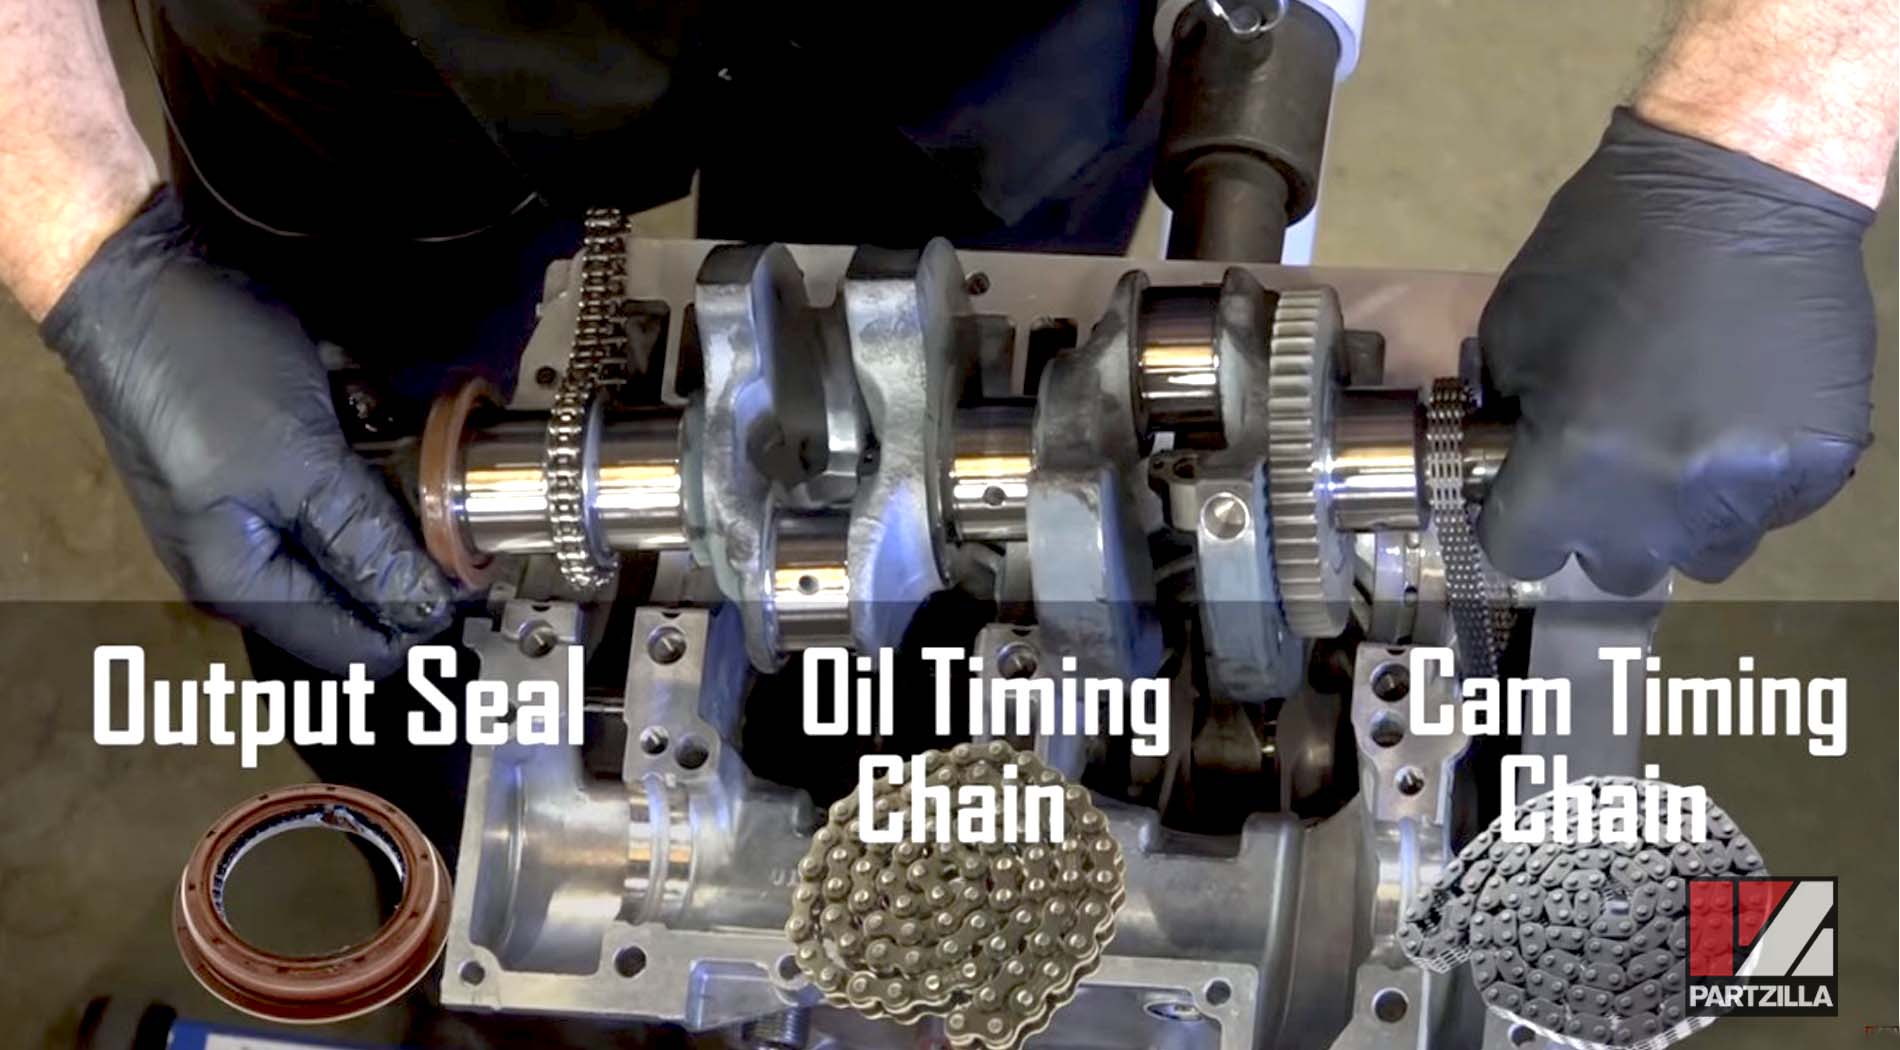
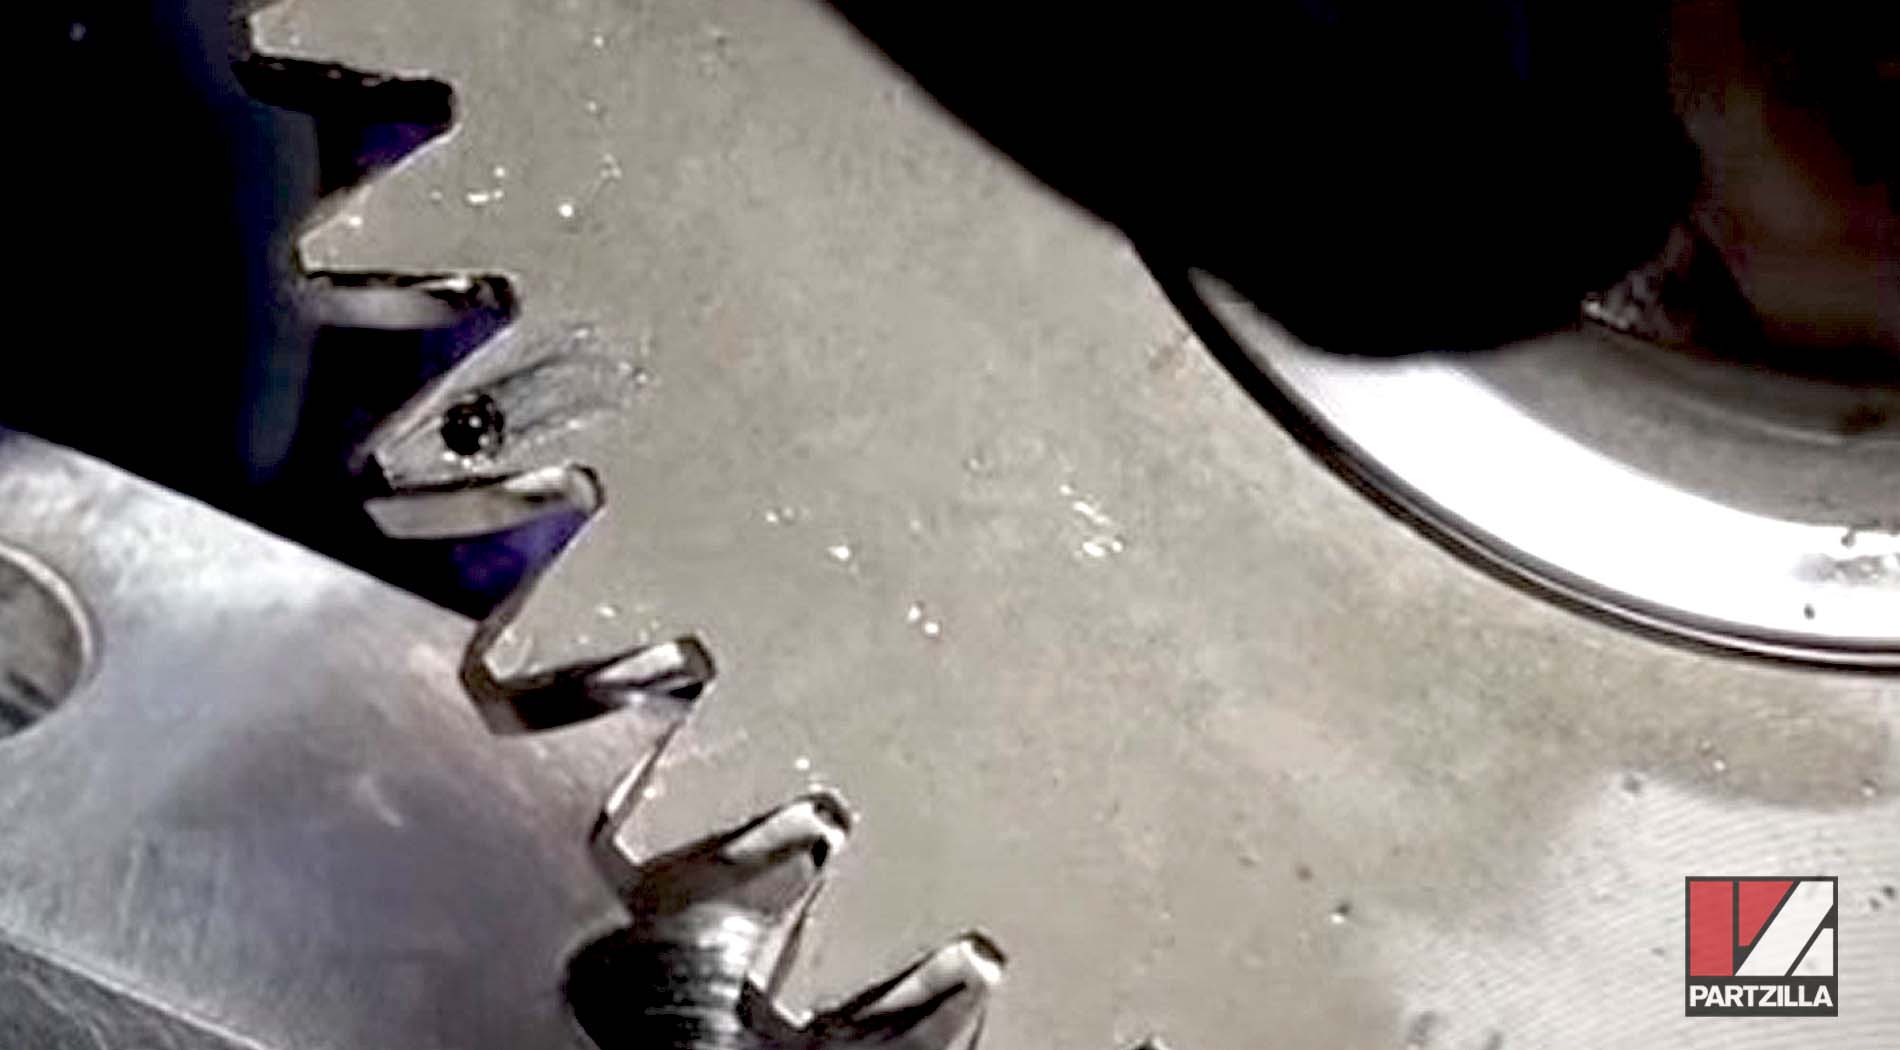
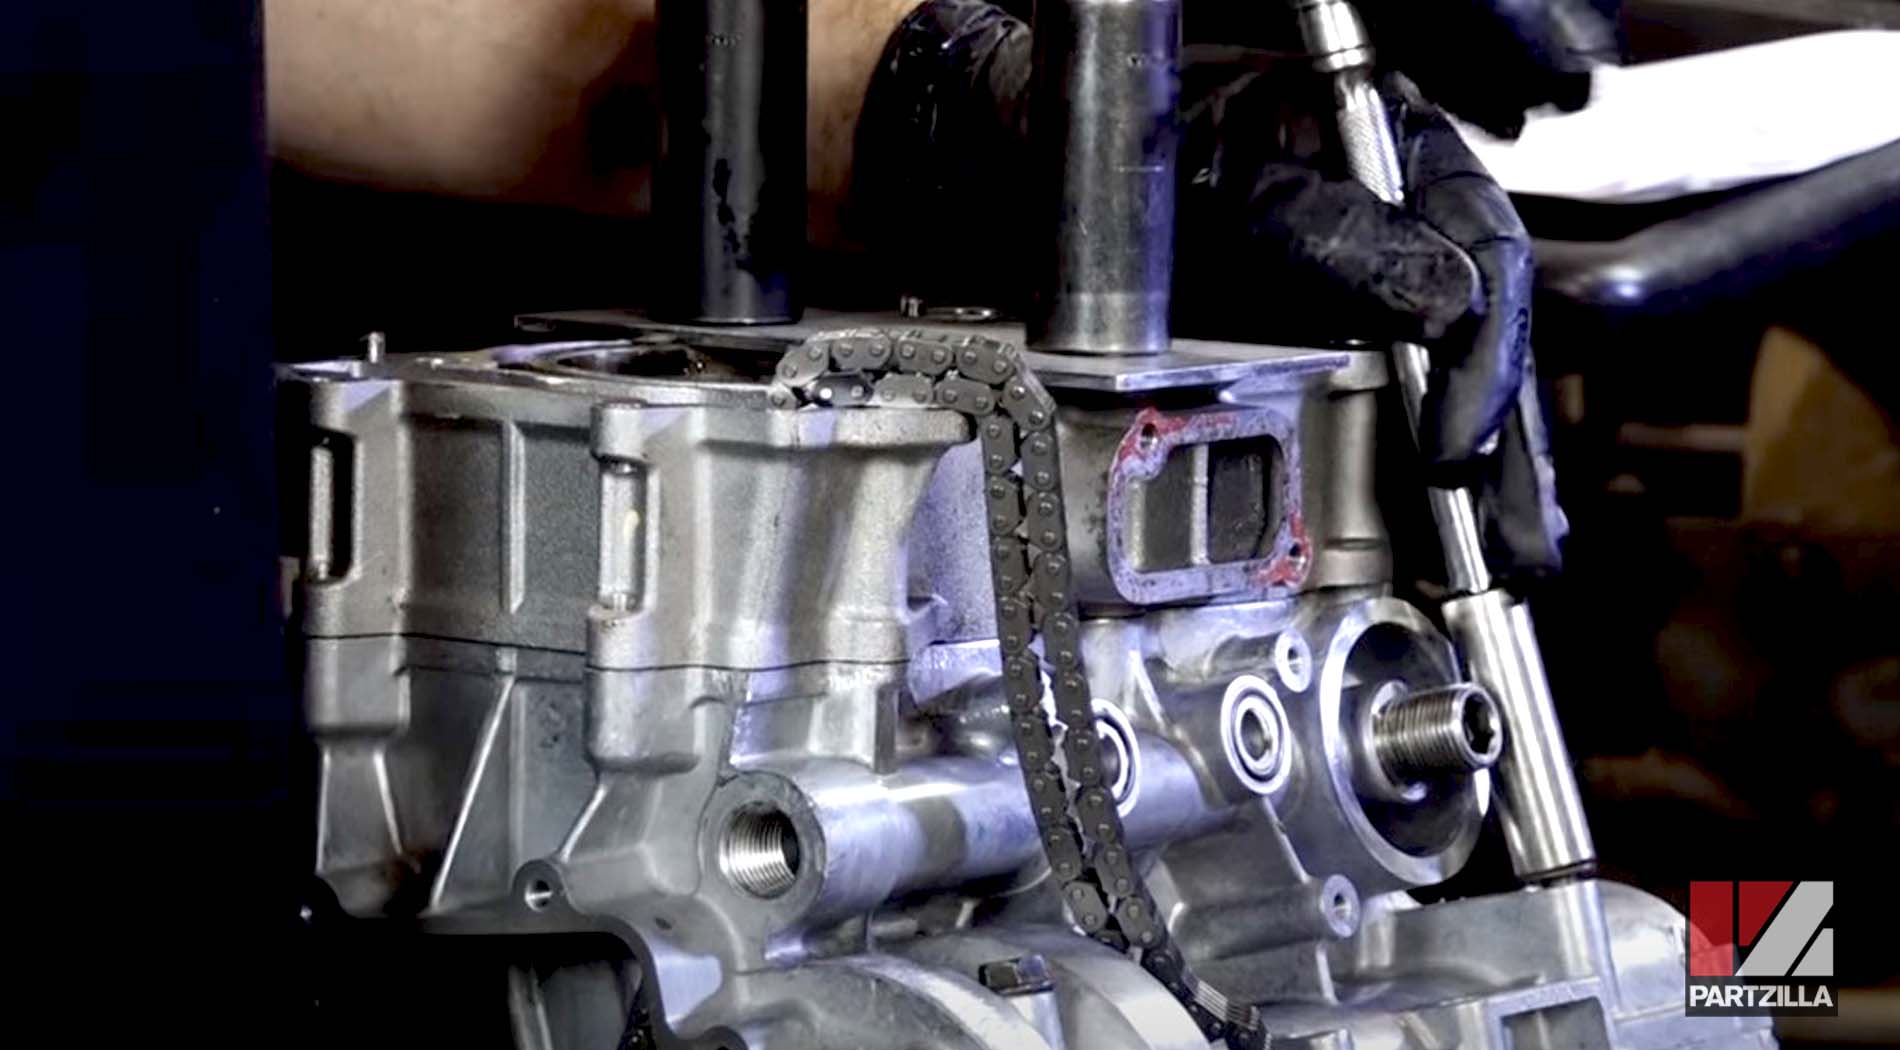
Step 13. Install the crankshaft with the oil timing chain and cam timing chain and the output seal.
Step 14. Install the connector rod end caps, making sure the serial numbers line up with the right connecting rod. The connector rod bolts are installed and torqued down in a two-stage sequence. First, torque them to 13 foot-pounds. Next, torque them to 105 degrees.
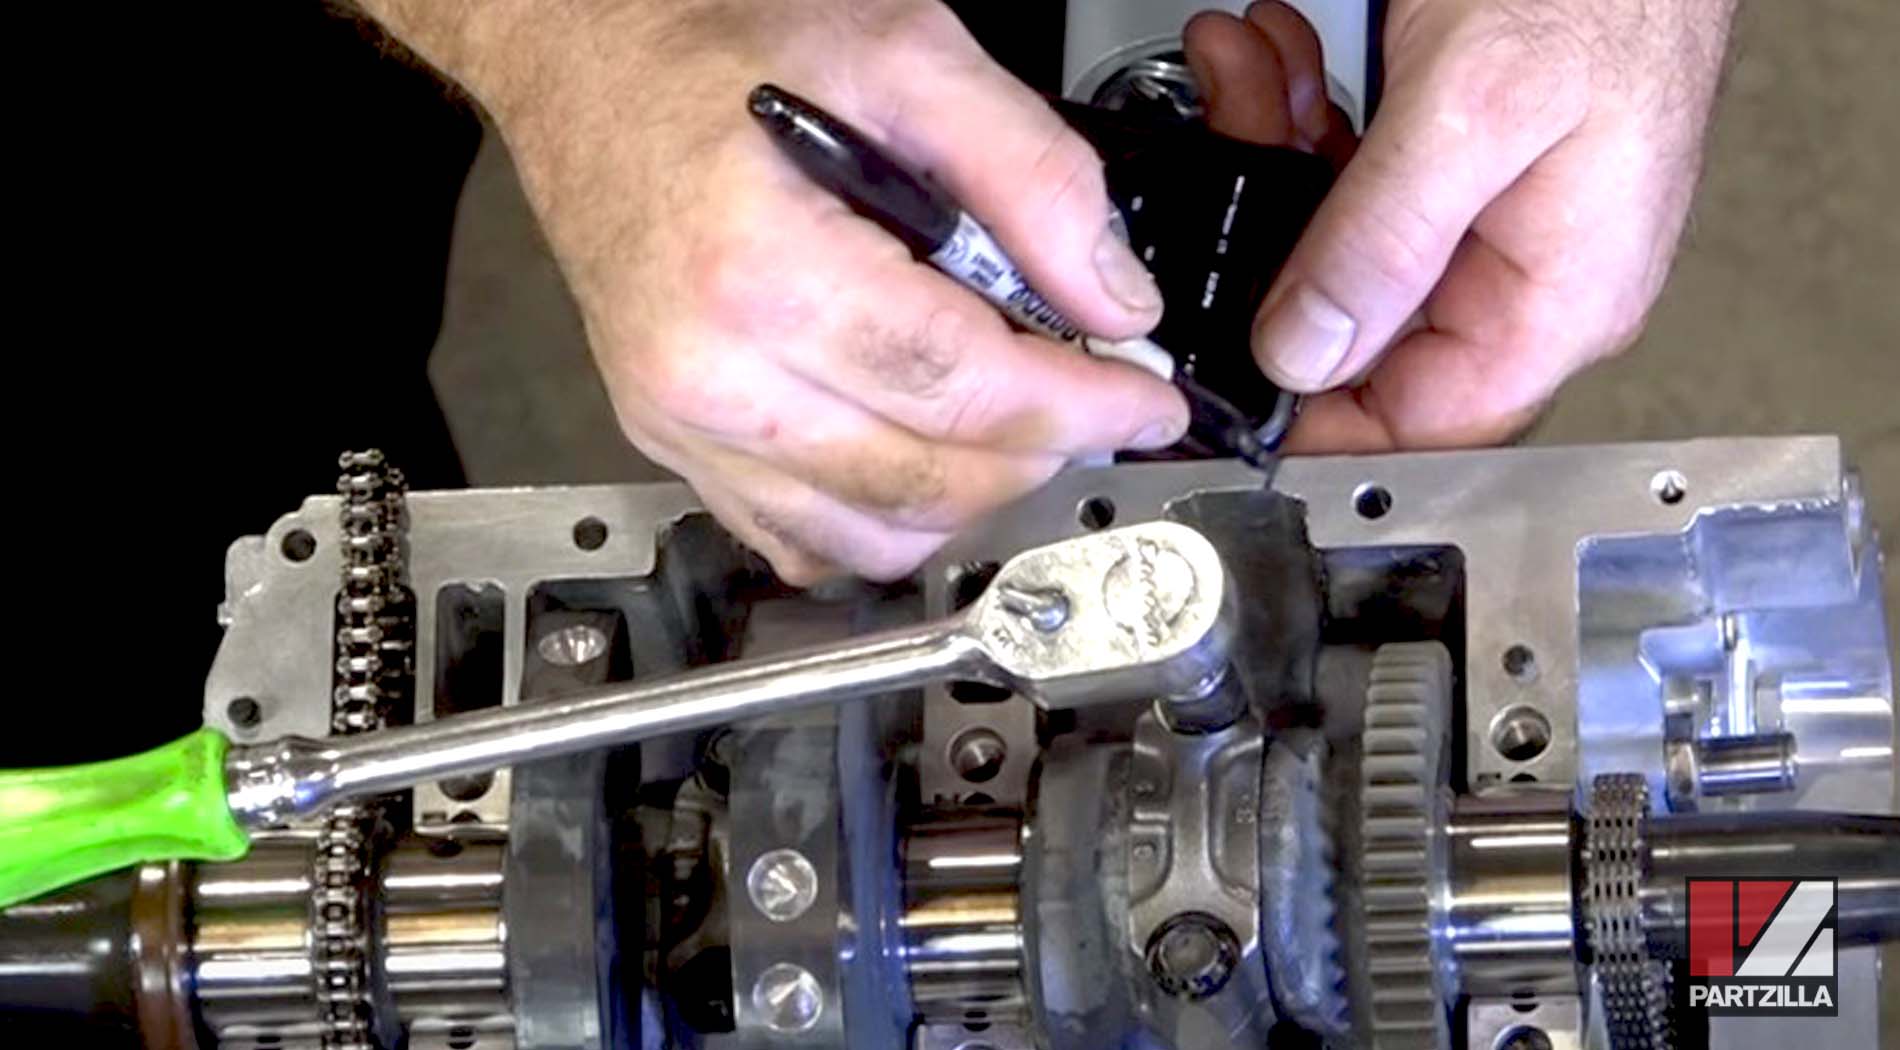
Step 15. Install the top half crankcase bearings, then dab a little oil in there so it isn't starving on startup.
Watch the clip below to see the crankshaft installation segment of our Polaris RZR 900XP bottom end rebuild video.
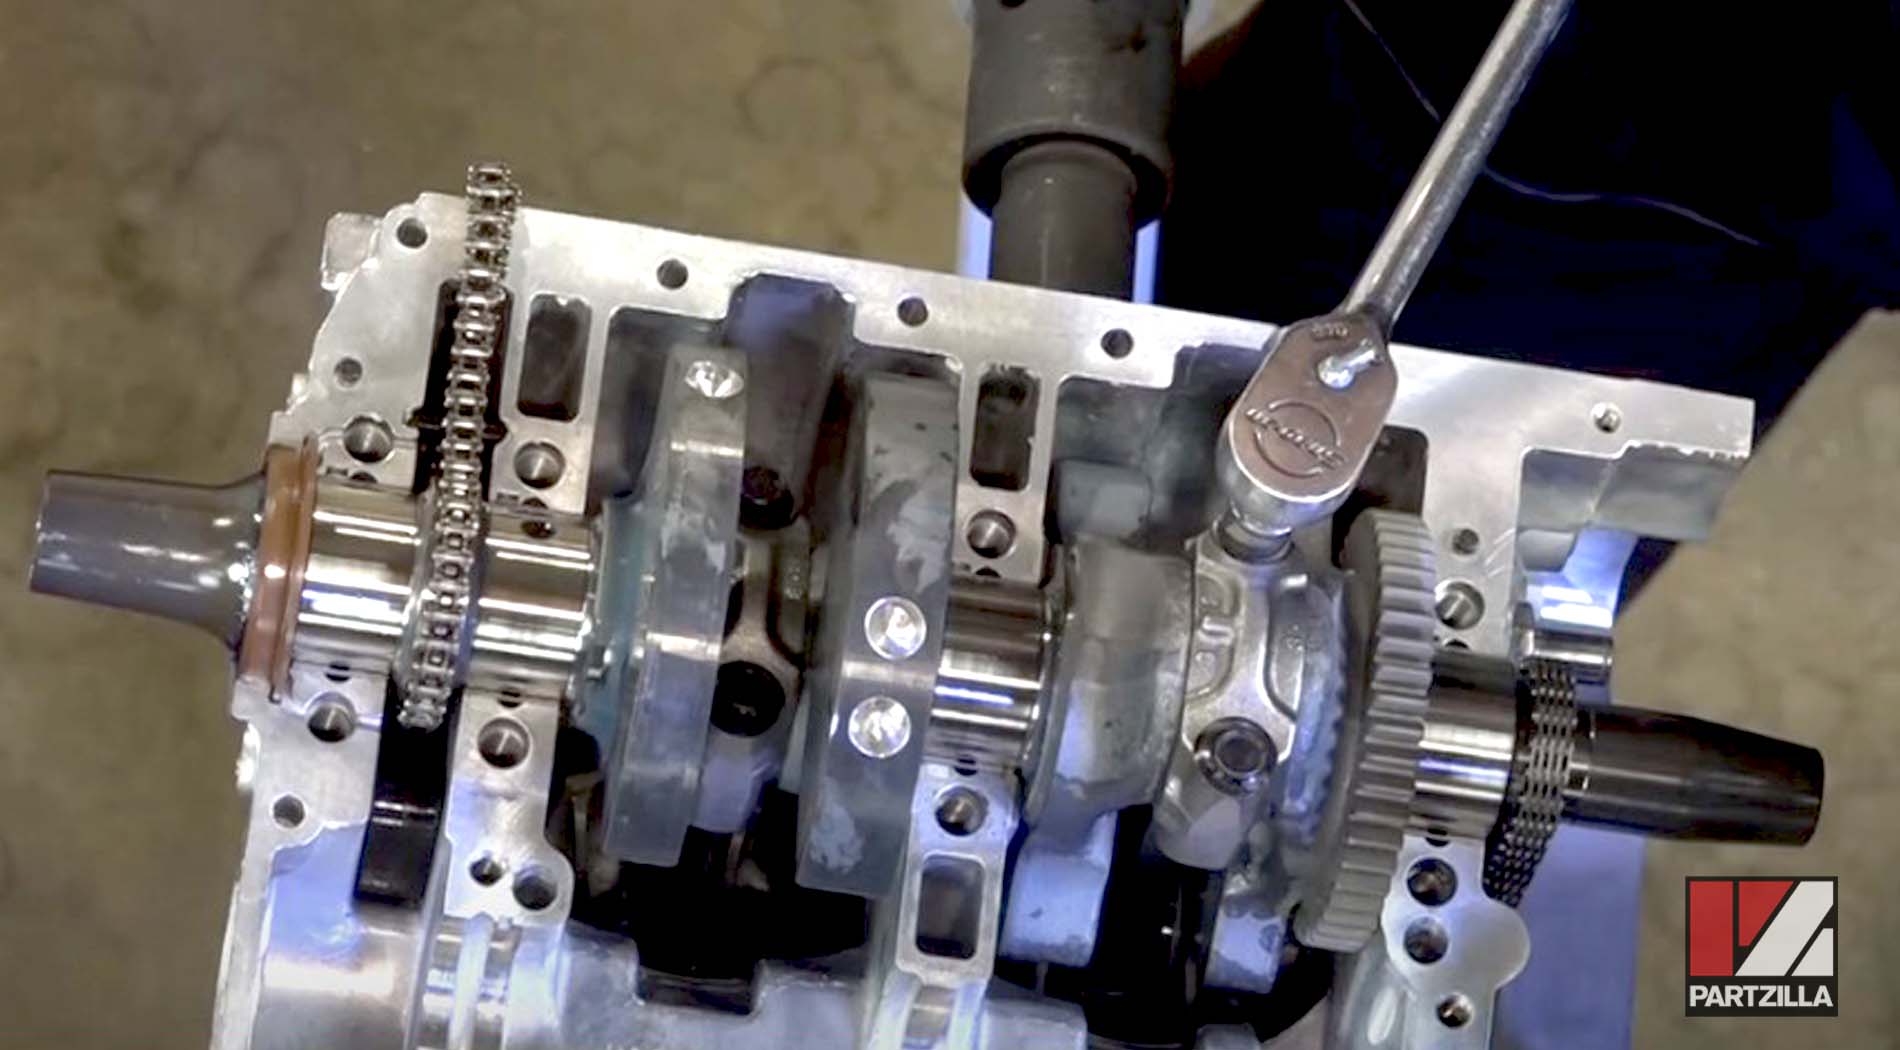
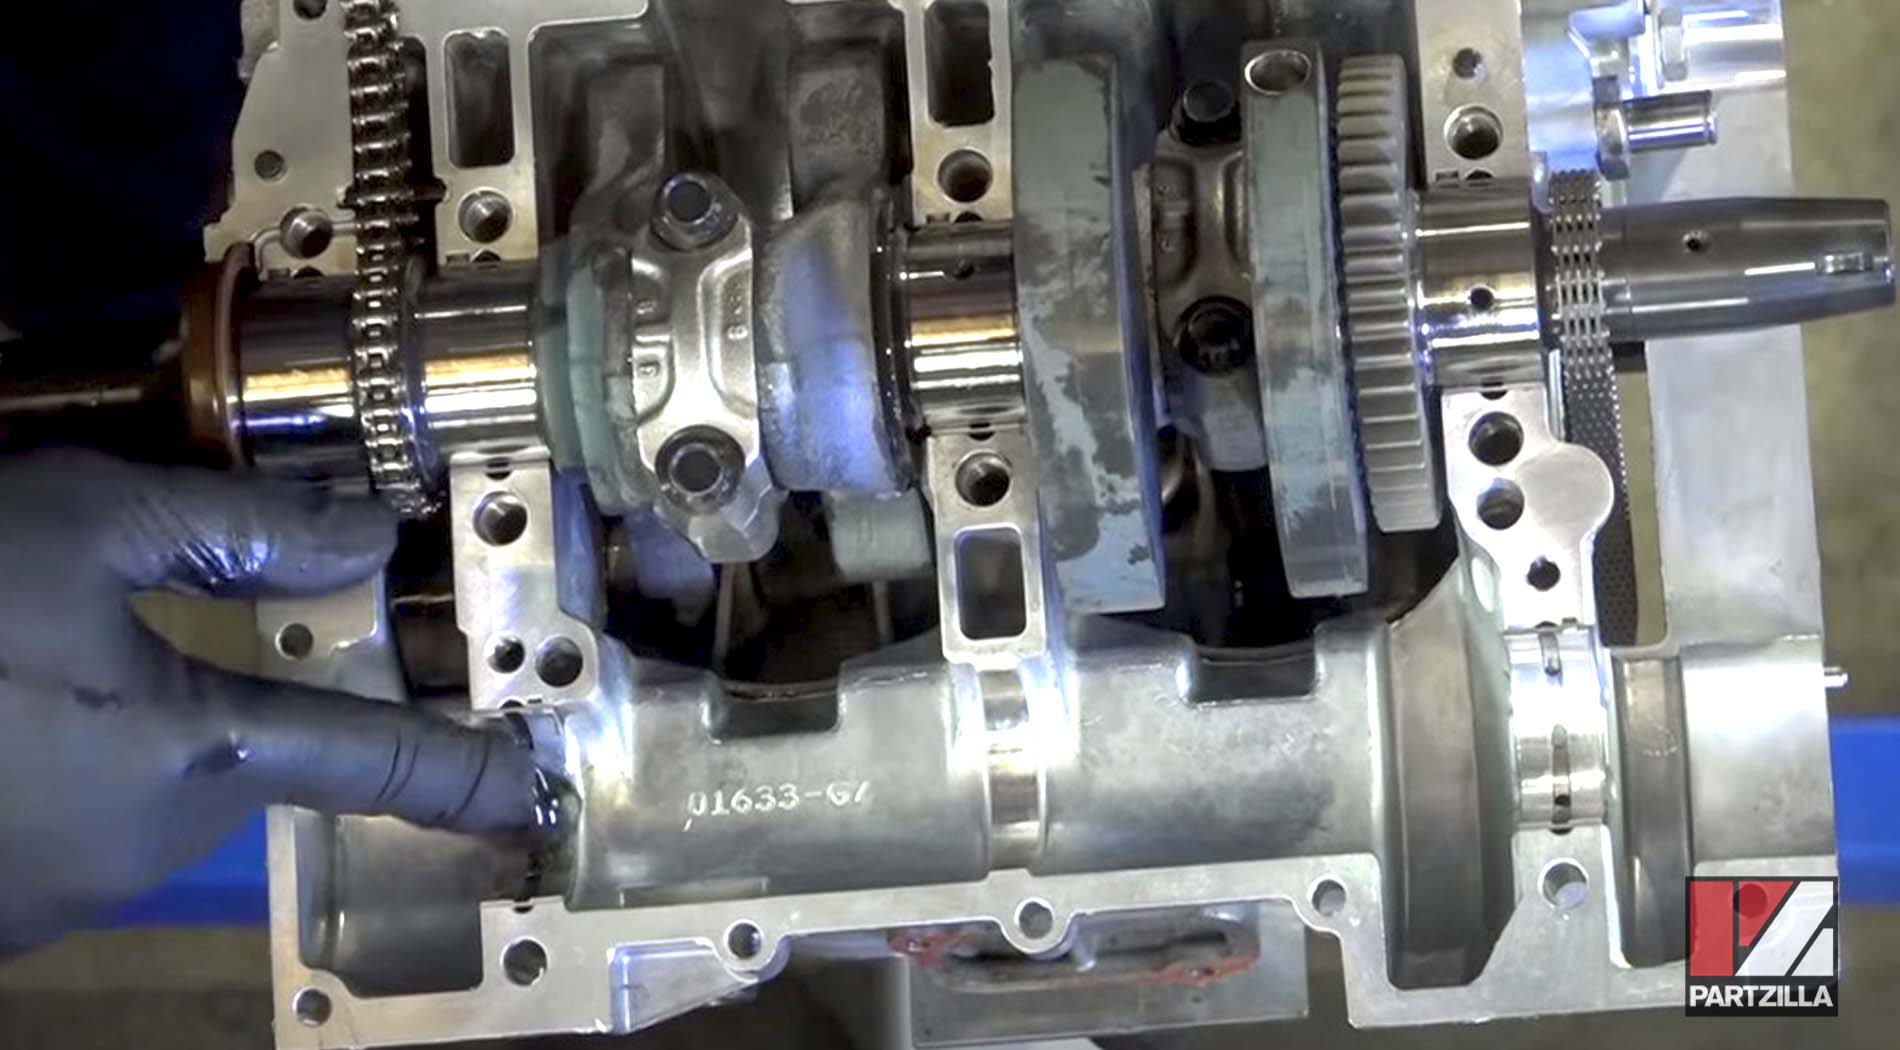
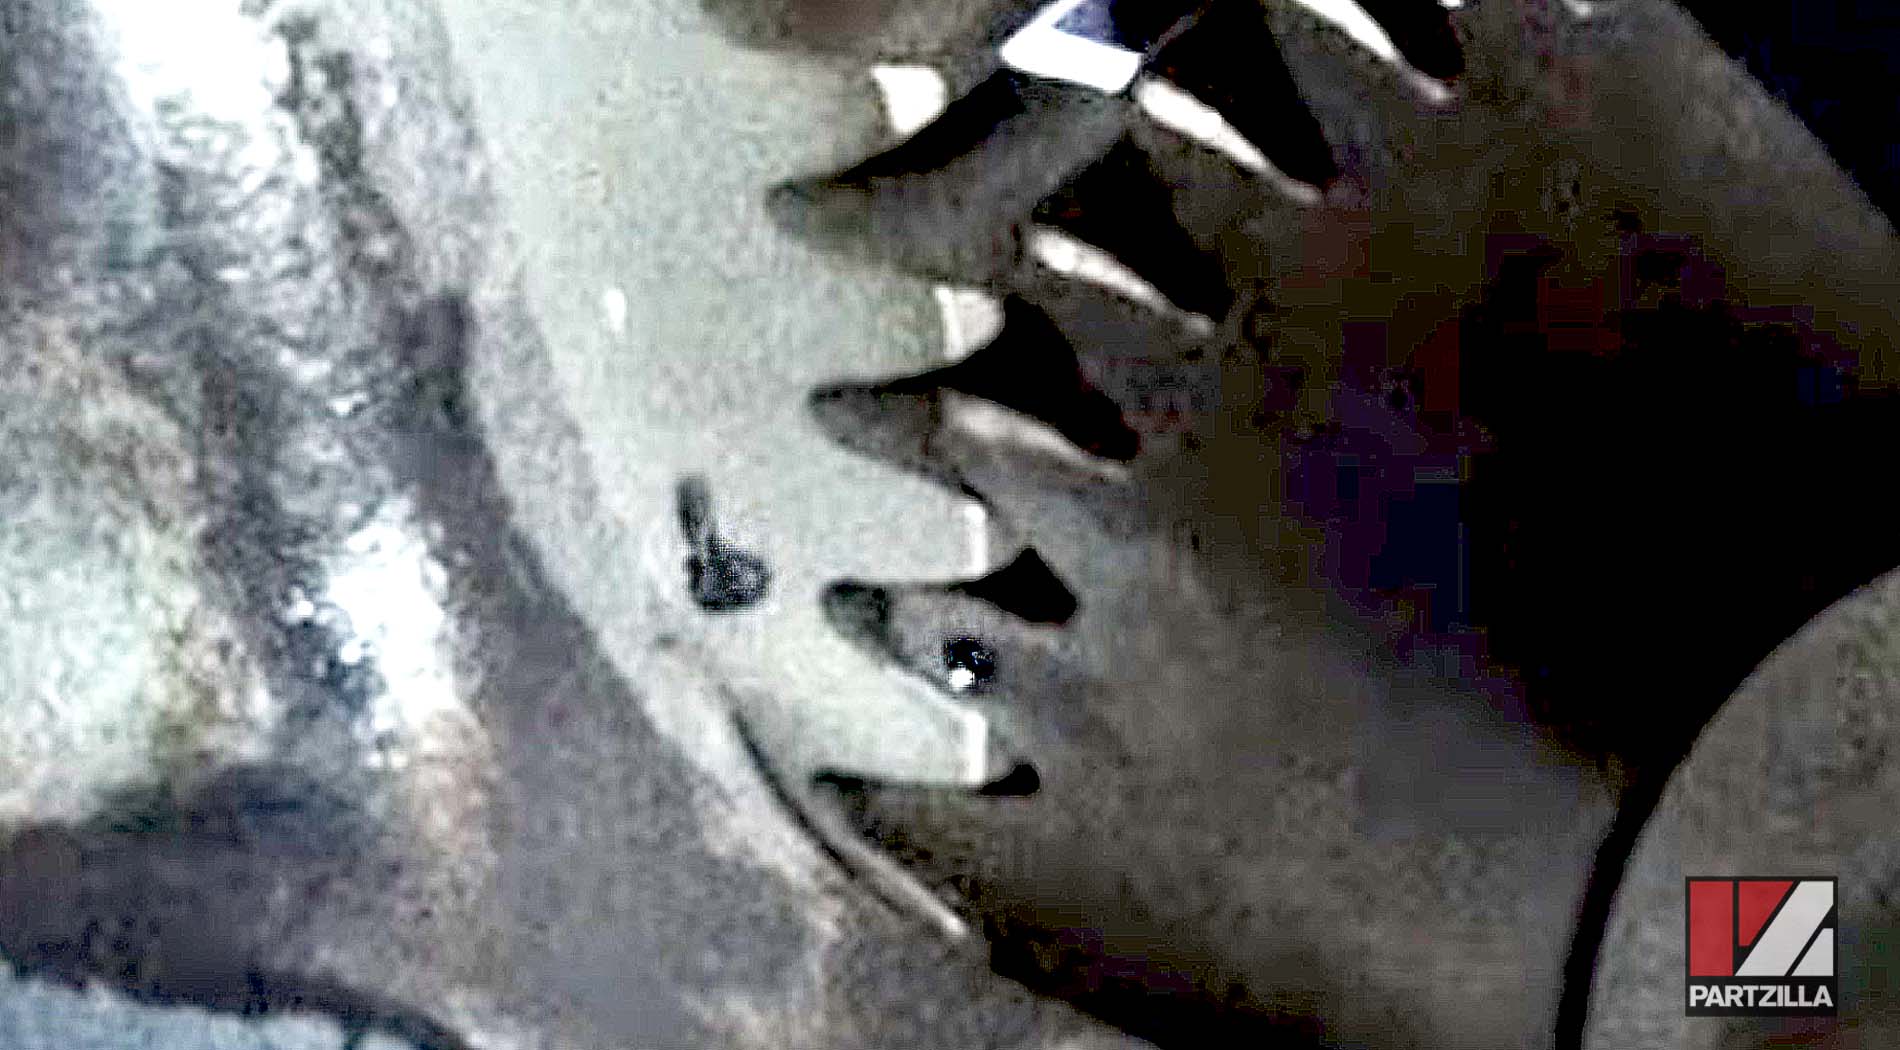
Step 16. Install the counterbalance, using the alignment dots to line it up with crankshaft.
Step 17. Install the bottom half crankcase bearings (Yellow, Green, Yellow, Yellow), followed by the two that came out of the counterbalance.
Step 18. Apply a thin, consistent layer of sealant to the upper cover using the path specified in the Polaris manual.
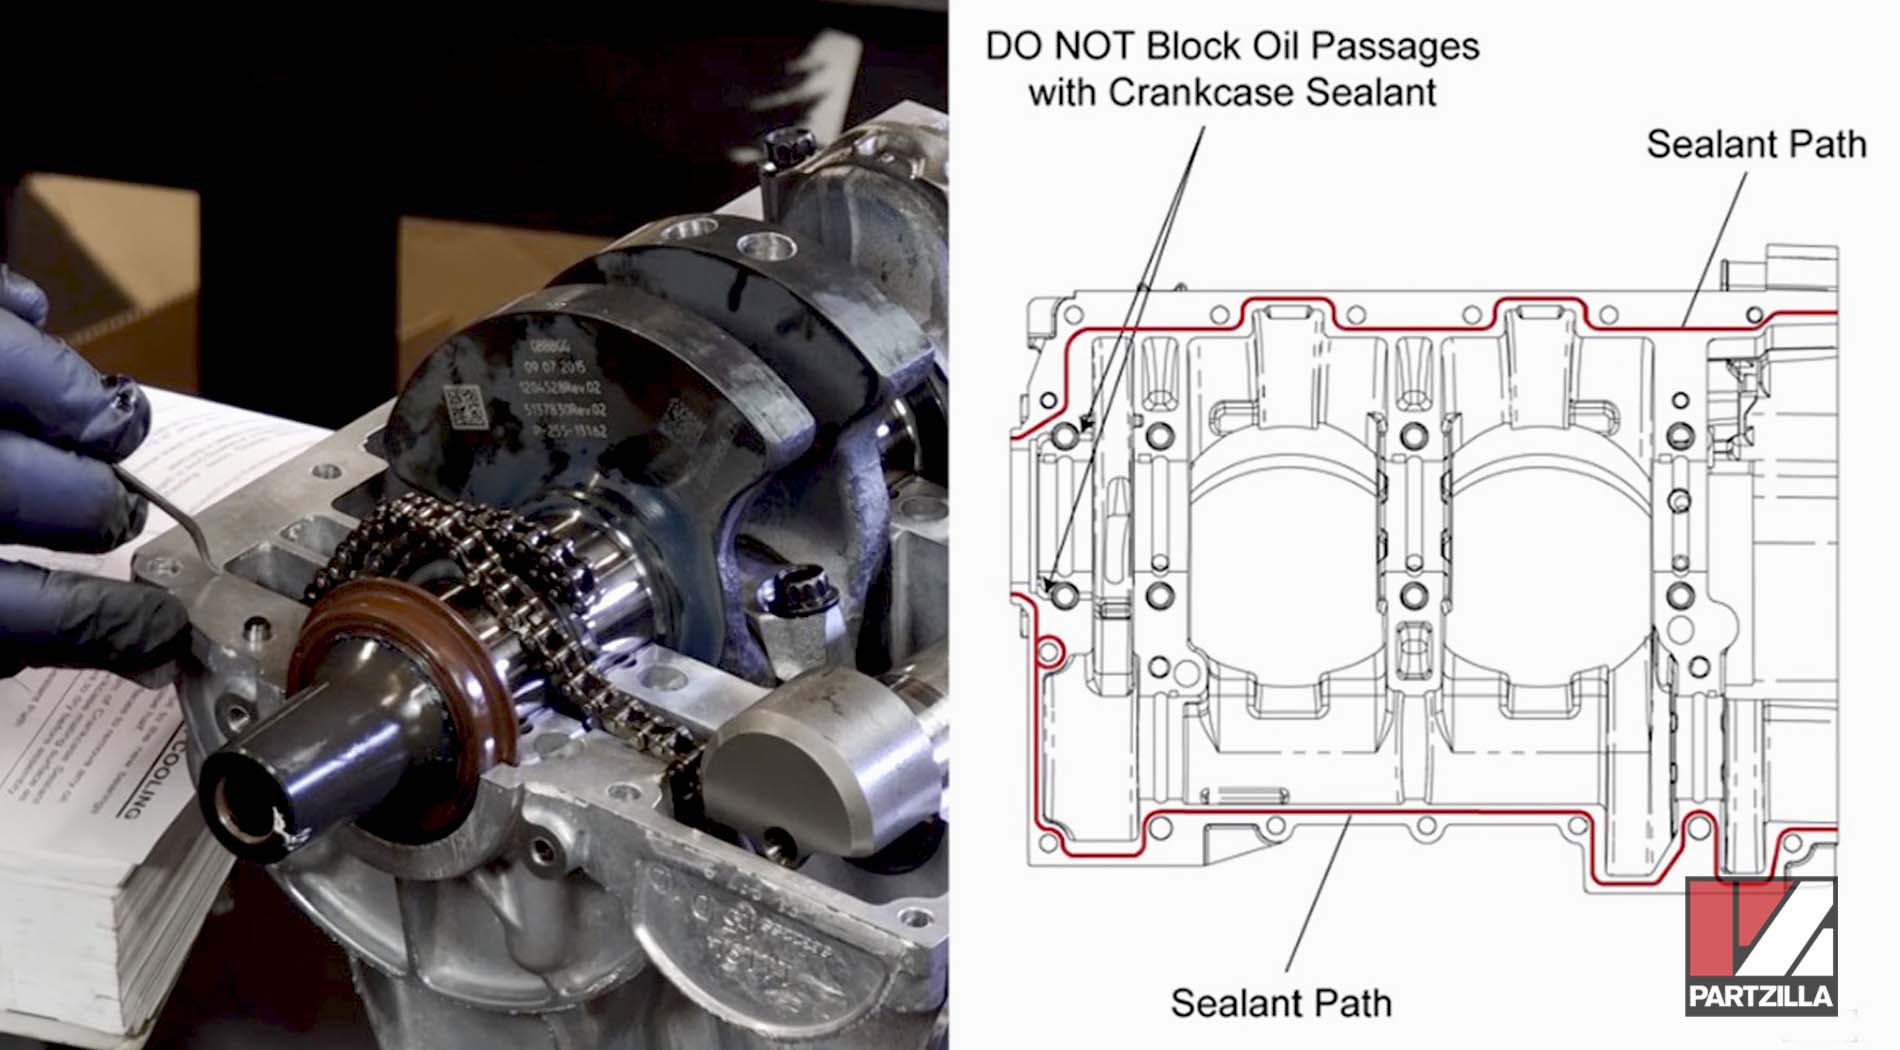
NOTE: Be extra careful not to get any sealant in the oil passageway.

Step 19. Join the top crankcase half with the bottom half, then tap it gently with a dead-blow hammer to get it seated properly.
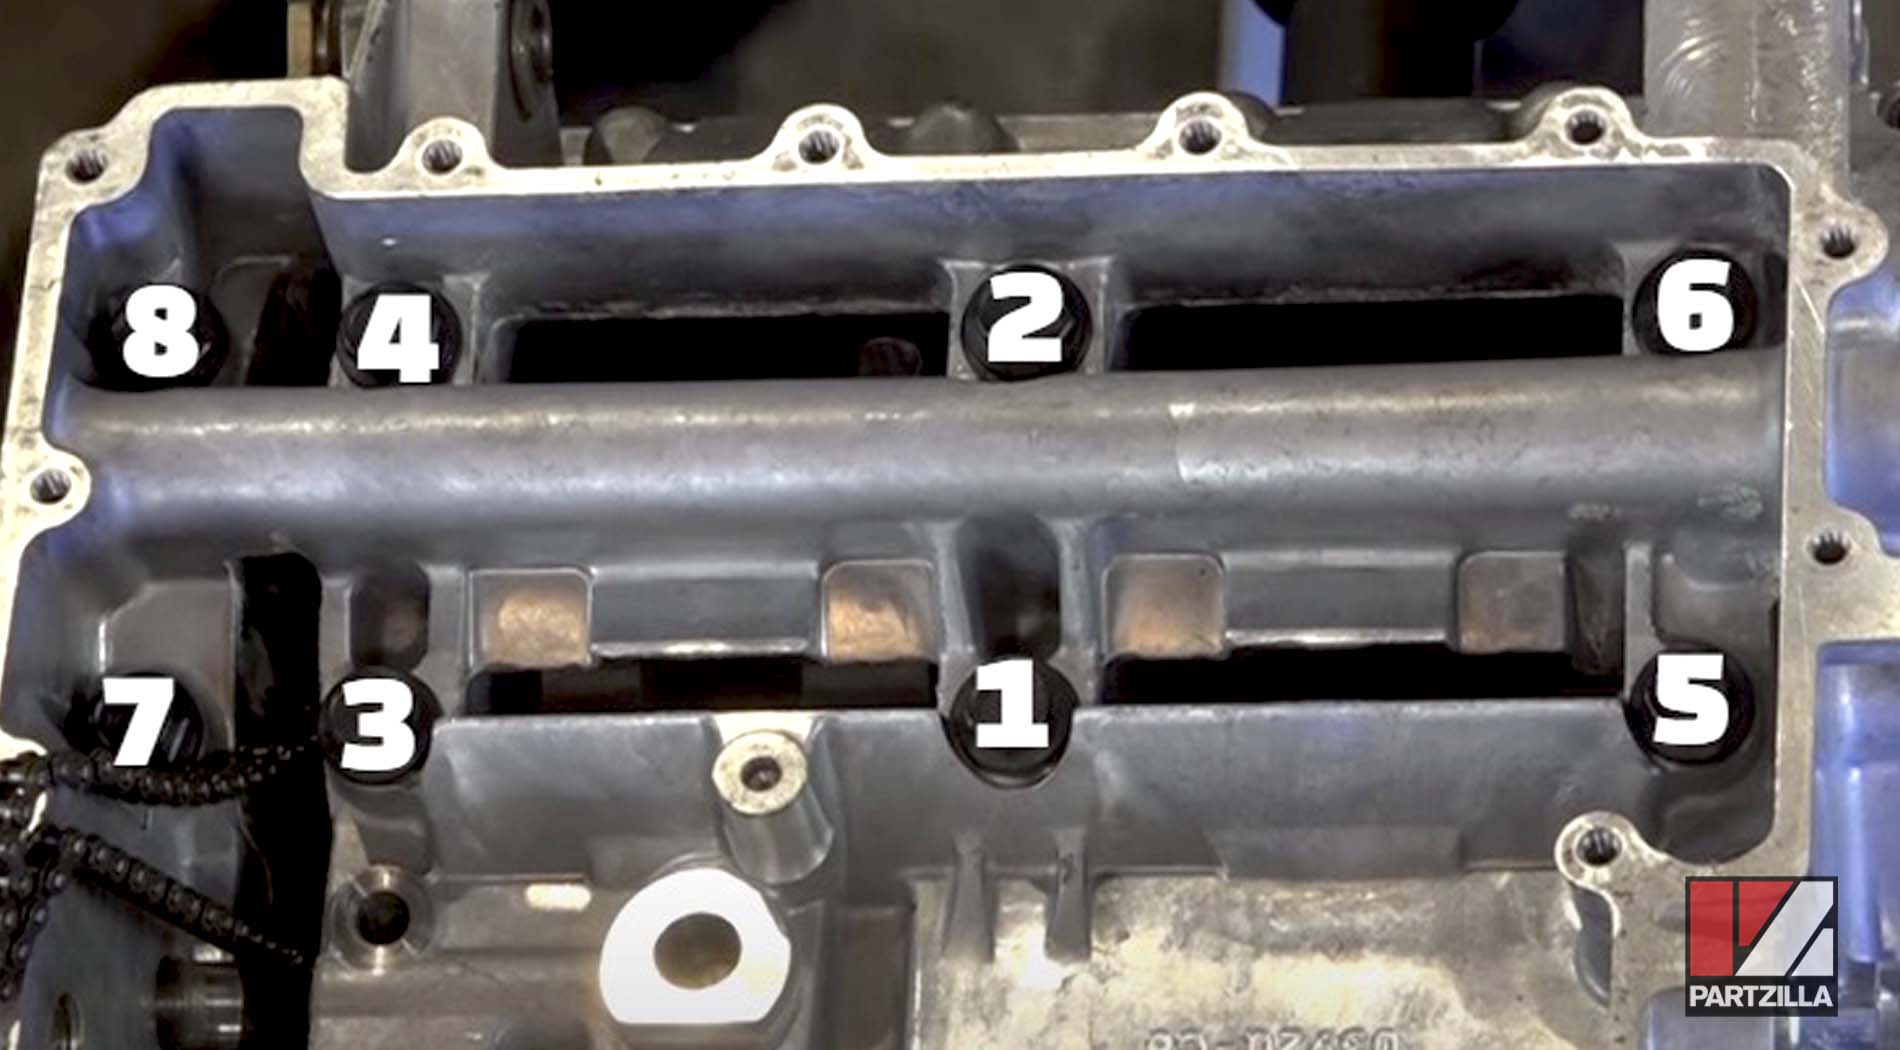
Step 20. Install the new M-10 bolts and torque them in sequential order from 1-8 (see diagram below). Torque the bolts in two stages, first at 21 foot-pounds and then again at 90 degrees.
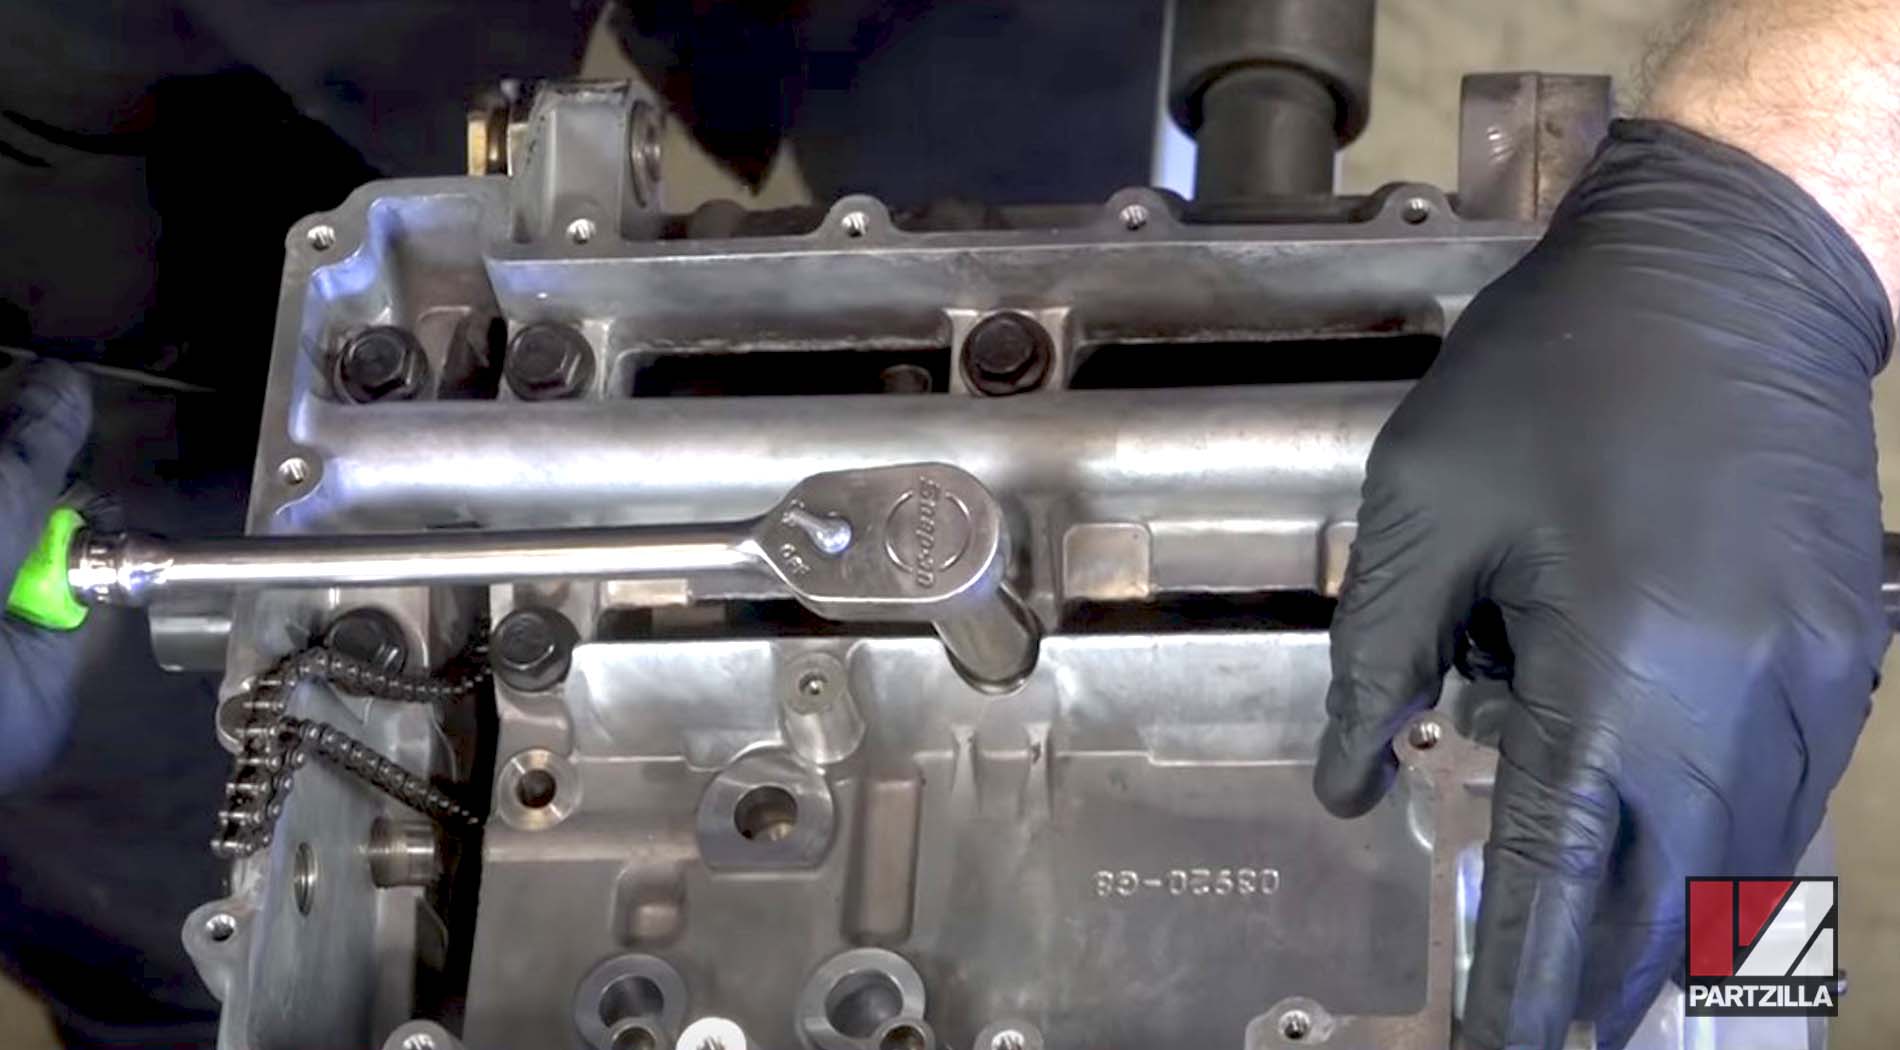

Step 21. Install the two M-8 bolts and torque them only once at 26 foot-pounds.
Step 22. Install the outer bolt and torque it to 106 inch-pounds.
Step 23. Rotate the engine back up and install the upper bolts by putting them in and bottoming them out snug, and then torqueing them to 26 foot-pounds.
Step 24. Install the rest of the little 8mm head bolts, then torque them to 89 inch-pounds.
Watch the clip below to see the crankcase reassembly segment of our Polaris RZR 900XP bottom end rebuild video.
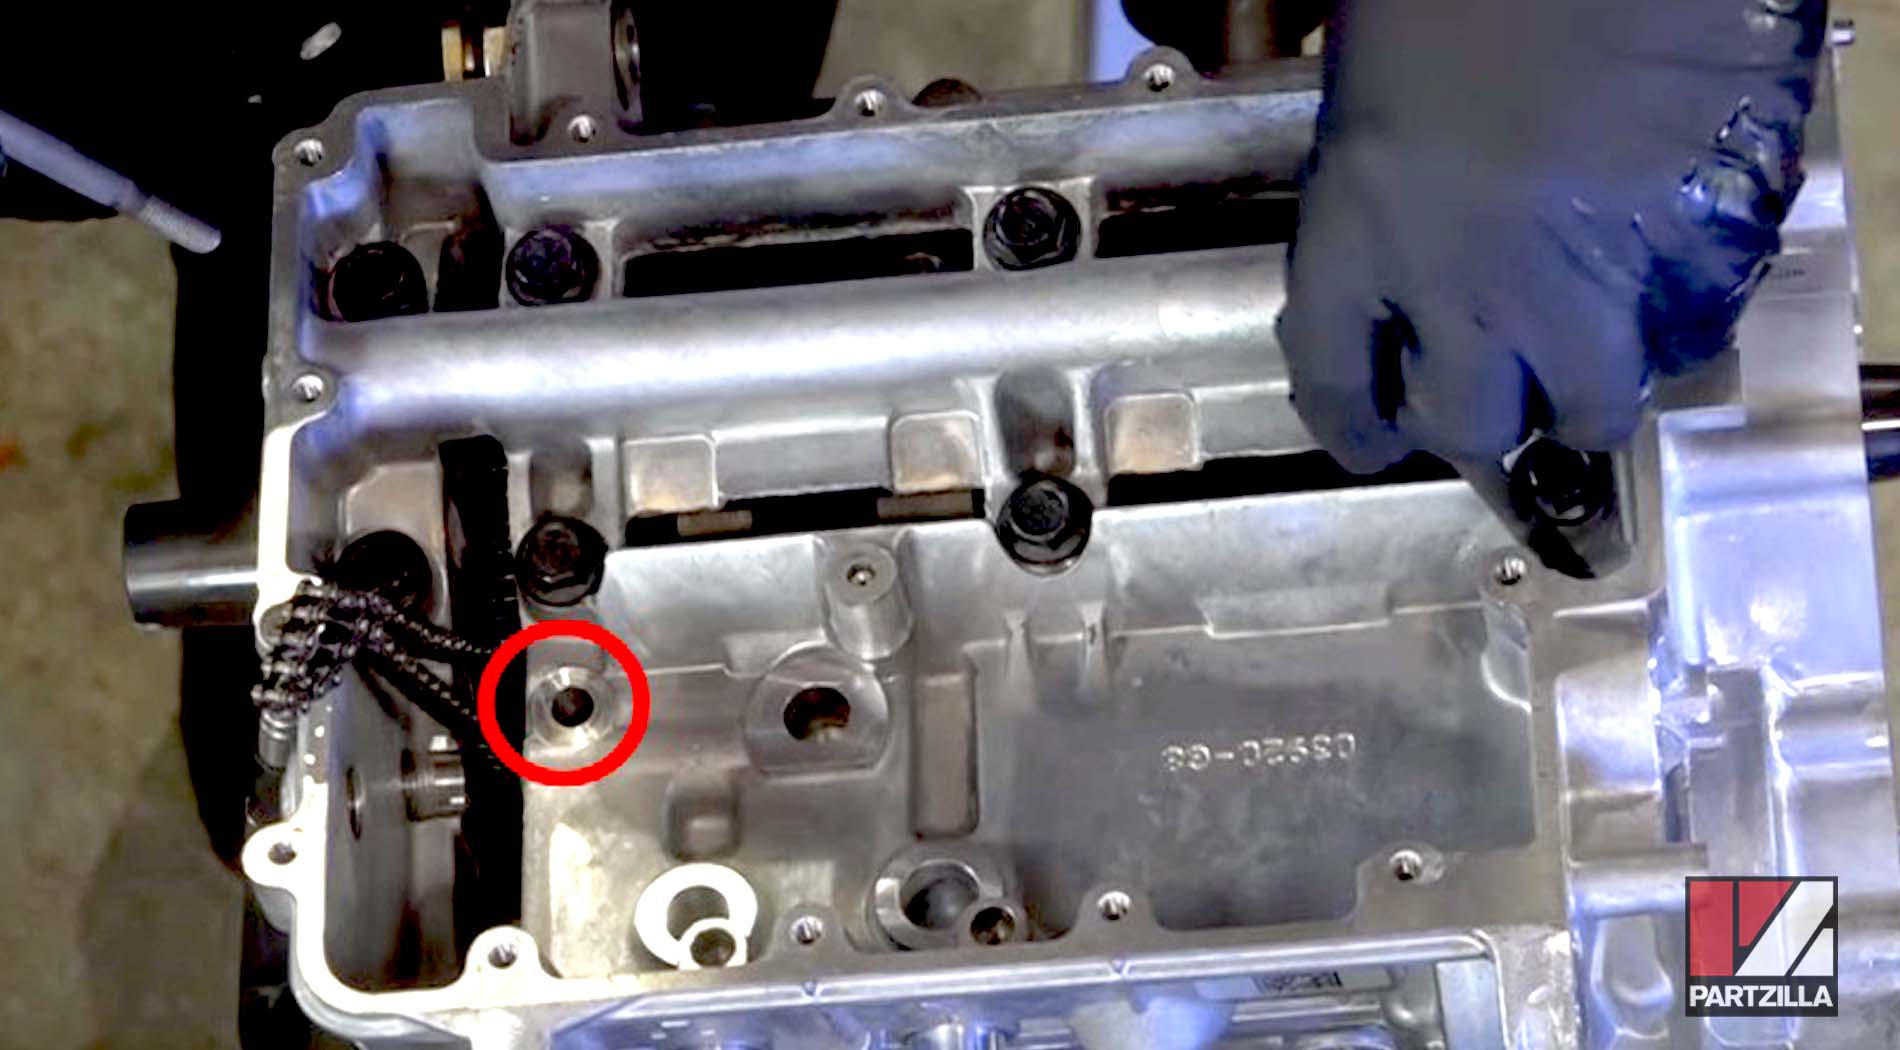
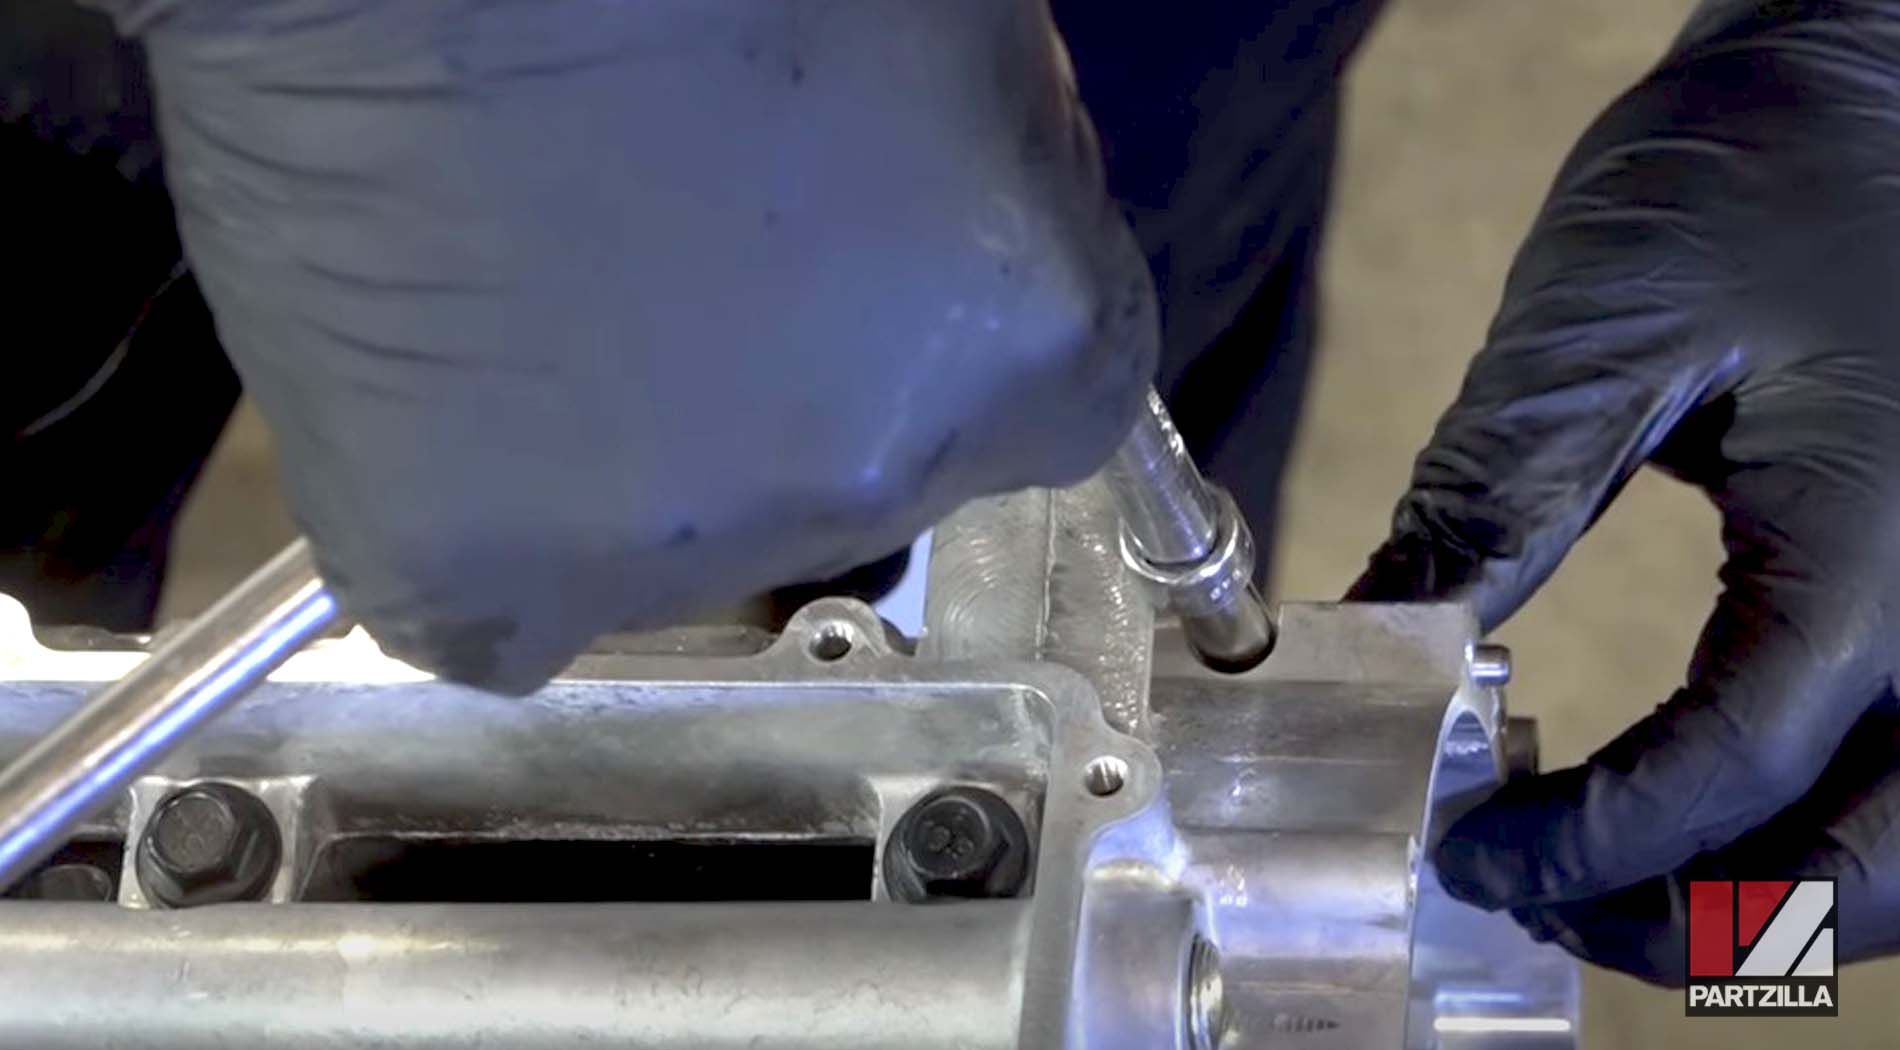
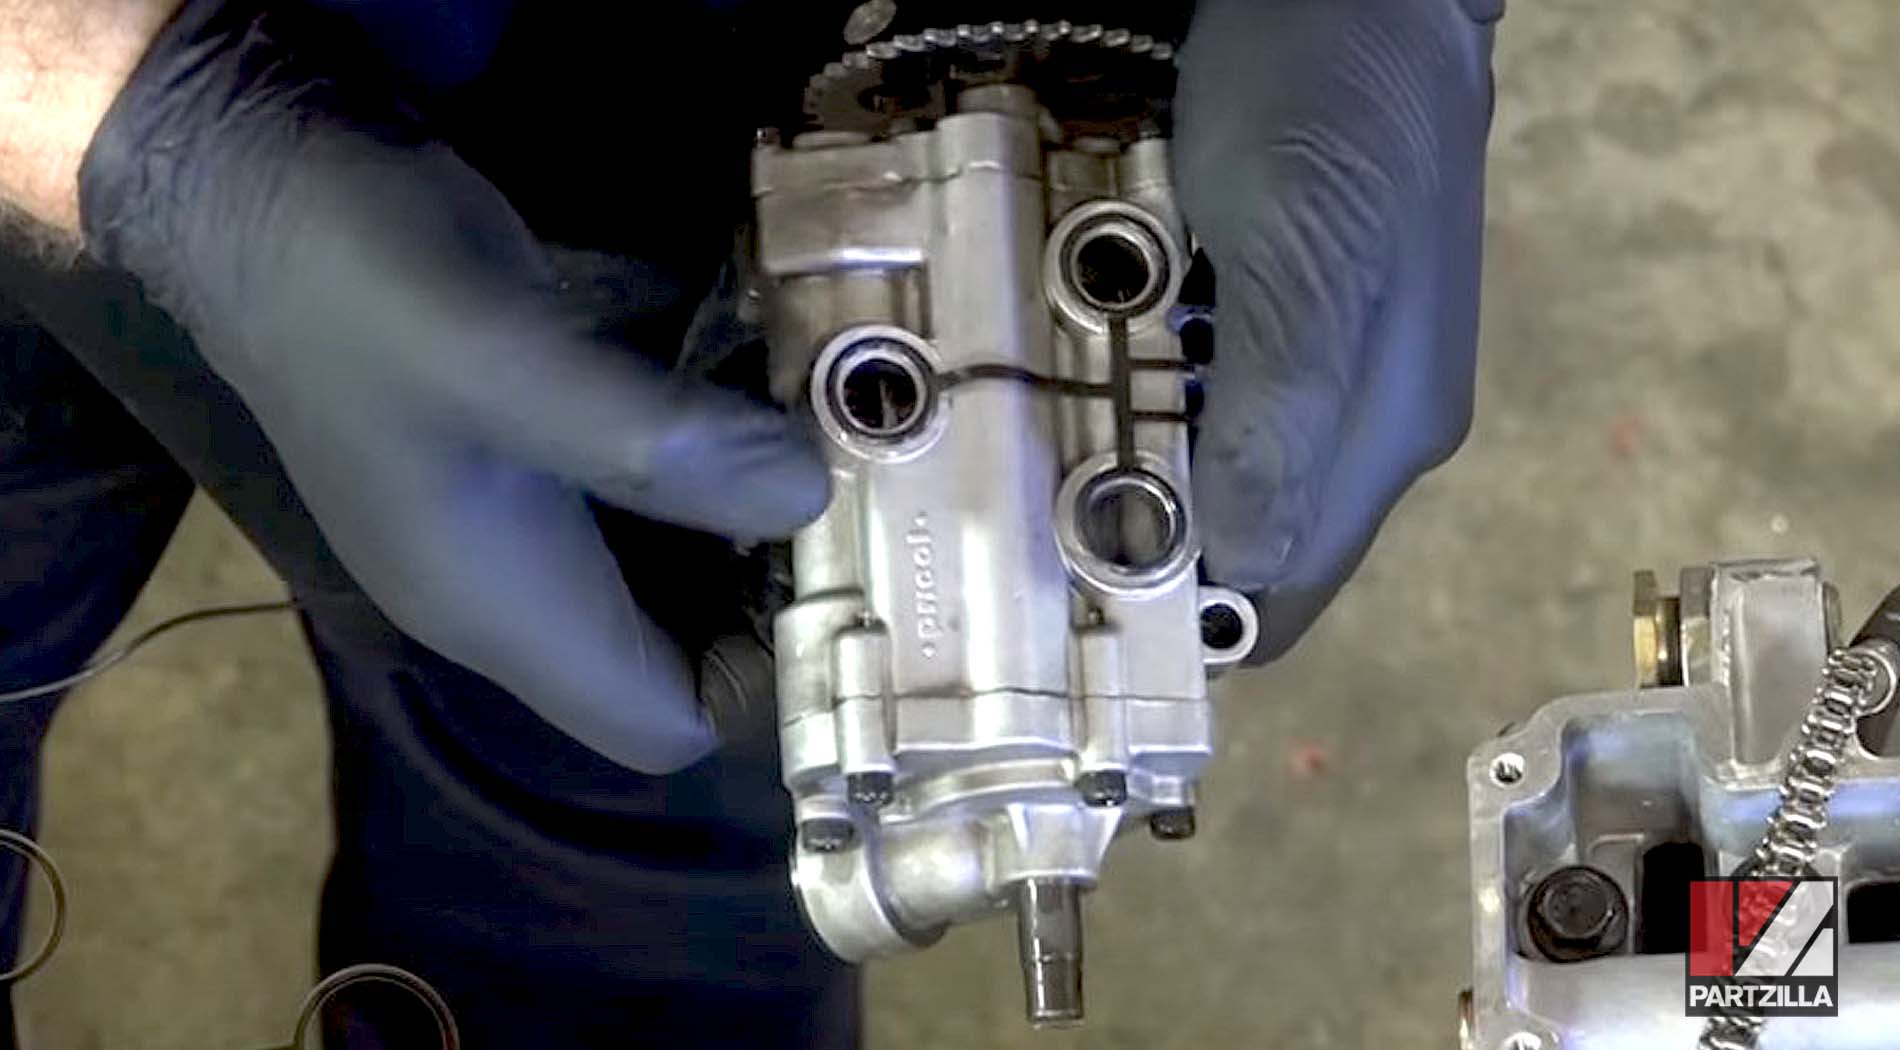
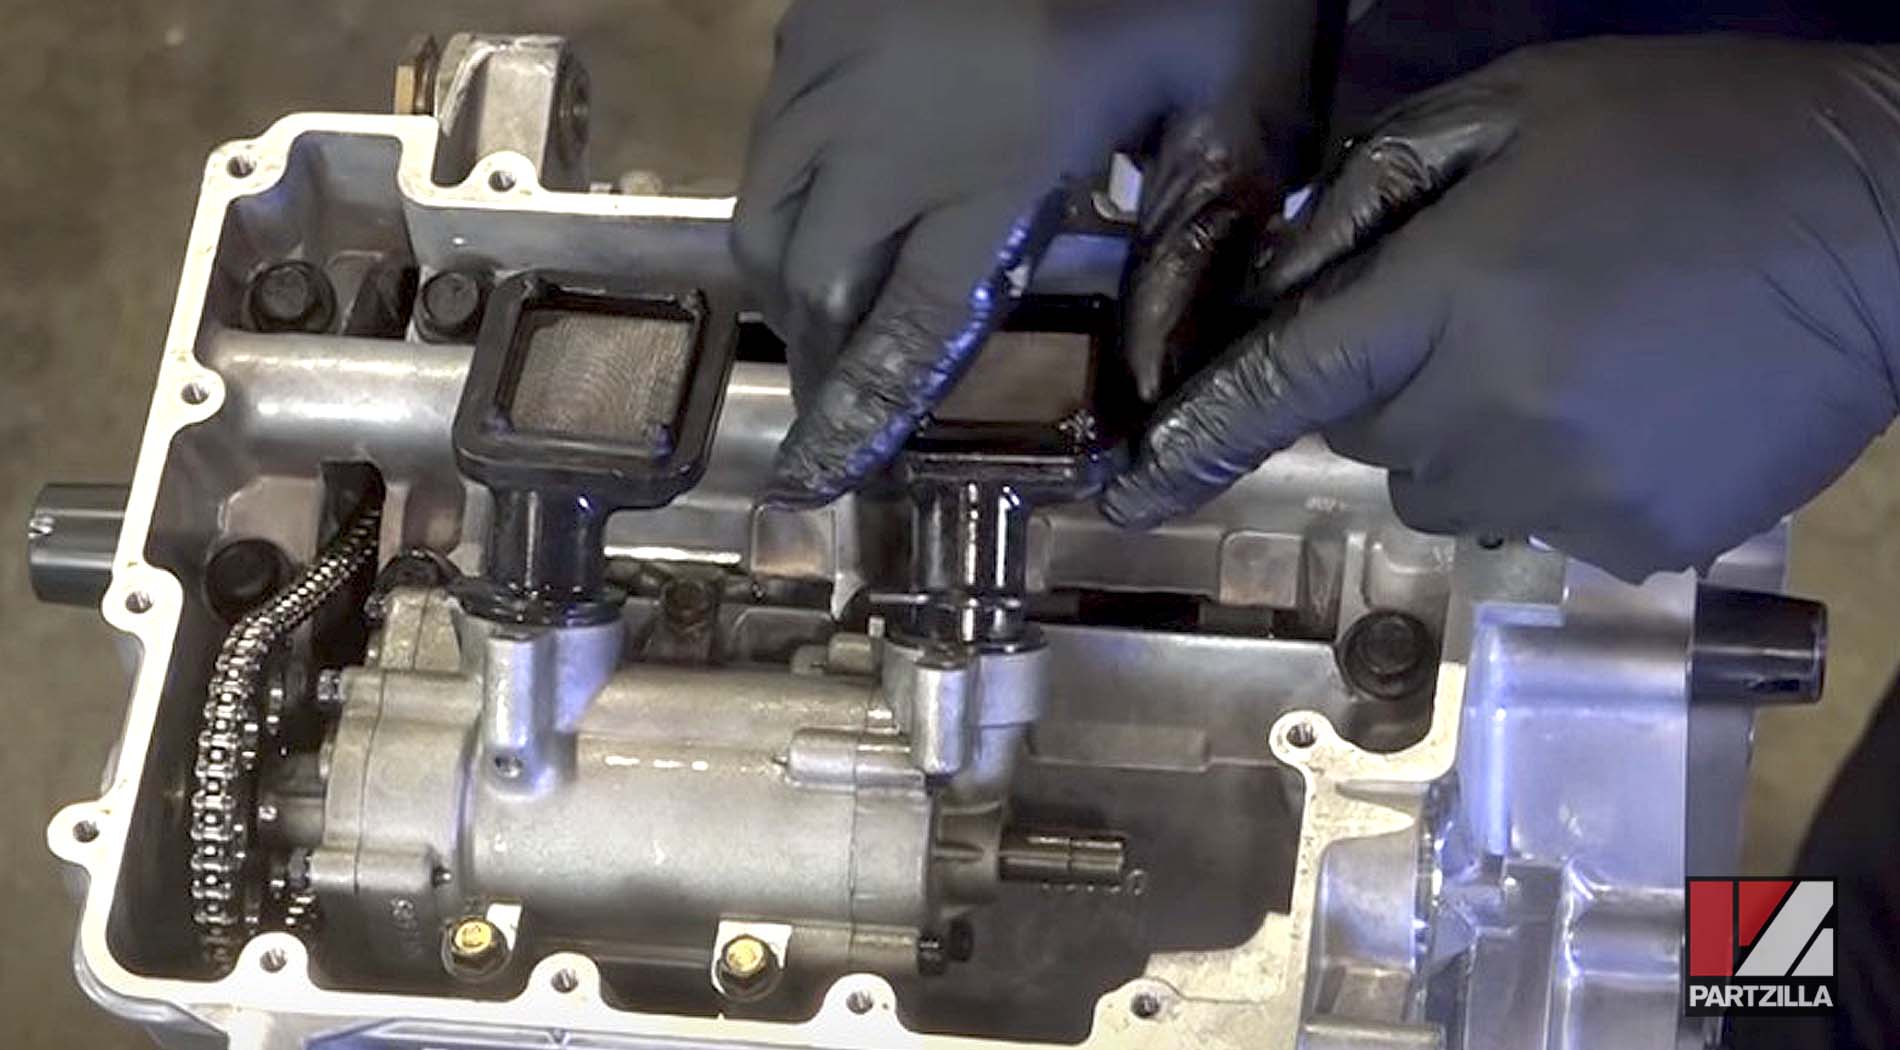
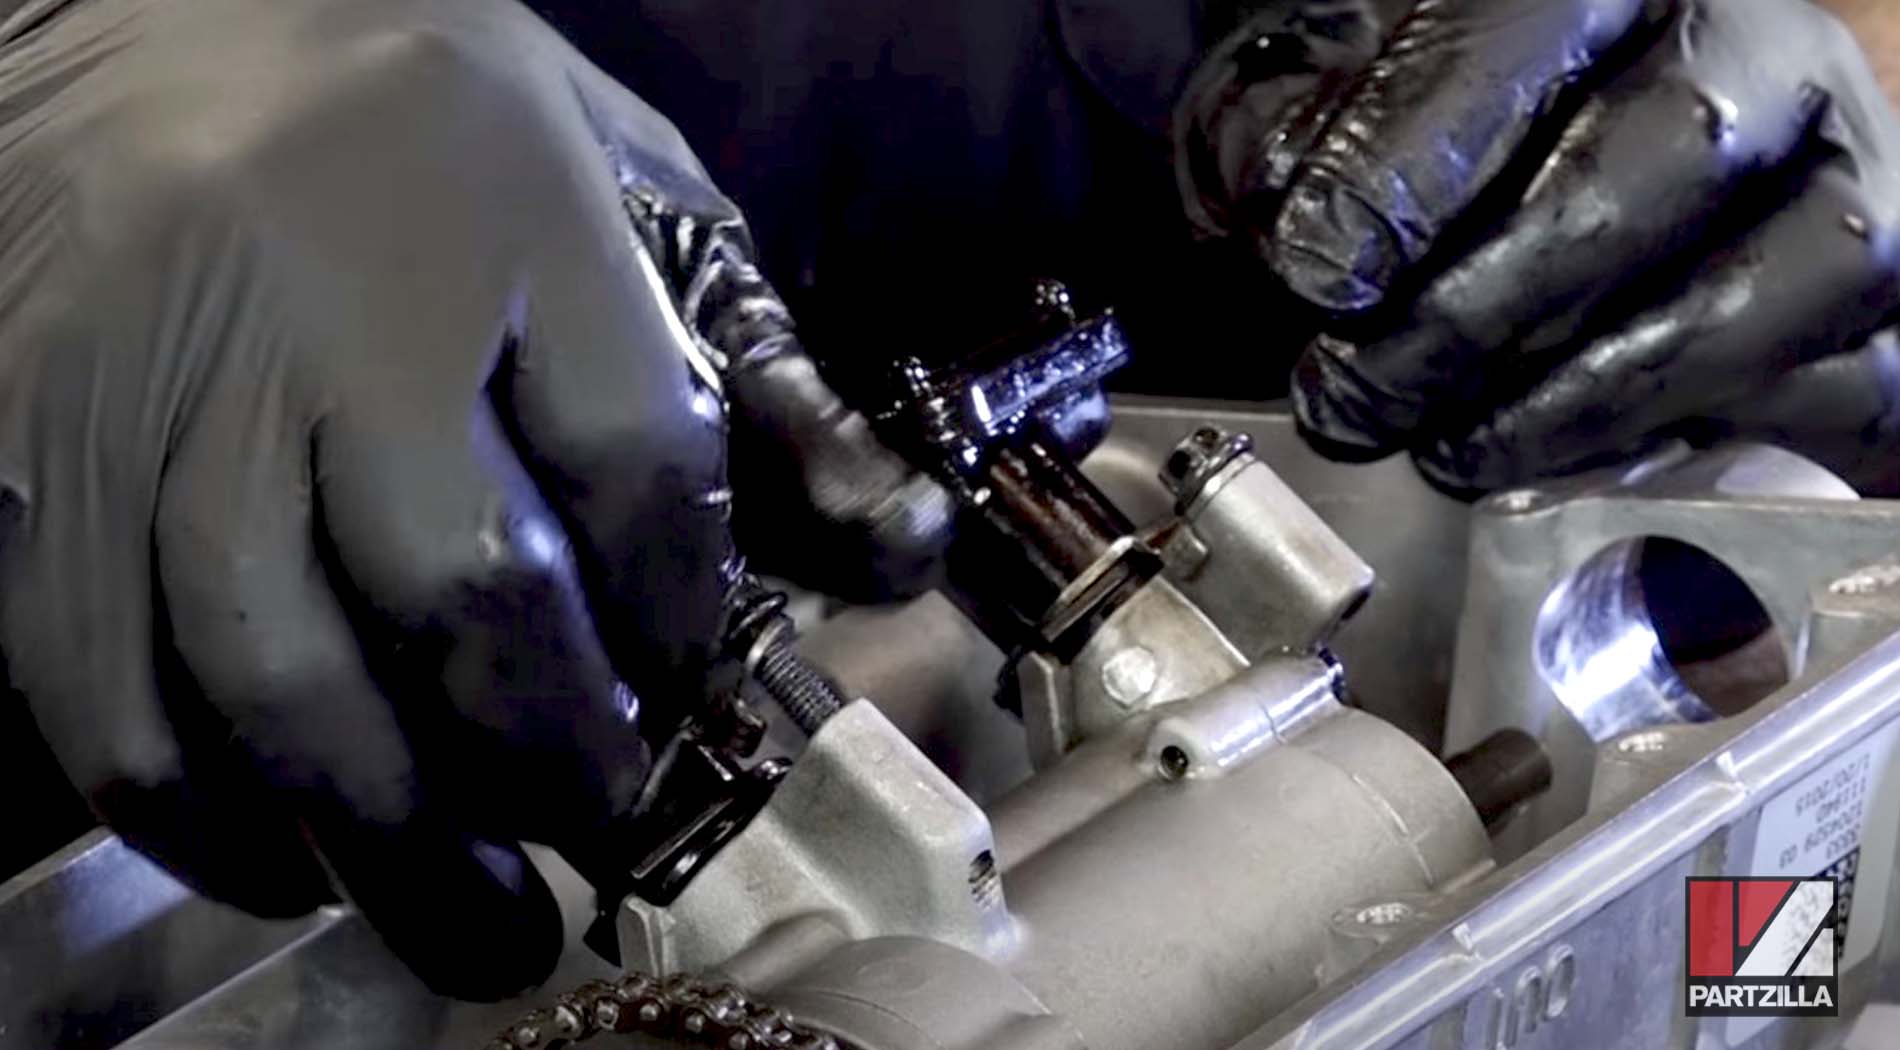
Step 25. Install the oil pump seal, followed by the pump itself. Slide the pump into position, then install the oil pump dowels in. Next, install the three 10mm bolts that hold it in place and torque them to 89 inch-pounds.
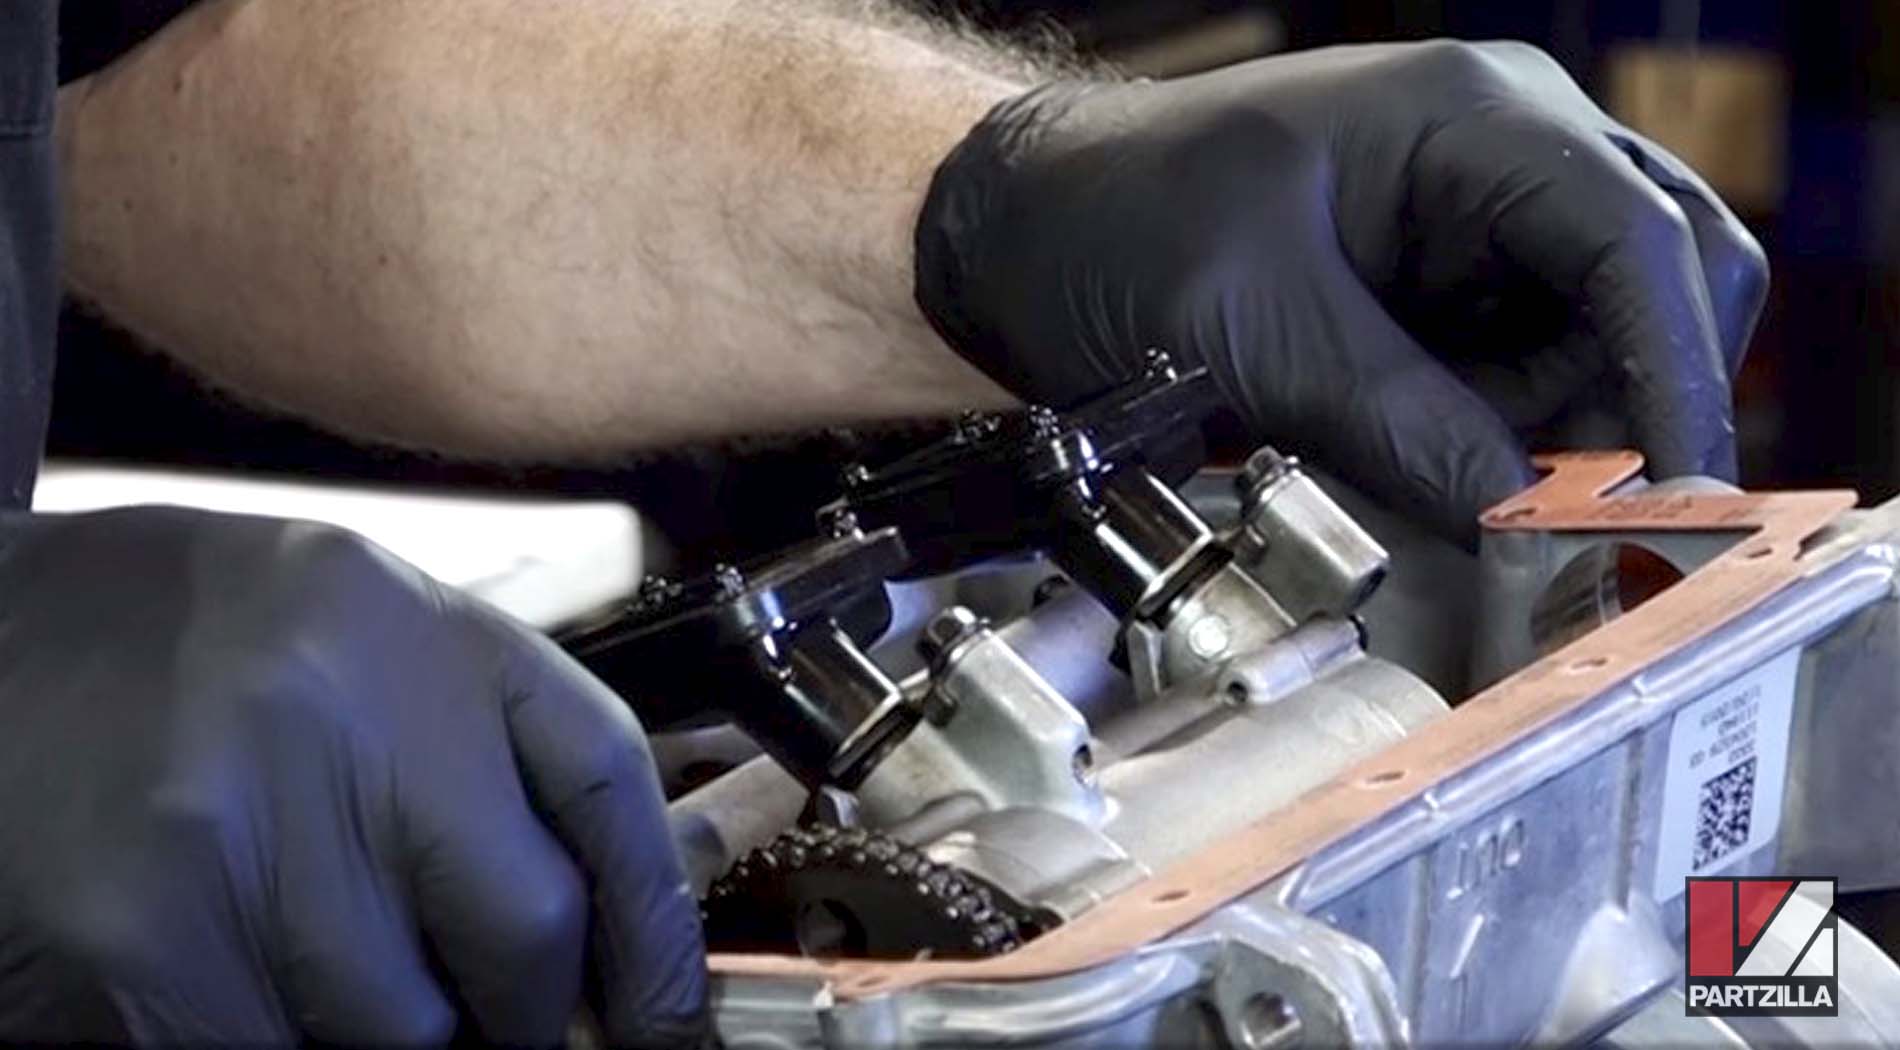
Step 26. Install the oil pump screens, making sure the O-rings are in good shape when you're putting them back in.
Step 27. Install the C-clamps, which are held in by 10mm bolts that hold the whole thing together.
Step 28. Install the oil sump pan, followed by the oil sump cover gasket.
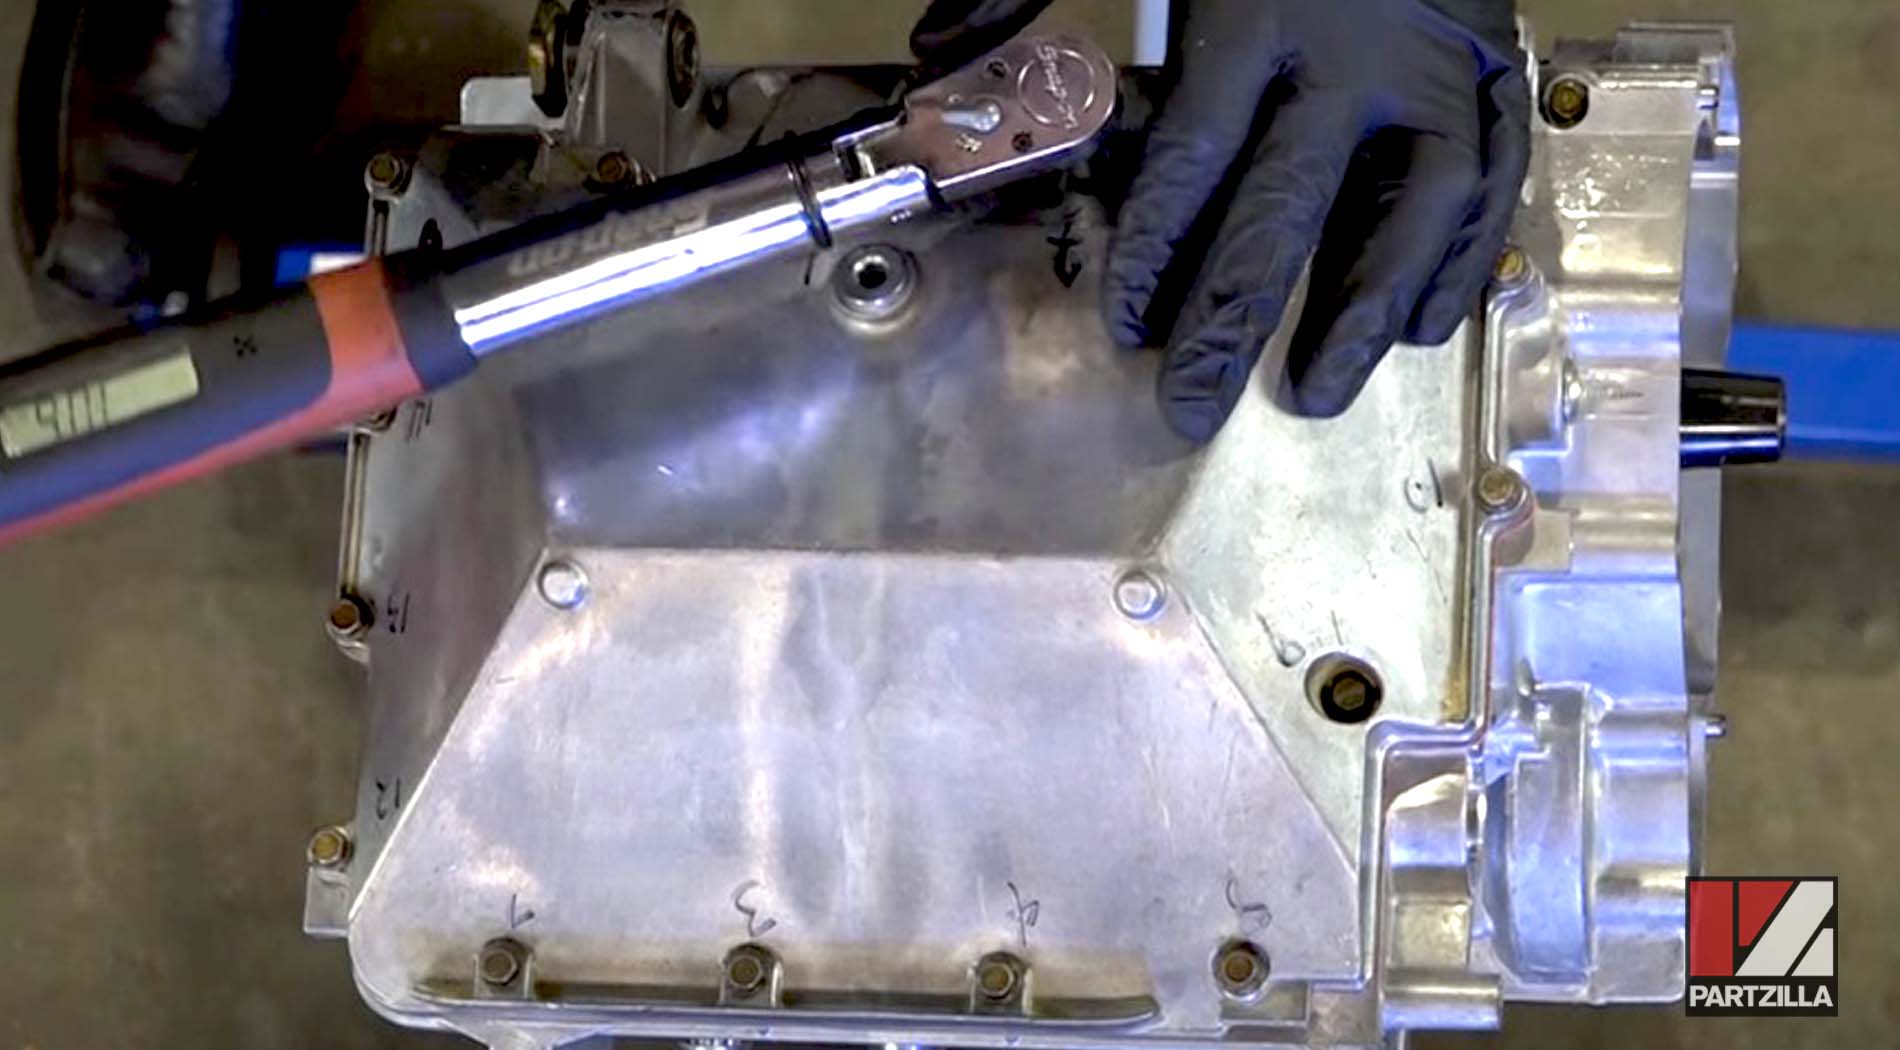
Step 29. Install the oil sump cover and its 8mm bolts by hand-tightening them first, then torqueing them in sequential order (see diagram below) to 106 inch-pounds.
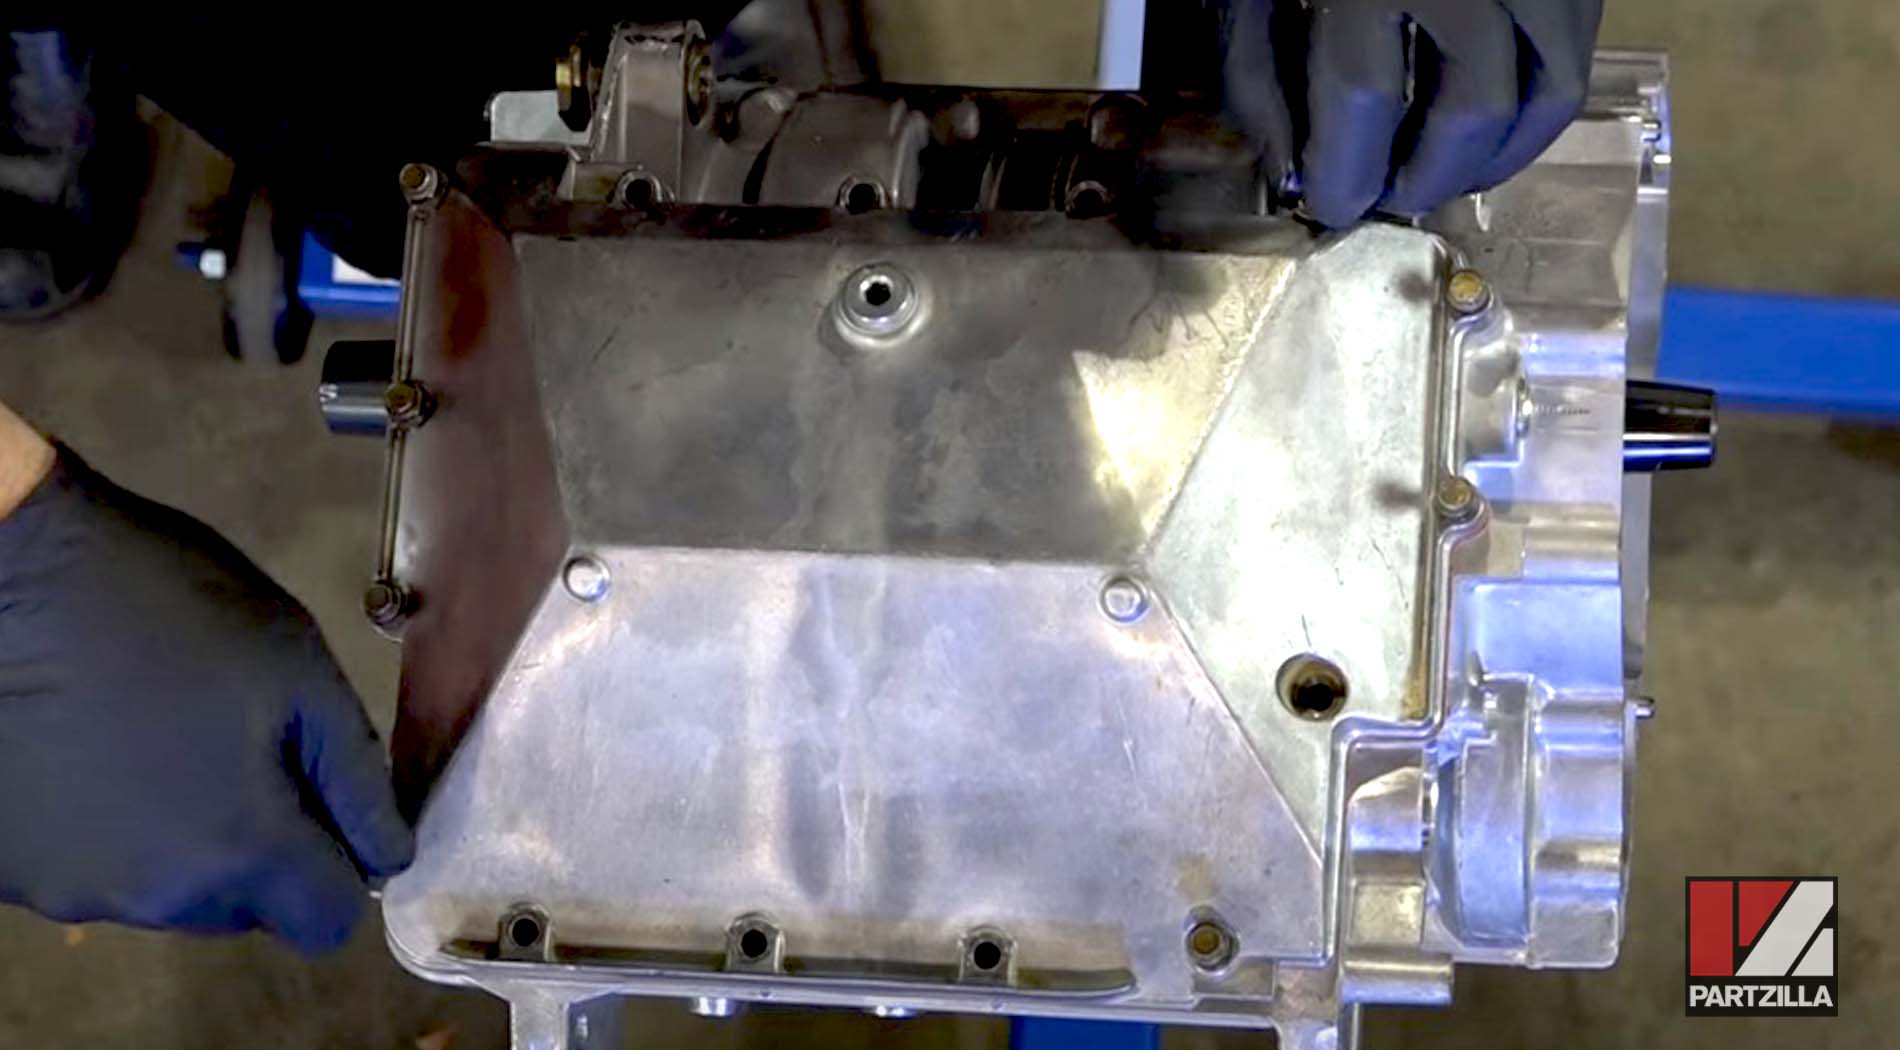

NOTE: When you're tightening this, don’t put your hand on the end of the socket because it’ll skew the amount of torque.
Watch the clip below to see the oil system reassembly segment of our Polaris RZR 900XP engine rebuild video.
The next stage in this Polaris RZR 900 engine rebuild project will be to rebuild the top end. Watch the Polaris RZR 900 Engine Rebuild: Part 6 video below.