Polaris RZR 900XP Engine Rebuild Part 6:Top End Rebuild
This is the sixth part of our Polaris RZR 900XP engine rebuild series, in which we highlight the important points of rebuilding the top end of a Polaris UTV.
Watch our Polaris RZR 900 engine rebuild video above and follow the steps below to rebuild the top end of an RZR side-by-side’s engine. Use our Polaris RZR 900 parts diagrams for additional reference.
Tools and Parts - Polaris RZR 900 Top End Rebuild
- Ratchet and extensions
- Socket set
- Allen set
- Screwdrivers
- Dead-blow hammer
- Feeler gauge set
- Magnet
- Torque wrench
- Polaris cam tool
- Lapping compound
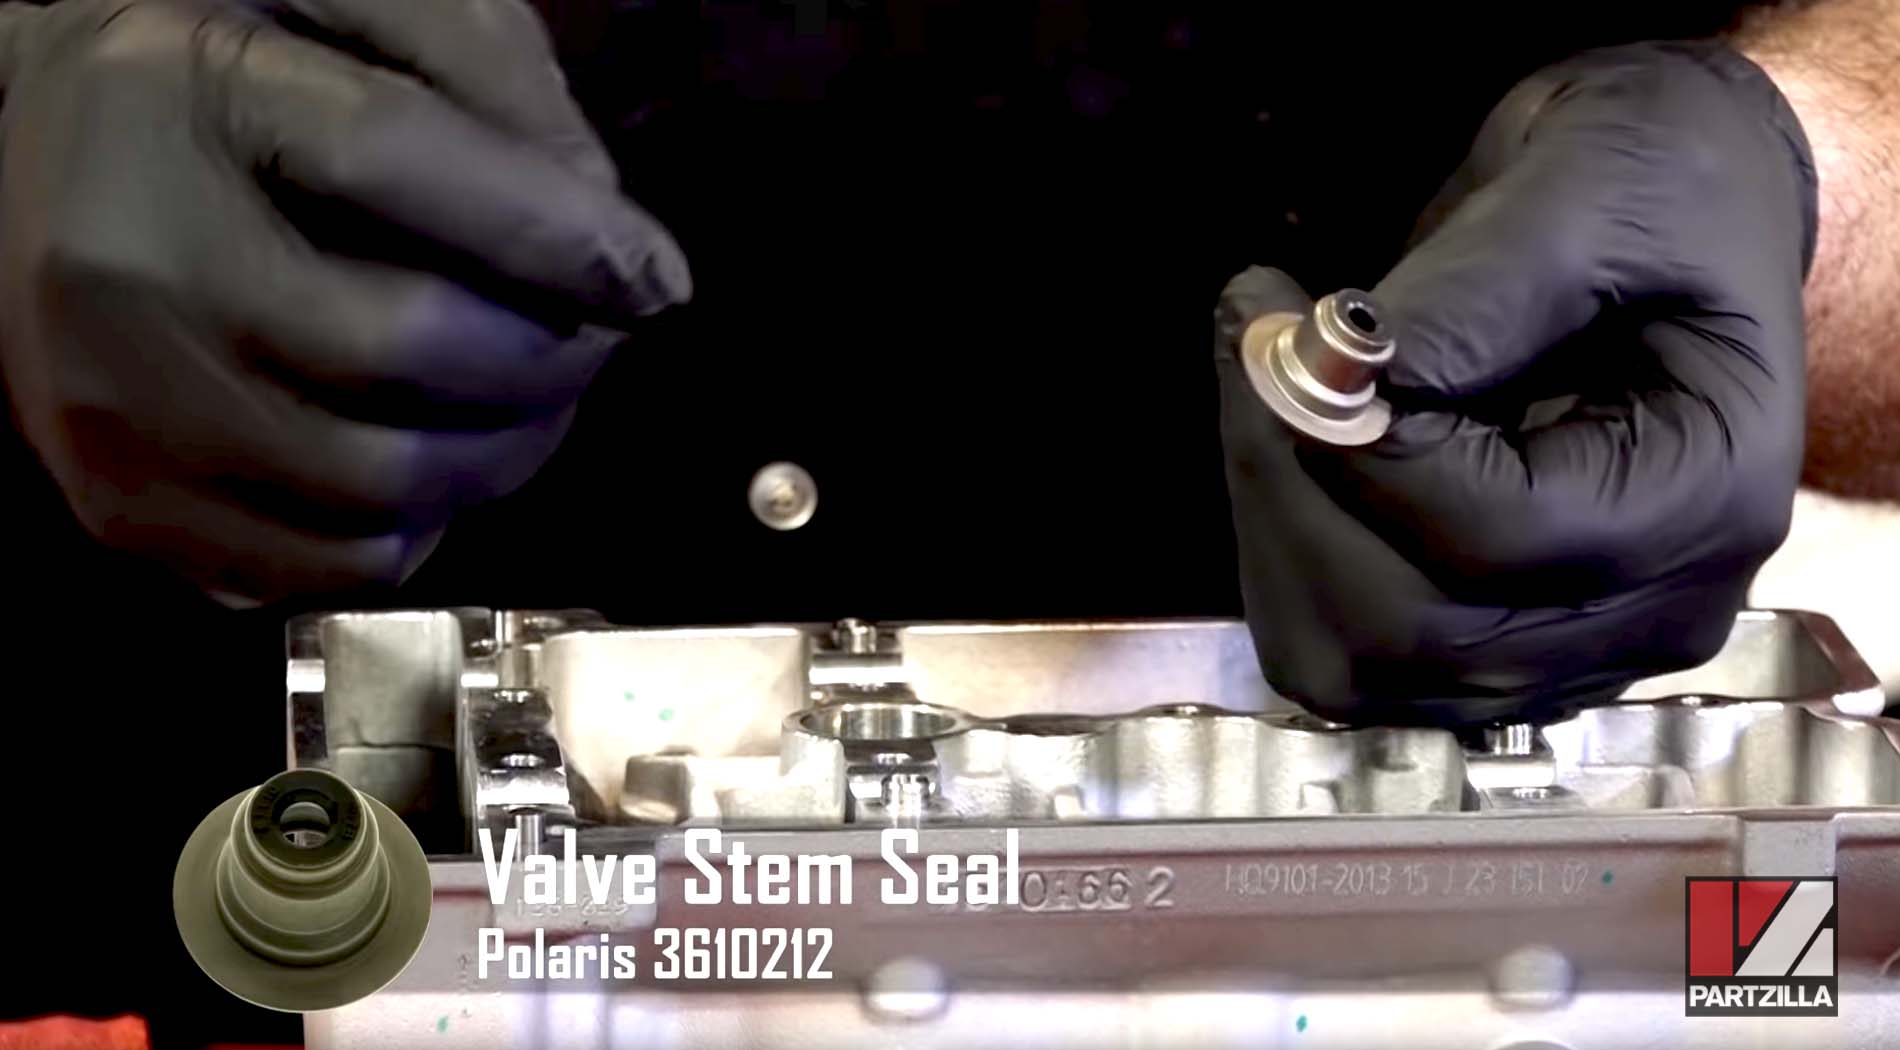
- Valve stem seals (x8)
- Valve spring compressor
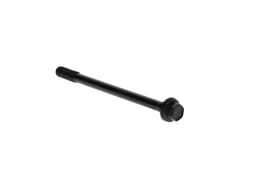
- Cylinder head bolts (x6)
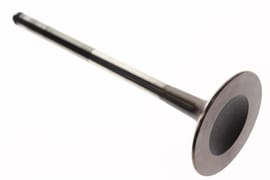
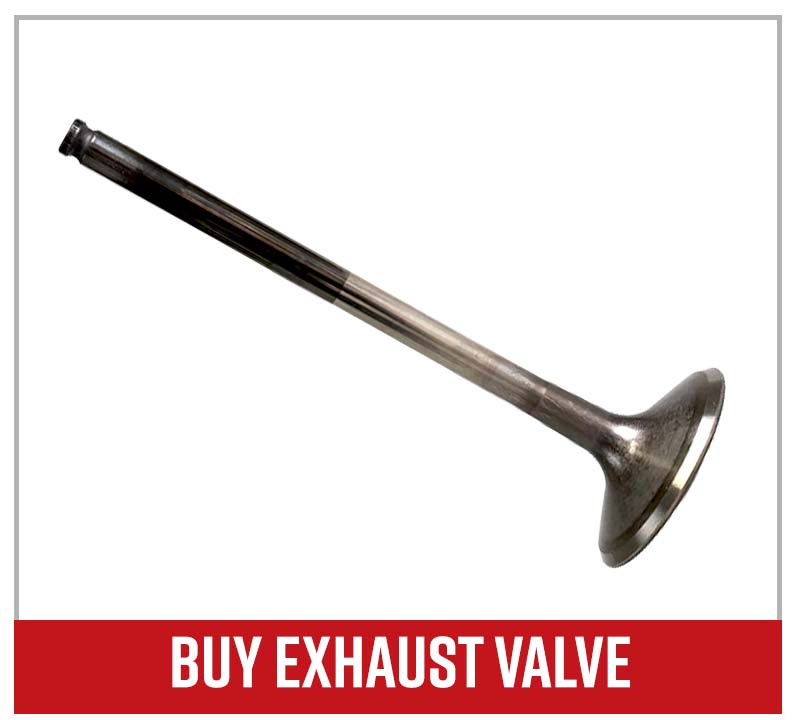
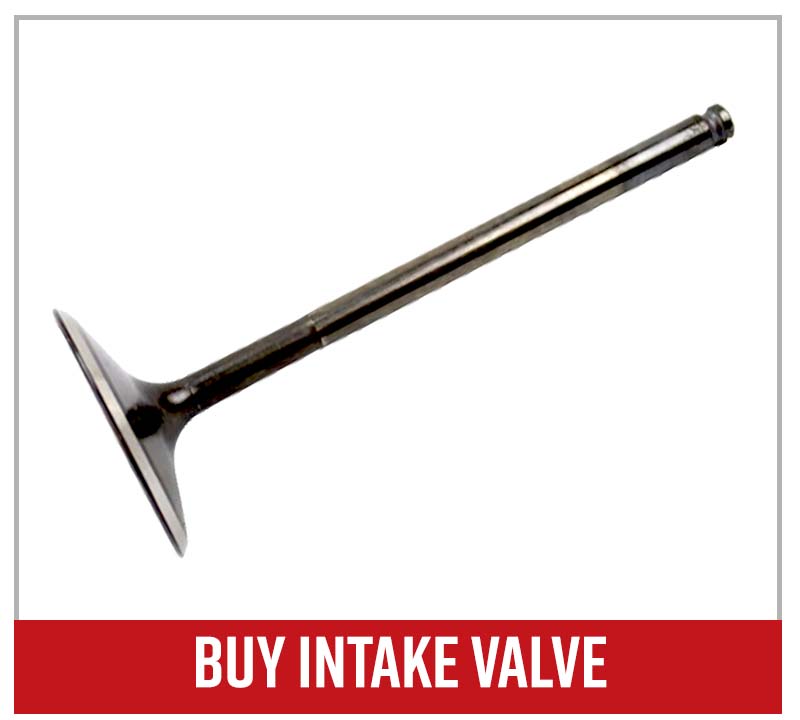
- Exhaust valves (x4)
- Intake valves (x4)
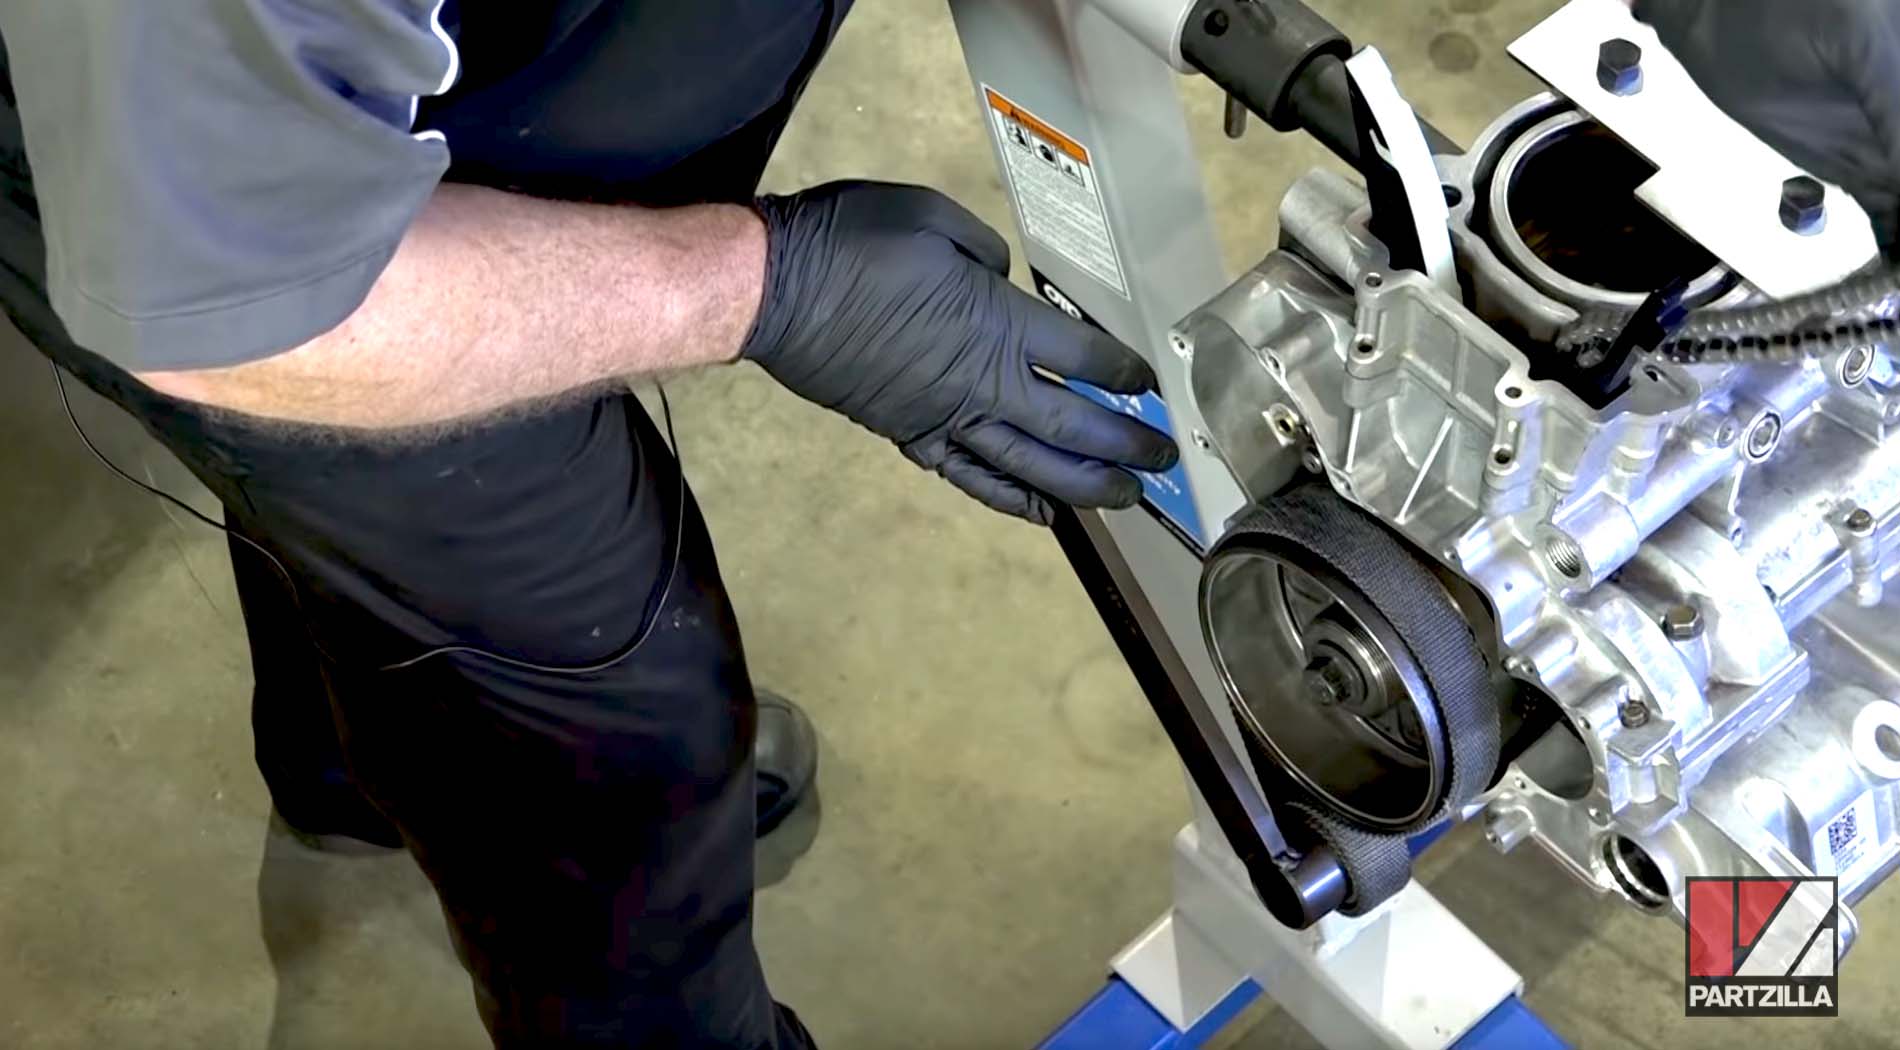
Reinstalling the Flywheel - Polaris RZR 900XP
Step 1. Apply a film of oil to the inside of the clutch freewheel and the flywheel before you reinstall them.

Step 2. Hold the flywheel with a strap to stop it from rotating, and torque the flywheel bolt to 133 foot-pounds.
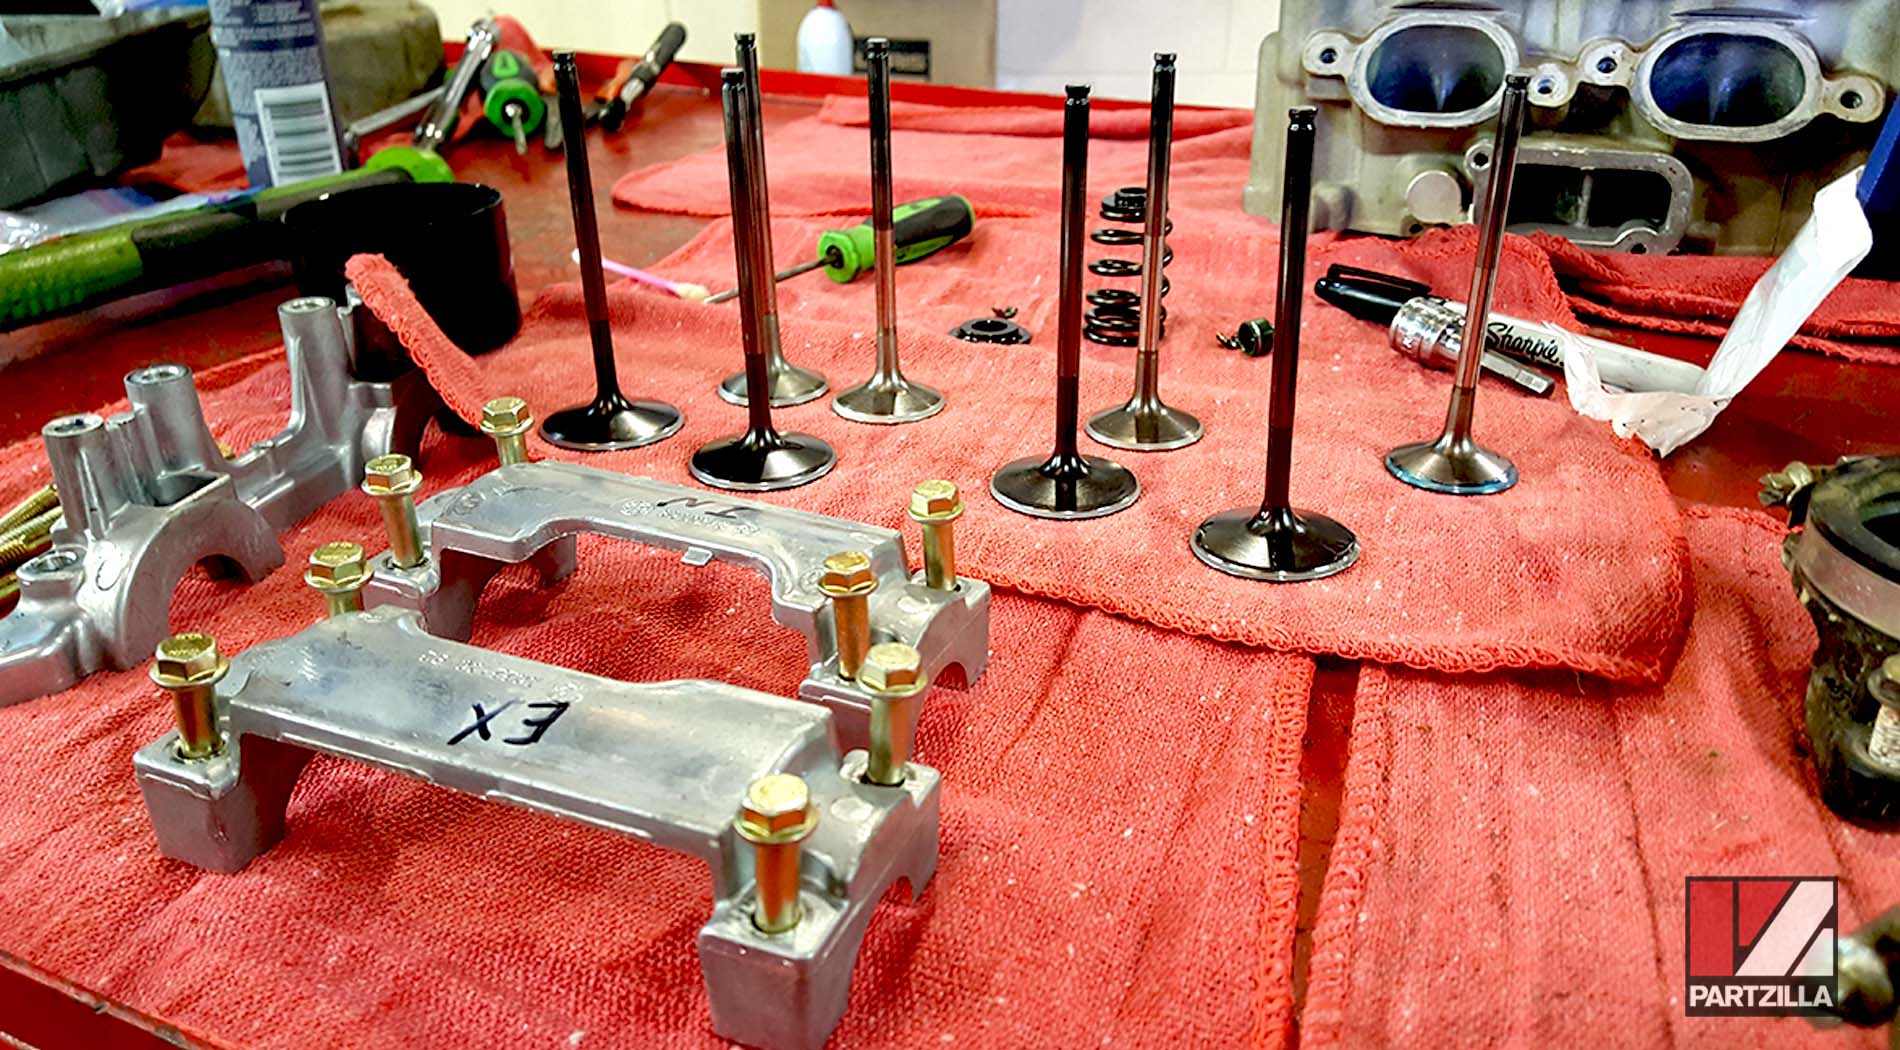
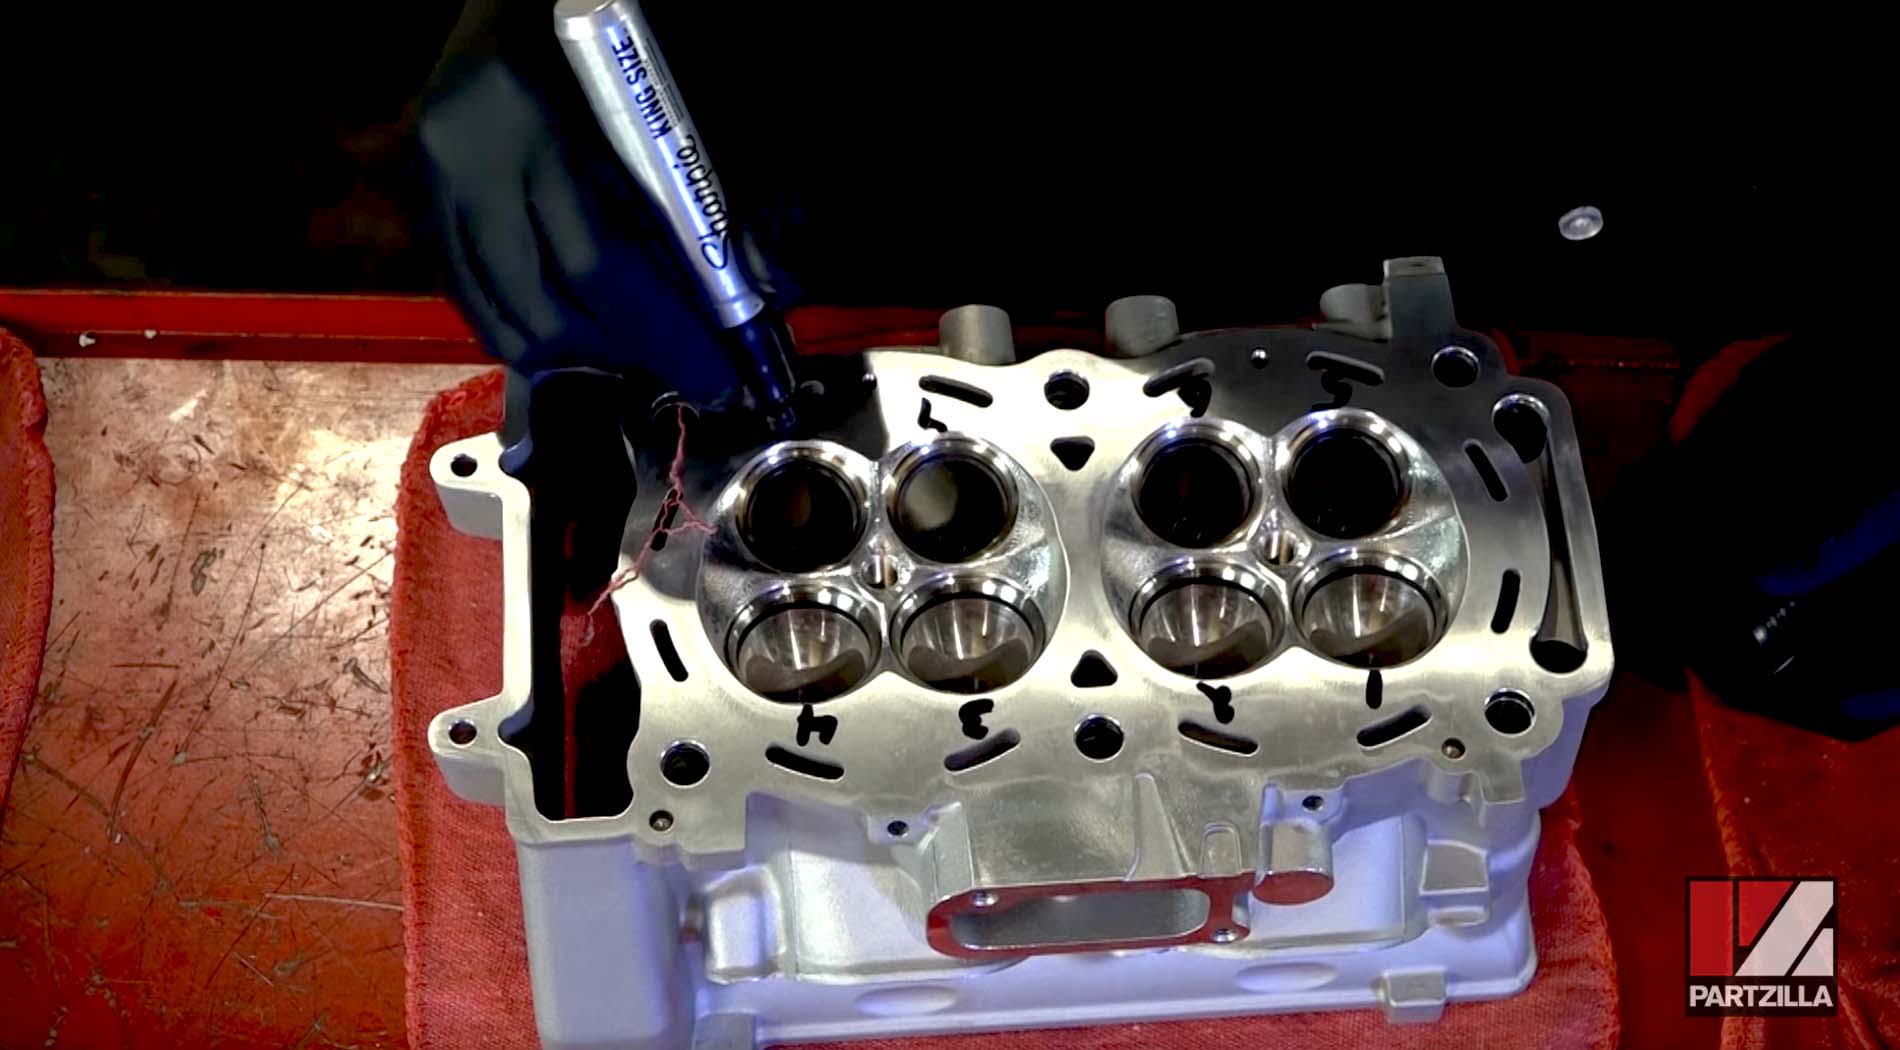
Polaris RZR 900XP Valve Lapping
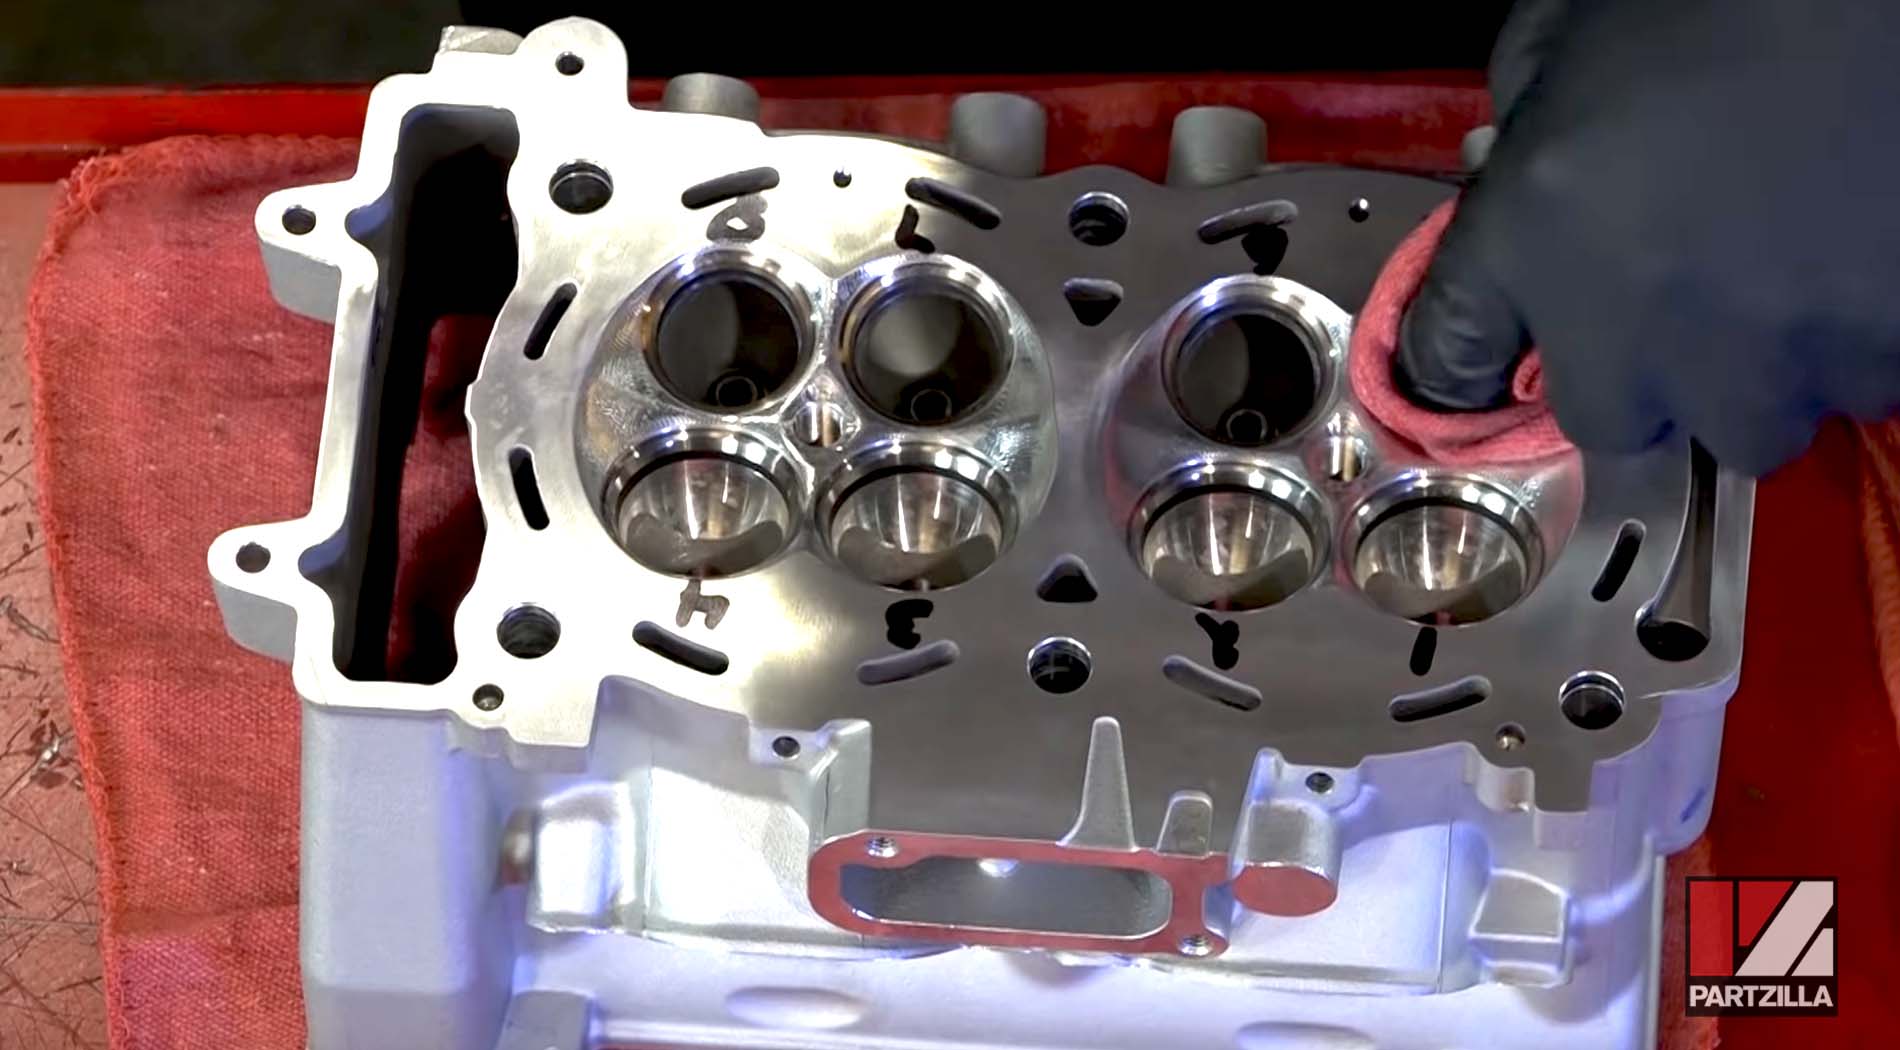
Step 1. Number each valve port in the cylinder block and each valve so you know which valve is matched to which port.
Step 2. Lightly oil the valve stems to prevent any scarring to the surfaces of the valve stems or cylinder head.
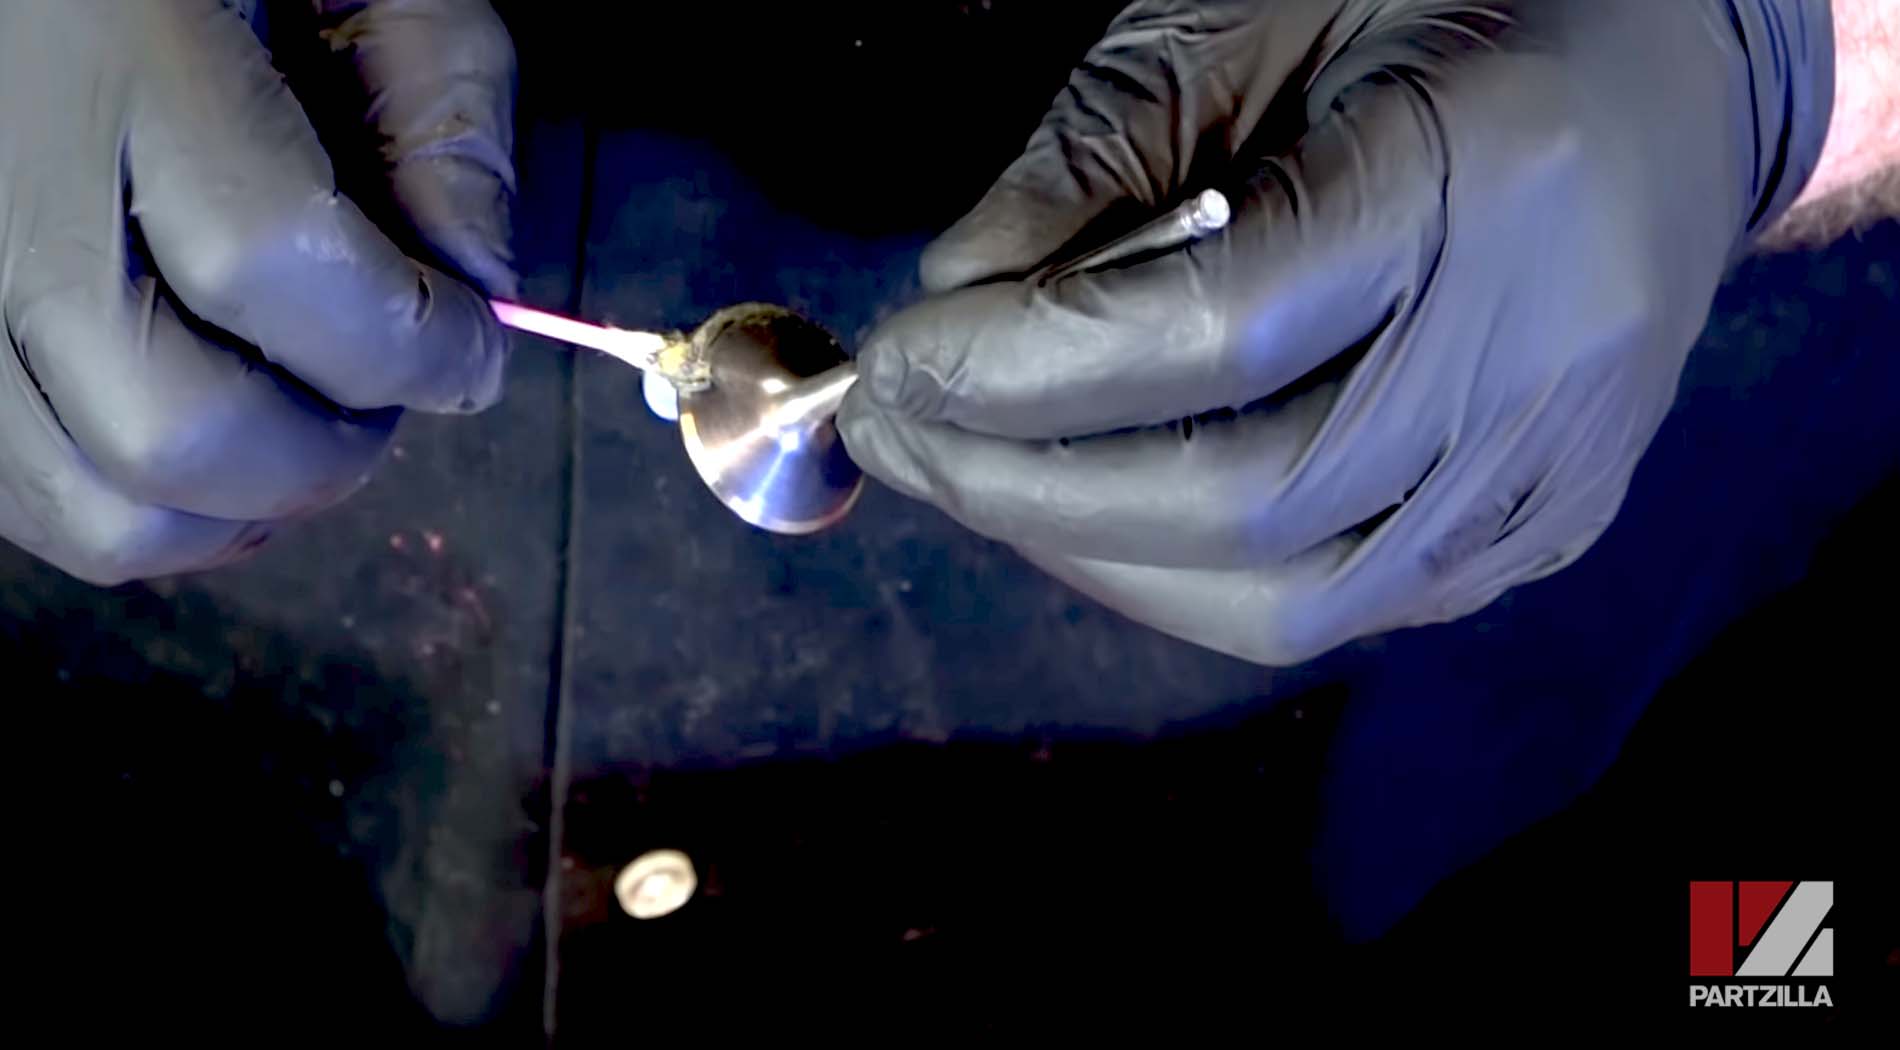
NOTE: If you’re using a lapping compound, don’t get any of it on the valve stems because it will damage the surfaces of the valve stems and cylinder head.
Step 3. After lapping the valves, remove any trace of lapping compound from the valves and the valve stem seats. Lapping compound left on the valves or seats will cause major wear to the valves and cylinder head.
Watch the clip below to see the valve lapping segment of our Polaris RZR 900XP engine rebuild video.
Polaris RZR 900XP Valve Installation
Older model Polaris RZR engines use separate valve stem seals and valve spring seats; newer model RZR engines use a combined valve seat with seal part. Make sure you have the correct parts for your model.
Step 1. Install the valve springs with their ends with the coils closest together facing downward.
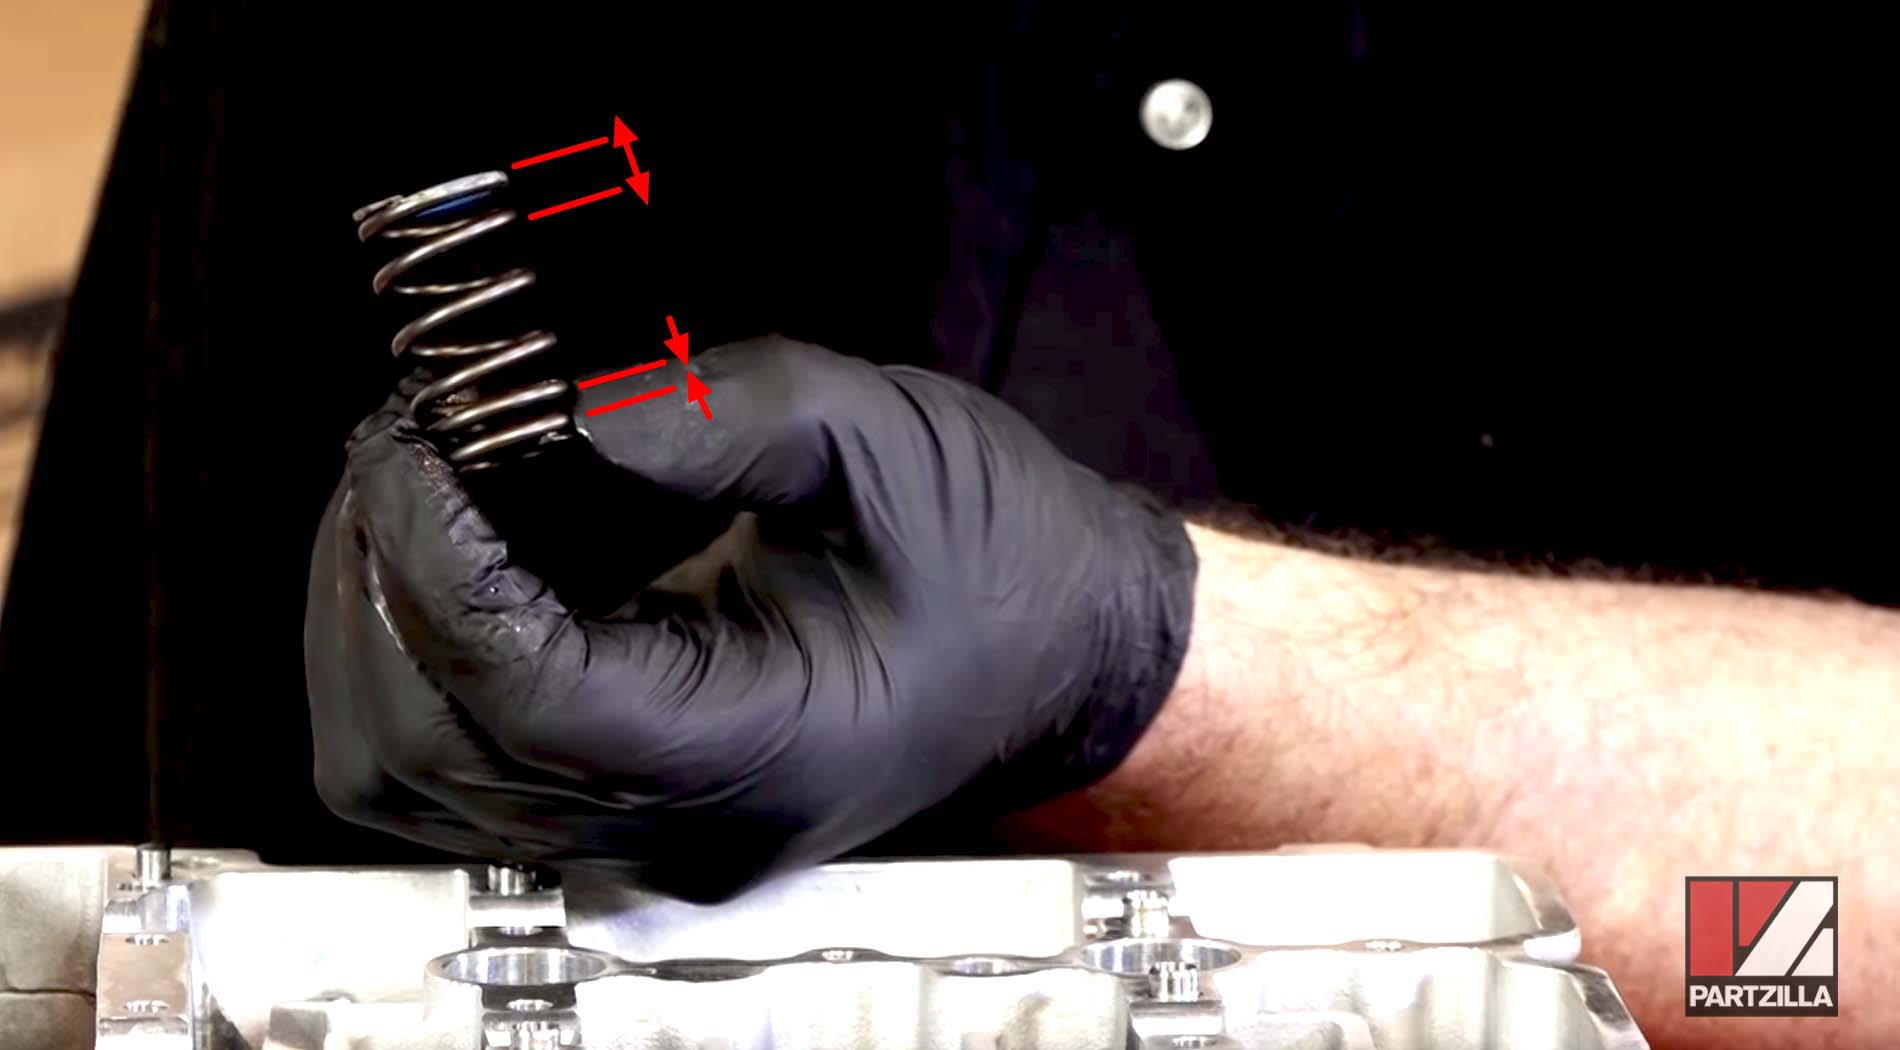
Step 2. Use a valve spring compressor to hold down the valve springs while you install the valve keepers.
NOTE: Installing the valves can be a tricky process. Watch the video above to see the full valve installation process on the Polaris RZR 900.
Polaris RZR 900XP Valve Lash Adjustment
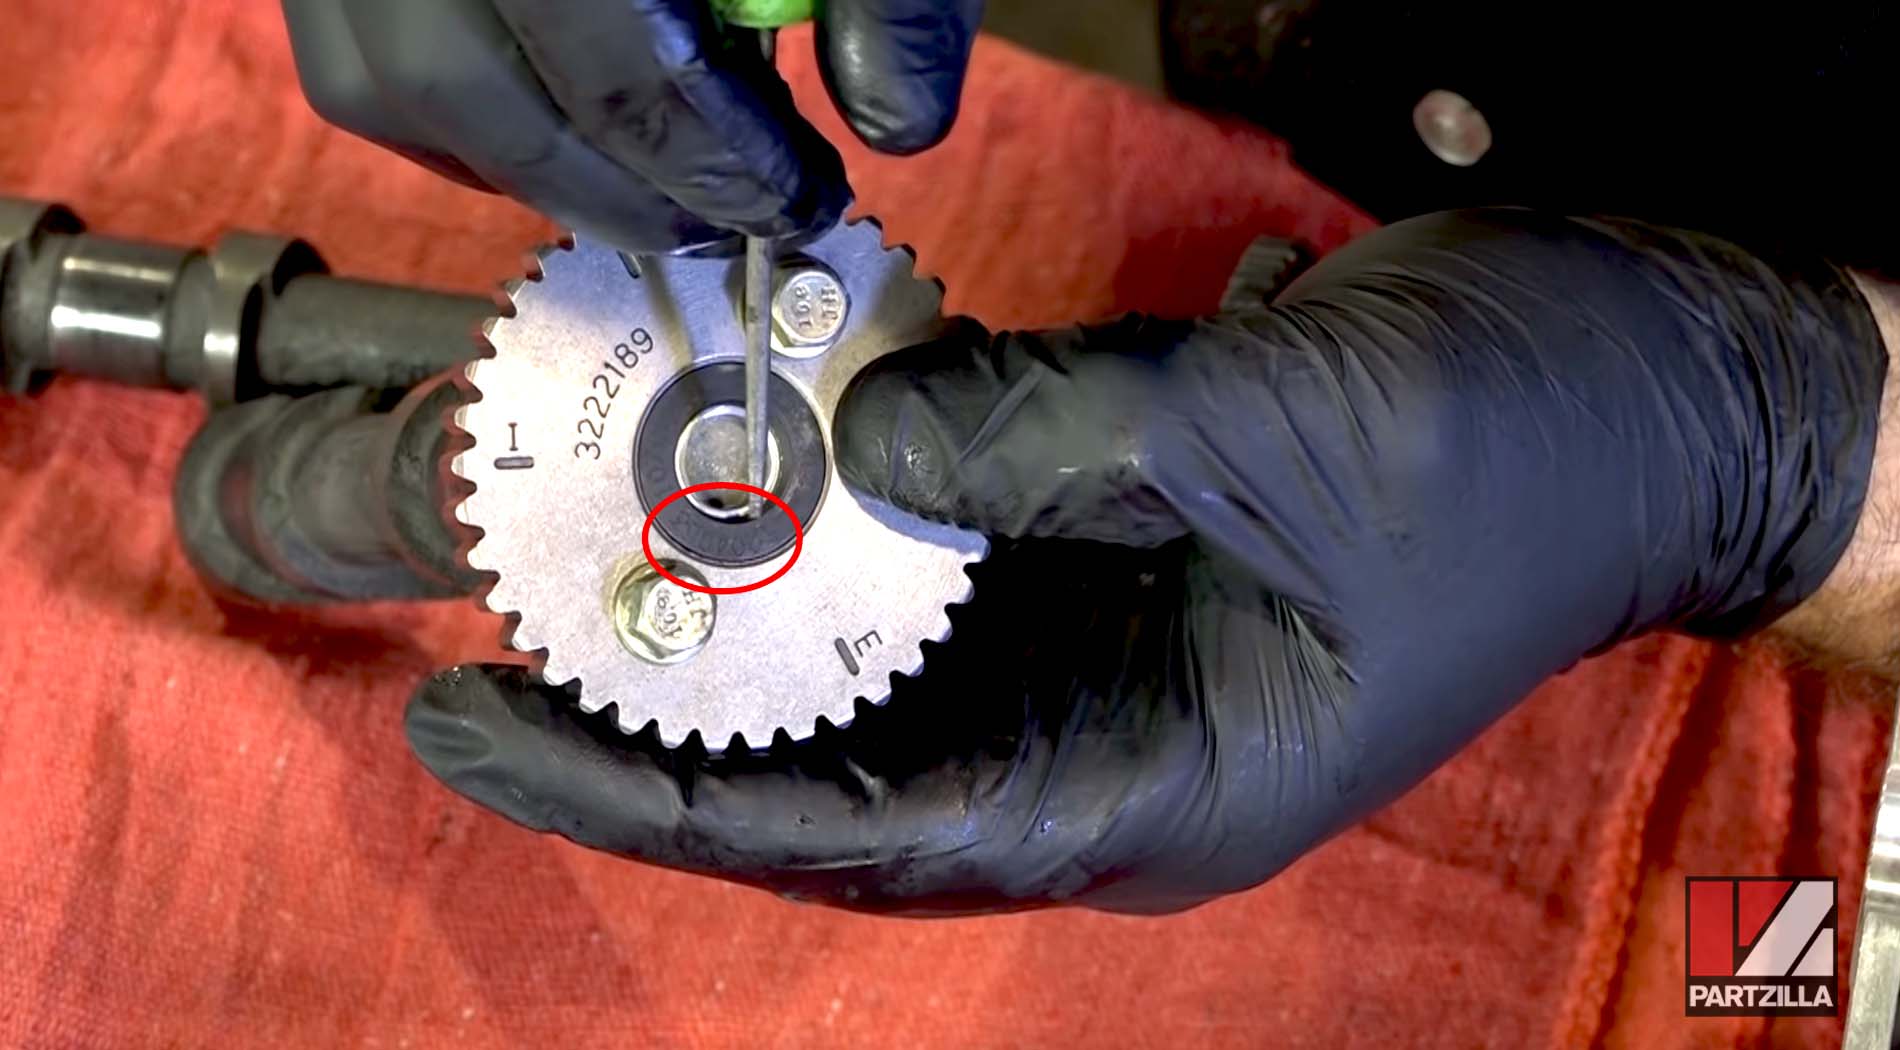
Step 1. Place the camshafts in the correct positions. The intake camshaft has a number ending with 52 stamped on its end and the exhaust camshaft has a number ending with 53 stamped on its end.
Step 2. Measure and calculate the correct valve shim sizes by fitting identical sized shims to all eight valves.
Step 3. Measure the valve lash by first making sure the camshaft lobes are pointing up at the same angle as the valve stems. Having calculated the correct shim size, reassemble the shims, tapper buckets, camshafts and camshaft caps and measure the valve lash again to make sure the clearances are correct.
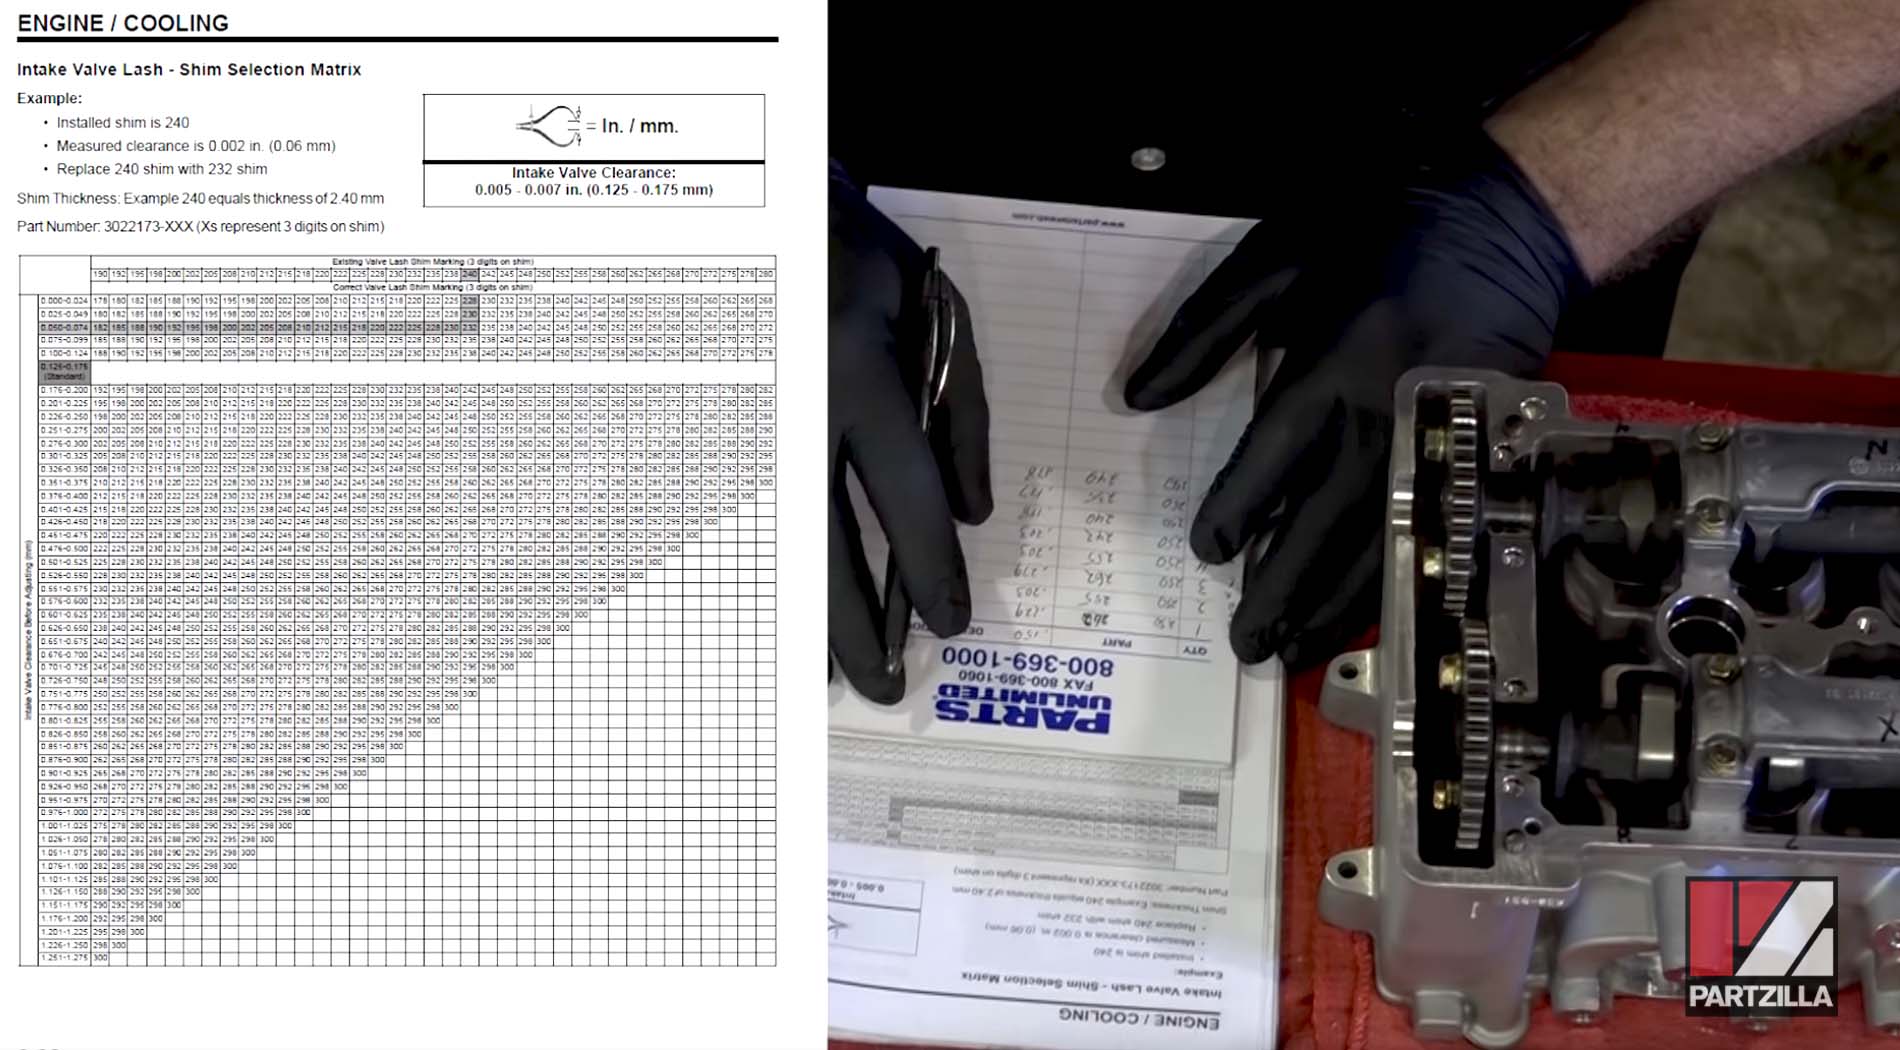
The valve lash on the intake valves should be between 0.127 and 0.175mm, and the valve lash on the exhaust valves should be between 0.275 and 0.325mm.
Step 4. Disassemble the camshafts and tapper buckets one last time and apply assembly lube to the buckets and all the bearing riding surfaces.
Watch the clip below to see the valve lash segment of our Polaris RZR 900XP engine rebuild video.
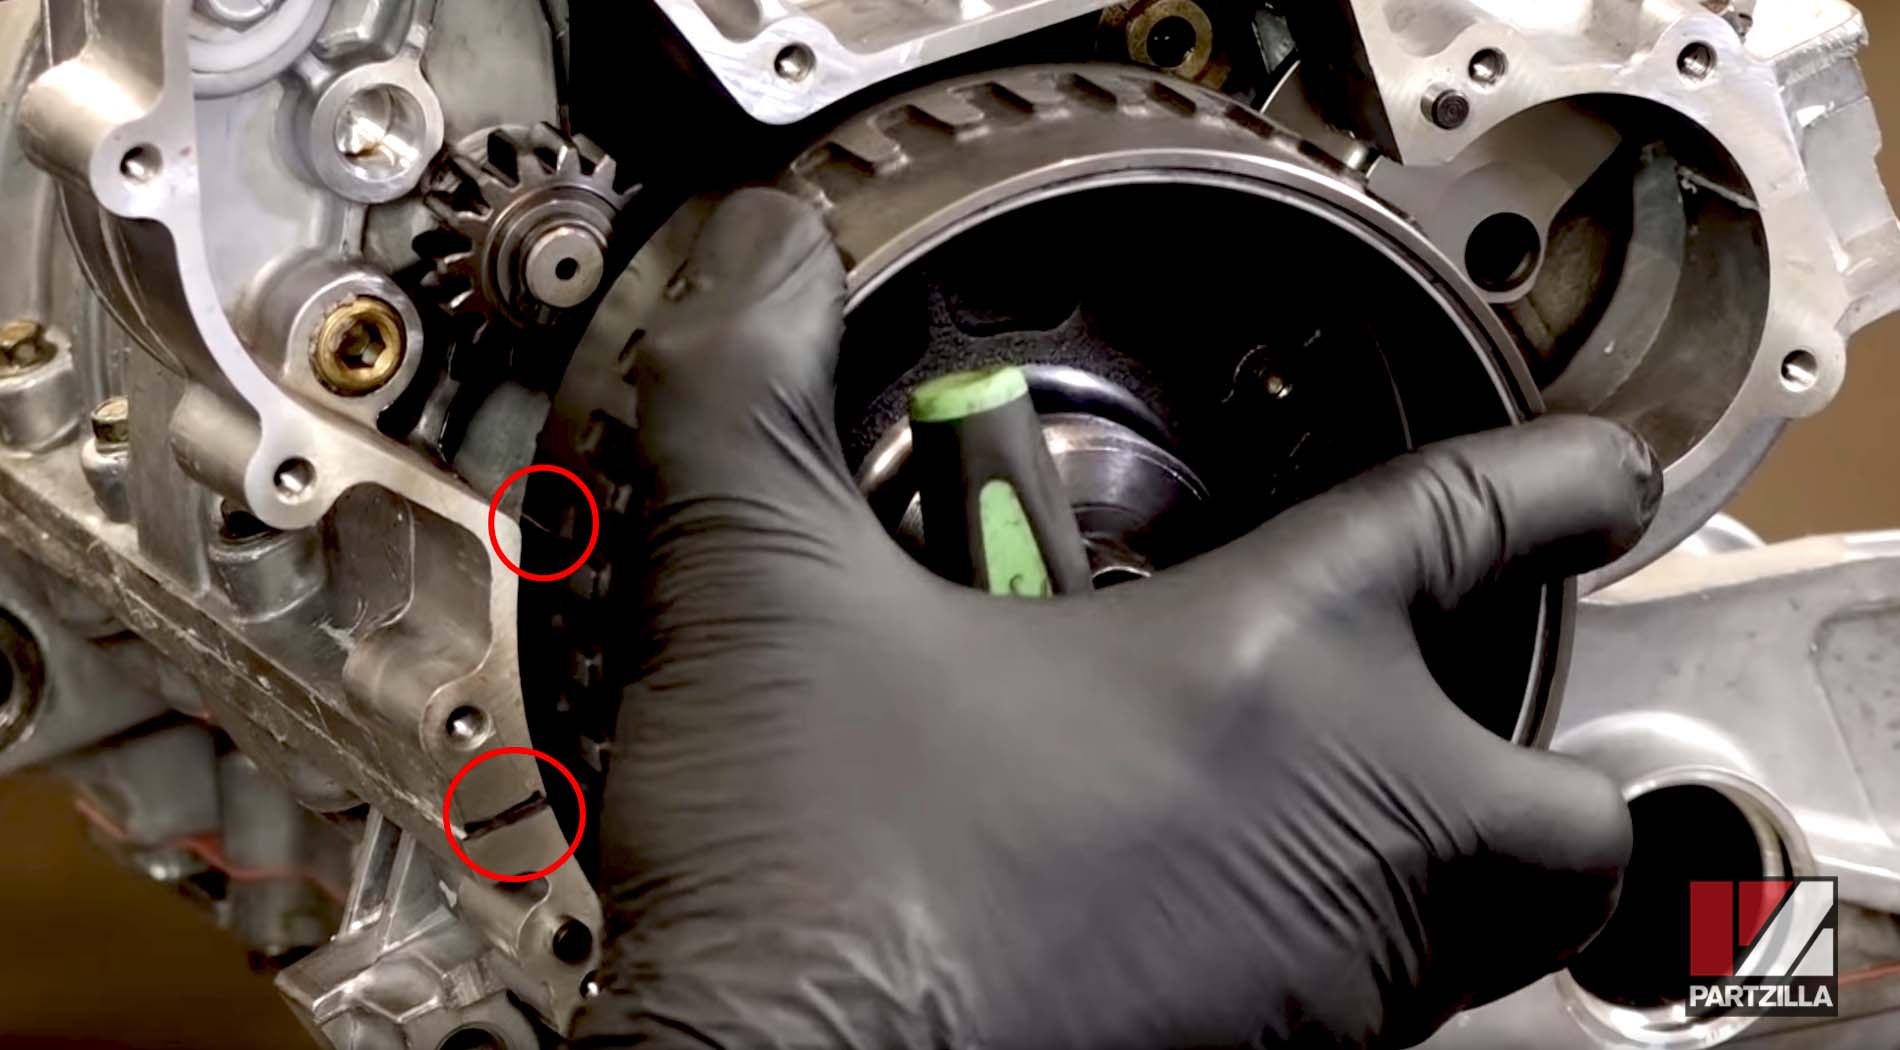
Polaris RZR 900XP Setting the Timing
Step 1. Bring the motor to TDC (top dead center) by rotating the flywheel until the mark on the side of the flywheel is aligned with the mark where the two halves of the crankcase meet.
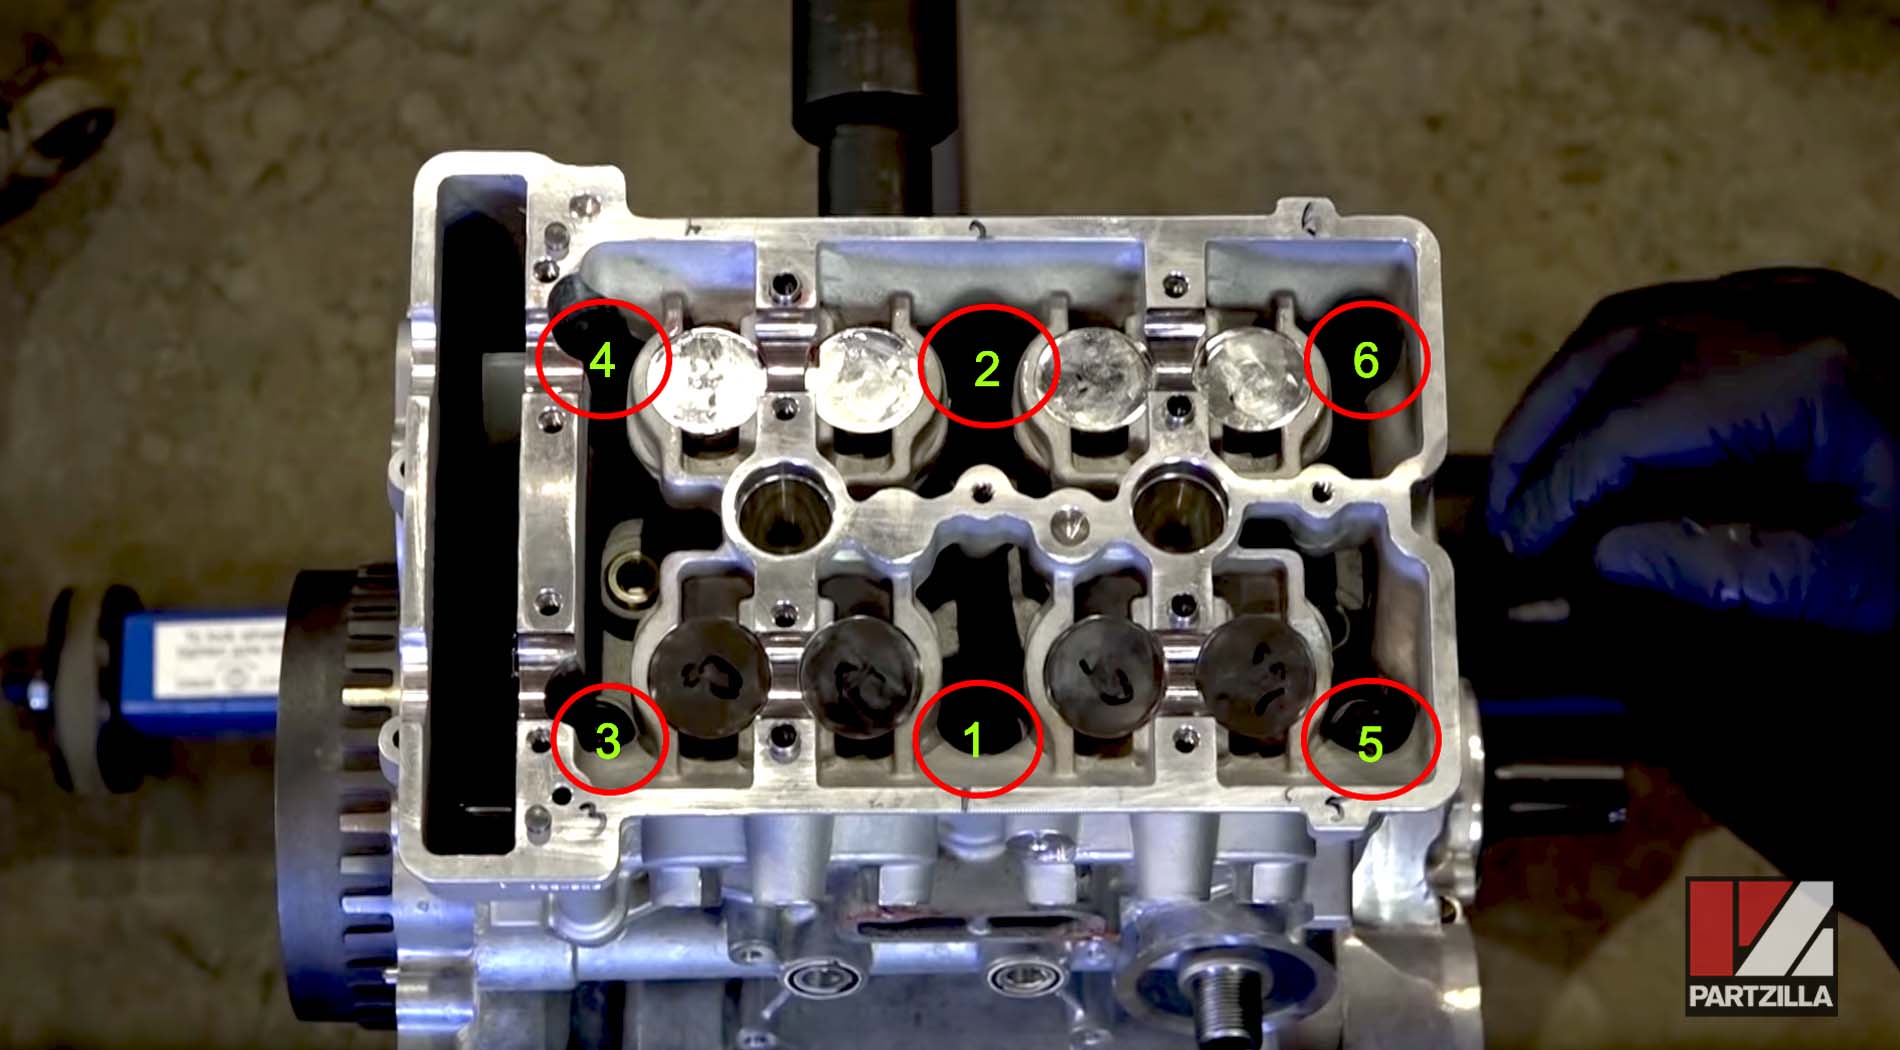
Step 2. Tighten the six cylinder head bolts in the sequence shown in the image below. The bolts must first be torqued to 21 foot-pounds, then torqued to 26 foot-pounds, then tightened by an additional 180 degree turn. Torque the two 8mm bolts on the flywheel end of the cylinder head to 89 inch-pounds.
Step 3. Oil the camshaft lobes before installing them, and torque the cam cap bolts to 89-inch pounds.
NOTE: You’ll need a special Polaris cam tool to set the timing on an RZR motor. Contact us if you need this tool so we can special order it for you.
Step 4. The intake cam sprocket has the letter I embossed on it and the exhaust cam sprocket has the letter E embossed on it. Position the sprockets so their two timing marks are level with the cylinder head. Torque the timing sprocket mounting bolts to 14 foot-pounds.

Step 5. Tighten the twelve camshaft bolts in the sequence shown in the image below. Torque each bolt to 89 inch-pounds.

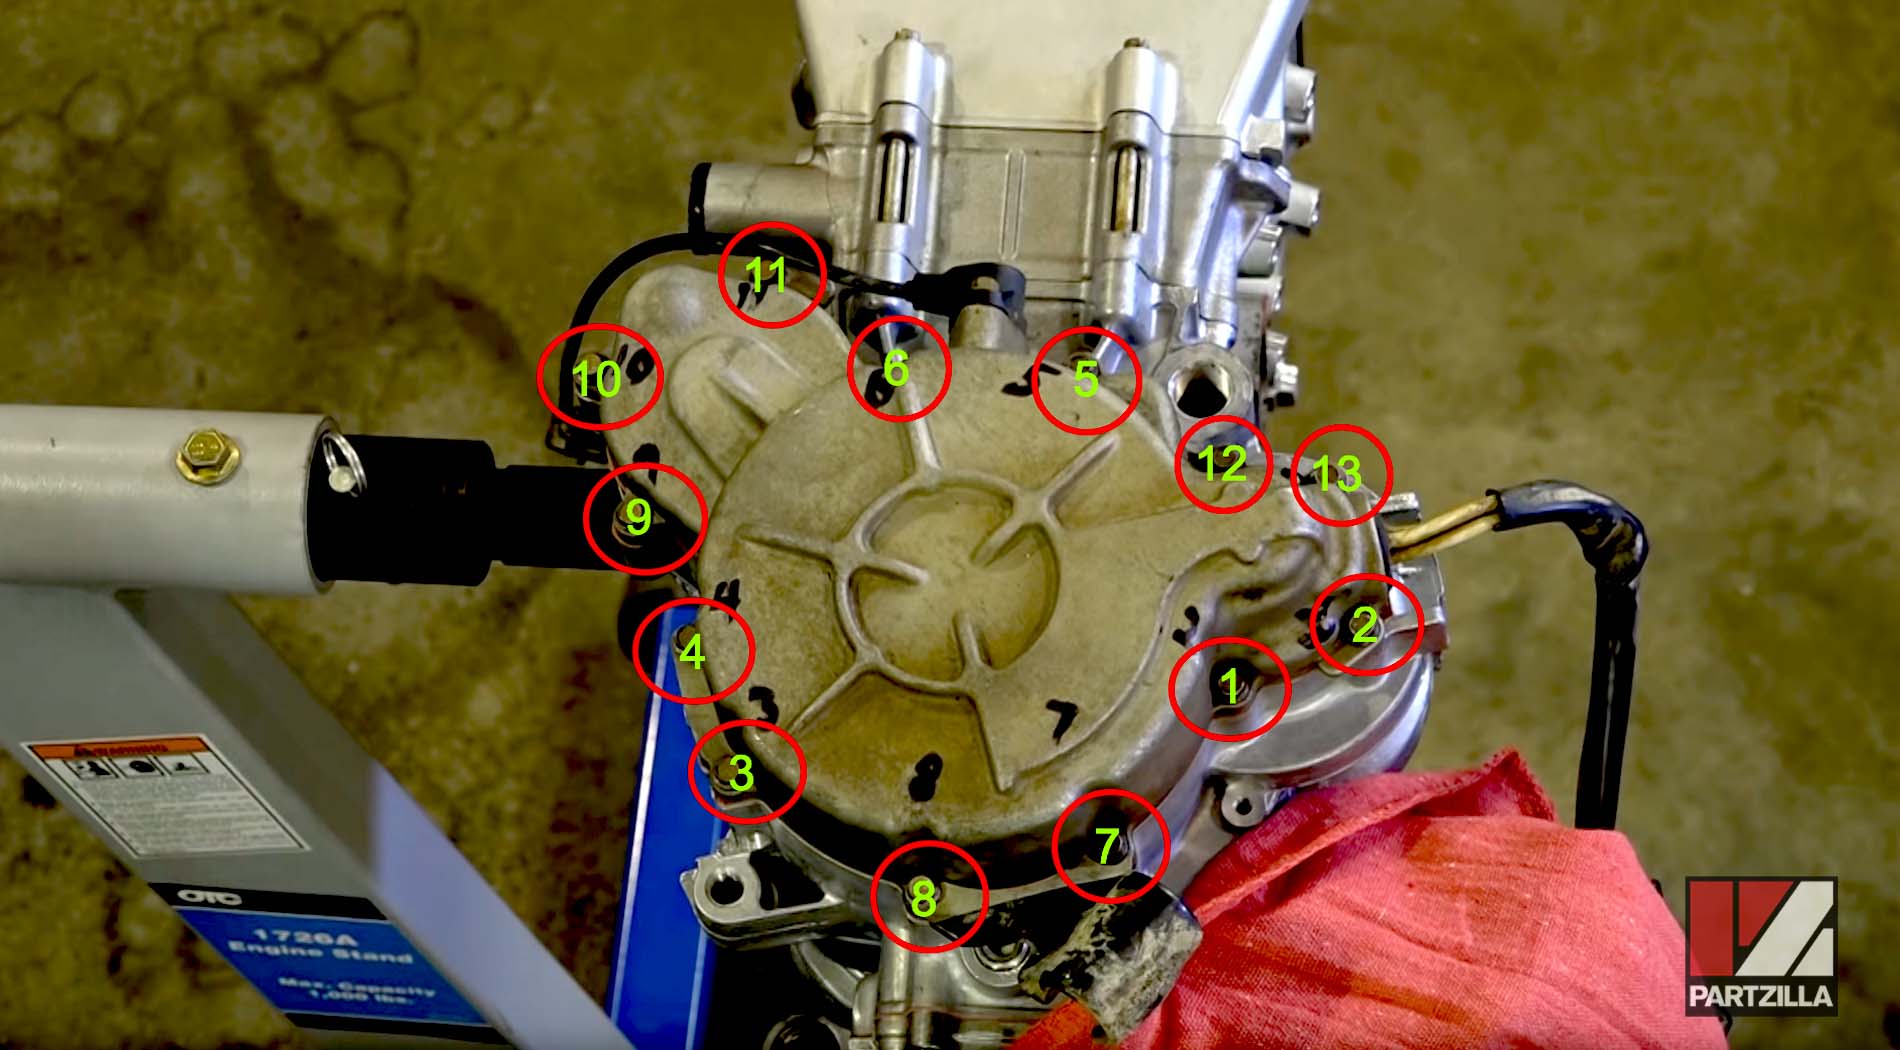
Step 6. Tighten the thirteen stator cover bolts in the sequence shown below, then torque them to 106 inch-pounds.
Watch the clip below to see the timing setting segment of our Polaris RZR 900XP engine rebuild video.
The next and final stage of our Polaris RZR 900 engine rebuild project is to reinstall the motor back into the chassis. Watch our Polaris RZR 900 Engine Rebuild Video Part 7 below to see the final stage.