How to Bleed Honda Rancher 350 Brakes
Brake fluid is hygroscopic, which means it attracts water molecules. When water builds up in the braking system of a Honda ATV, it needs to be bled out.
Water in the braking system leads to damaged seals and corrosion, so removing the water-contaminated brake fluid calls for a brake bleed. A Honda Rancher's brakes should be bled at least once a year, or every time the brake shoes are replaced. Watch the video above and follow the steps below to bleed the brakes on a Honda Rancher 350
Tools and Supplies - Honda TRX350 Brake Bleed
- 8mm wrench
- Phillips screwdriver
- 3/16" hose
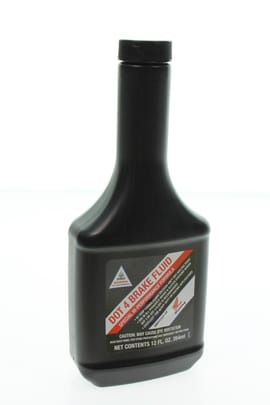
- Brake fluid
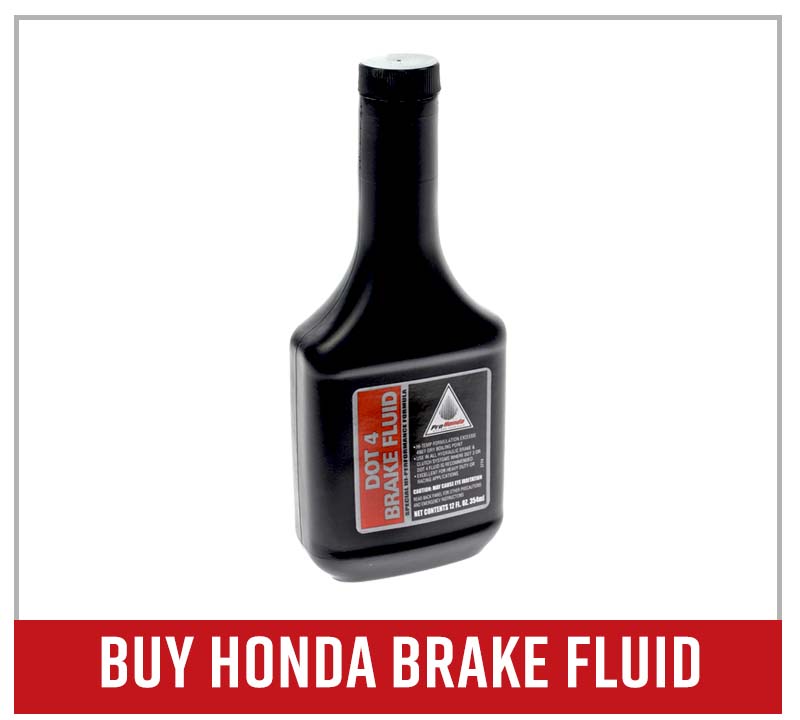
NOTE: Brake fluid is harmful to the paintwork and plastics on a Honda Rancher. Always have rags or shop towels handy, and immediately wipe up any brake fluid drips or spills.
Bleeding Honda TRX350 Rancher Brakes
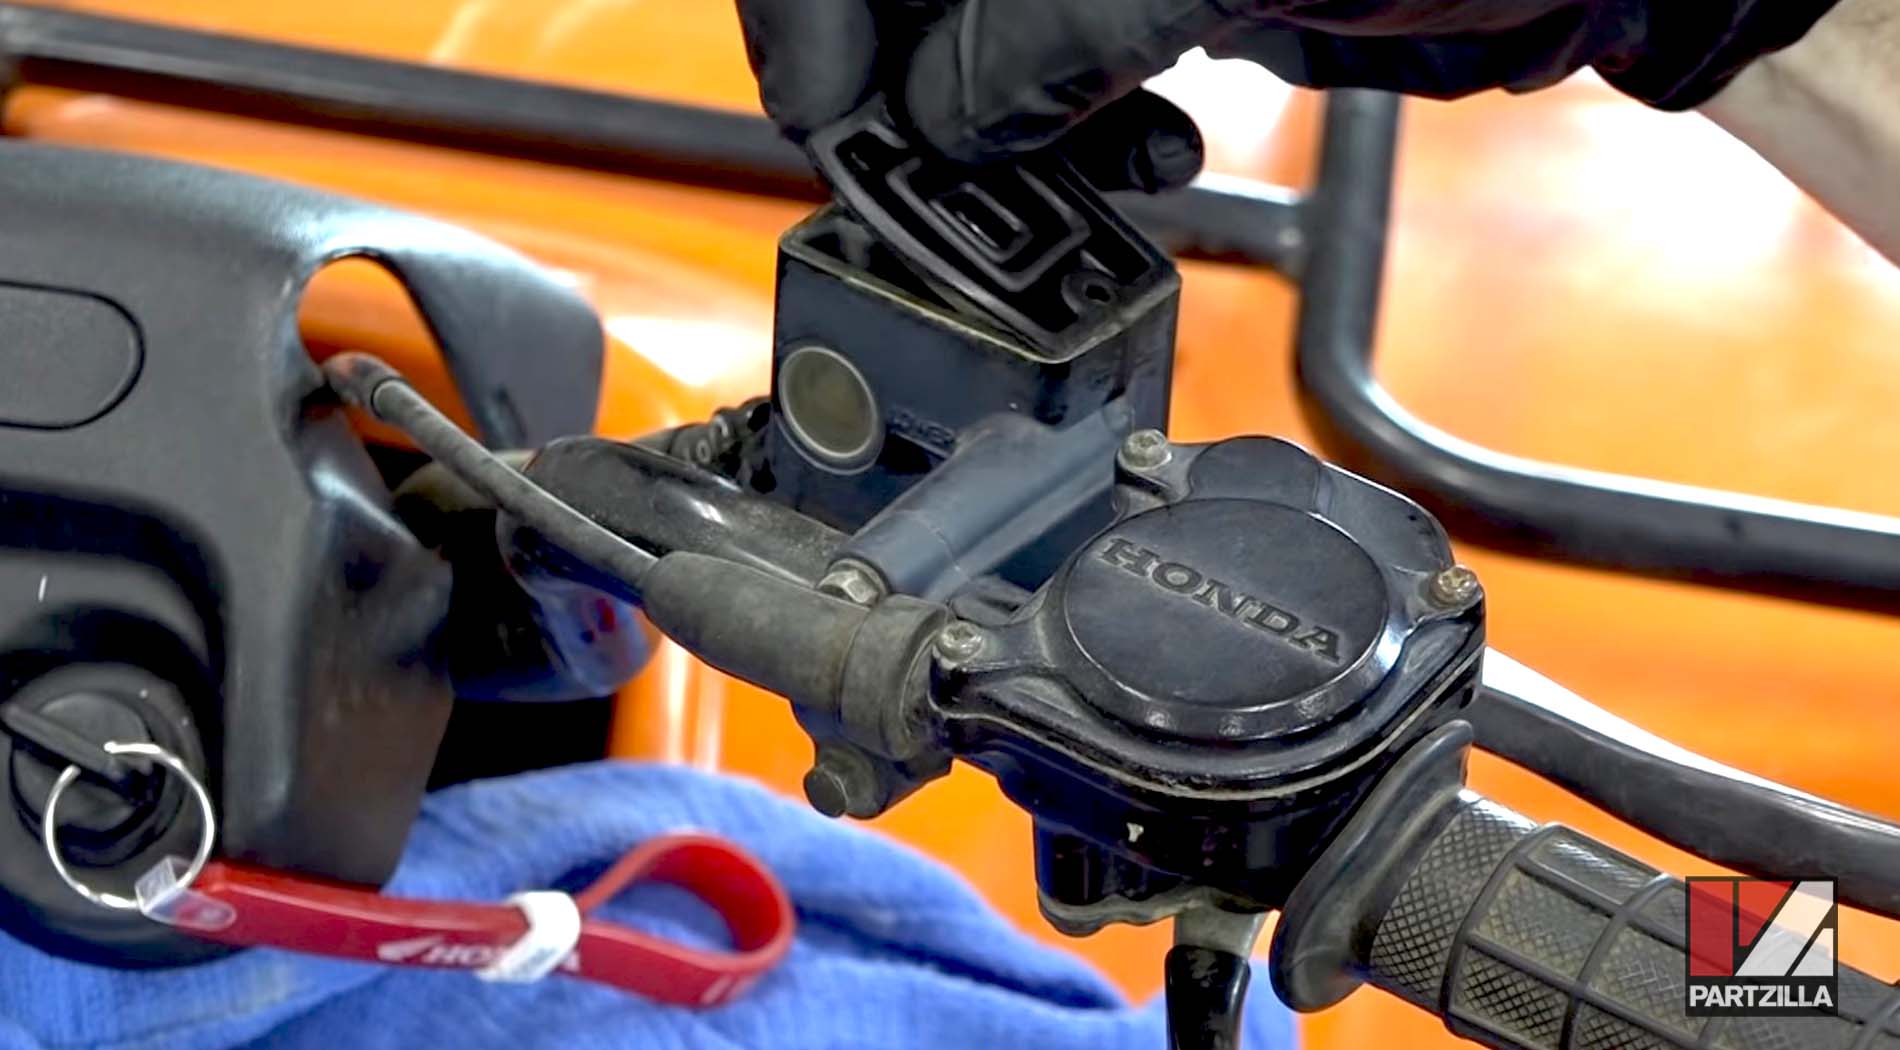
Step 1. Locate the master cylinder reservoir on the right side handlebar, and remove the reservoir cap, the diaphragm plate and the rubber diaphragm beneath it.

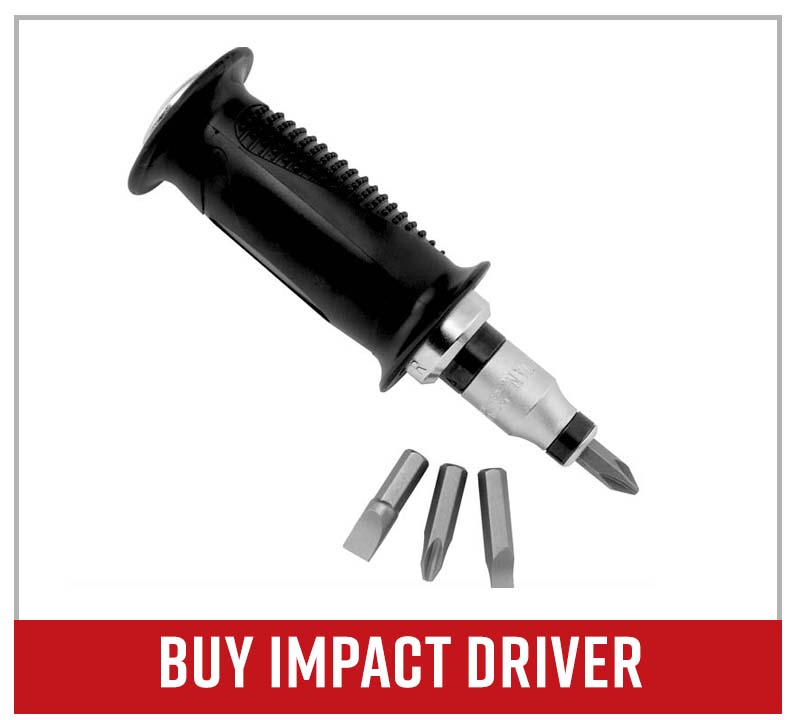
PRO TIP: If the brakes haven't been bled in a long time and the two reservoir cap screws are badly corroded, you might need an impact driver to loosen them.
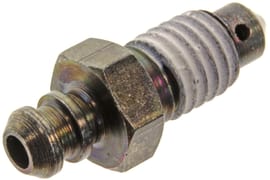
Step 2. Inspect the bleed valve on the inside of the brake assembly's backing plate. The valve is just behind the brake line, and is covered with a rubber dust cap. If the dust cap is missing and/or the bleed valve is corroded, replace them.
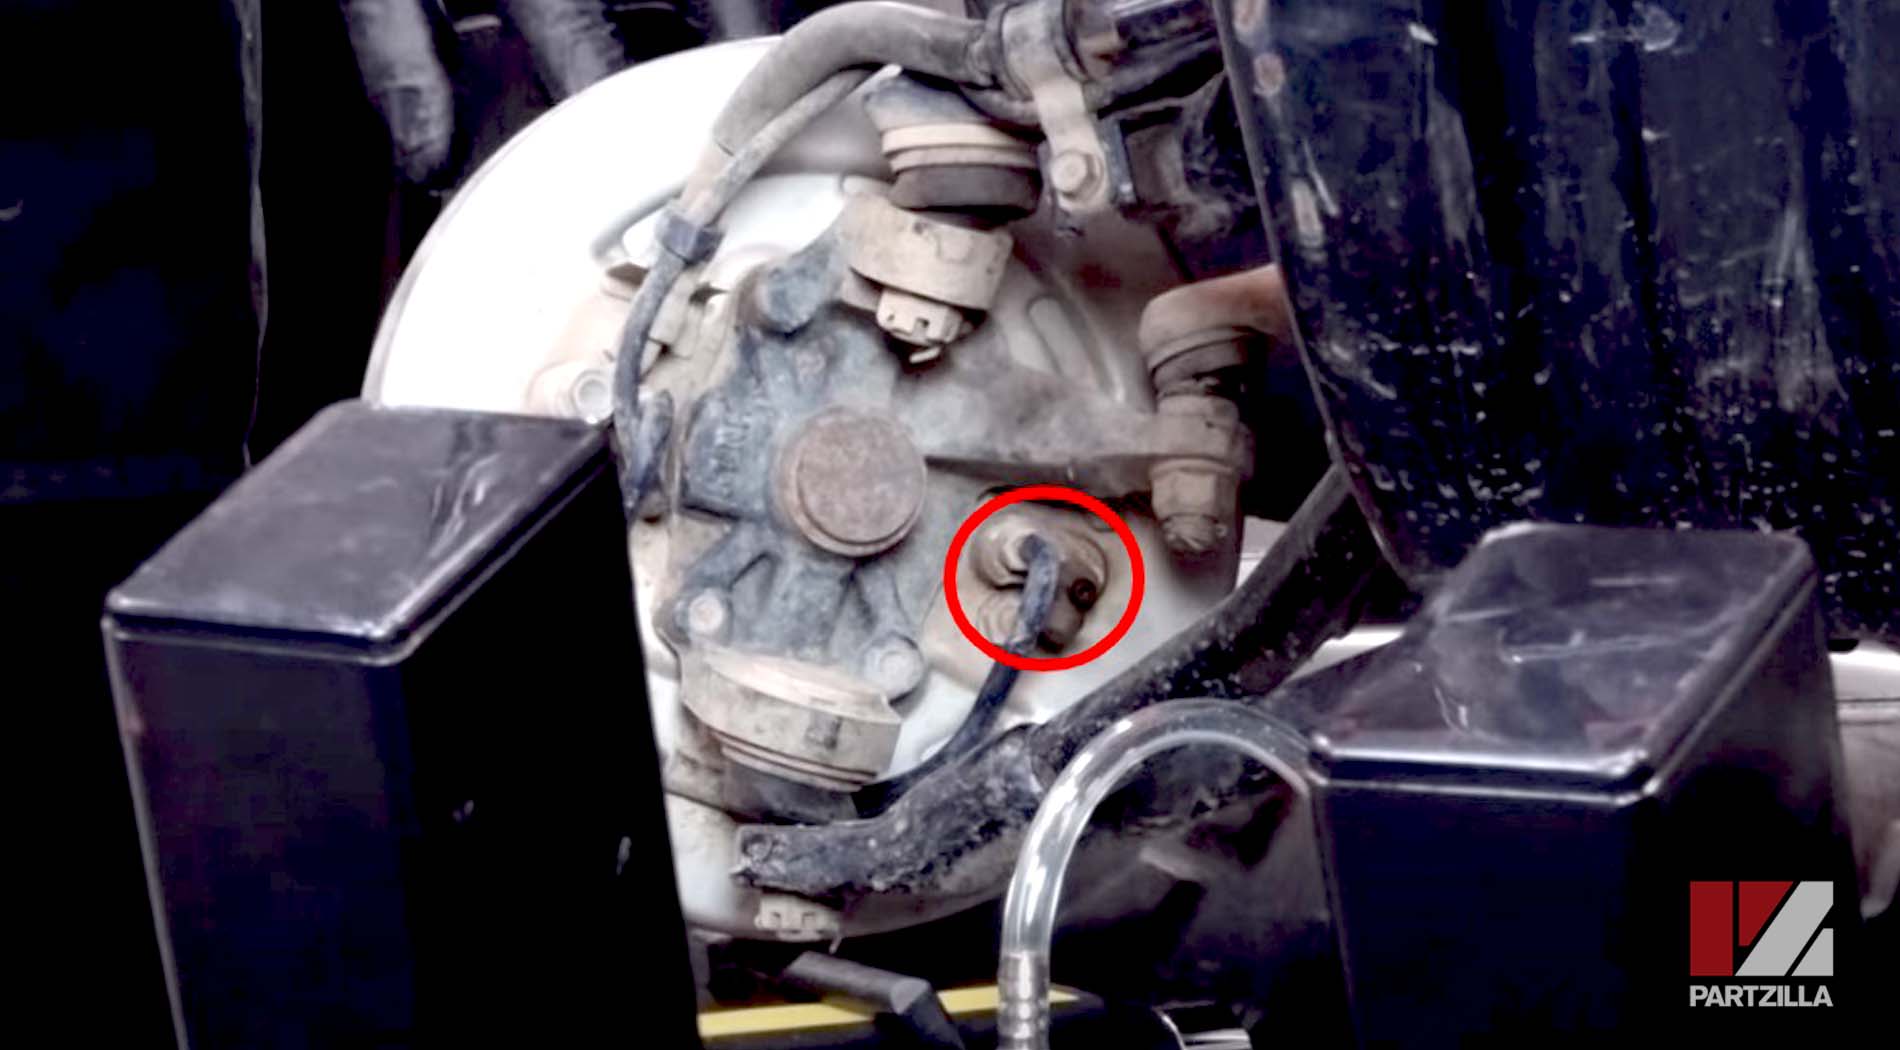
PRO TIP: Always bleed the brake furthest from the reservoir first, which on a Rancher TRX350 is the left side brake.
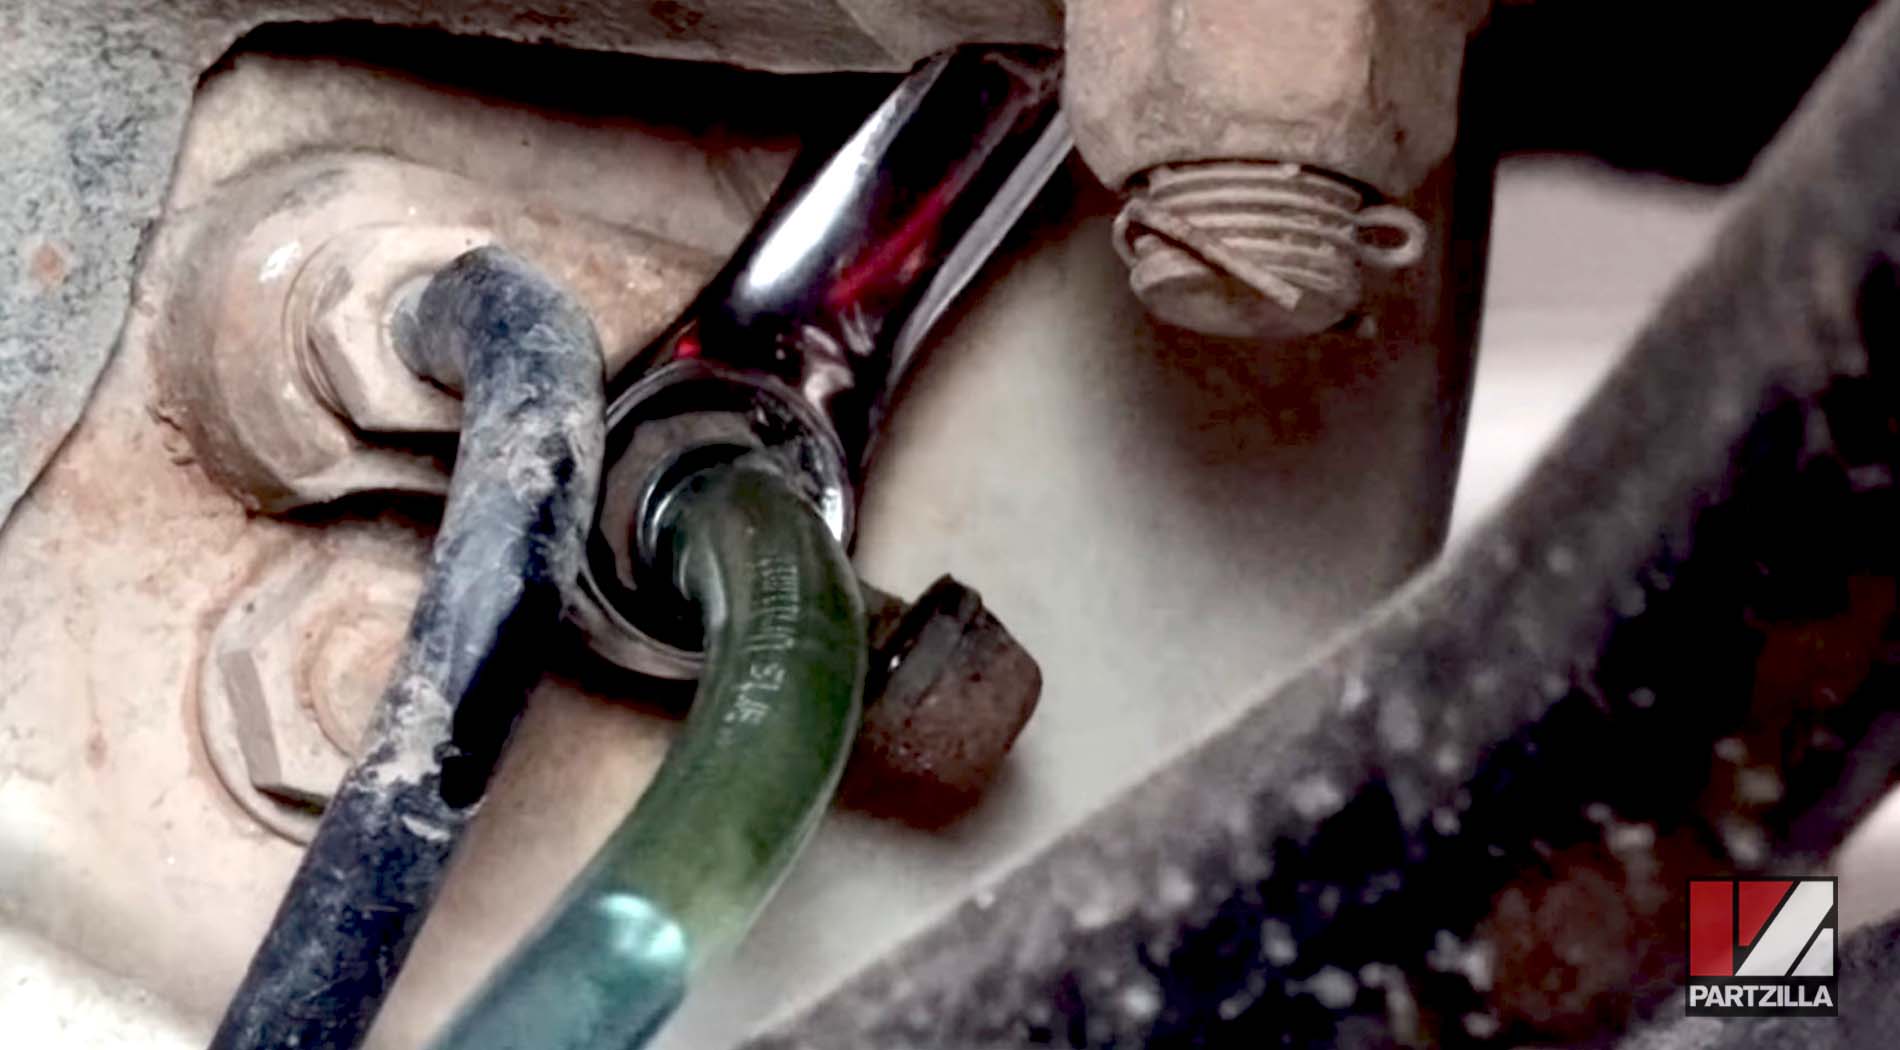
Step 3. Put a 10mm wrench on the bleed valve, then place one end of a length of 3/16" hose over the valve, and run the other end of the hose into a container to catch the old brake fluid.
Step 4. Pump the brake lever a couple of times, then hold the lever in and open the bleed valve. You should see old, discolored brake fluid flow out of the valve into the hose. Tighten the bleed valve.
PRO TIP: If you can't reach the brake lever and the bleed valve at the same time, have a second person work the lever while you open and tighten the bleed valve.
Step 5. Repeat Step 4 a few times, then pause and top off the brake fluid in the master cylinder reservoir. As you bleed out the old brake fluid, you must refill the system with fresh brake fluid.

PRO TIP: Don't let the reservoir run dry, because that'll introduce air into the system and you'll have to start the bleed process again from scratch.
Step 6. Continue to bleed and refill the brake system until fresh, clear brake fluid with no air bubbles begins to flow from the bleed valve. Tighten the bleed valve and put the dust cap back over the valve to protect it.
Step 7. Bleed the brake on the other side of the Rancher by repeating steps 2 through 6.
Step 8. Top off the reservoir, and clean and replace the rubber diaphragm, the diaphragm plate and the reservoir cap. Give the brake lever a few hard pulls and examine the bleed valves for any leaks. Retighten the valves if necessary and you're done.
Are you ready to replace the front brake shoes on your Honda Rancher TRX350? Watch the video below to see how to change the front brake shoes on a Honda Rancher 350.