Yamaha YXZ1000R Bottom End Rebuild Part 2
Welcome to the 2nd part of our 2016 Yamaha YXZ1000R engine bottom end rebuild project, in which we’re doing a turbo rebuild for the Yamaha side-by-side.
This project was broken up into two parts (see part 1 here) and began with installing new Wiseco pistons to reduce the compression ratio of the YXZ1000R engine. This post picks up at the installation of the crankshaft and ends with the completion of the bottom end rebuild. Watch the video above and follow the steps below to continue with the bottom end rebuild of our Yamaha YXZ1000R engine.
Tools and Parts - Yamaha YXZ1000R Bottom End Turbo Rebuild Part 2
- Torque wrench
- Ratchet and extensions
- Flat-blade screwdriver
- Silicone sealant
- Impact wrench
- Contact cleaner
- Oil
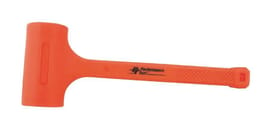
- Soft blow hammer
- Dead-blow hammer
- Assembly lube
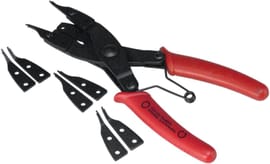
- Snap ring pliers
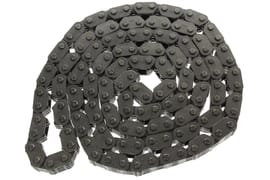
- Cam chain
- Oil pump O-ring #1

Yamaha YXZ1000R Bottom End Rebuild (Continued)
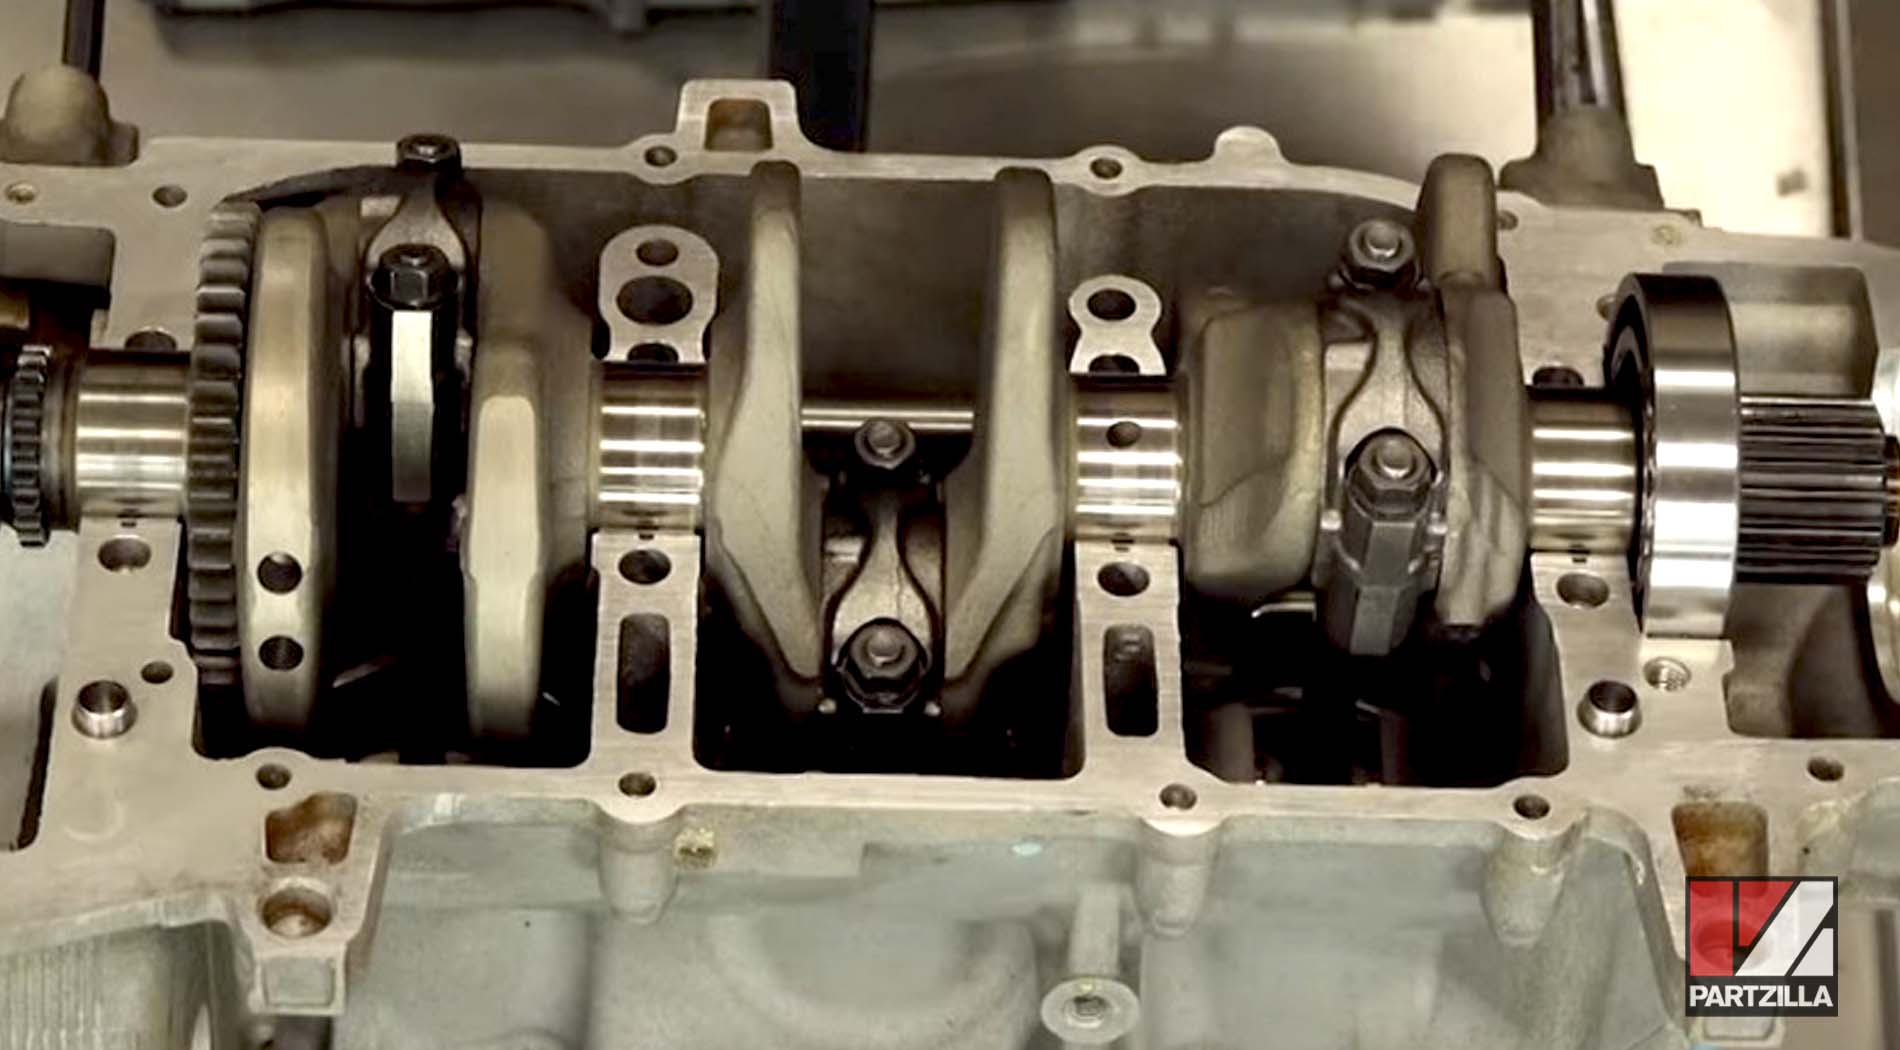
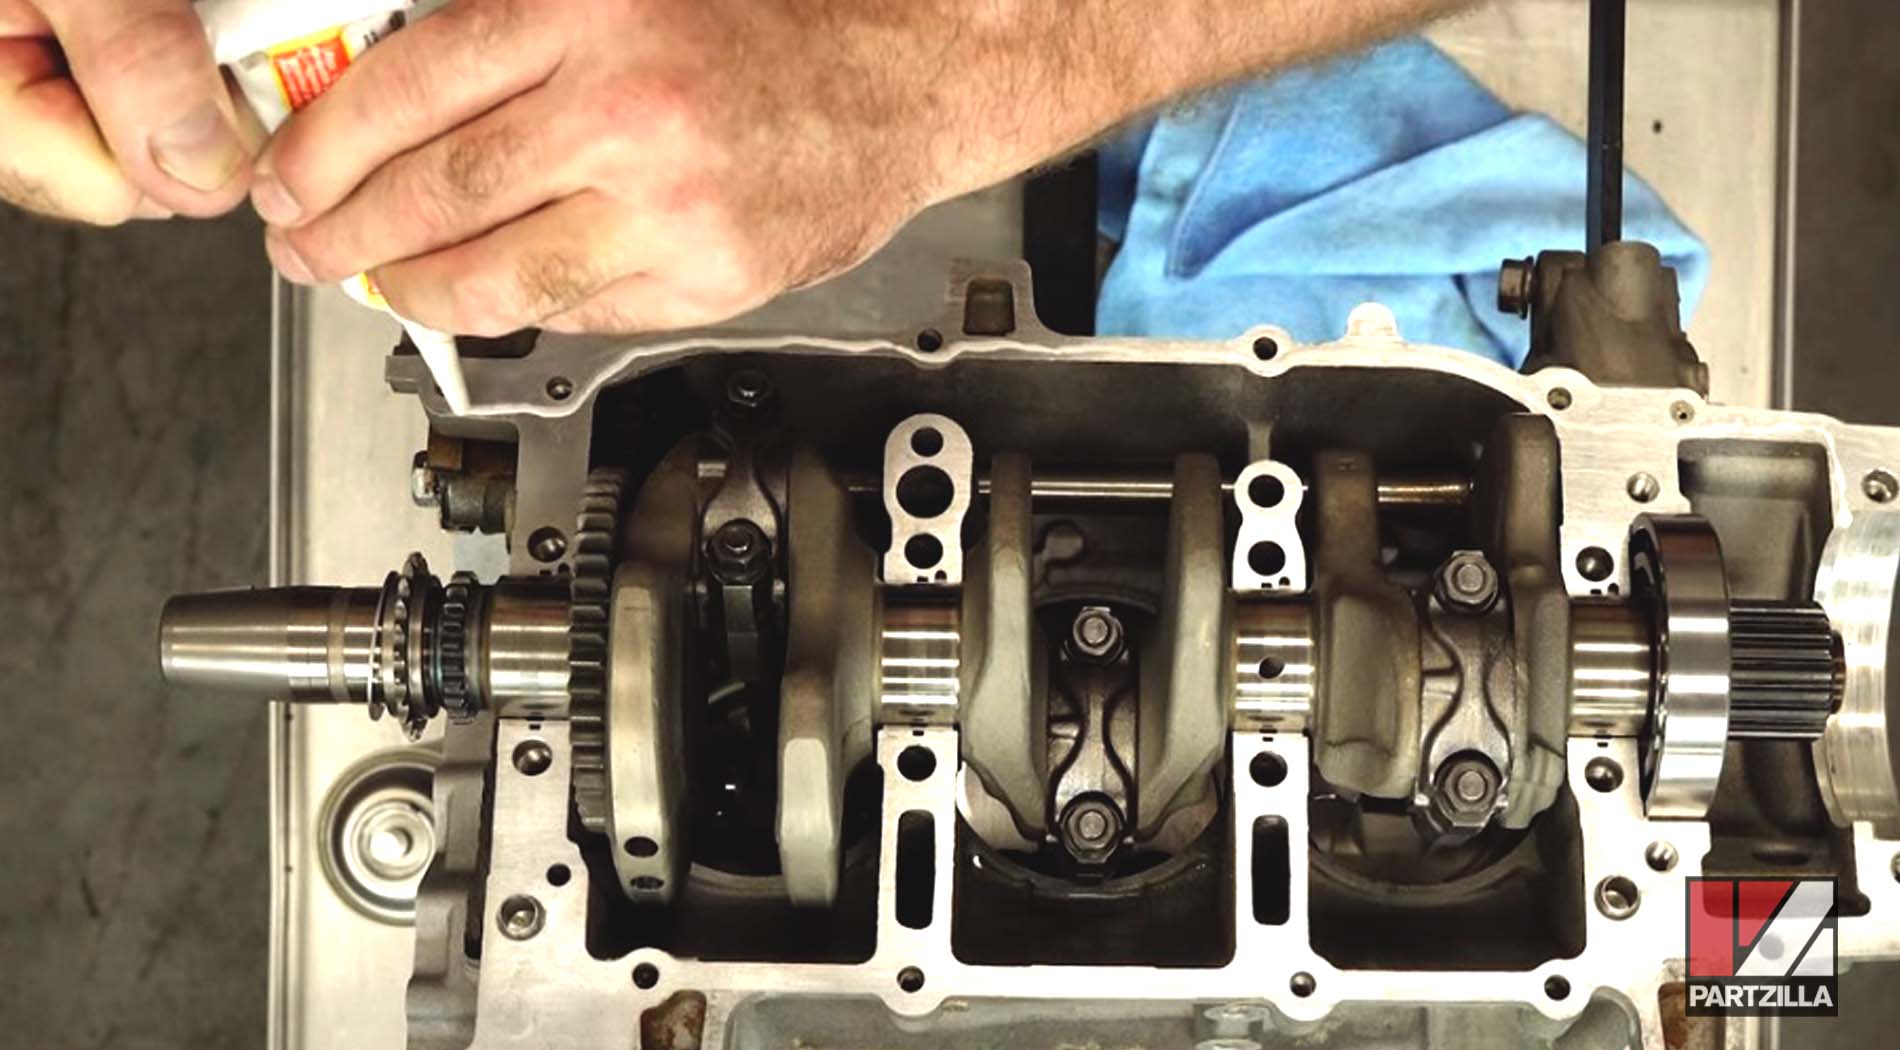
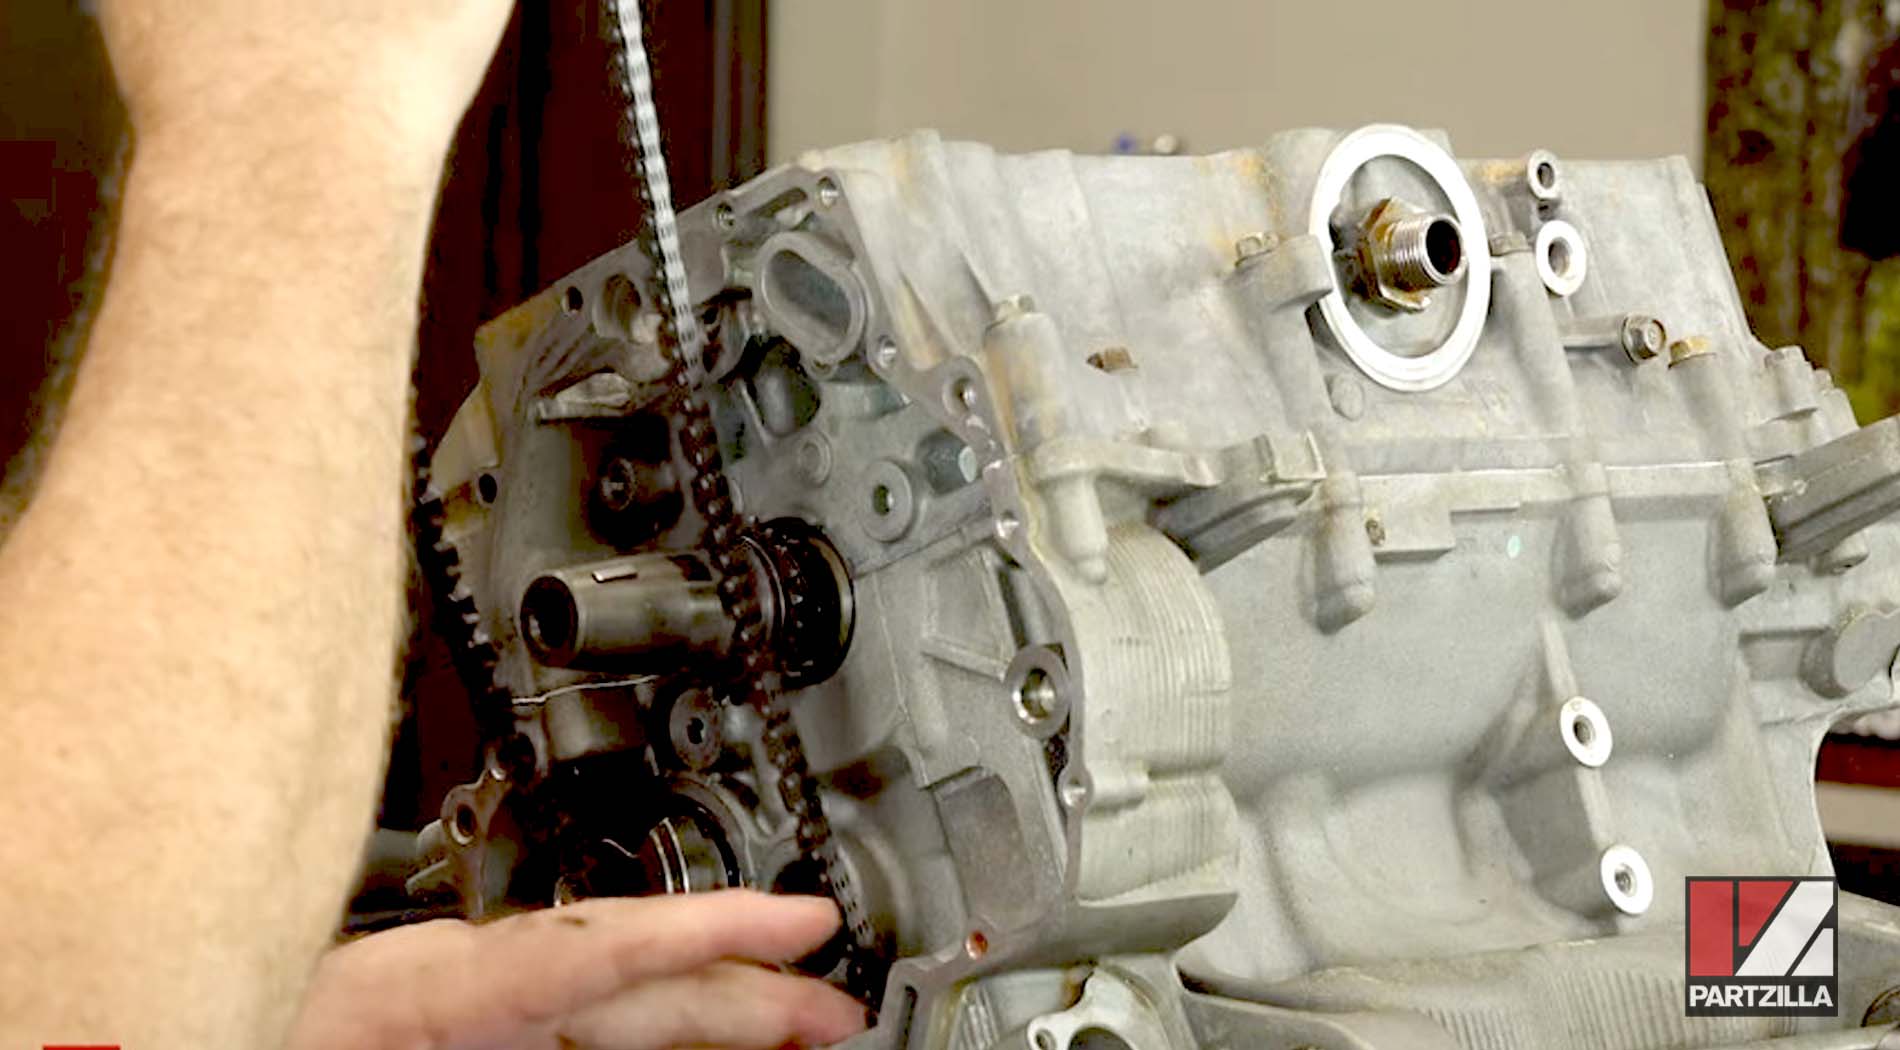
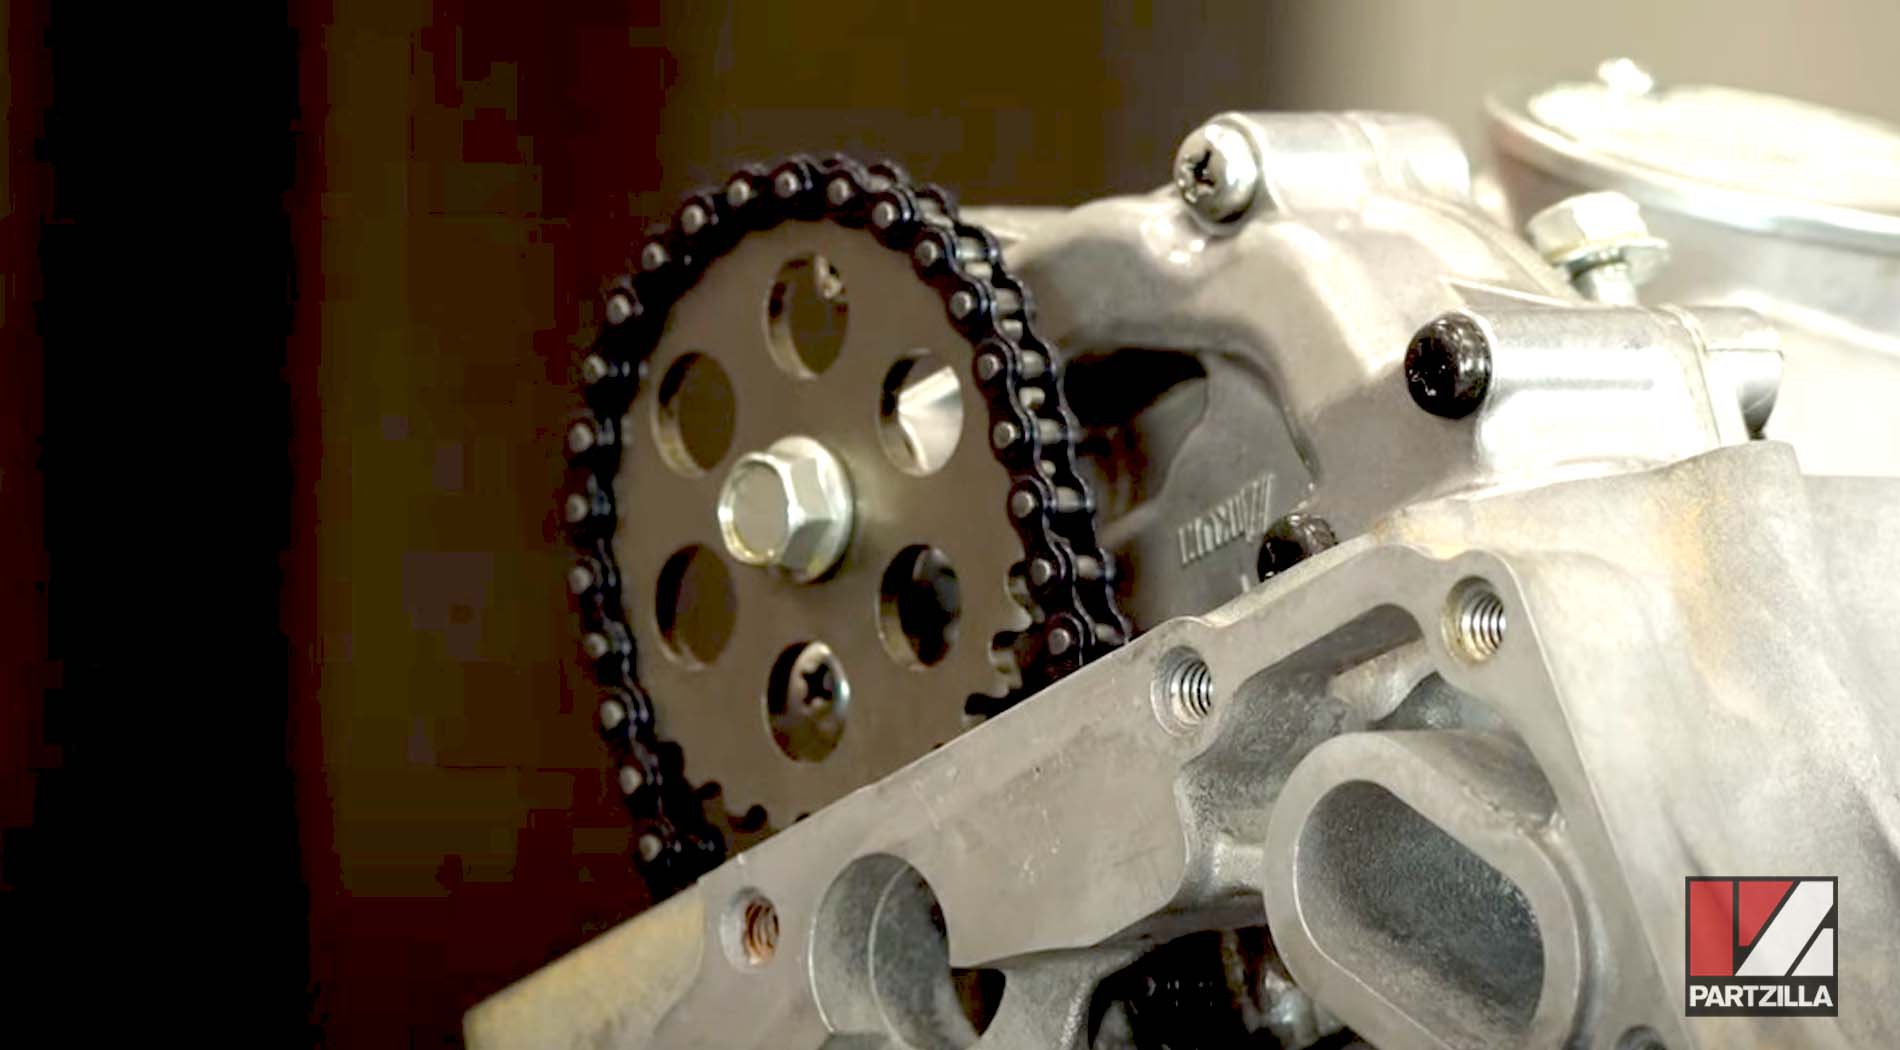
Step 1. Find the dot on the crankshaft and add a mark so it's easier to see where that point on the crankshaft is going to line up with the point on the end of the tooth on the gear (pictured below), then install the crankshaft.
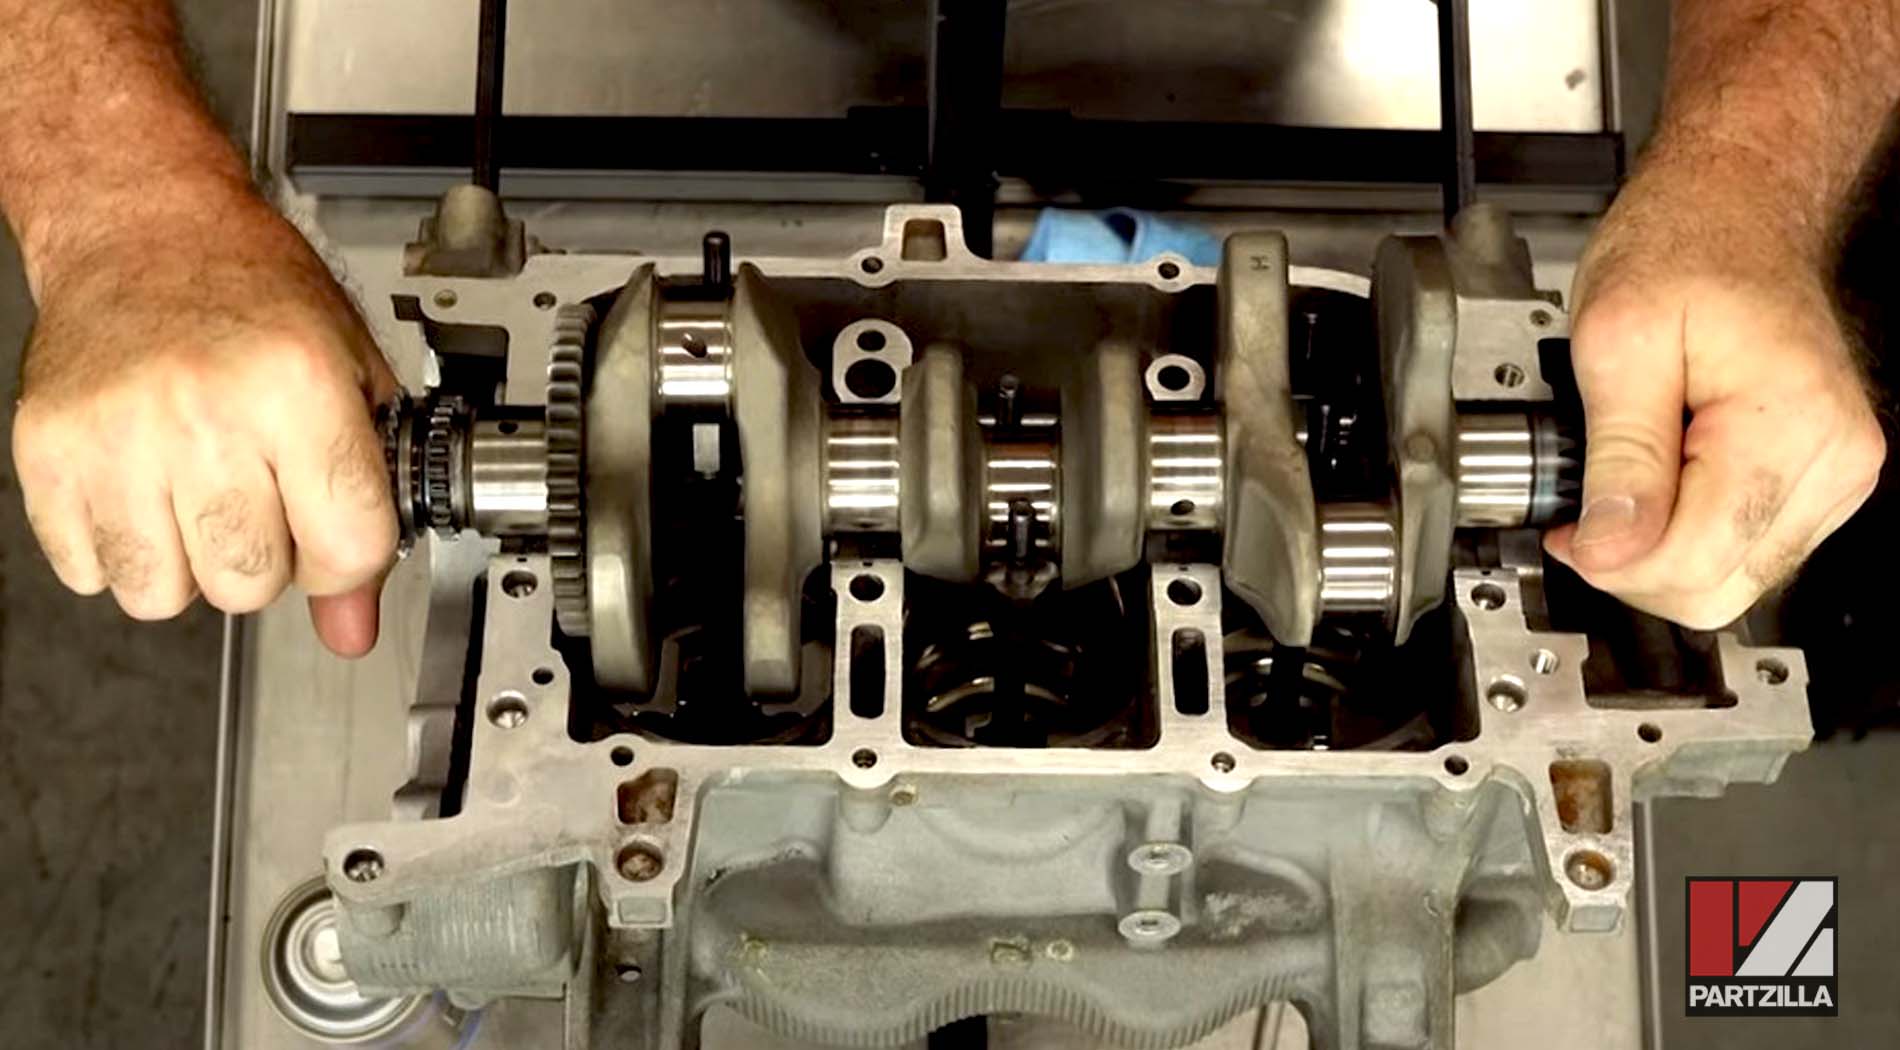
Step 2. Install the connecting rod end caps by first putting a little bit of oil on the mounting bolt threads and on the base. Start the torque sequence at 15 foot-pounds across the board, then go back and torque each one at a 120-degree angle.
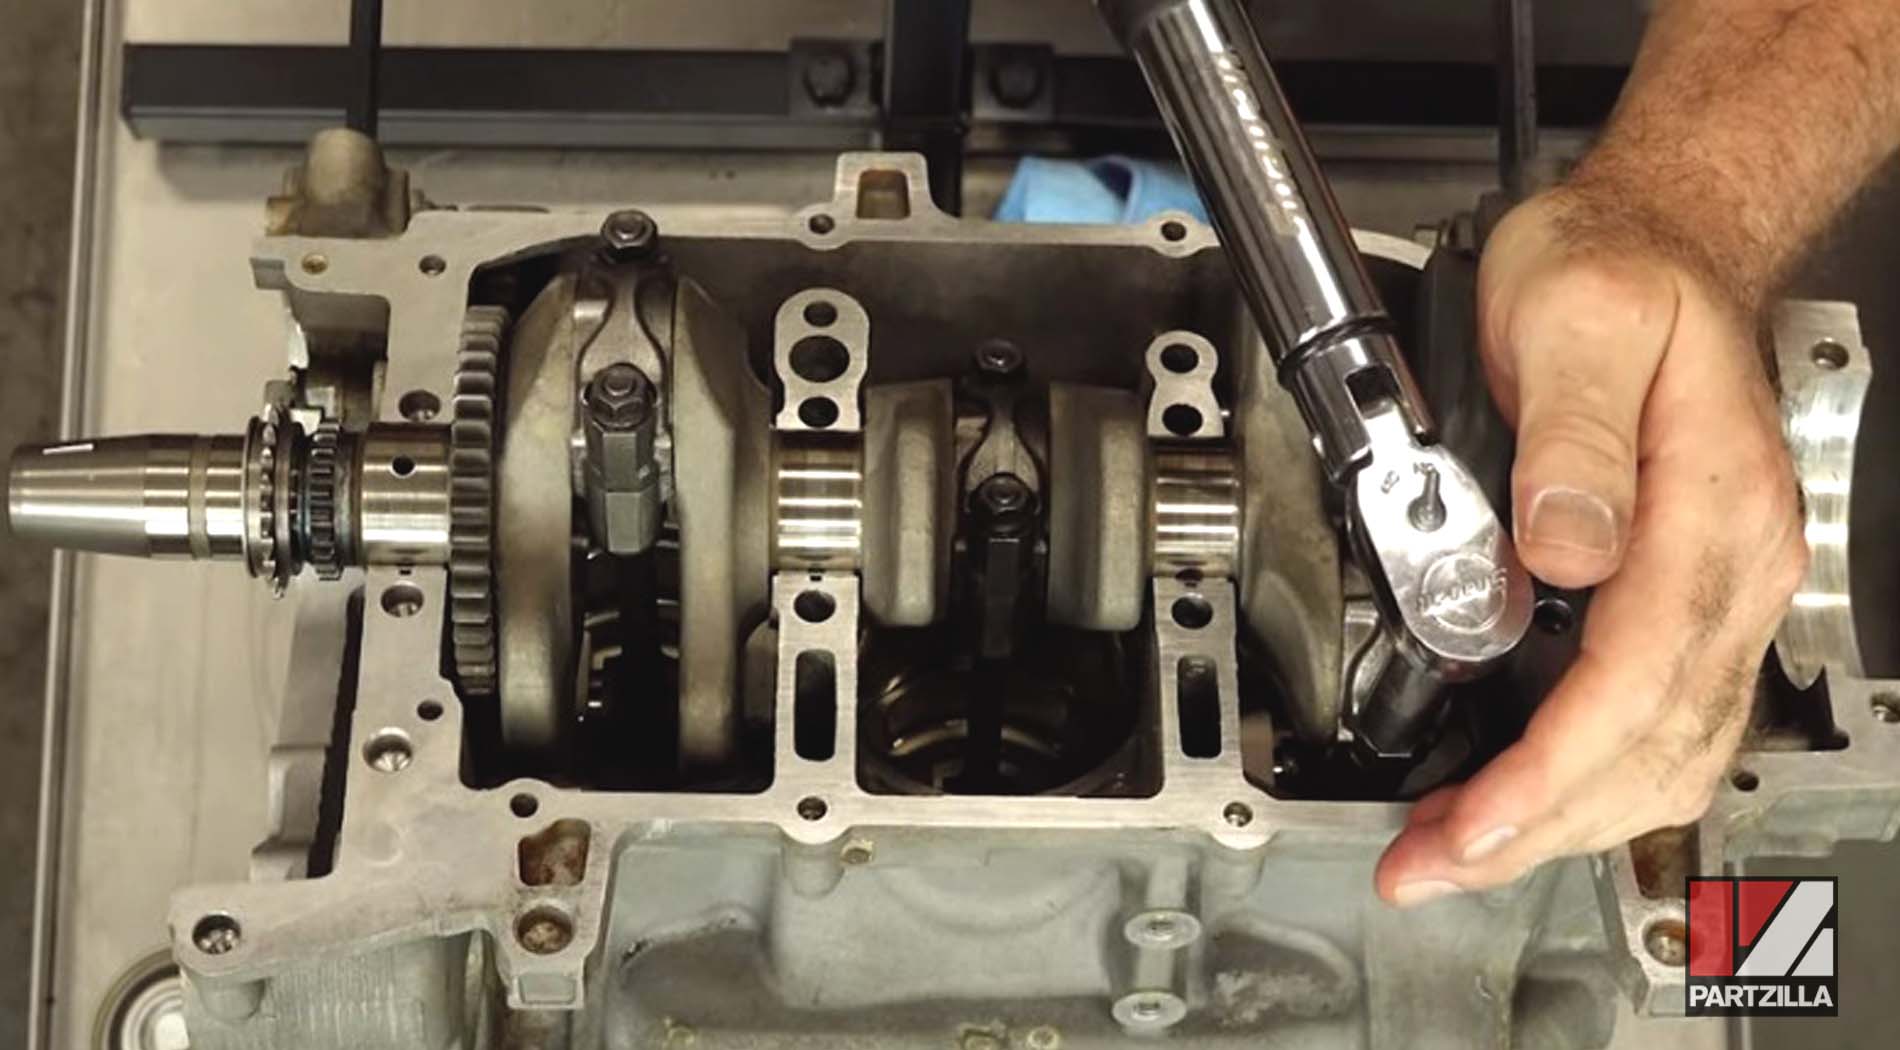
Step 3. Torque both end bolts of the crankshaft to 25 foot-pounds.
PRO TIP: Yamaha says to put a piece of wood somewhere to keep the crankshaft from turning. If you don't have a piece of wood handy, use a piece of steel bar wrapped up in a shop towel before torqueing it down to 25 foot-pounds.
Step 4. Bend the tabs in to secure the end bolts on both sides in place.

Step 5. Add assembly lube to the large bearing that goes at the end of the crankshaft, then install it by lining its dot up with the dowel in the back.
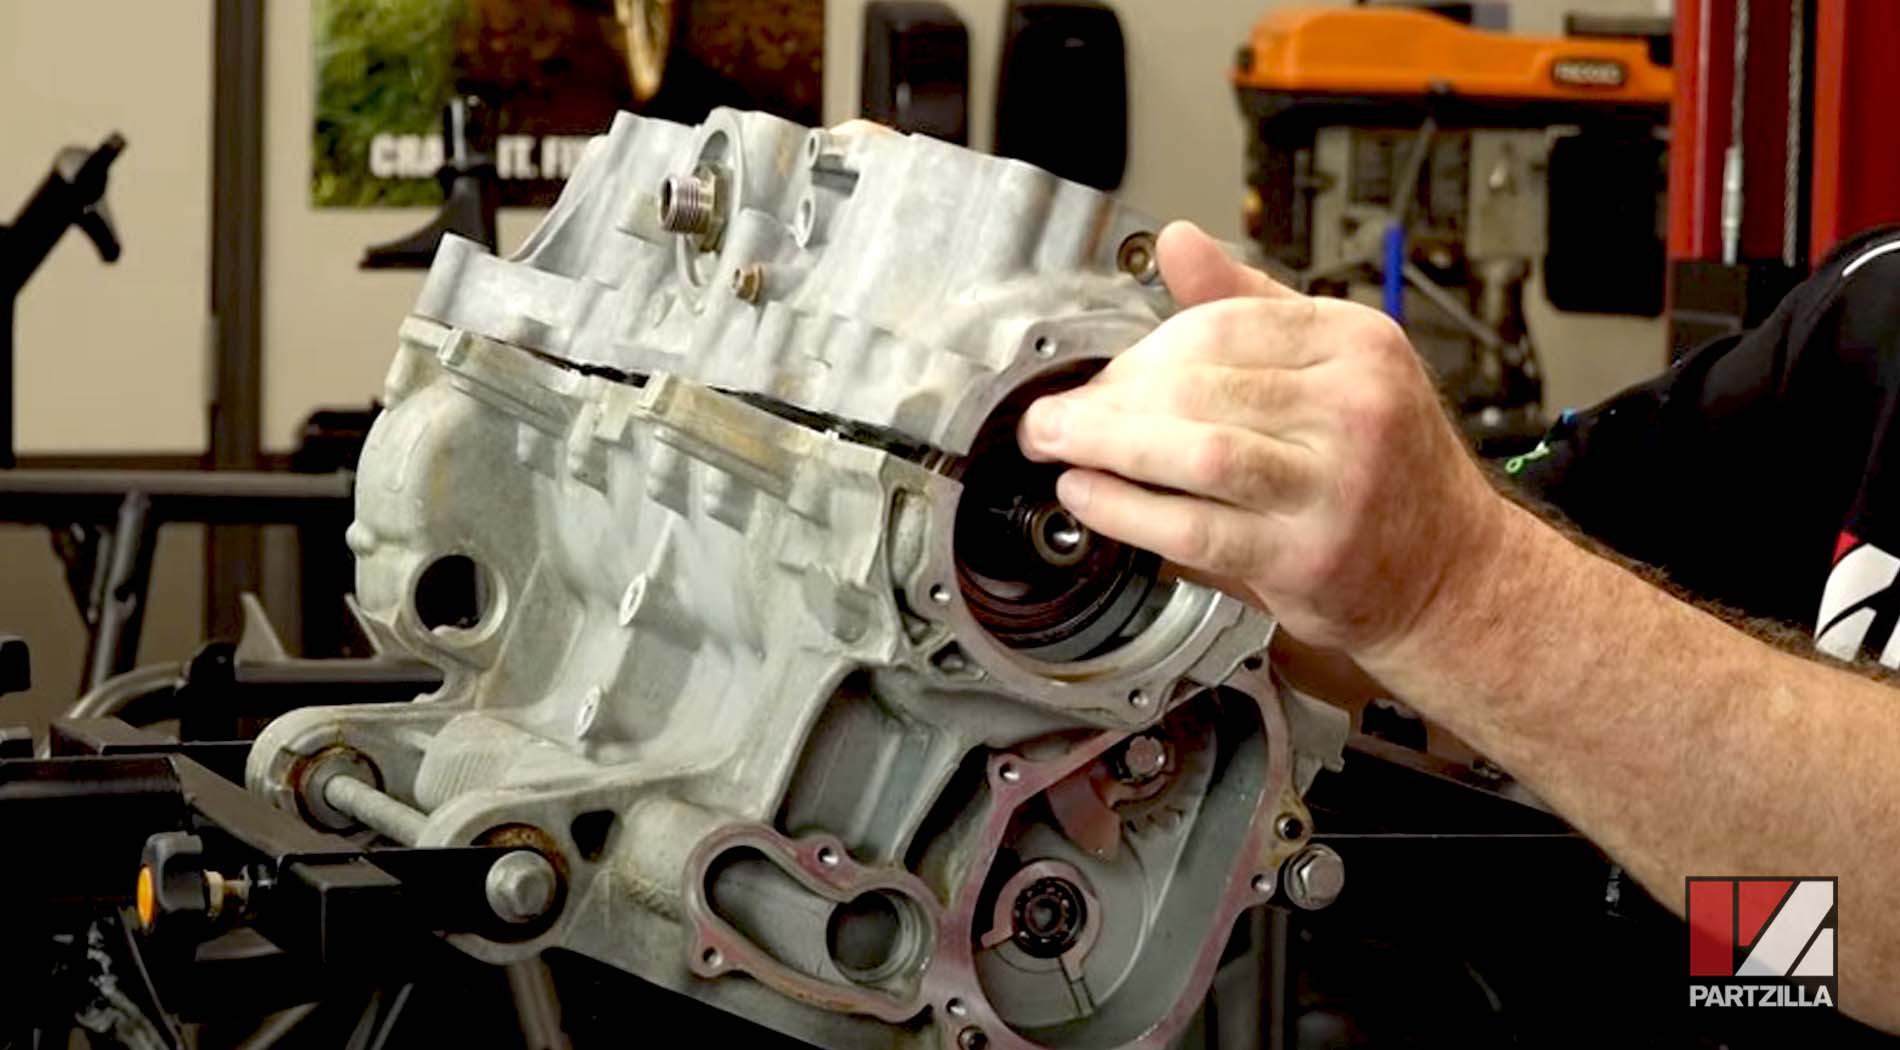
Step 6. Install the crankcase bearings into the lower half of the crankcase and tap them in gently with a soft-blow hammer.
Step 7. Install the left and right dowels onto the crankcase.
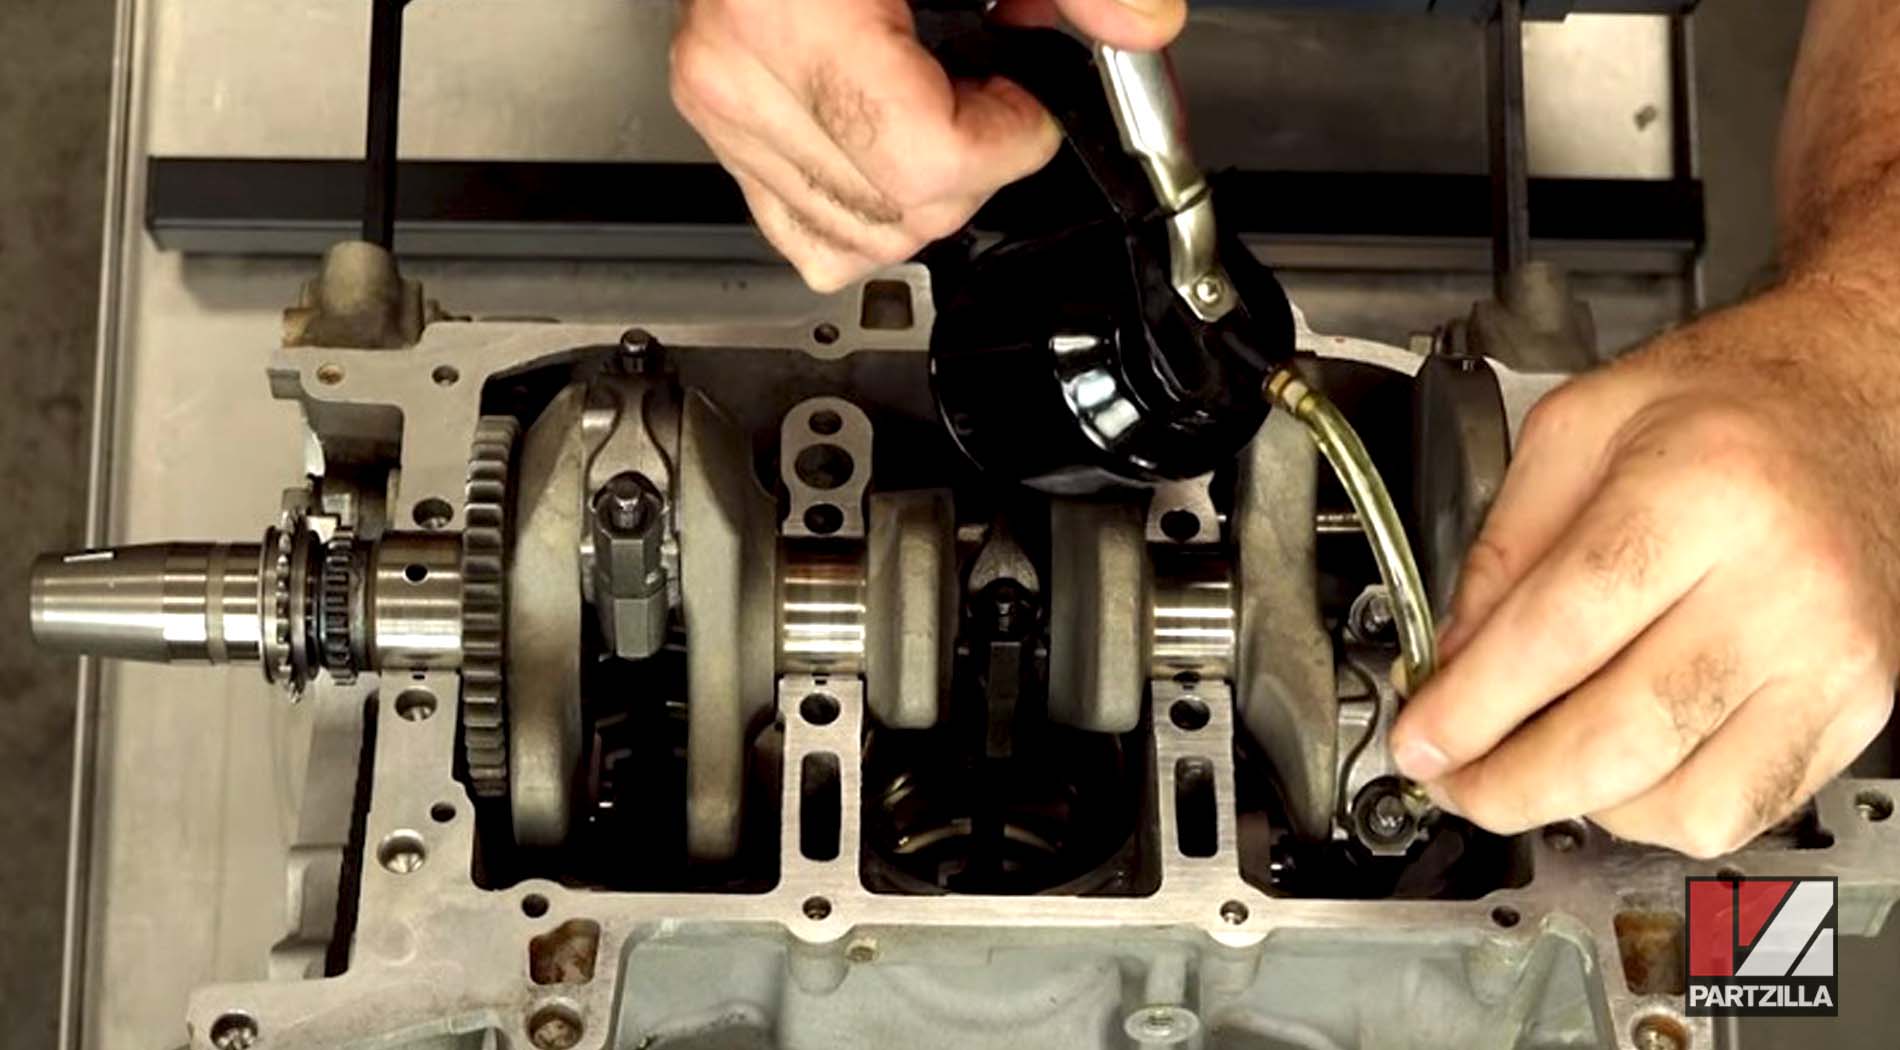
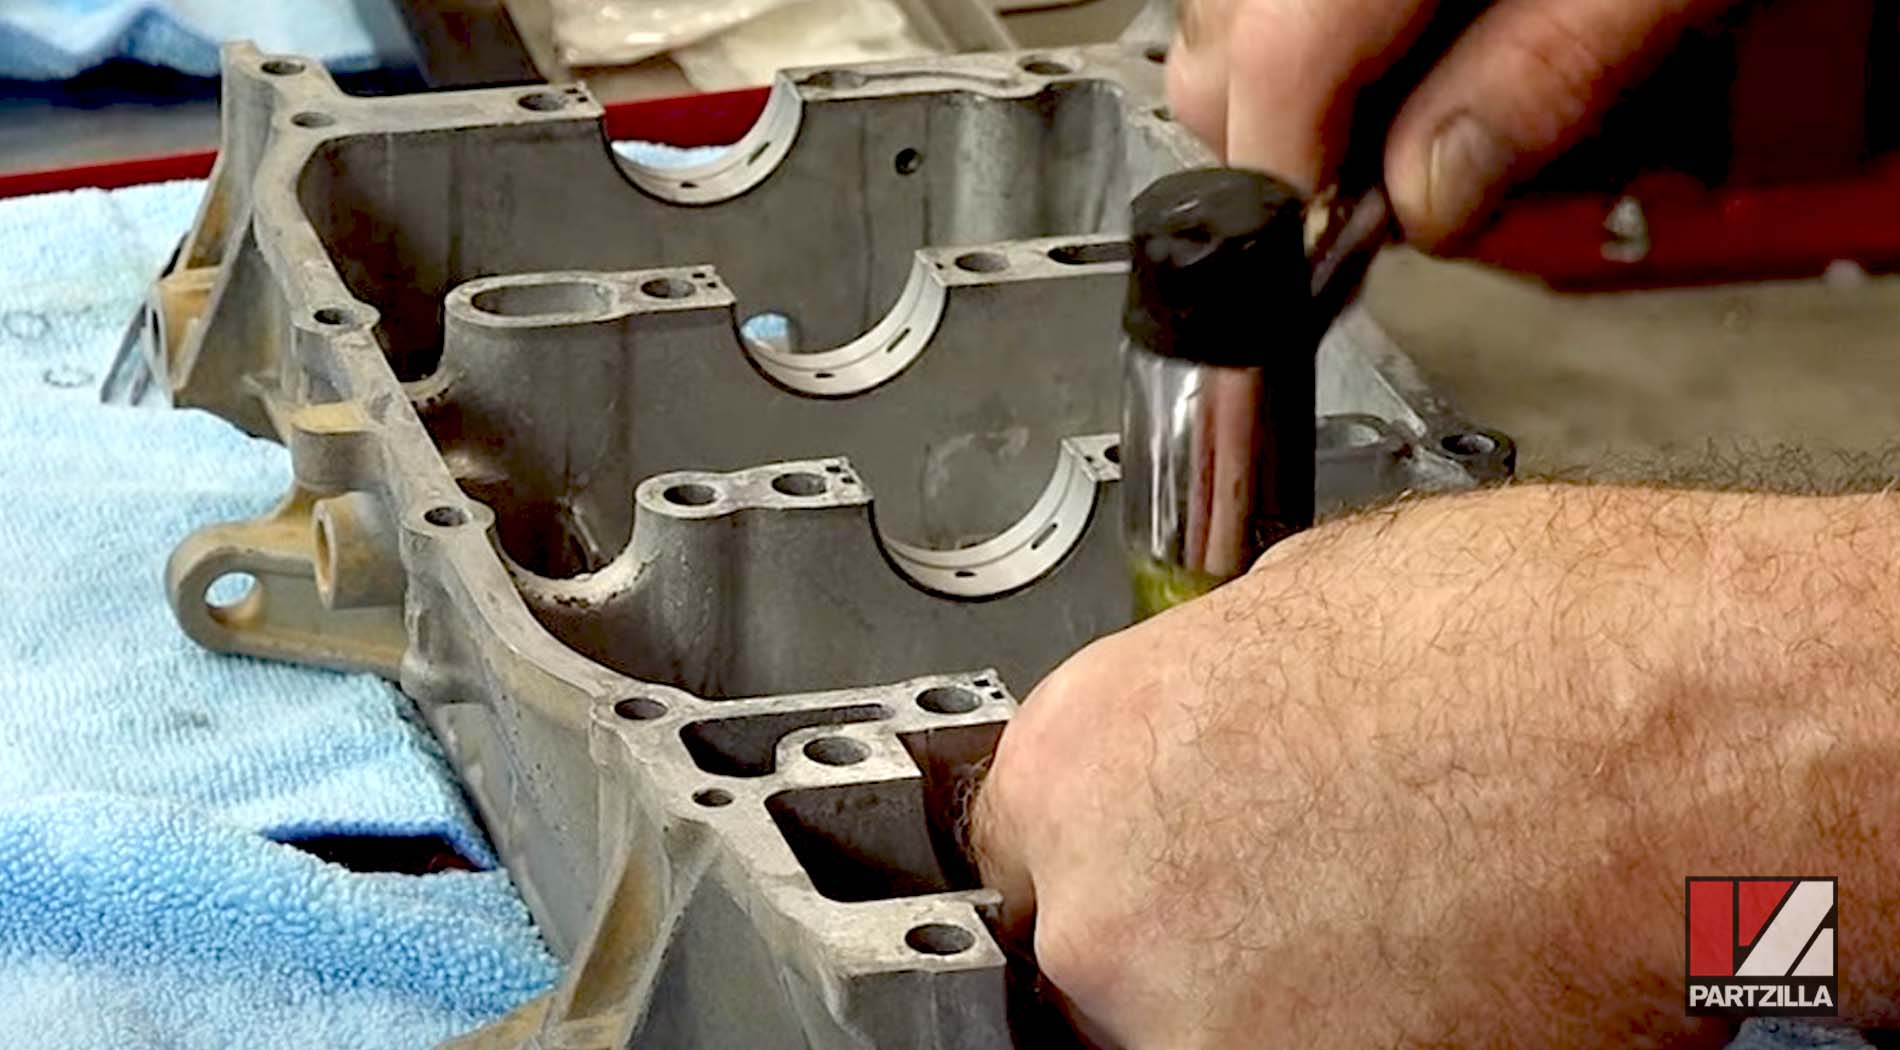
Step 8. Apply a bead of sealant around the mating surface of the crankcase. Don’t apply too much, just a thin strip all around, then apply a little assembly lube to the bearings.
NOTE: Yamaha's manual calls for Yamabond 1215, but we used Three Bond 1211 sealant instead. The only difference between them is that the 1215 is gray and the 1211 is white, but otherwise they’re the same.

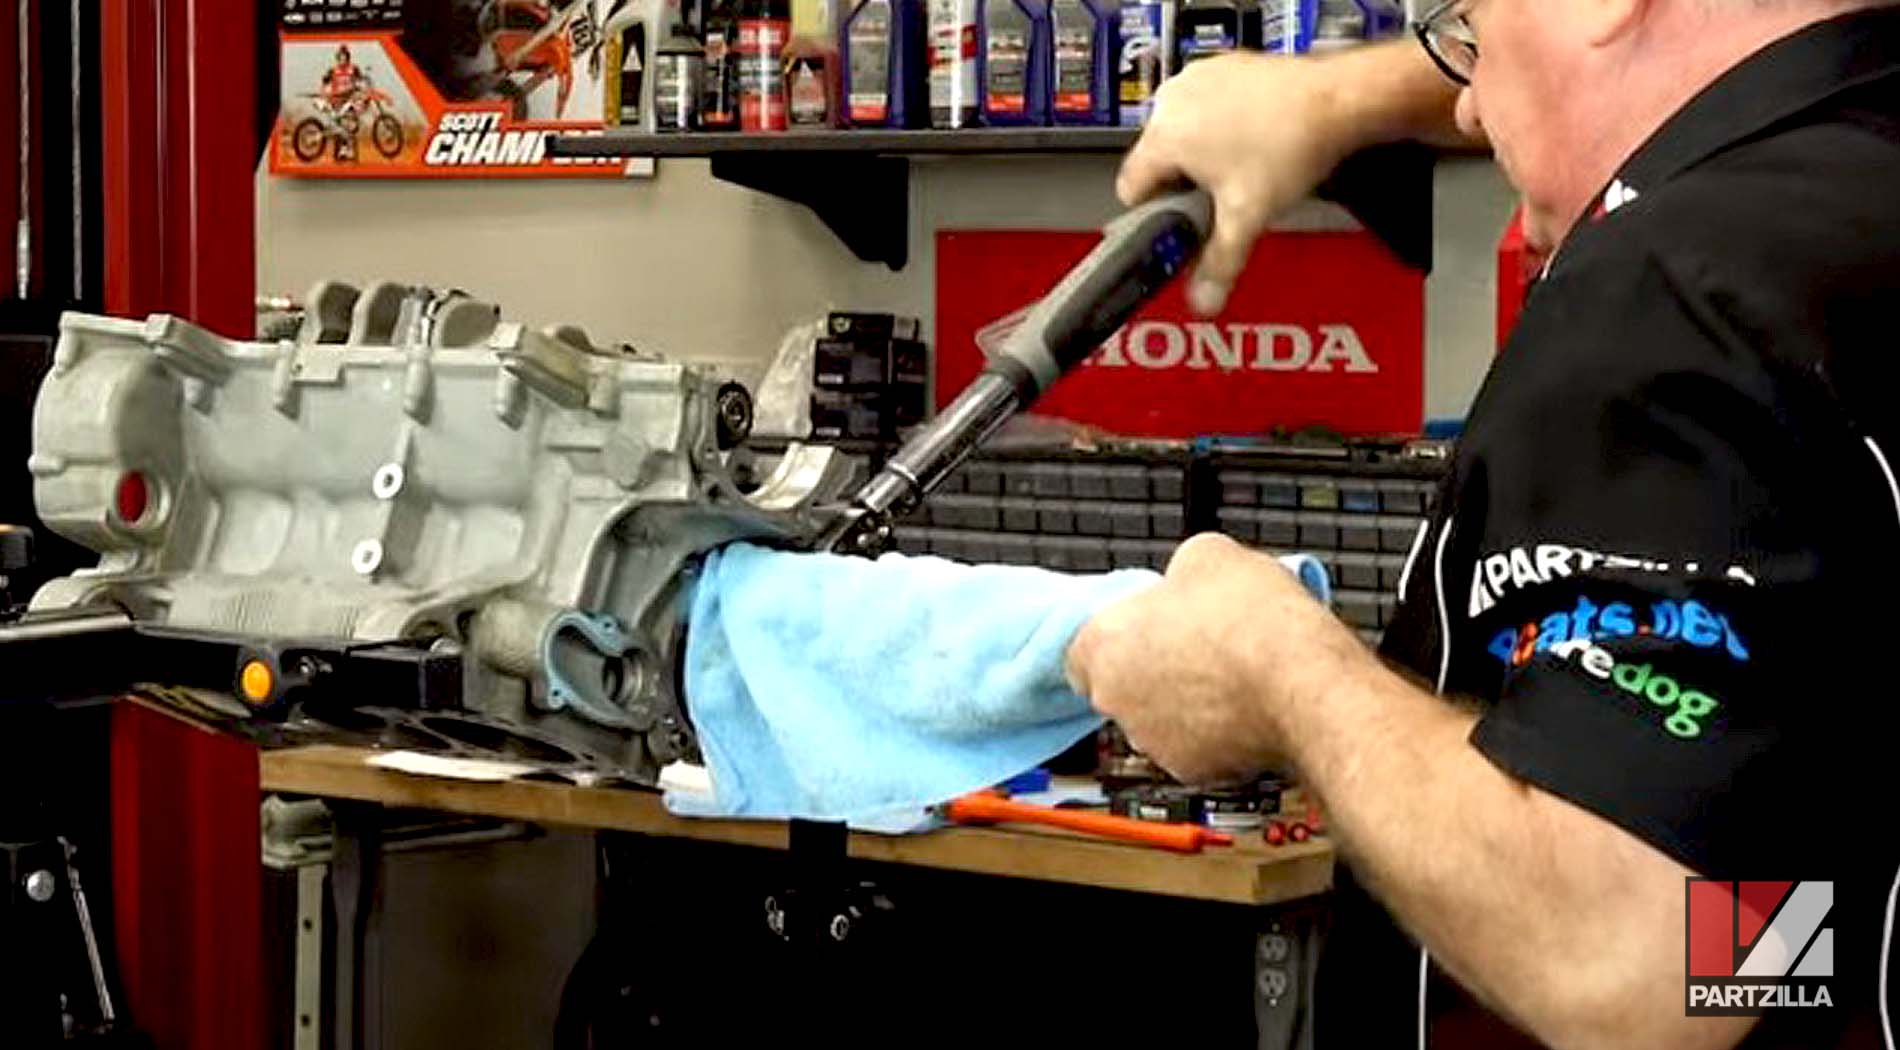
Step 9. Join the top half of the crankcase with the bottom half to close it up, then tap it gently all around with a dead blow hammer to get it seated properly.
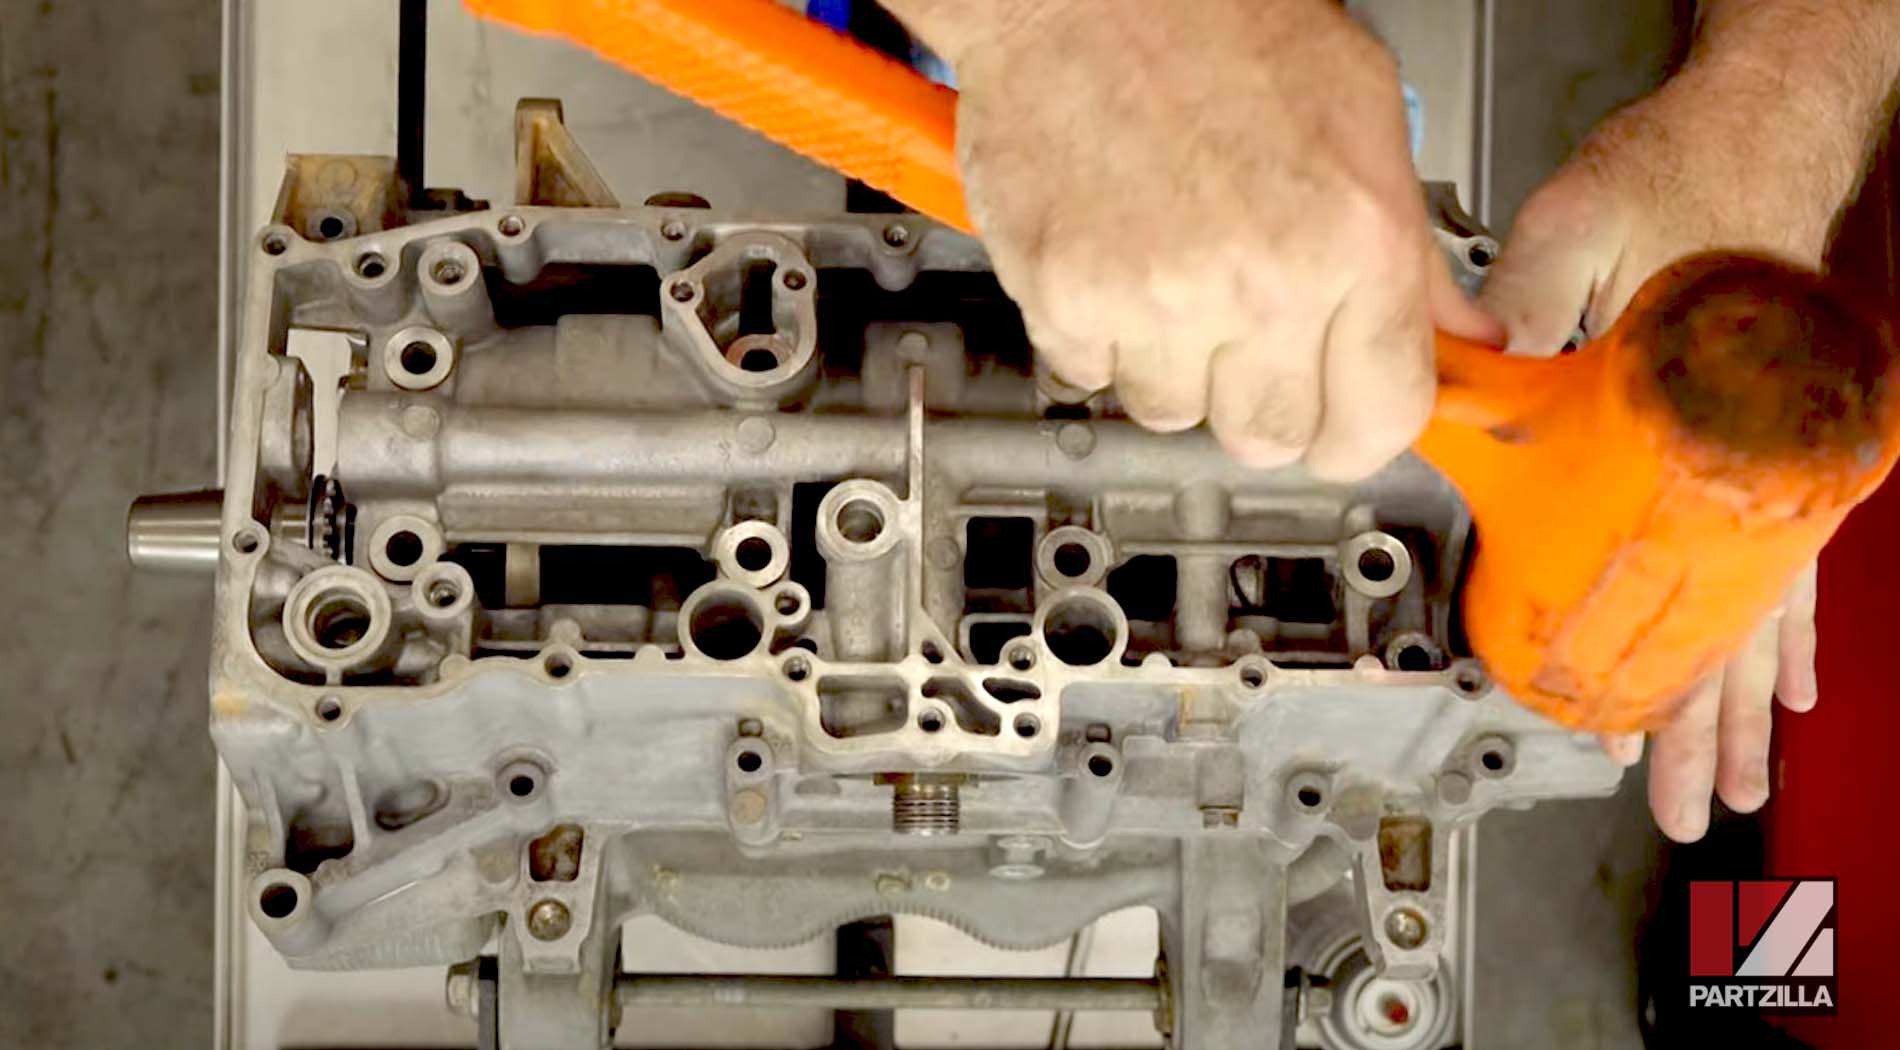
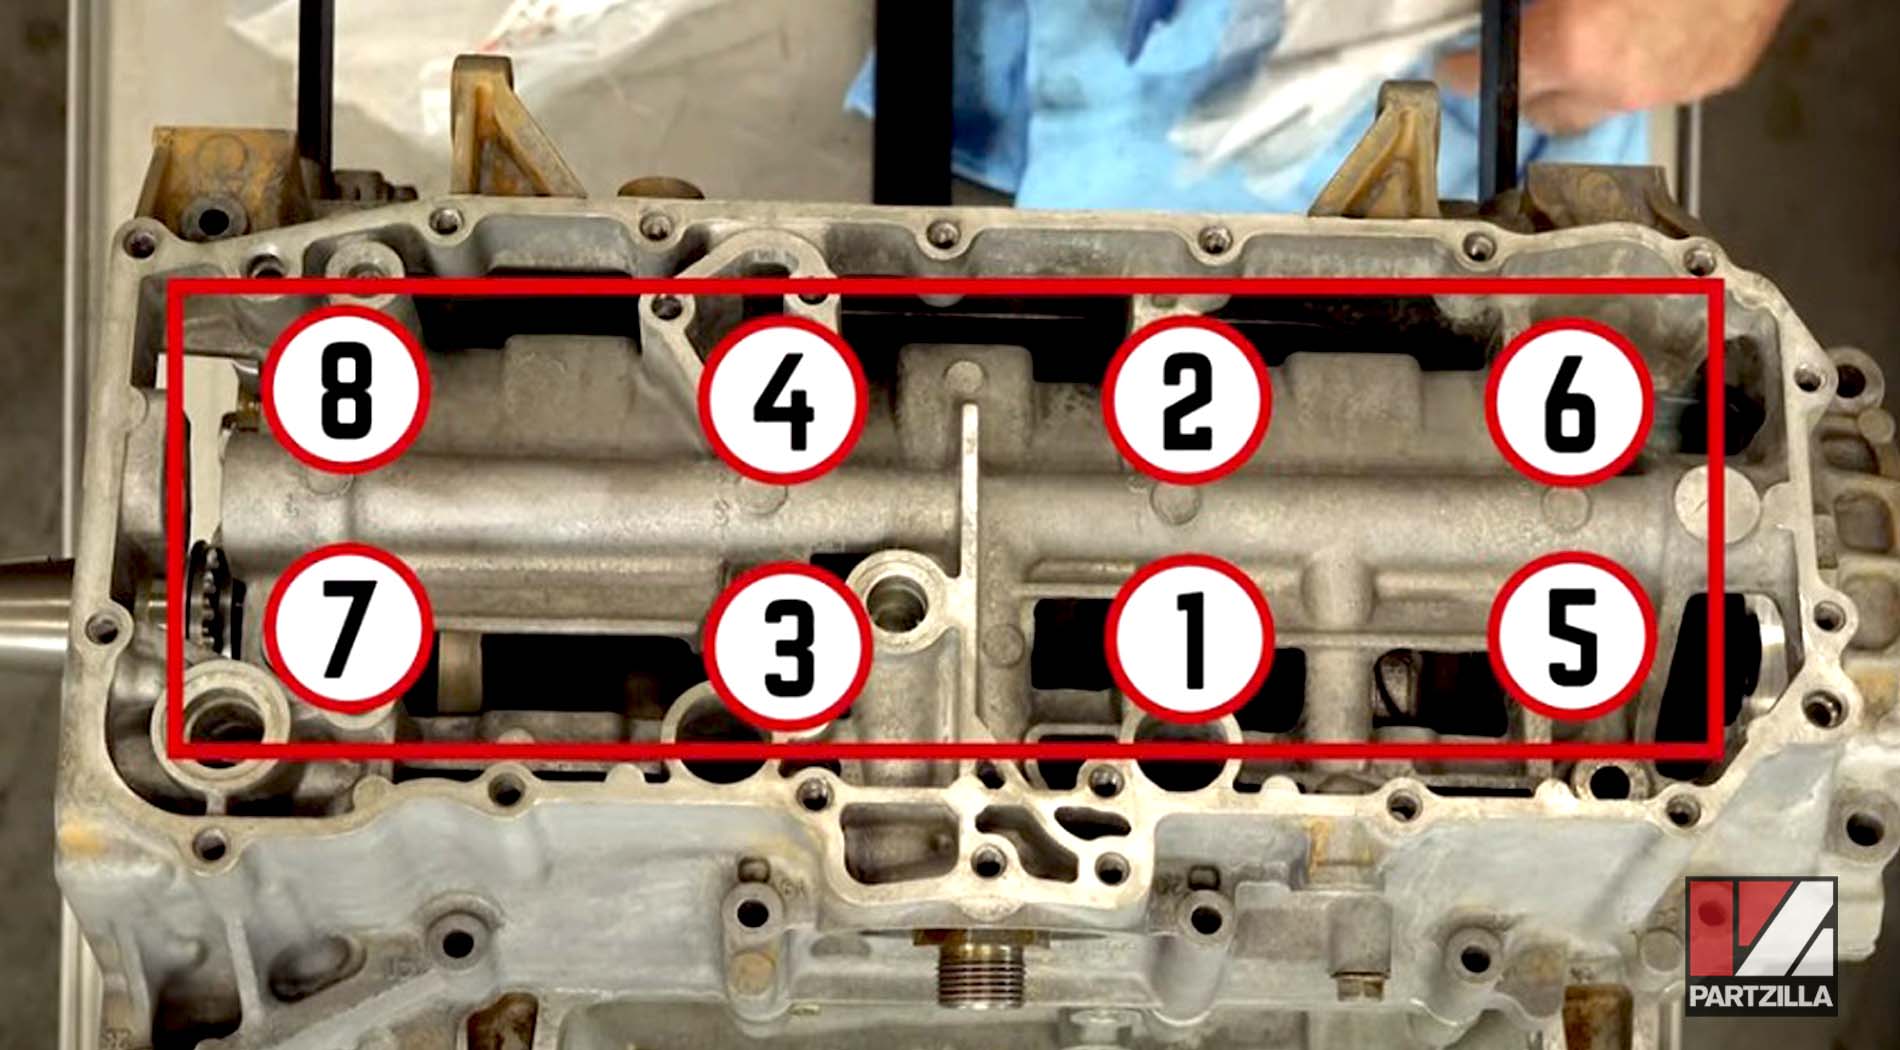
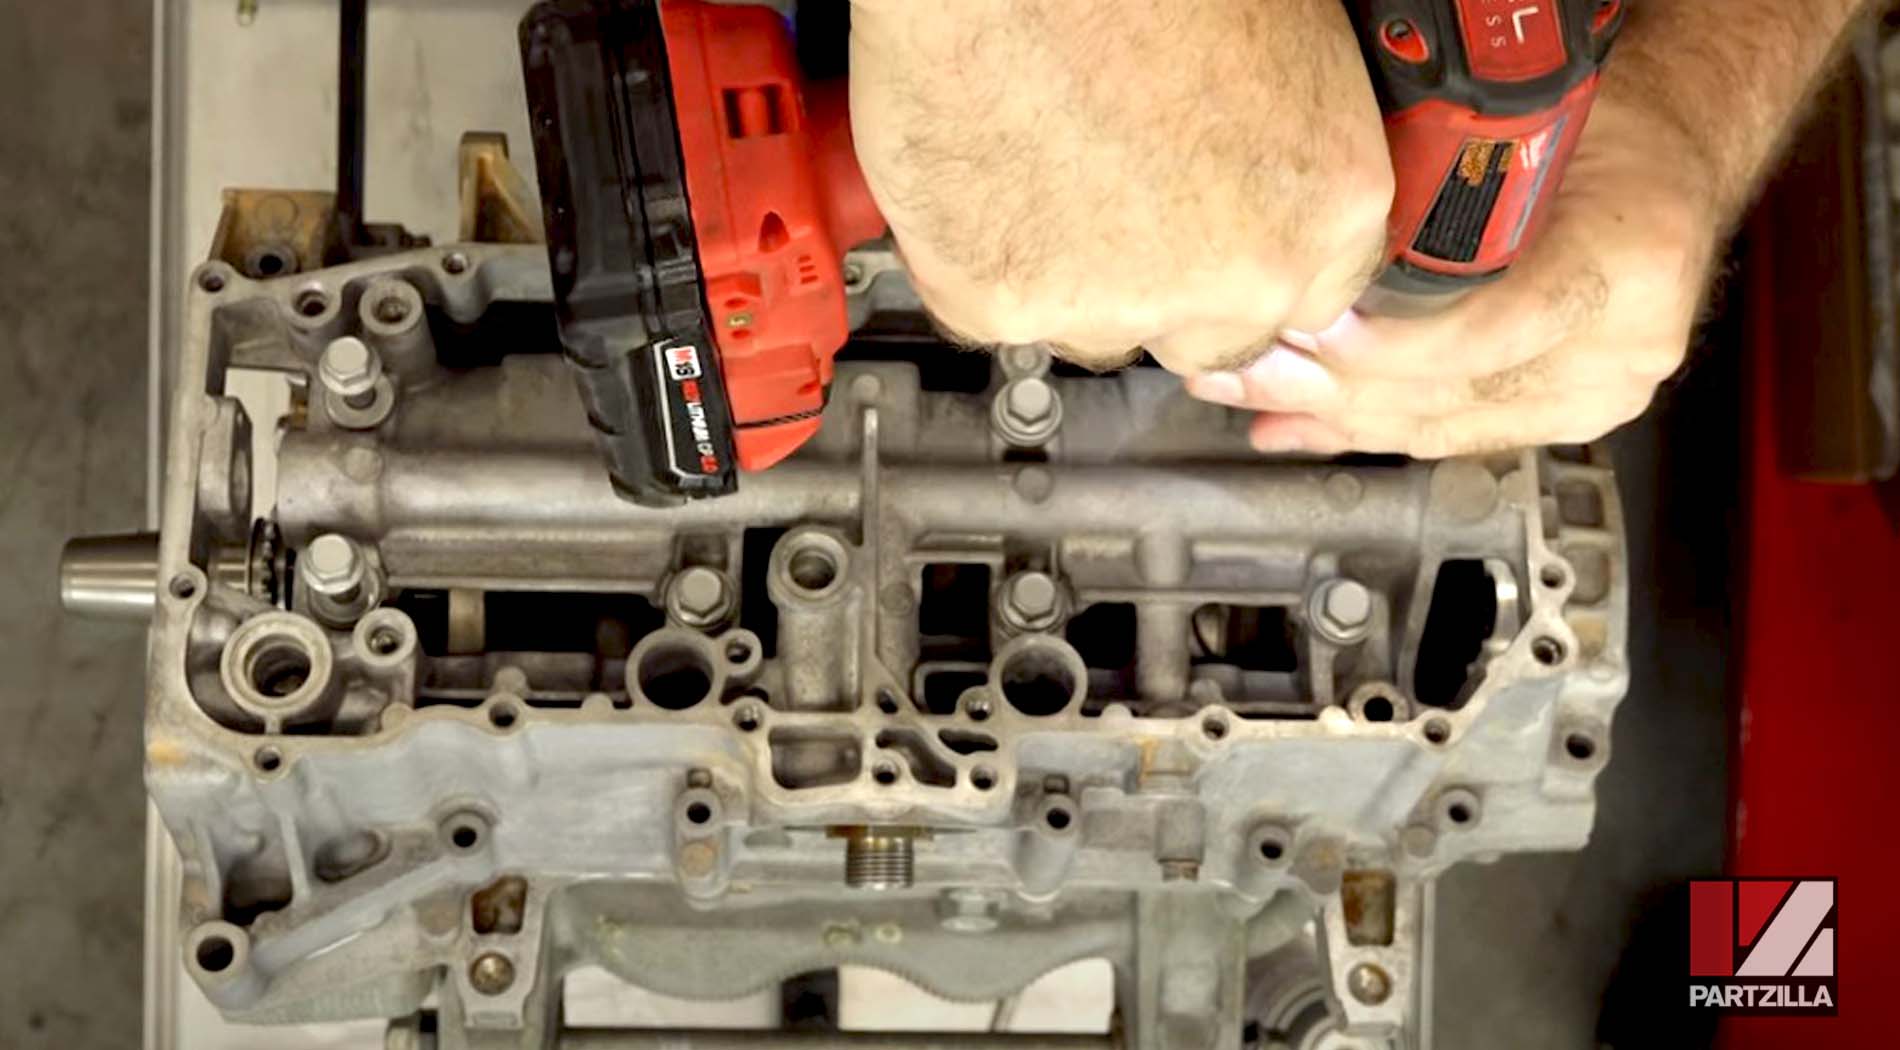
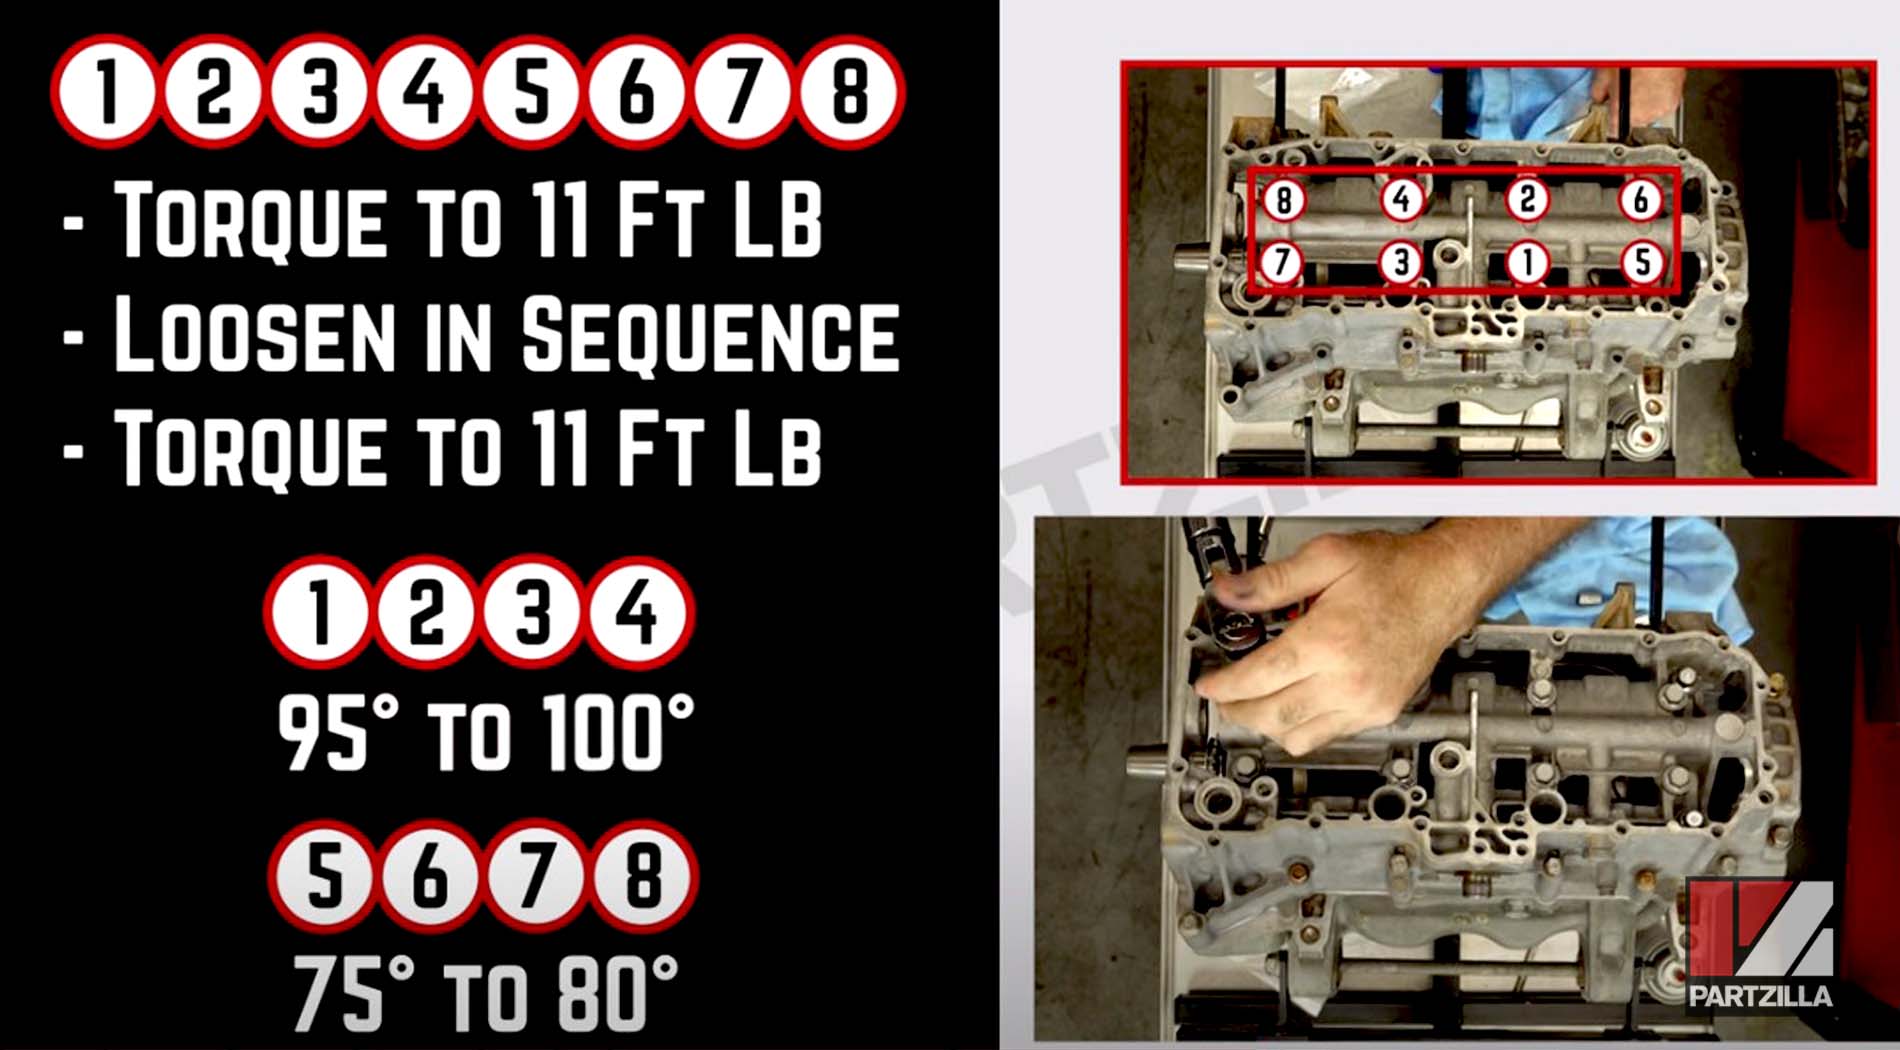
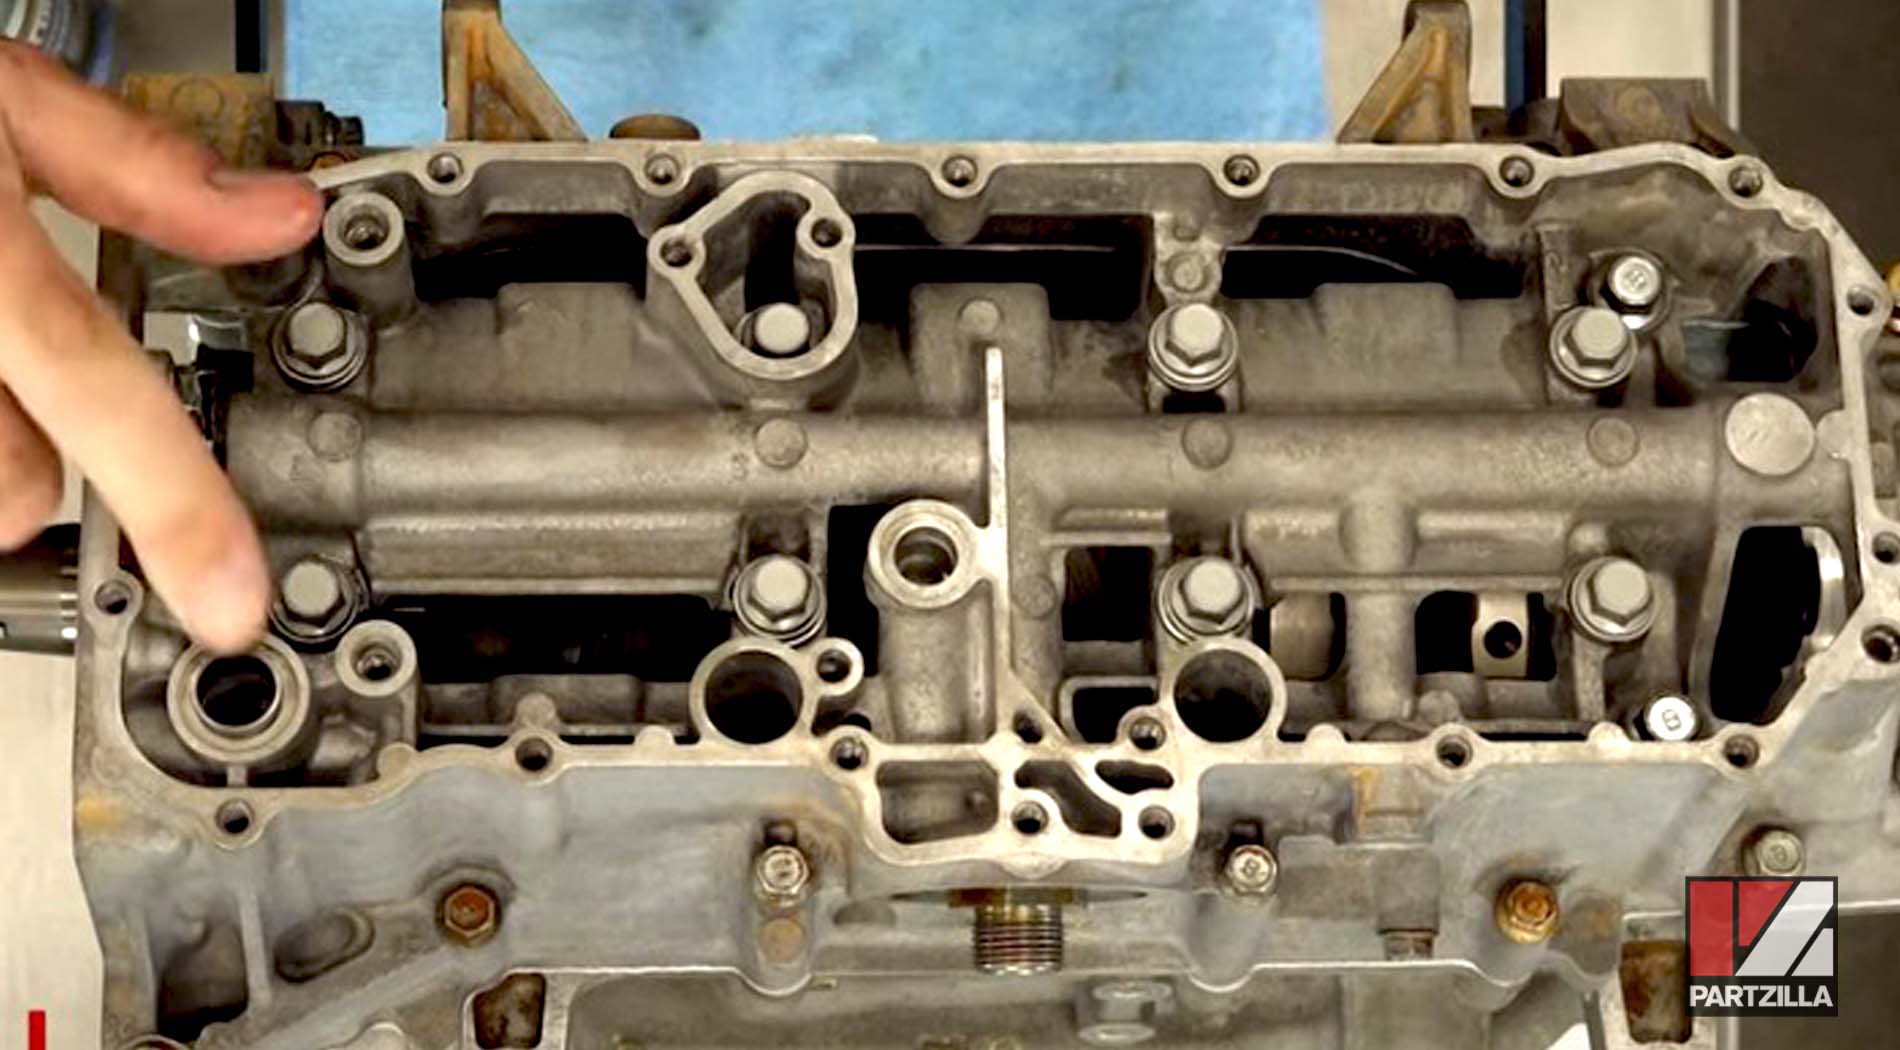
Step 10. Oil the threads and the surface area of crankcase bolts 1-8 (see diagram below) where the washers come in contact with the head of the bolt. Next, install the bolts and hand-tighten each one a couple of turns, and then use an impact wrench just to seat them lightly without tightening them.
Step 11. Add oil only to the threads of the new silver crankcase bolts, and then add Yamabond sealant only to the threads of the black bolts.

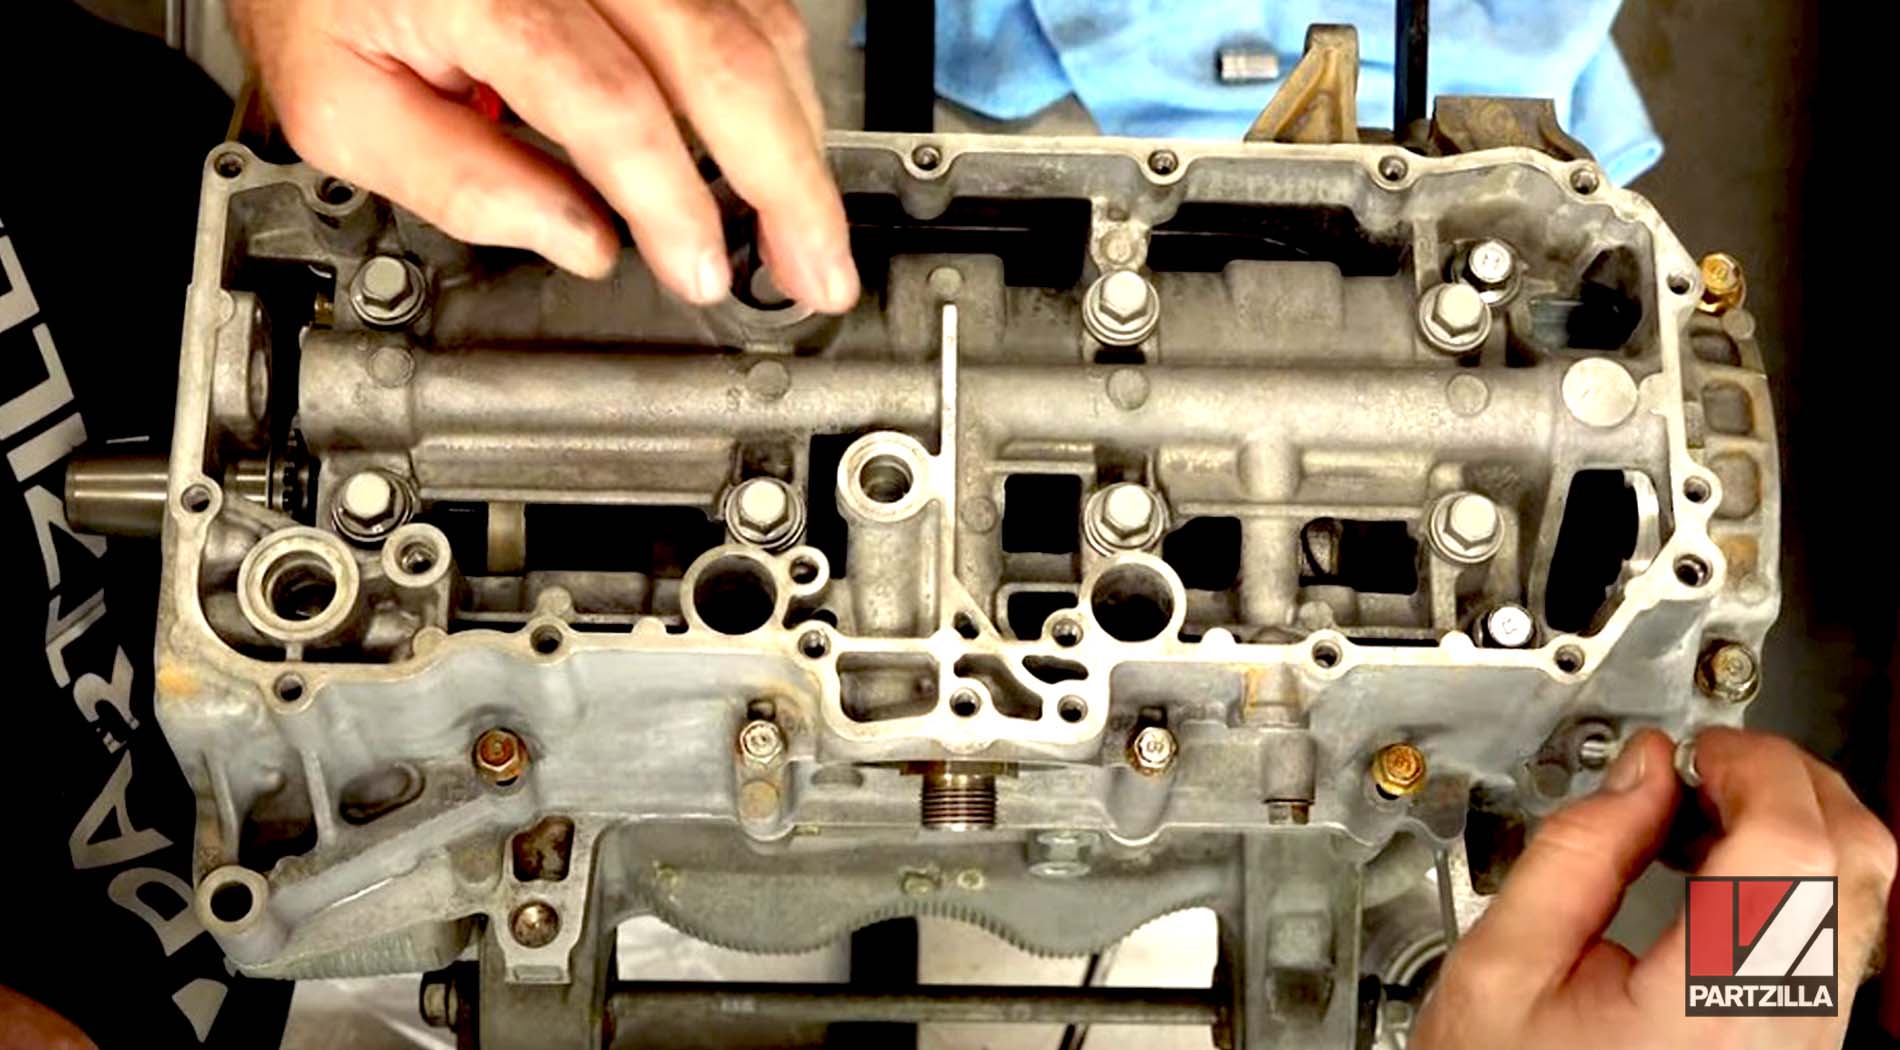
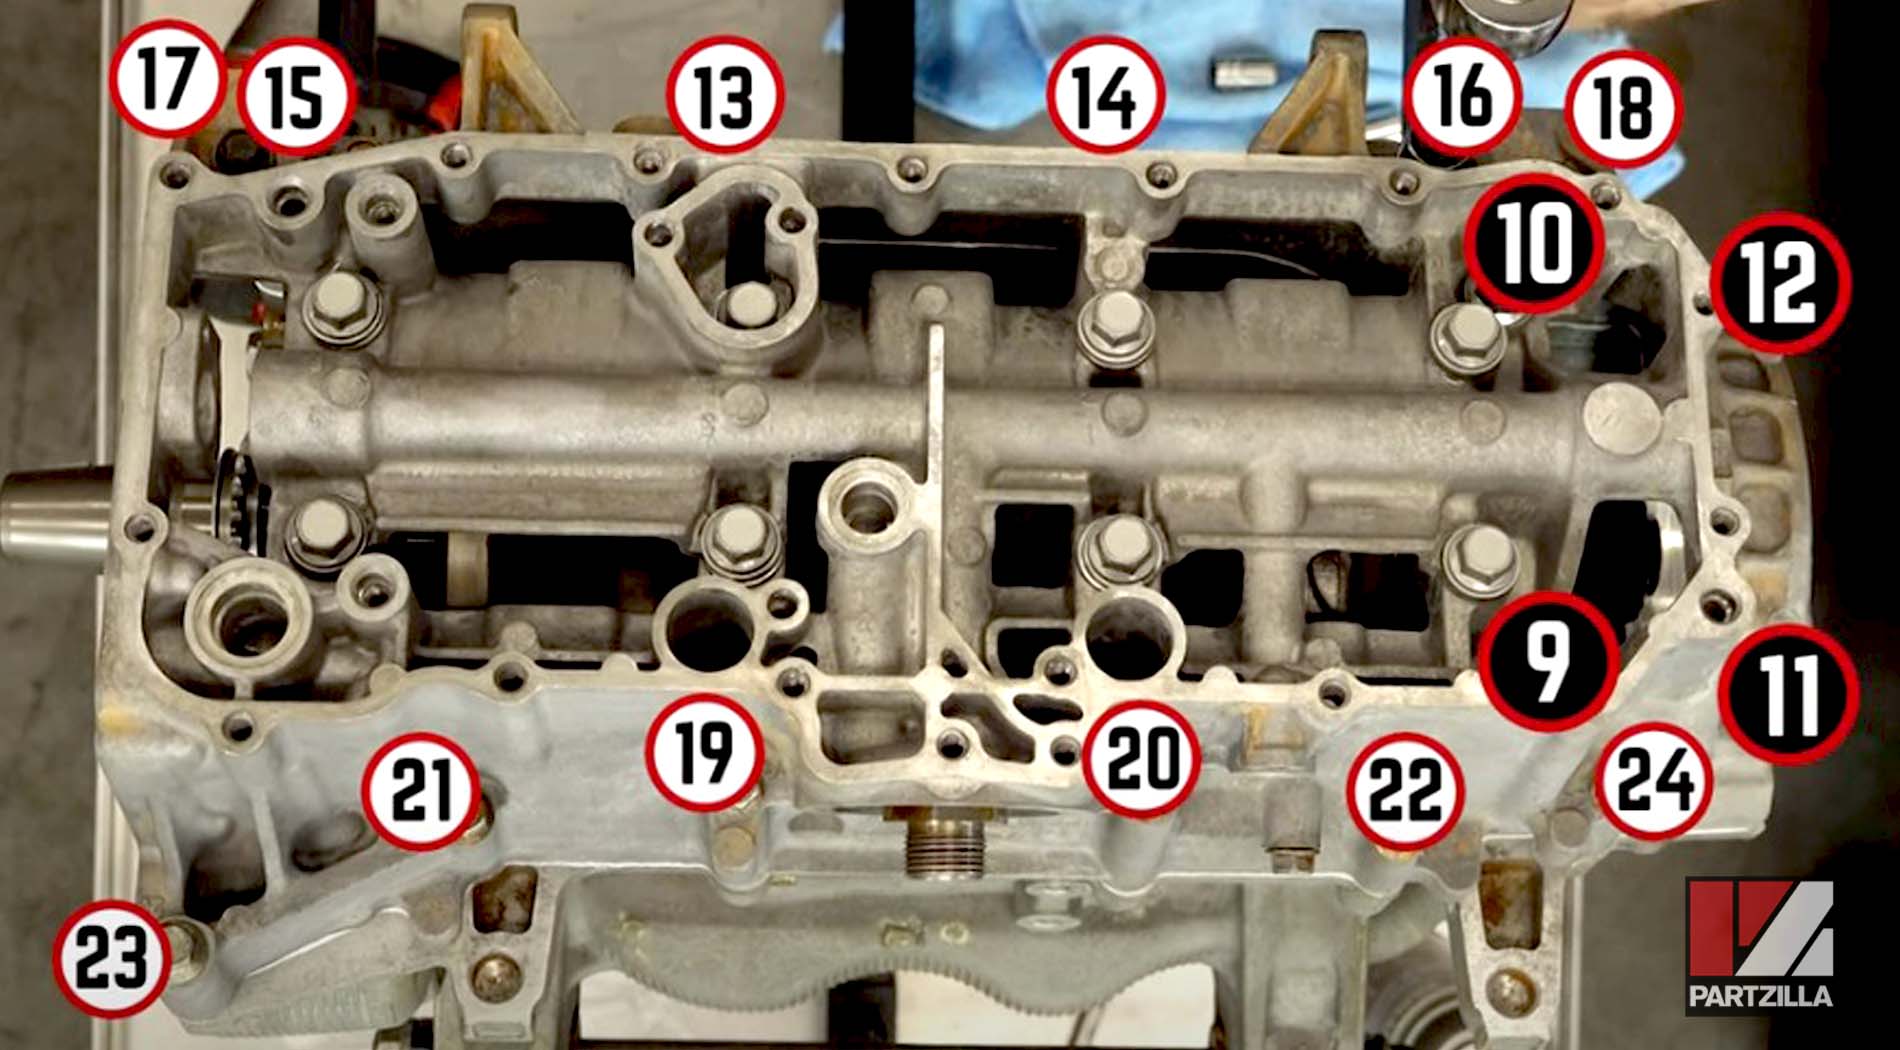
Step 12. Install crankcase bolts 9-24, then torque all of the crankcase bolts in sequence as follows:
Foot-pounds
- Bolts 1-8: Torque to 11 foot-pounds, then go back and loosen them, and then torque them back to 11 foot-pounds again one at a time.
Degrees
- Bolts 1-4: Torque them between 95 and 100 degrees.
- Bolts 5-8: Torque them between 75 and 80 degrees.
Foot-pounds
- Bolts 9-12: Torque to 17 foot-pounds
- Bolts 13-24: Torque to 8.7 foot-pounds
Watch the clip below to see the crankshaft installation segment of our Yamaha YXZ1000R bottom end rebuild video.
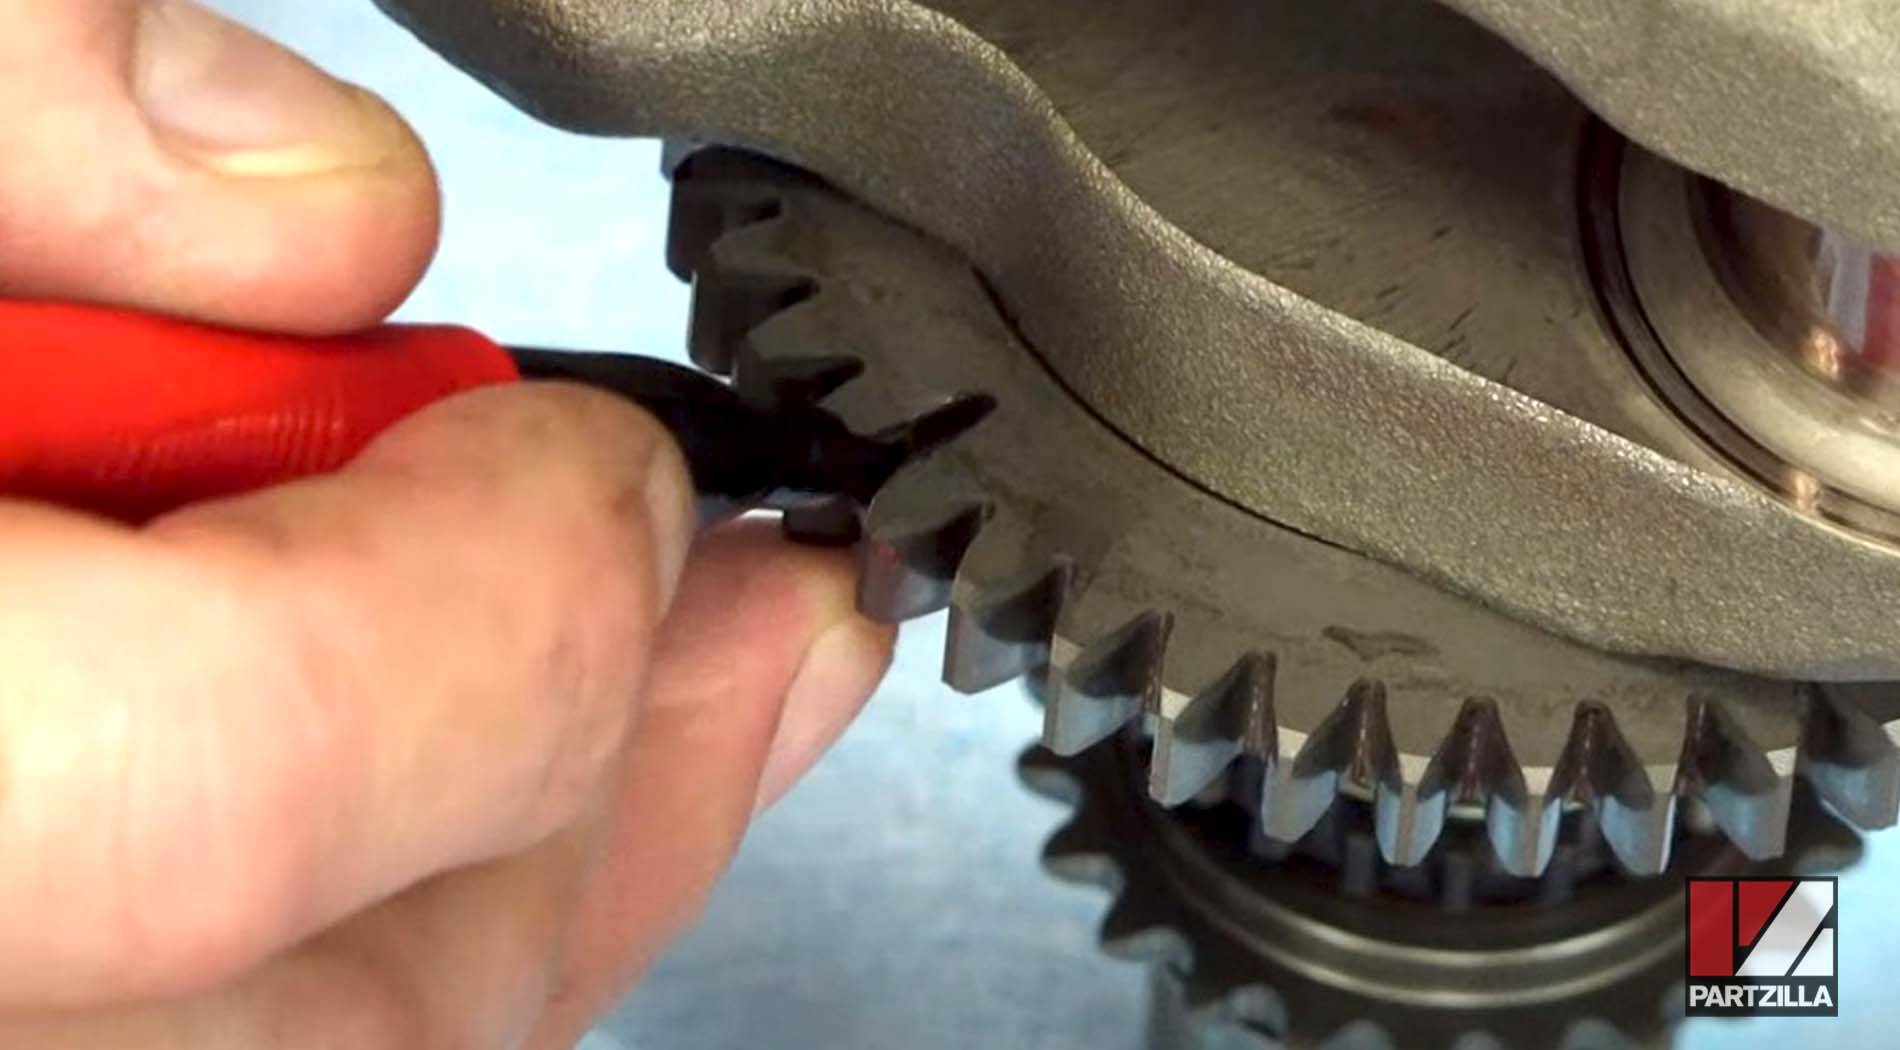
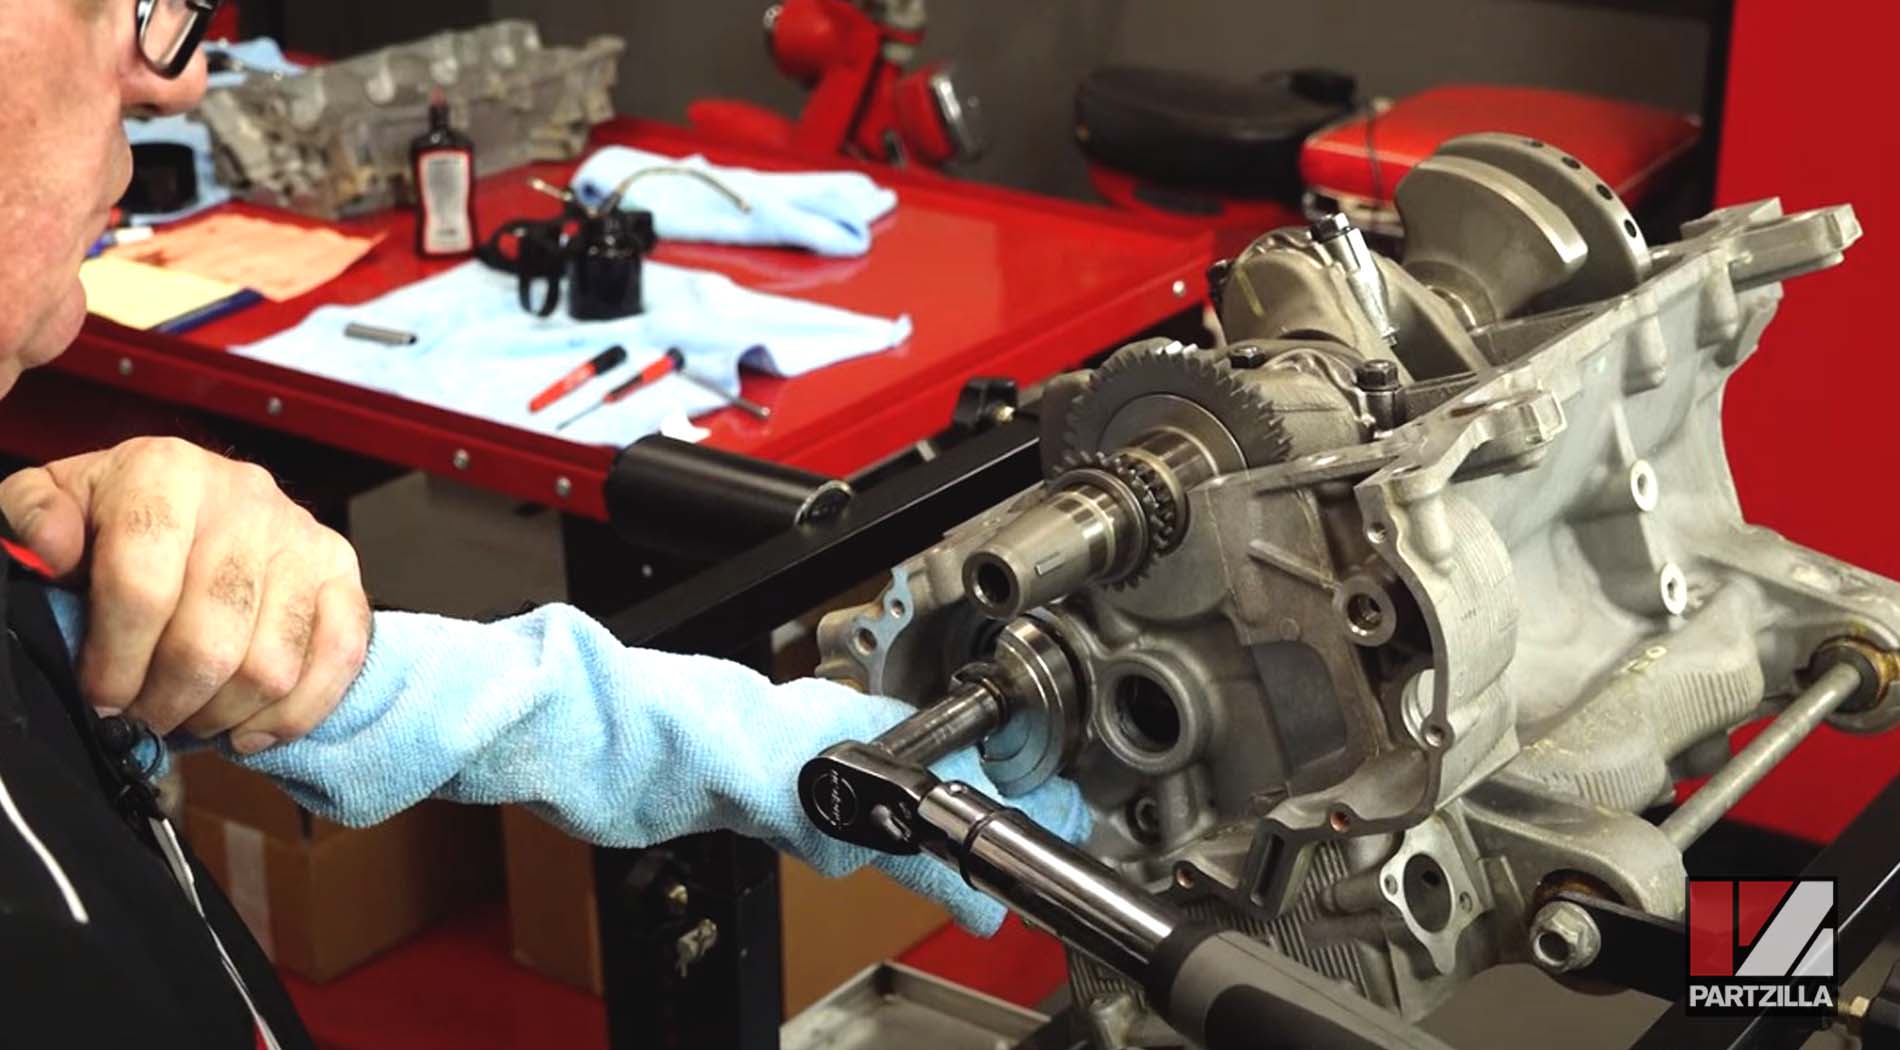
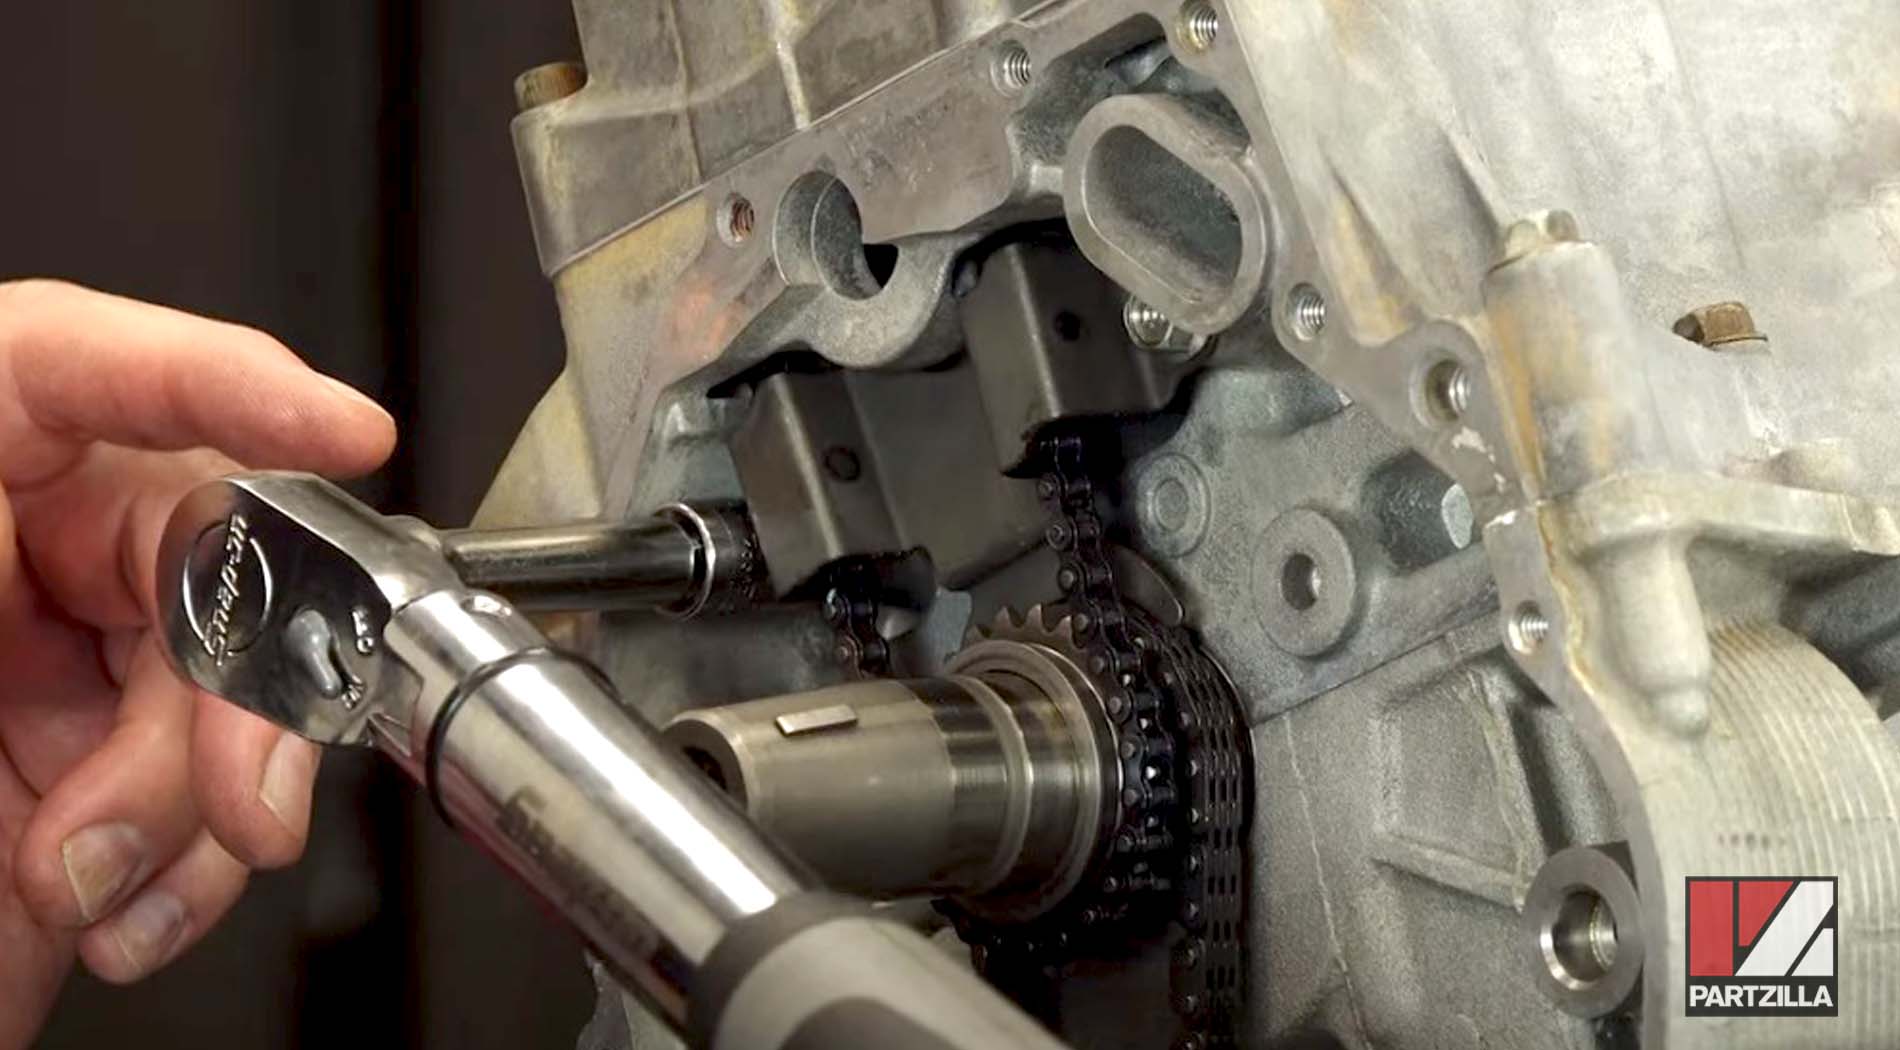
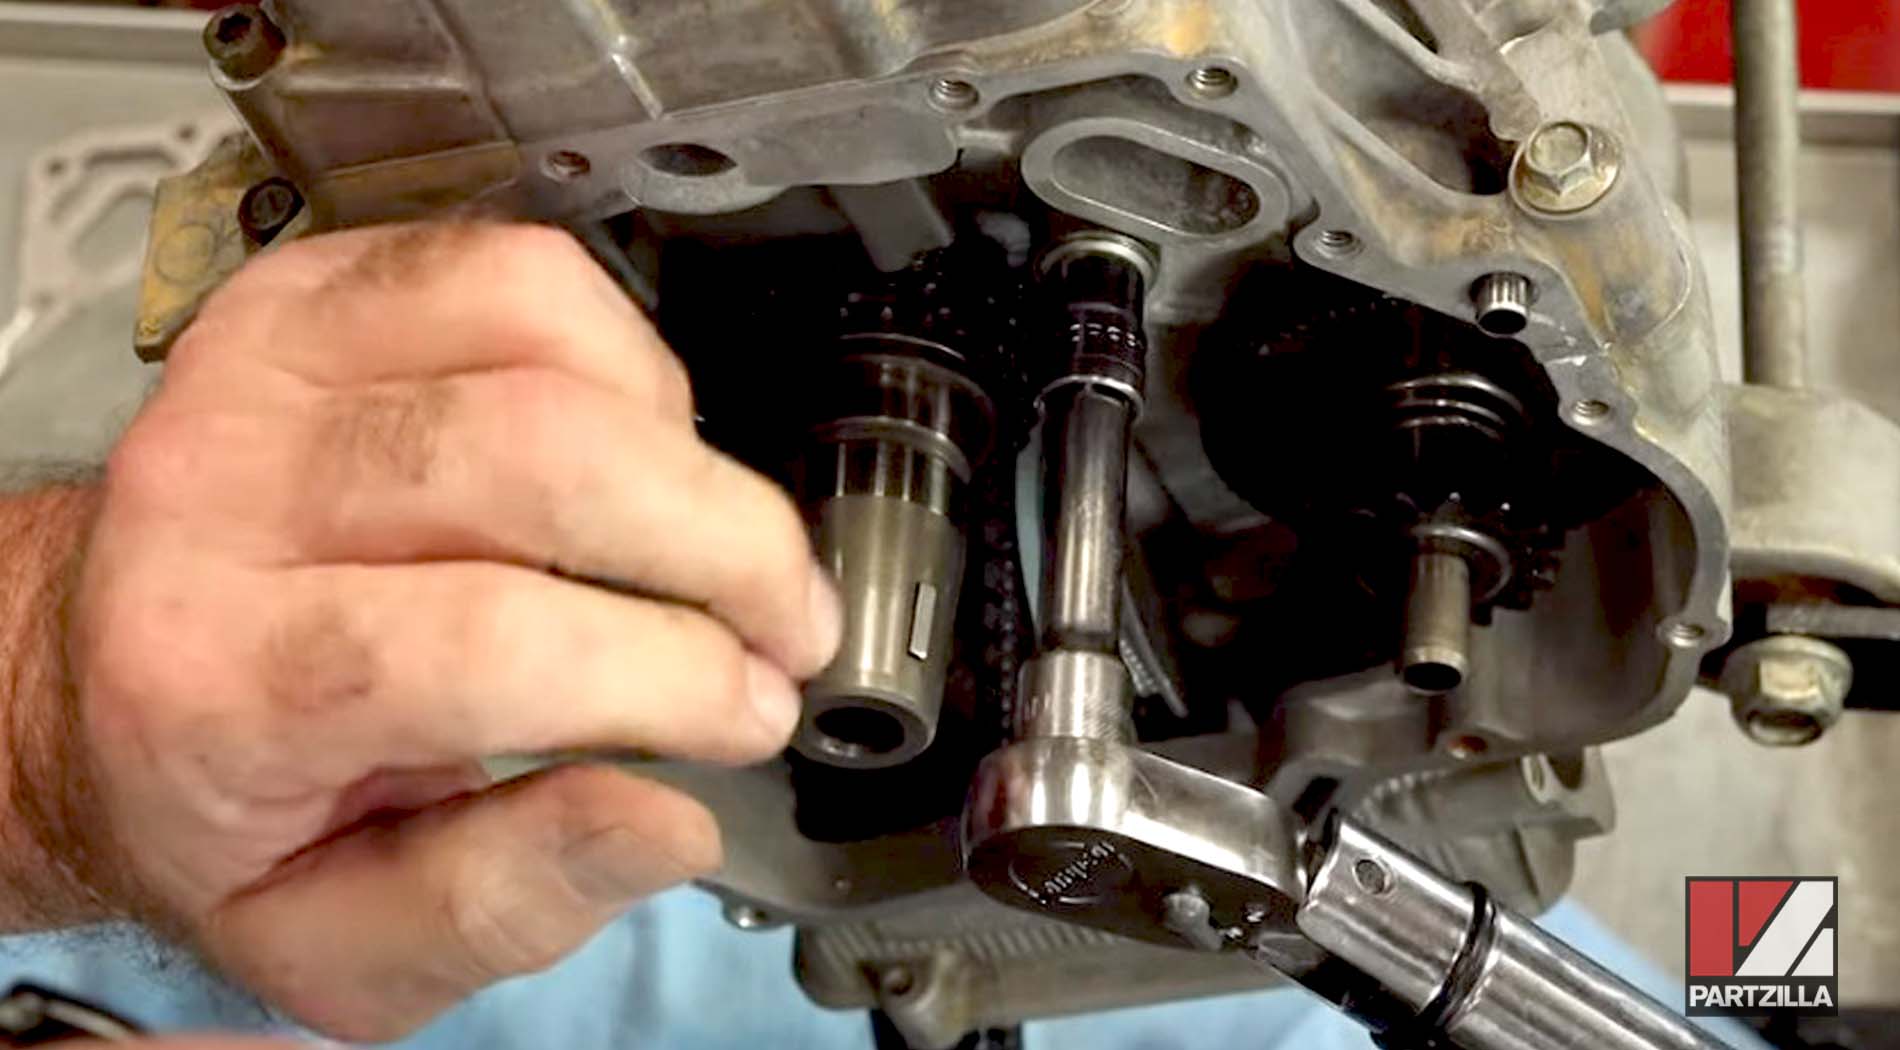
Step 13. Install the cam chain.
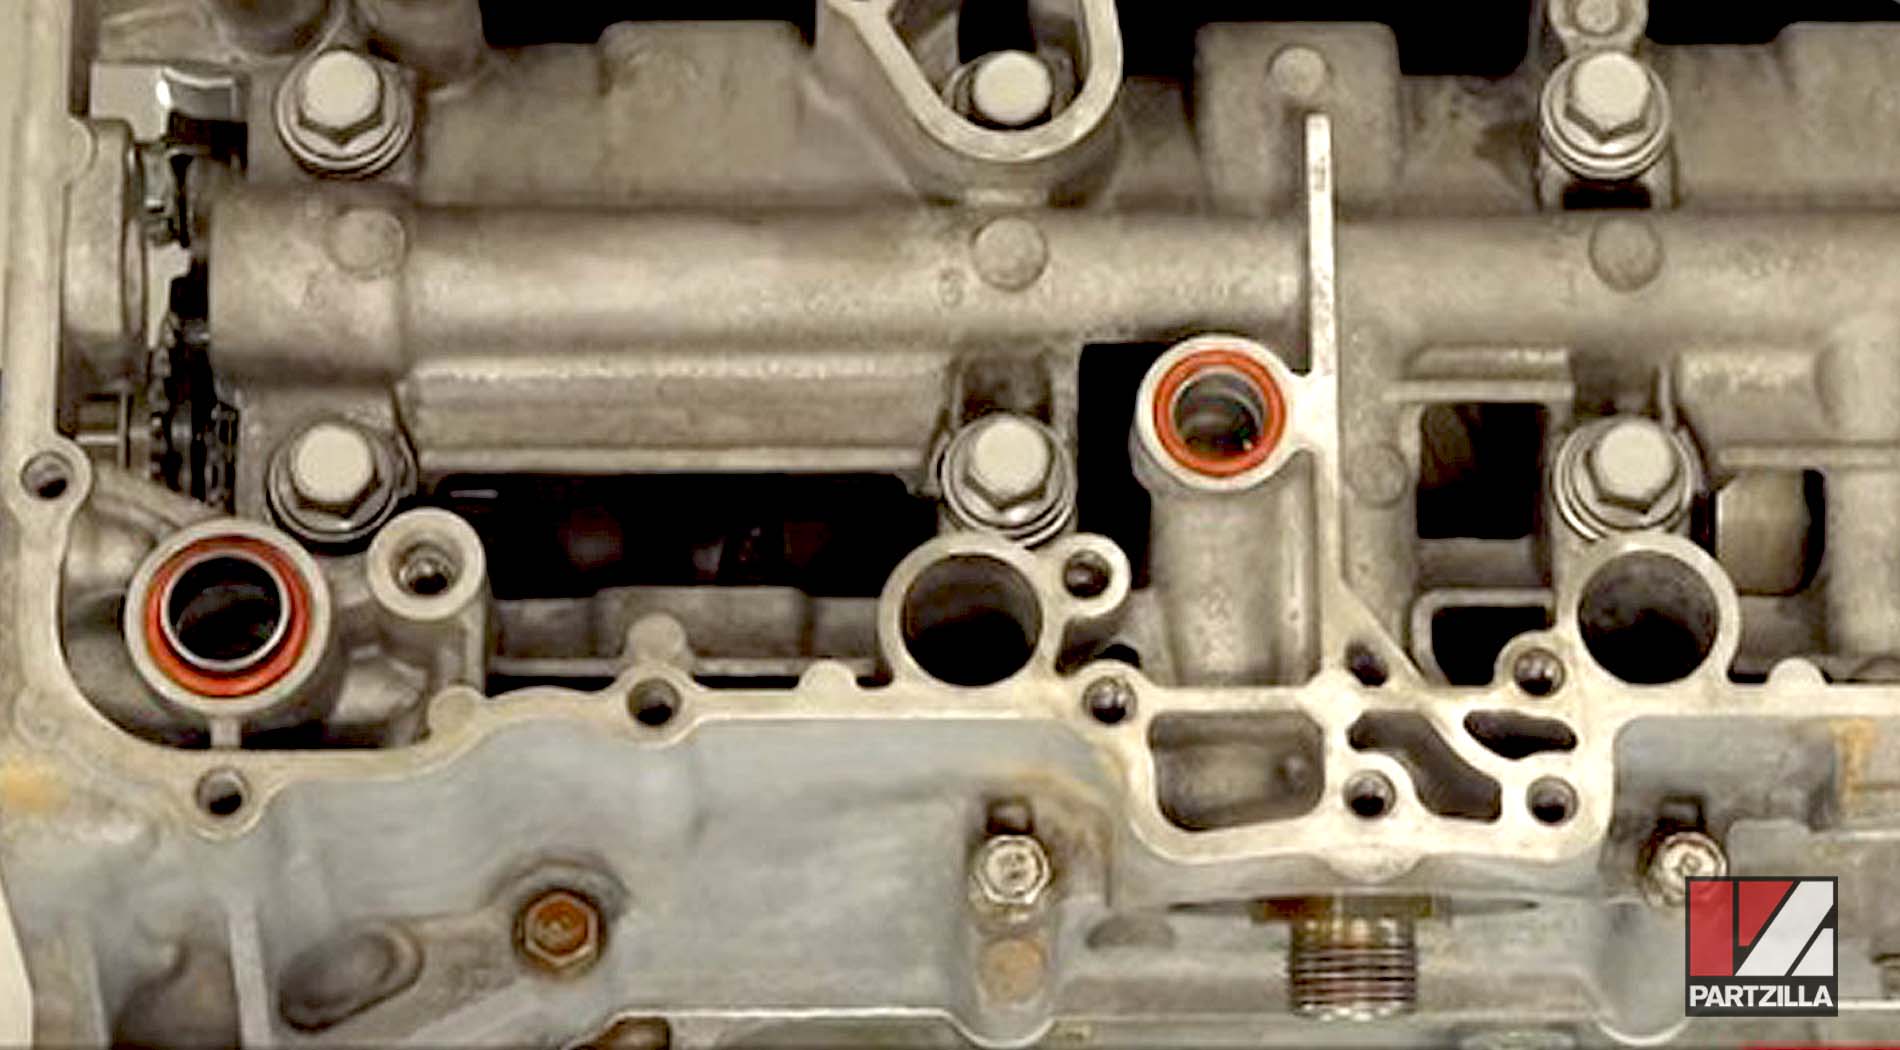
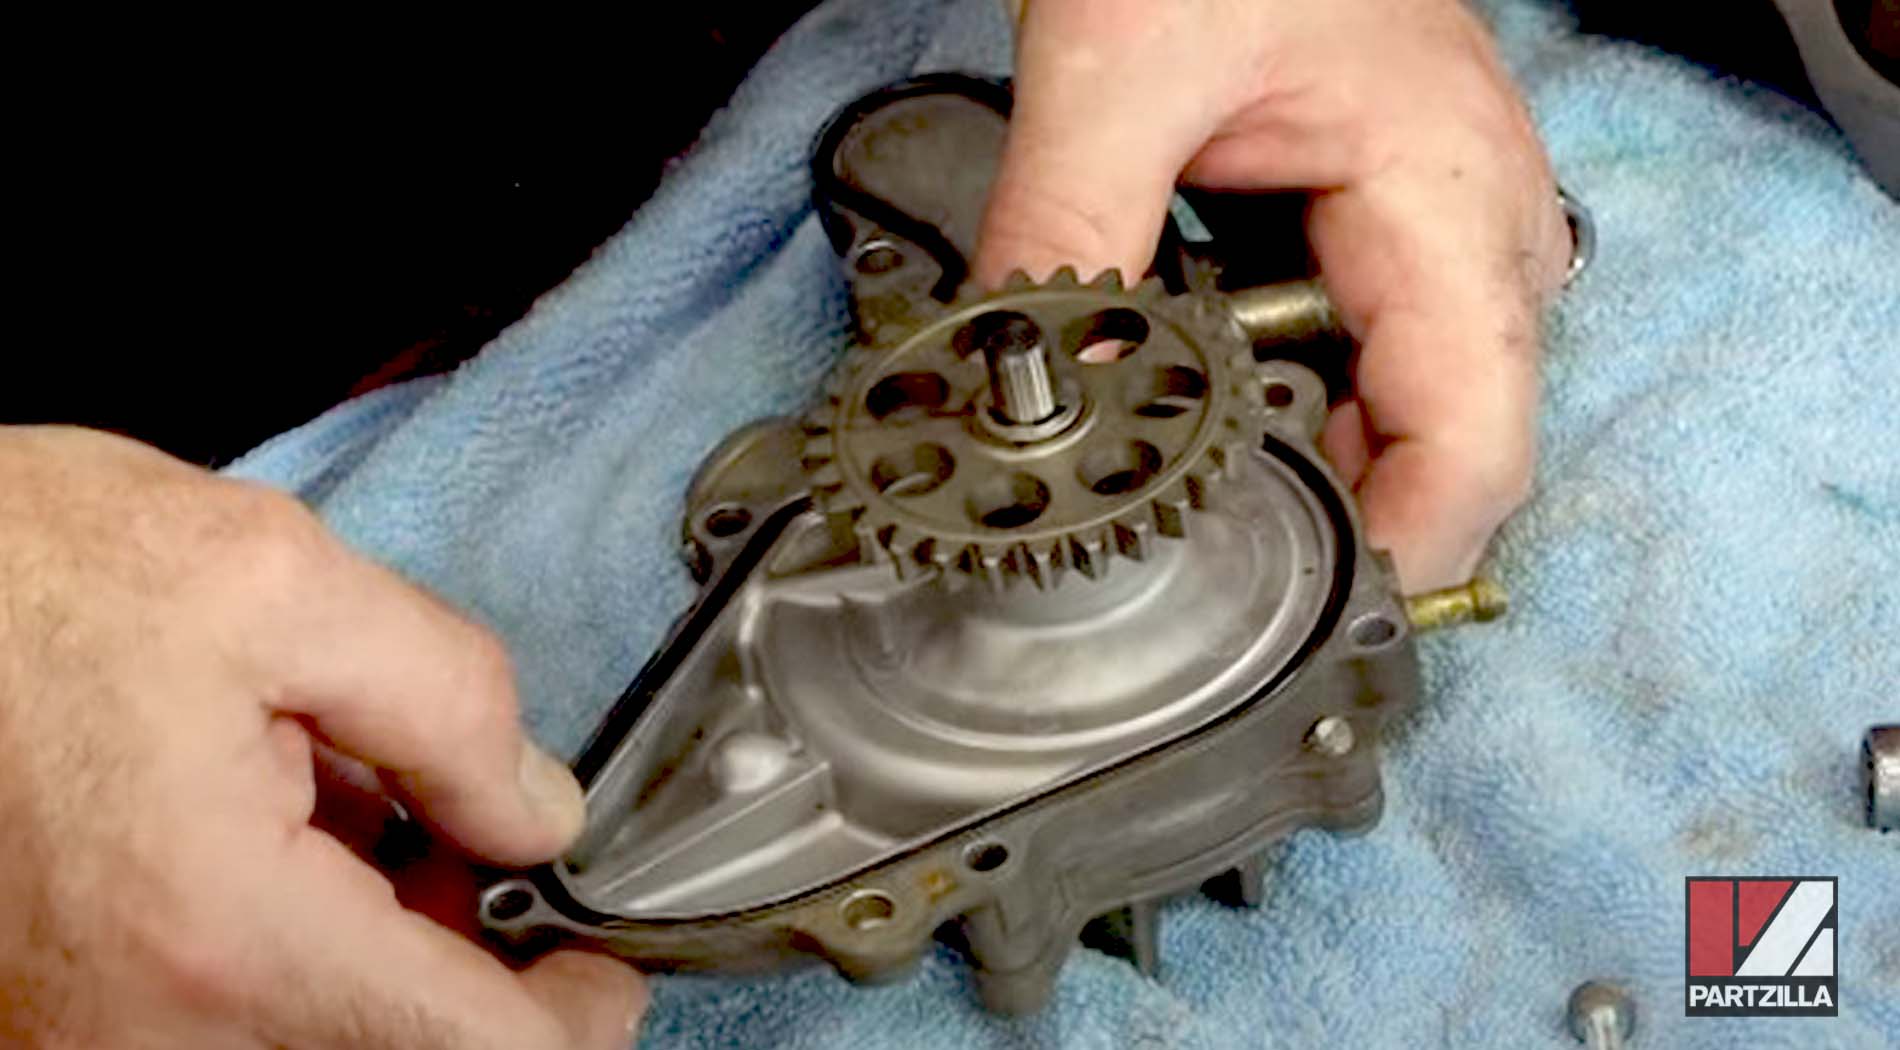
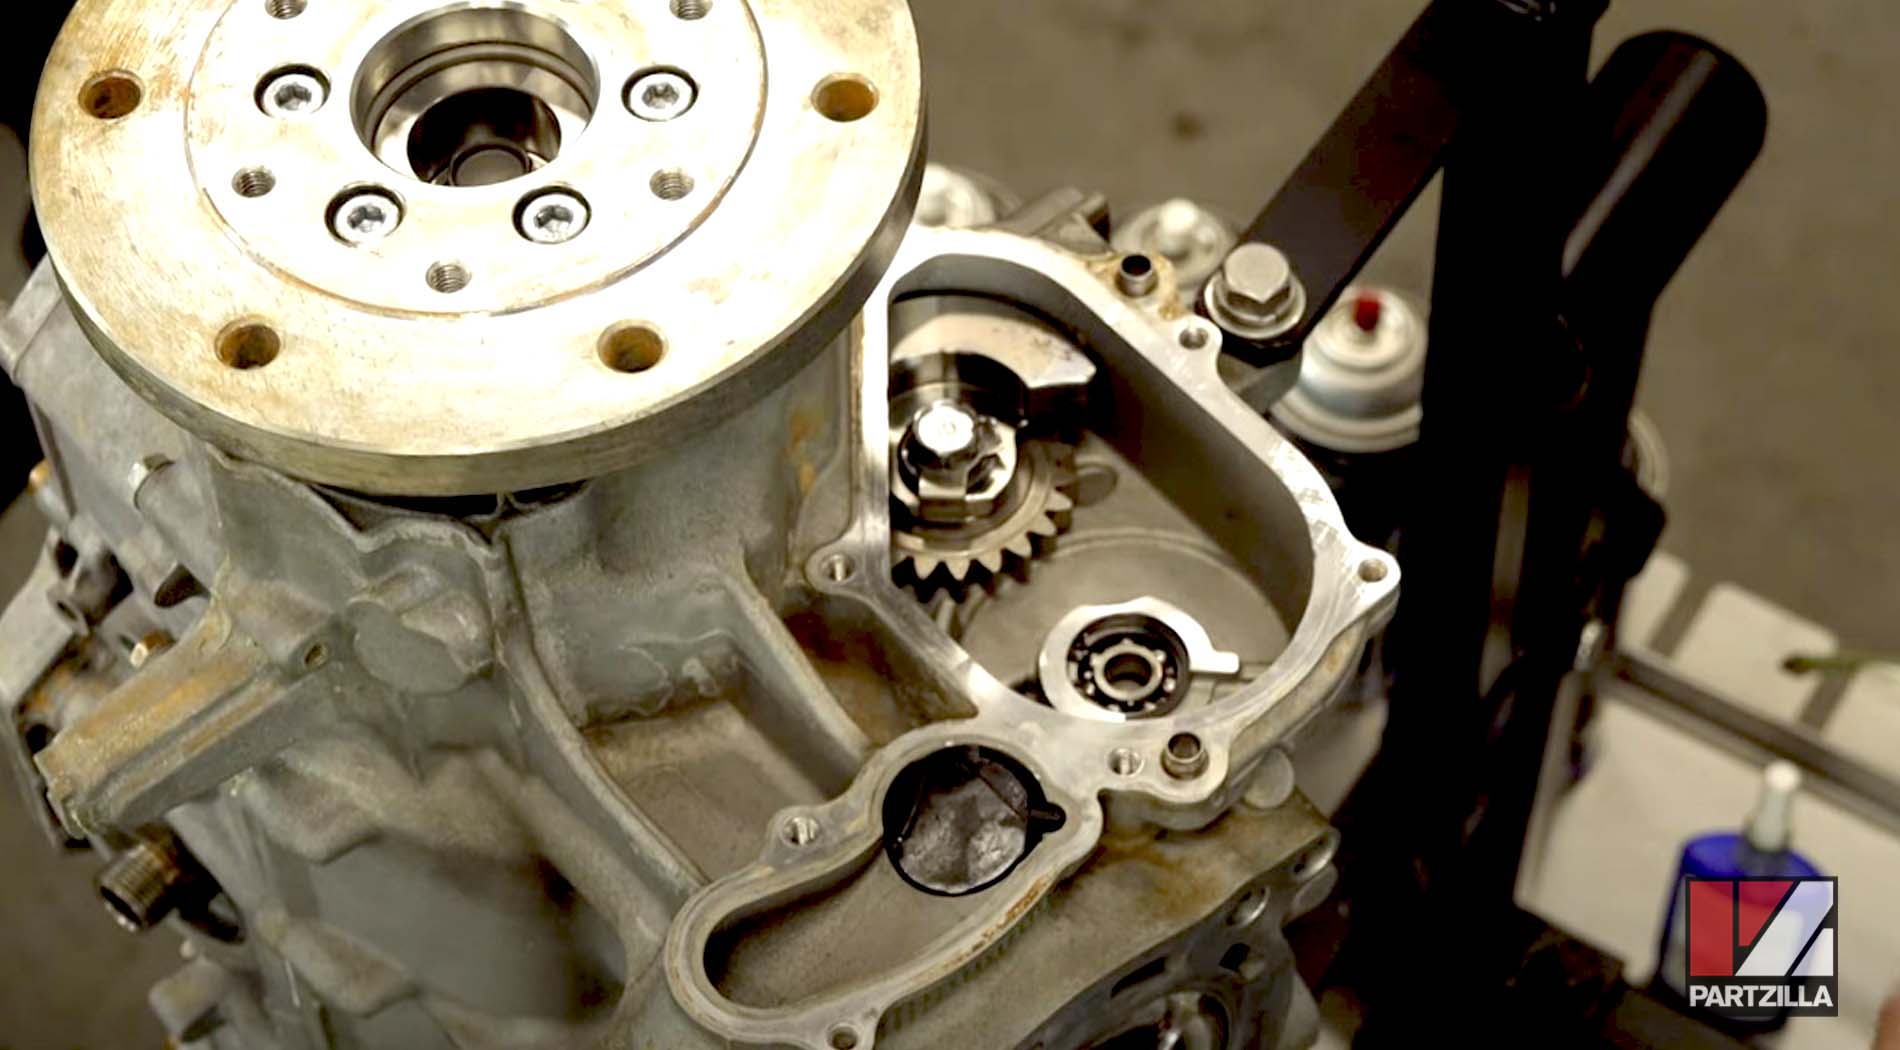
Step 15. Install the oil pump chain and gear, and make sure the 4XV on the gear is pointing toward the pump. Hold it in place as you bring in the oil pump. Make sure you've got the dowels in place, and line up the gear with the pump.
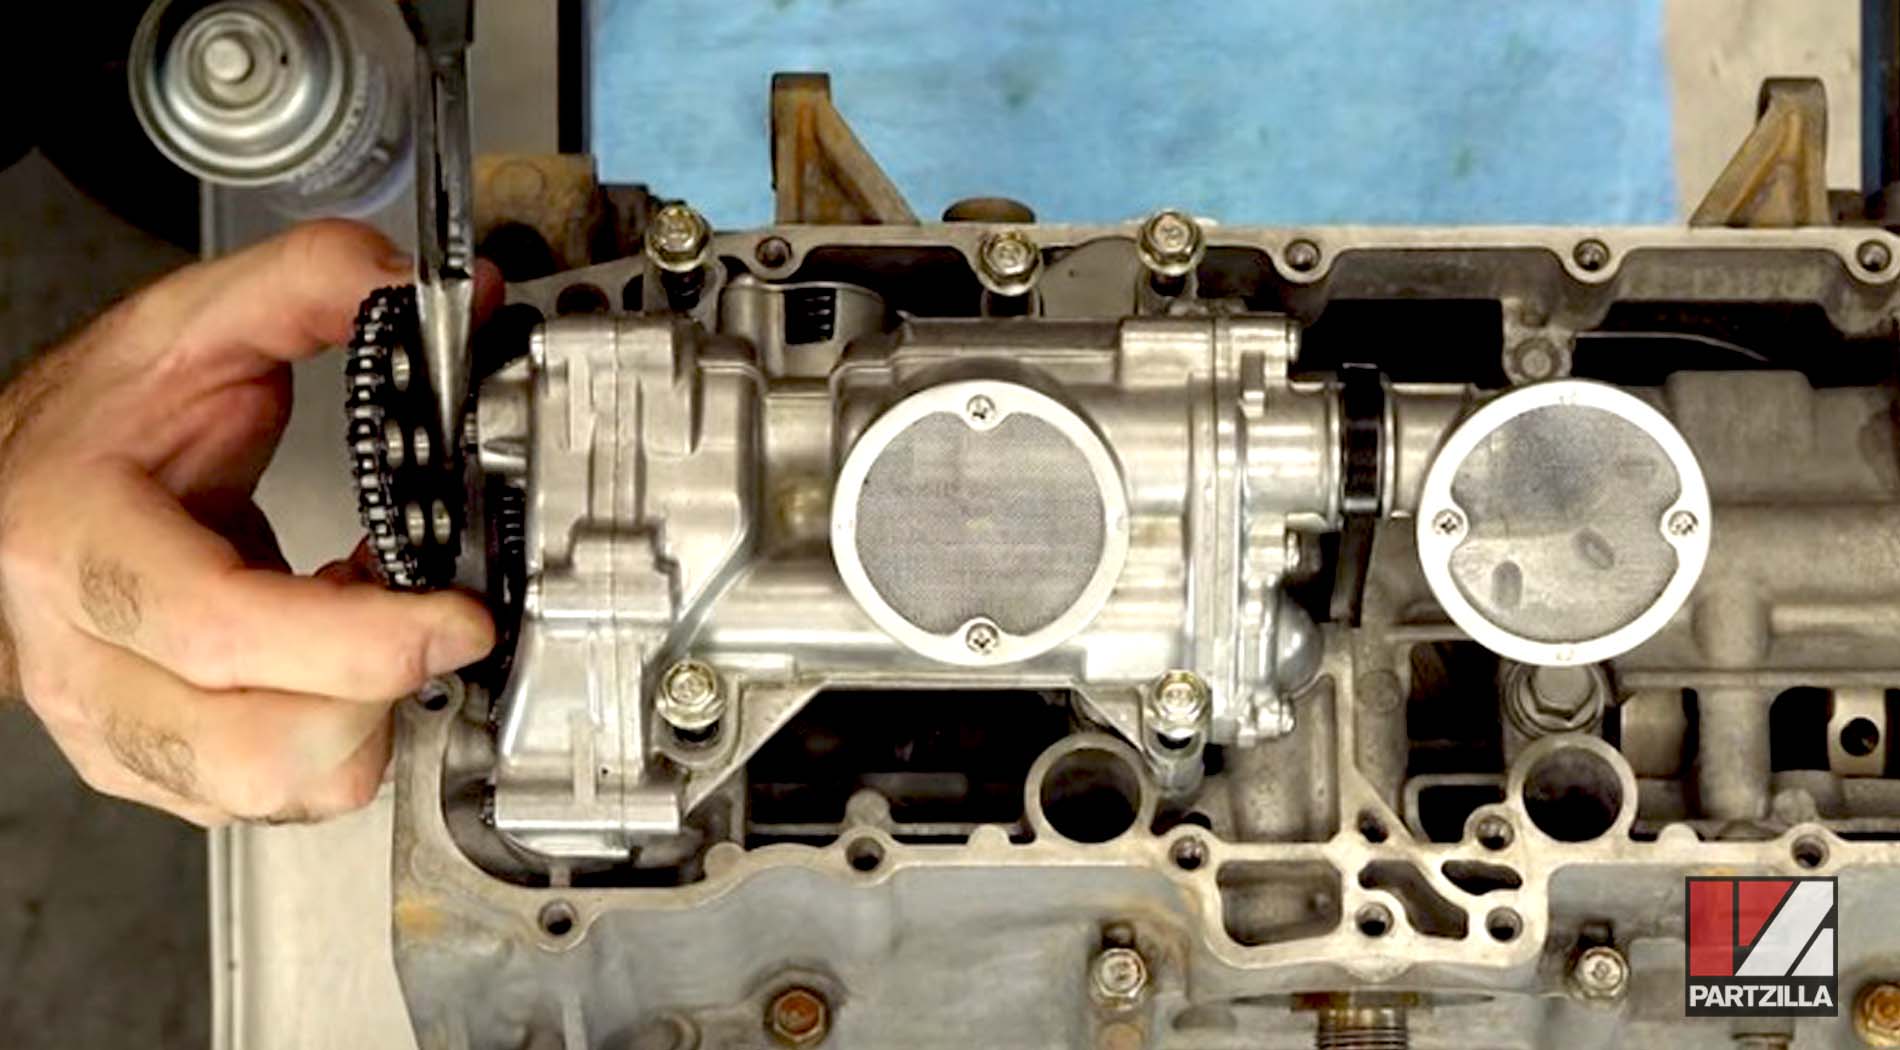
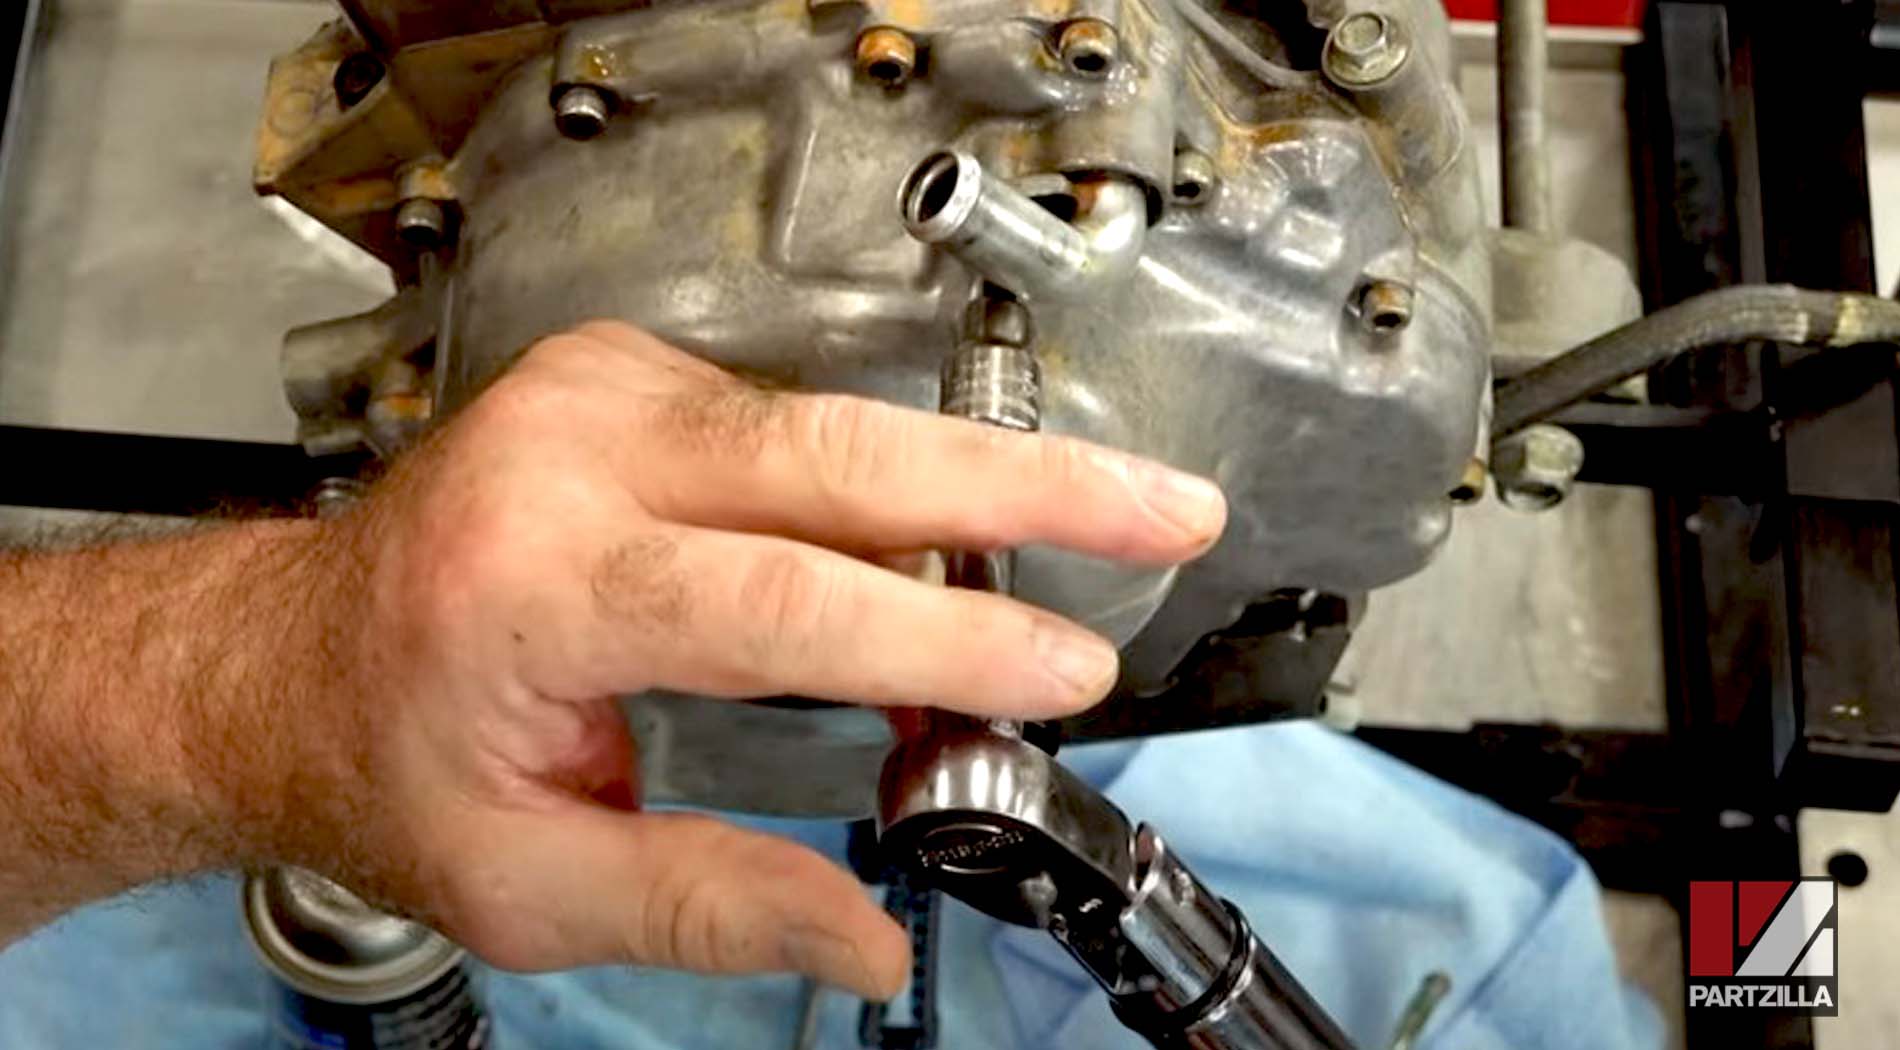
Step 16. Install the oil pump mounting bolts and torque them to 8.7 foot-pounds.
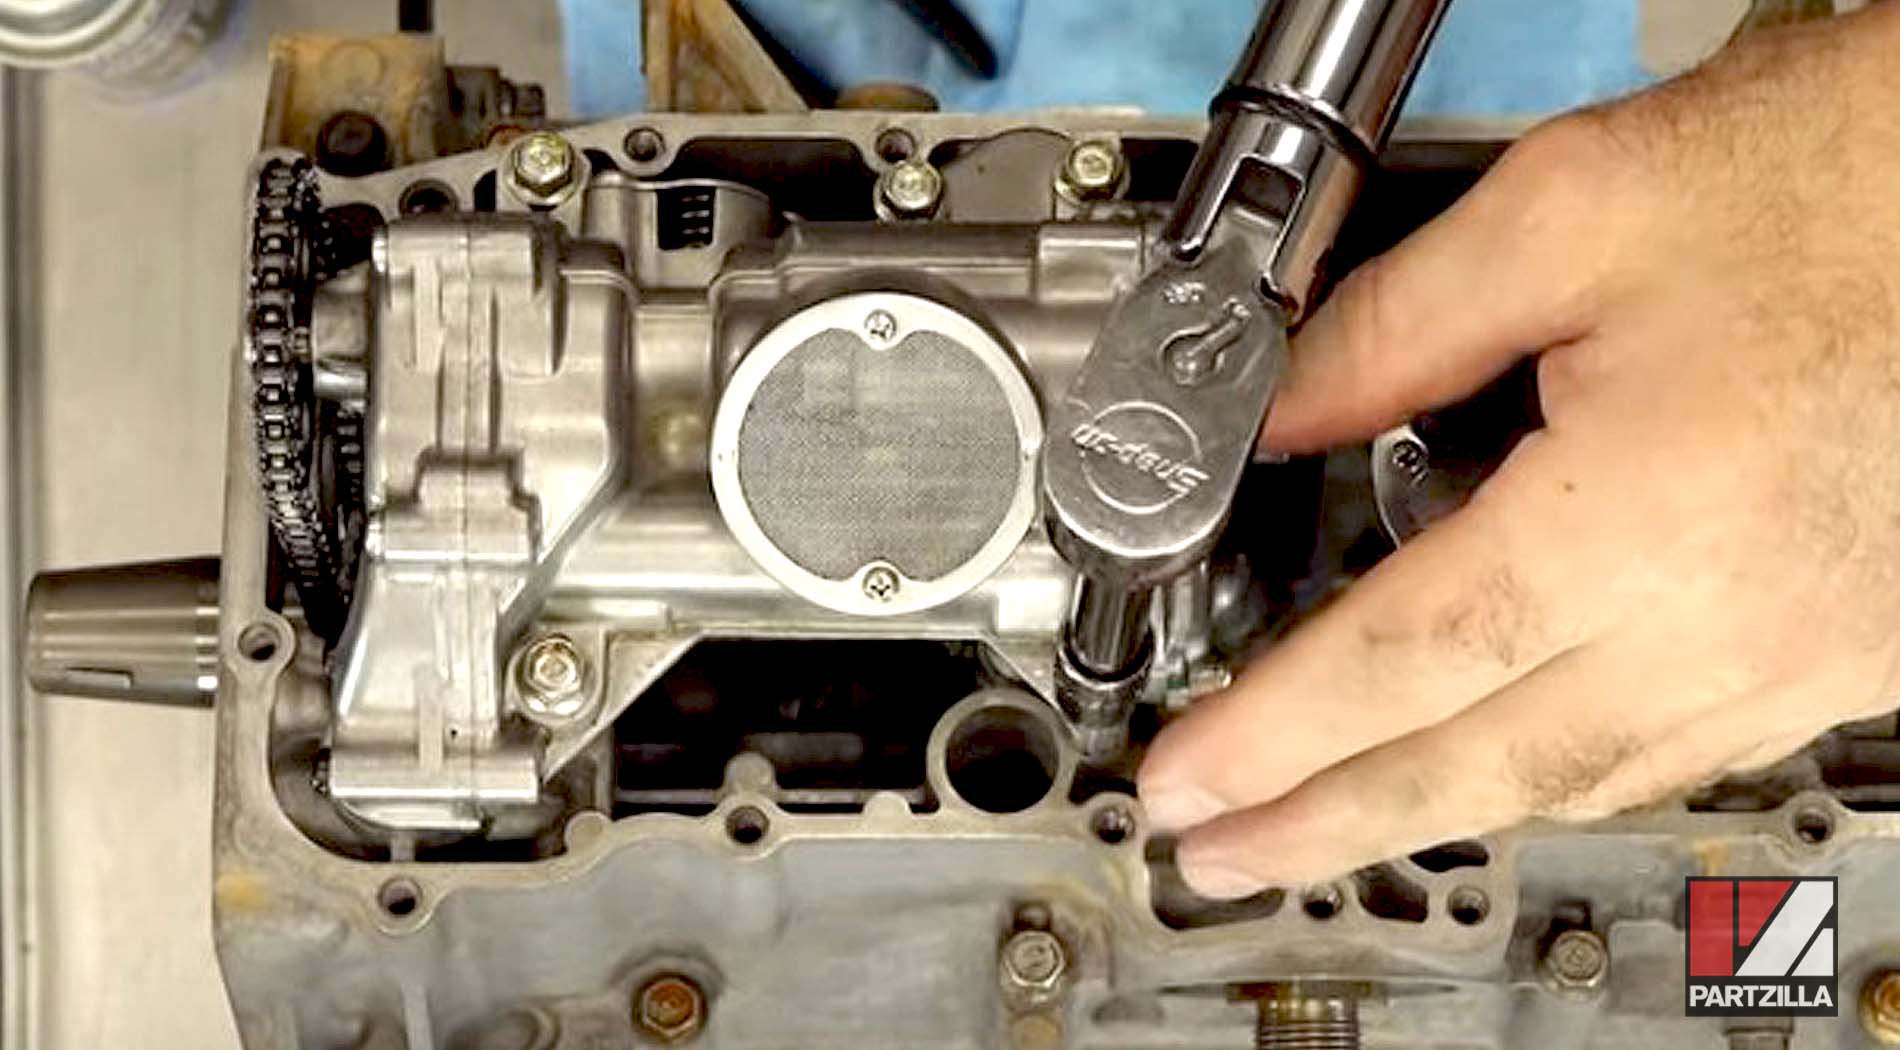
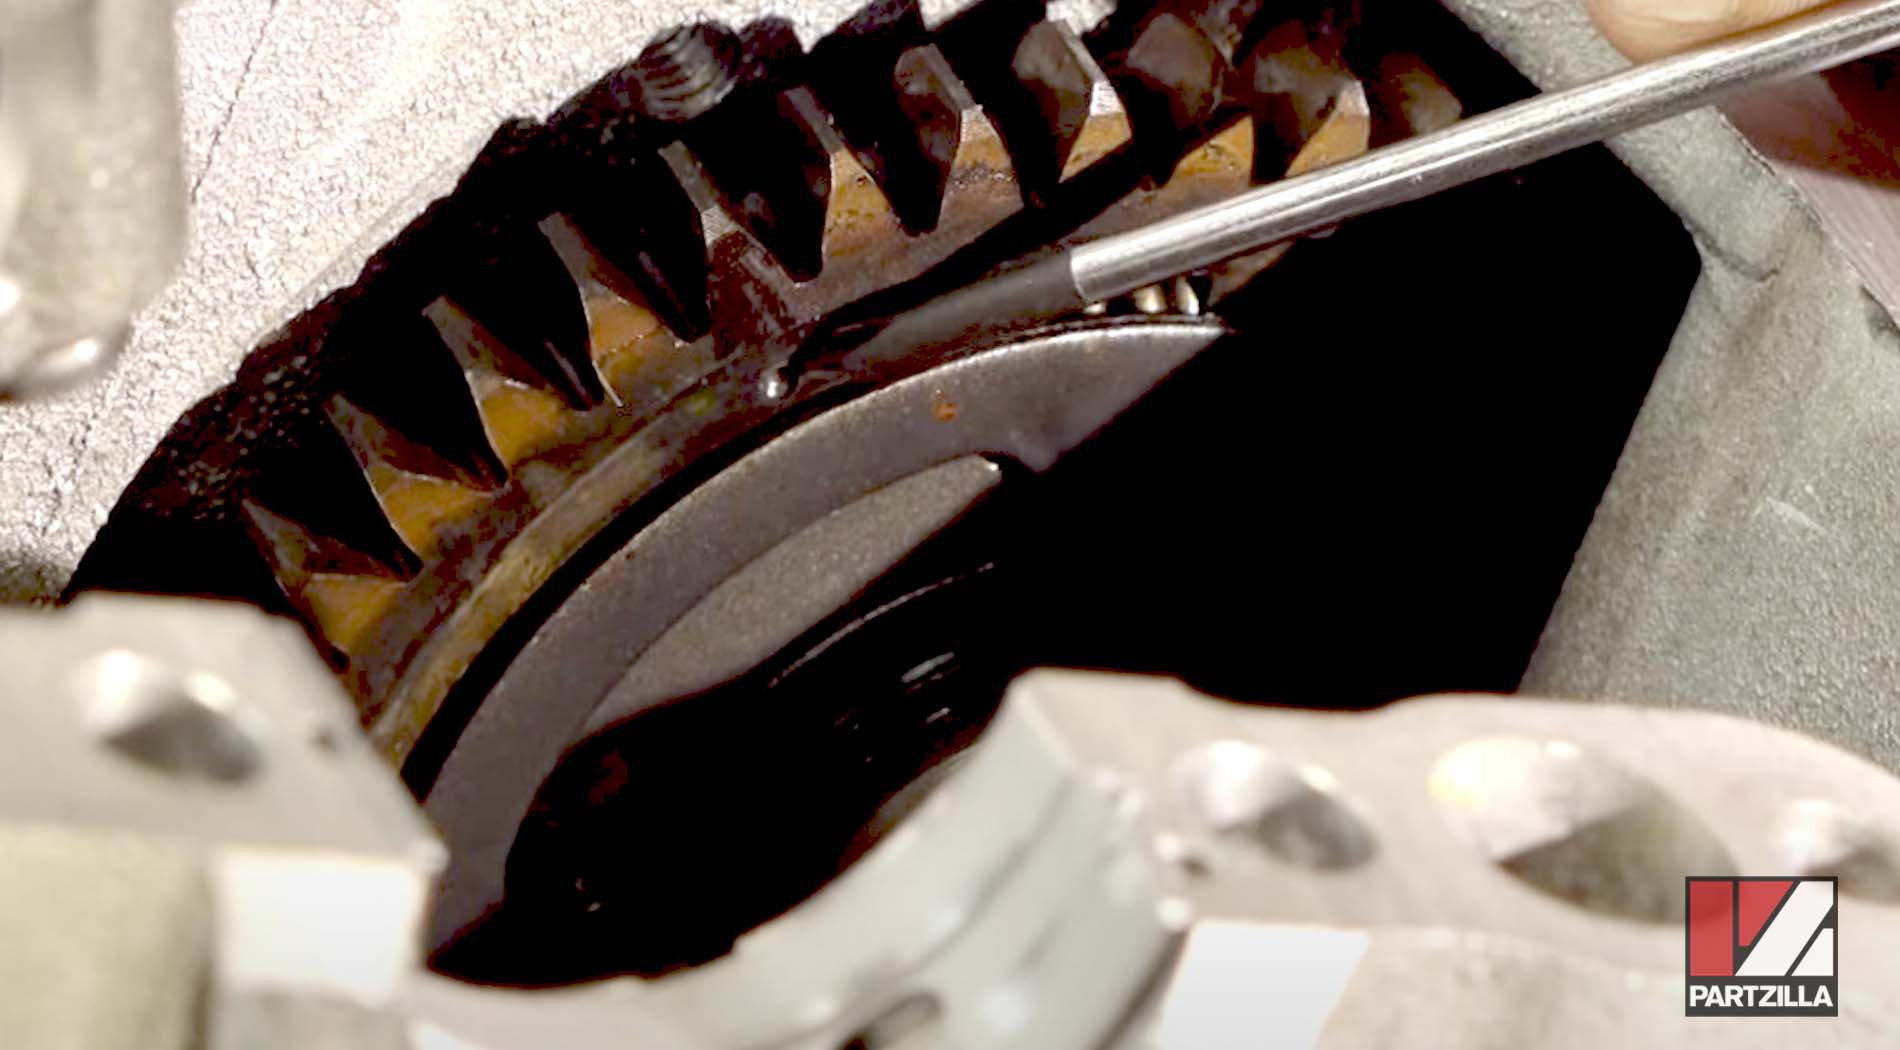
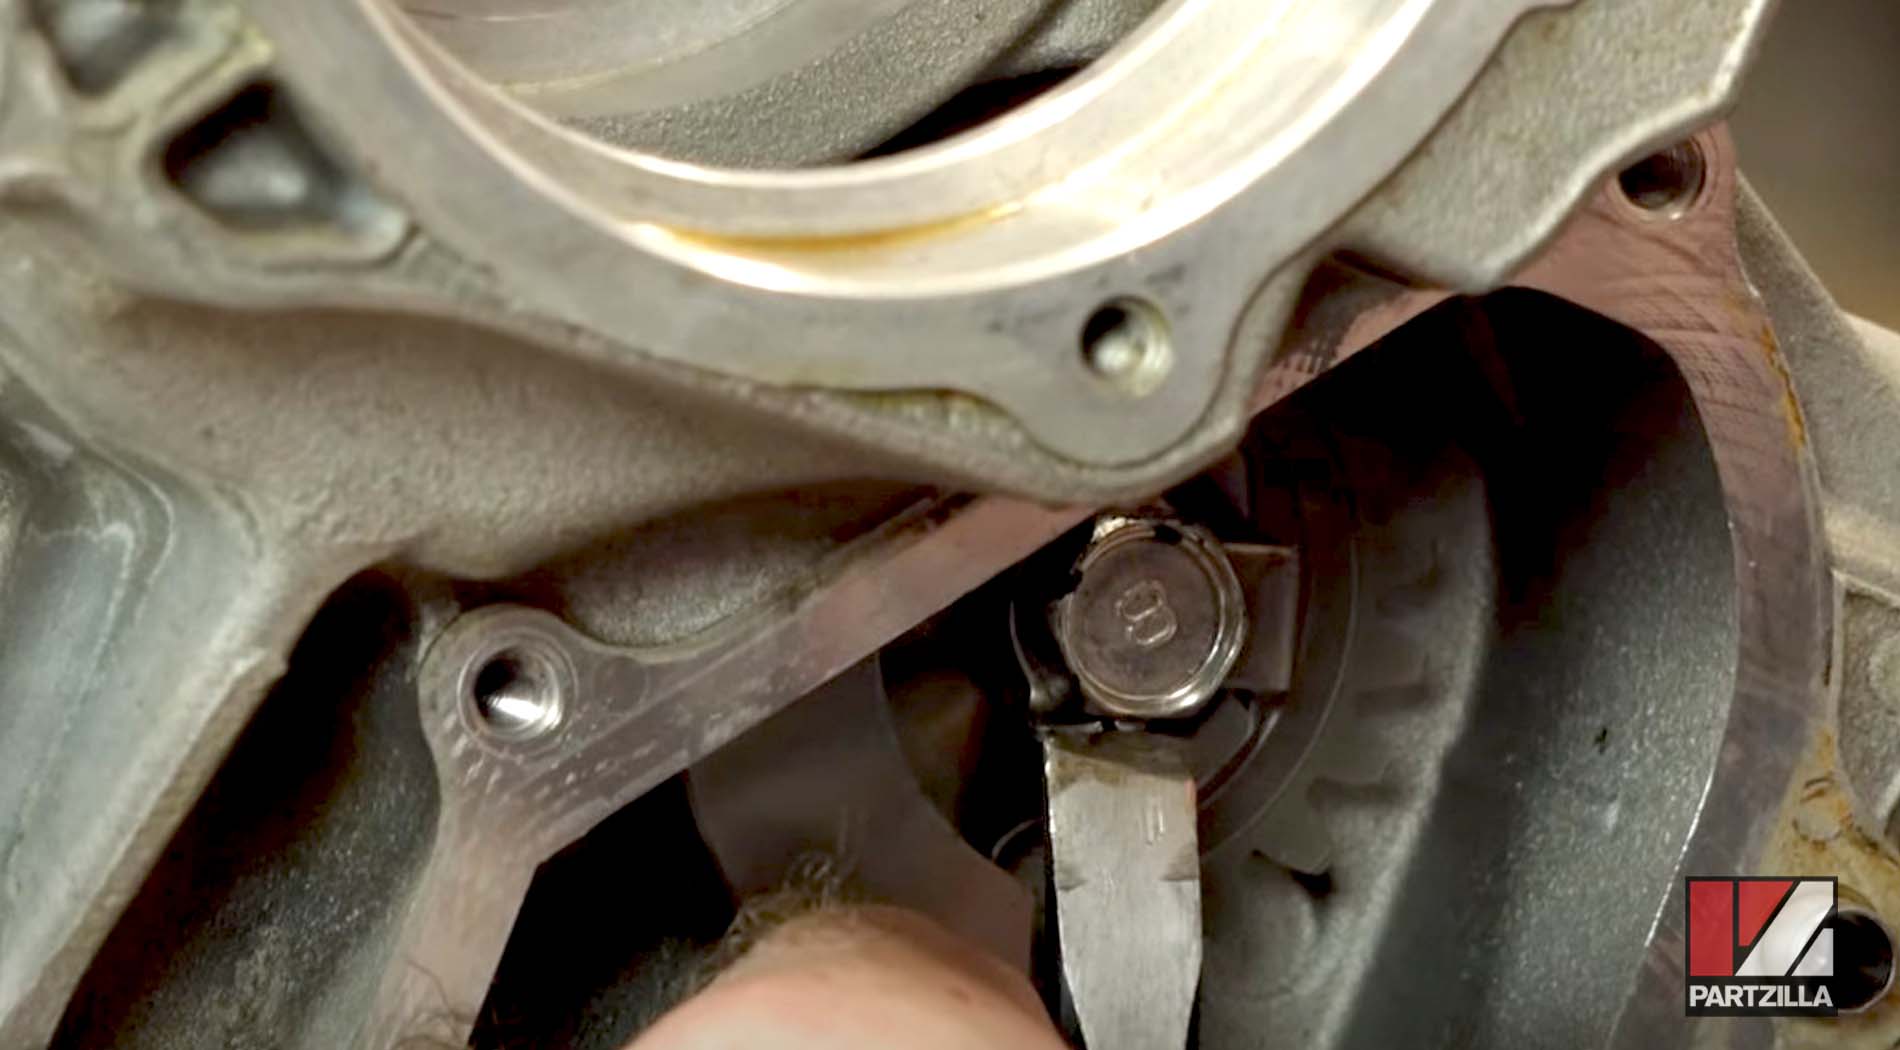
Step 17. Tighten down the oil gear bolt.
NOTE: Yamaha has a holder for this, but whatever you can get in there to hold the sprocket should be fine. You can use a screwdriver or quarter-inch extension to hold the sprocket in place.
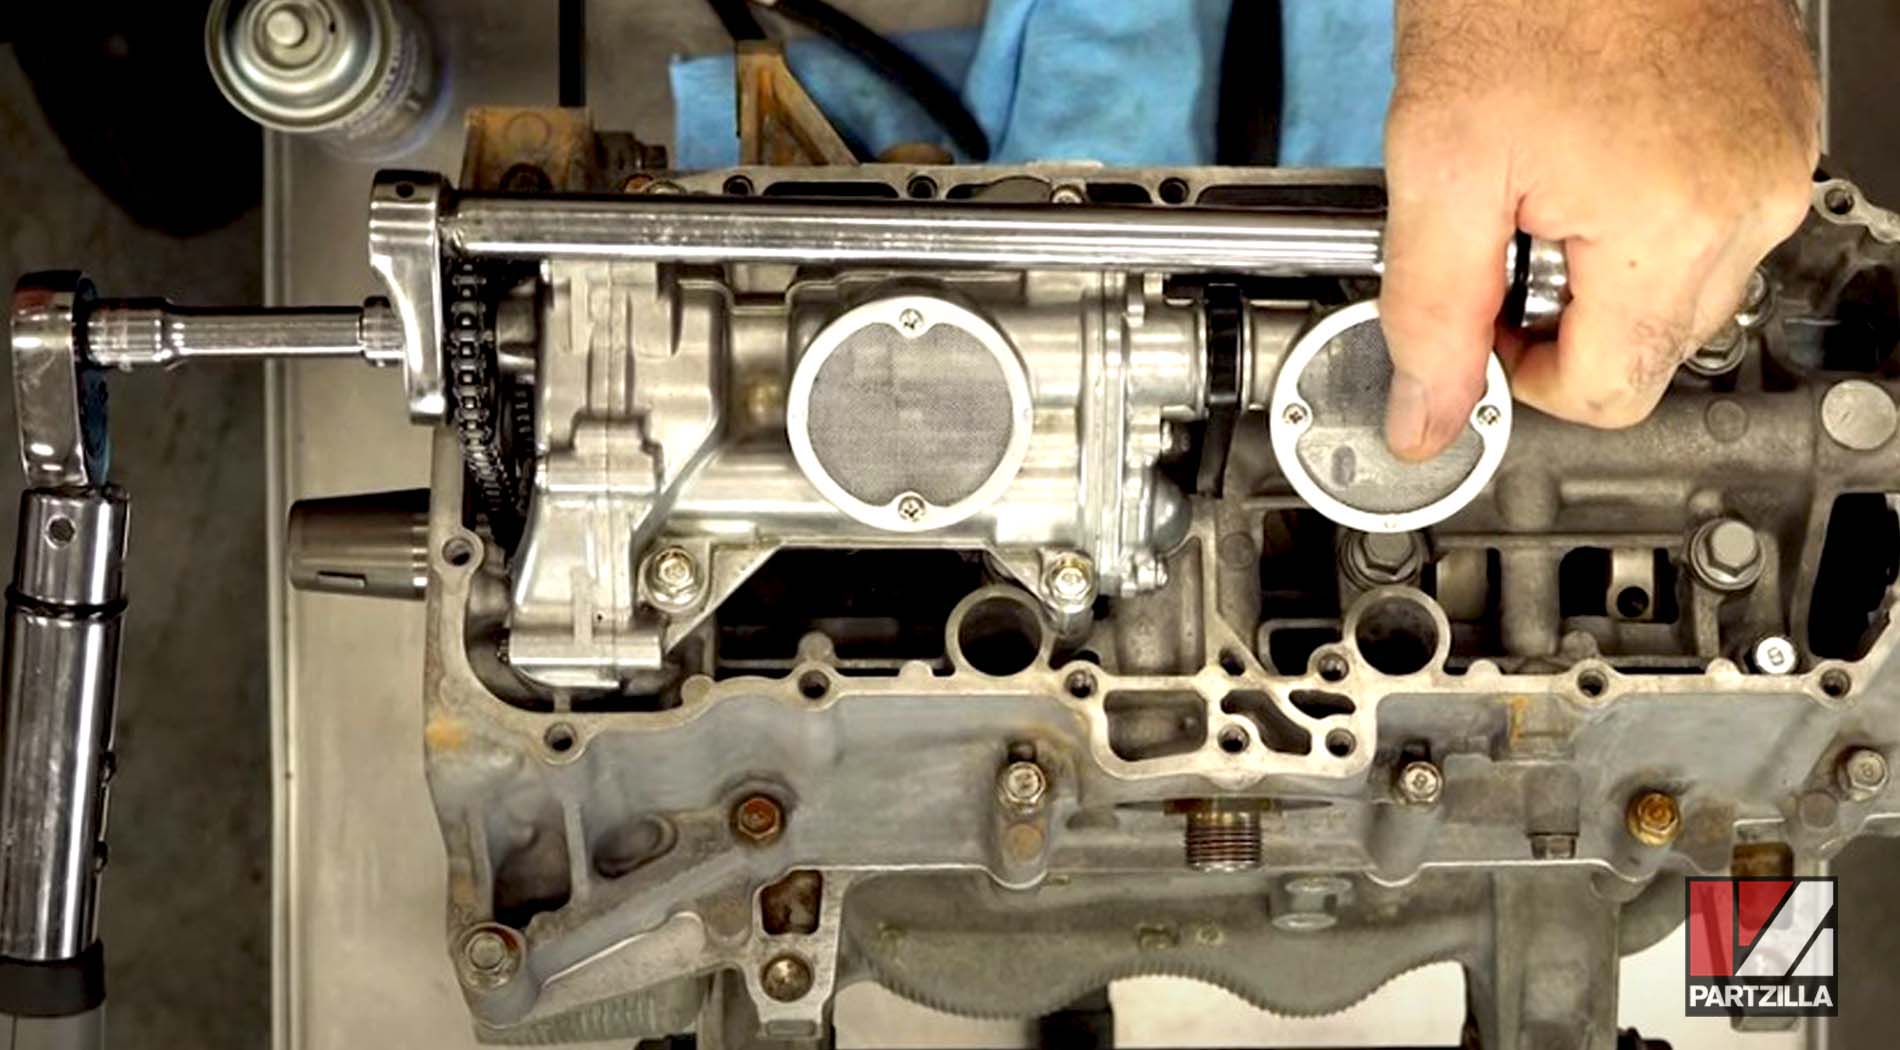
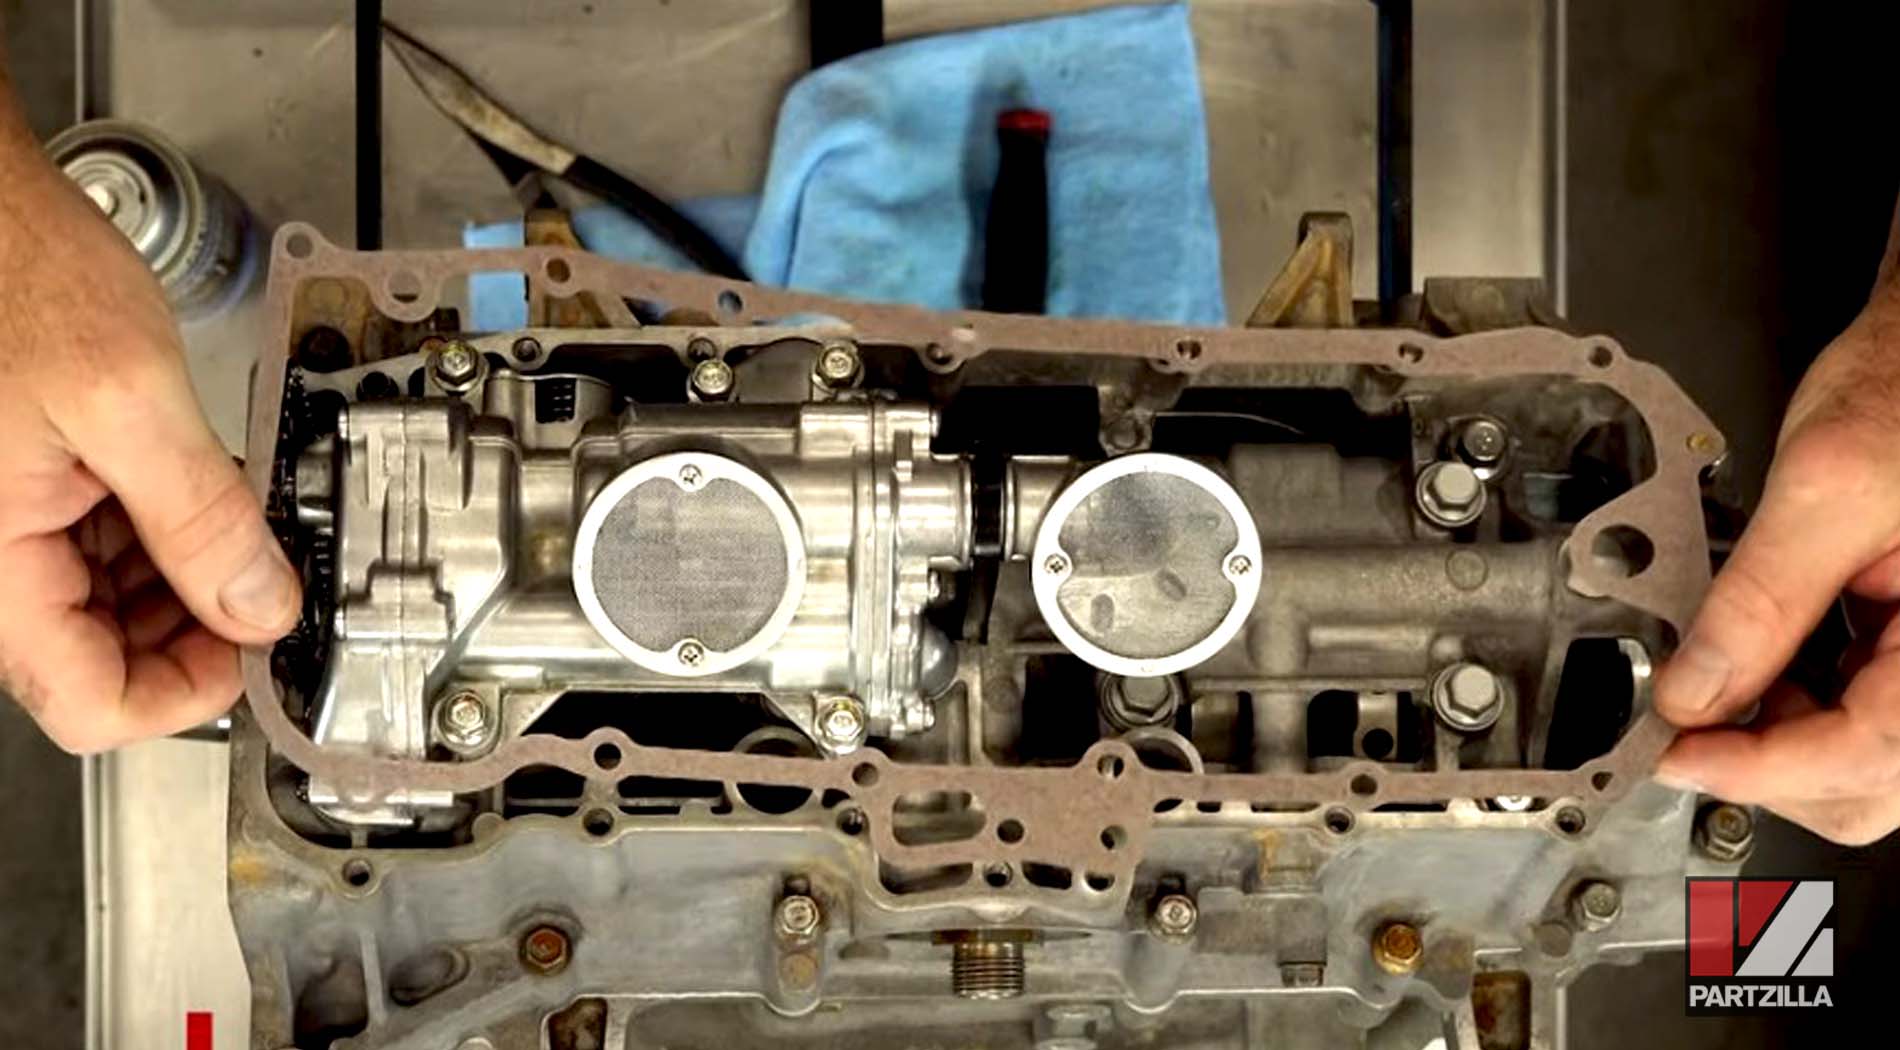
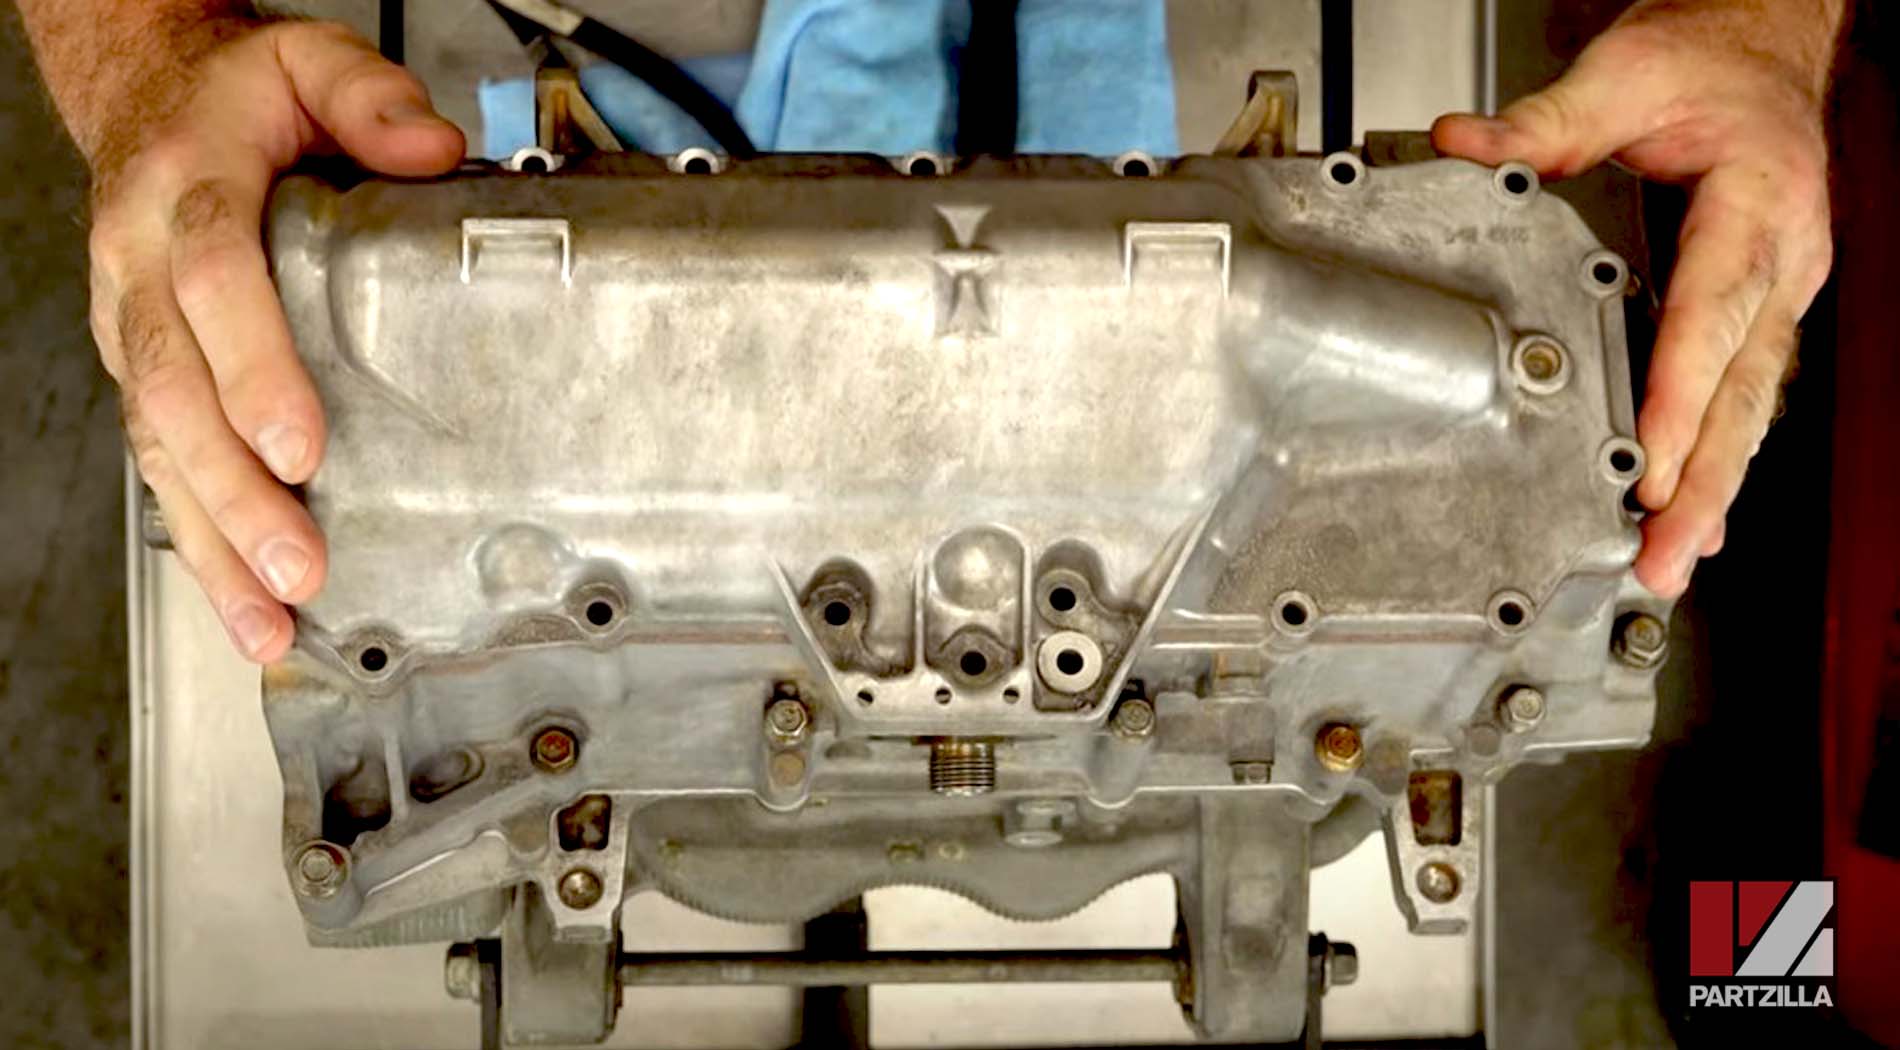
Step 18. Install the remaining dowels, the oil pan and the strainer cover gasket before installing the head cover.
Step 19. Install the head cover bolts. There are three different types of bolts that need to be torqued to 7.2 foot-pounds in sequence as follows (see the diagram below):
1 - The black bolts on the end
2 - The oil drain bolt
3 - The rest of the bolts
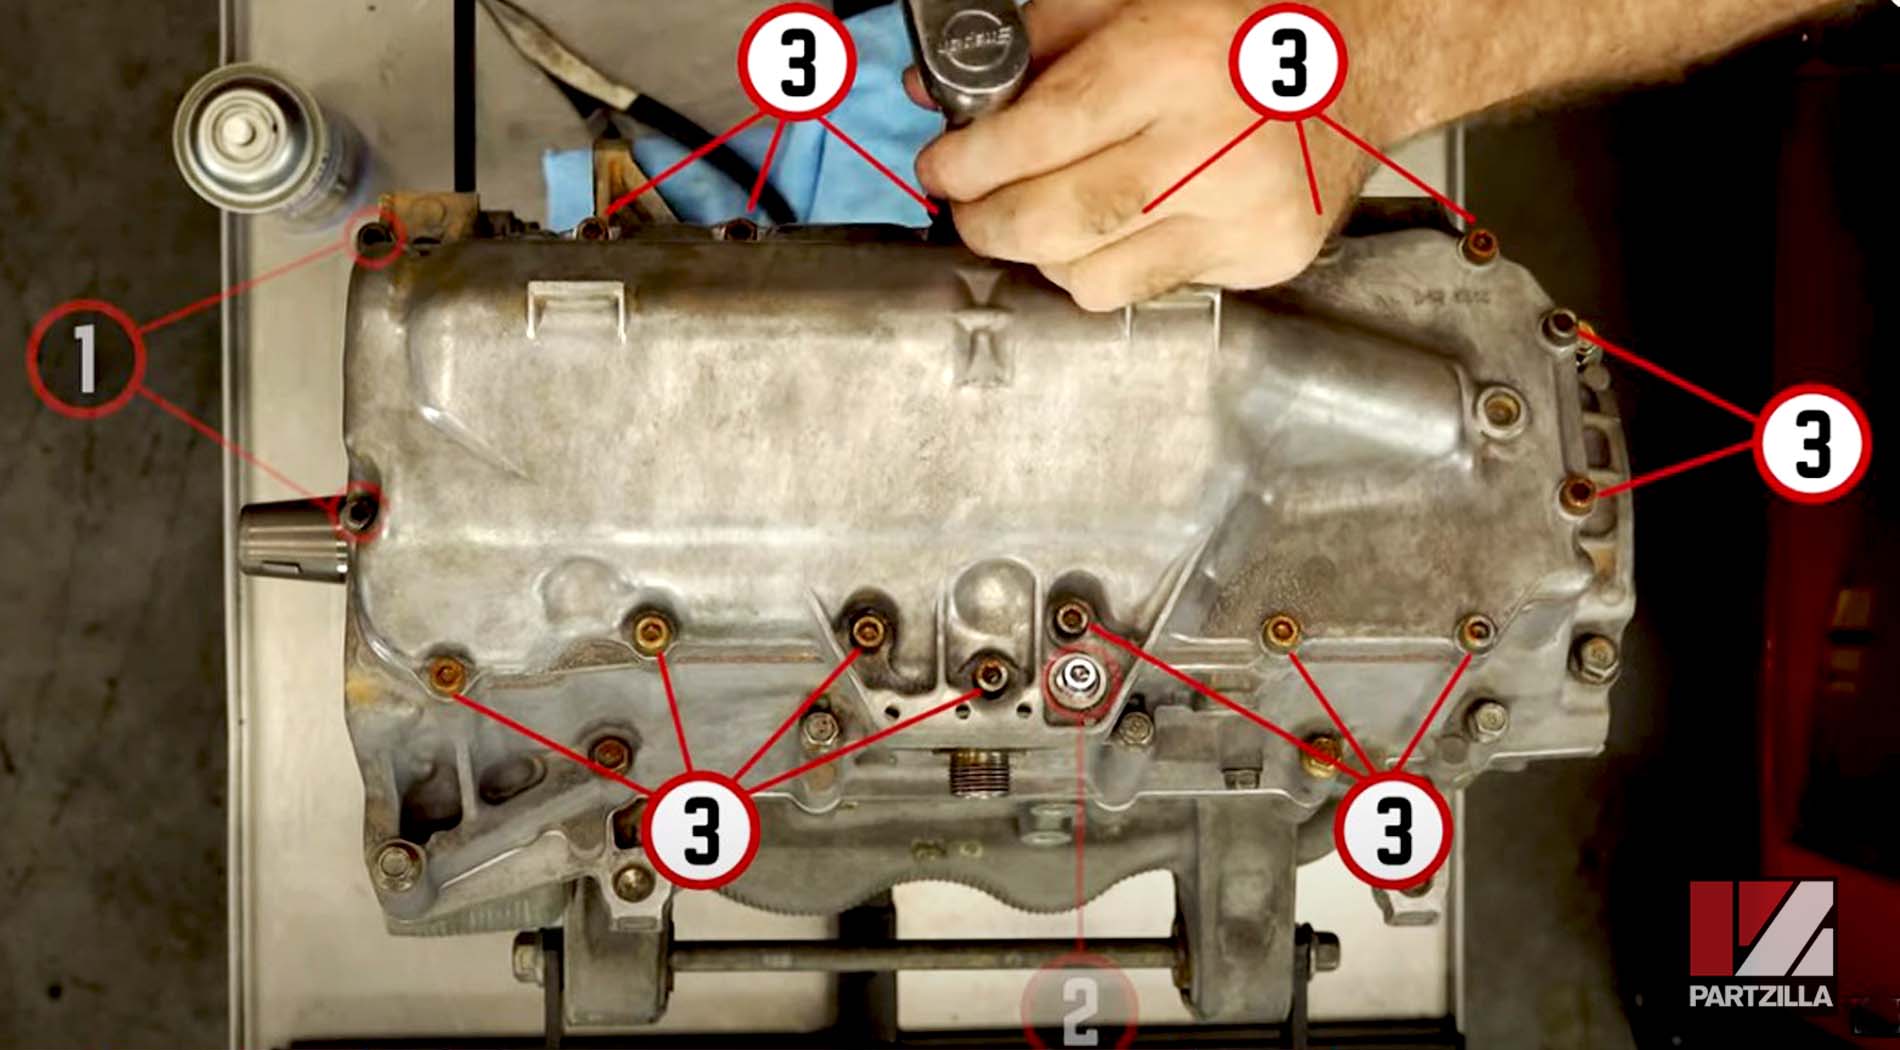
Step 20. Install the retention guide and torque its bolts to 7.2 foot-pounds.
Watch the clip below to see the oil pump installation segment of our Yamaha YXZ1000R bottom end rebuild video.
Step 21. Install the chain guides (chain damper 1 and chain damper 2) and torque their mounting bolts to 7.2 foot-pounds.
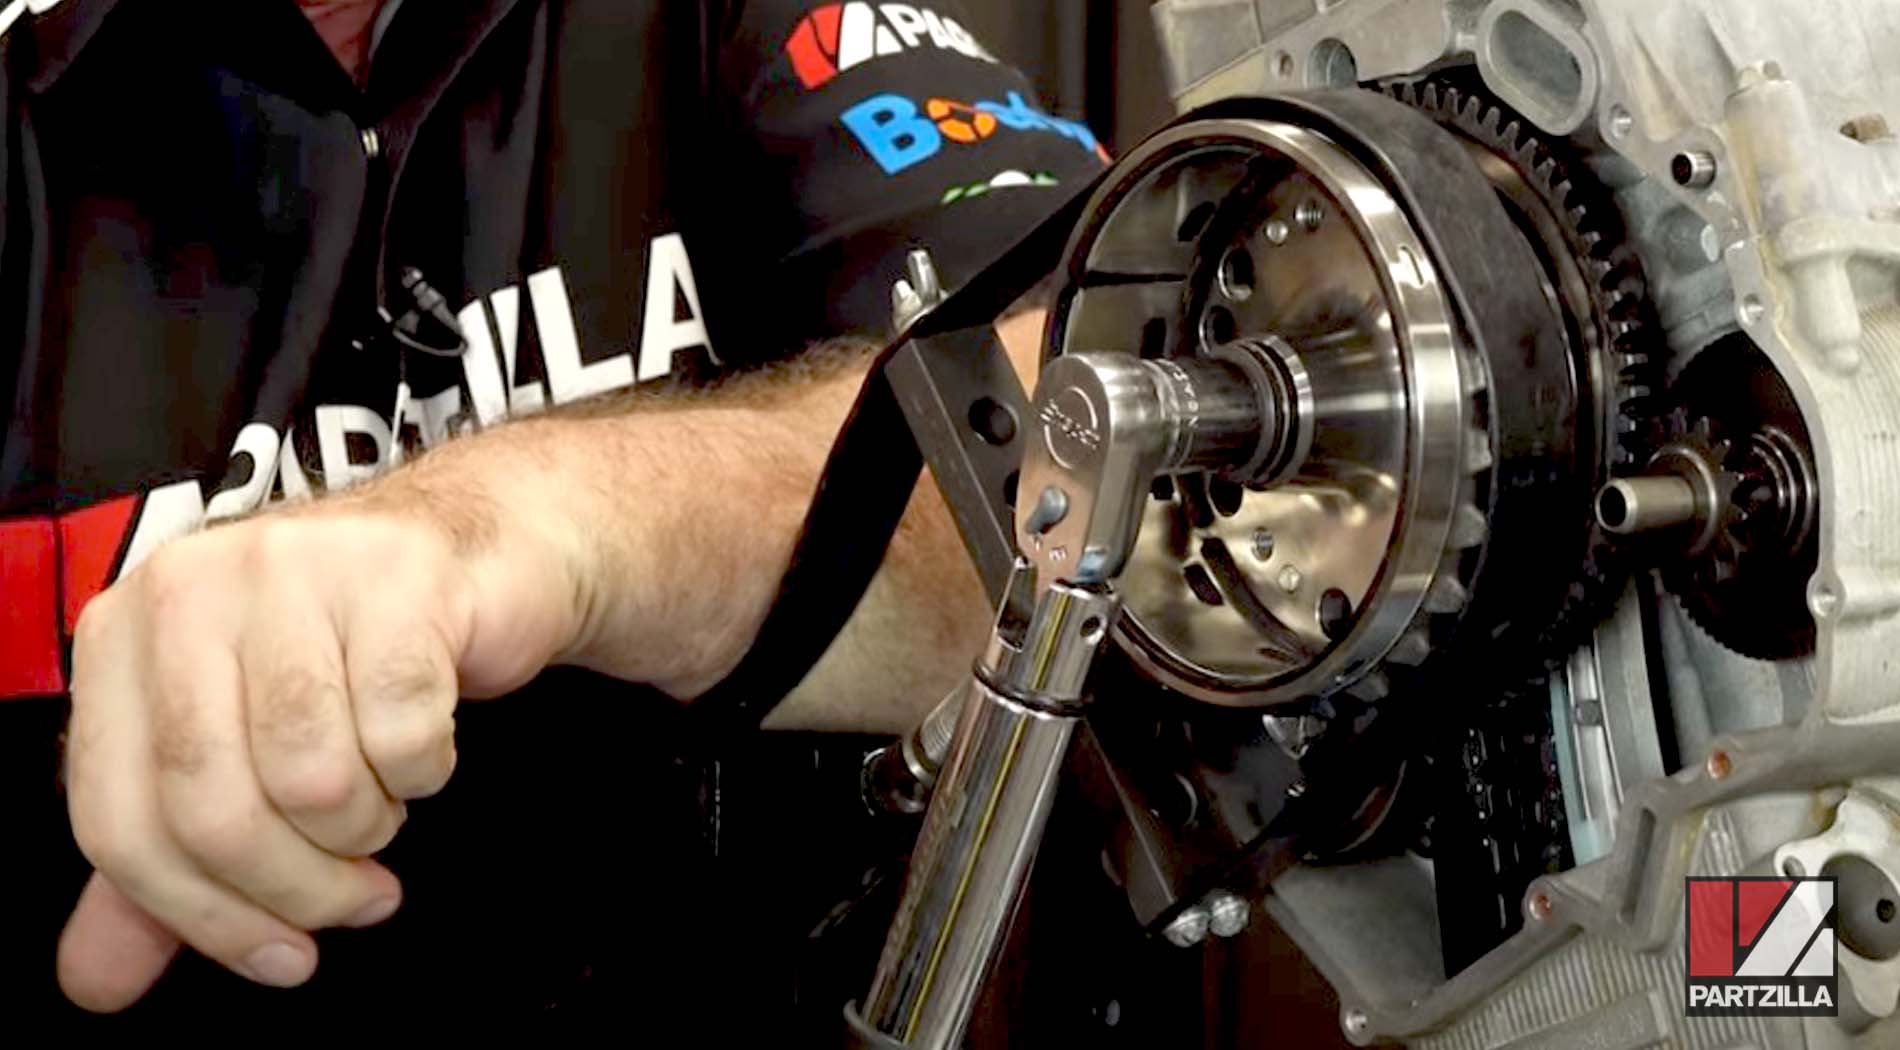
Step 22. Install the flywheel, making sure the washer and key are in place, then line it up with the teeth. Next, put some oil on the washer, the main bolt and the threads, then use a flywheel holder and torque the main bolt to 94 foot-pounds.
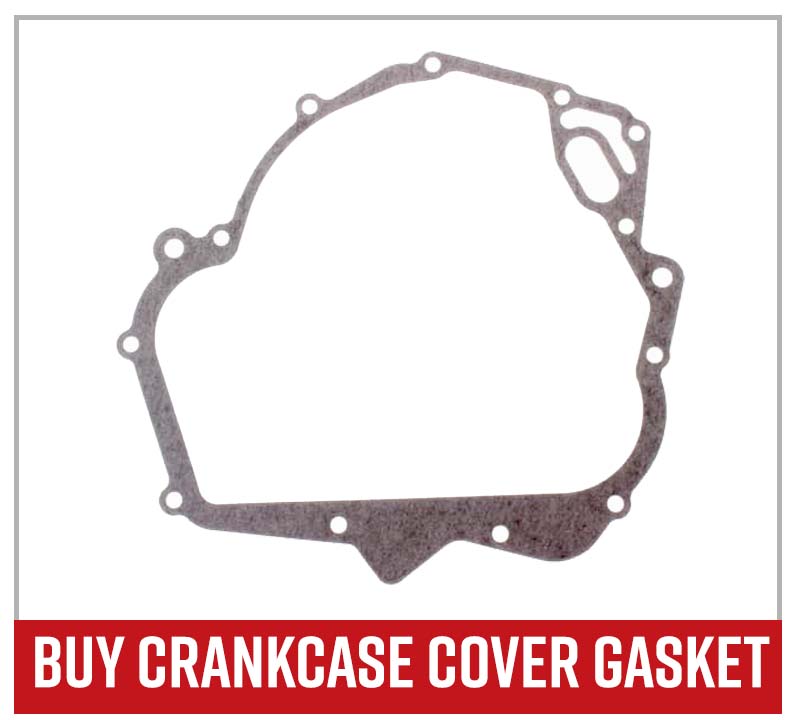
Step 23. Use a gasket scraper and contact cleaner to remove any old gasket material from the flywheel stator (crankcase) cover.
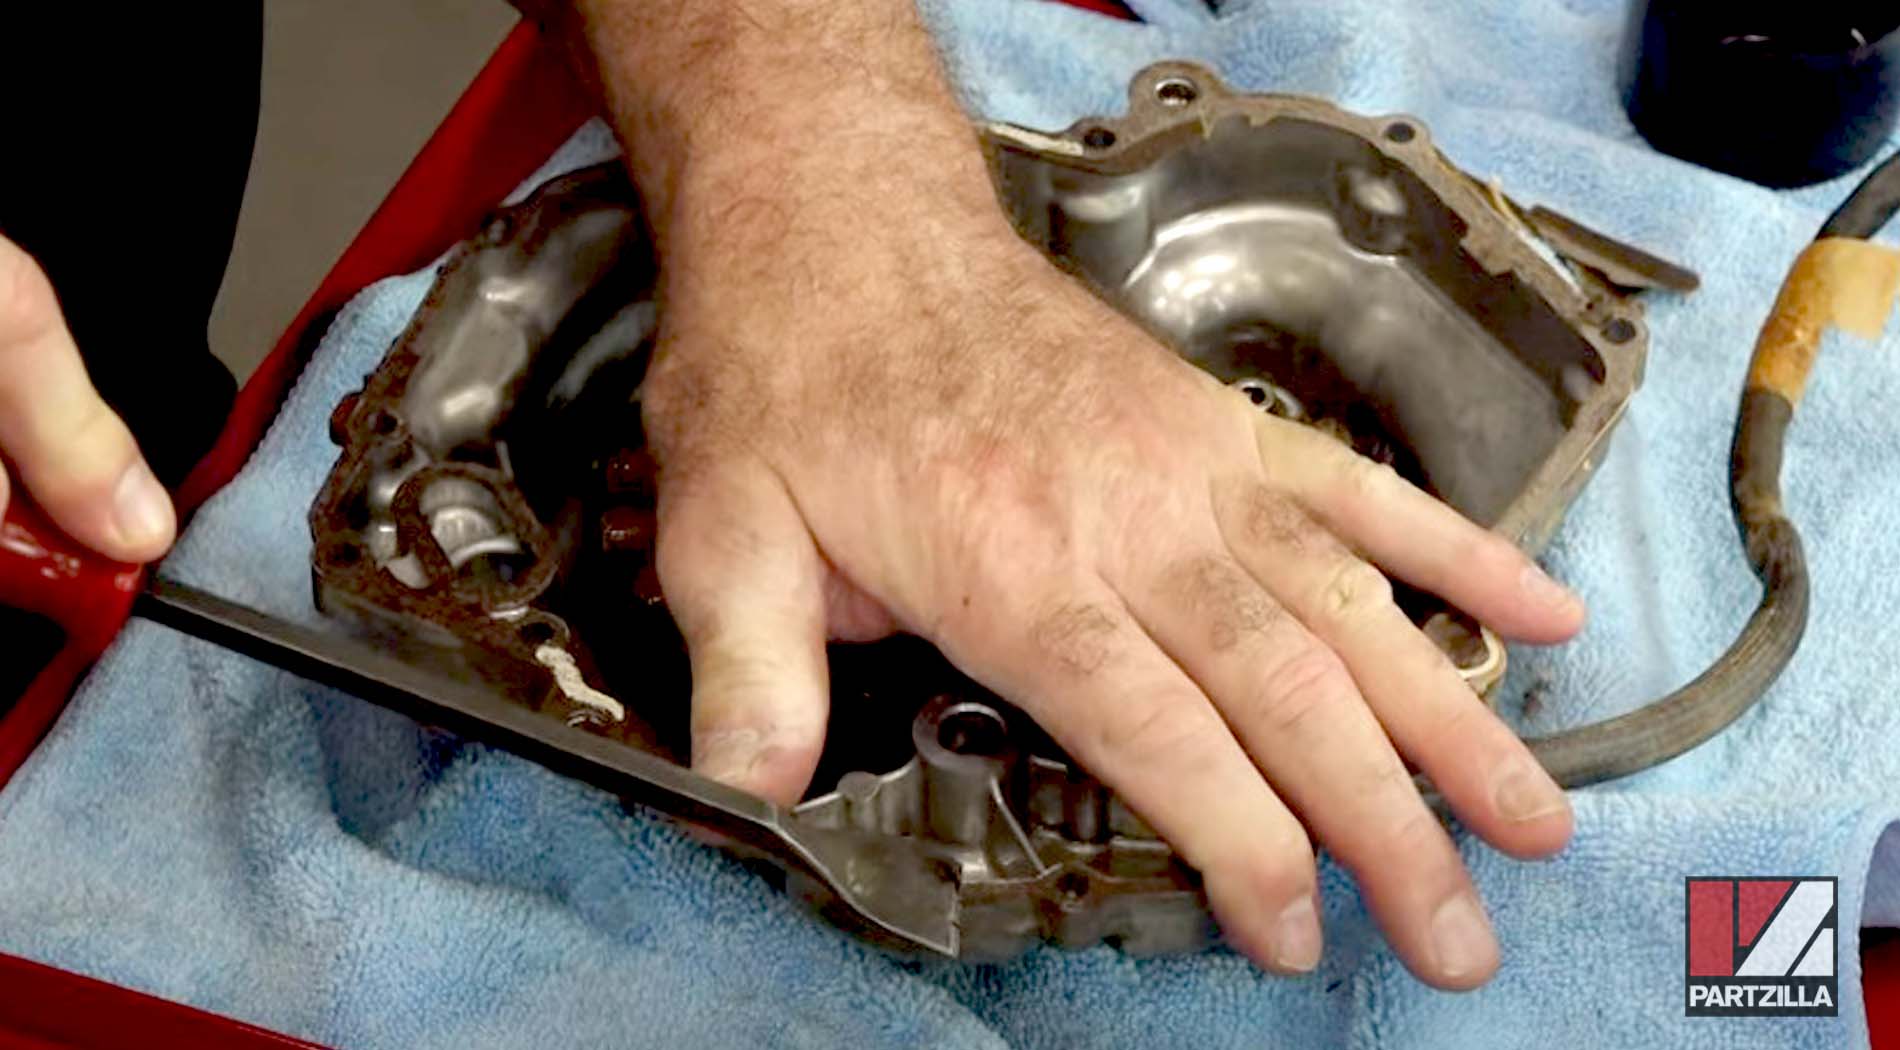
Step 24. Install the crankcase cover gasket, followed by the cover itself.
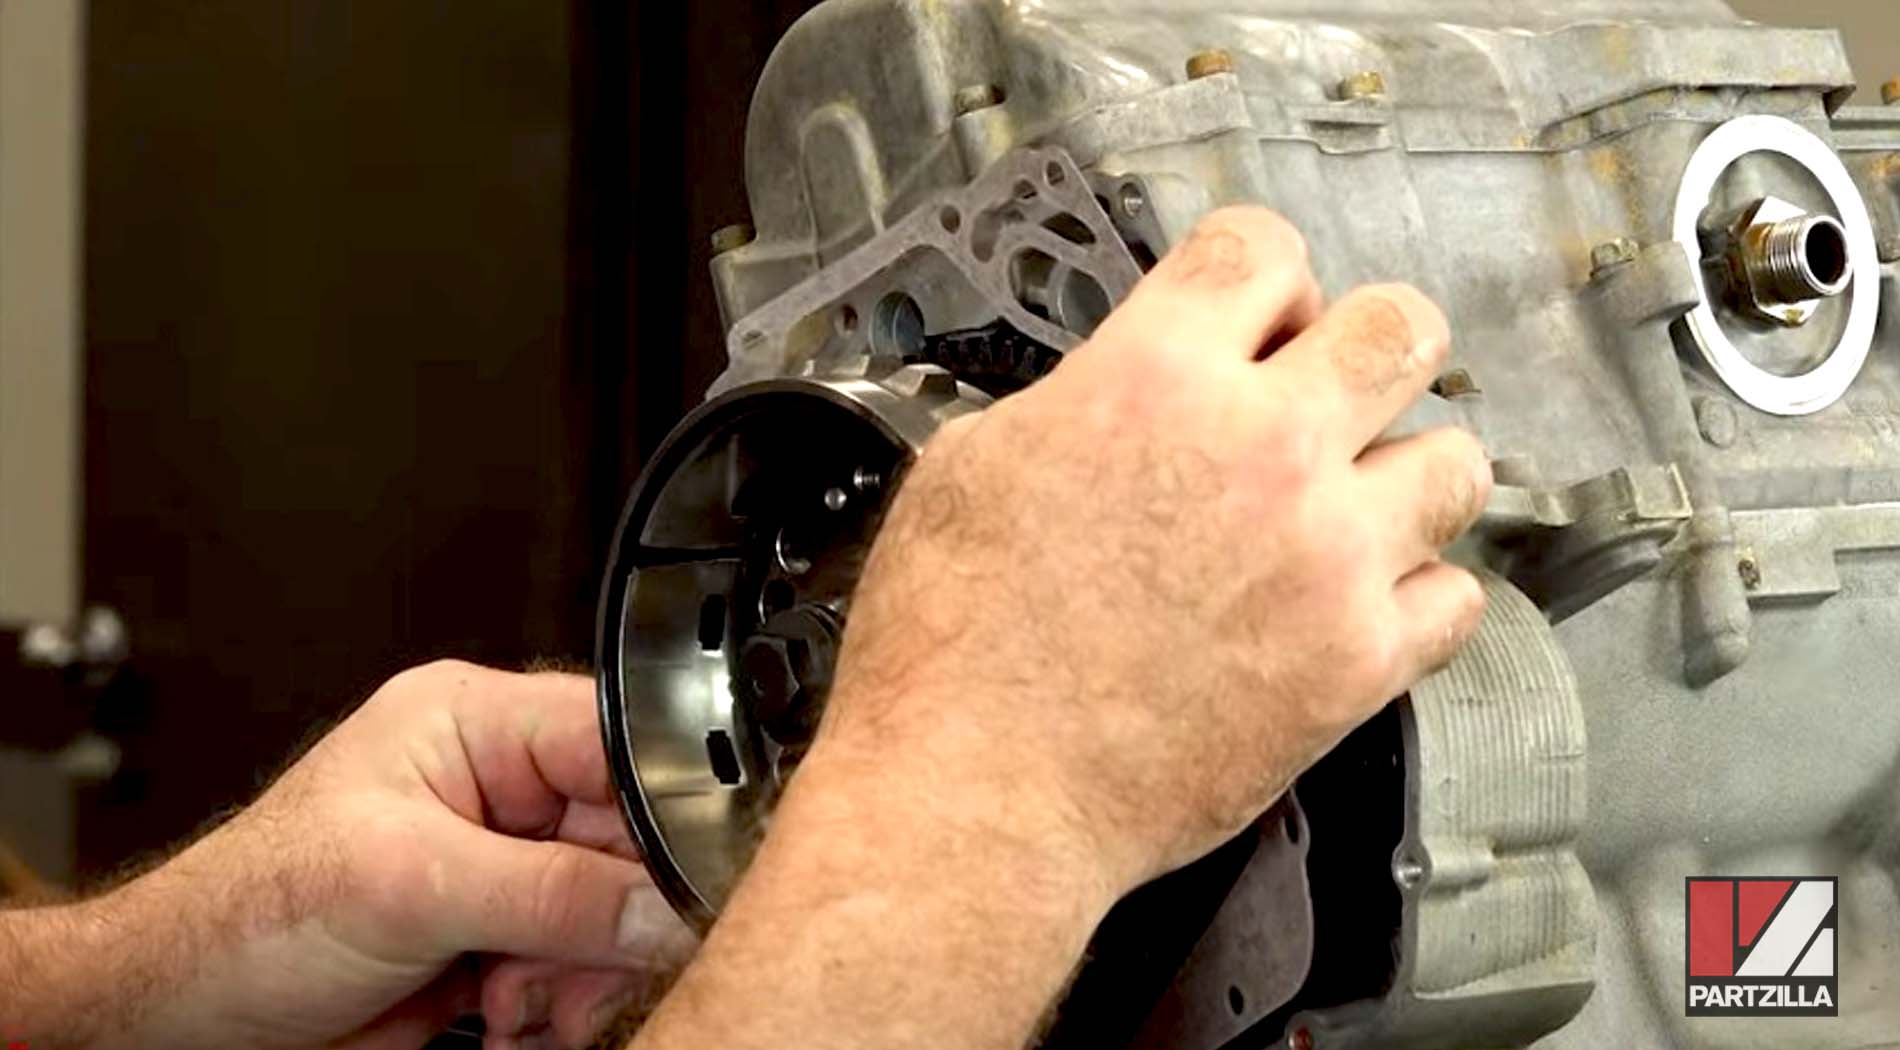

NOTE: Be careful when installing the crankcase cover, as the magnets are going to pull in the cover and potentially pinch your fingers.
Step 25. Install the crankcase cover bolts and torque them to 8.7 foot-pounds.
NOTE: Three of the crankcase cover bolts have washers on them, and there are little arrows to show you which ones those are.
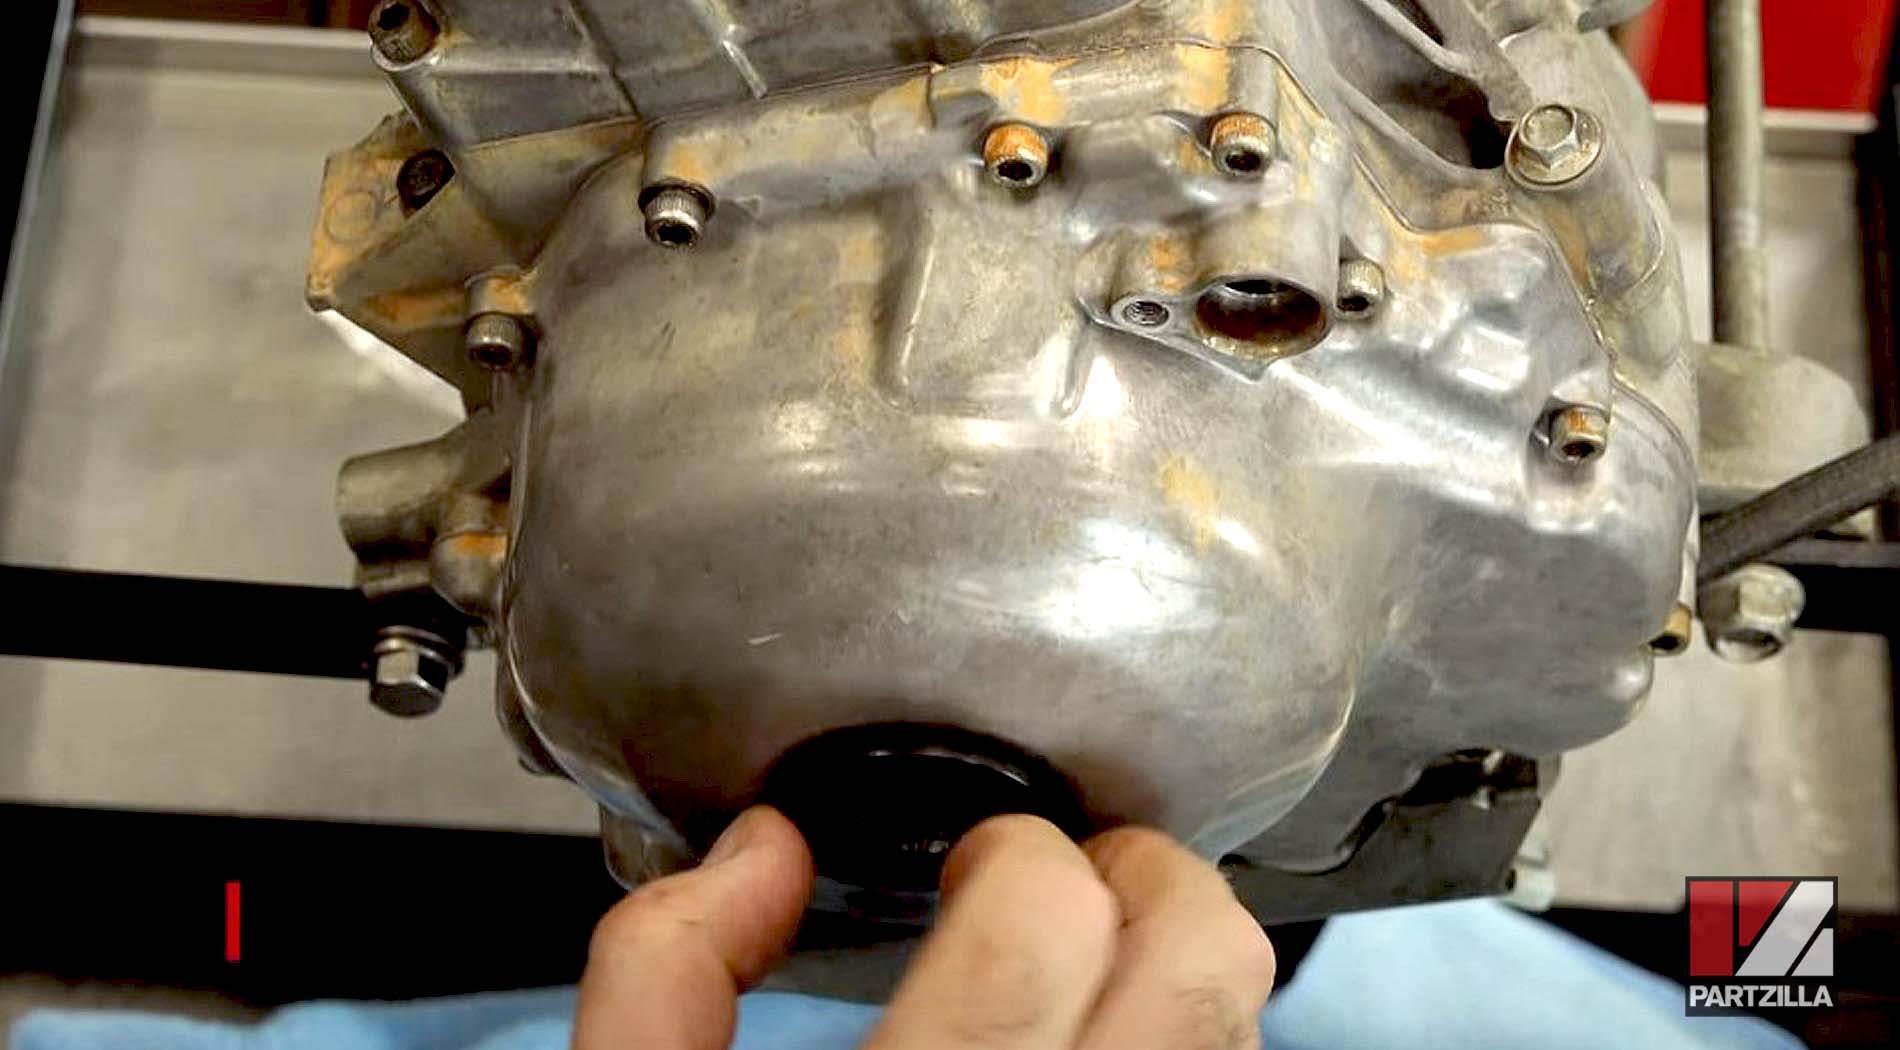
Step 26. Install the oil suction pipe connector, making sure it has its O-ring attached.
Watch the clip below to see the flywheel installation segment of our Yamaha YXZ1000R bottom end rebuild video.
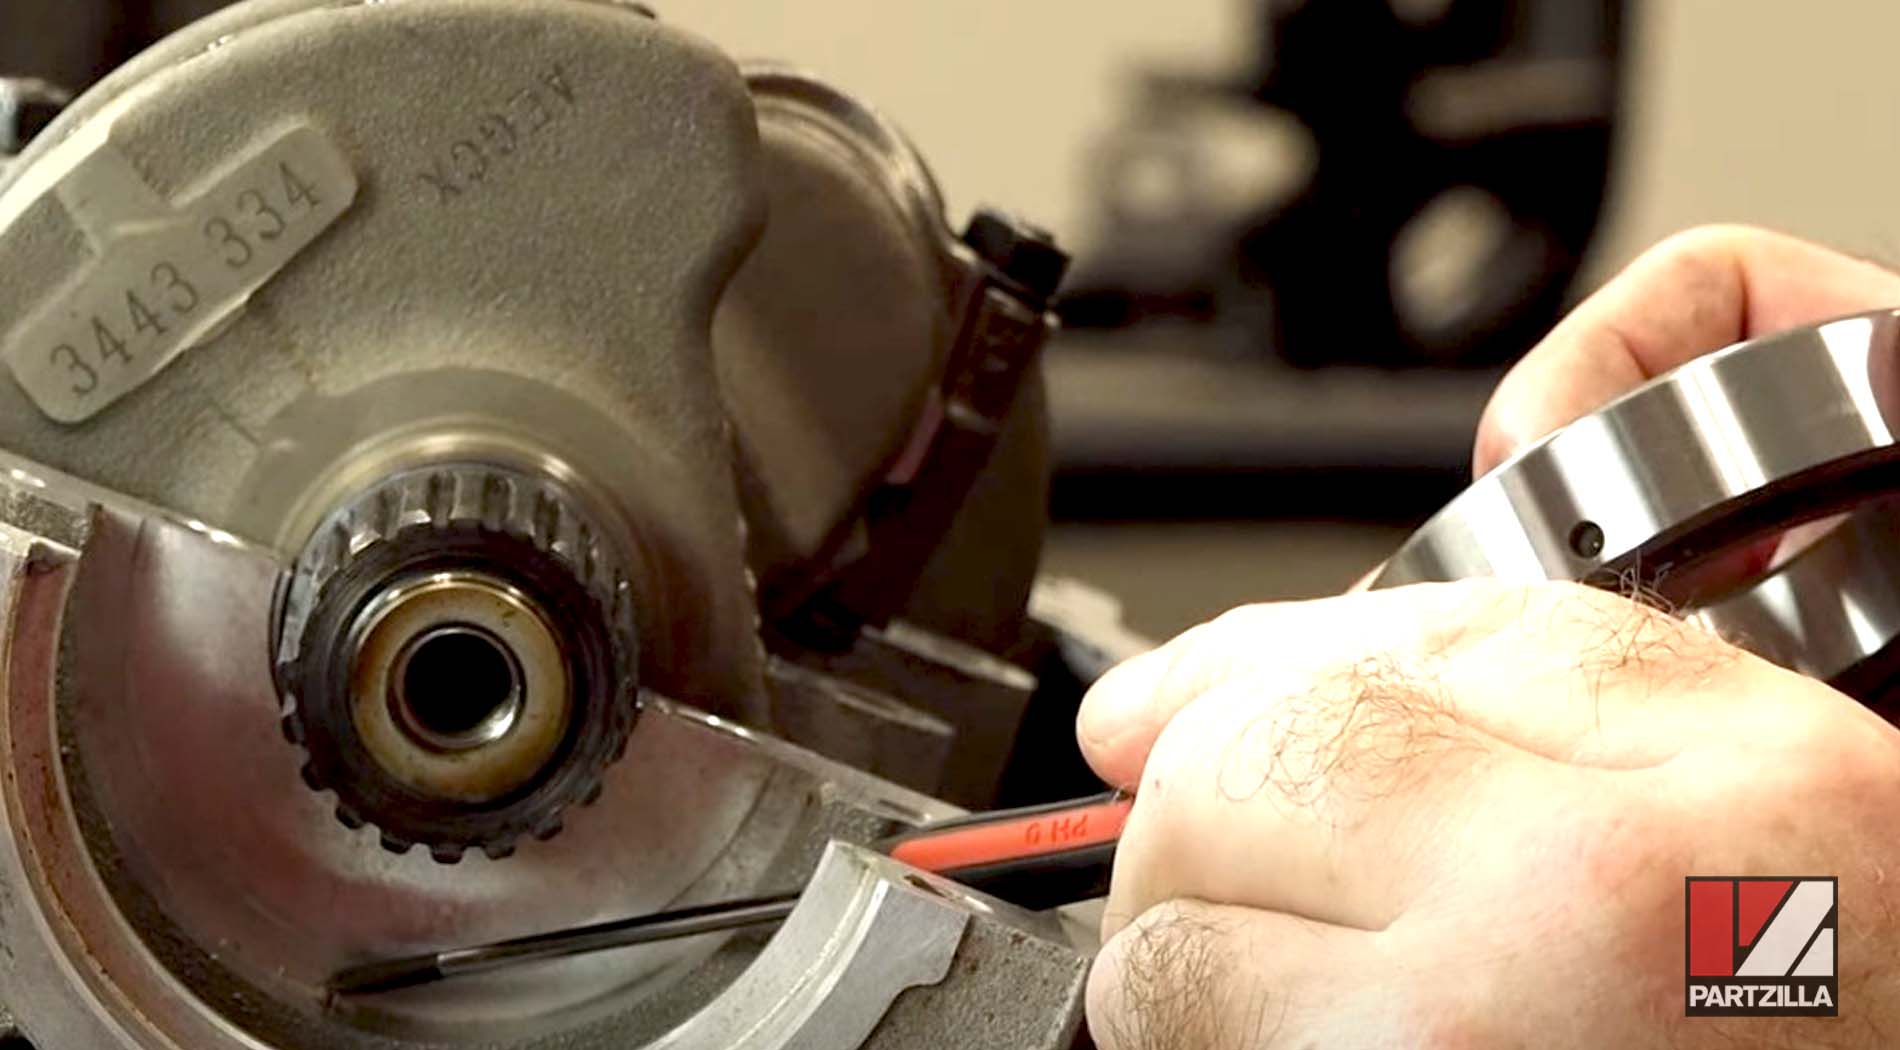
NOTE: There's an output flange bearing that needed to be replaced before the flange itself was installed. The next few steps cover how to do that.
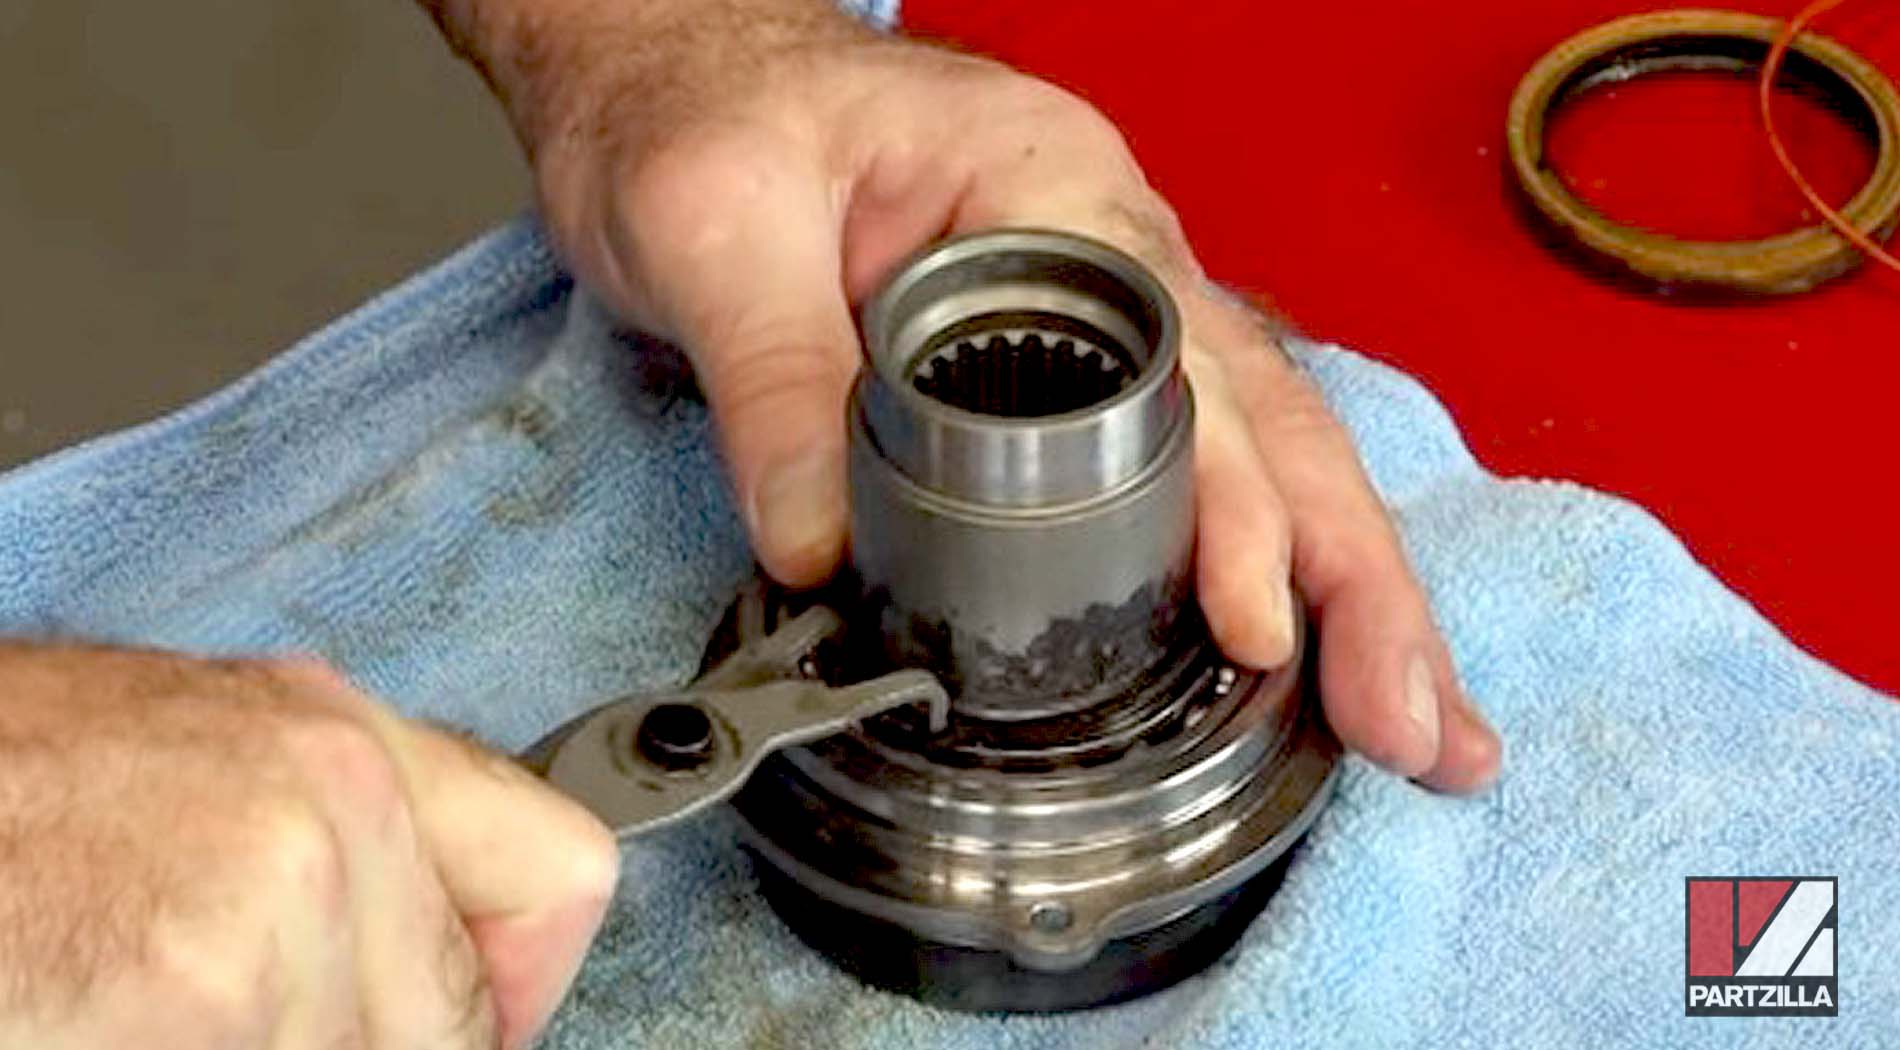
Step 27. Use snap ring pliers to remove the circlip from the output flange, then remove the main oil seal.
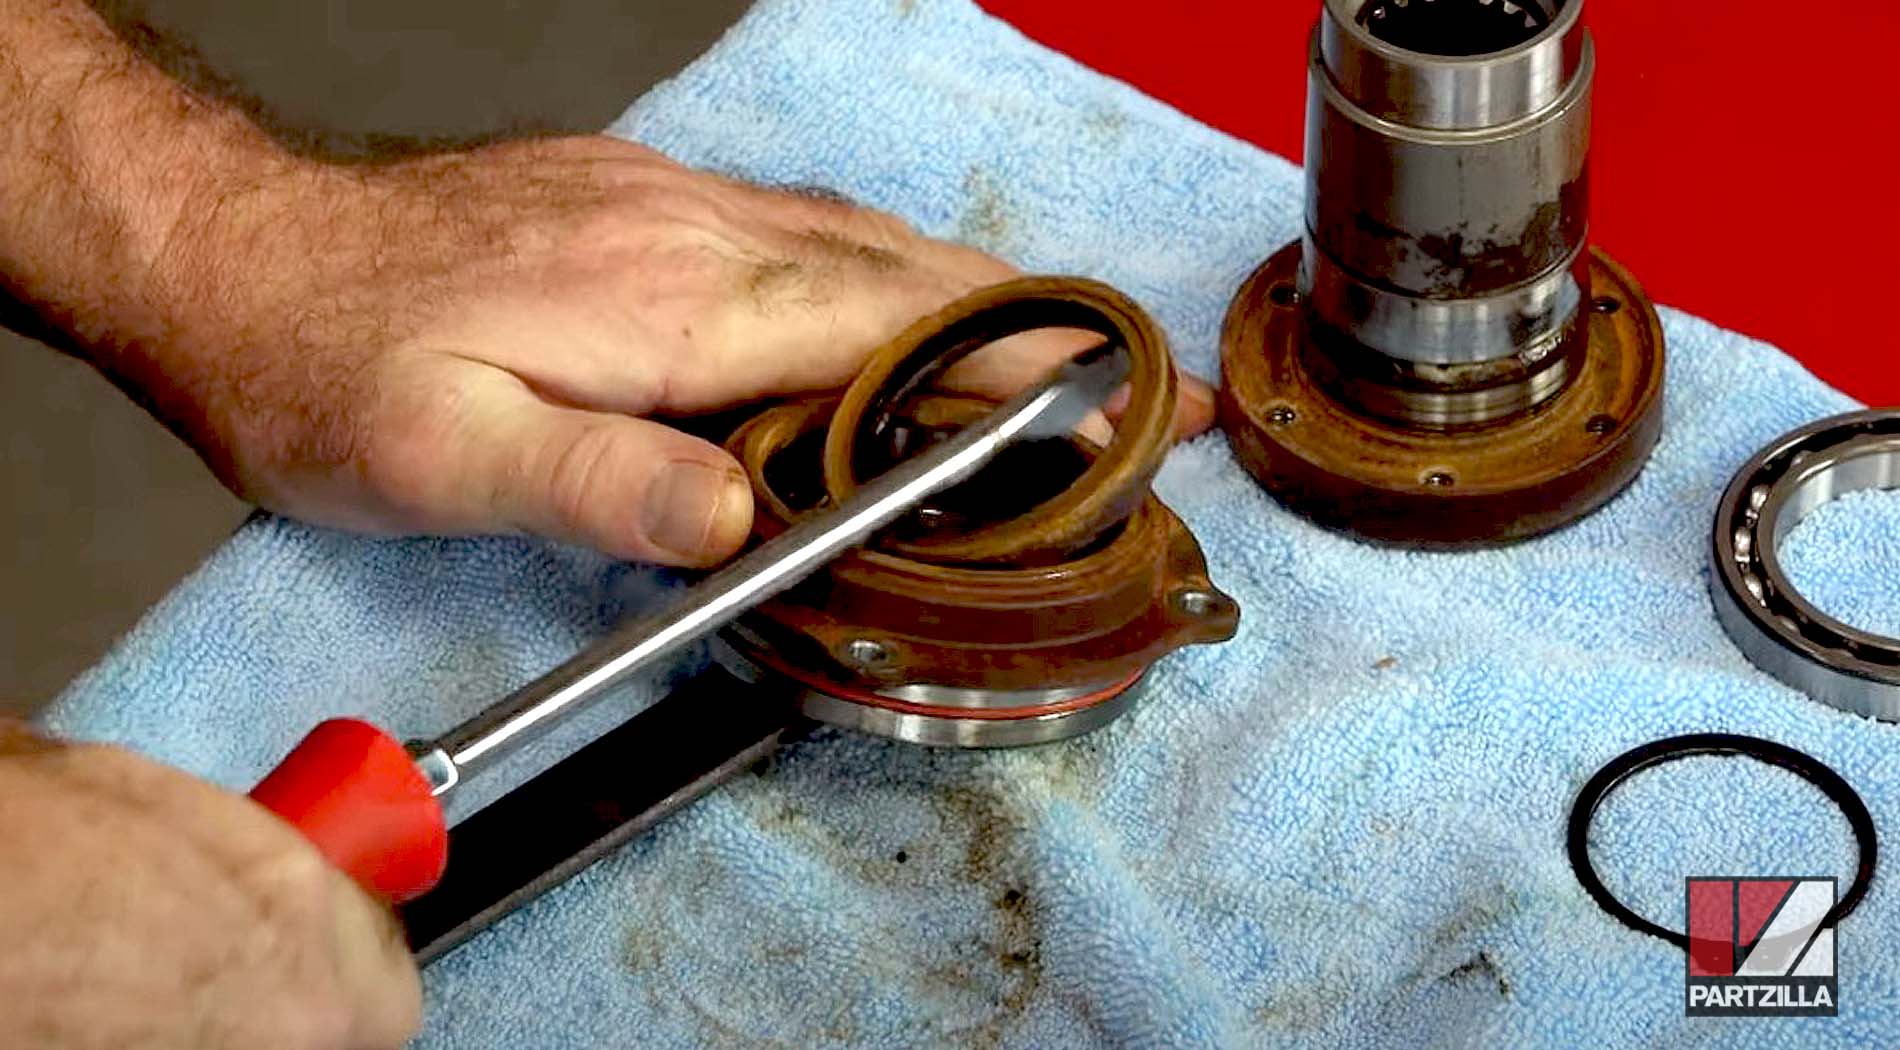
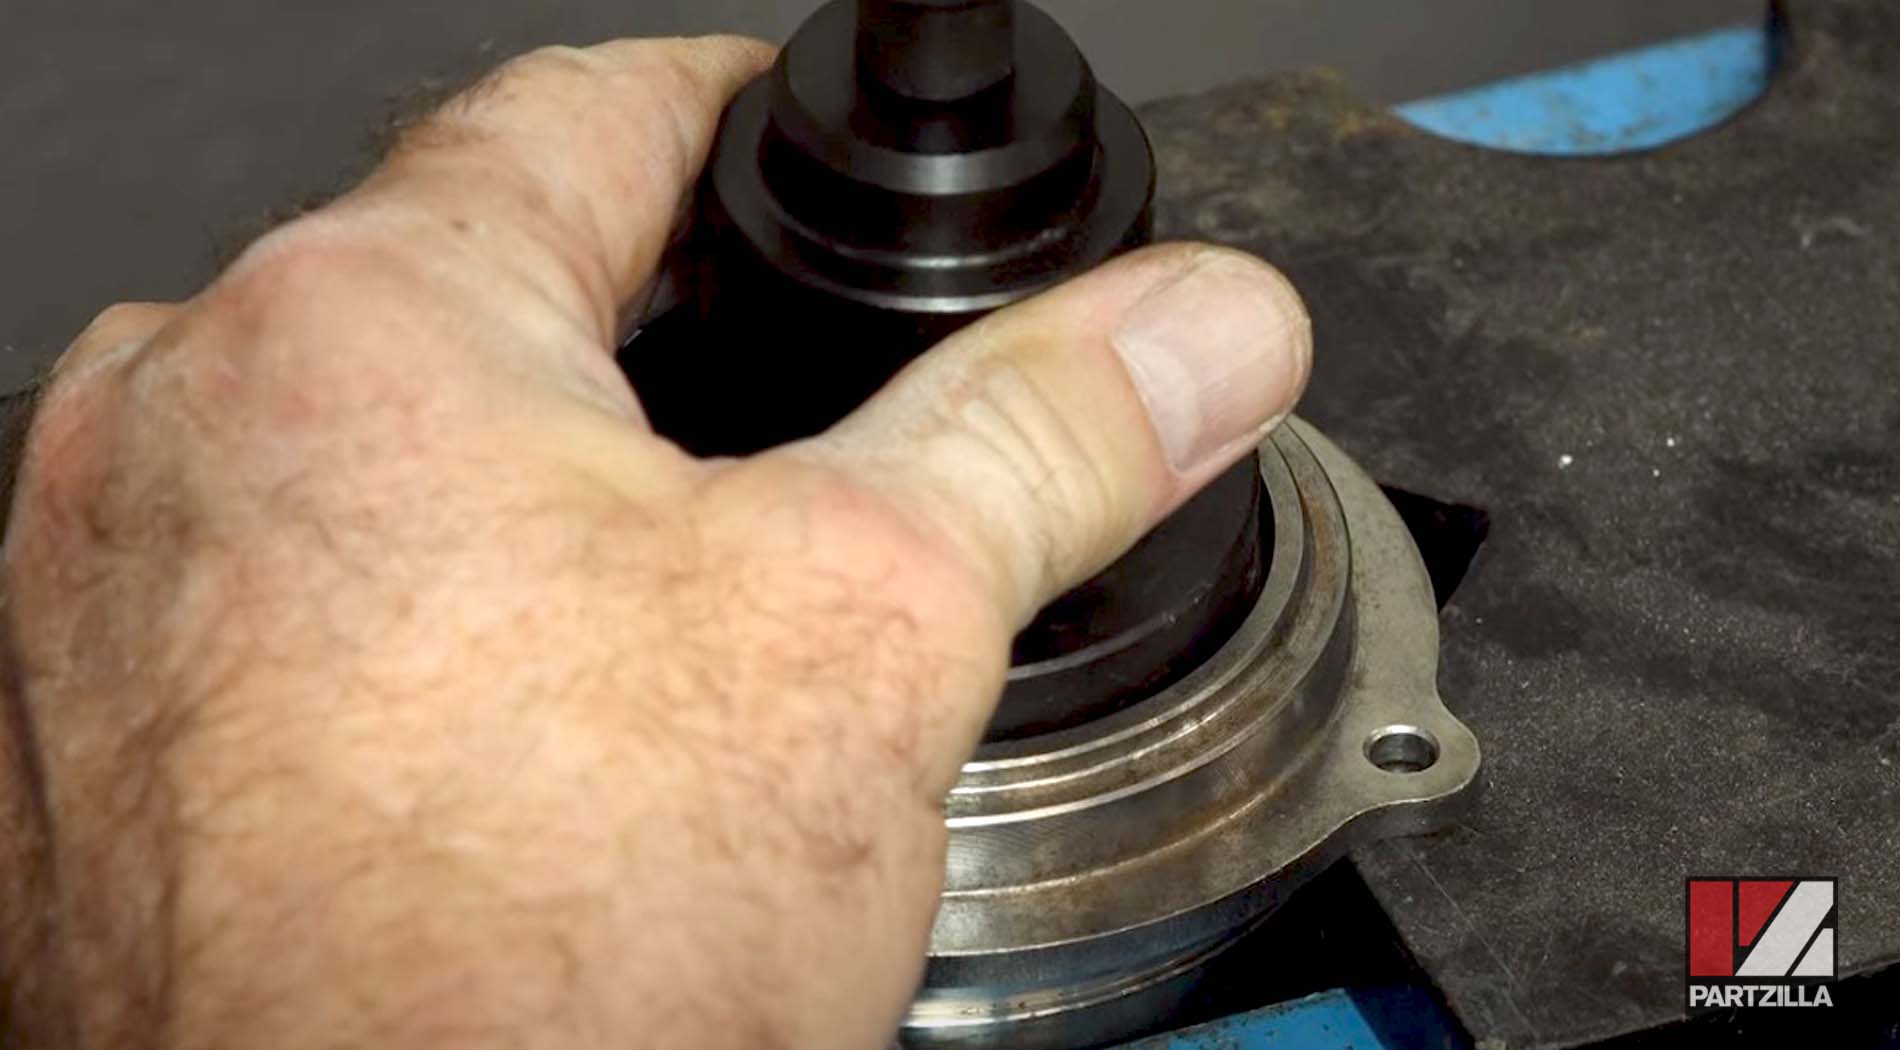
Step 28. Press the old bearing out.

Step 29. Use a wire wheel, a brush in parts washer, contact cleaner, and lapping compound on the back side of an Emery cloth to clean the output flange, then press in the new bearing.
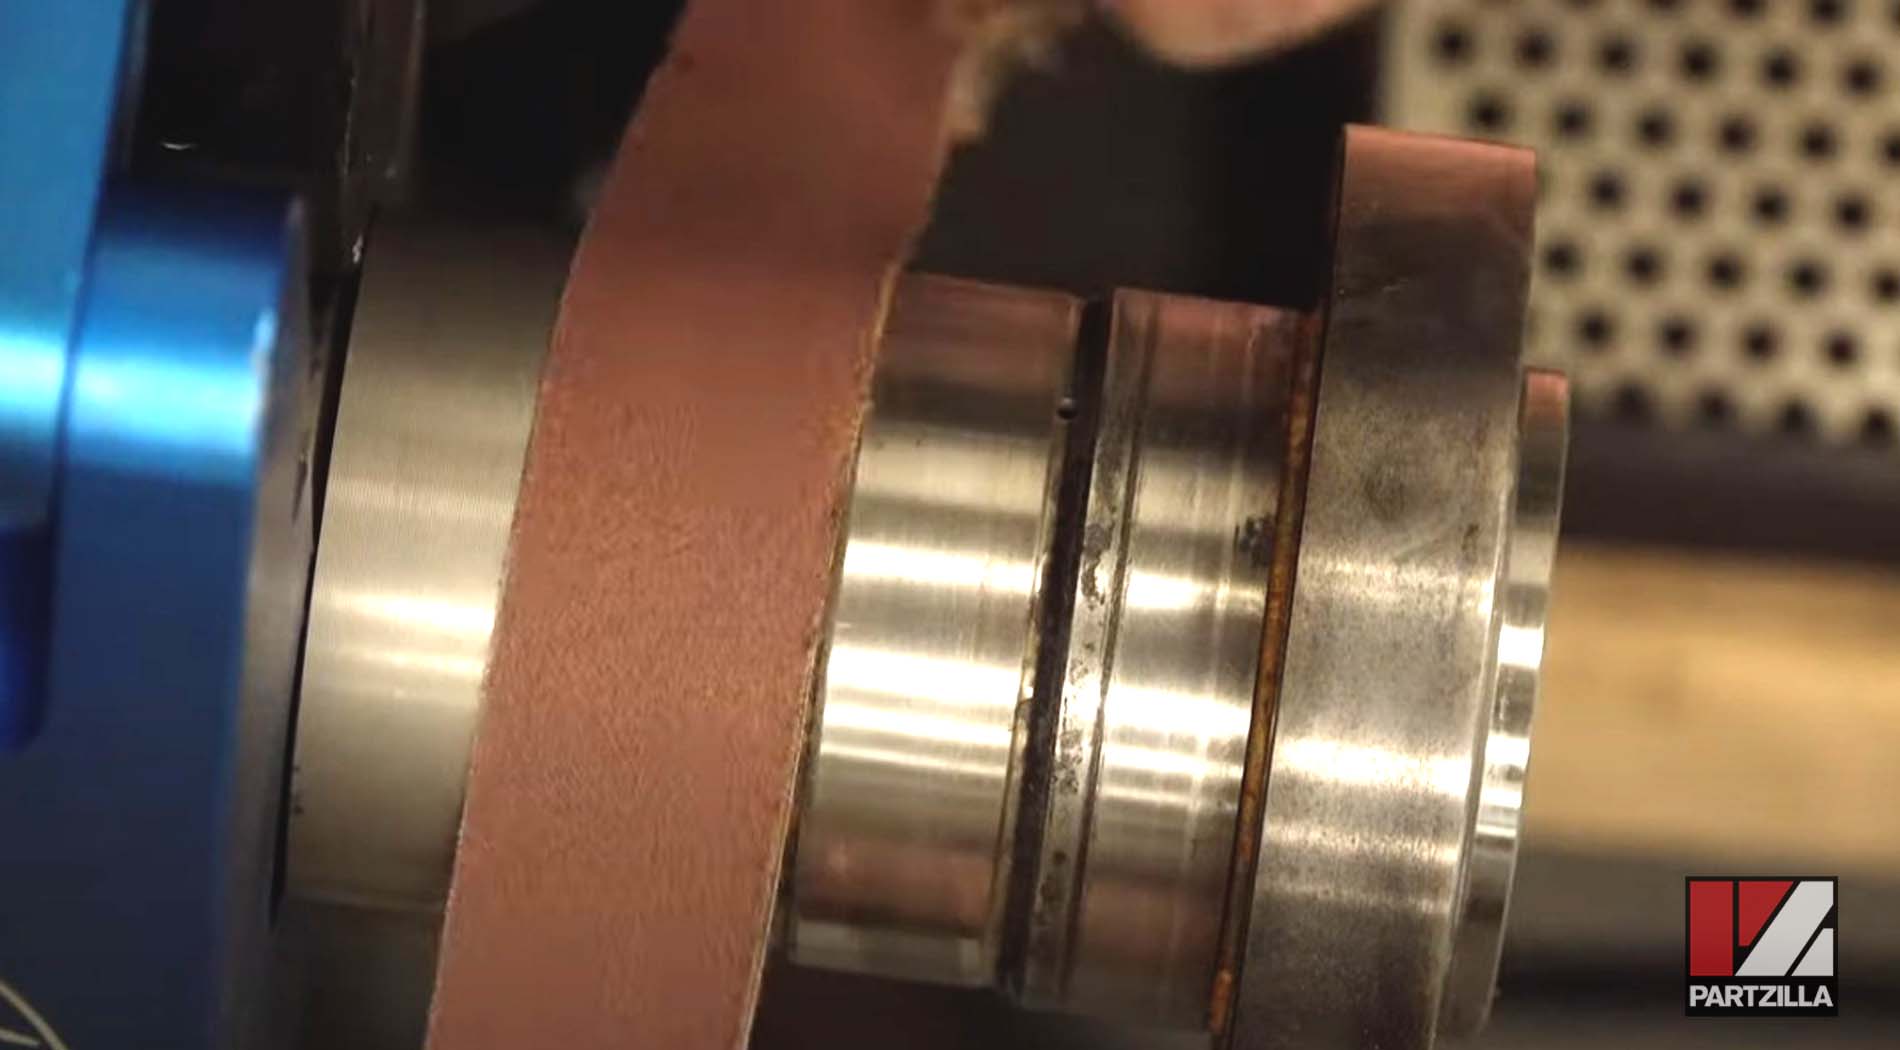
Step 30. Use the press to put in the new oil seal so it can be set accurately at the correct depth, between 5 and 5 ½ millimeters from the upper edge.
PRO TIP: Use a digital caliper to measure the depth.

Watch the clip below to see the output flange bearing replacement segment of our Yamaha YXZ1000R bottom end rebuild video.
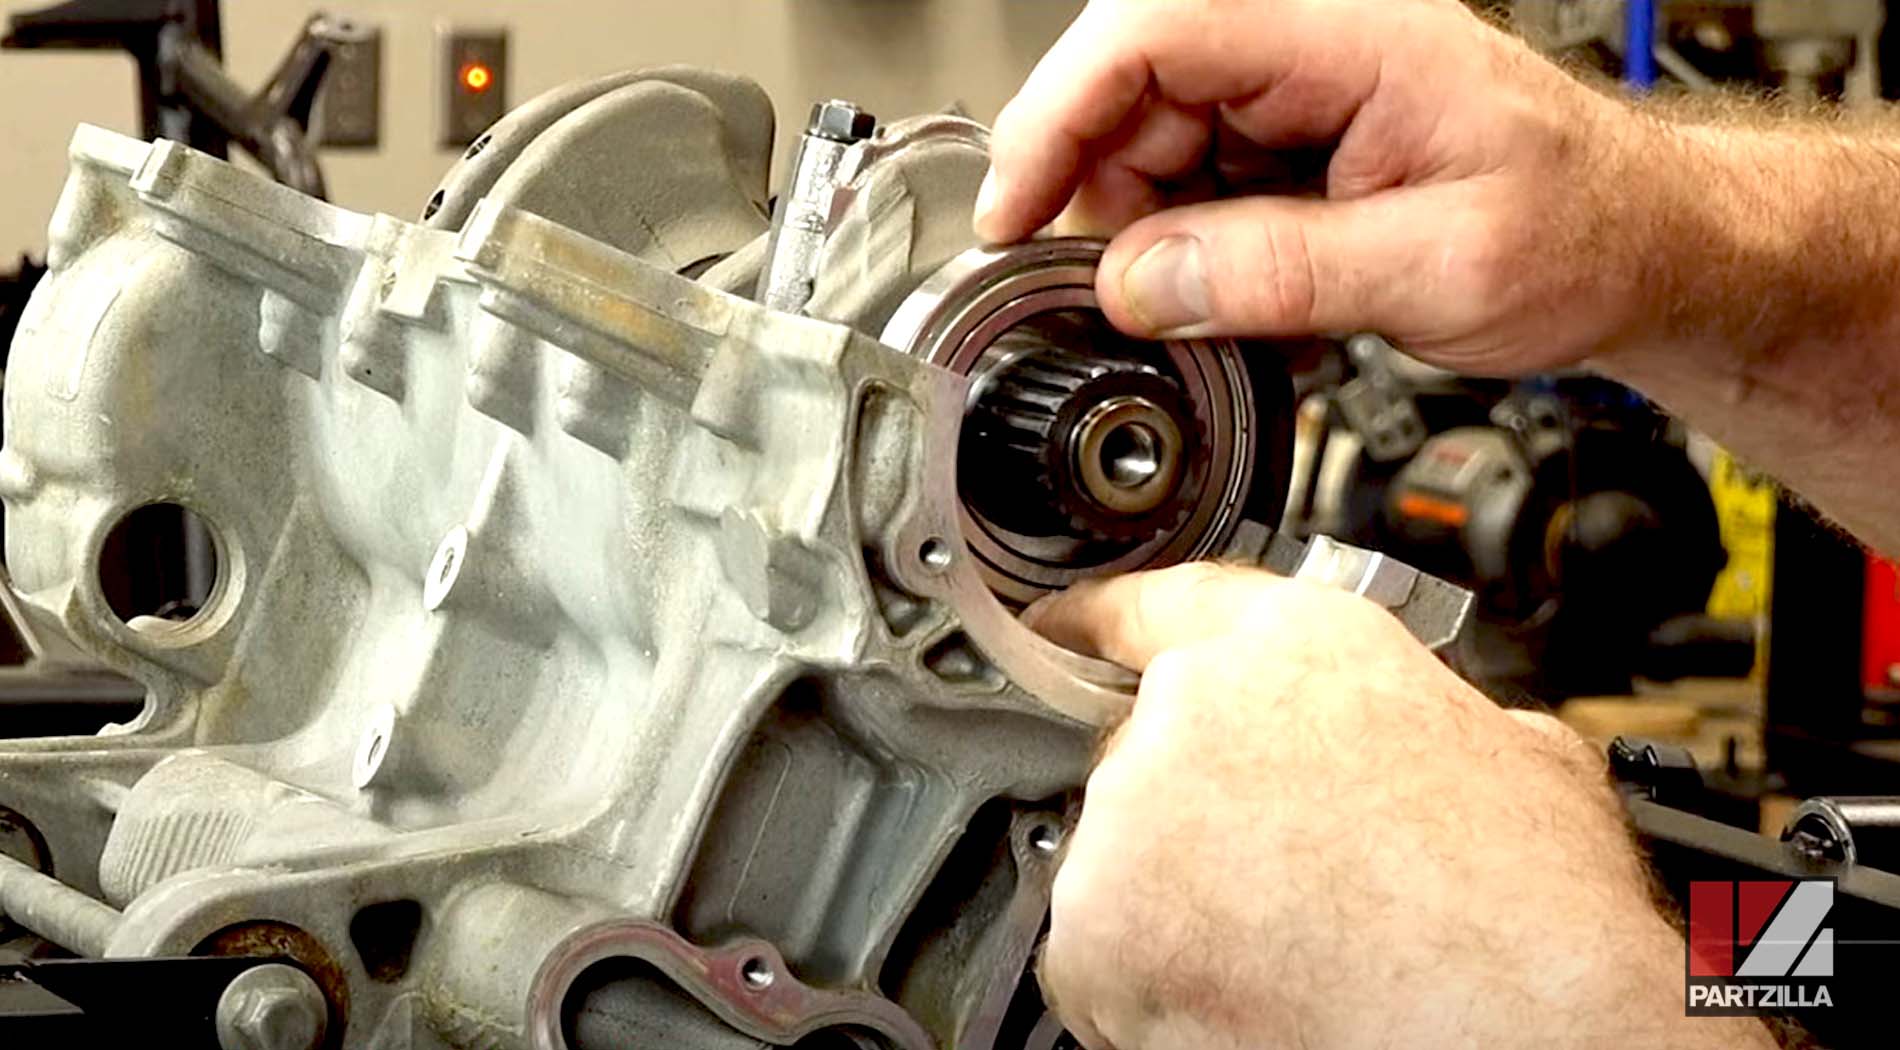
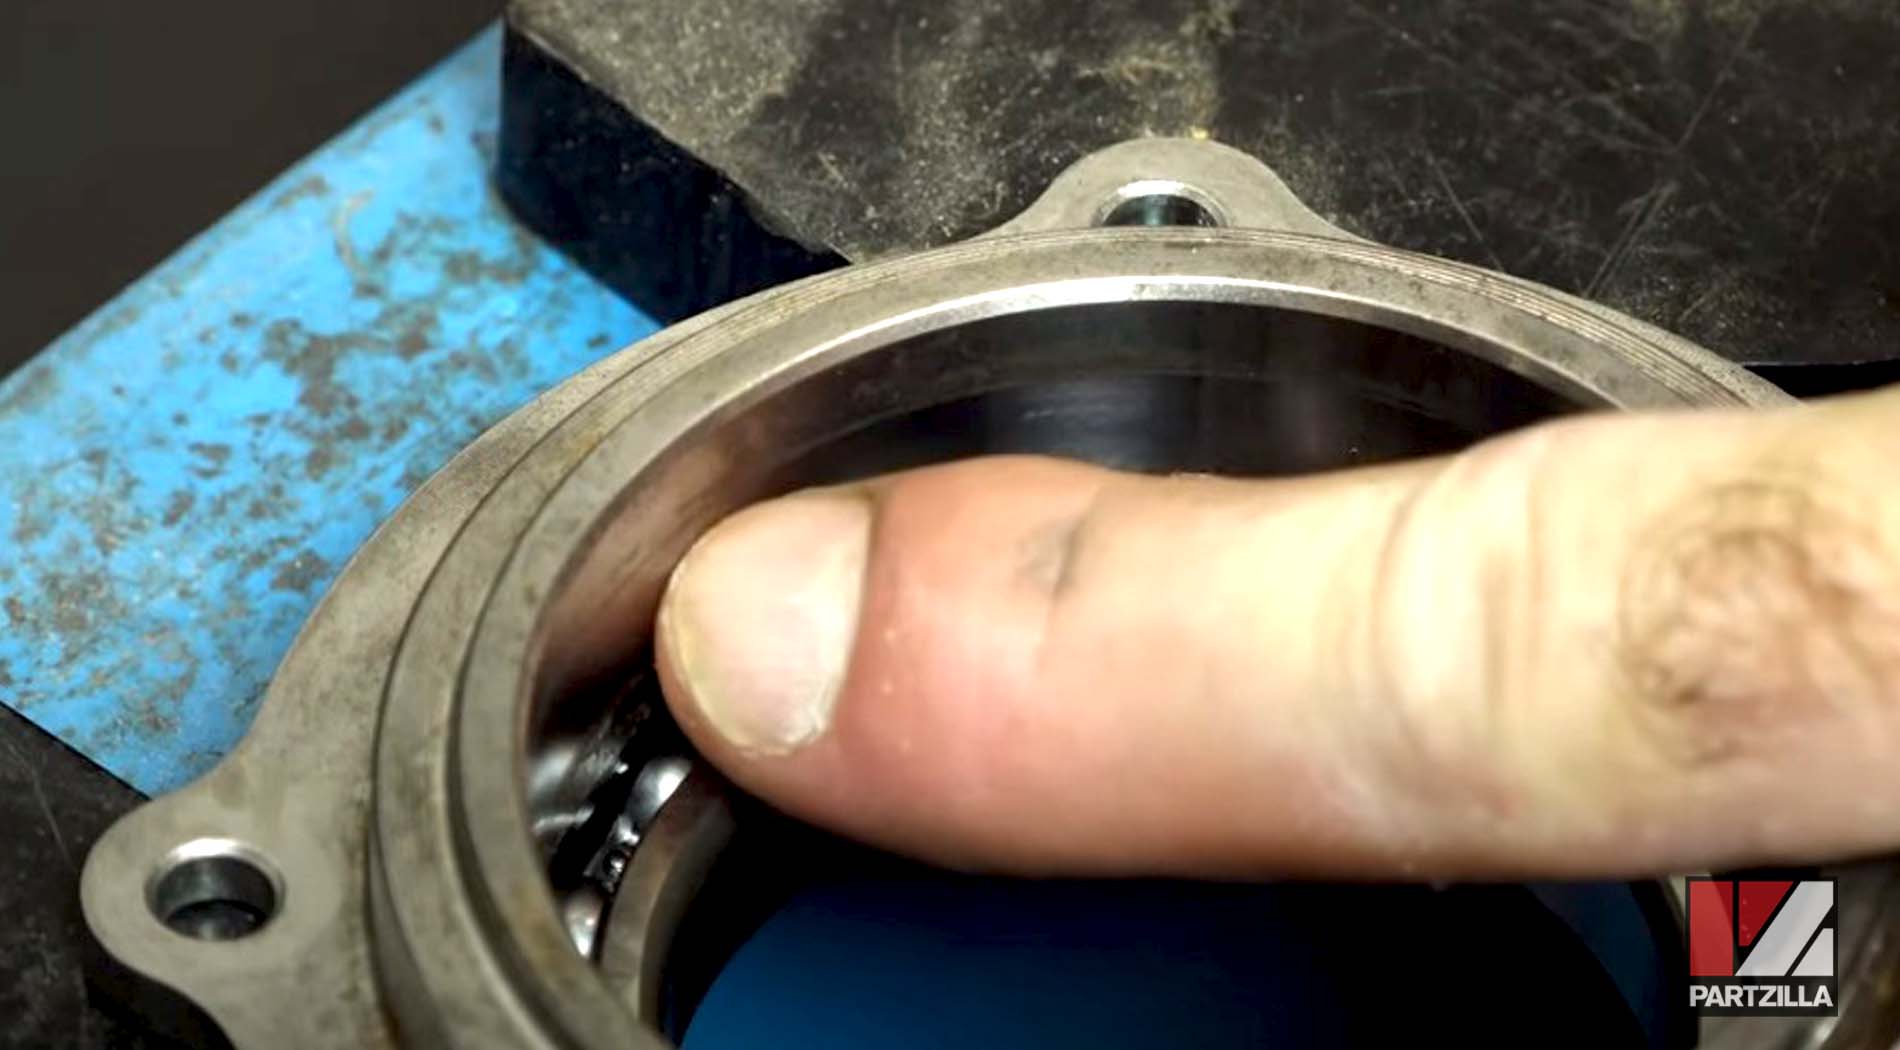
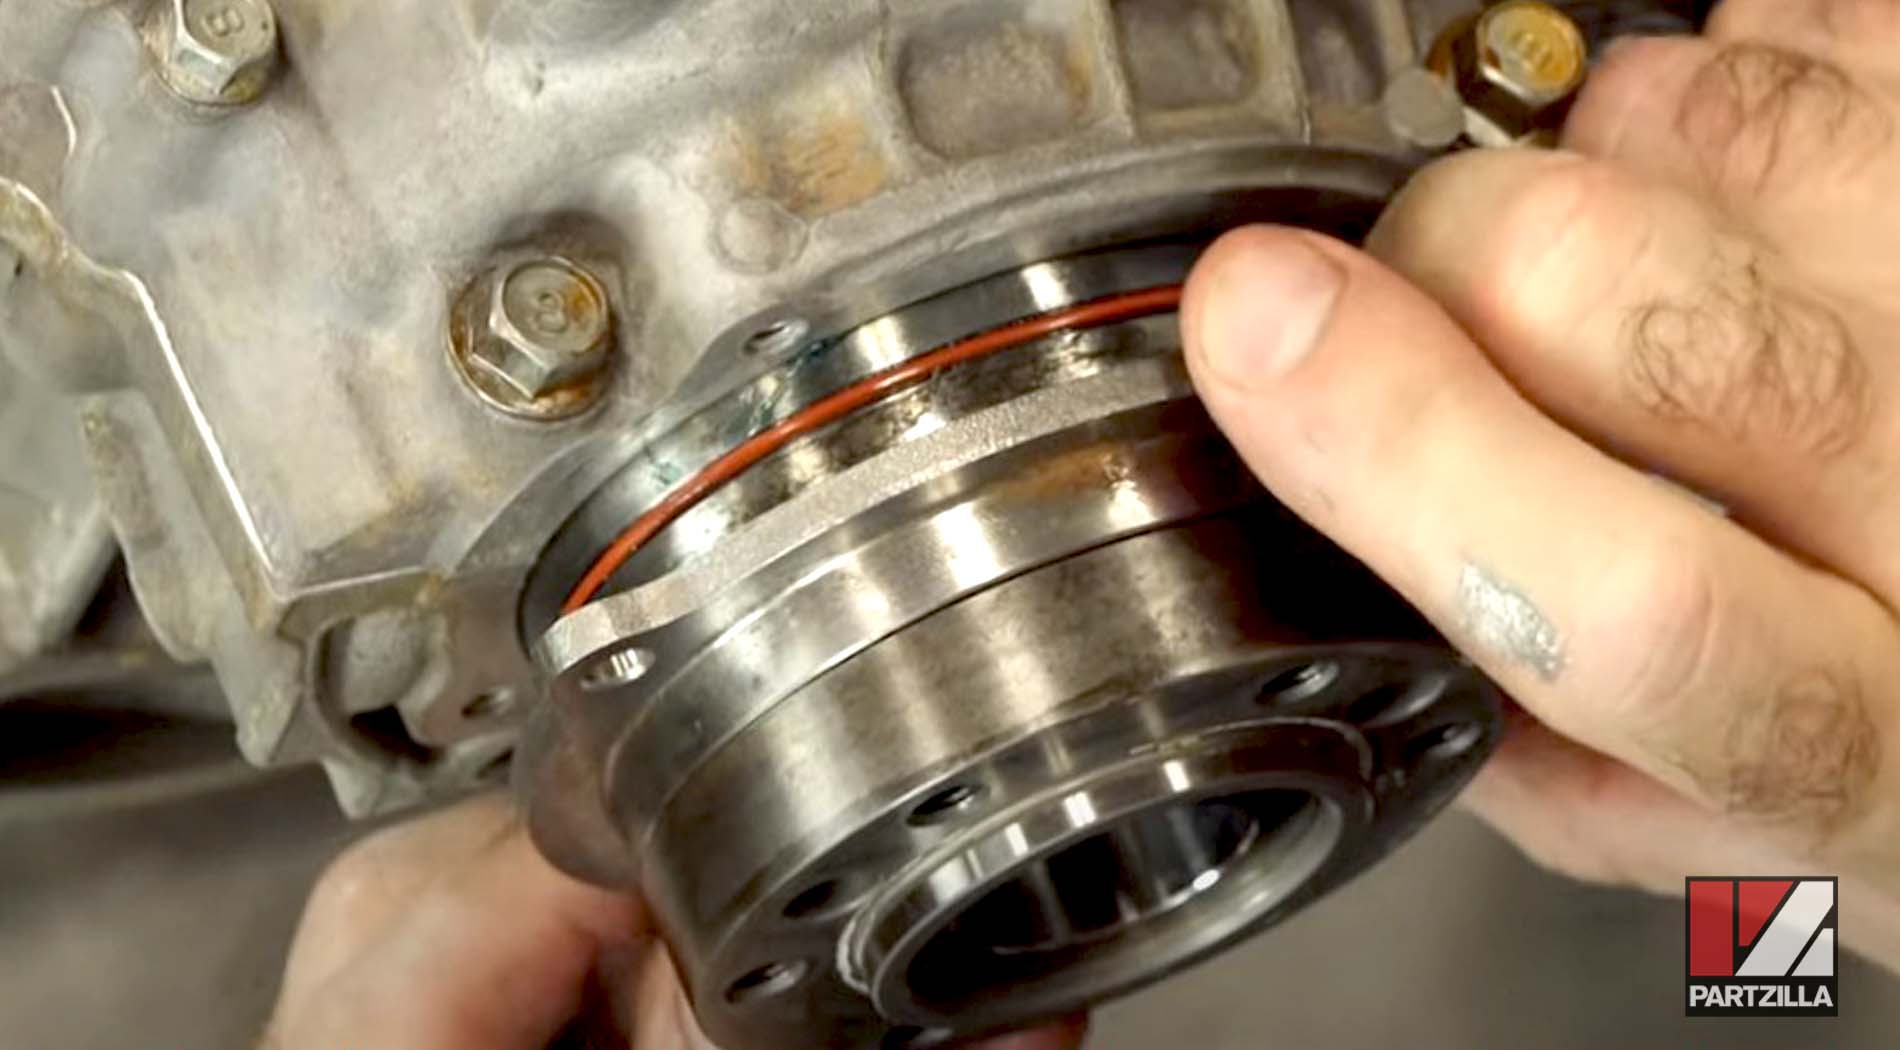
Step 31. Add assembly lube and some grease around the seal and the output flange itself, then install the circlip.
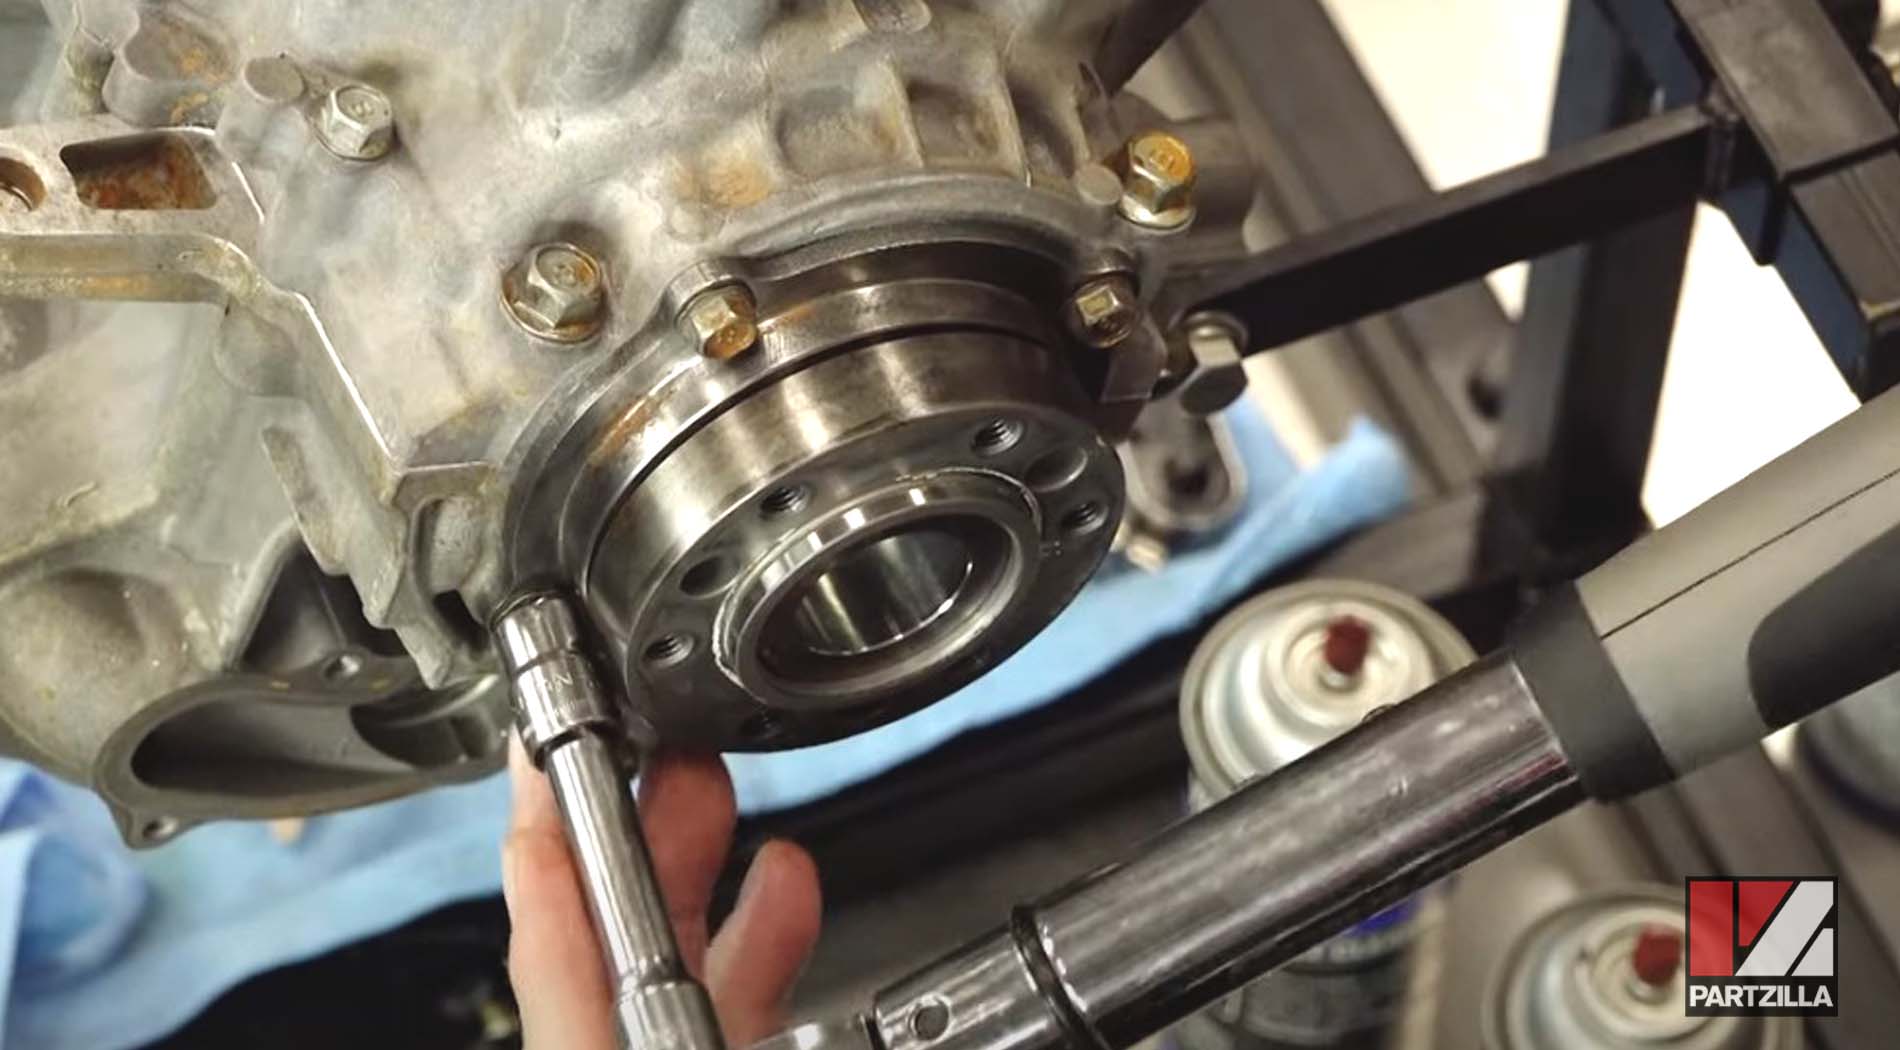
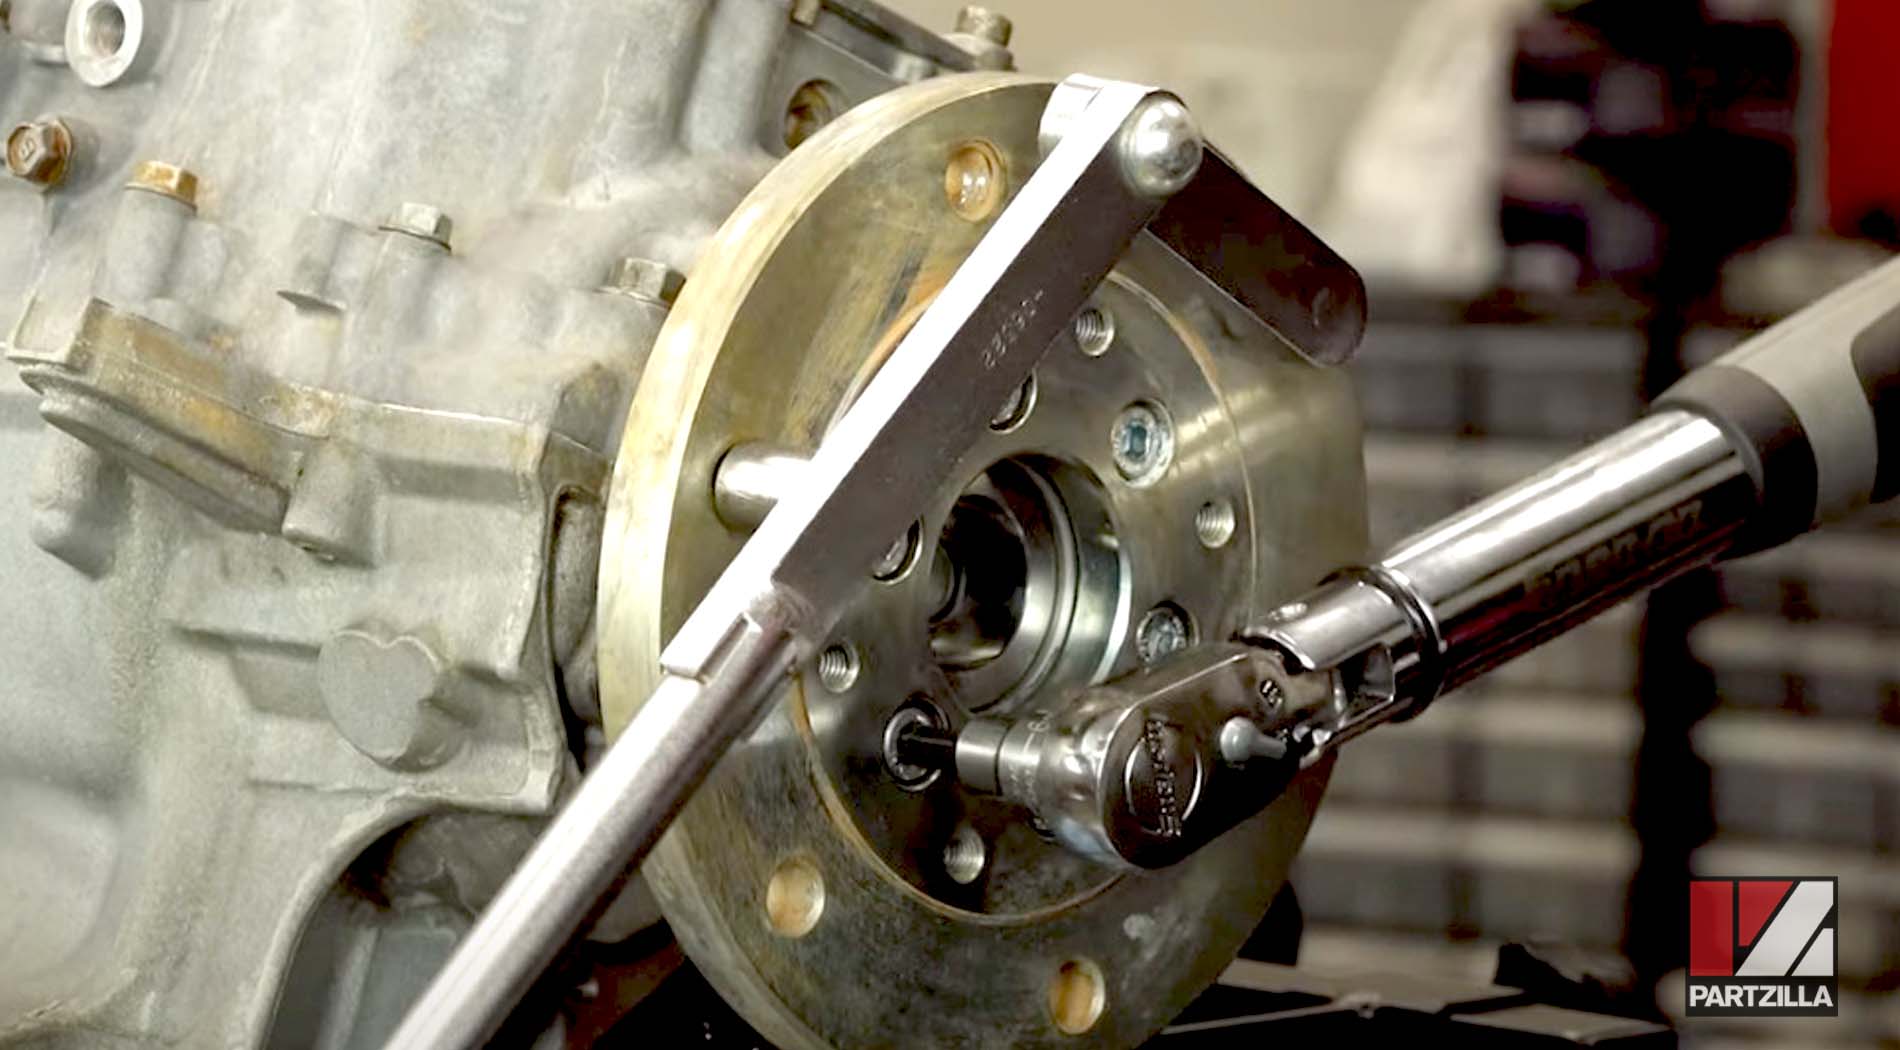
Step 32. Install a new housing O-ring onto the output flange, then add a little grease around the edge of it and inside the crankcase halves to make it easier to slide the flange back in. Next, install the output flange and its mounting bolts and torque them to 8.8 or 9 foot-pounds until it bottoms out. Add some oil to the main bolt.
Step 33. Install the flywheel and its mounting bolts. Use a rotor mag holder to hold it in place while you tighten the center bolt to 87 foot-pounds, and torque the rest of the bolts to 27 foot-pounds.
NOTE: Be careful when you're getting the flywheel to lay flush. It may take a little bit of rocking back and forth before it finally seats in, but don't force it with the bolts. You want it completely flush before you start tightening the bolts down.
Watch the clip below to see the output flange installation segment of our Yamaha YXZ1000R bottom end rebuild video.
Step 34. Install the starter motor and its mounting bolts.
Watch the clip below to see the starter mounting segment of our Yamaha YXZ1000R bottom end rebuild video.
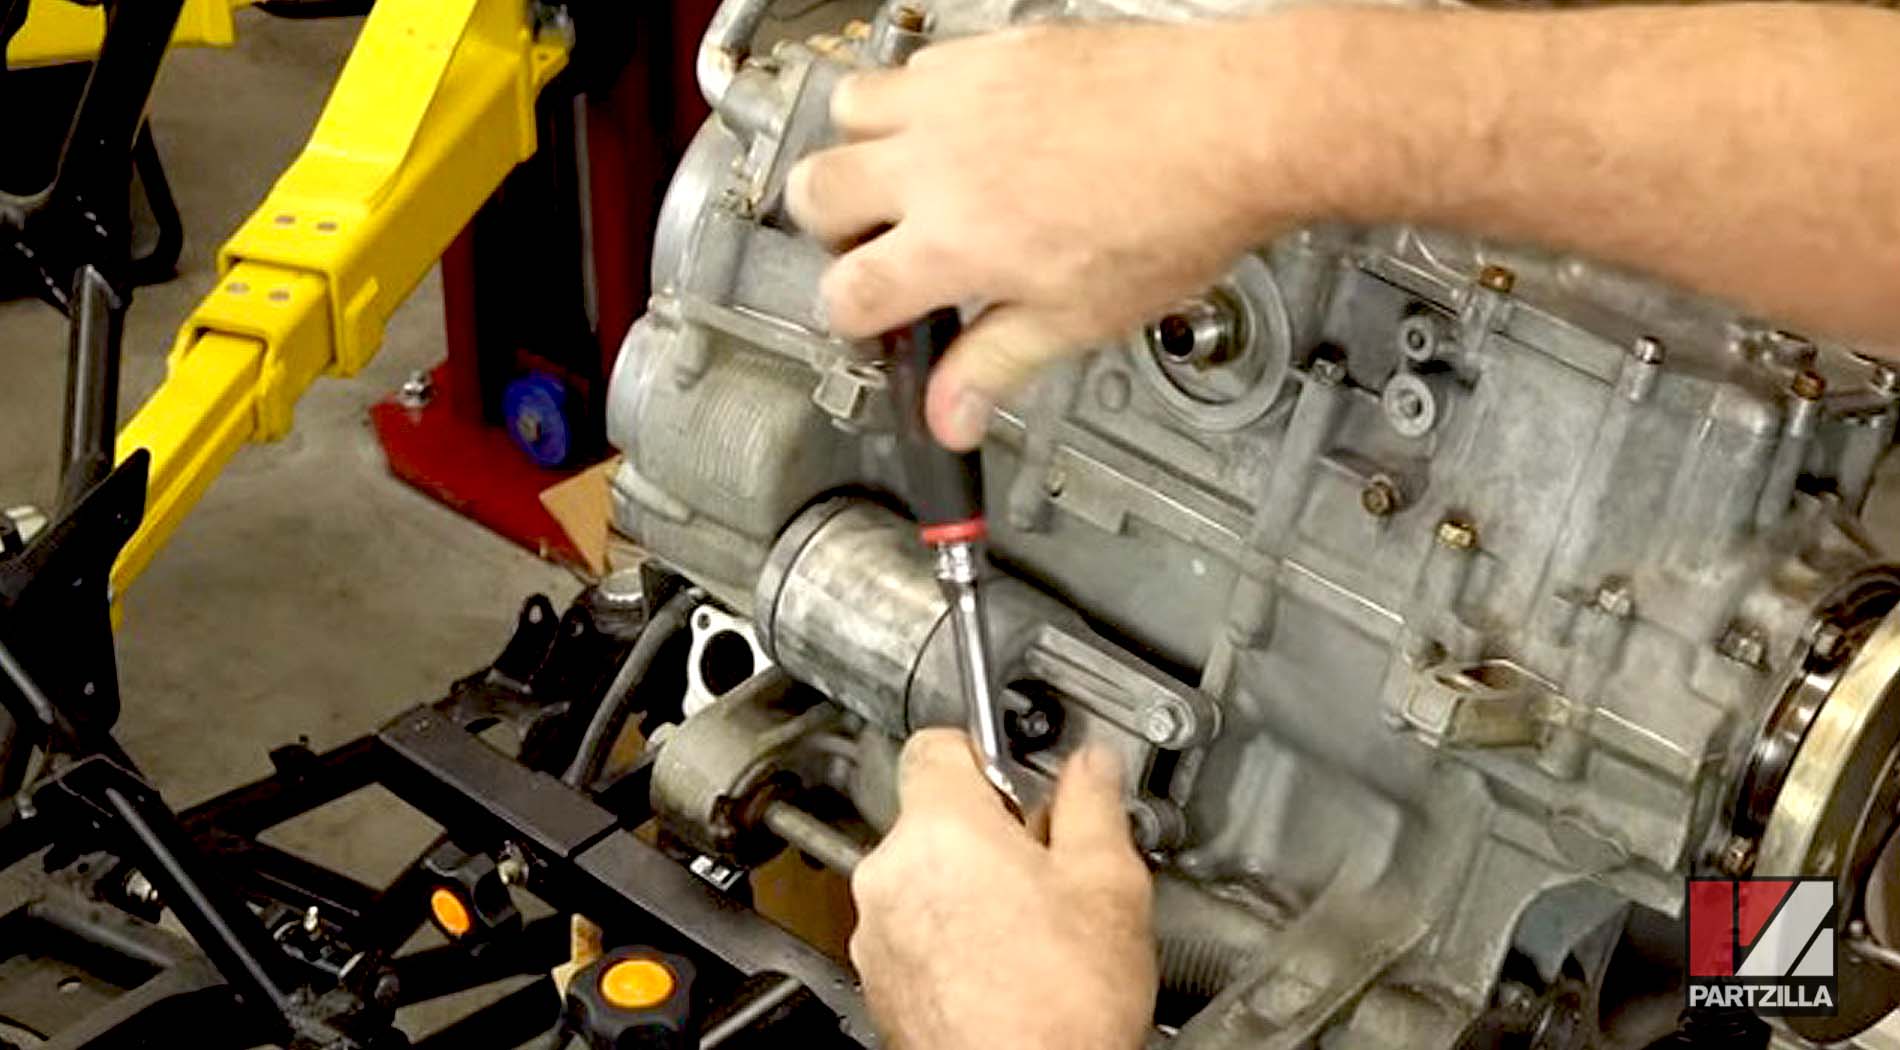
Step 35. Rotate the engine a bit to make it easier to install the water pump, then remove the old O-rings from the pump and install new ones.
Step 36. Install the blind plug, the water pump assembly and its mounting bolts, then torque the bolts to 8.7 foot pounds.
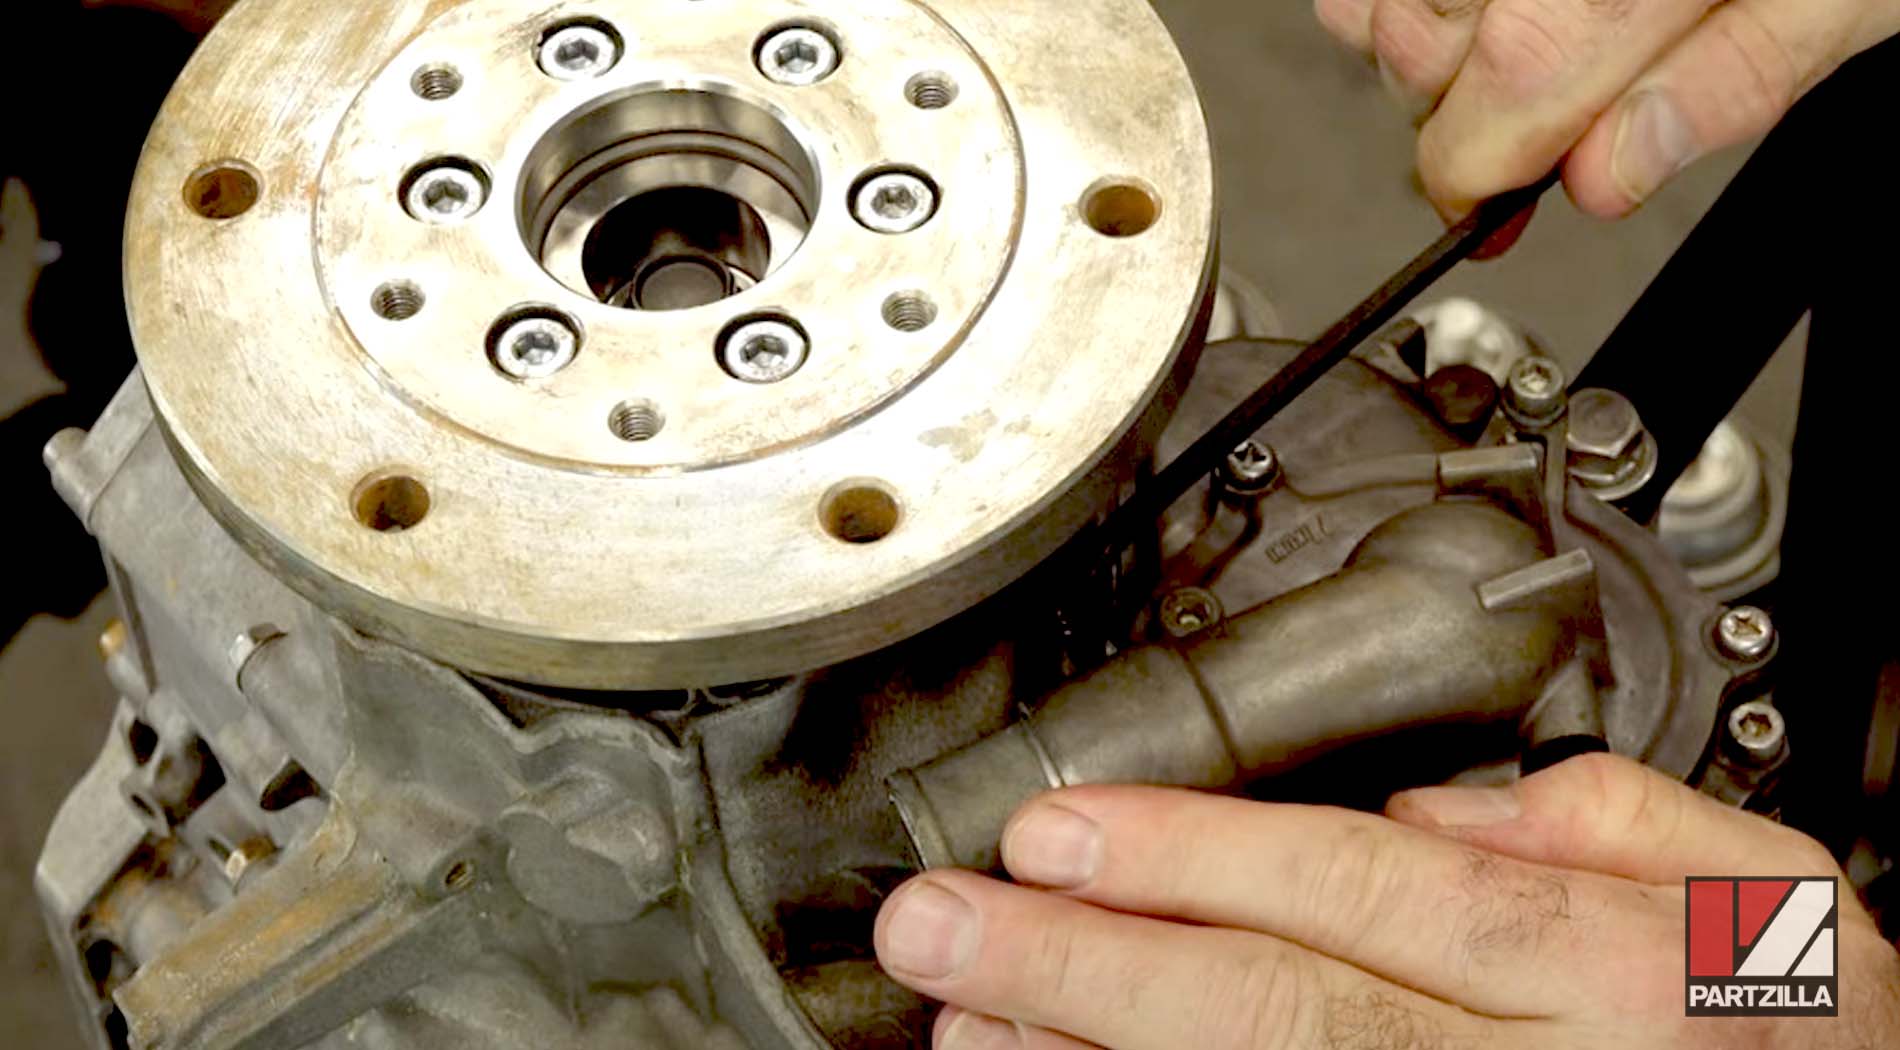
PRO TIP: For the bolt that’s tucked up under the flywheel, instead of taking the flywheel off, use a regular handle and an internal torque wrench to tighten it down.
Watch the clip below to see the water pump installation segment of our Yamaha YXZ1000R bottom end rebuild video.
That wraps up the bottom end rebuild of this Yamaha YXZ1000R engine. More videos on this side-by-side engine rebuild will be coming soon. Until then, enjoy our 2016 Yamaha YXZ1000R repairs playlist below.