Polaris Sportsman Ball Joints Change
The lower ball joints on a Polaris Sportsman are prone to damage from rocks and debris. You need to check them regularly for rips or wear, and replace them as soon as you find a problem.
While the A-arm is off your ATV to replace the ball joint, it's also a good time to inspect and, if necessary, replace the rubber bushings. This guide will walk you through replacing Polaris Sportsman 850XP front lower ball joints and bushings. Watch the video above and print the guide below for reference.
Tools & Parts - Polaris Sportsman Ball Joints & Bushings Replacement
- Ratchet and sockets
- Screwdriver
- Circlip pliers
- Metal collar or pipe
- Press or hammer
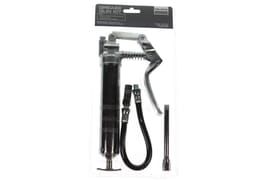
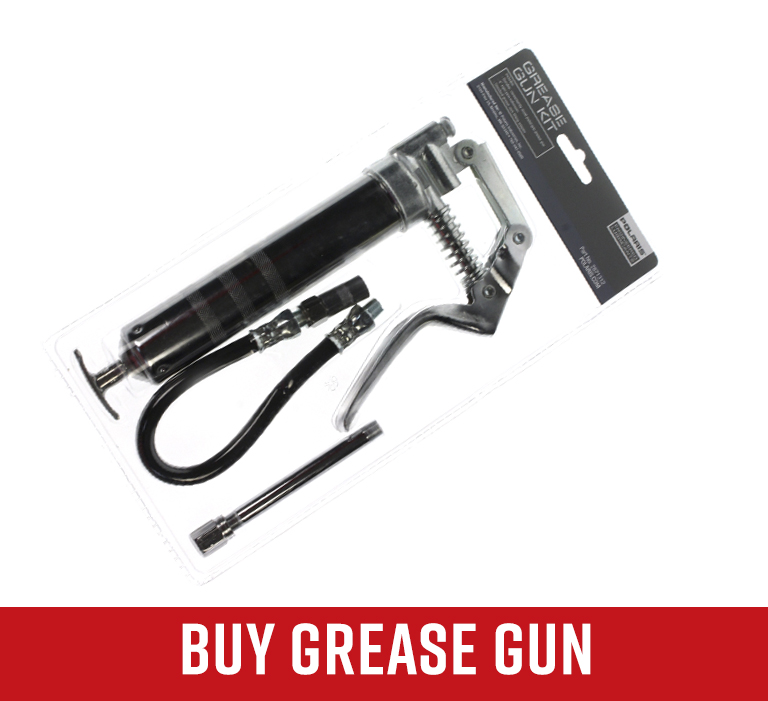
- Grease gun
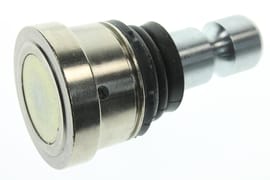
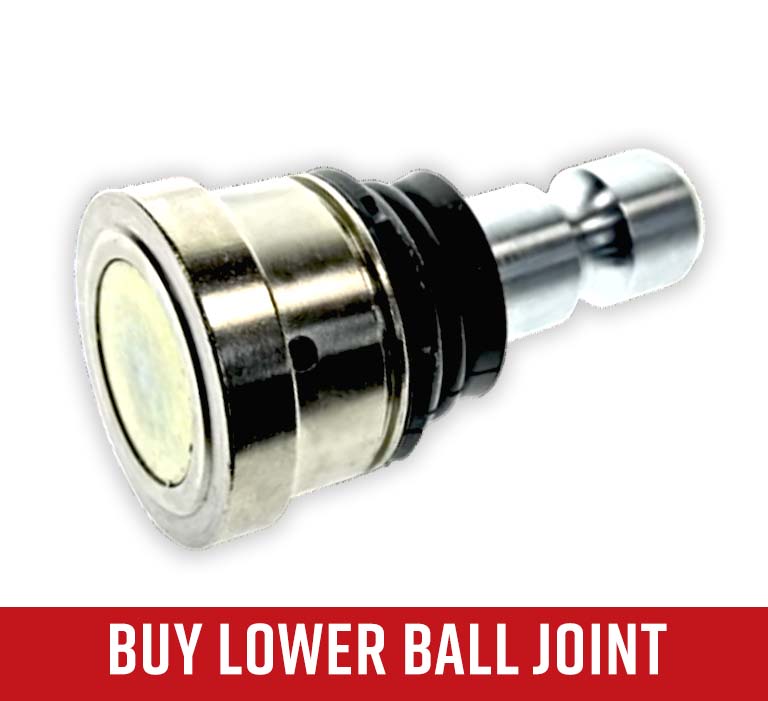
- Lower ball joint
- Lower control arm/A-arm bushings
NOTE: The suspension control arms on a Polaris Sportsman 850XP are more commonly known as the A-arms. We refer to them as A-arms in this guide.
Replacing Polaris Sportsman 850 Front Lower Ball Joints
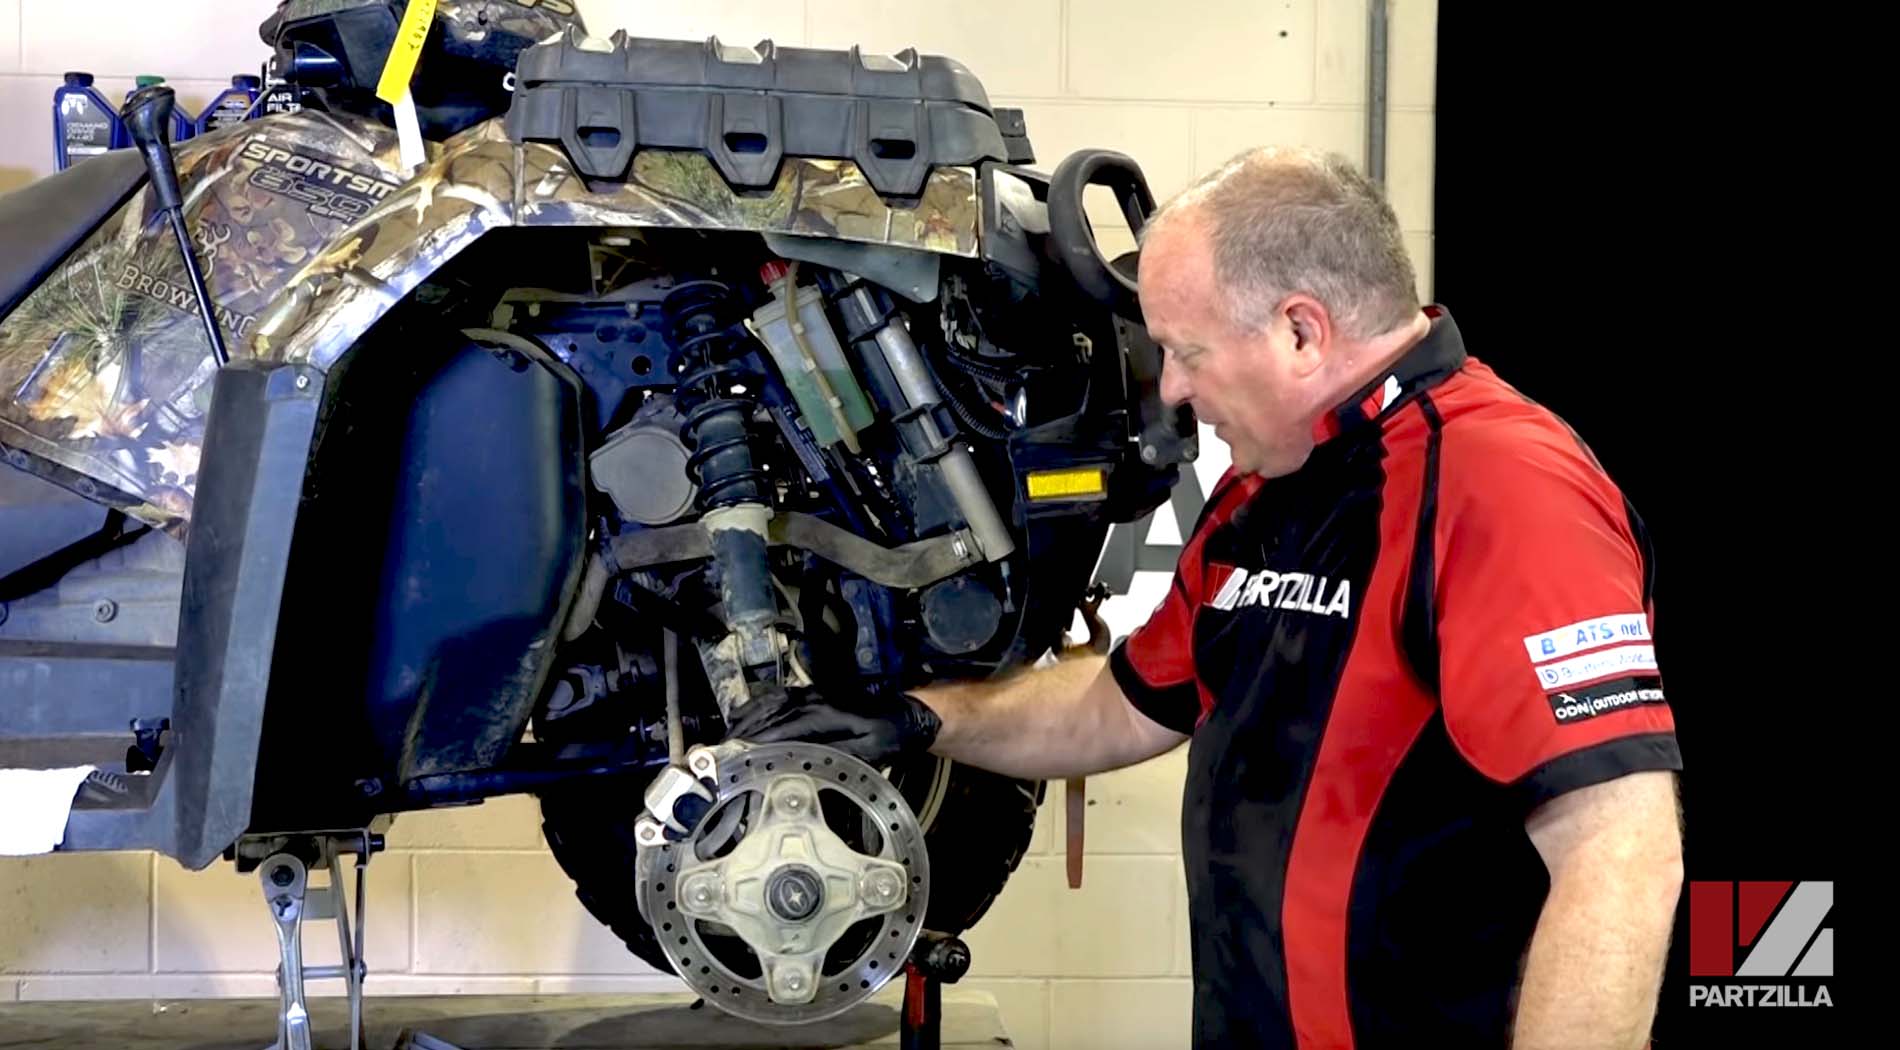
Step 1. Remove the front wheel.
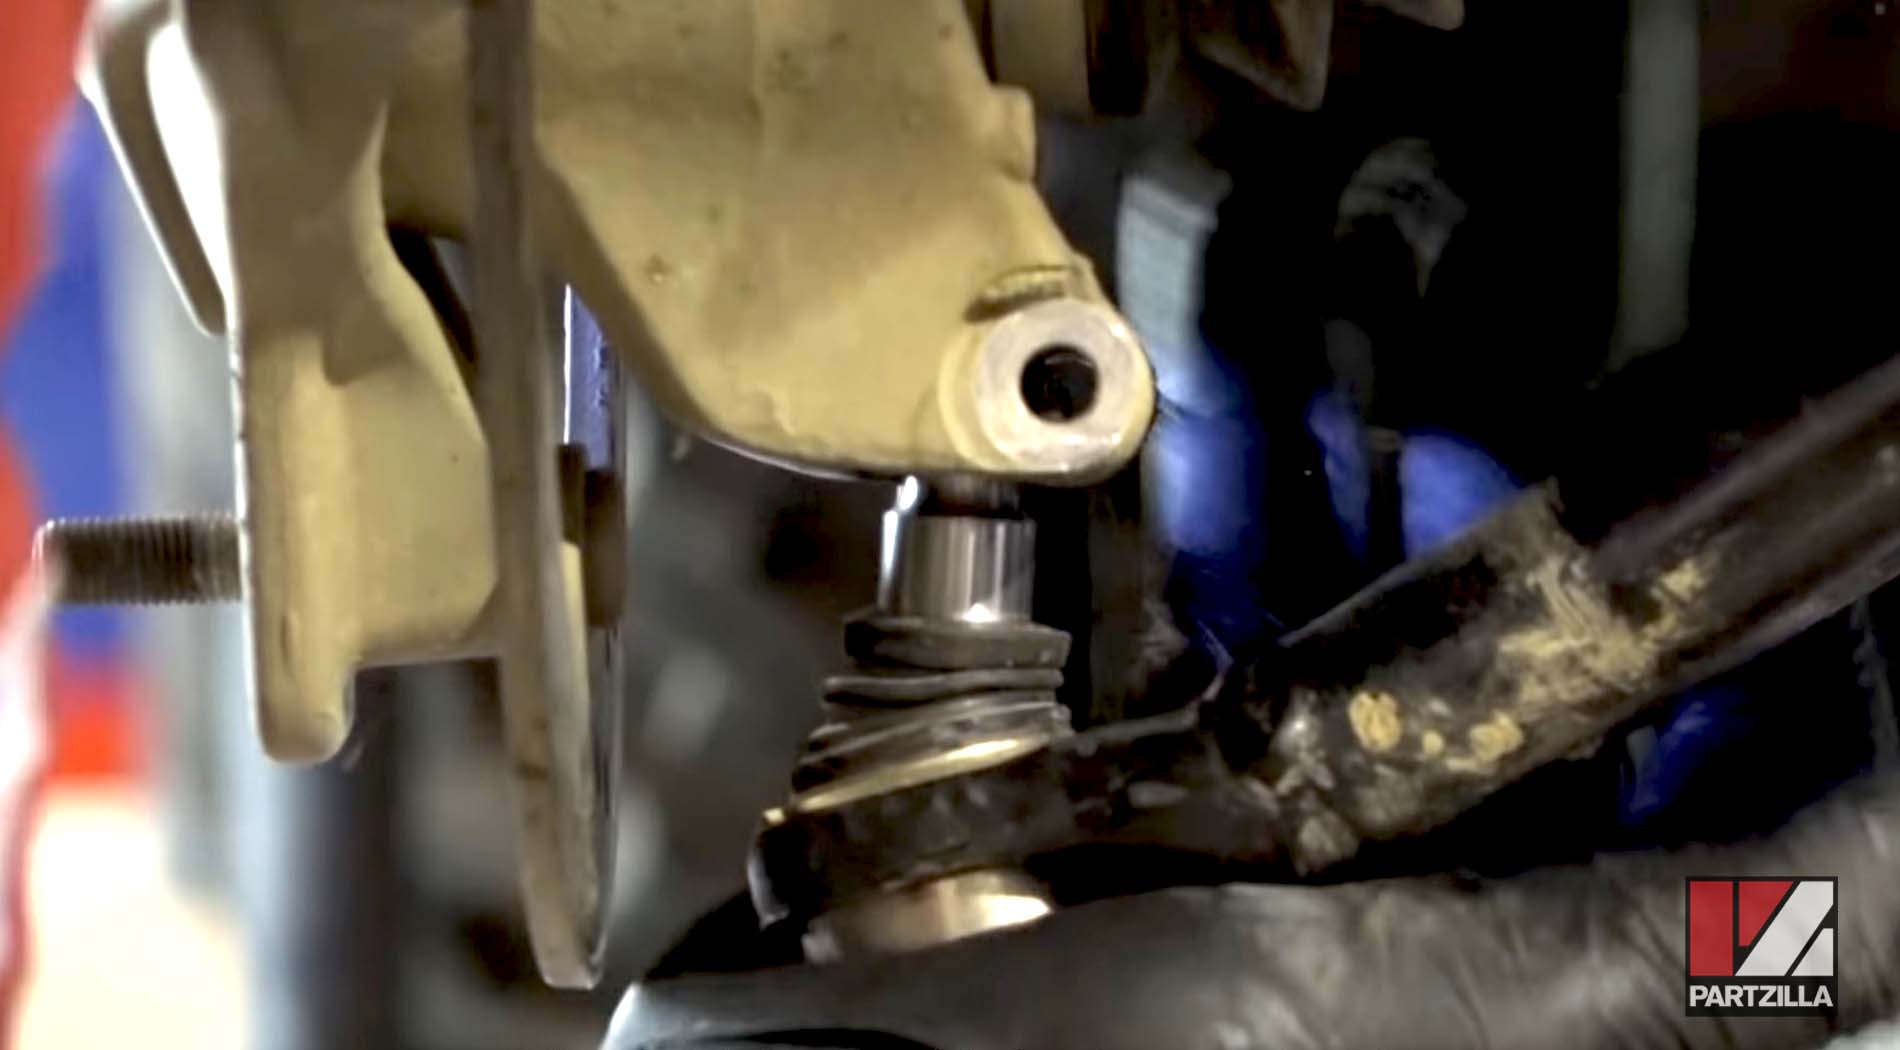
Step 2. Remove the lower ball joint bolt from the steering knuckle, and tap the ball joint down and out of the knuckle.
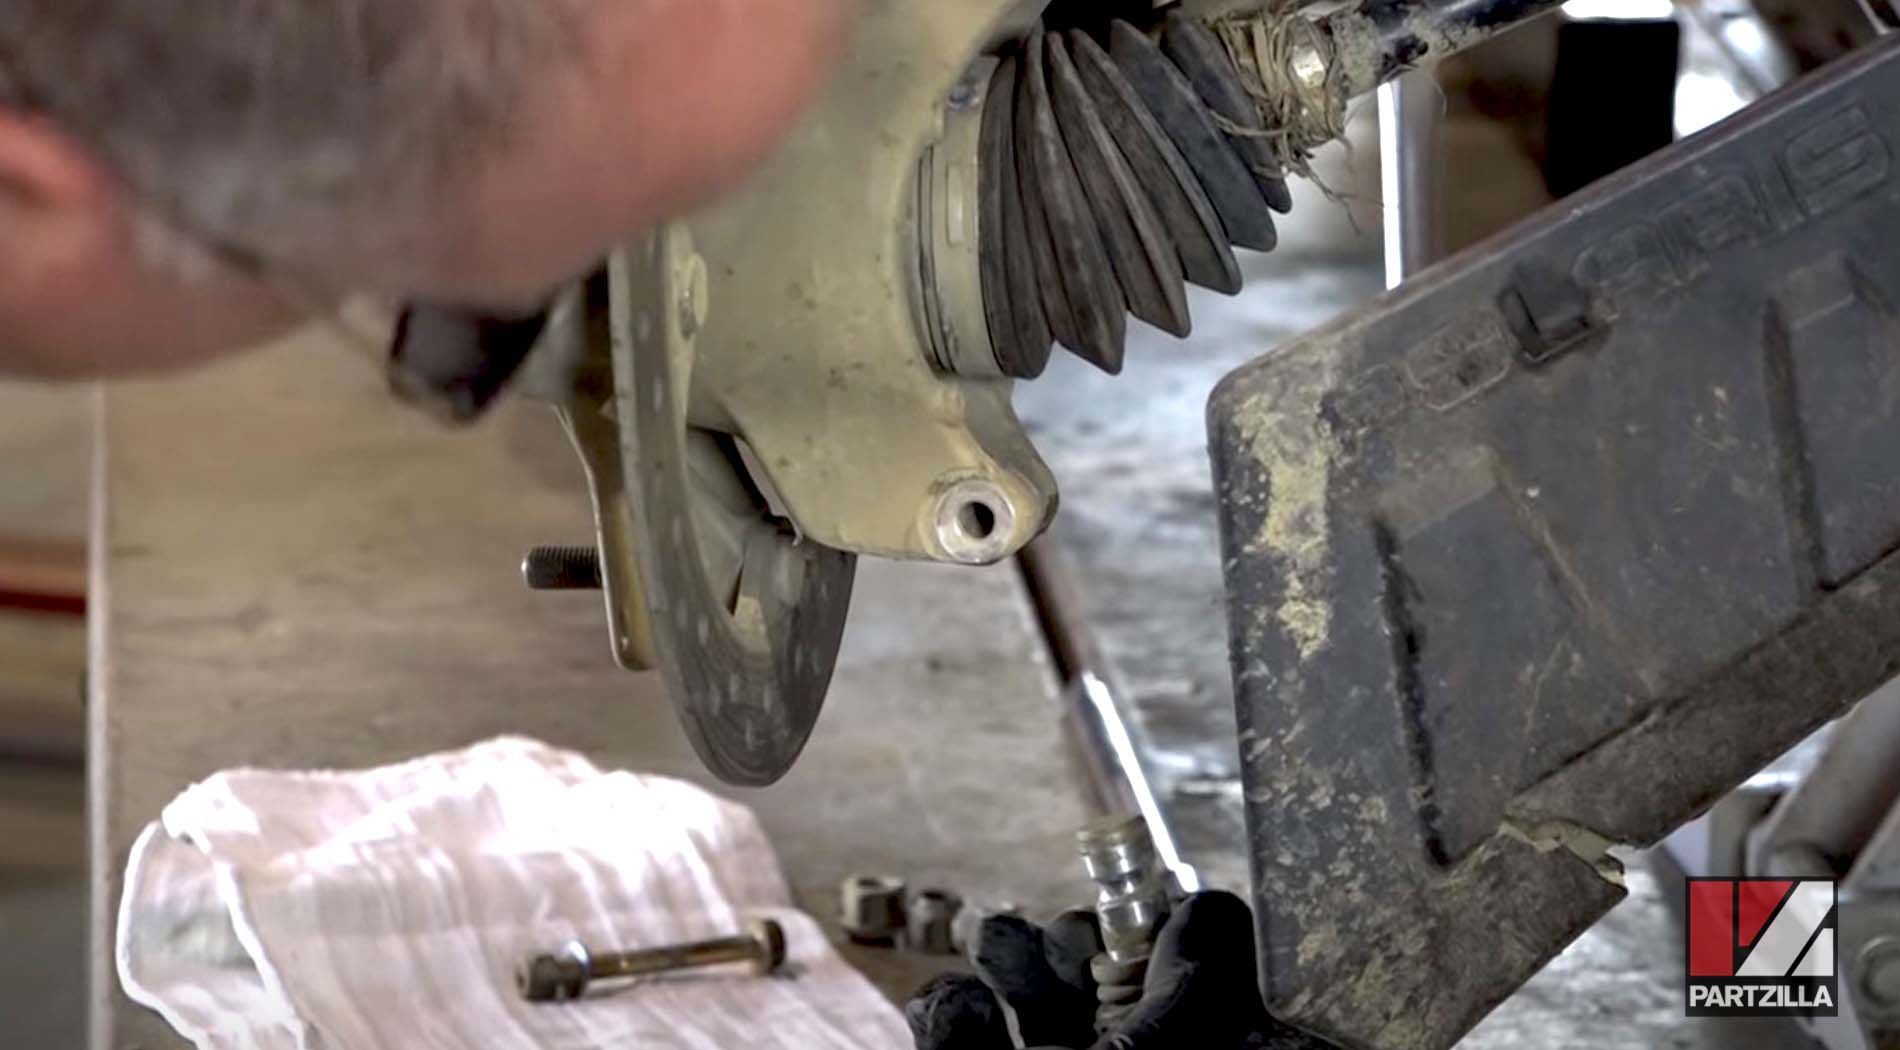
Step 3. Remove the two 15mm lower A-arm pivot bolts securing the A-arms to the chassis.
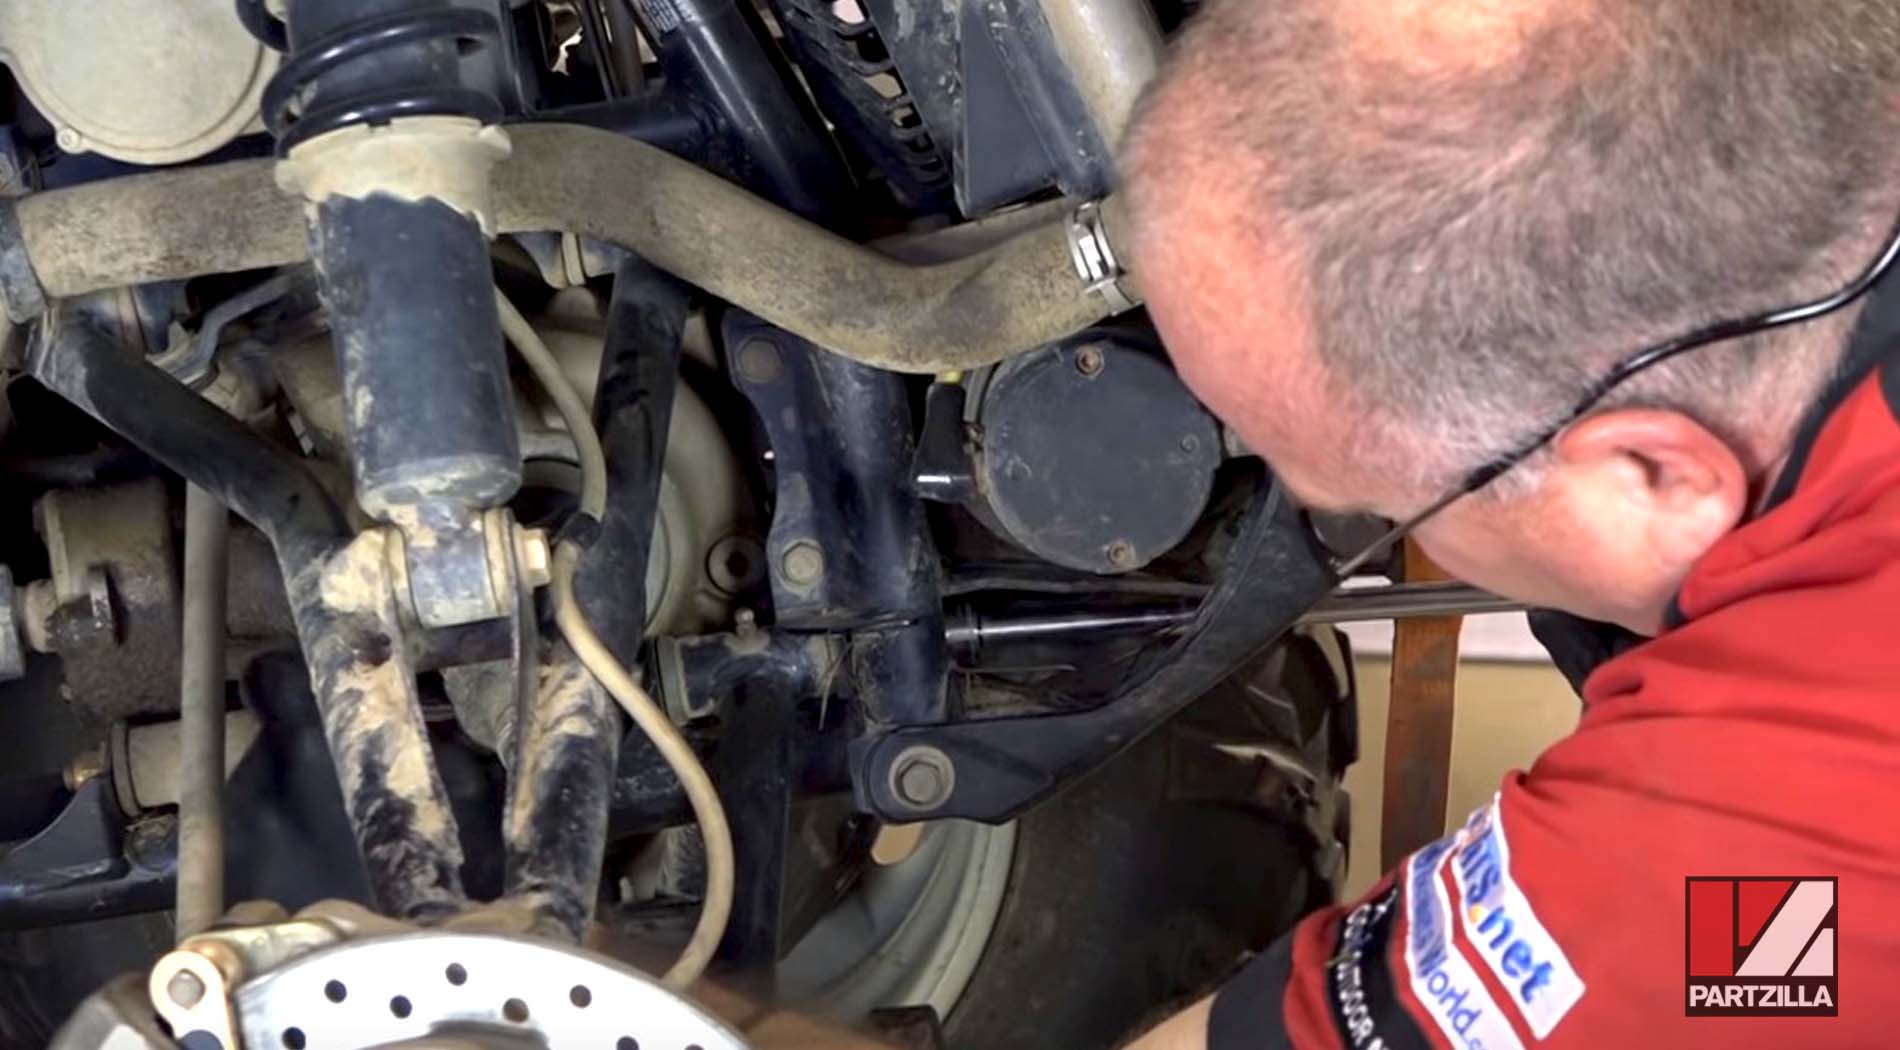
Step 4. Remove the lower A-arm from the chassis. You'll probably have to use a screwdriver to pry the arms and the rubber bushings from their mounting points. Clean the lower A-arm if necessary.
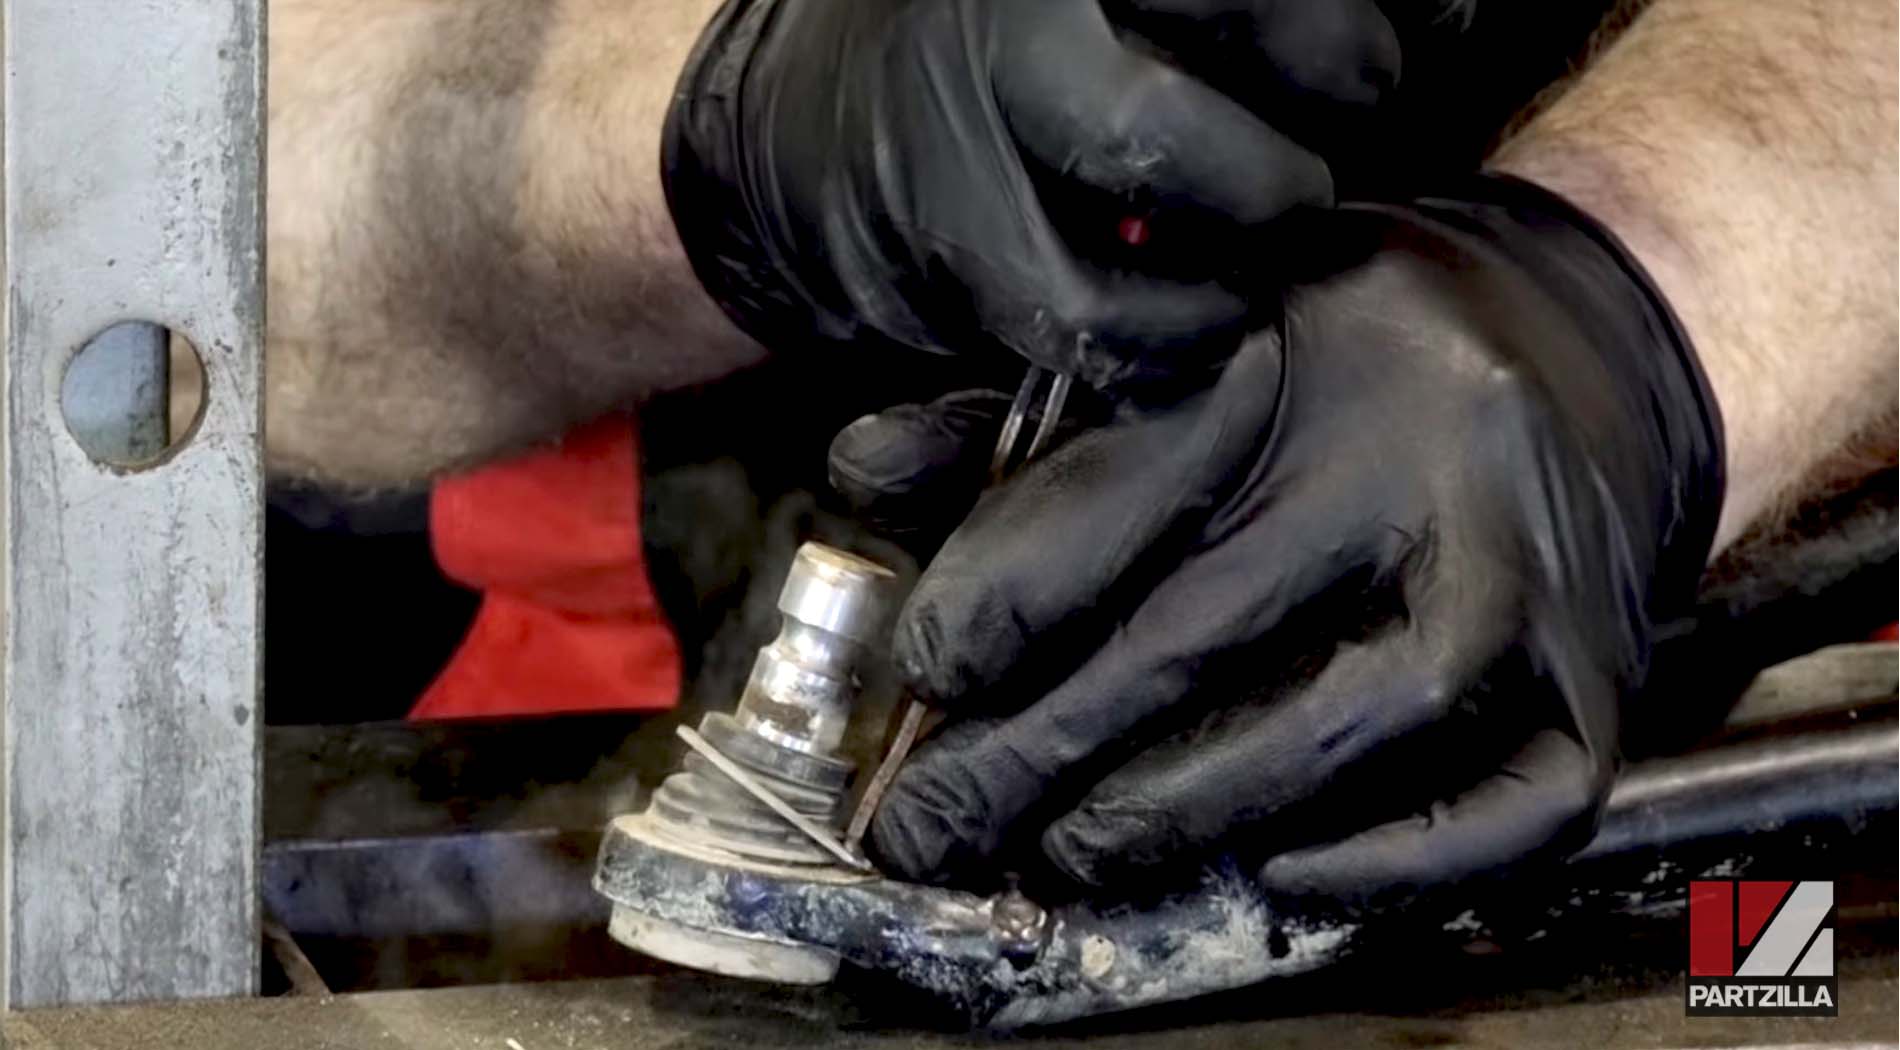
Step 5. Remove the circlip from the lower ball joint.
Step 6. Place the lower A-arm and ball joint over a metal collar or piece of pipe with a diameter just big enough to allow the ball joint to be driven out of the A-arm and into the collar/pipe.
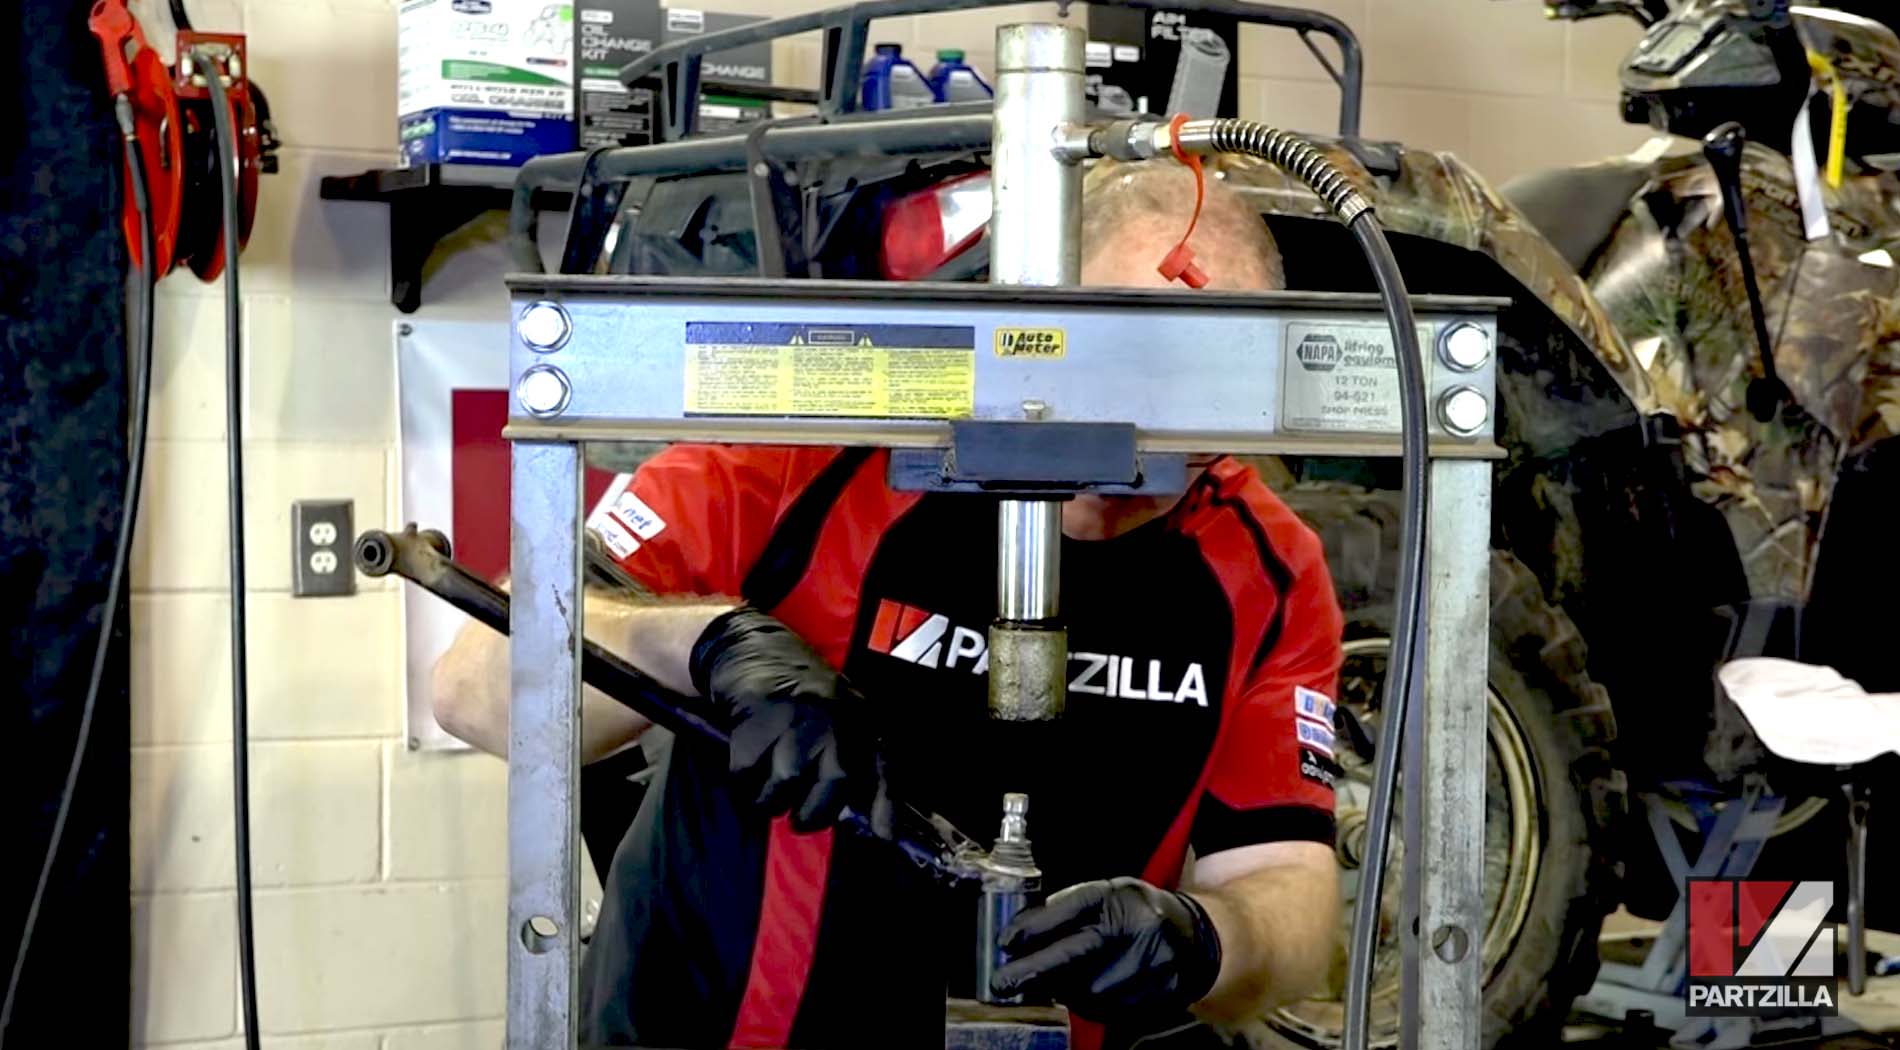
Watch the clip below for the portion of the video that covers this step.
Step 7. Use a press to push the lower ball joint out of the A-arm. If you don't have a press, it is possible to drive the ball joint out by hitting it with a hammer, but it's not recommended.
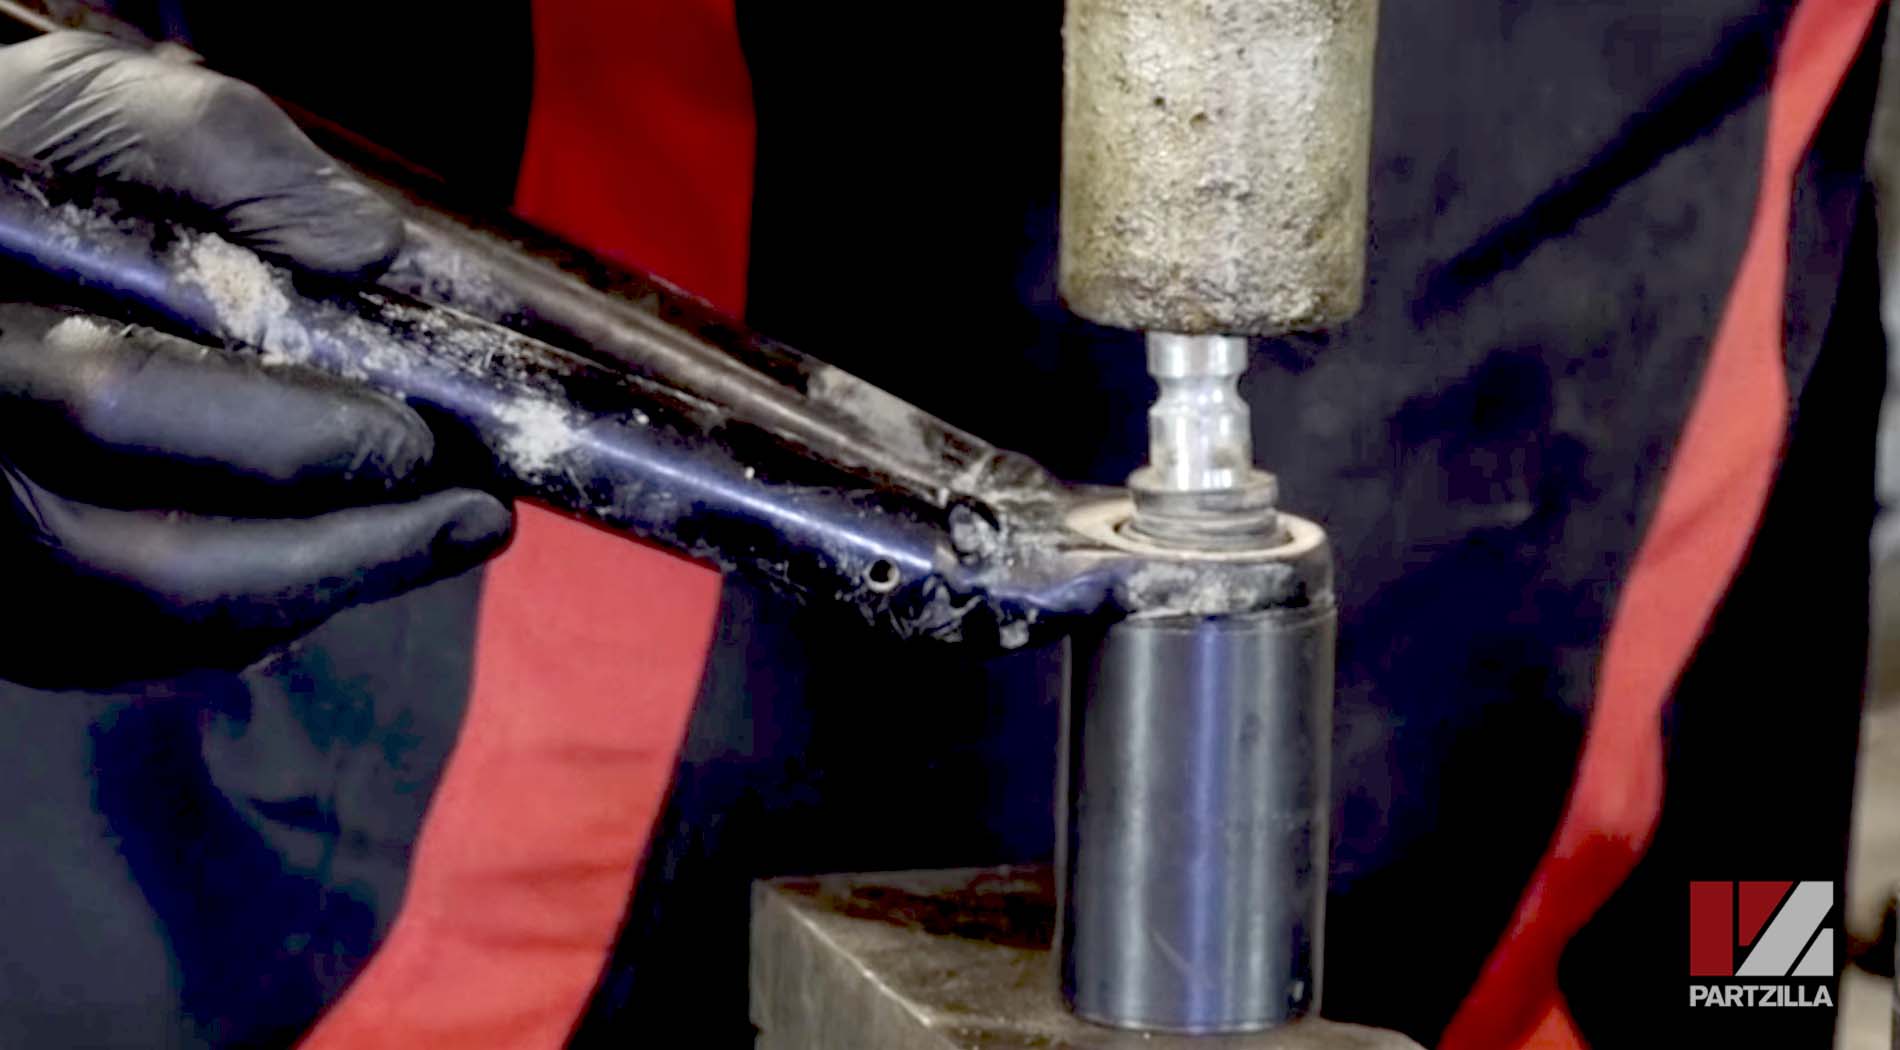
PRO TIP: Placing a large enough socket over the lower ball joint makes pressing it out much easier than pressing directly onto the ball joint itself.
Watch the clip below for the portion of the video that covers this step.
Step 8. Turn the A-arm over, place it back over the collar or pipe, install a new lower ball joint and press it into the A-arm. Once again, it's possible to drive the new ball joint into the A-arm with a hammer, but that method is not recommended.
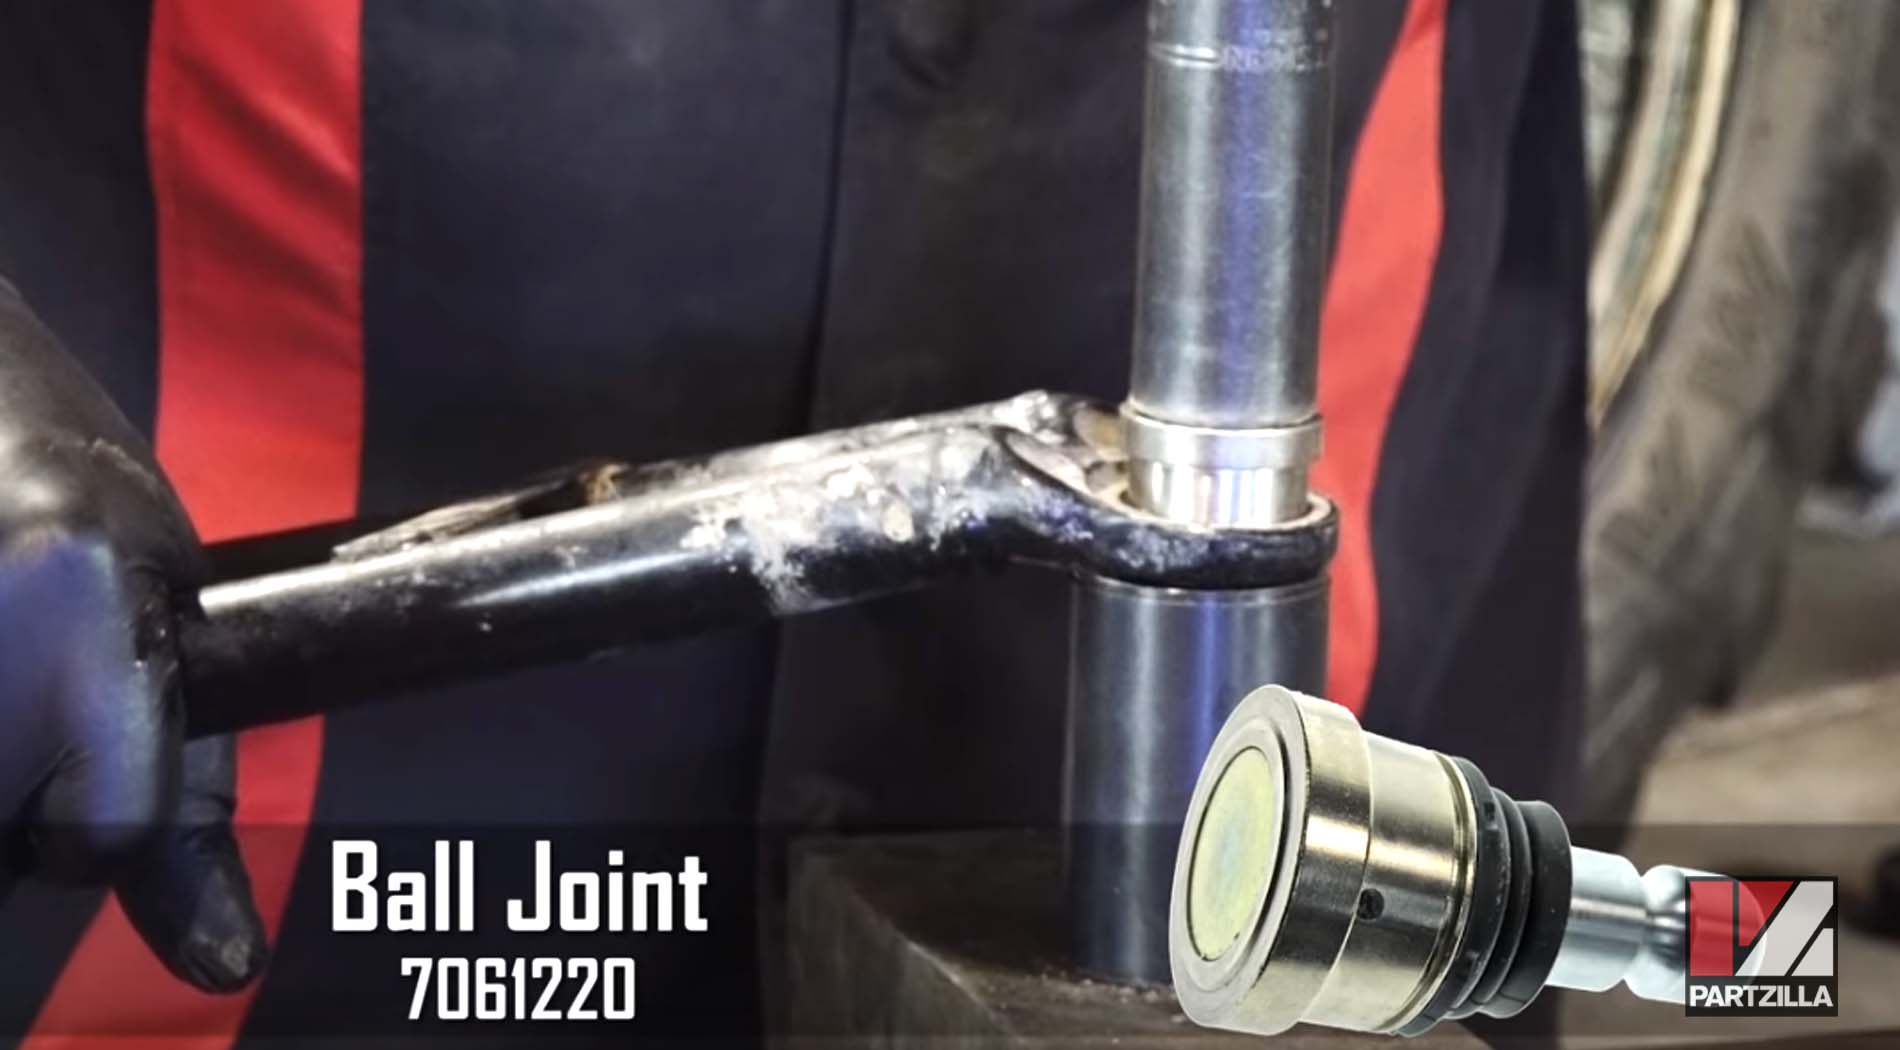
Watch the clip below for the portion of the video that covers this step.
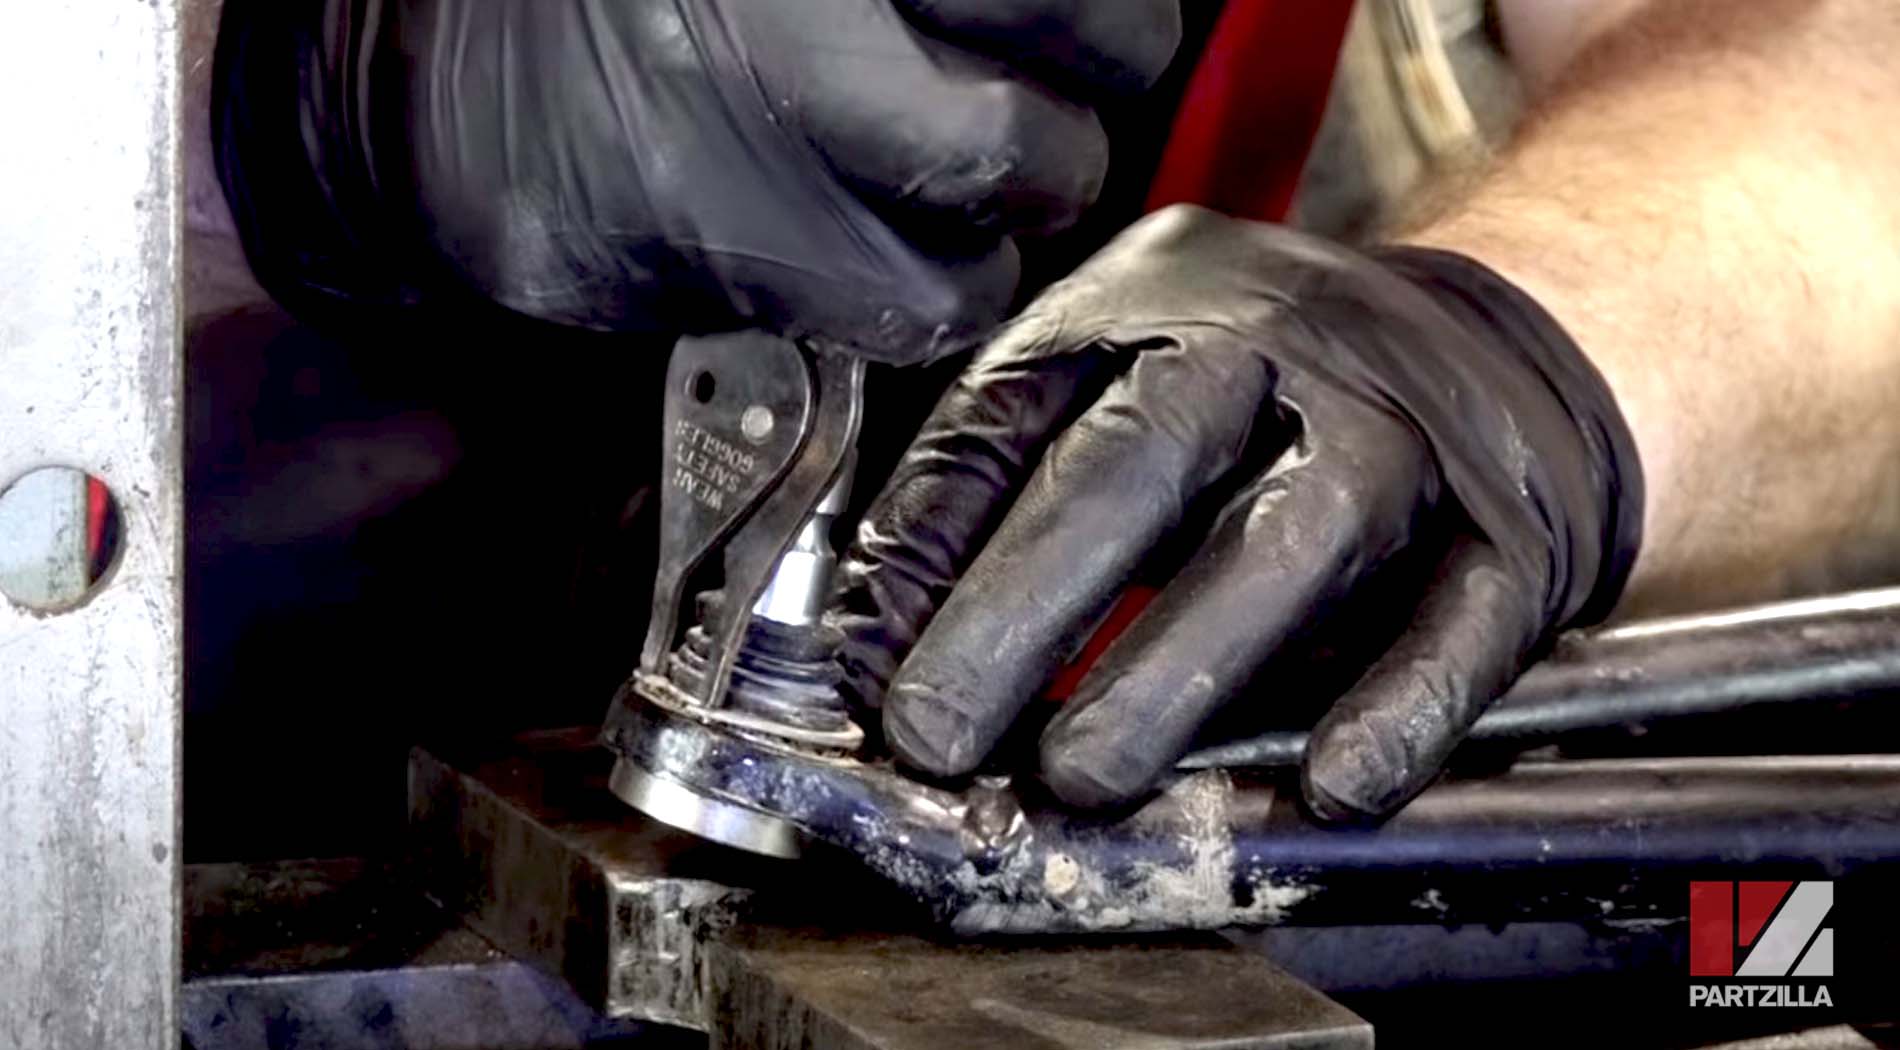
Step 9. Reinstall the circlip over the new lower ball joint.
Replacing Polaris Sportsman Front A-Arm Bushings
Step 1. Remove the four rubber A-arm bushings (two in each arm) and the two metal shafts (one in each arm) that sit inside the bushings.
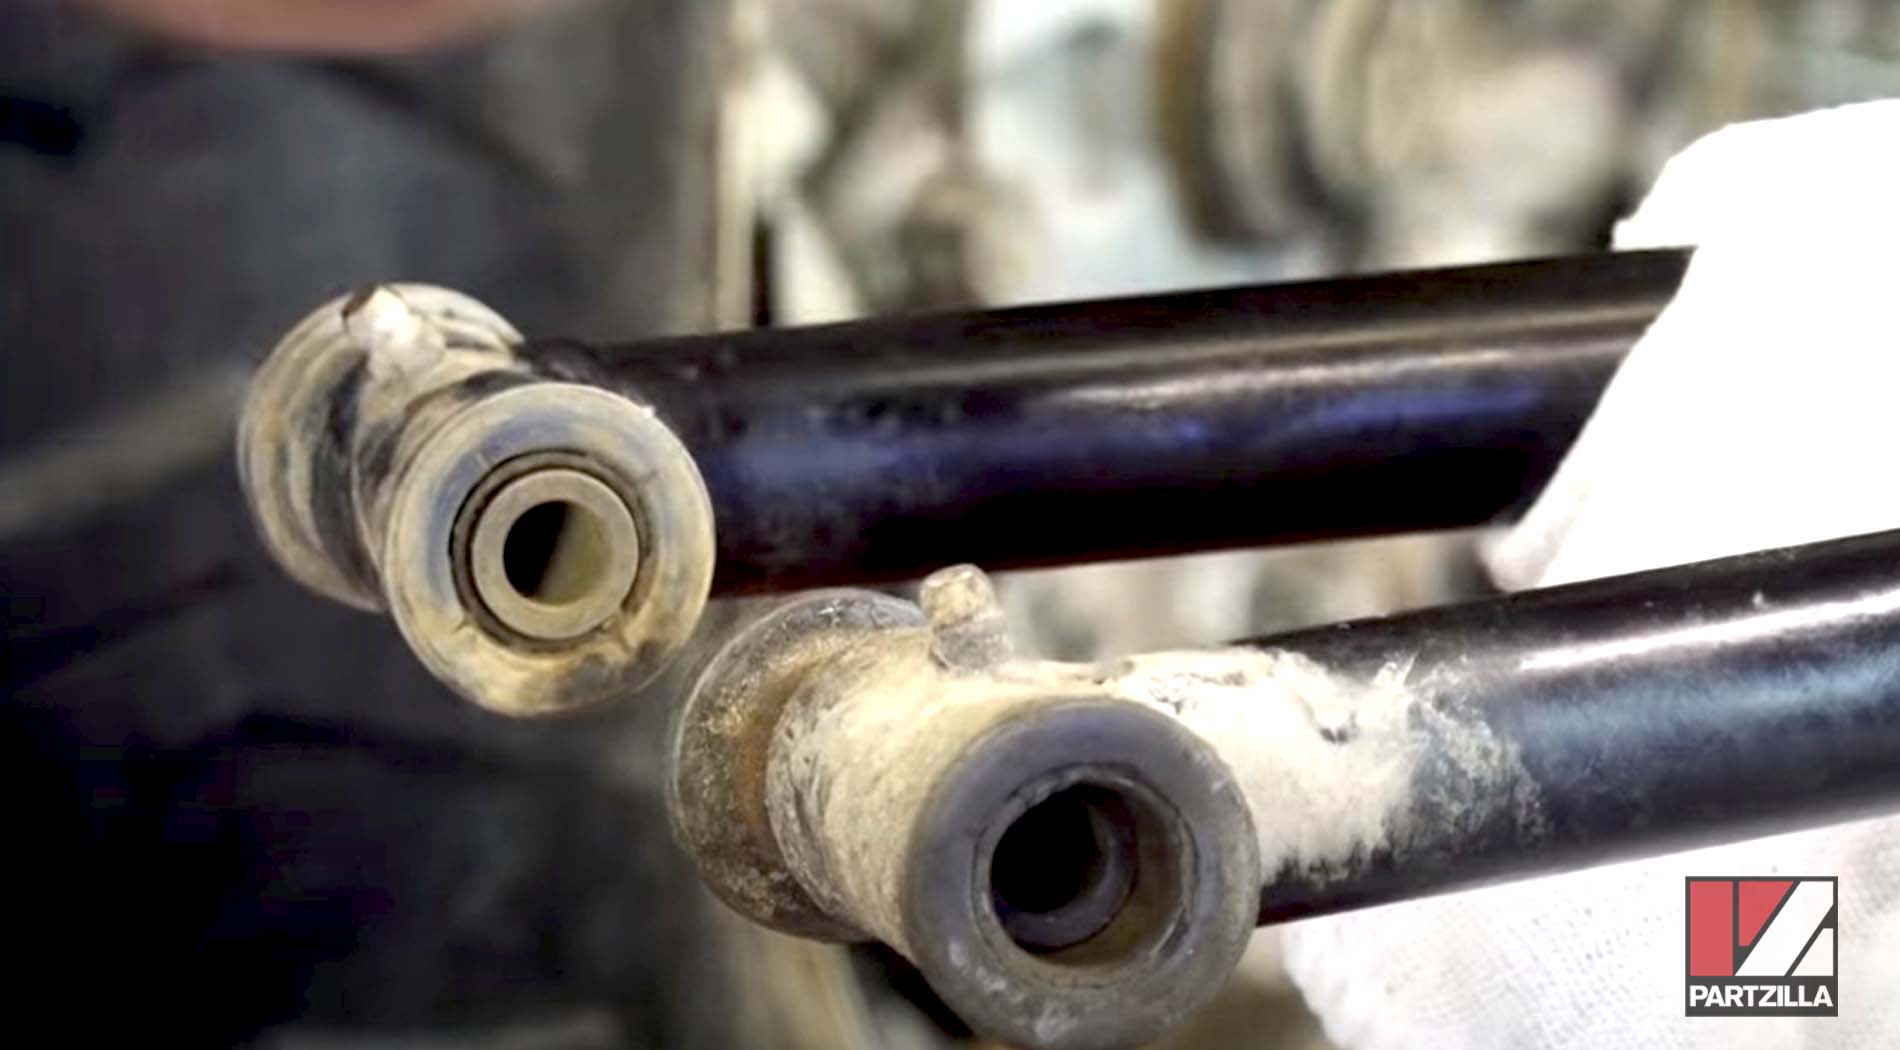
Step 2. Clean the metal A-arm shafts, inspect them for wear and replace them if necessary.
PRO TIP: Replacing the shafts should only be necessary if the A-arms/bushings have not been greased regularly.
Step 3. If the A-arm shafts are worn, also inspect the lower A-arm pivot bolts for wear and replace those too if necessary.
Step 4. Thoroughly clean the inside of the A-arms where the bushings are housed, and check that the zerk fittings on each arm are clean and working. Replace the zerks if they're badly corroded or no longer work.
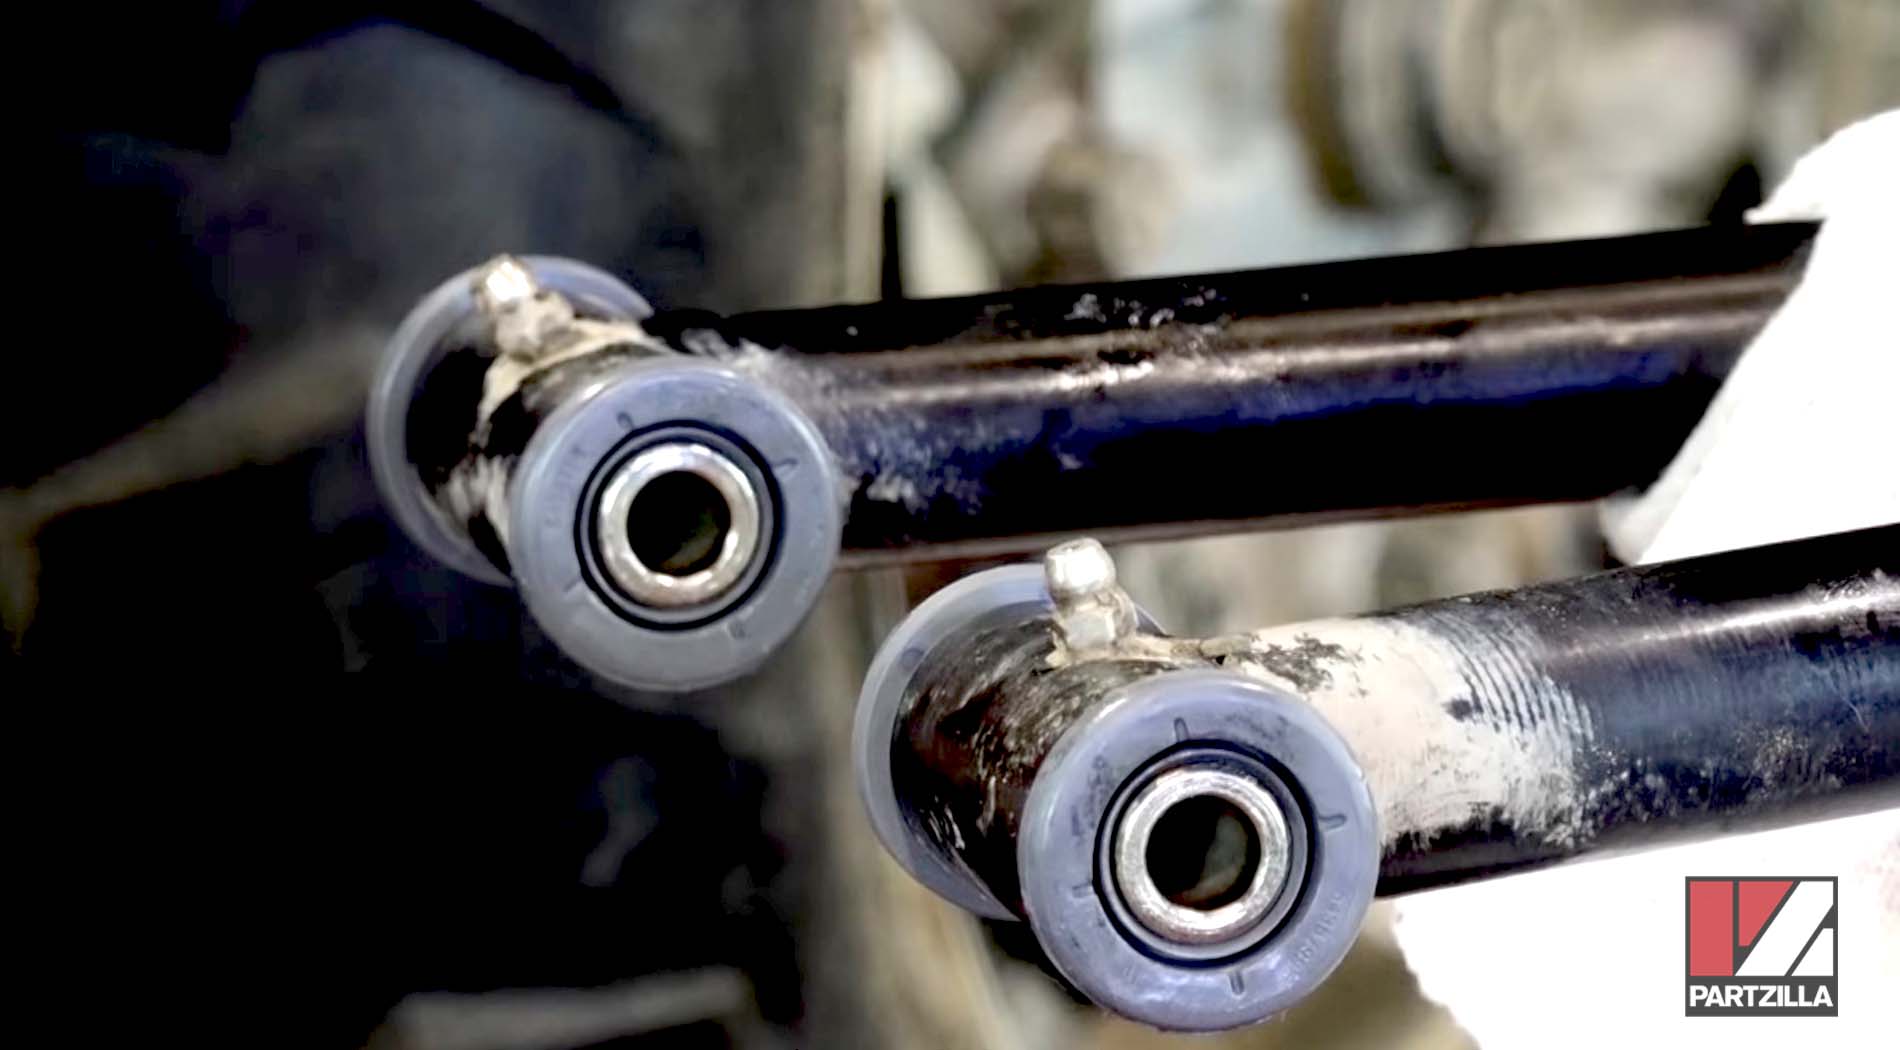
Step 5. Lightly grease the new A-arm bushings and install one into each A-arm. Gently tap the bushings fully into place.
Step 6. Lightly grease the A-arm shafts, and install them into the A-arms and the bushings. Next, install the second bushing into each A-arm. Gently tap the bushings fully into place, and center the shafts within the A-arms.
Reinstalling Polaris Sportsman Front Lower A-arms
Step 1. Reinstall the A-arm into its chassis mounts, and reinstall and tighten the two pivot bolts.
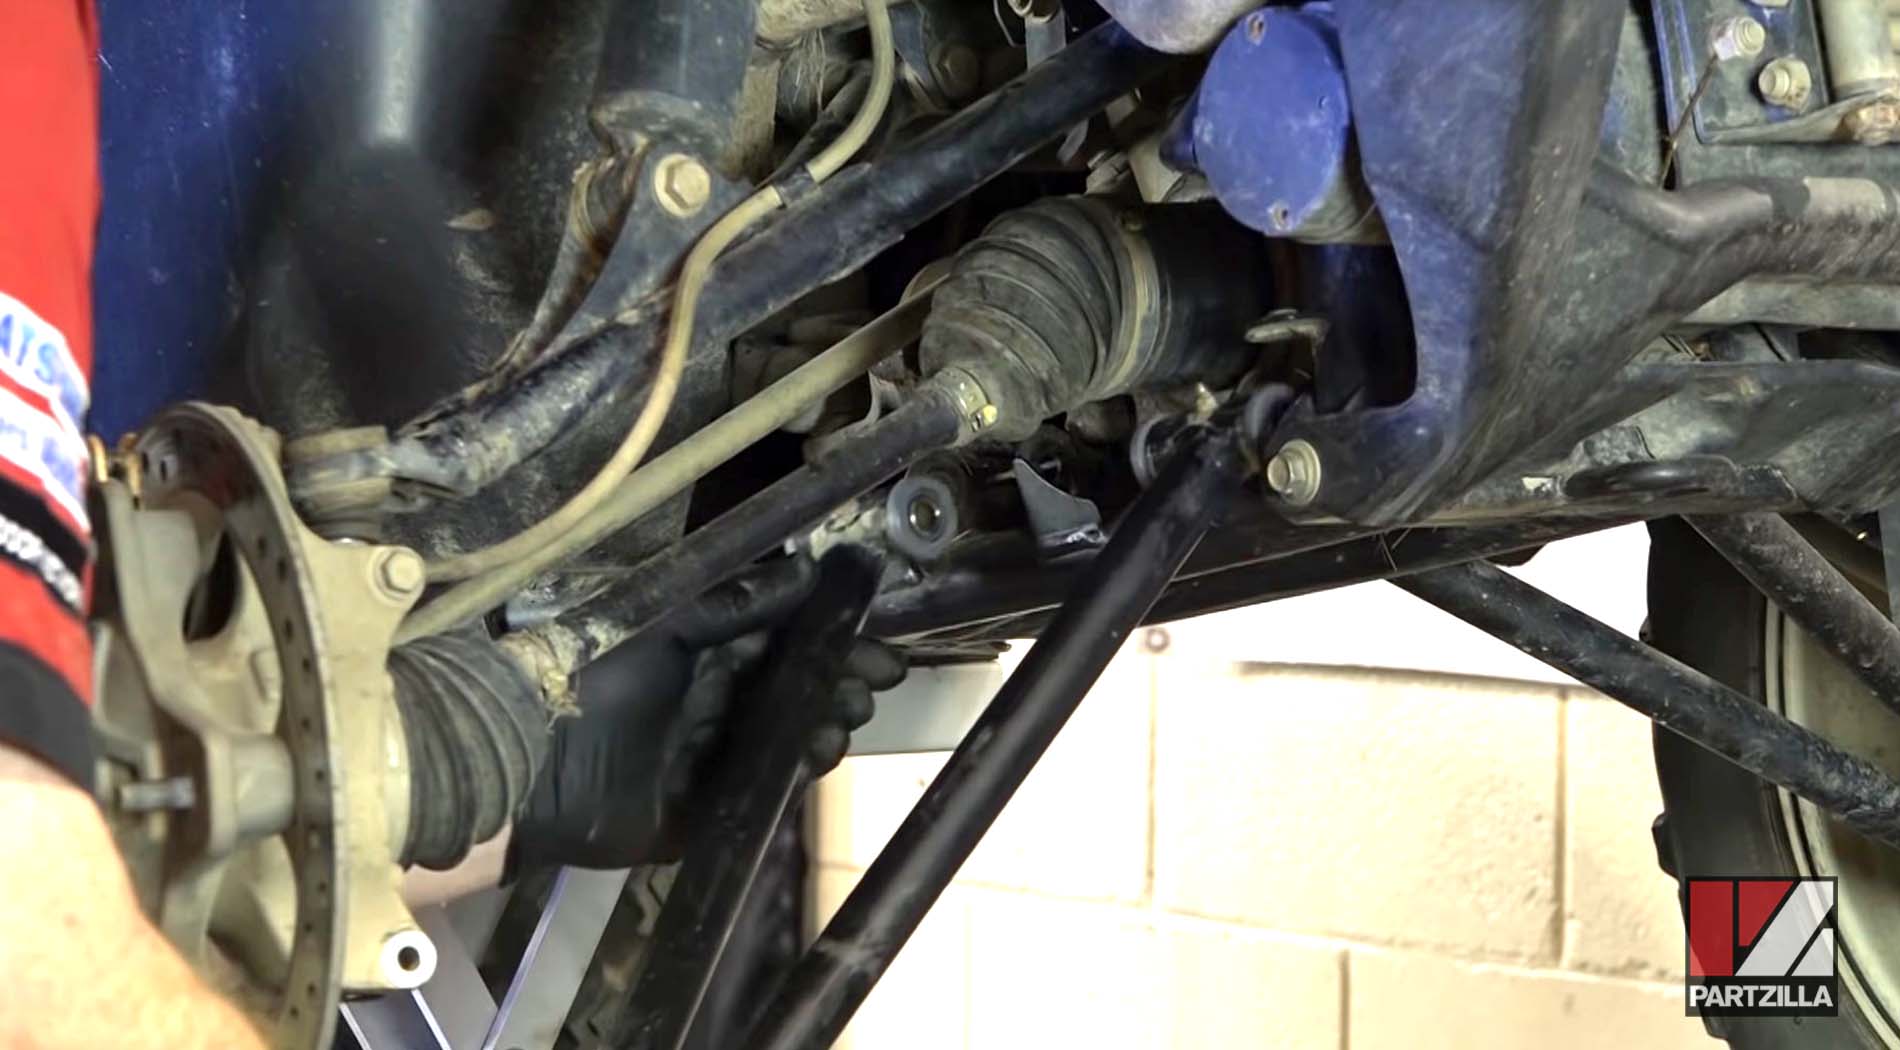
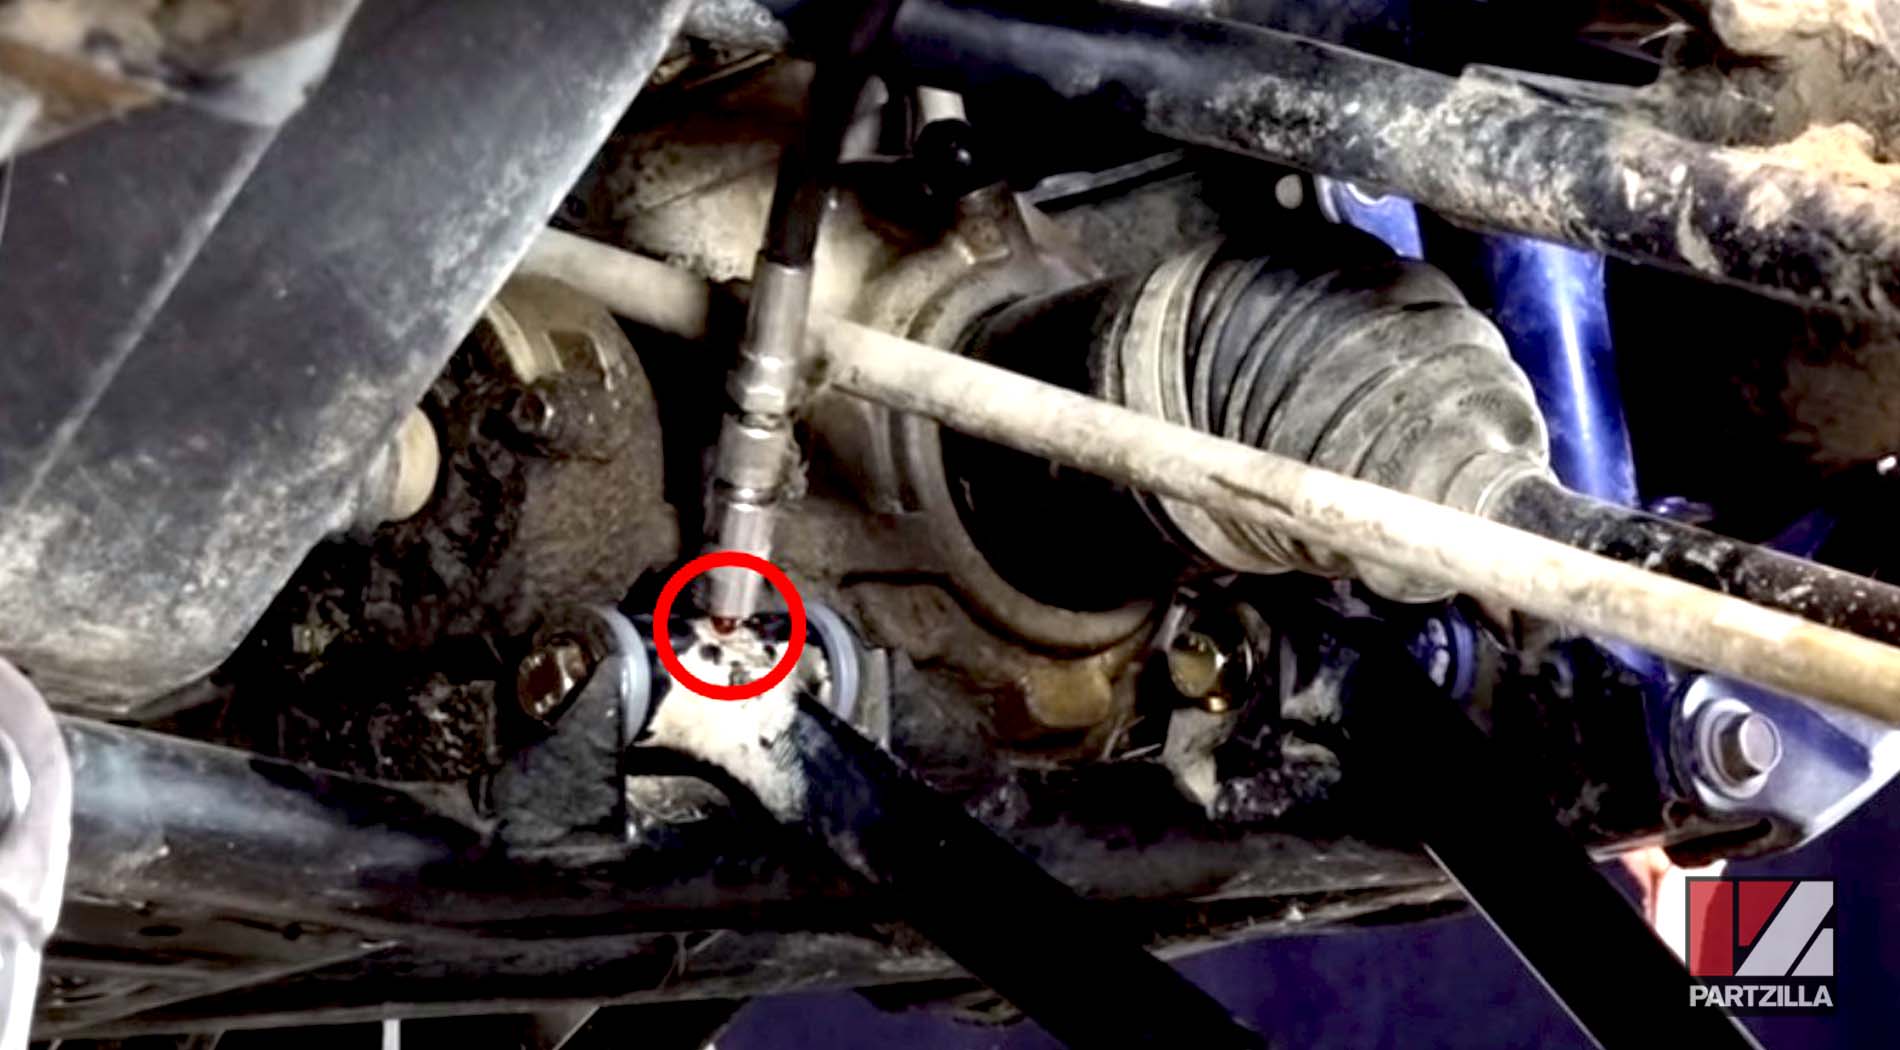
Step 2. Connect a grease gun to each A-arm zerk fitting, and pack them both with grease until you can see it just beginning to squeeze out from the bushings.
Step 3. Push the lower ball joint back up into the steering knuckle. Position the groove in the ball joint to align with the bolt hole, and reinstall the ball joint bolt.
Step 4. Reinstall the wheel and you're all done installing the front lower ball joint on your Polaris Sportsman 850XP.
Remember to regularly grease the zerk fittings on the upper and lower A-arms, or you'll be replacing the bushings a lot more frequently than is otherwise necessary. Watch the video below to learn how to grease the zerk fittings on a Polaris ATV.