How to Change Kawasaki KLX 110 Front Brake Shoes
The brakes on a Kawasaki dirt bike have some adjustment in them at the handle, and even more at the other end of the cable near the hub. When adjustment runs out, it’s time to replace the brake shoes.
Watch the video above and follow the steps below to change the front brake shoes on a Kawasaki KLX 110 dirt bike.
Tools and Parts – Kawasaki KLX110 Front Brake Pads Replacement
- Pliers
- Flat-blade screwdriver
- 8mm, 14mm socket
- Ratchet
- 10mm, 14mm wrench
- Torque wrench
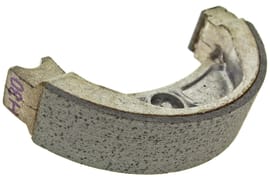
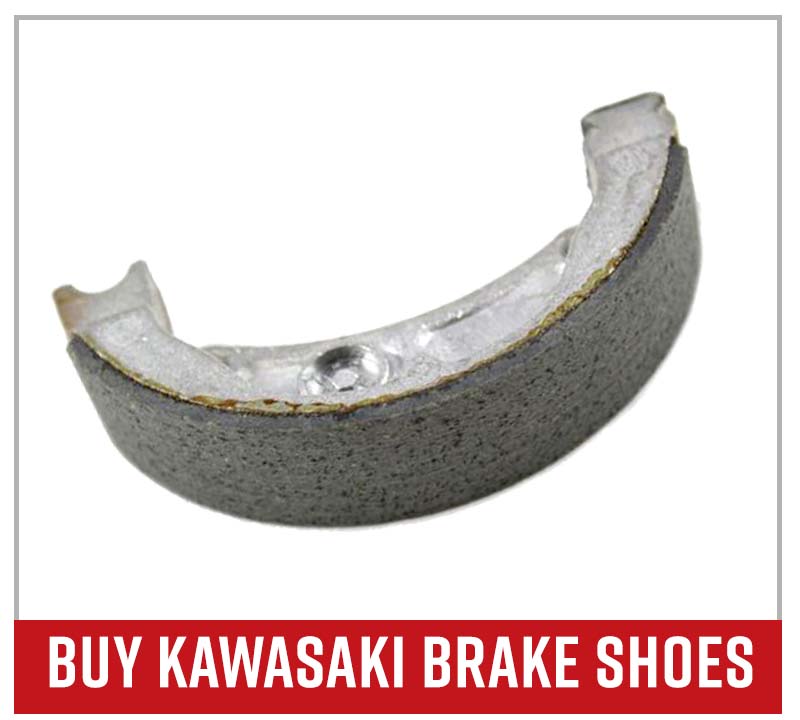
- Kawasaki dirt bike brake shoes
How to Change Kawasaki KLX 110 Front Brake Shoes
Step 1. Lift the front end off the ground, then remove the small cotter pin holding the axle in place on the left-hand side.
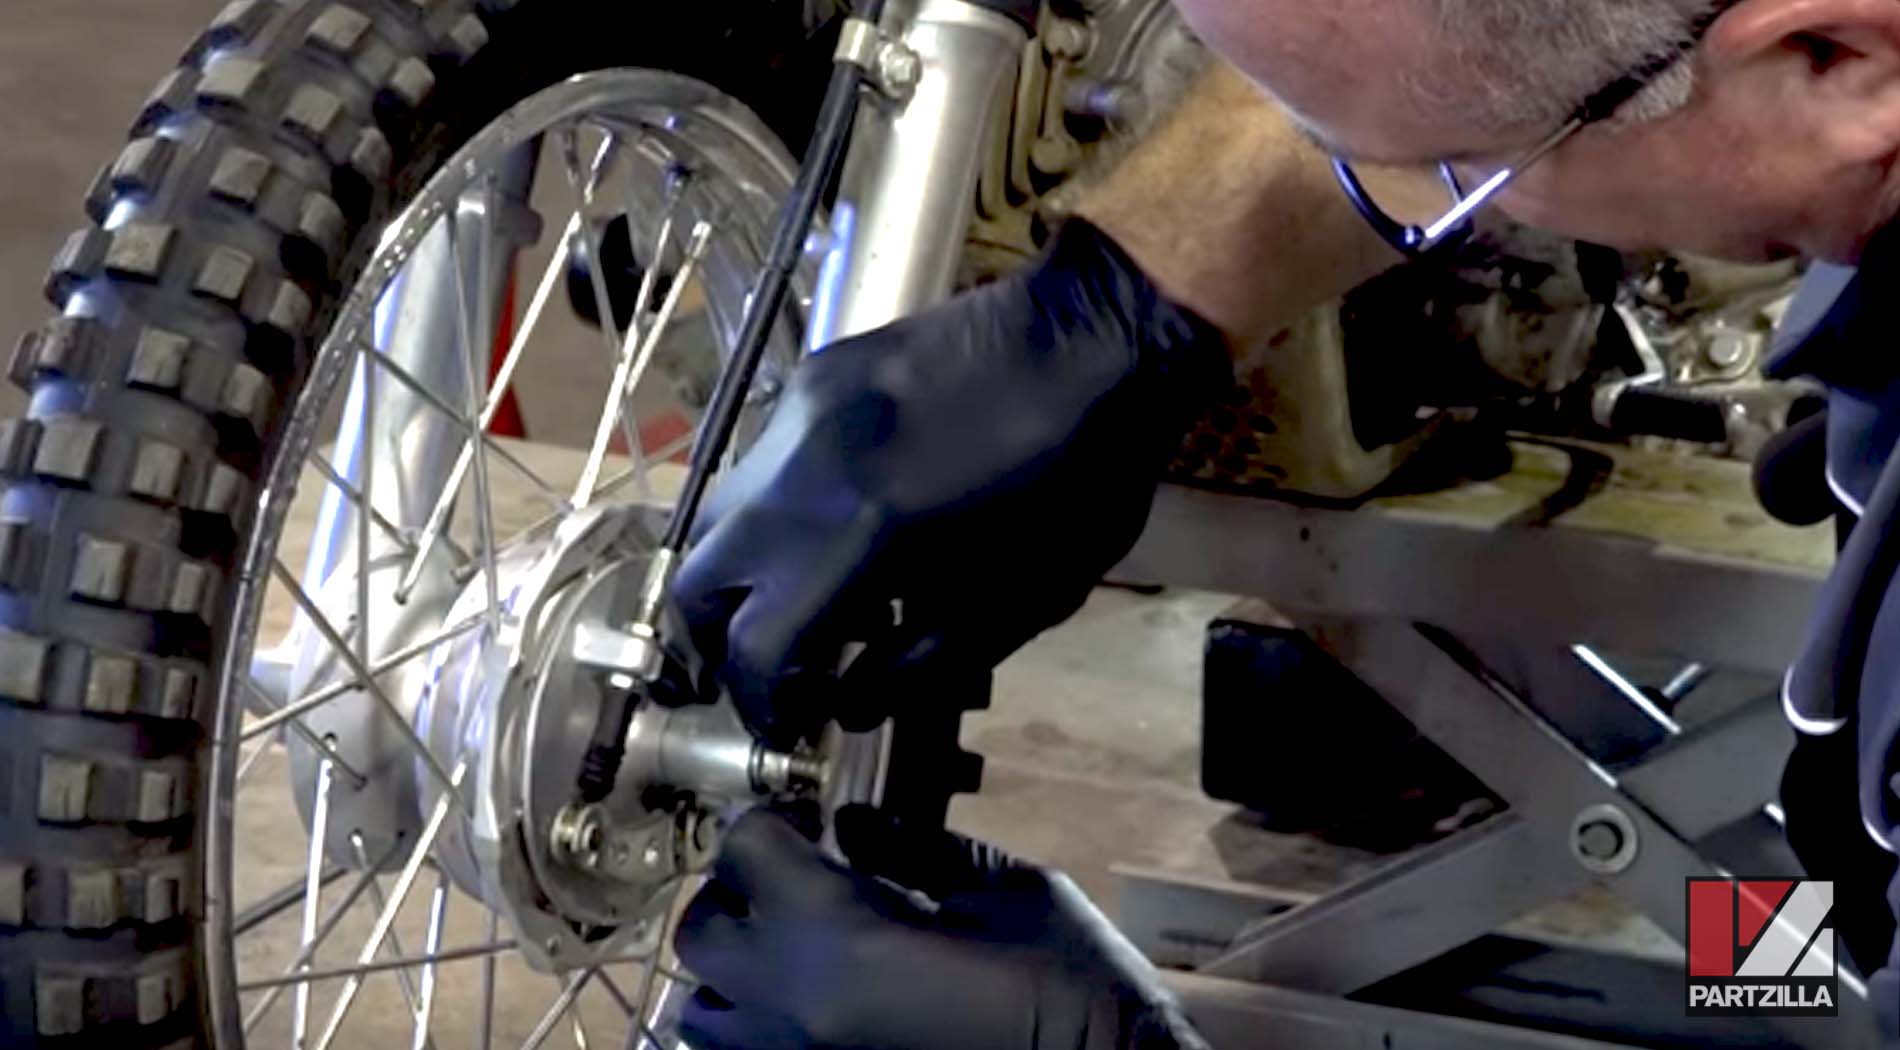
Step 2. Remove the 14mm bolt holding the axle in place.
NOTE: You’ll need to use a second wrench to hold the right side in place to prevent it from rotating while you loosen the bolt.
Step 3. Loosen the pinch bolt securing the brake cable.
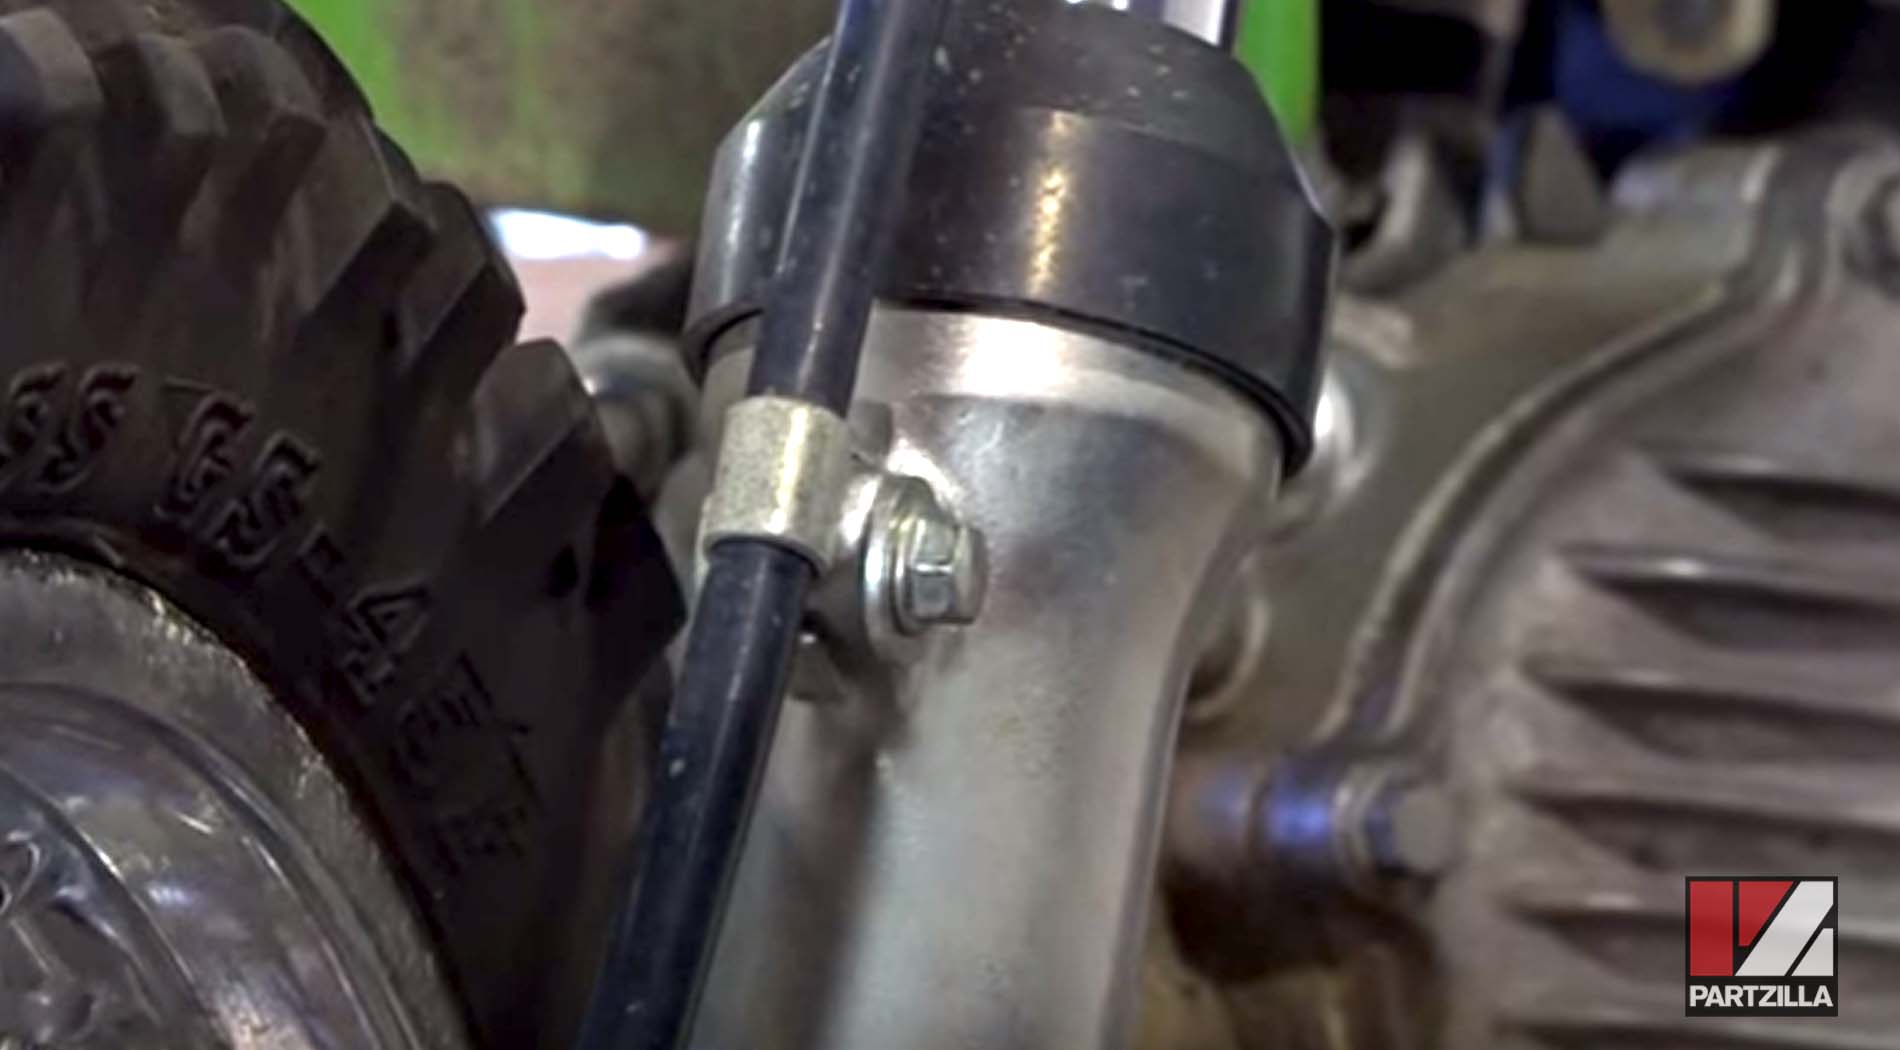
PRO TIP: You can give yourself more play in the brake cable by removing the cable clamp on the left side of the fork.
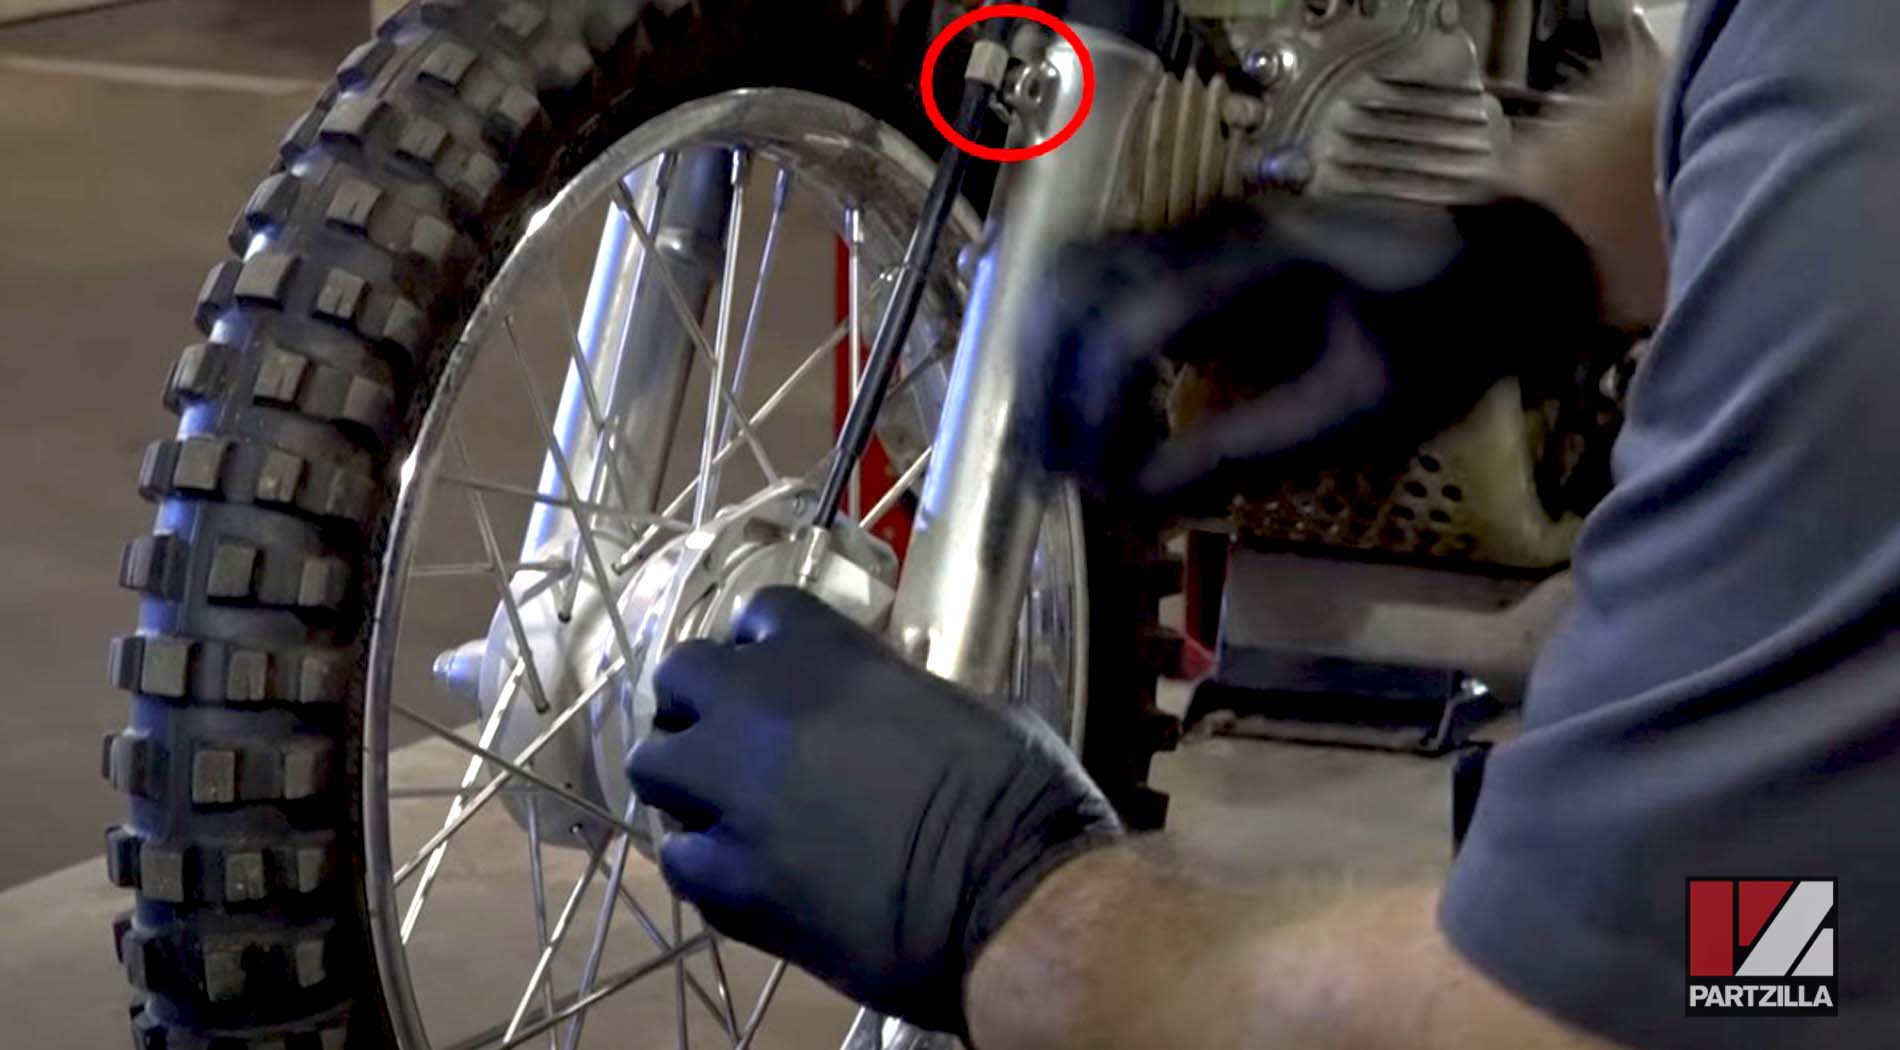
Step 4. Slide the dust cover on the brake handle down to expose the brake adjuster. Tighten the adjuster all the way up to the handle.
Step 5. Disconnect the brake cable at the handle by pulling the black cable cover away from the handle, then rotating it toward the handle and sliding it out of the groove.

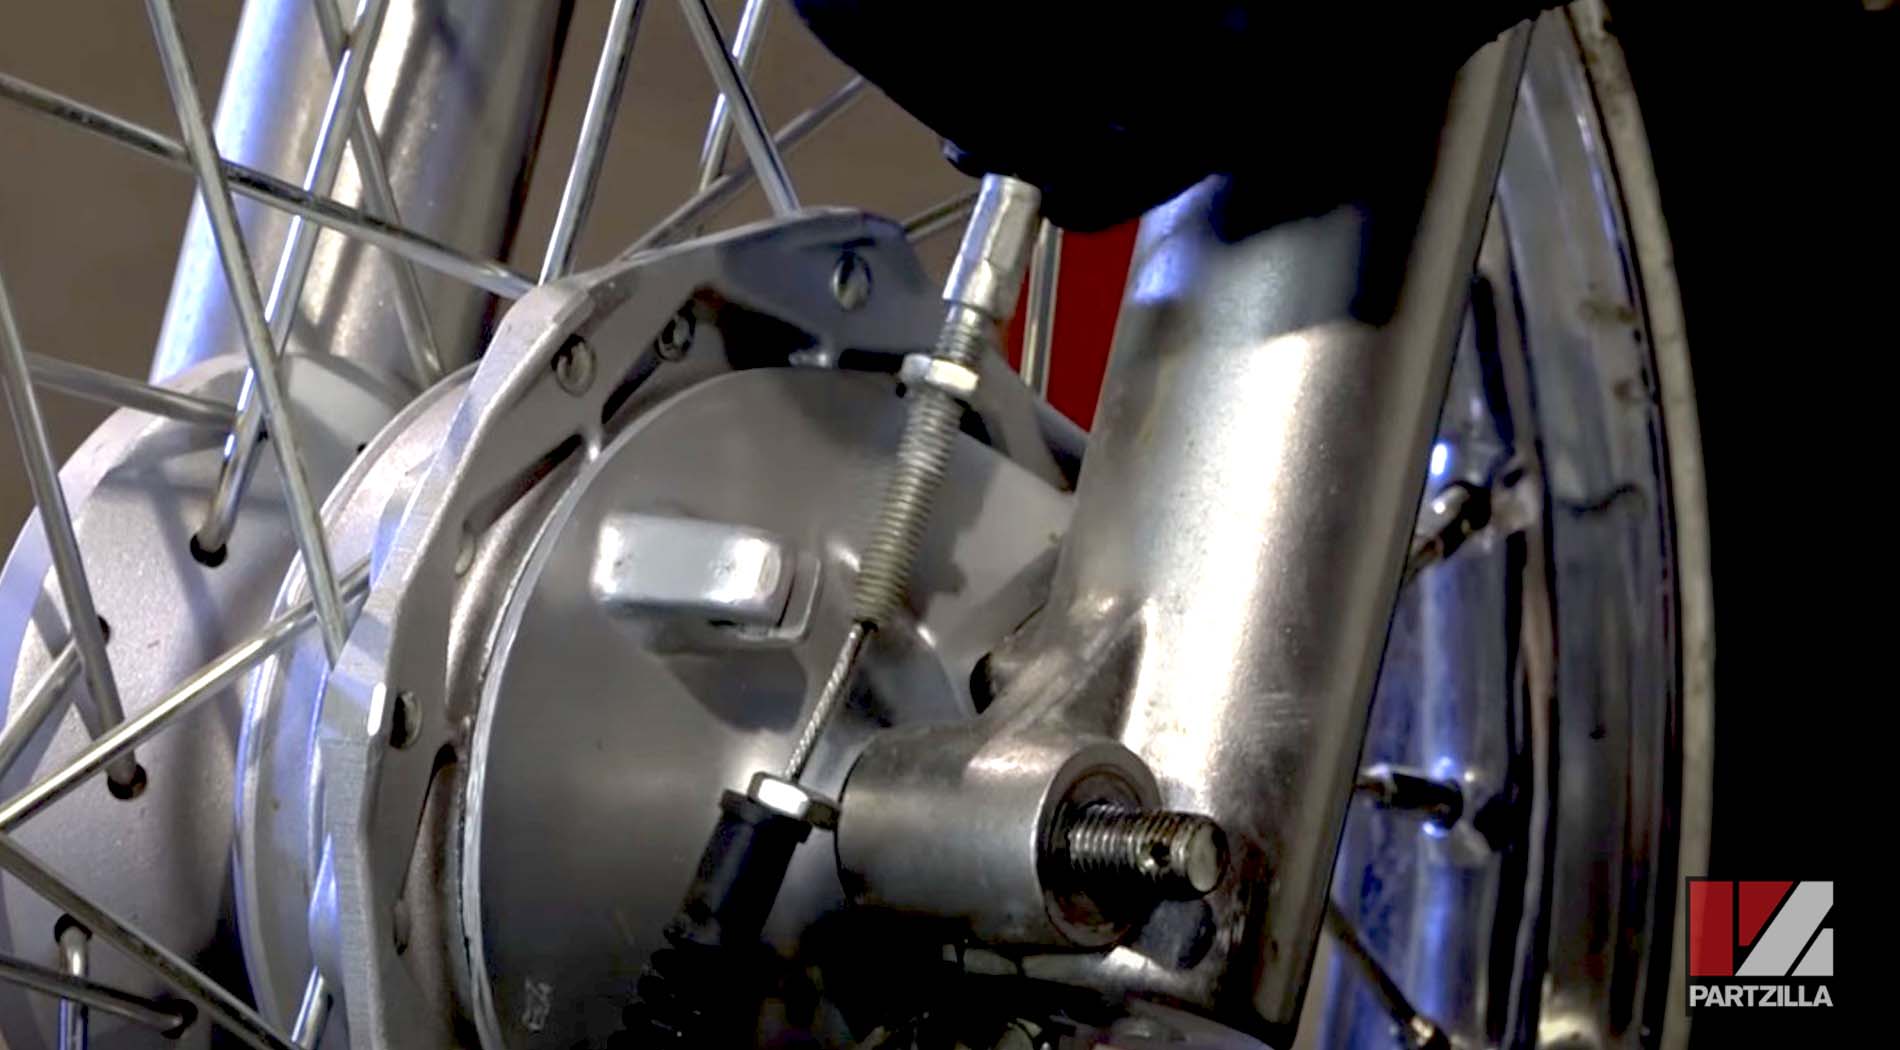
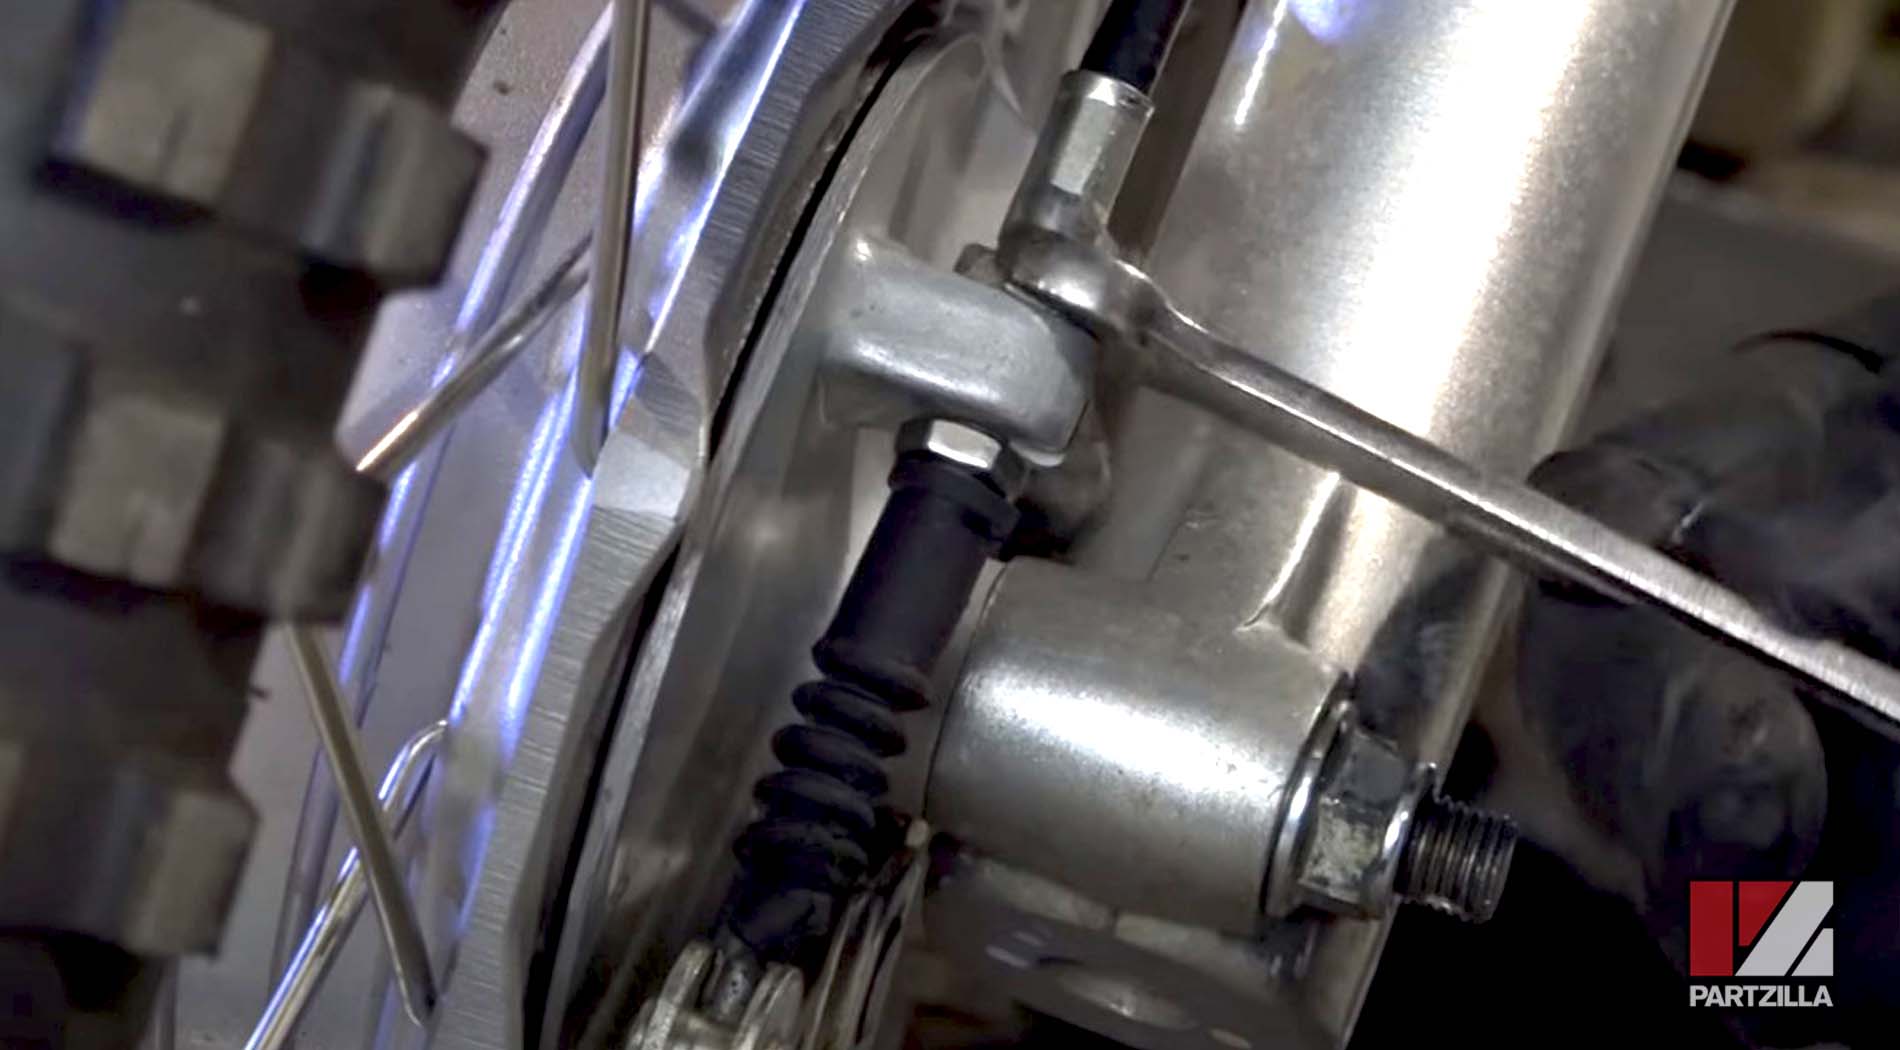
Step 6. Remove the lower pinch bolt on the brake cable at the hub, which allows you to slide the cable out of its channel and remove it from the hub.
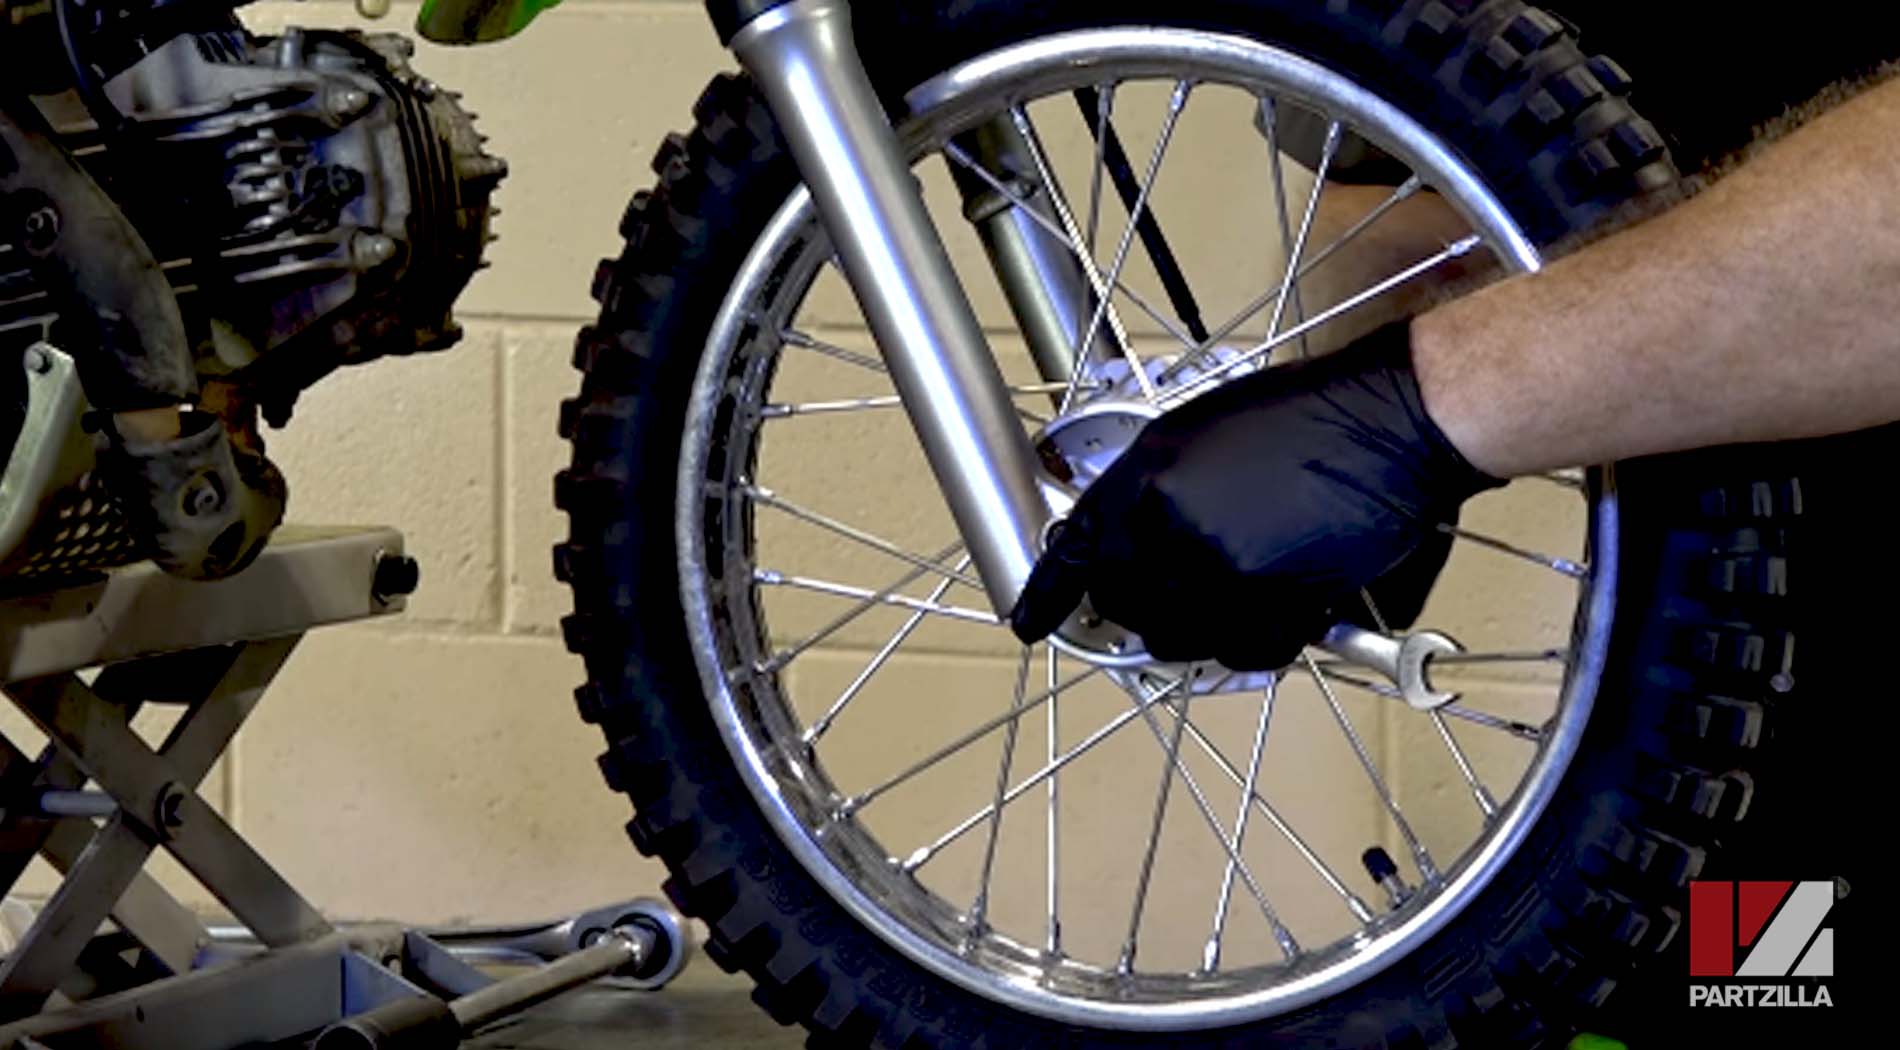
Step 7. Push the axle through by using your palm to push on the threaded end, and pulling on the head of the bolt with the other hand, which releases the front wheel from the machine.
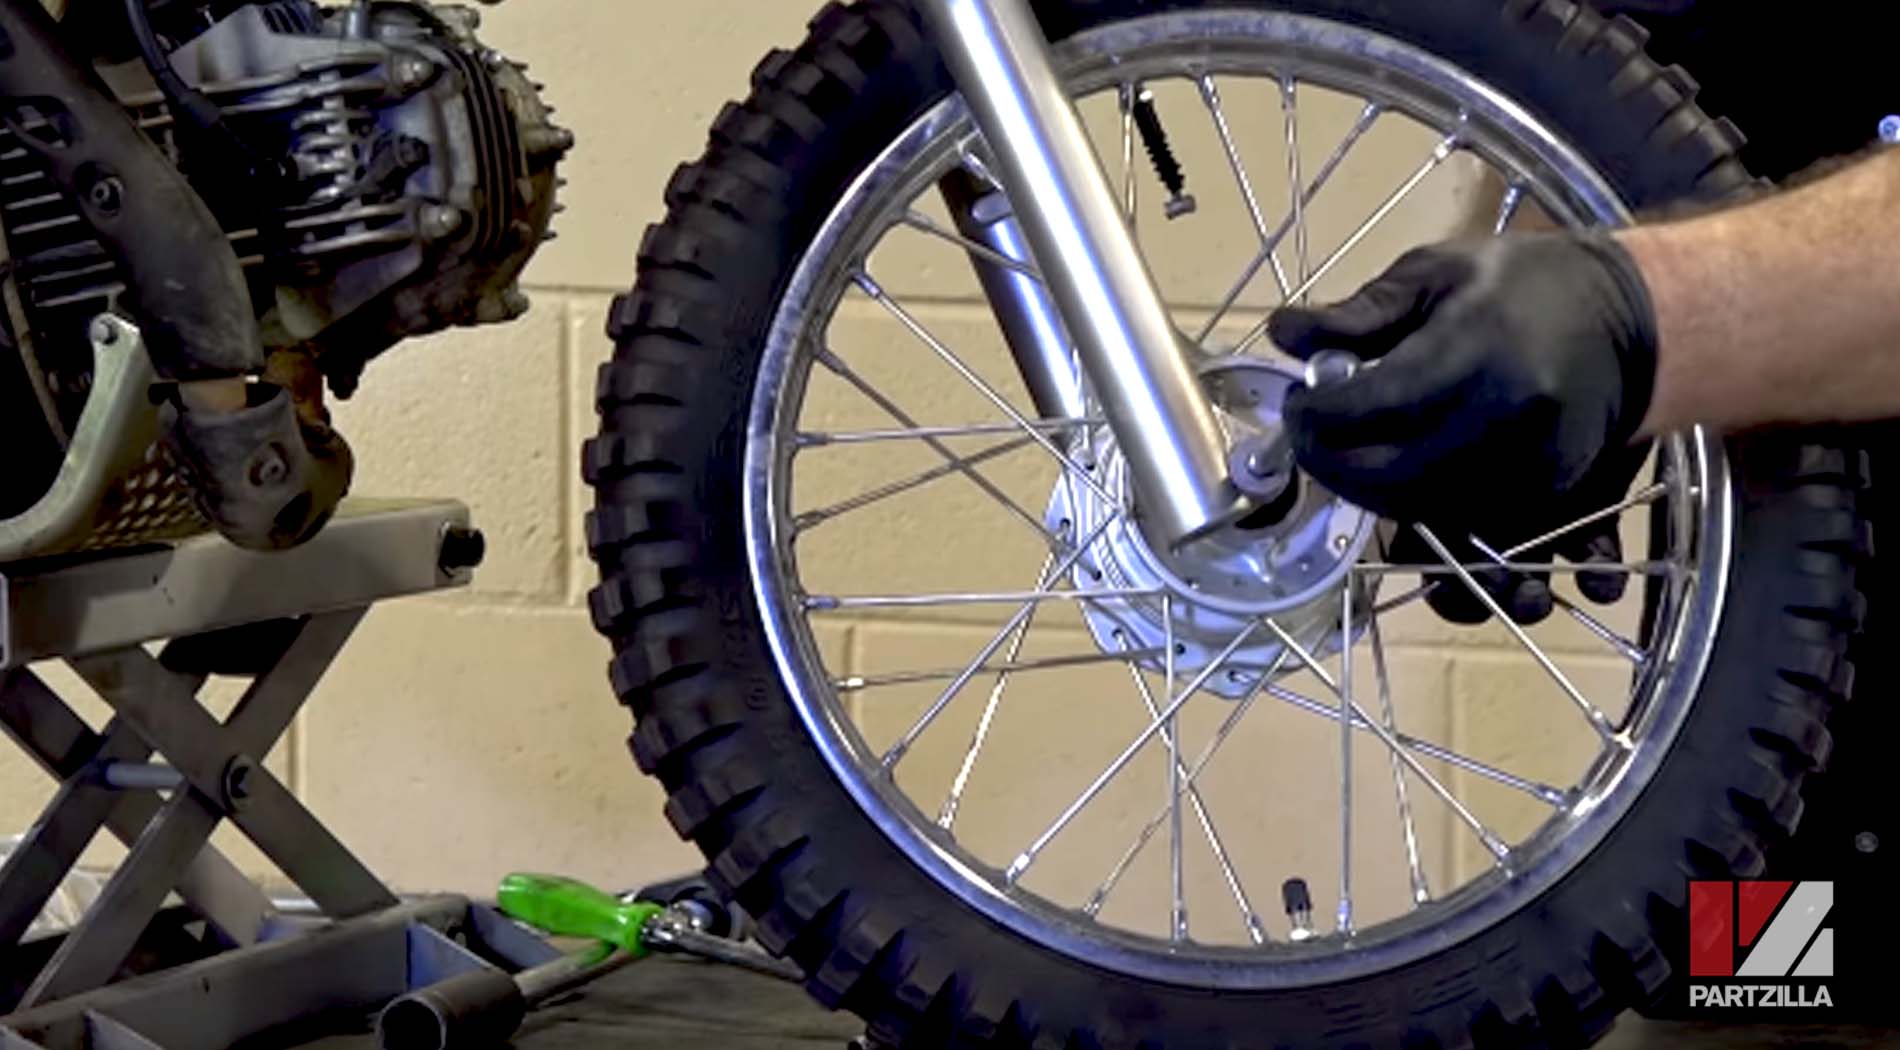
NOTE: Don’t lose the spacer on the right hand side of the wheel.
Step 8. Lift the left side of the hub to access the brake shoes.
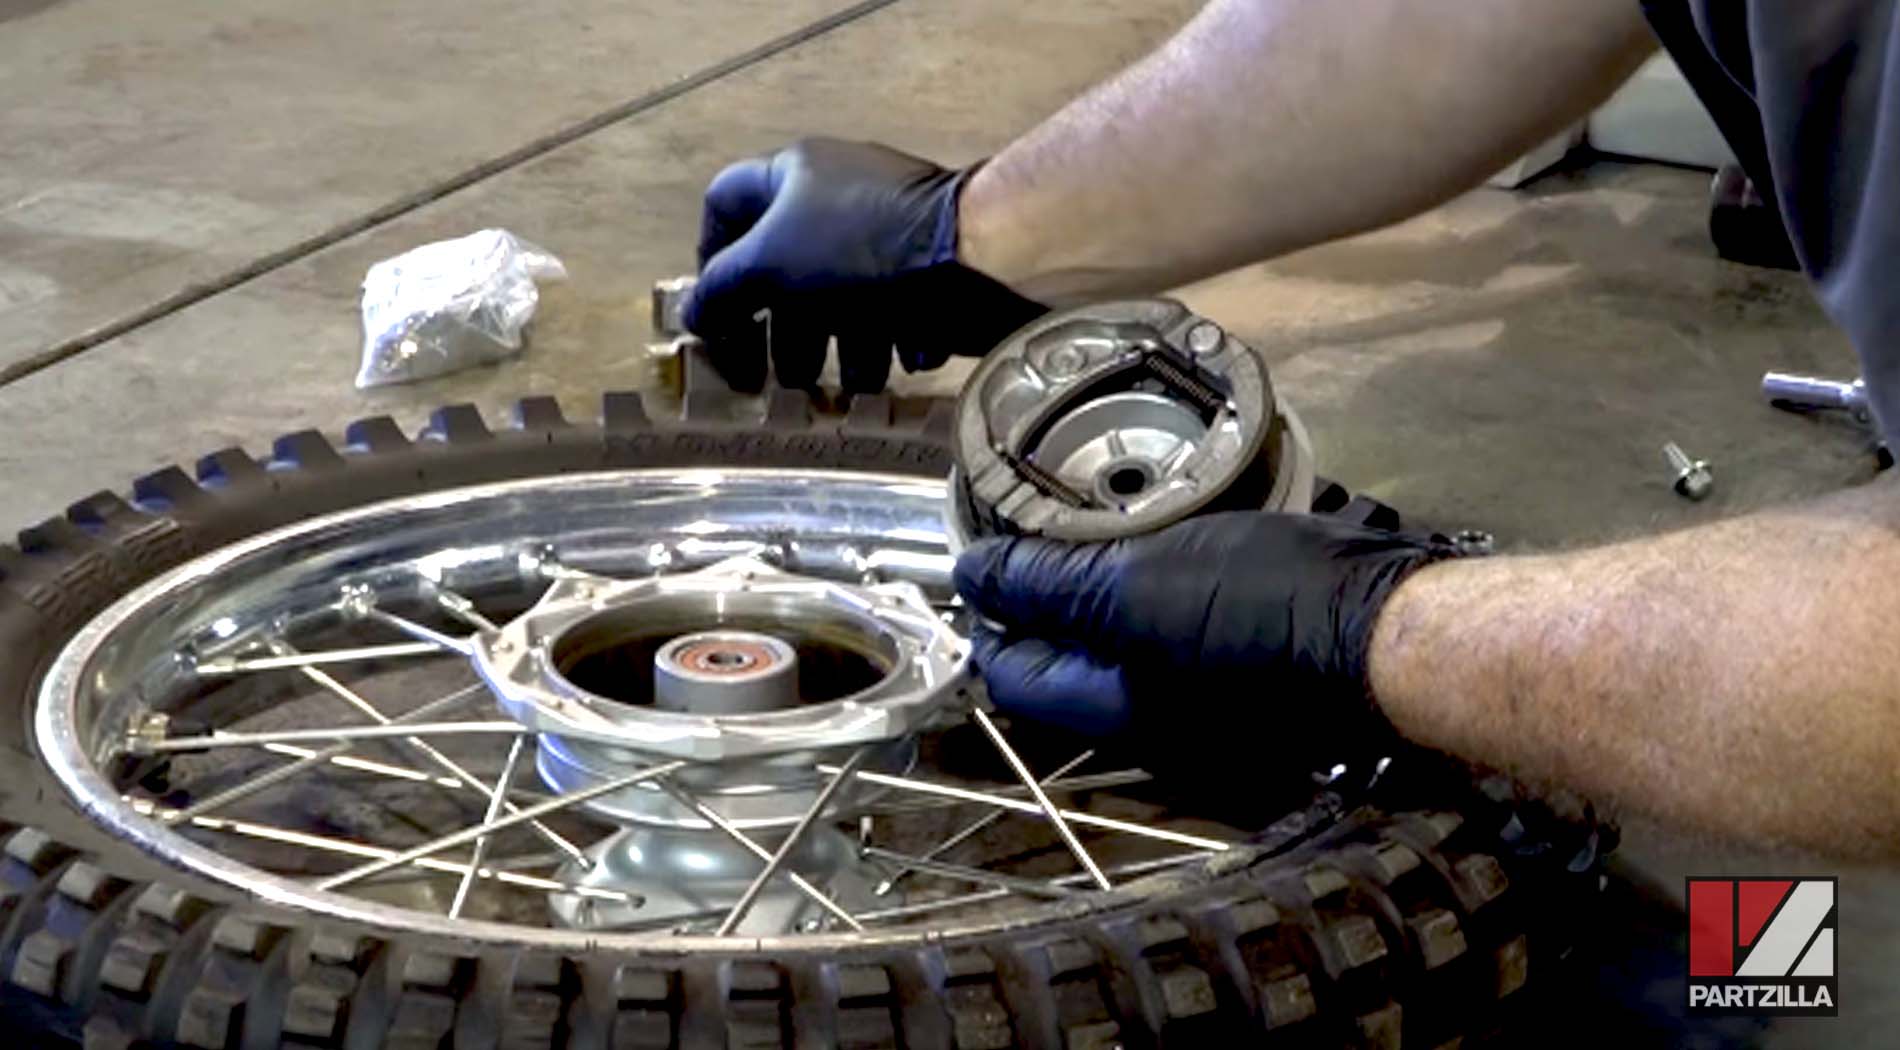
Step 9. Pull the brake shoes away from each other while pulling them up off the hub.
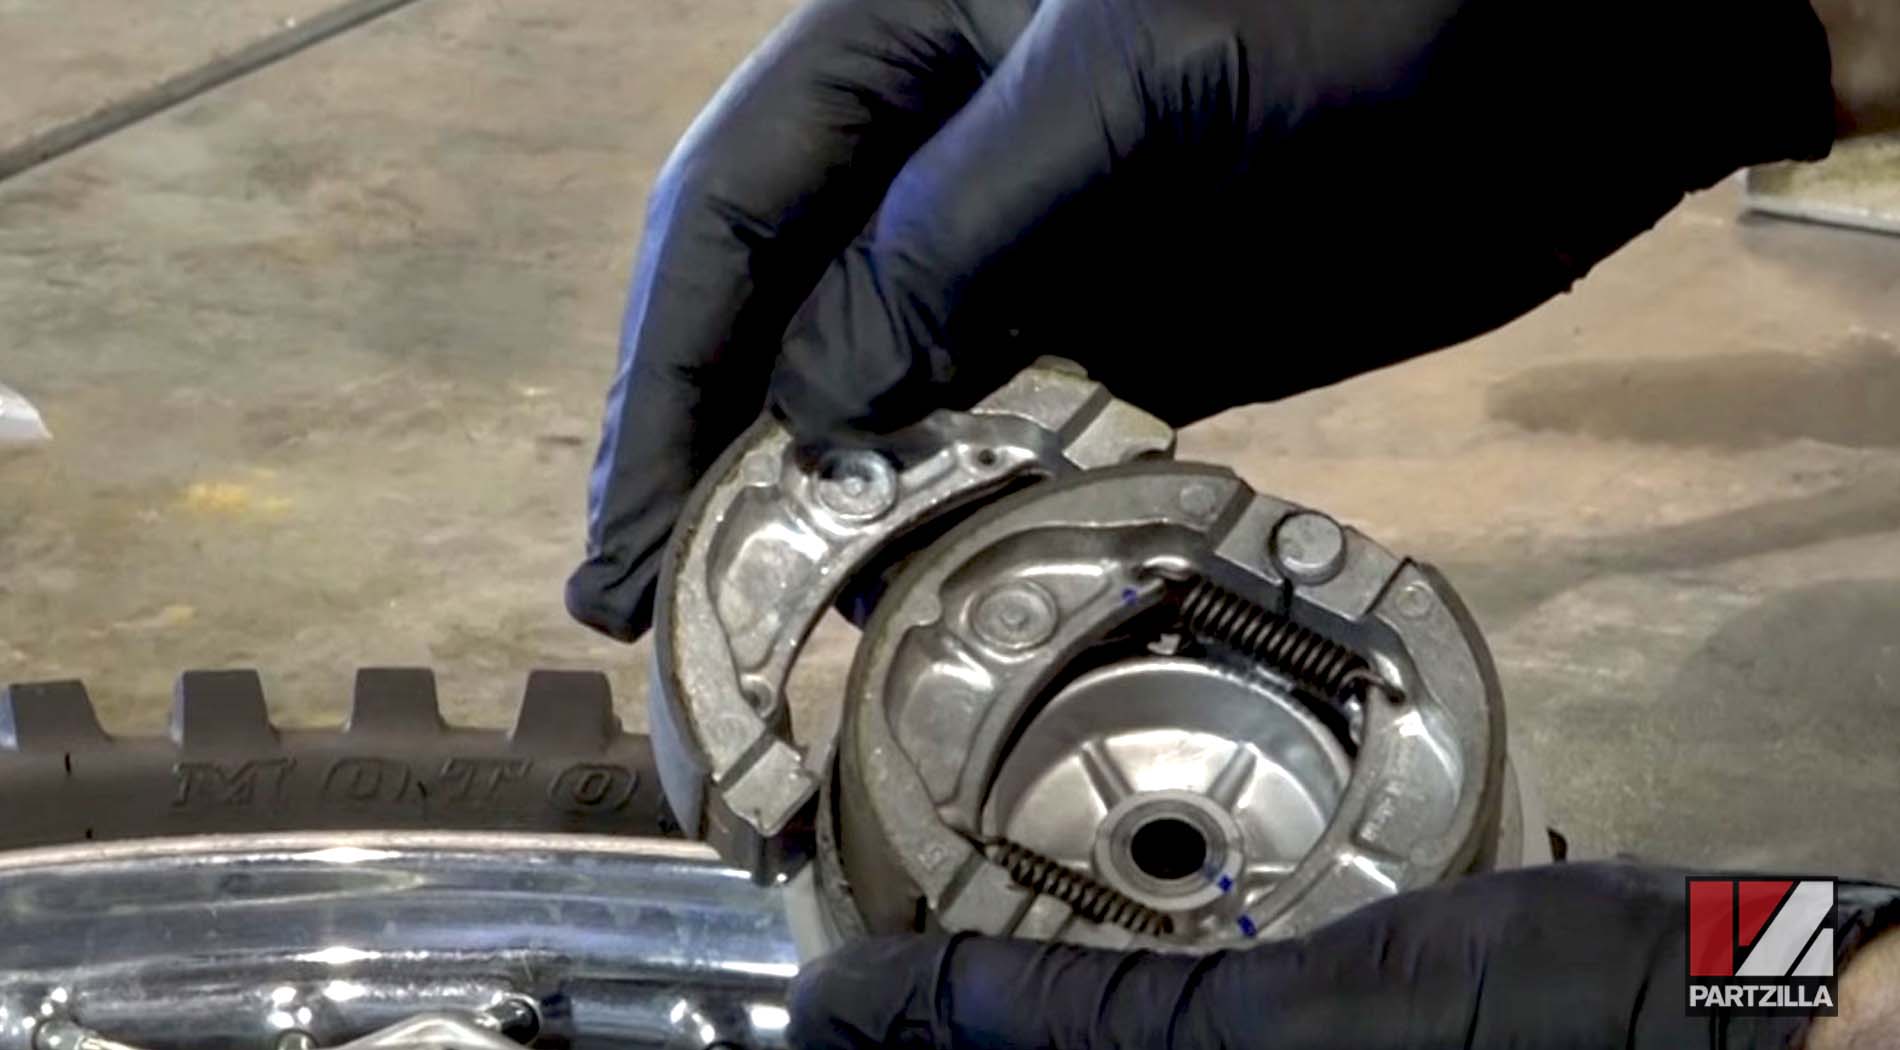
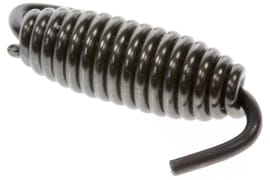
Step 10. Use pliers to remove the springs from the old brake shoes, then put the springs on the new brake shoes and install the shoes onto the hub.

NOTE: The shoes have different ends: one curved, one flat. Match these ends up on each shoe so they face each other. They’ll snap into place once positioned correctly.
Step 11. Put the hub assembly back on the wheel.
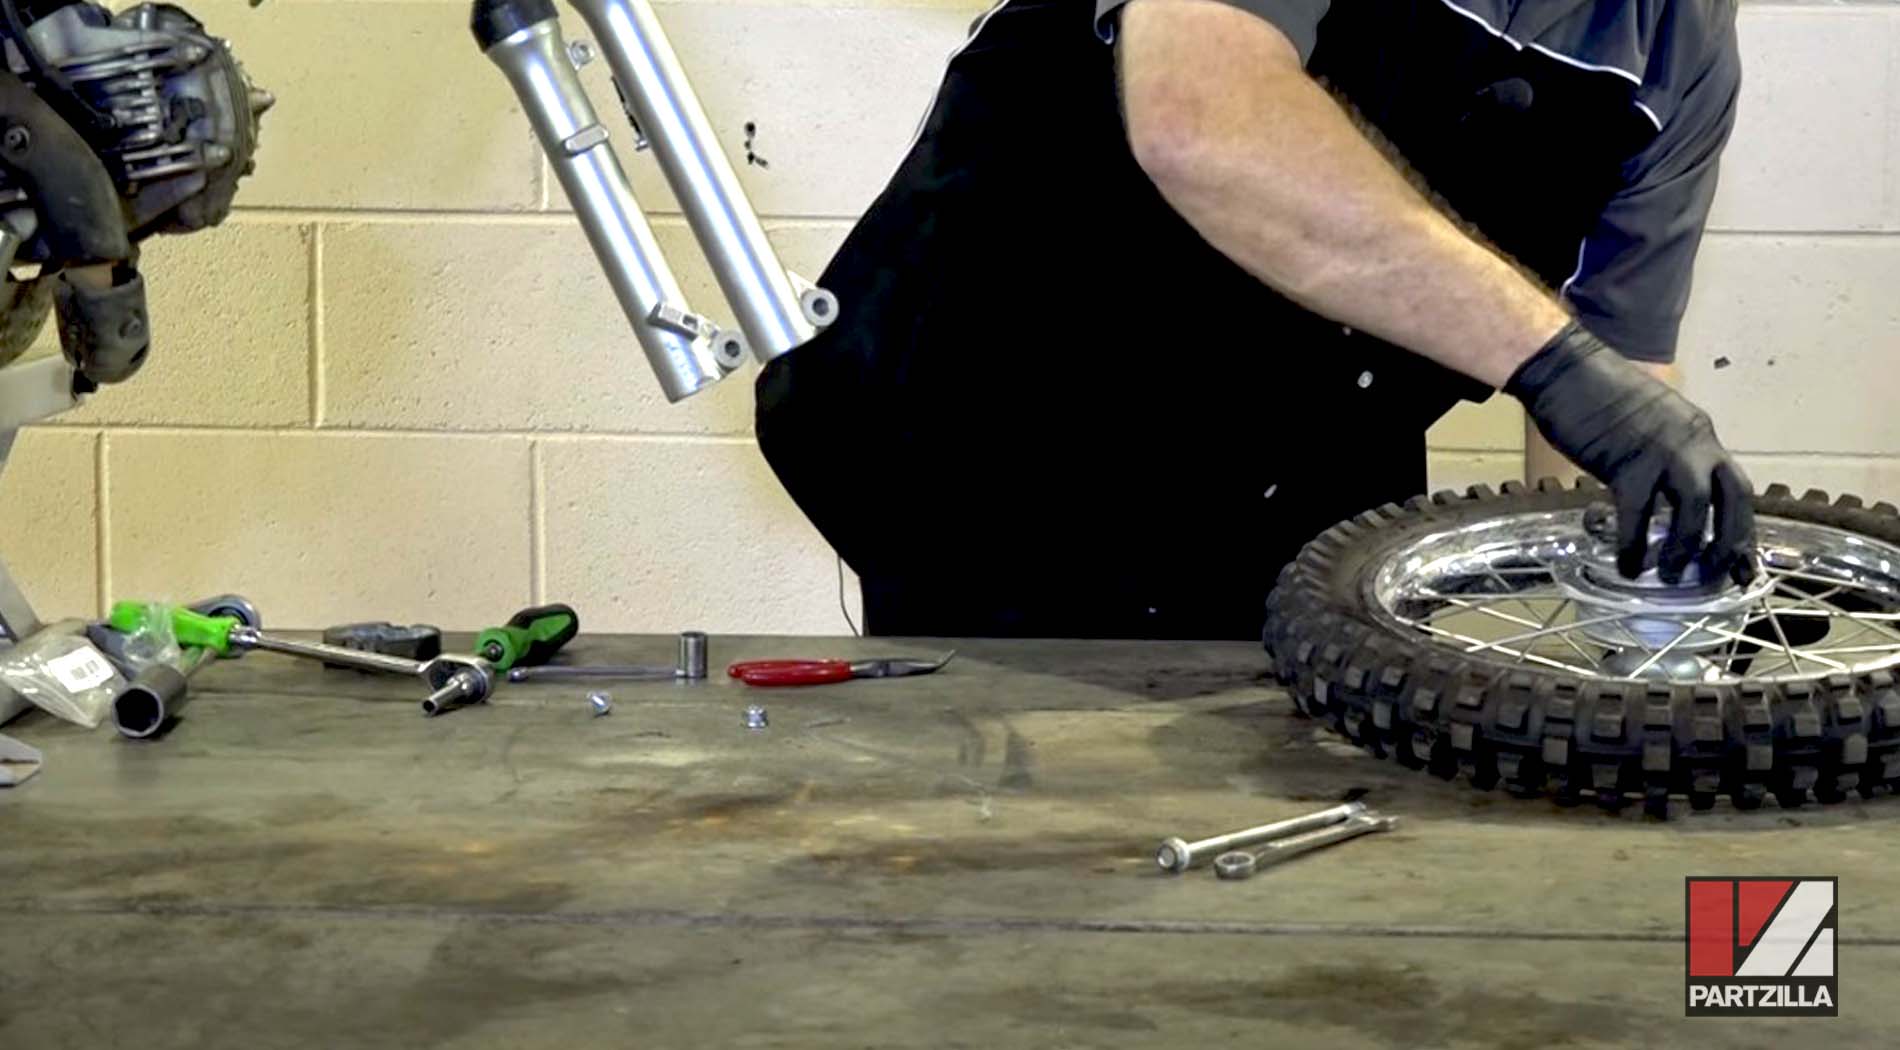
NOTE: There are no fasteners, simply position the wheel in.
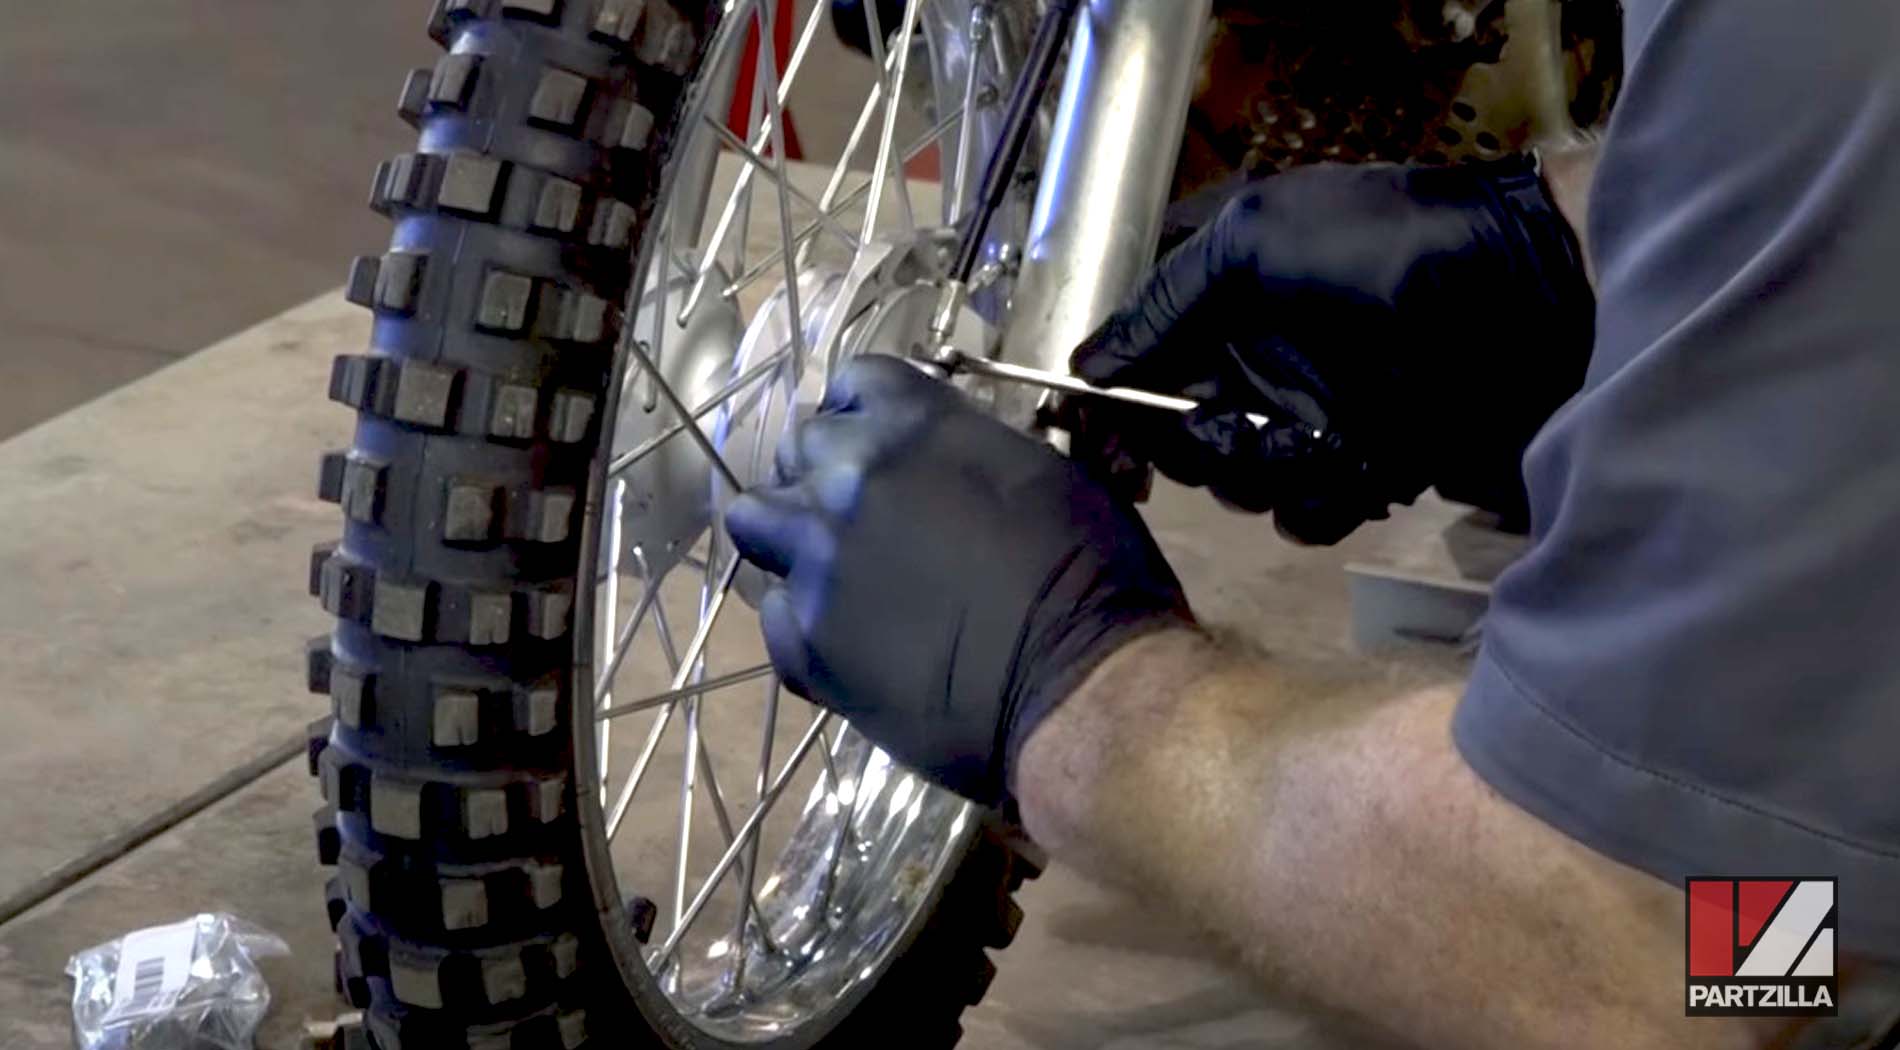
Step 12. Replace the wheel on the fork. There’s a notched section on the brake side of the hub that slides over a tab on the fork. Once they’re aligned, position the wheel so the holes for the axle line up.
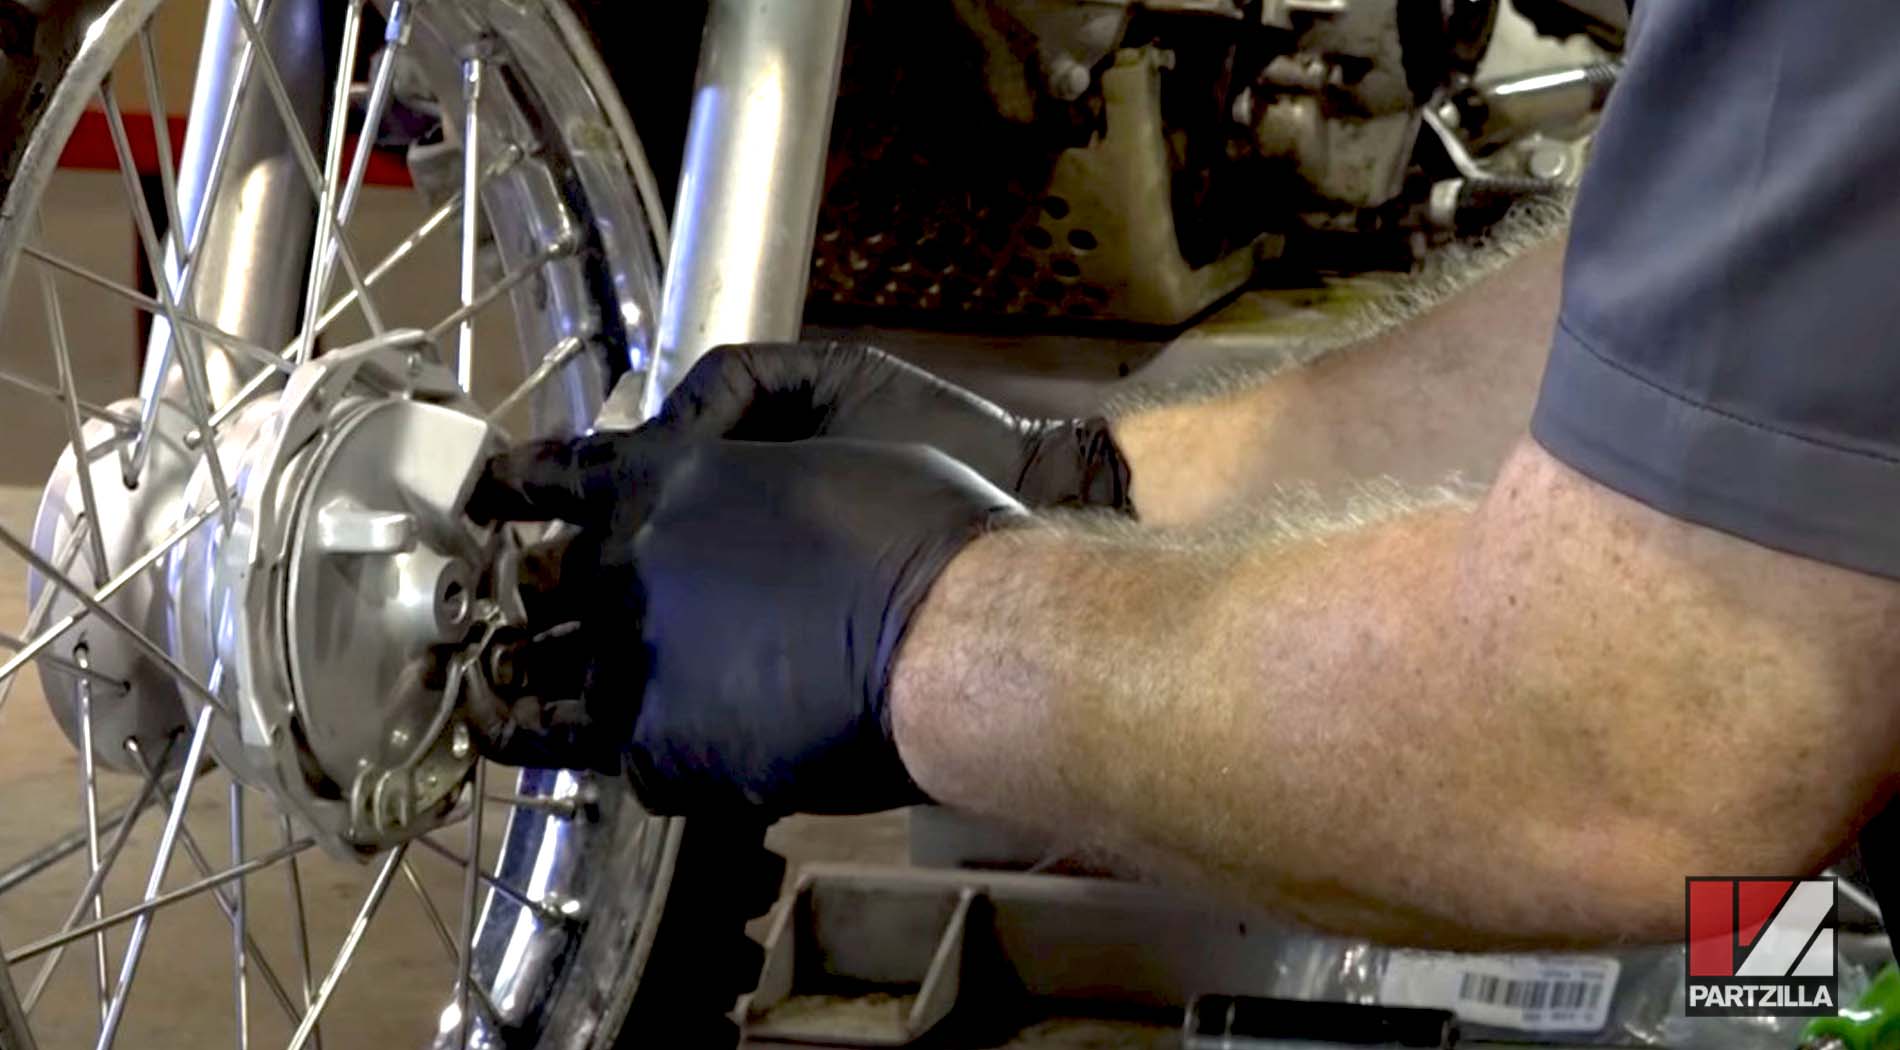
Step 13. Slide the axle through the hub. The head of the bolt will be on the side opposite the brake. Thread the 14mm bolt back on the axle and get it snug, then torque the bolt to 32 foot-pounds.
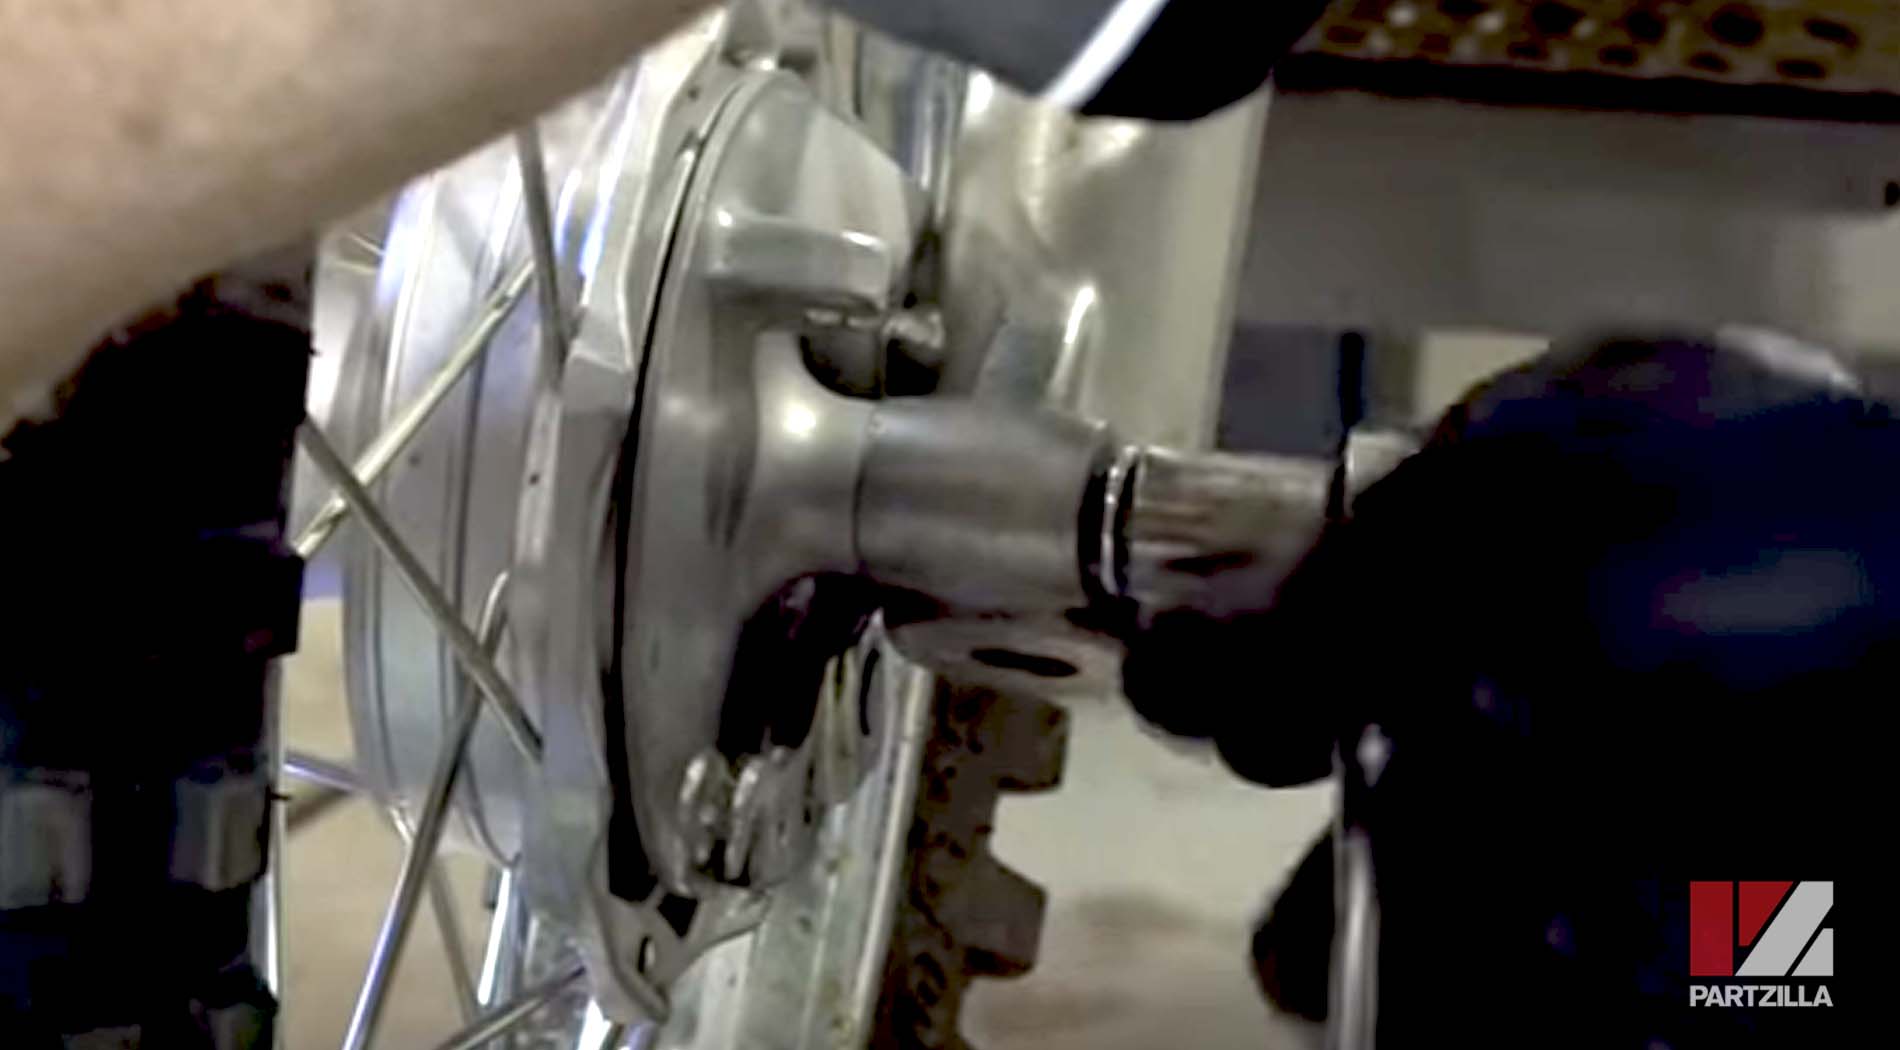
NOTE: Once again, you’ll need a wrench to hold the other side of the axle in place and keep it from turning.
Step 14. Reconnect the lower end of the brake cable by routing the cable underneath its hook on the hub, then placing it in the channel molded into the surface of the hub.
Step 15. Snug the pinch bolt up to the bottom of the channel, and the second bolt on top.
NOTE: You can leave some play in the adjustment since you’ll set that up once the top is connected, but adjust it as far up as you can for the new brake shoes.
Step 16. Retighten the clamp on the fork holding the cable in place, then reconnect the top of the brake cable. Rotate the adjustment wheel all the way up to the brake handle.
Step 17. Fine tune the brake adjustment at the bottom of the cable. Next, spin the wheel a few times and check the brakes to make sure the play in the brake handle feels comfortable.
Step 18. Slide the dust cover on the brake handle back into place, then replace the cotter pin on the axle and you’re done.

Ready to do the rear brake shoes next? Watch the video below to see how to replace the rear brake shoes on a Kawasaki KLX 110 dirt bike.