How to Adjust Honda TRX400EX Valve Clearance
Easier cold starts, better fuel economy and improved engine performance are benefits of correctly adjusting the valve clearance on a Honda ATV.
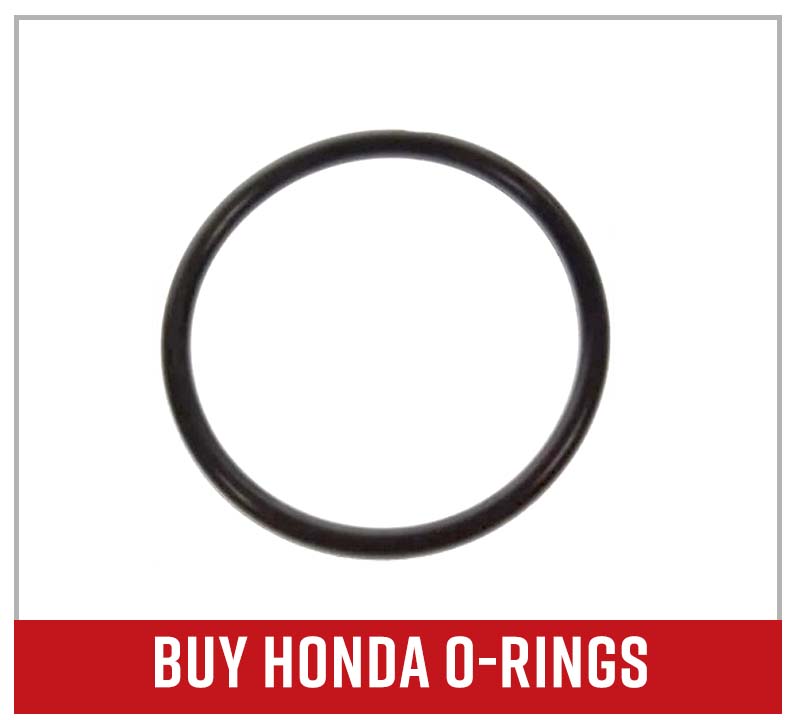
Although you don’t need any new parts to adjust the valve clearance on a Honda ATV, we recommend replacing the O-rings in the cylinder head cover. A pack or two of OEM Honda plastic rivets also may come in handy when working on a TRX. Watch the video above and follow the steps below to learn how to do a Honda TRX 400EX valve clearance adjustment.
Tools and Parts – Honda TRX 400 Valve Clearance Adjustment
- Ratchet
- 10mm, 22mm sockets
- 5mm, 6mm, 12mm Allens
- 10mm wrench
- Pliers
- Flathead screwdriver
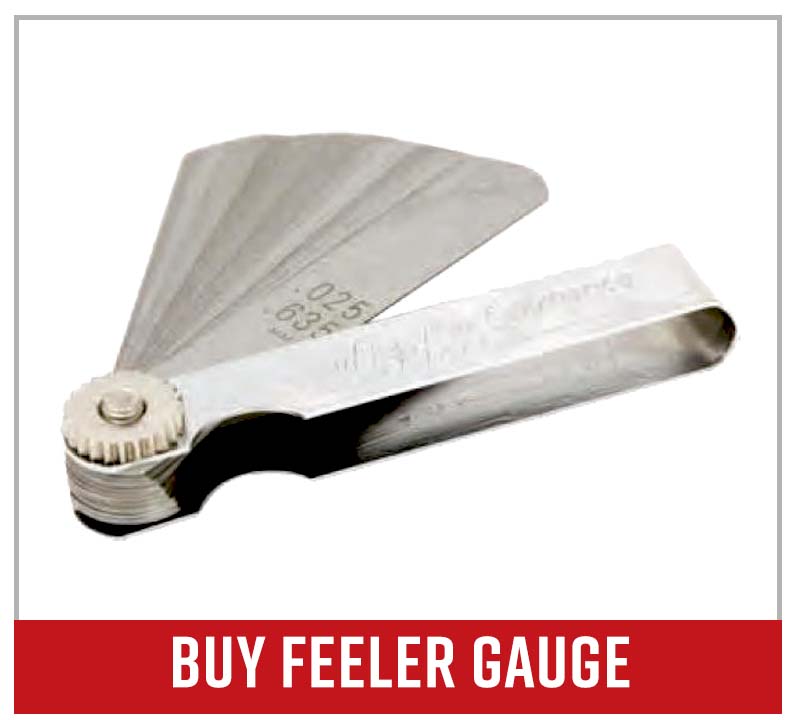
- Feeler gauge
- O-rings
- Plastic rivets
Accessing the Honda TRX400EX Valves
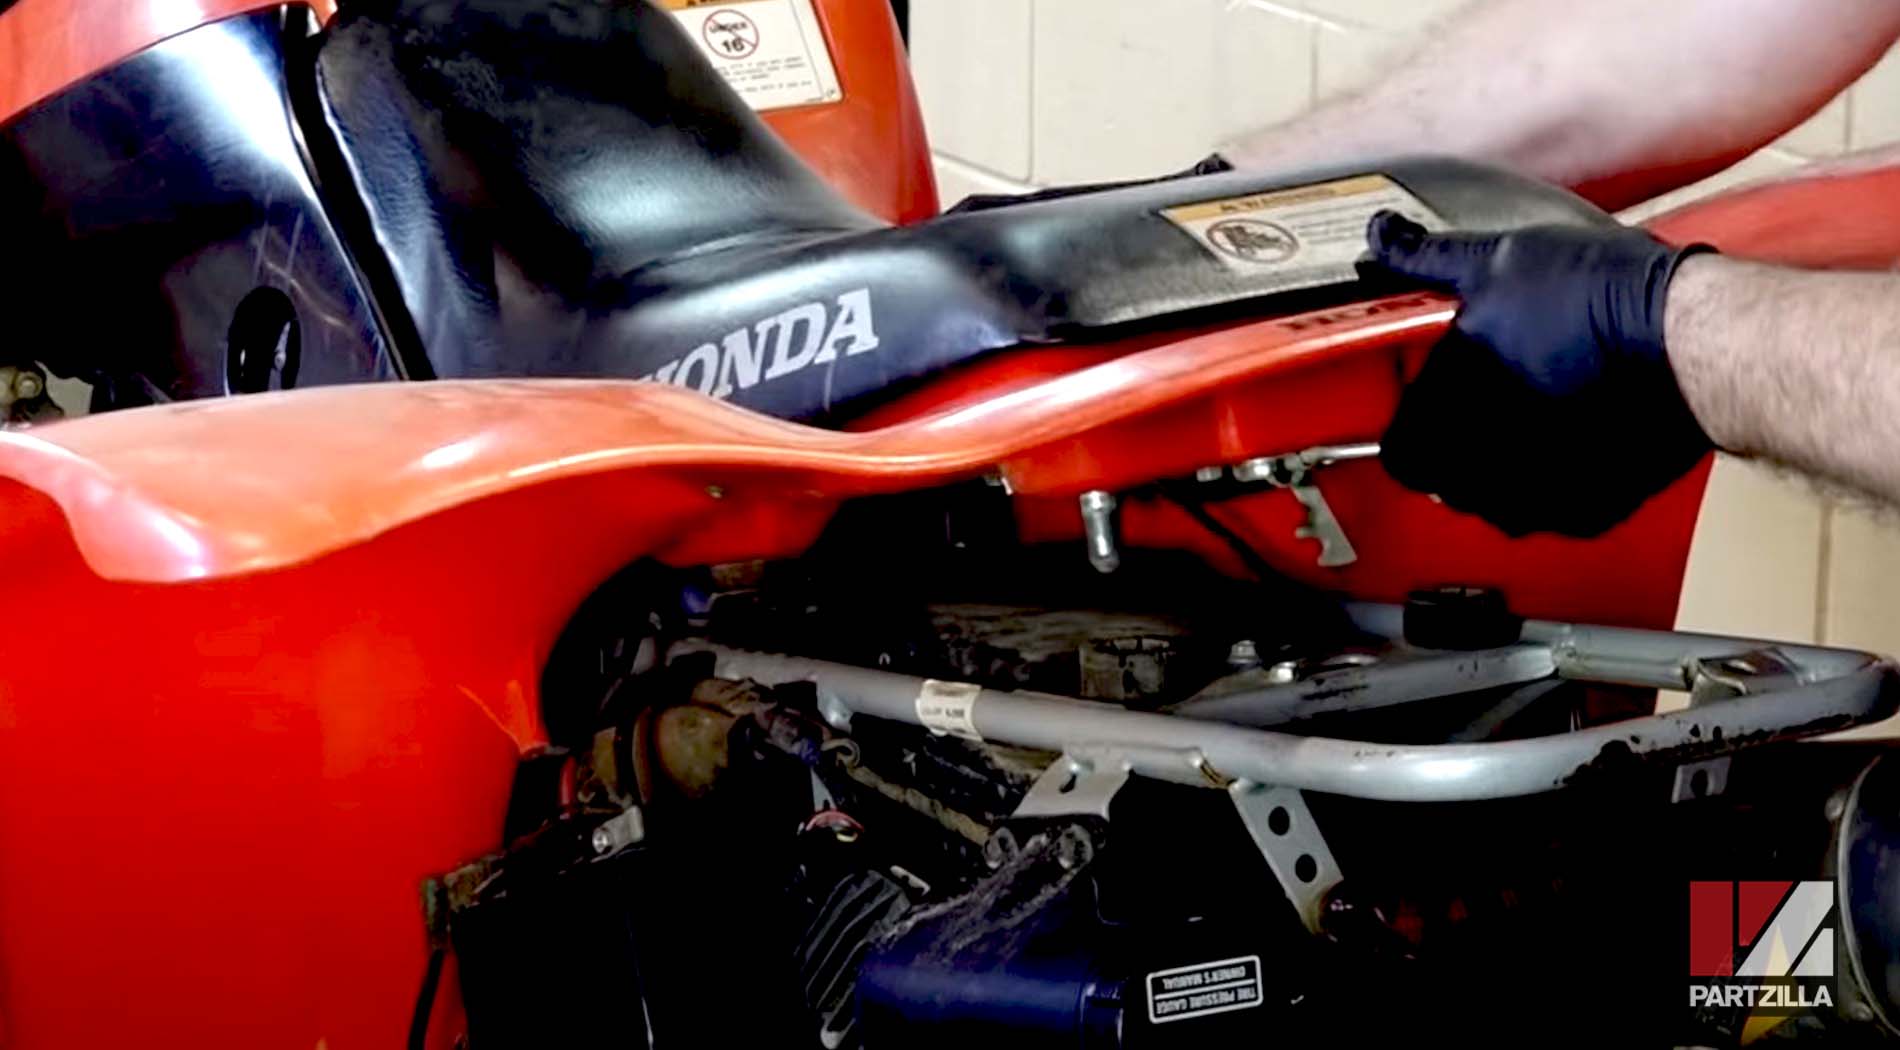
Step 1. Remove the rear fender and seat by releasing the latch at the back and lifting the entire assembly off the ATV.
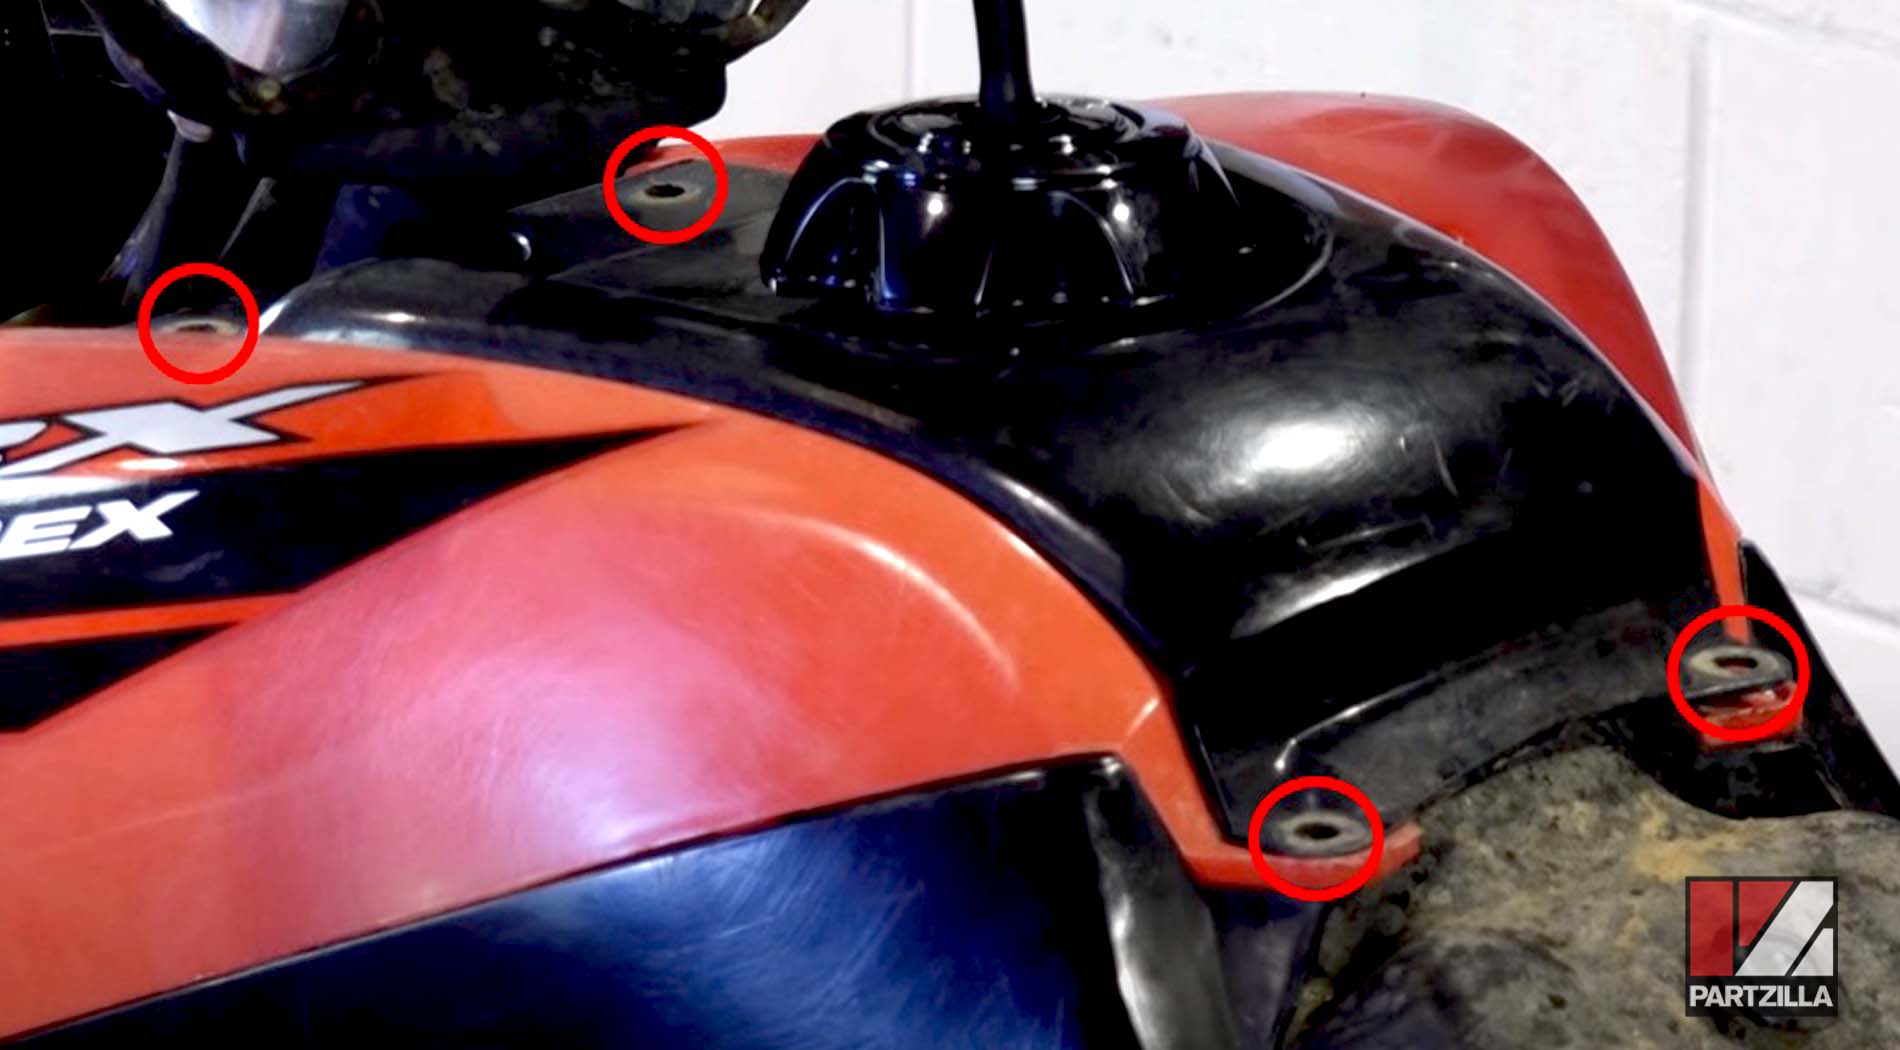
Step 2. Remove the fuel tank cover by pulling out the four plastic rivets holding it in place.
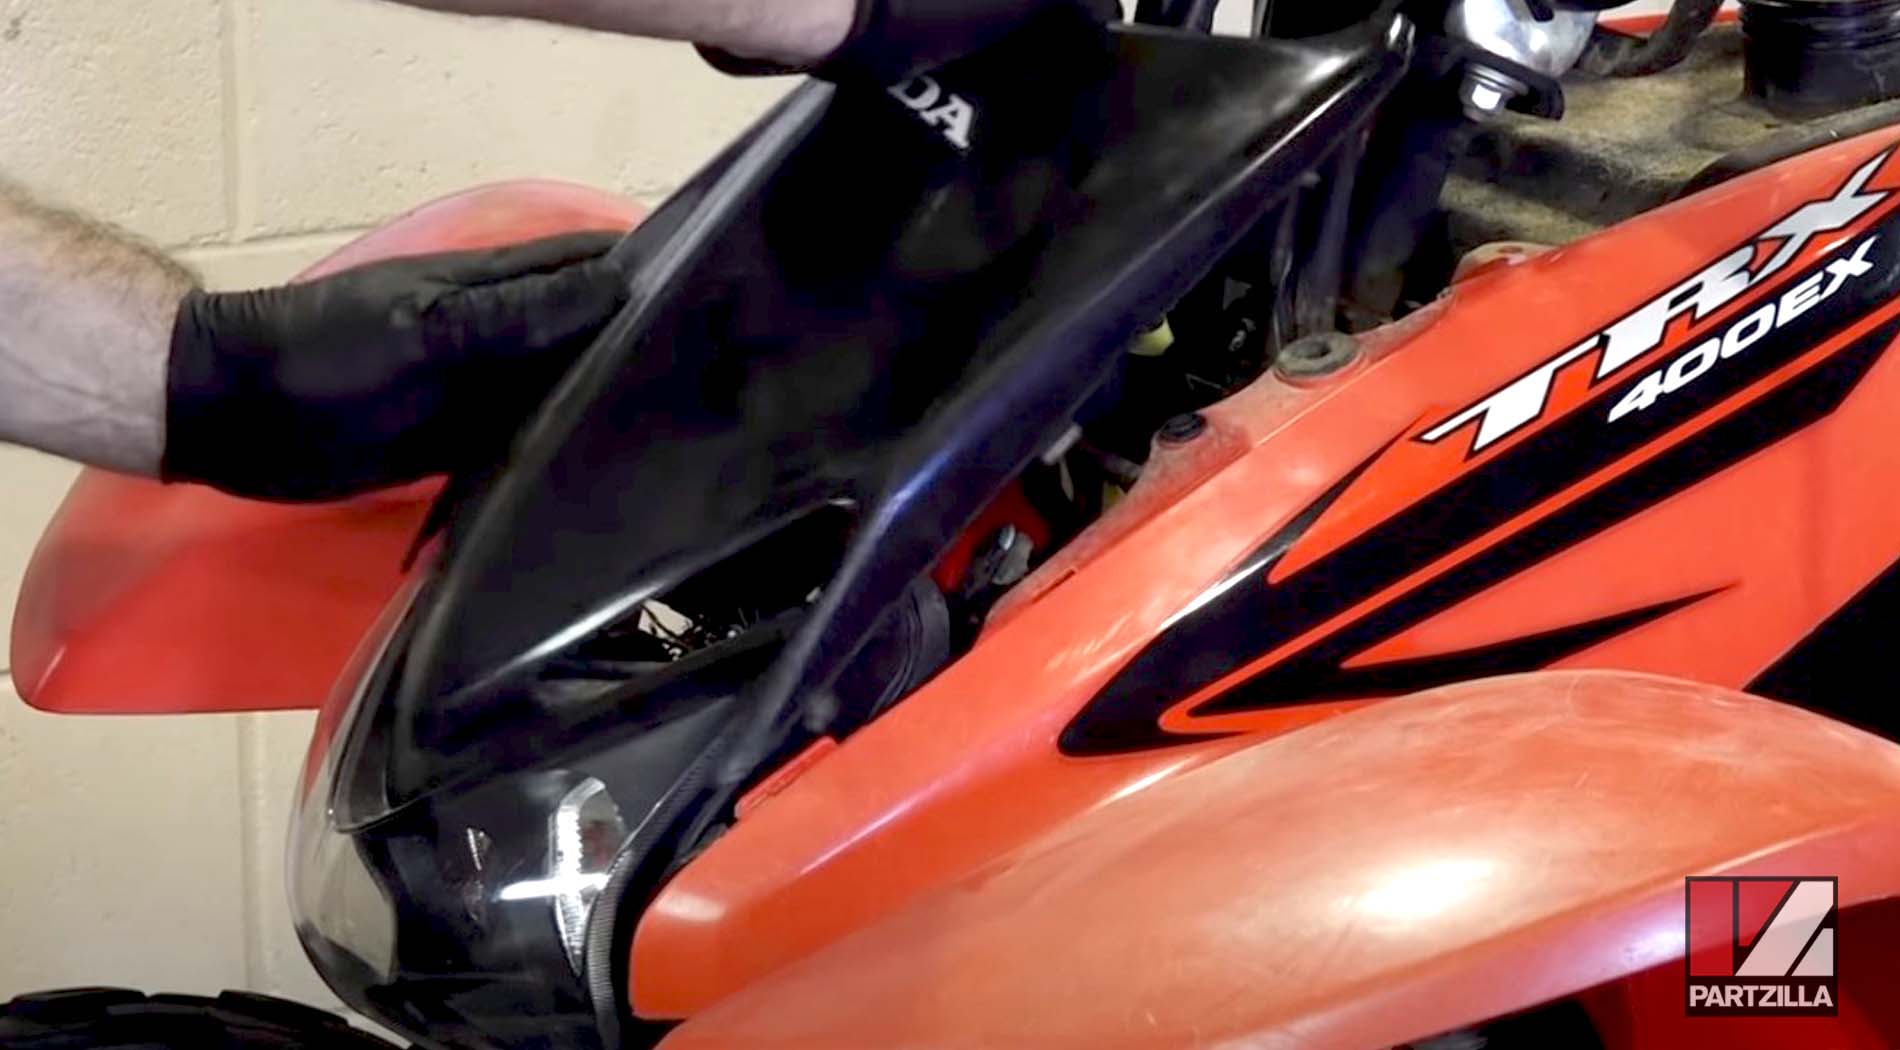
Step 3. Remove the front bodywork center section by pulling it out.
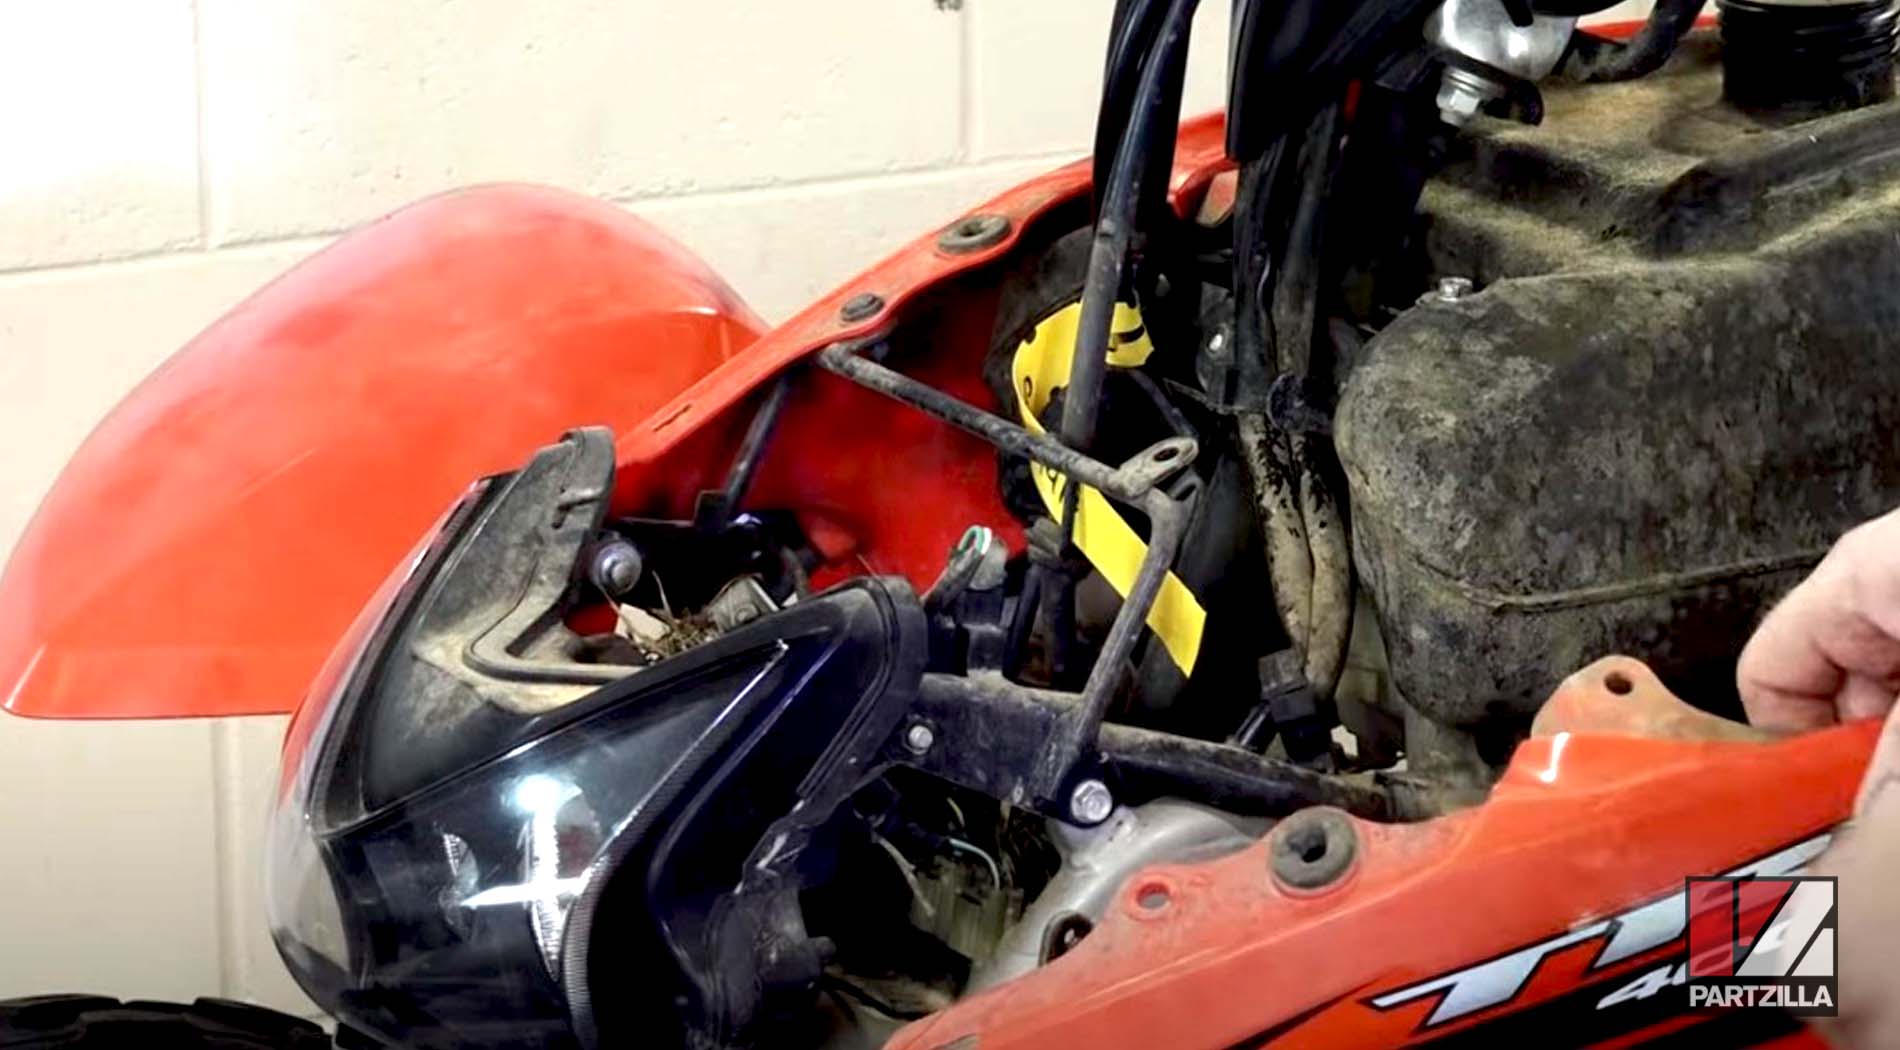
Step 4. Remove the two 10mm bolts and the plastic rivet underneath the left front fender assembly, as well as the plastic rivet on top of it and the 5mm Allen bolt behind it, and remove the assembly.
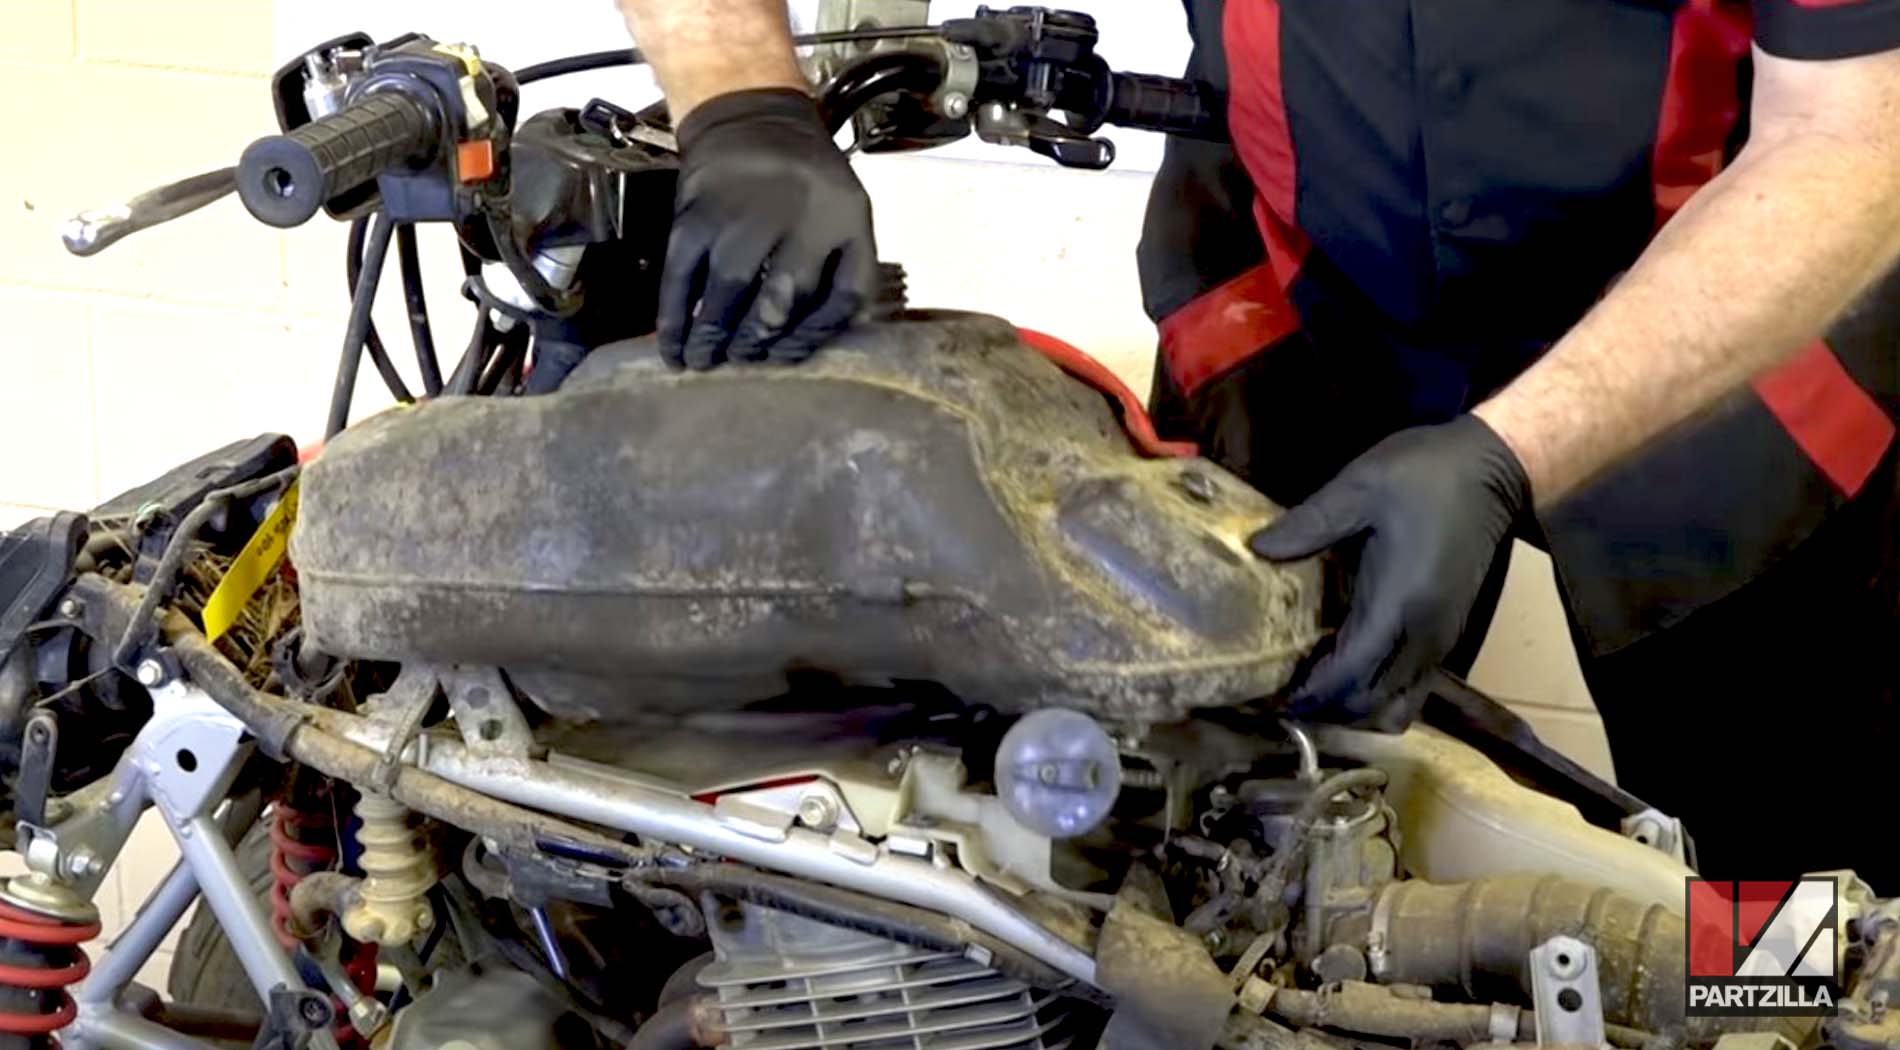
Step 5. Remove the fuel tank by taking off the two 10mm bolts at the front end, making sure the petcock is set to OFF, and disconnect the fuel hose that leads from the petcock to the carburetor. Next, lift the tank off the ATV.
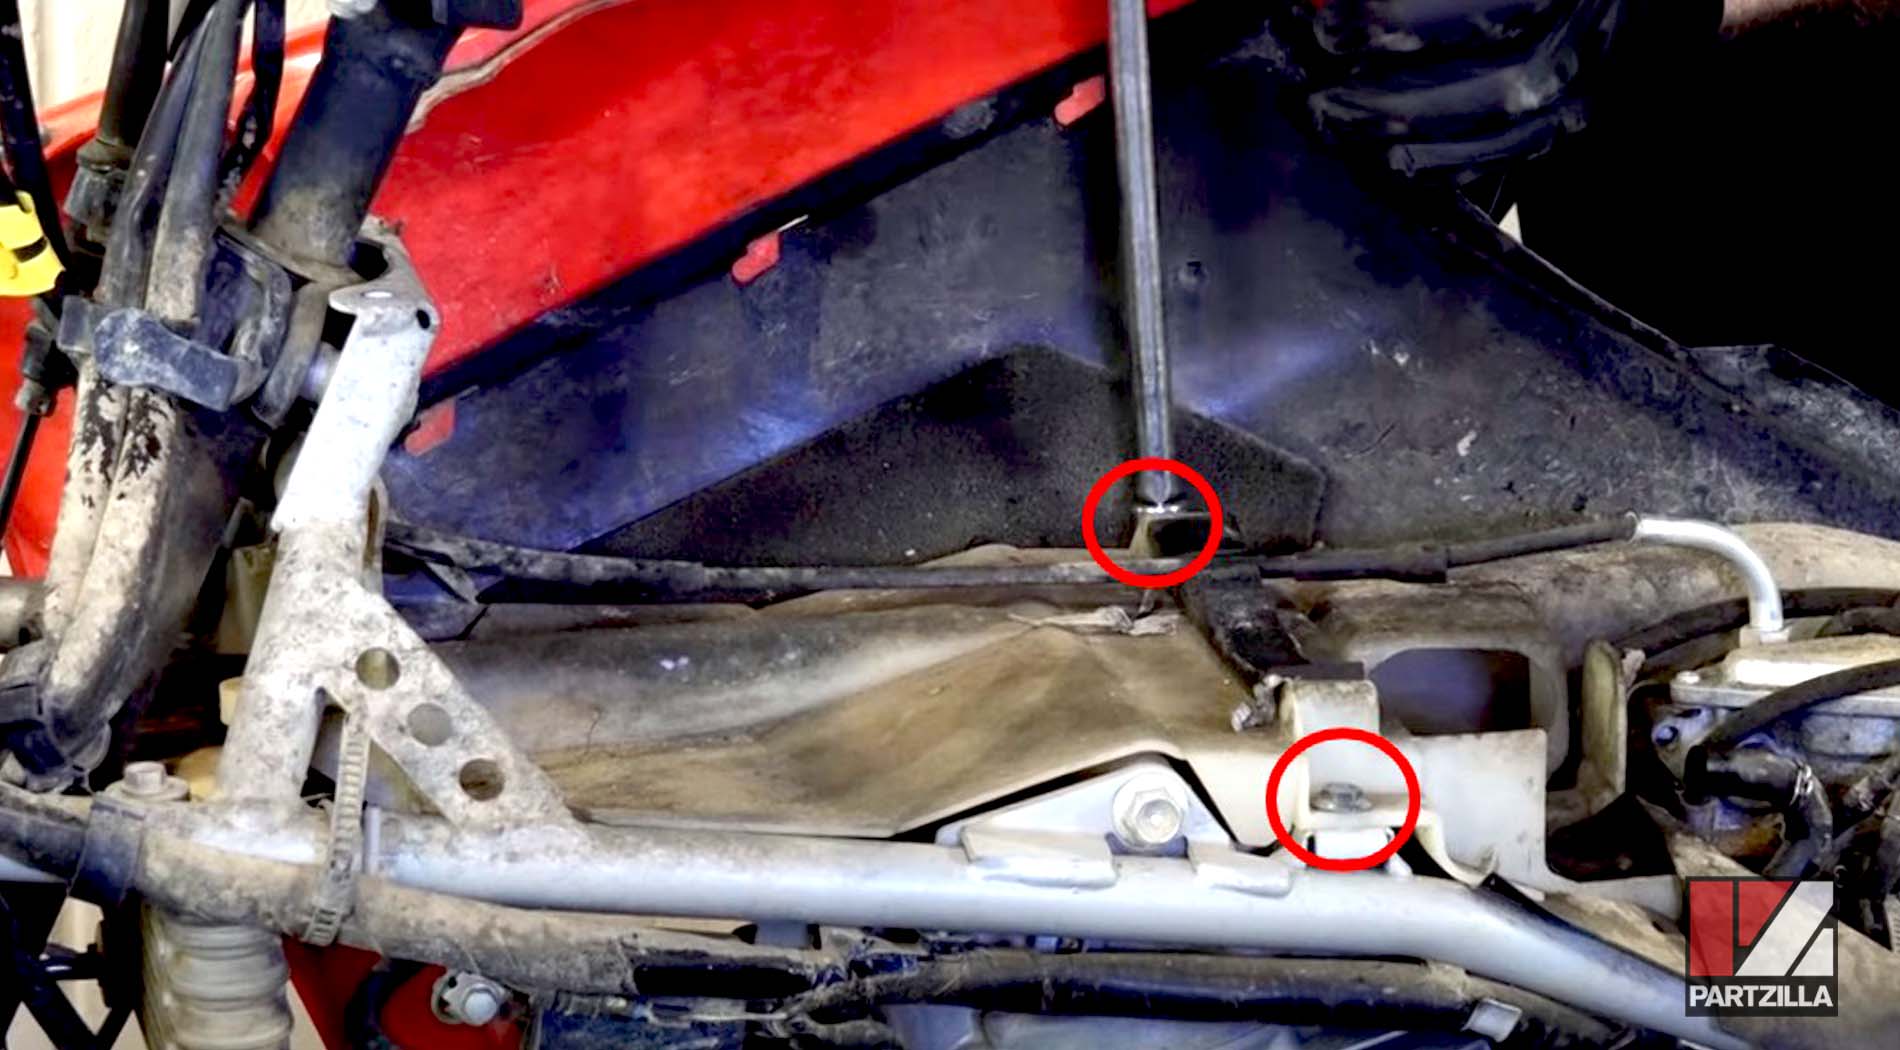
Step 6. Remove the plastic tank protector beneath the fuel tank by taking off the two plastic rivets and two 10mm bolts, and pulling out the cover.
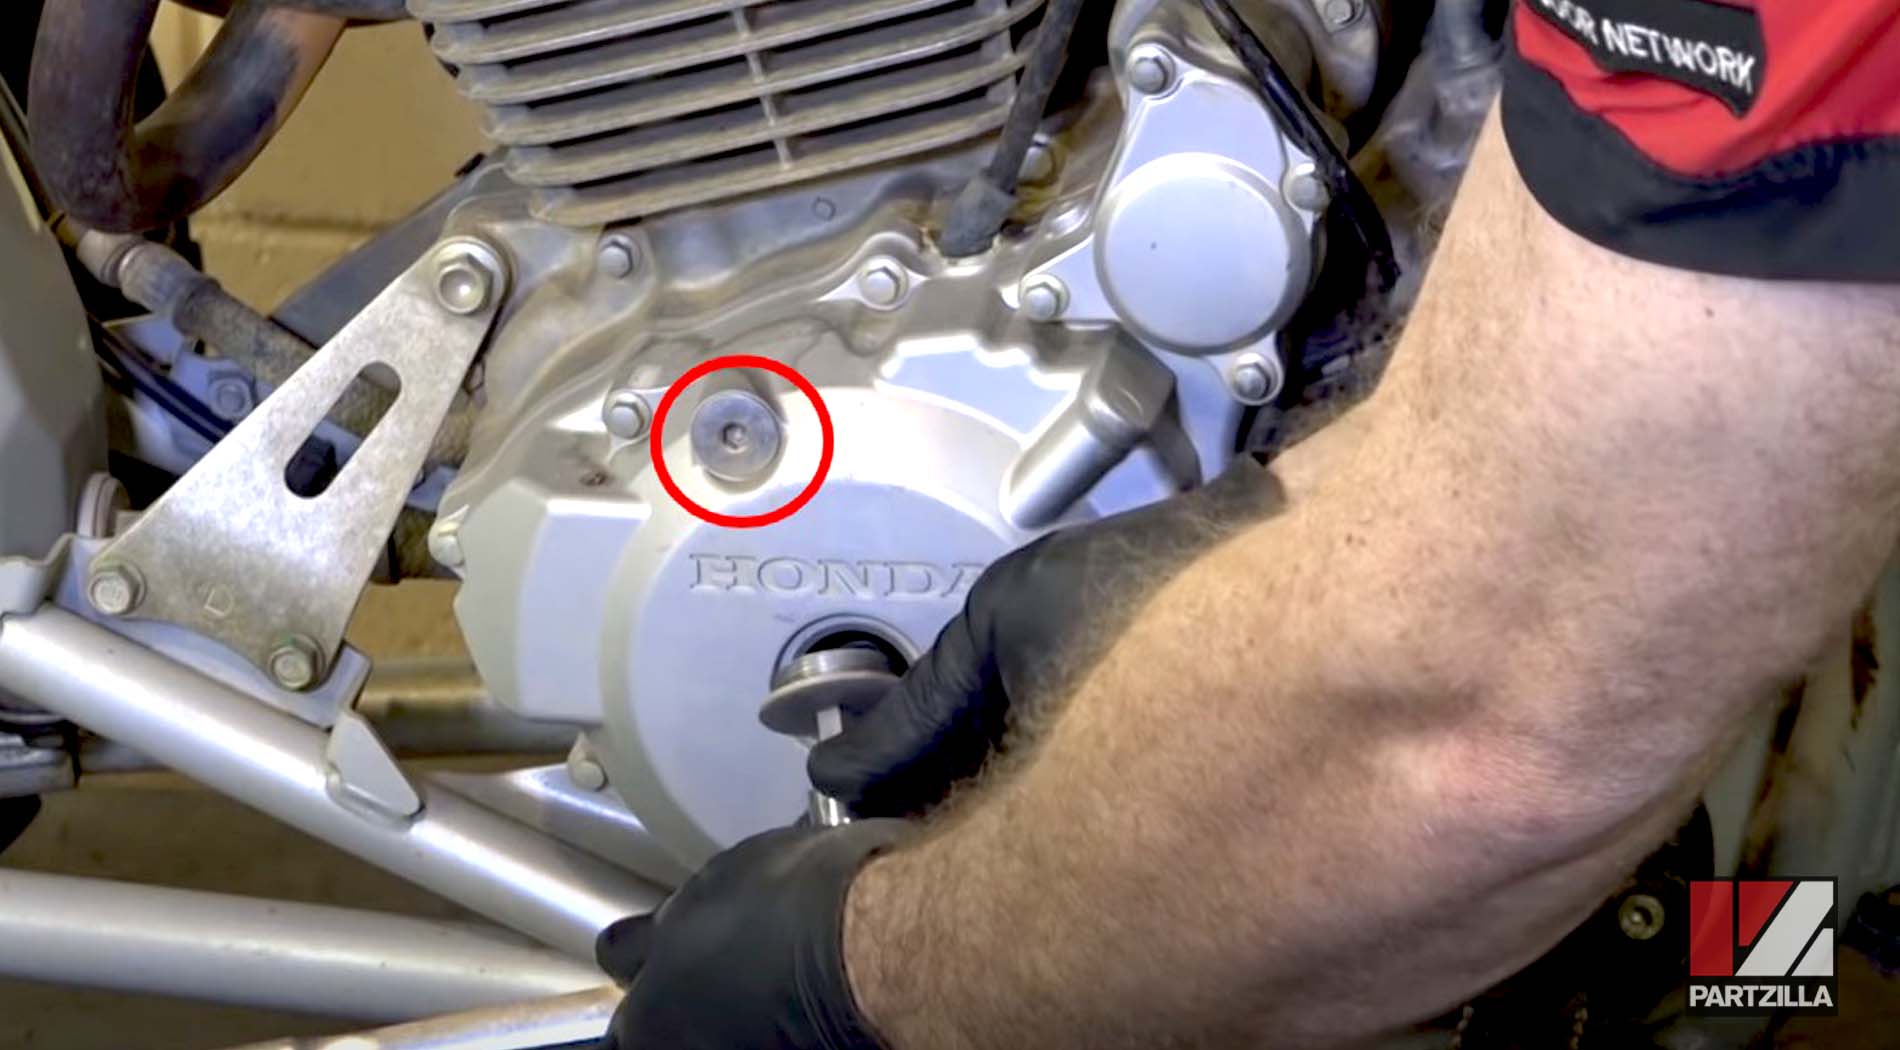
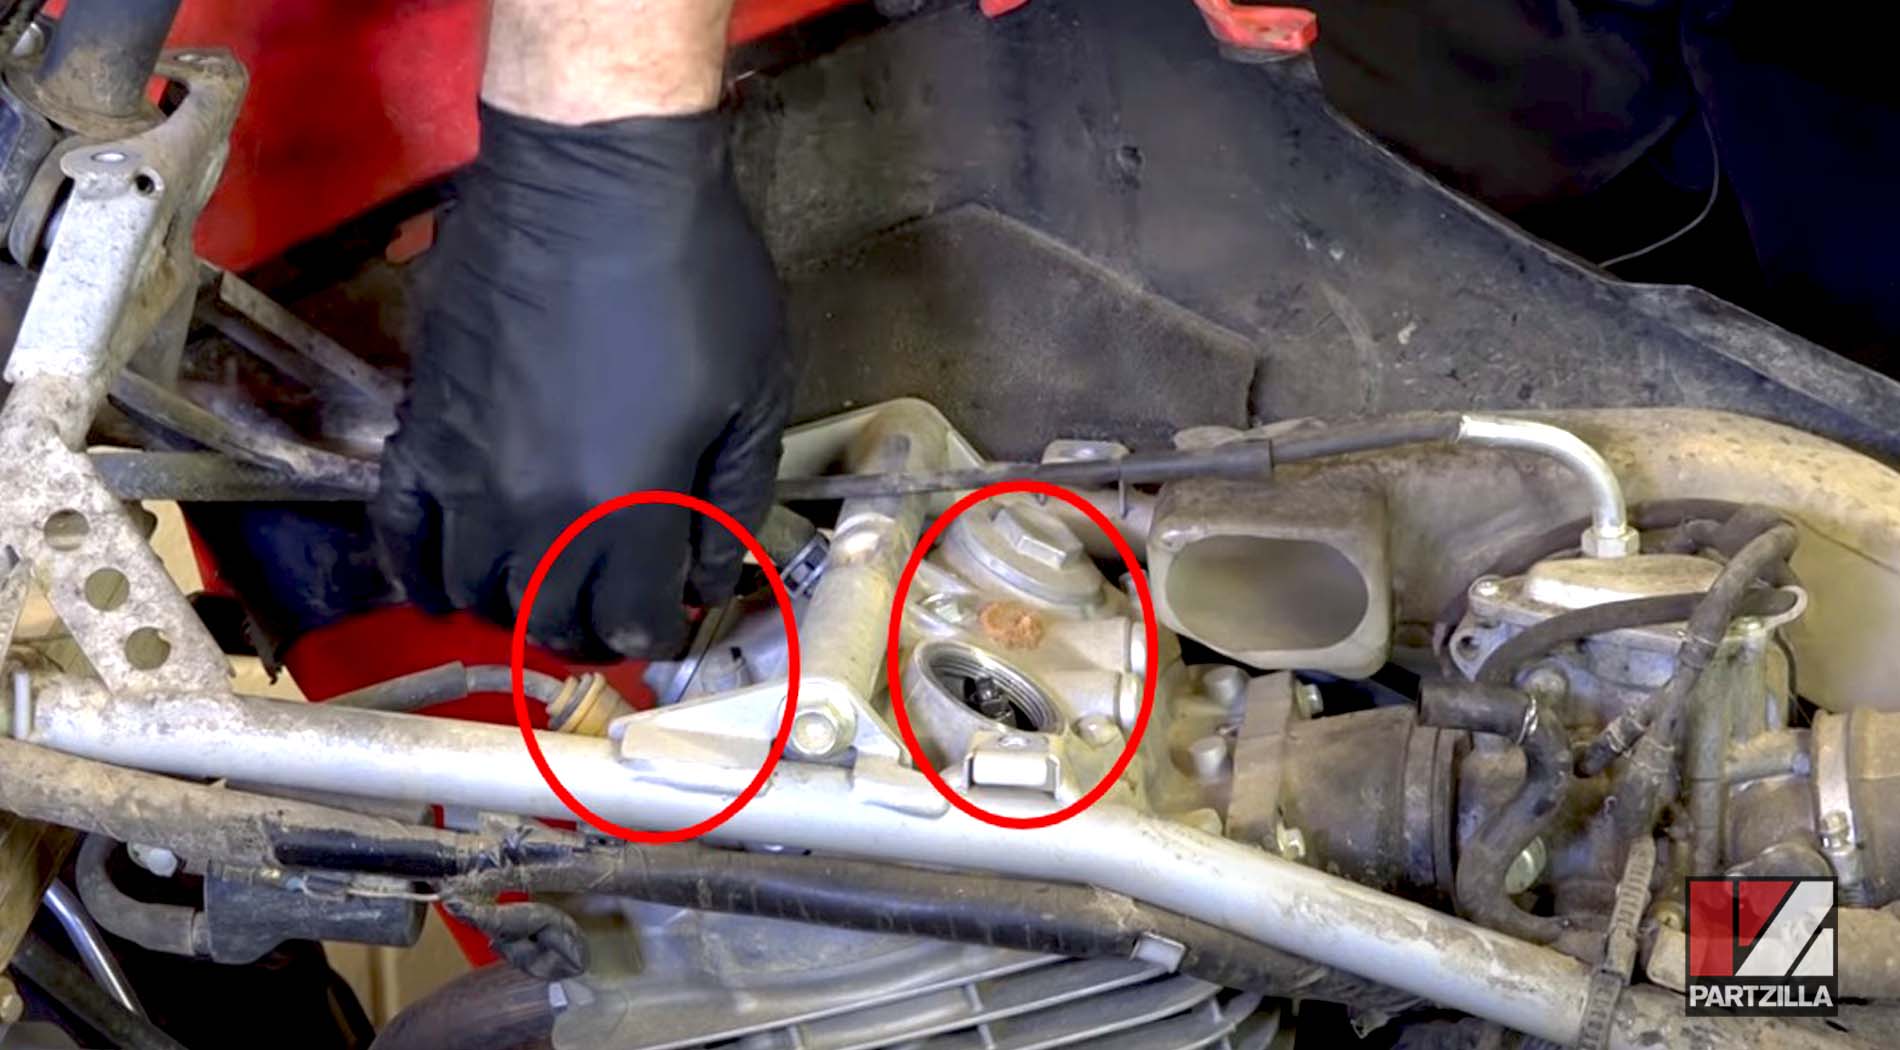
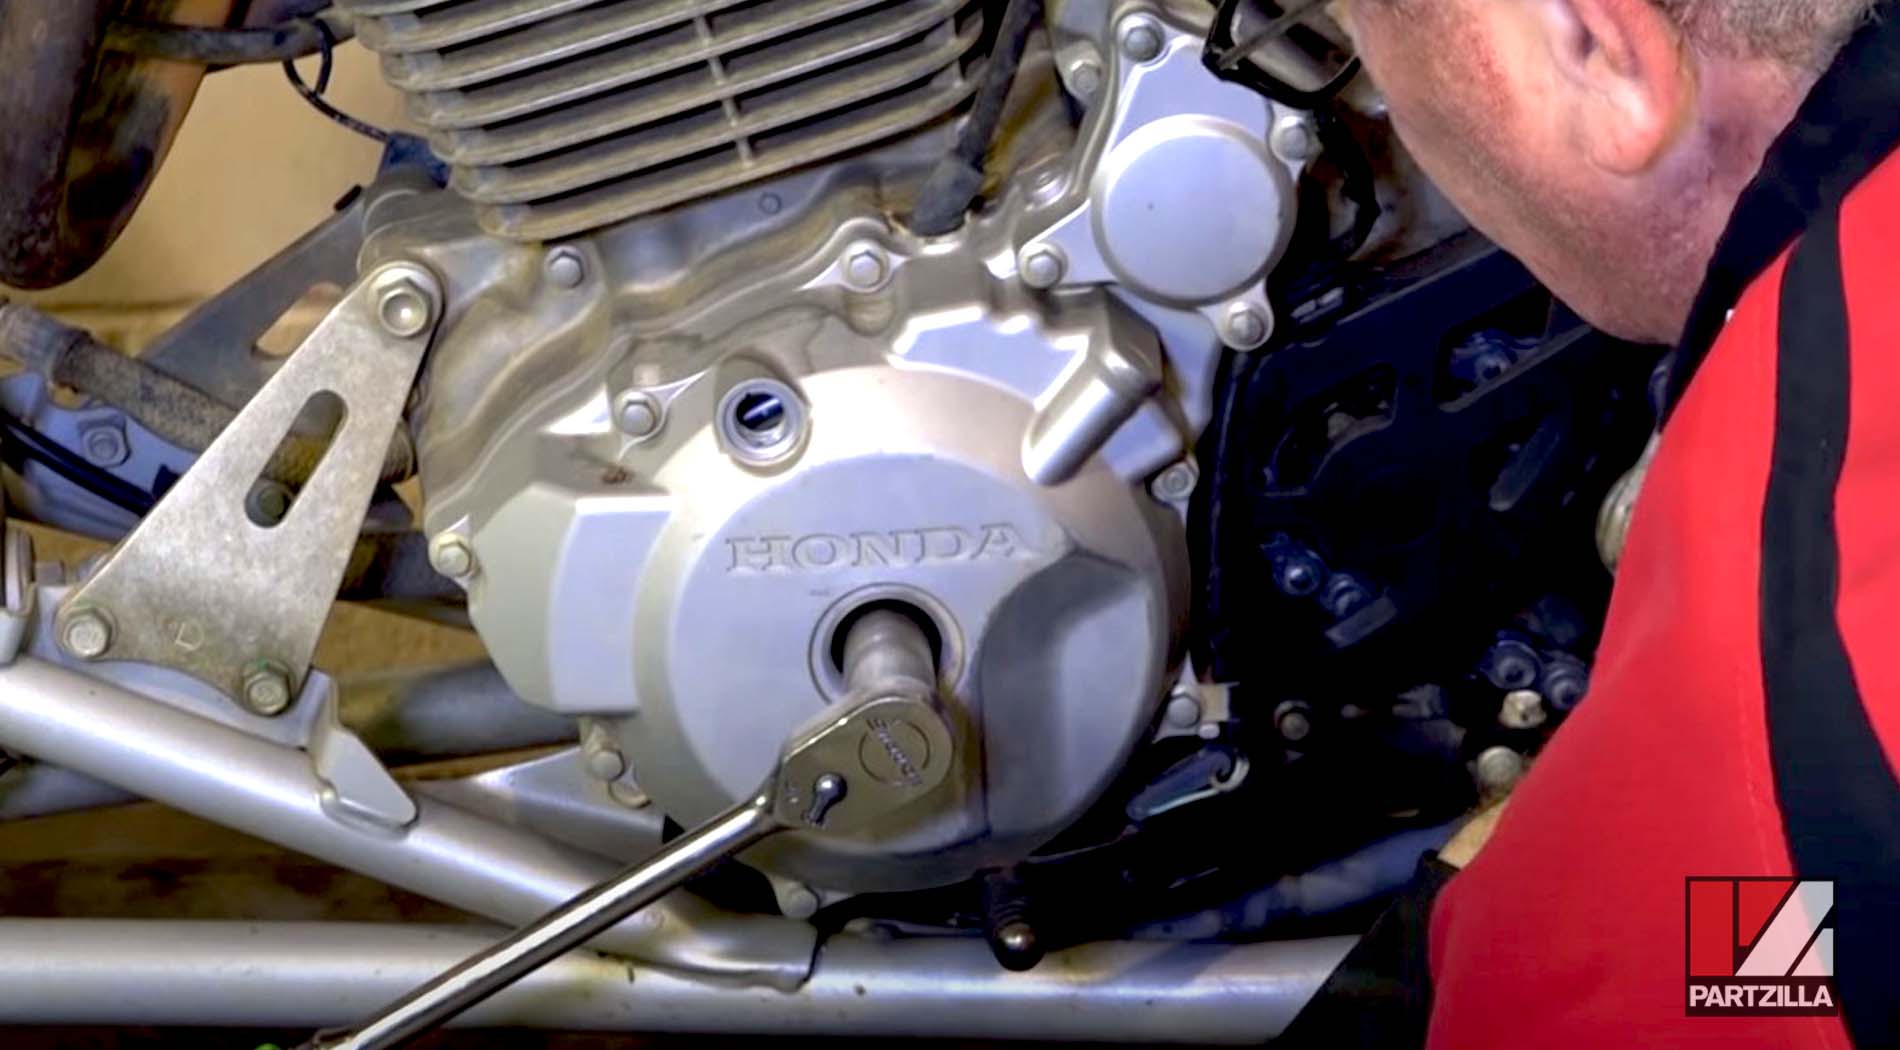
Step 7. Remove the two access plugs located in the crankcase cover. The upper plug needs a 6mm Allen and the central plug needs a 12mm Allen.
Setting the Engine to TDC and BDC
There are four valves on your Honda TRX400EX (two intake valves and two exhaust valves). The intake valves are the two behind the cylinder head, and the exhaust valves are the two in front of the cylinder head.
The valves are measured and adjusted when they’re fully open. When the engine is at top dead center (TDC), the intake valves will be open and the exhaust valves closed, and when the engine is at bottom dead center (BDC), the exhaust valves will be open and the intake valves closed.
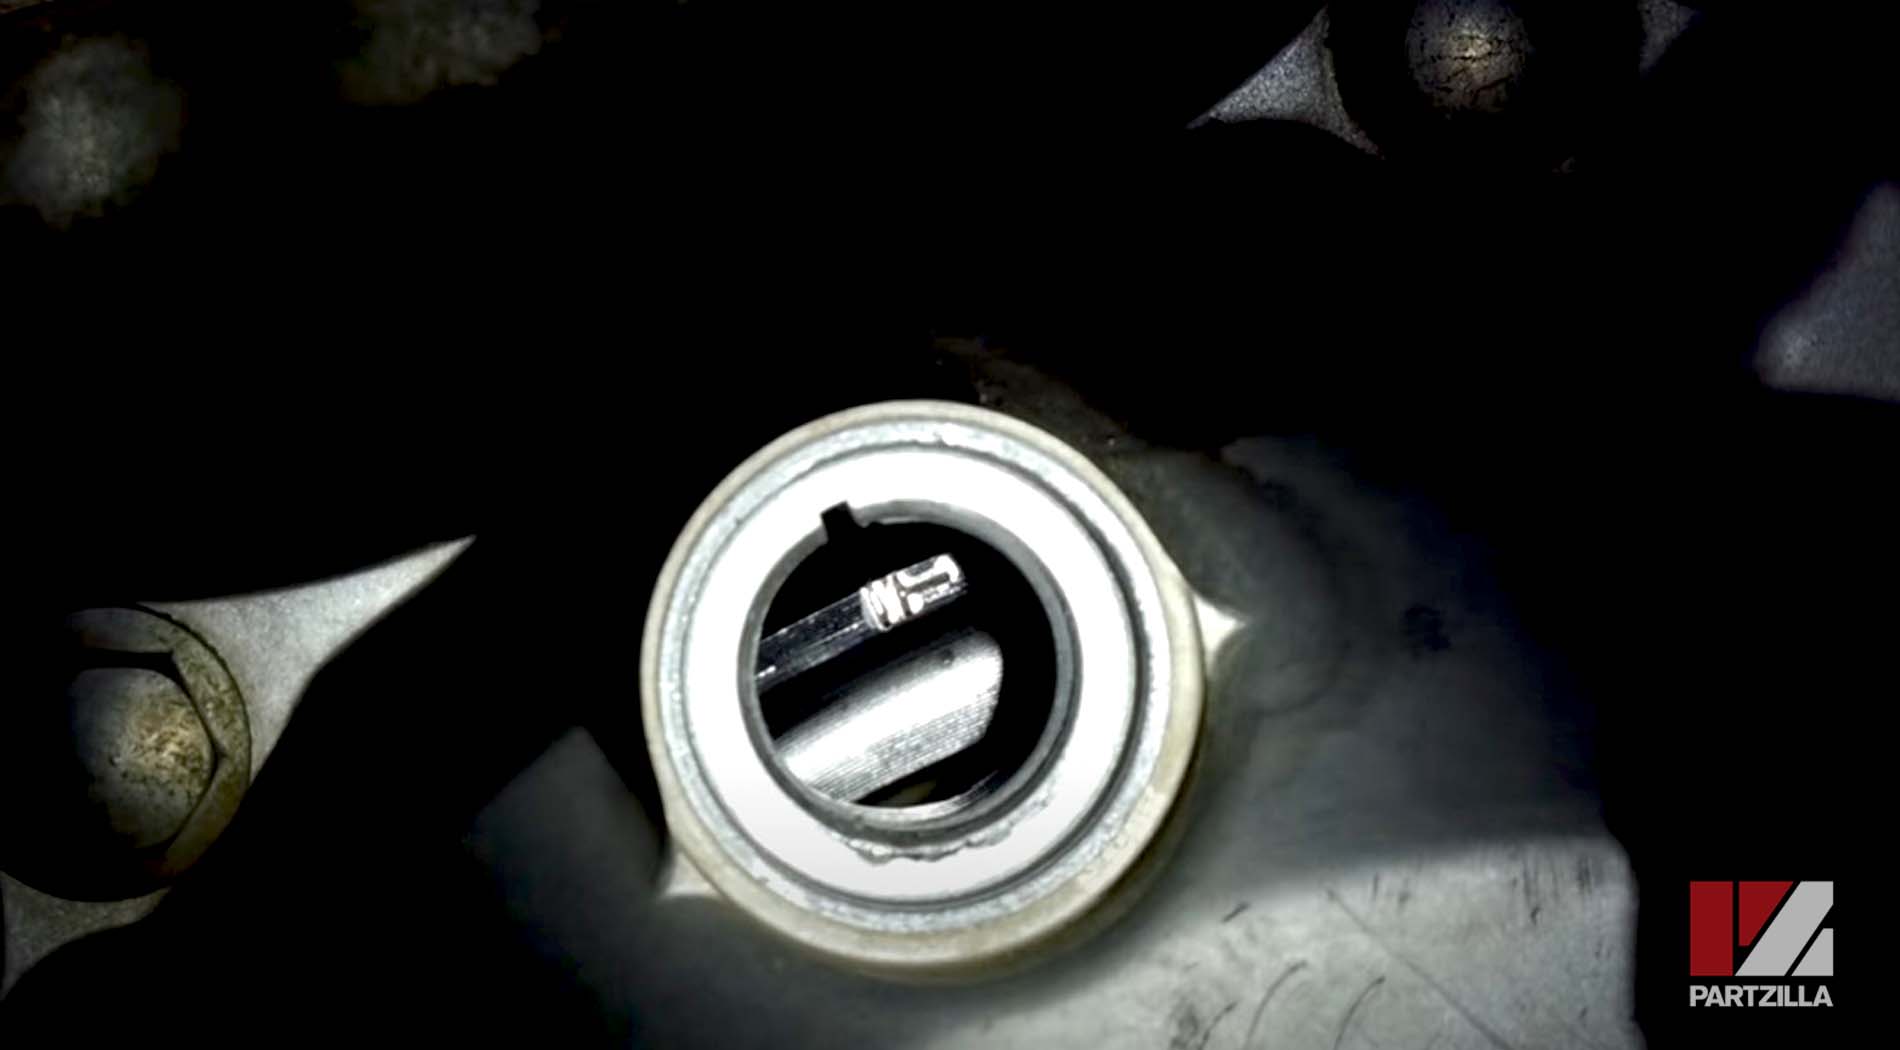
Step 8. Rotate the engine by turning the crankcase bolt counterclockwise until the T-mark is aligned with the notch in the upper crankcase inspection hole. This indicates the engine is either at TDC or BDC.
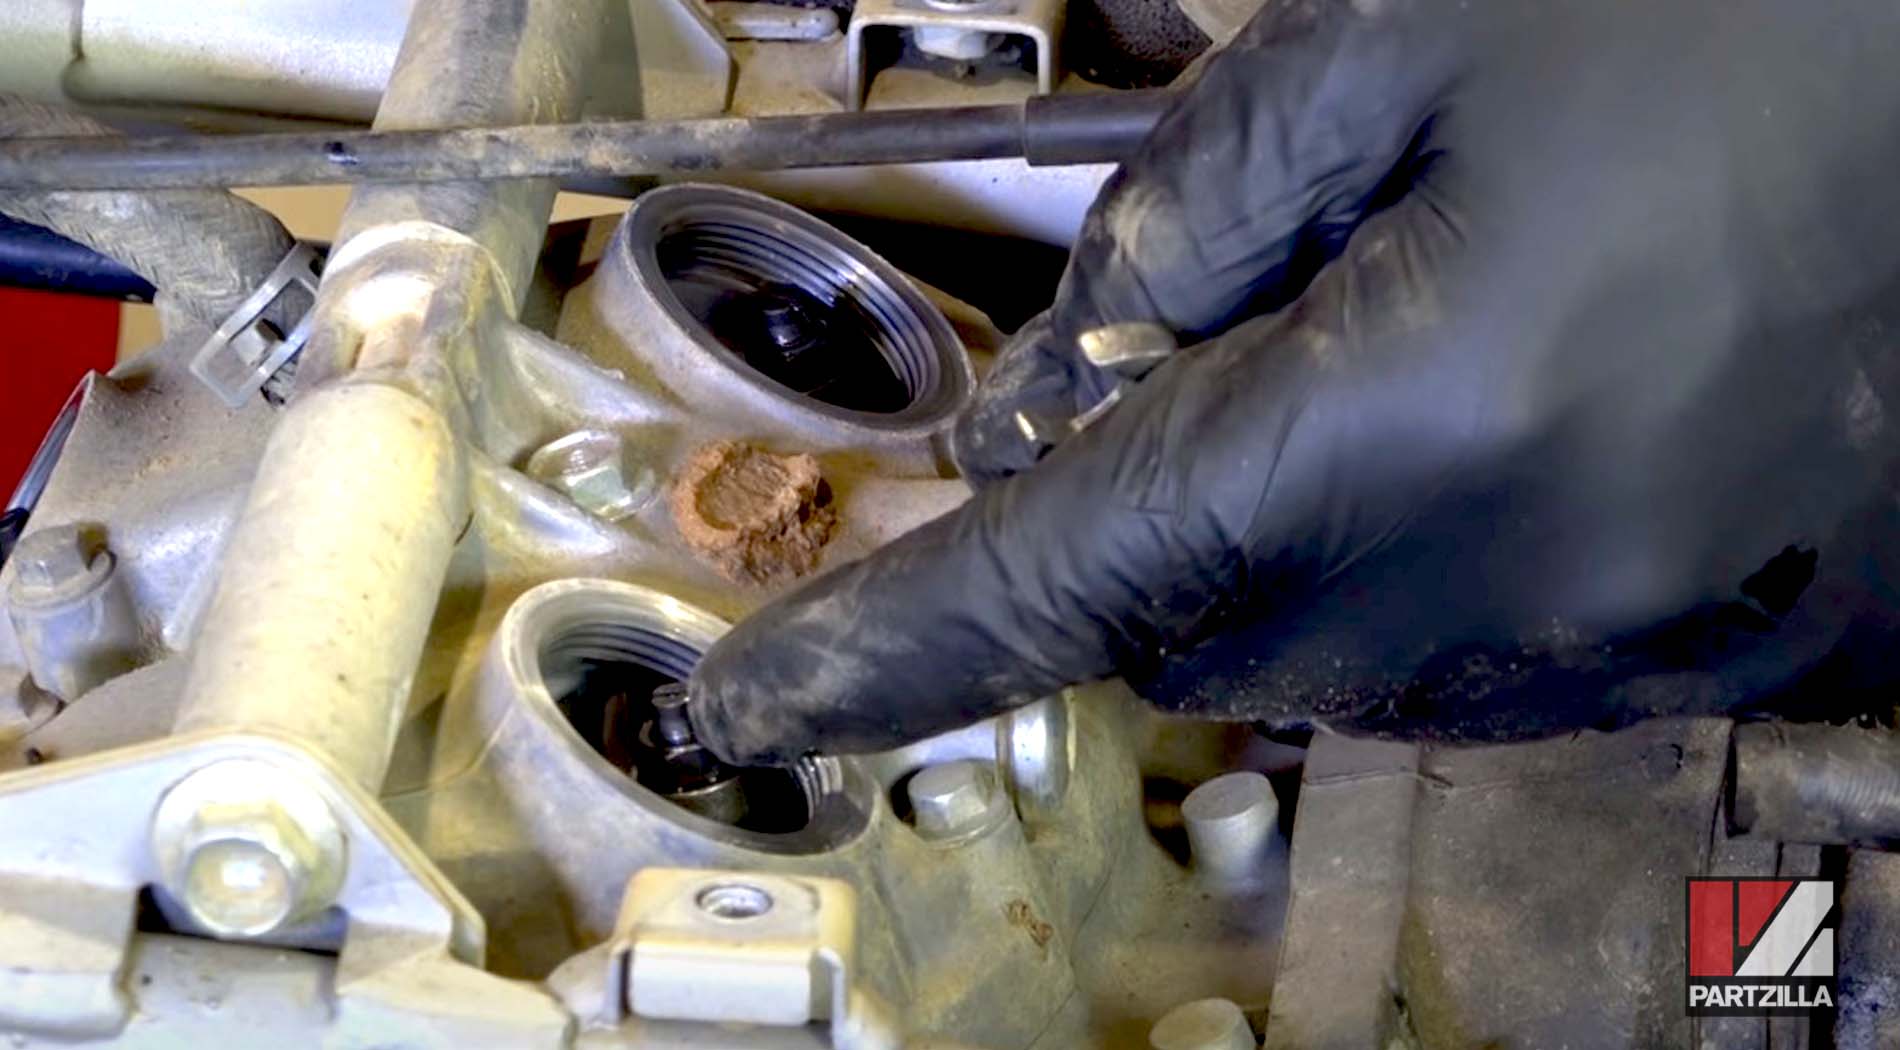
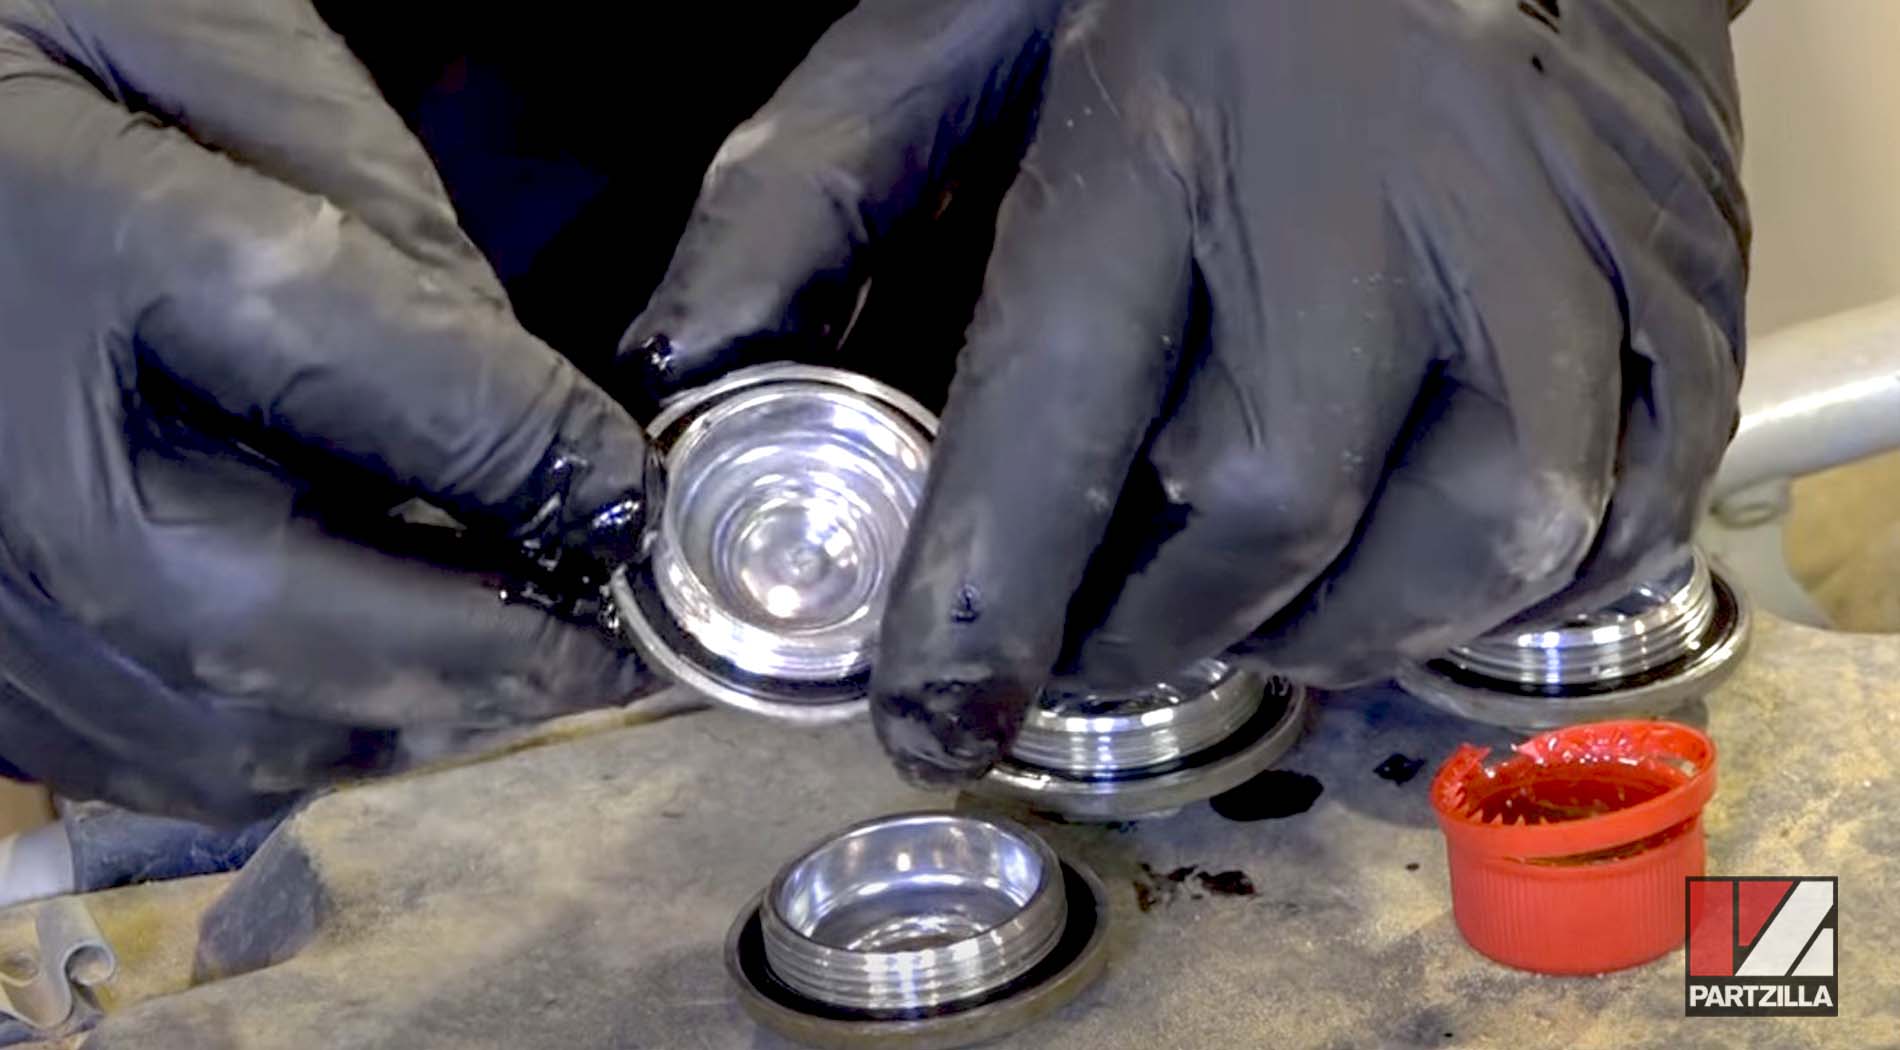
Step 9. Remove the four caps from the cylinder head cover.
NOTE: Don’t allow any contaminants in the engine. Eliminate as much dirt and debris as possible from the cylinder head cover before removing the caps.
Adjusting Honda TRX400EX Intake Valve Clearance
Step 10. Check if there is any play in the intake valves. There should be a tiny amount of movement in the valves, which indicates the valves are open and the engine is at TDC. If the valves are locked solid, they’re closed and the engine is at BDC. If the engine is at BDC, bring it to TDC.
Step 11. Loosen the 10mm locking nut and the valve adjustment screw. Insert a 0.1mm feeler gauge into the gap between the adjuster and the valve.
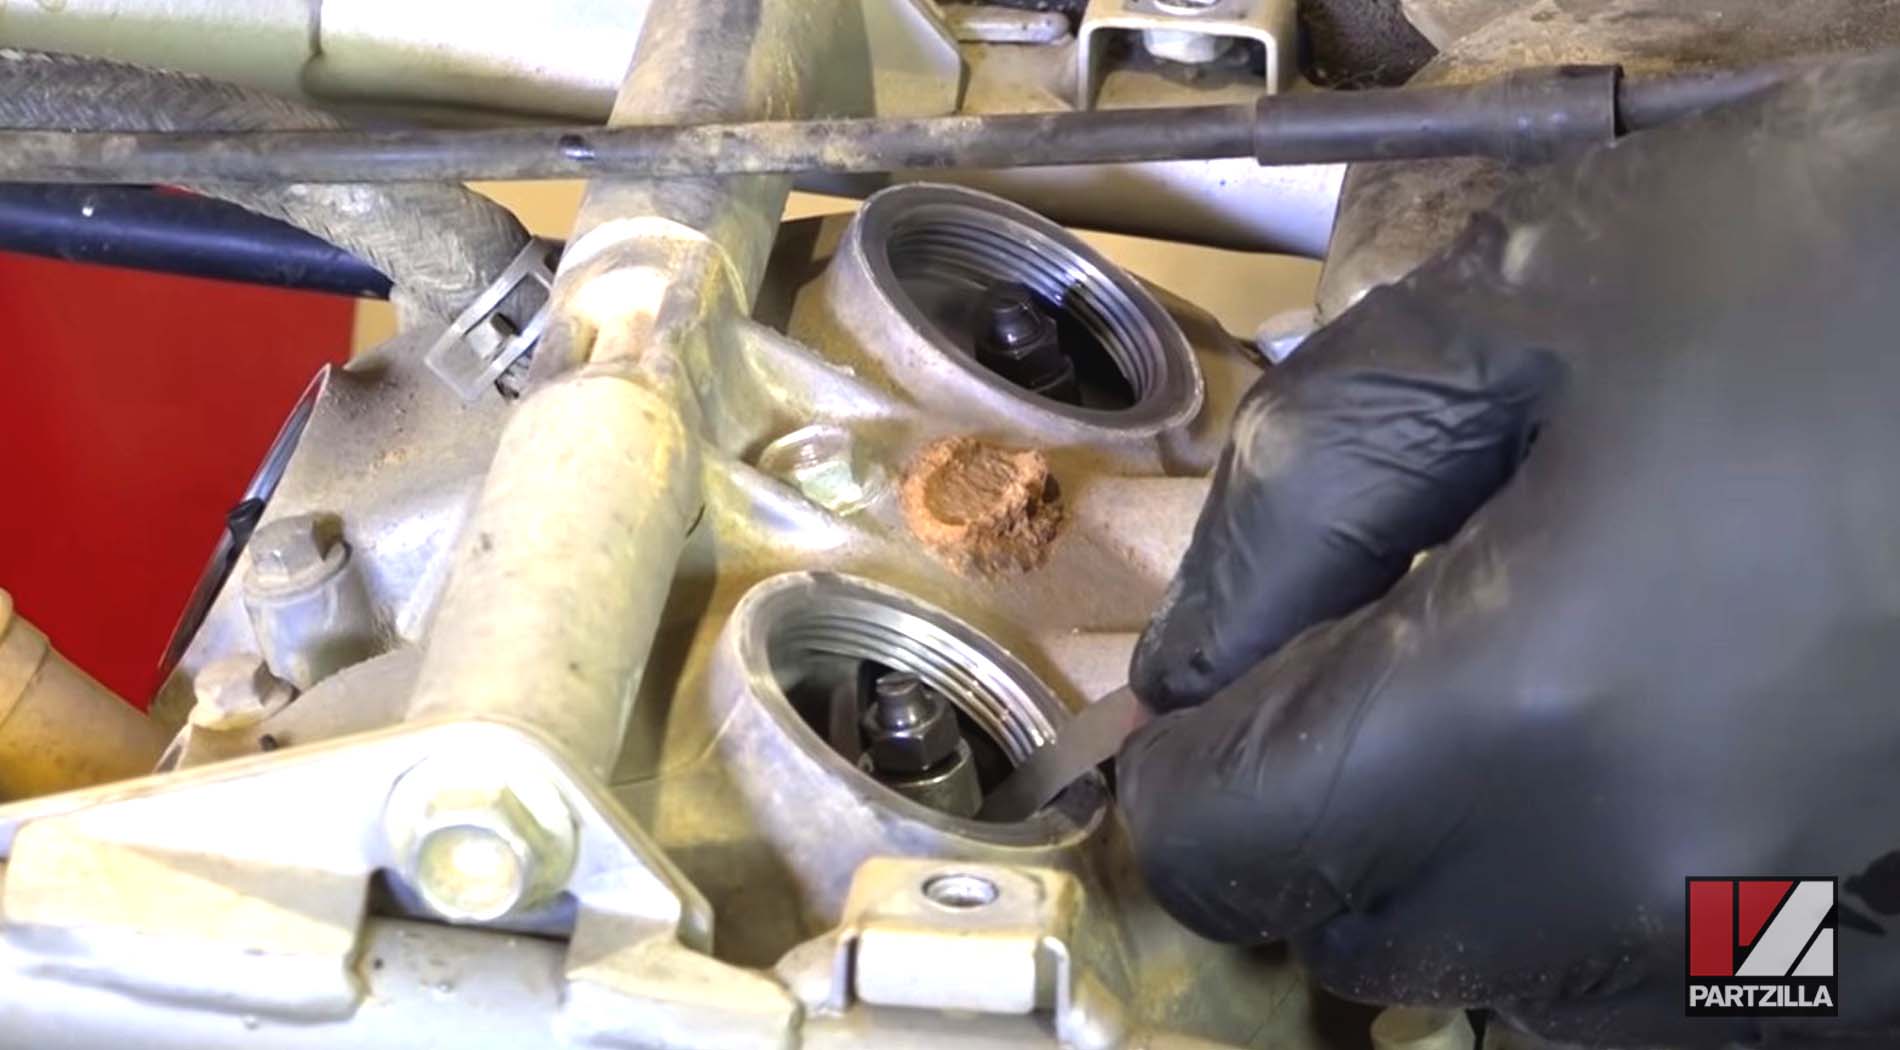
Step 12. Tighten the valve adjustment screw until it begins to put tension on the feeler gauge, then tighten the locking nut while holding the adjustment screw in place. This should set the exhaust valve clearance to 0.1mm.
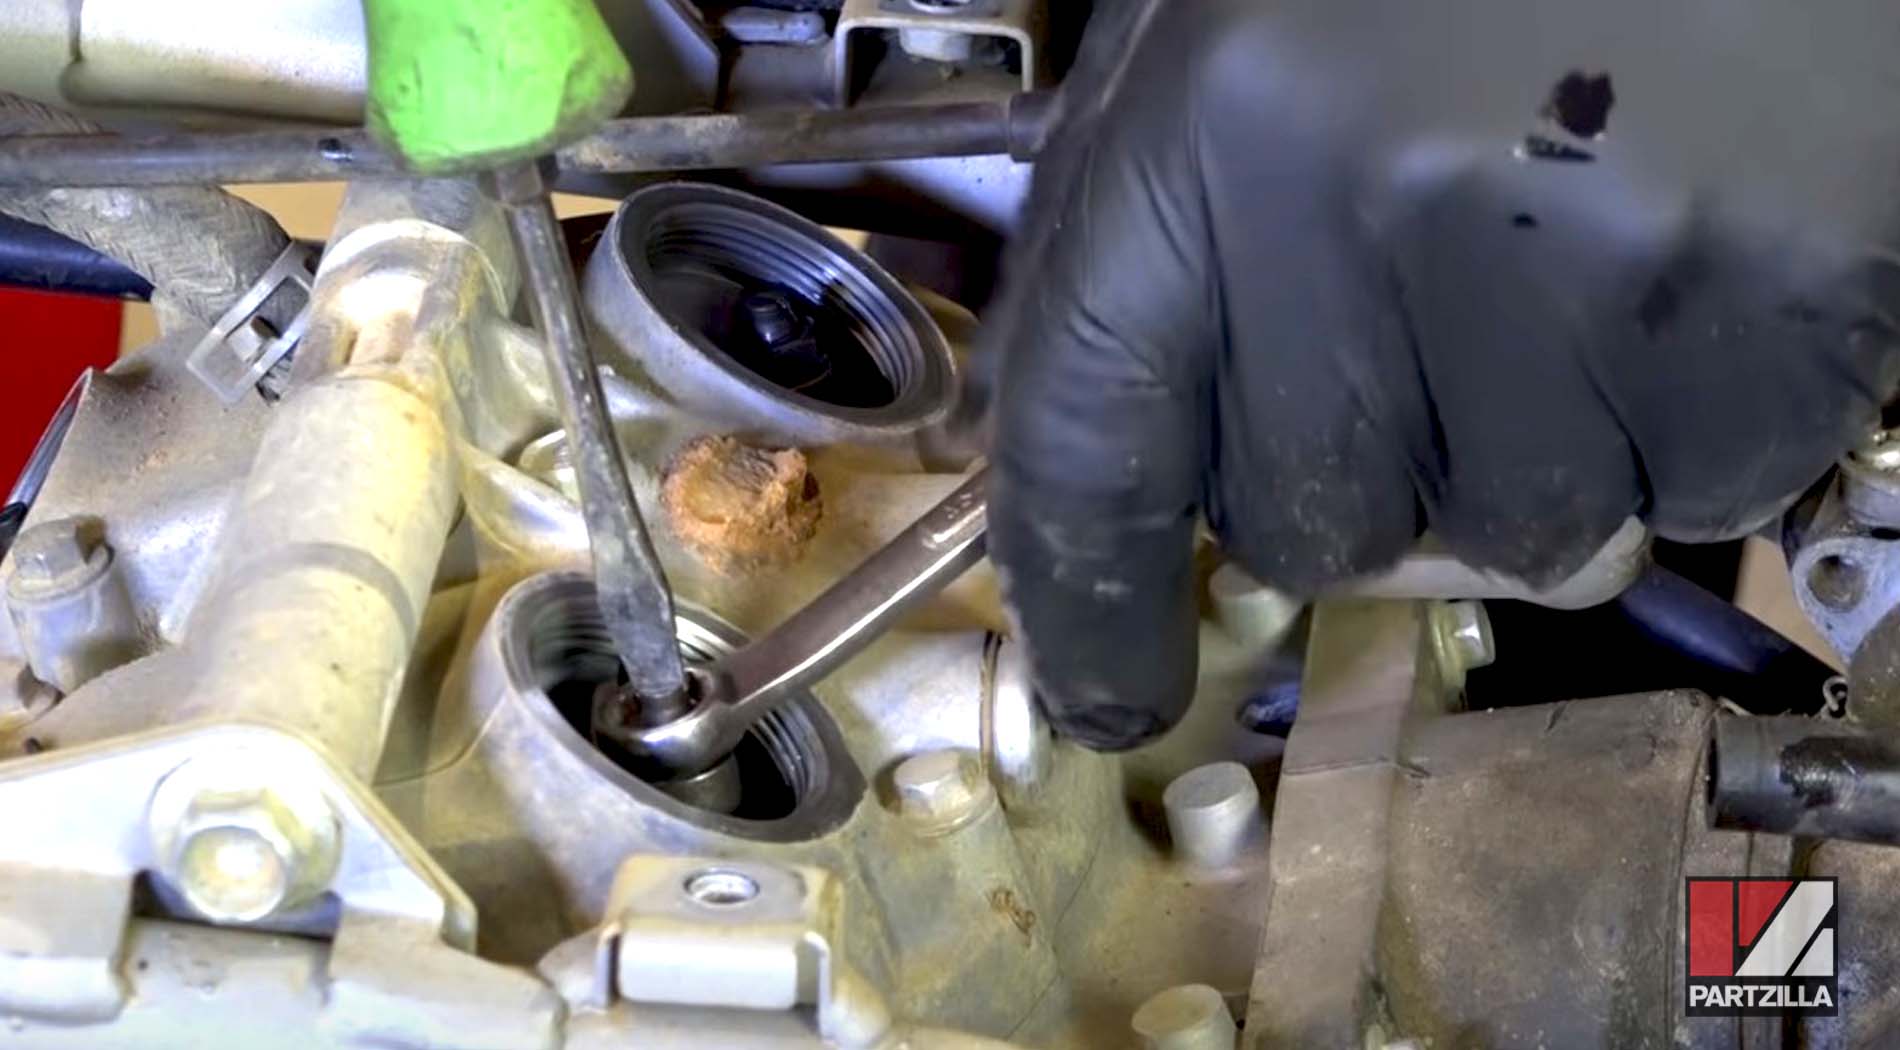
NOTE: It’s easy to accidentally tighten the adjustment screw as you tighten the locking nut, so check that the valve gap is still 0.1mm and readjust the gap if necessary.
Step 13. Repeat steps 11-12 on the other intake valve.
Adjusting Honda TRX400EX Exhaust Valve Clearance
Step 14. Rotate the engine again until the T-mark is aligned in the crankcase hole to bring the engine to BDC. Check for play in the exhaust valves. If the valves are locked solid, the engine is still at TDC, so turn it until it is at BDC.
Step 15. Loosen the 10mm locking nut and valve adjustment screw, but this time use a 0.12mm feeler gauge to set the valve gap. Use the same process as you did in steps 11-12.
Step 16. Repeat Step 15 on the other exhaust valve.
Reassembling the Honda TRX400EX
Step 17. Clean the cylinder head cover caps, then install a new O-ring on each and smear the O-rings with oil. Reinstall the caps back into the cylinder head cover.
NOTE: Don’t overtighten the caps and risk stripping the threads in the cylinder head cover.
Step 18. Reinstall the two access plugs back into the crankcase cover, followed by the tank protector above the cylinder head with its two plastic rivets and 10mm bolts.
Step 19. Reinstall the fuel tank by reconnecting the fuel hose to the petcock and reinstalling the two 10mm bolts.
Step 20. Reinstall the left front fender assembly with the two 10mm bolts and the plastic rivet underneath, the plastic rivet on top and the 5mm Allen bolt at the back.
Step 21. Push the front bodywork center section back into place, then reinstall the fuel tank cover with its four plastic rivets. Reinstall the rear fender and seat assembly and you're done.