Honda Grom Racing Rearset Upgrade
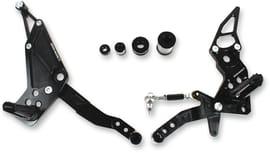
Welcome to the fourth part of our project to improve the performance of a 2018 Honda Grom: installing a TT rearset from Driven Racing. The rearset kit includes race-inspired foot pegs, and gearshift and brake pedals.
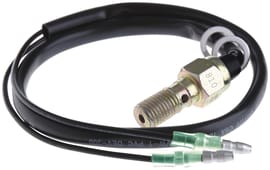
Because the kit eliminates the Grom’s existing brake light pull switch, a new hydraulic brake light switch is also installed. Watch the video above or follow the steps below to learn how to get this Honda Grom aftermarket rearset upgrade done.

Tools and Parts – Honda Grom Rearset Installation
- Ratchet and extensions
- Socket set and Allen set
- 1/2-inch steel rod
- Hammer
- Torque wrench
- TT rearset kit
- Hydraulic brake light switch
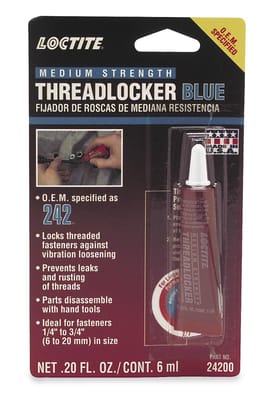
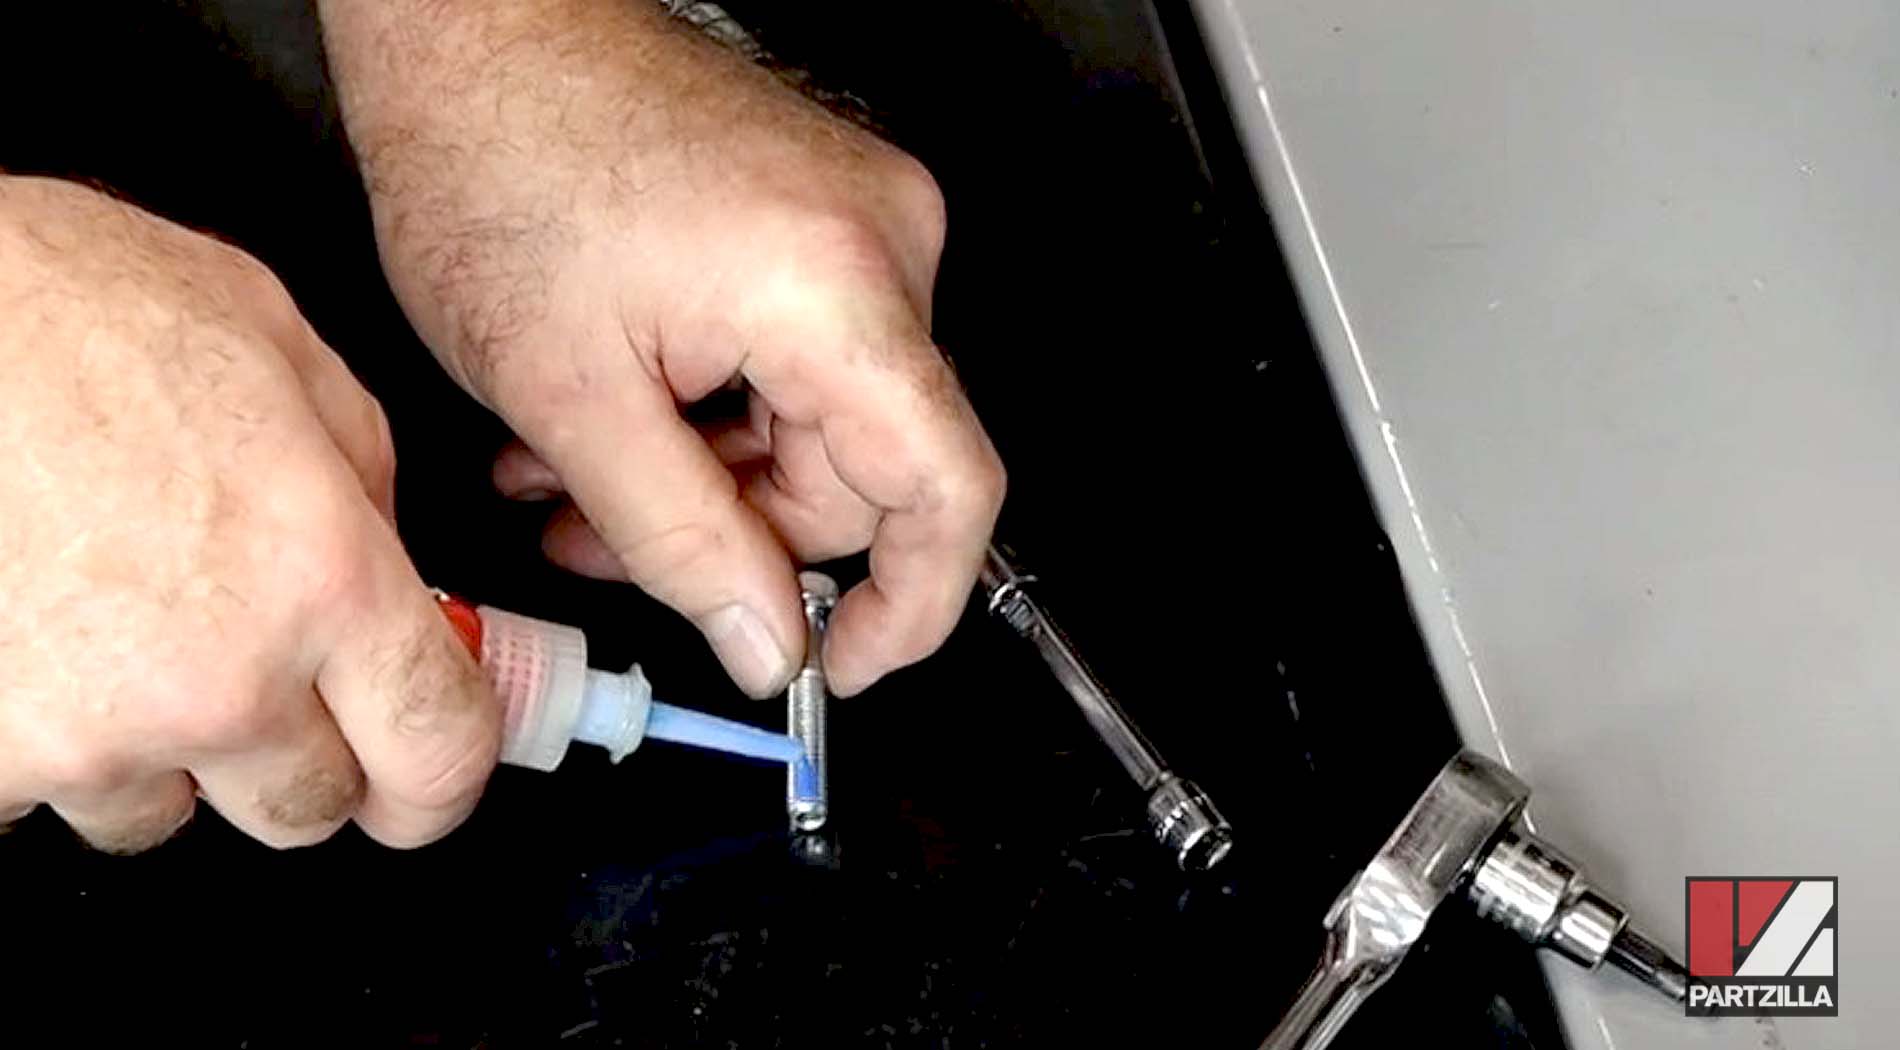
- Blue threadlocker
Part 1: Removing Honda Grom Gearshift and Brake Pedals
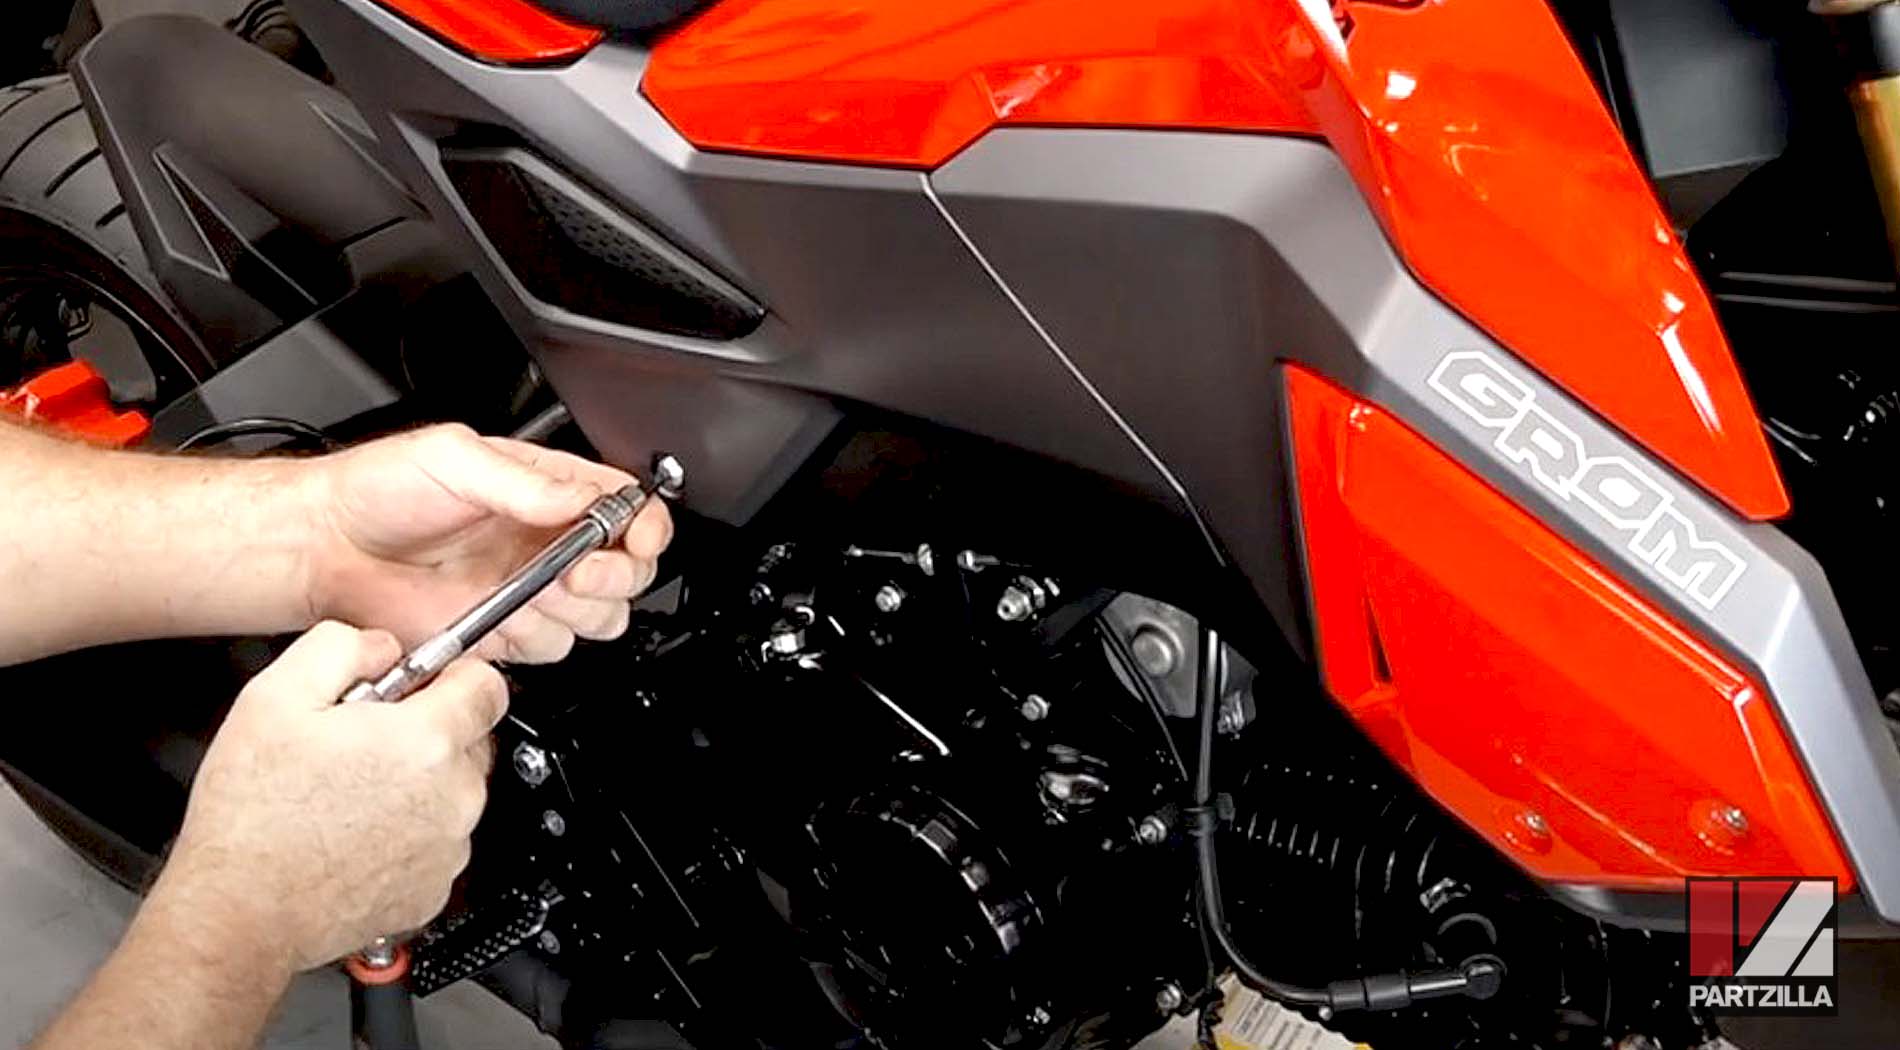
Step 1. Remove the 10mm gearshift pedal mounting bolt.
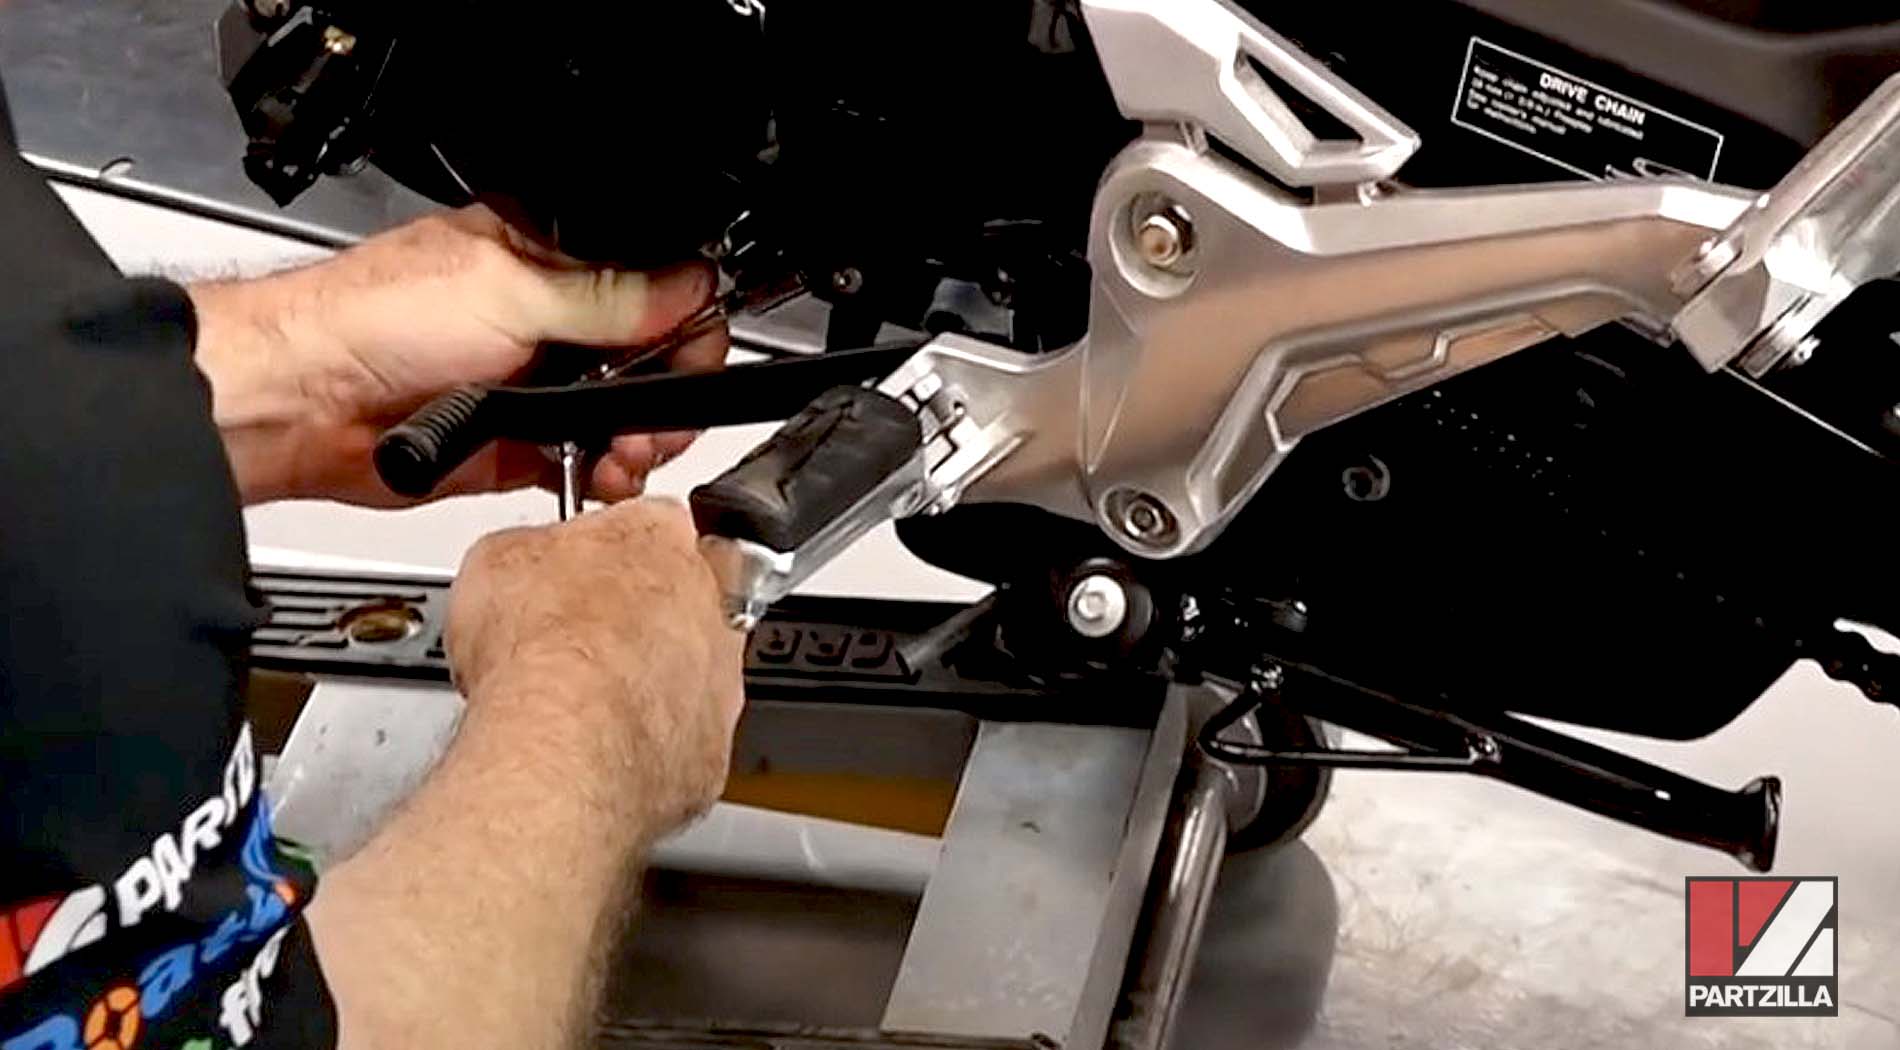
Step 2. Remove the 12mm bolts from the bottom of the left- and- right-side step holders.
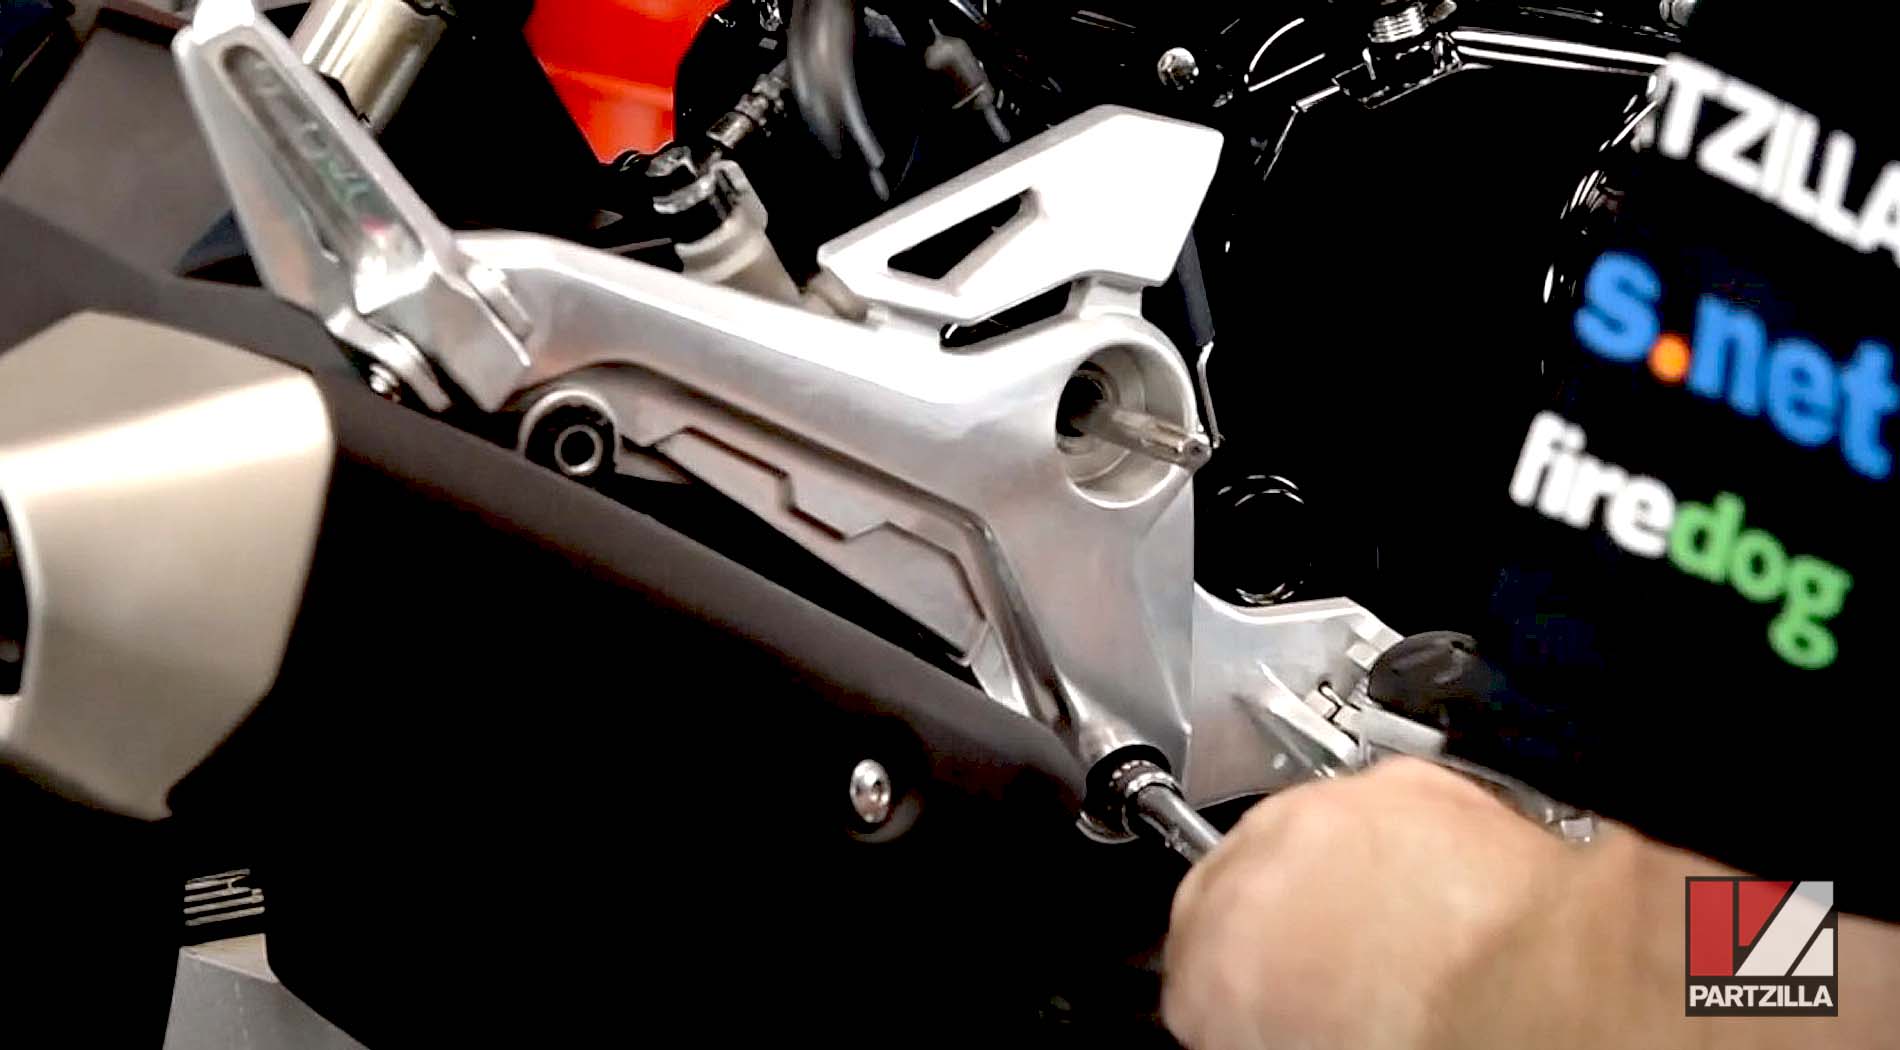
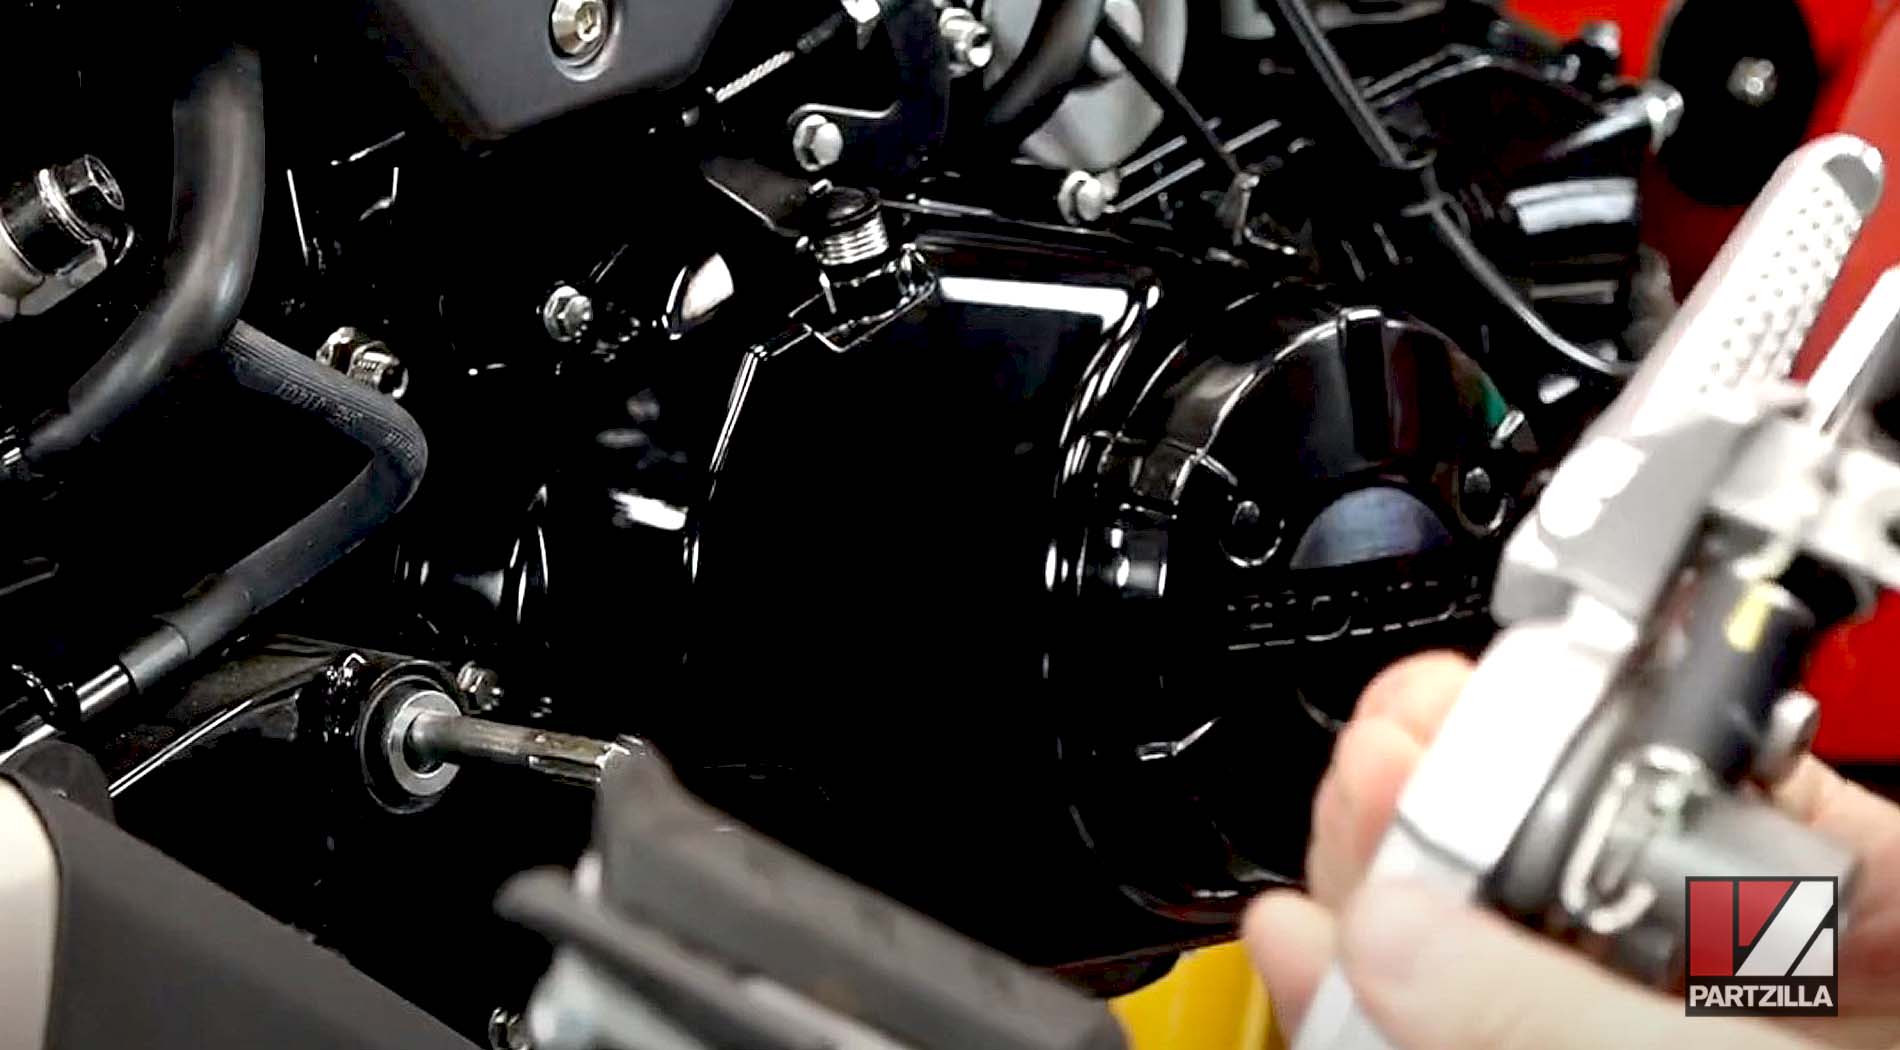
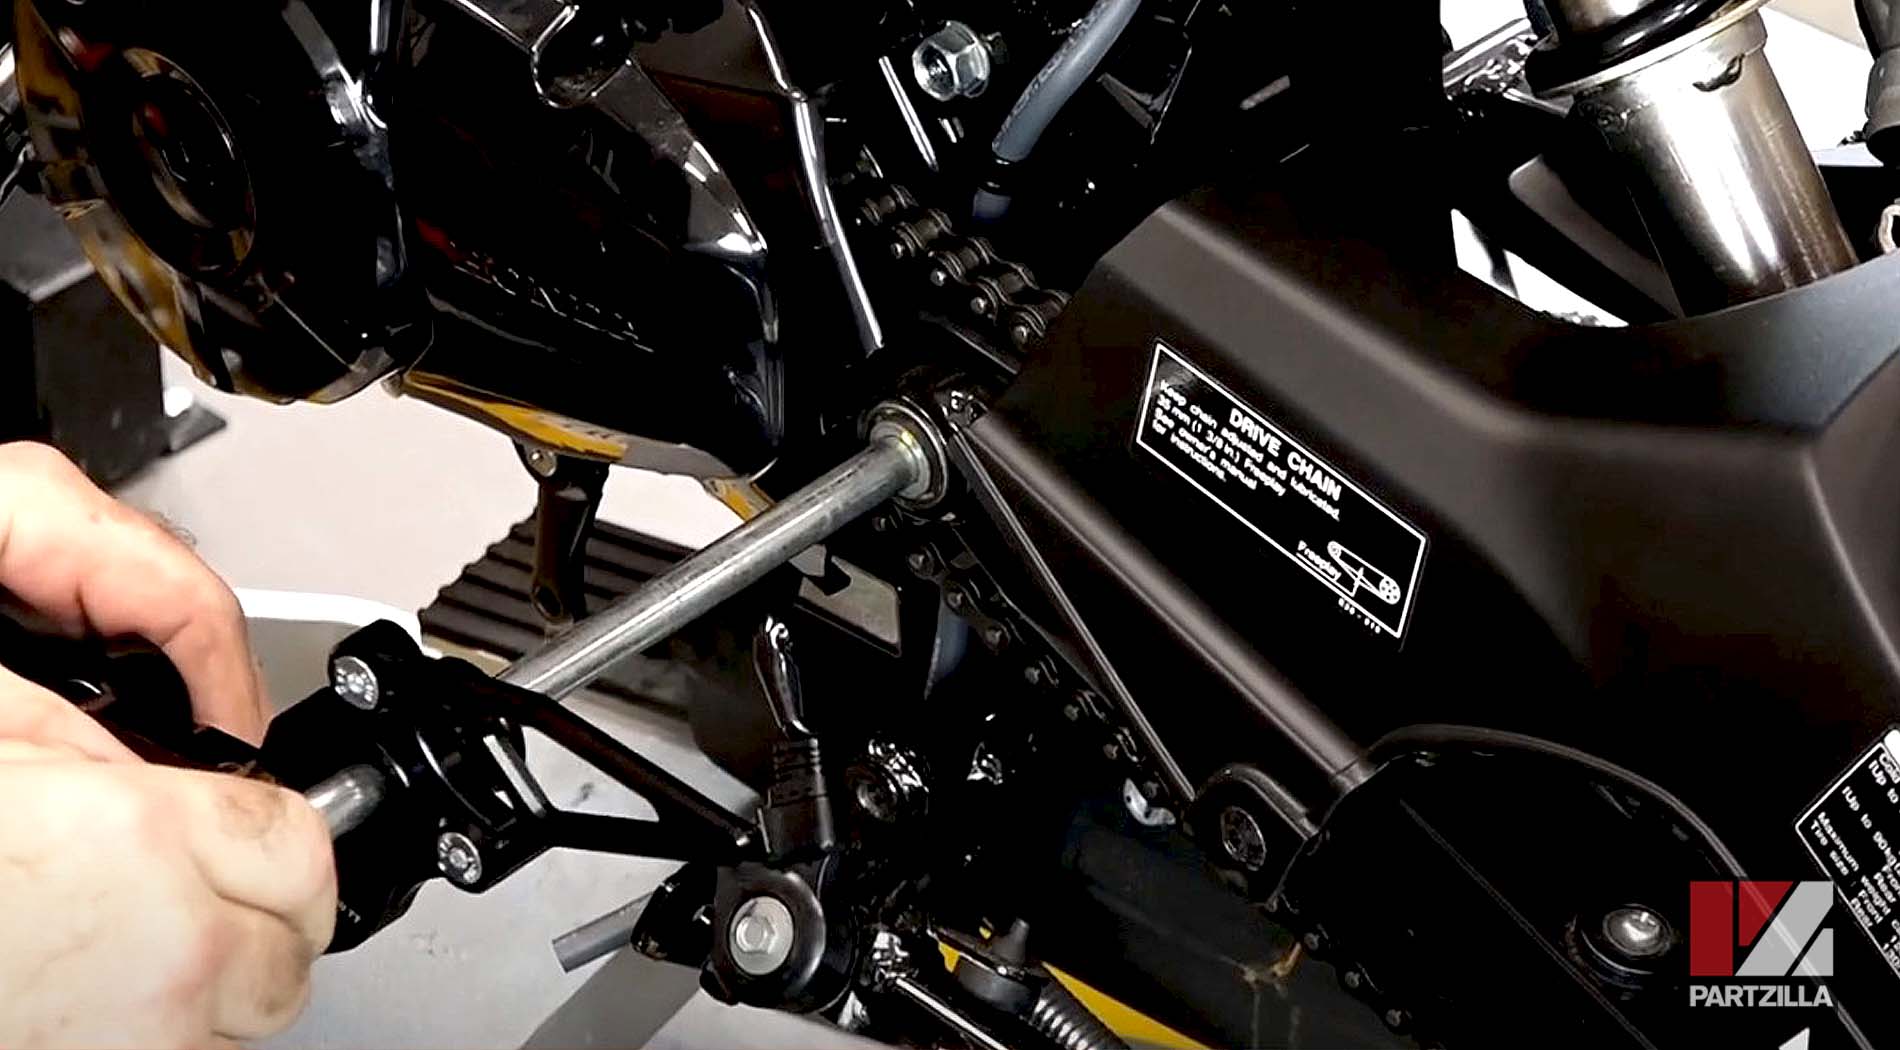
Step 3. Put a jack under the swingarm to support it, and remove the 19mm swingarm axle nut from the right-side step holder. Tap the swingarm axle out with a piece of 1/2-inch steel rod, and leave the rod in to hold the swingarm in place.
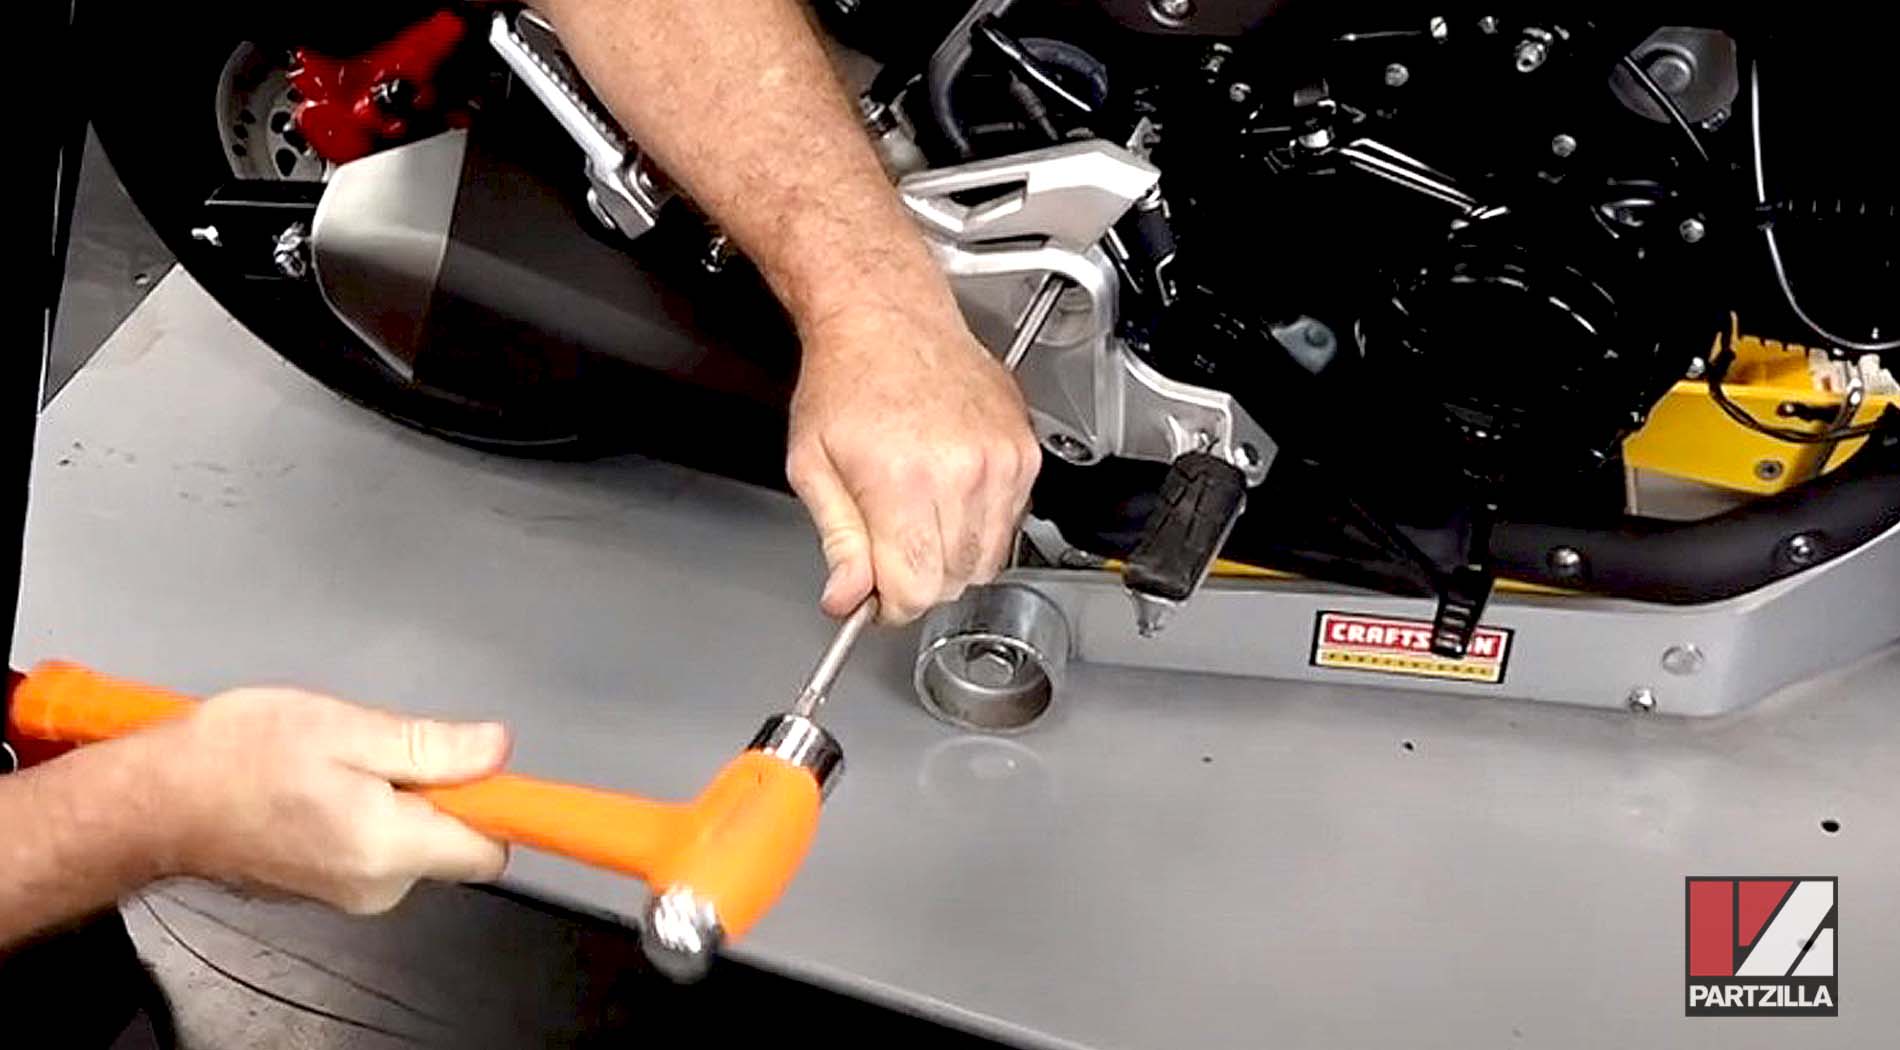
Step 4. Remove the left-side step holder and the gearshift pedal.
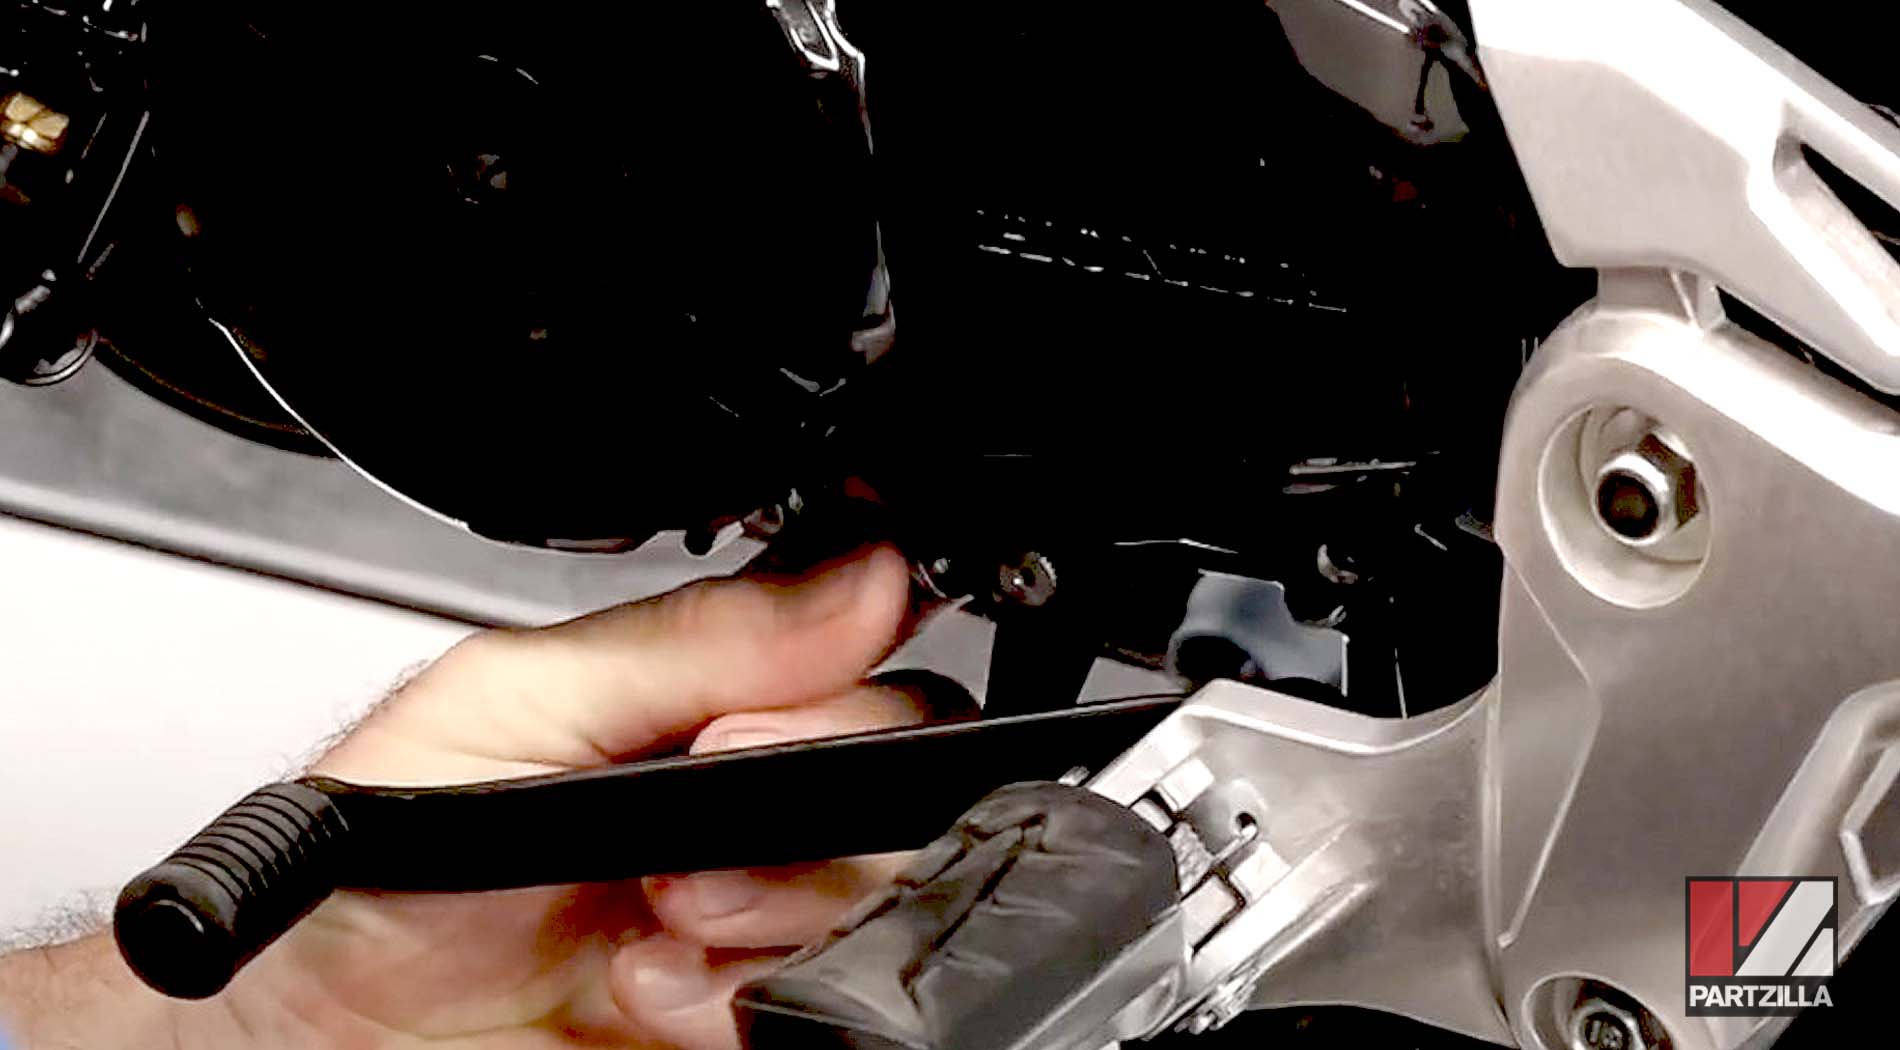
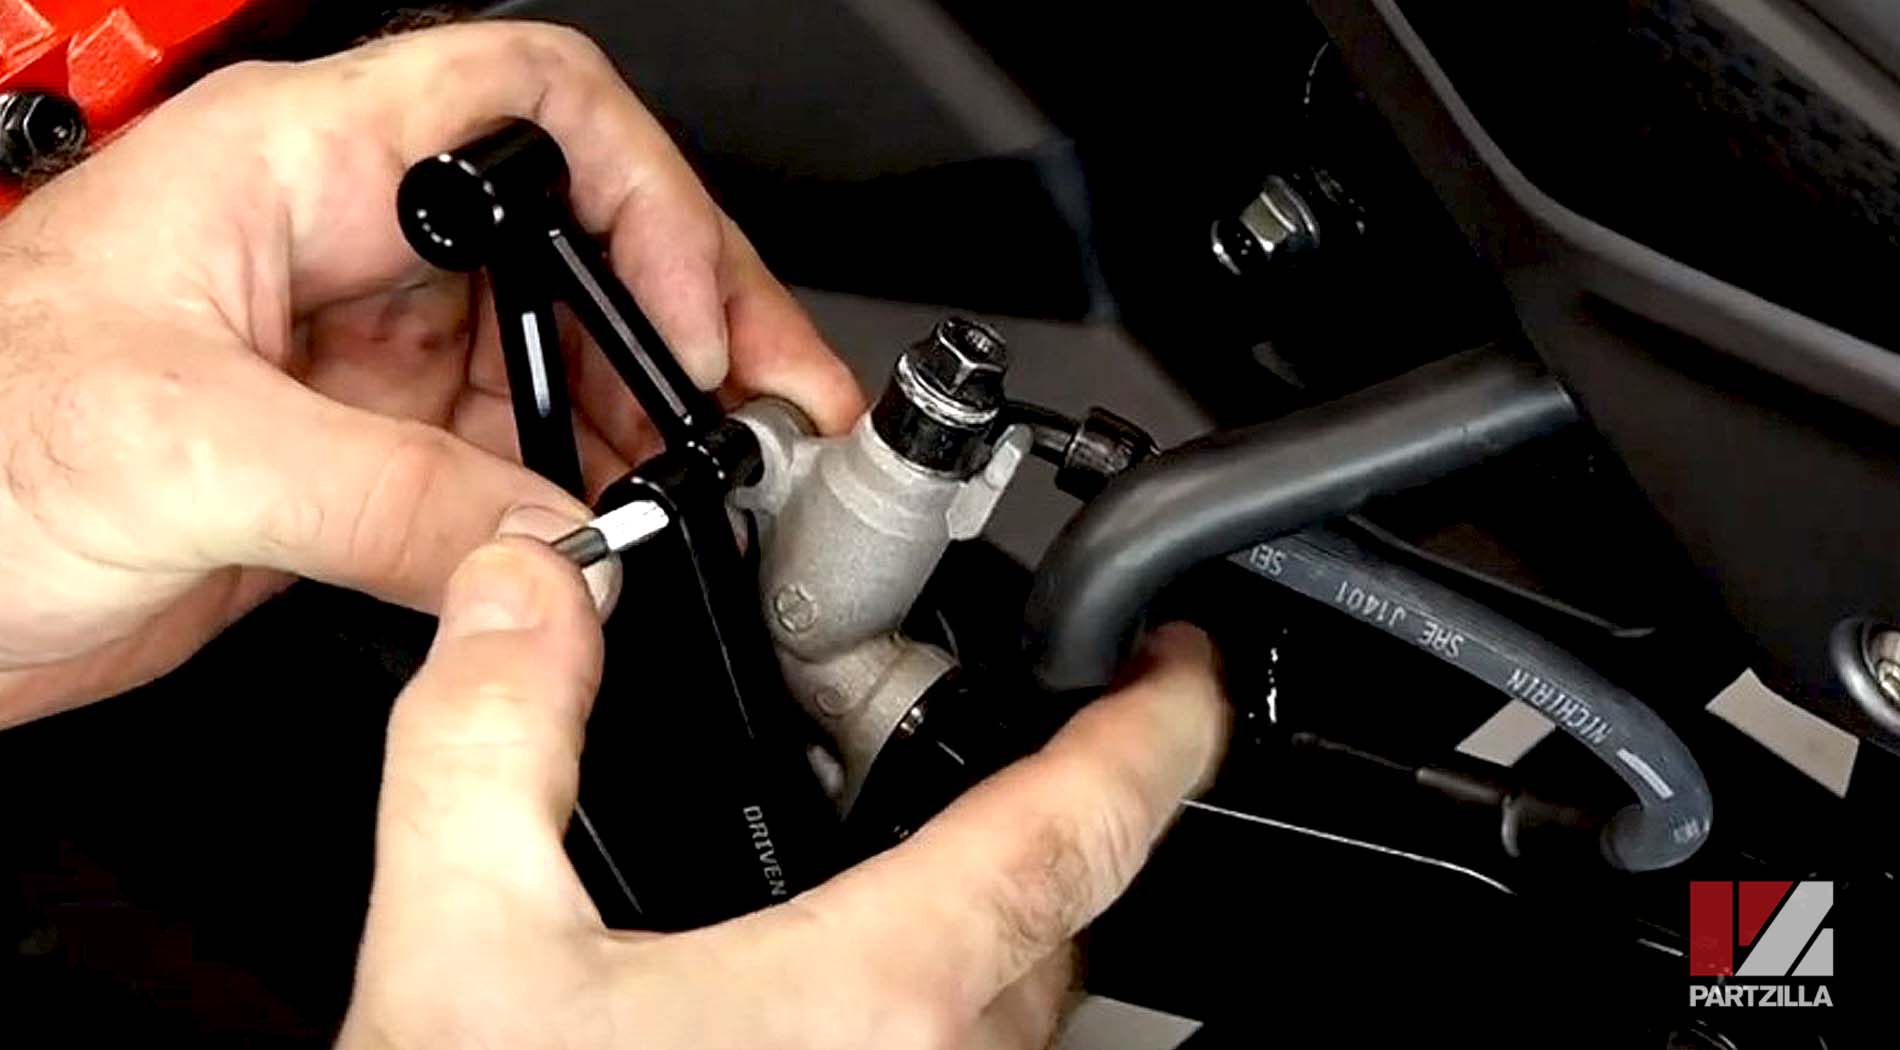
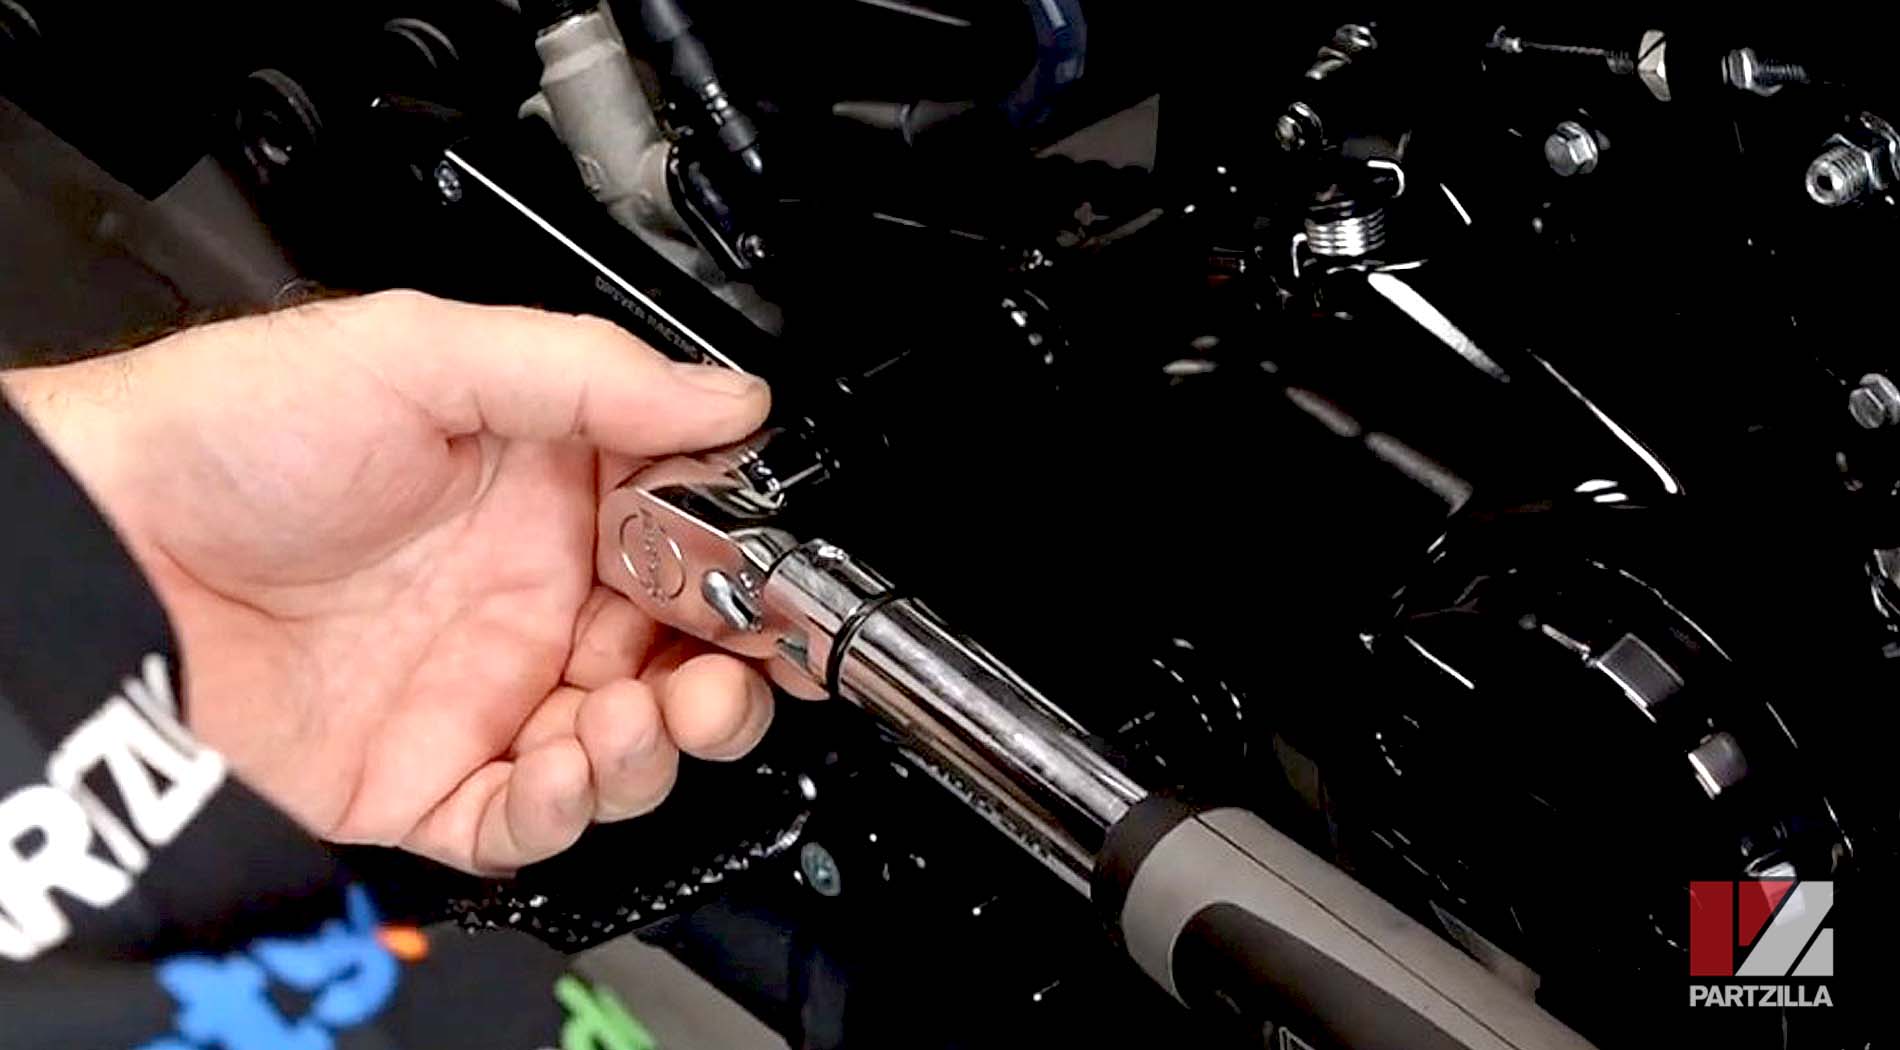
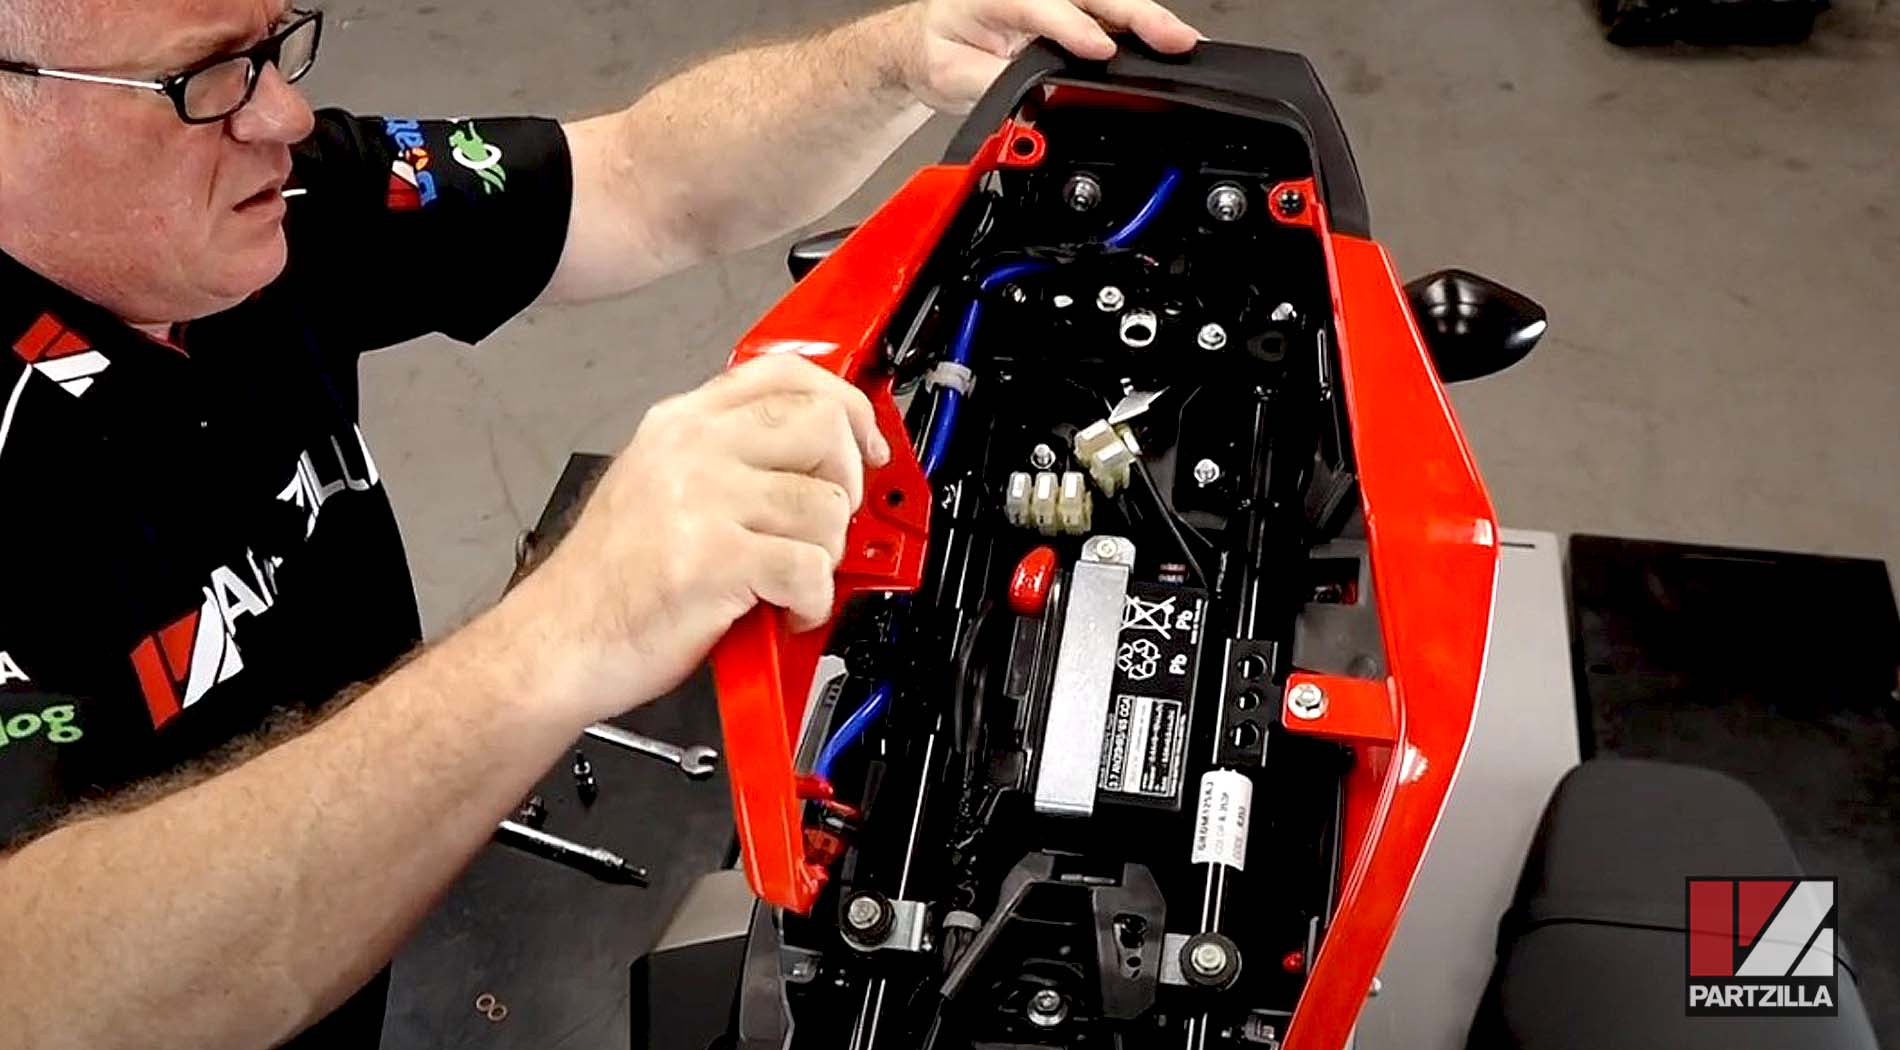
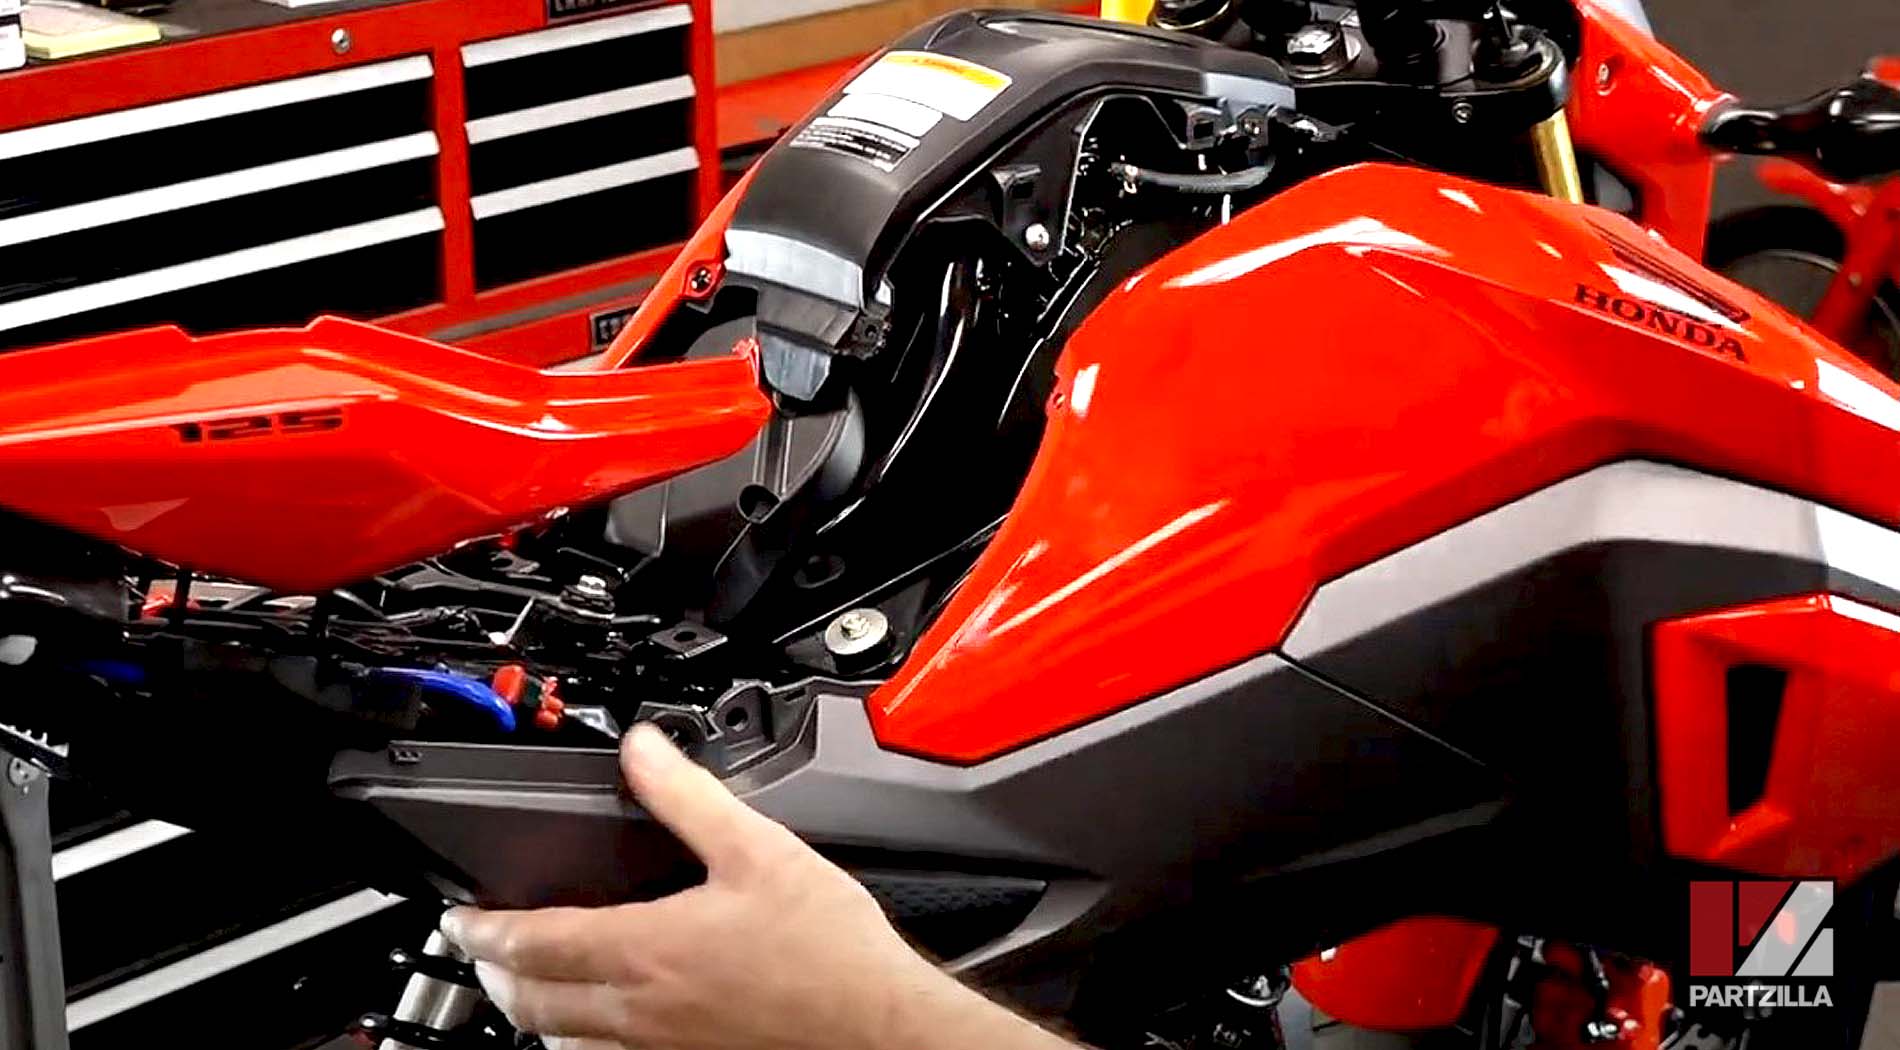
Step 5. Remove the muffler mounting bolt, and pull out right-side step holder to access the rear brake master cylinder and linkages behind it.

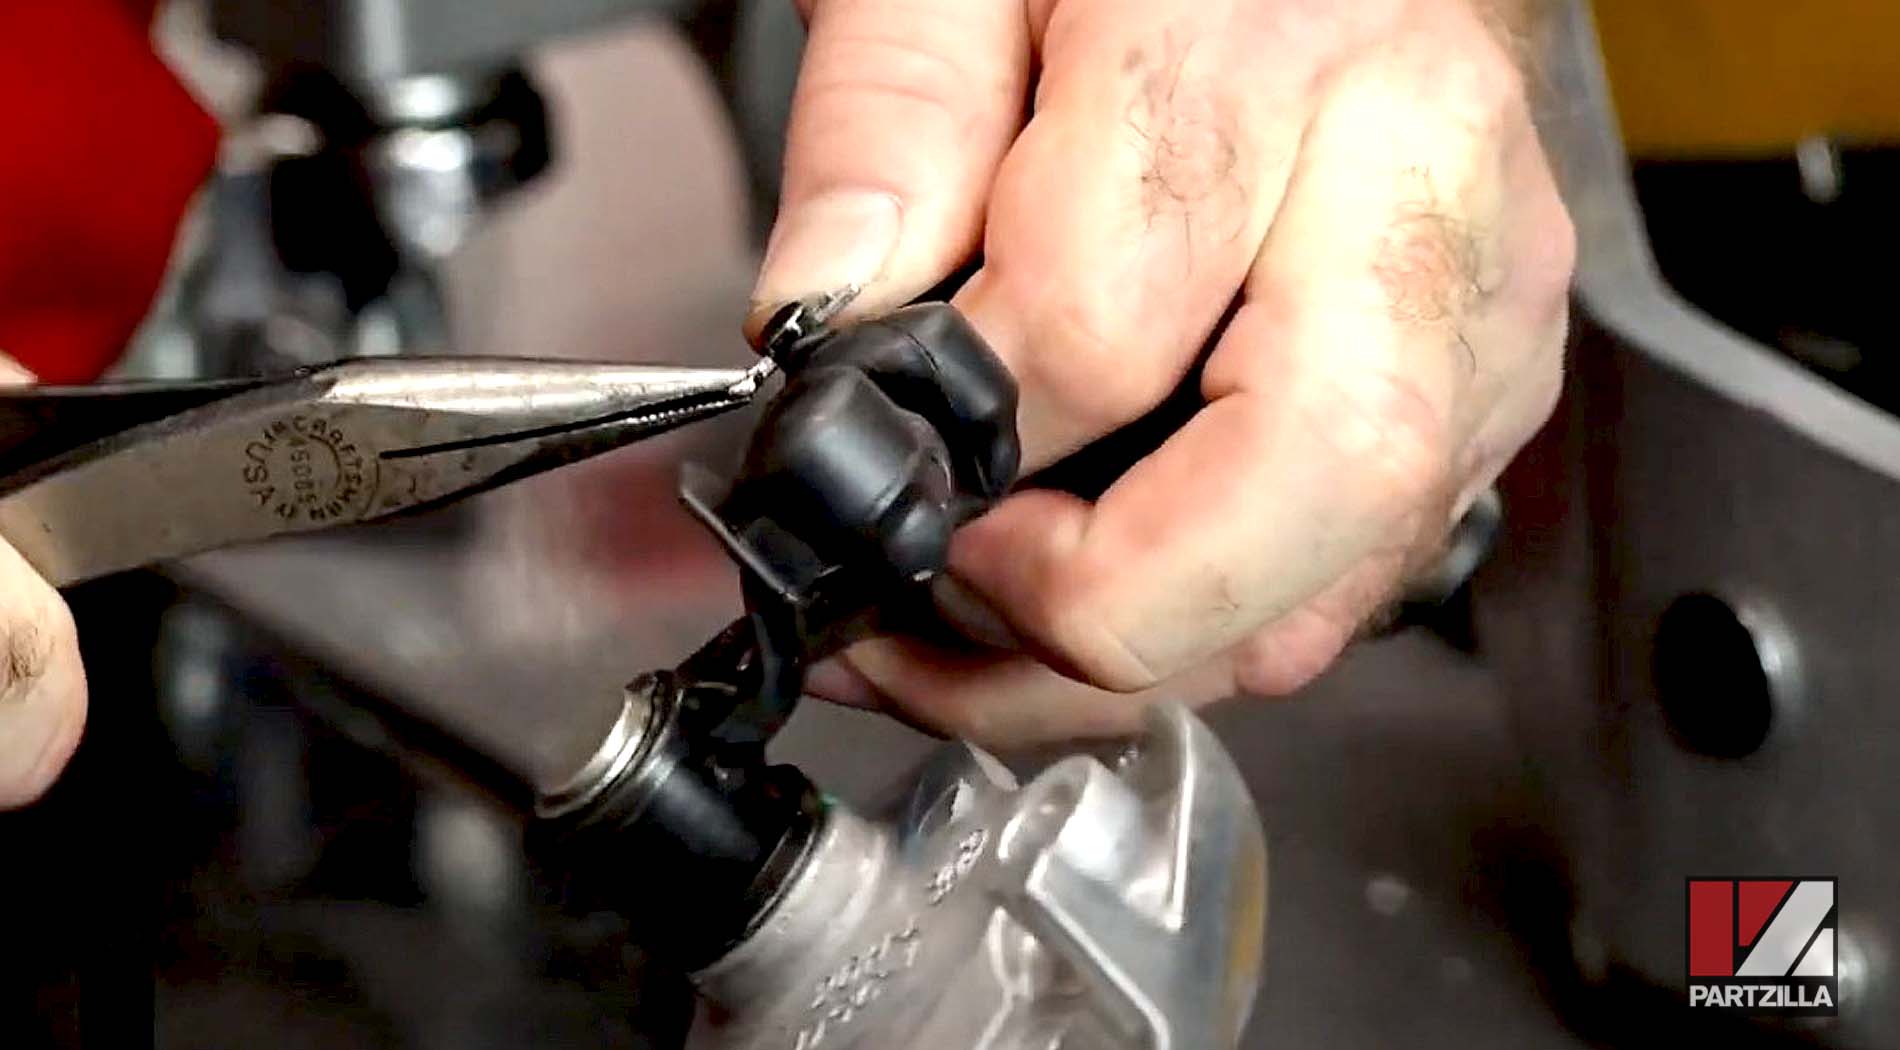
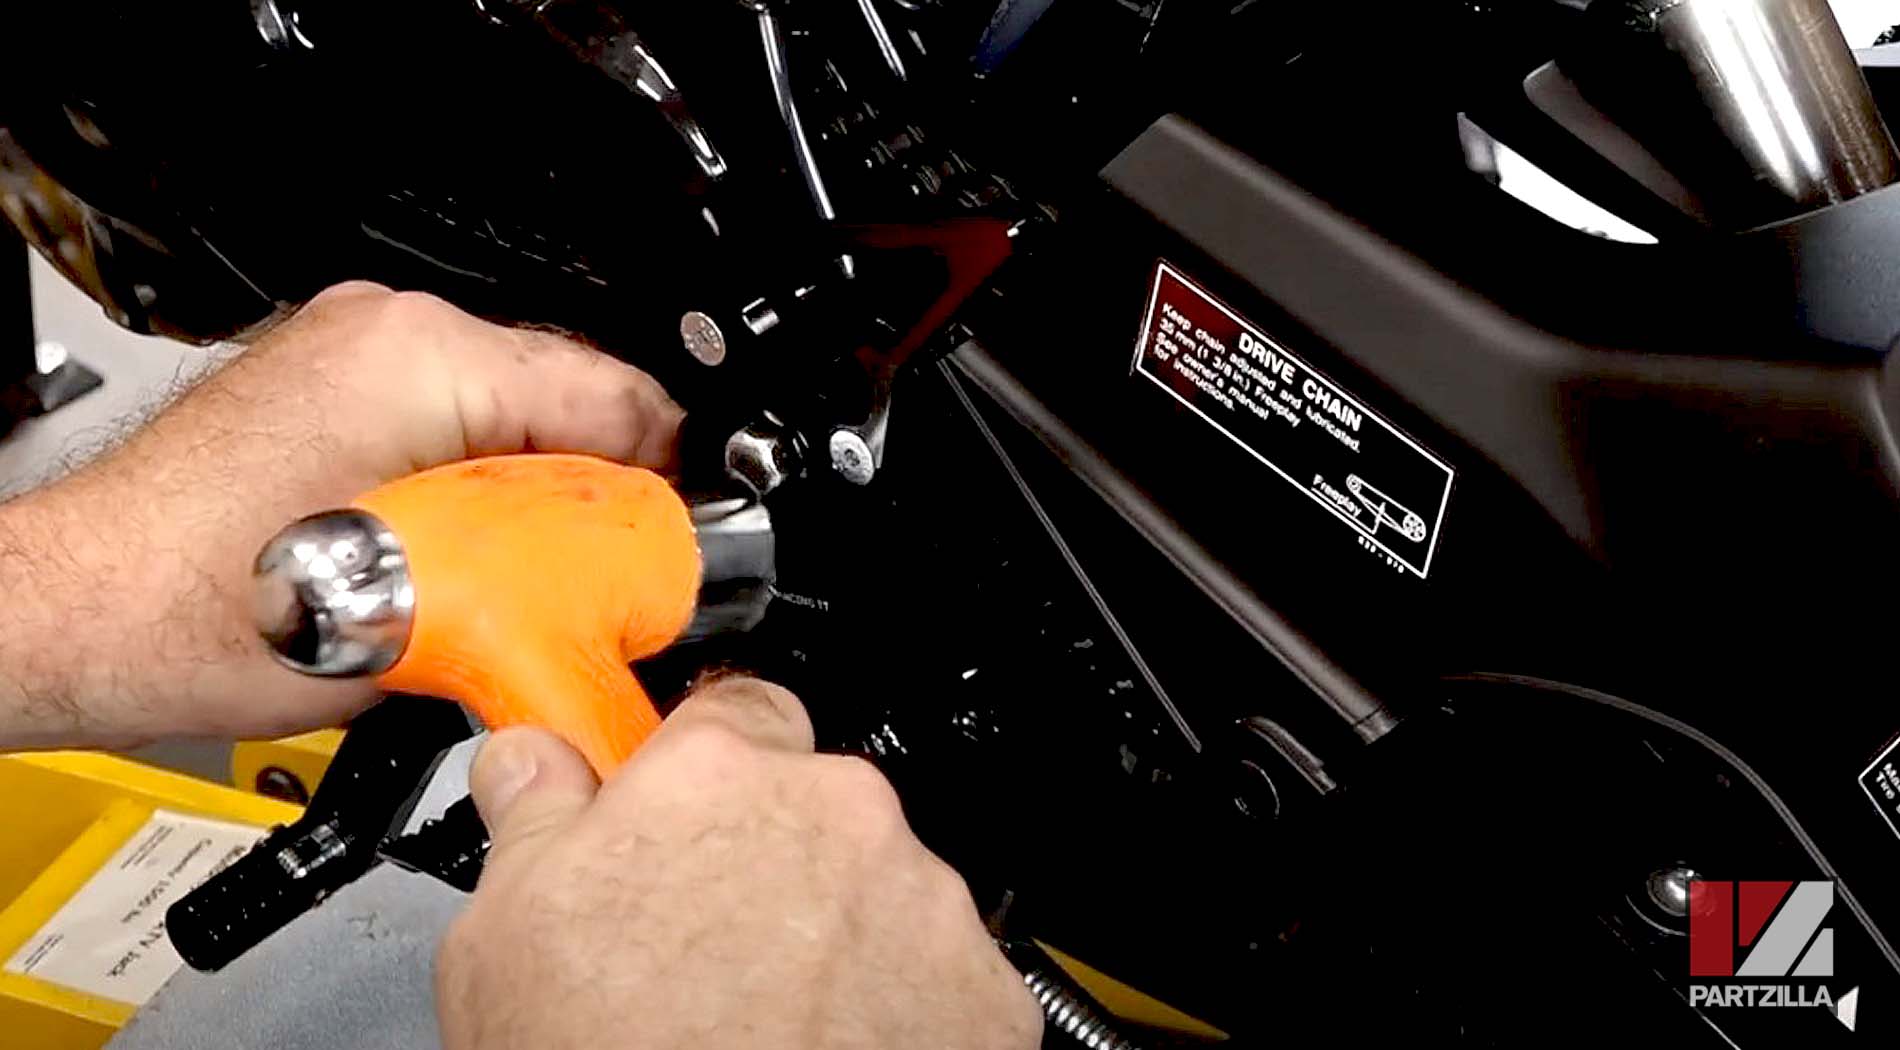
Step 6. Remove the two master cylinder mounting bolts, and the cotter pin and clevis pin from the linkage. Next, remove the master cylinder from the step holder.
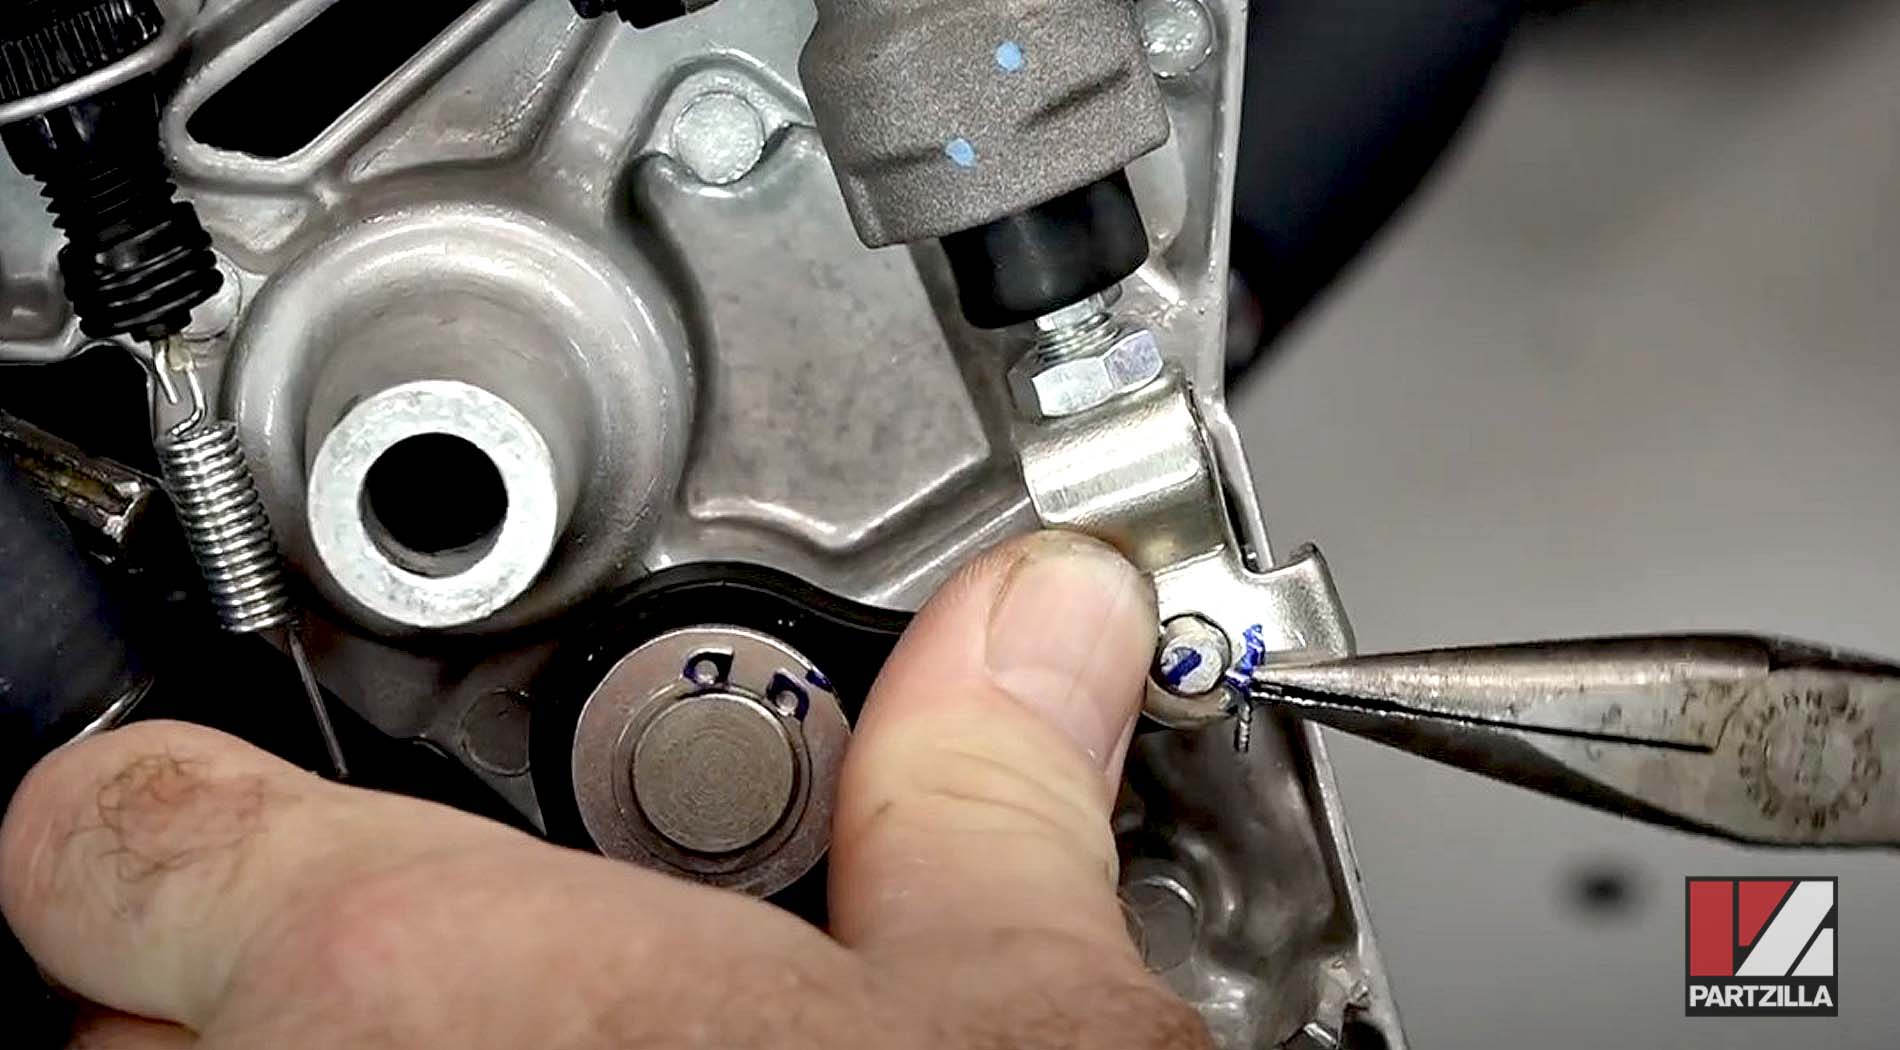
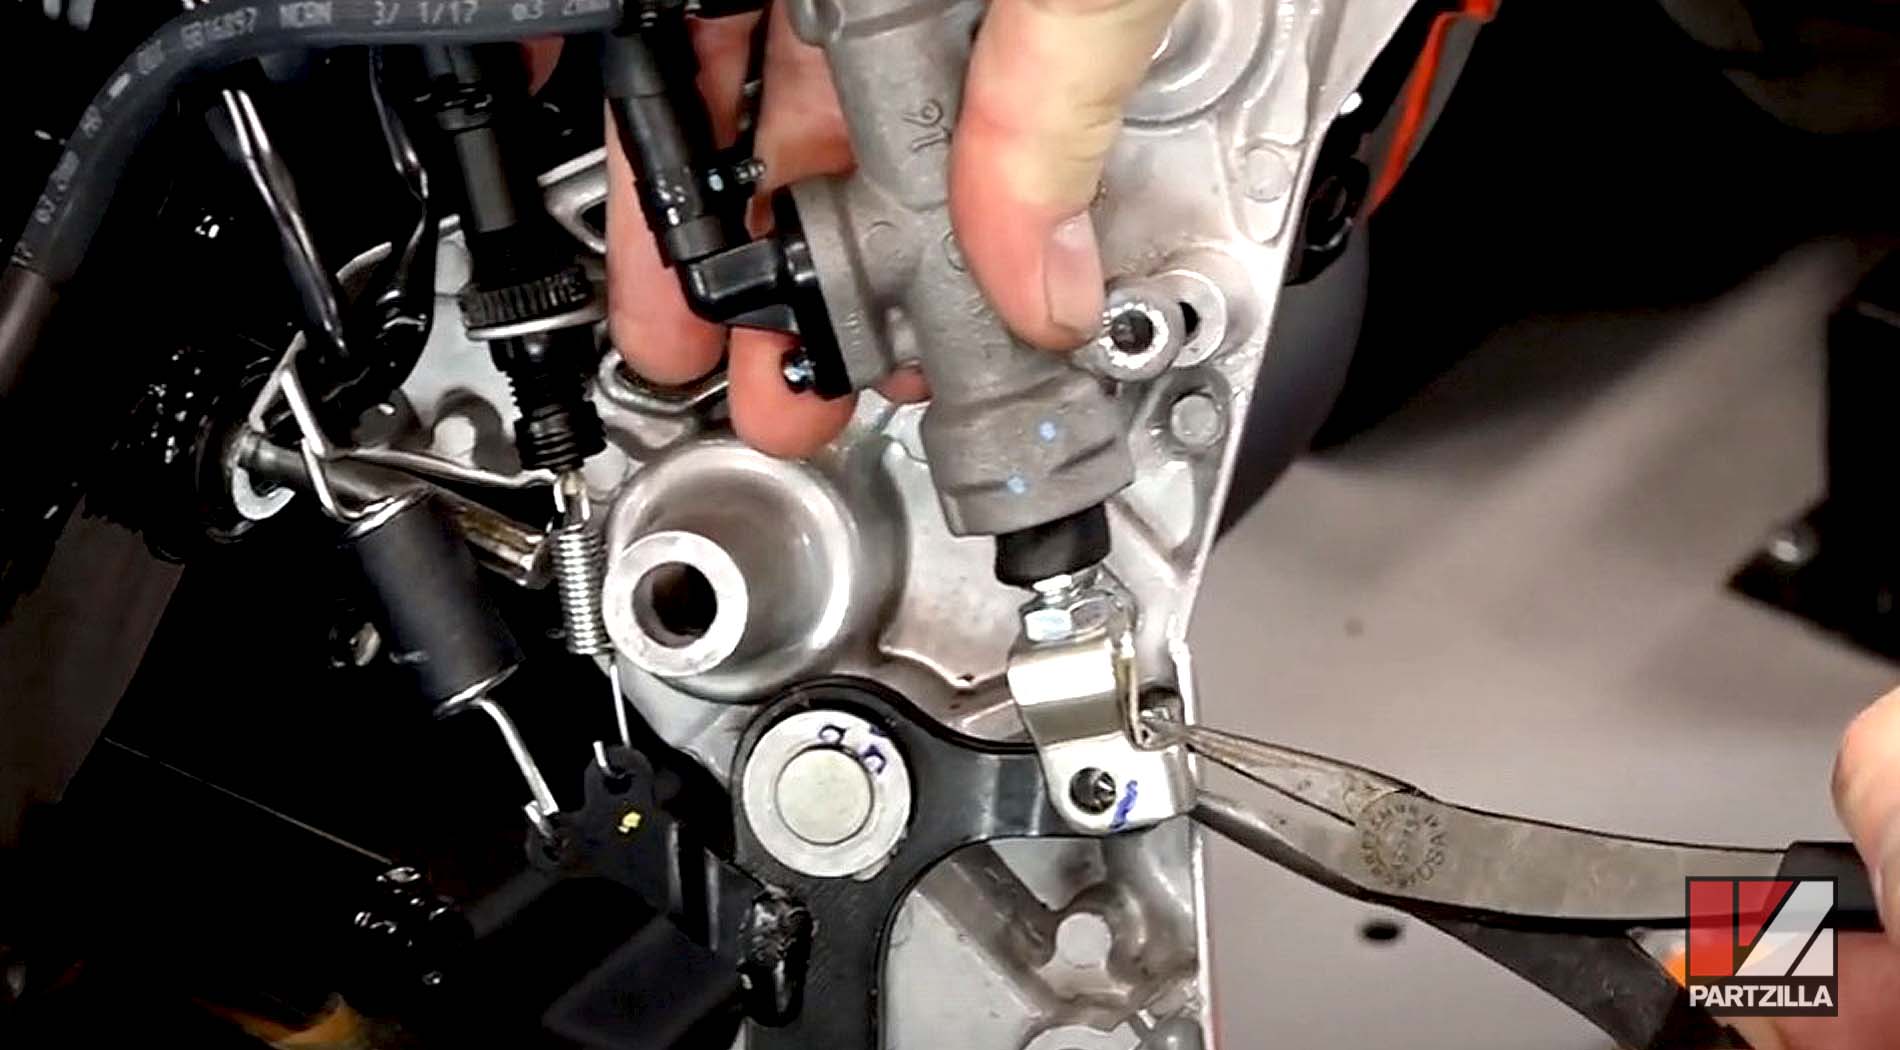
Step 7. Disconnect the brake light wires, and remove the step holder completely.
Watch the clip below to see the gearshift and brake pedal removal segment of our Honda Grom Rearset video.
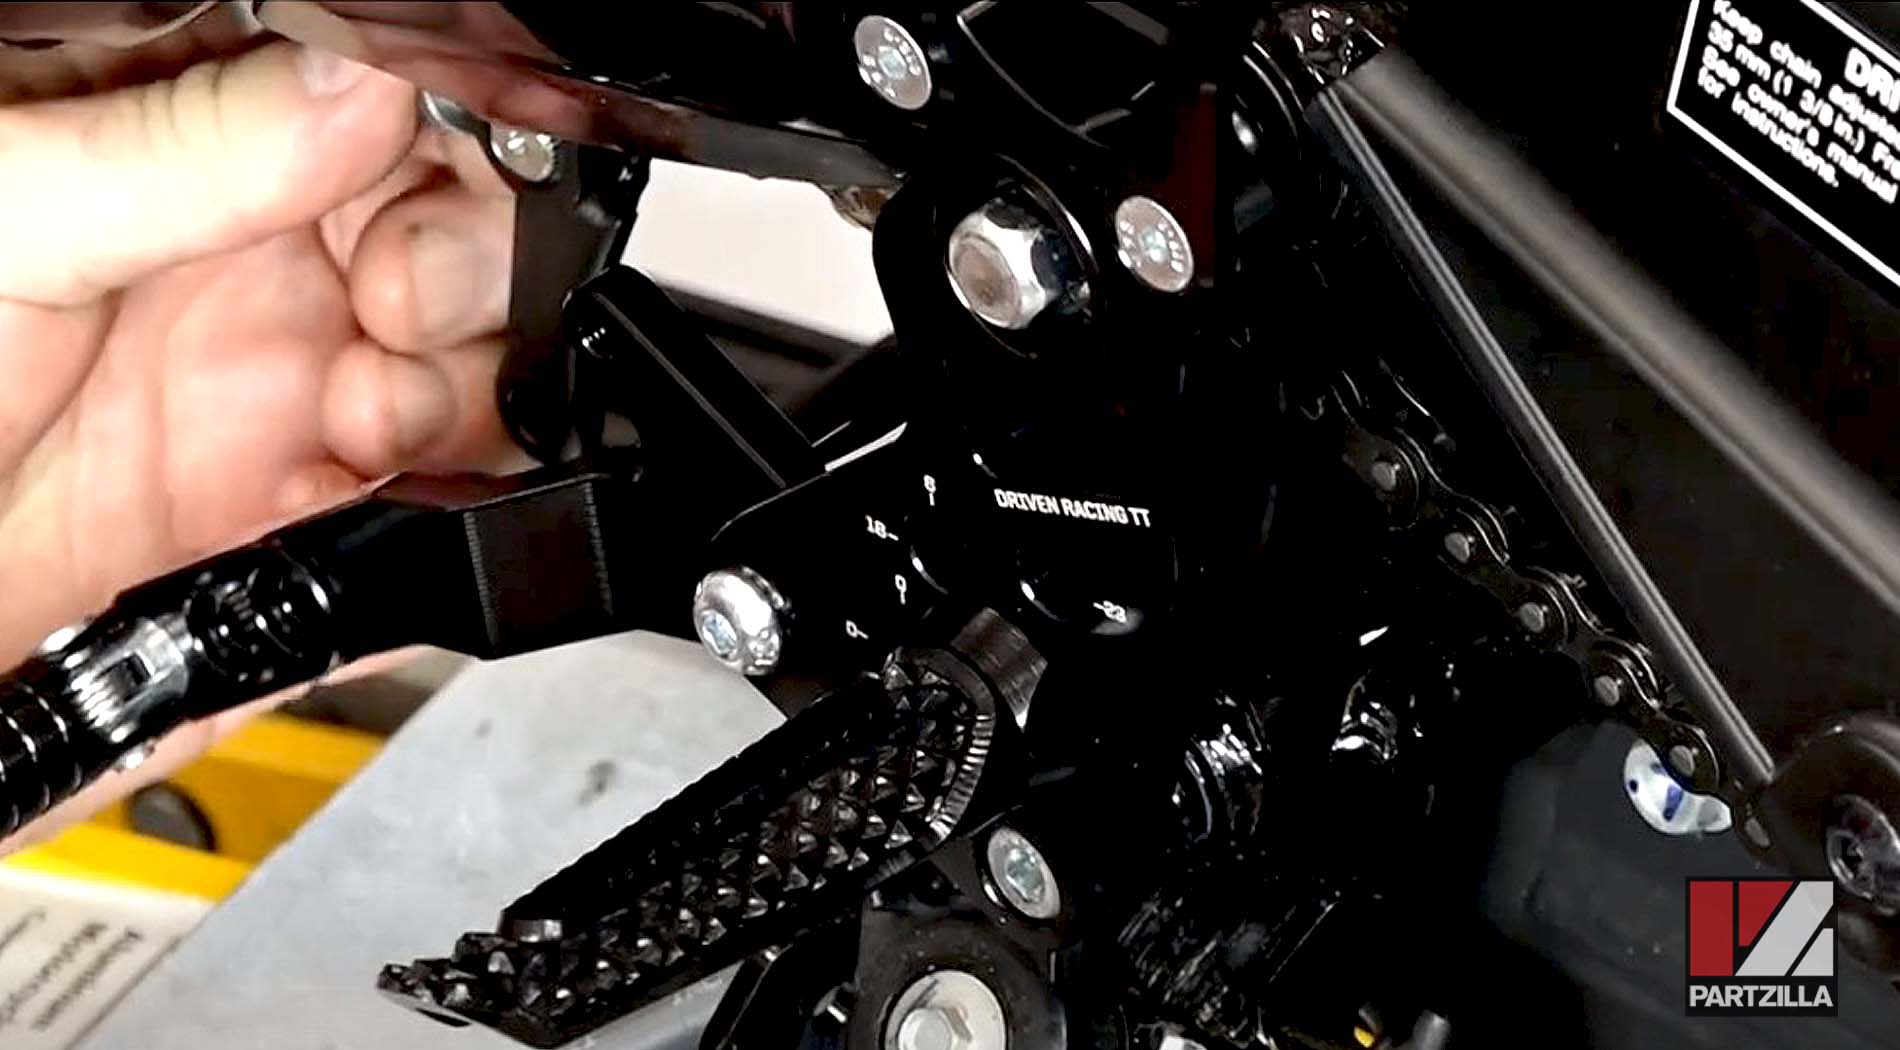
Part 2: Installing Honda Grom Rearset Gearshift Pedal
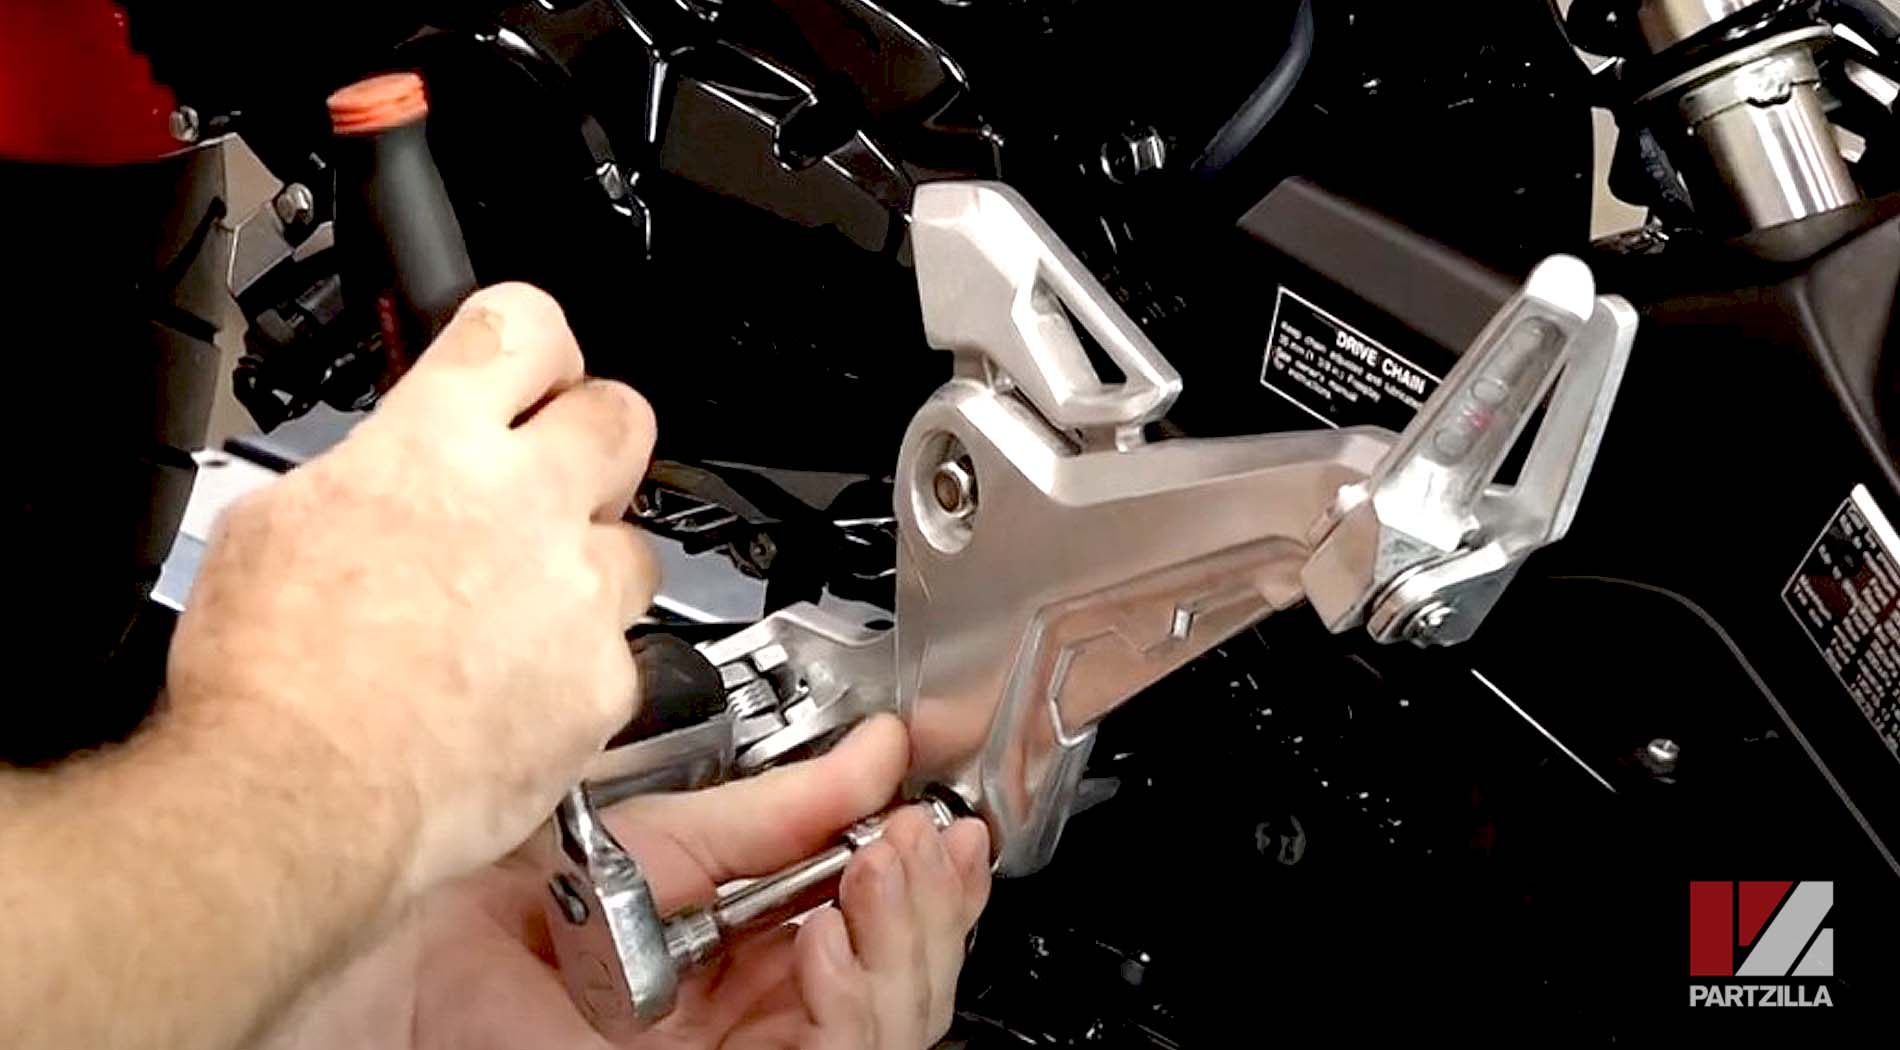
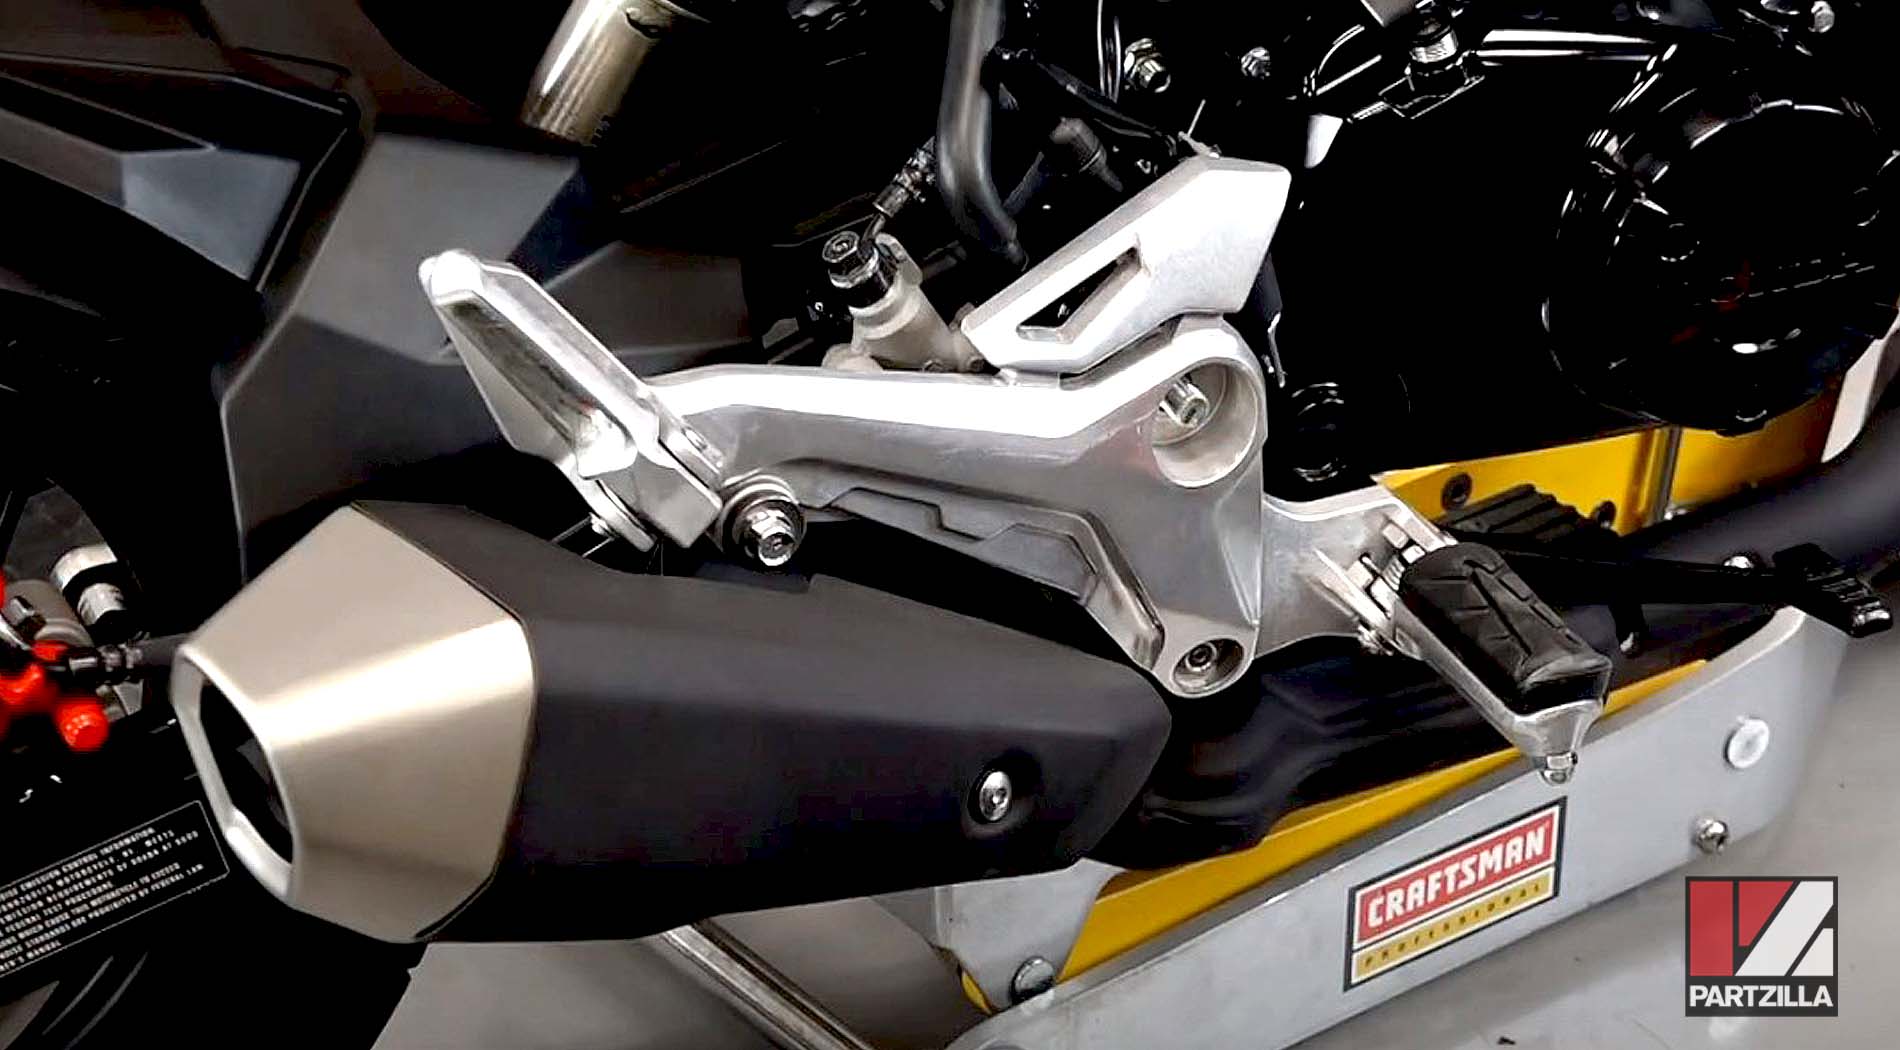
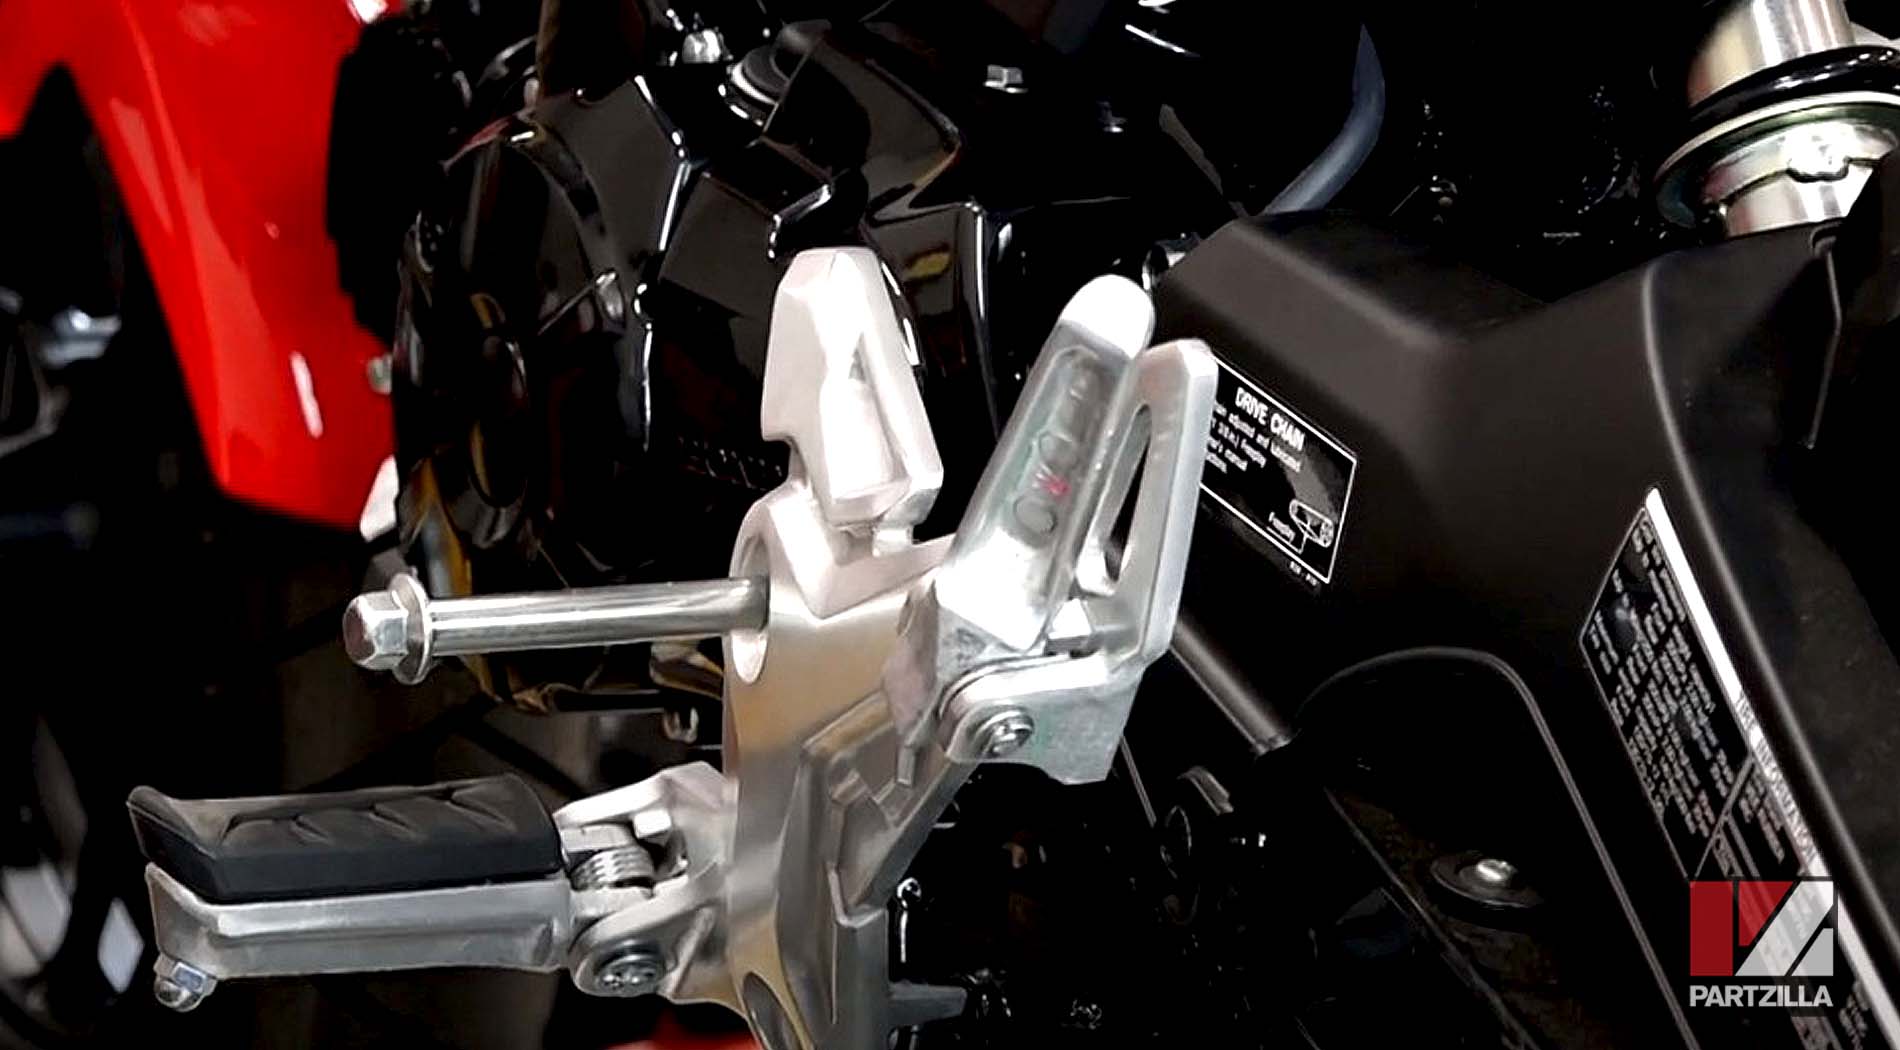
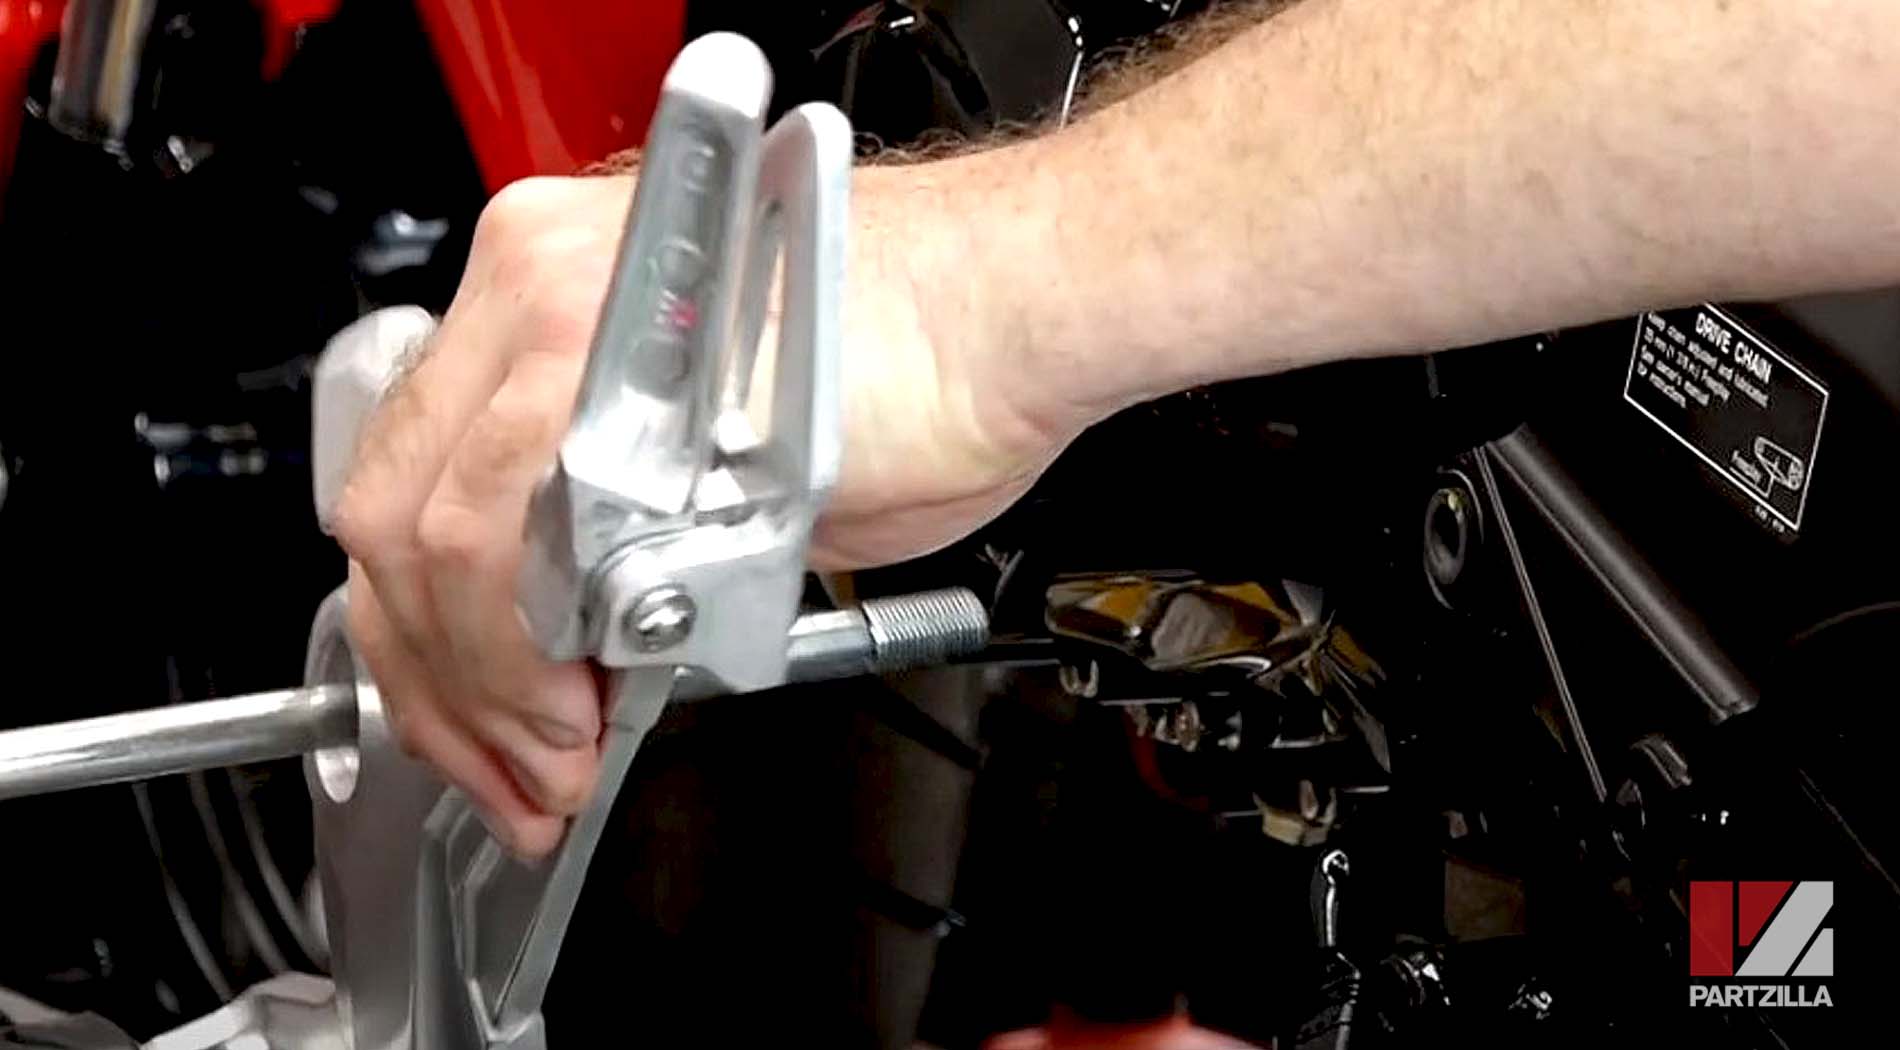
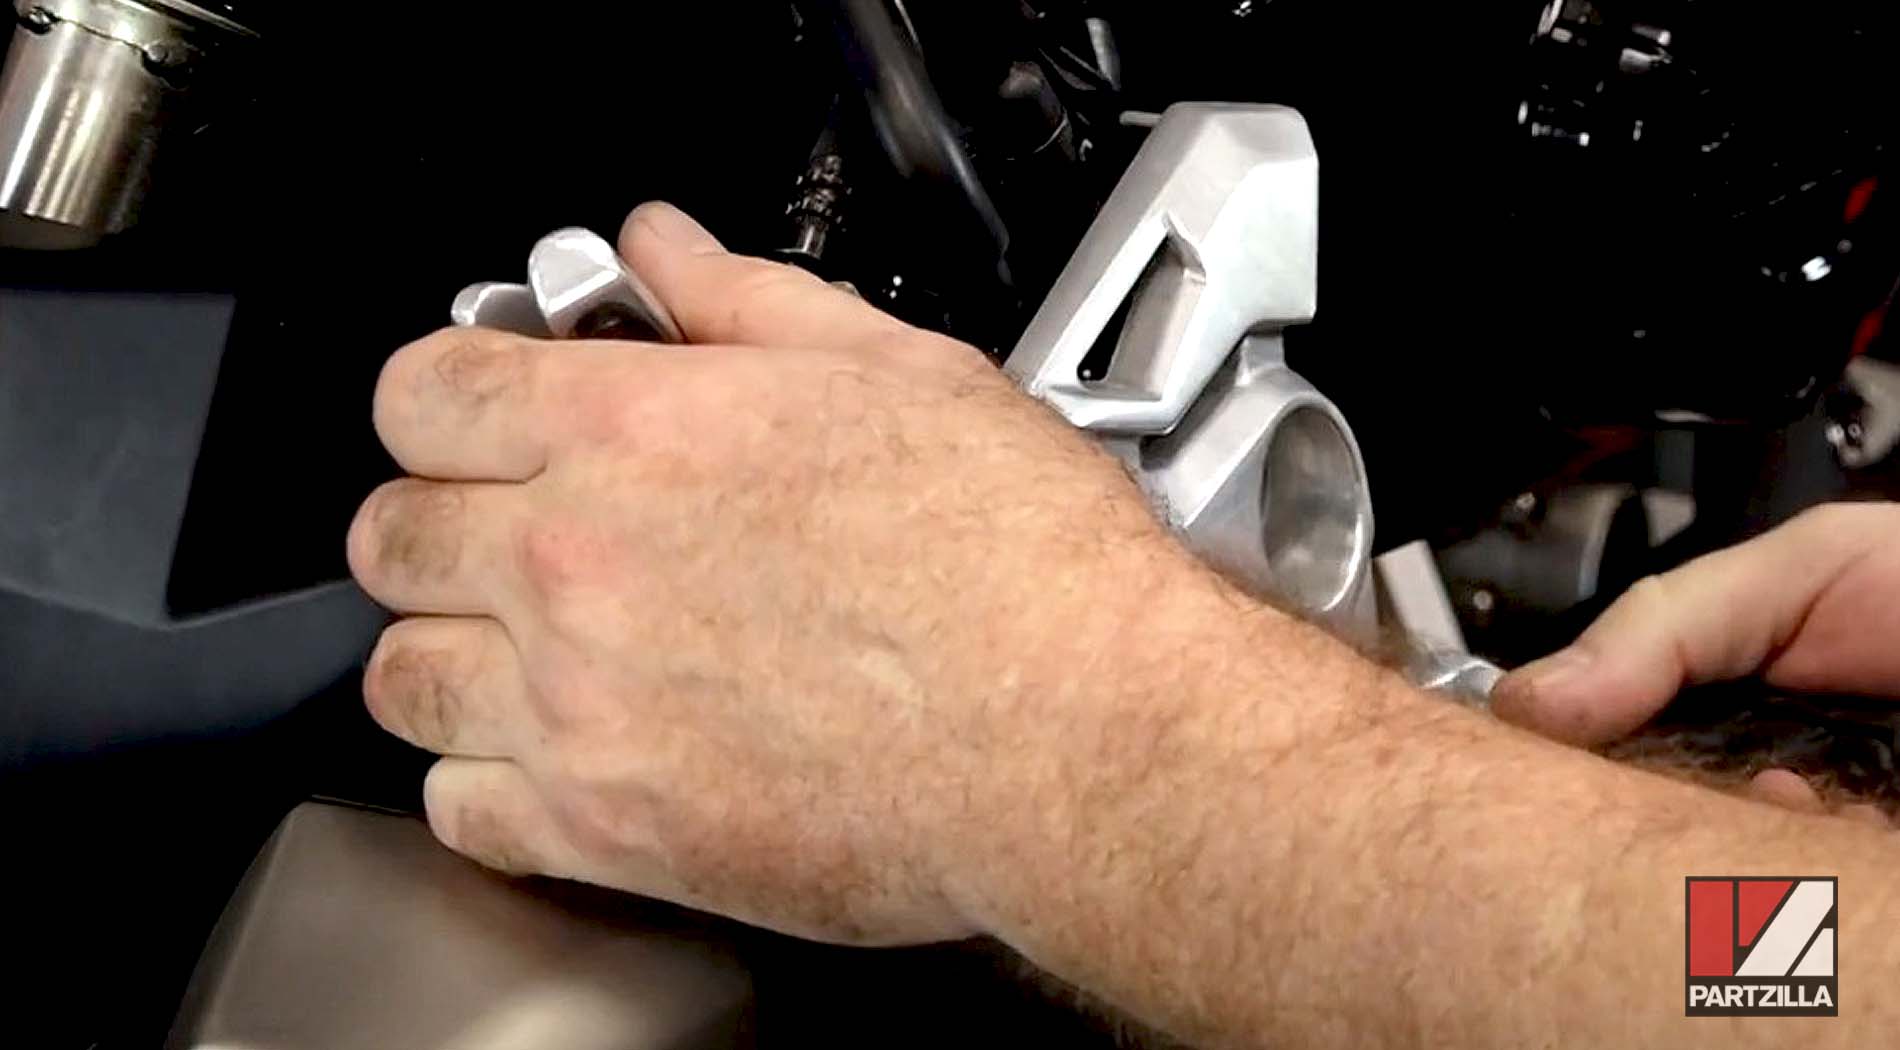
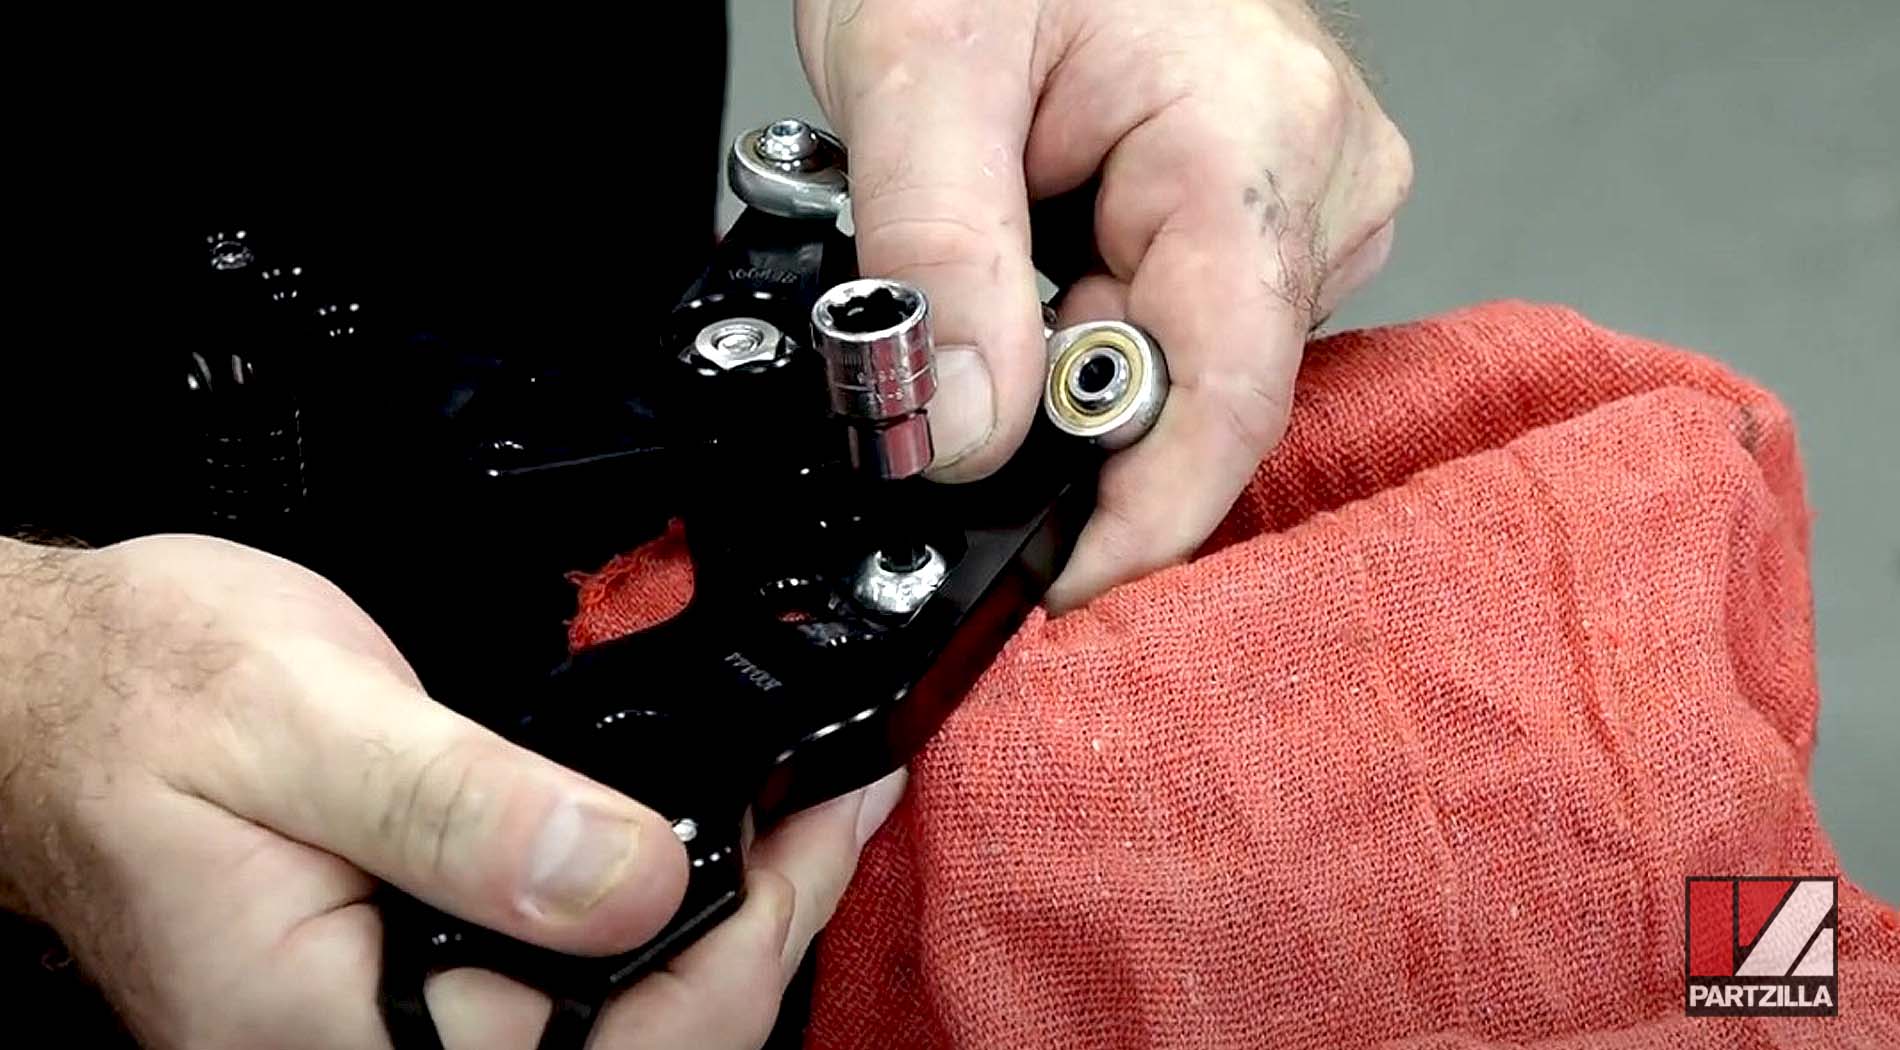
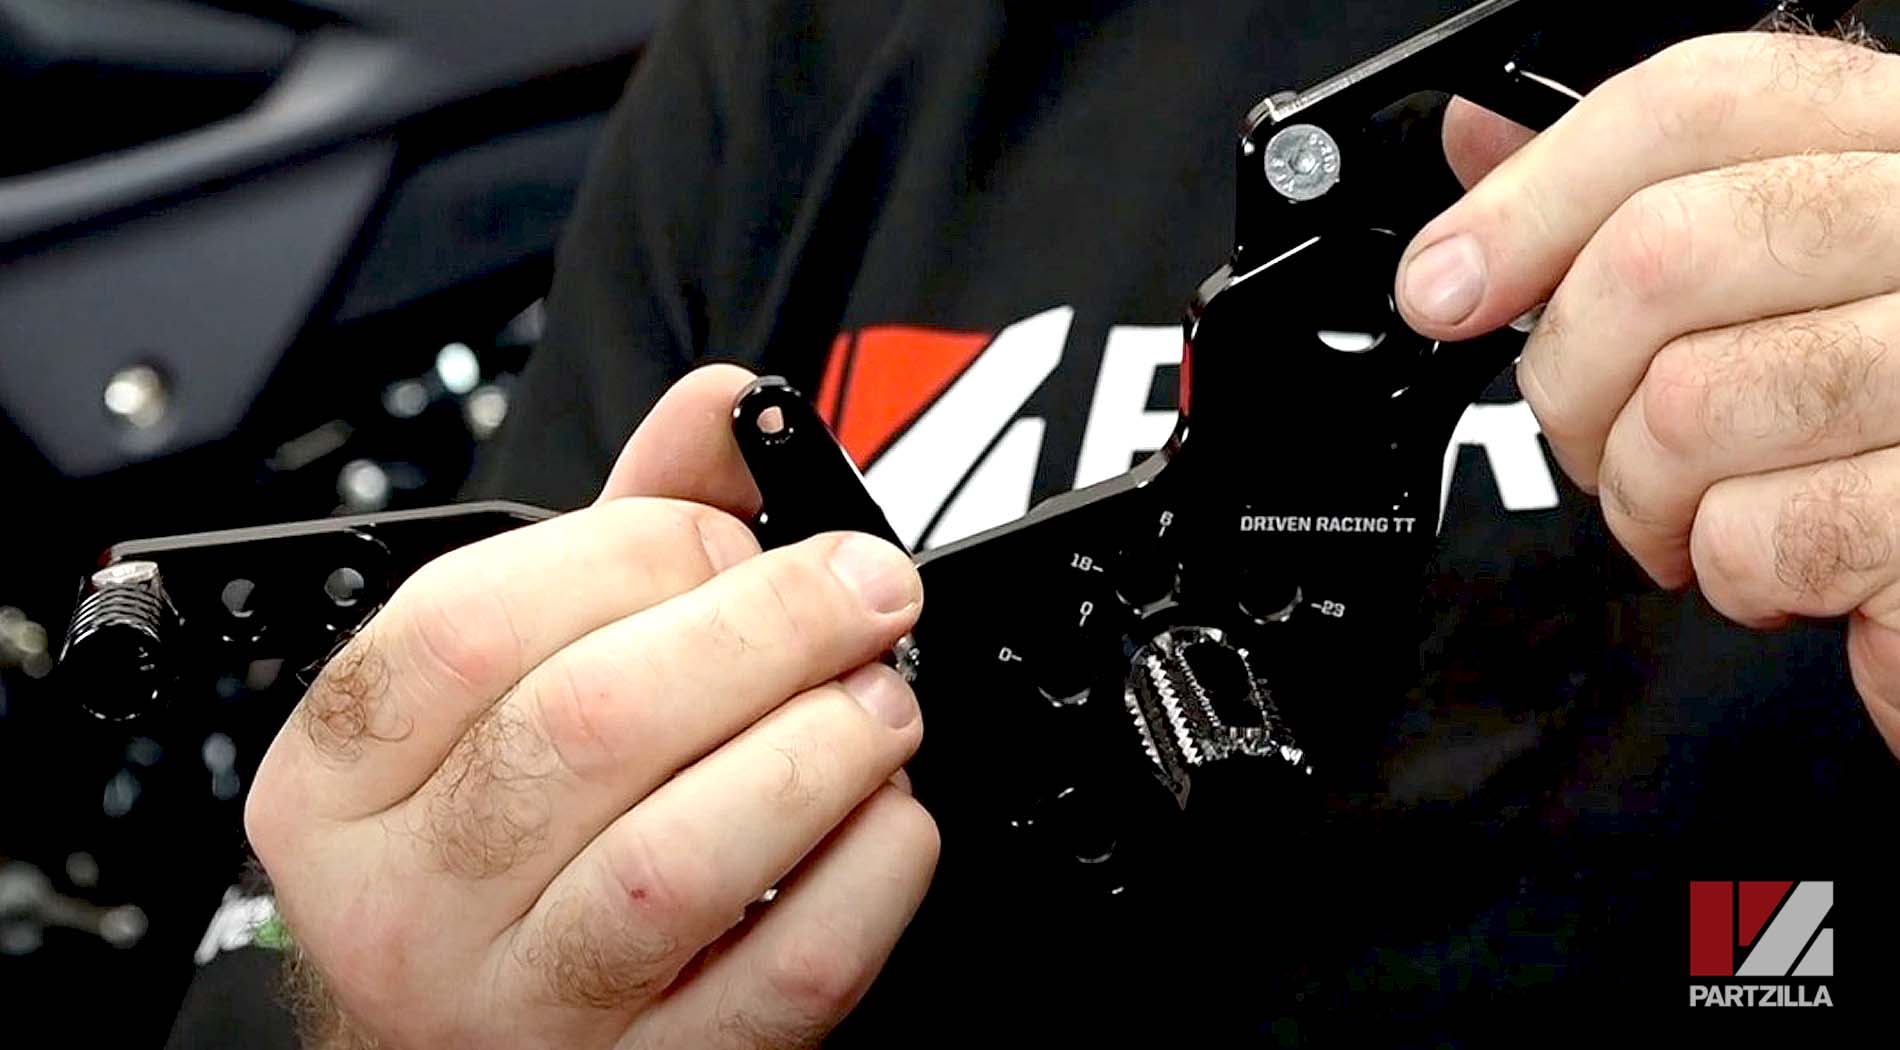
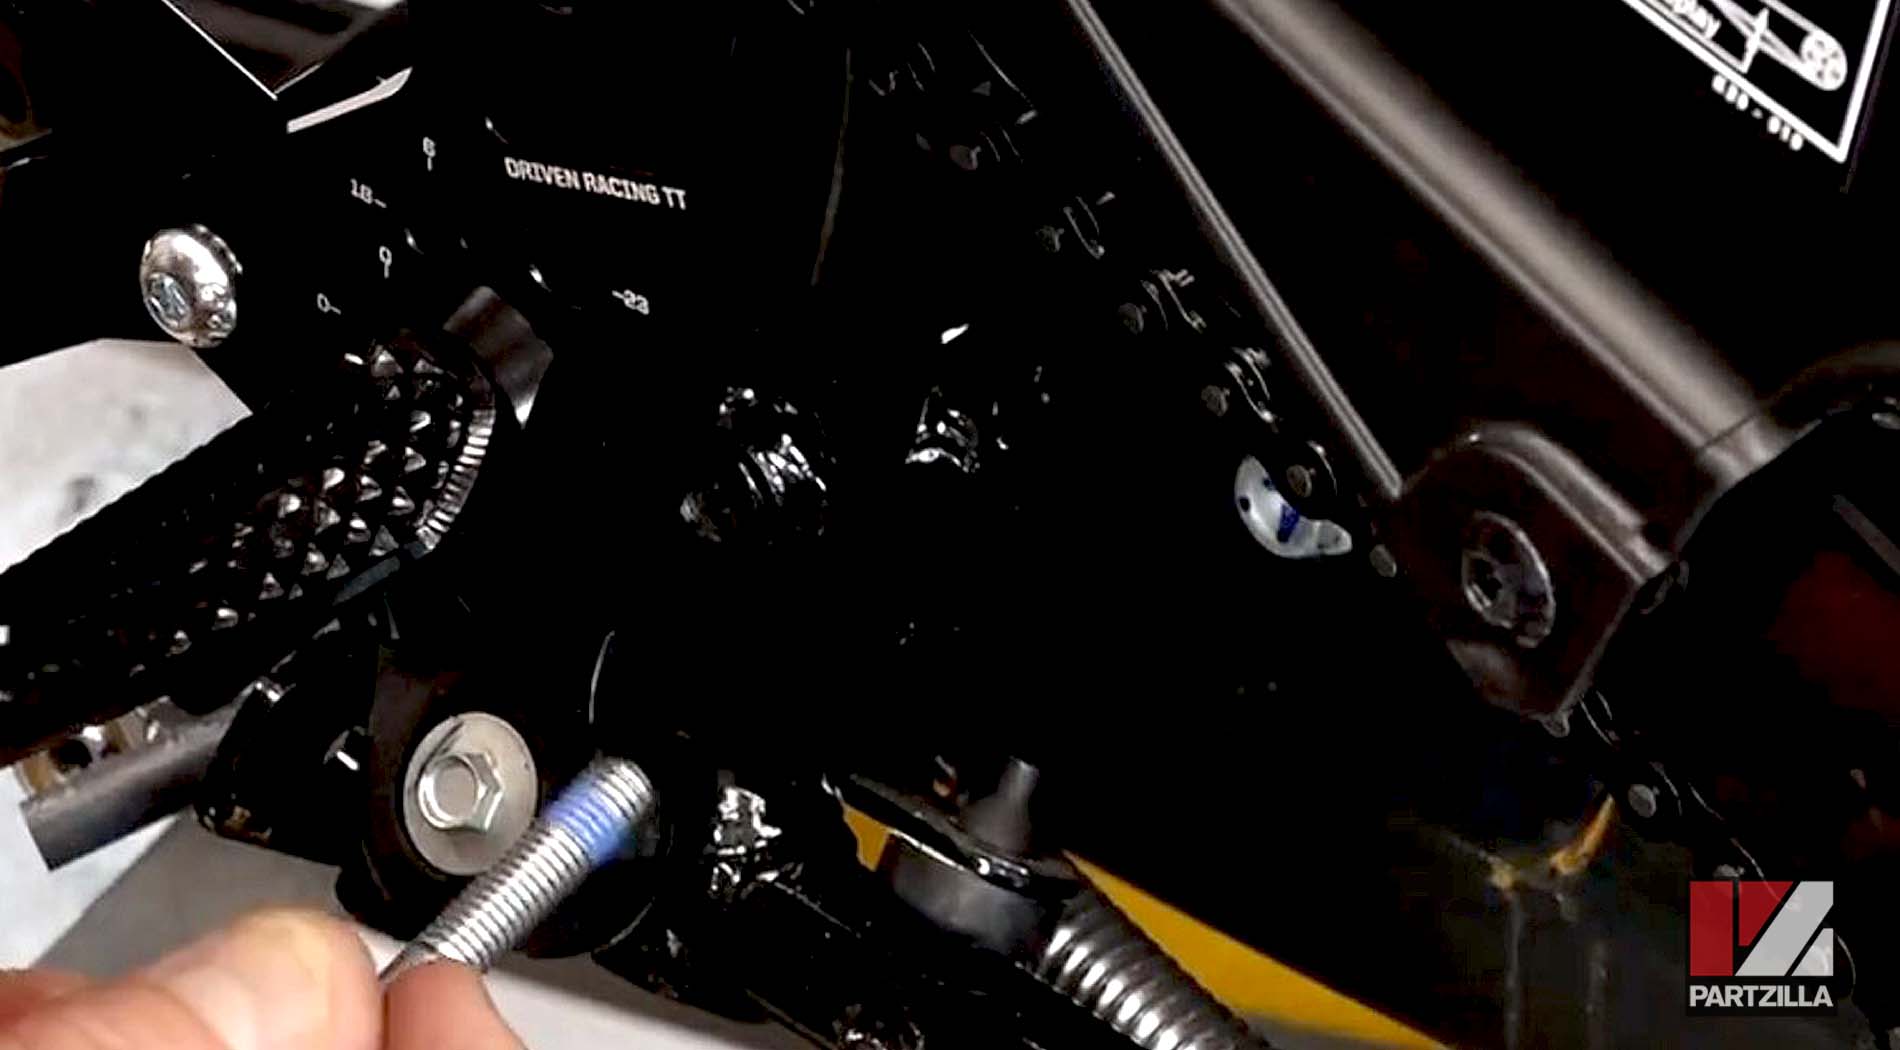
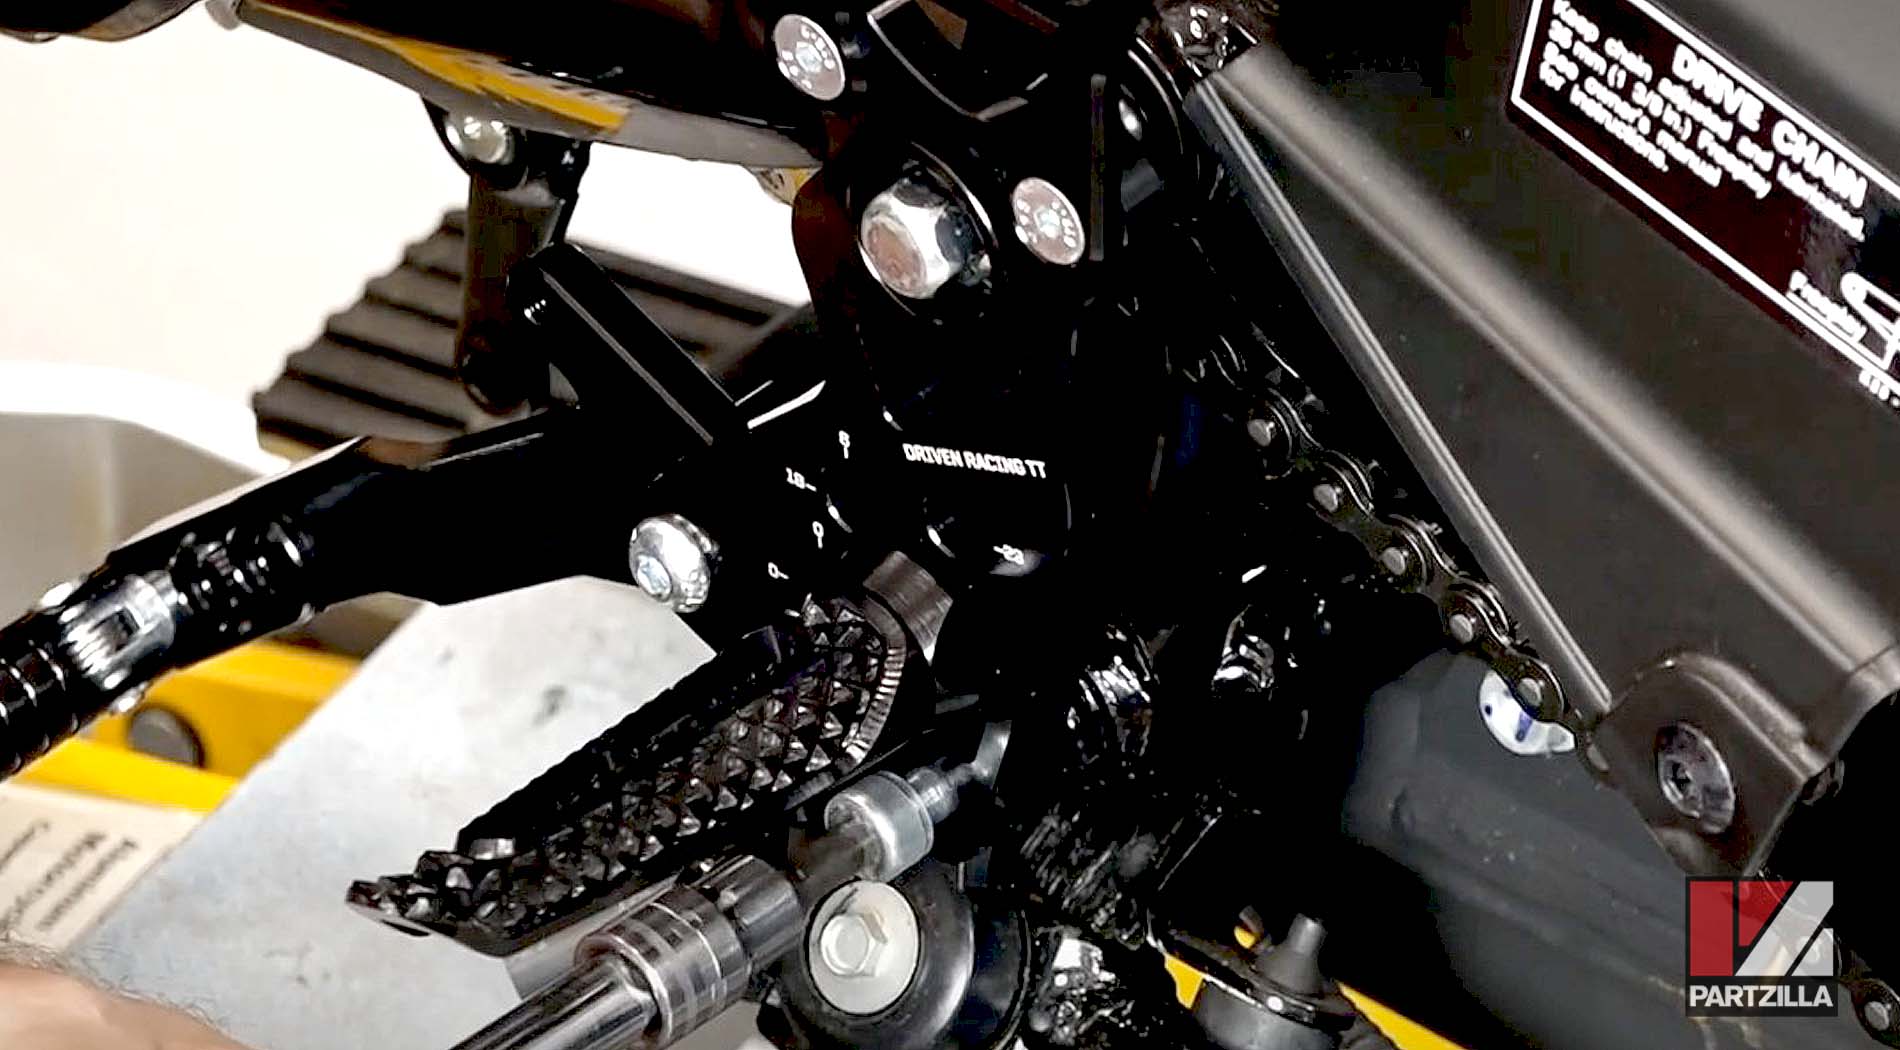
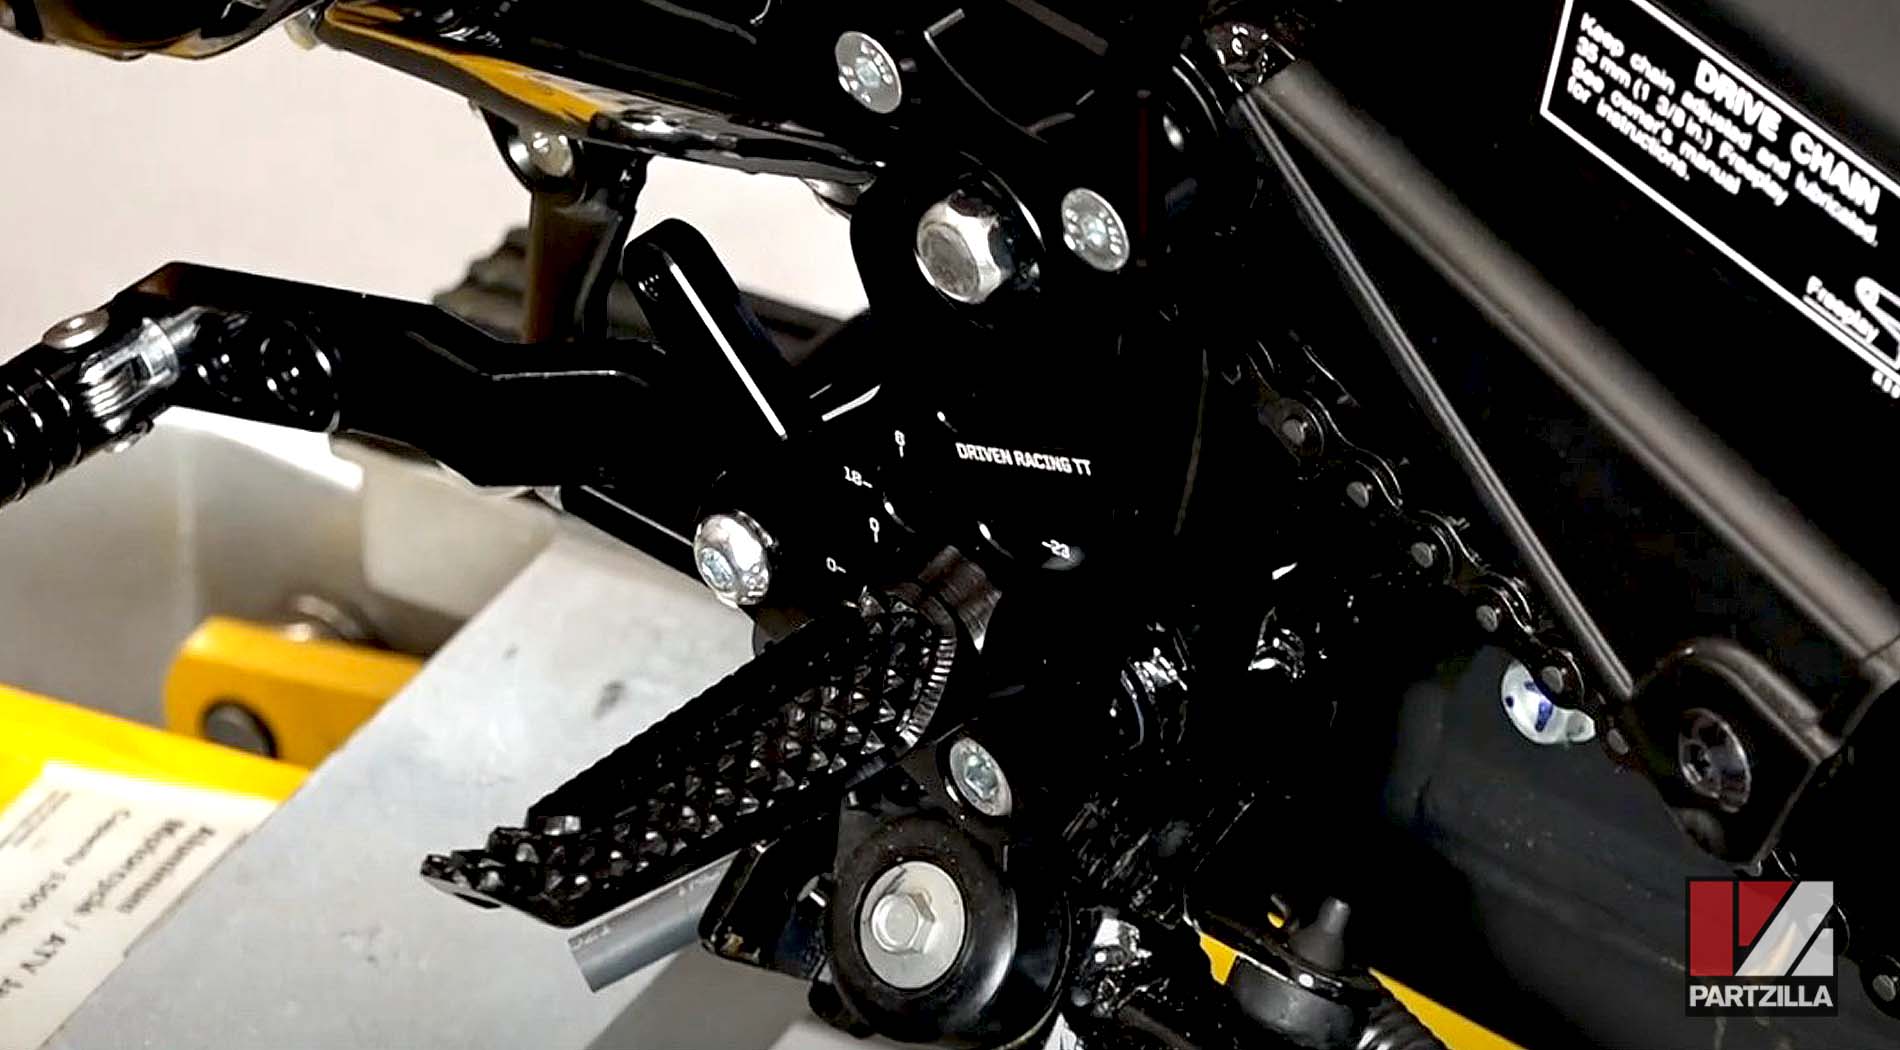
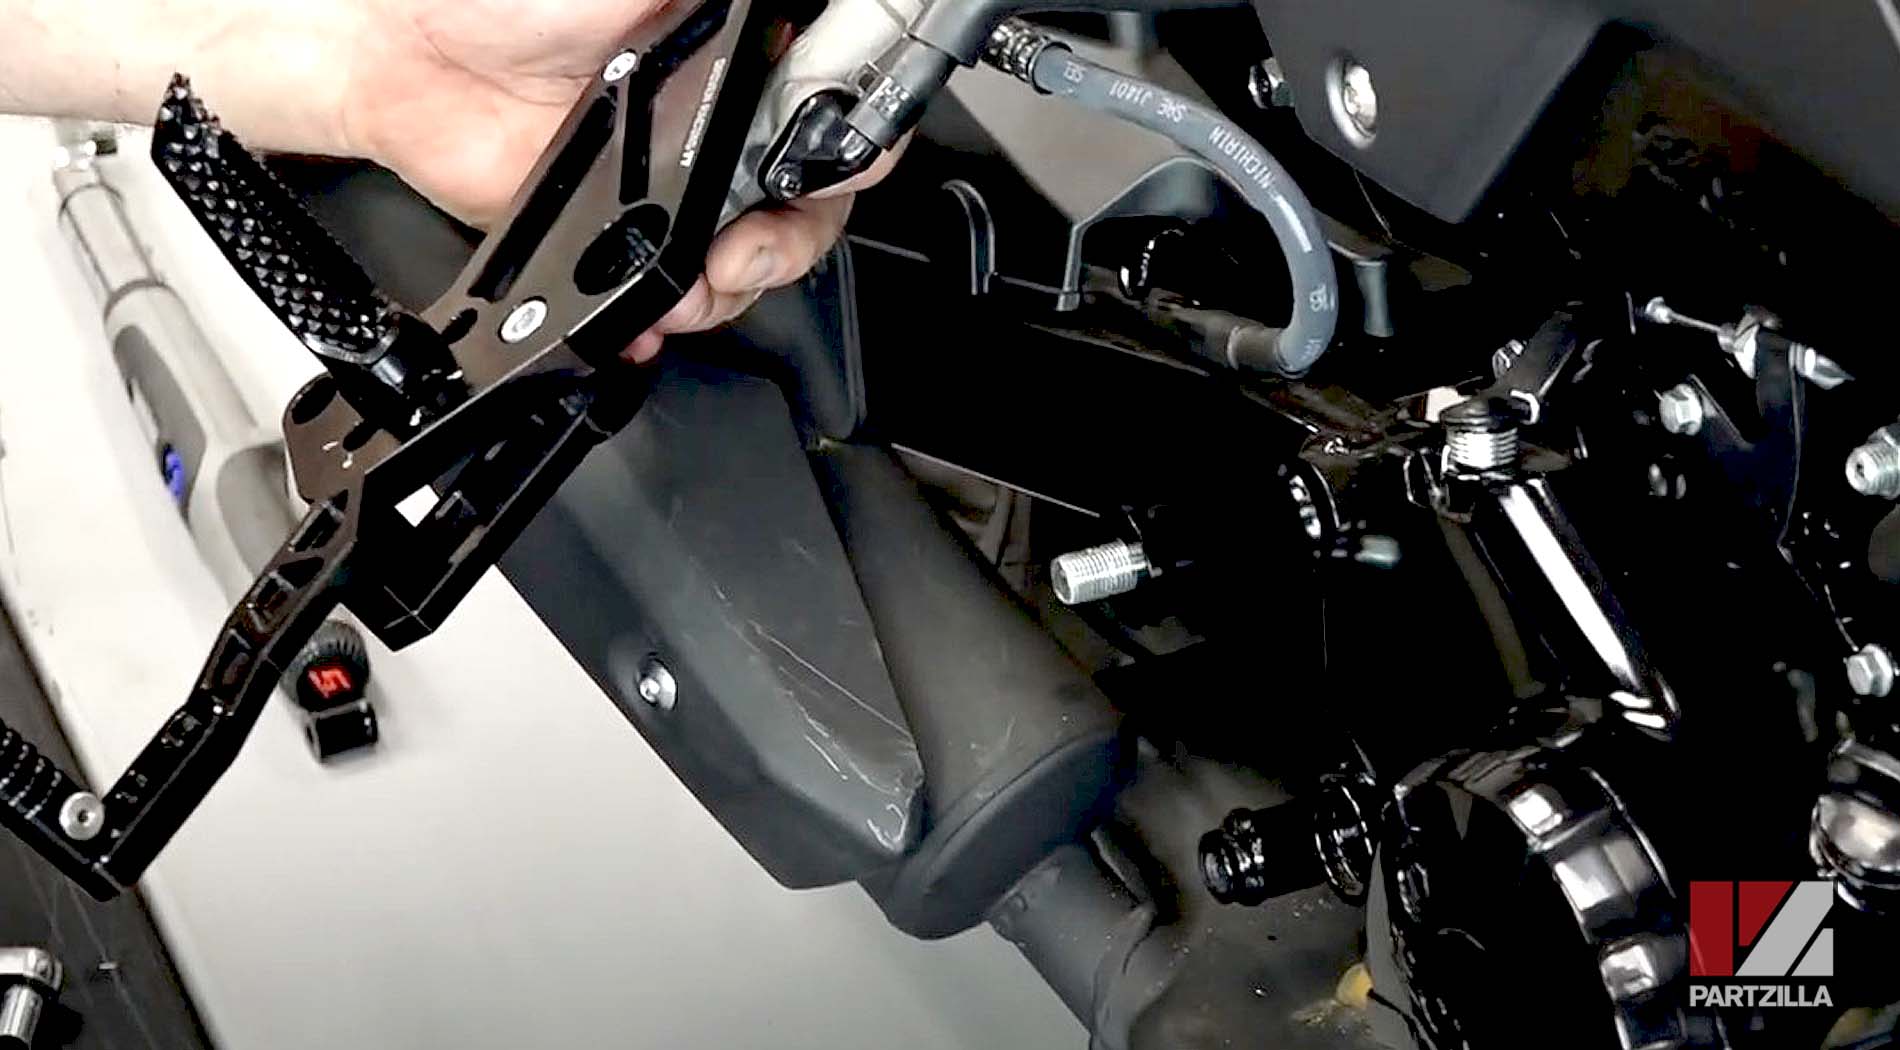
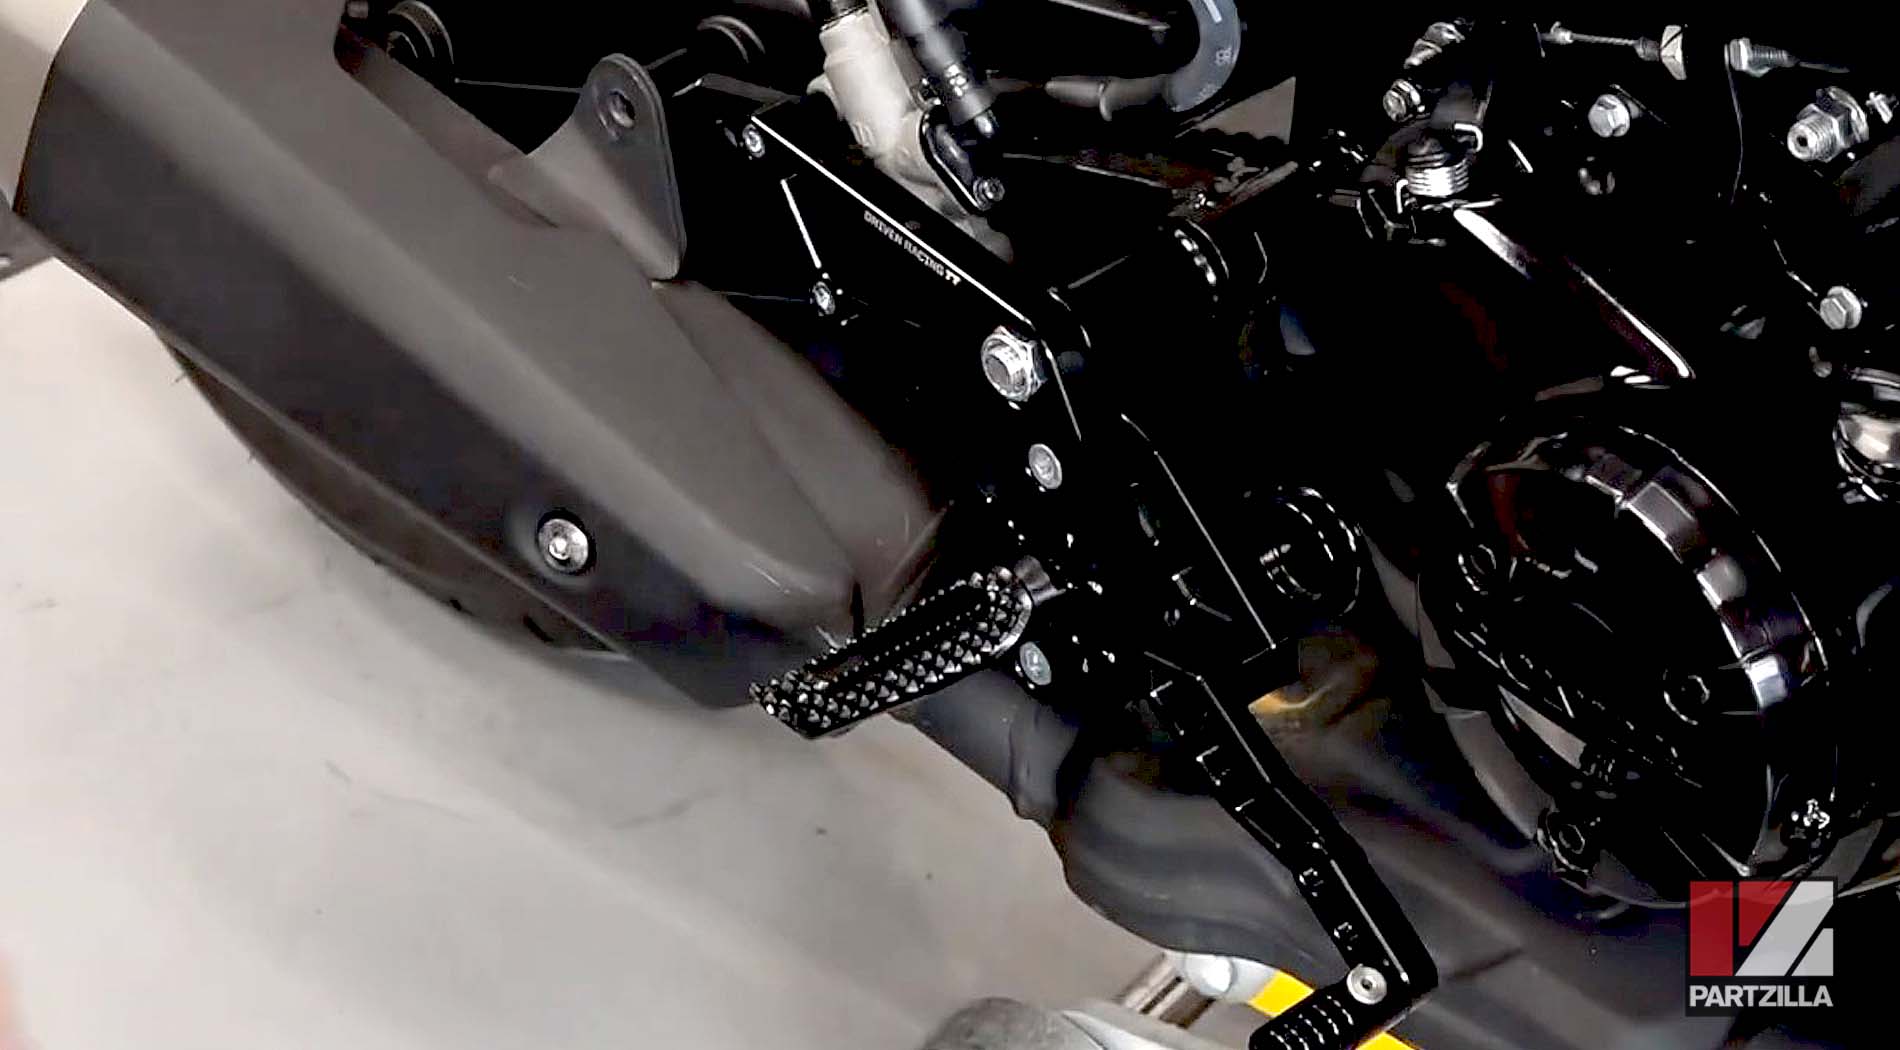
Step 1. Attach the new foot pegs to the new rearset step holders (all included in the TT rearset kit), then apply blue threadlocker to the mounting bolts and torque them to 29 foot-pounds.
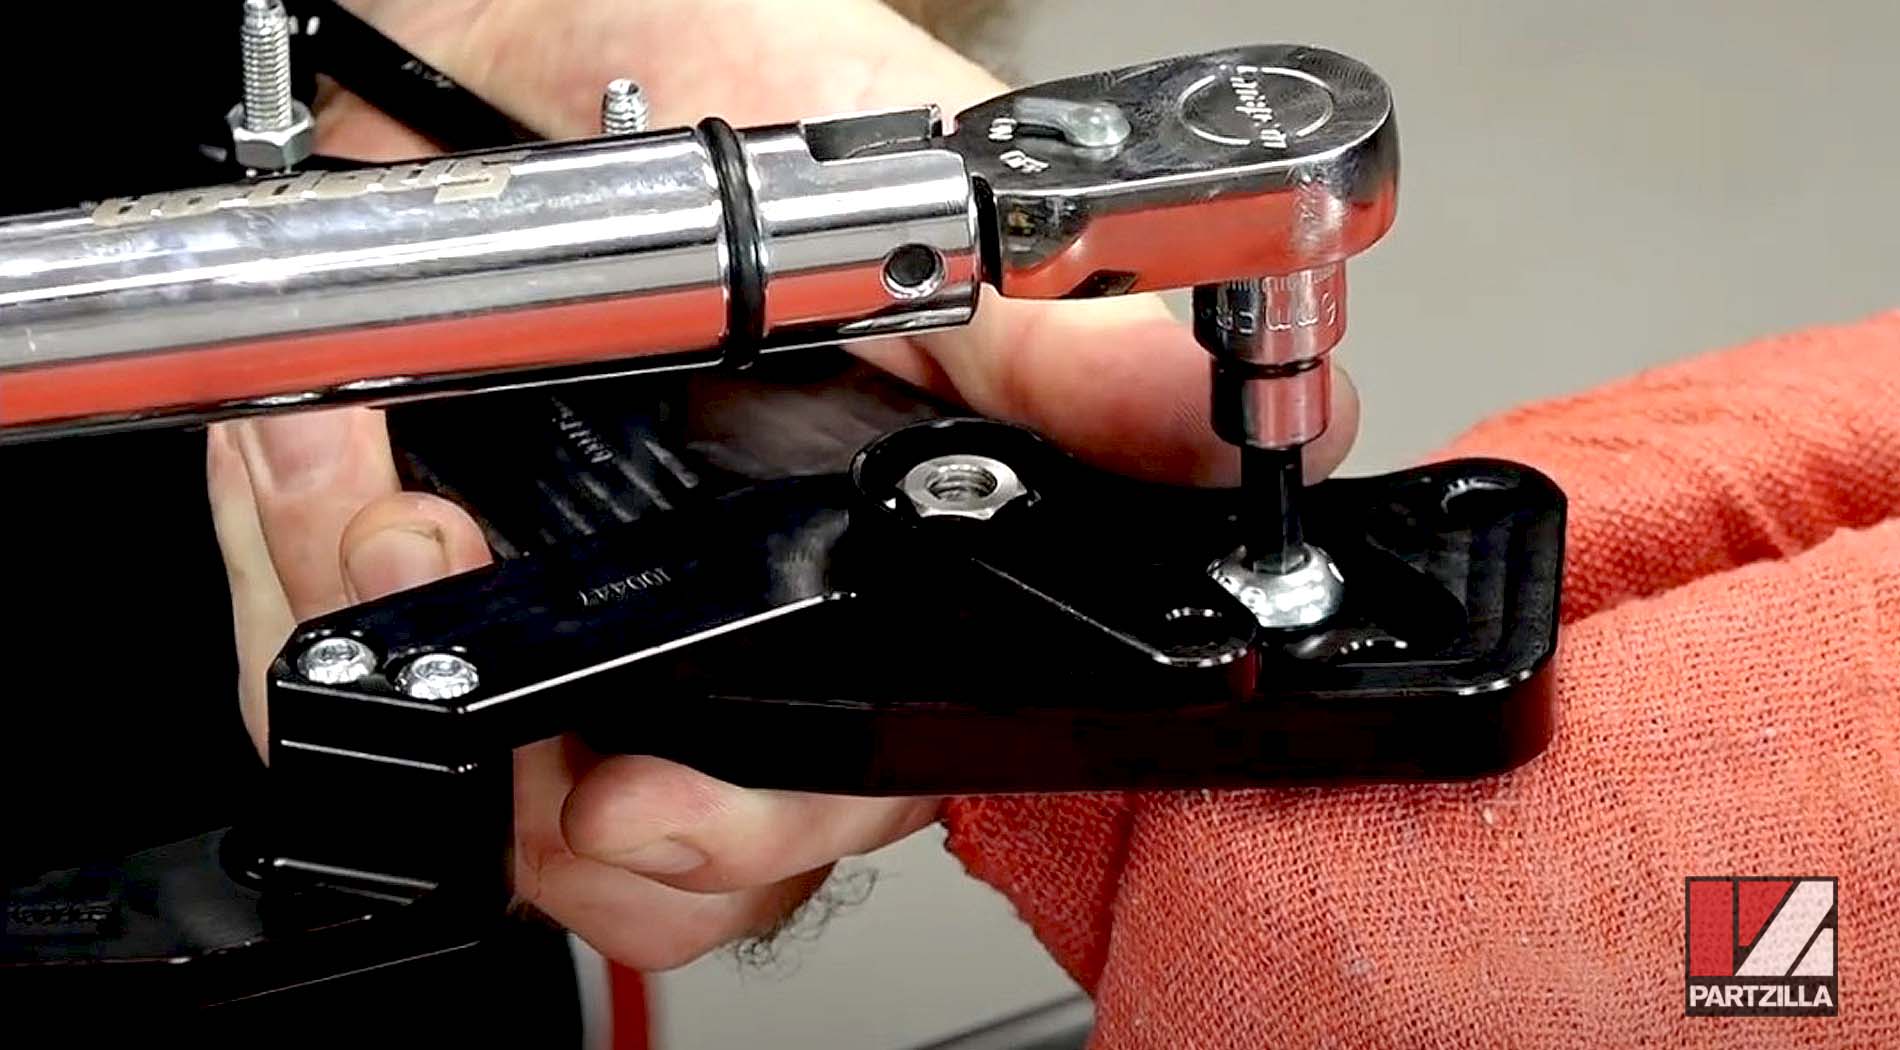
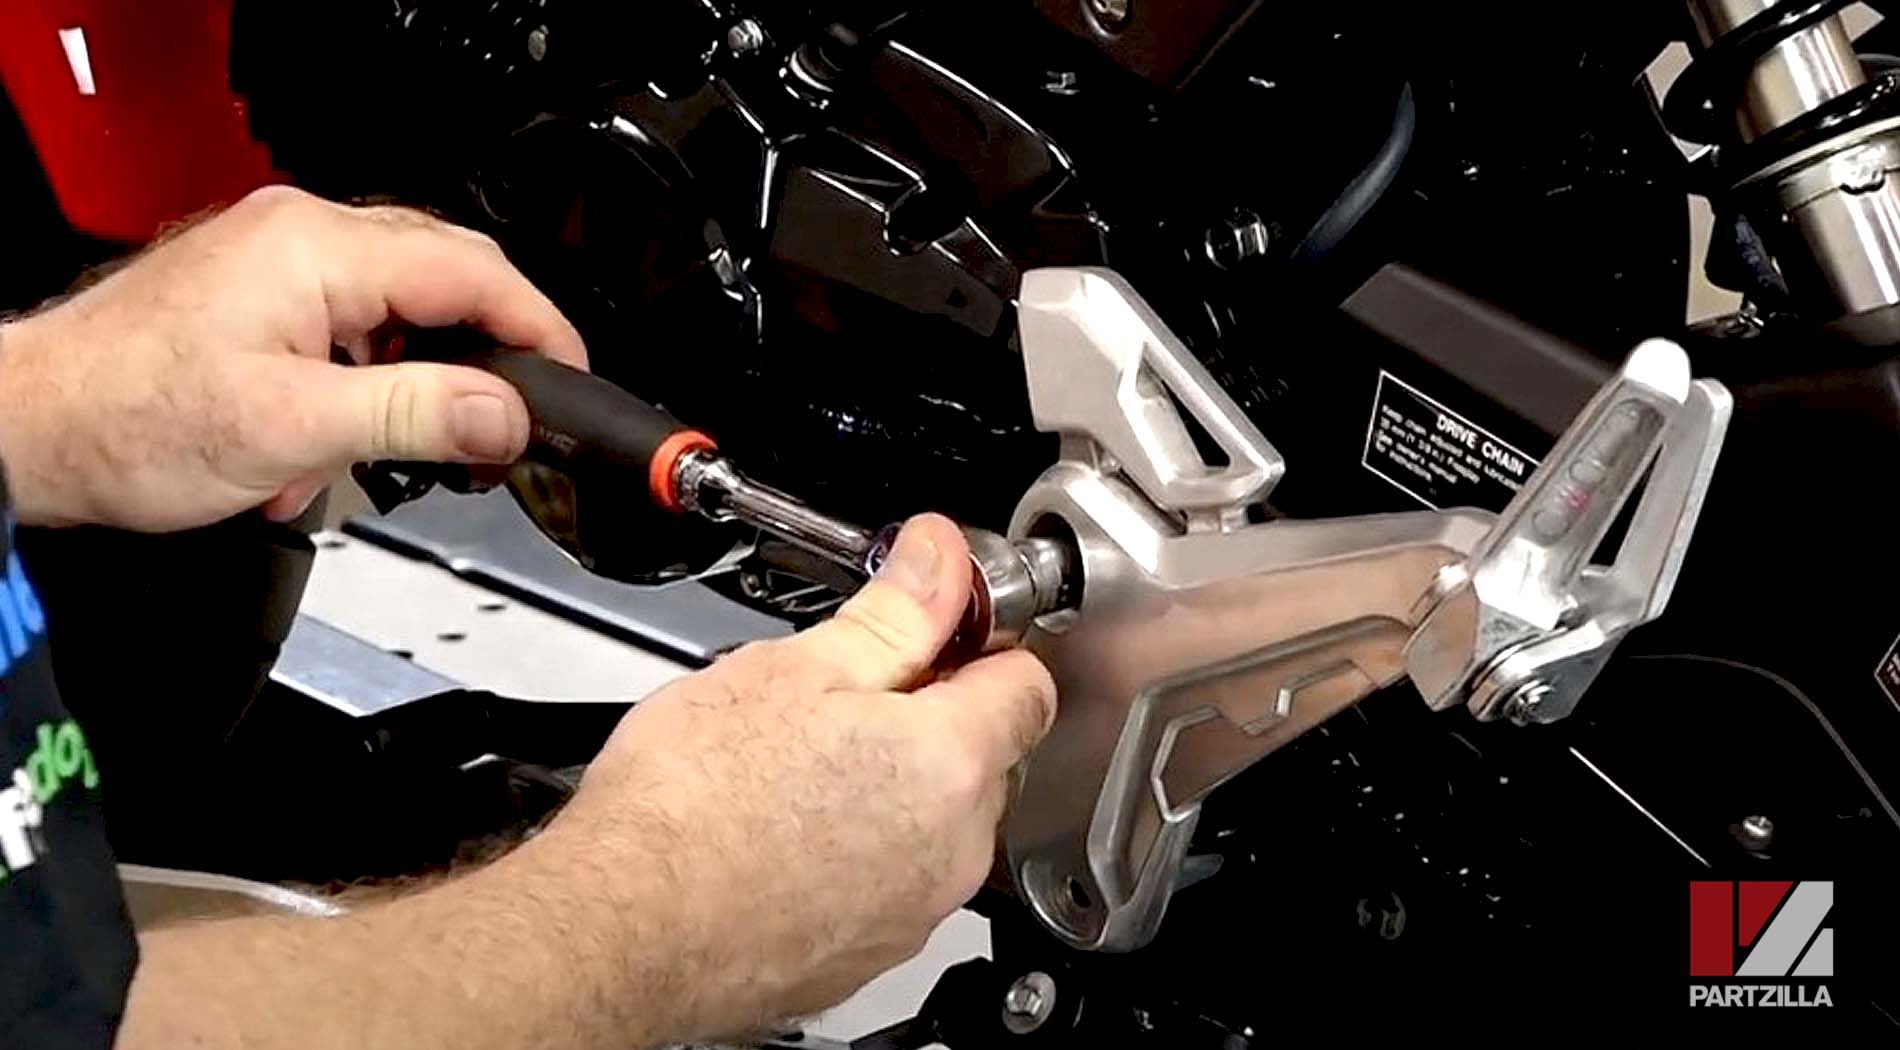
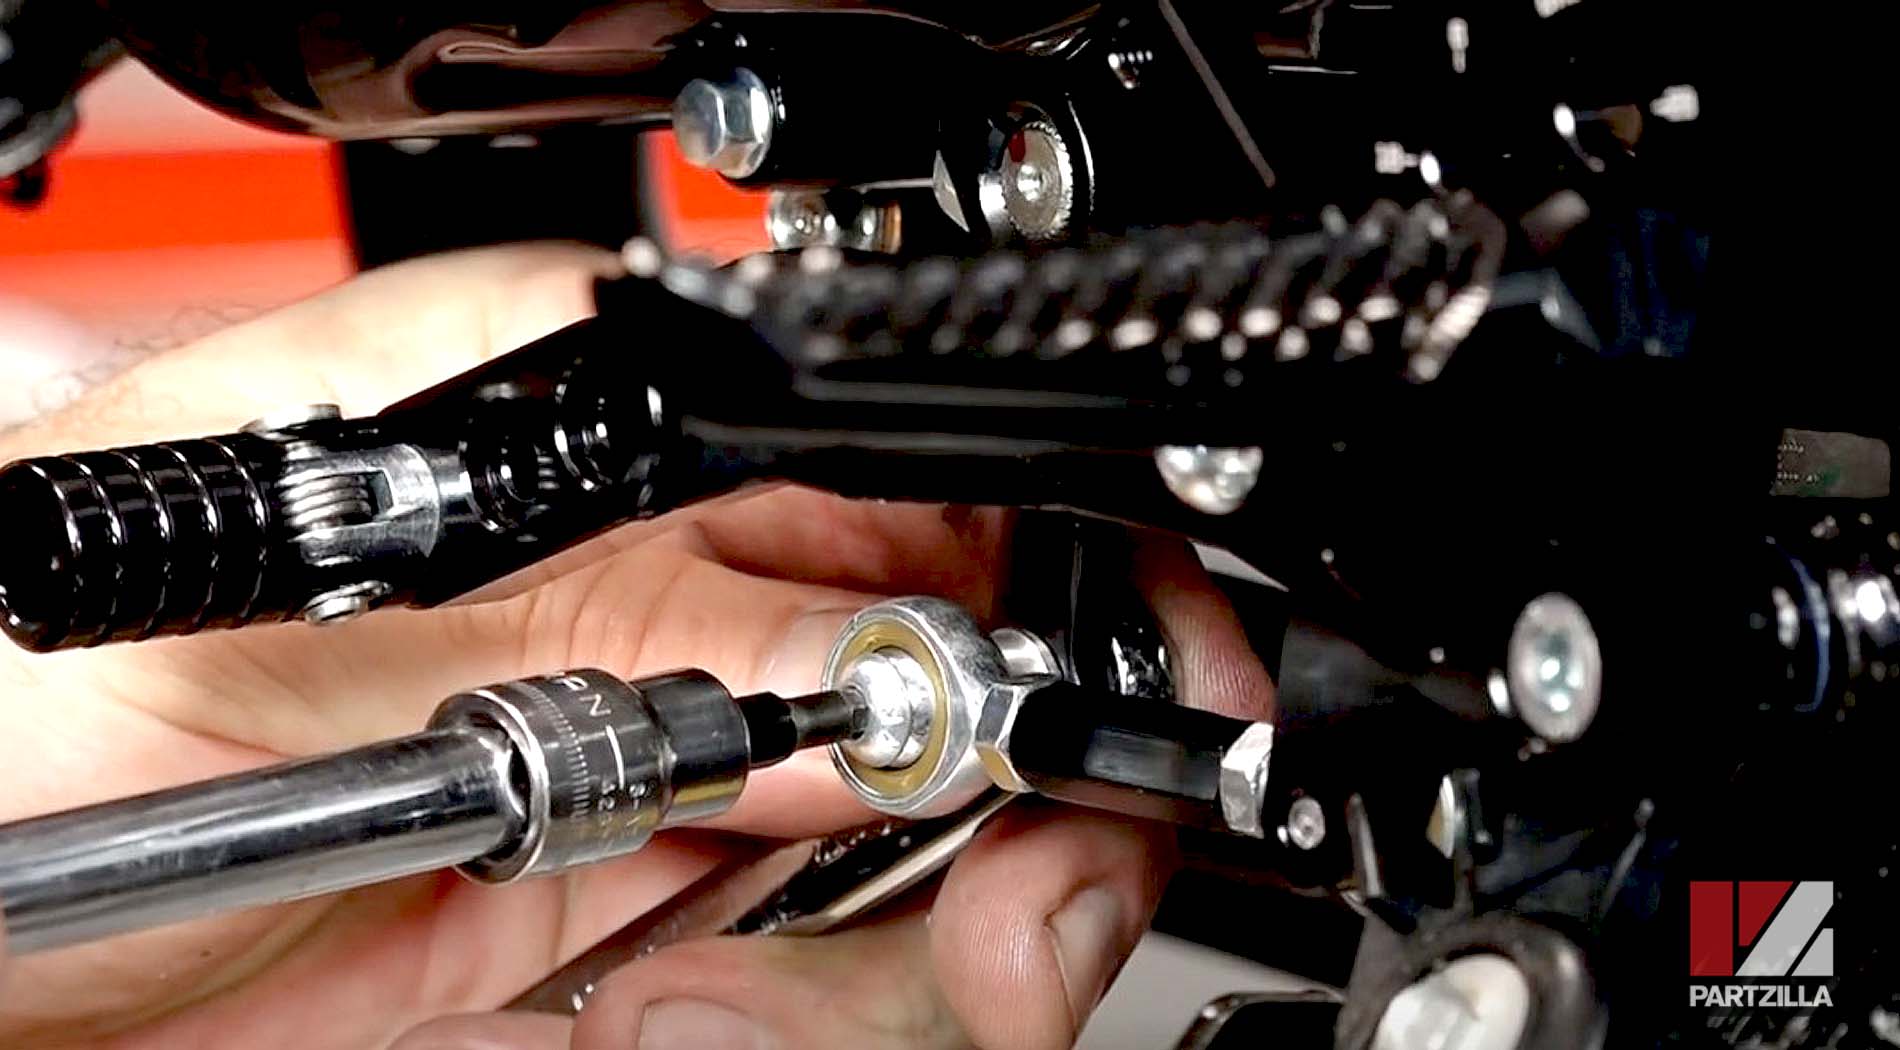
Step 2. Put the left-side step holder and spacer onto the swingarm axle bolt, and reinstall the axle bolt through the swingarm. Apply blue threadlocker to the lower step holder bolt and reinstall the bolt.
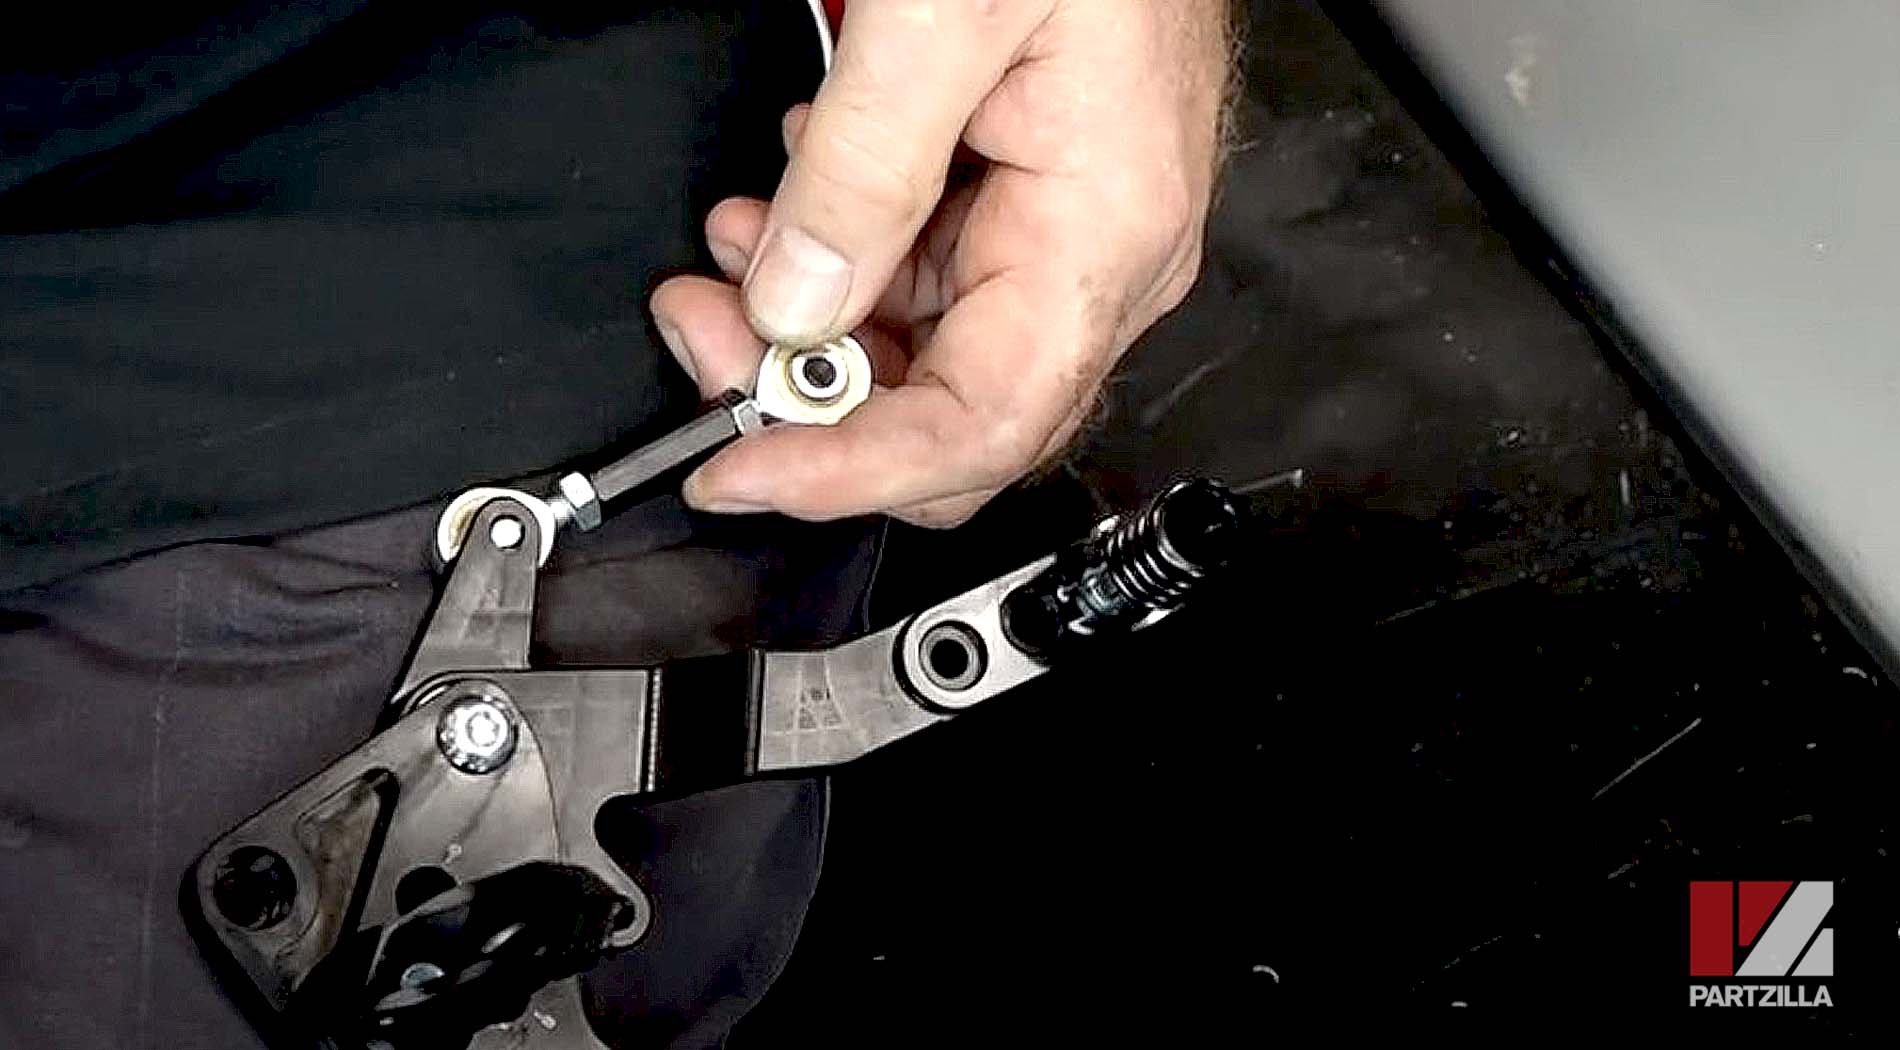
Step 3. Reinstall the gearshift pedal mounting bolt, and install the nut and bolt to connect the gearshift to the turnbuckle. Use blue threadlocker on both bolts.
Watch the clip below to see the gearshift pedal installation segment of our Honda Grom Rearset video.
Part 3: Installing Honda Grom Rearset Brake Pedal
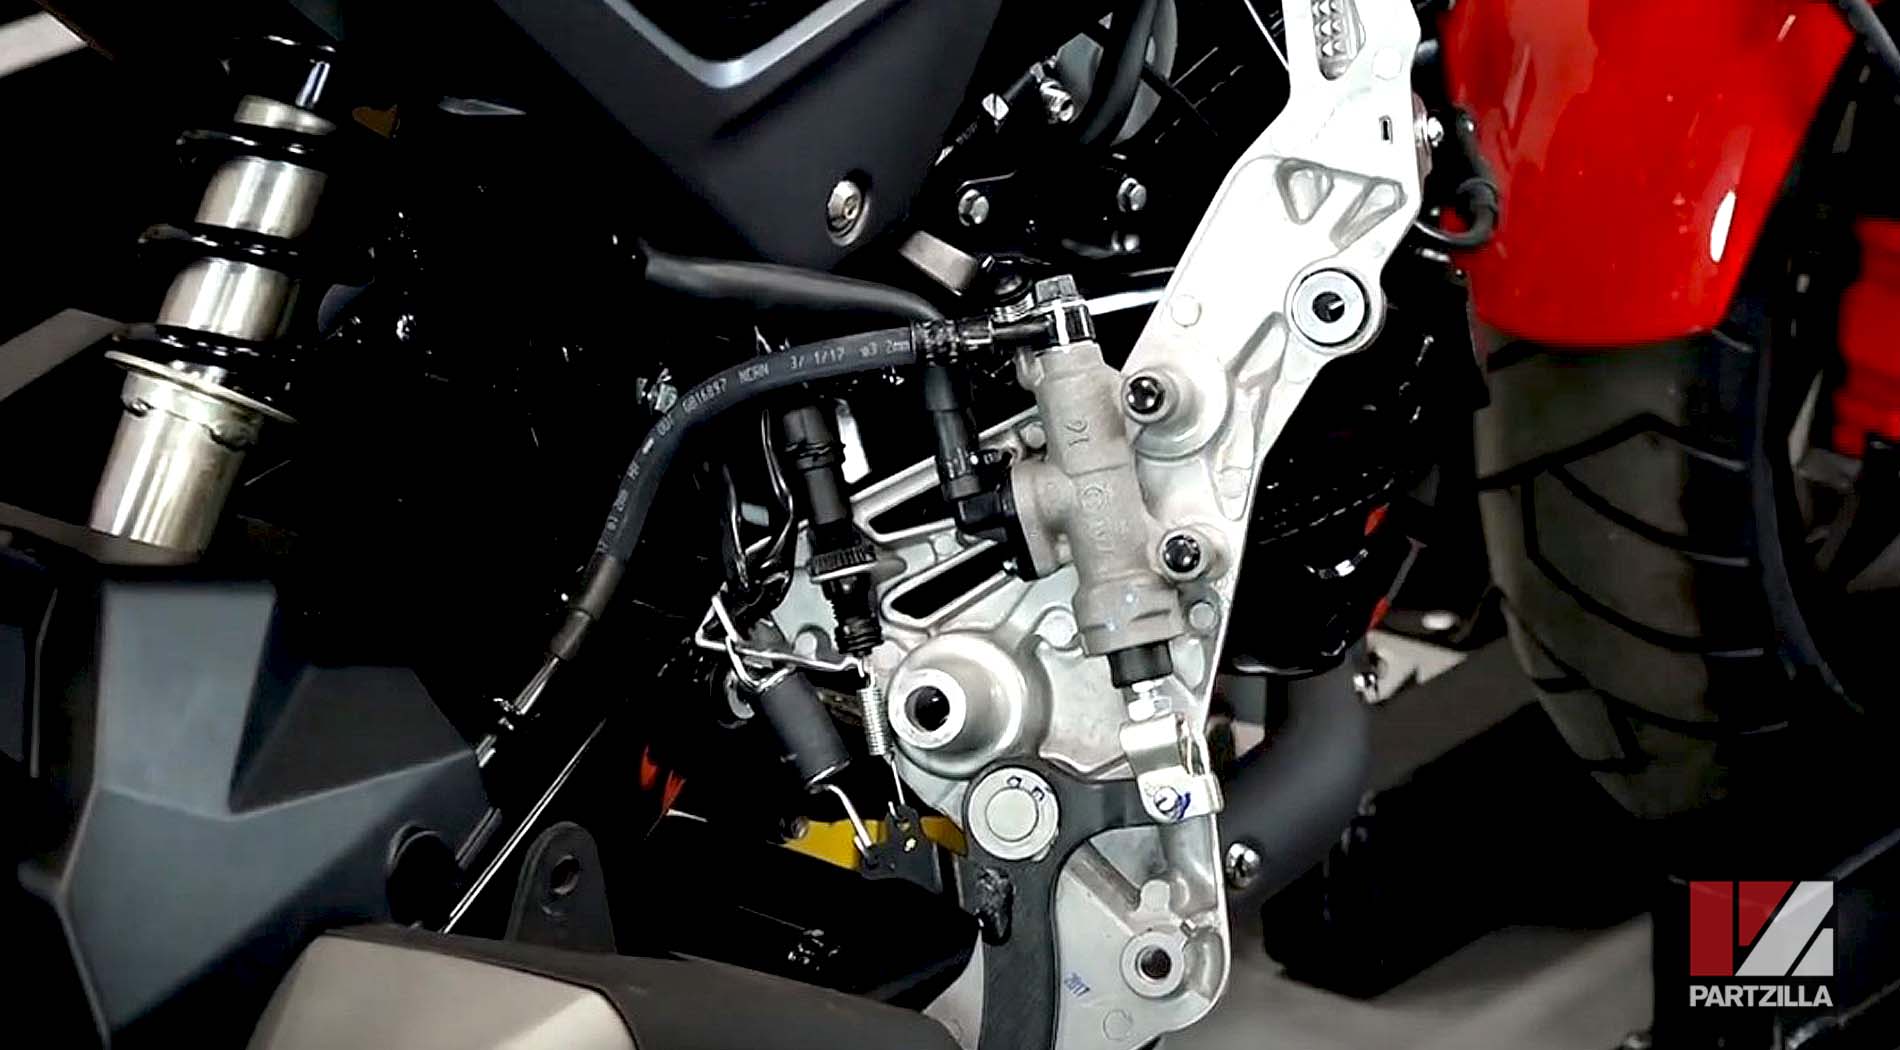
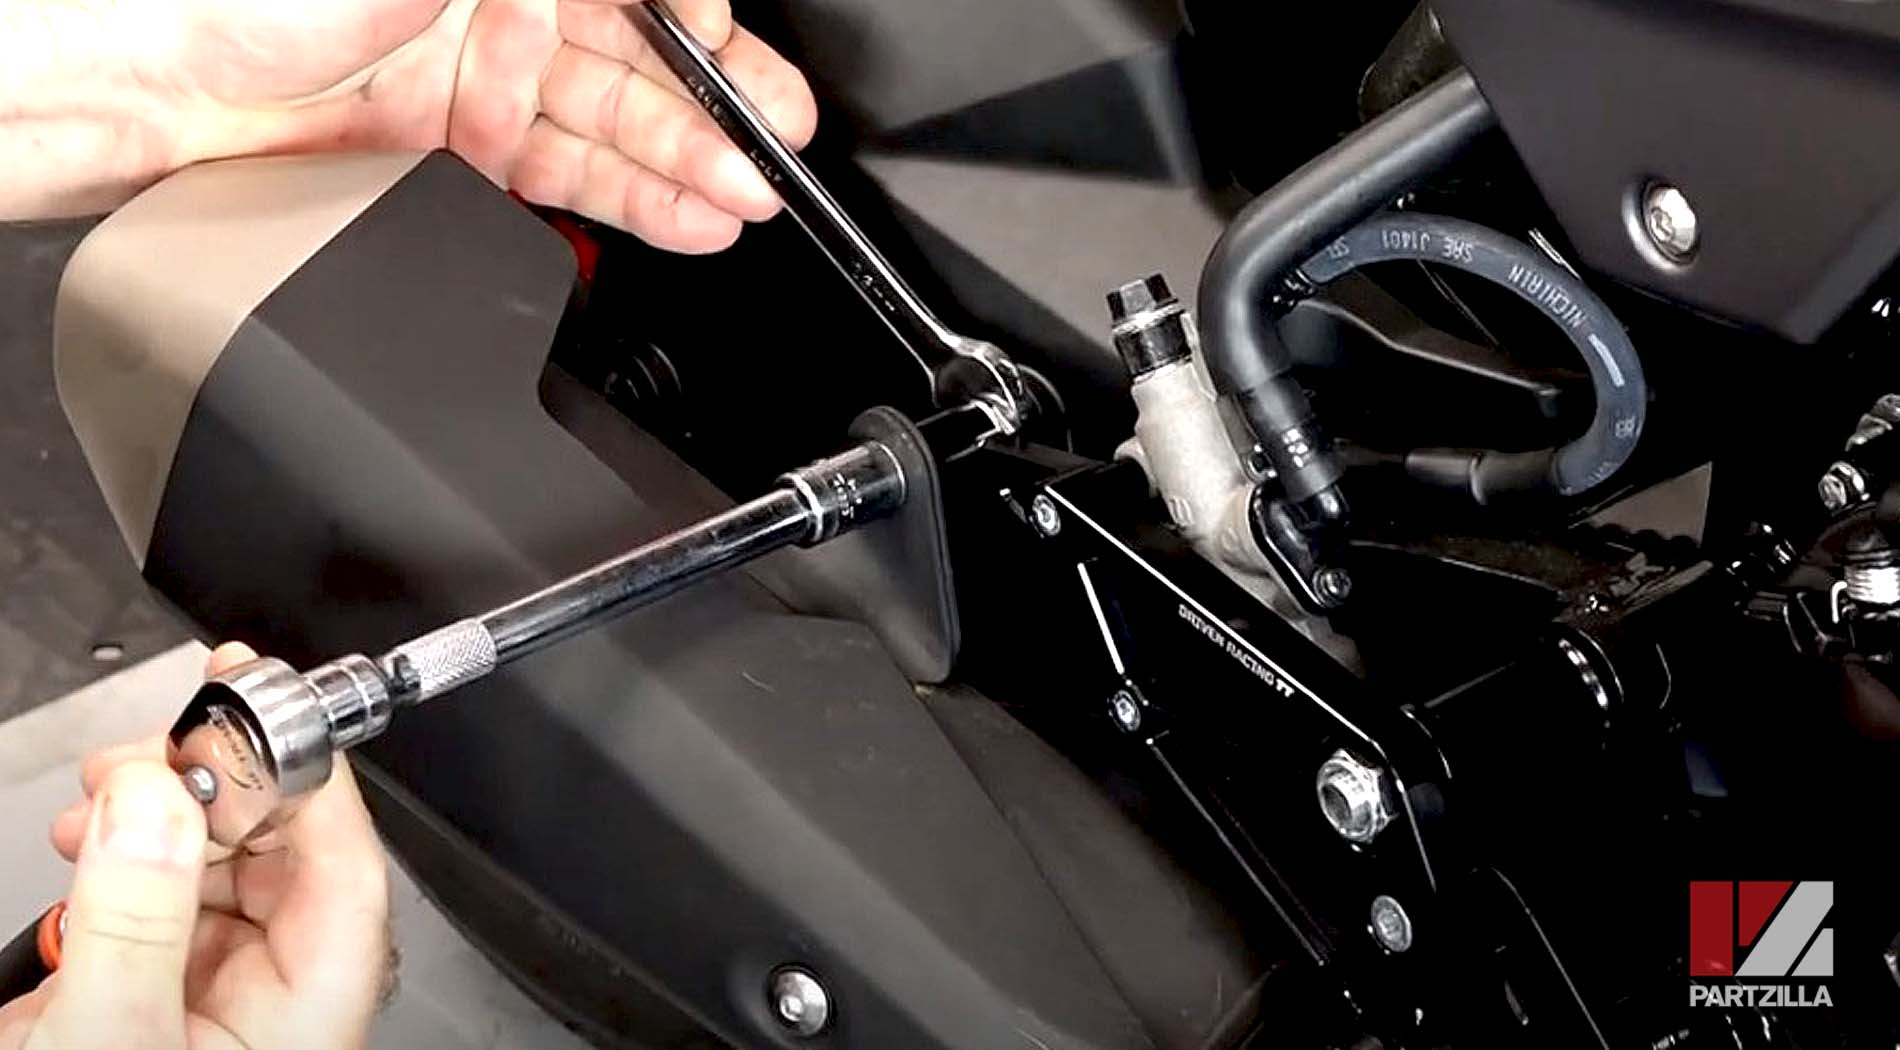
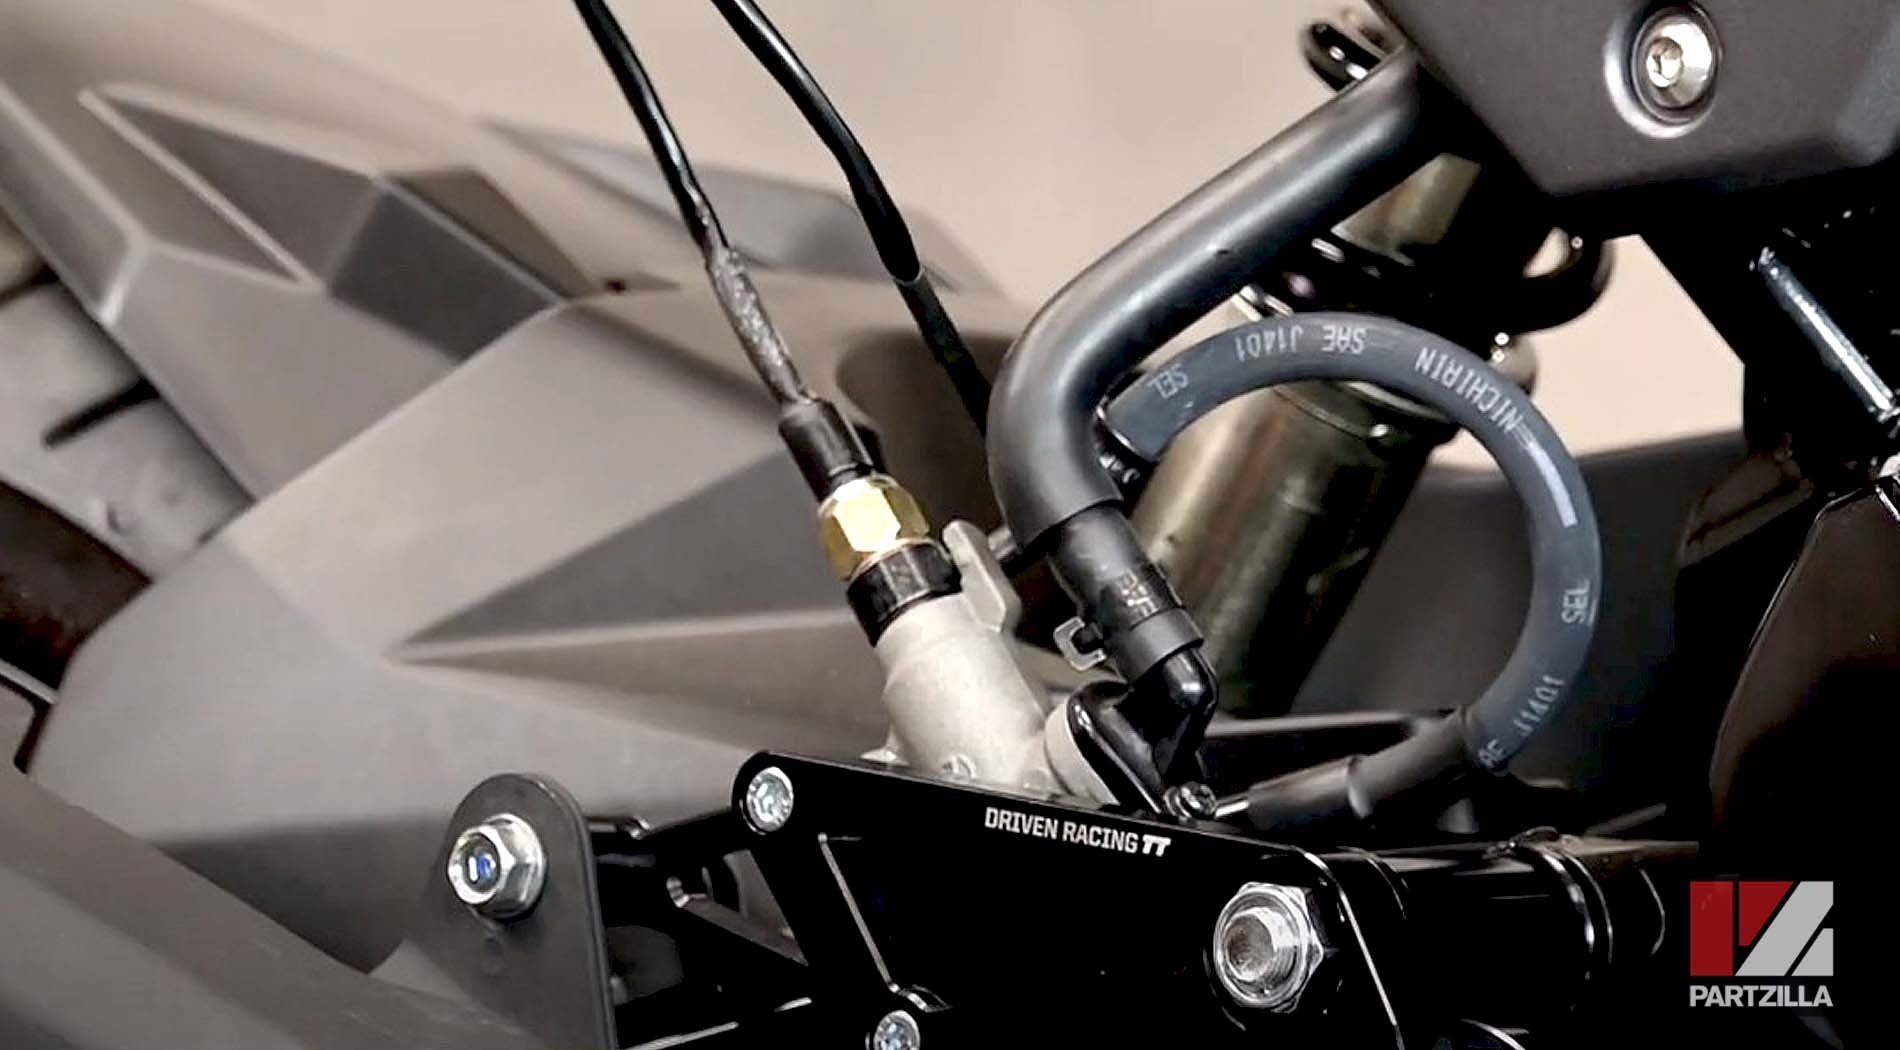
Step 1. Install the rear brake master cylinder to the right-side step holder with the two mounting bolts, and attach the linkage with the clevis and cotter pins.
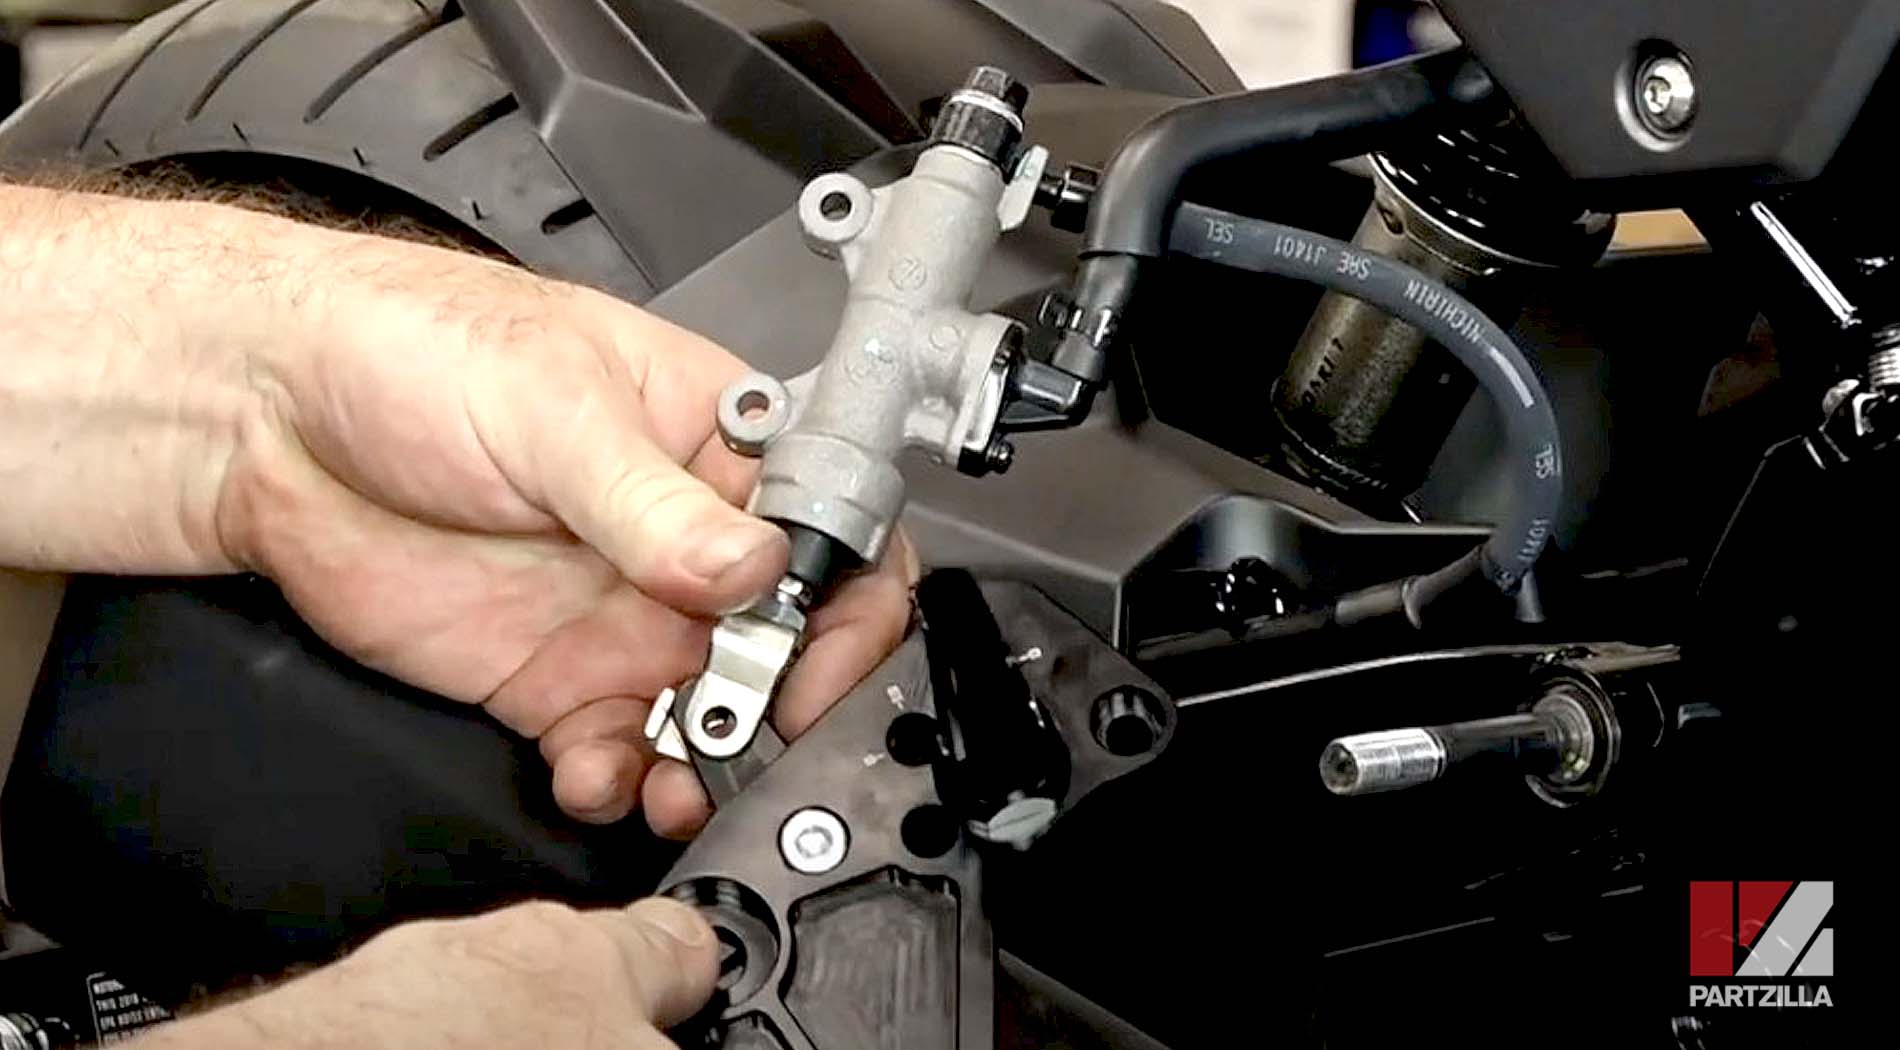
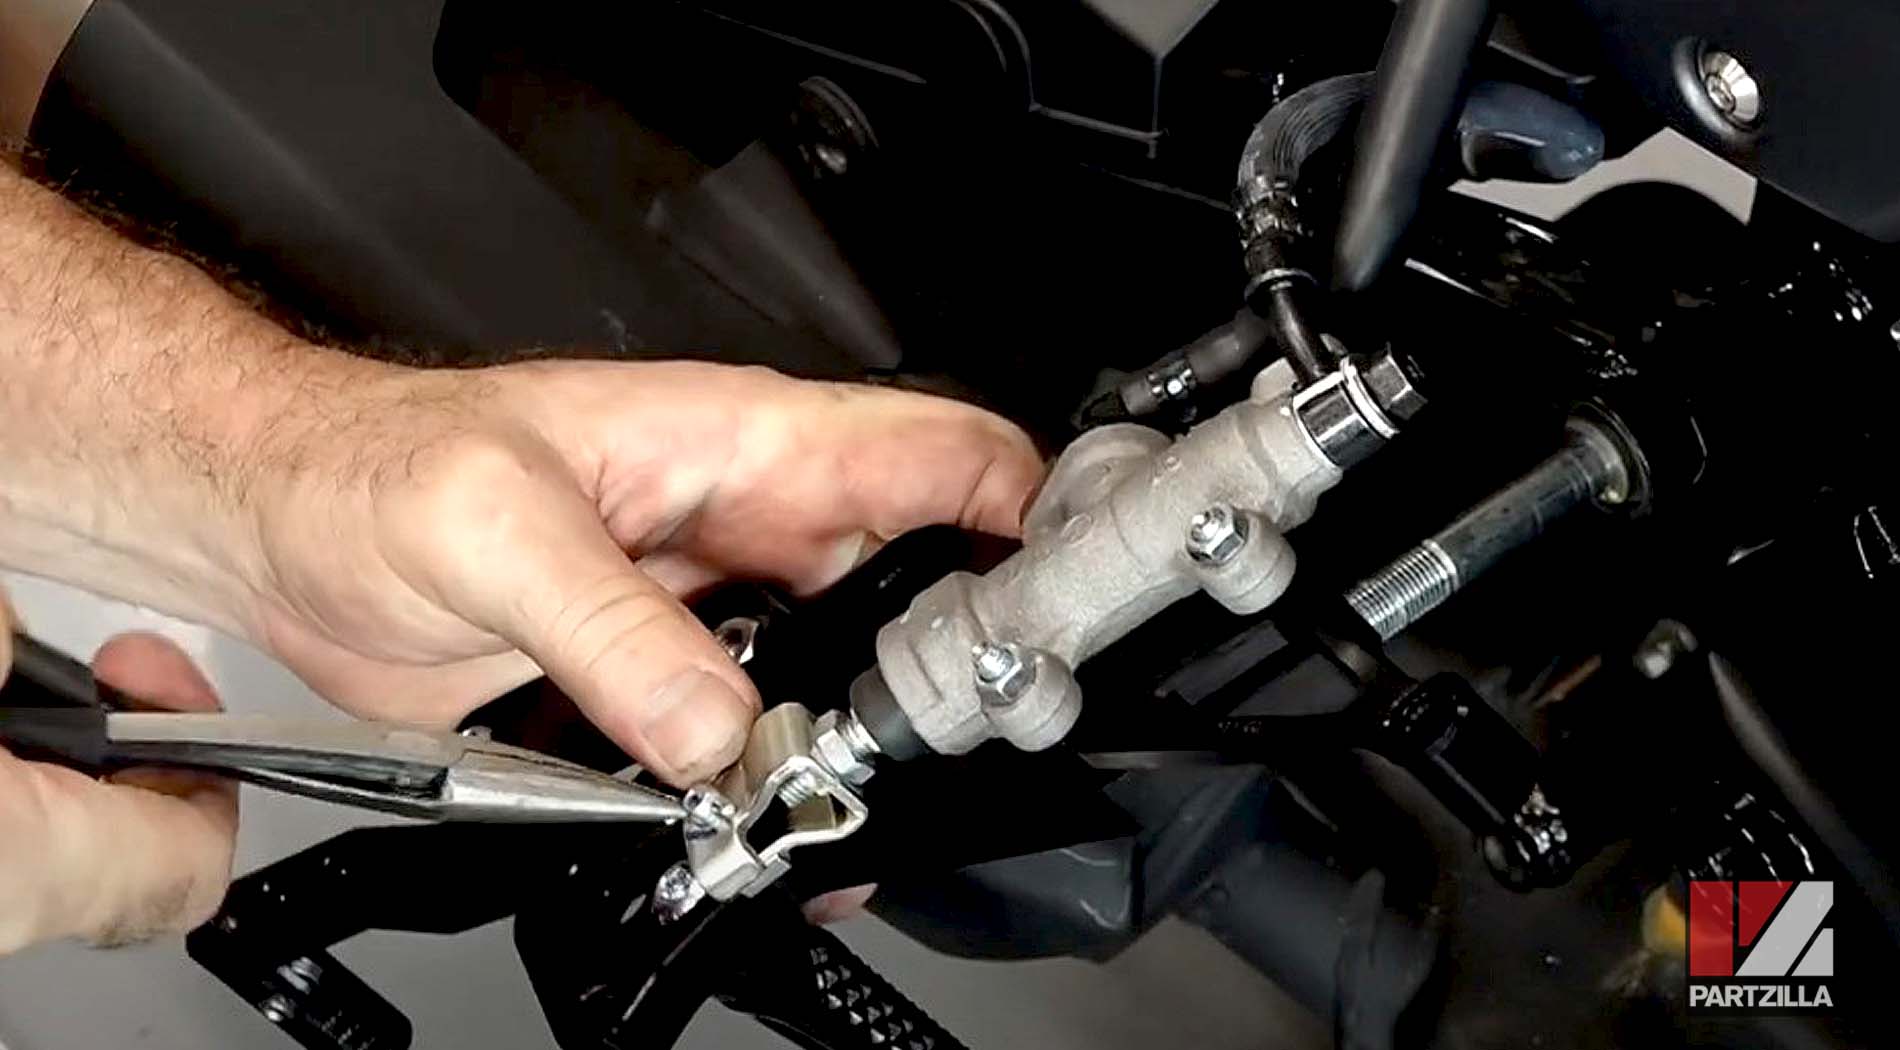
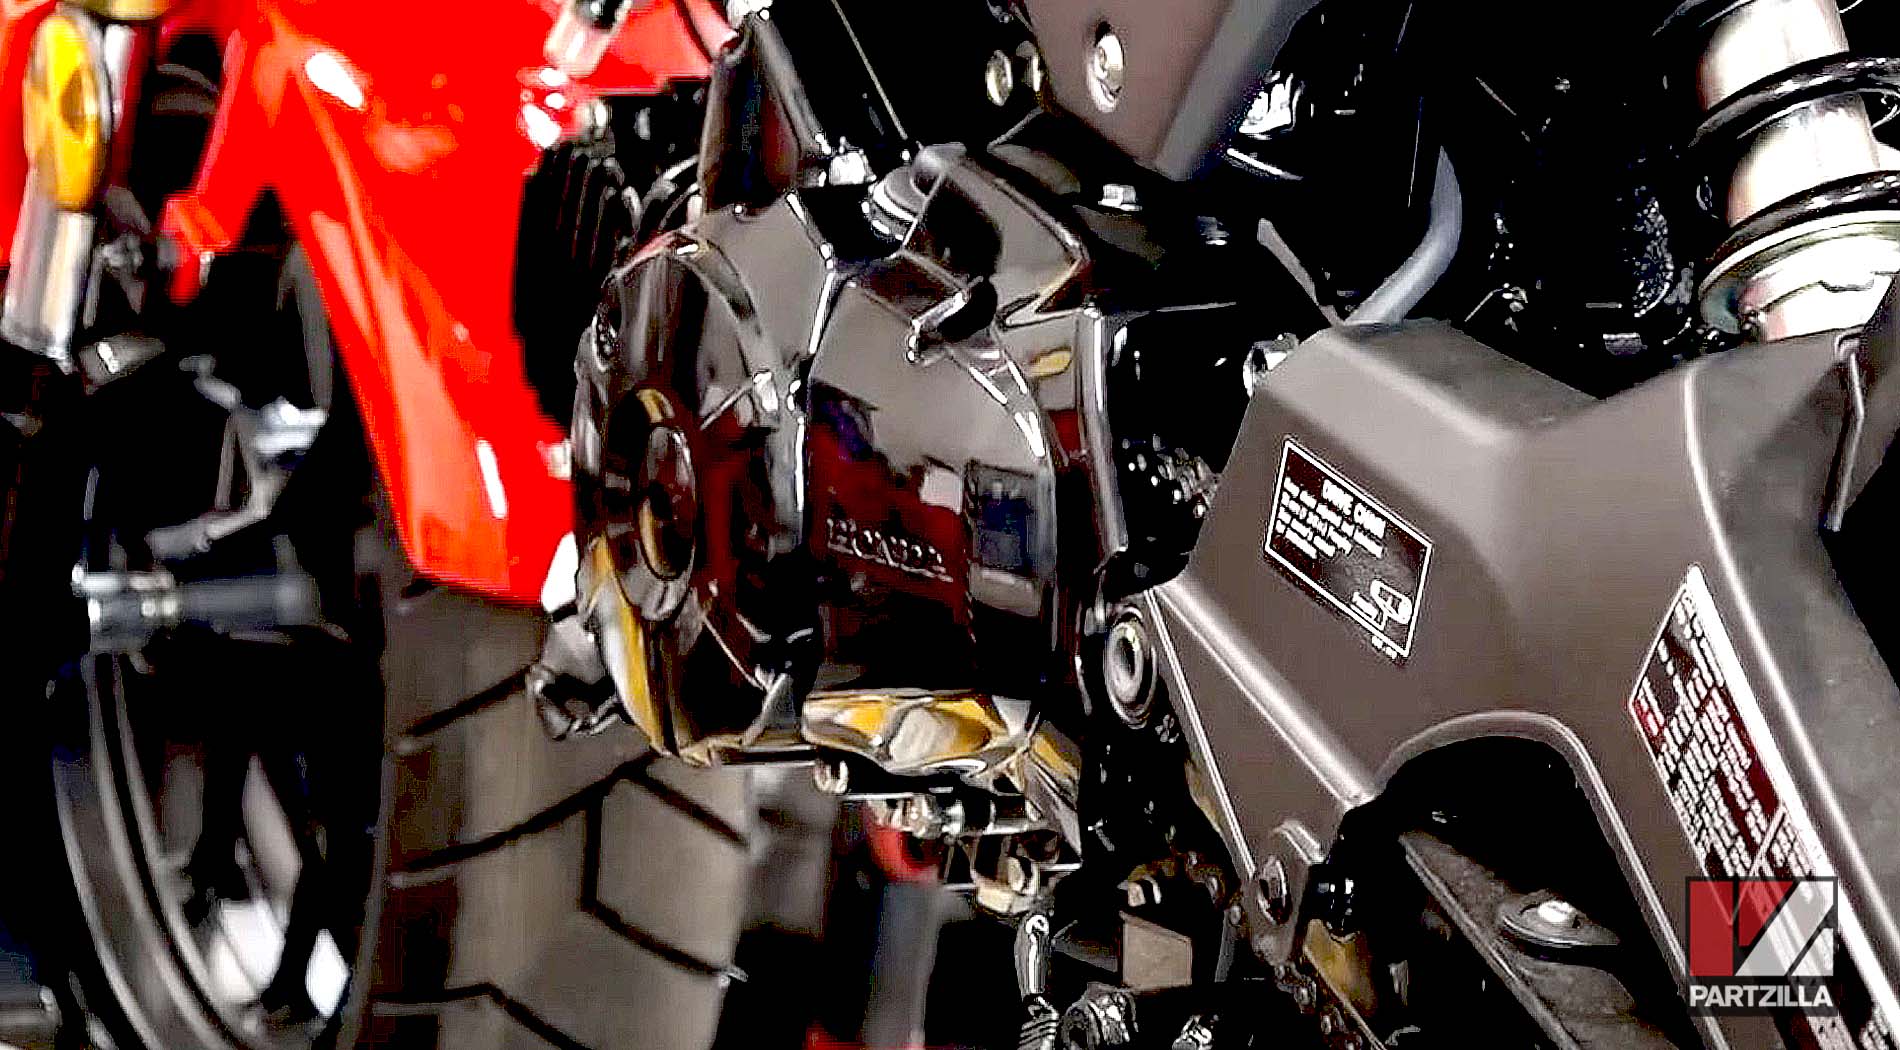
Step 2. Put the spacer onto the swingarm axle, then apply blue threadlocker to the lower step holder bolt, and reinstall the right-side step holder. Reinstall the swingarm axle nut to 54 foot-pounds.
Step 3. Apply blue threadlocker to the muffler mounting bolt and reinstall it.
Watch the clip below to see the brake pedal installation segment of our Honda Grom Rearset video.
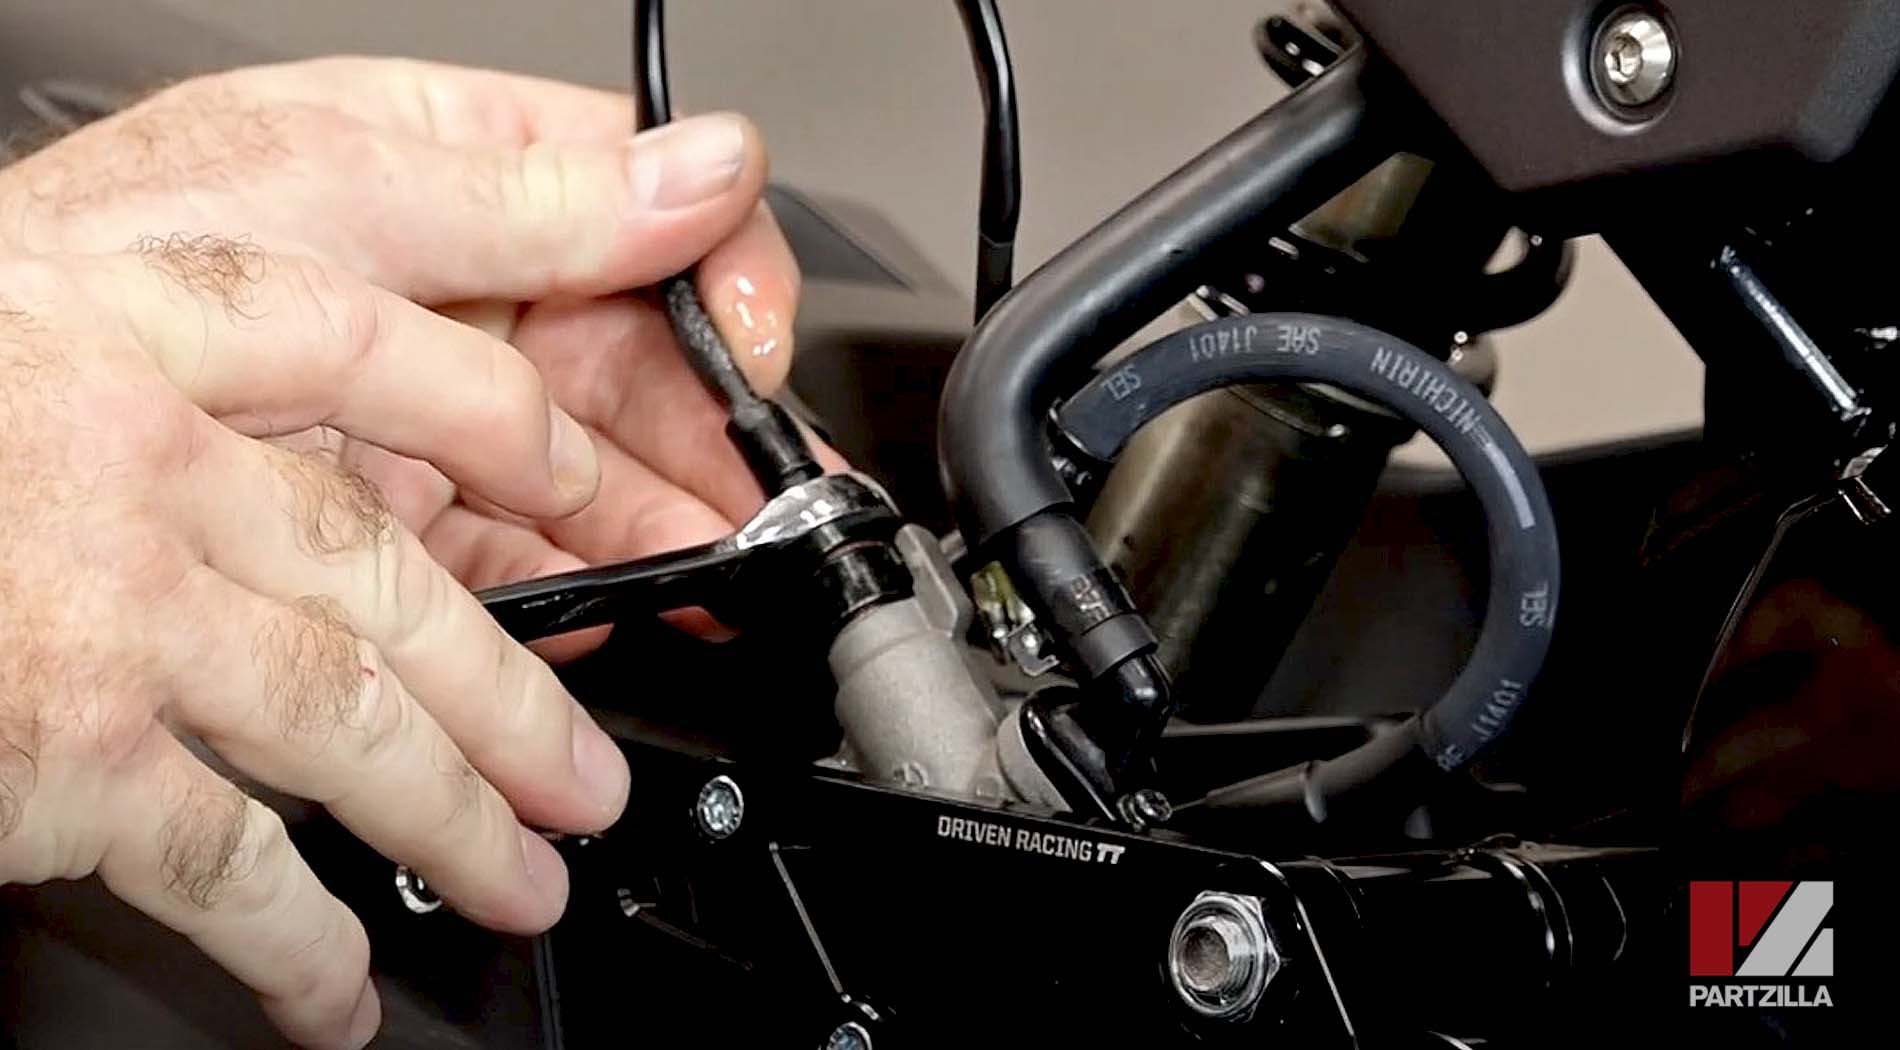
Part 4: Installing Honda Grom Rearset Hydraulic Brake Light Switch
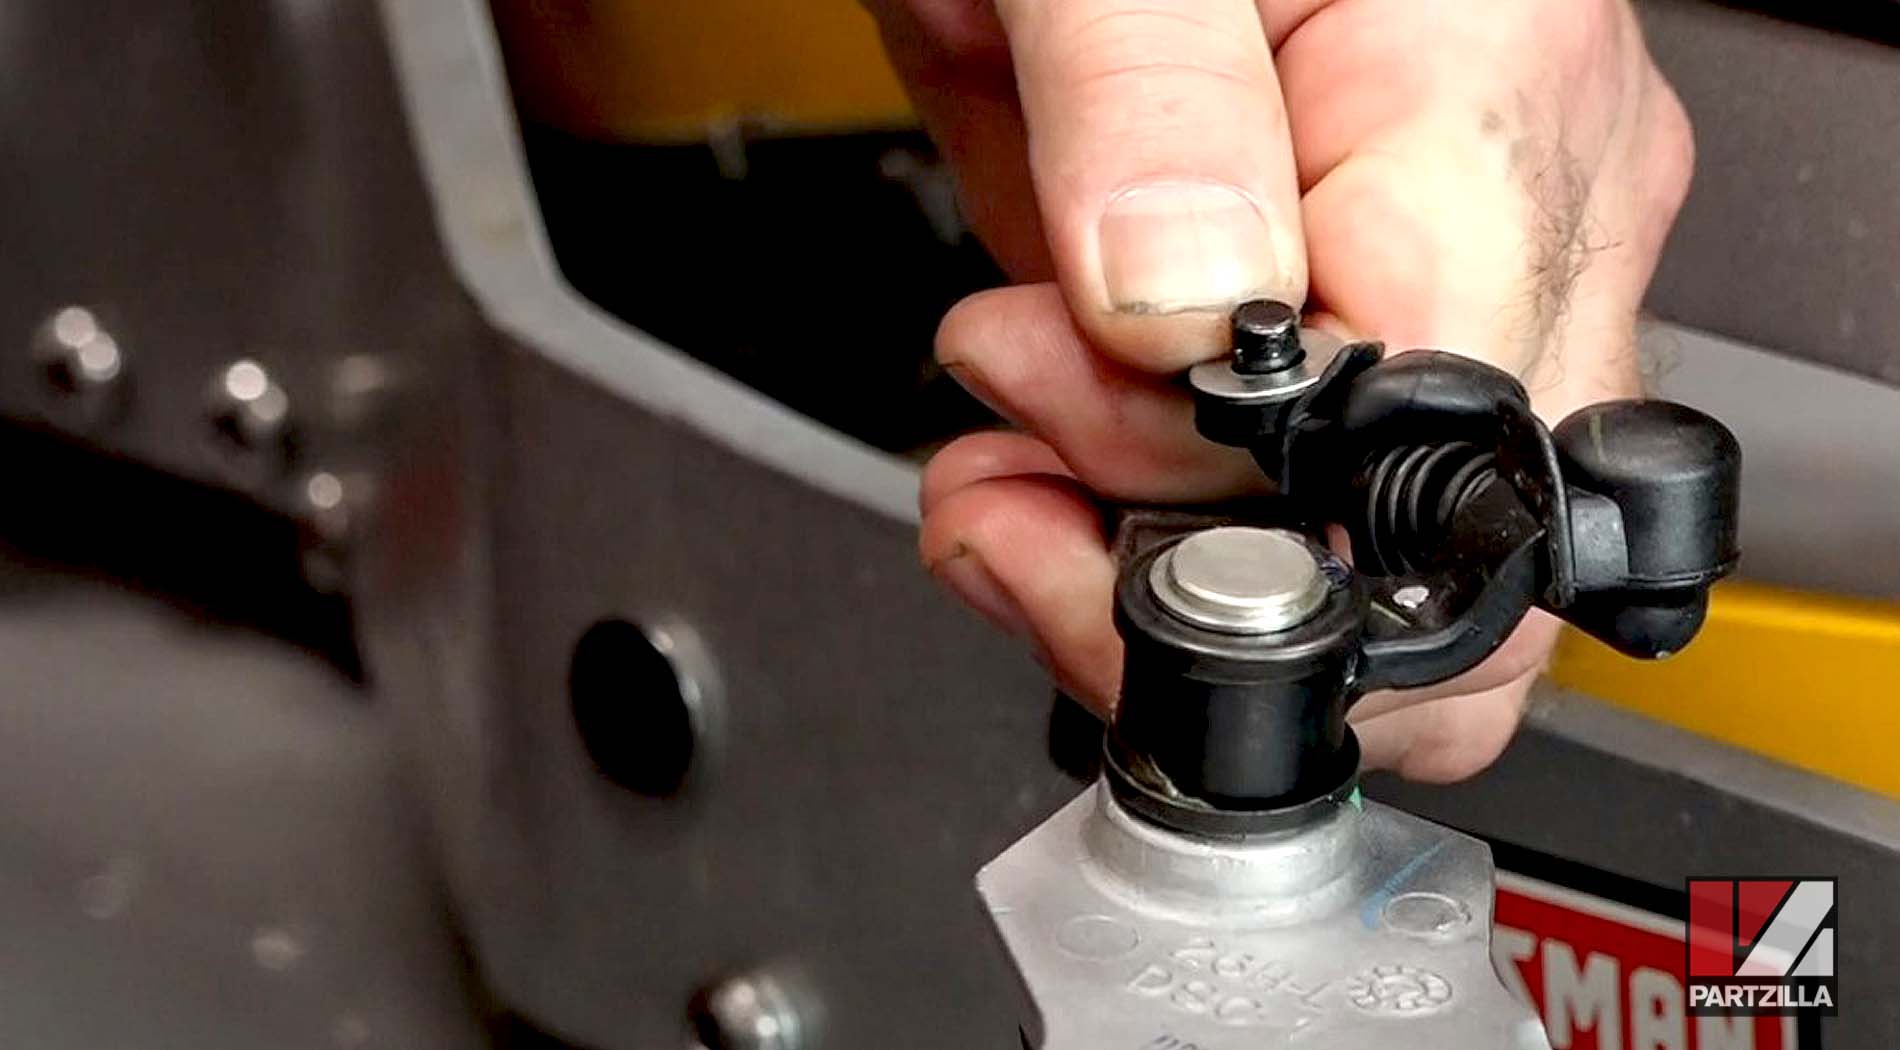
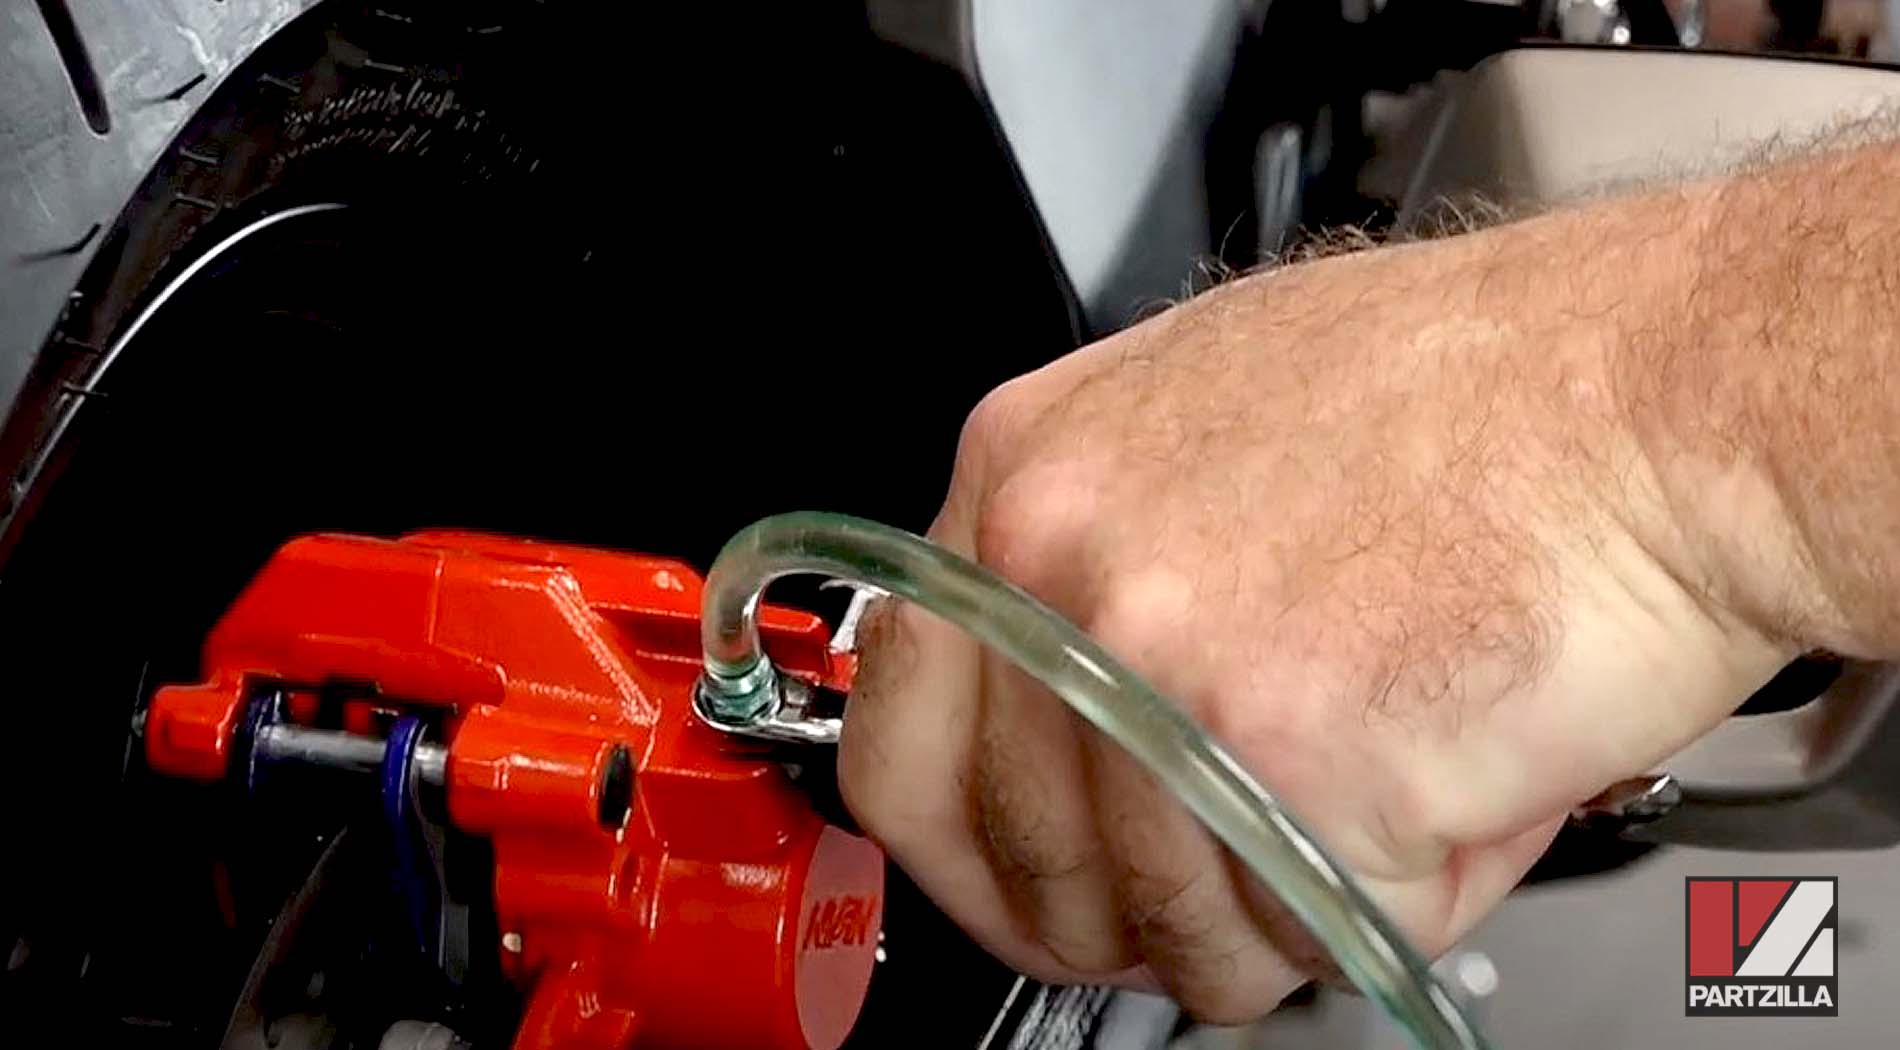
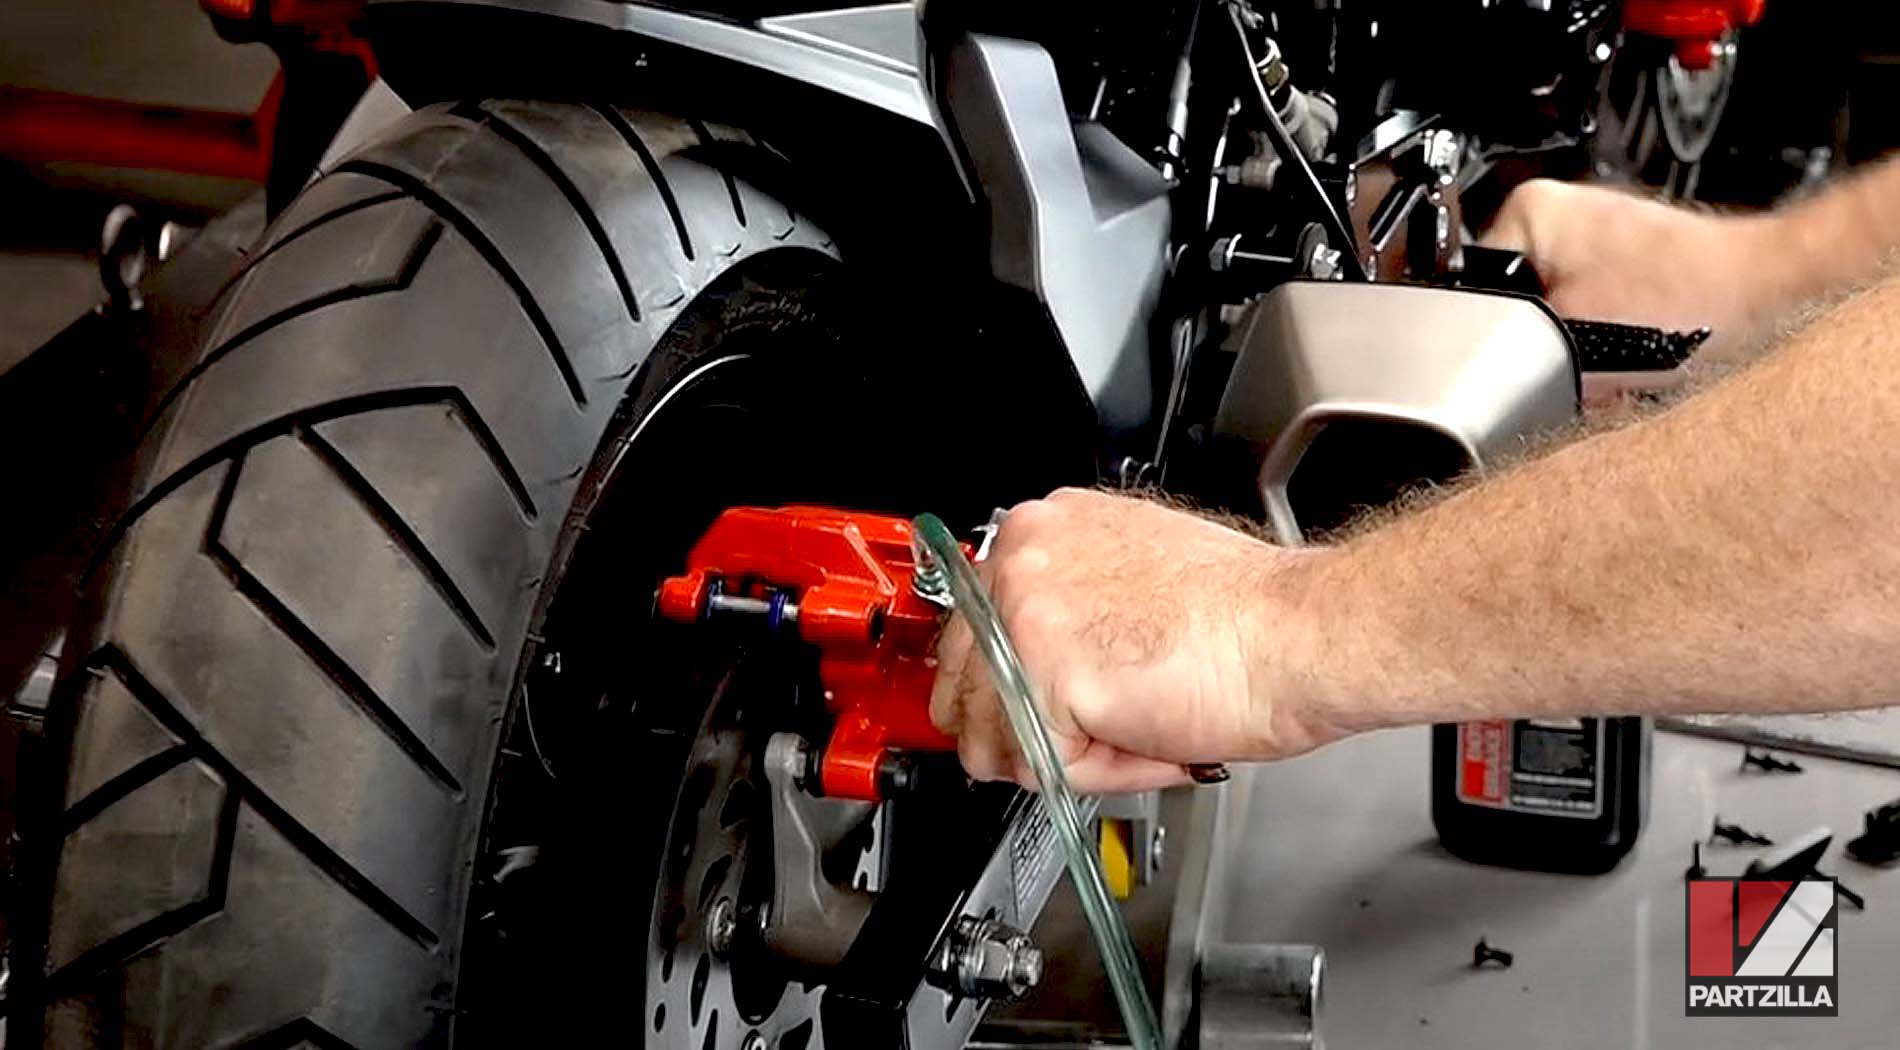
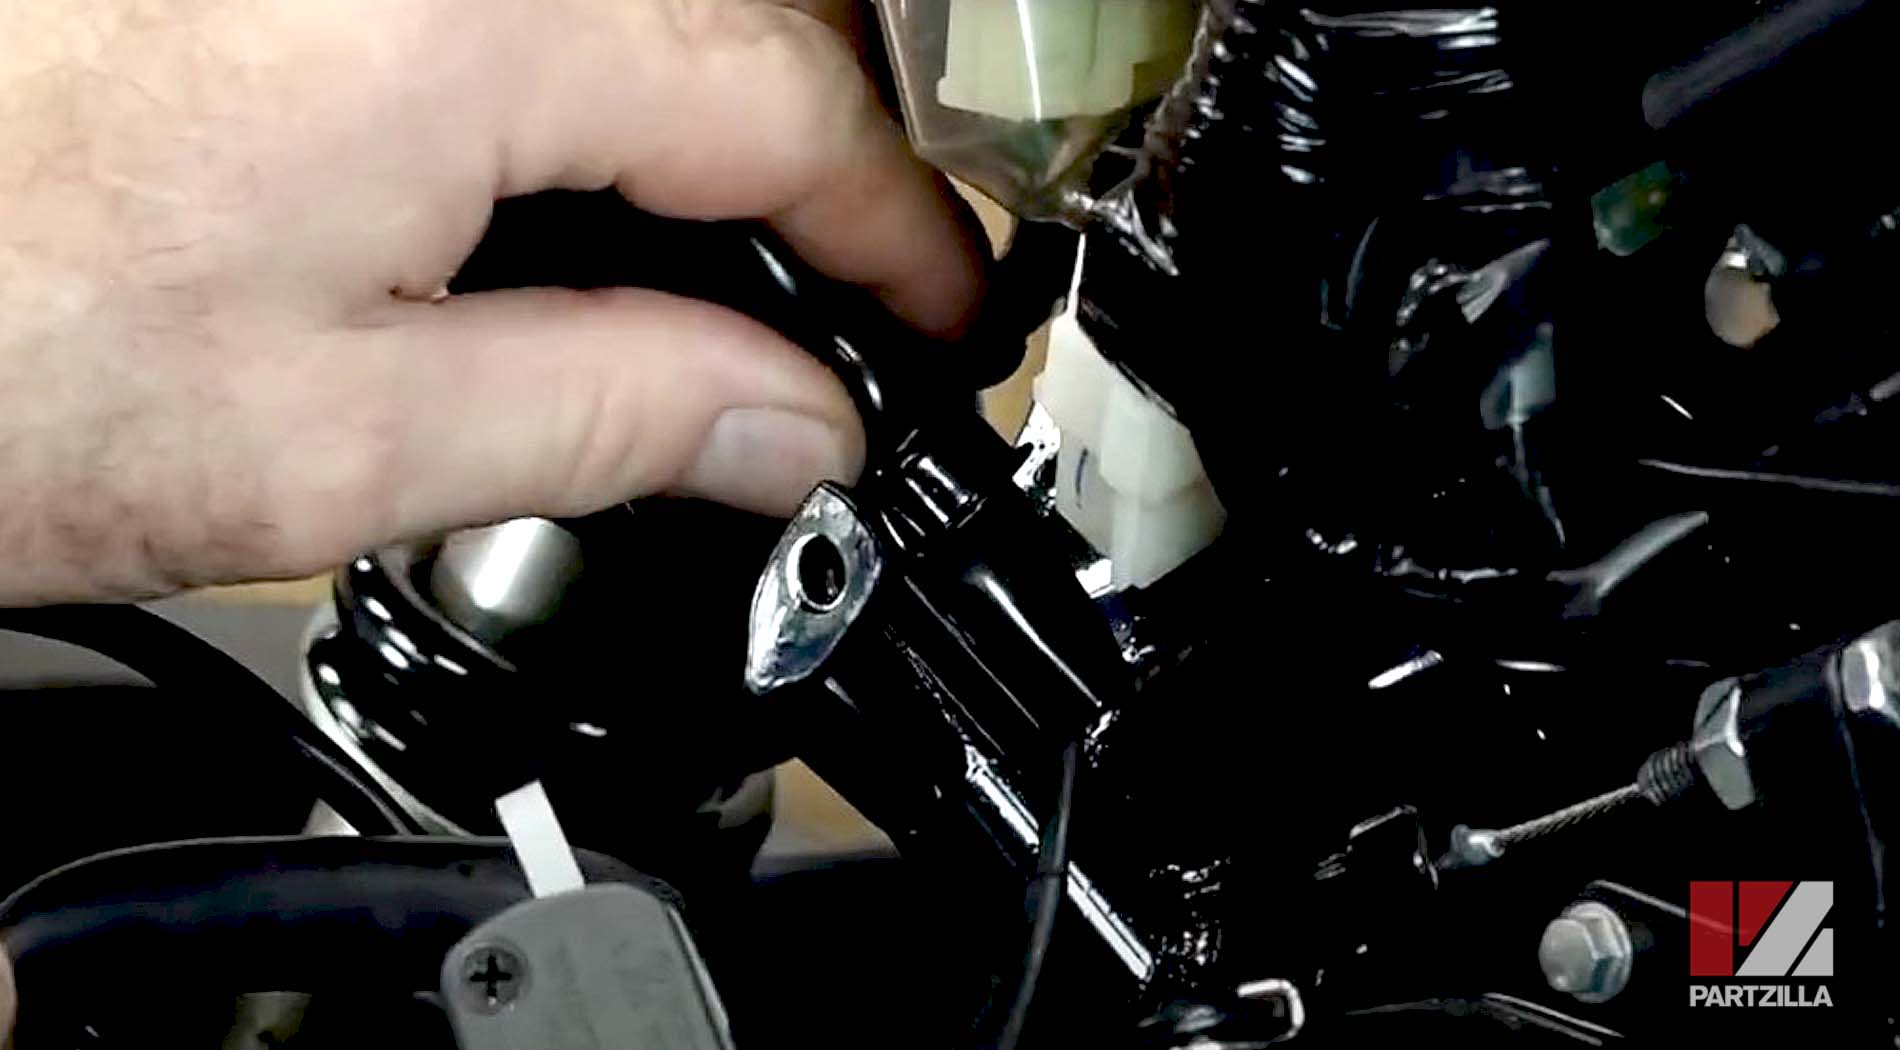
Step 1. Remove the banjo bolt securing the brake hose to the master cylinder. Have a rag ready to catch any brake fluid that may spill out of the brake hose.
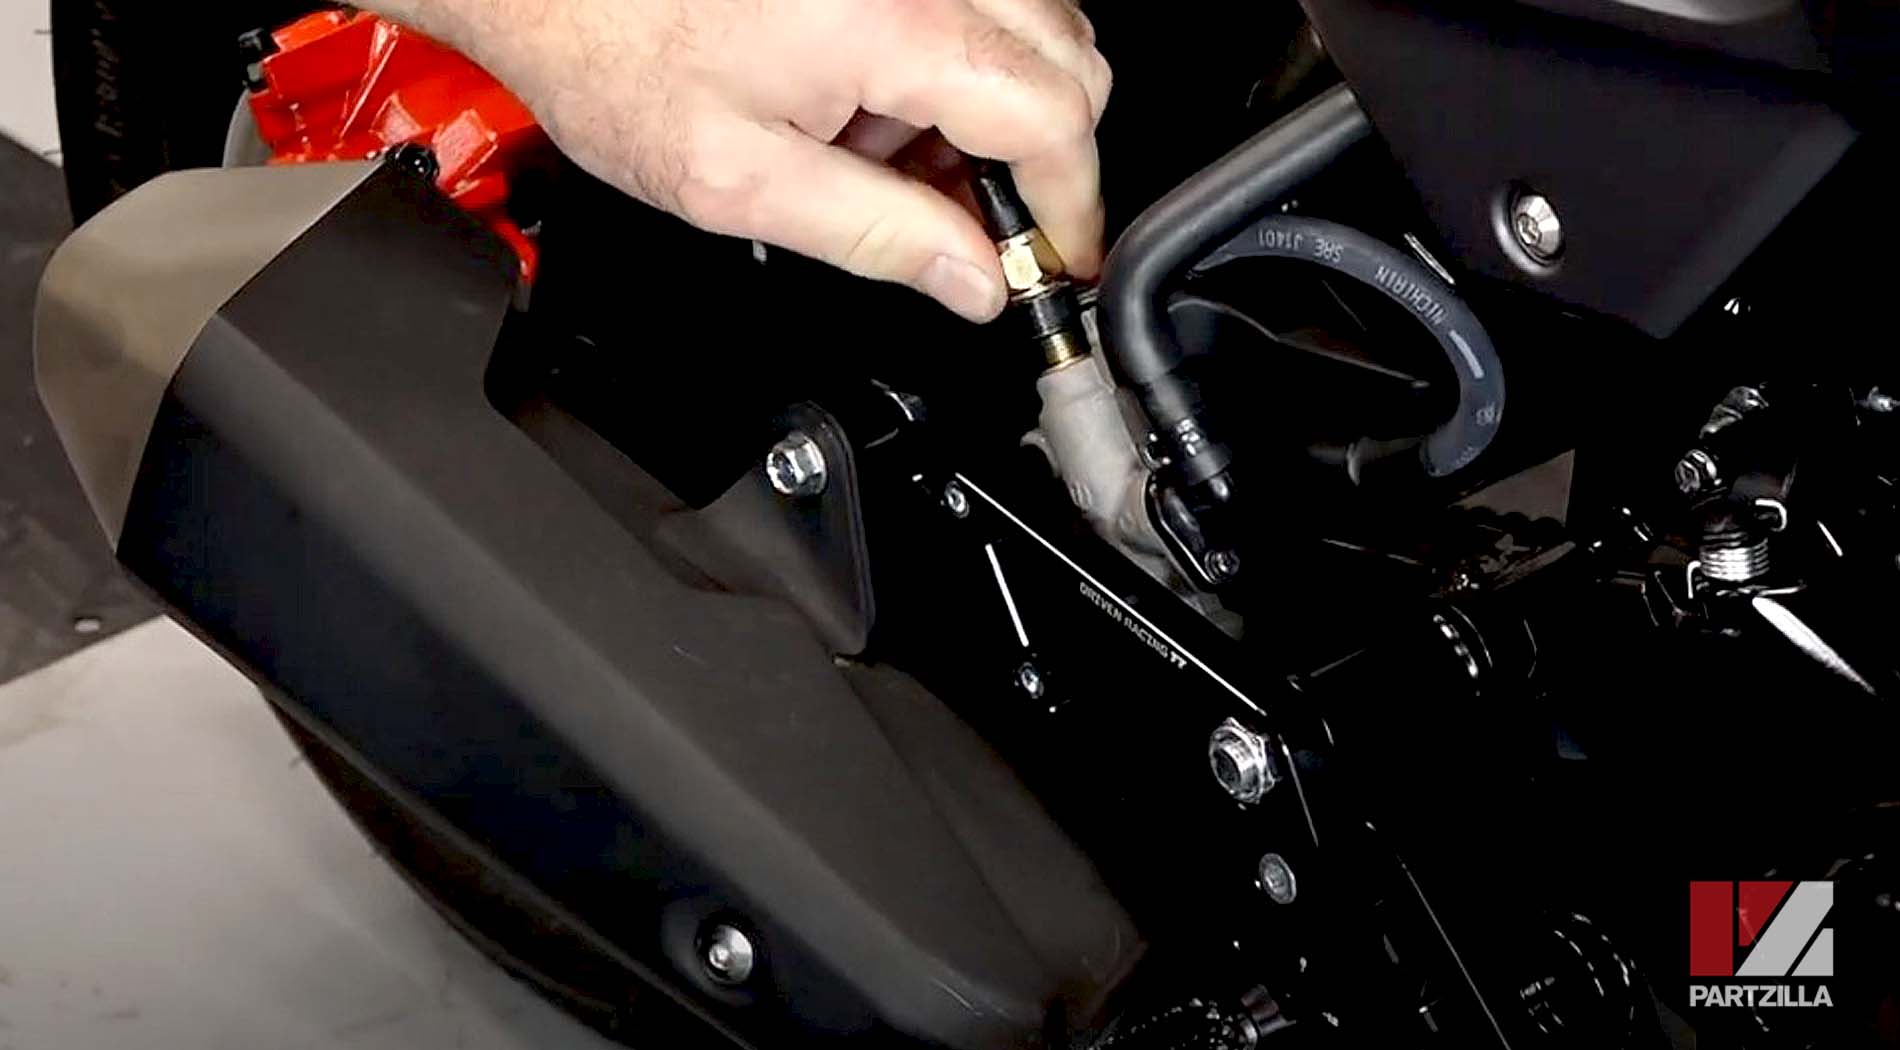
Step 2. Install the hydraulic brake light switch through the brake hose connector and into the brake master cylinder, tightening it securely.
Watch the clip below to see the brake light switch installation segment of our Honda Grom Rearset video.
NOTE: Because air entered the hydraulic brake system when the banjo bolt was disconnected from the master cylinder, it is now necessary to bleed the rear brake.
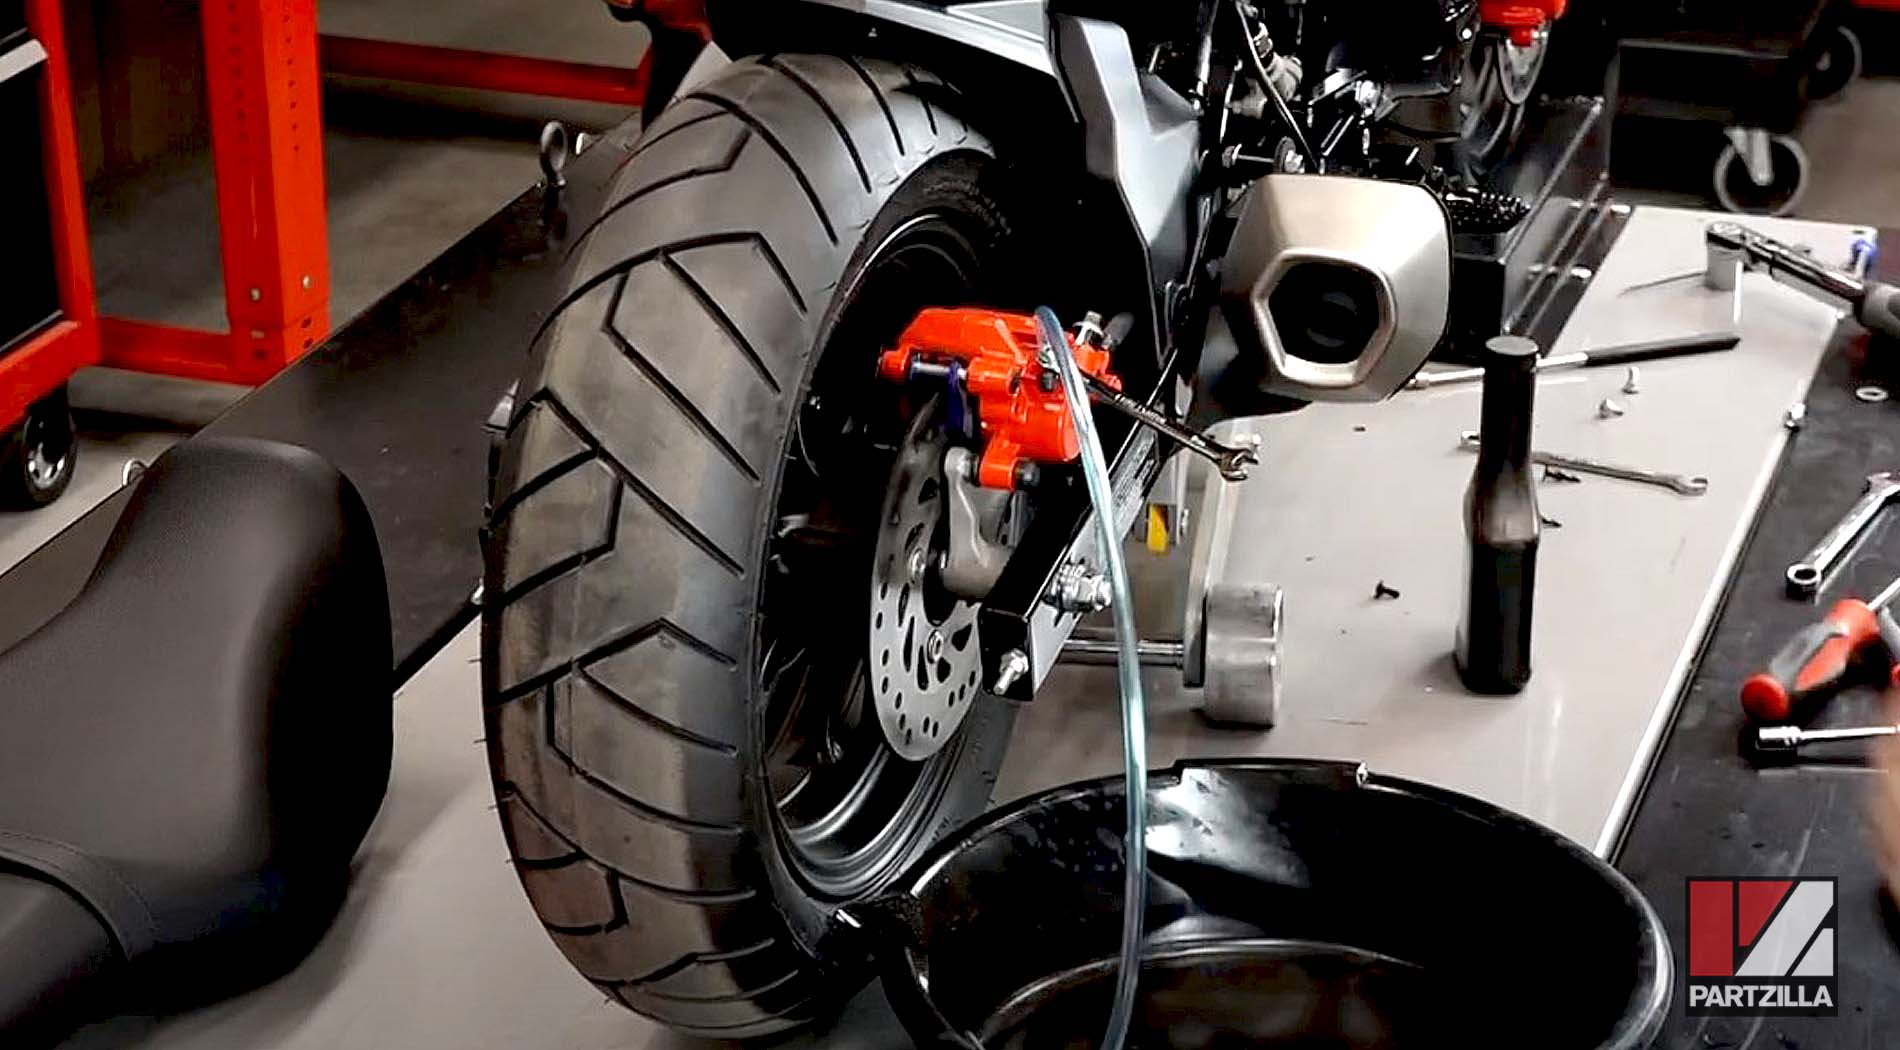
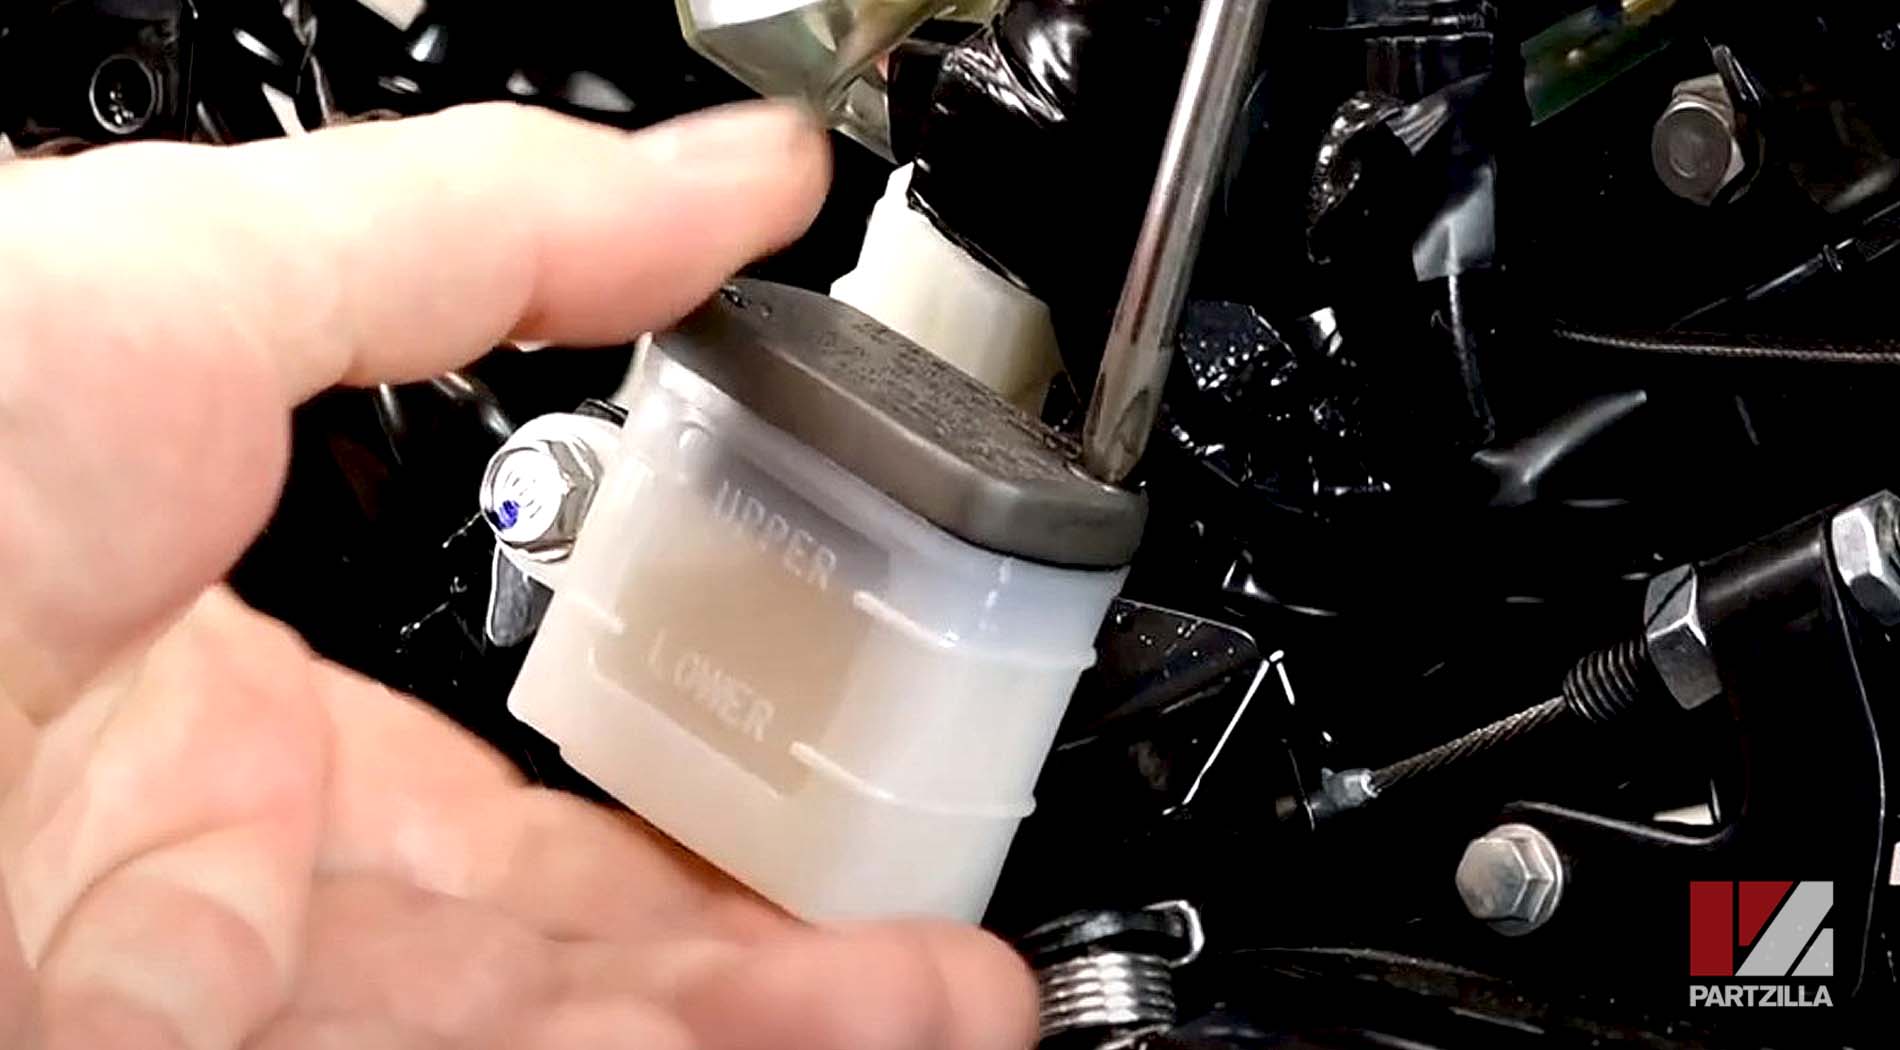
Part 5: Bleeding Honda Grom Rearset Rear Brakes
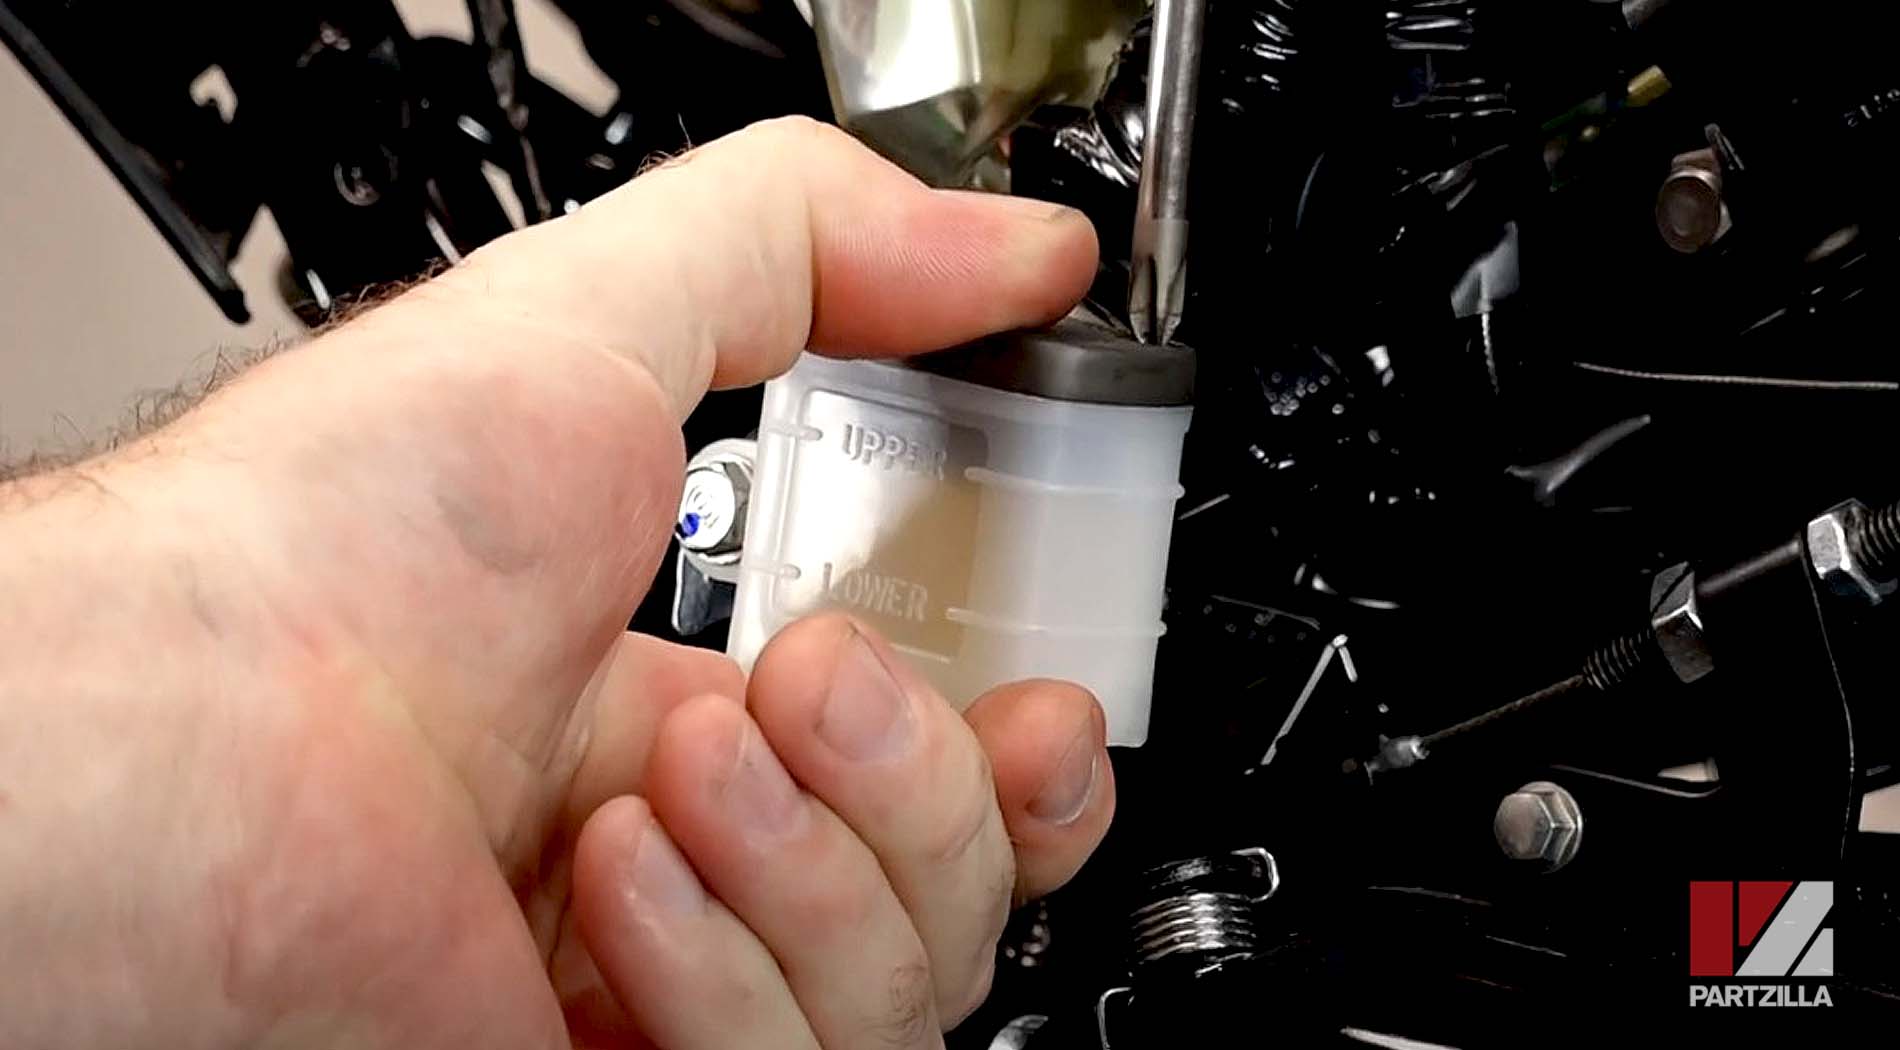
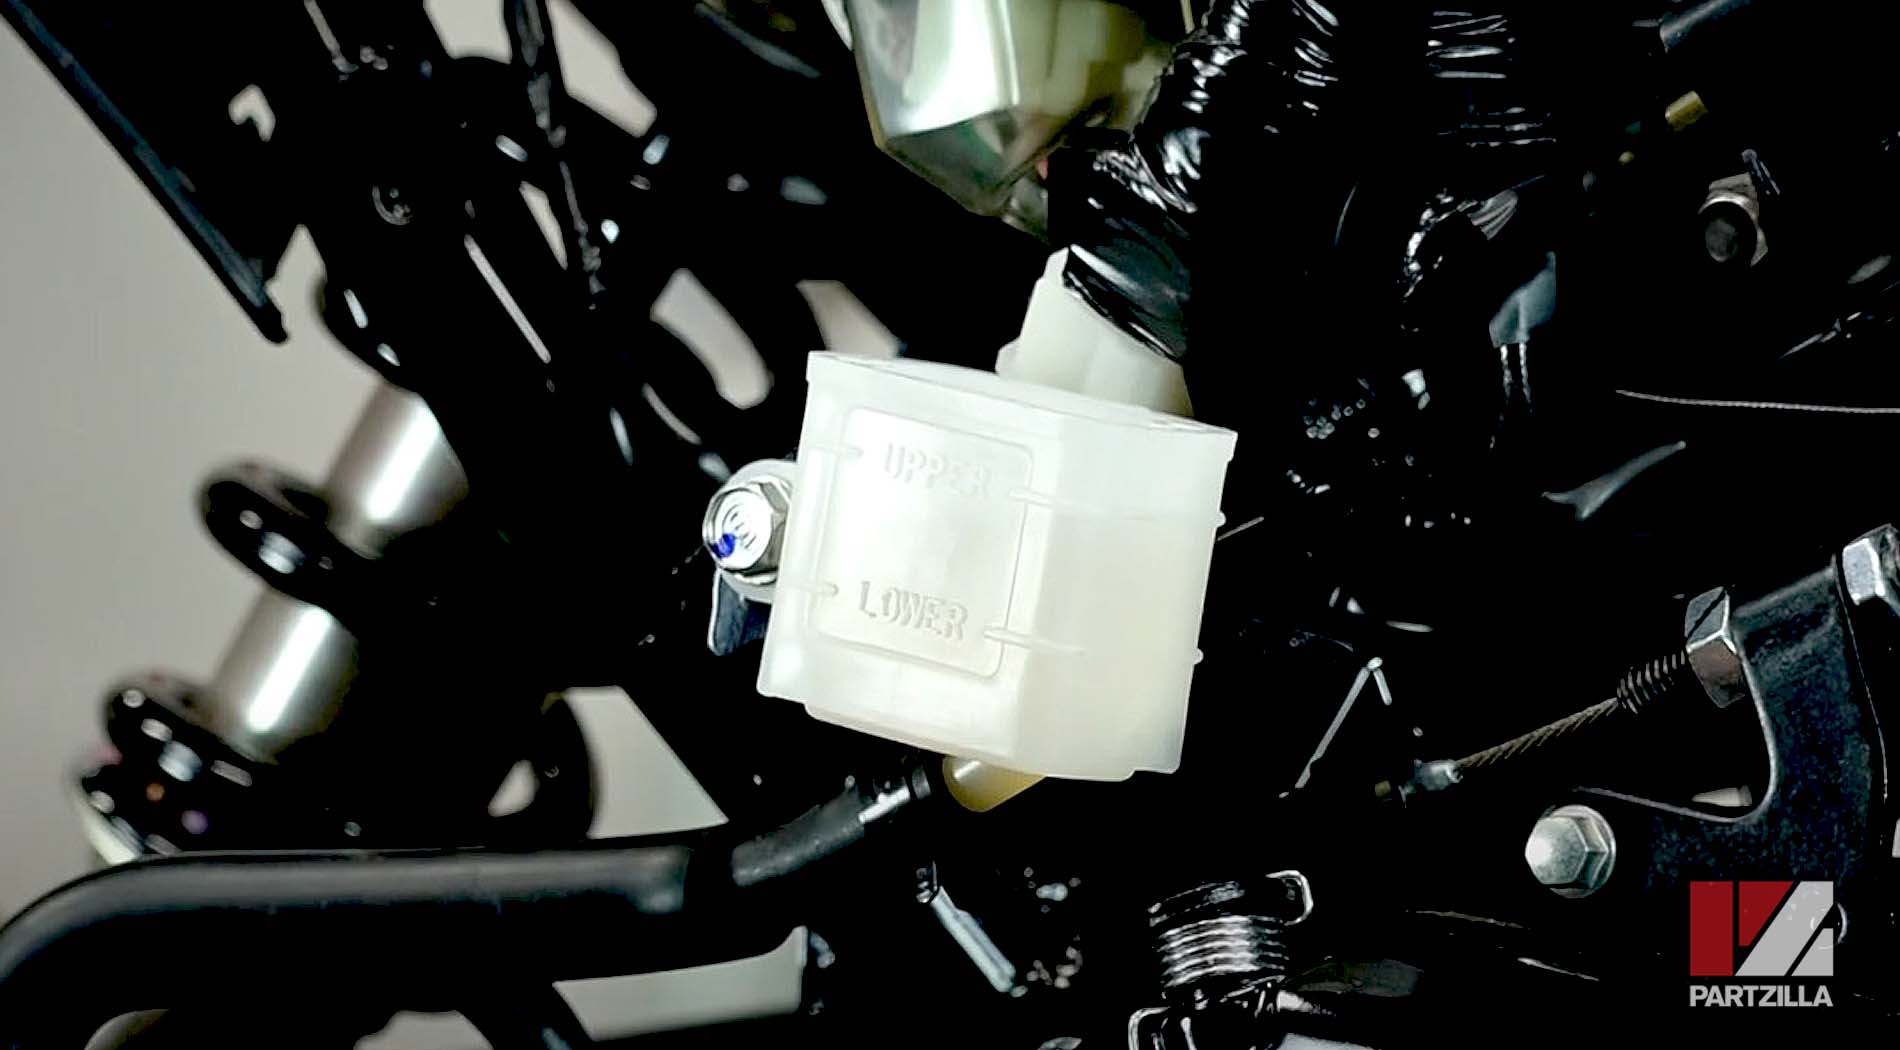
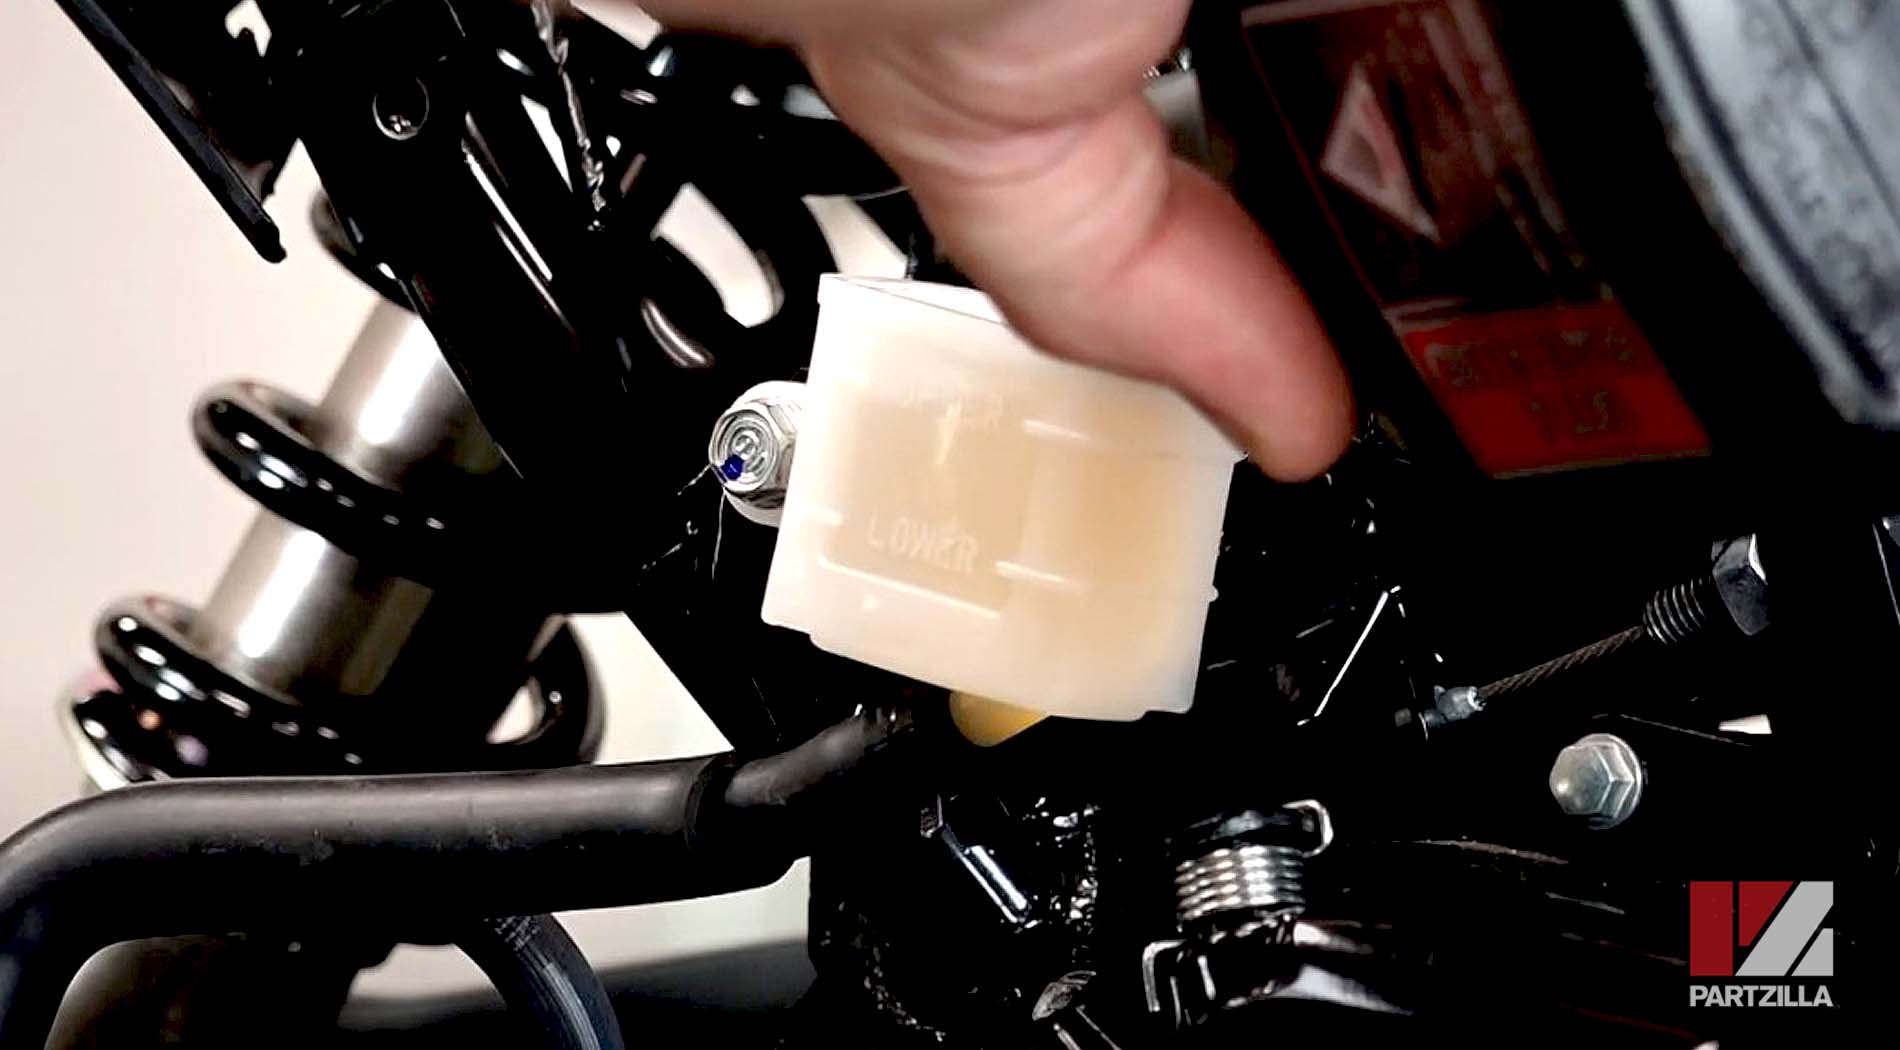
Step 1. Remove the side covers to access the rear brake reservoir, then remove the rear brake reservoir mounting bolt, and move the reservoir to access and remove the reservoir cap.
Step 2. Bleed the rear brakes until all the air is removed from the system. Once completed, reinstall the reservoir cap and reattach the reservoir to the Grom.
Step 3. Connect the hydraulic brake switch’s electrical connectors to the connector from which you disconnected the old switch’s wires.

Step 4. Reinstall the side covers and you're done.
Watch the clip below to see the brake bleed segment of our Honda Grom Rearset video.
The next step in our project to enhance a 2018 Honda Grom is to install front and rear turn signals, as well as shorty levers and a set of bar-end mirrors.
Watch the video above to see our Honda Grom turn signal and mirror installation video.