How to Install Honda Grom Lights, Mirrors & Levers
Welcome to the fifth part of our project to improve the performance of a 2018 Honda Grom: adding a set of KOSO turn signals, D-Axis bar end mirrors from Driven Racing and CRG shorty levers.
These upgrades are set to make our Honda Grom really stand out from the crowd. Follow the guide below and watch our Honda Grom Lights, Mirrors and Levers video above to see how we made these enhancements.

Tools and Parts – Honda Grom Lights, Mirrors and Levers Installation
- Ratchet and sockets
- 12mm, 14mm wrenches
- 5mm Allen
- Philips screwdriver
- Soldering iron
- Heat gun

Part 1: Honda Grom Aftermarket Rear Turn Signal Lights Installation
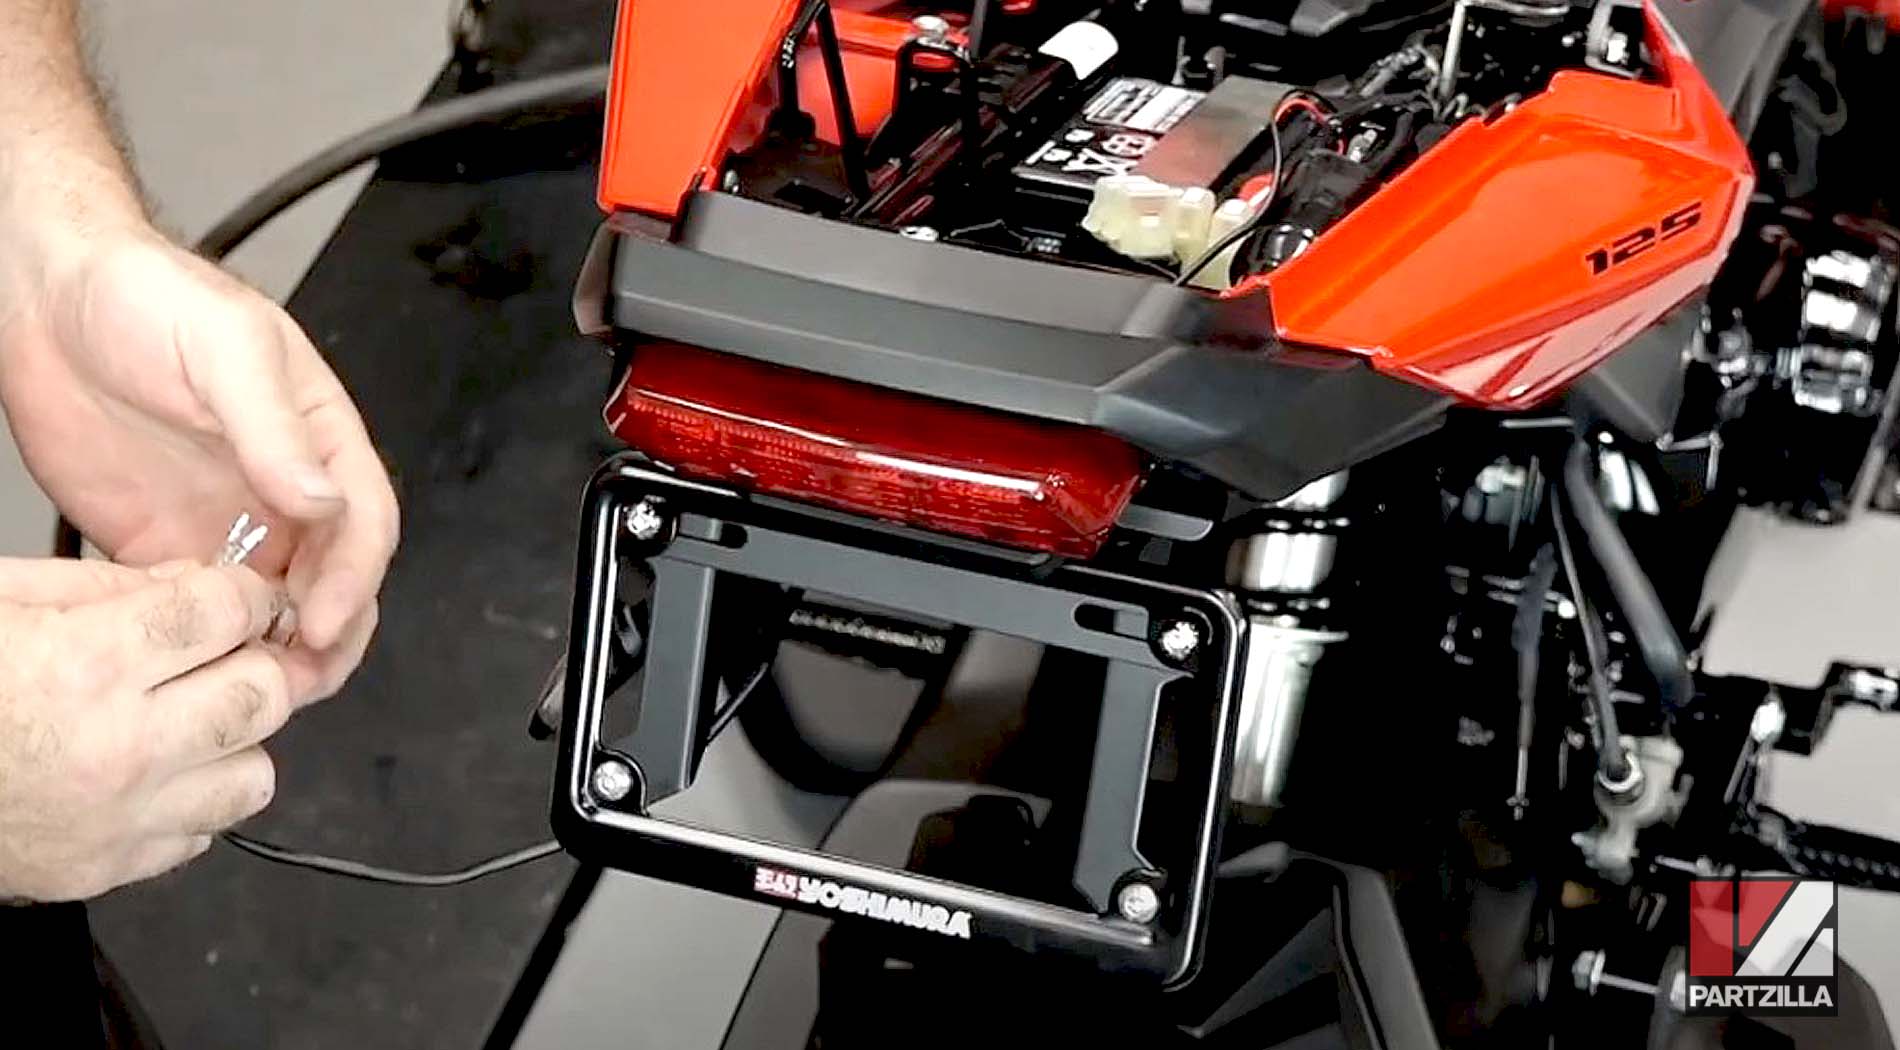
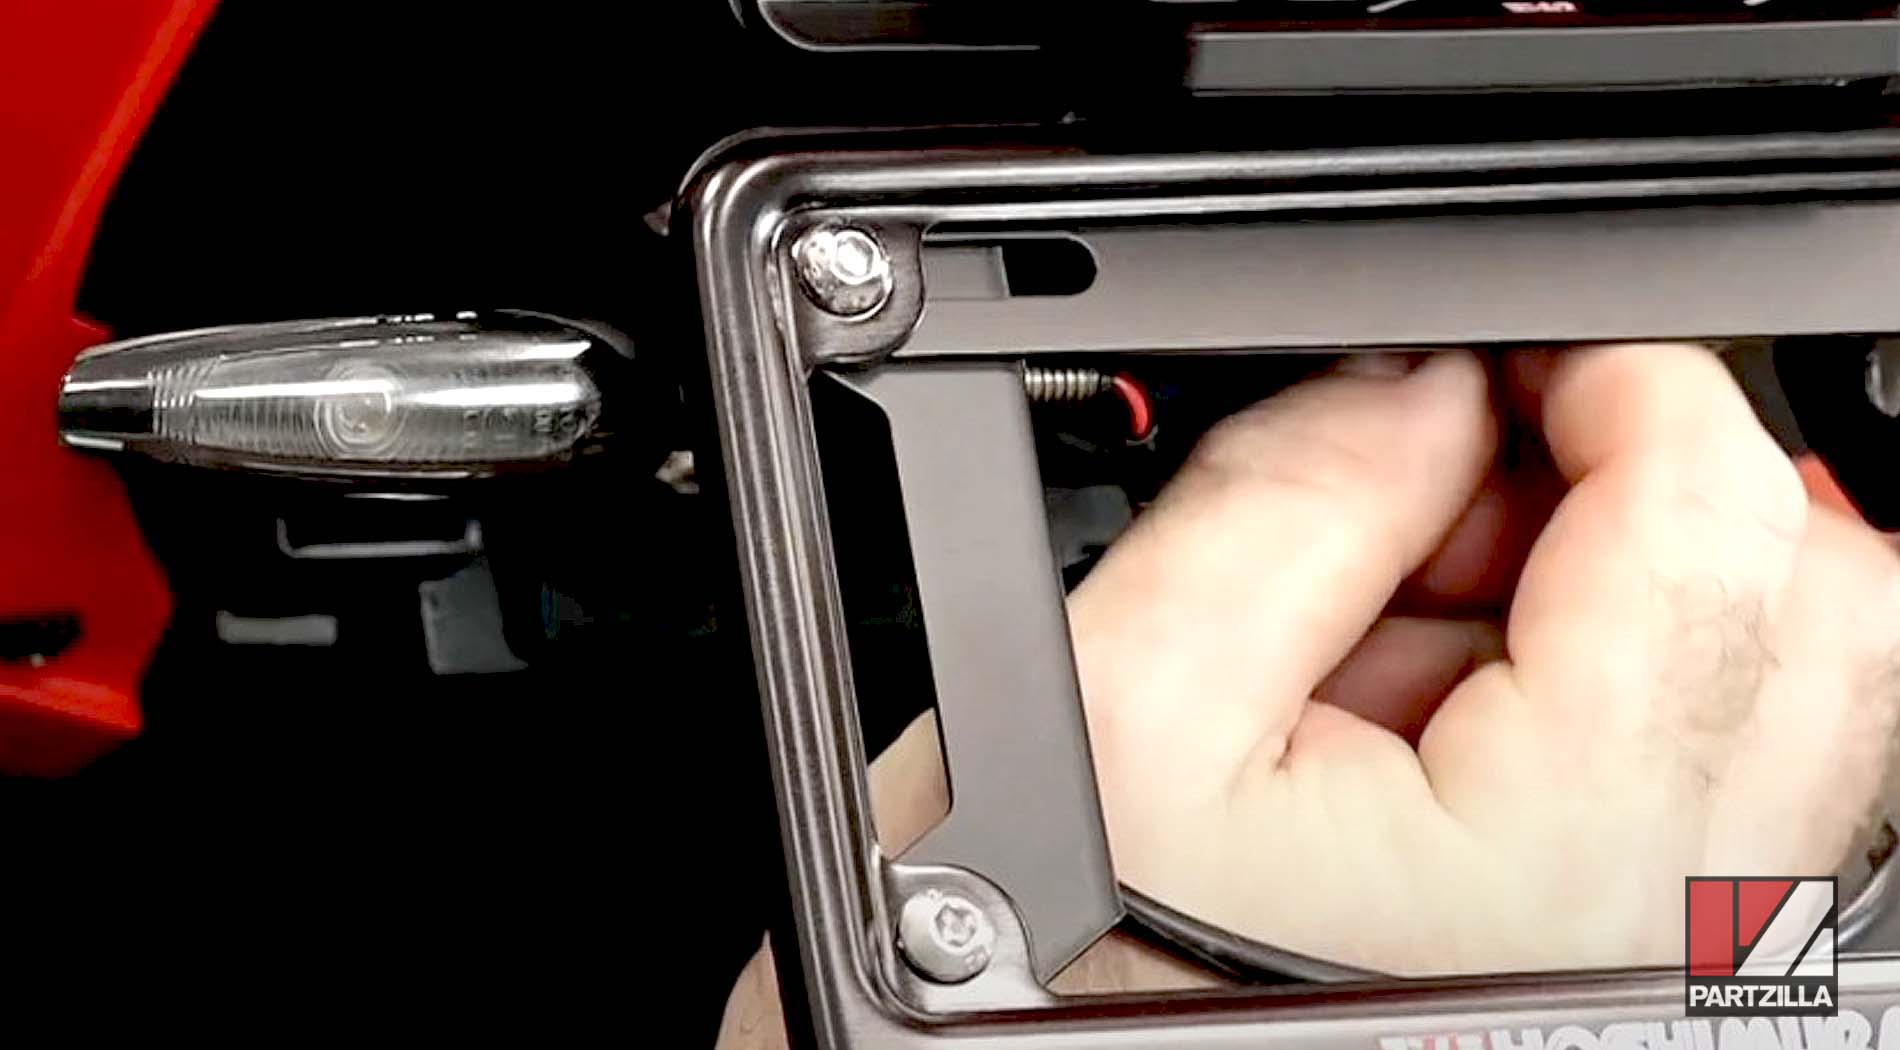
Step 1. Remove the seat and the lower panel from the rear fender assembly to access the wiring, and disconnect the rear turn signal wires from the wiring harness.
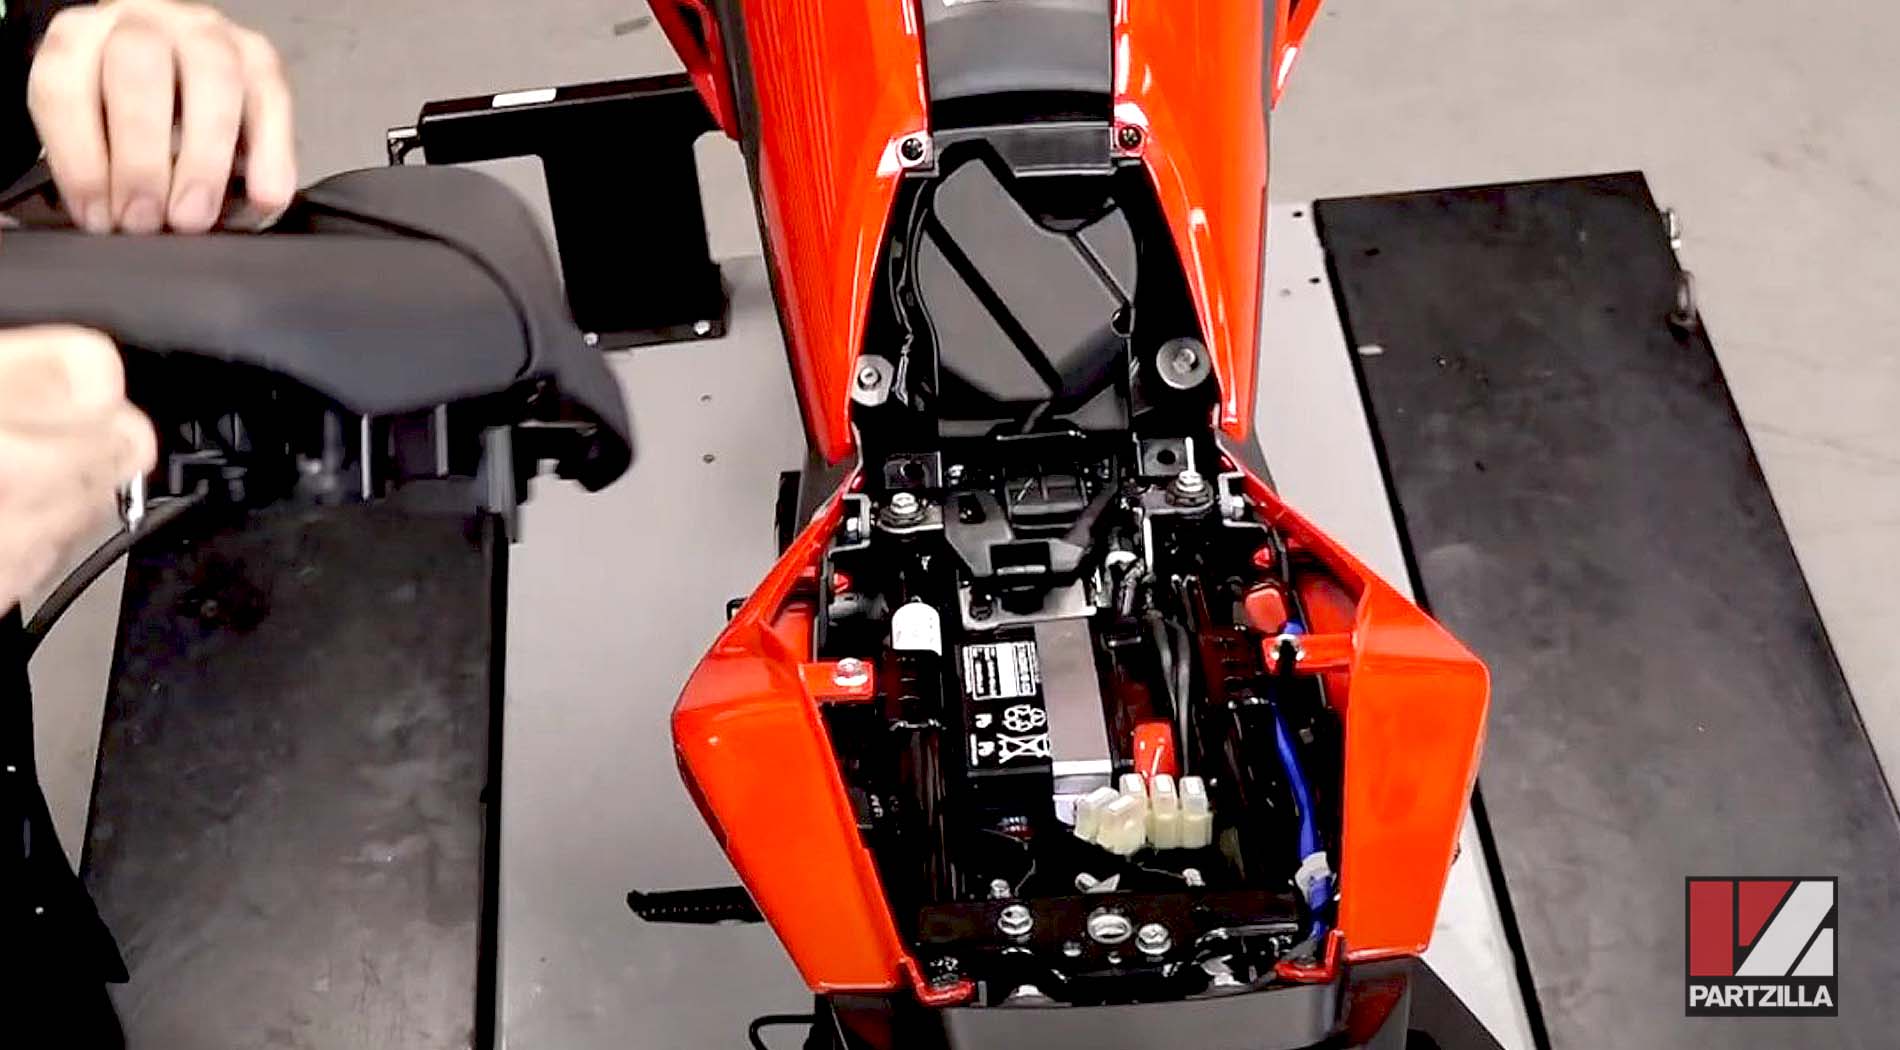

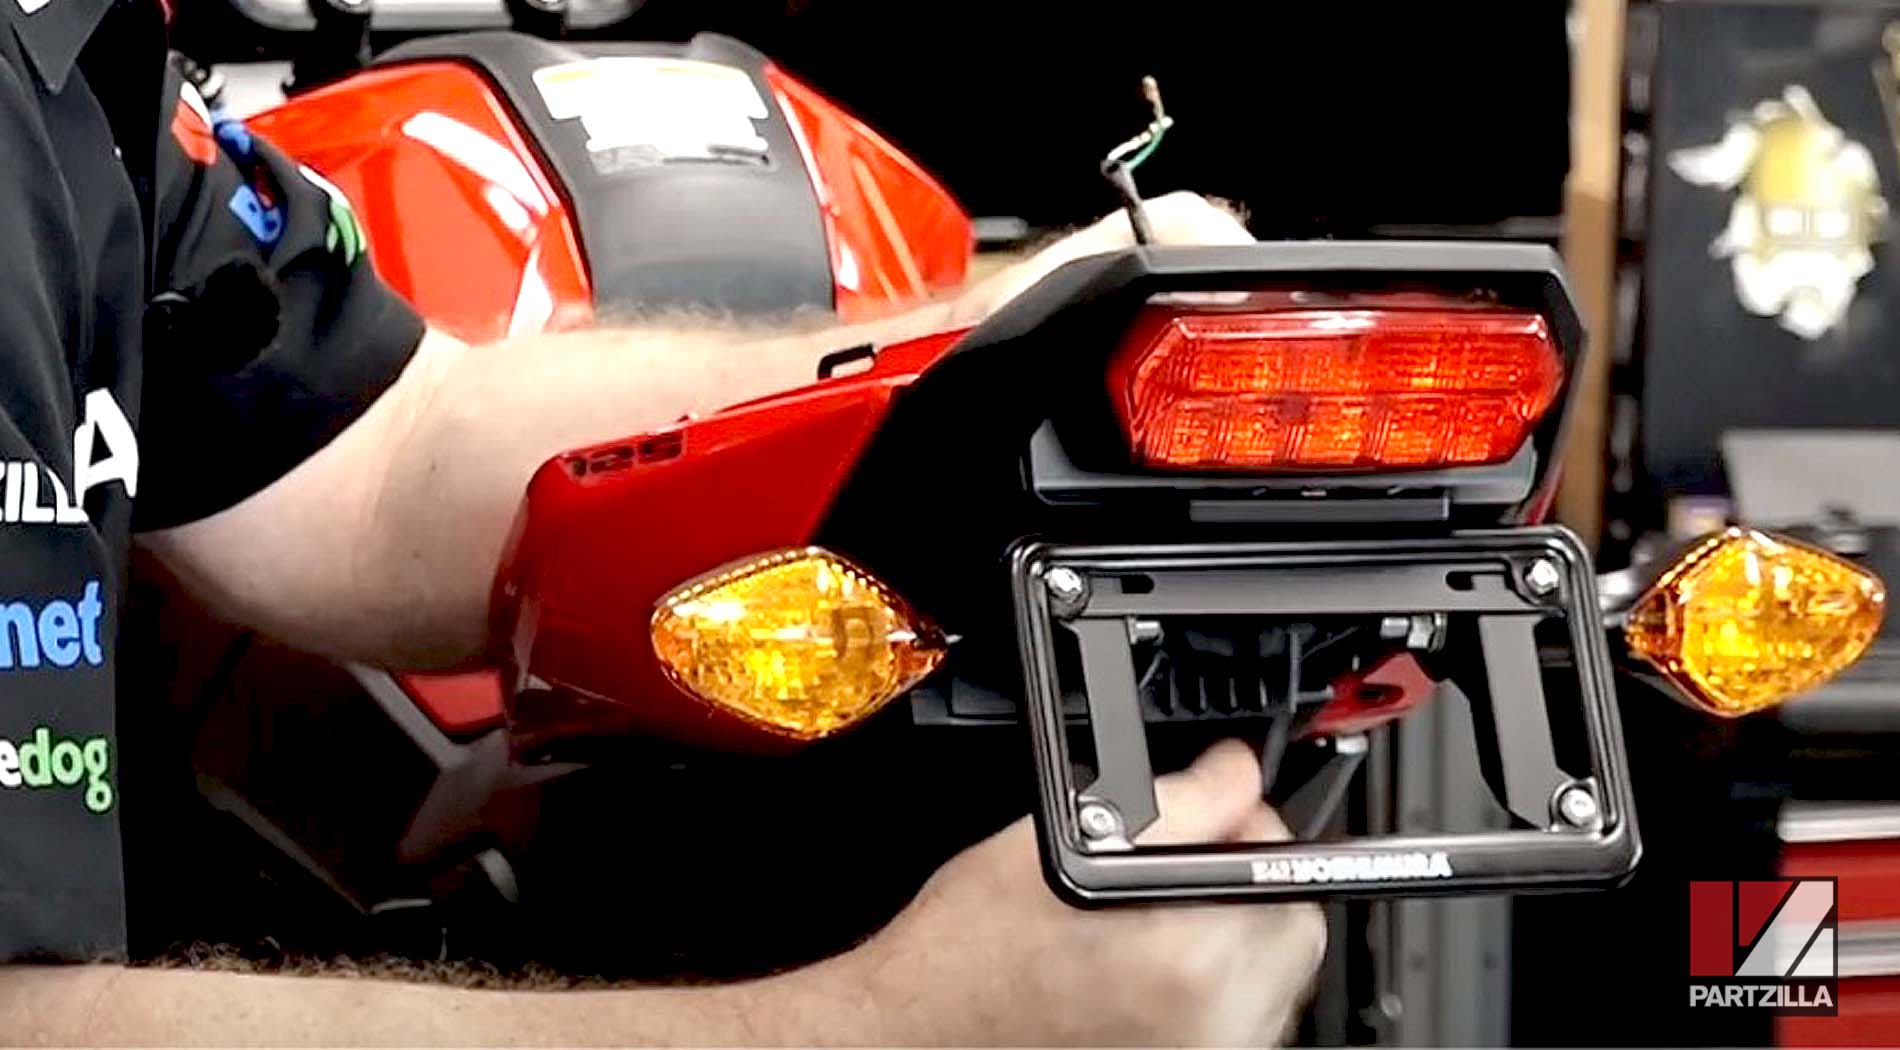
Step 2. Remove the 14mm nuts holding the turn signal lights, followed by the lights themselves.
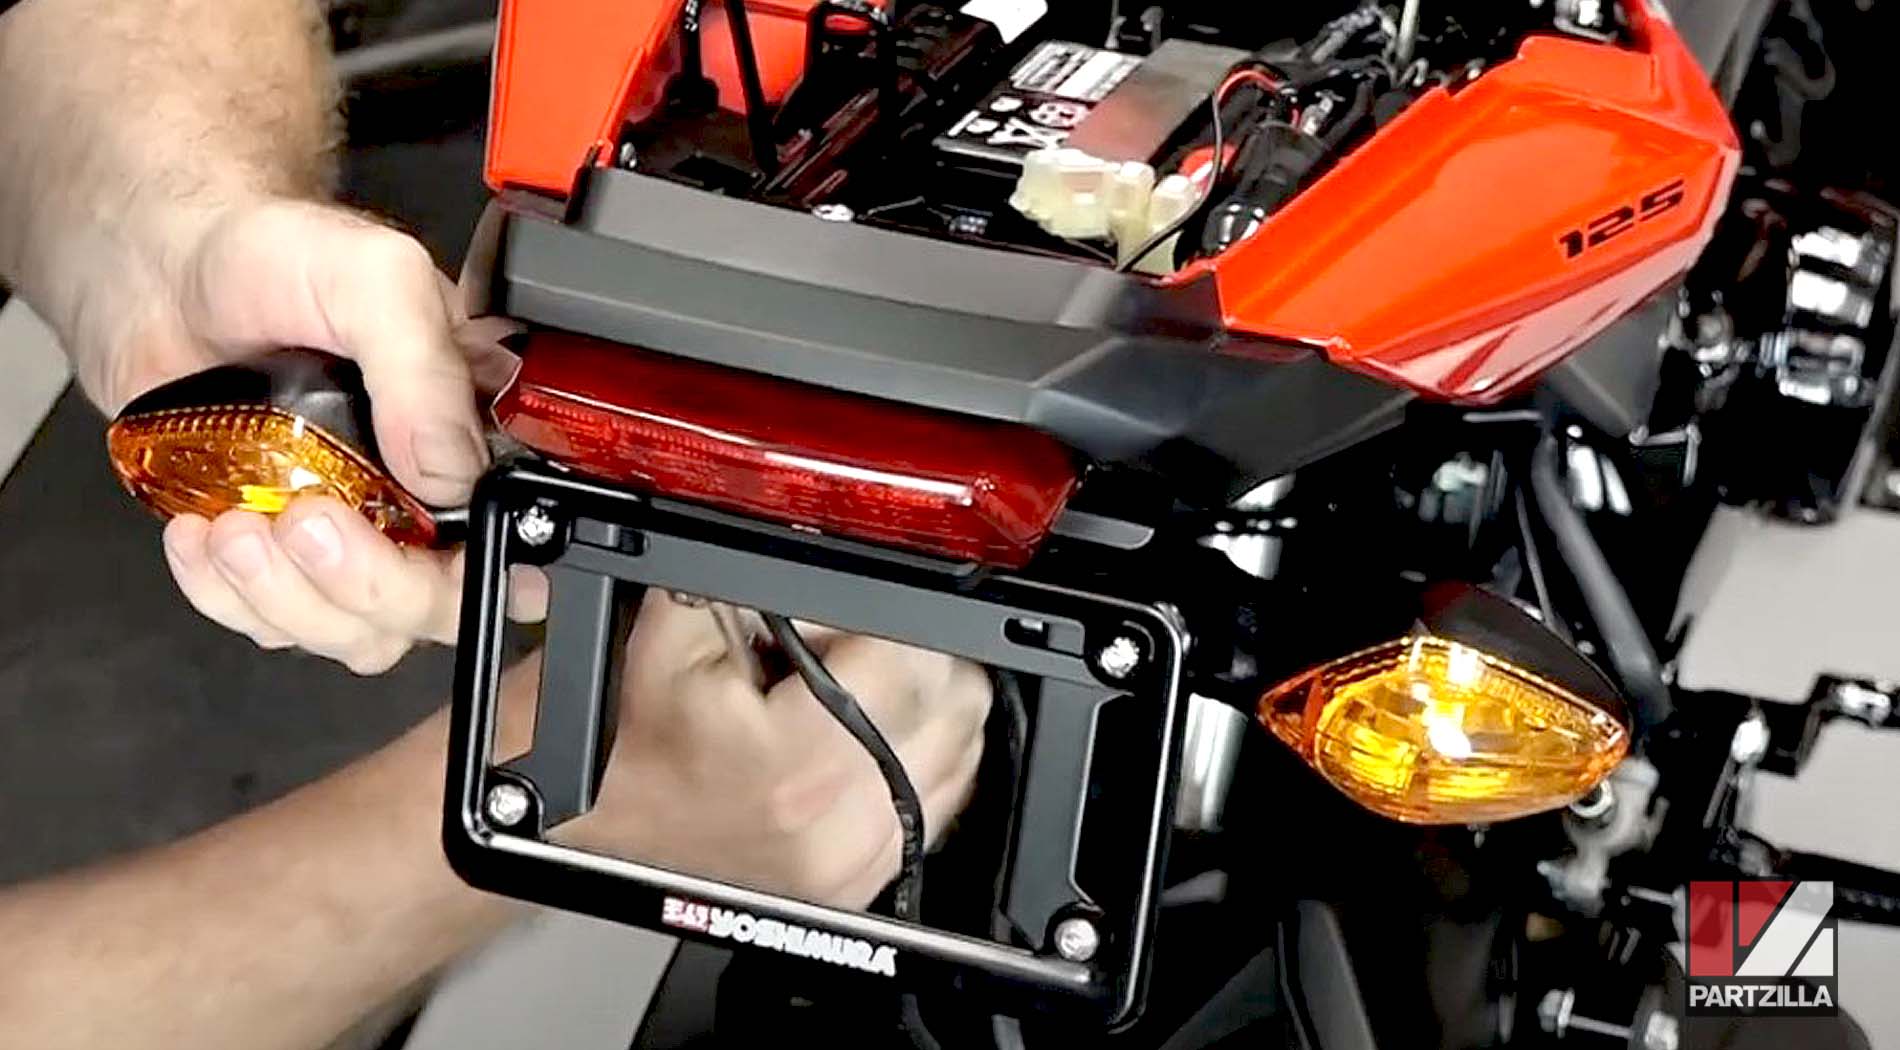
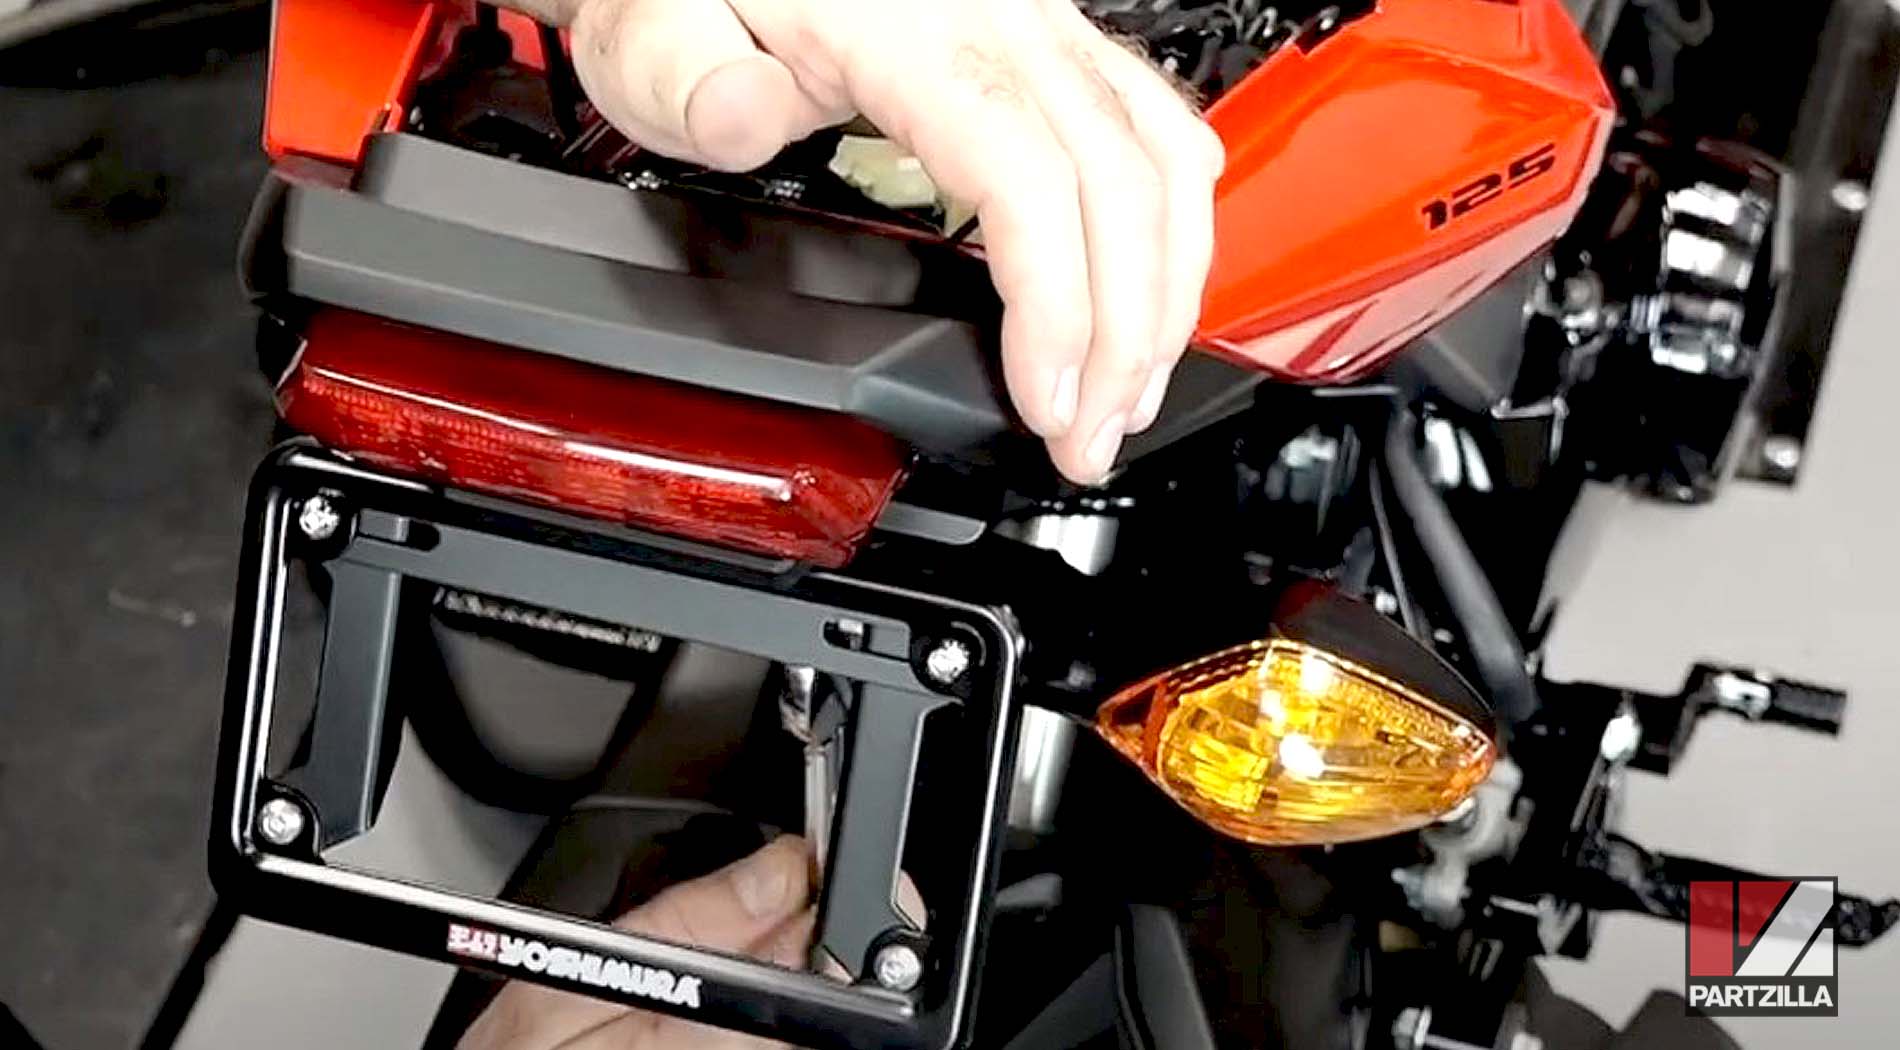
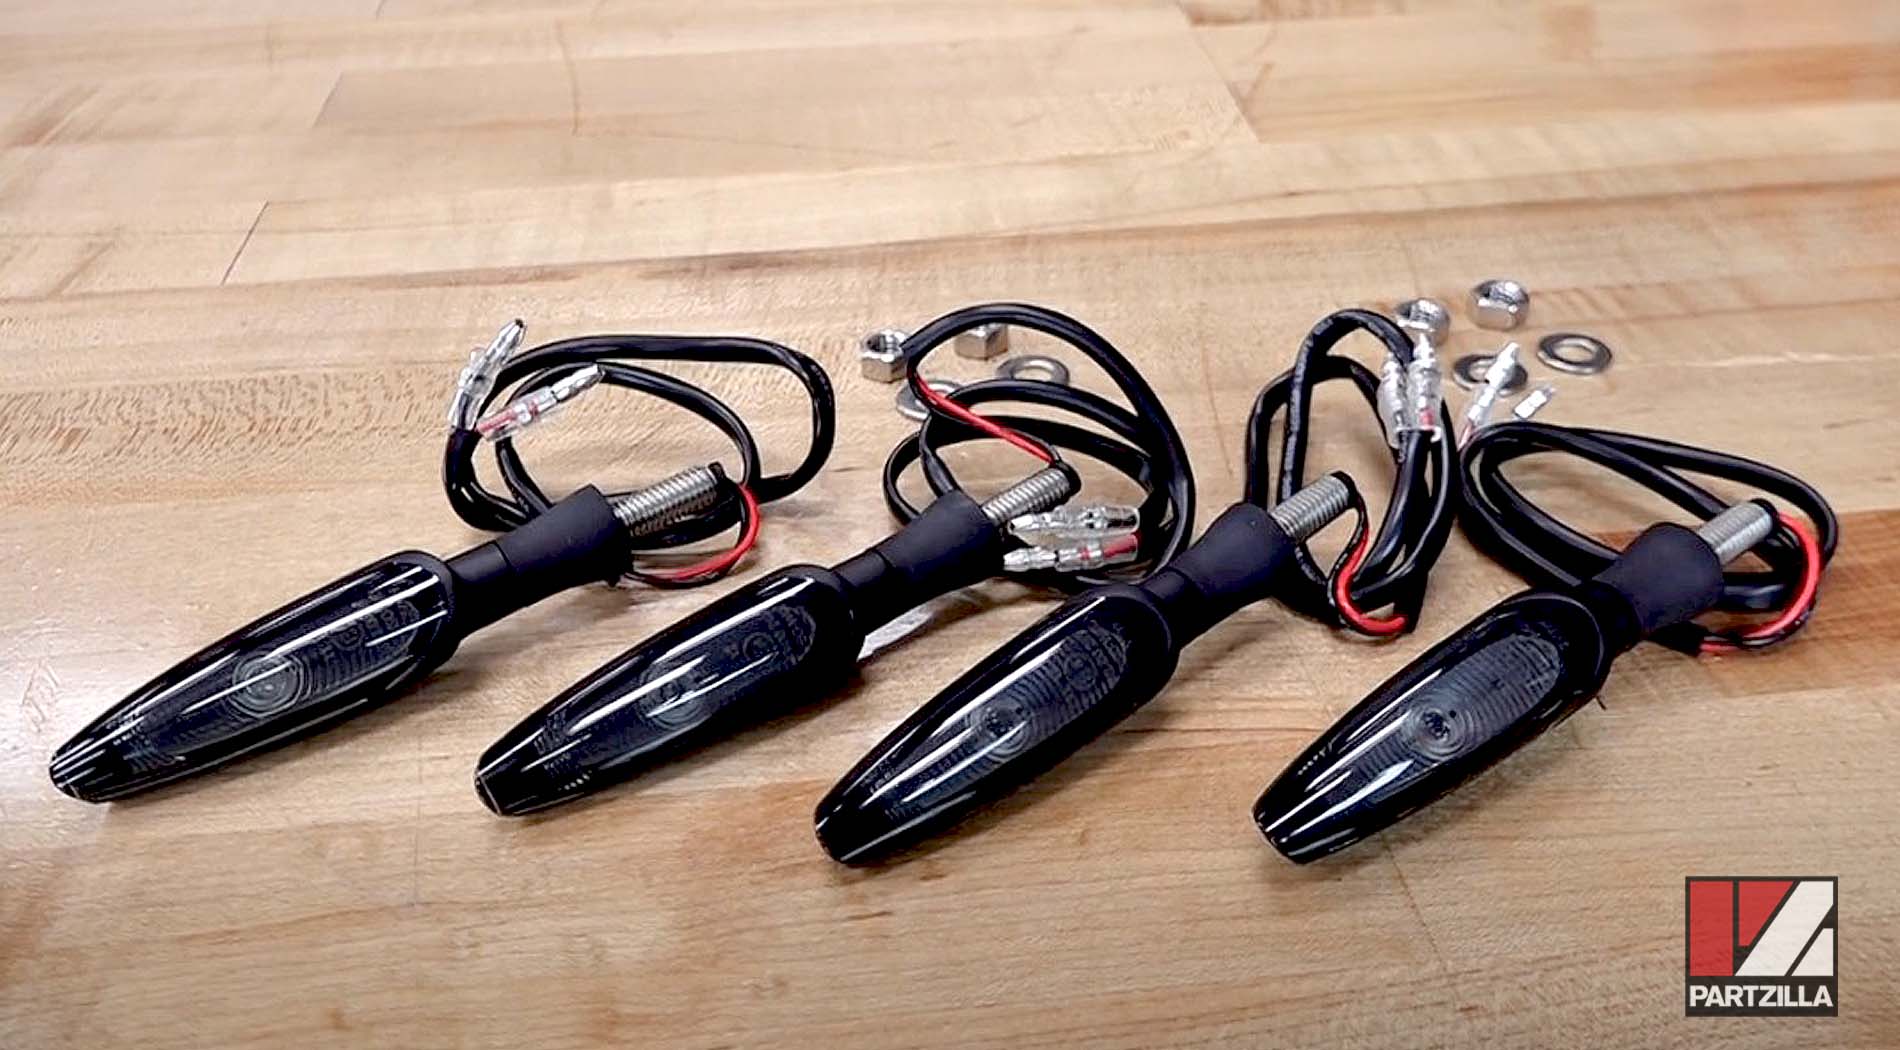
Step 3. Install the KOSO LED turn signals using the washers and 12mm nuts included in the signal set.
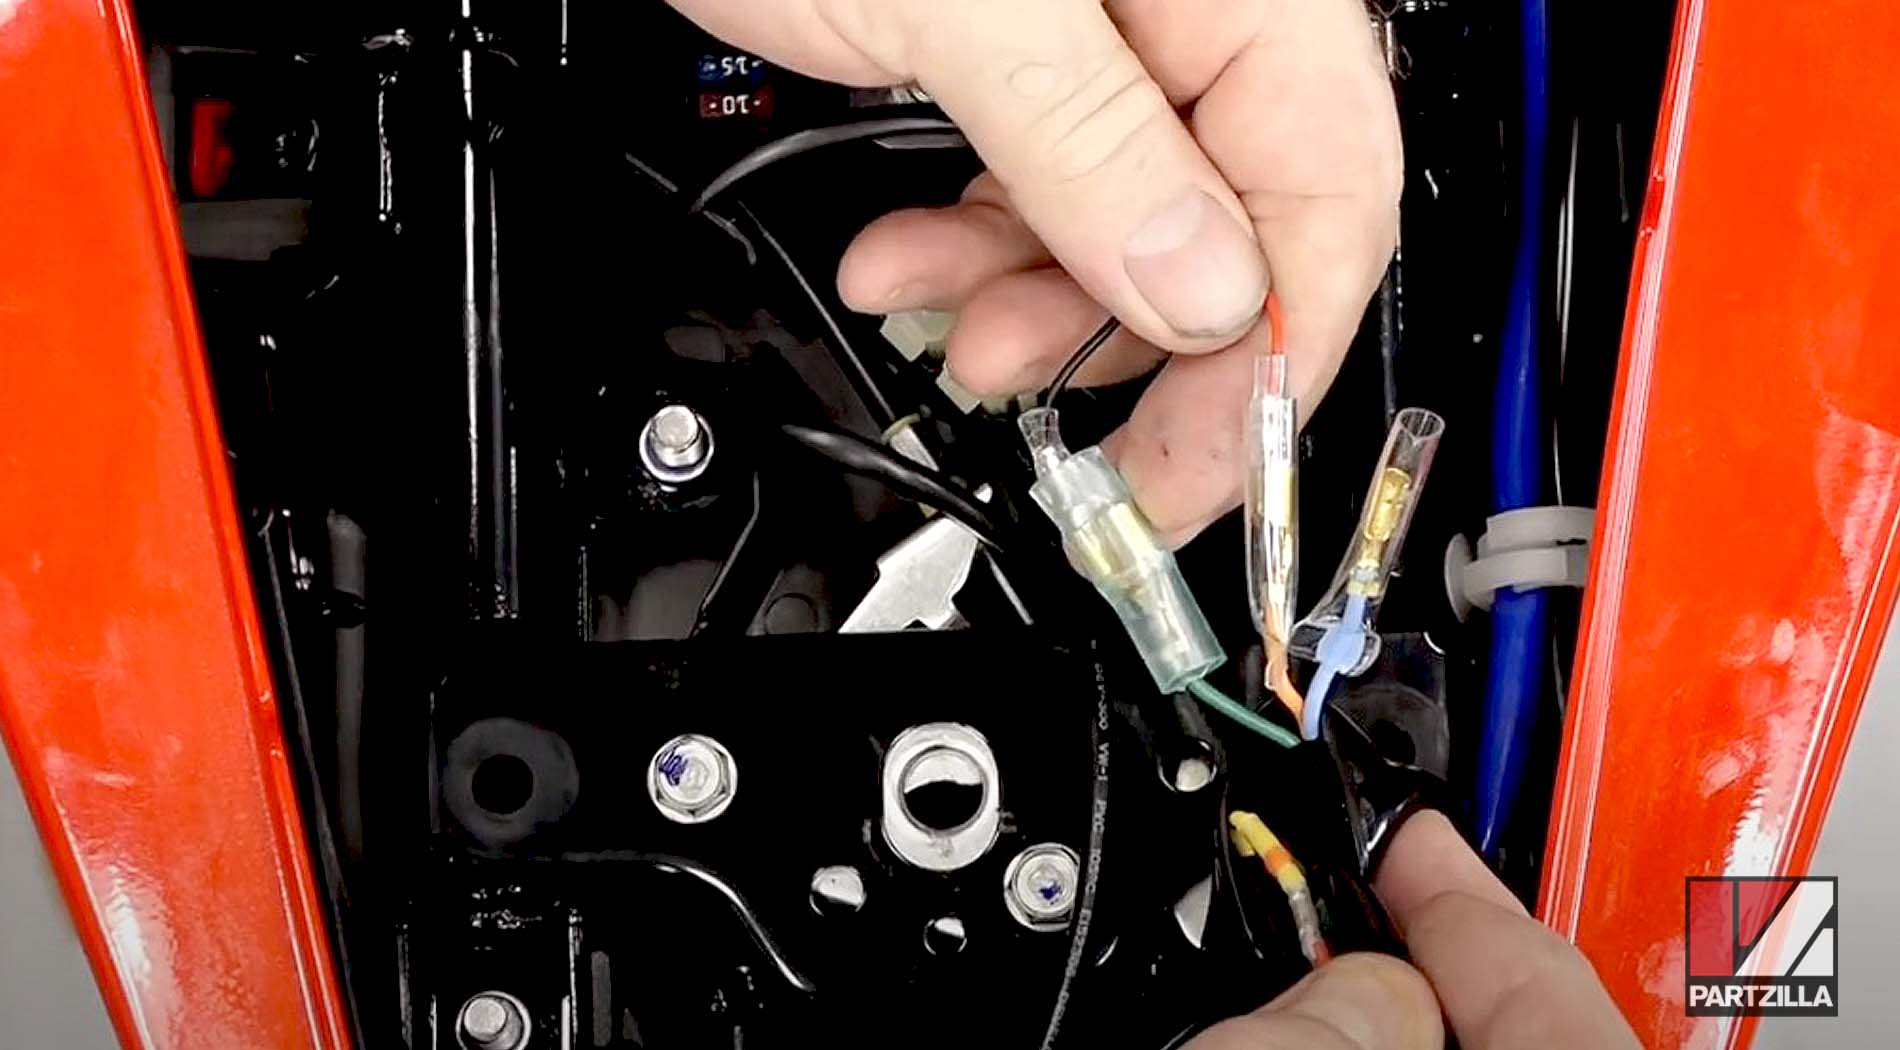
Step 4. Connect the new turn signal wires to the wiring harness as follows:
- The black wire from the left turn signal connects to the green wire in the wiring harness
- The red wire from the left turn signal connects to the orange wire in the wiring harness
- The black wire from the right turn signal connects to the green wire in the wiring harness
- The red wire from the right turn signal connects to the blue wire in the wiring harness

Step 5. Reinstall the seat and you're done.

Watch the clip below to see the rear turn signal installation segment of our Honda Grom Lights, Mirrors & Levers video.
Part 2: Honda Grom Front Aftermarket Turn Signal Lights Installation
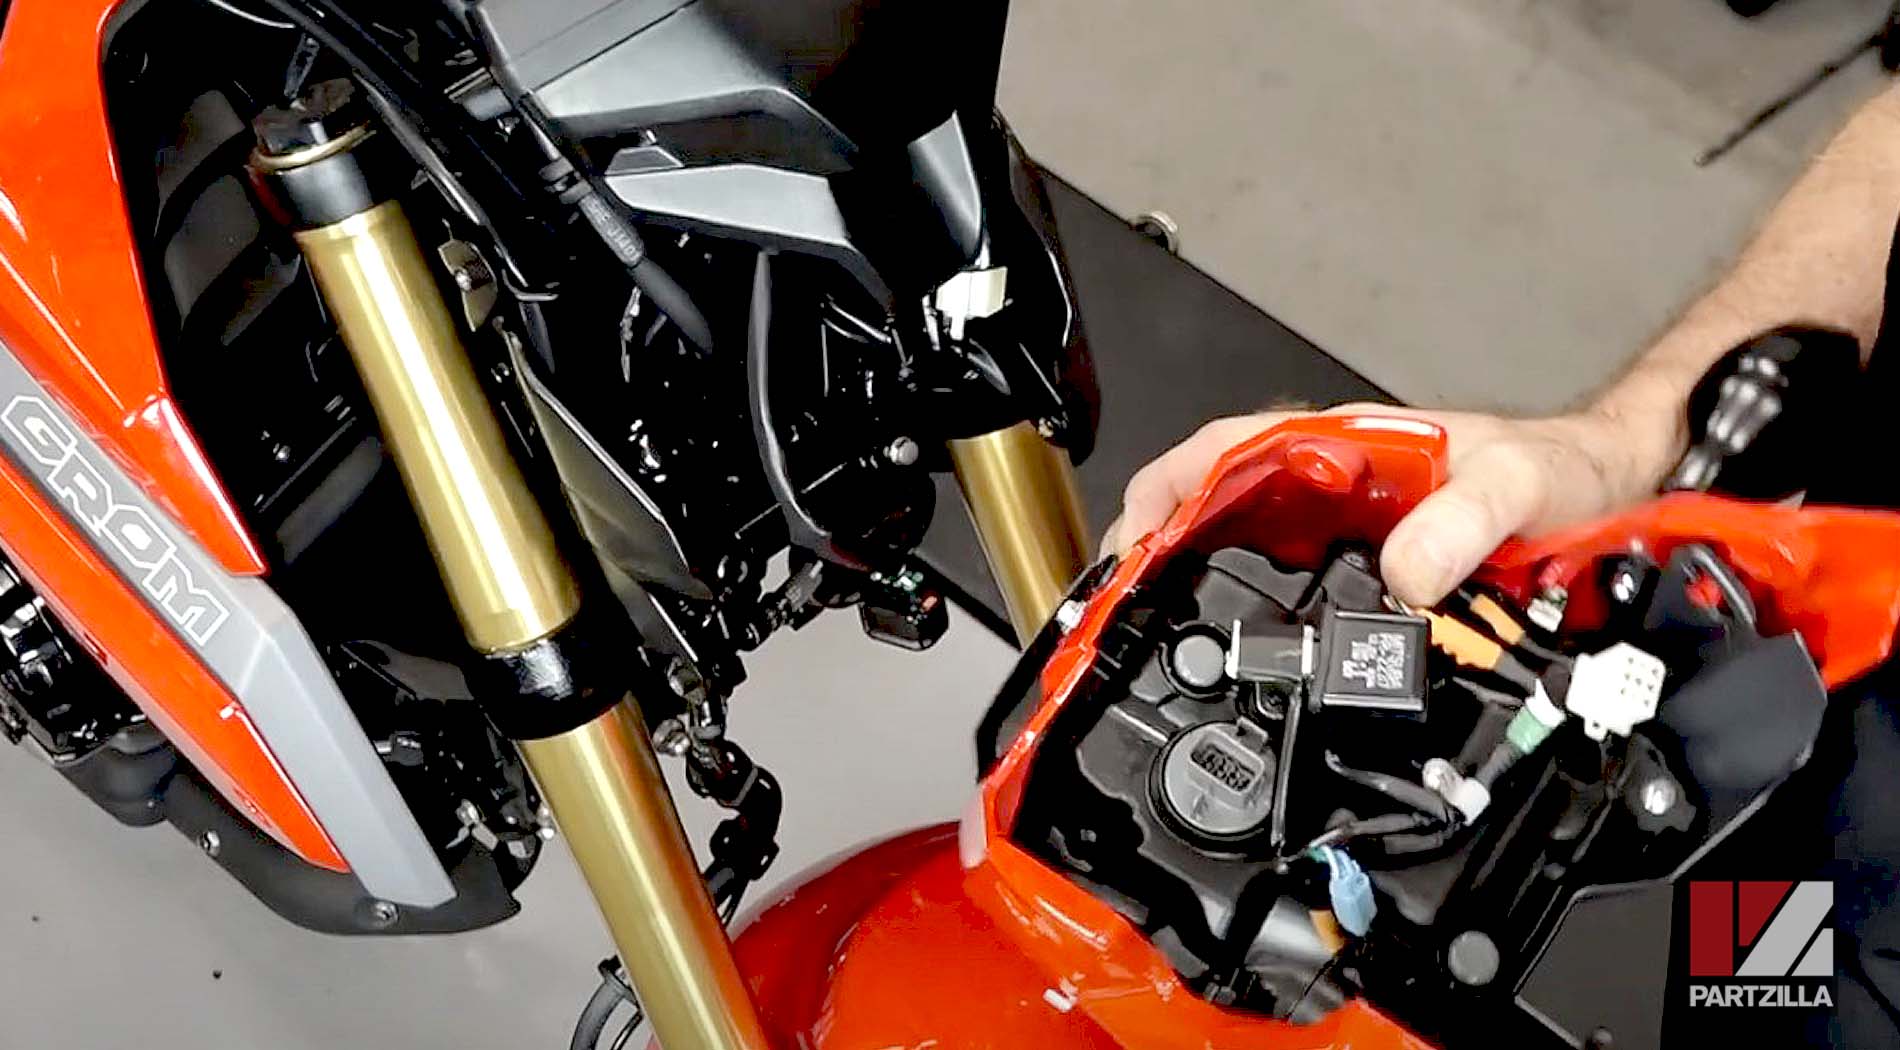
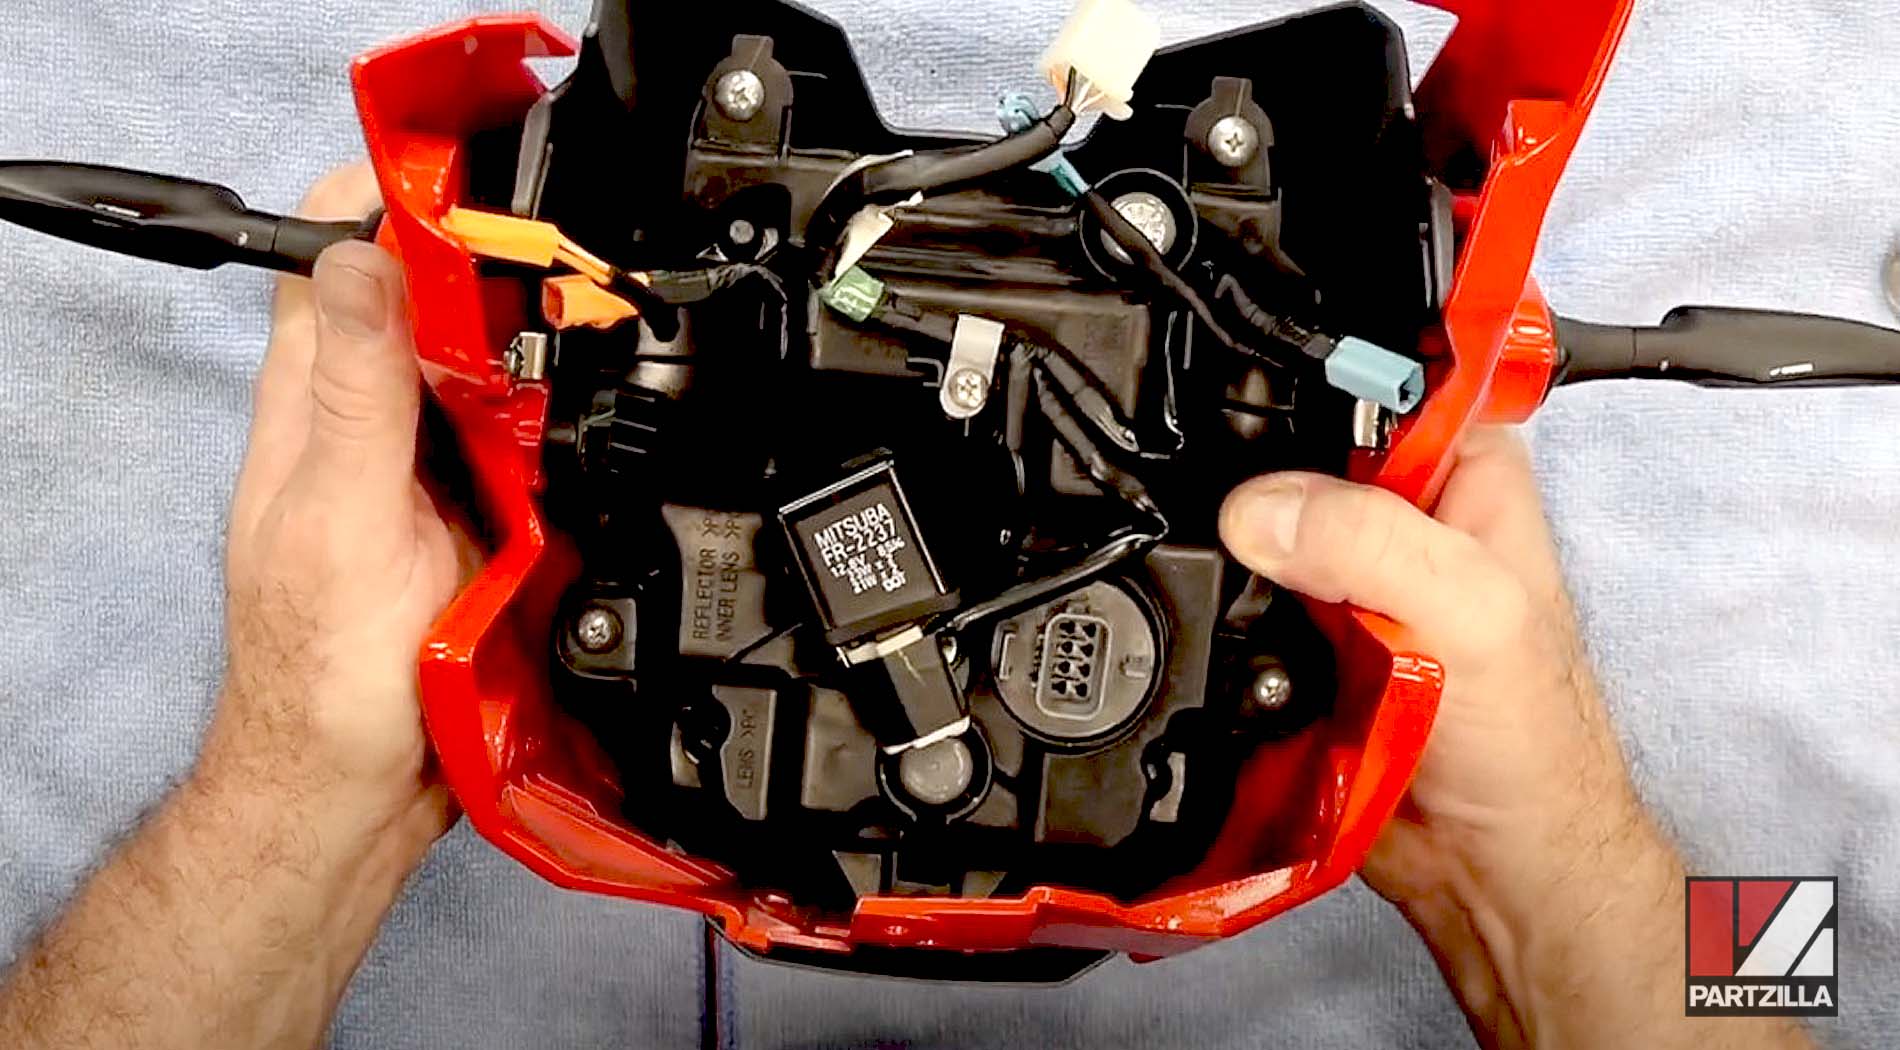
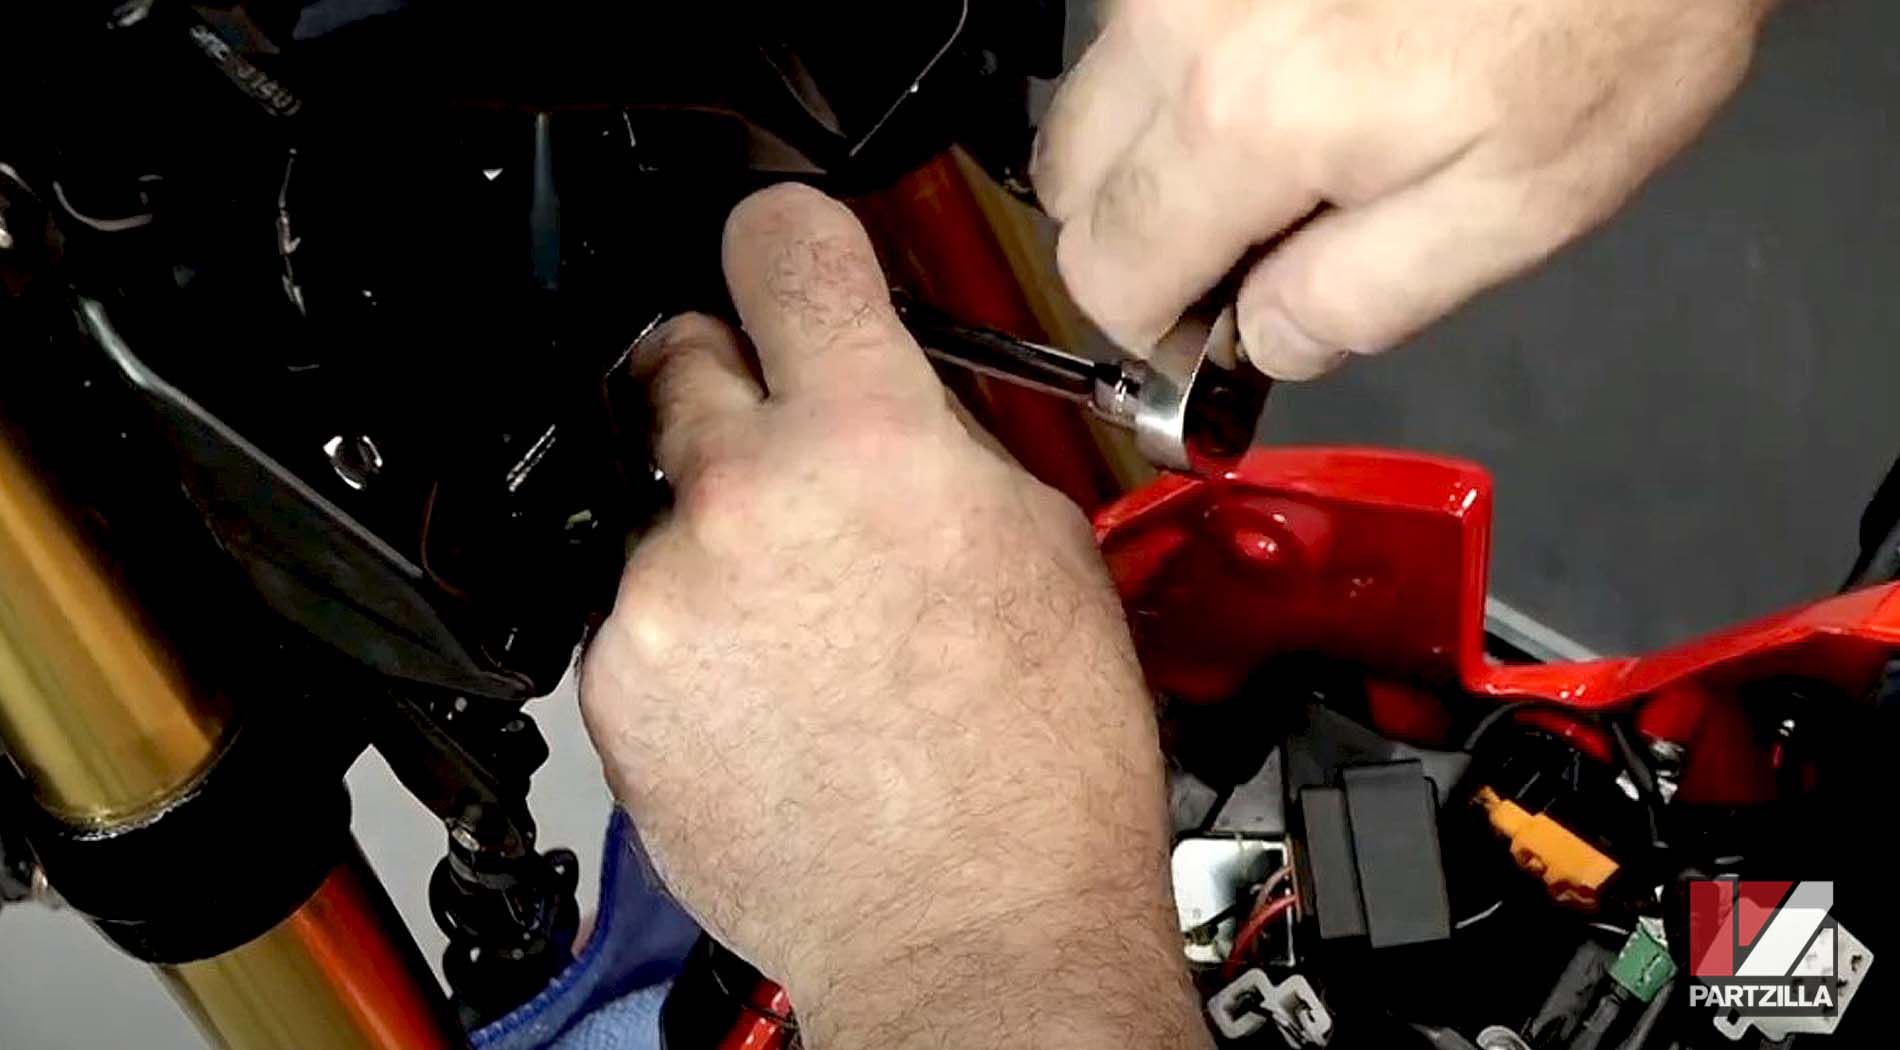
Step 1. Remove the four 12mm Allen bolts that hold the headlight assembly, then pull the assembly free.
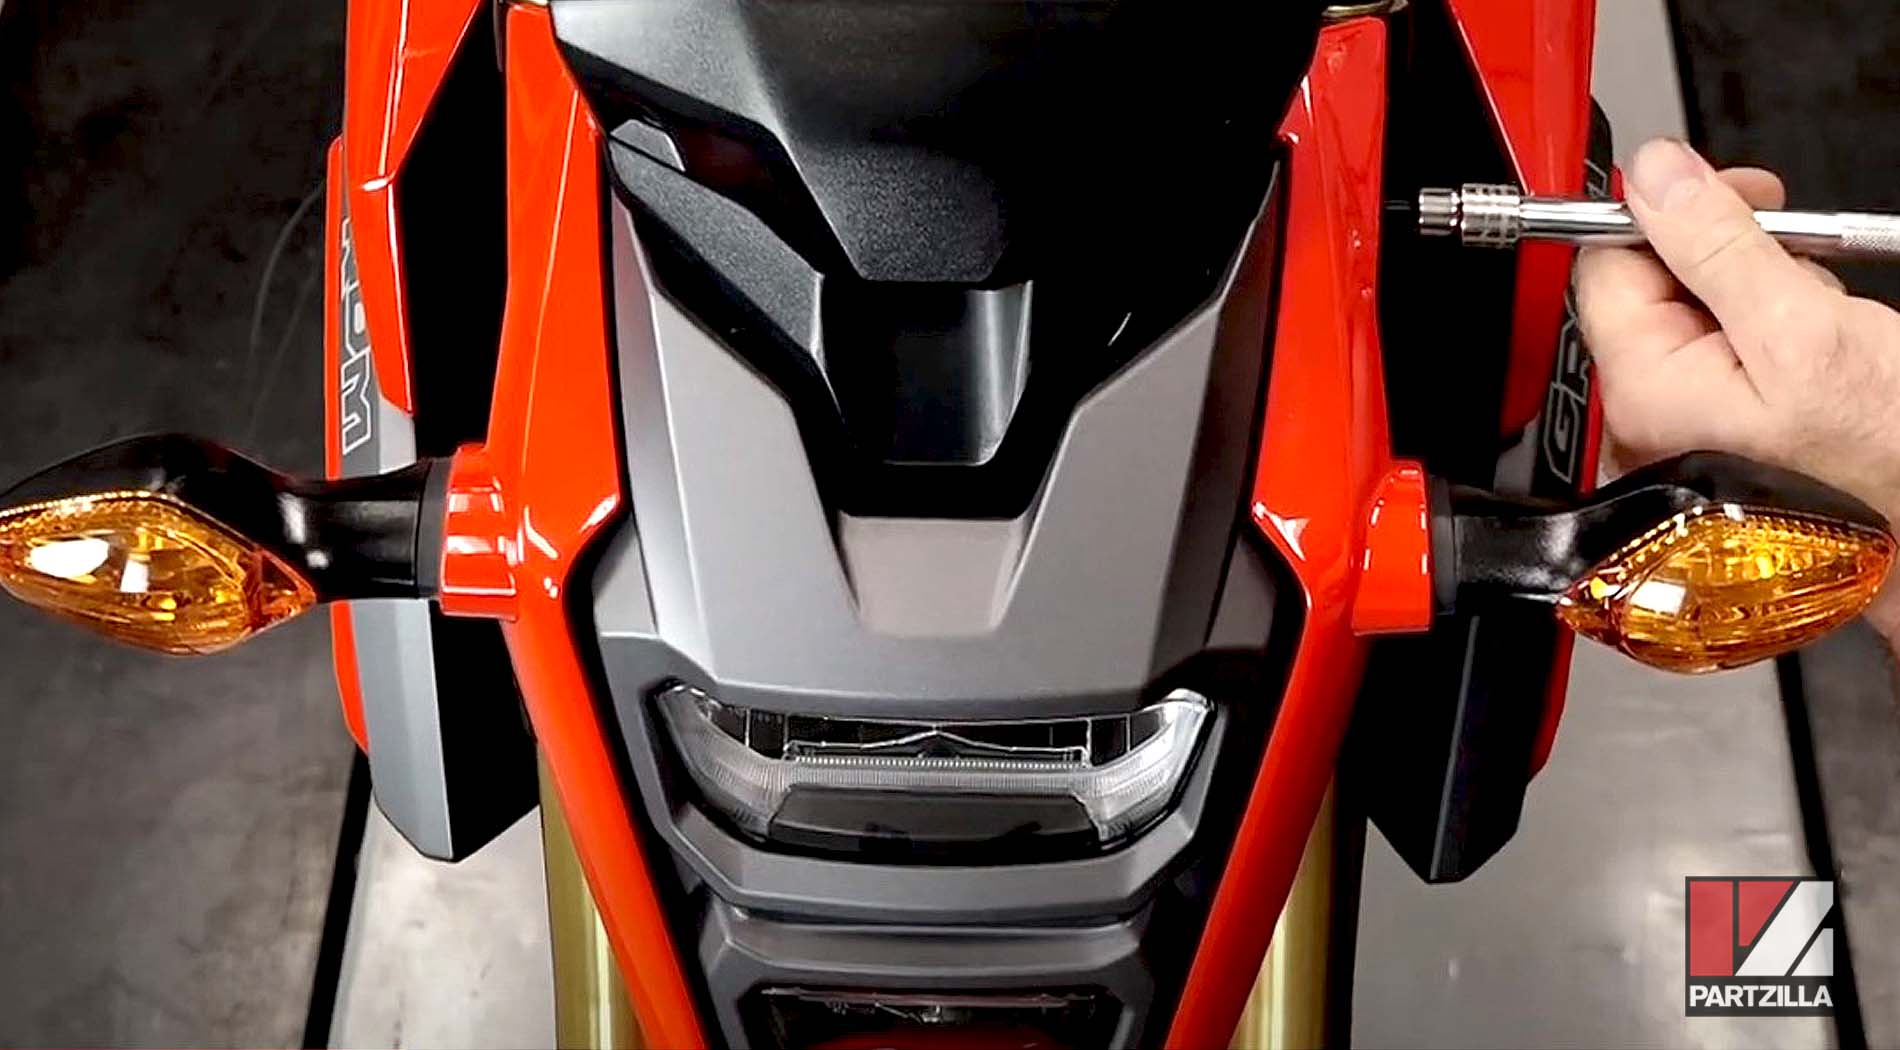

Step 2. Disconnect the headlight assembly’s wiring harness and the headlight, and remove the headlight assembly completely.
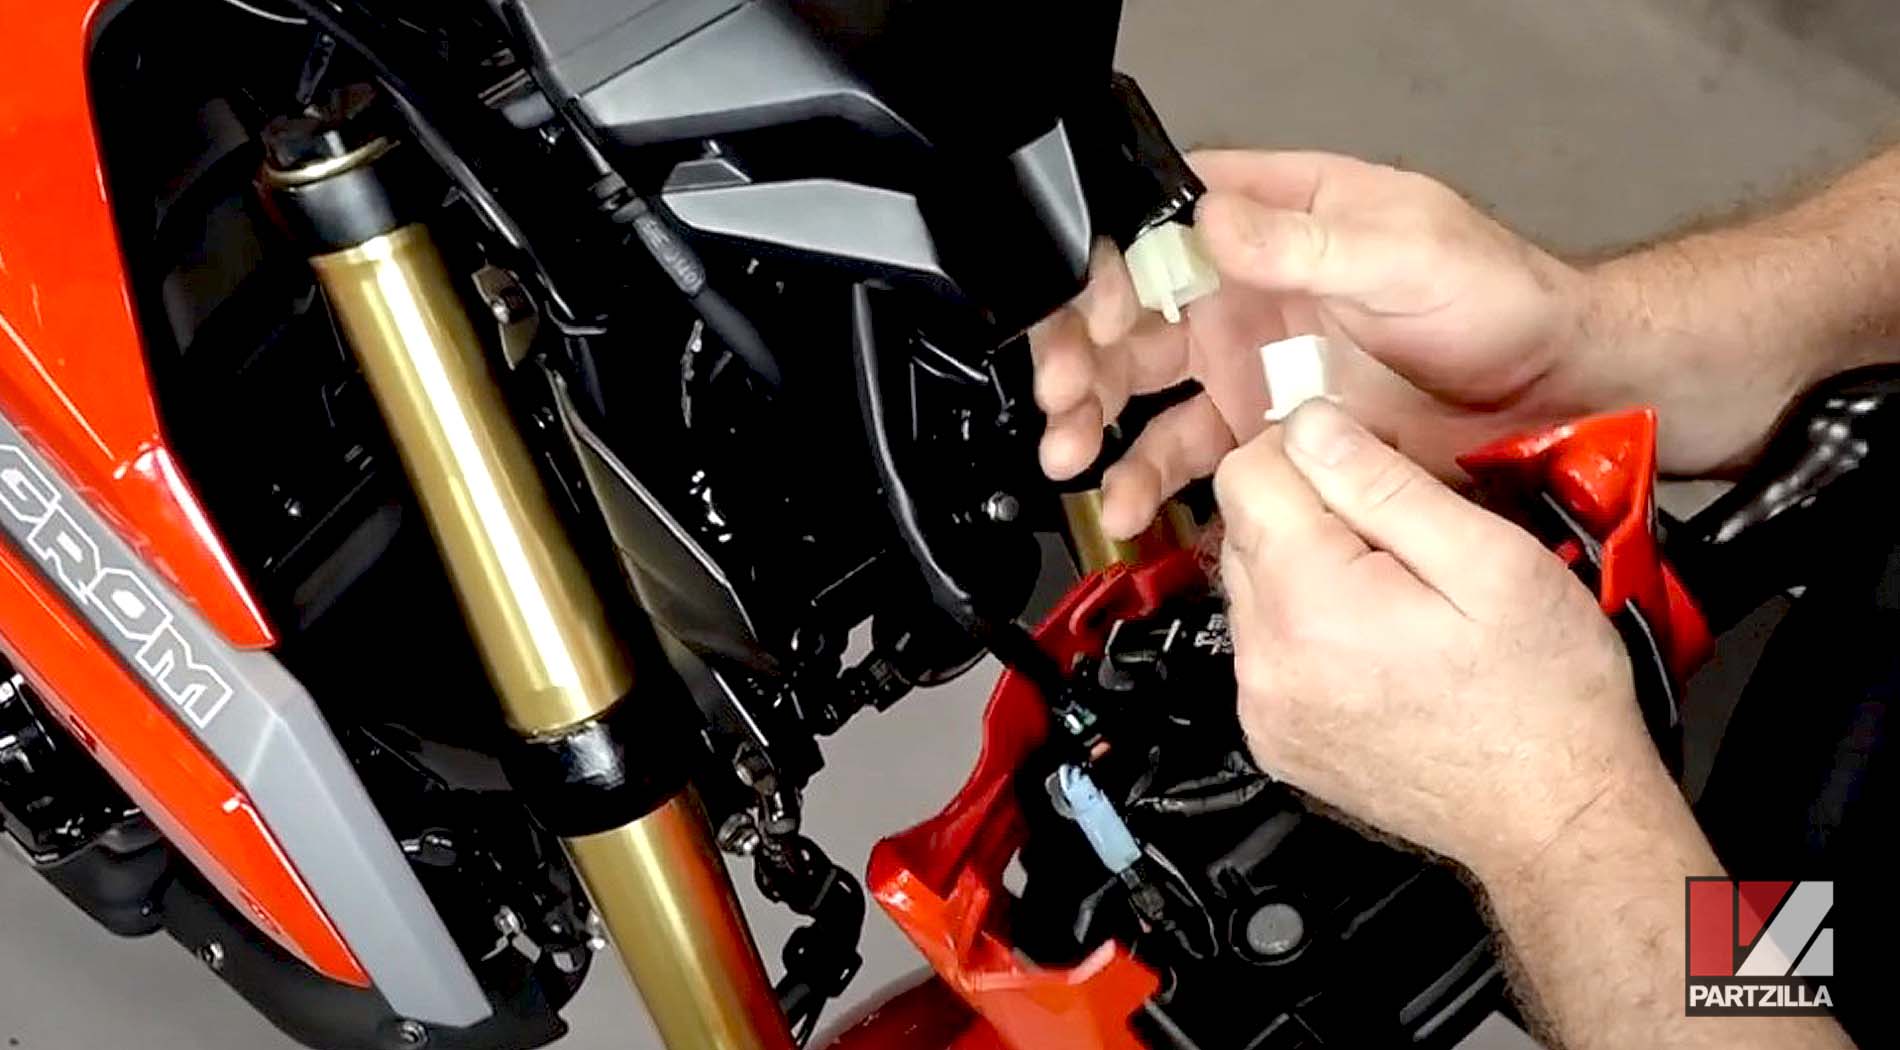
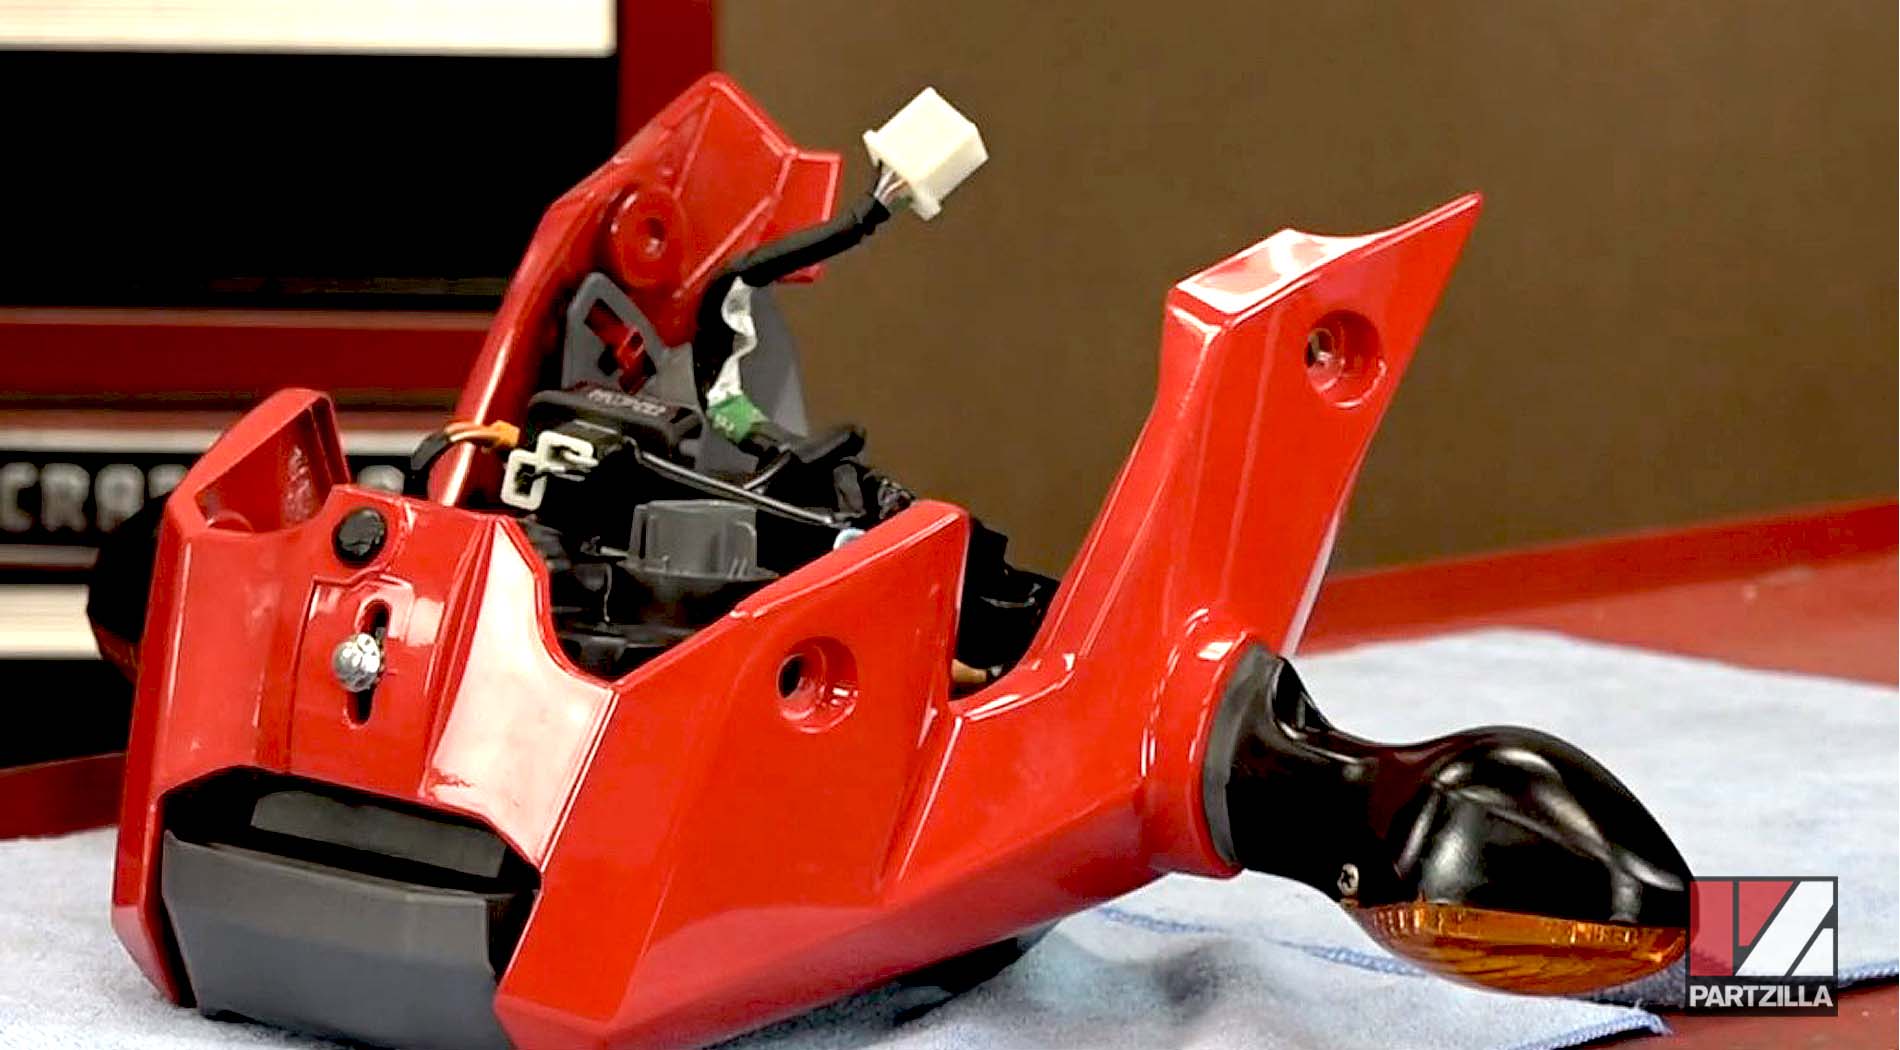
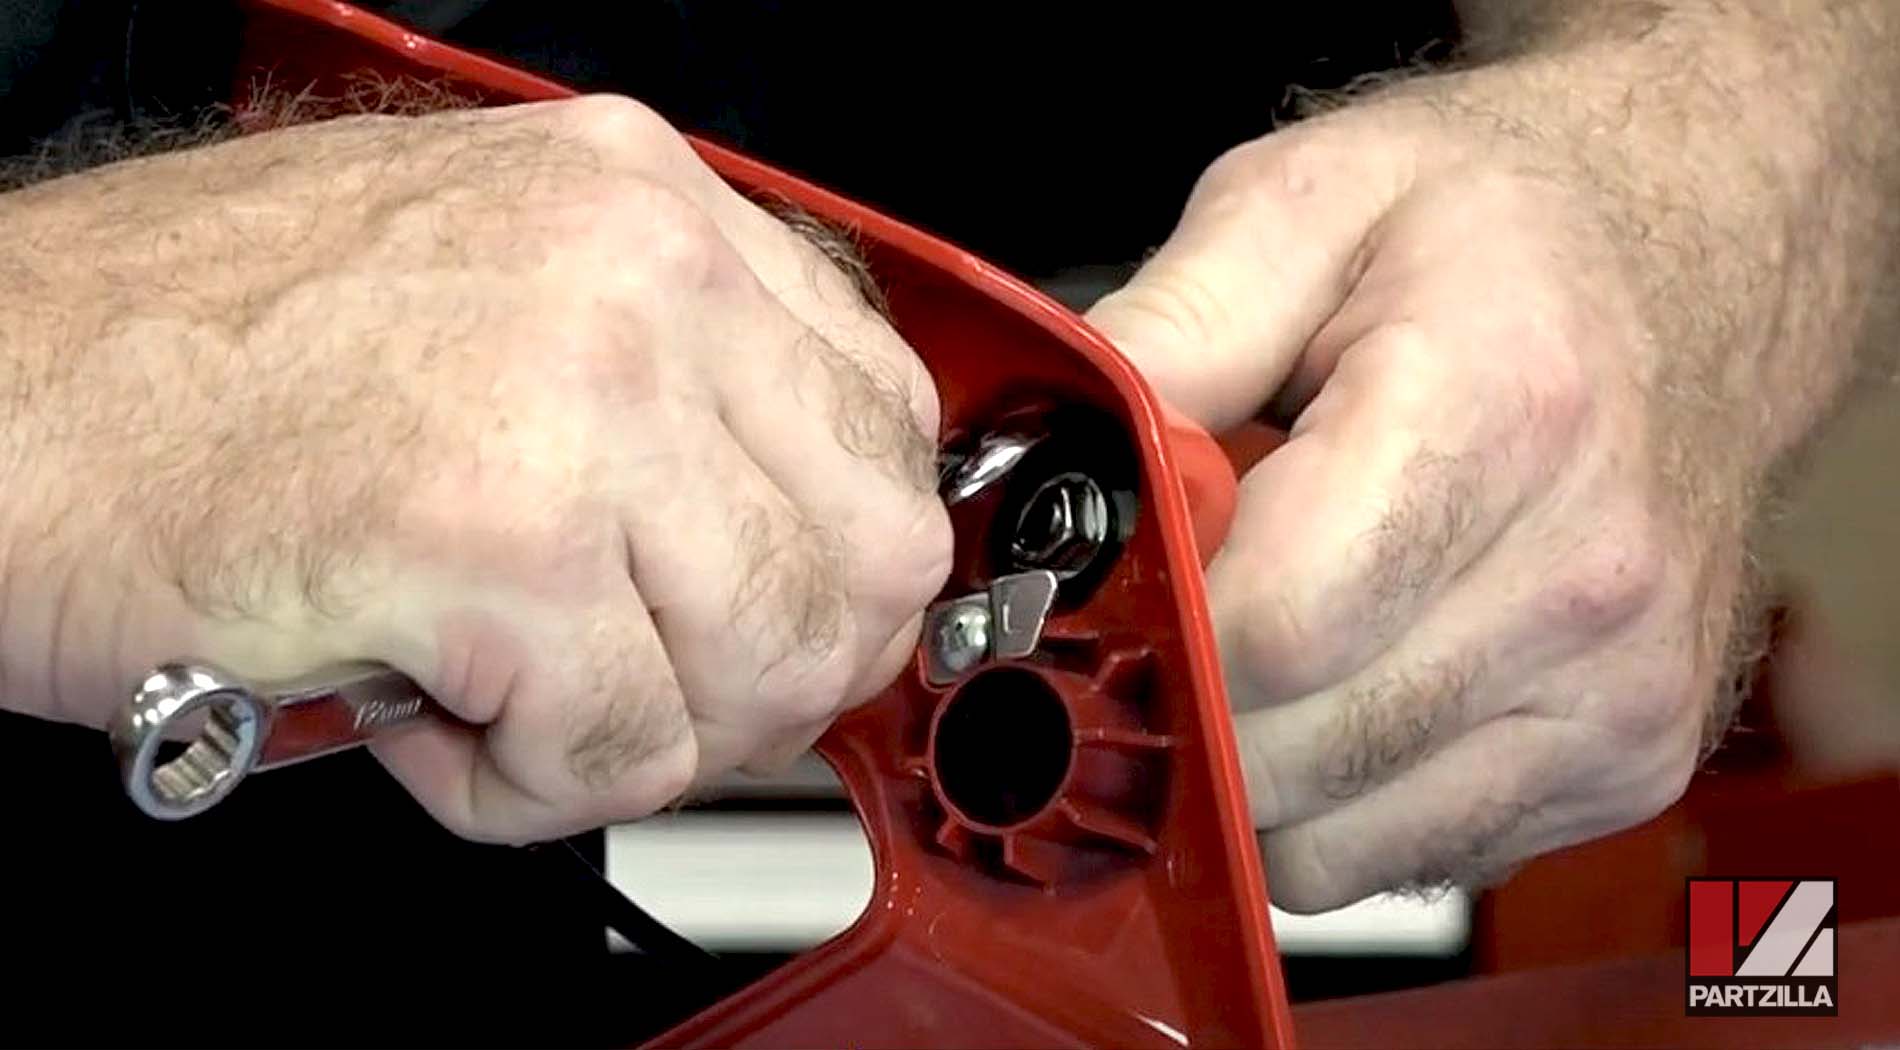
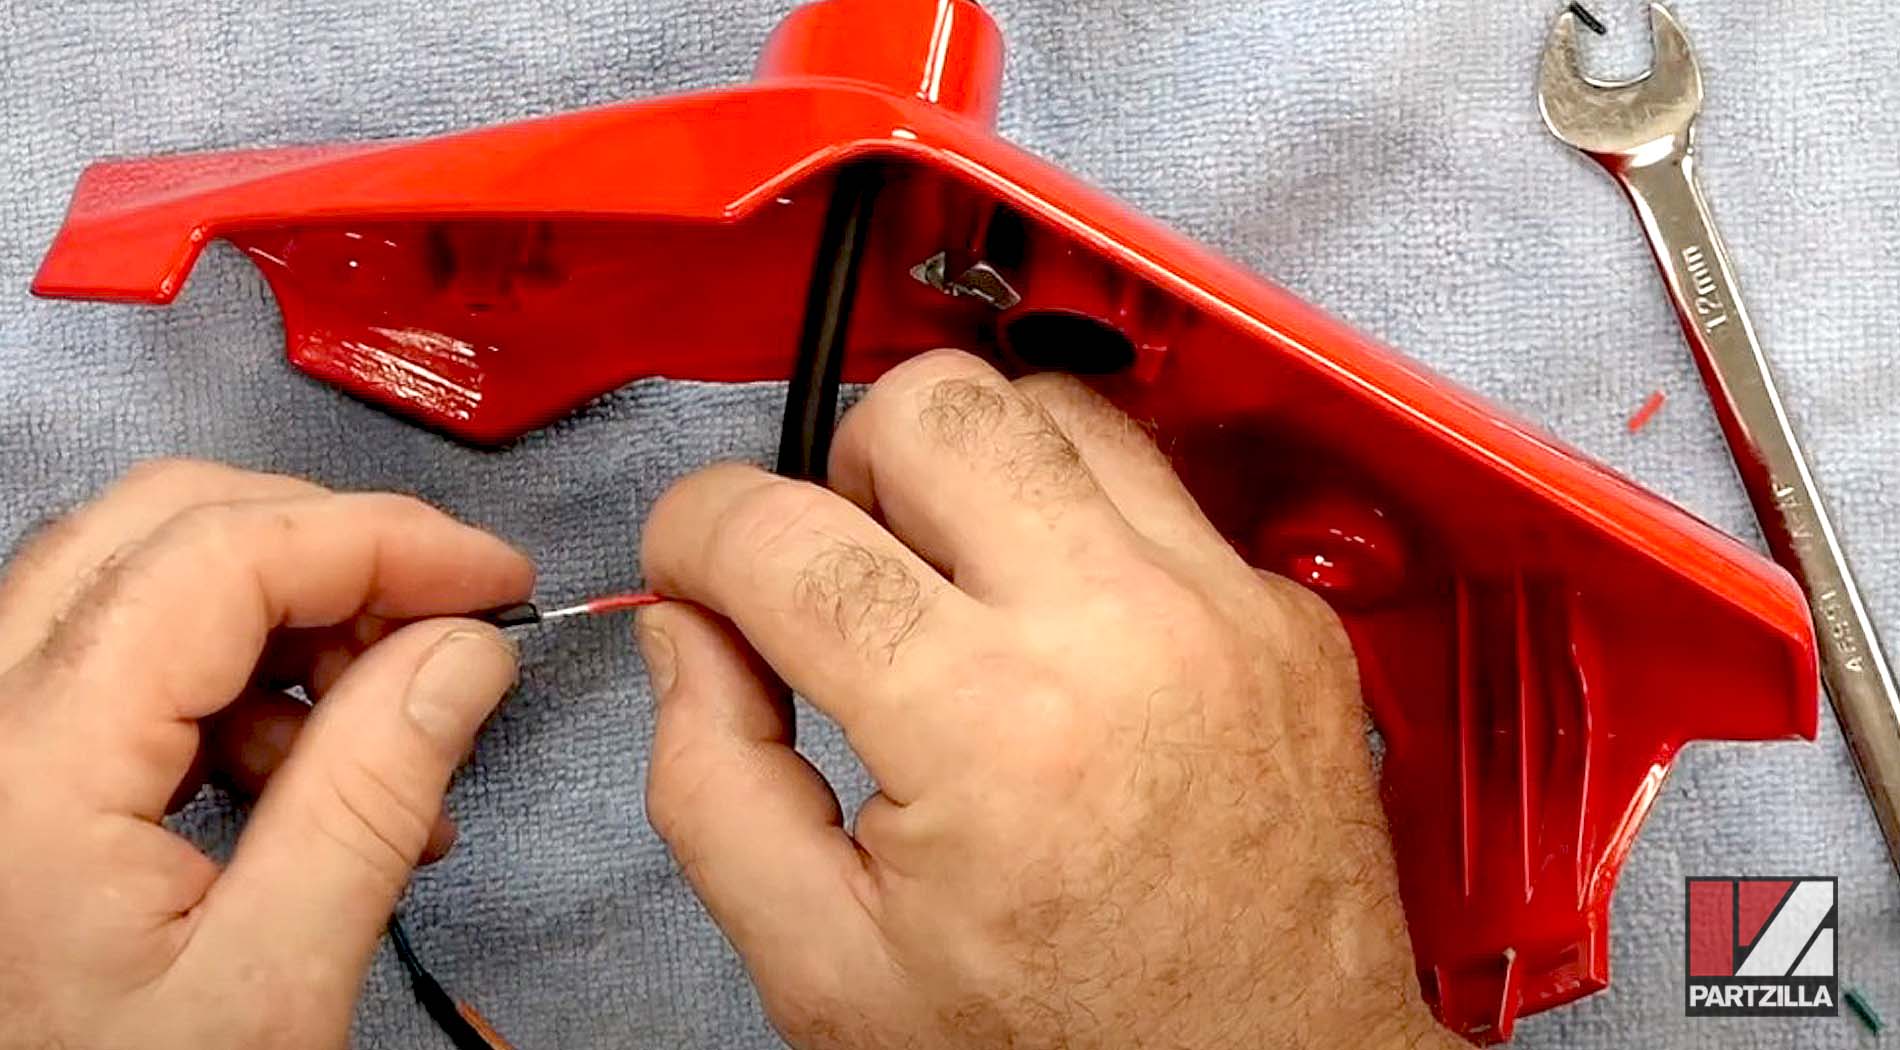
Step 3. Remove the 8mm adjustment bolt and plastic rivet from beneath the headlight, then pull the two halves of the headlight cover apart.
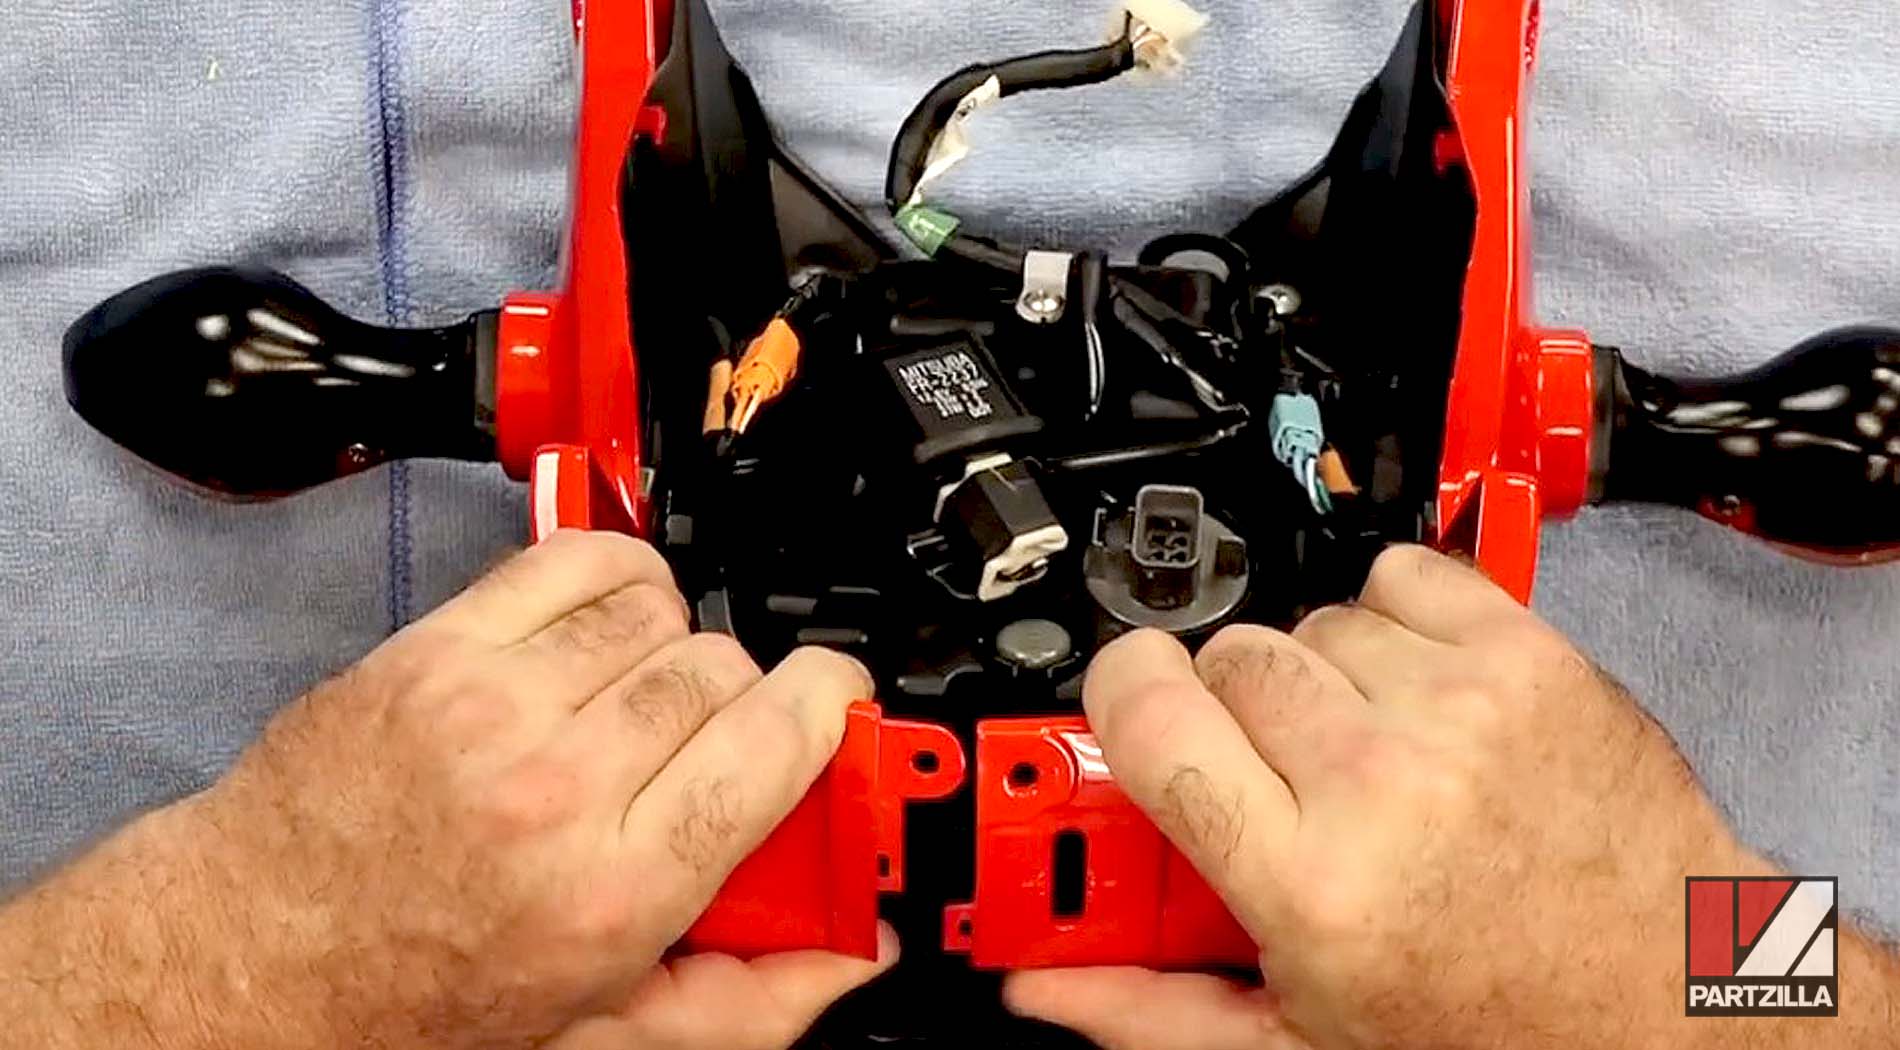
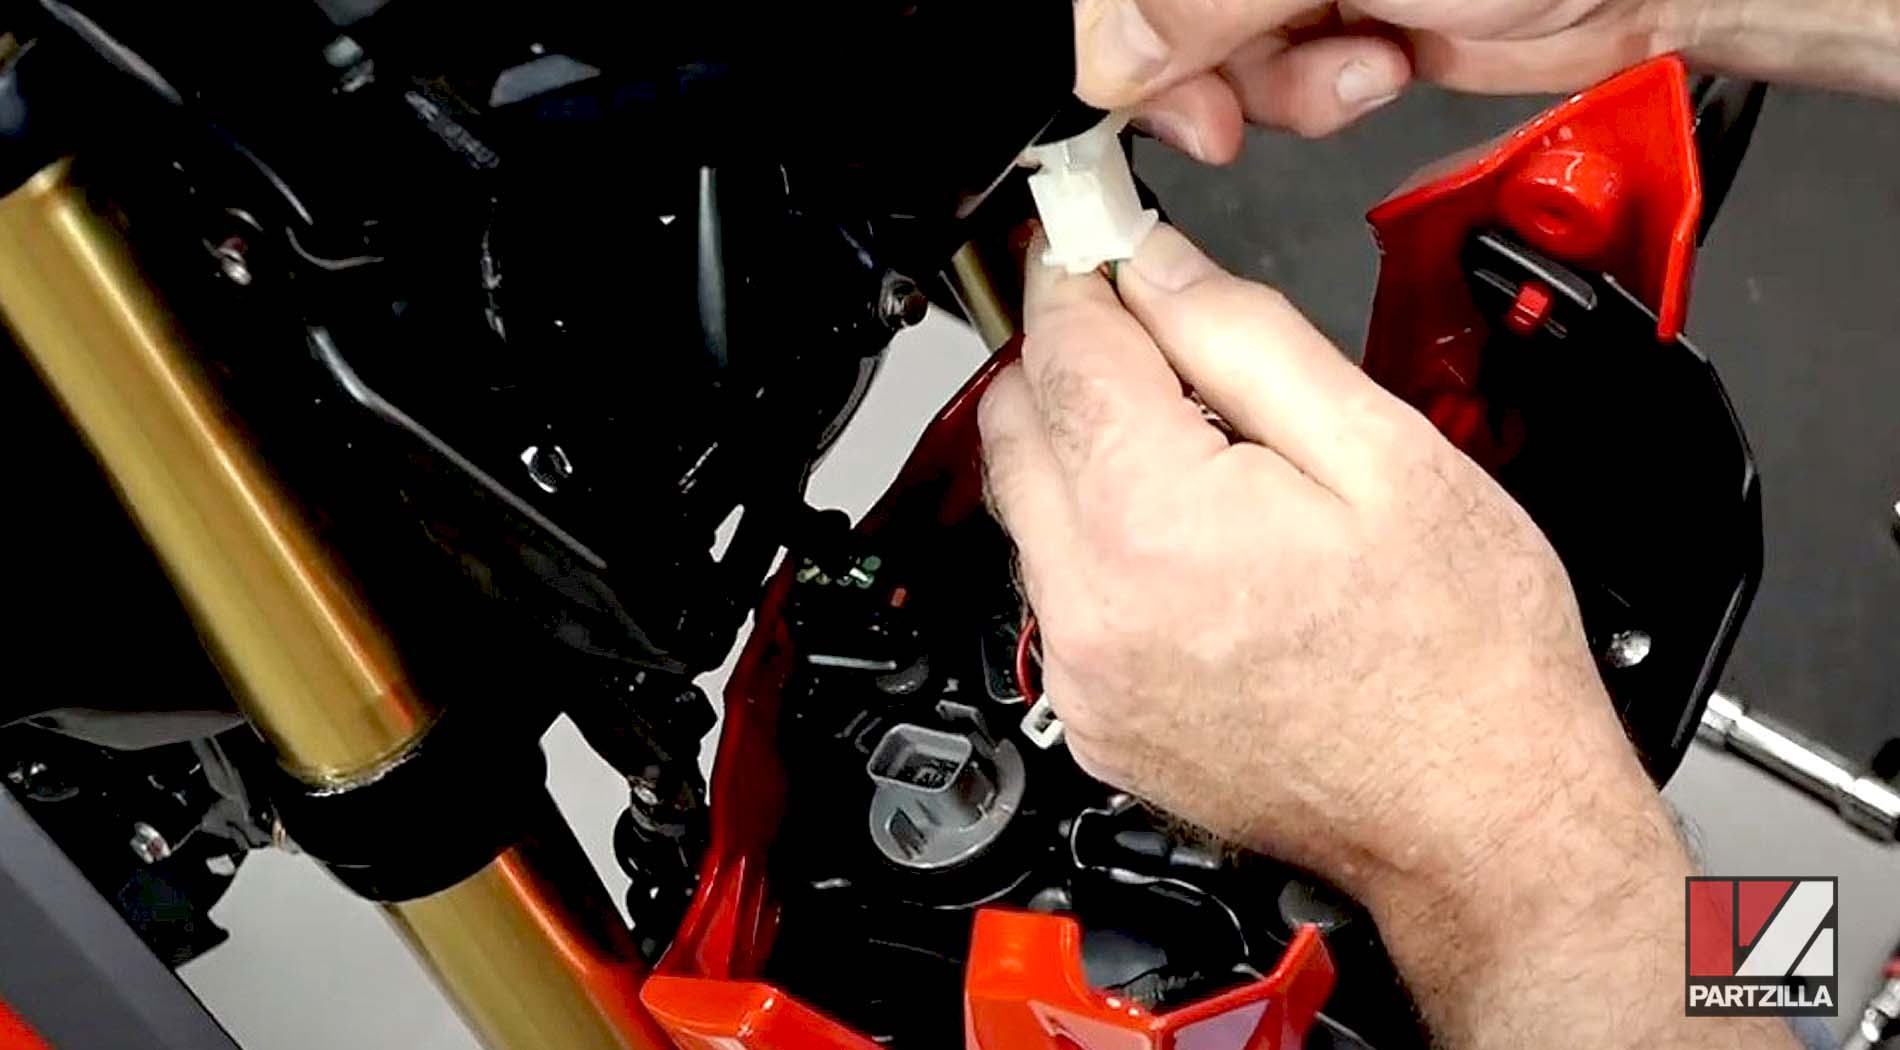
Step 4. Disconnect the turn signal wires from the sub-harness serving the headlight assembly.

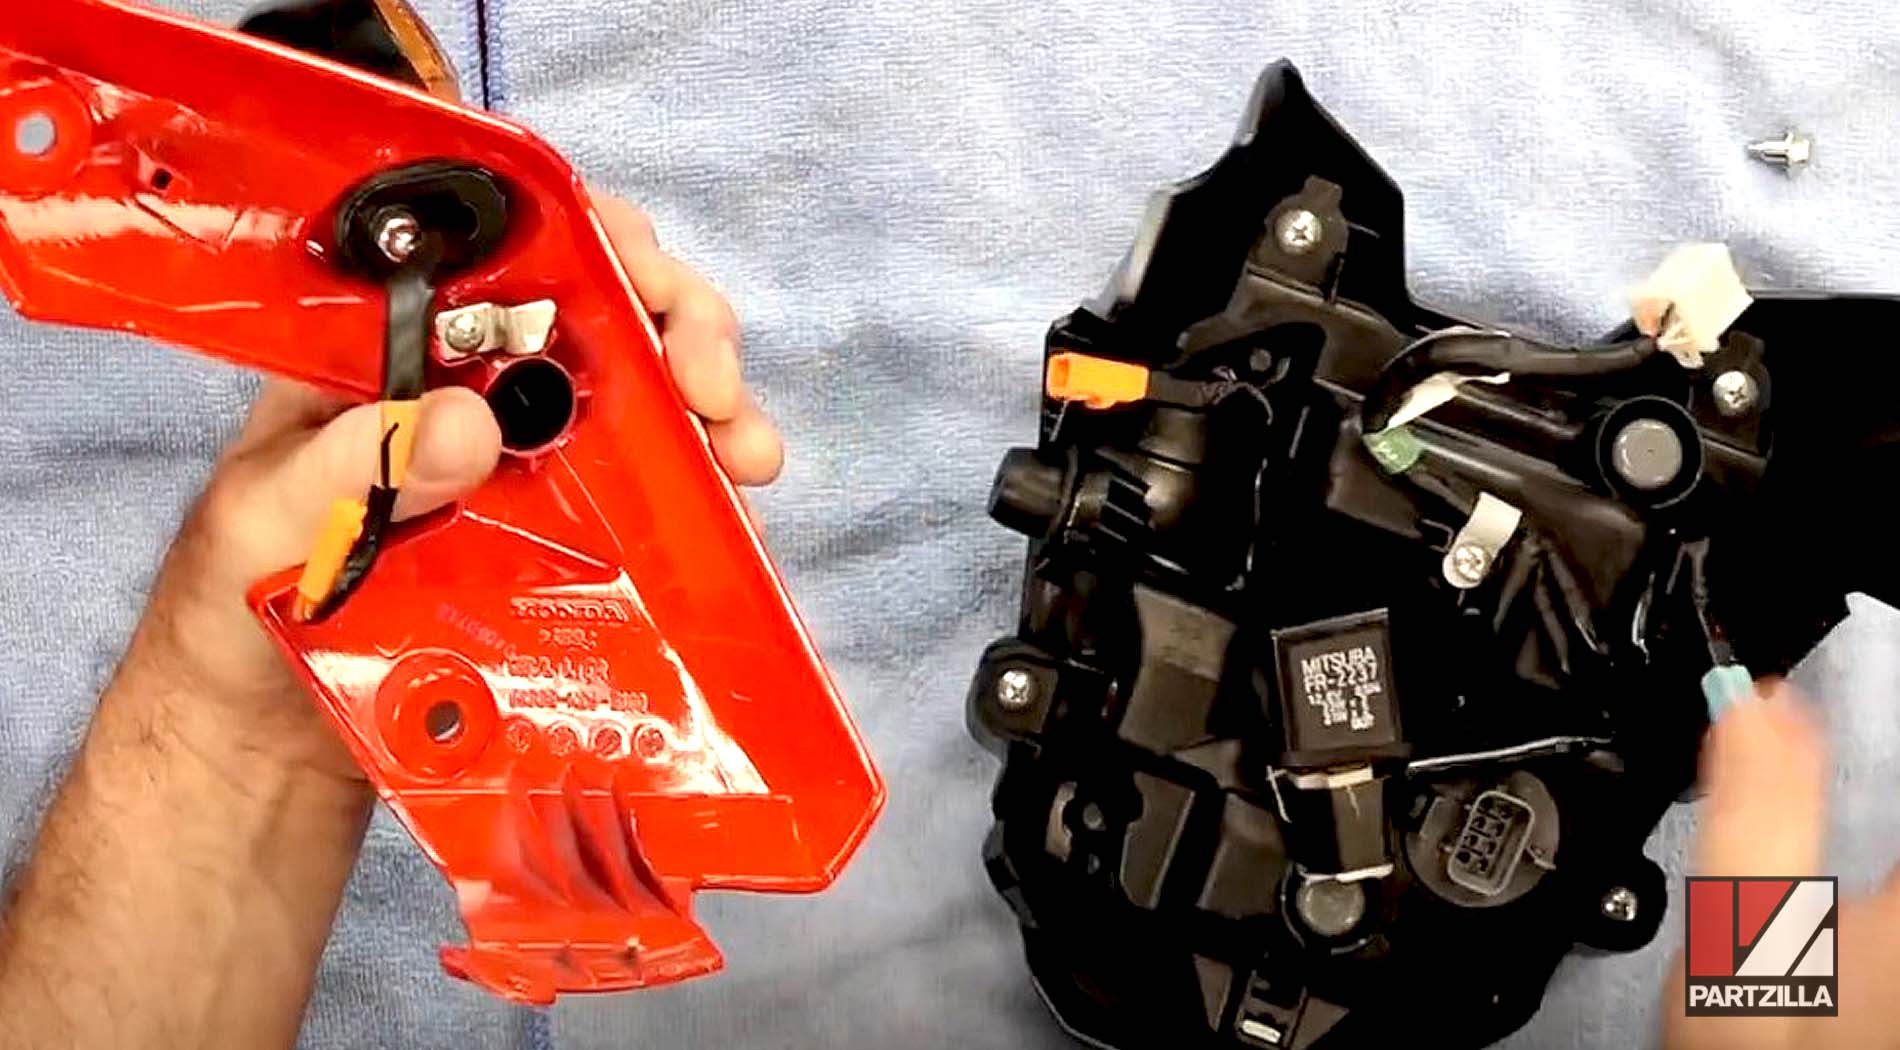
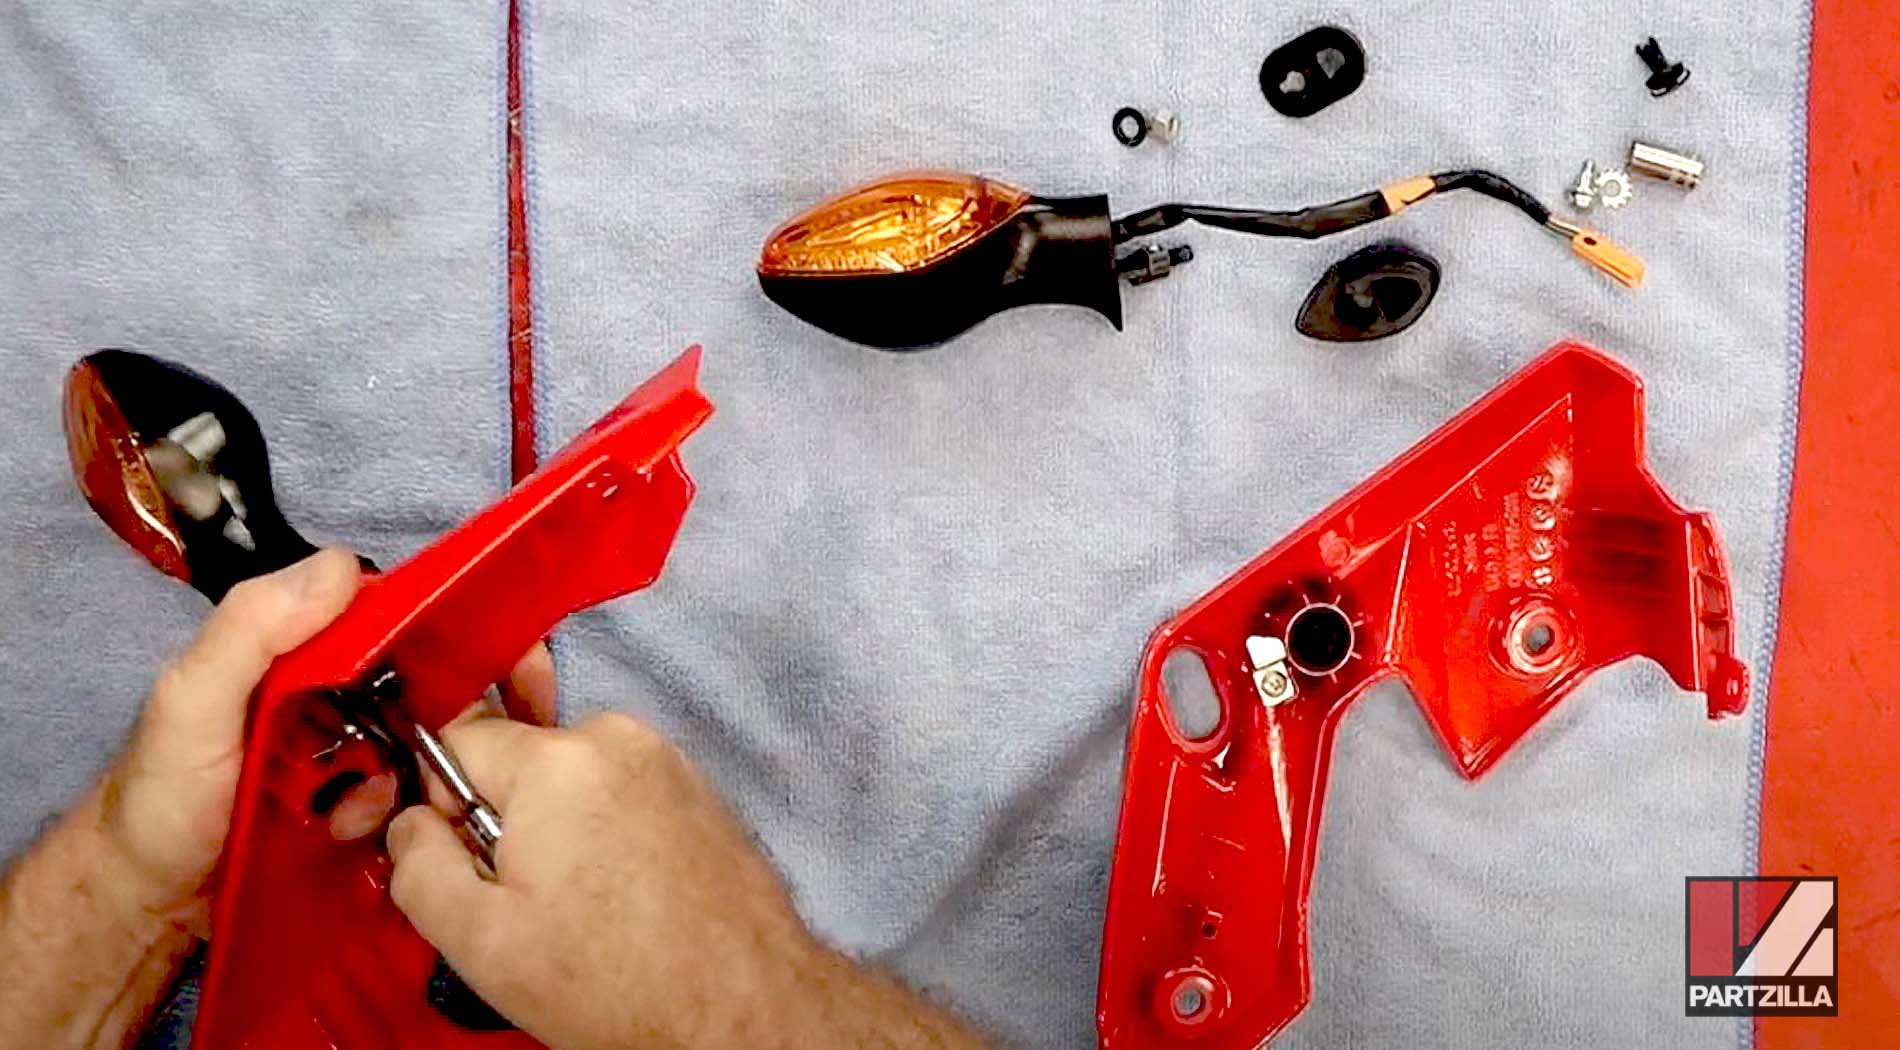
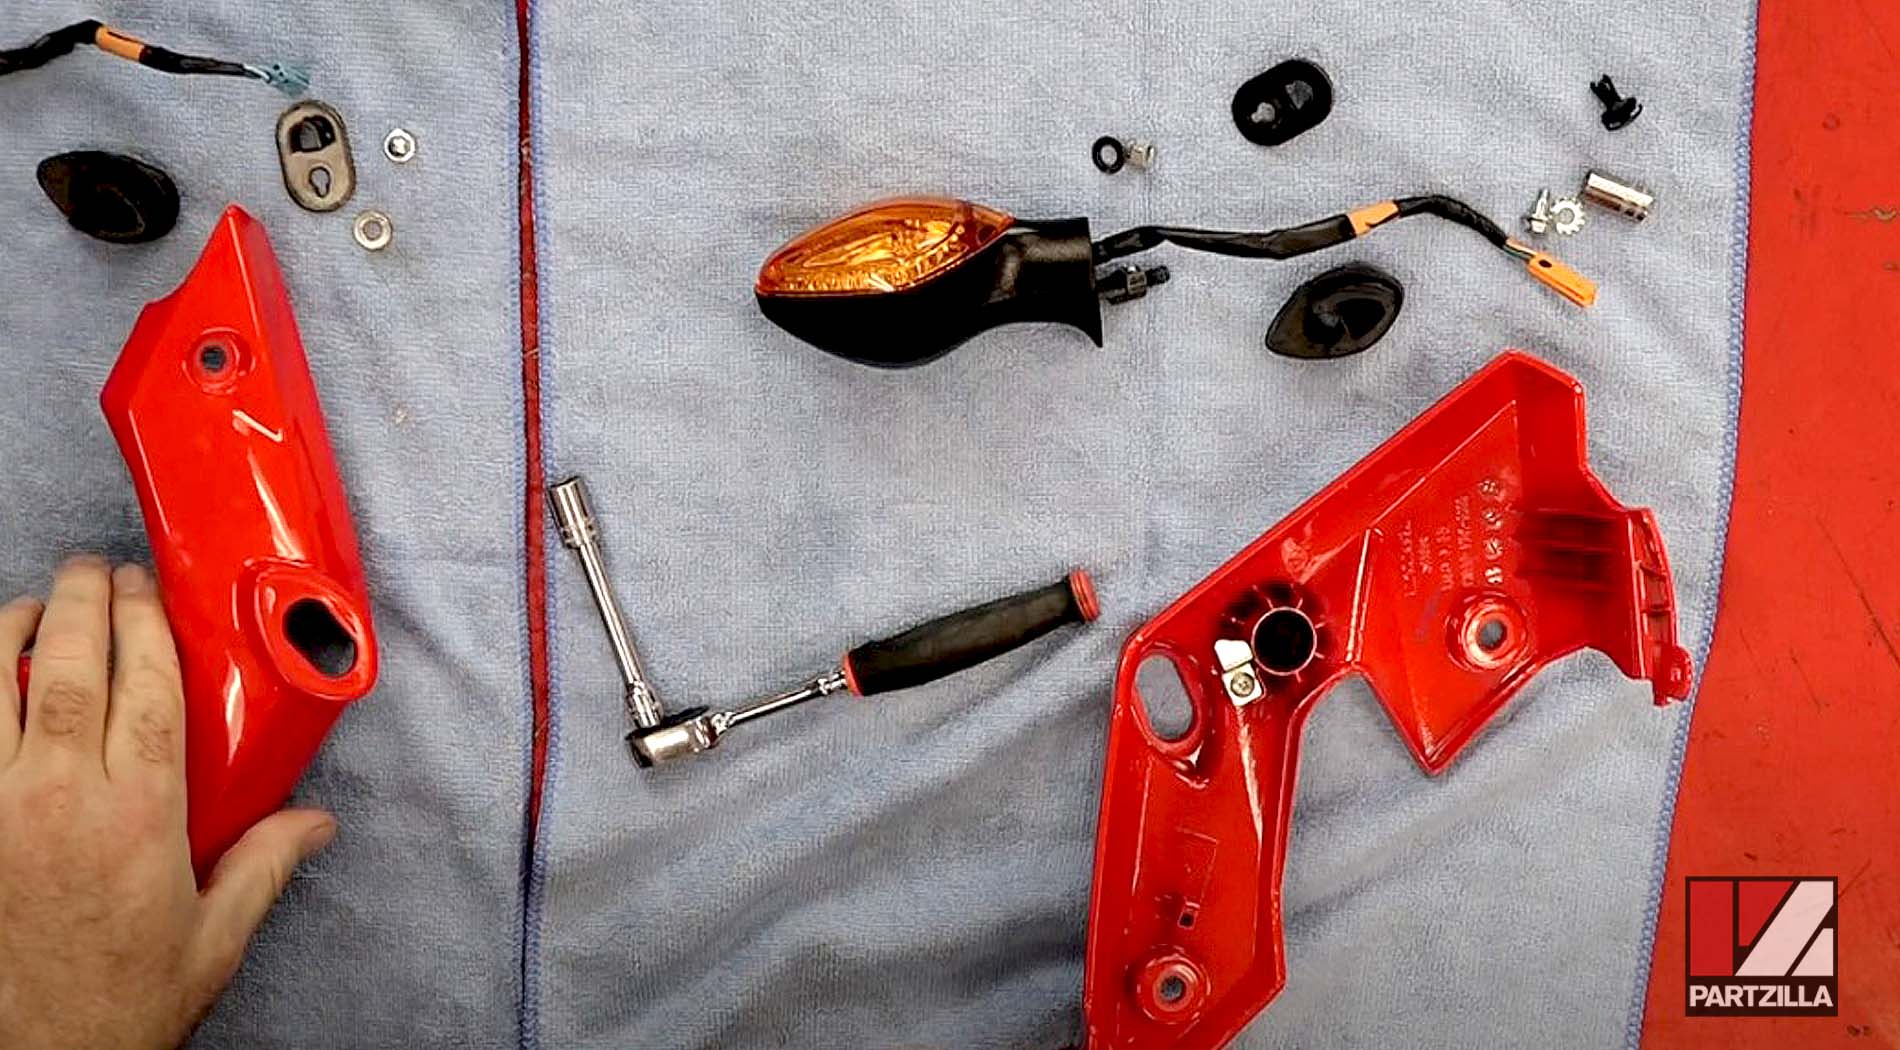
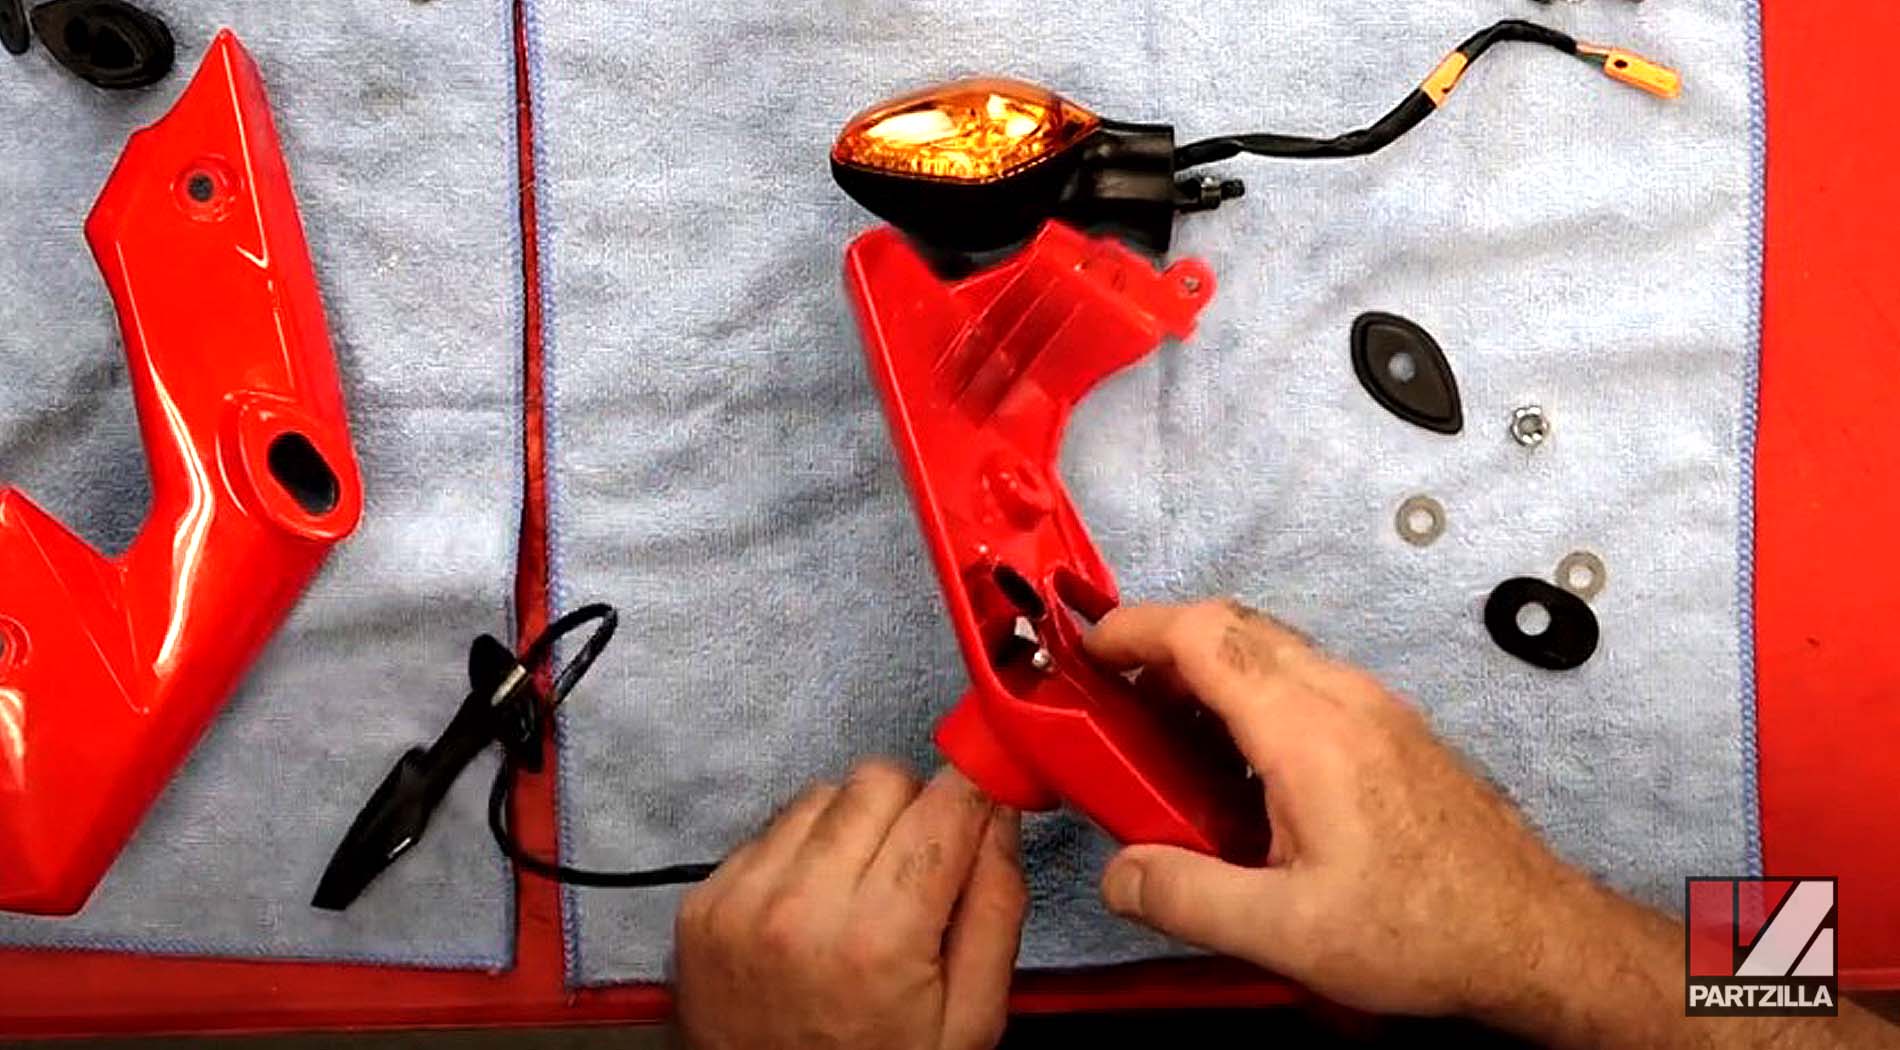
Step 5. Remove the 12mm nut, the turn signal and the rubber turn signal mount from each half of the headlight cover.
Watch the clip below to see the front turn signal removal segment of our Honda Grom Lights, Mirrors & Levers video.
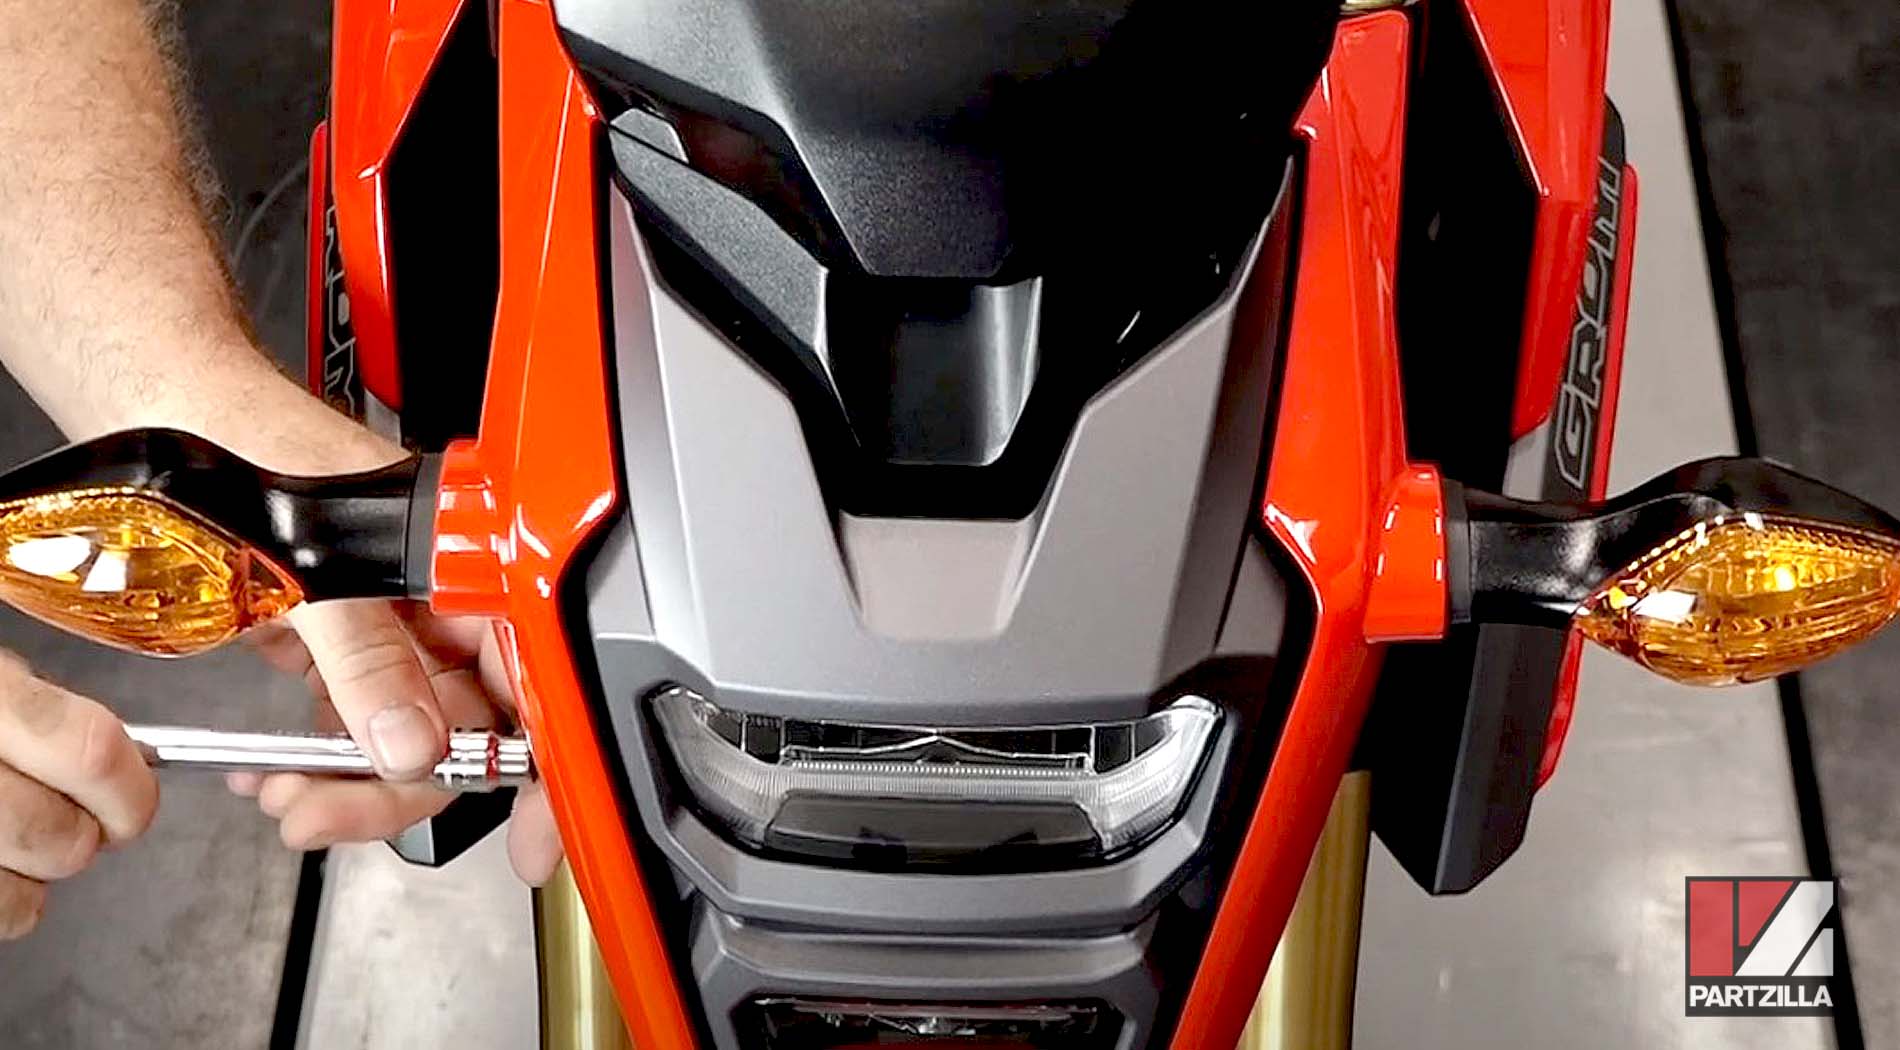
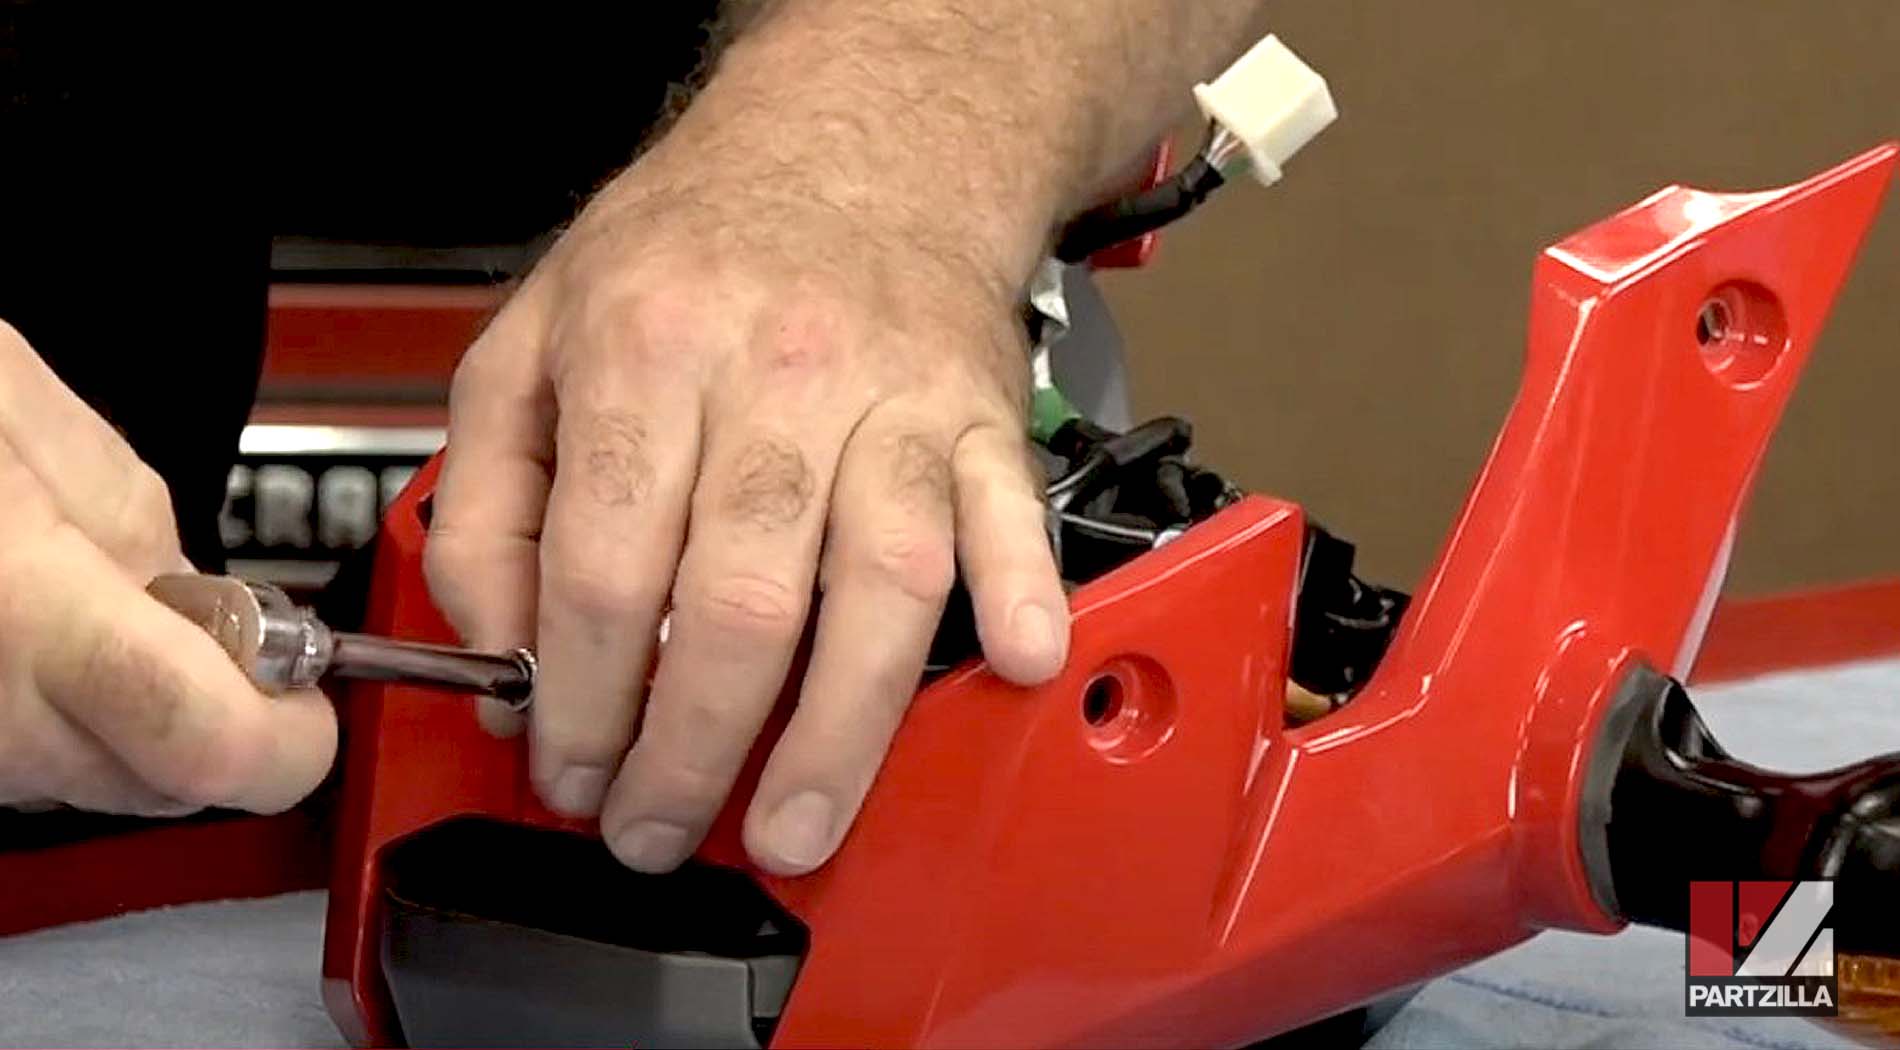
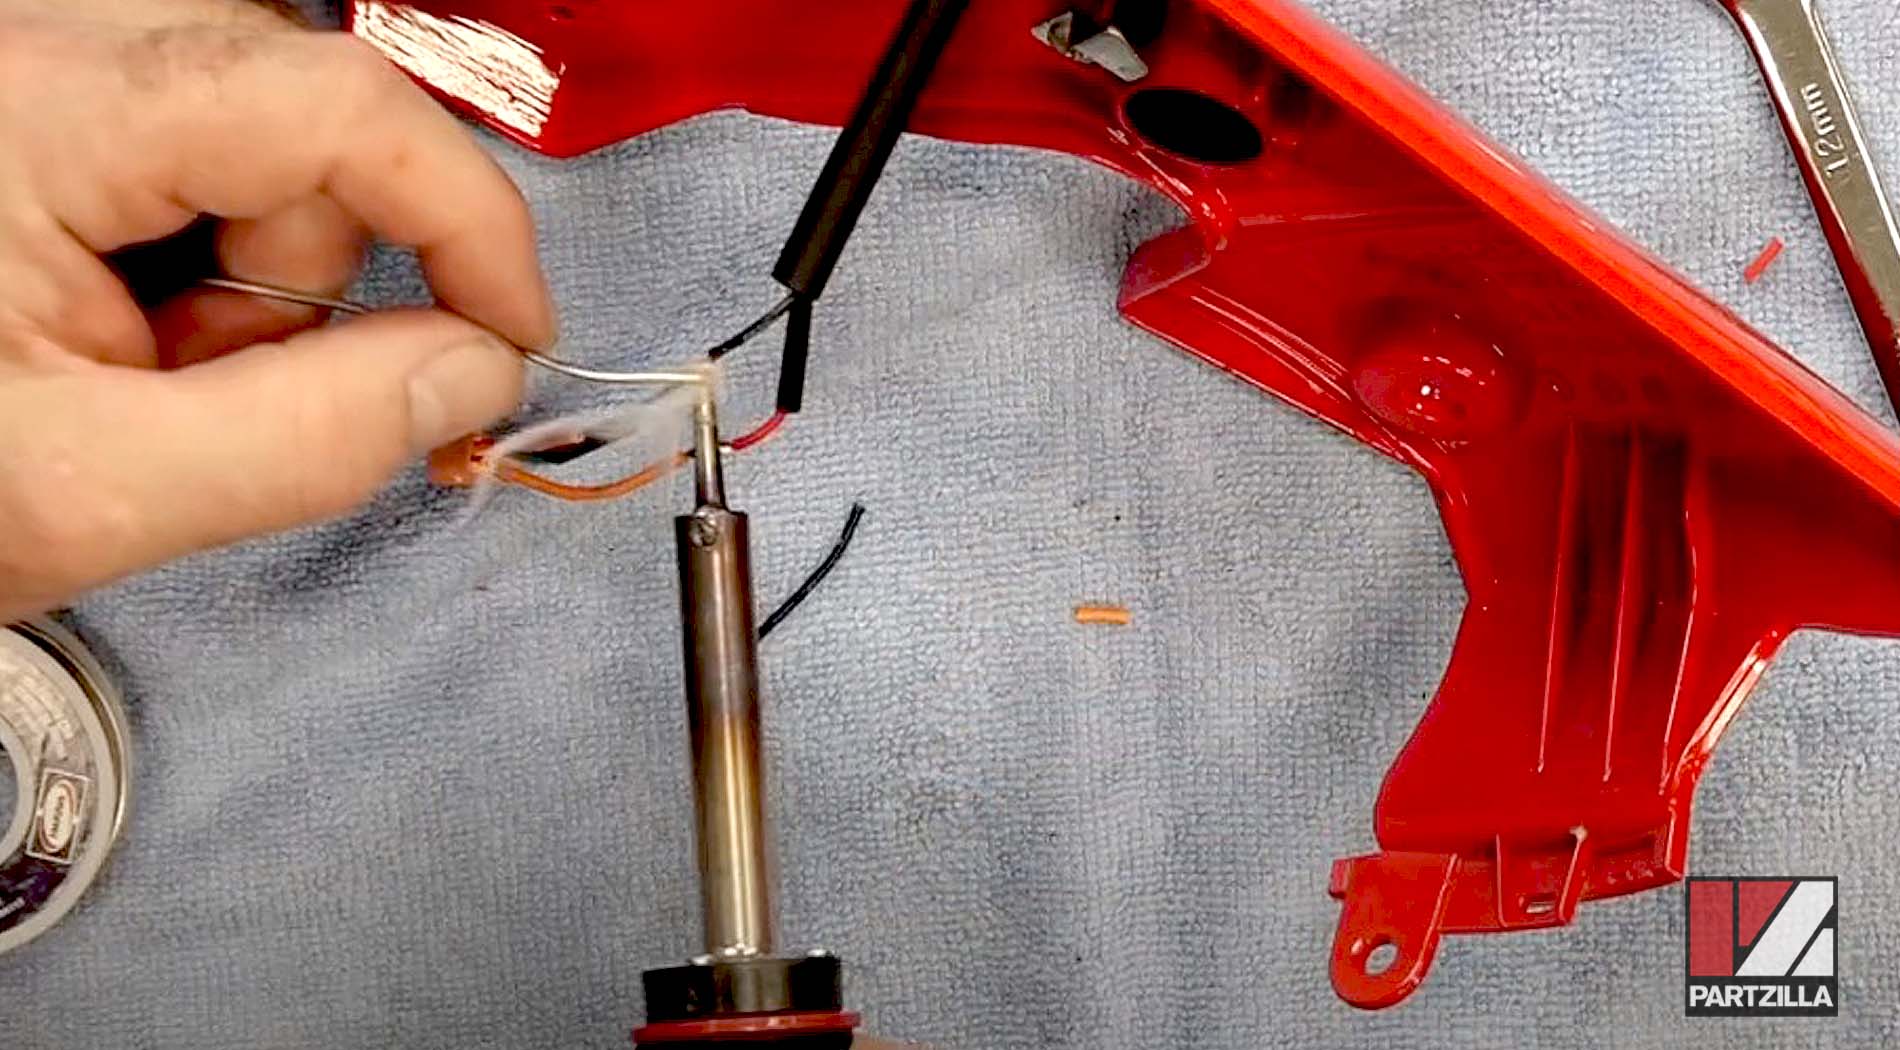
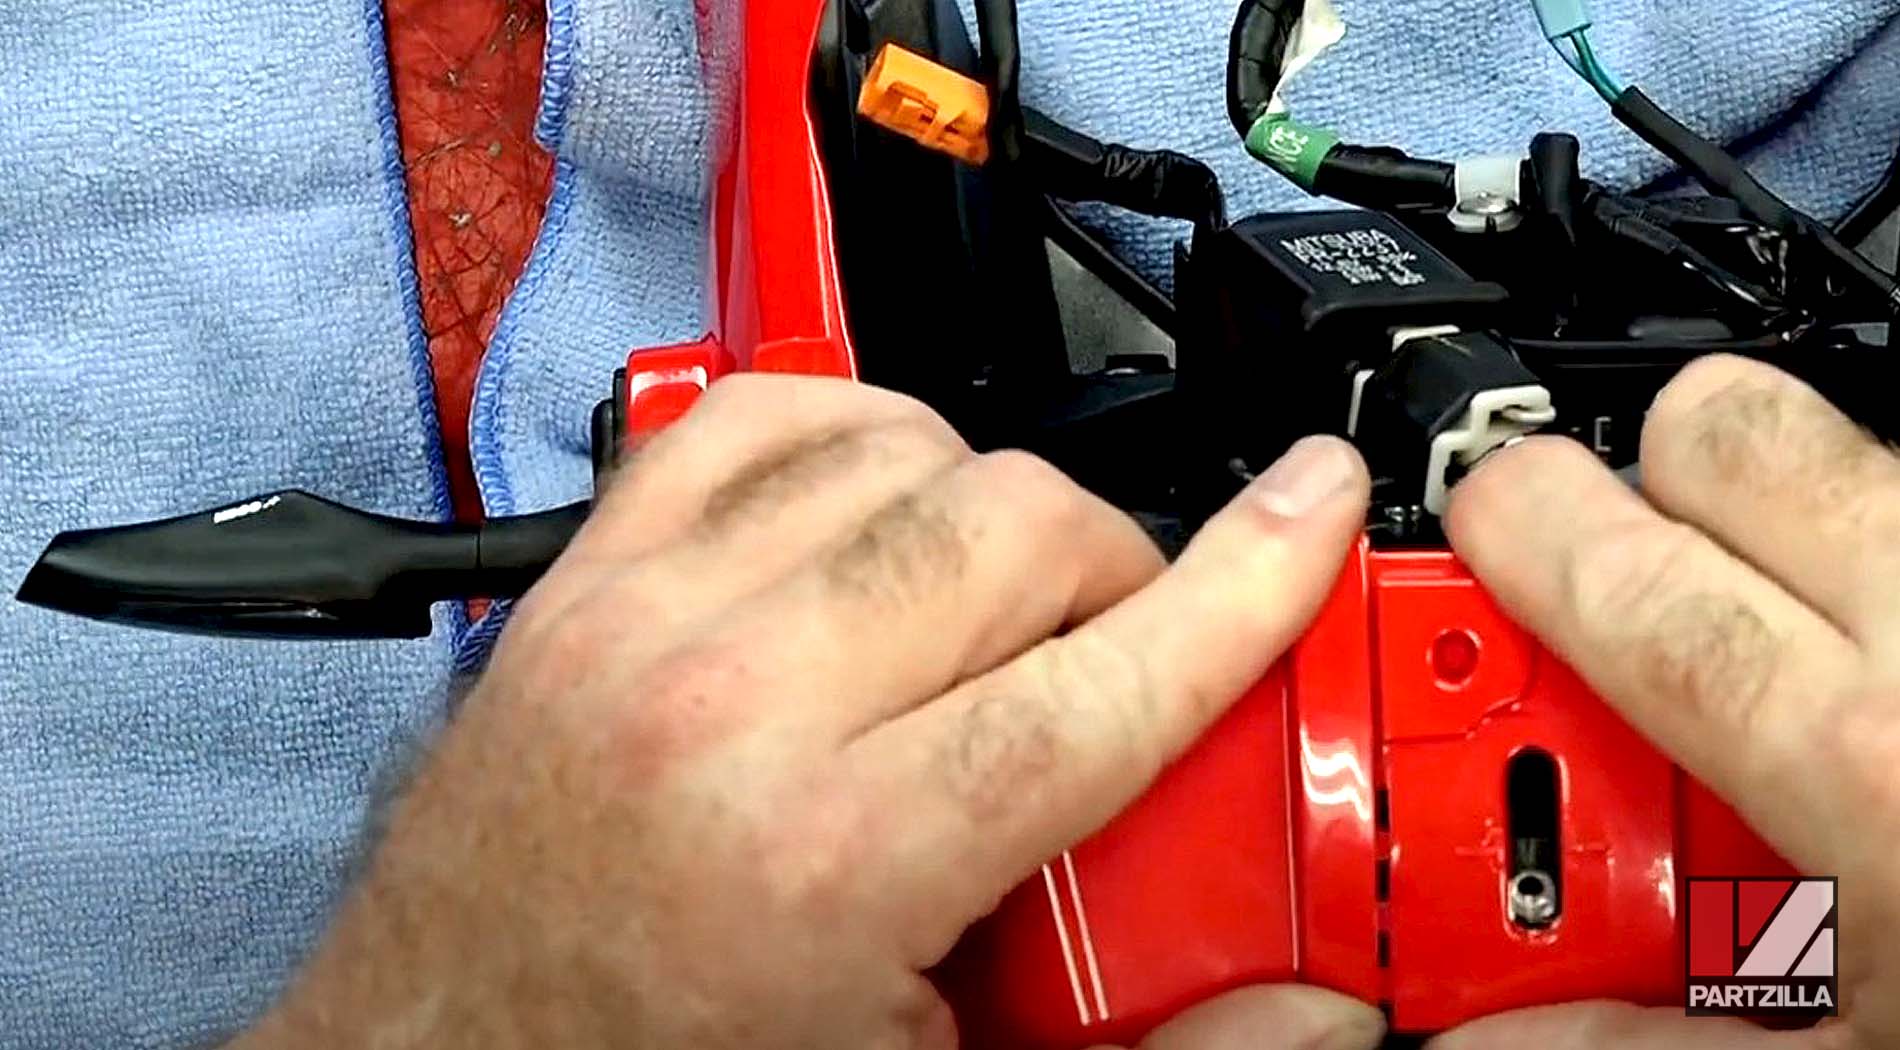
Step 6. Install the new KOSO turn signals with the outer turn signal adapter plates on the outside of the headlight assembly, and the inner adapter plates, washers and 12mm nuts on the inside of the headlight assembly. (All the adapter plates are included in the turn signal adapter kit.)
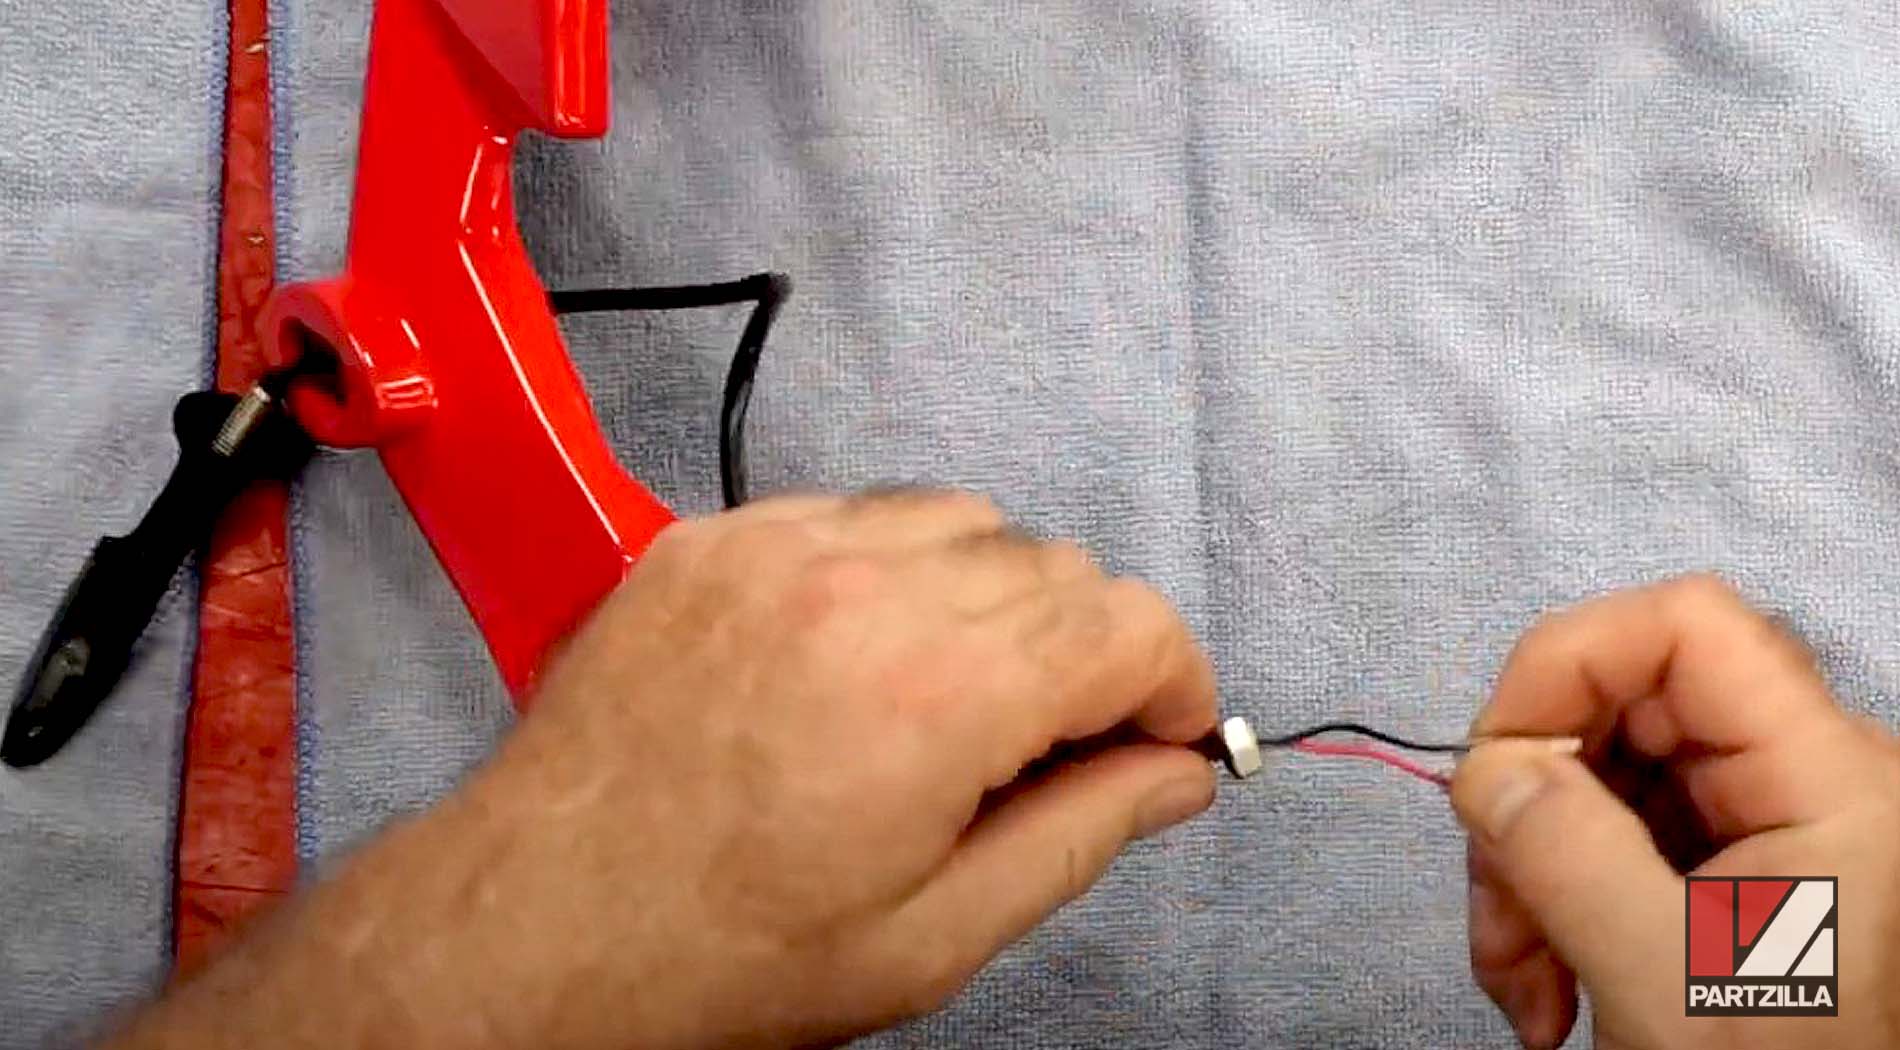
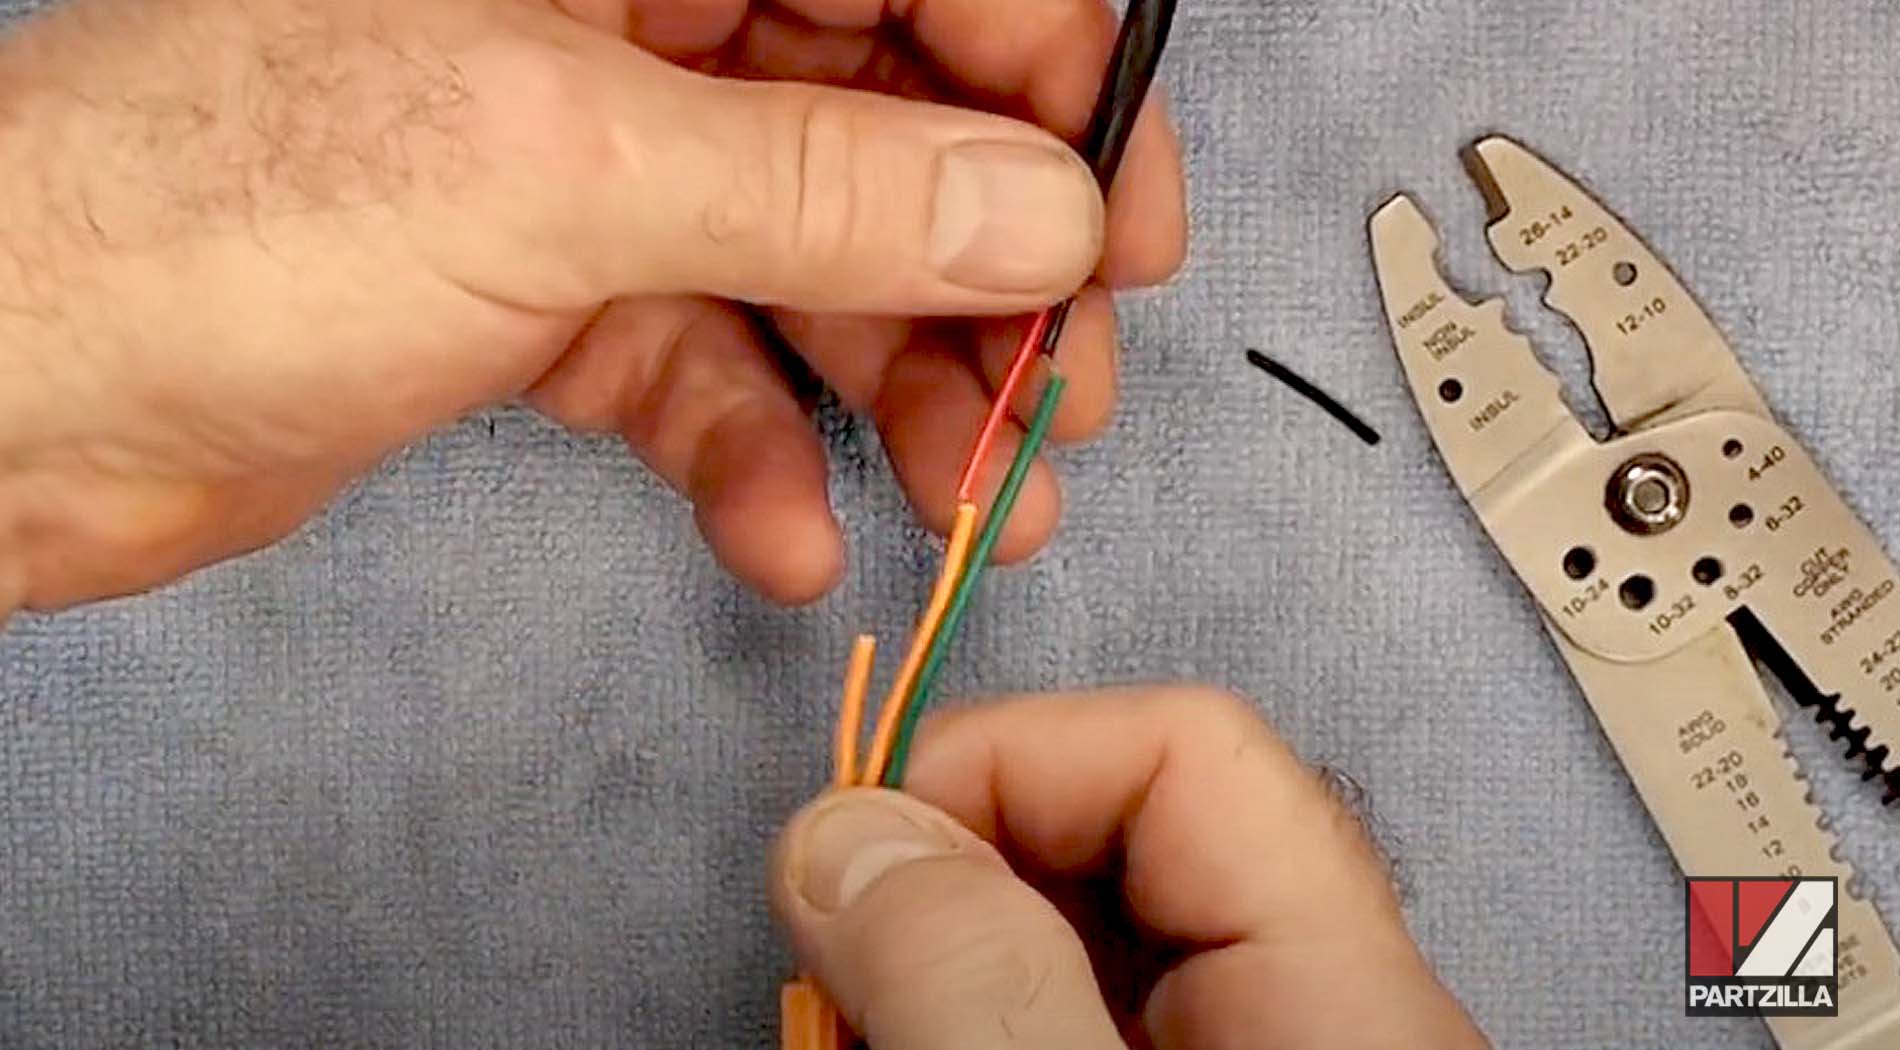
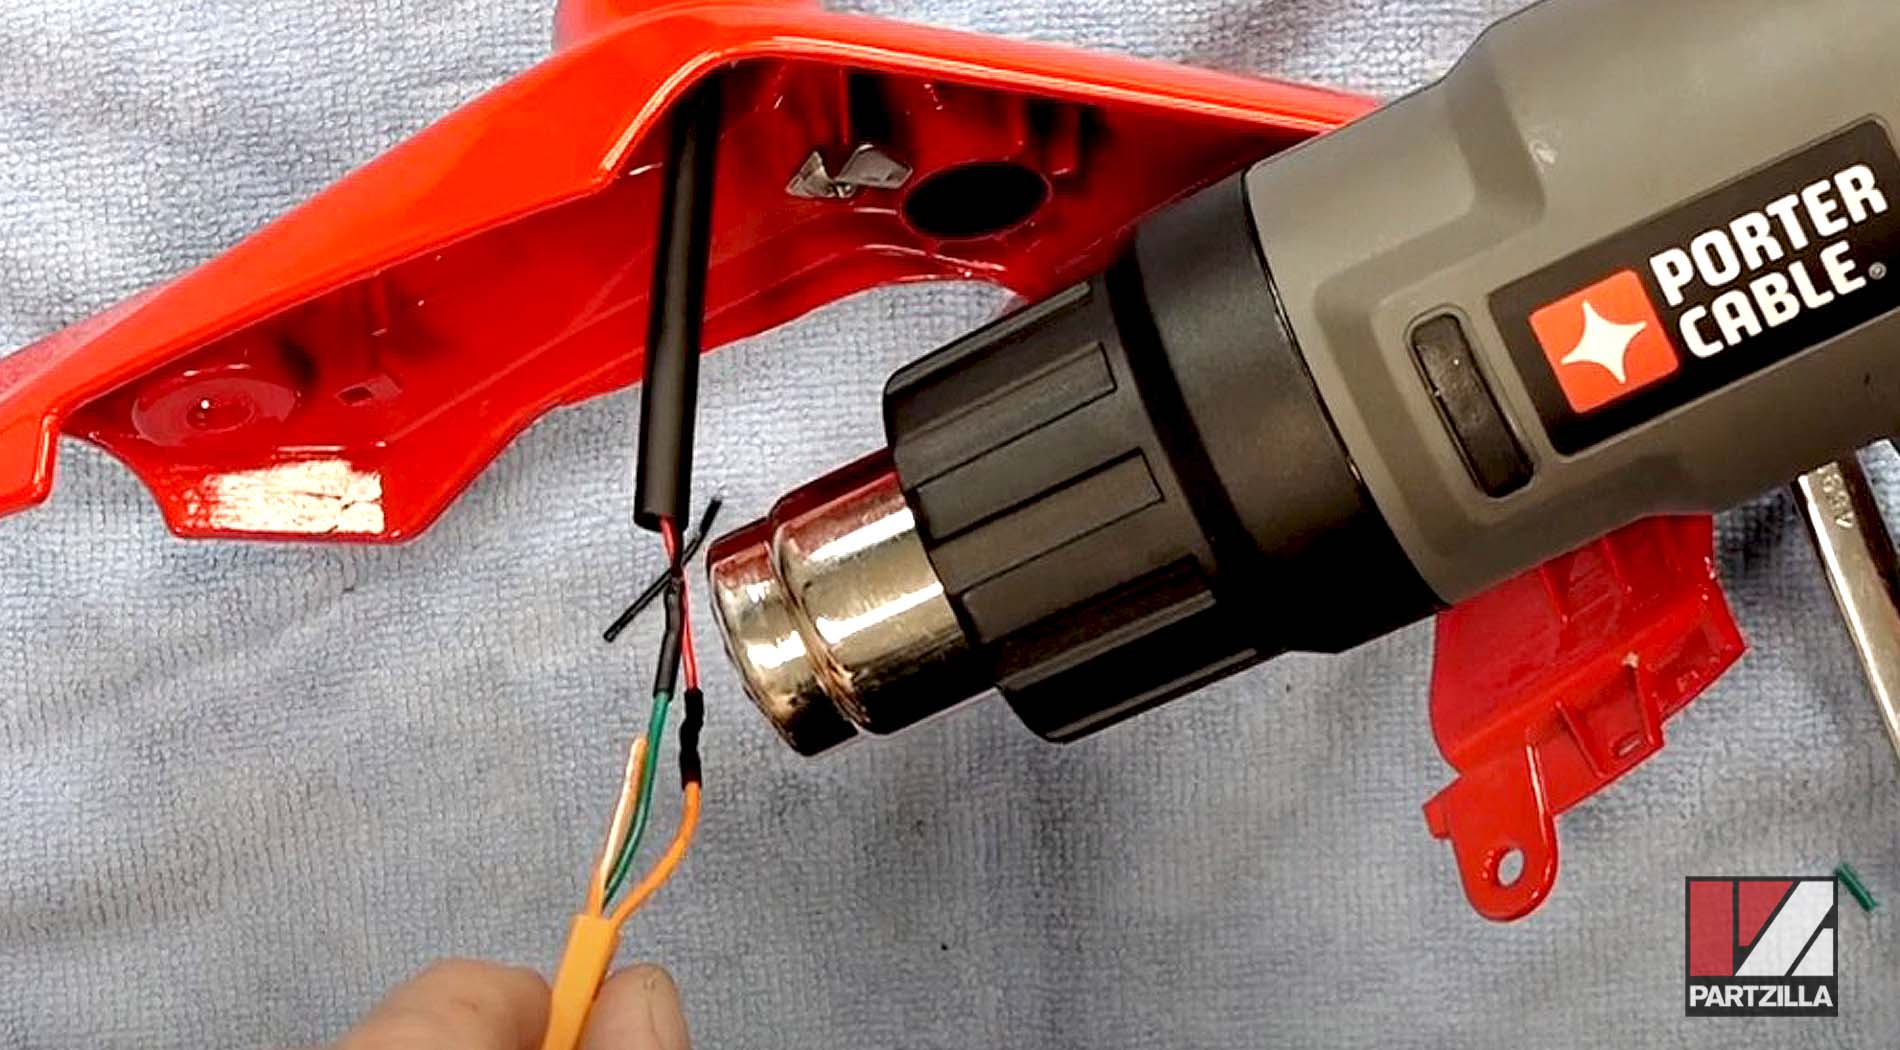
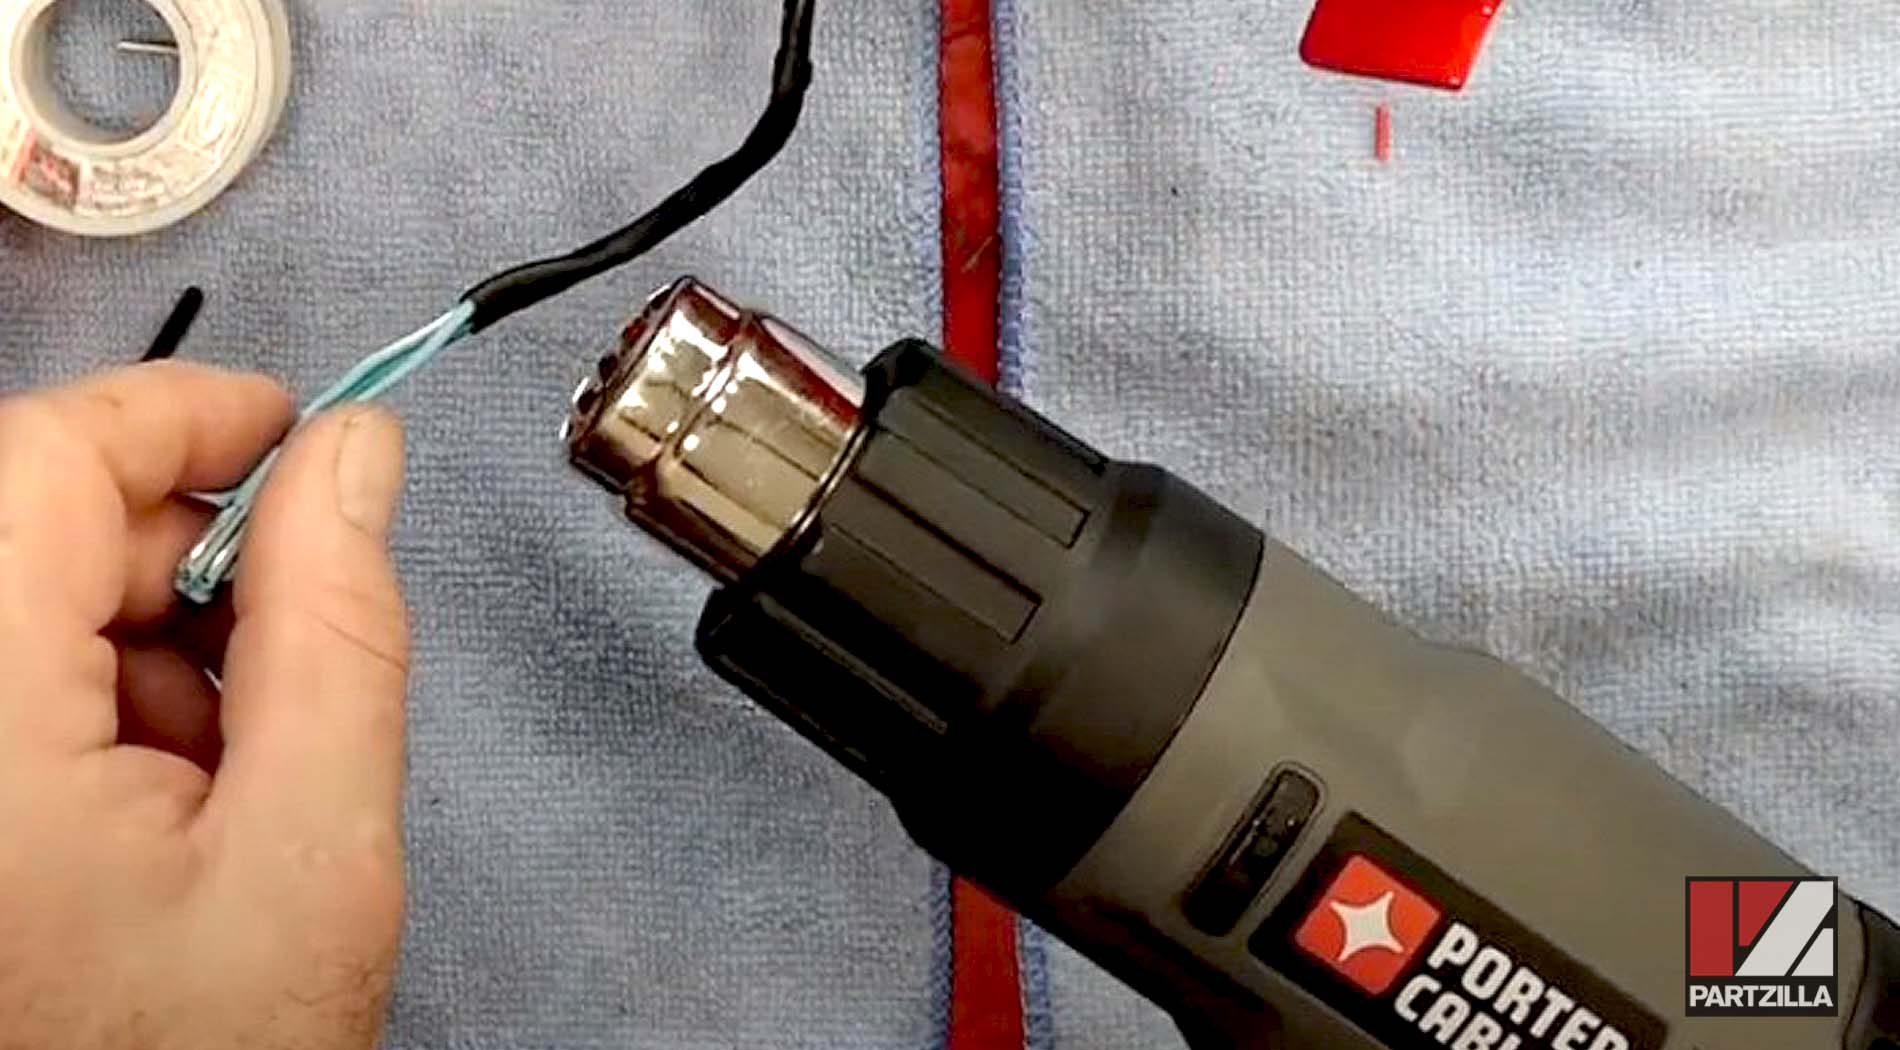
Step 7. Cut the cable and connector from the old left turn signal, then put a length of shrink tube over the green and orange wires, and solder them as follows:
- Solder the green wire to the black wire from the new turn signal
- Solder the orange wire to the red wire from the new turn signal
- The orange/white wire in the cable will not be used
Step 8. Cut the cable and connector from the old right turn signal, then put a length of shrink tube over the green and the blue wires, and solder them as follows:
- Solder the green wire to the black wire from the new turn signal
- Solder the blue wire to the red wire from the new turn signal
- The blue/white wire in the cable will not be used
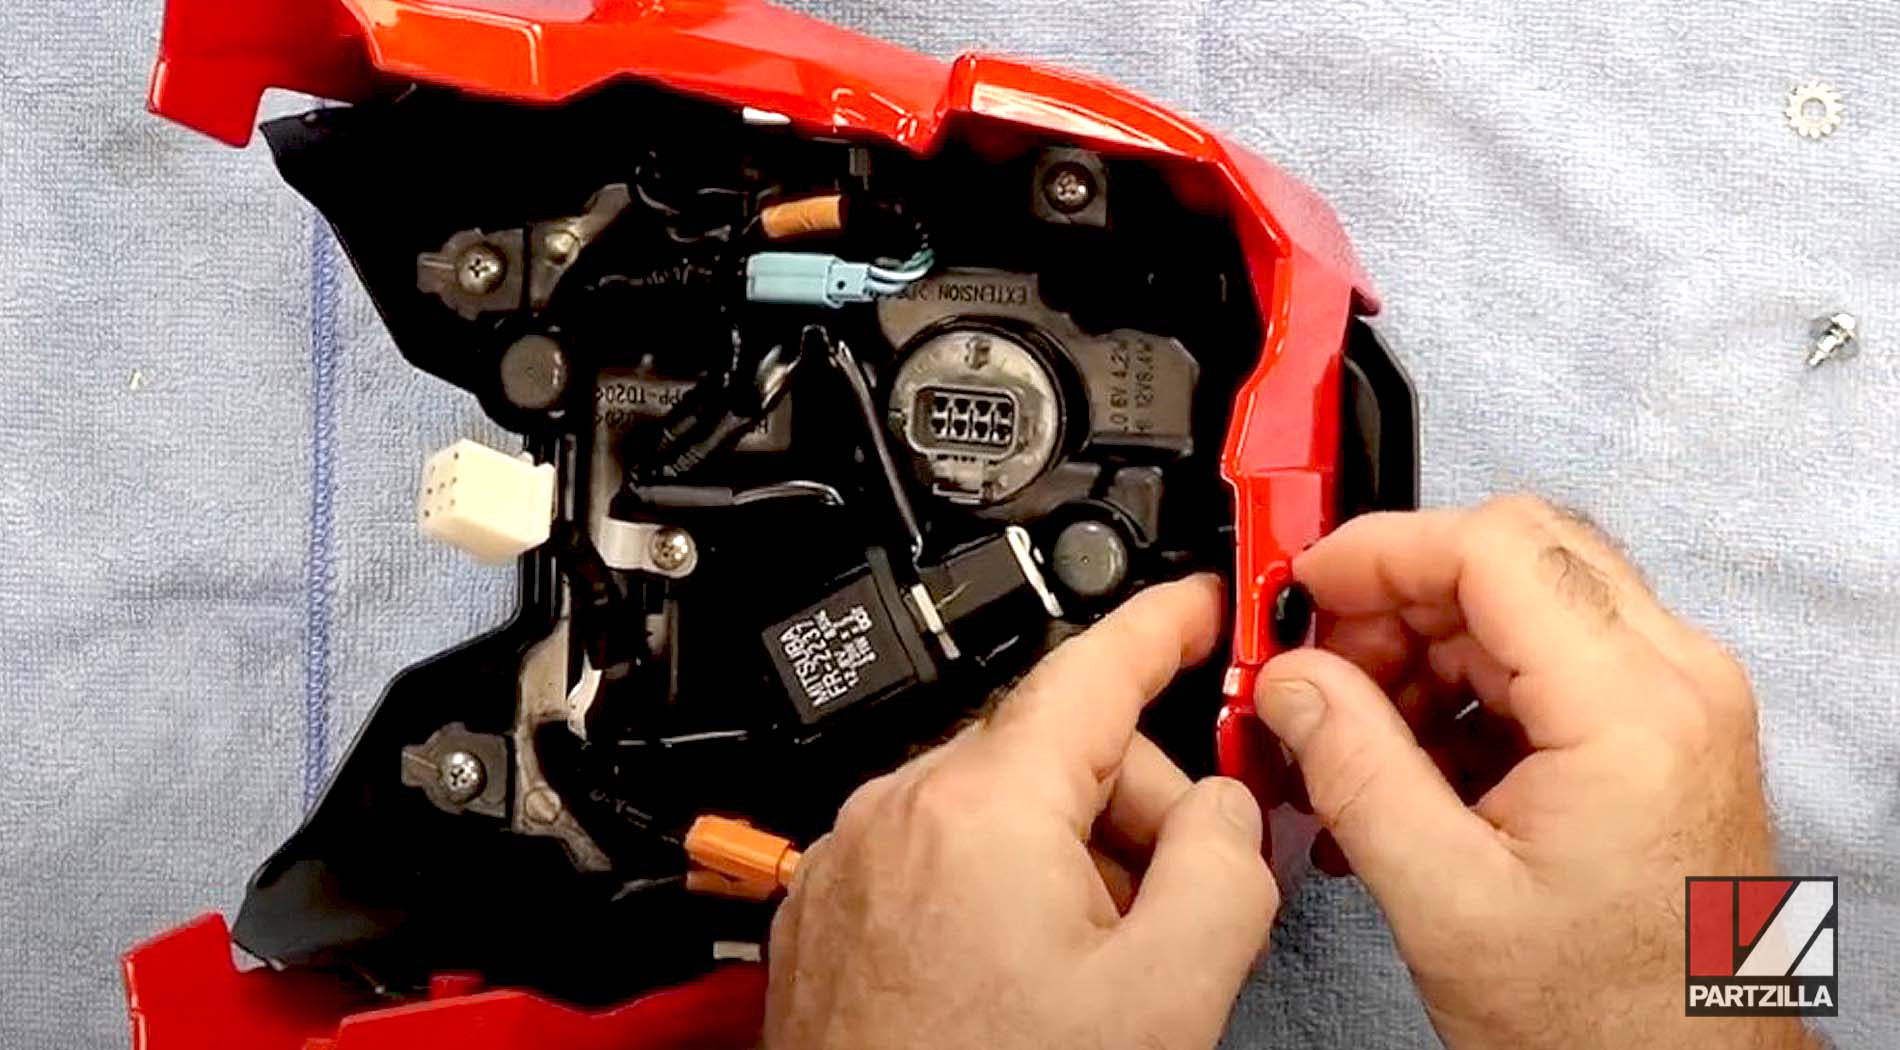
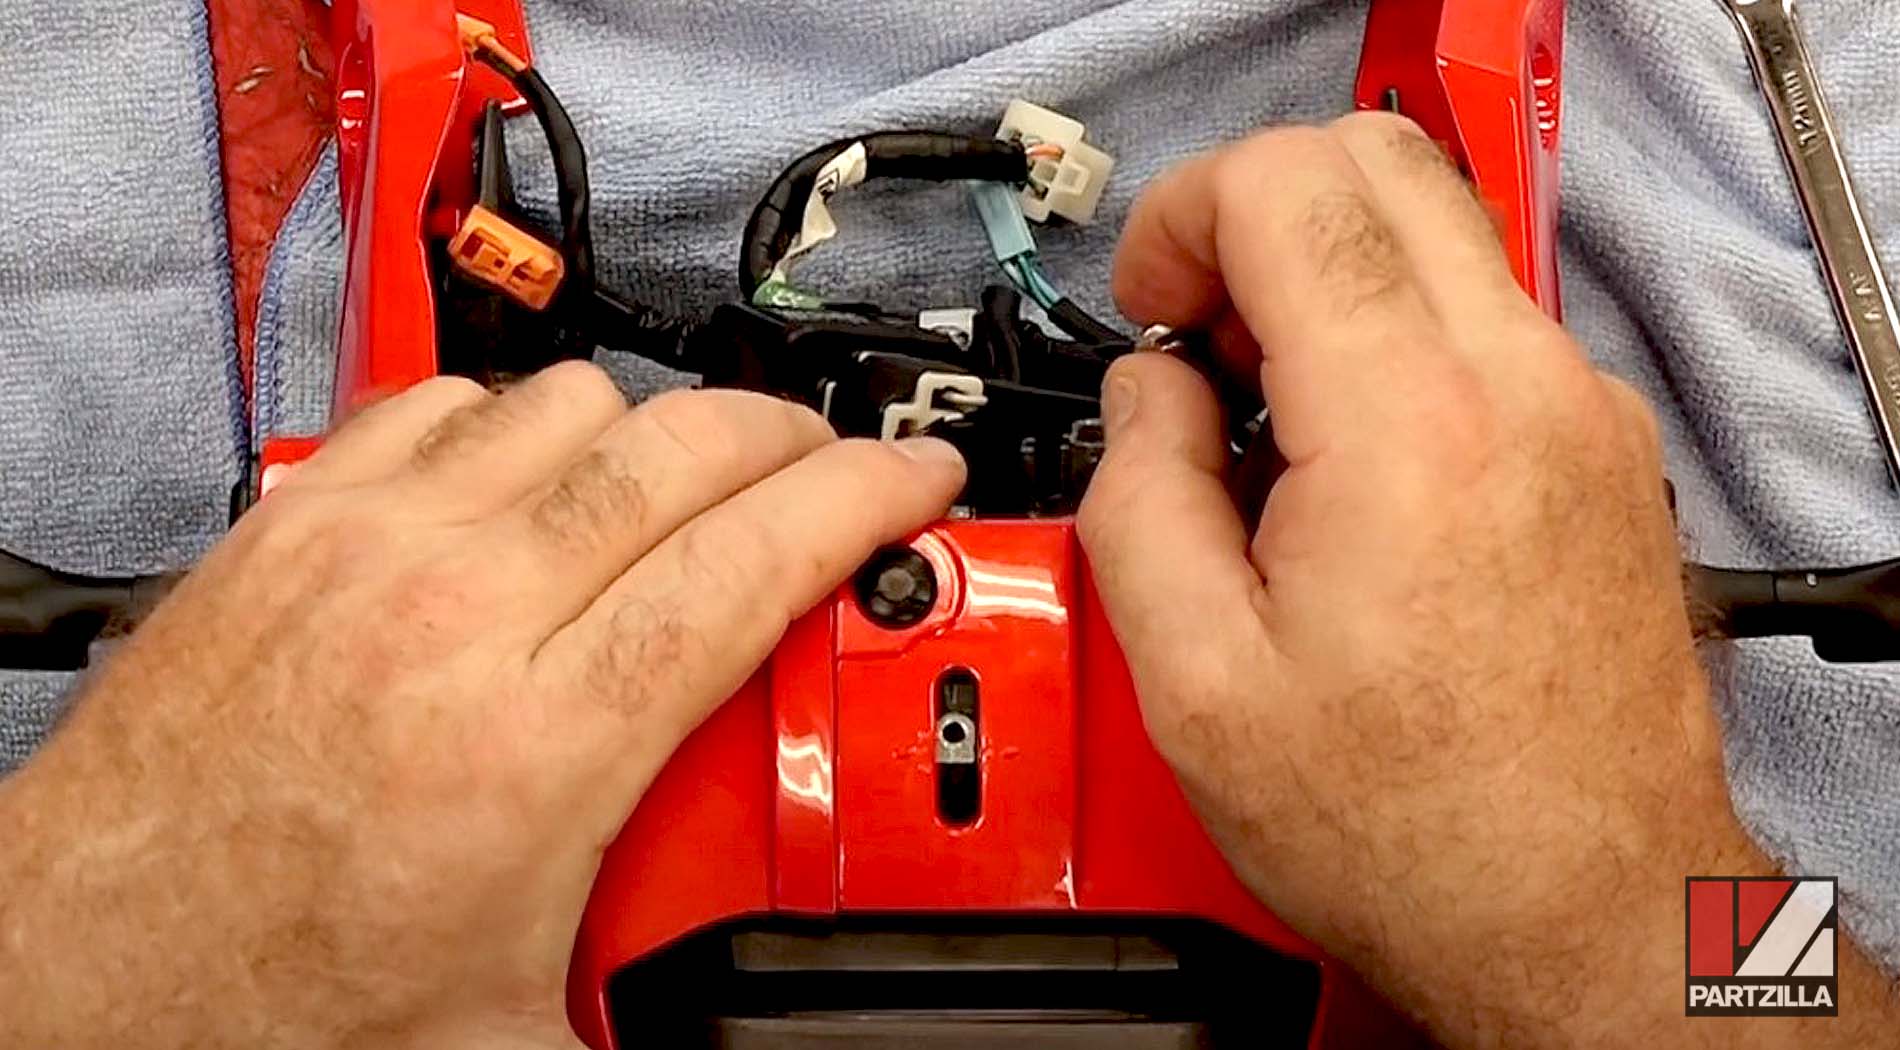
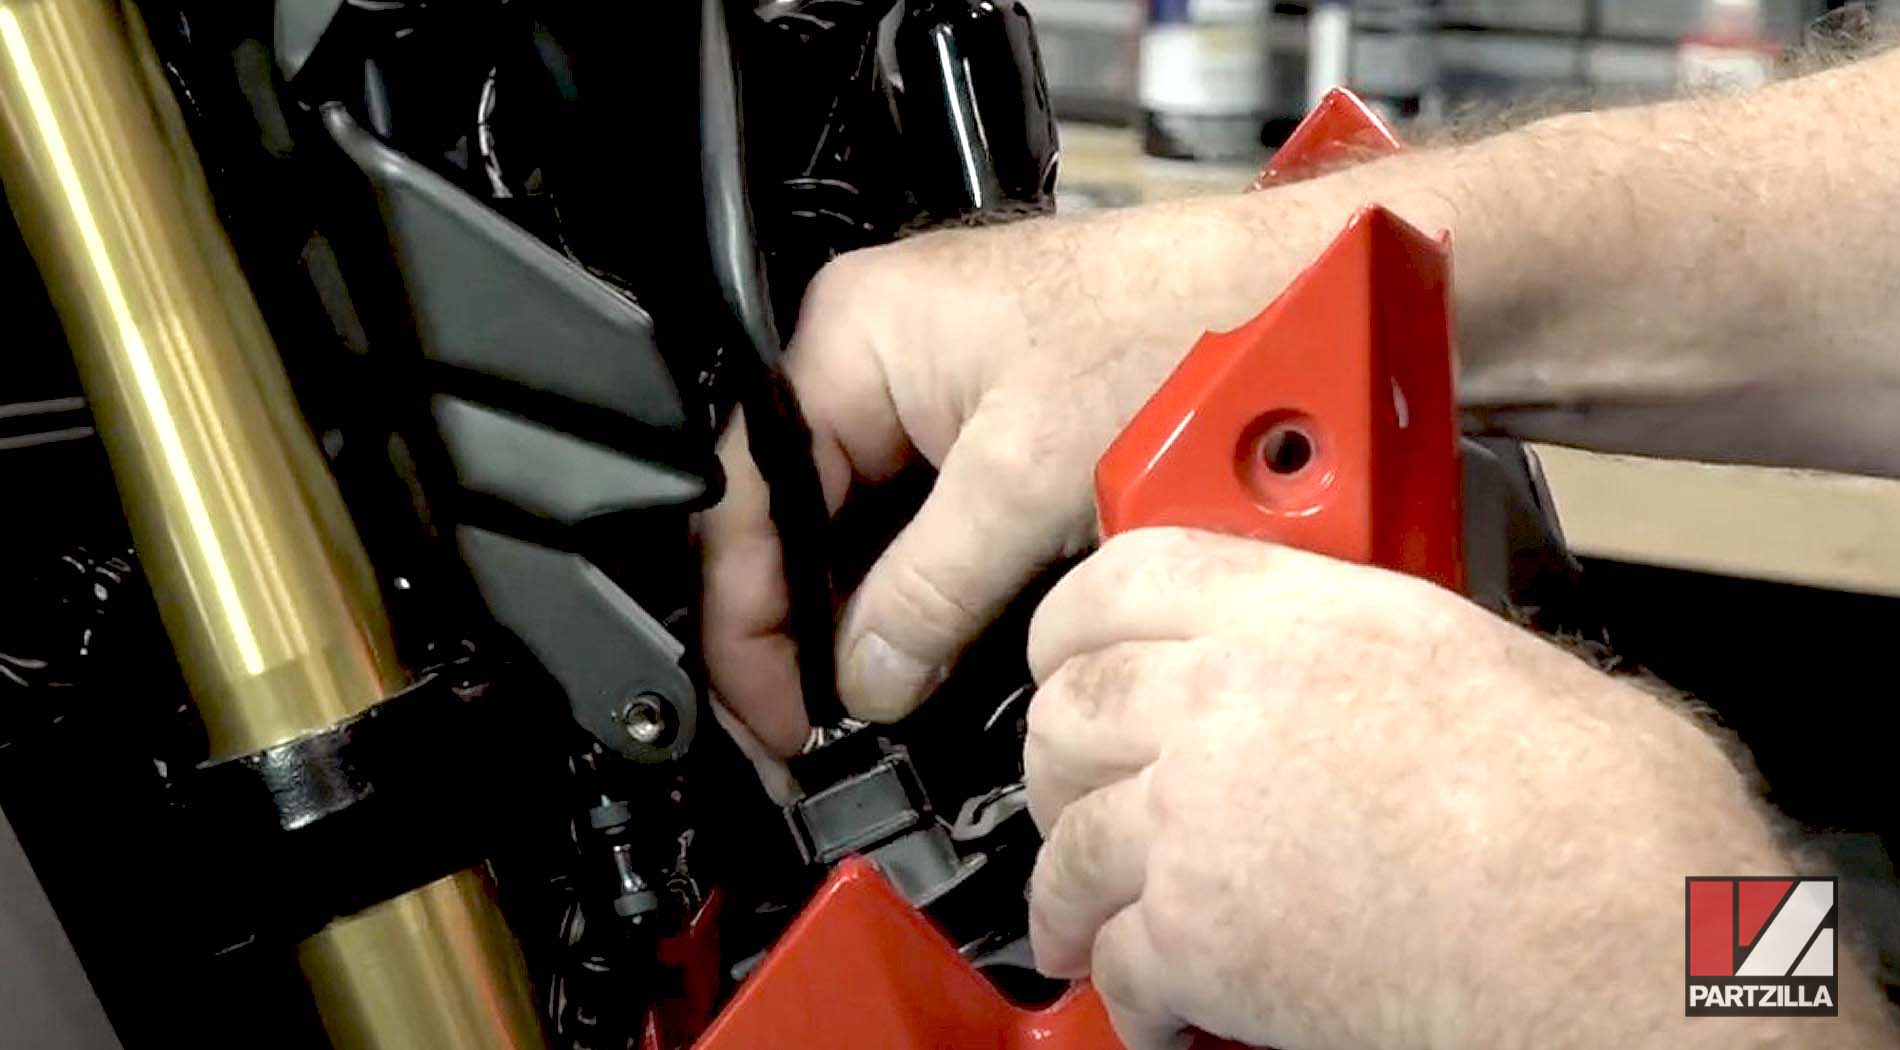
Step 9. Reinstall the two halves of the headlight cover to the headlight, then reconnect the turn signal wires to the sub-harness serving the headlight assembly, and reinstall the 8mm adjustment bolt and plastic rivet beneath the headlight.

Watch the clip below to see the front turn signal installation segment of our Honda Grom Lights, Mirrors & Levers video.
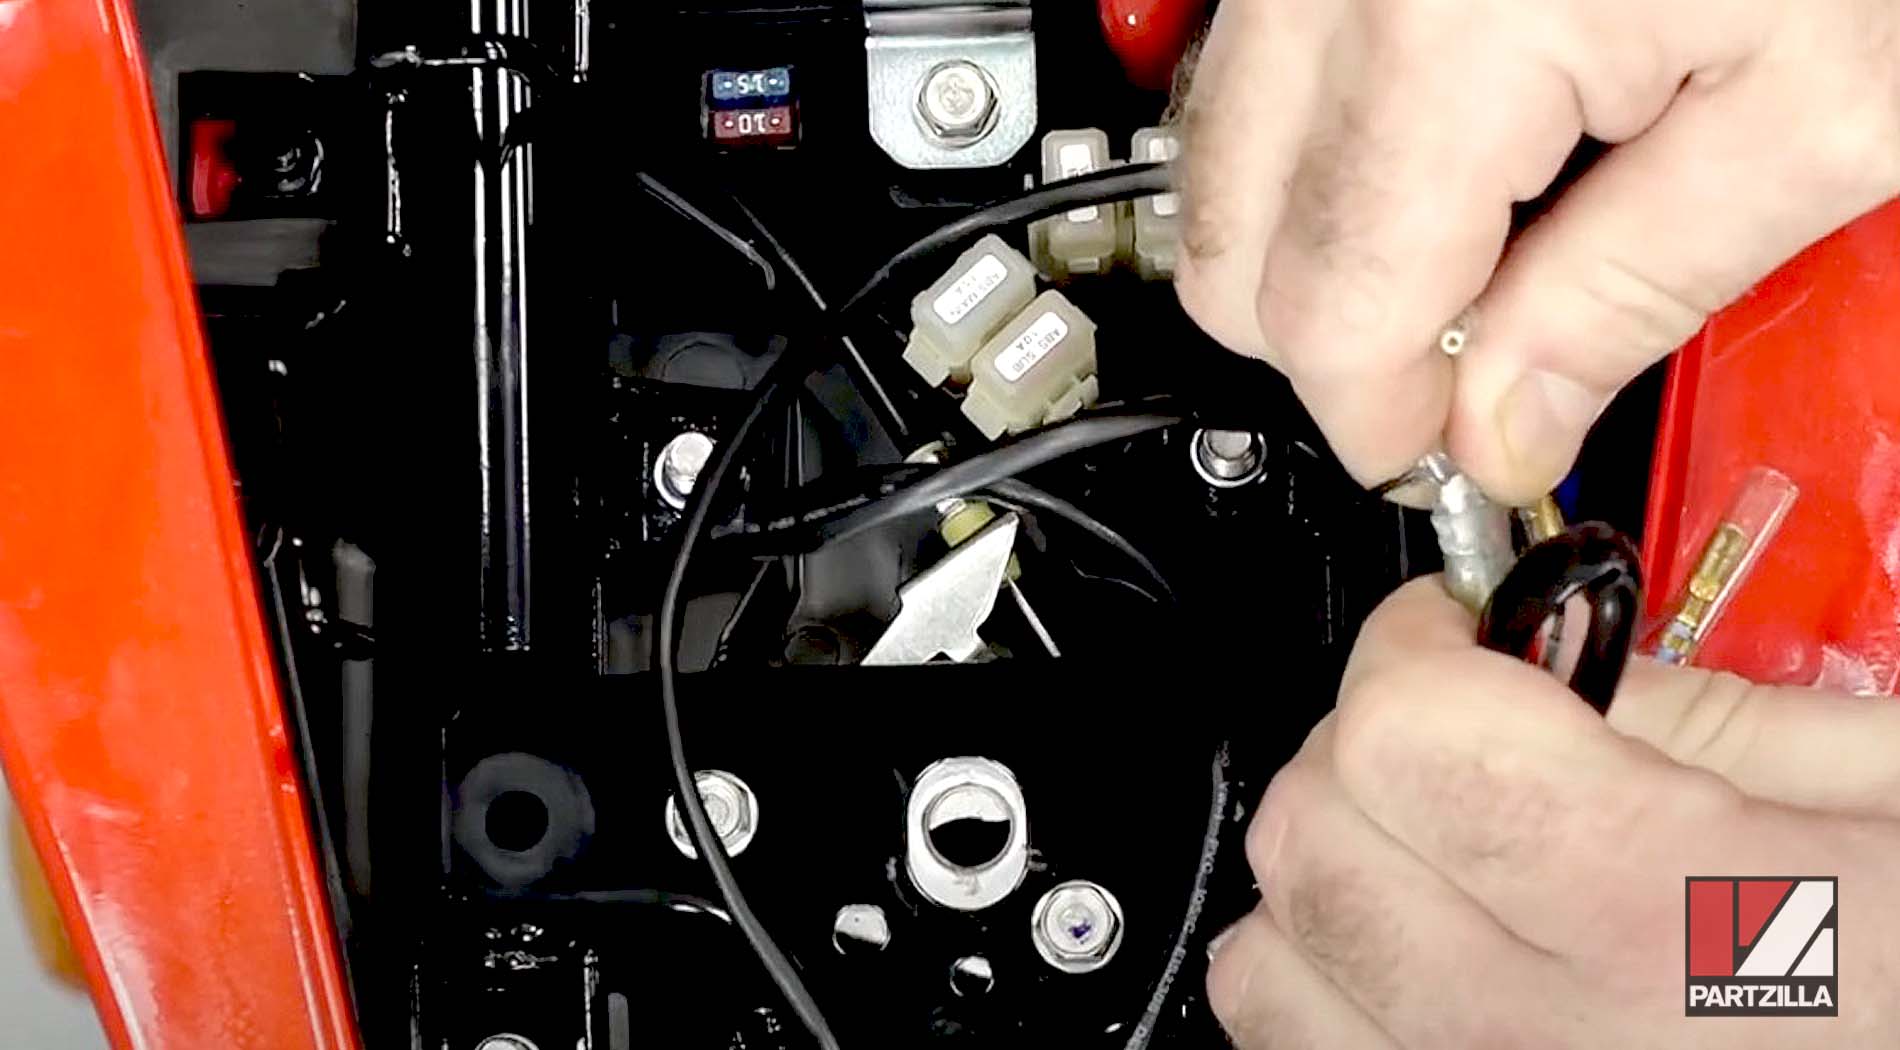
Part 3: Honda Grom Turn Signal Relay Installation
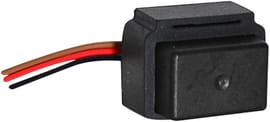
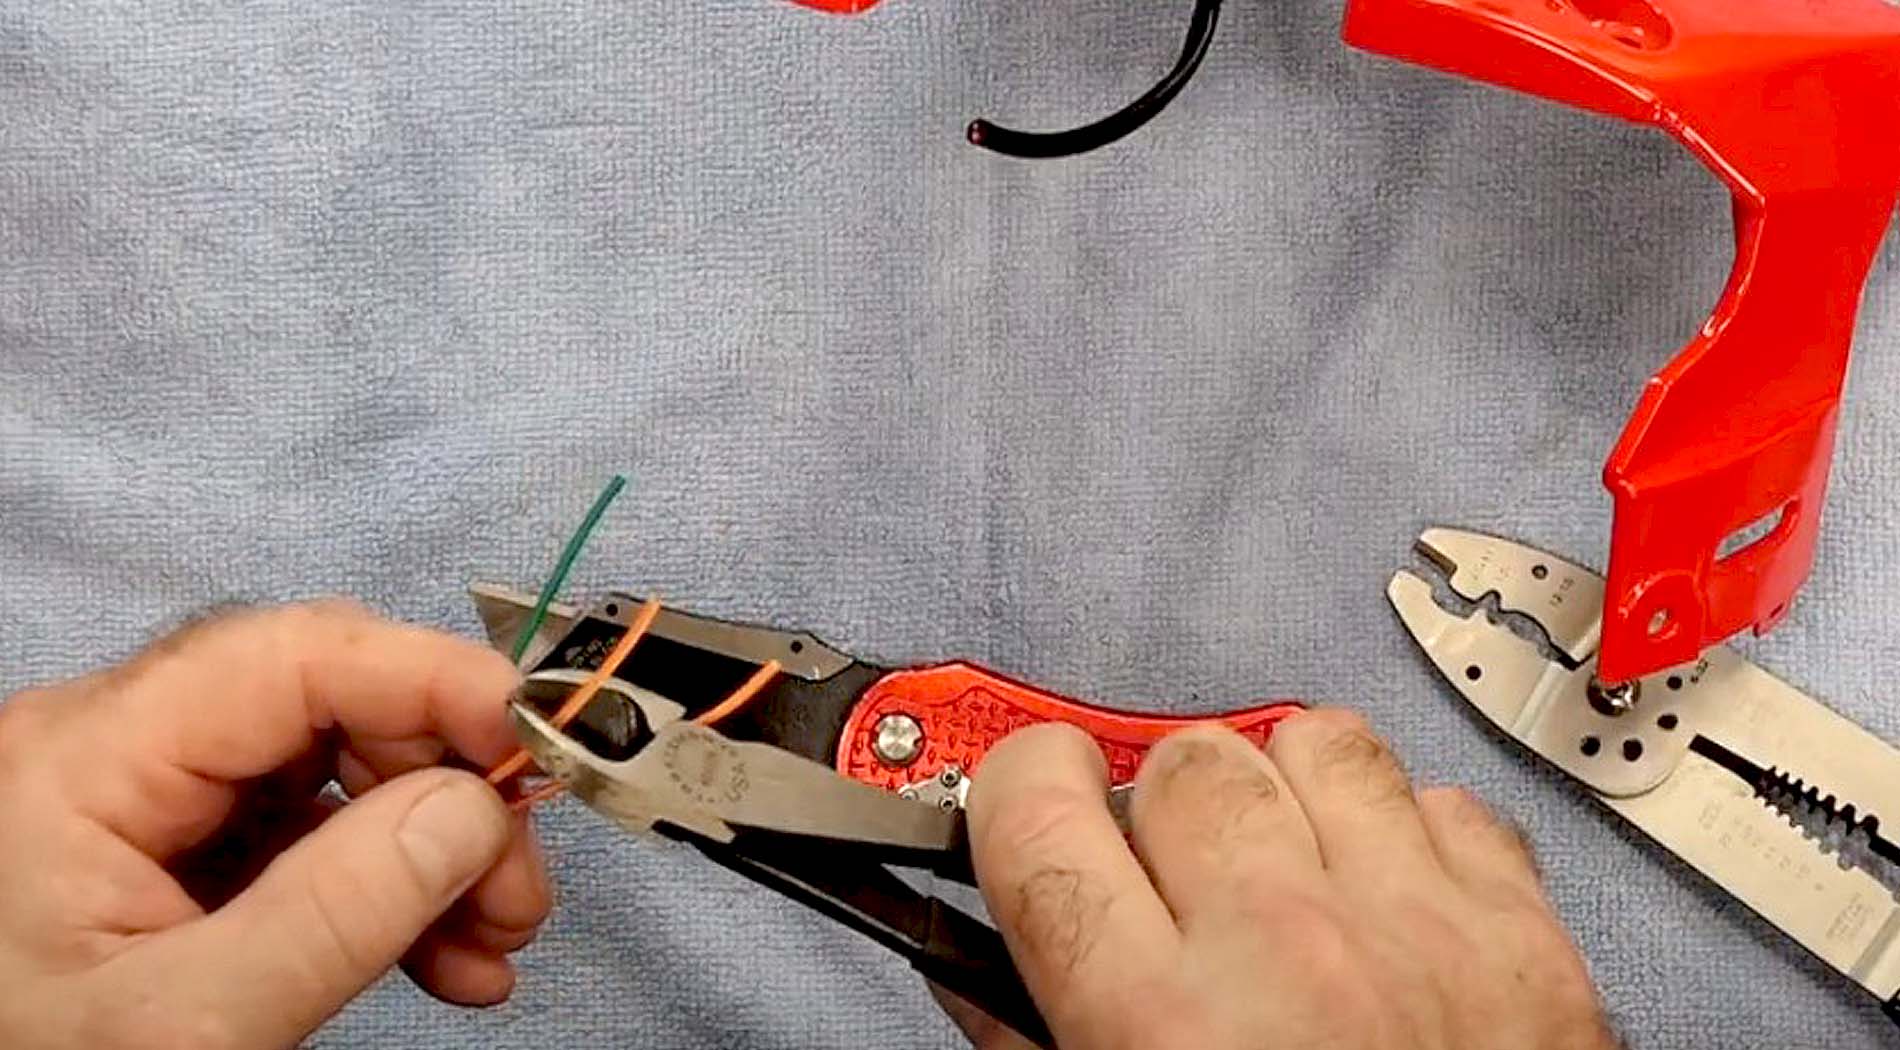
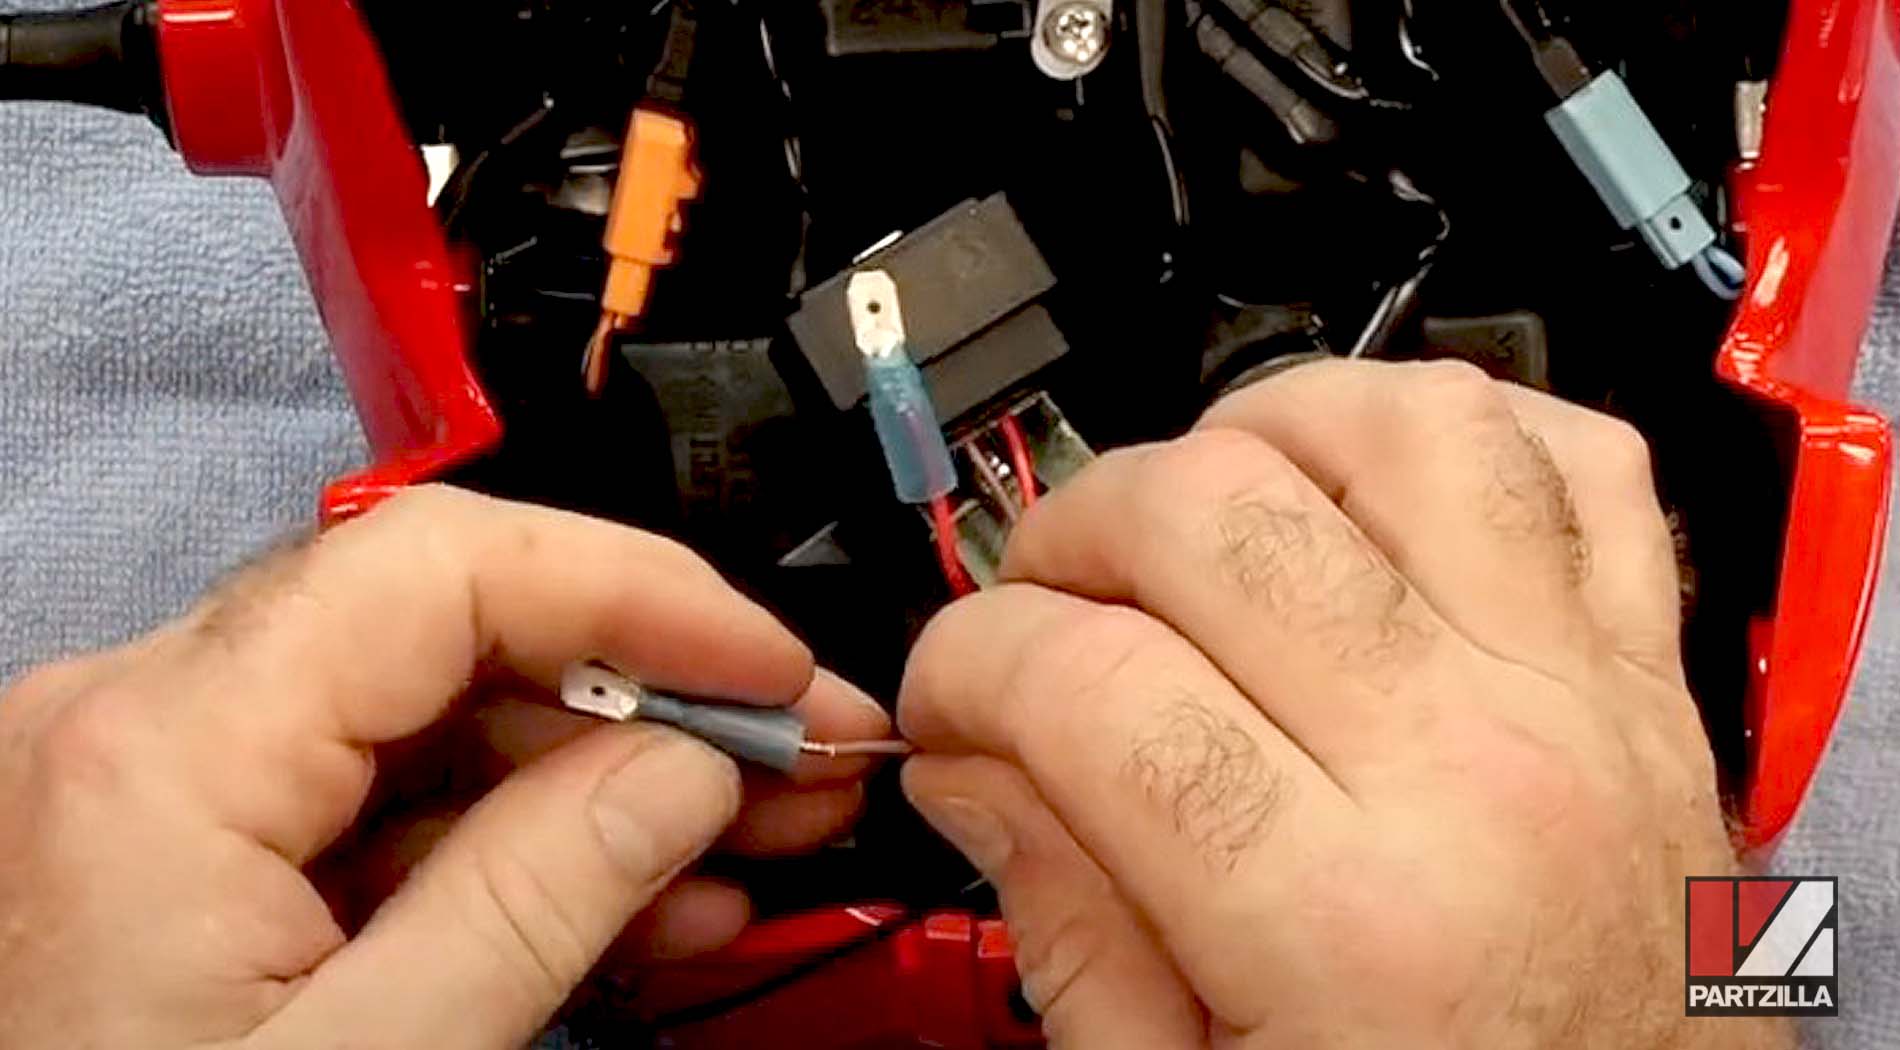
Step 1. Remove the turn signal relay, and install the new KOSO turn signal relay (the new relay is compatible with LED lights). Attach spade connectors to the wires from the new relay using a crimp tool as follows:
- Attach spade connectors to the red and the brown wires from the new relay and heat-shrink the spade connectors
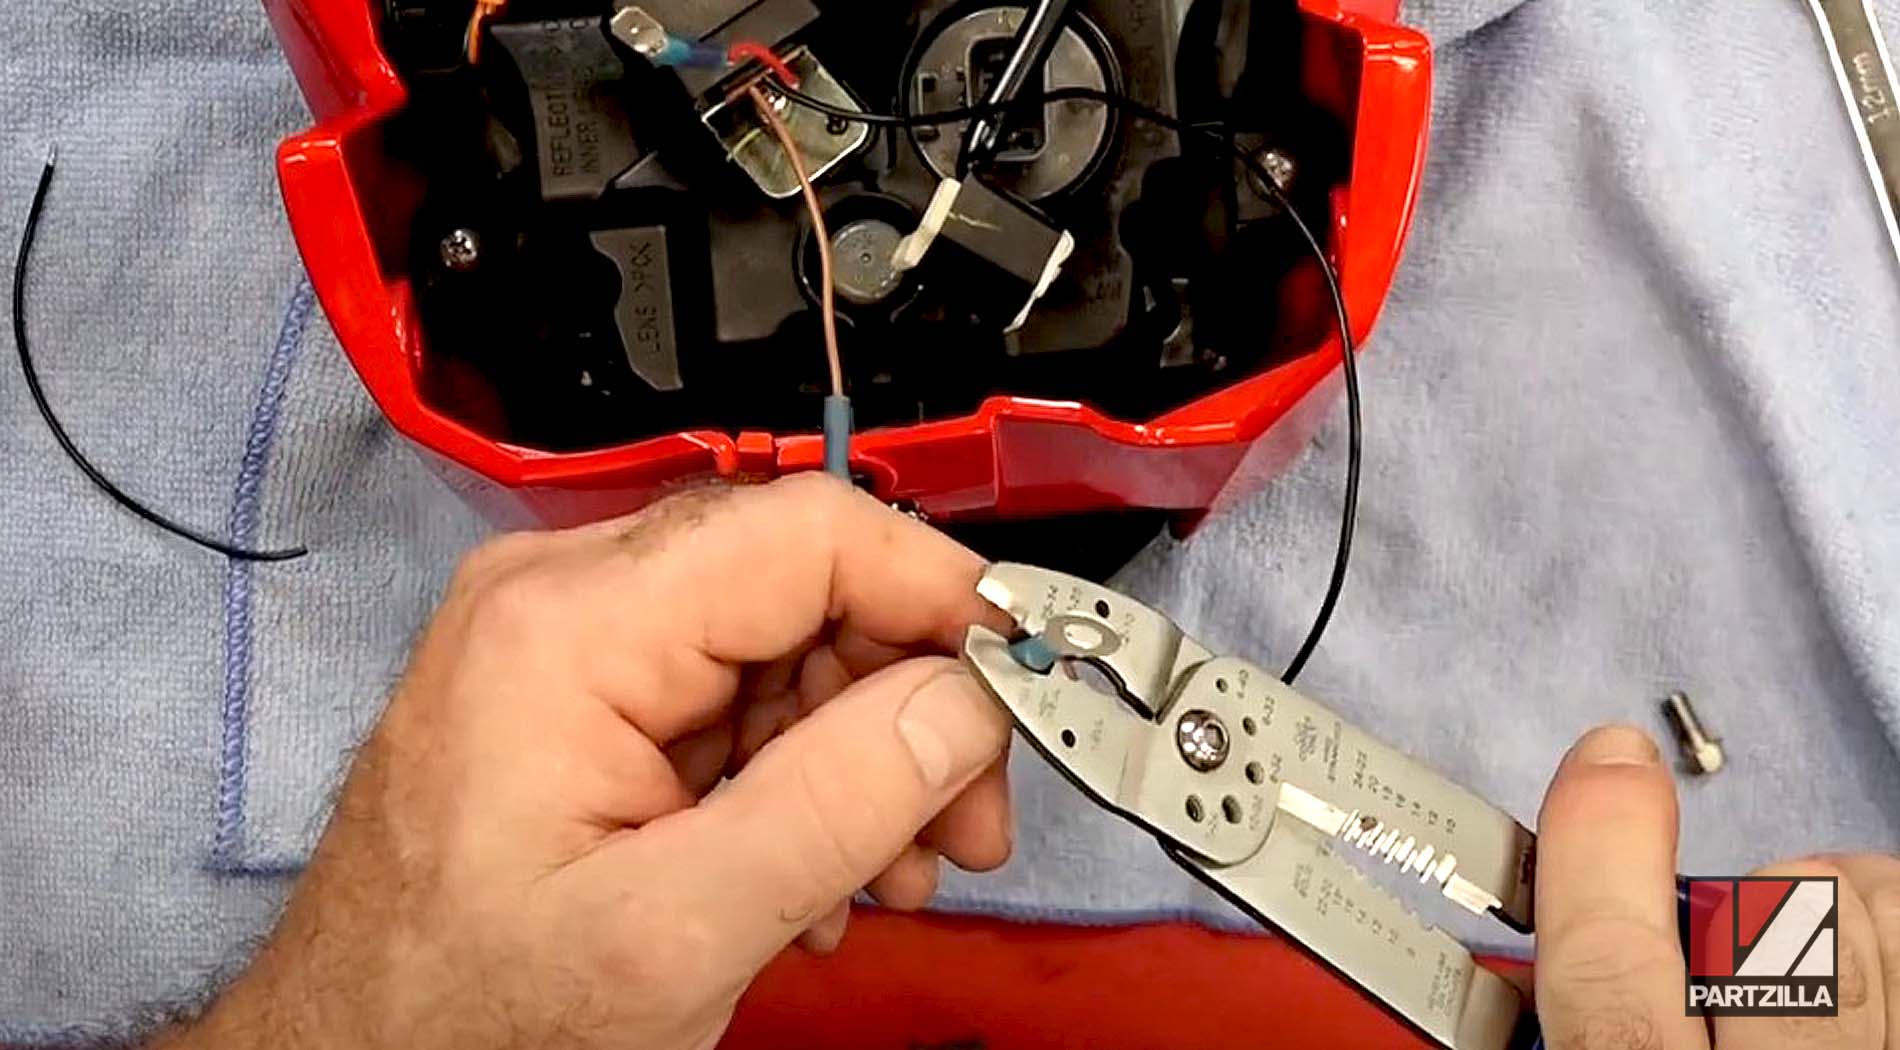
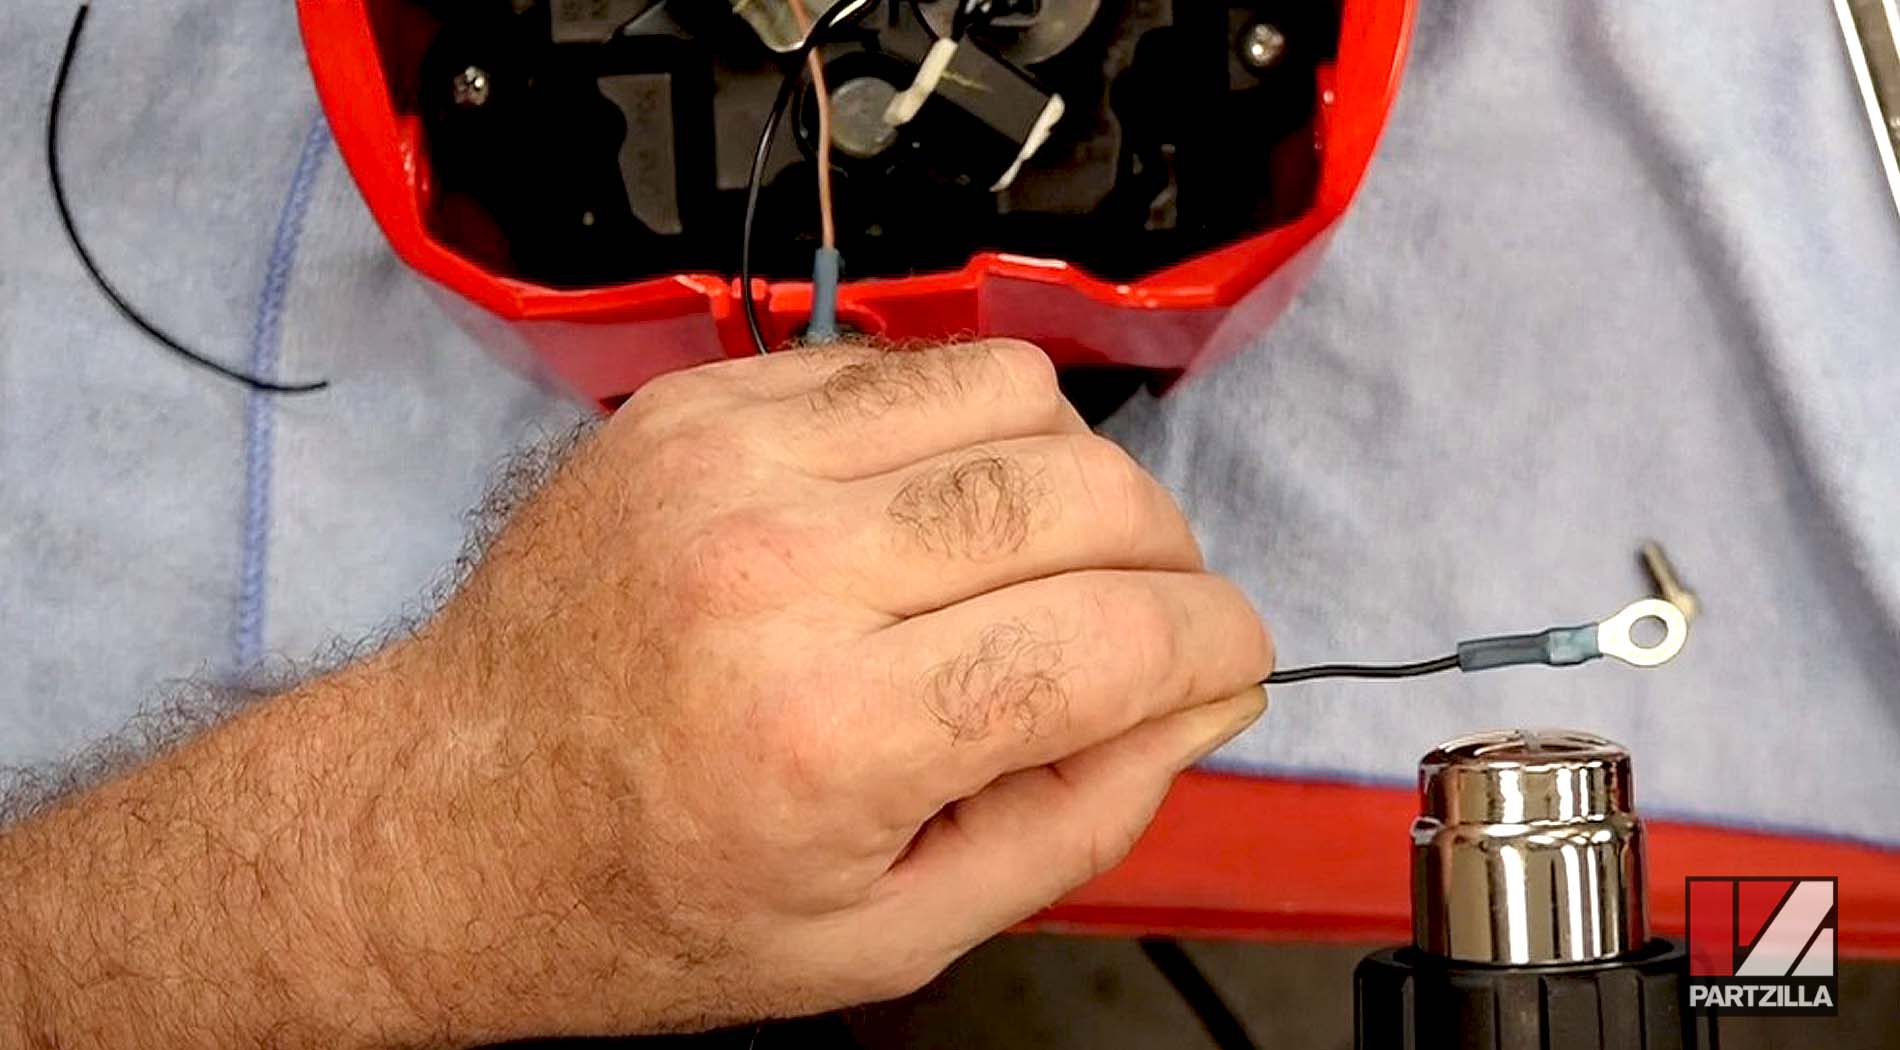
- Attach a ring connector to the black wire from the new relay and heat-shrink the ring connector
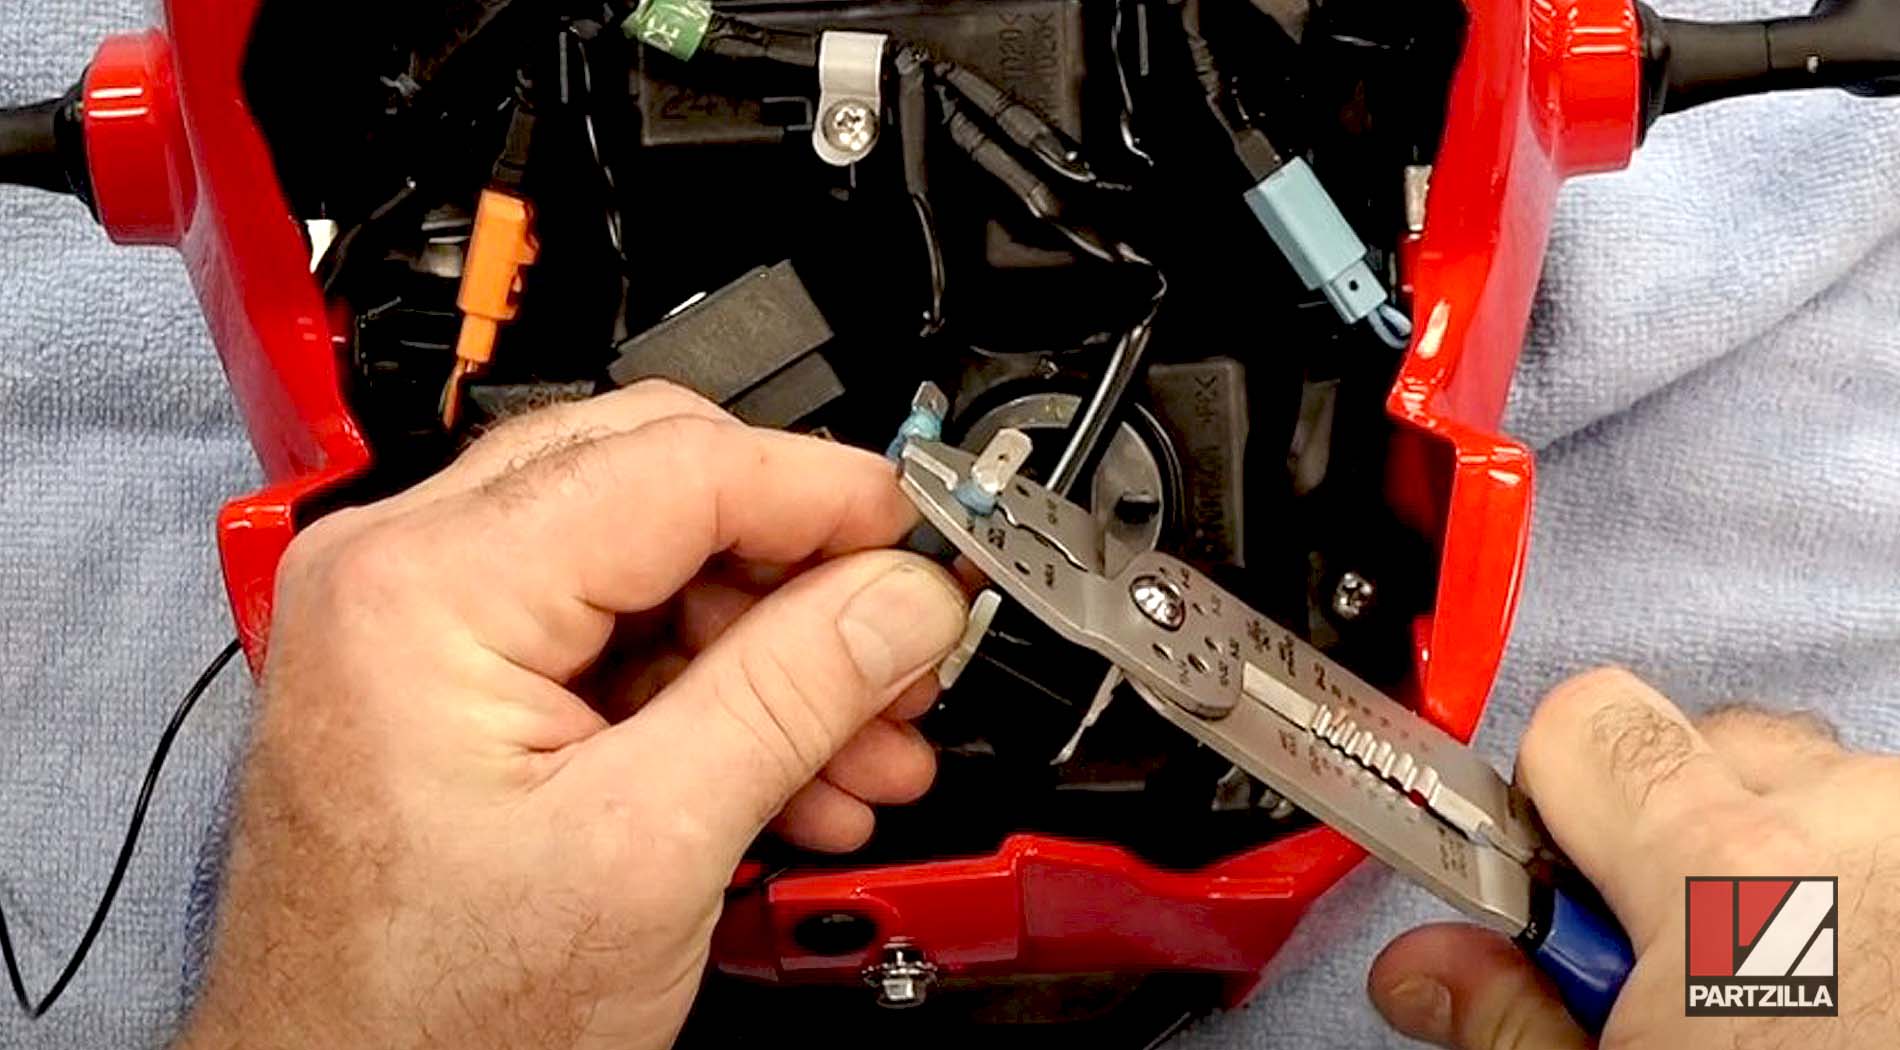

Step 2. Connect the new relay’s wires as follows:
- Connect the relay’s red wire to the terminal housing the black/silver wire
- Connect the relay’s brown wire to the terminal housing the grey wire
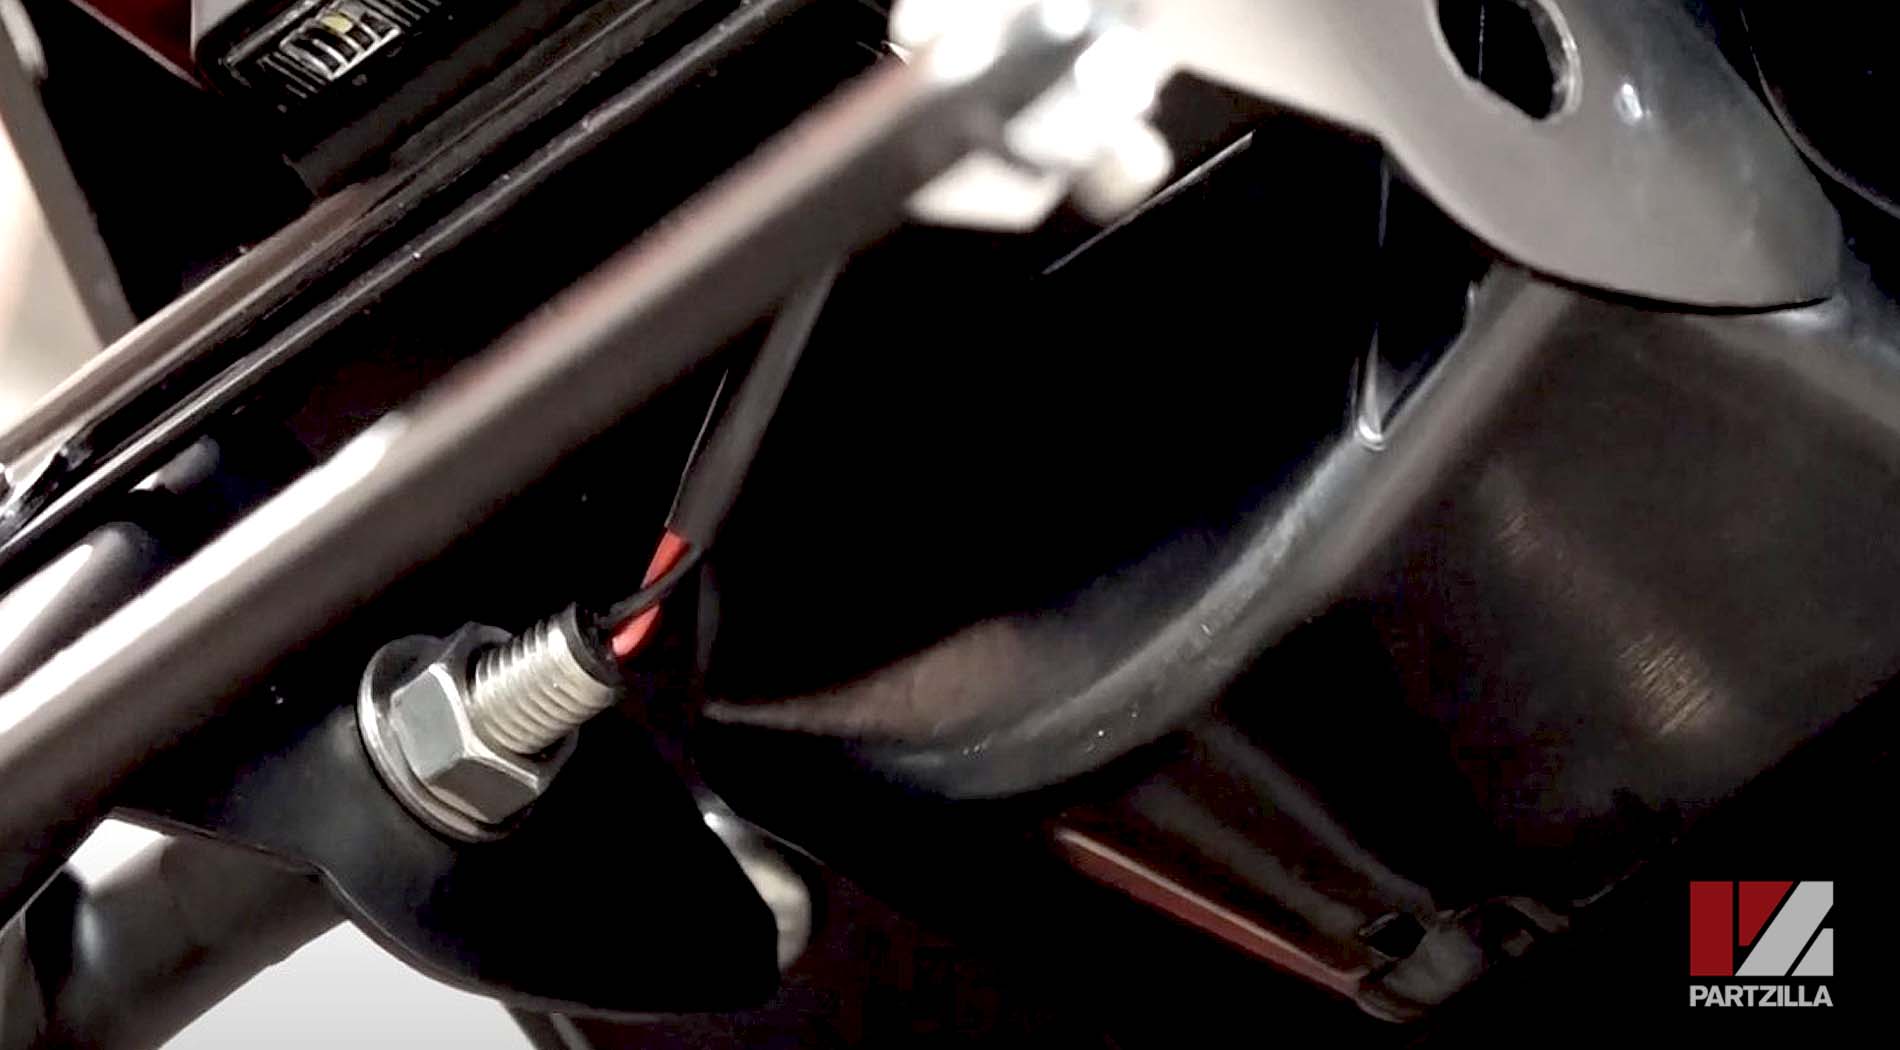
- Connect the black wire to a suitable ground, such as a bolt attached to the Grom’s frame

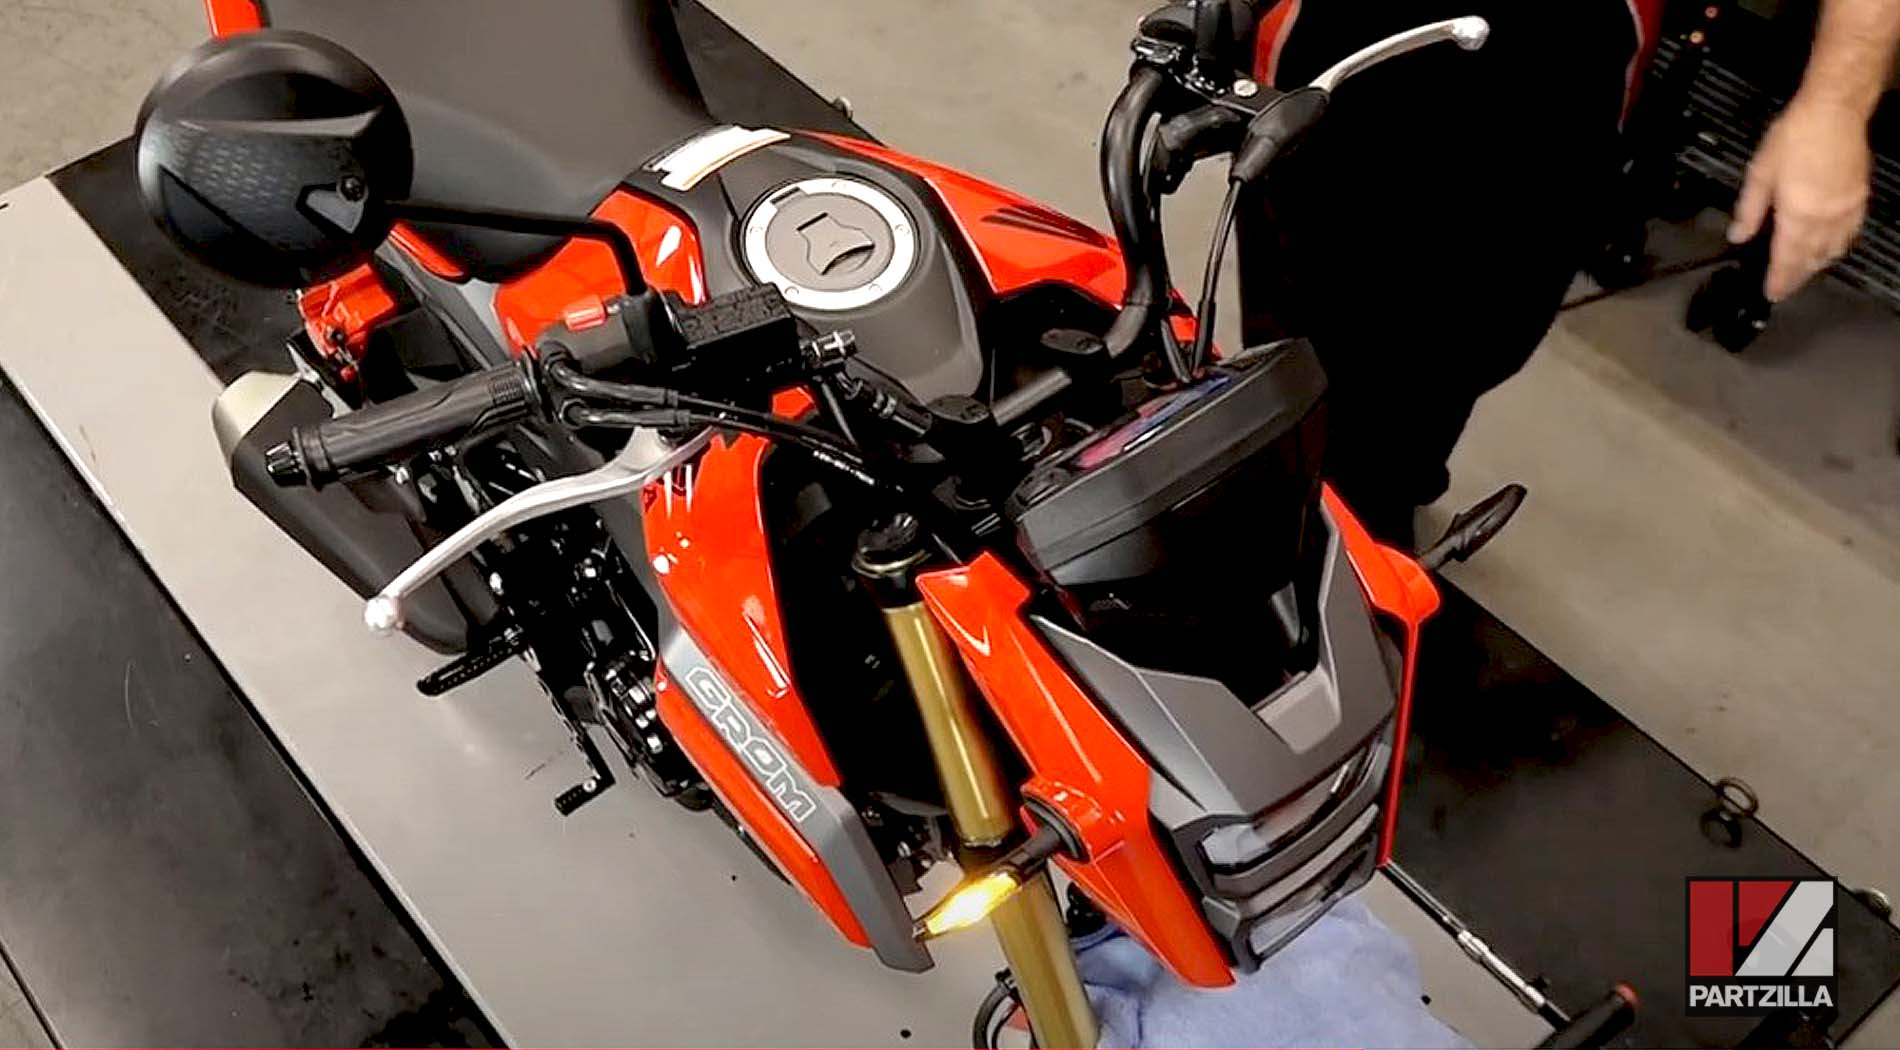
Step 3. Reconnect the headlight assembly’s wiring harness and the headlight, then reinstall the headlight assembly onto the Grom and tighten the assembly’s four 12mm Allen bolts.
Watch the clip below to see the turn signal relay installation segment of our Honda Grom Lights, Mirrors & Levers video.
Part 4: Honda Grom Aftermarket Levers Installation
Step 1. Remove the clutch cable from the lever, the 10mm nut and flathead bolt from the clutch lever, and the clutch lever from the Grom.
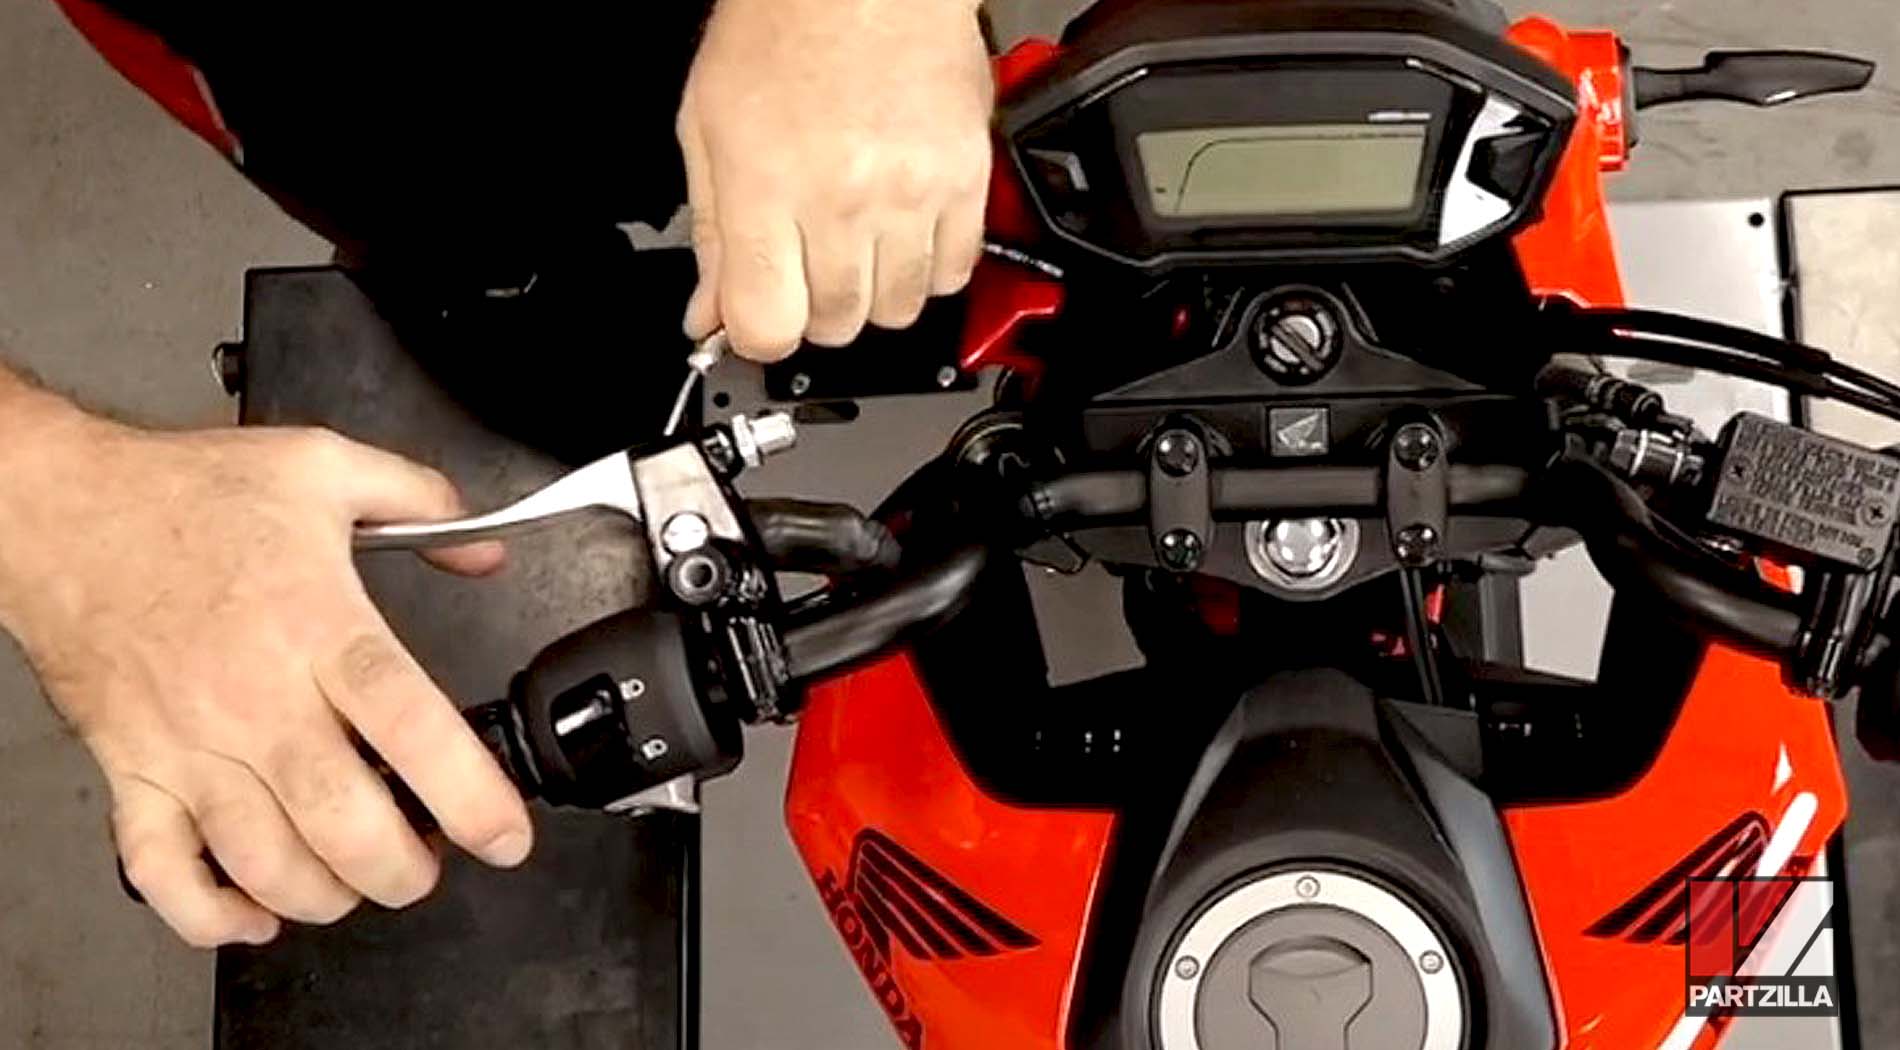
Step 2. Remove the 10mm nut and bolt from the brake lever, and the brake lever from the Grom.
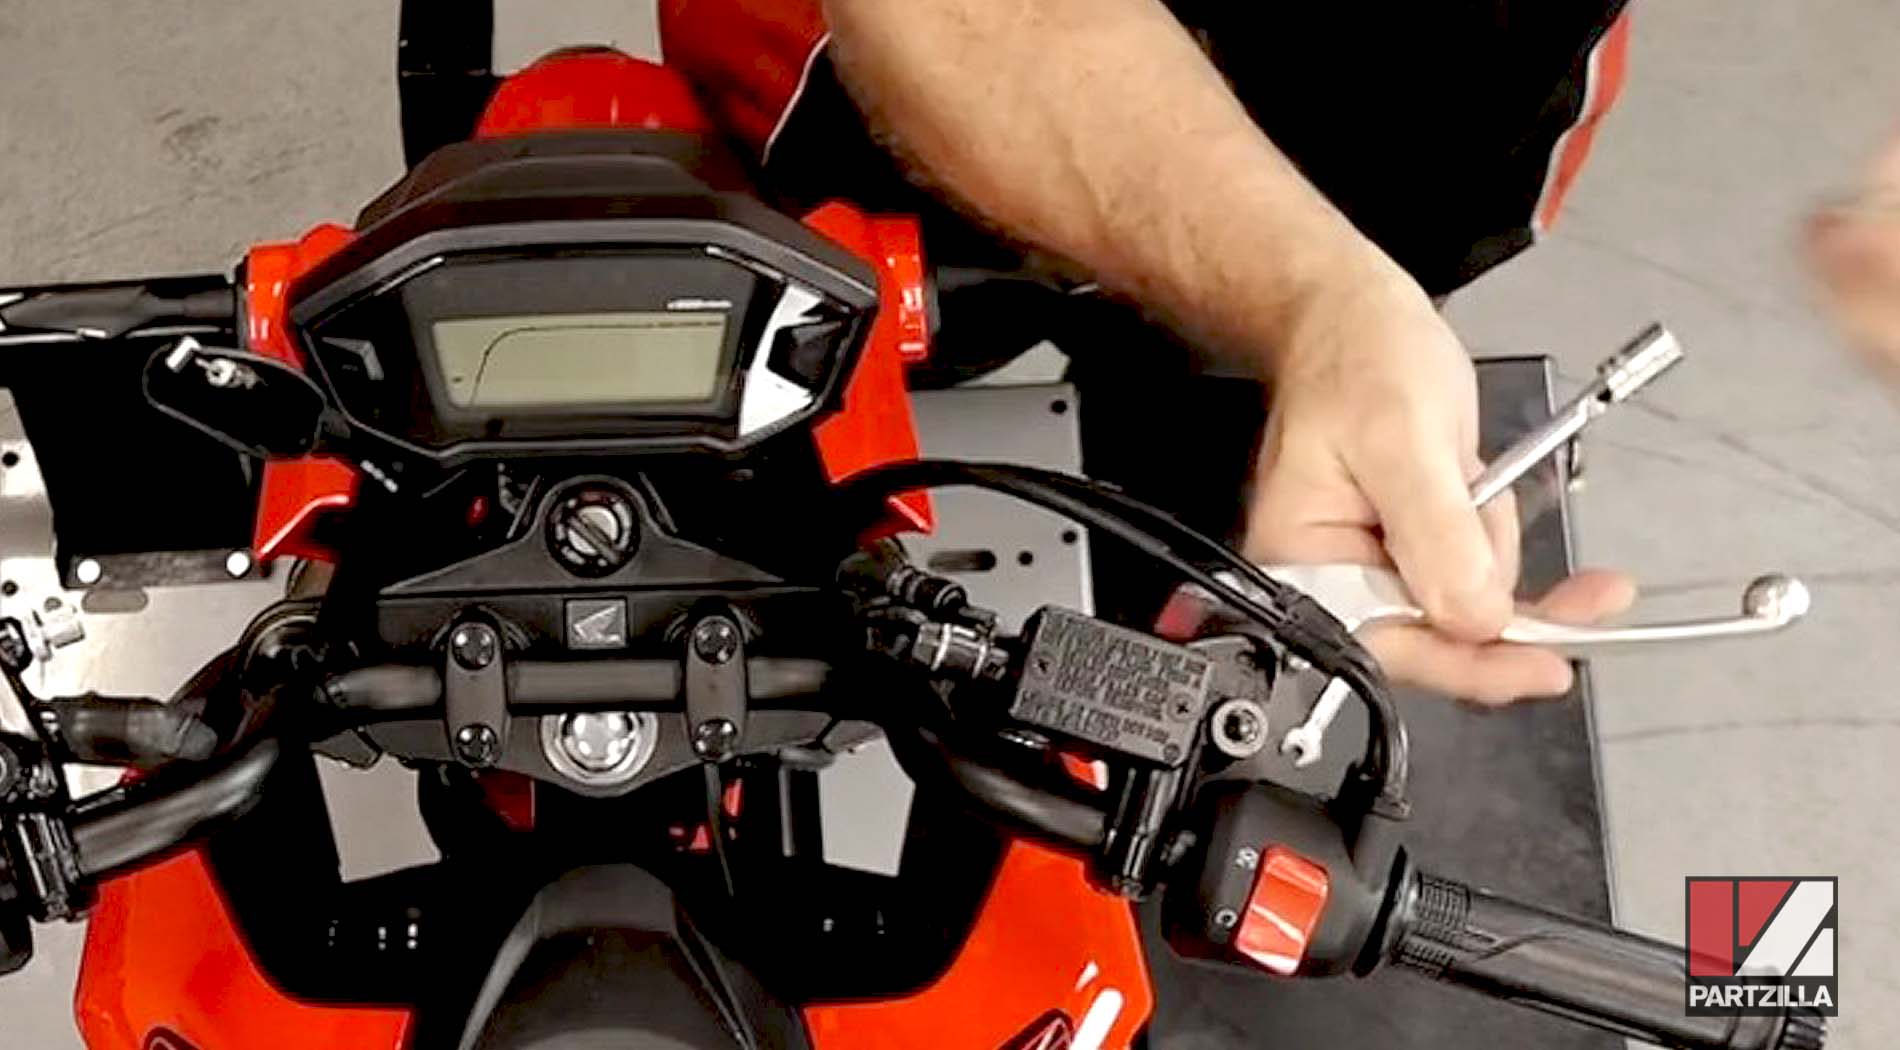
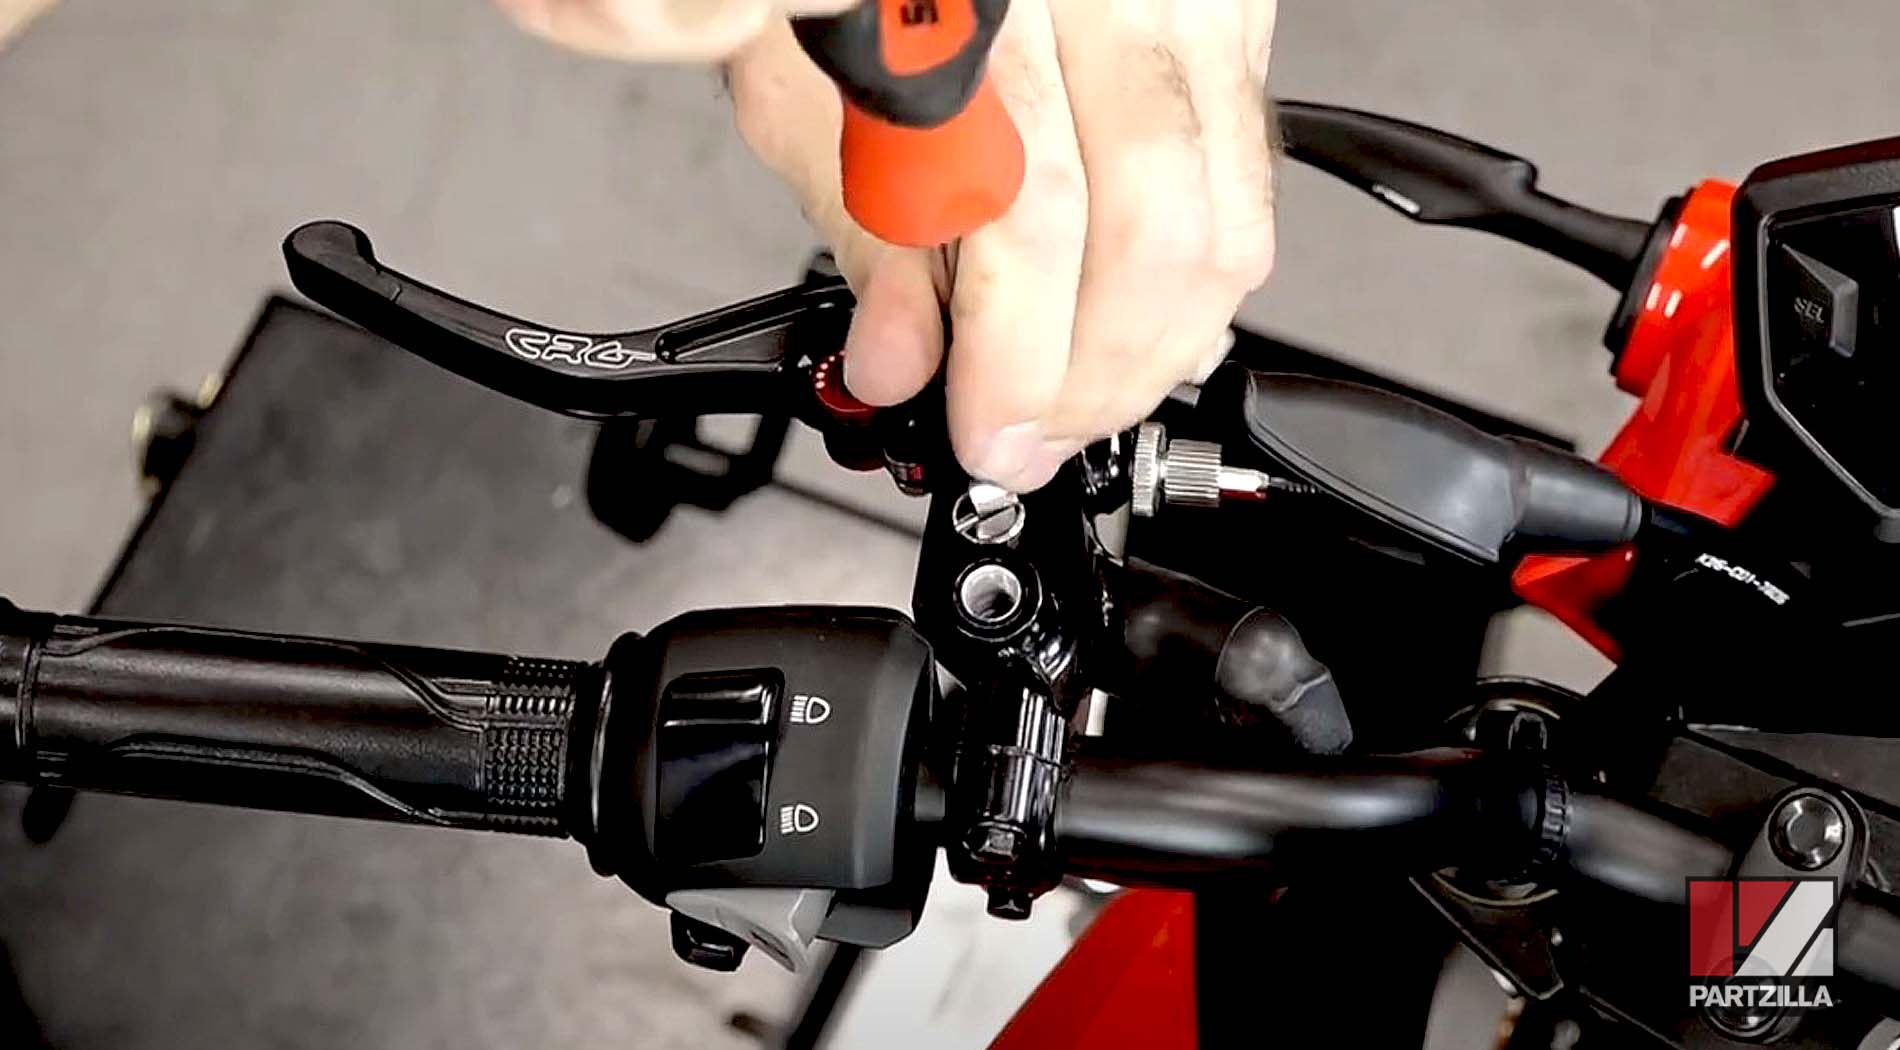
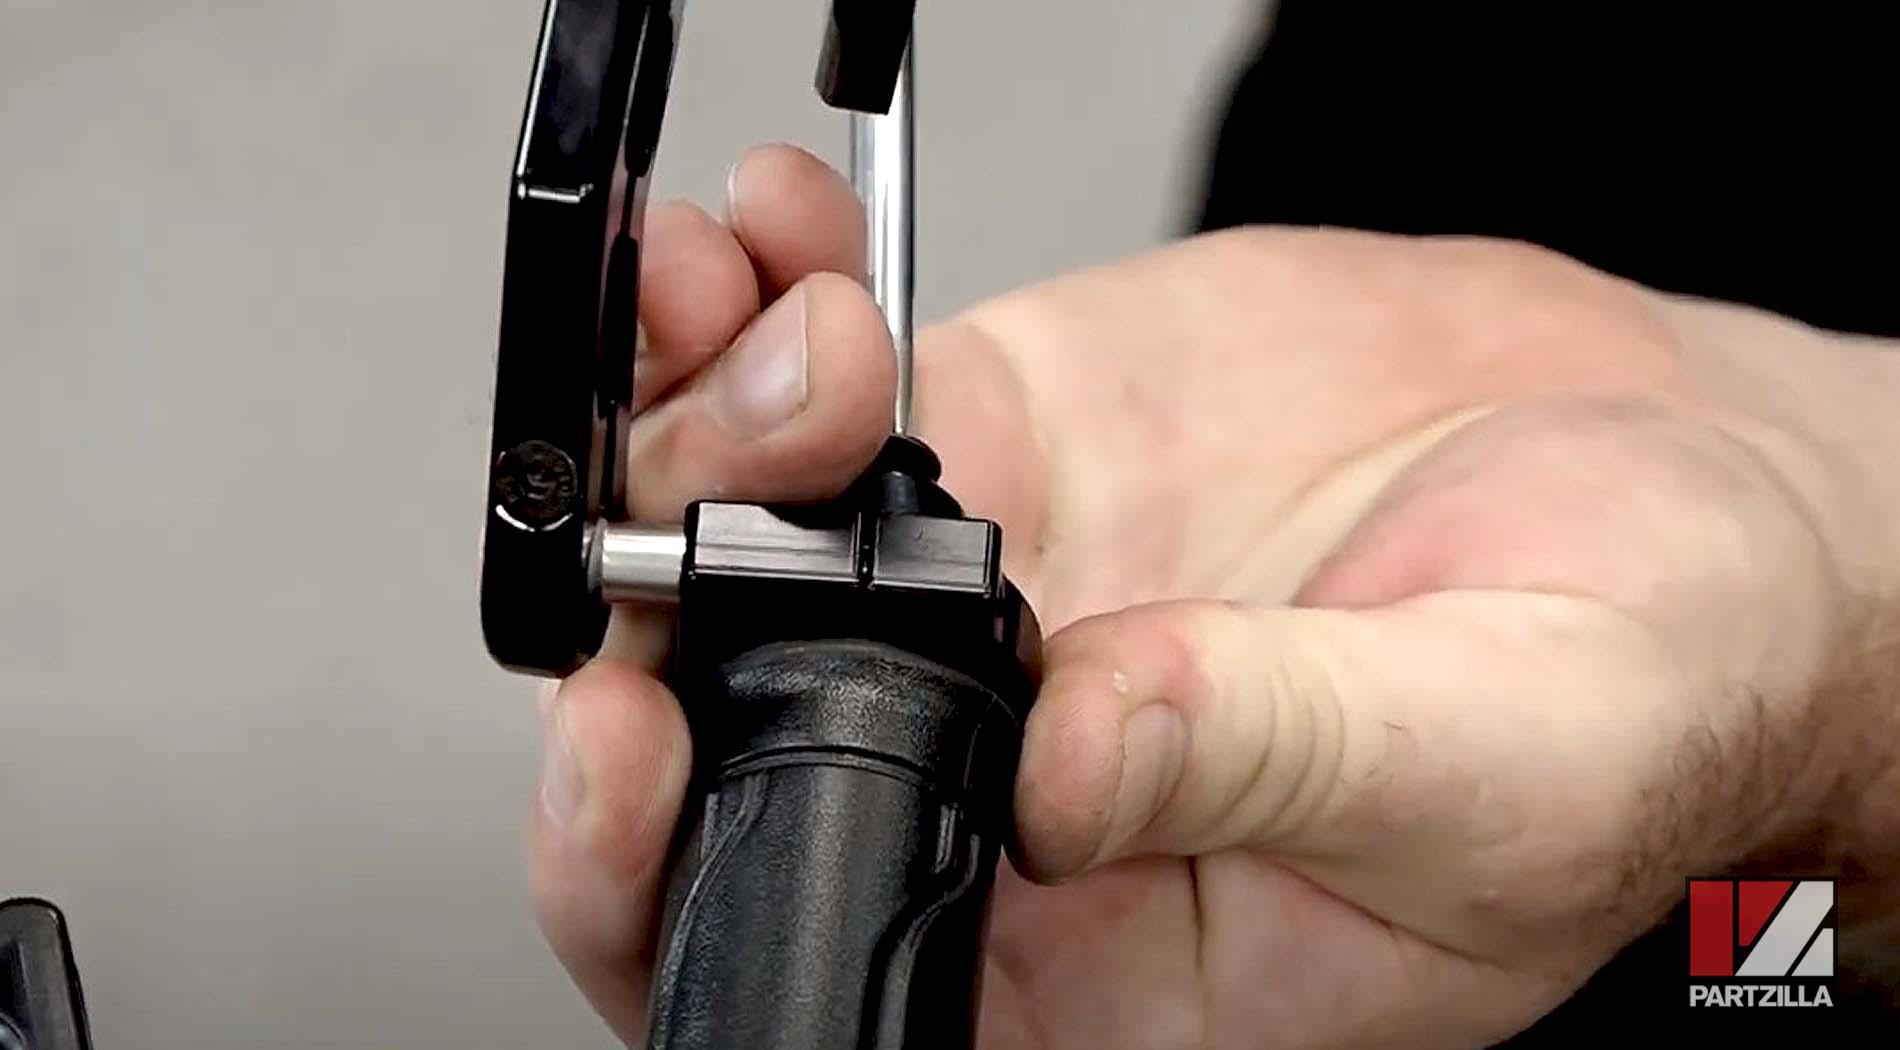
Step 3. Put a smear of grease on the new shorty brake lever where it will pivot within its handlebar mounting, and install the lever with the 10mm nut and bolt.
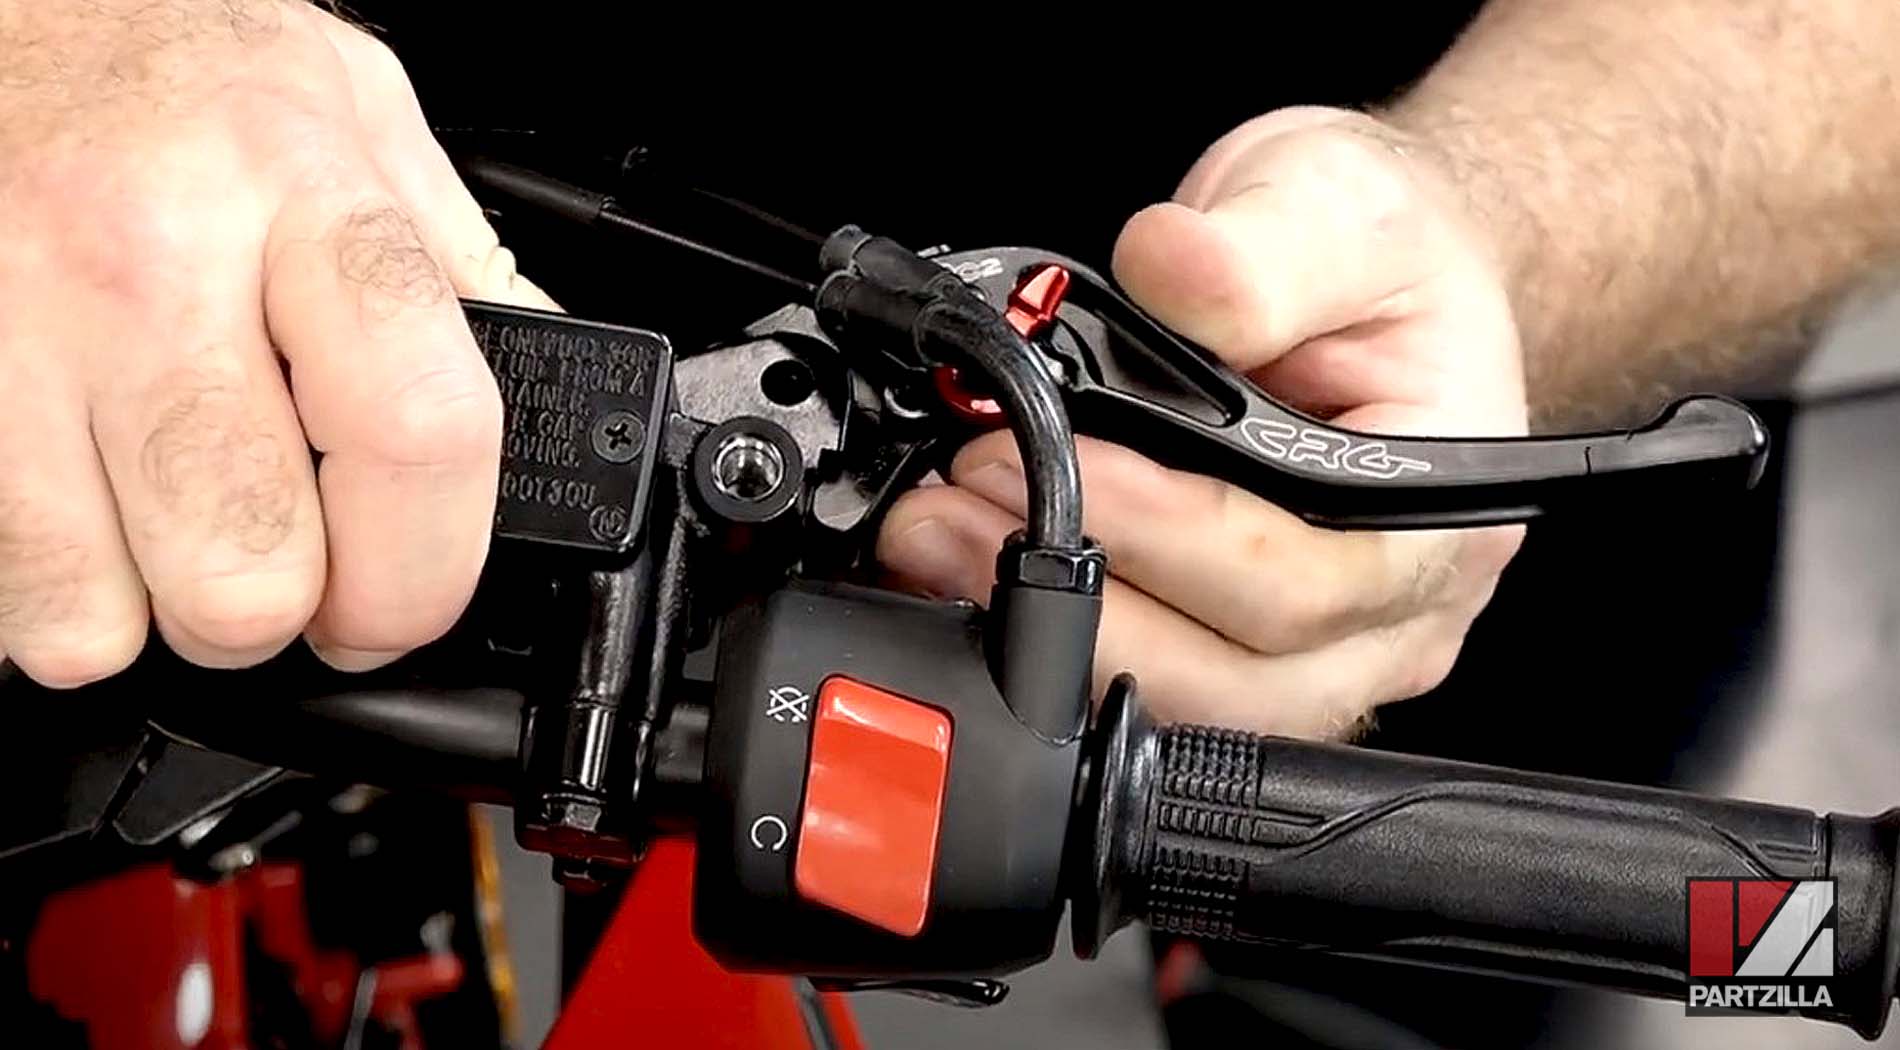
Step 4. Put a smear of grease on the new shorty clutch lever where it will pivot within its handlebar mounting, then install the clutch cable into the lever and the lever with the 10mm nut and flathead bolt.
Watch the clip below to see the lever installation segment of our Honda Grom Lights, Mirrors & Levers video.
Part 5: Honda Grom Aftermarket Mirrors Installation
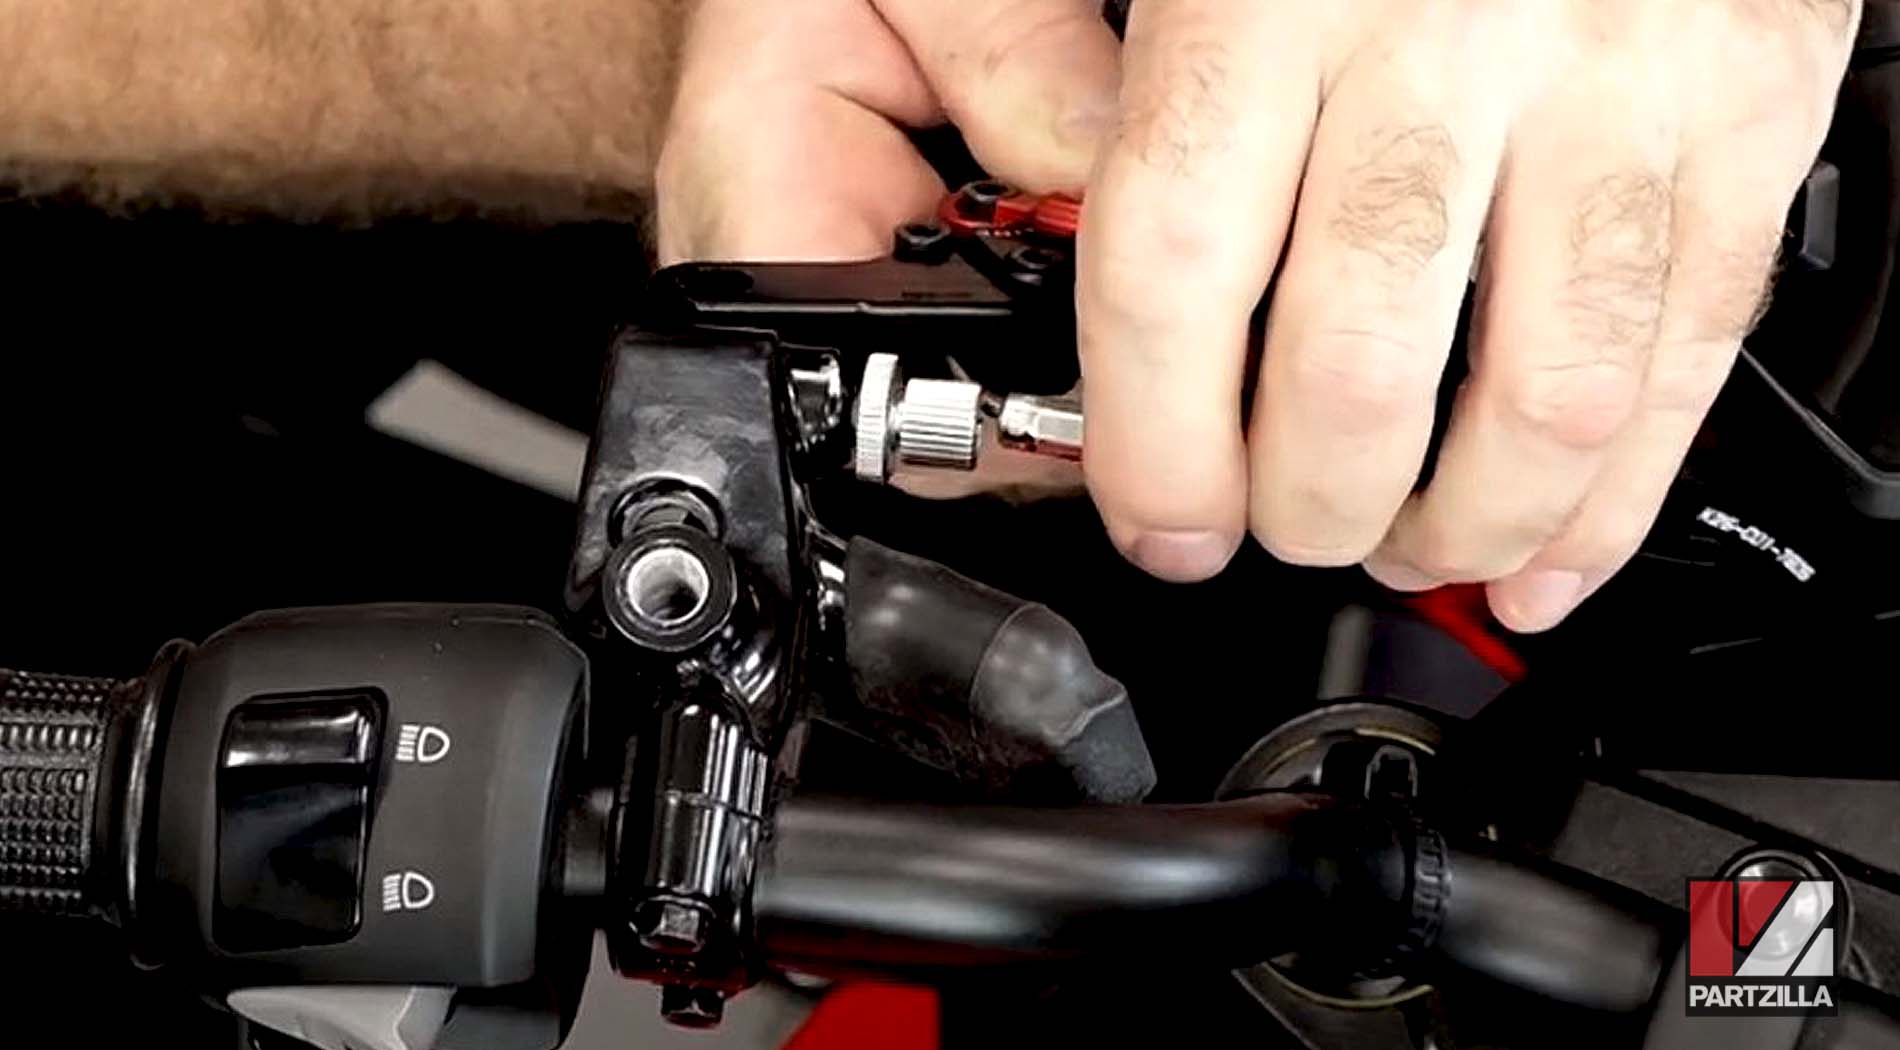
Step 1. Pull back the covers from the mirror mount bolts, loosen the 10mm nuts (note that the nuts have a counterclockwise thread), unscrew and remove the mirrors, then remove the 10mm adapter bolts from the handlebars.
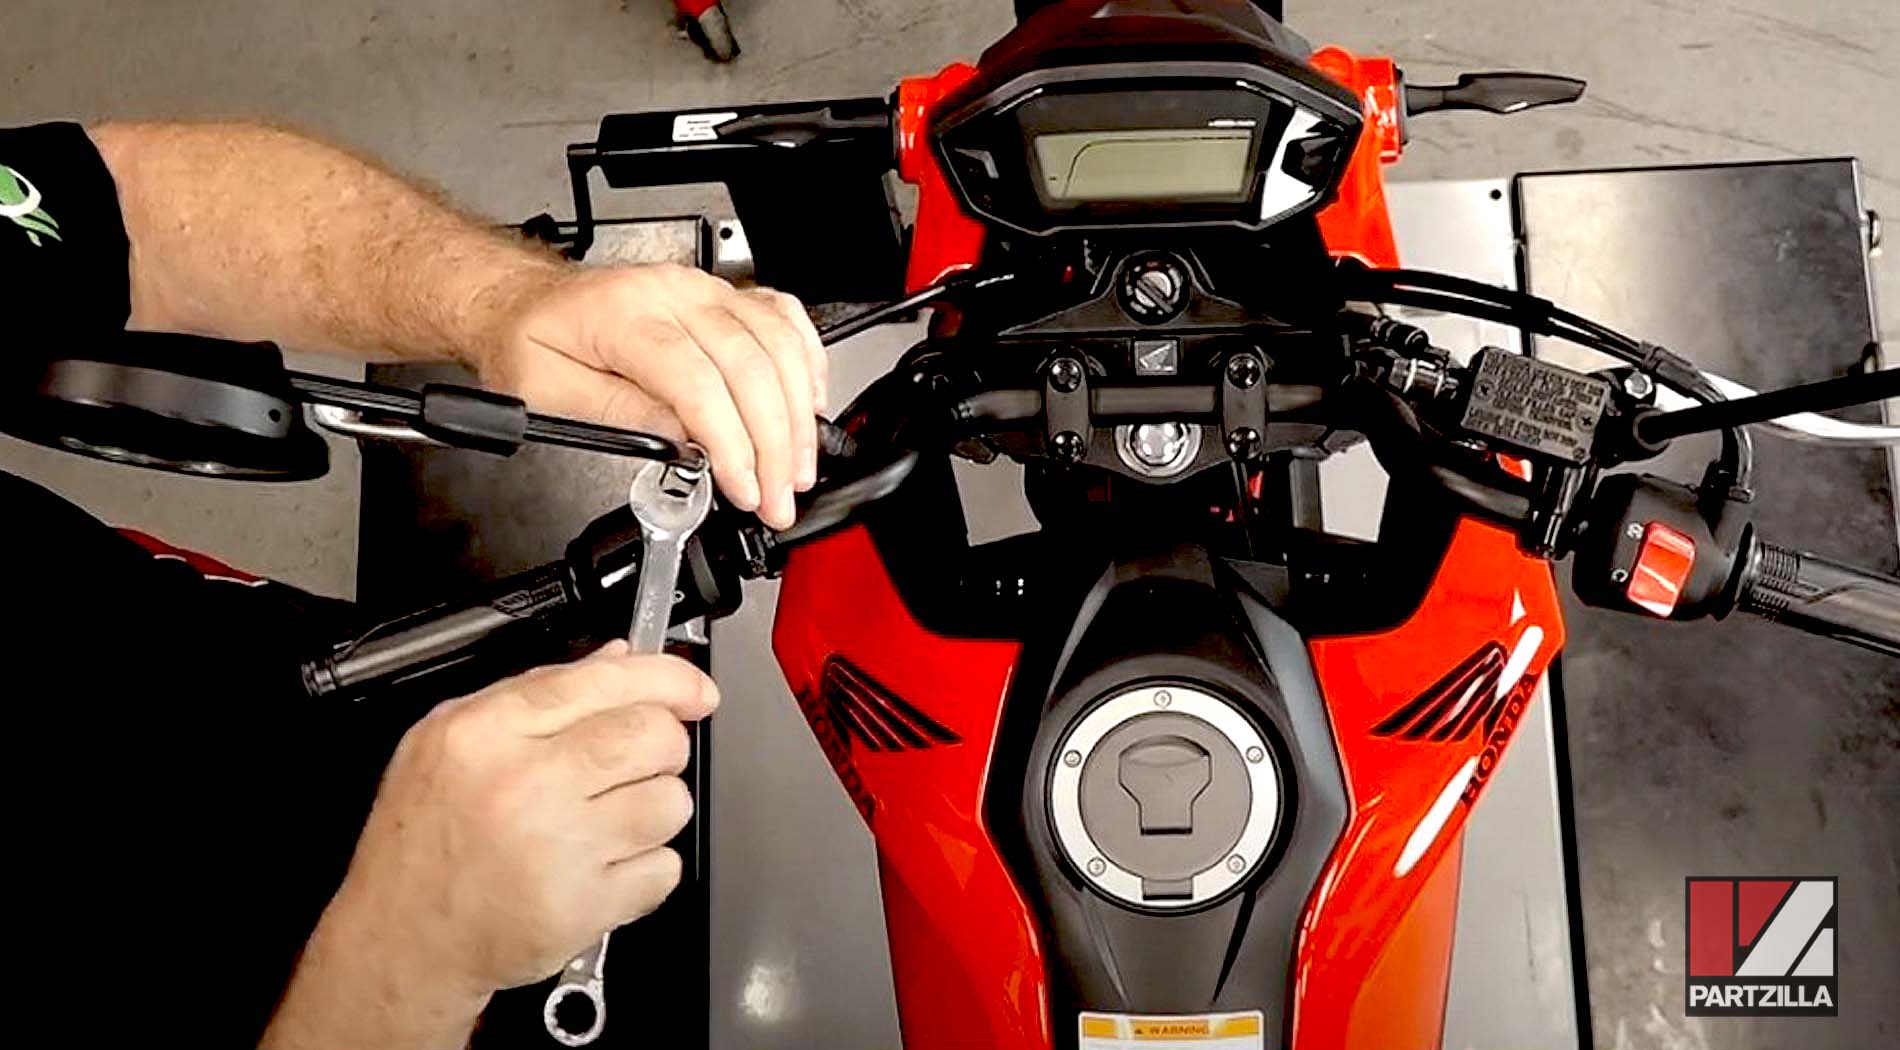
PRO TIP: You can cap the old mirror threaded holes with a button-top bolt that has the same screw thread.
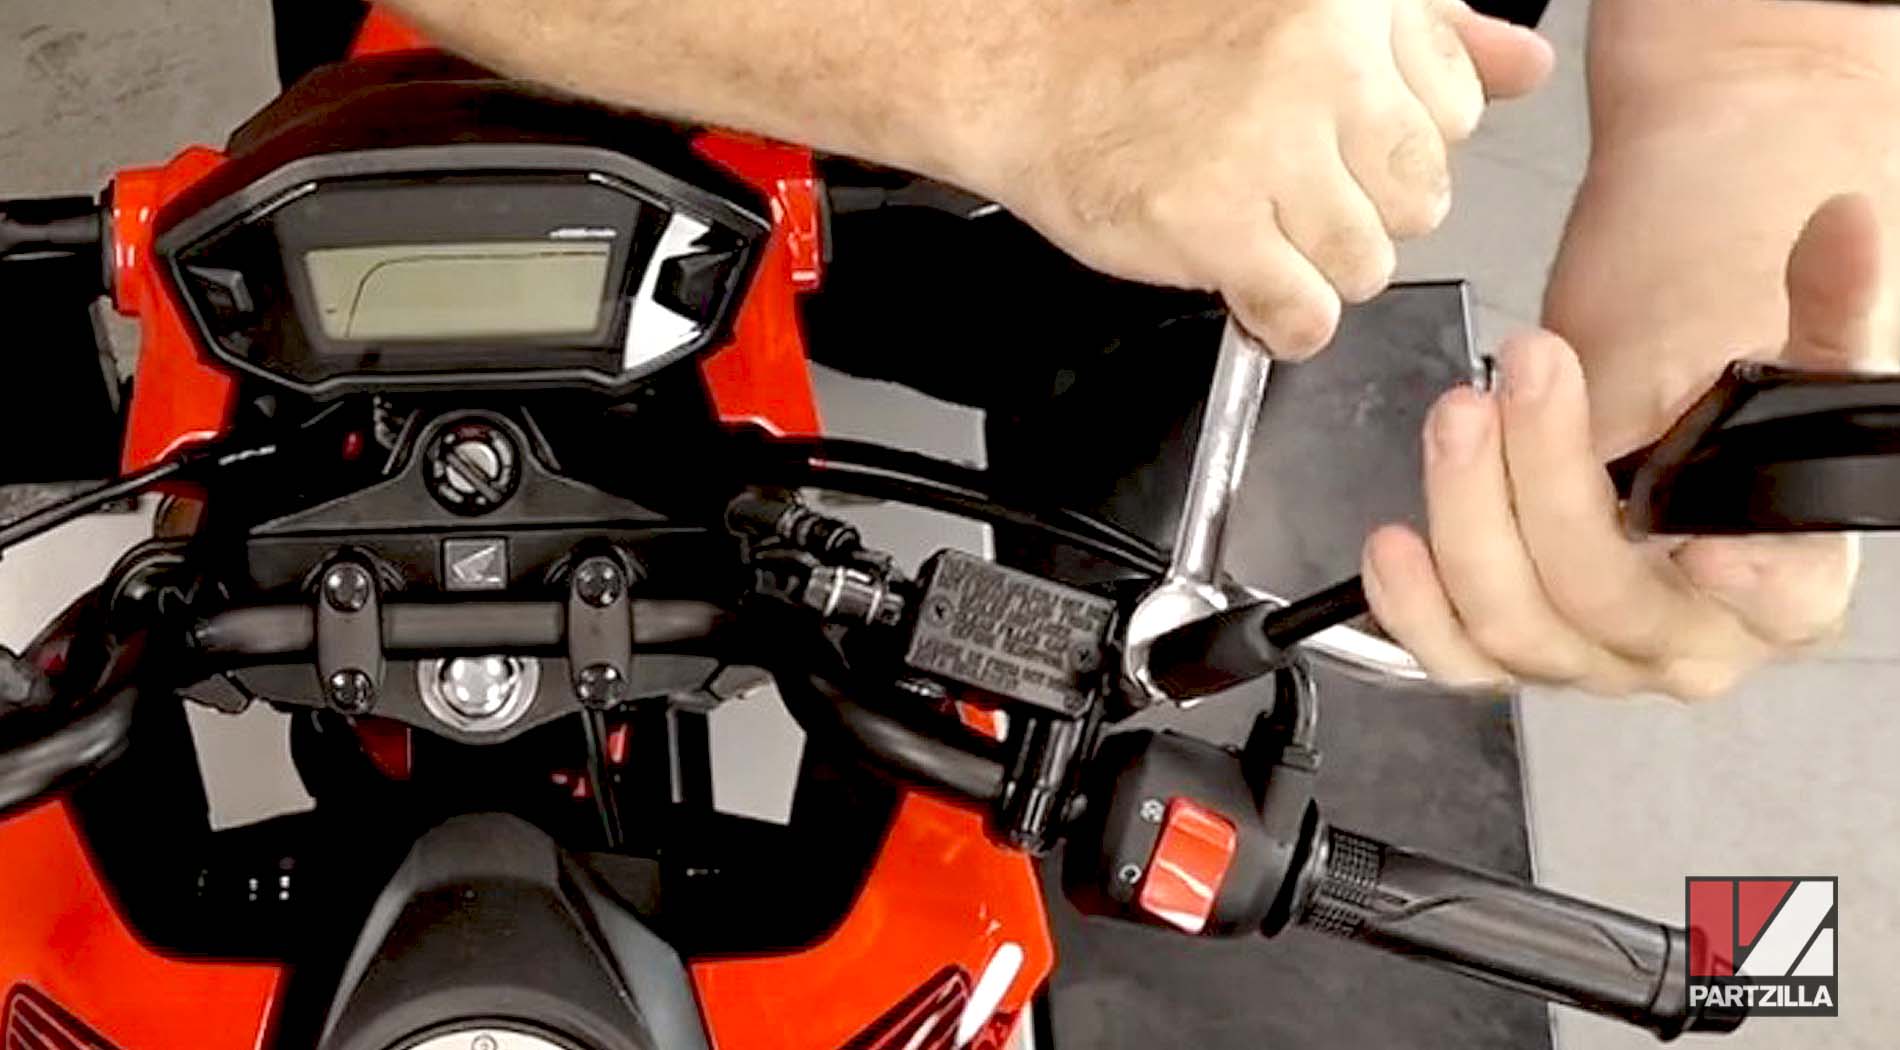
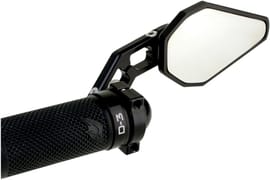
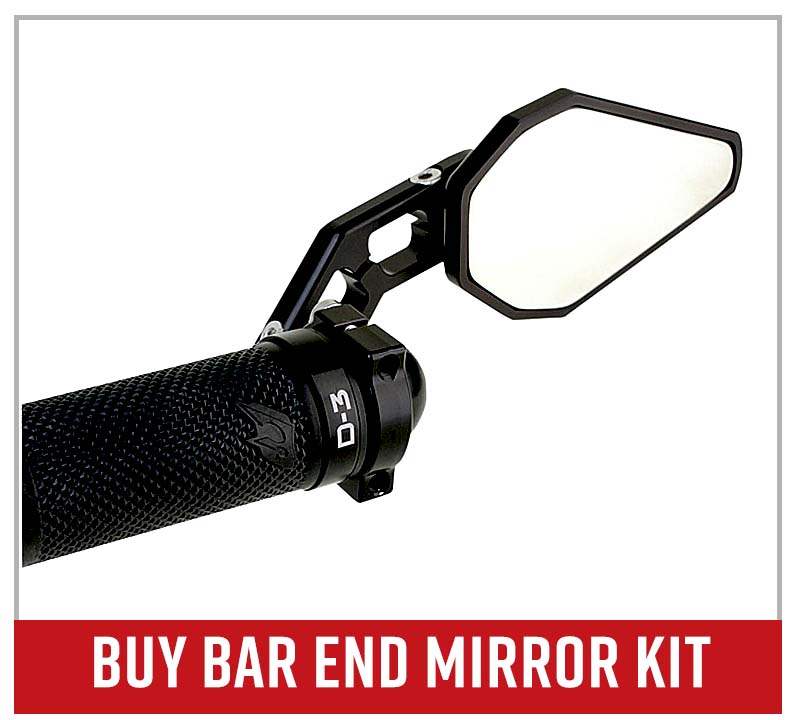
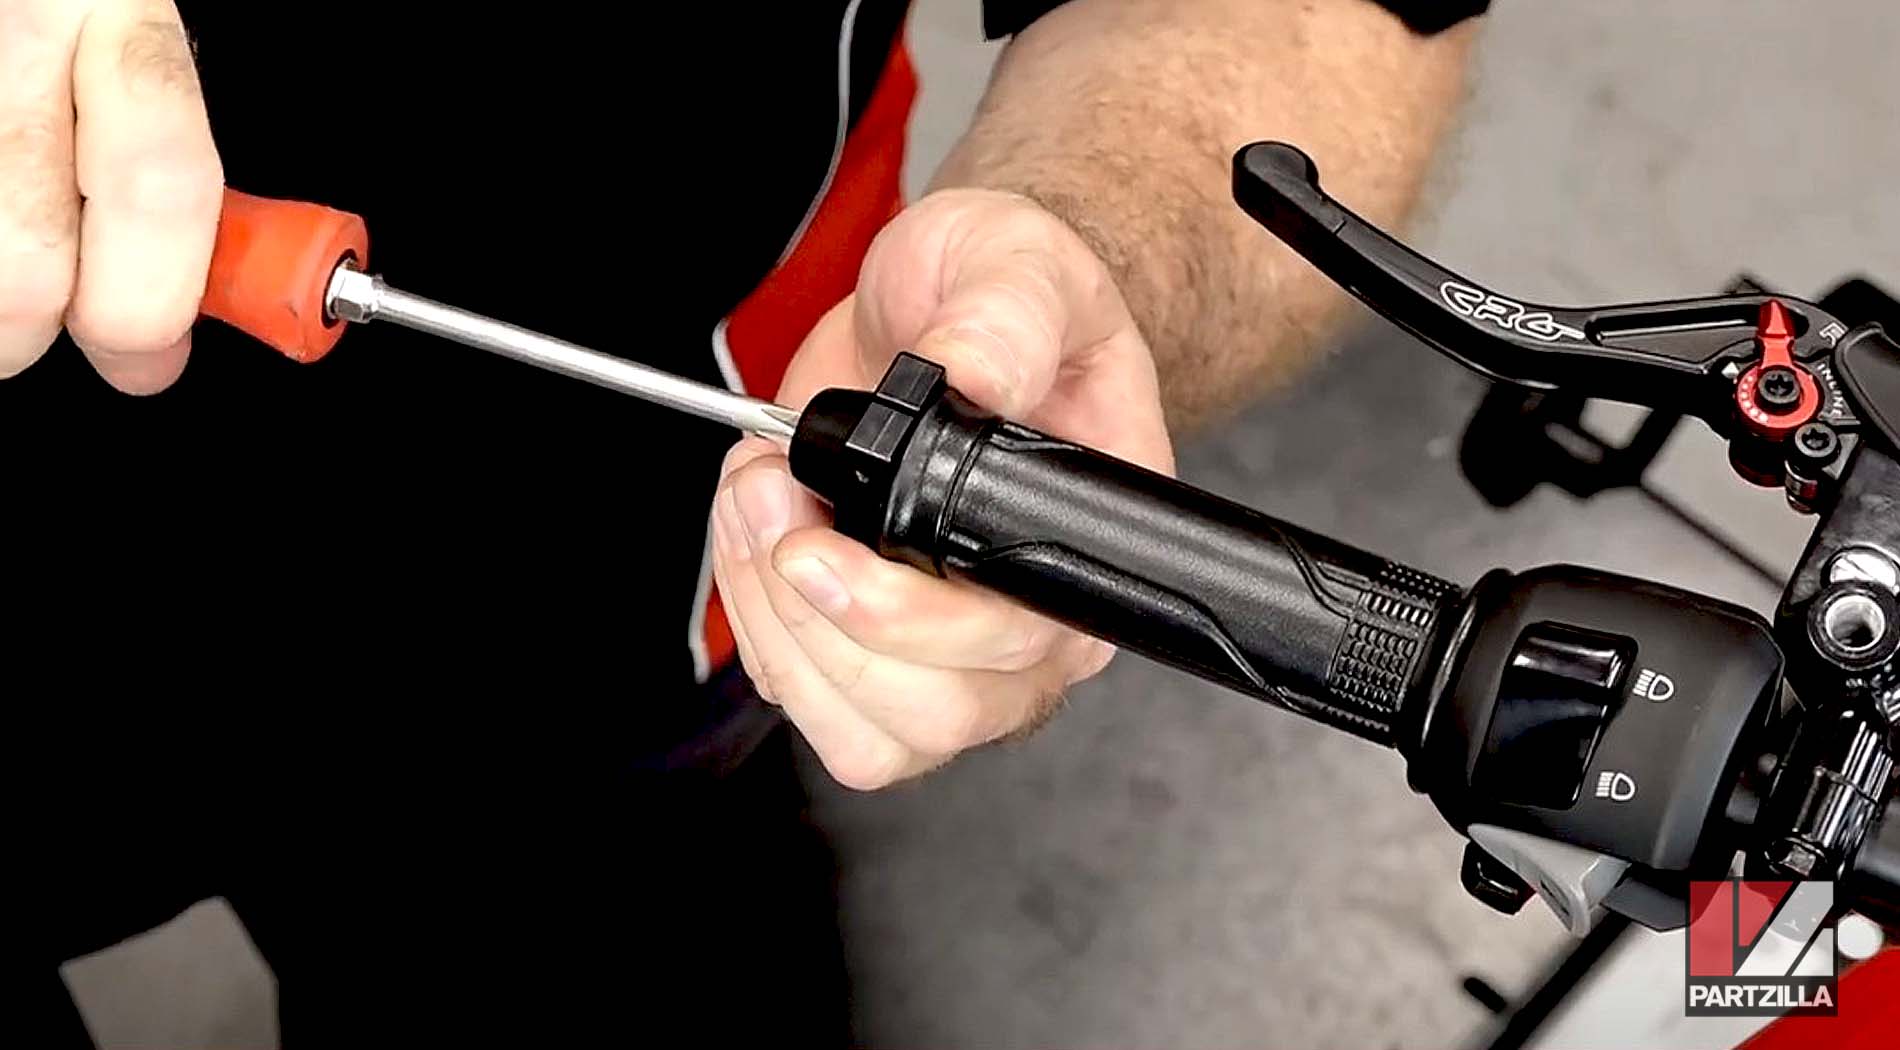
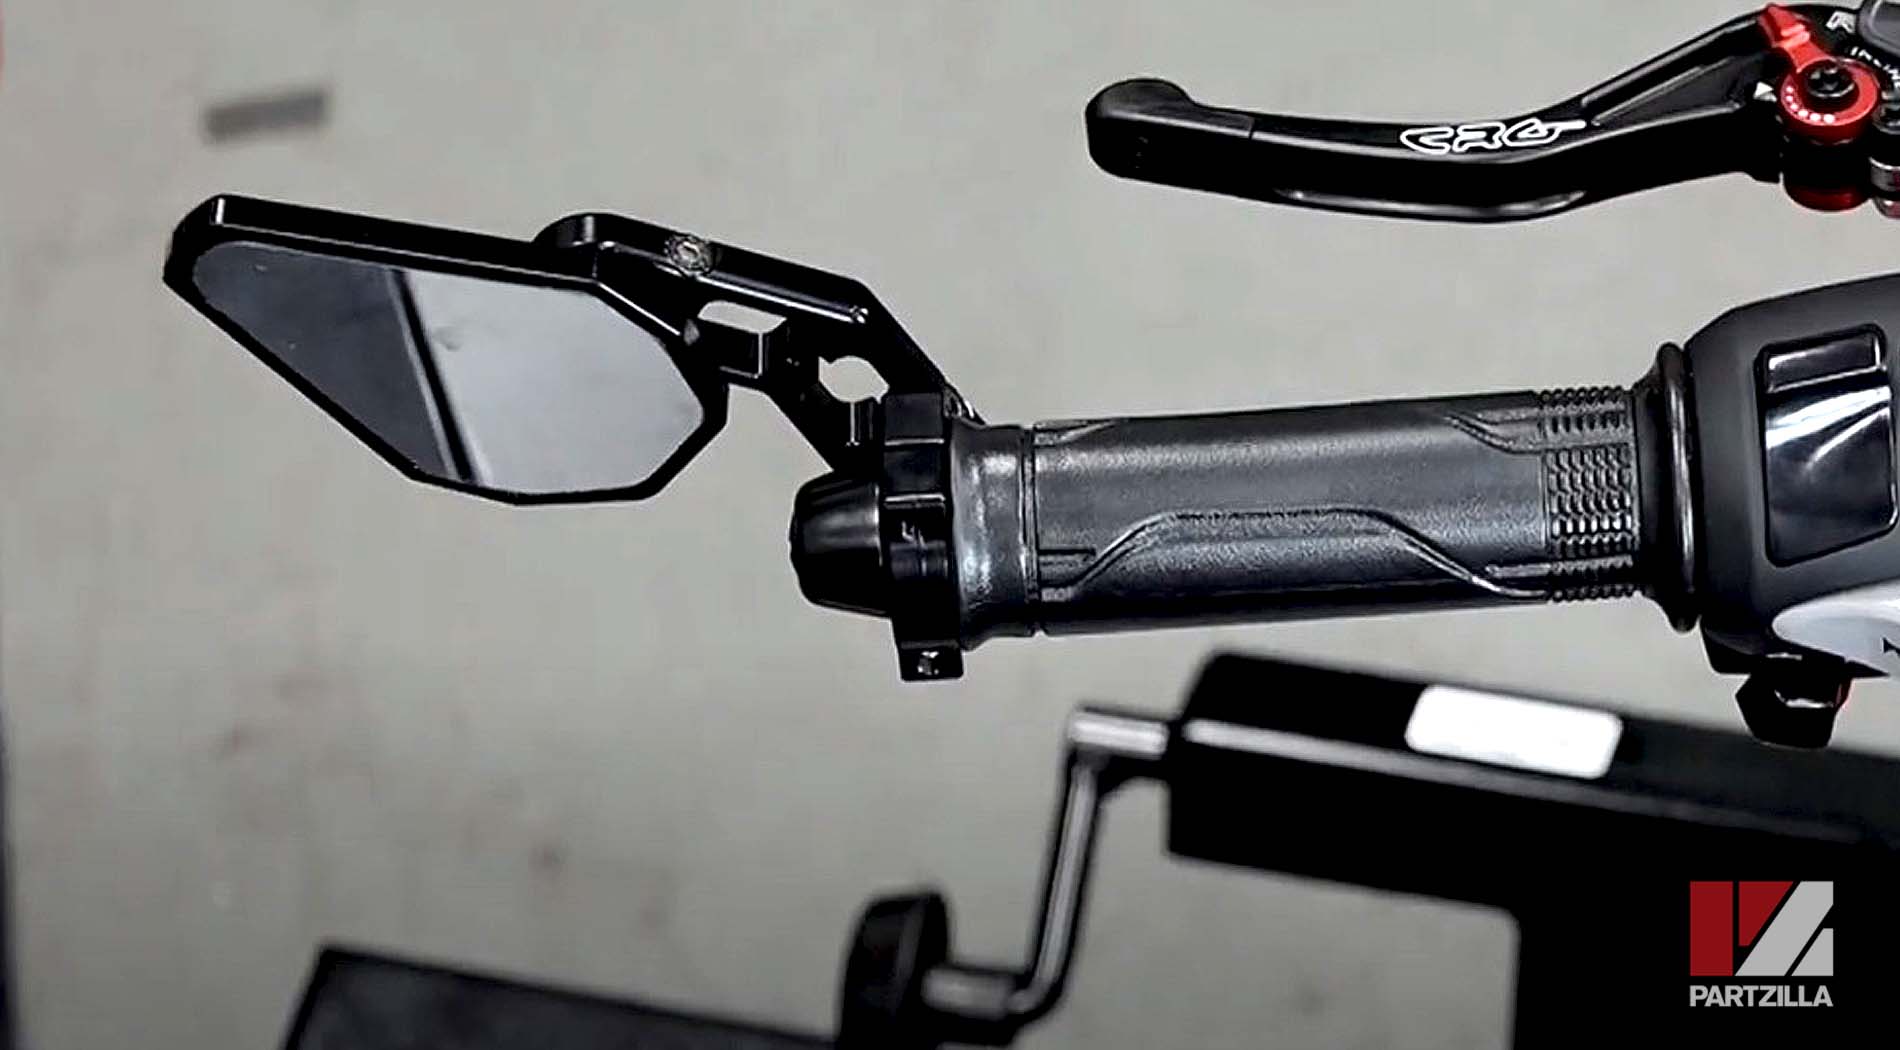
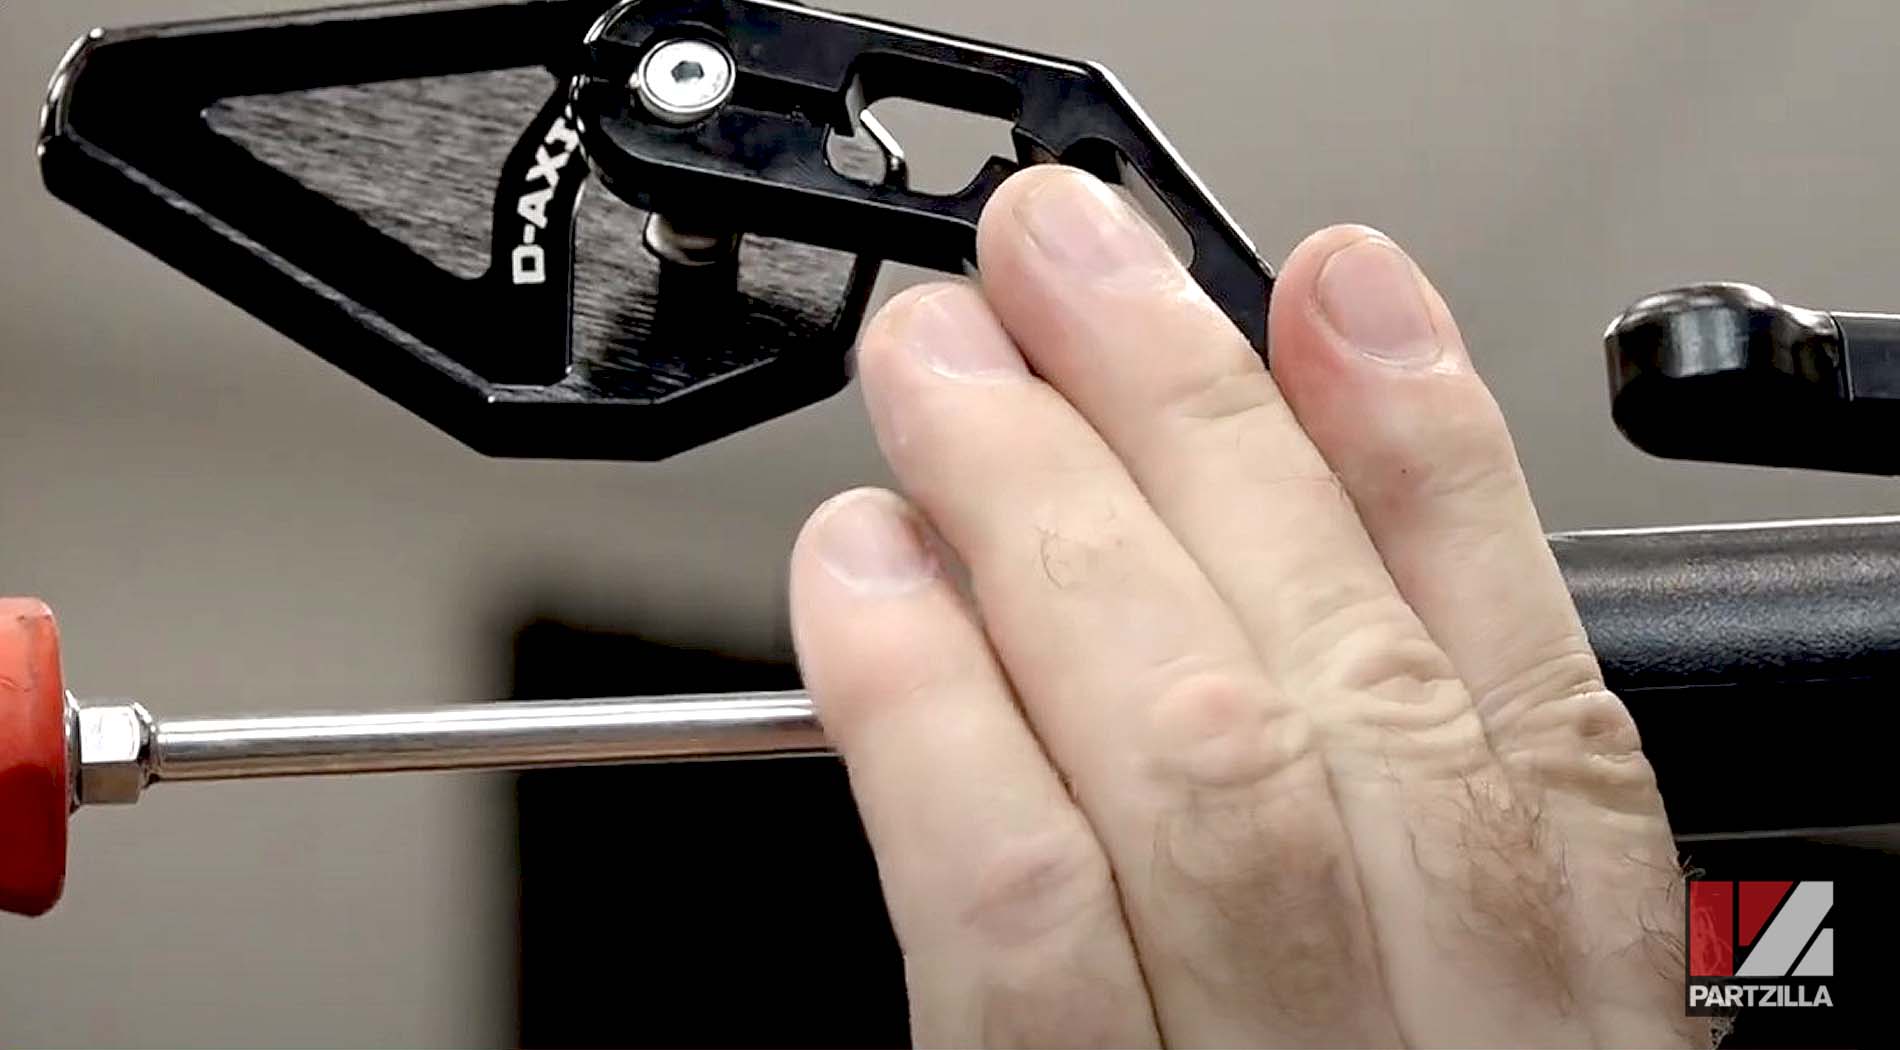
Step 2. Remove the Phillips screw and bar ends from the left or clutch side. Install the mirror bracket (included in the D-Axis bar end mirror kit), and reinstall the bar ends and screw.
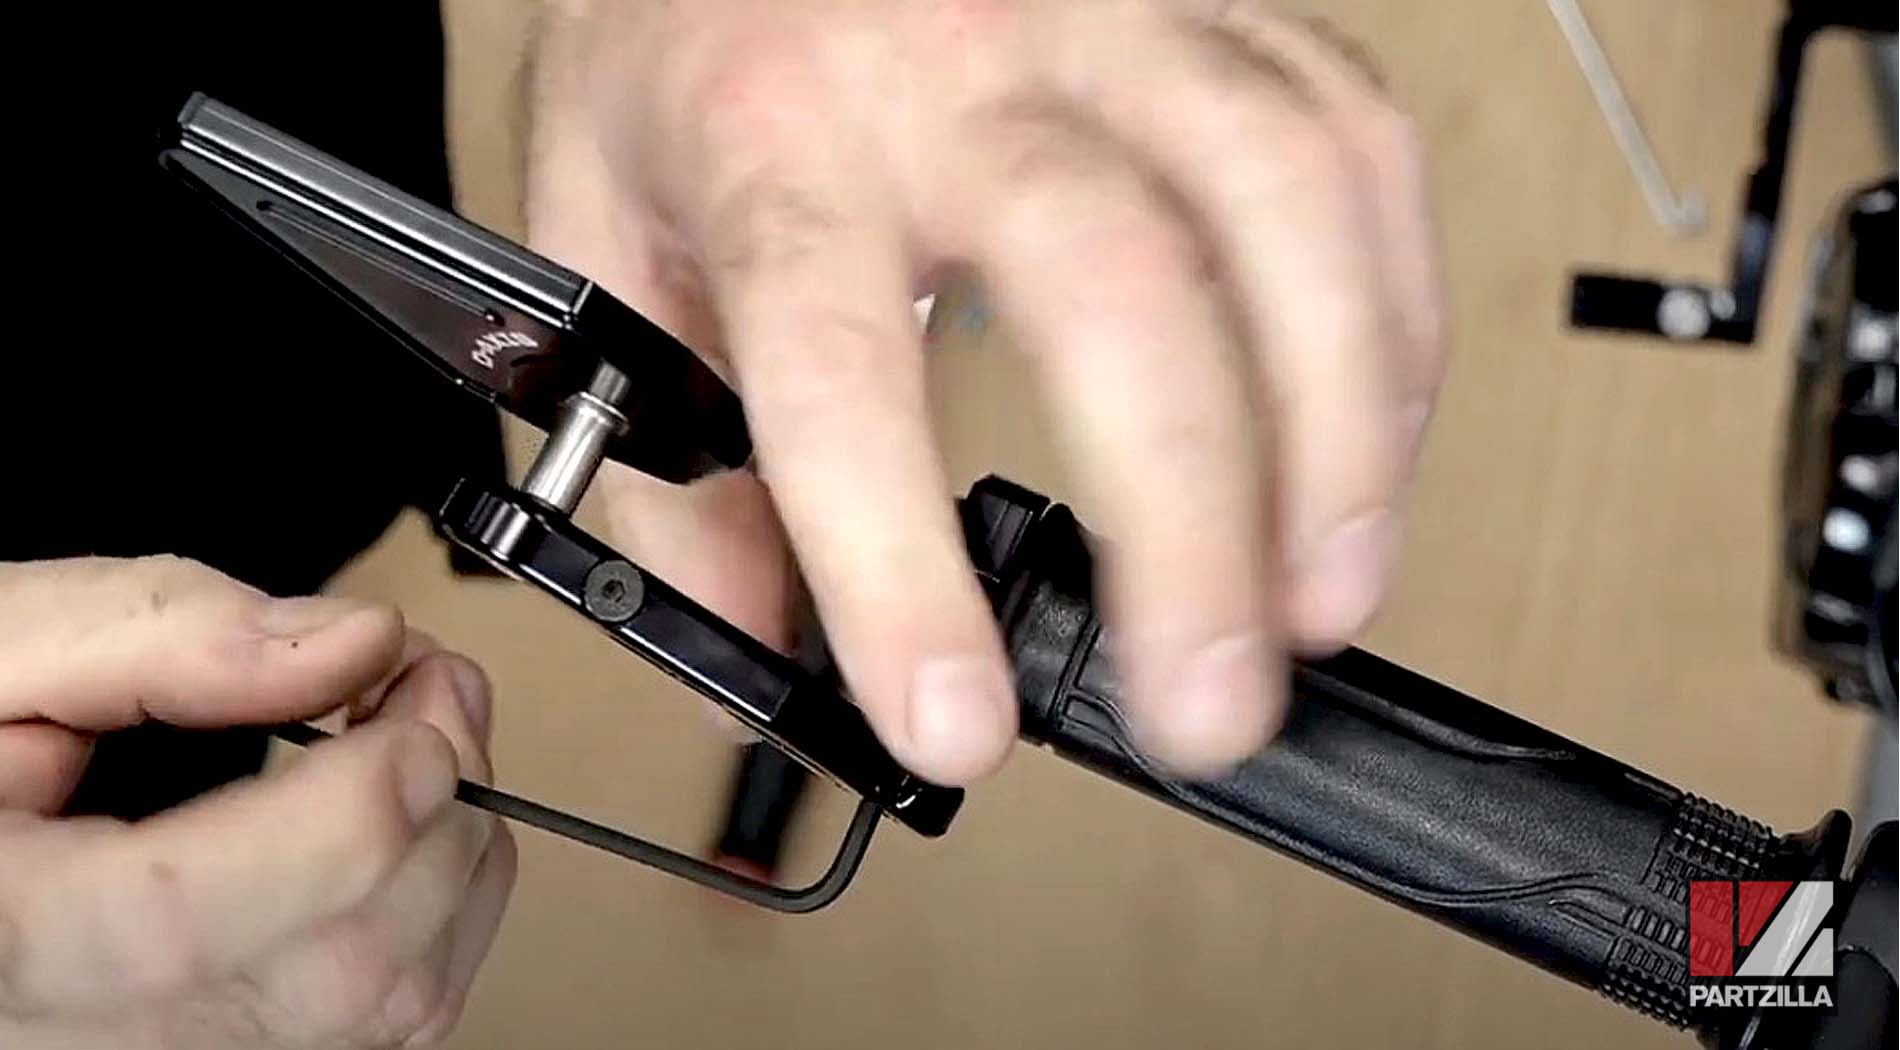
Step 3. Attach the mirror arm to the left or clutch mirror bracket, and attach the mirror to the mirror bracket (all included in the mirror kit).
NOTE: Be careful not to overtighten and strip the mirror kits Allen bolts.
Step 4. Remove the Phillips screw and bar ends from the right (or throttle) side. Install a bar end adapter (purchased separately from the mirror kit) to prevent the mirror from rotating when the throttle is twisted, and install the mirror bracket (included in the mirror kit).
Step 5. Attach the mirror arm to the right (or throttle) mirror bracket, and attach the mirror to the mirror bracket (all included in the mirror kit).
Watch the clip below to see the mirror installation segment of our Honda Grom Lights, Mirrors & Levers video.
With all of the upgrades and enhancements we’ve done to our Grom, why stop now? Next, we’re installing a new clutch and oil pump mod to further improve our ride!
Watch the video above to see how to upgrade the clutch and oil pump on a 2018 Honda Grom.