How to Change Honda CRF450 Front Brake Pads
Changing the front brake pads and rotor on a Honda CRF450 is a quick 1-2 motorcycle maintenance task. When you change the front brake pads, it’s a good idea to check the front brake rotor as well for wear and replace it if necessary.
Tools and Parts – Honda CRF450 Front Brake Pads Change
- Flathead screwdriver
- 5mm Allen
- Honda front brake disk
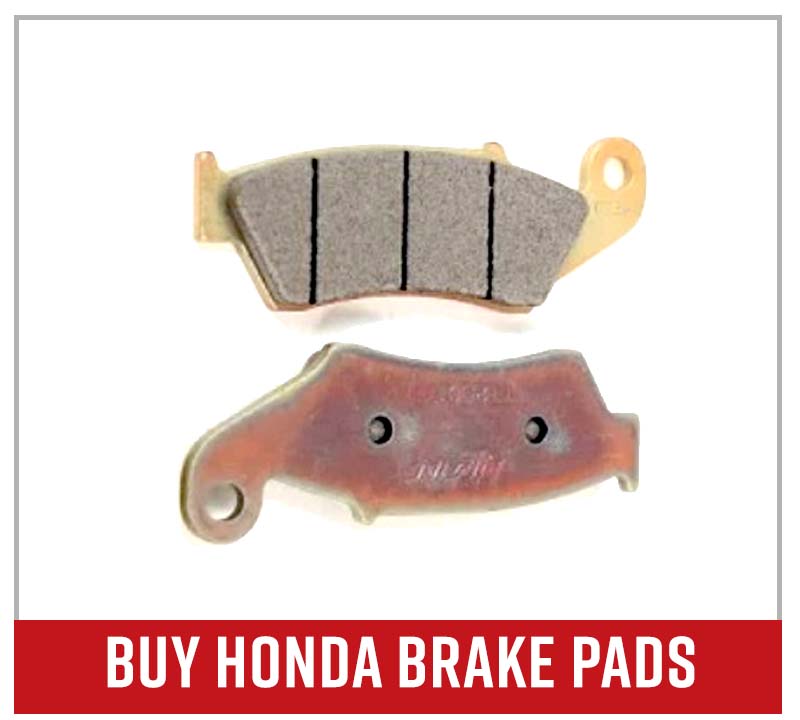
- Honda front brake pads set
Watch the video above and follow the steps below to change the front brake pads and front rotor on a Honda CRF450 dirt bike. Use our Honda CRF450R front brake assembly and front wheel parts diagrams for additional reference.
Replacing Honda CRF450R Front Brake Pads
Step 1. Push the pistons back into the brake caliper by putting your fingers behind the brake rotor, and pressing the caliper against the rotor with your thumbs. This gives you enough room to fit the new pads between the caliper assembly and the rotor.
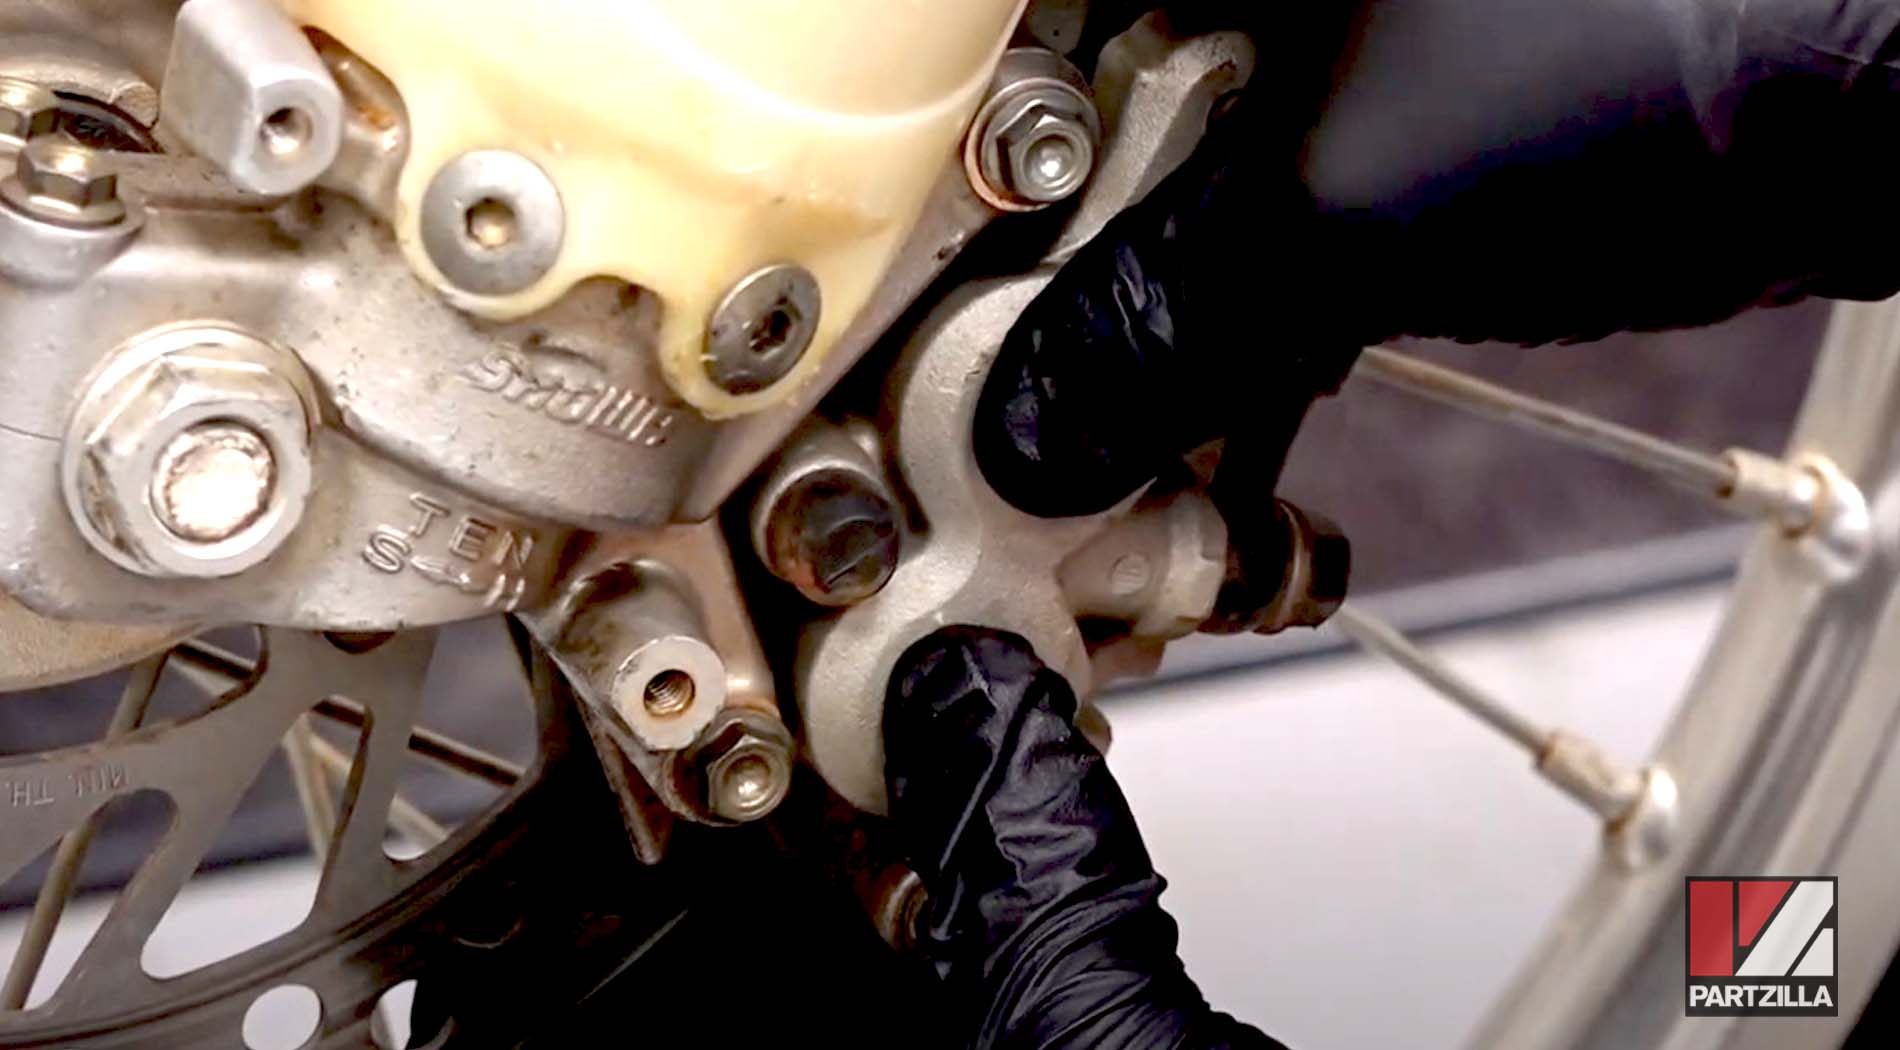
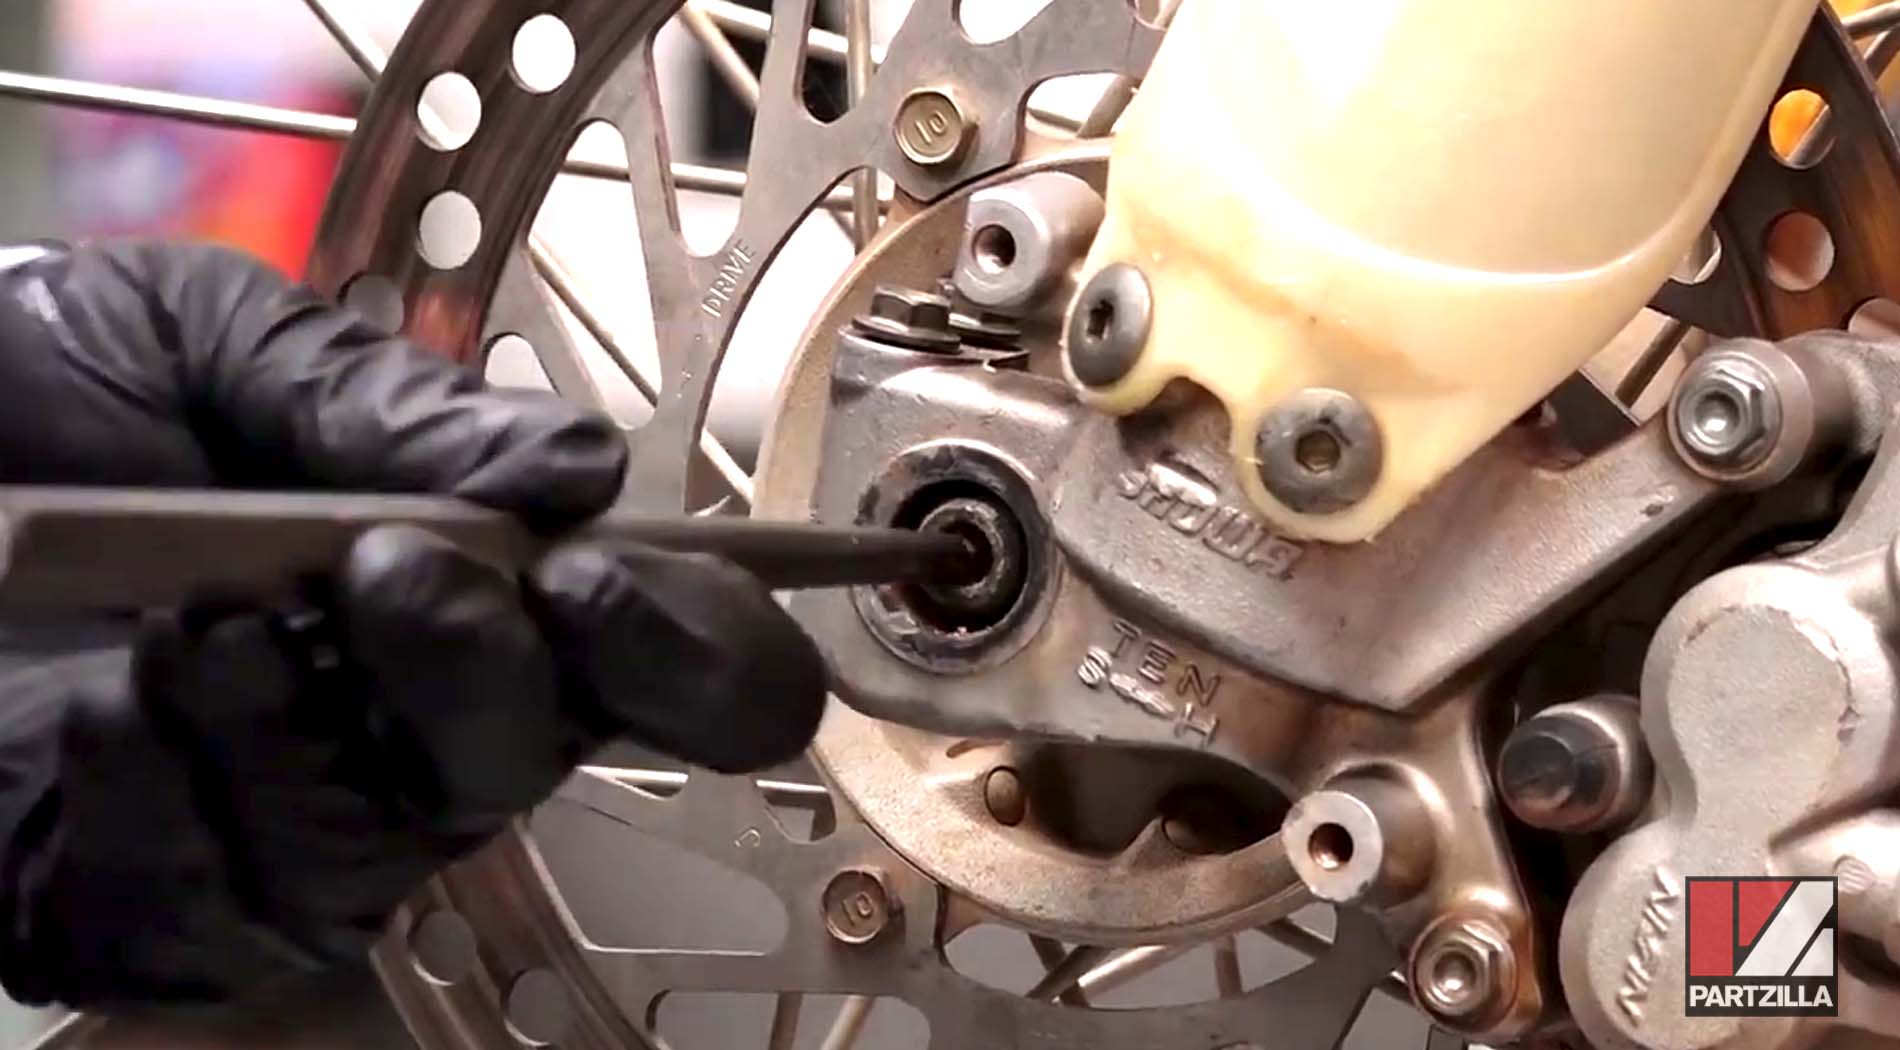
Step 2. Remove the brake pad pin plug from the bottom of the brake caliper using a flat head screwdriver, then remove the pad pin beneath the plug with a 5mm Allen.
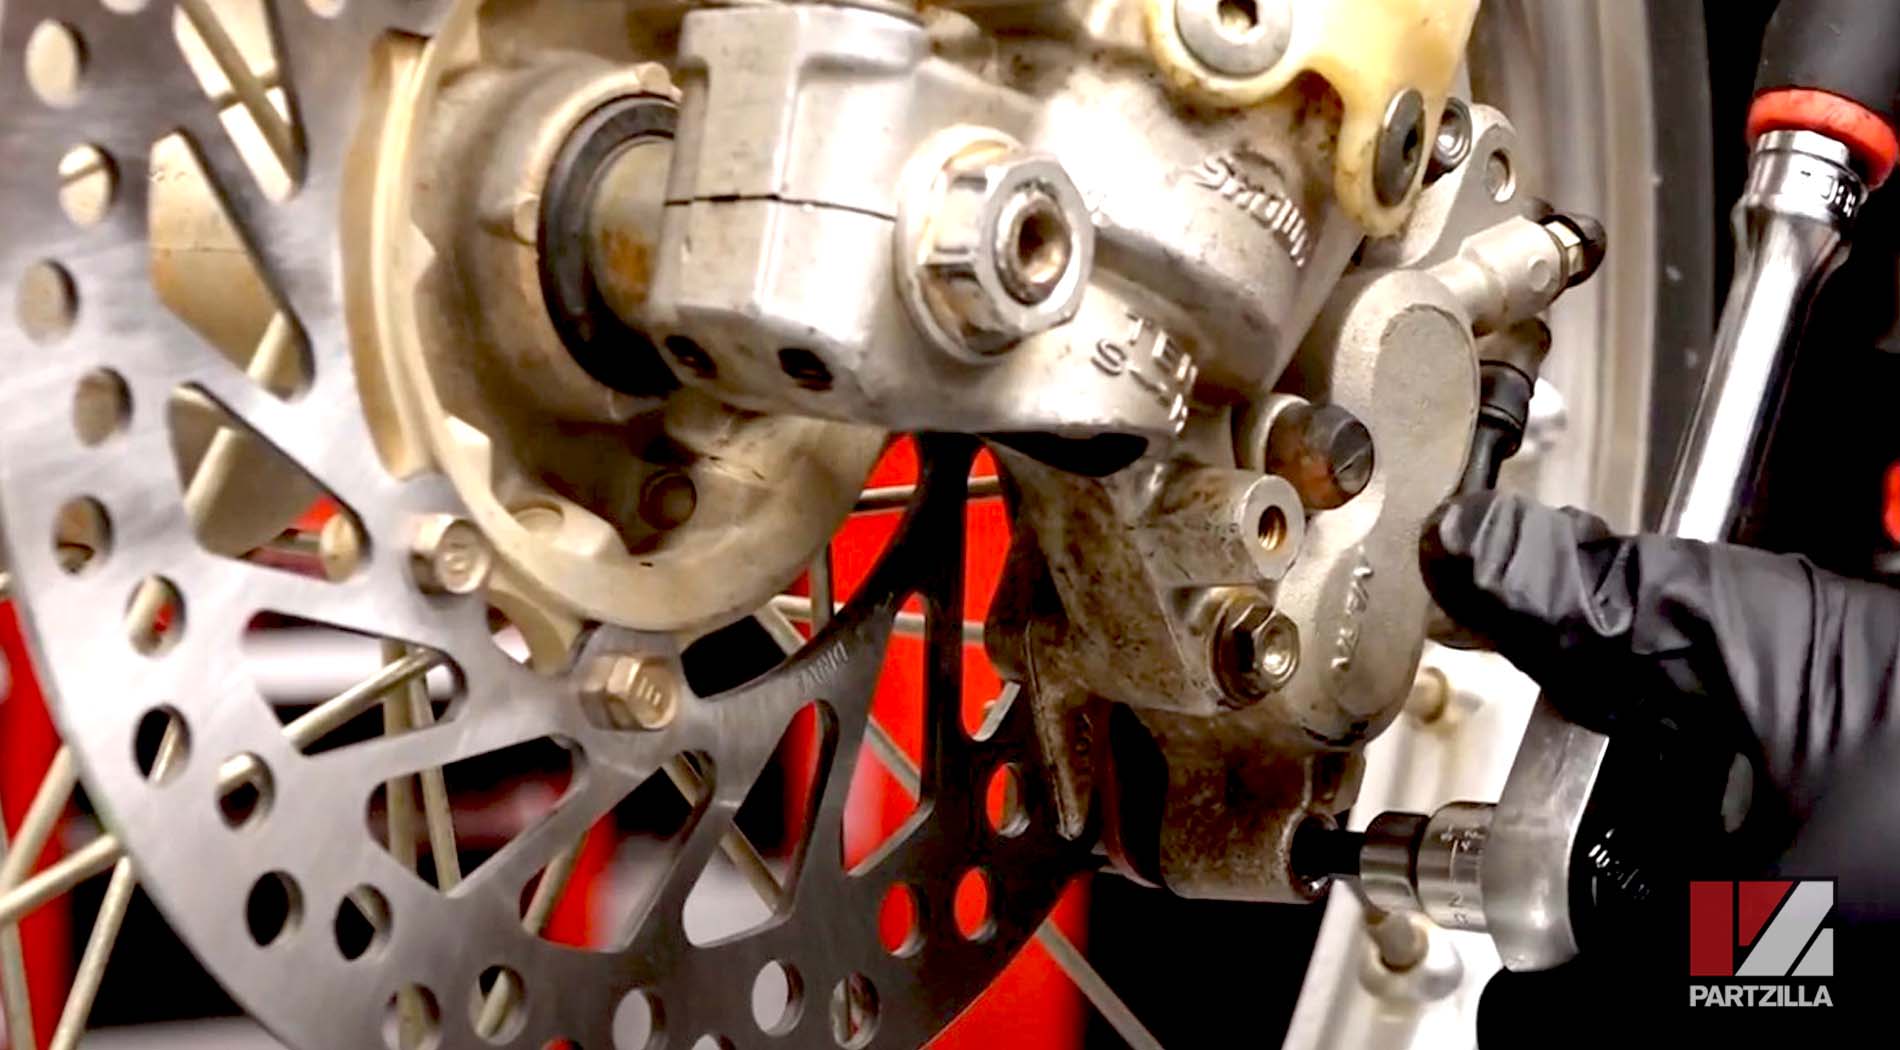
Step 3. Remove the old brake pads by pulling them downward, and install the new brake pads by pushing them up into the caliper assembly.
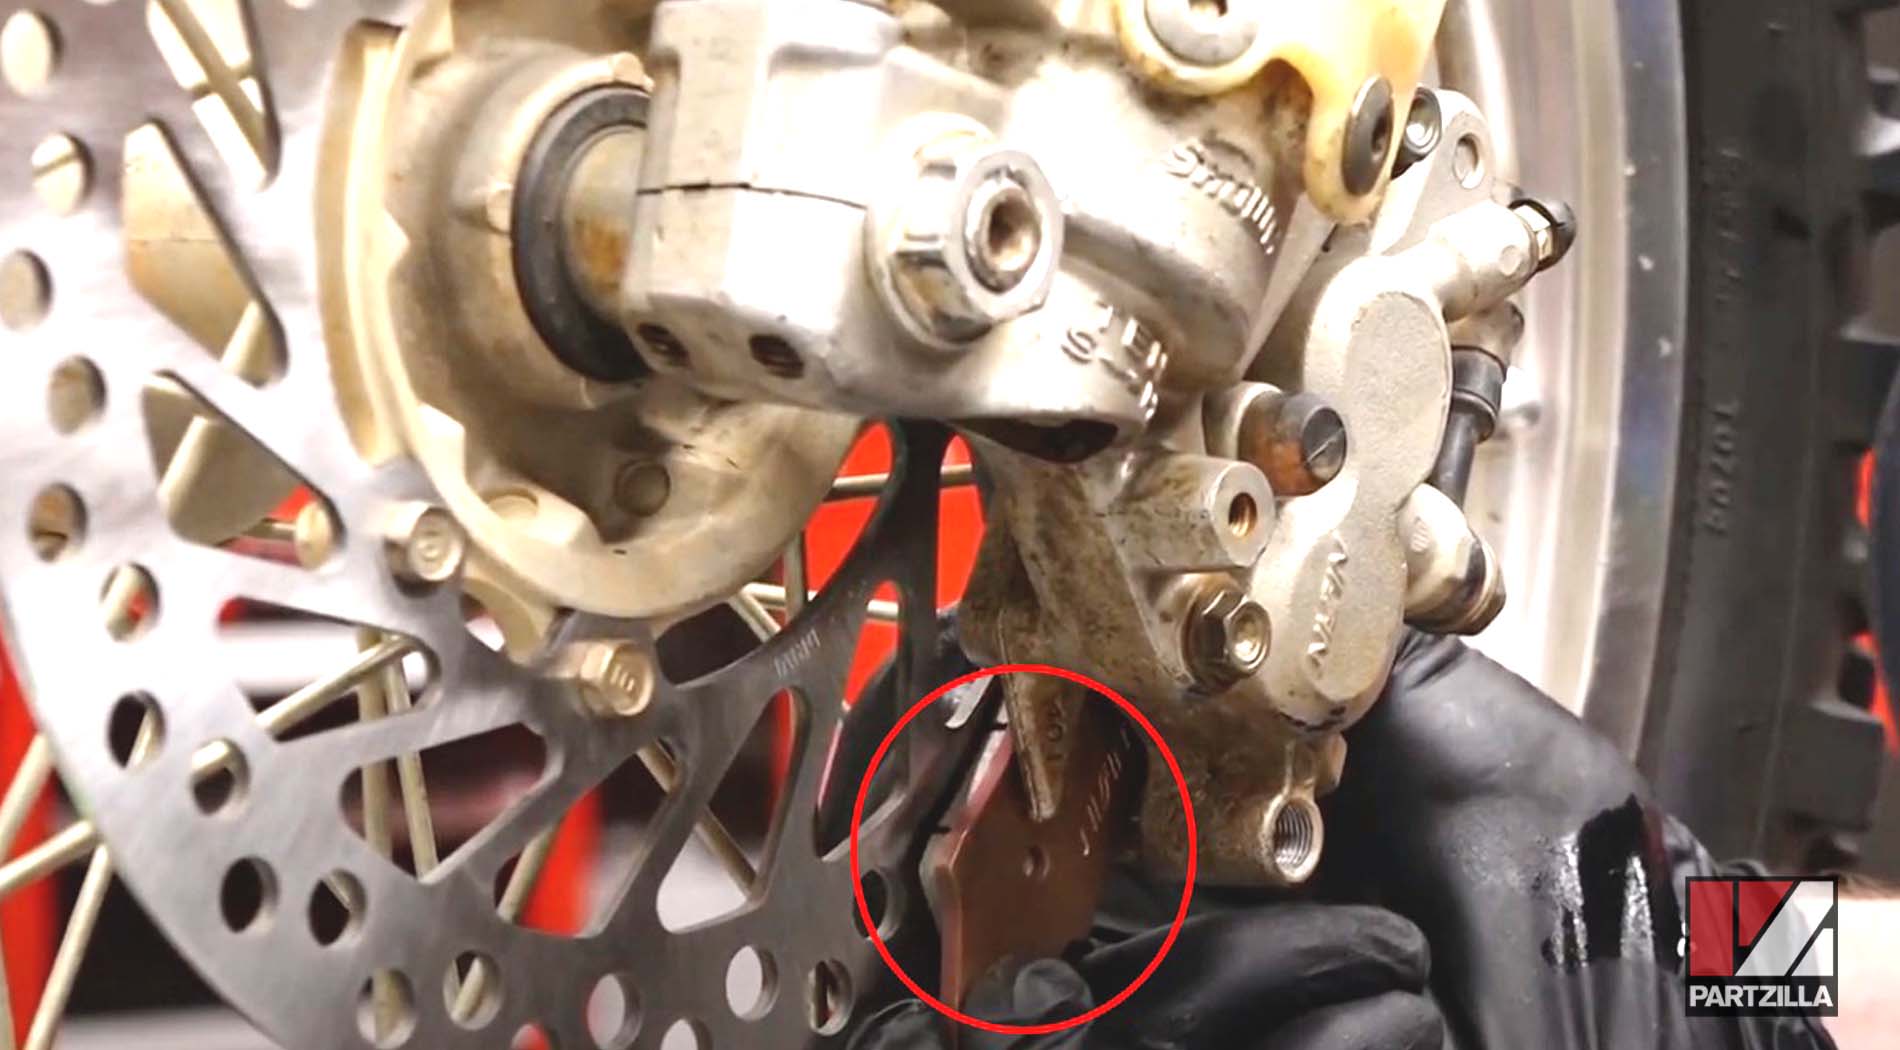
NOTE: Make sure you install the new pads with the holes for the pad pins at the bottom.
Step 4. Reinstall the brake pad pin, and torque it to 13 foot-pounds. Next, reinstall the pad pin plug.
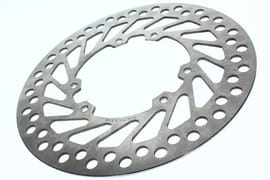
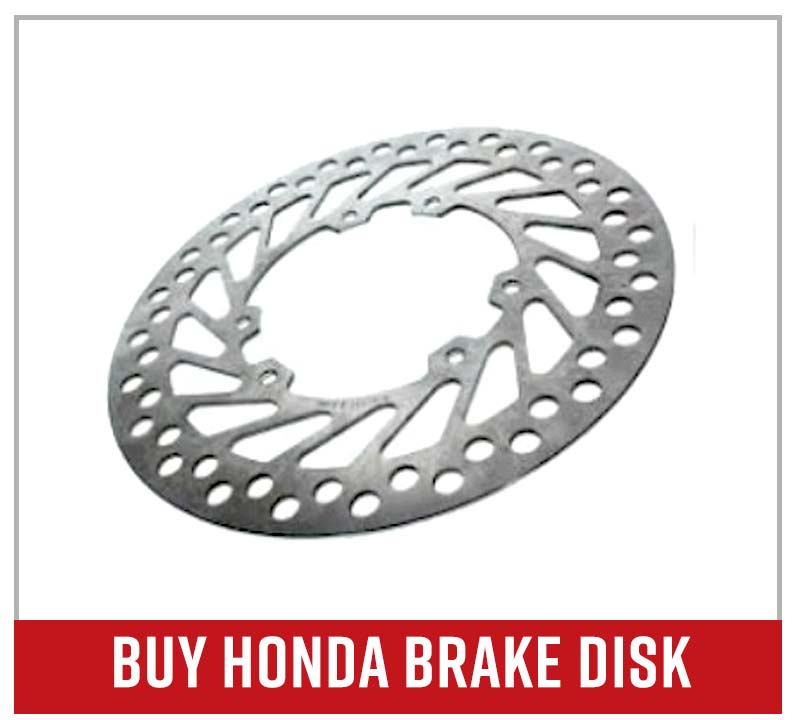
NOTE: Measure the thickness of the rotor using a micrometer. Honda specifies the minimum thickness for a CRF450R front rotor is 2.5mm, so if yours is anything less than that you’ll need to replace it.
Replacing Honda CRF450R Front Brake Rotor
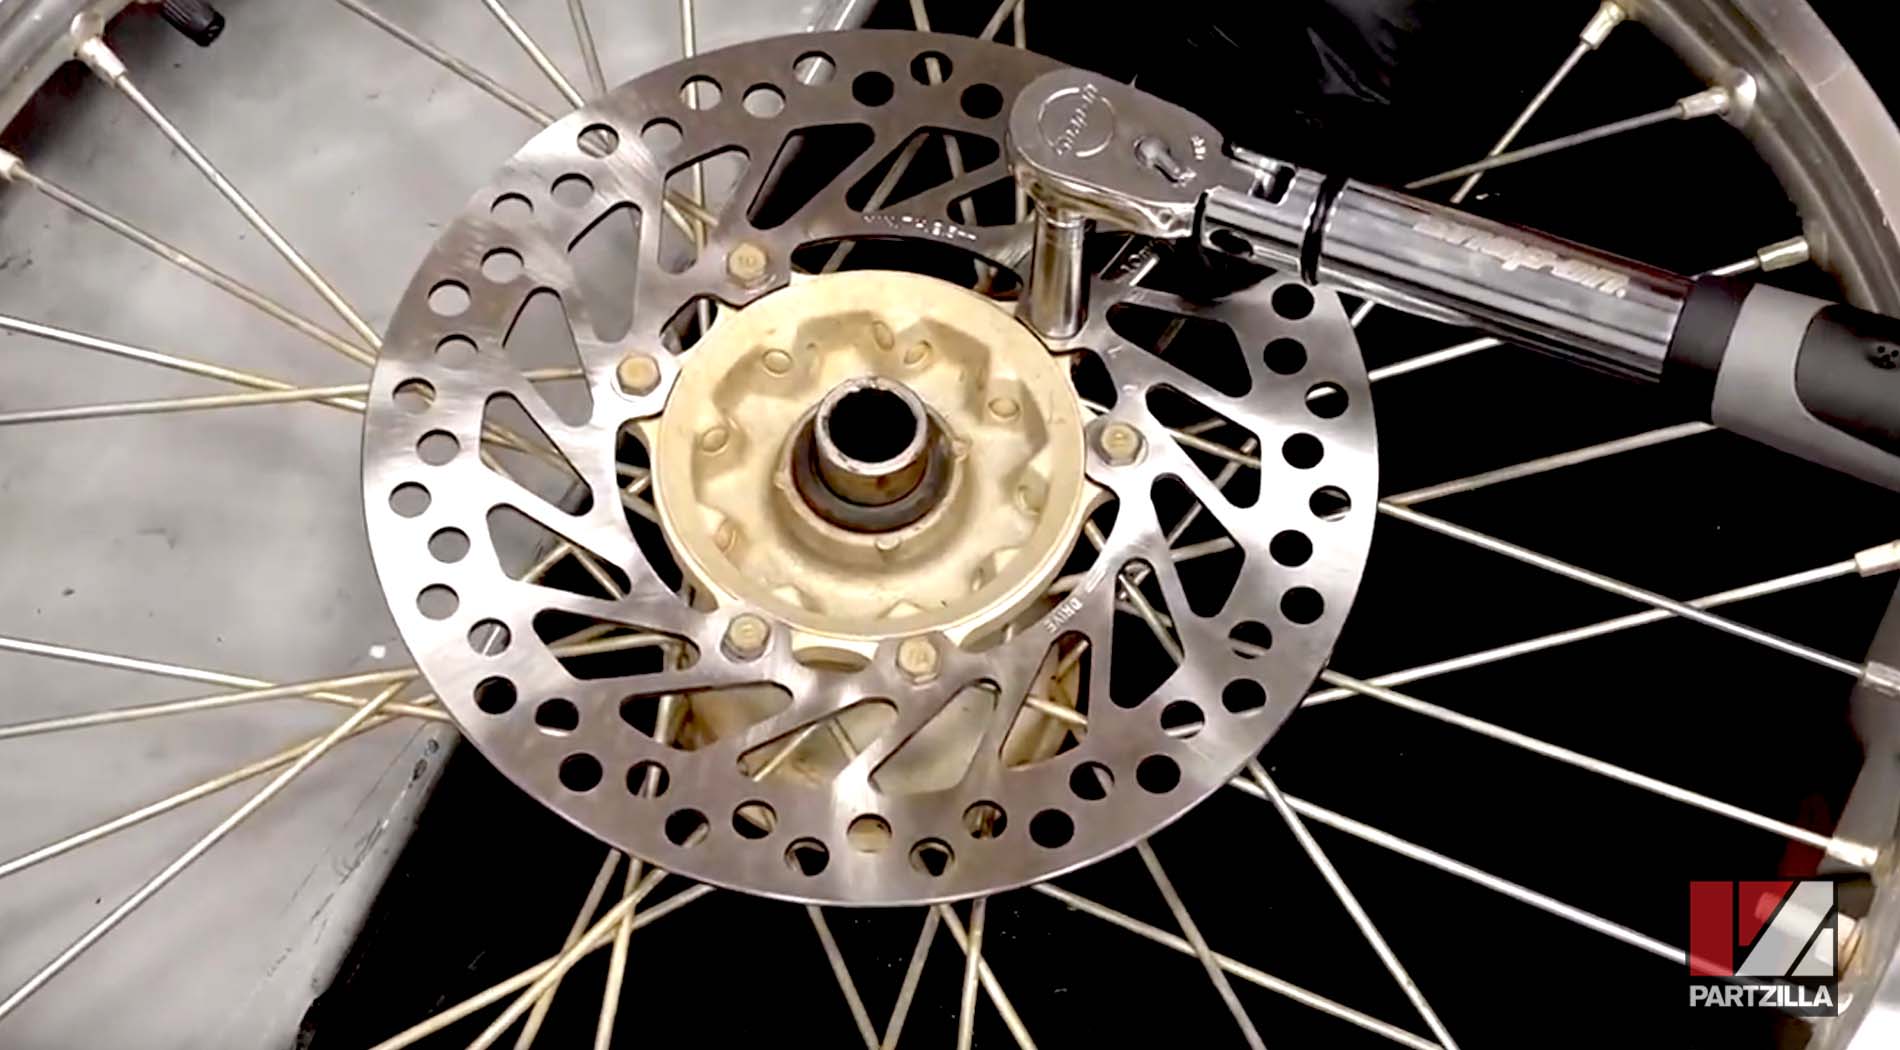
Step 1. Free the rotor from the brake pads by putting your fingers behind the brake rotor, and pressing the caliper against the rotor with your thumbs to push the pistons back into the brake caliper.
Step 2. Loosen the four 10mm axle pinch bolts (two on each side of the wheel), but don’t remove them.

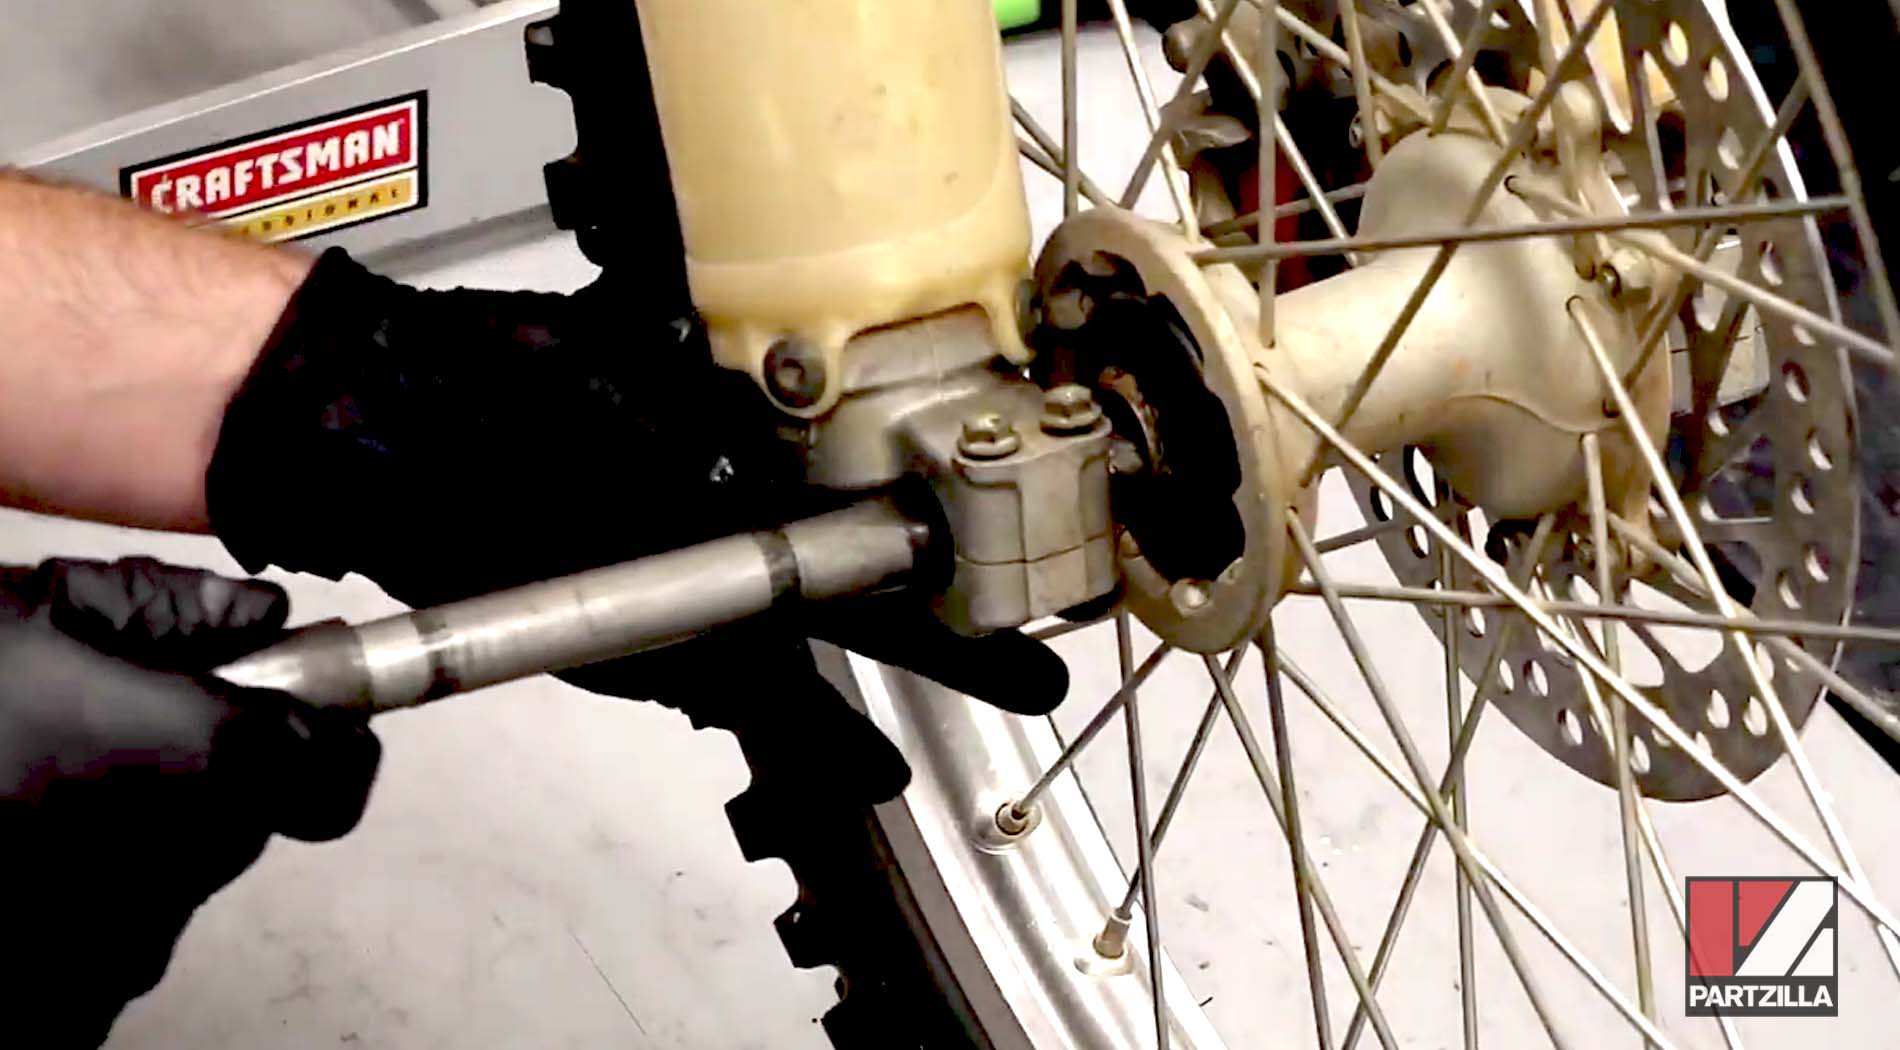
Step 3. Remove the 22mm axle bolt, tap the axle stub through with a rubber mallet, then pull the axle out from the other side of the wheel and remove the wheel.
PRO TIP: If the axle is difficult to pull through the wheel, place a punch or something similar on the axle and hammer it through.
Step 4. Remove the six 10mm nuts and bolts securing the rotor to the wheel, then make note of the orientation of the old rotor first before removing it.
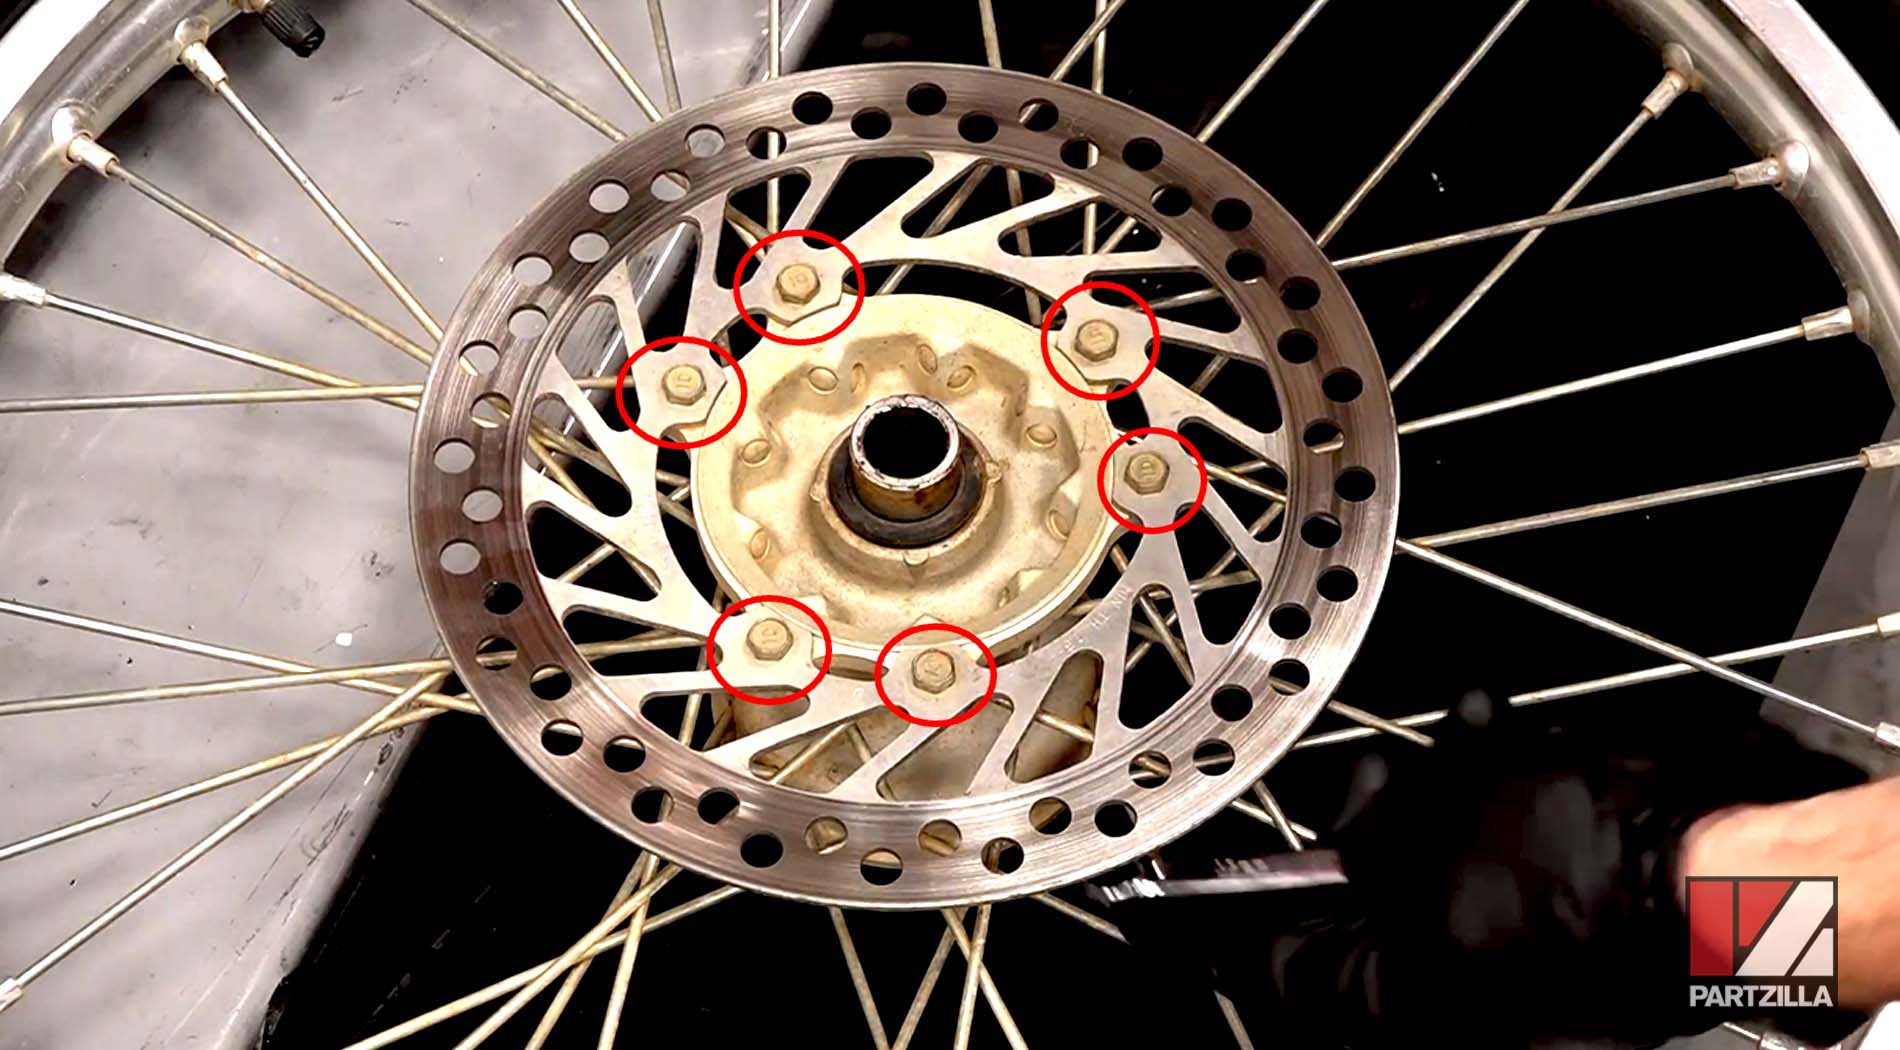
Step 5. Install the new brake rotor so it matches the orientation of the old one, then reinstall the six 10mm nuts and bolts, and torque them to 12 foot-pounds.
Step 6. Clean and lightly grease the axle, then put the wheel back in place and reinstall the axle. Next, reinstall the axle nut and torque it to 65 foot-pounds.
Step 7. Torque the two axle pinch bolts on the left side to 15 foot-pounds. Pump the front brakes and the front forks a few times to align the axle. Next, torque the axle pinch bolts on the right side to 15 foot-pounds and you’re done.