Honda Grom Big Bore Kit Upgrade
Welcome to the first part of our project to make a 2018 Honda Grom faster, and to improve its handling. For this upgrade, we install a KOSO big bore kit, which will increase the cylinder bore to 170cc.
We also install a KOSO cam chain tensioner kit to cope with the additional forces from the upgraded motor, as part of our Grom top end rebuild. Watch the video above or follow the steps below to learn how to do a Honda Grom big bore cylinder kit installation.
See the parts diagrams:
Tools and Parts – Honda Grom Big Bore Cylinder Installation
- Sheave holder
- Left crankcase cover gasket
- Ring end gap grinder
- Cylinder head gasket
- Cylinder gasket


NOTE: For this project, you’ll need a well-stocked toolbox that includes a ratchet, socket set, wrenches, screwdrivers, a torque wrench and other essential tools, as well as the special tools listed above.
Part 1: Honda Grom Cylinder Head Removal
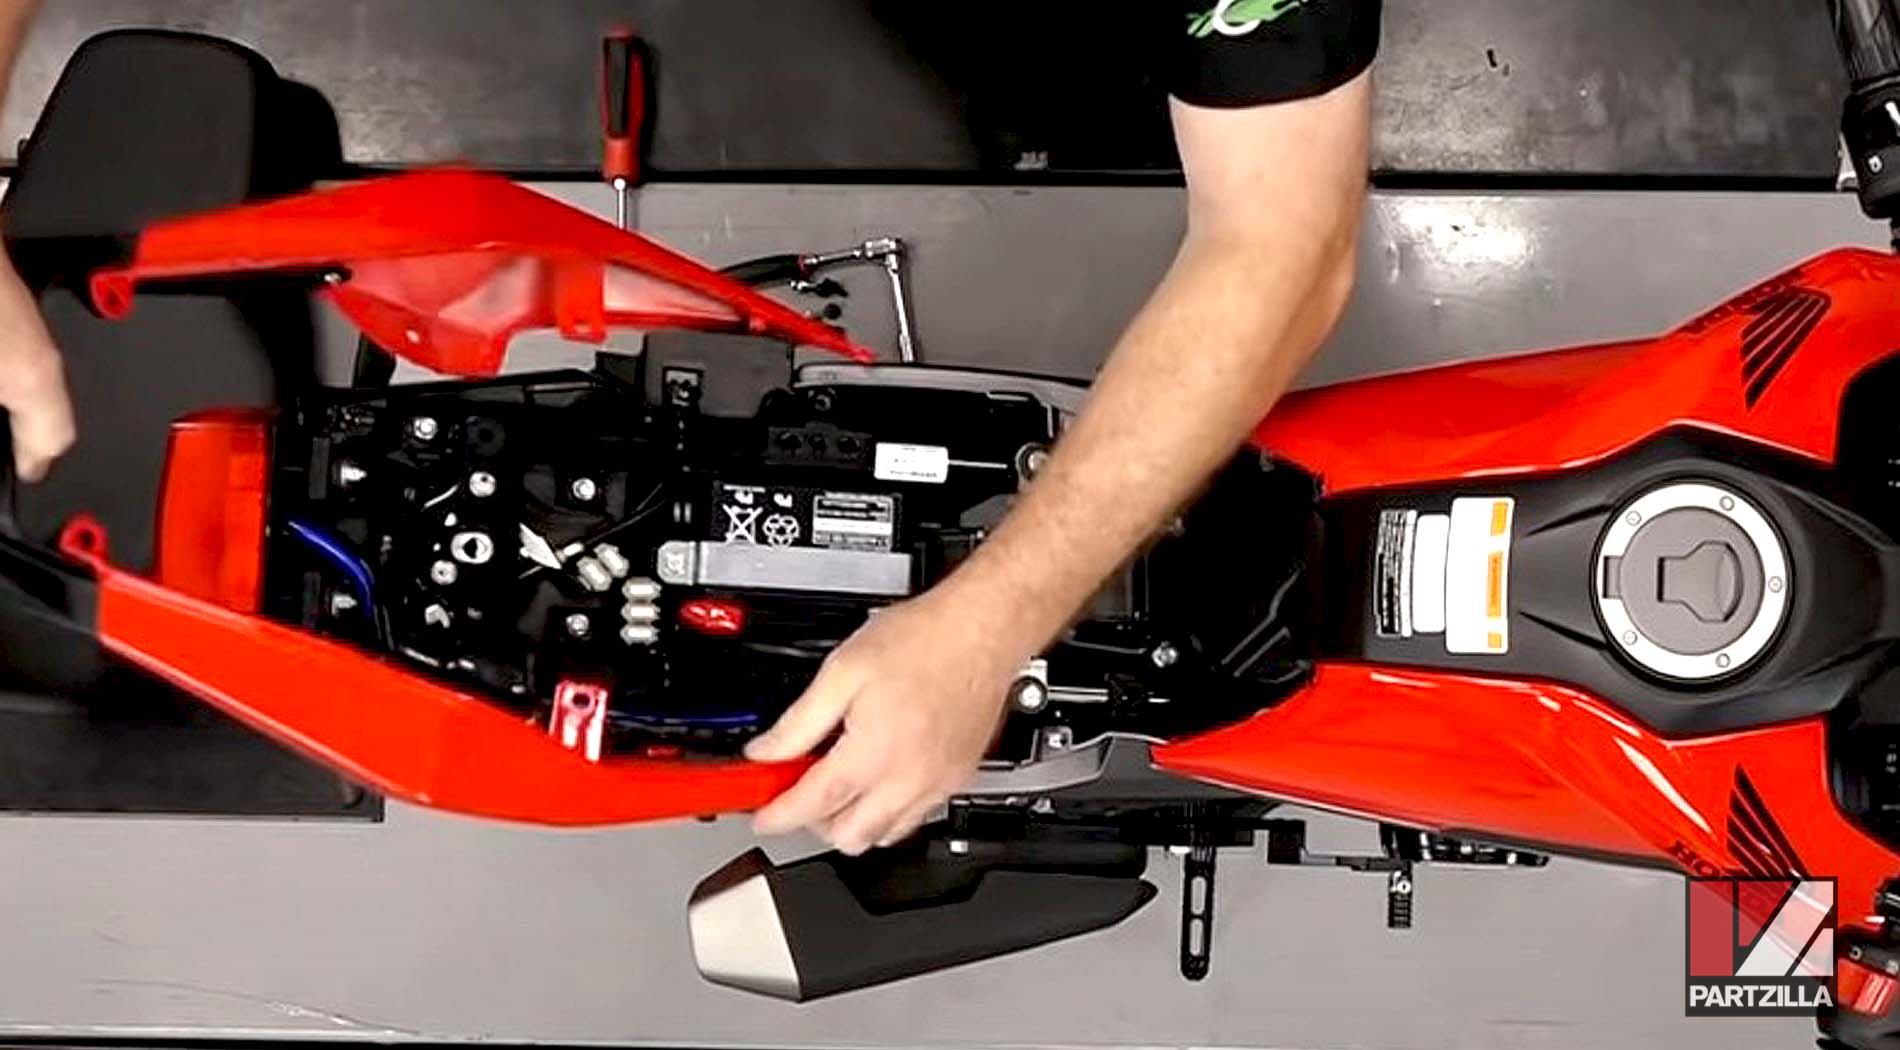
Step 1. Remove the seat, plastics and shrouds.
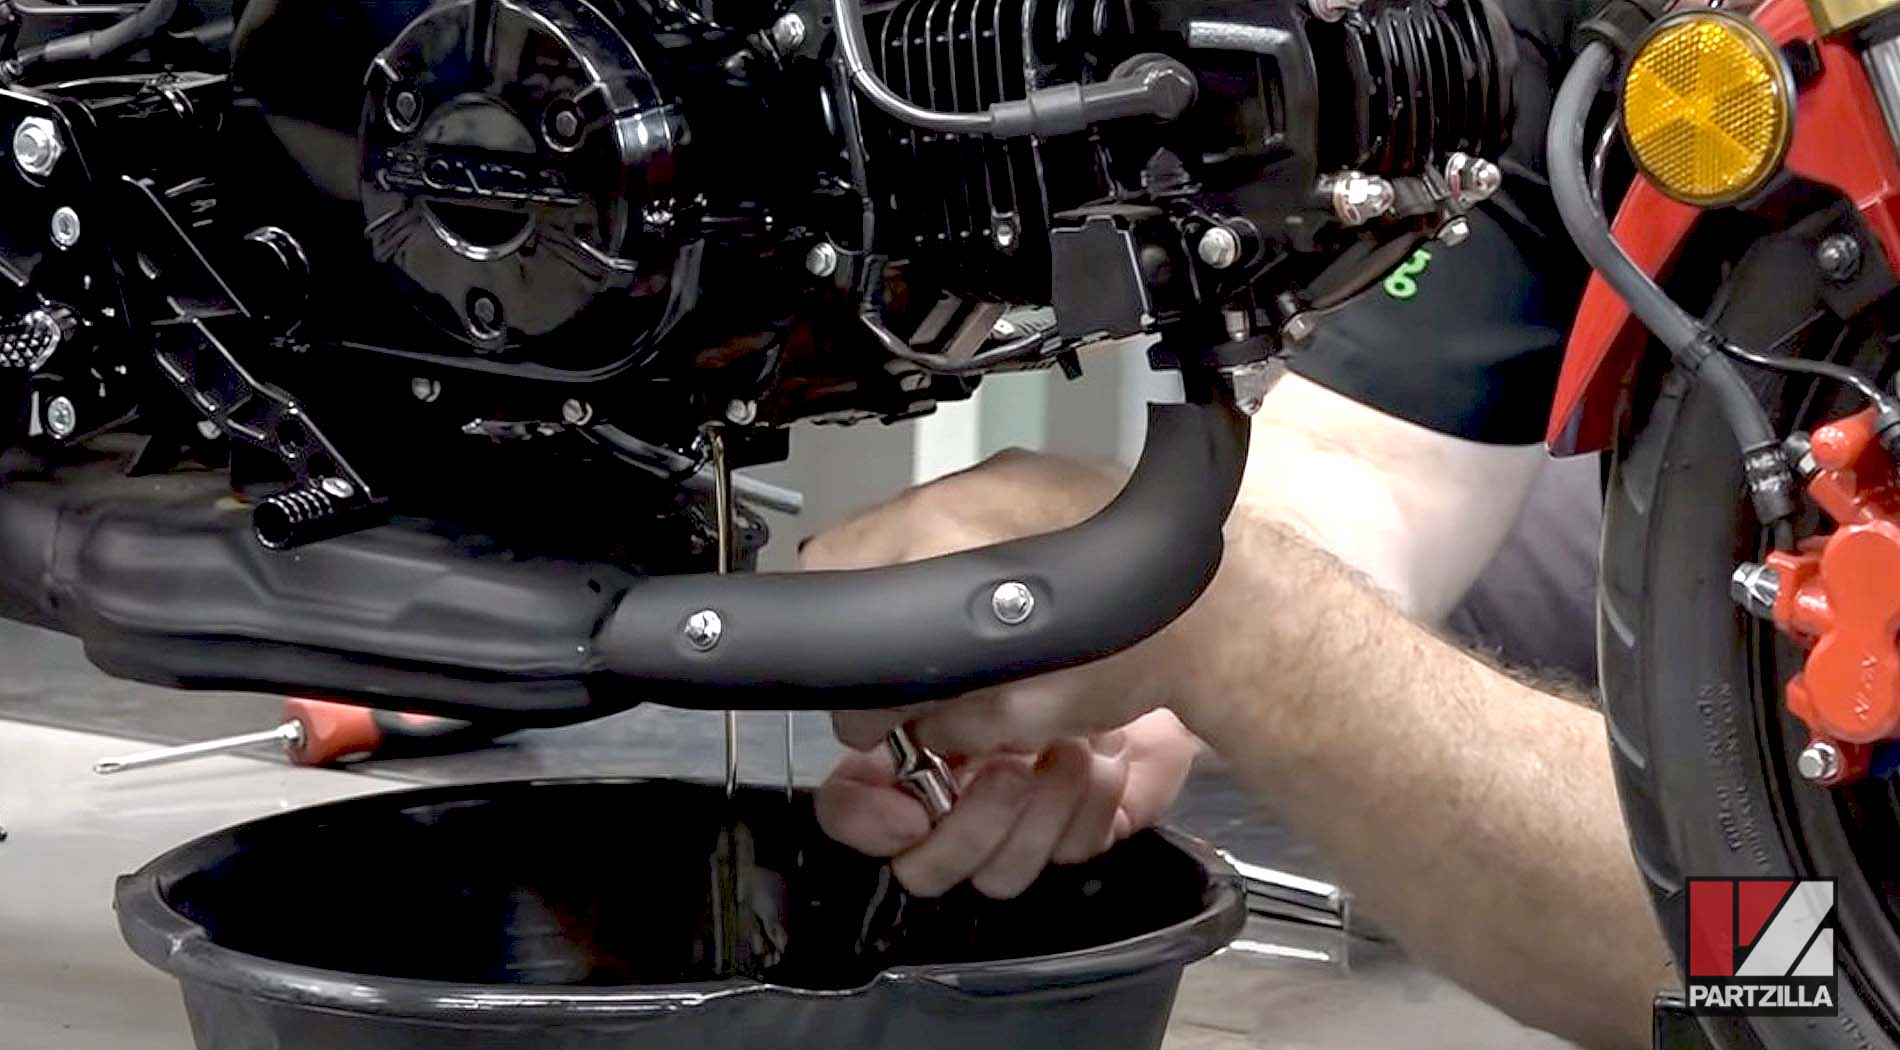
Step 2. Disconnect the cable from the negative battery terminal, then remove the drain plug, drain the engine oil and reinstall the drain plug.
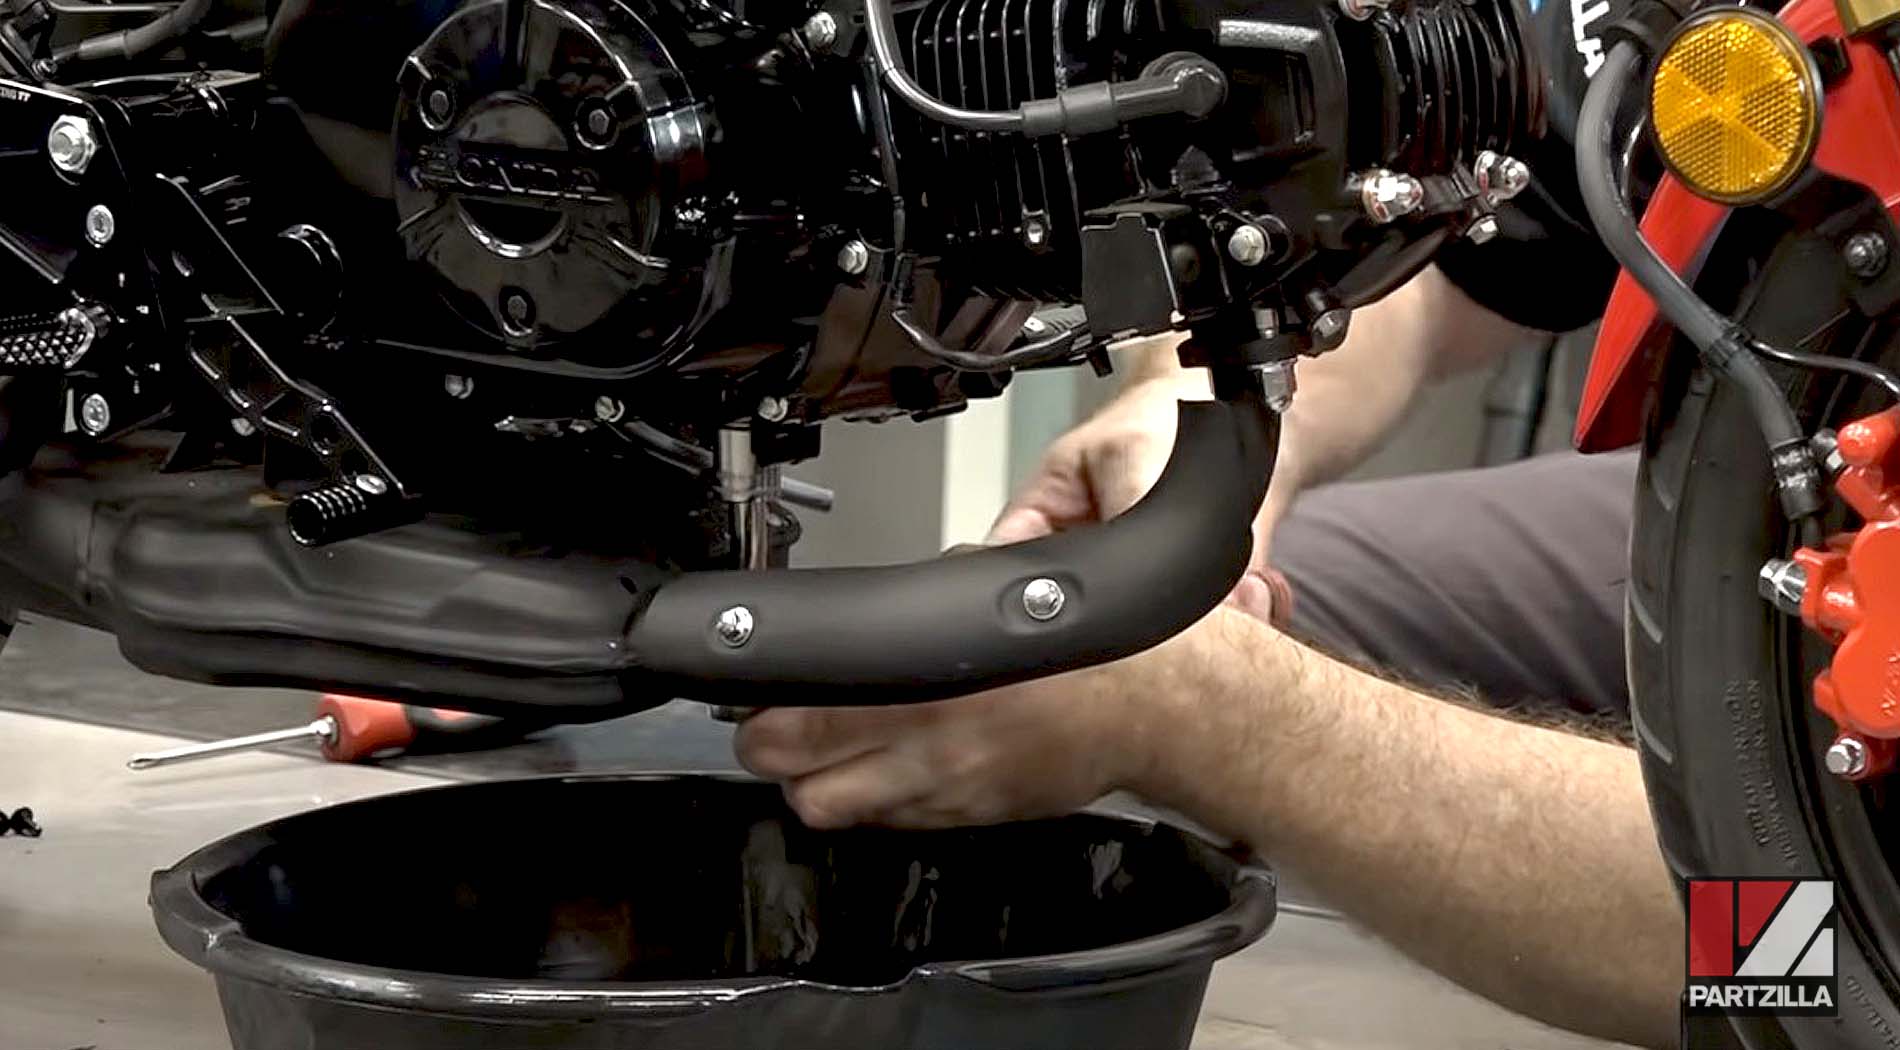
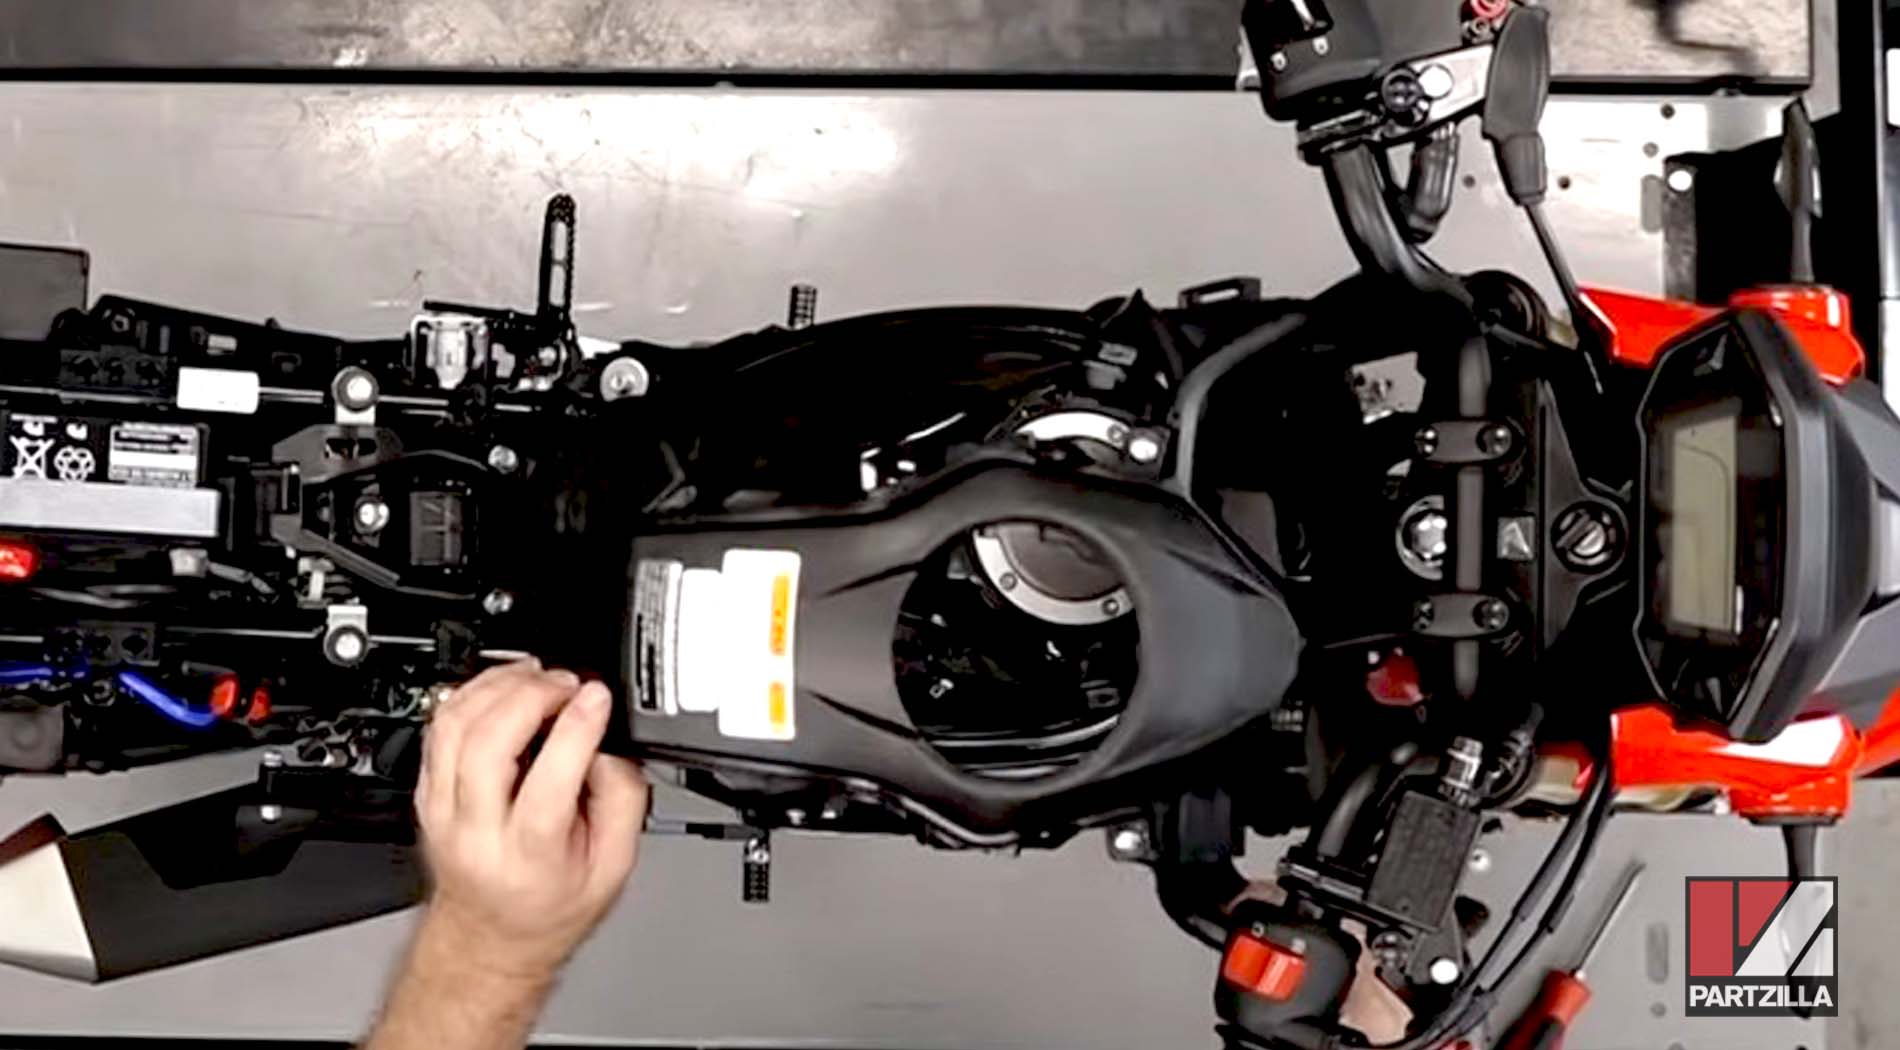
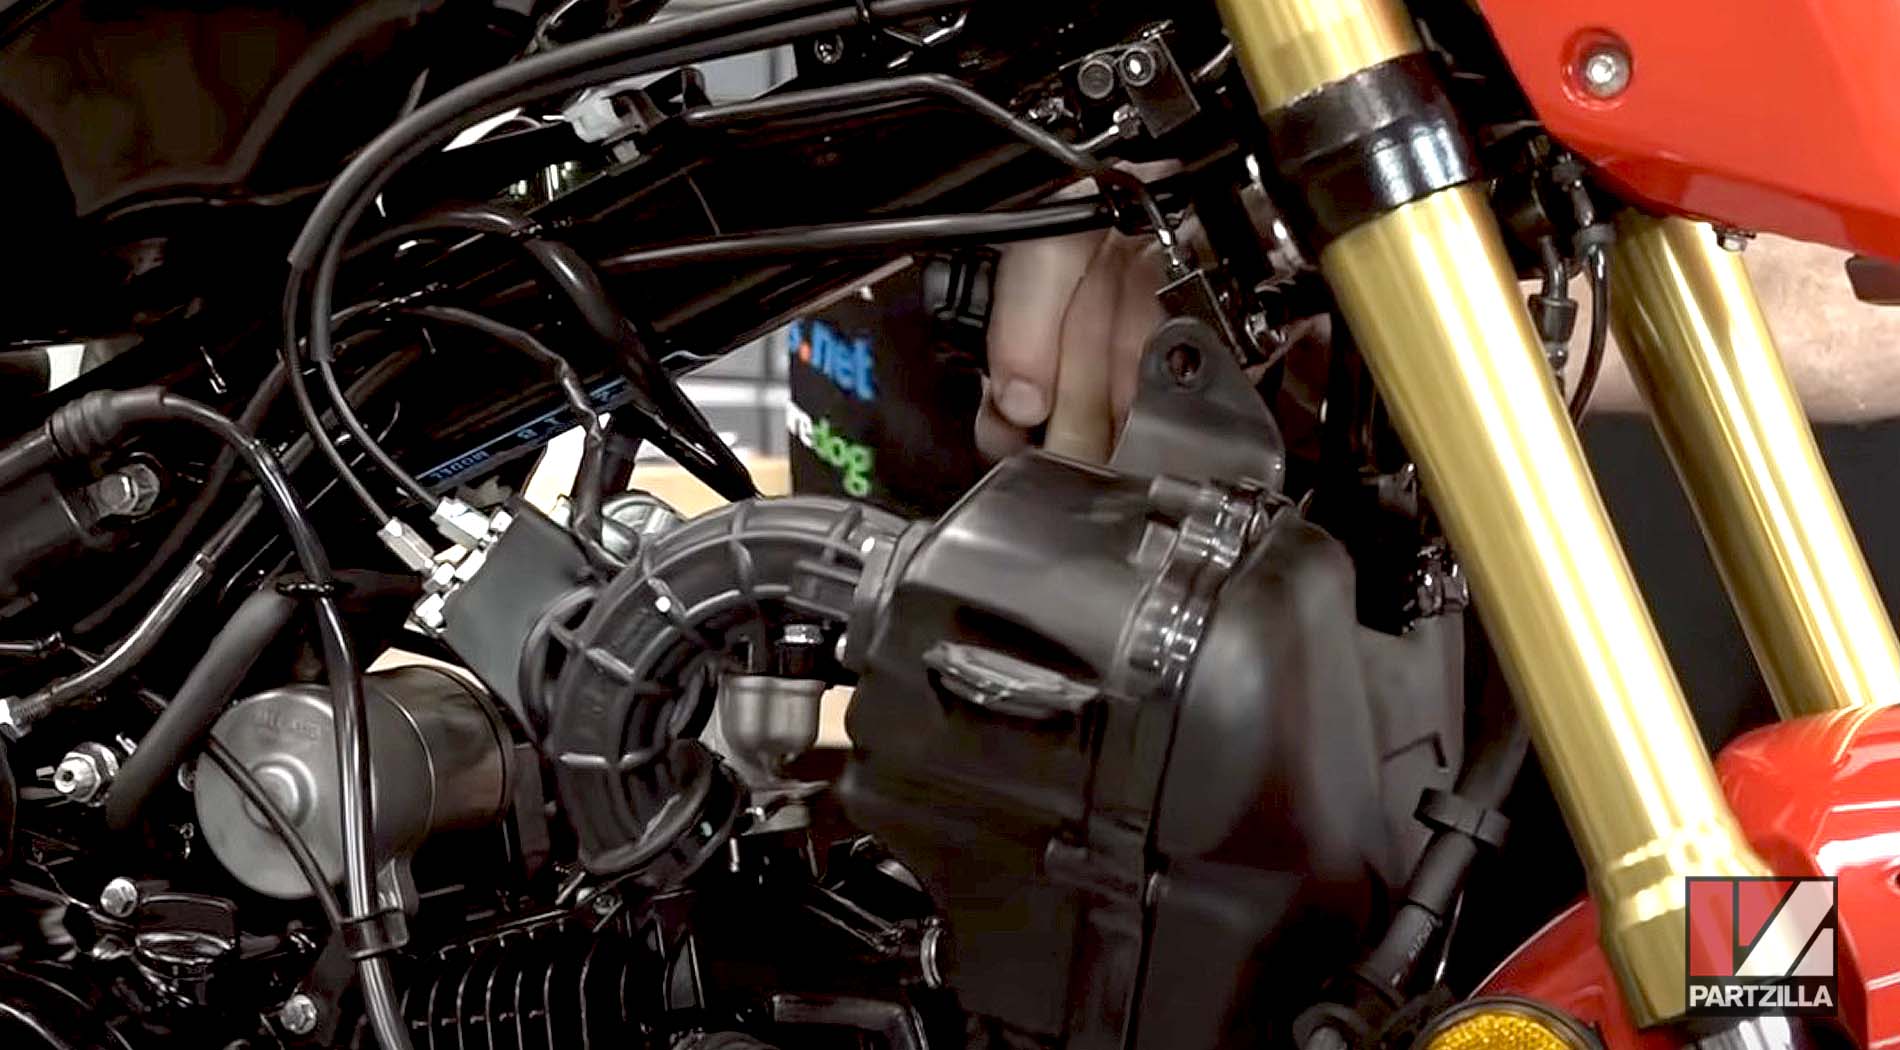
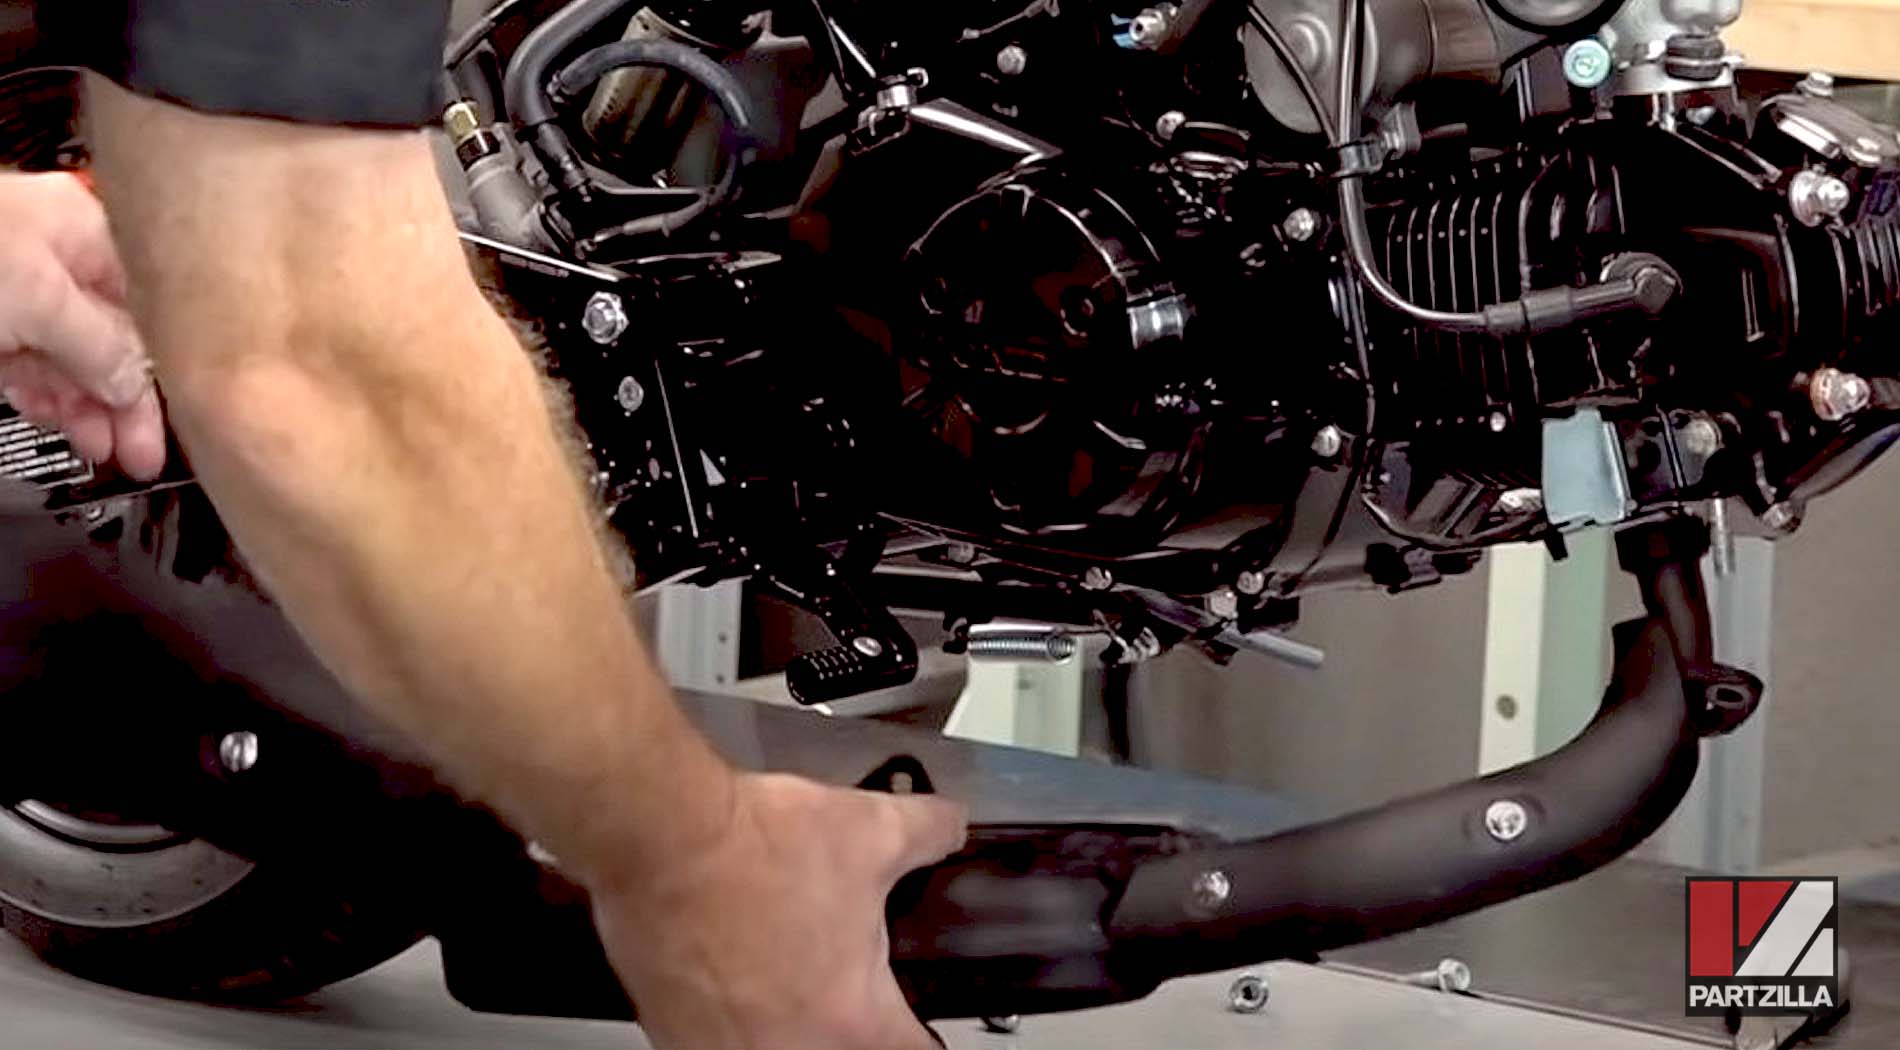
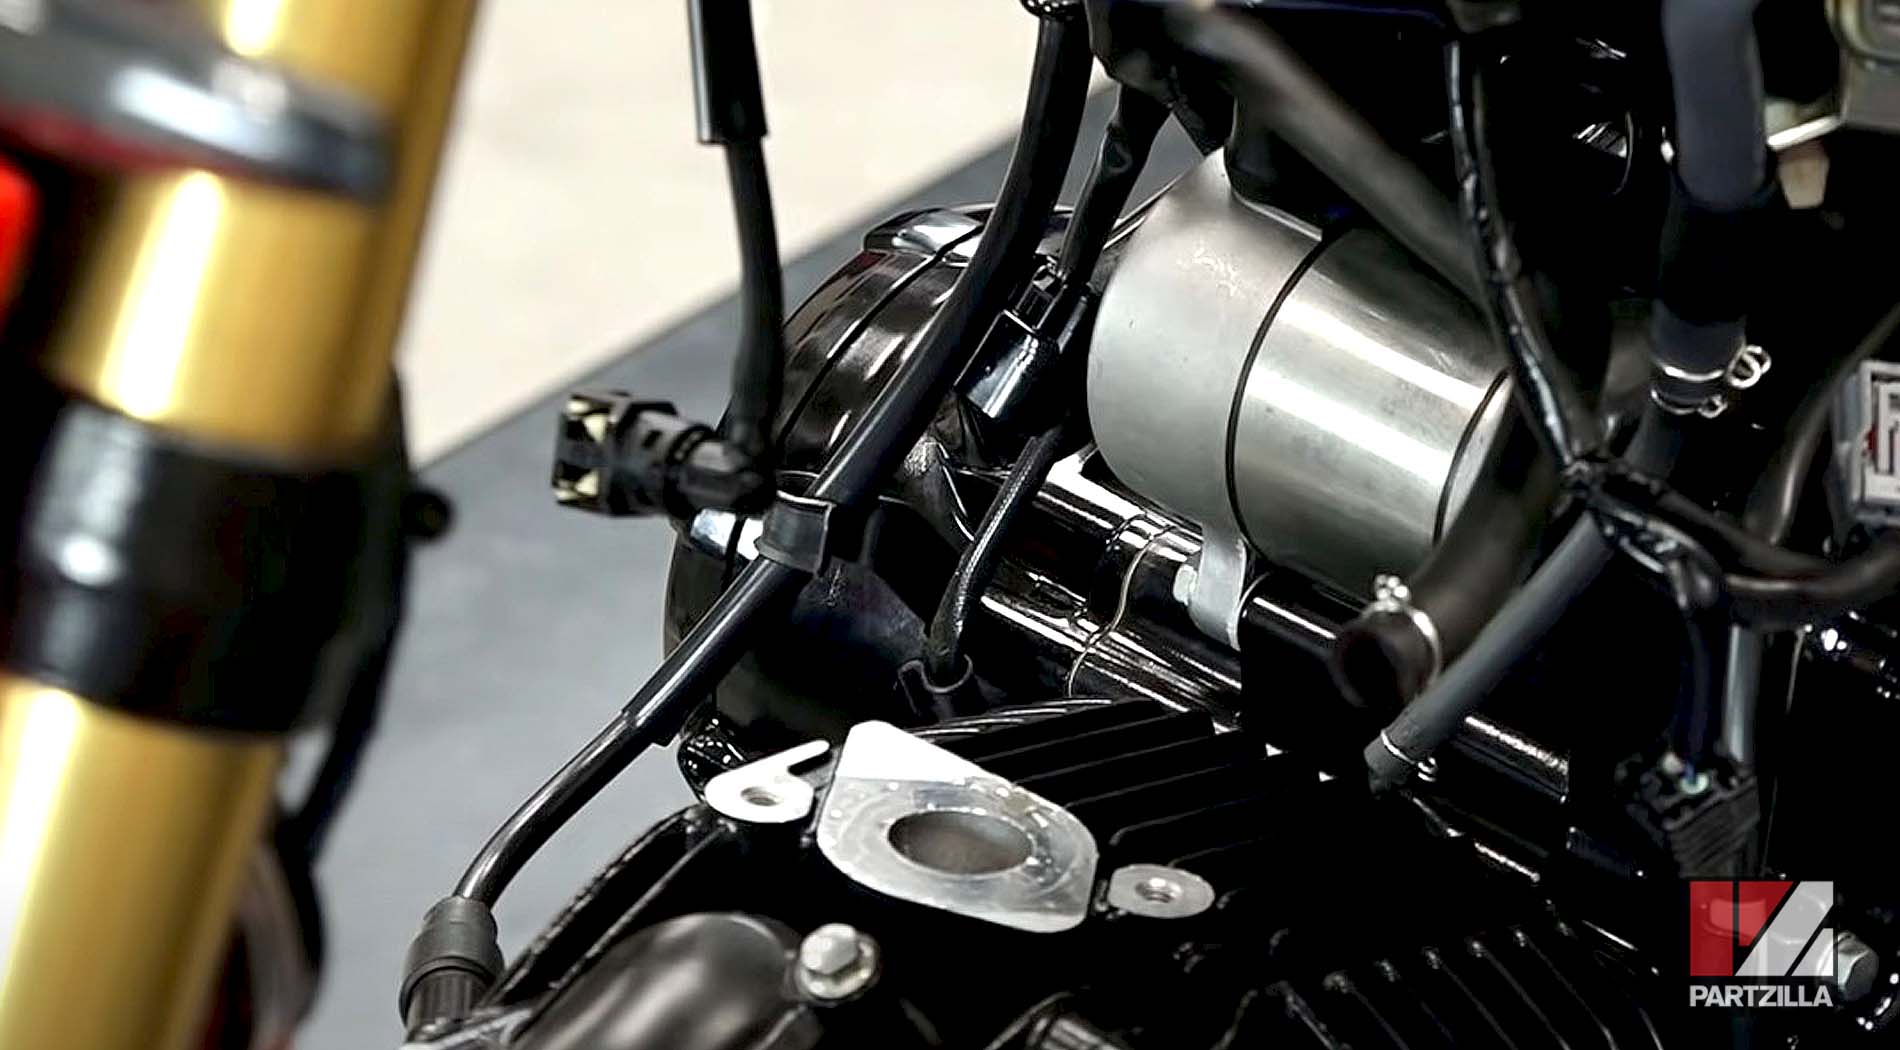
Step 3. Remove the airbox and the exhaust system, then disconnect the throttle cables, electrical connectors and hoses attached to the throttle body. Next, remove the two mounting bolts and the throttle body assembly from the engine.
Step 4. Set the engine to TDC (top dead center) by removing the cam cover from the left side of the cylinder head, then removing the timing cap and crankshaft cap from the left side crankcase cover, rotating the crankshaft counterclockwise until the T mark is in the center of the timing window and the mark on the cam sprocket is aligned with the mark on the cylinder head.
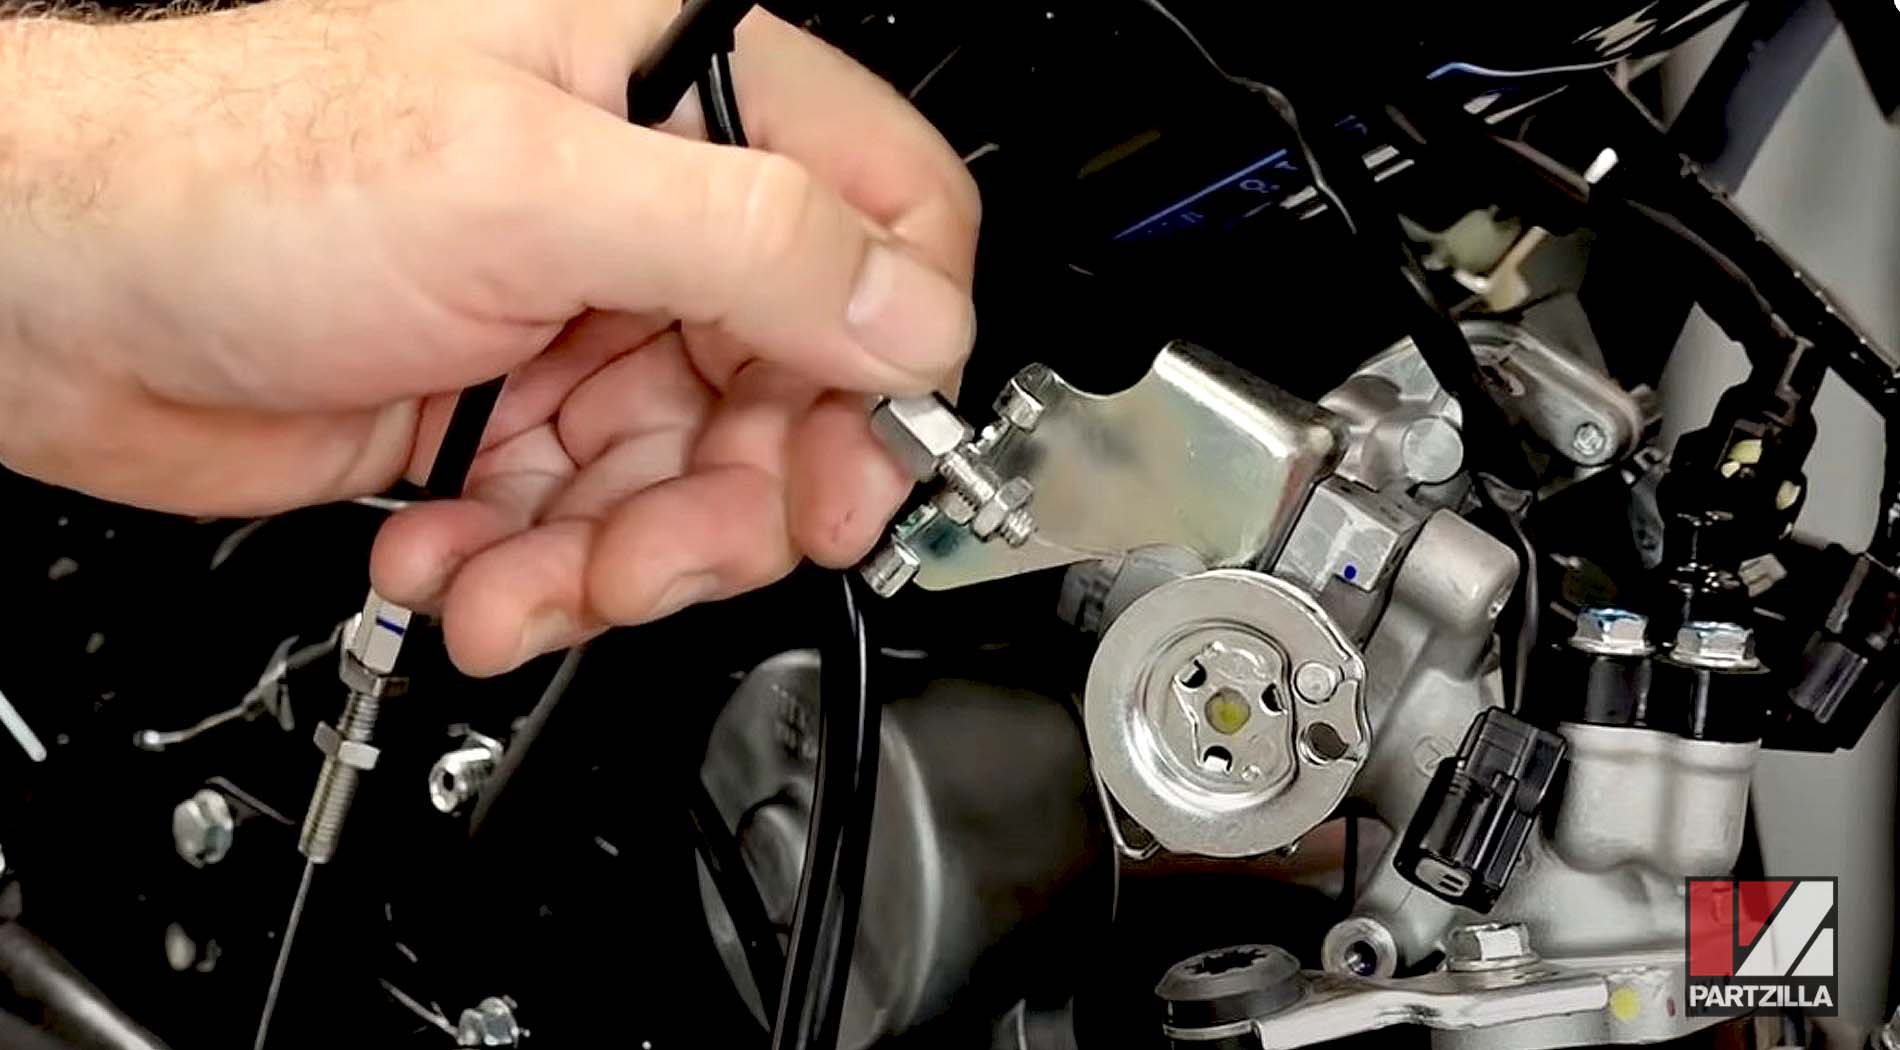
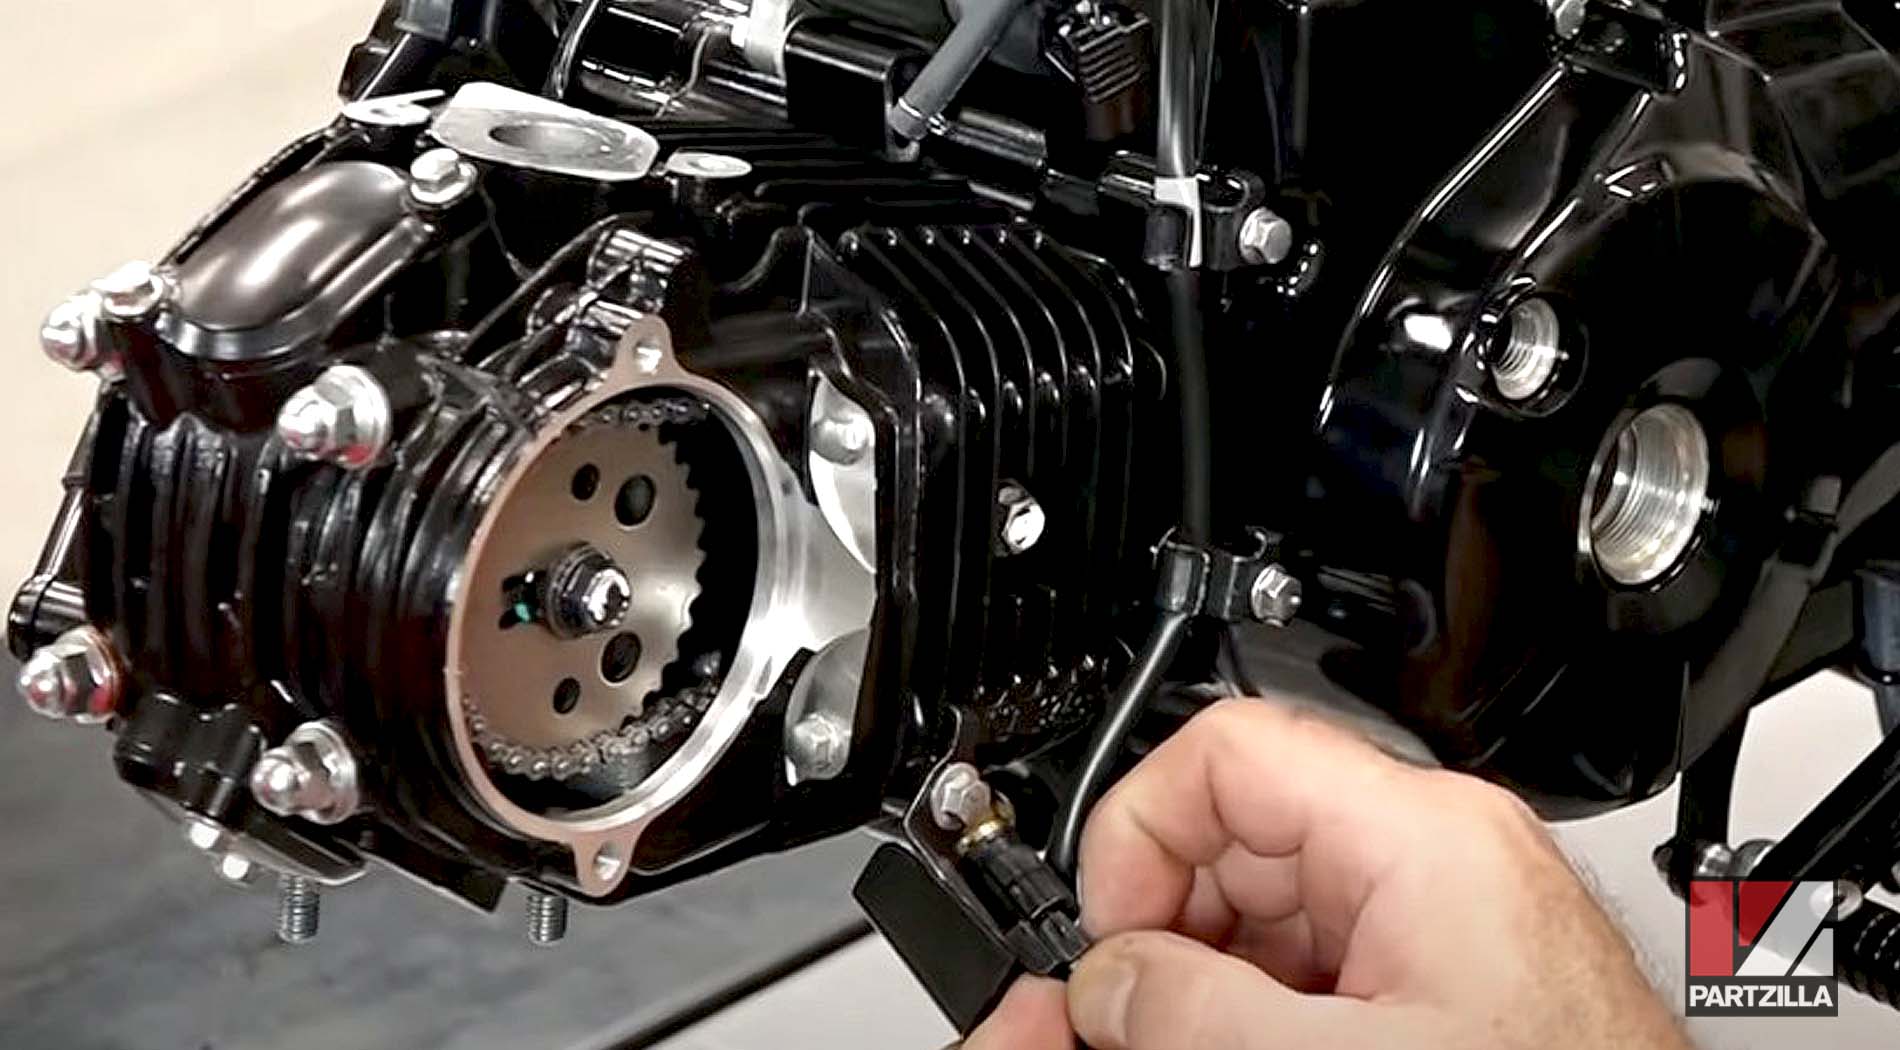
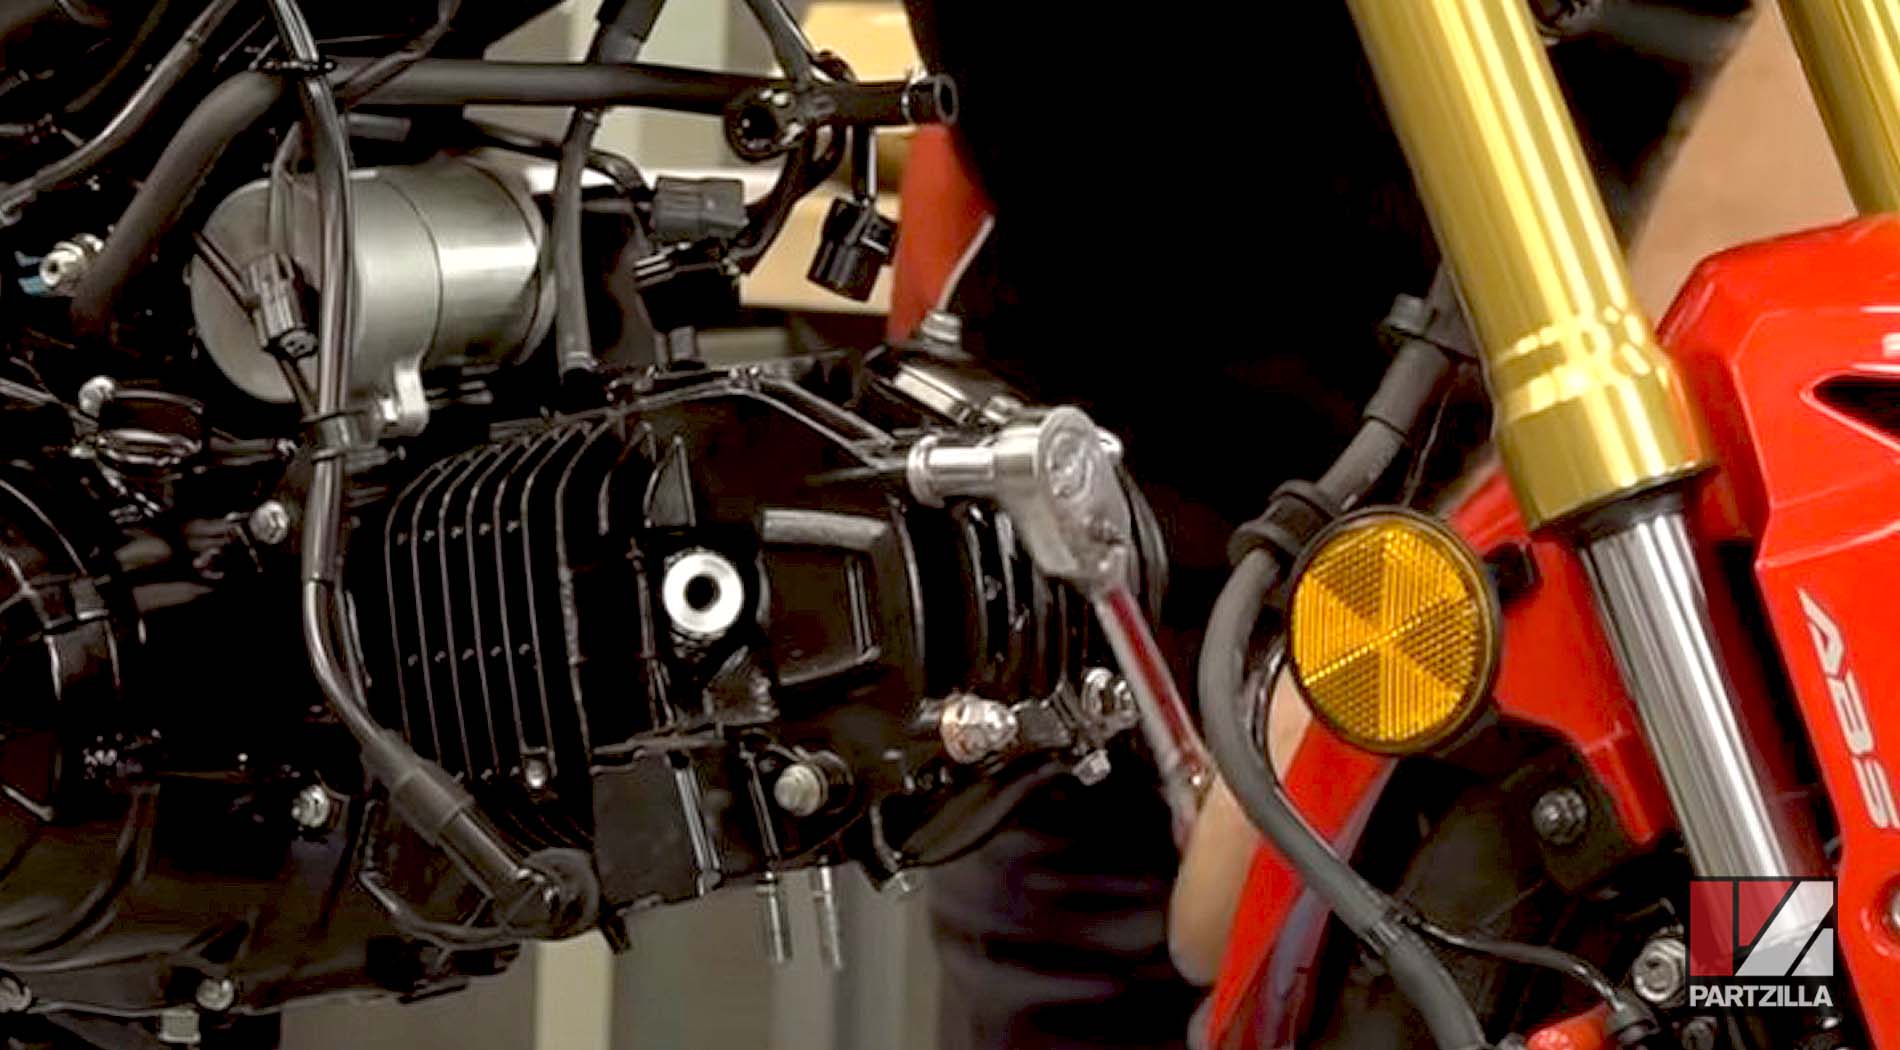
Step 5. Remove the cable and bracket from the thermostat (located in the lower left side of the cylinder) and remove the O2 sensor from the right side of the cylinder head.
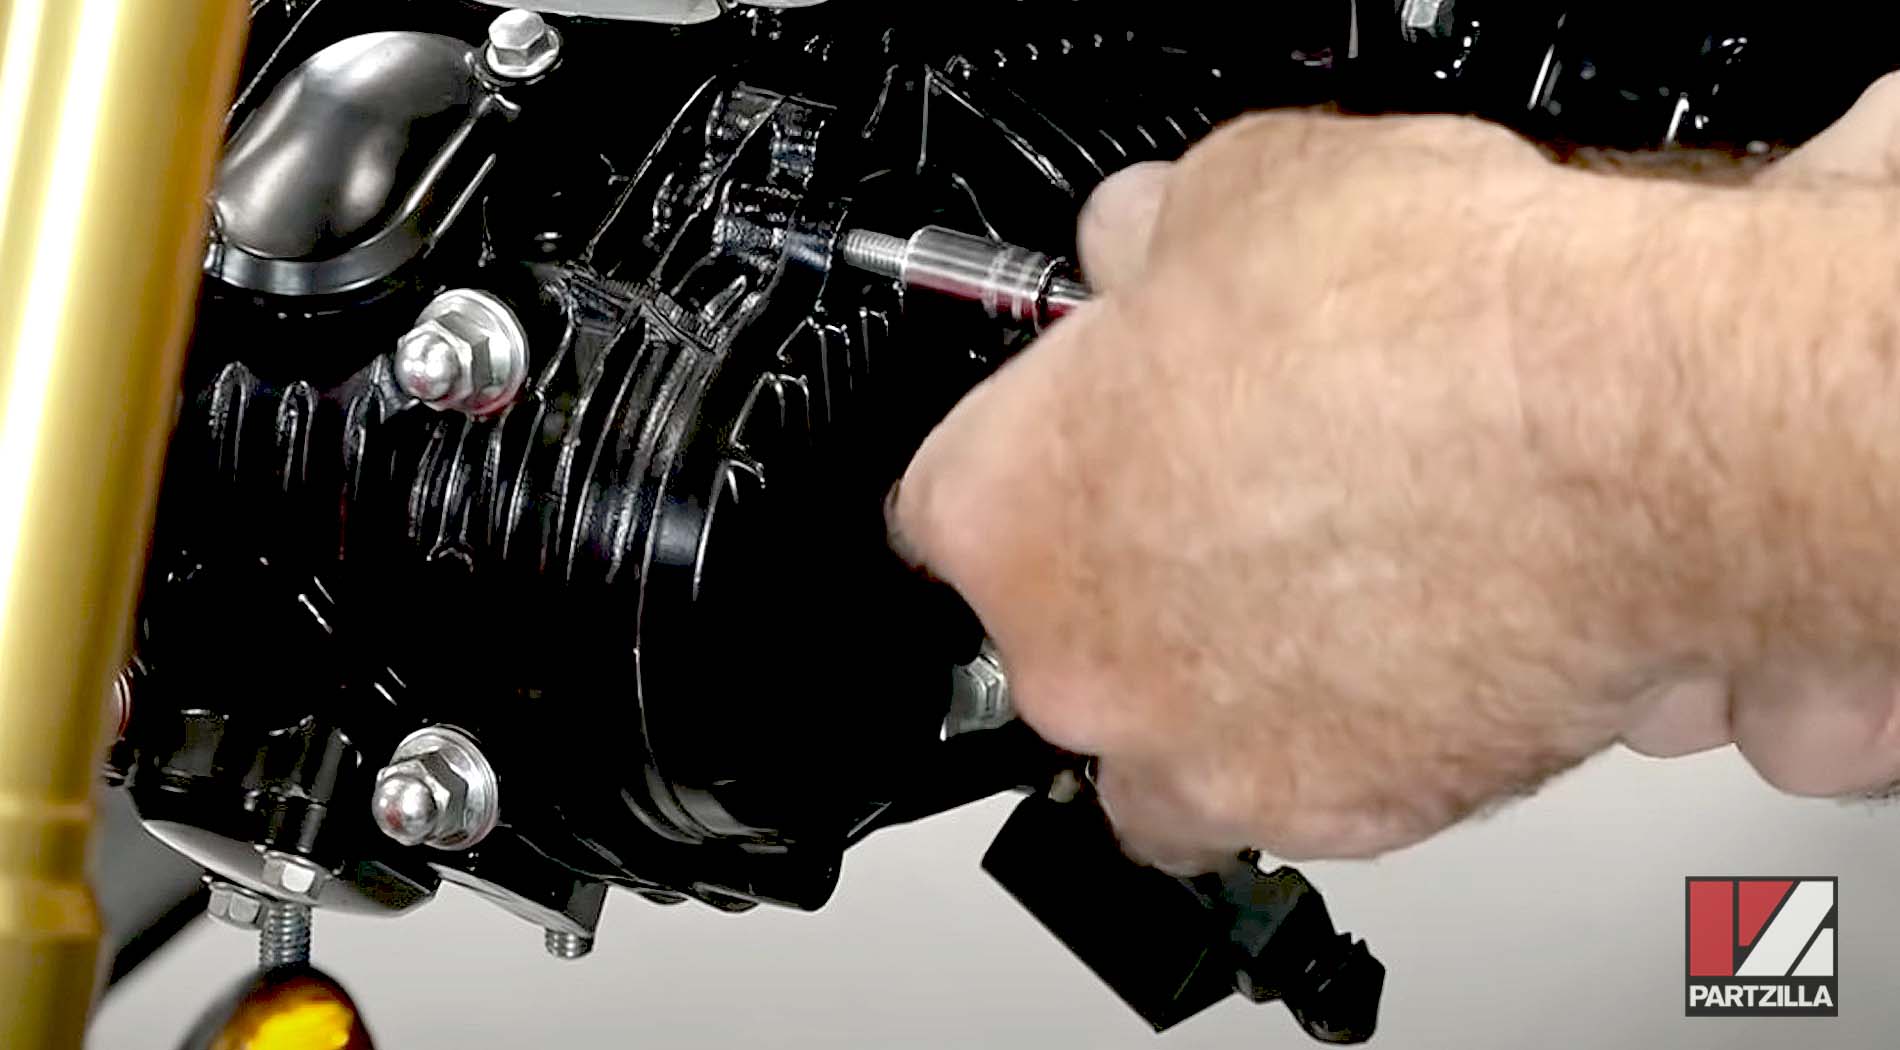
Step 6. Hold the crankshaft with a socket to stop it and the cam sprocket from rotating, and remove the cam sprocket bolt. Next, remove the cam sprocket from the cylinder head.

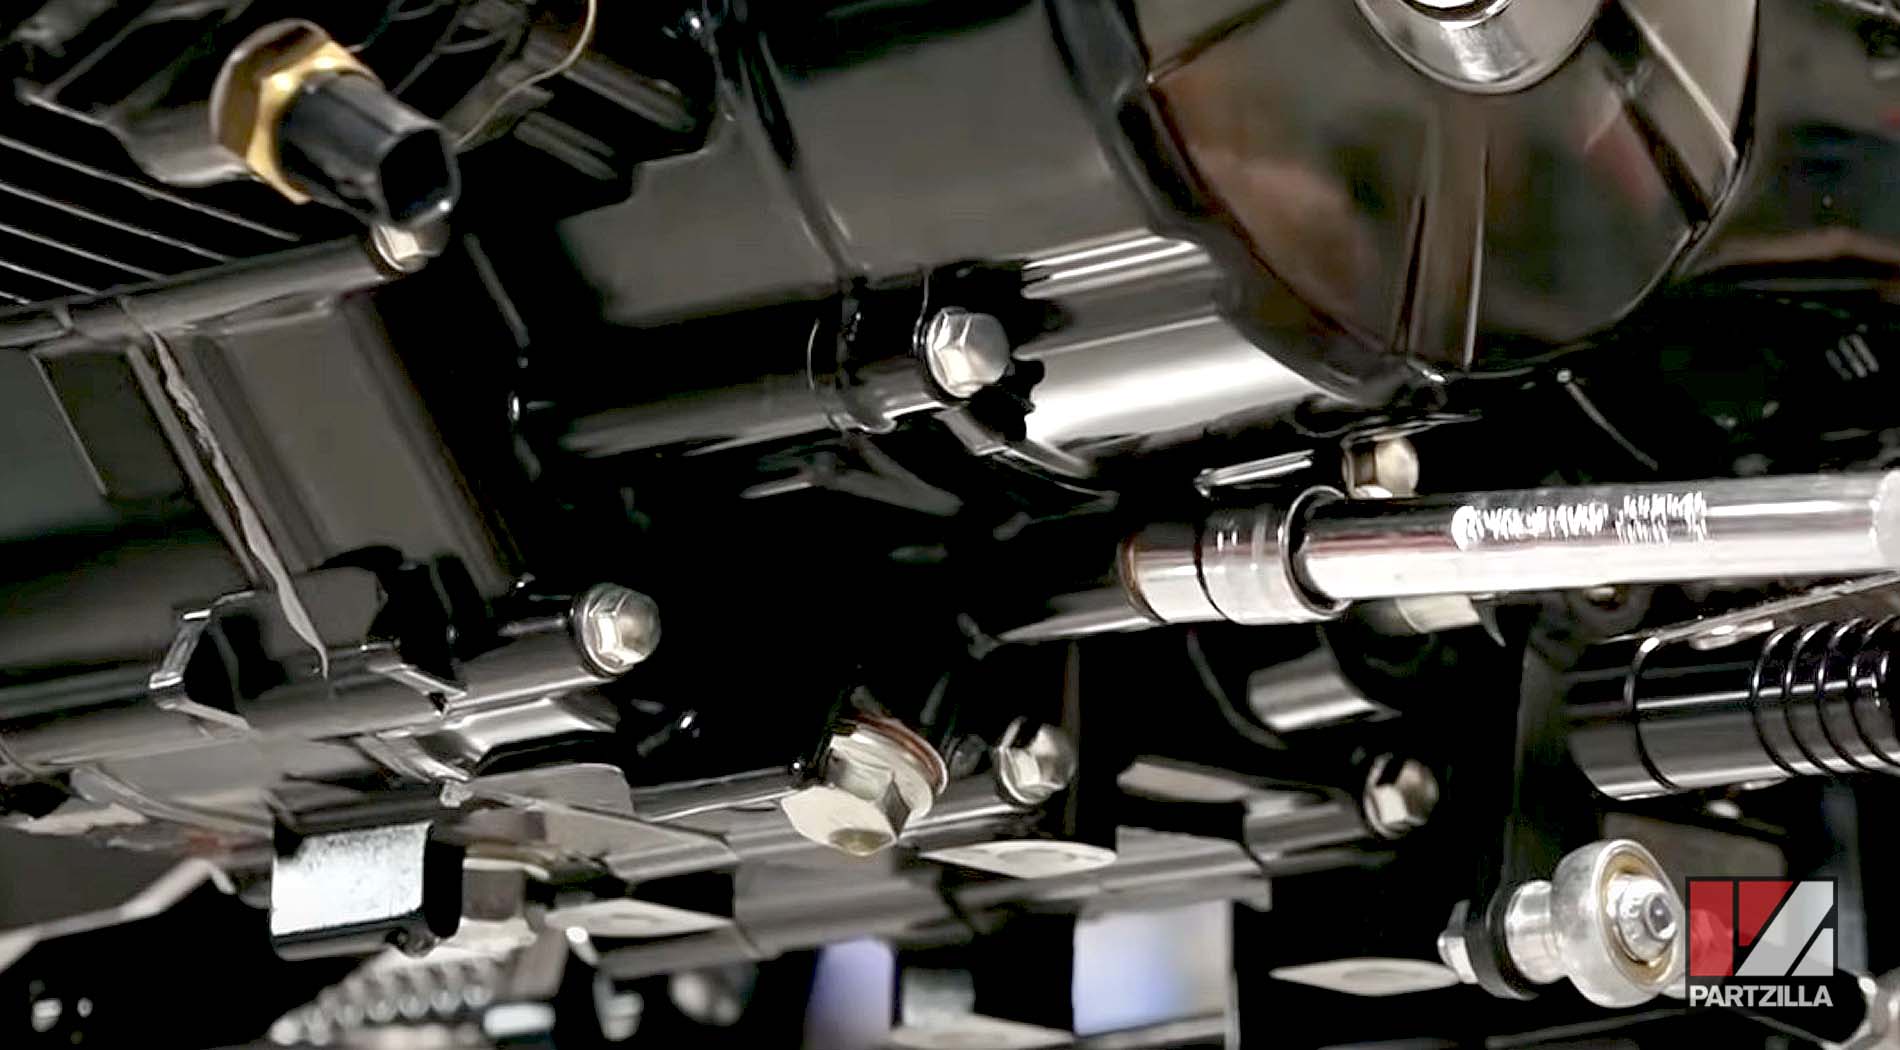
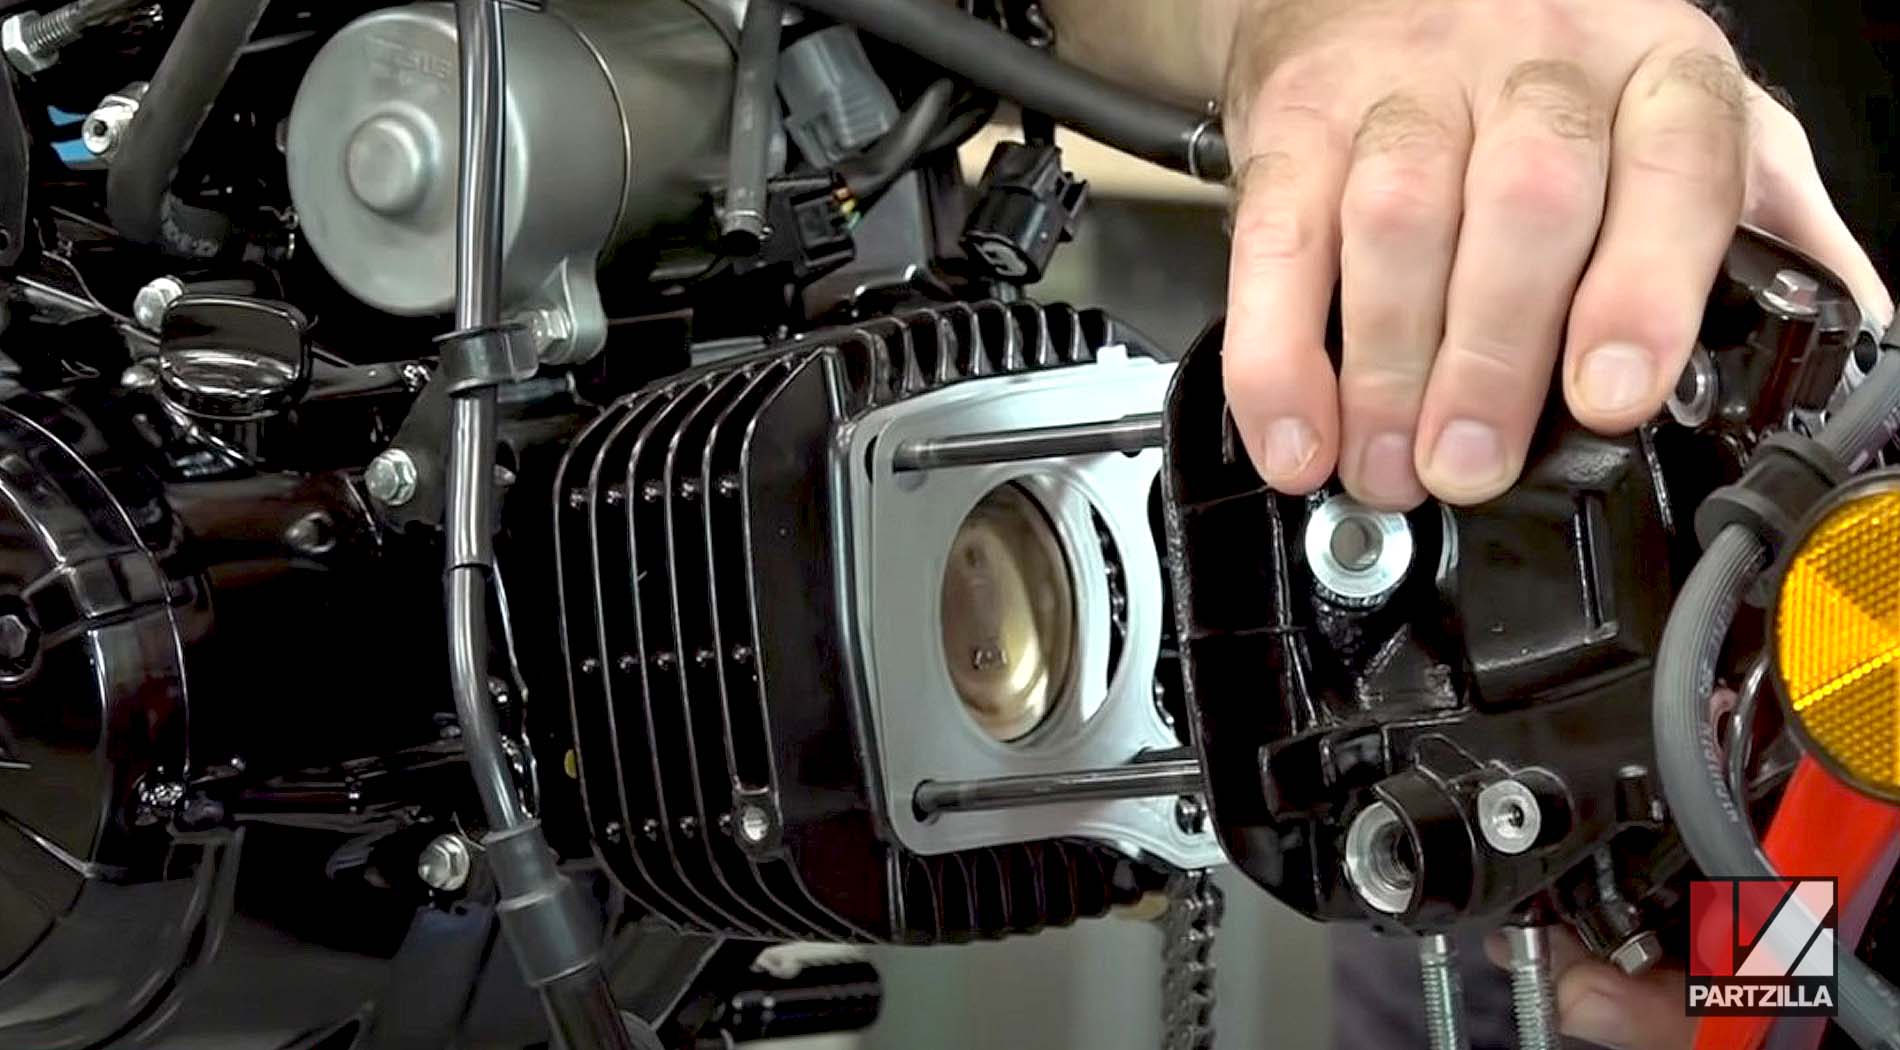
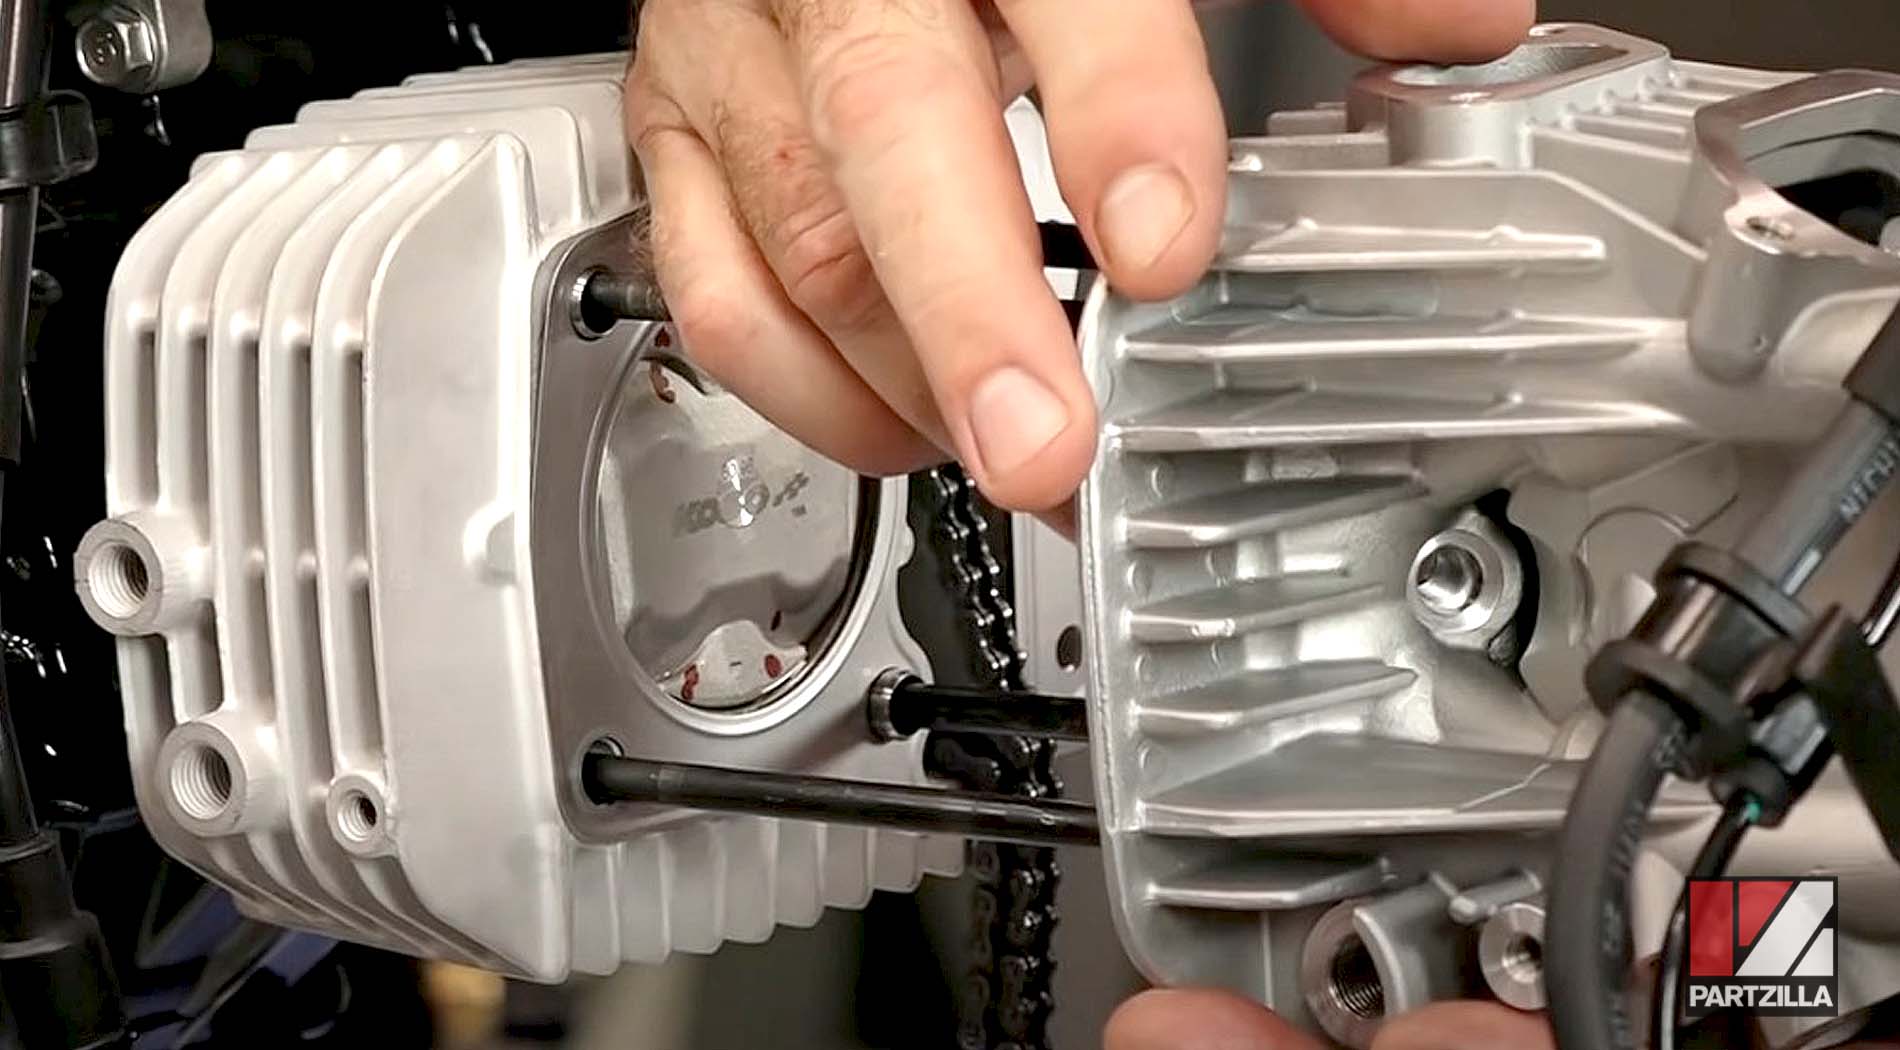
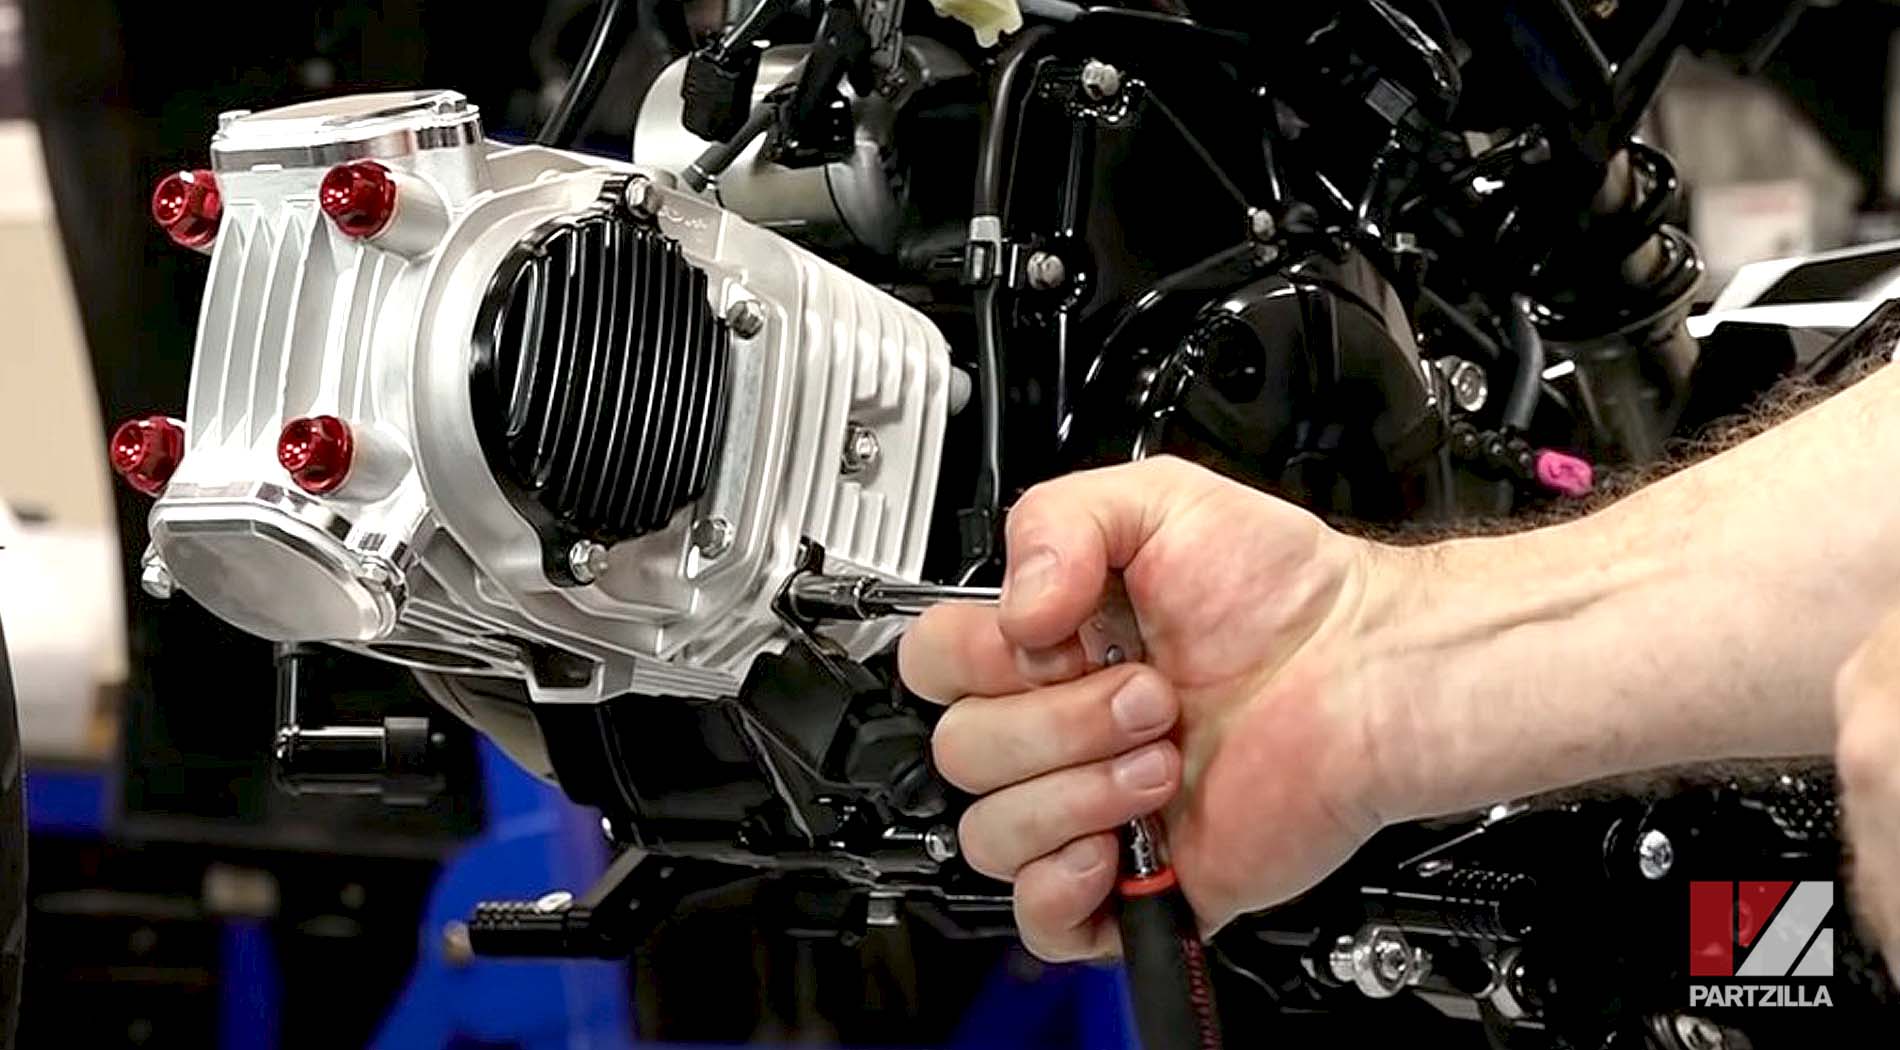
Step 7. Remove the two bolts mounting the left side of the cylinder head to the cylinder, then remove the four cylinder head cap nuts. Next, remove the cylinder head from the engine.
Watch the clip below to see the cylinder head removal segment of our Honda Grom big bore kit installation video.
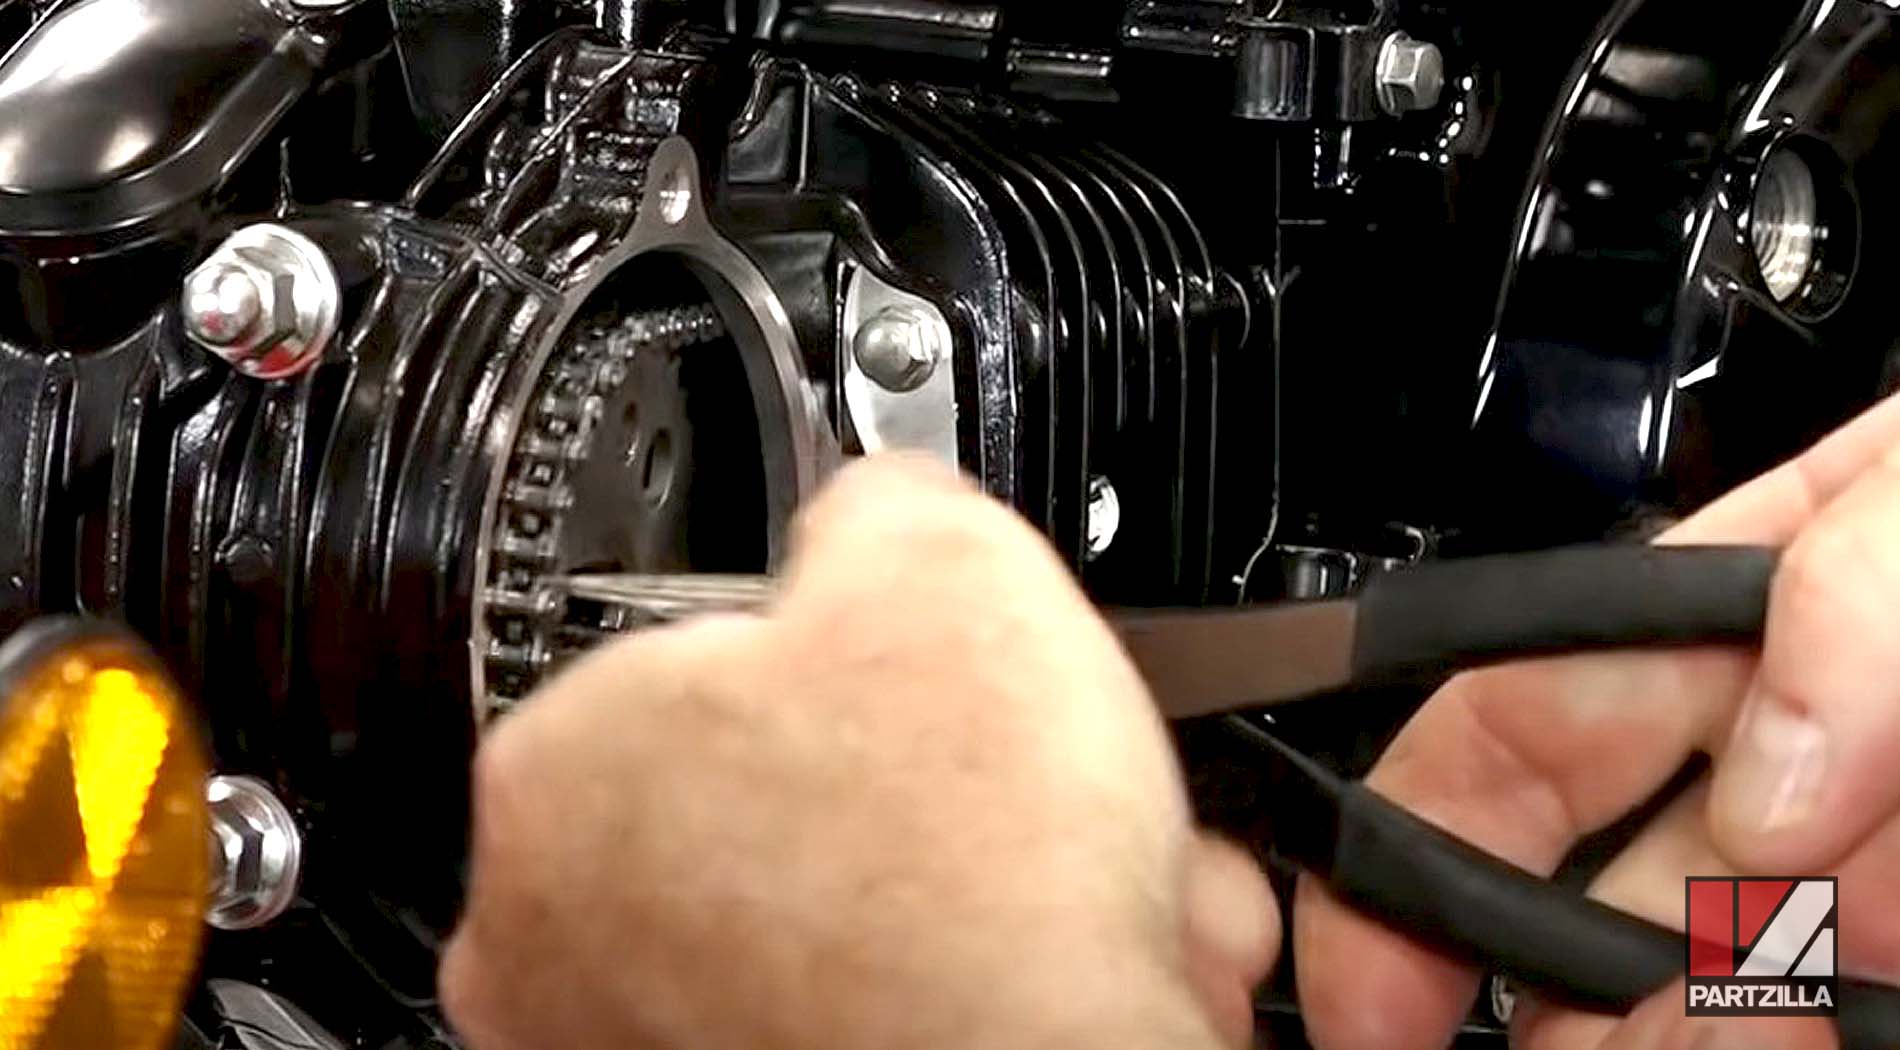
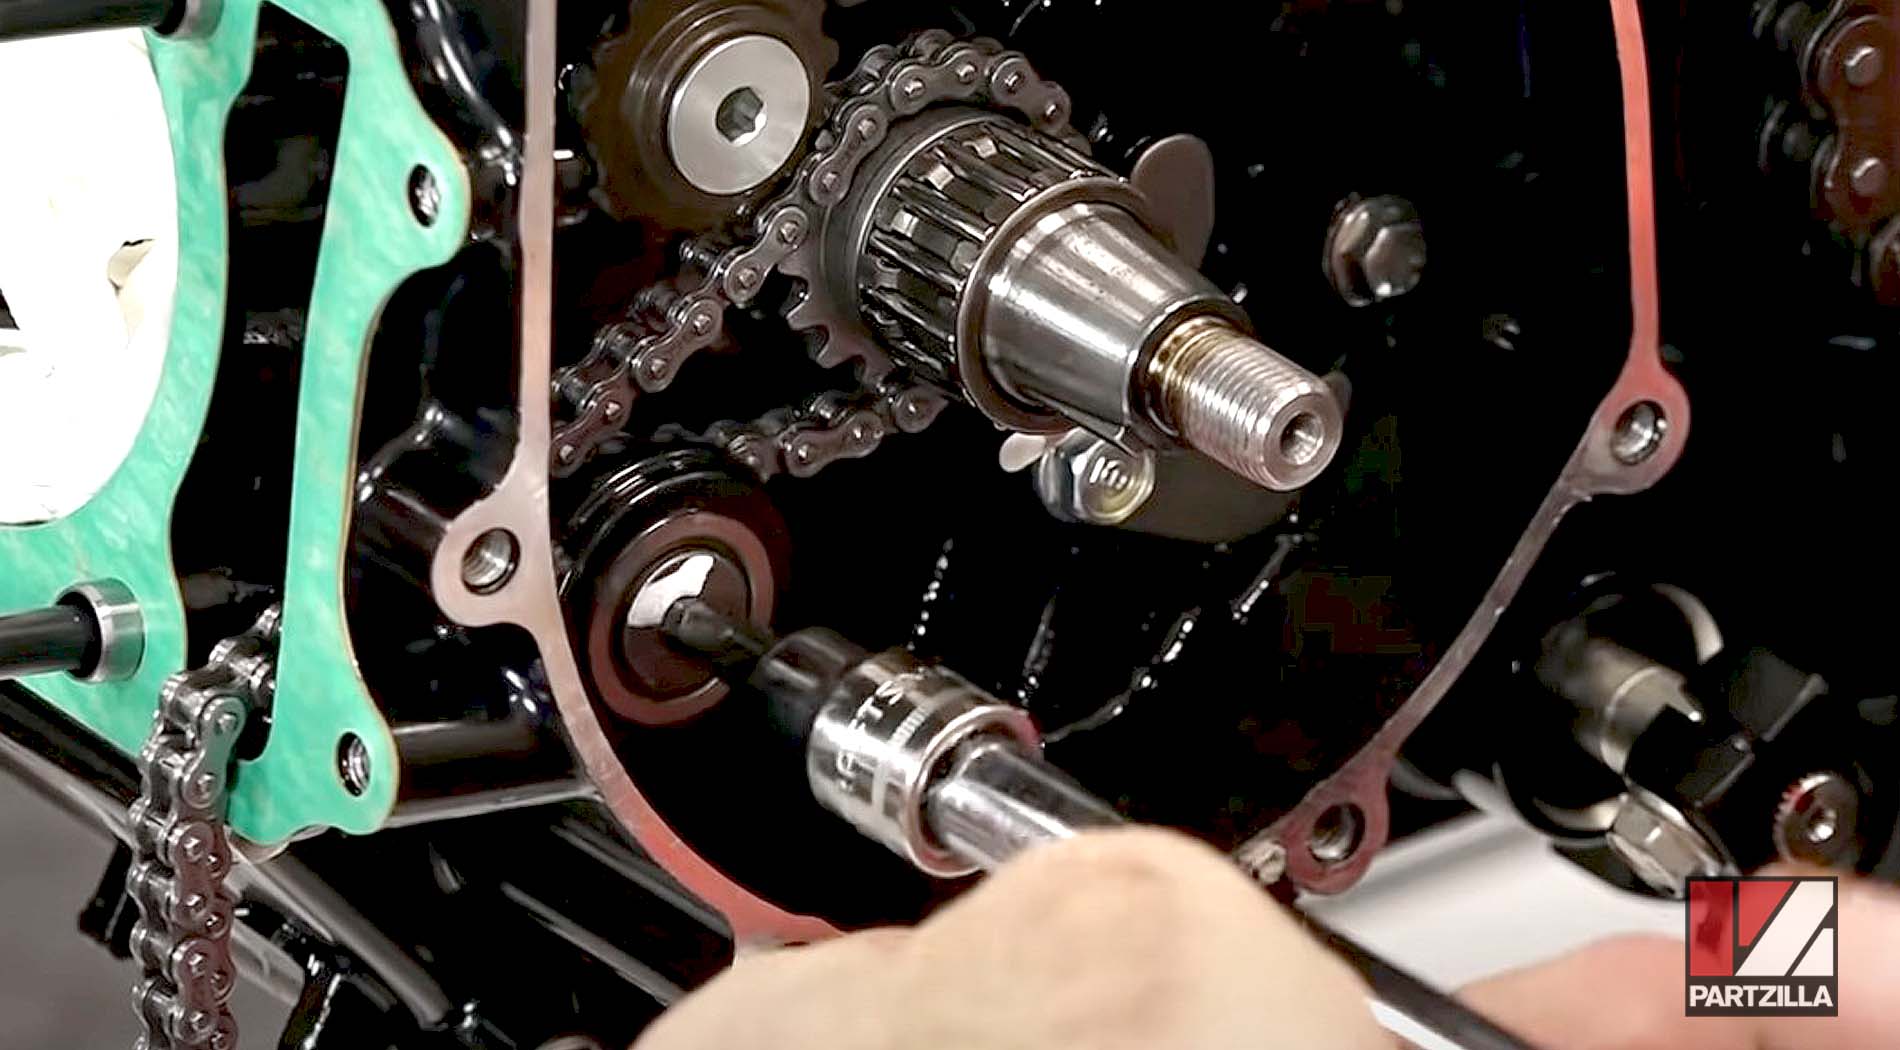
Step 9. Remove the bolt from the left side of the cylinder that holds the cam chain guide wheel, and then remove the guide wheel from the cylinder and the cylinder from the crankcase.
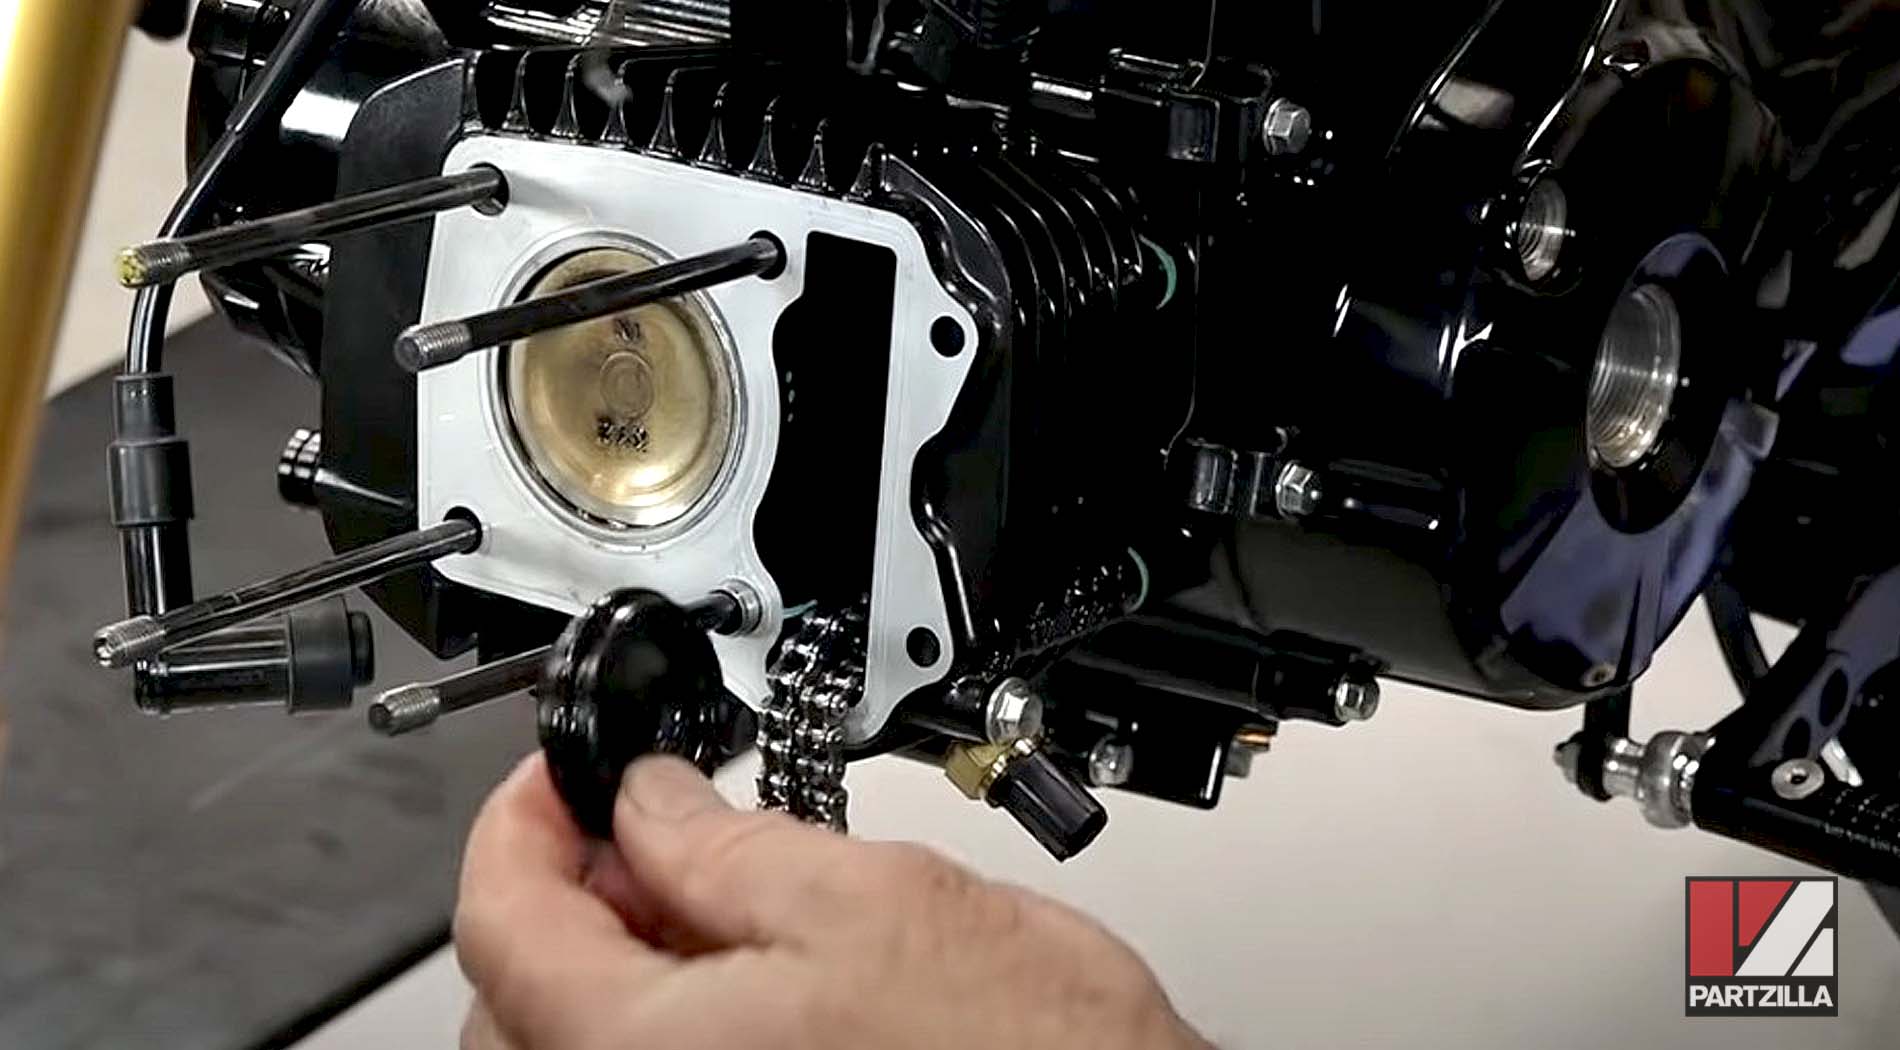
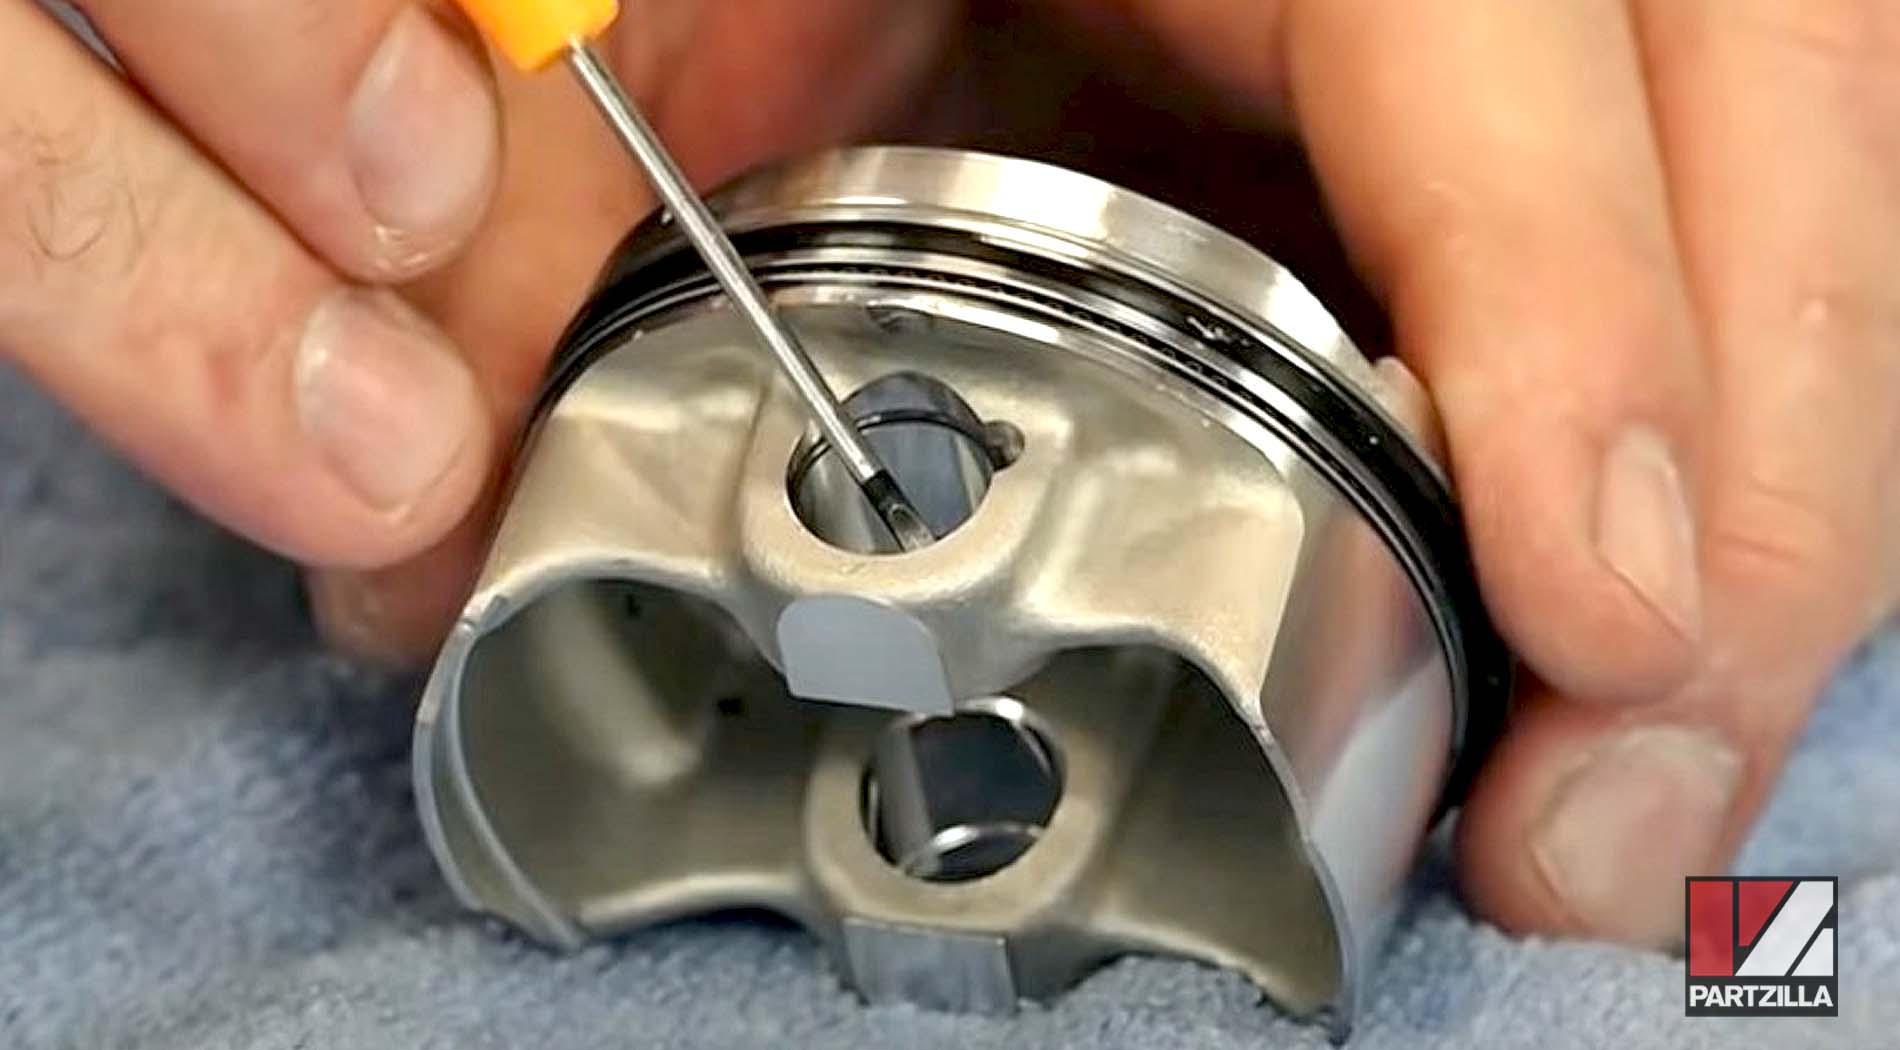
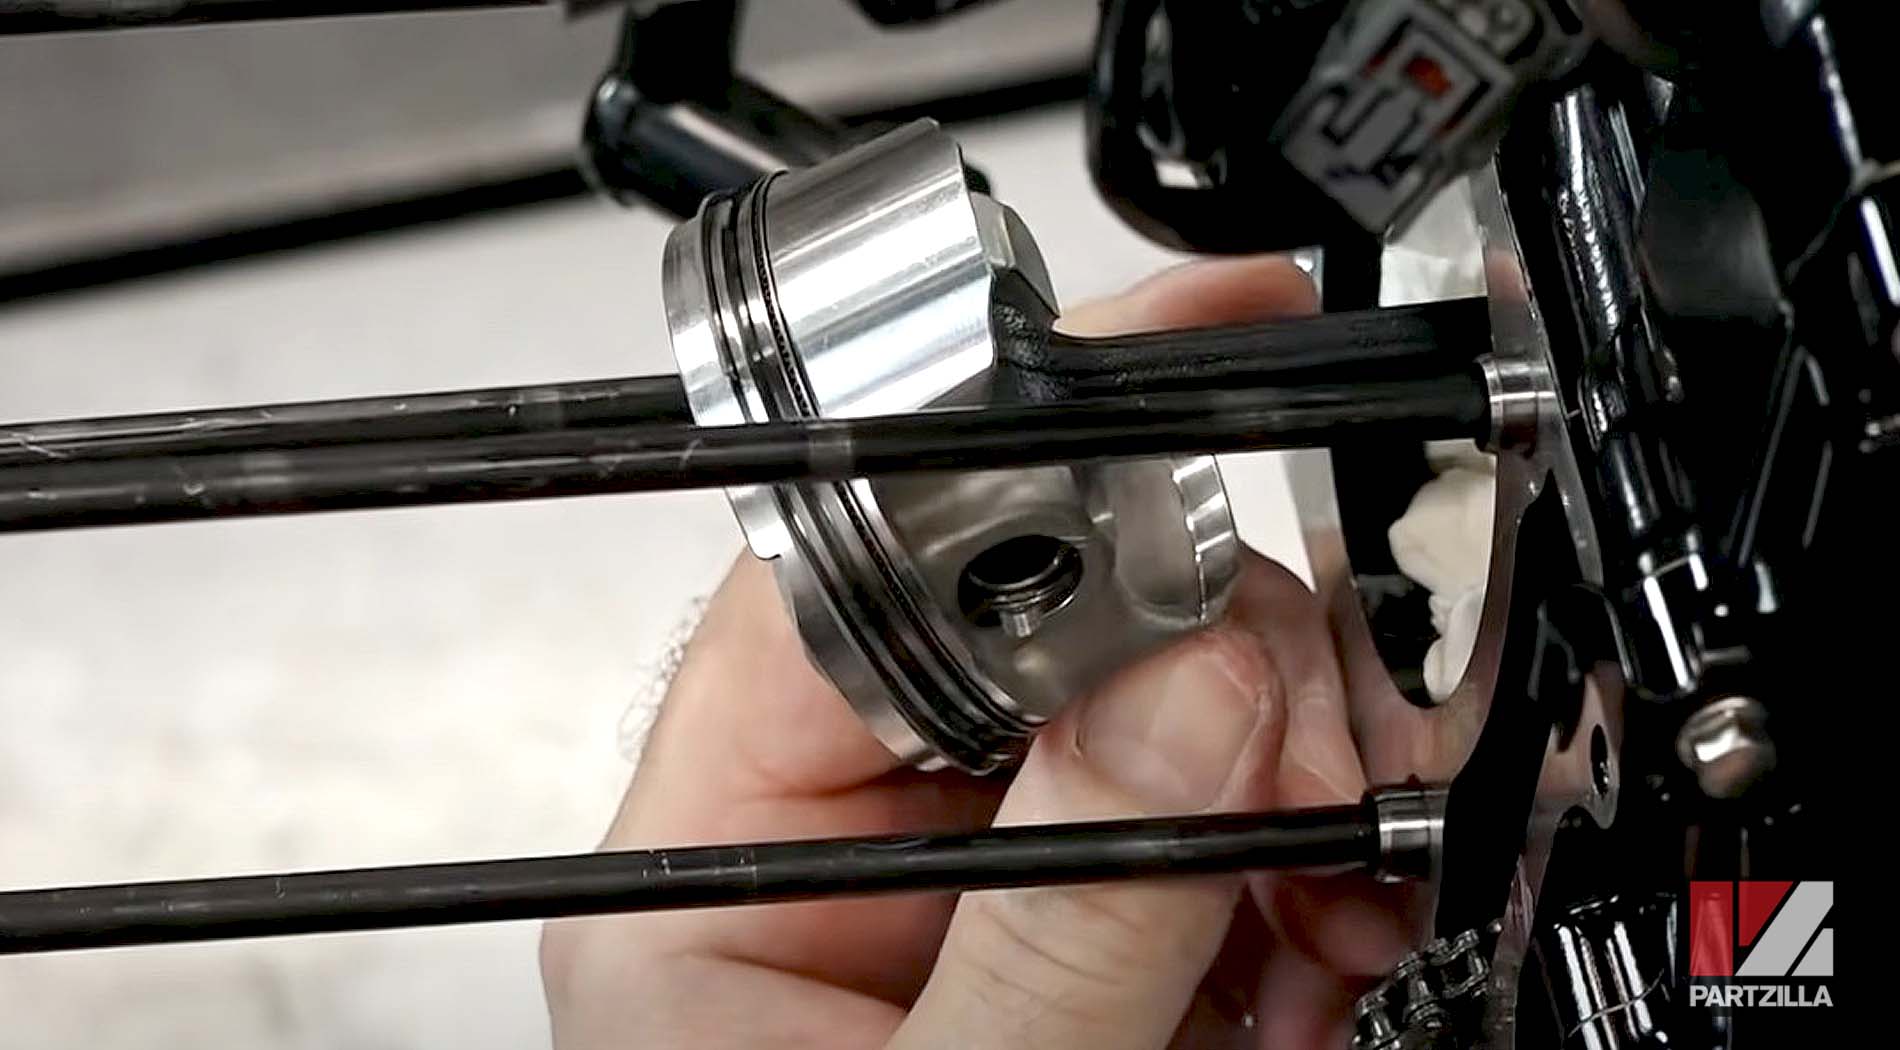
Step 10. Cover the opening around the connector rod with paper towels or something similar to prevent any debris from getting into the crankcase, then remove the circlip and piston pin from the piston, and slide the piston off the connector rod.
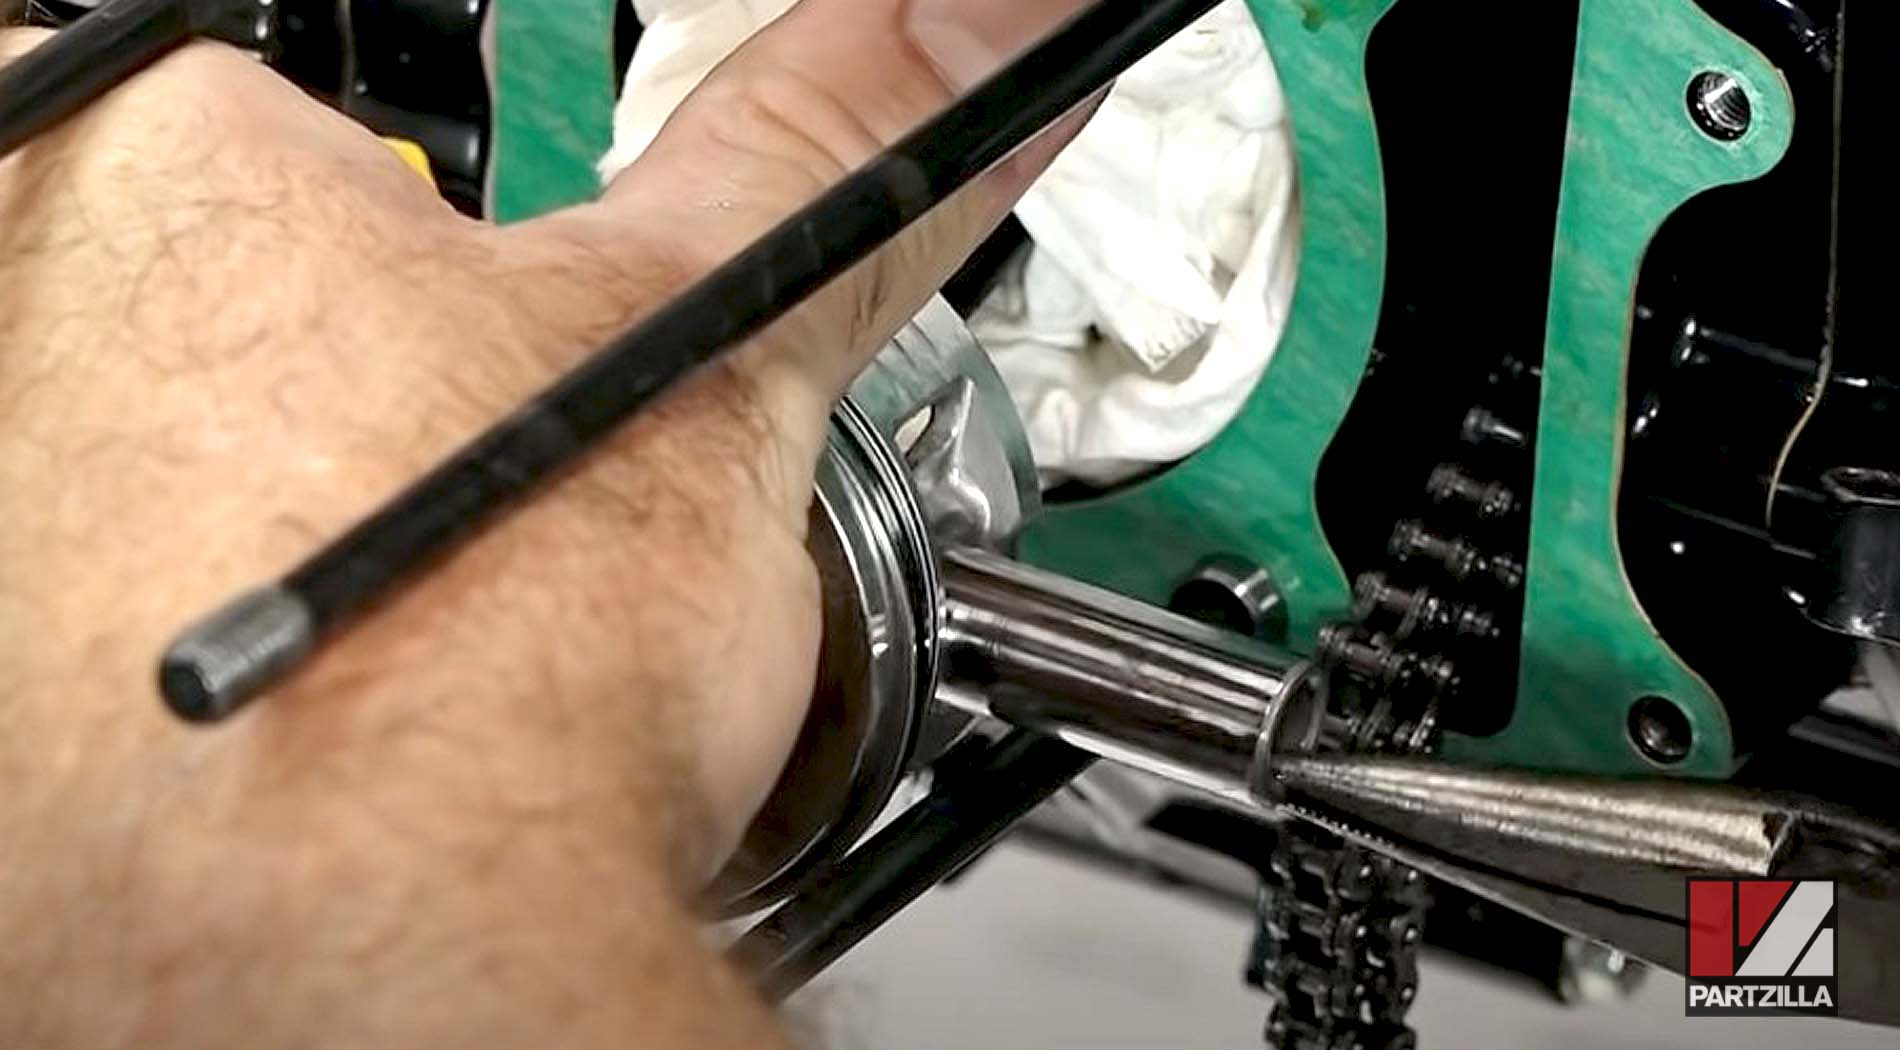
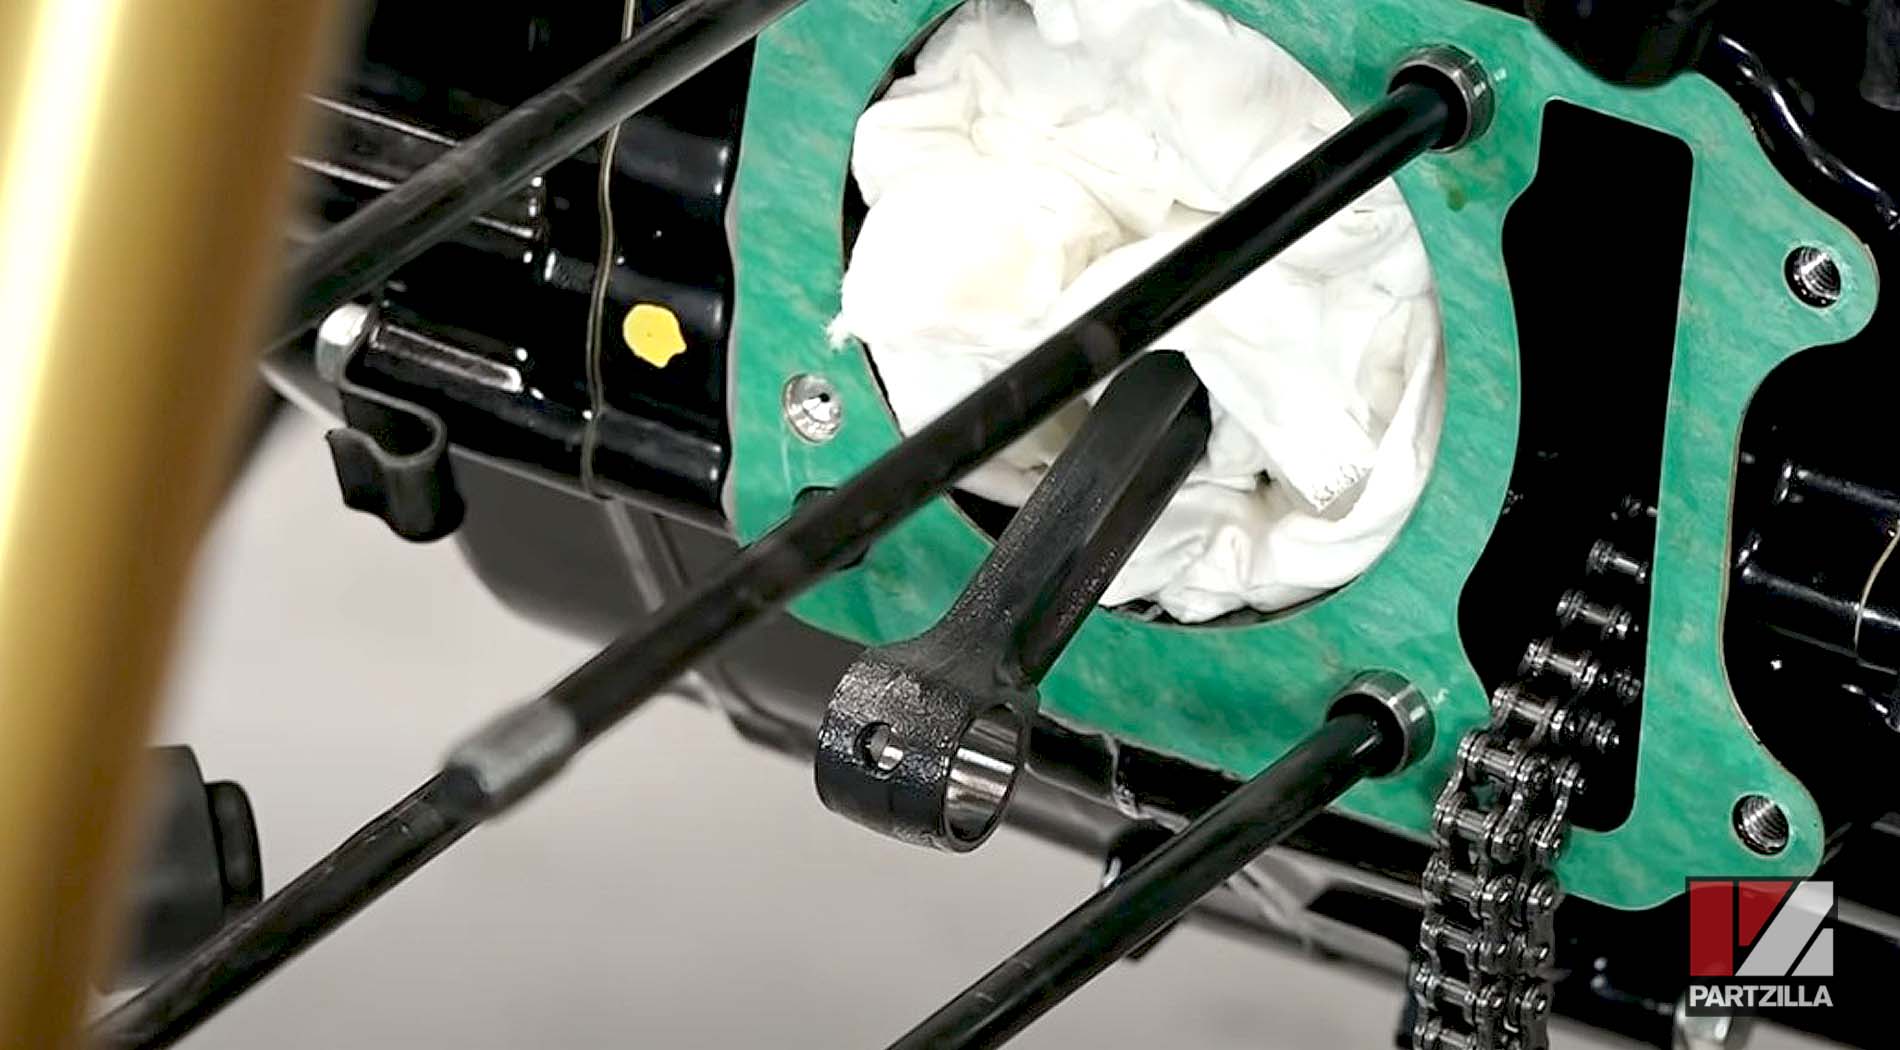
Watch the clip below to see the cylinder and piston removal segments of our Honda Grom Big Bore Kit video.
NOTE: The KOSO cam chain tensioner kit will withstand the extra loads that will be generated from the upgraded motor once the big bore kit has been installed.
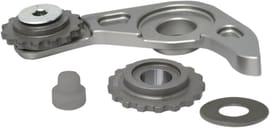
Part 2: Honda Grom Cam Chain Tensioner Replacement
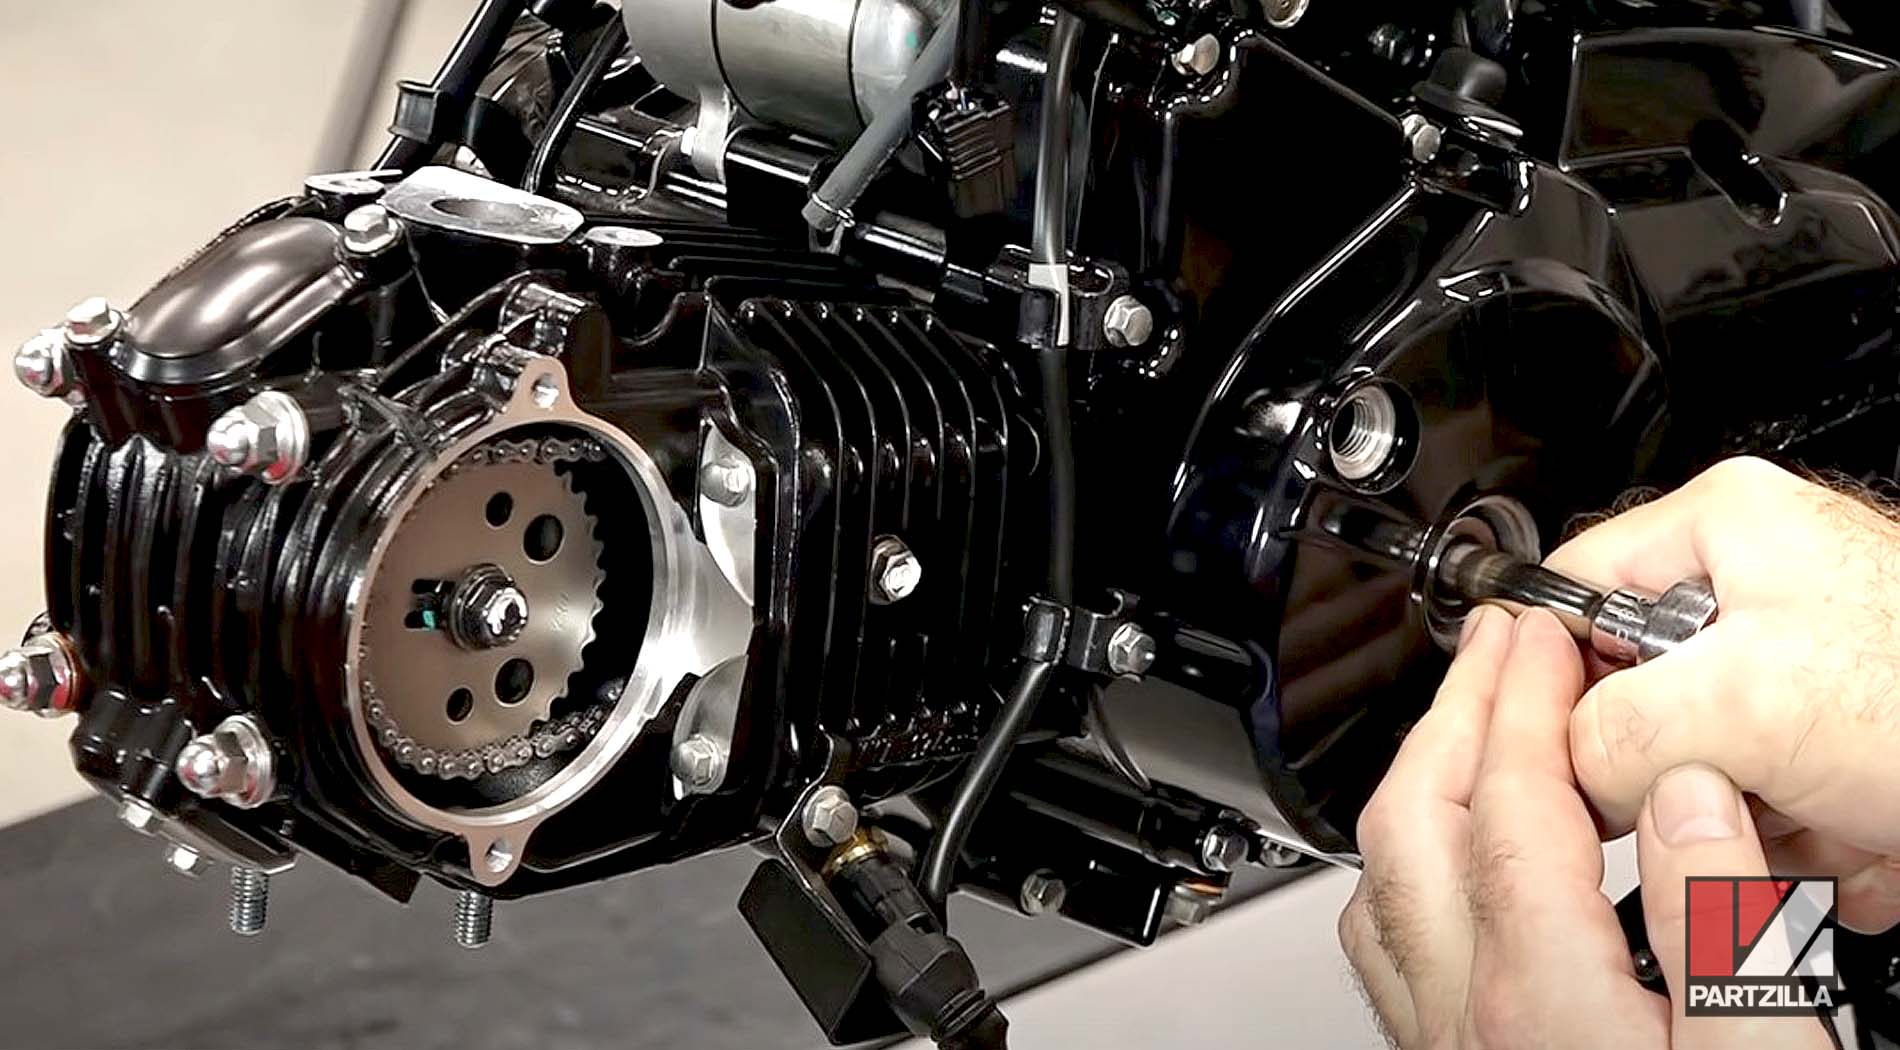
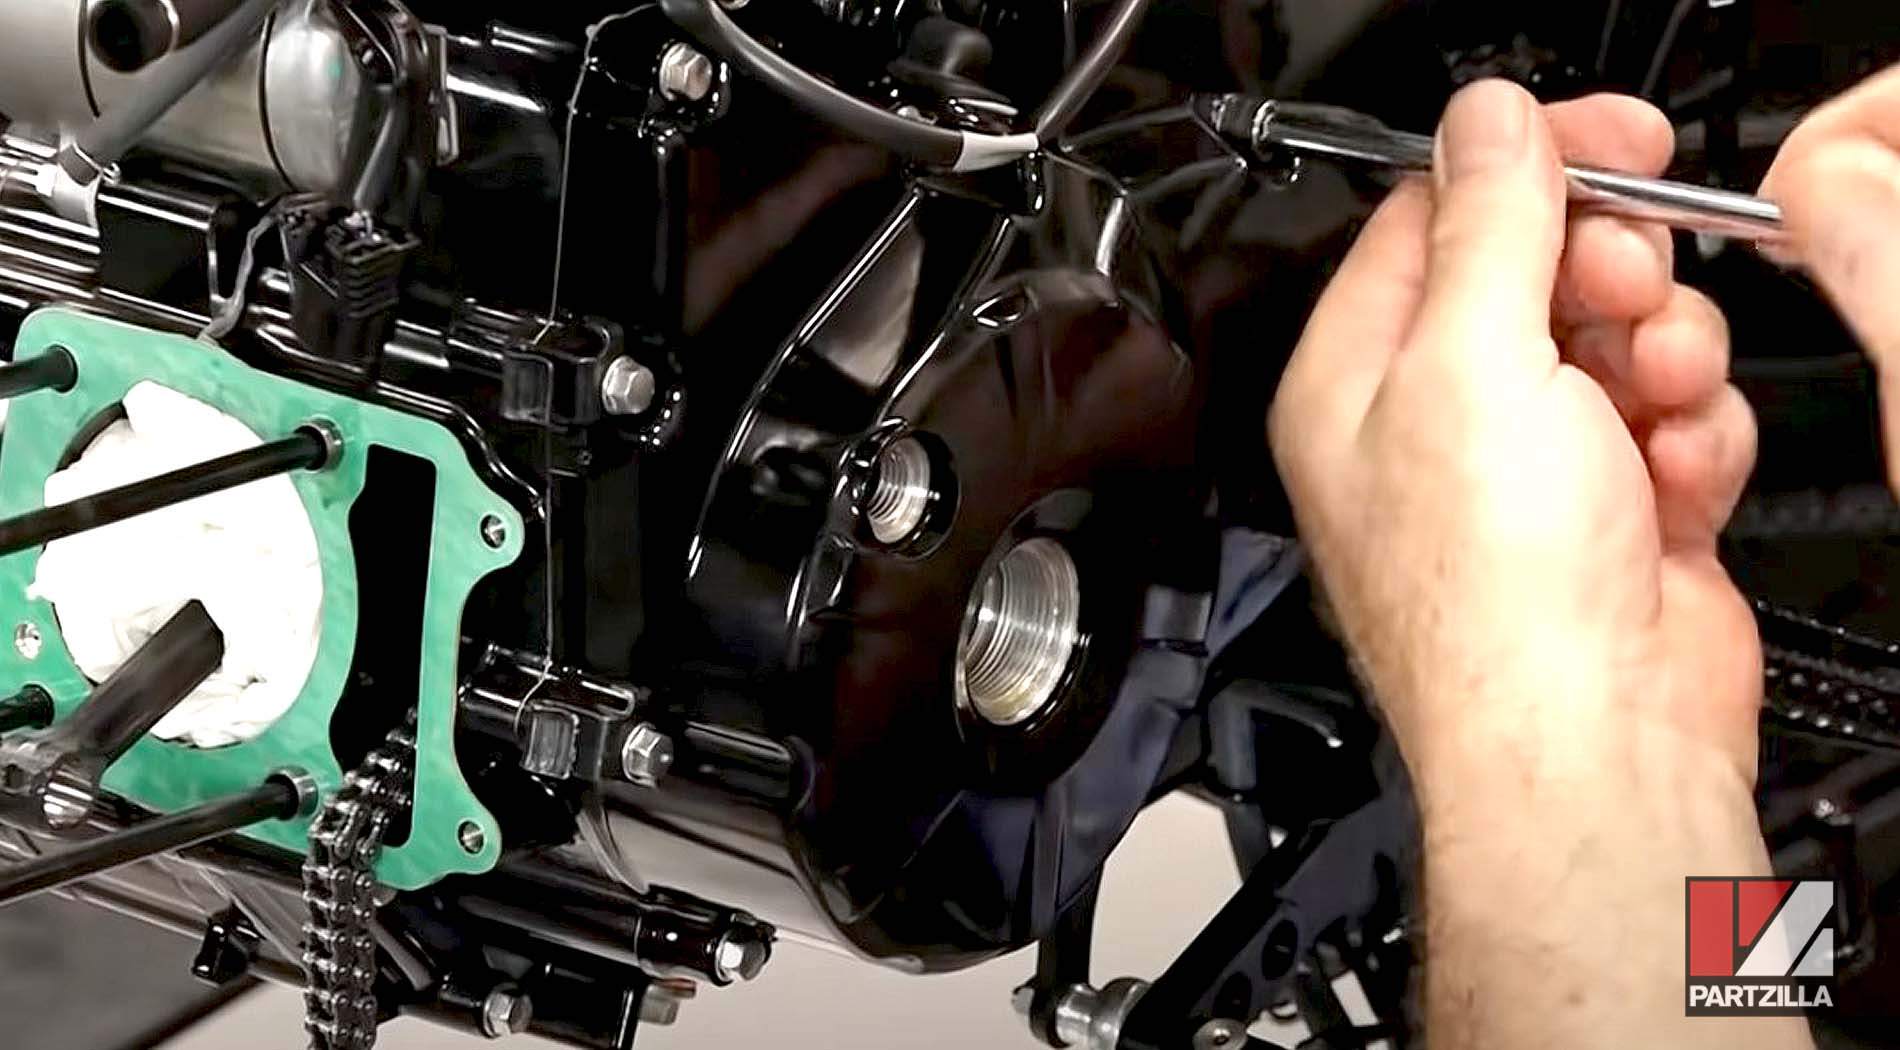
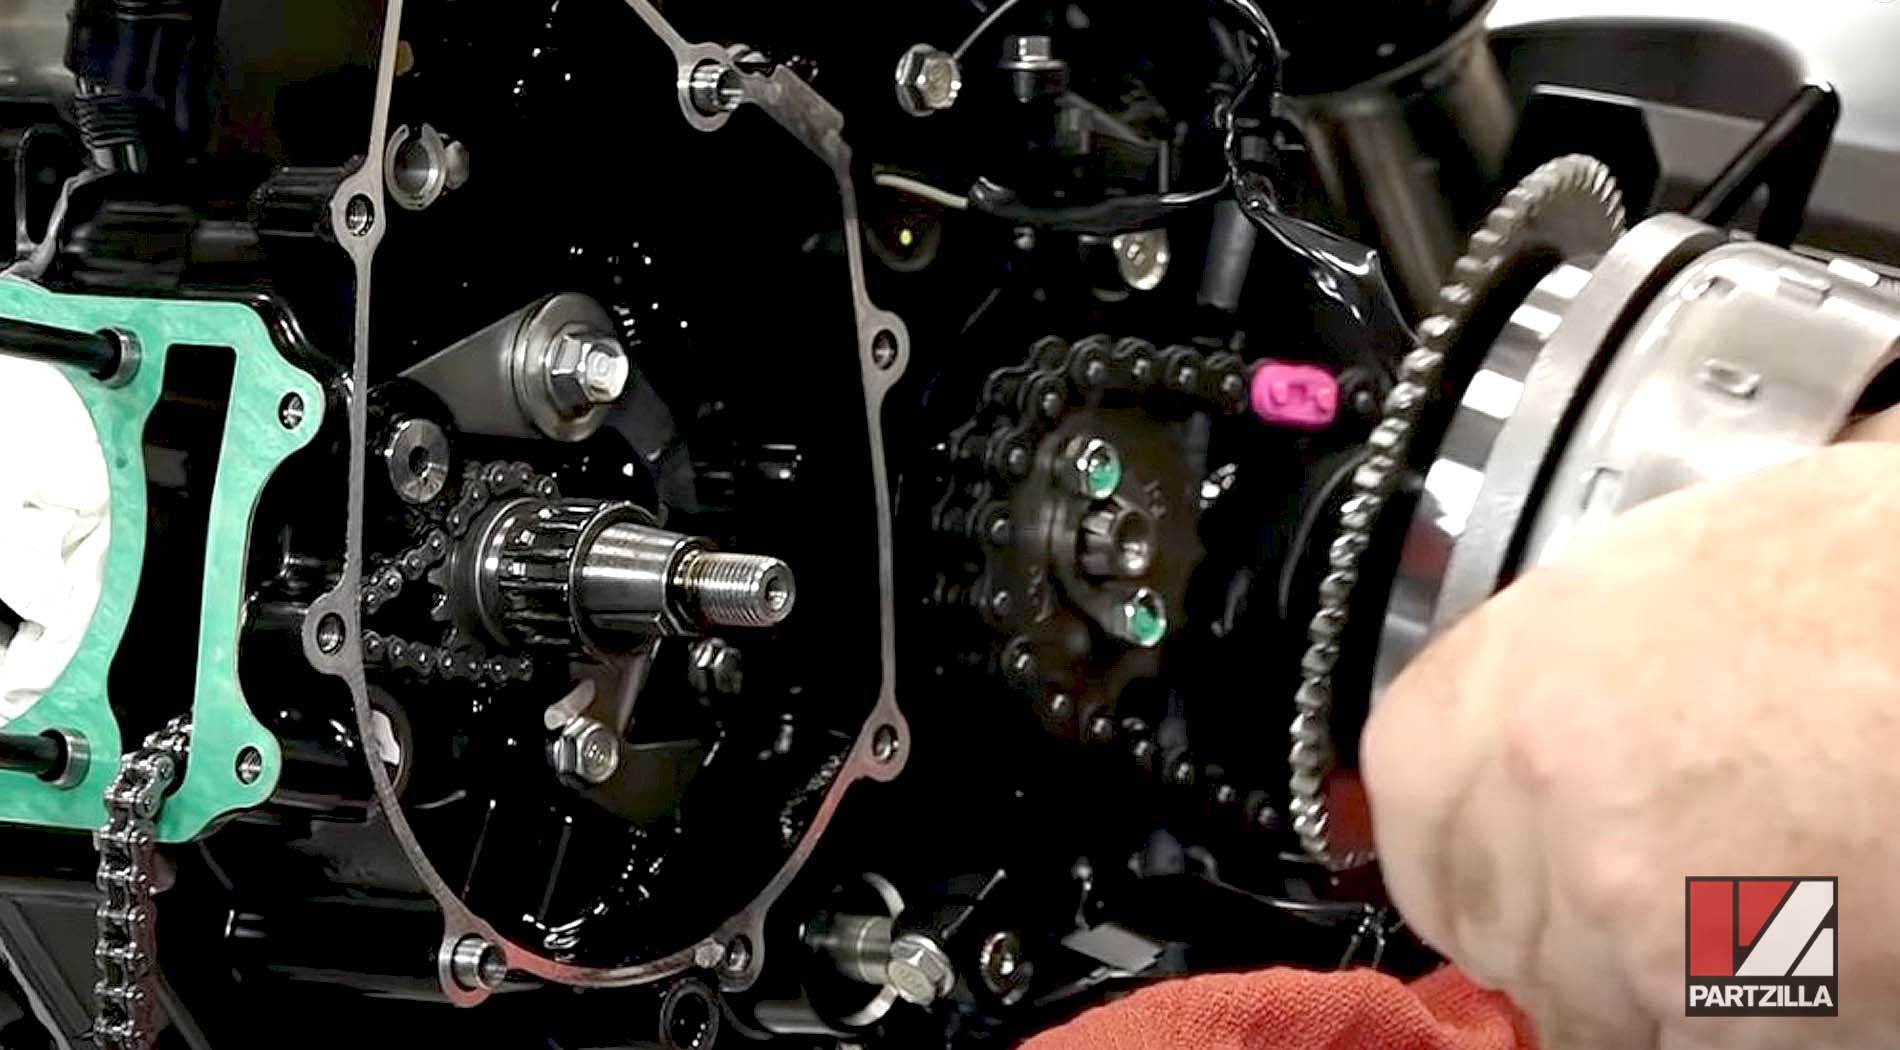
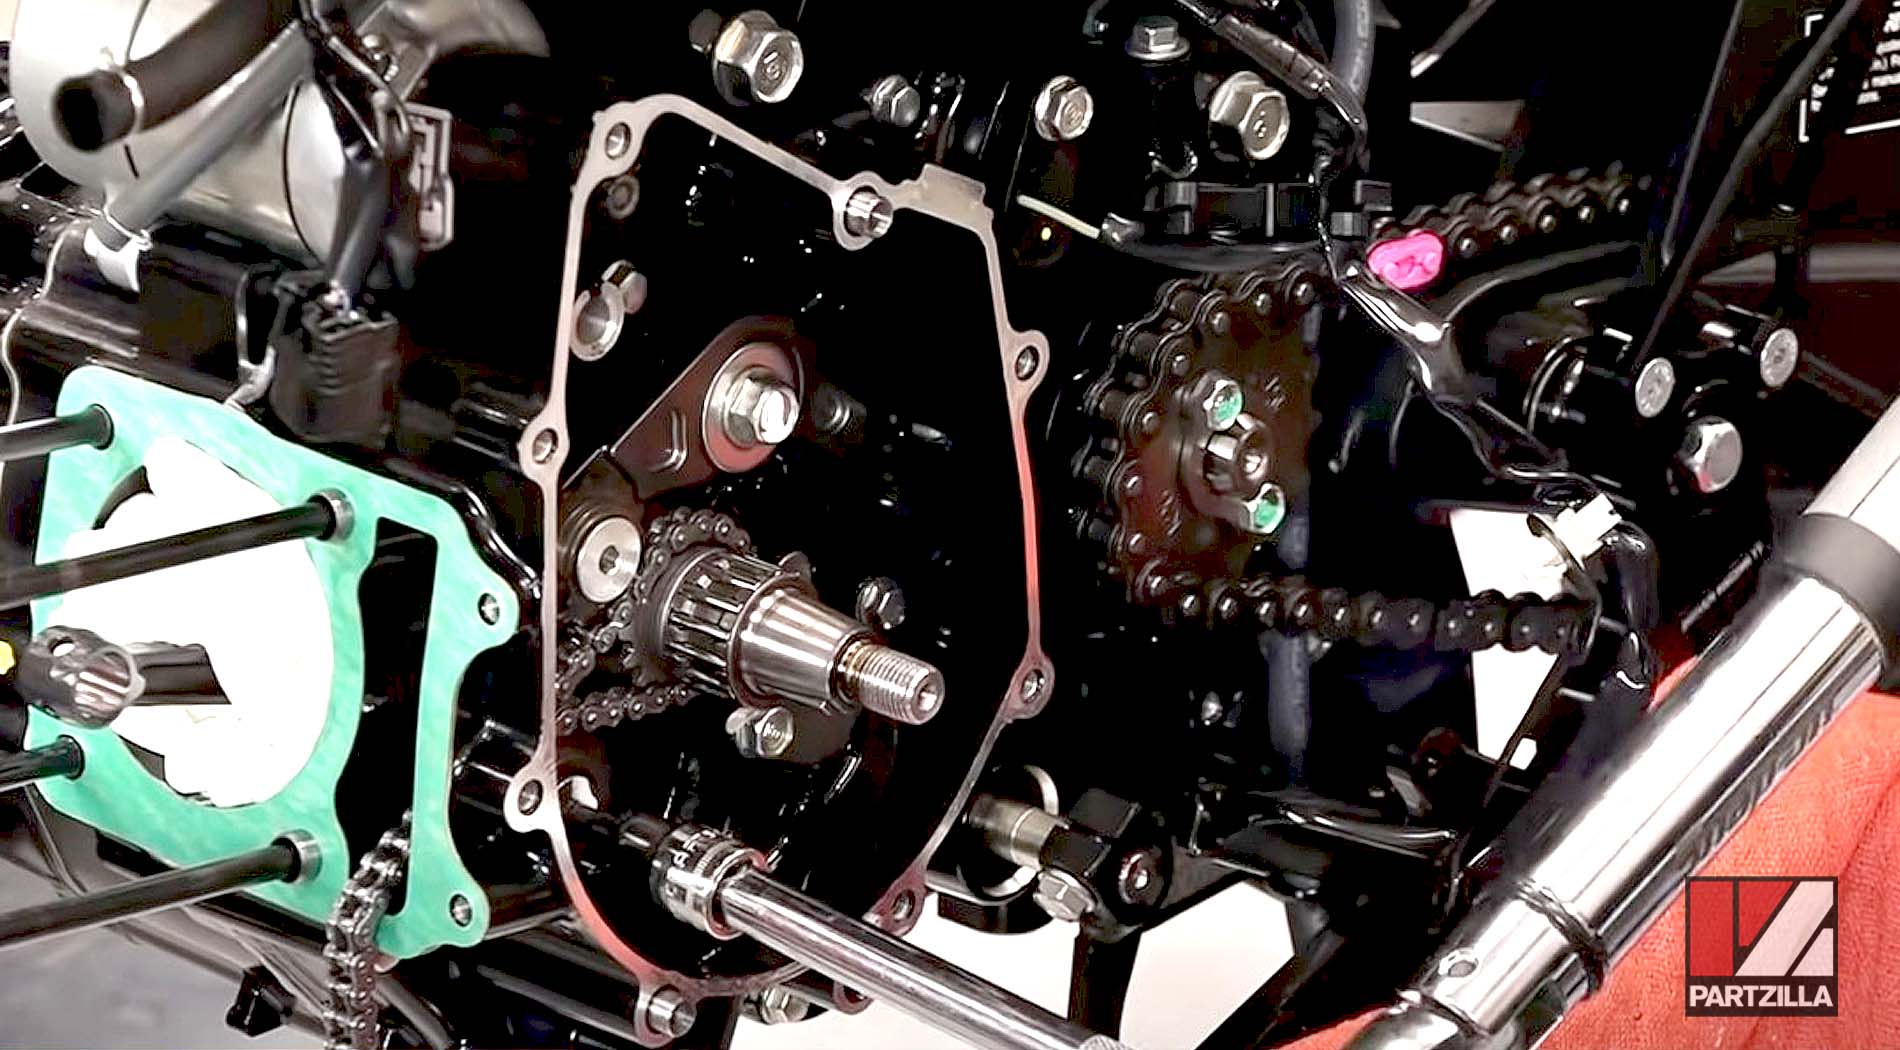
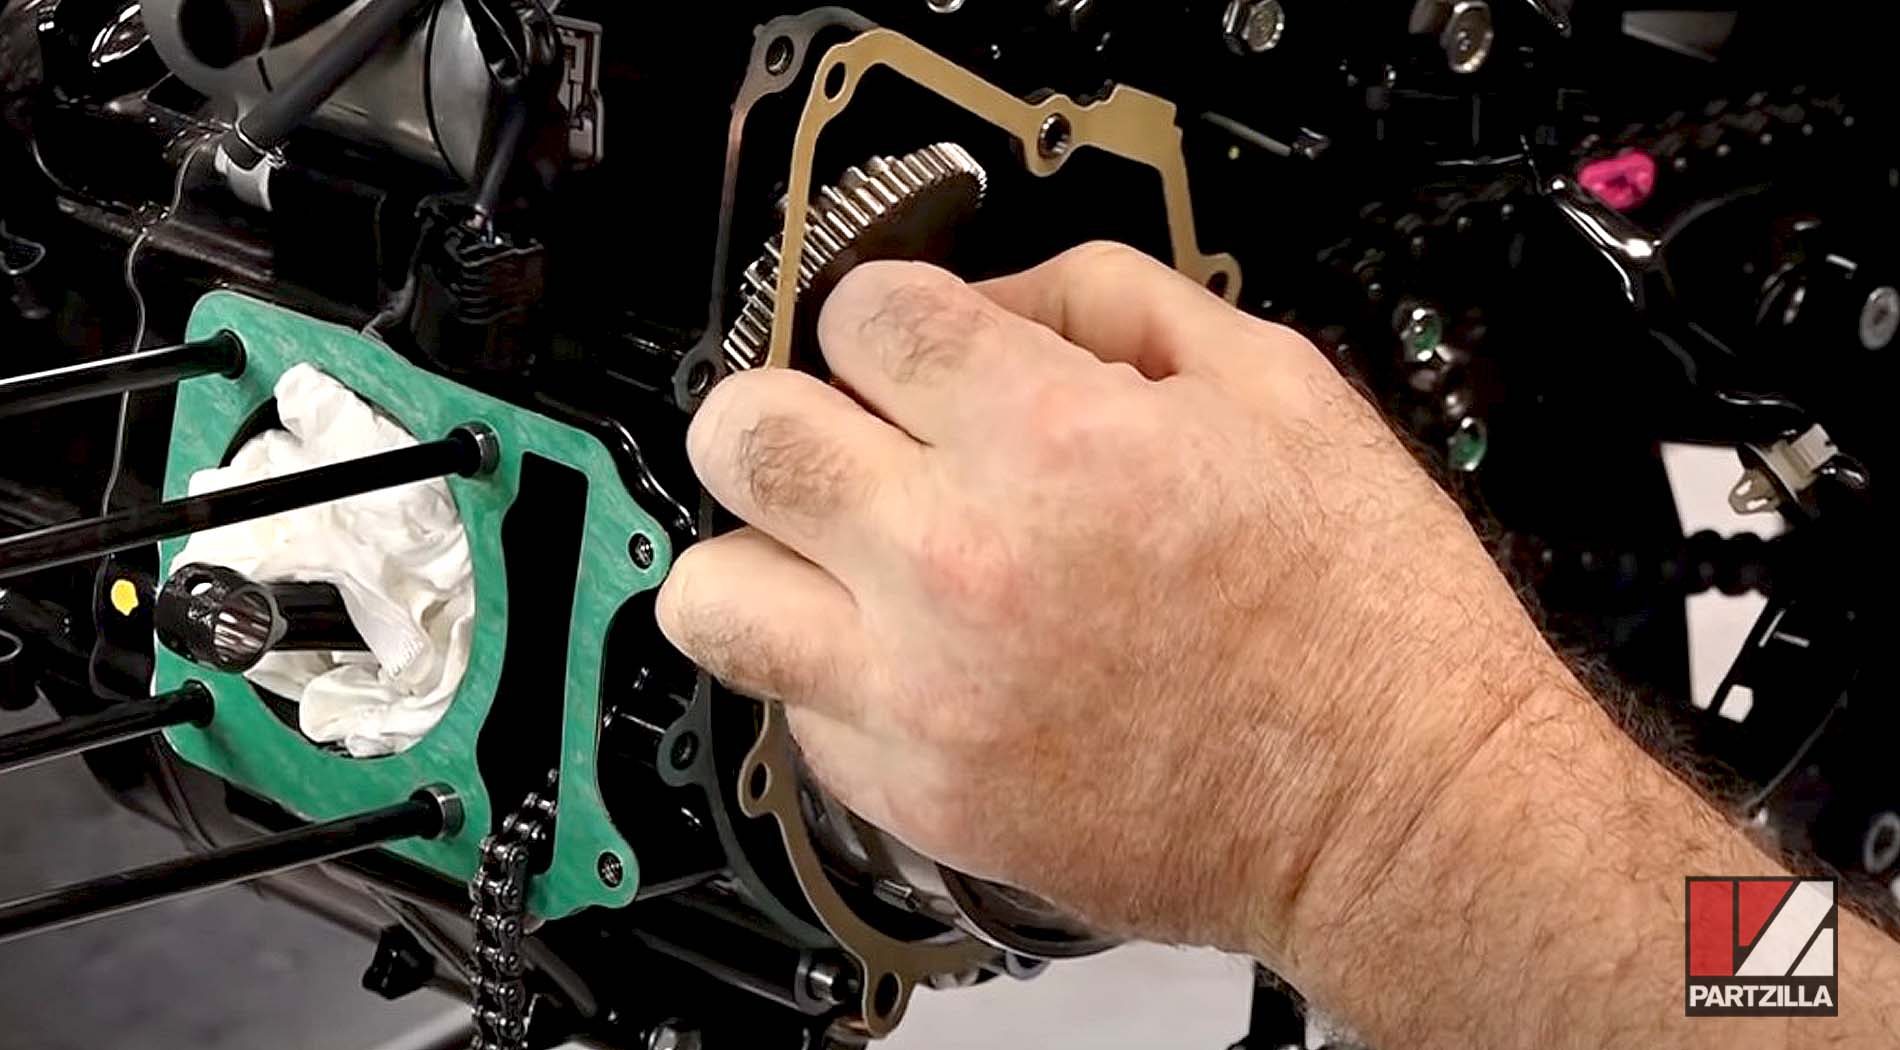
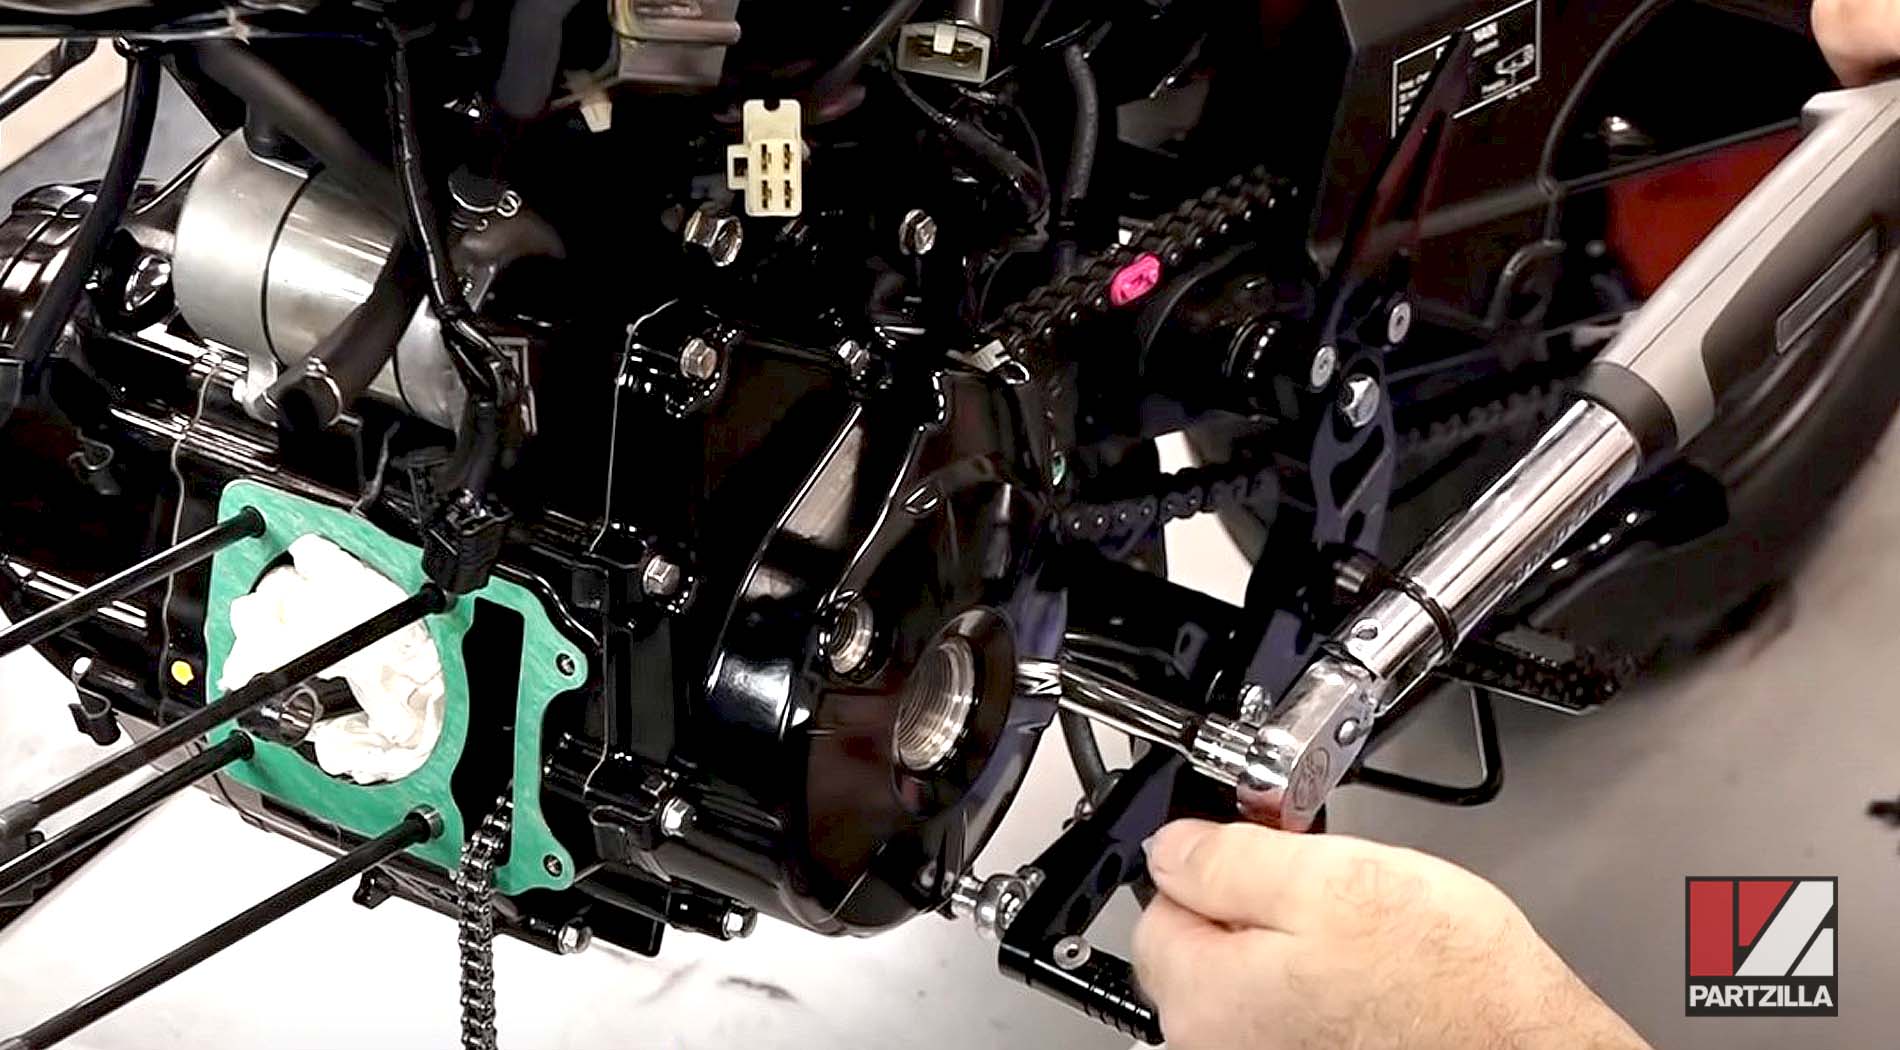
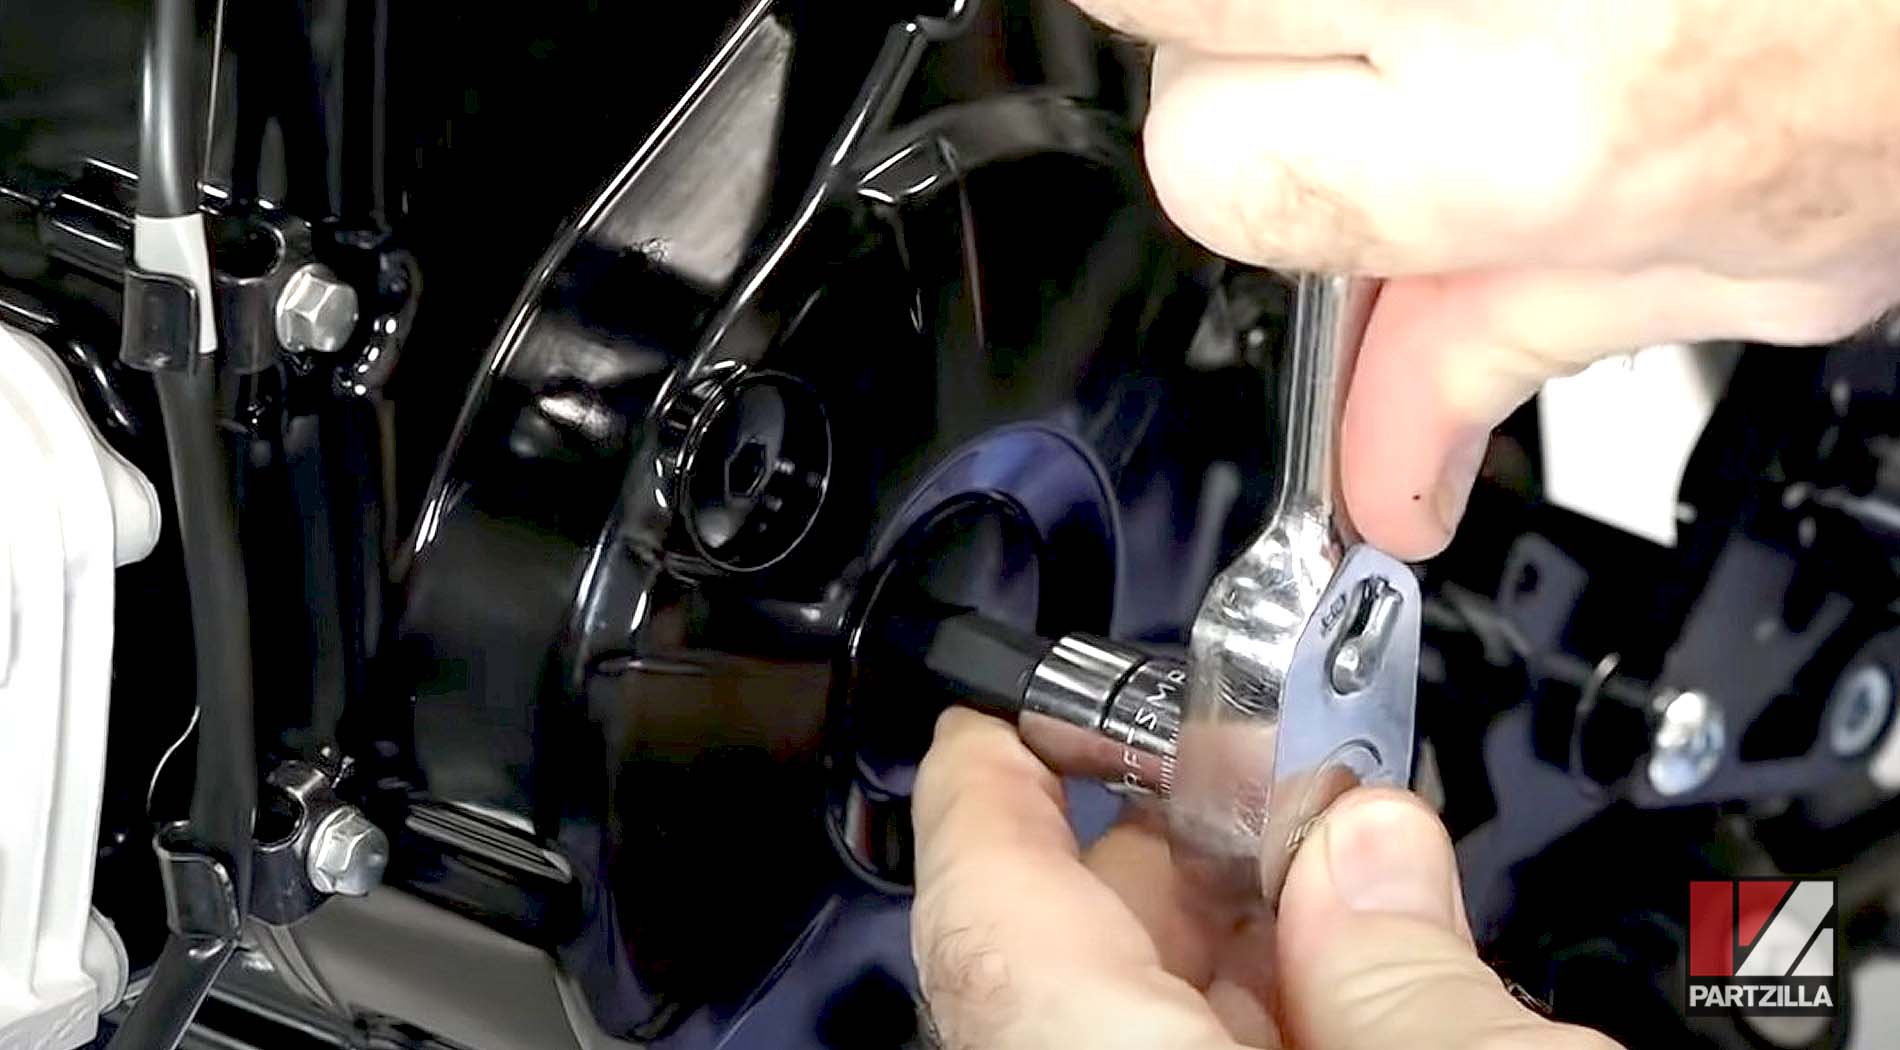
Step 1. Remove the cover to the rear of the crankcase cover, followed by the crankcase cover itself. Next, remove the starter reduction gear and its shaft and collar from the left side of the crankcase.
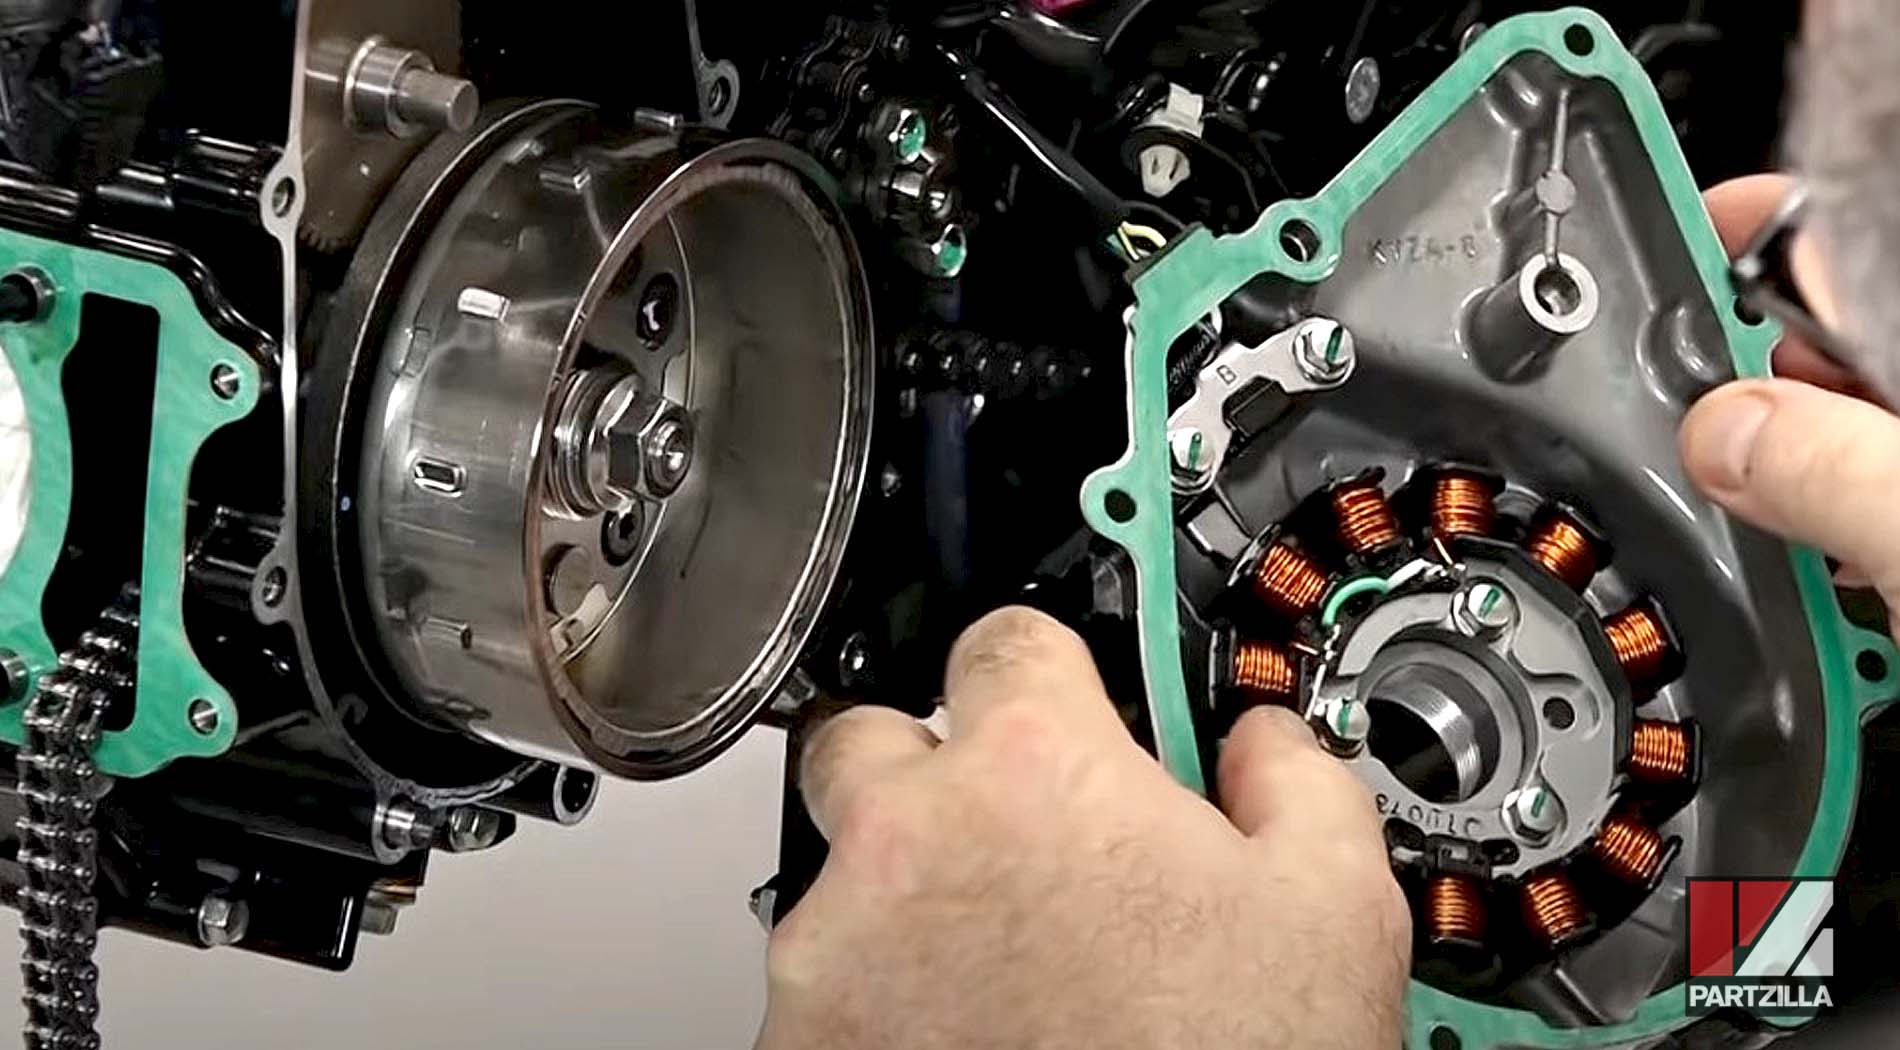
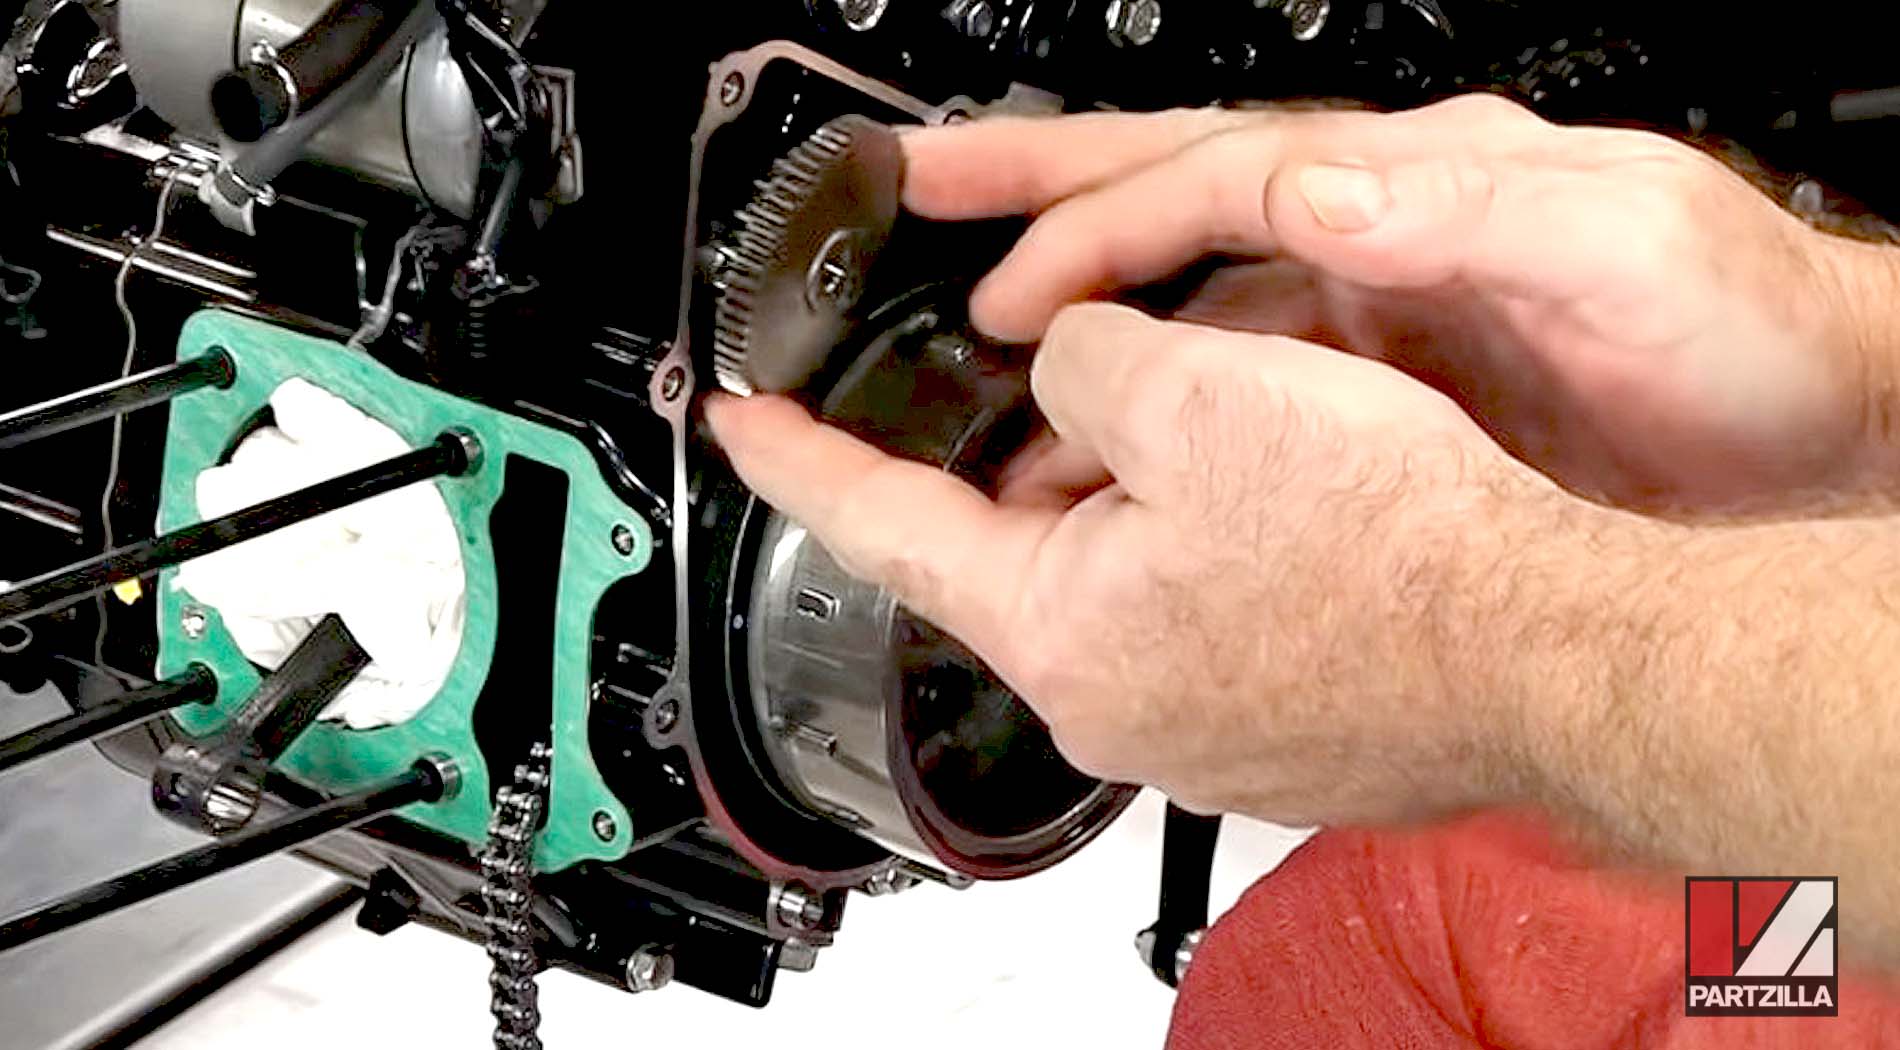
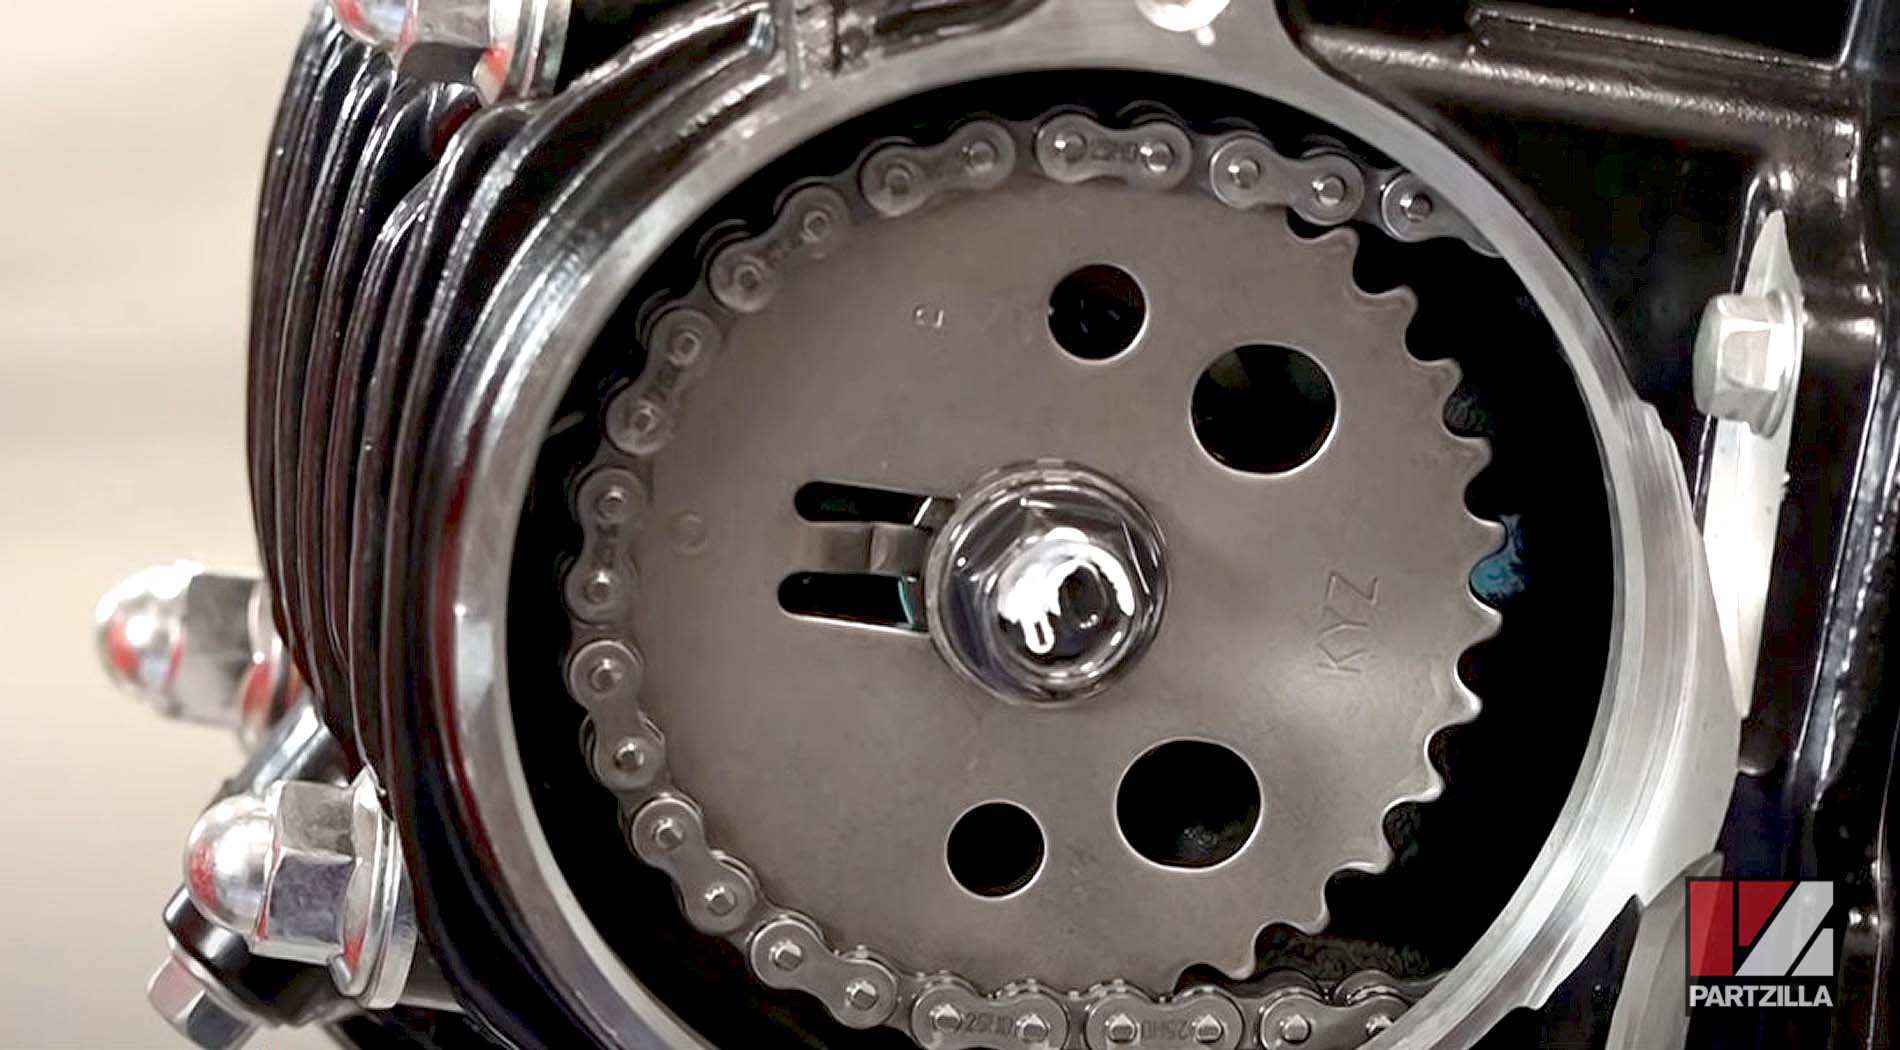
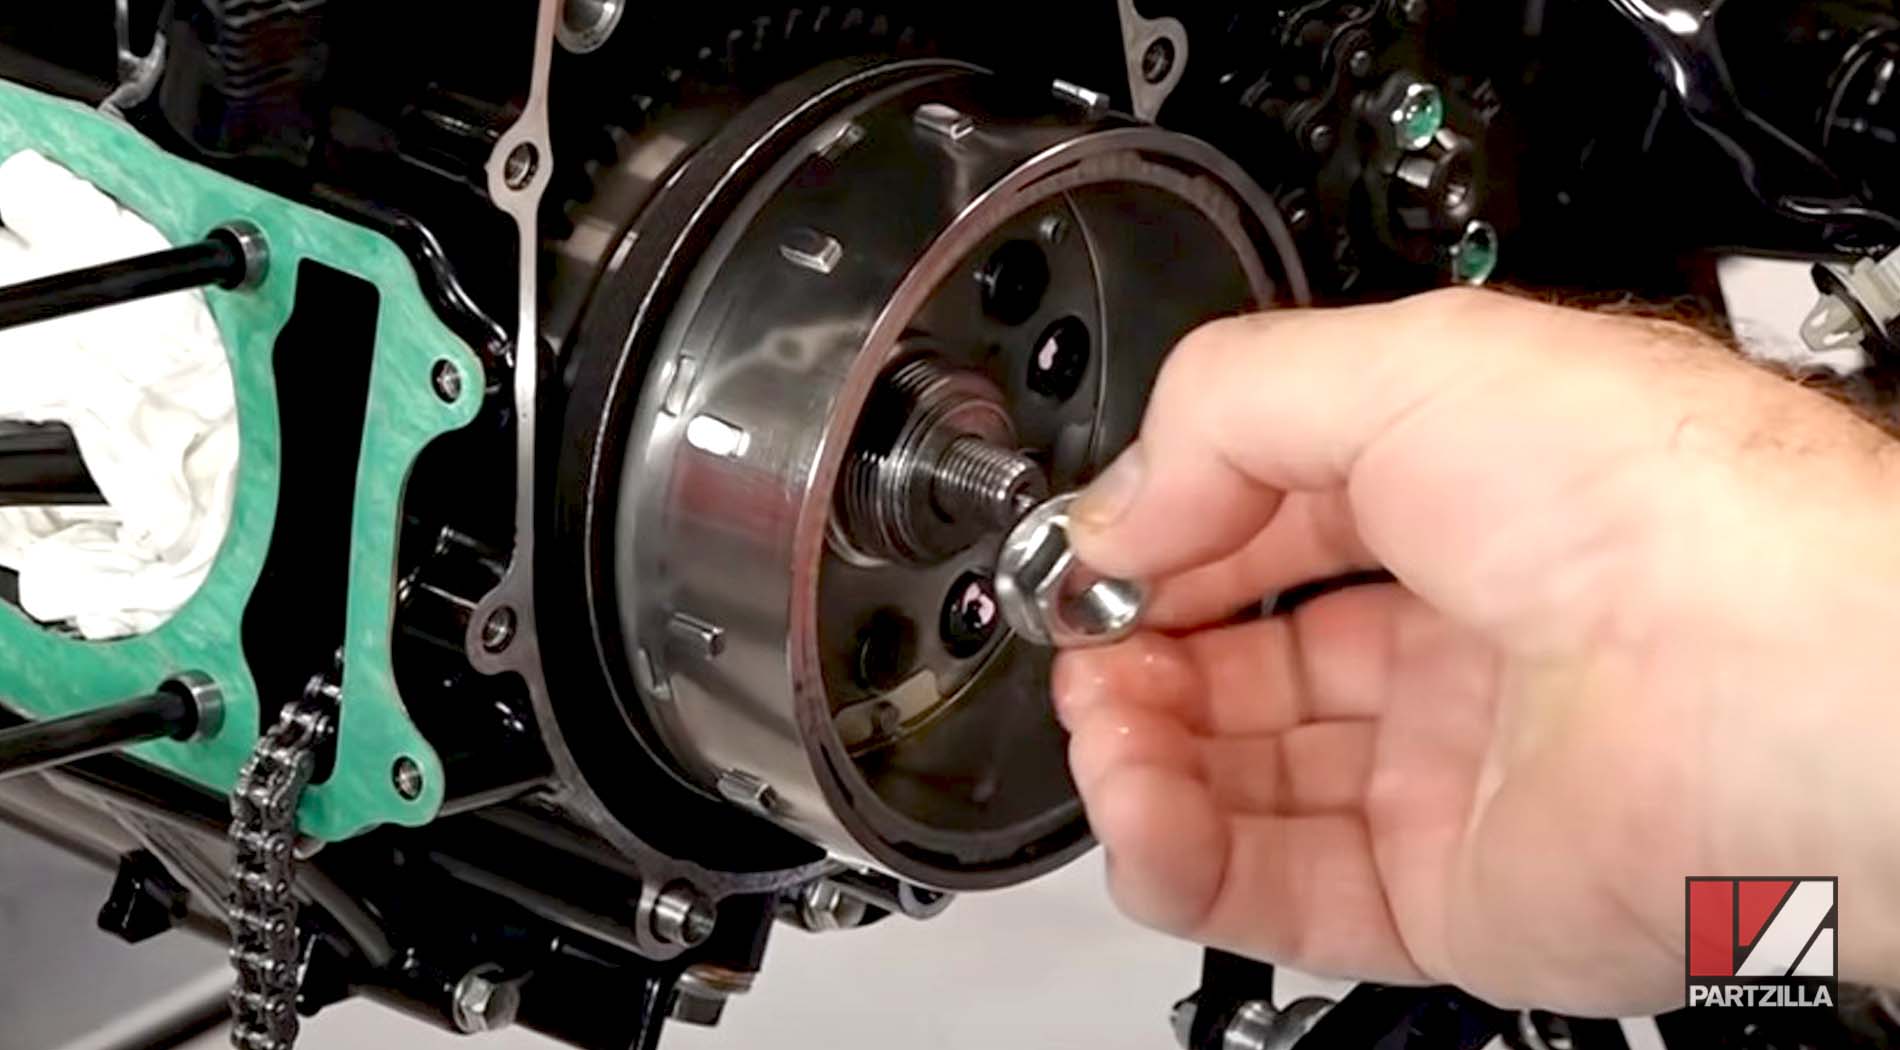
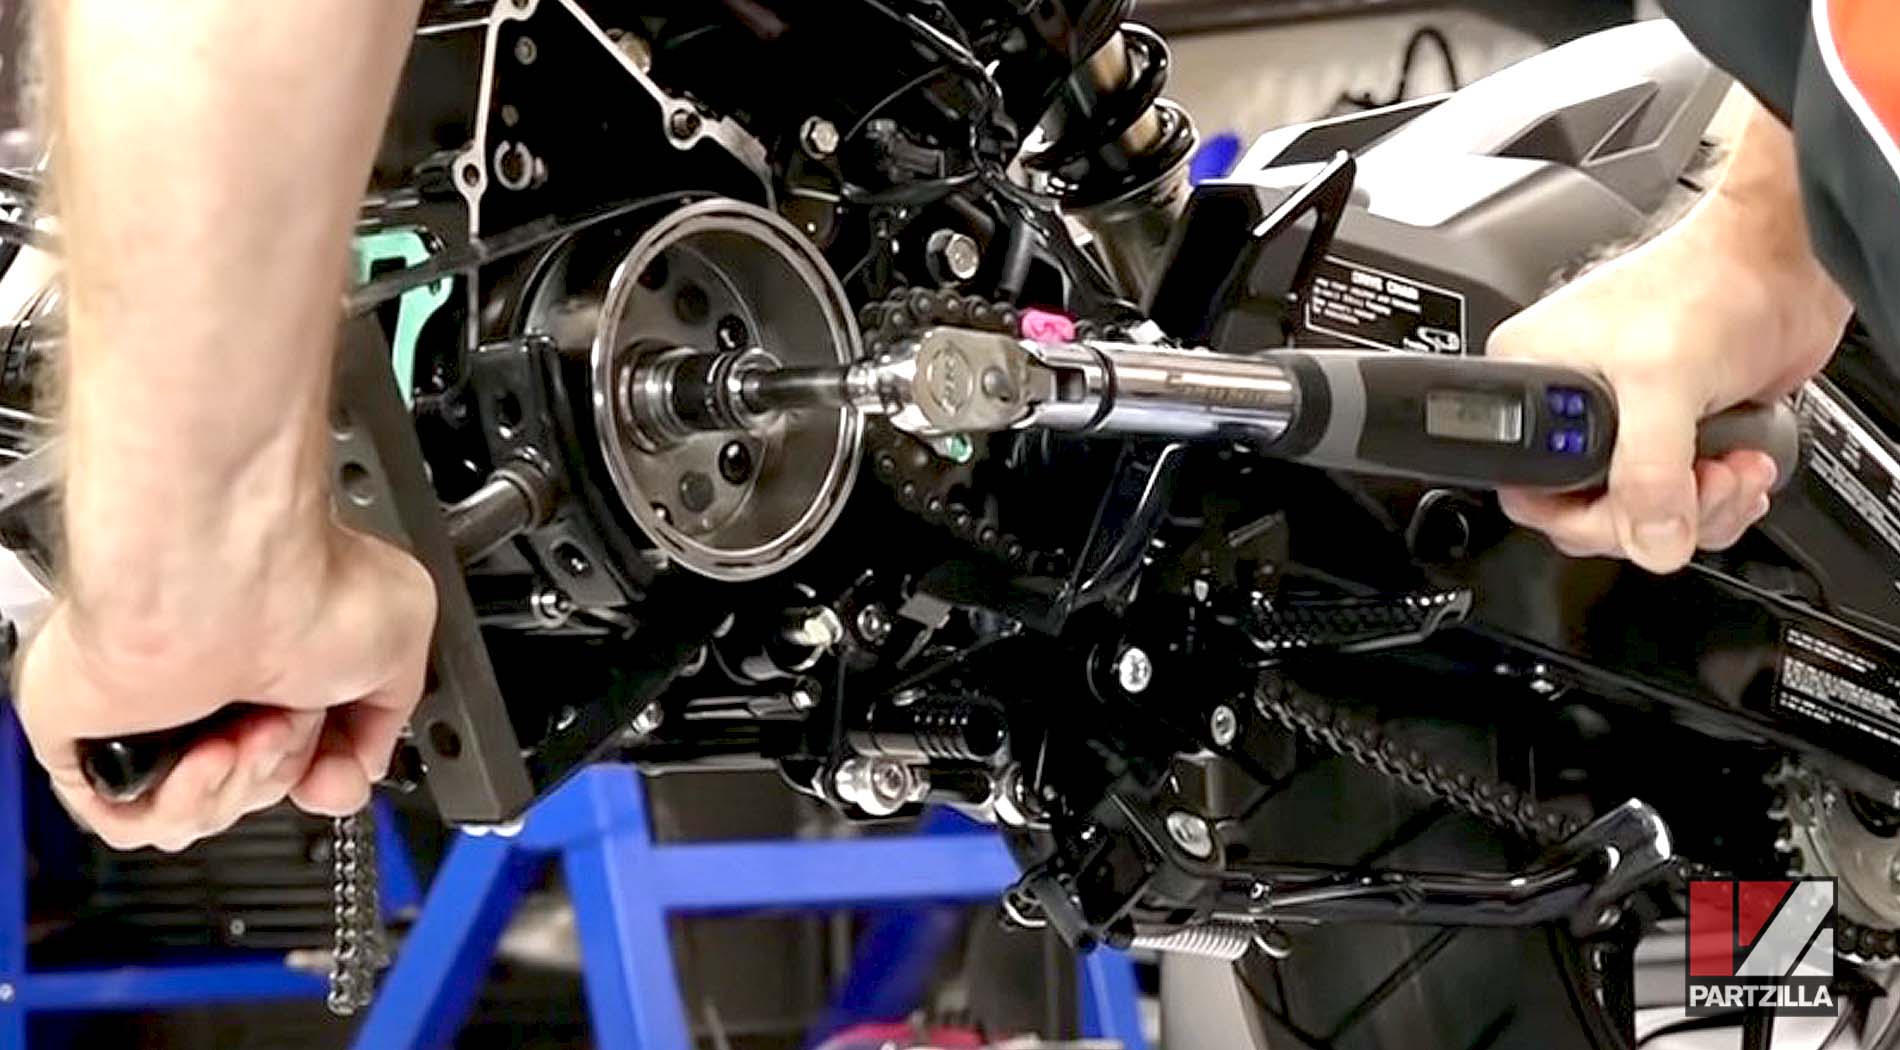
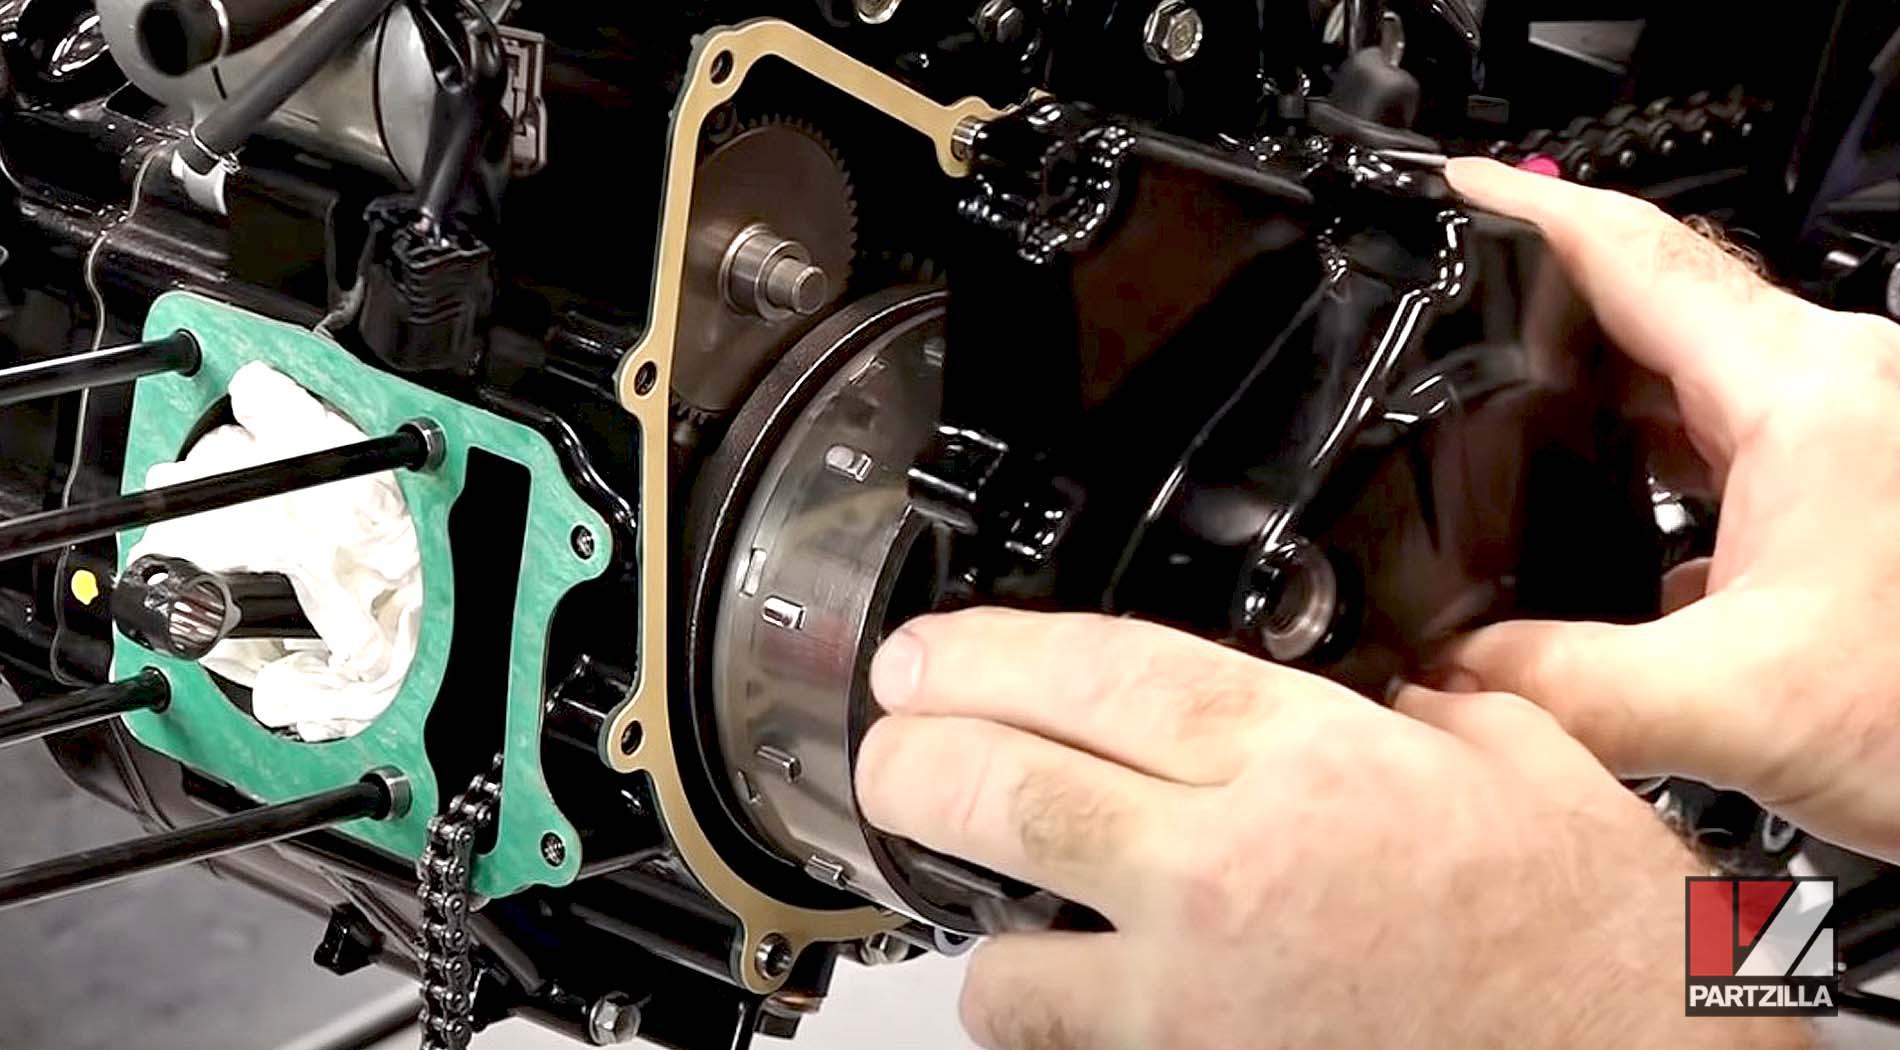
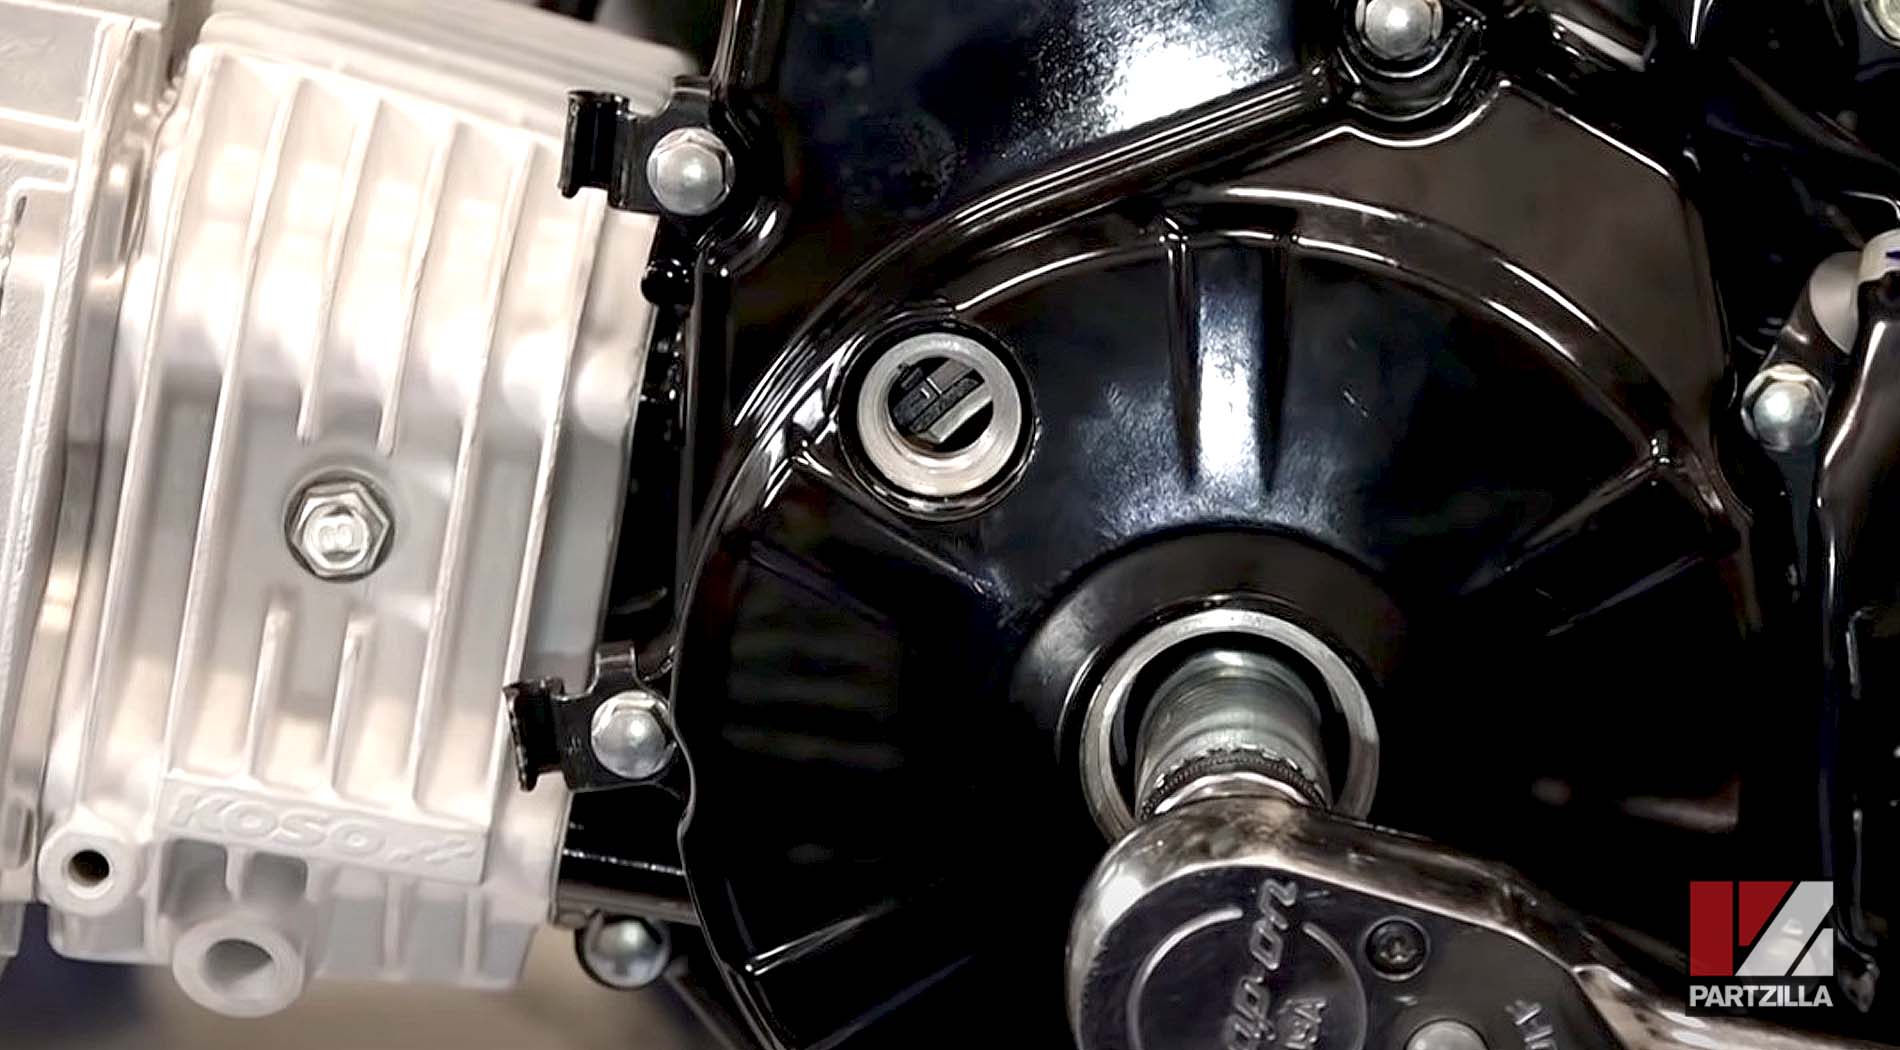
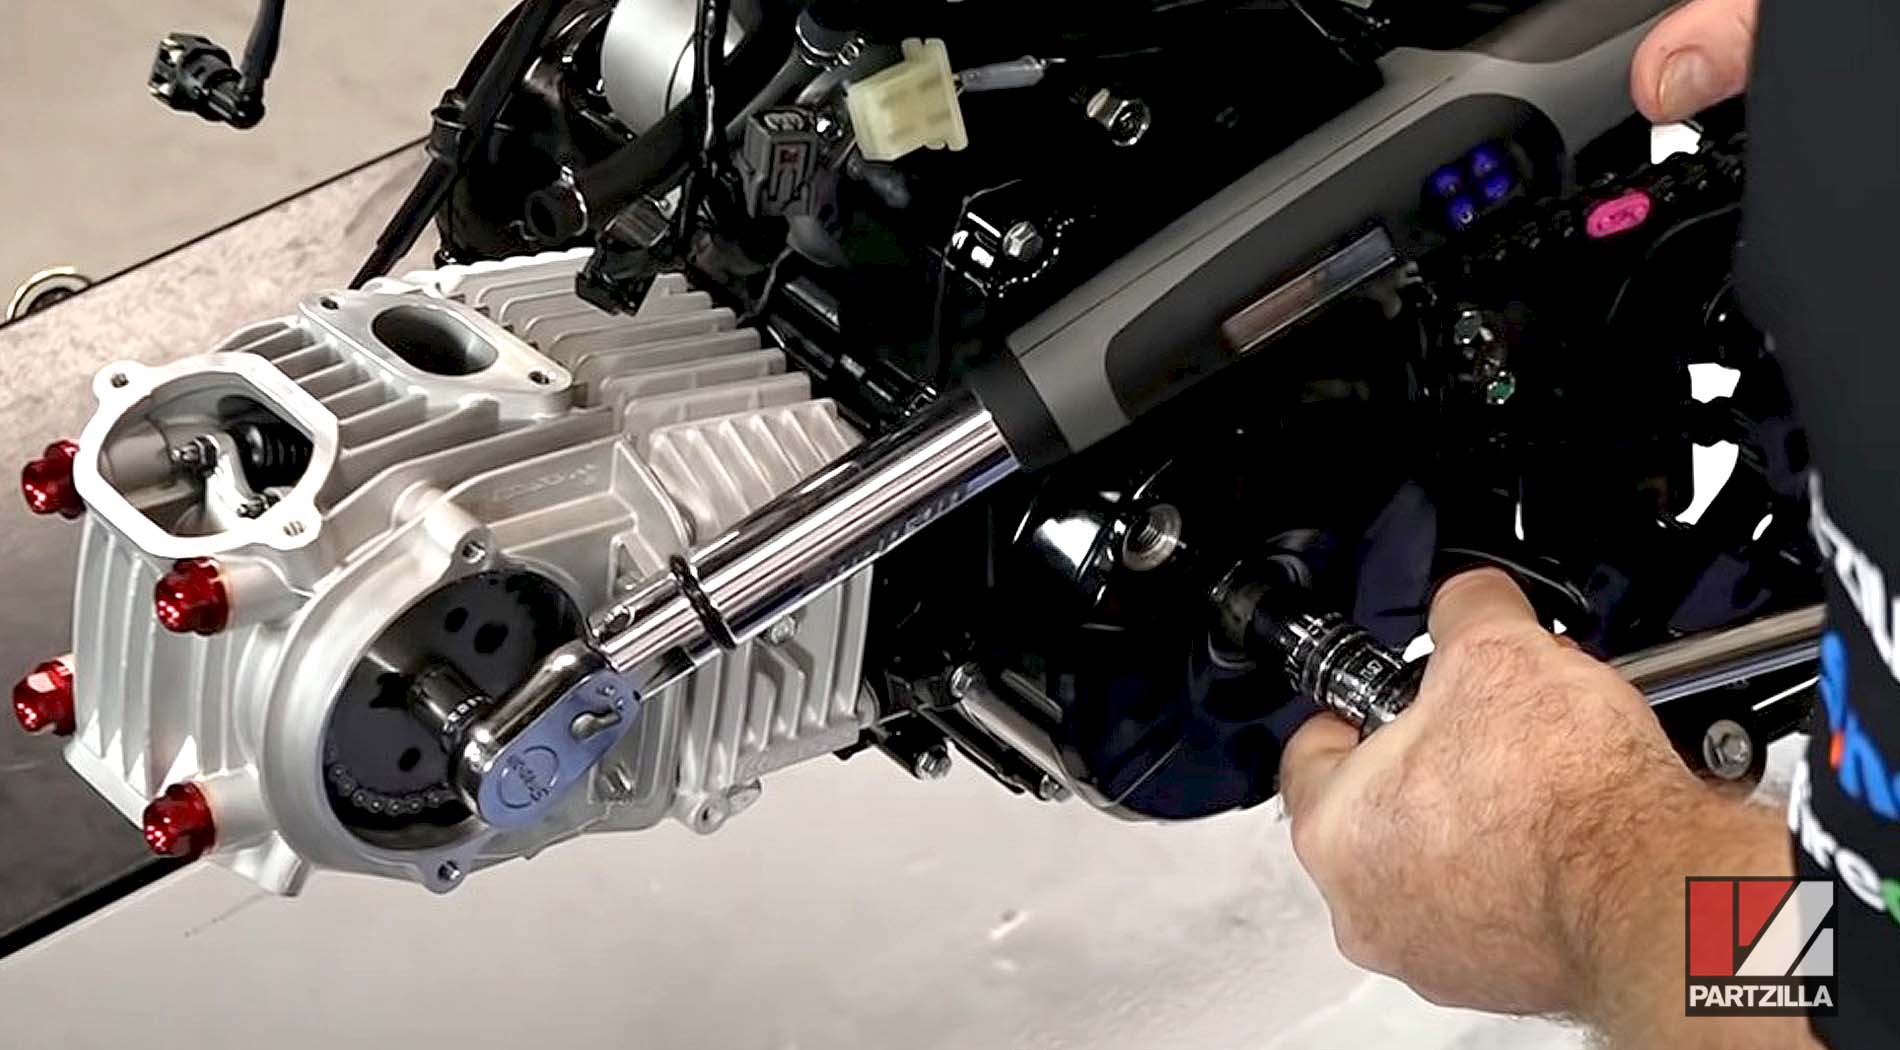
Step 2. Remove the flywheel by holding it with a sheave holder and taking off the central nut and washer. Then, use a rotor puller to draw the flywheel out of the crankcase.
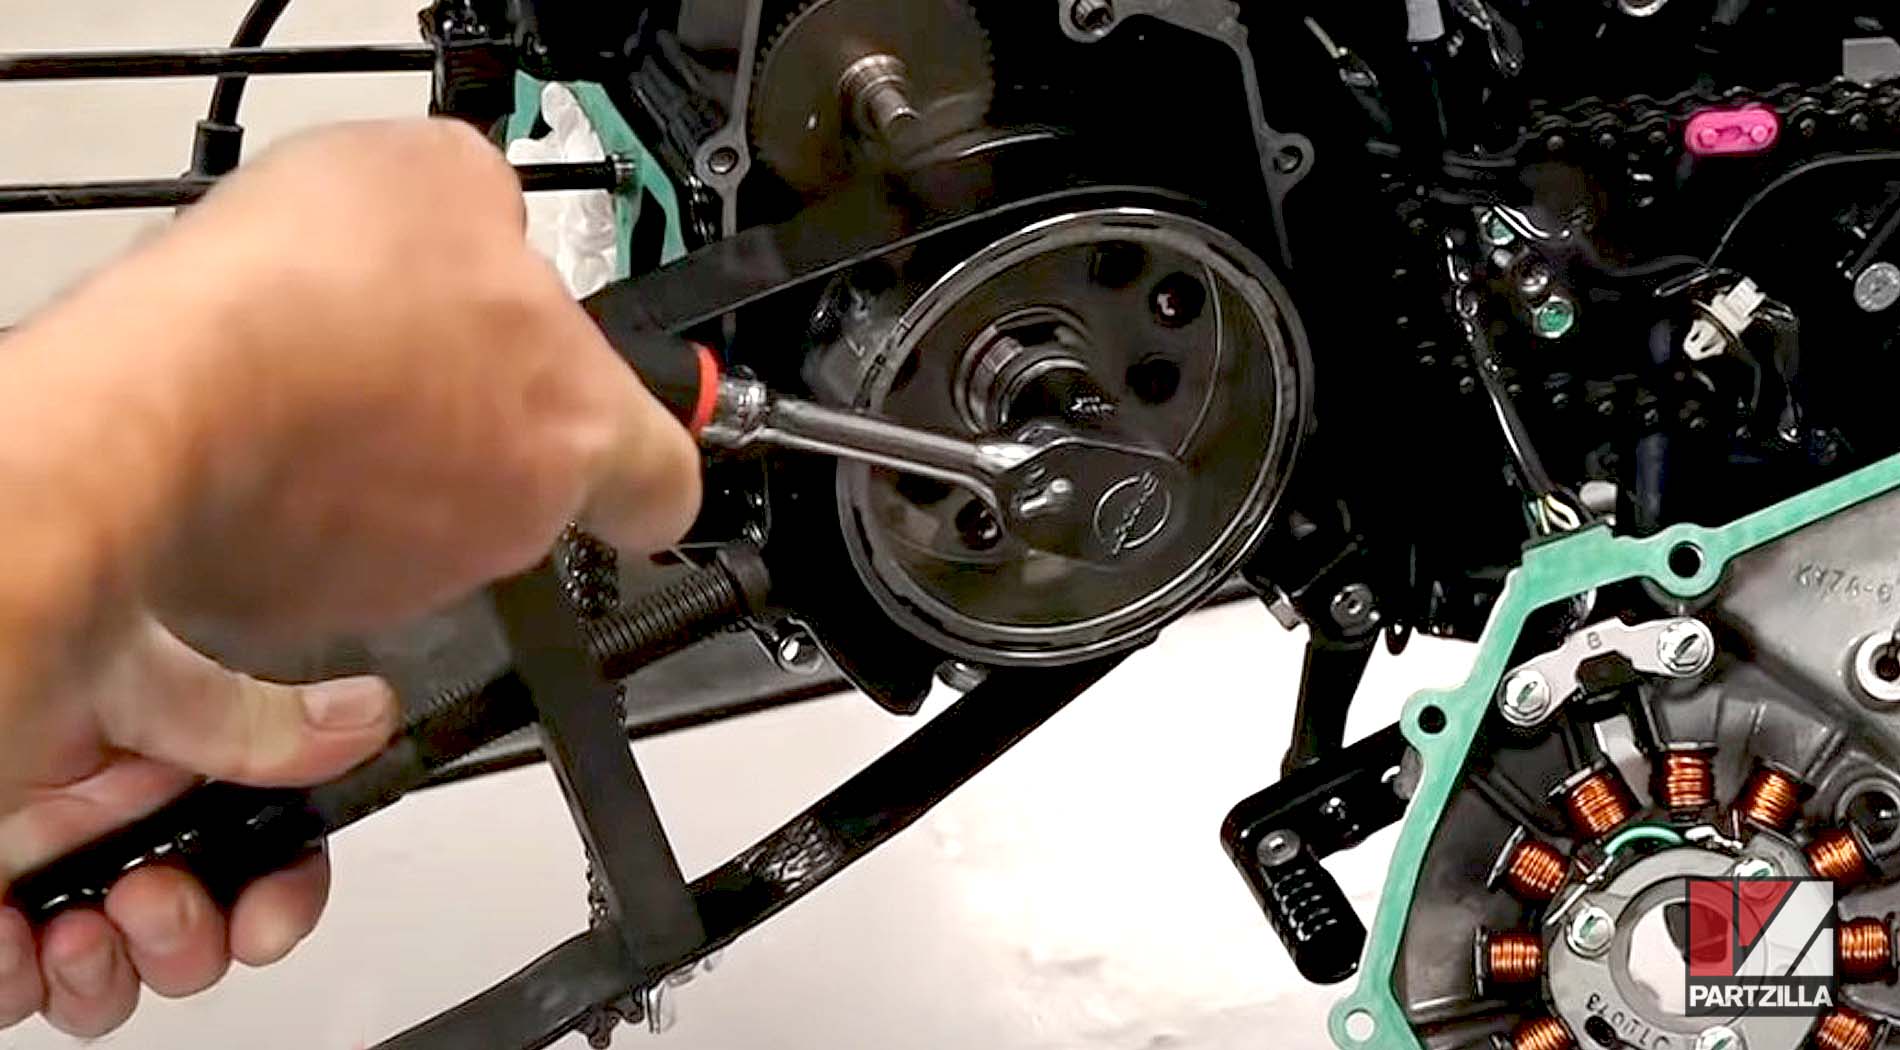
NOTE: Don’t lose the woodruff key in the crankshaft.
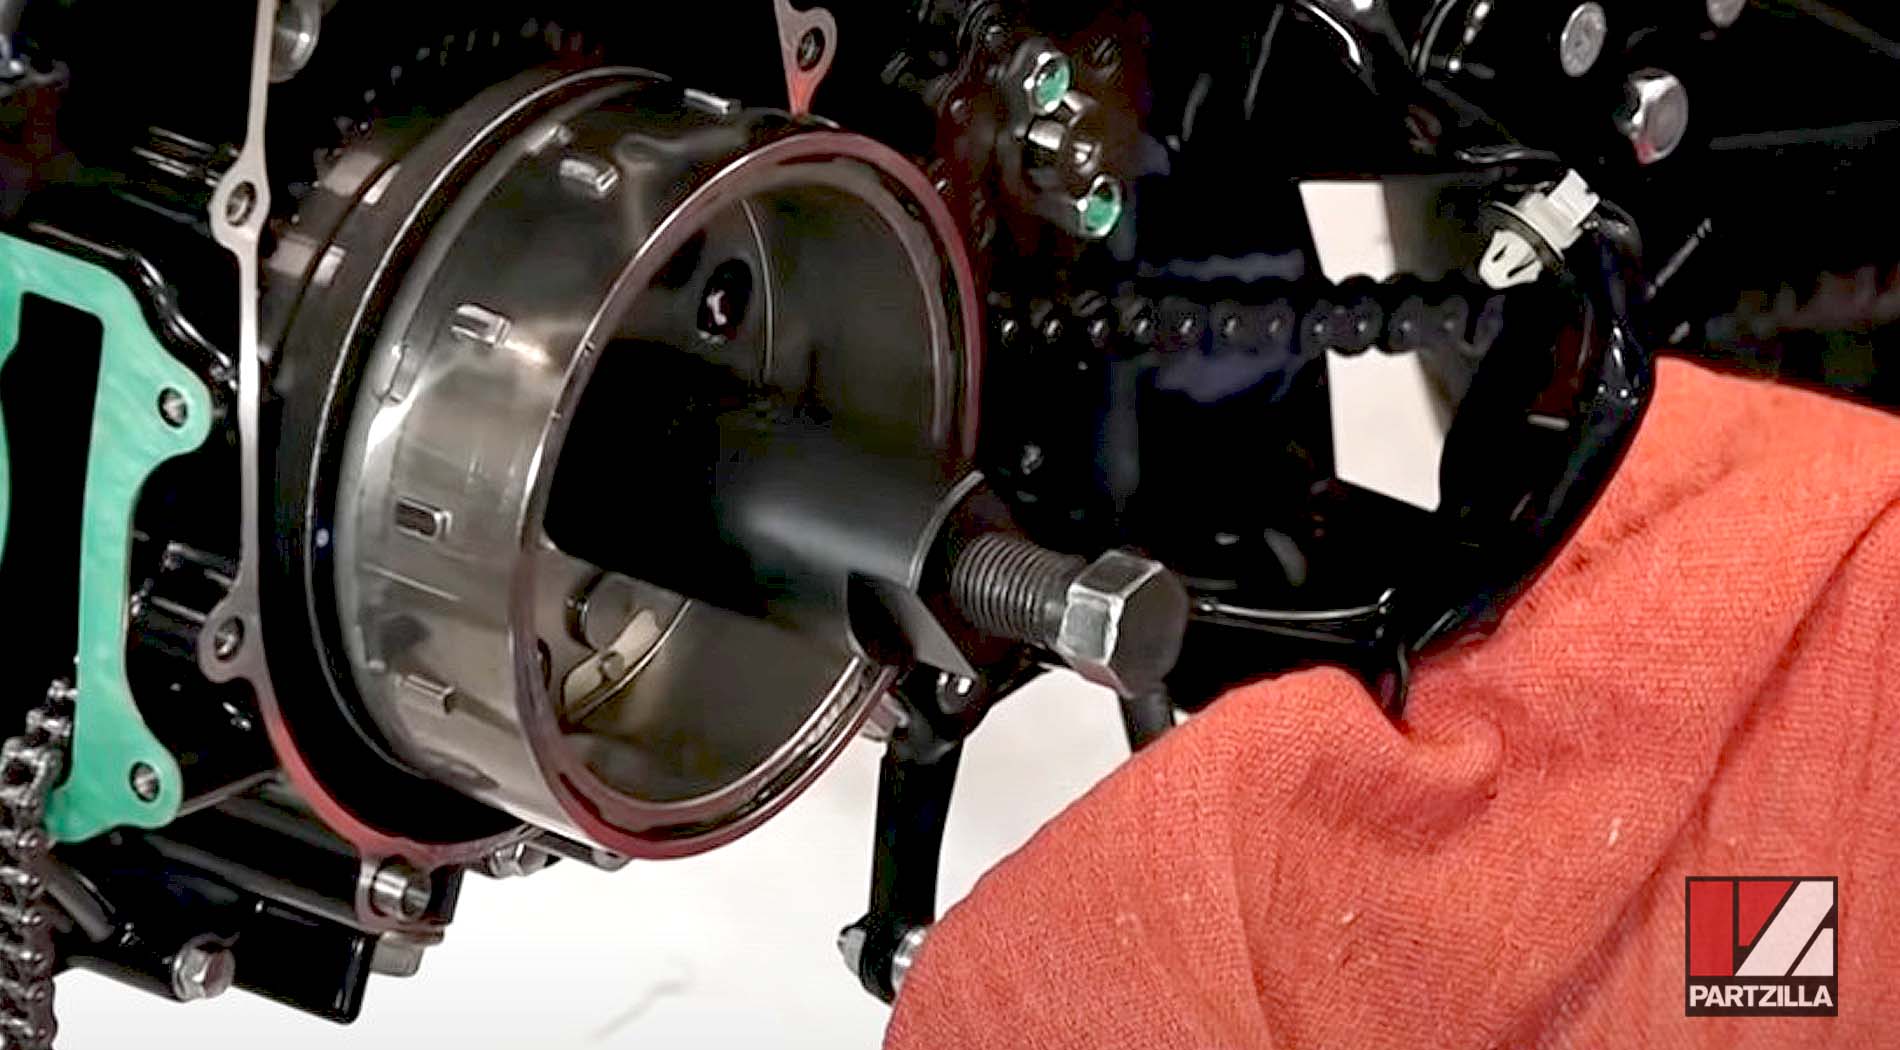
Step 3. Remove the bolt from the bottom of the crankcase, followed by the cam chain tensioner spring and the tensioner push rod.
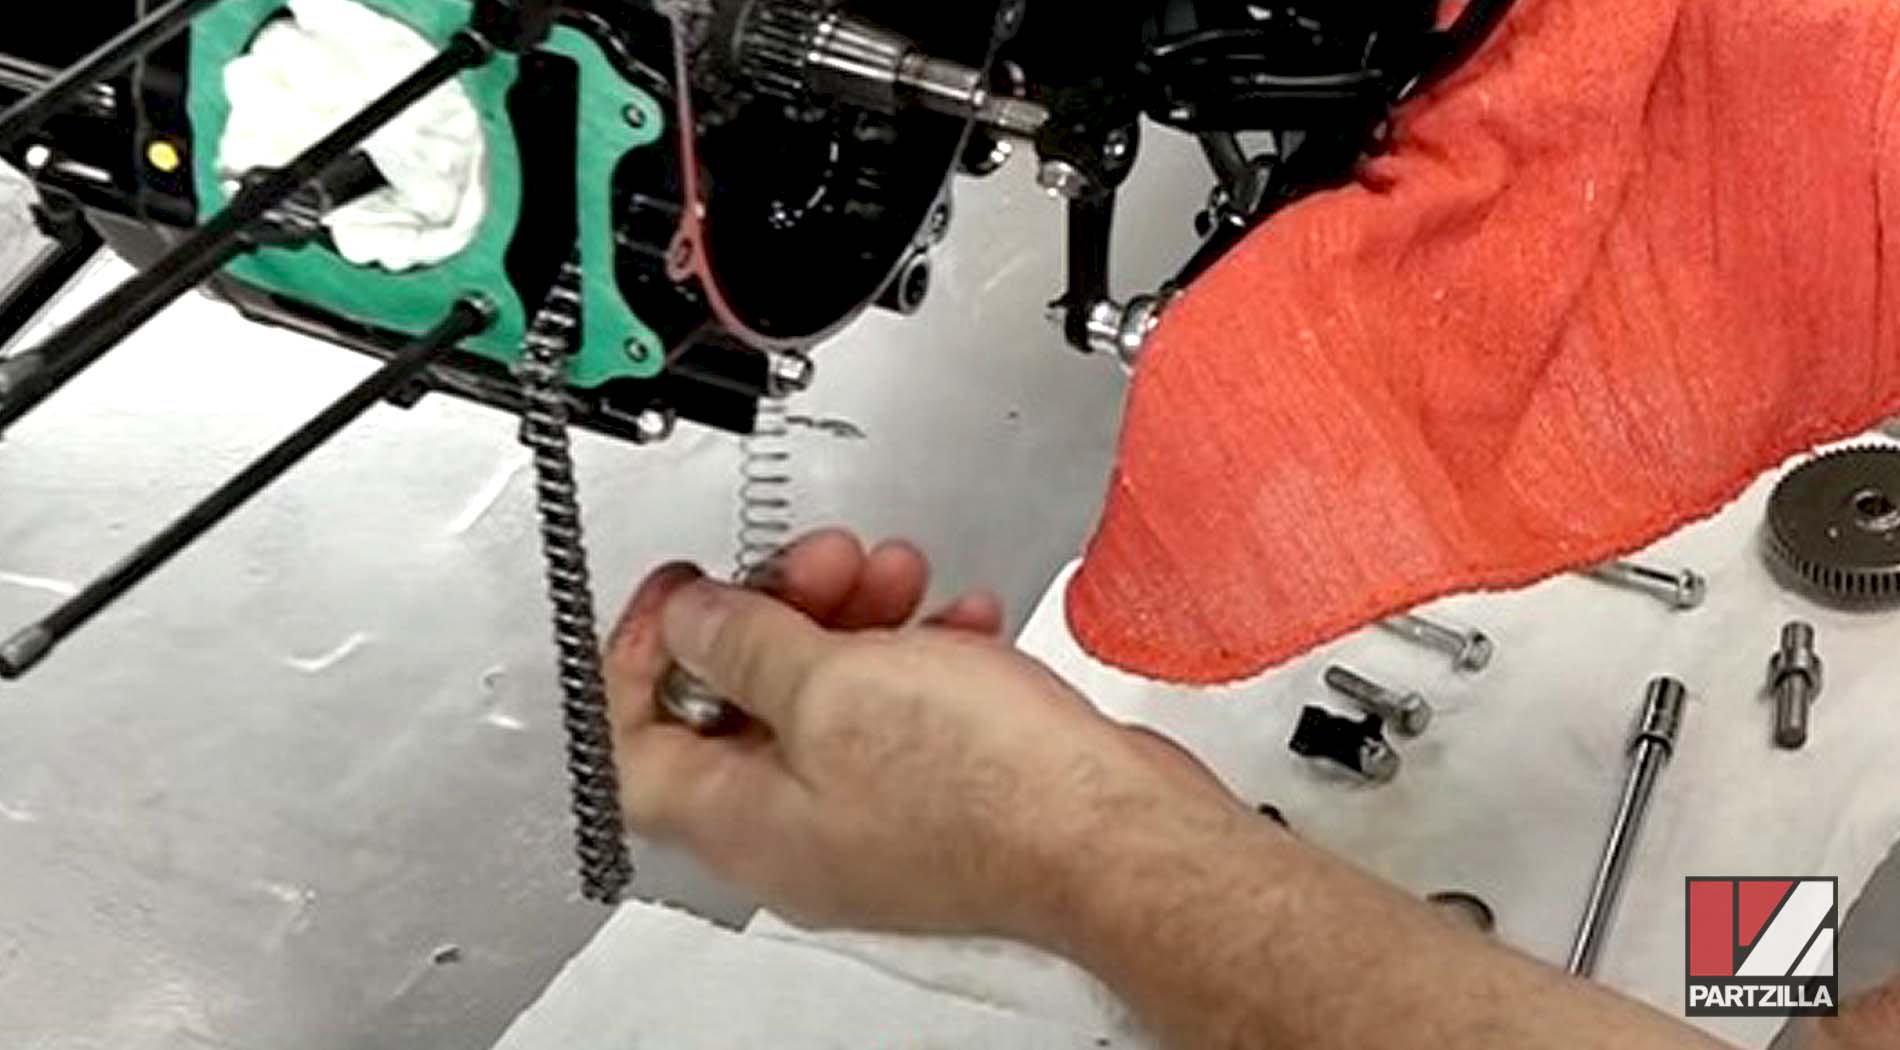
Step 4. Remove the bolt holding the chain tensioner arm. Next, remove the collar, washer and the tensioner arm. Install the new chain tensioner arm and collar (both included in the KOSO chain tensioner kit), and torque the bolt to 16Nm or 11.8 foot-pounds
Step 5. Remove the cam chain guide roller bolt and the chain guide roller. Install the new cam chain guide roller (included in the KOSO chain tensioner kit), and torque the bolt to 10Nm or 7.5 foot-pounds.
Watch the clip below to see the cam chain tensioner installation segment of our Honda Grom big bore kit upgrade video.
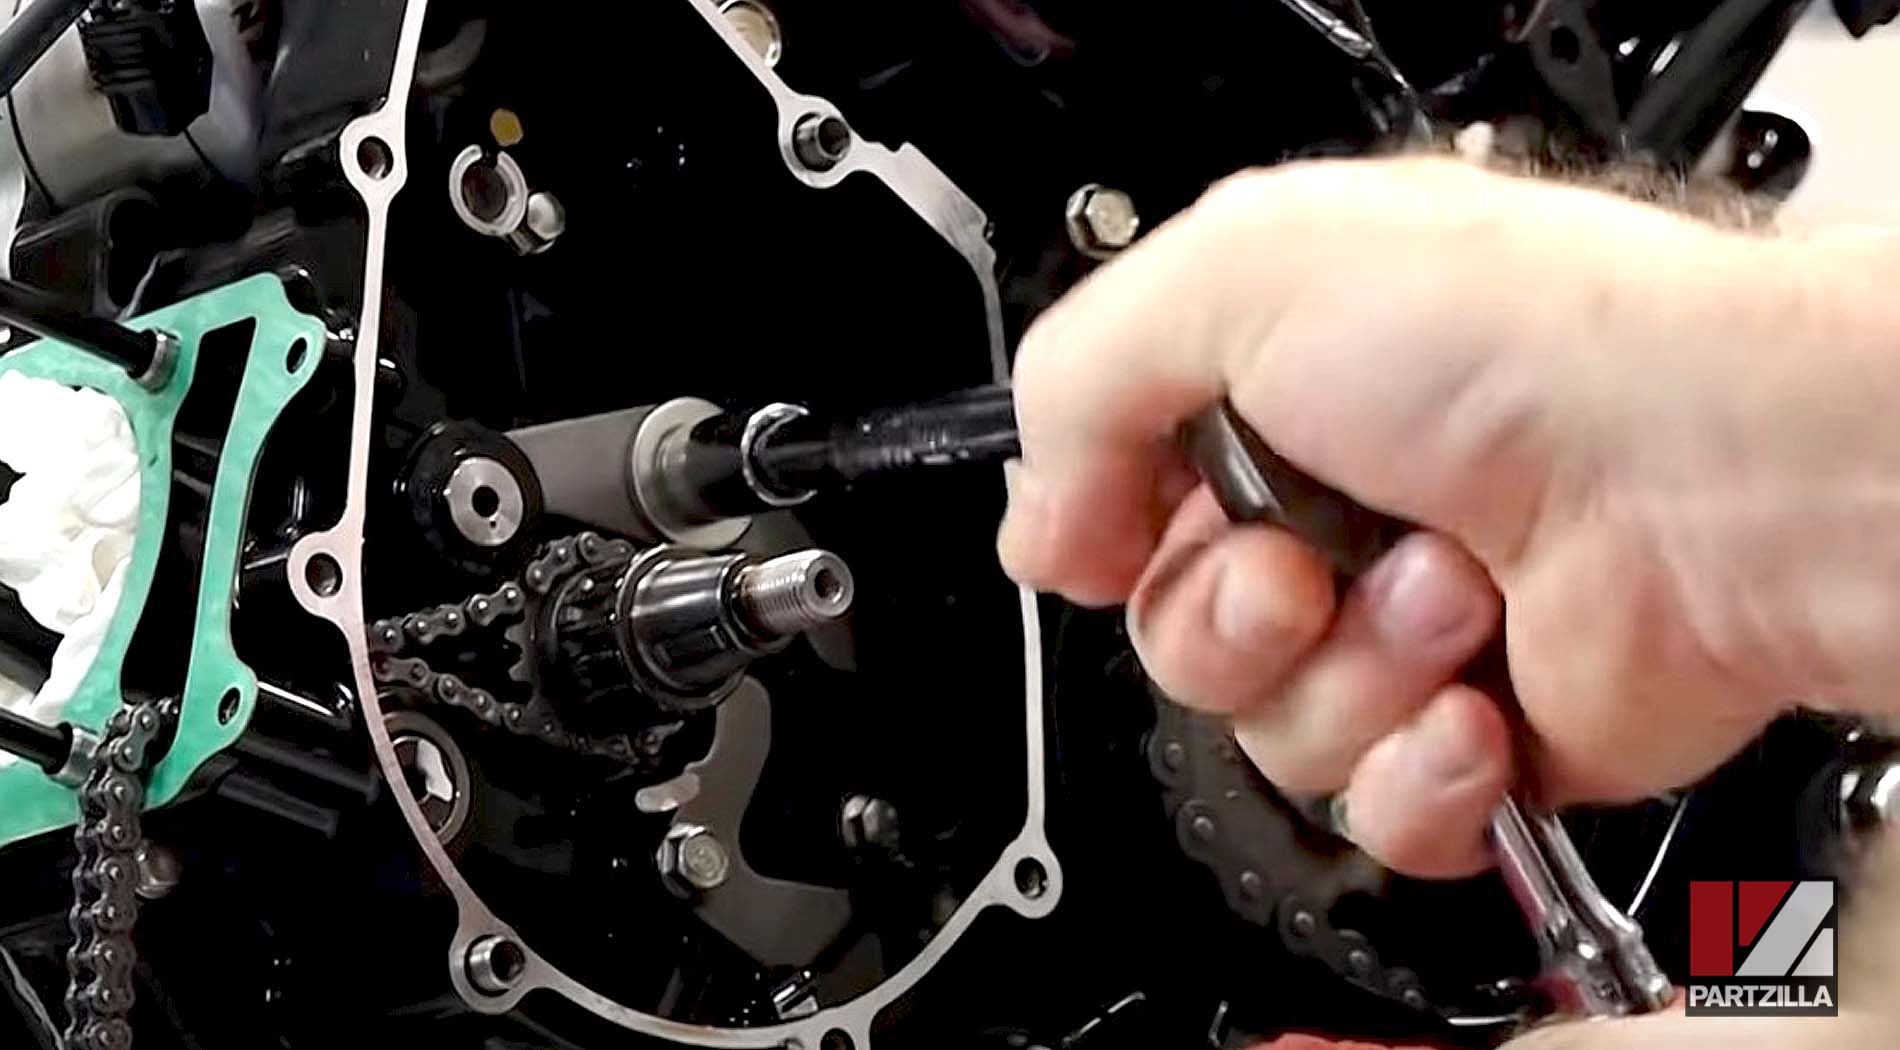
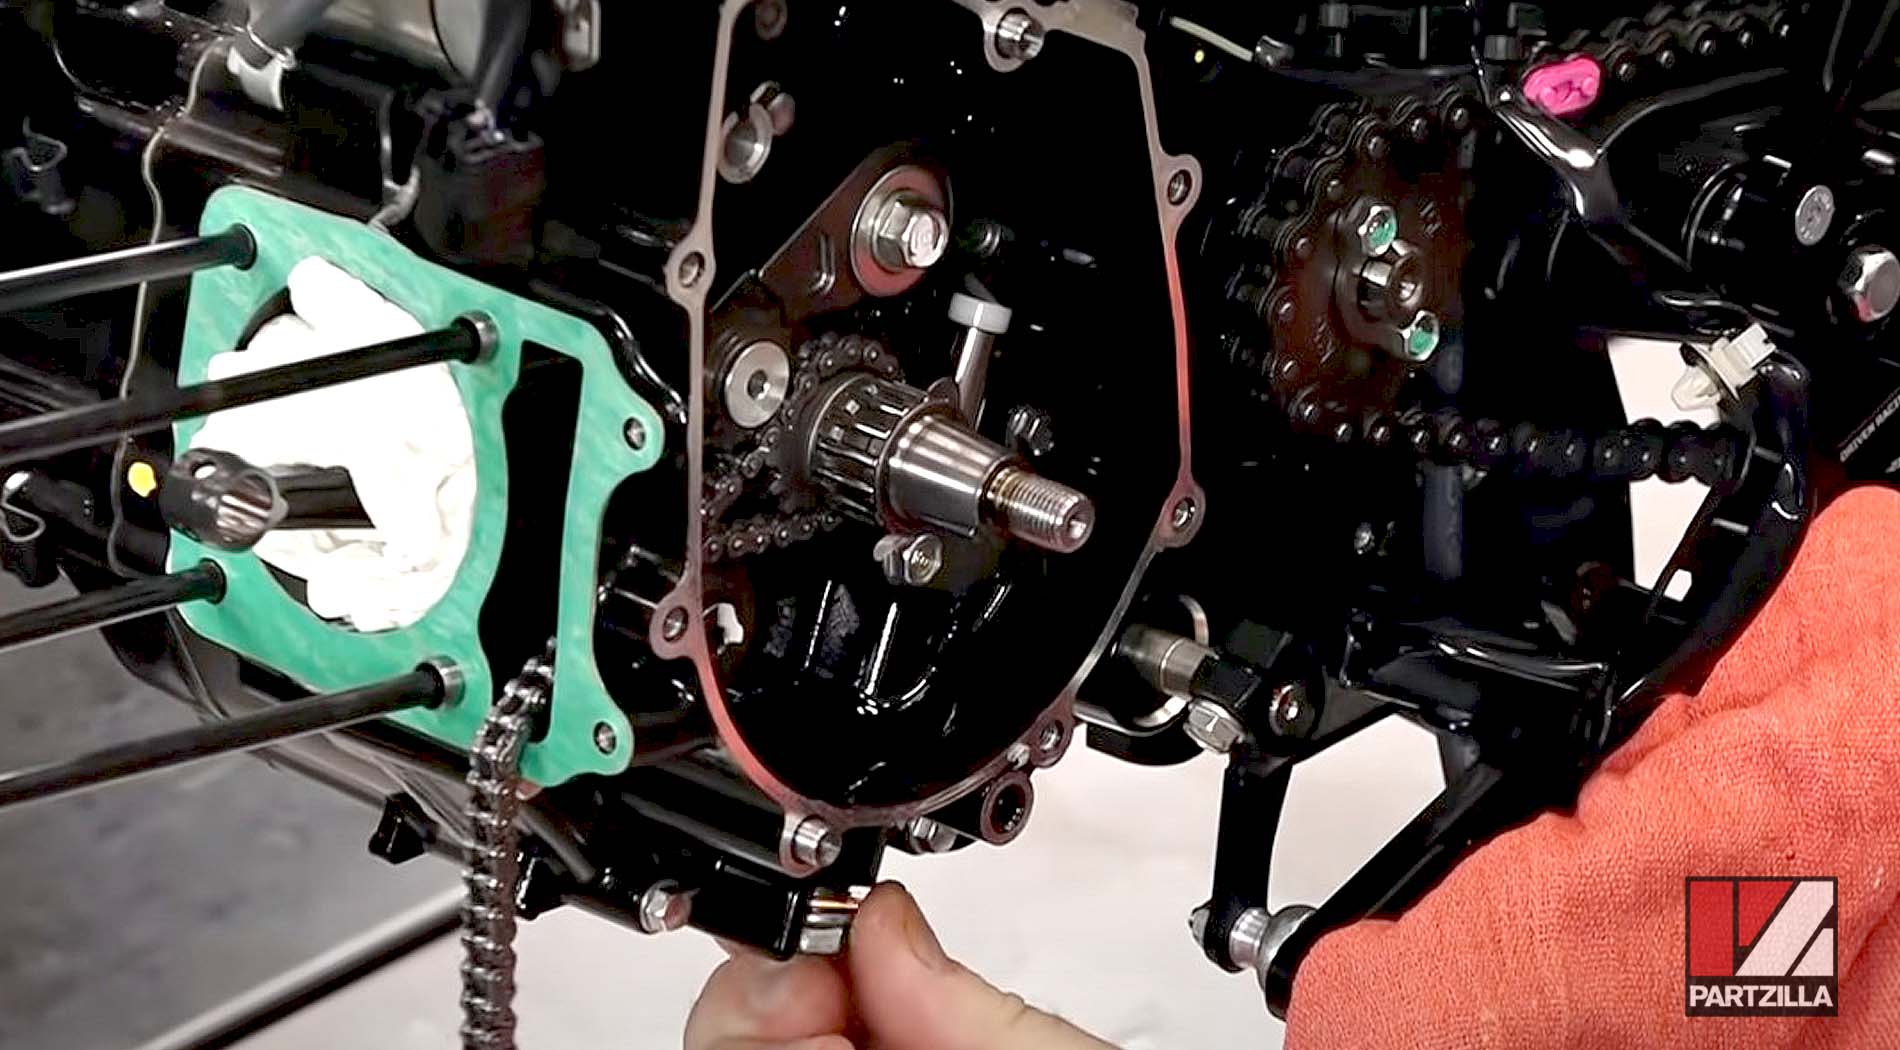
Step 6. Reinstall the tensioner push rod, the cam chain tensioner spring and the bolt into the crankcase. Torque the bolt to 22Nm or 16 foot-pounds.
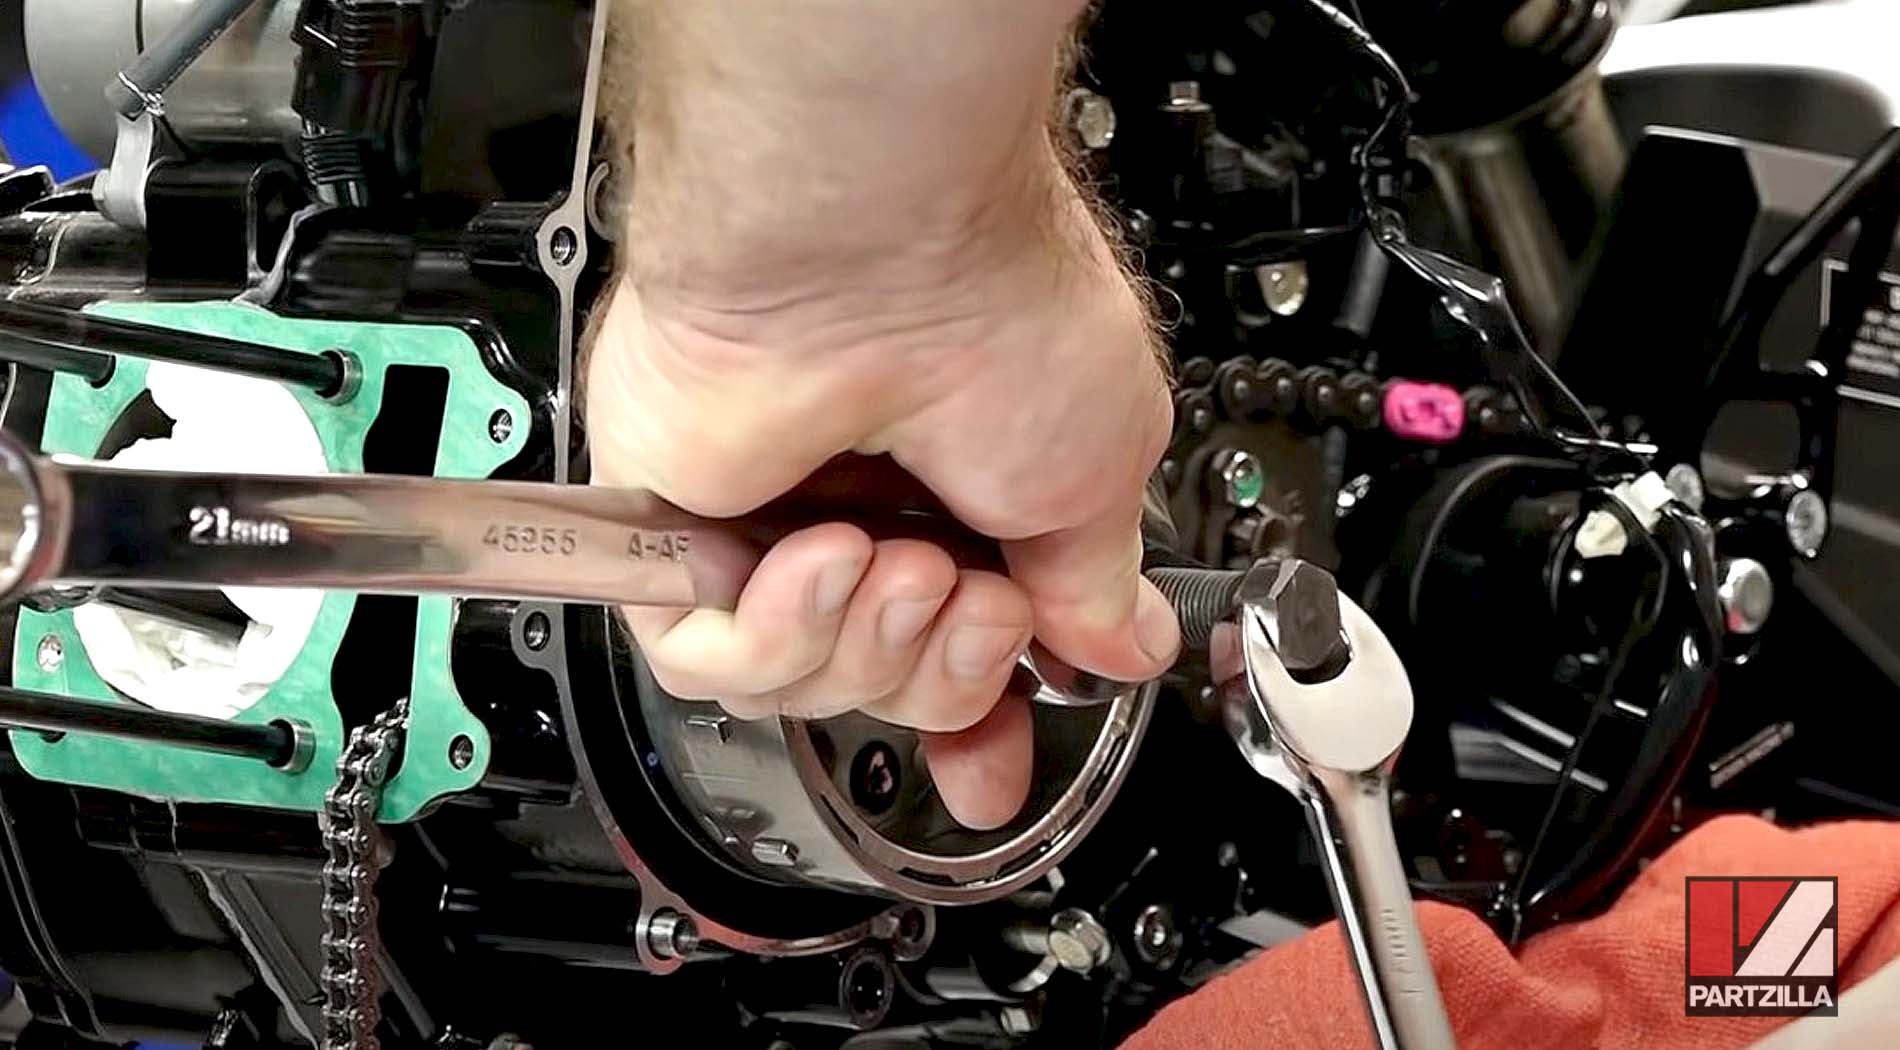
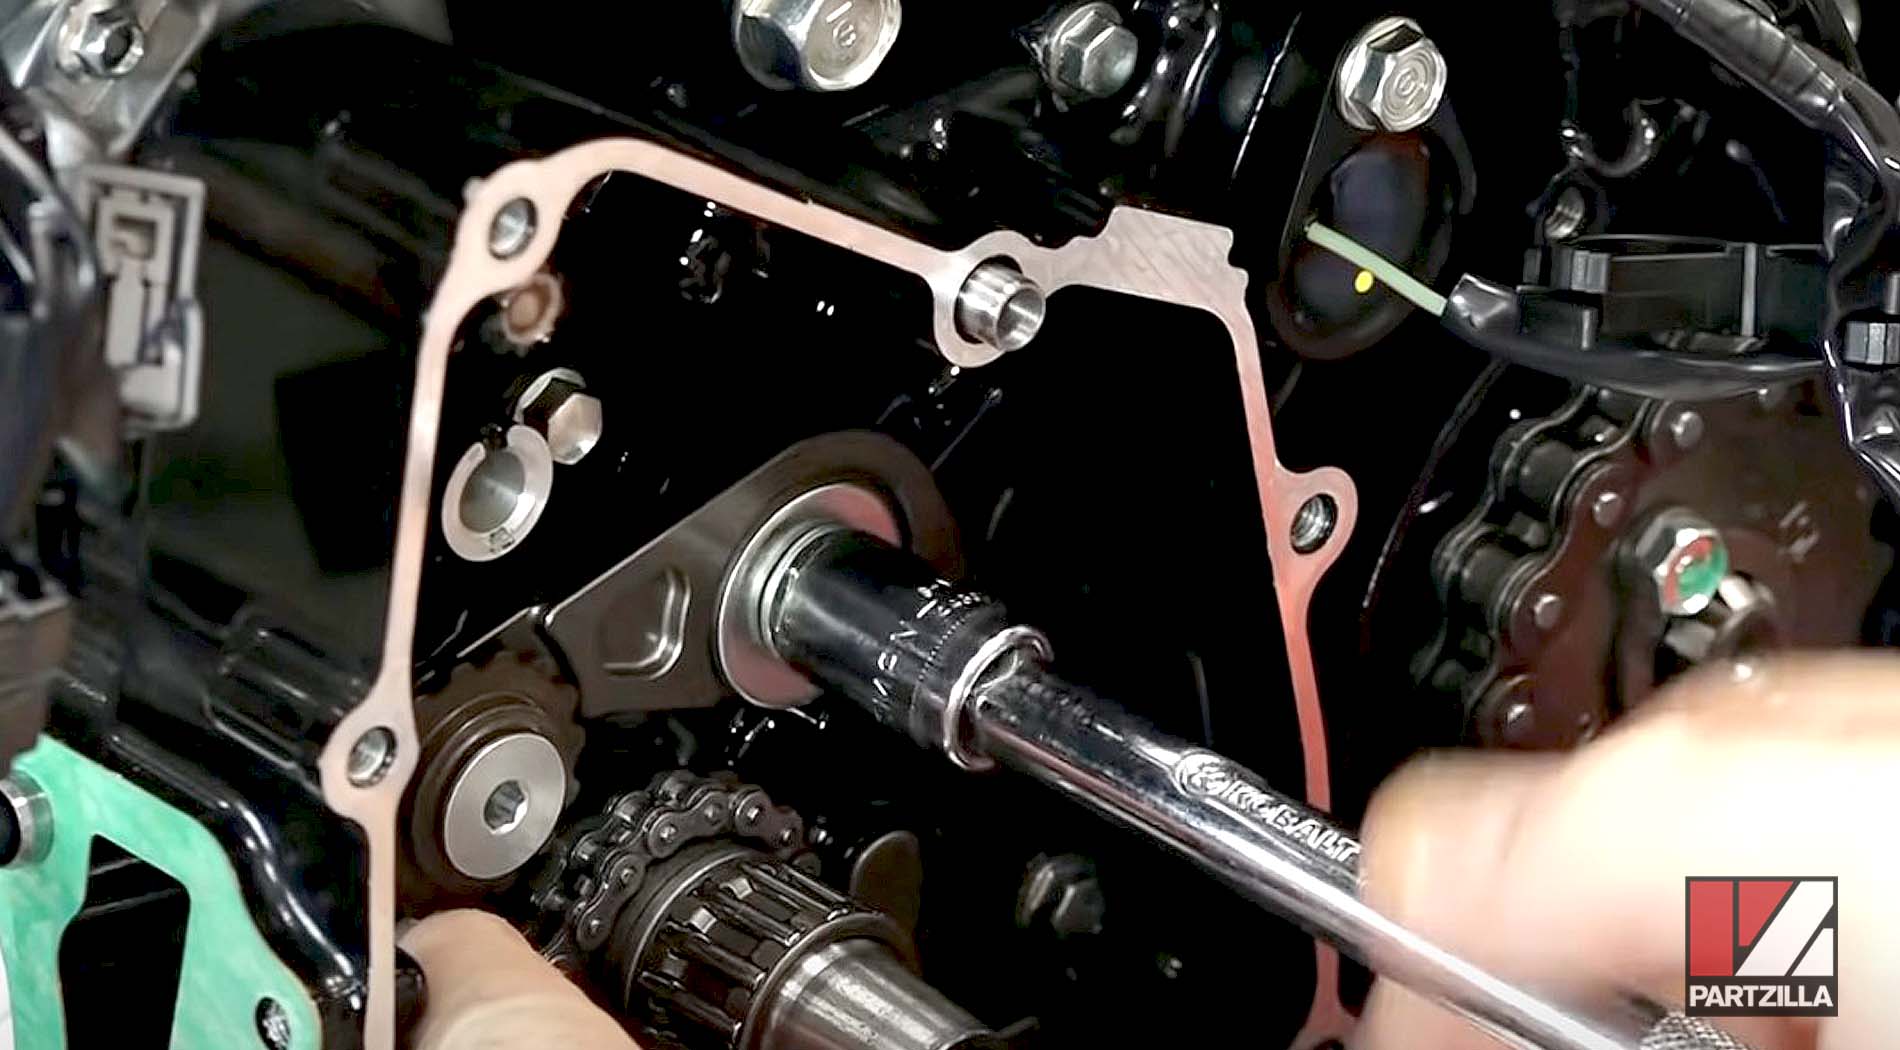
Step 7. Reinstall the flywheel, the washer and nut, then hold the flywheel with a sheave holder and torque the nut to 64Nm or 47 foot-pounds.
Step 8. Reinstall the starter reduction gear and its shaft and collar, along with the new left crankcase cover gasket.
Step 9. Reinstall the crankcase cover and the cover to the rear of it, then torque the cover bolts to 8 foot-pounds.
Watch the clip below to see the flywheel reinstallation segment of our Honda Grom big bore kit upgrade video.
NOTE: Before installing the big bore kit, it’s important to check the ring gaps in the new piston and cylinder. If the ring gaps are too small, the ring ends will touch once they heat up in a running engine, which will quickly cause damage to the rings and cylinder.
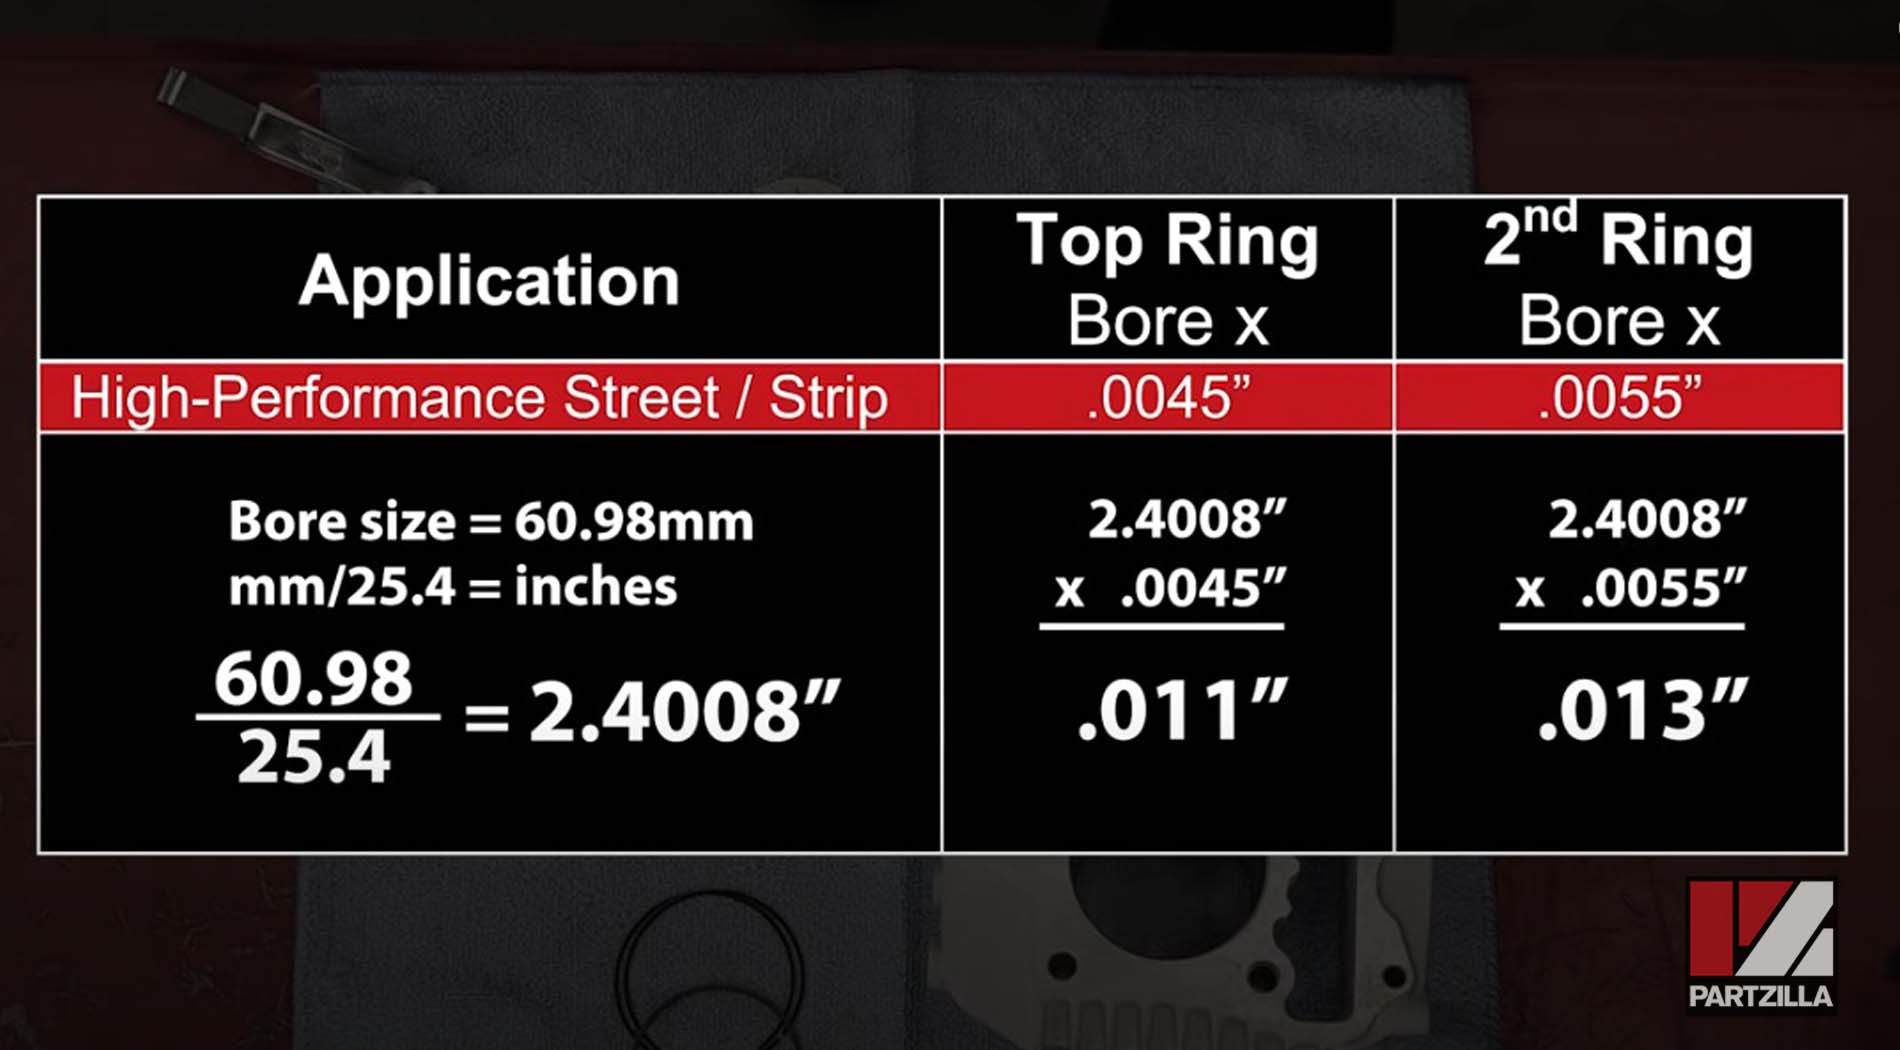
Part 3: Honda Grom Piston Ring Gaps Check
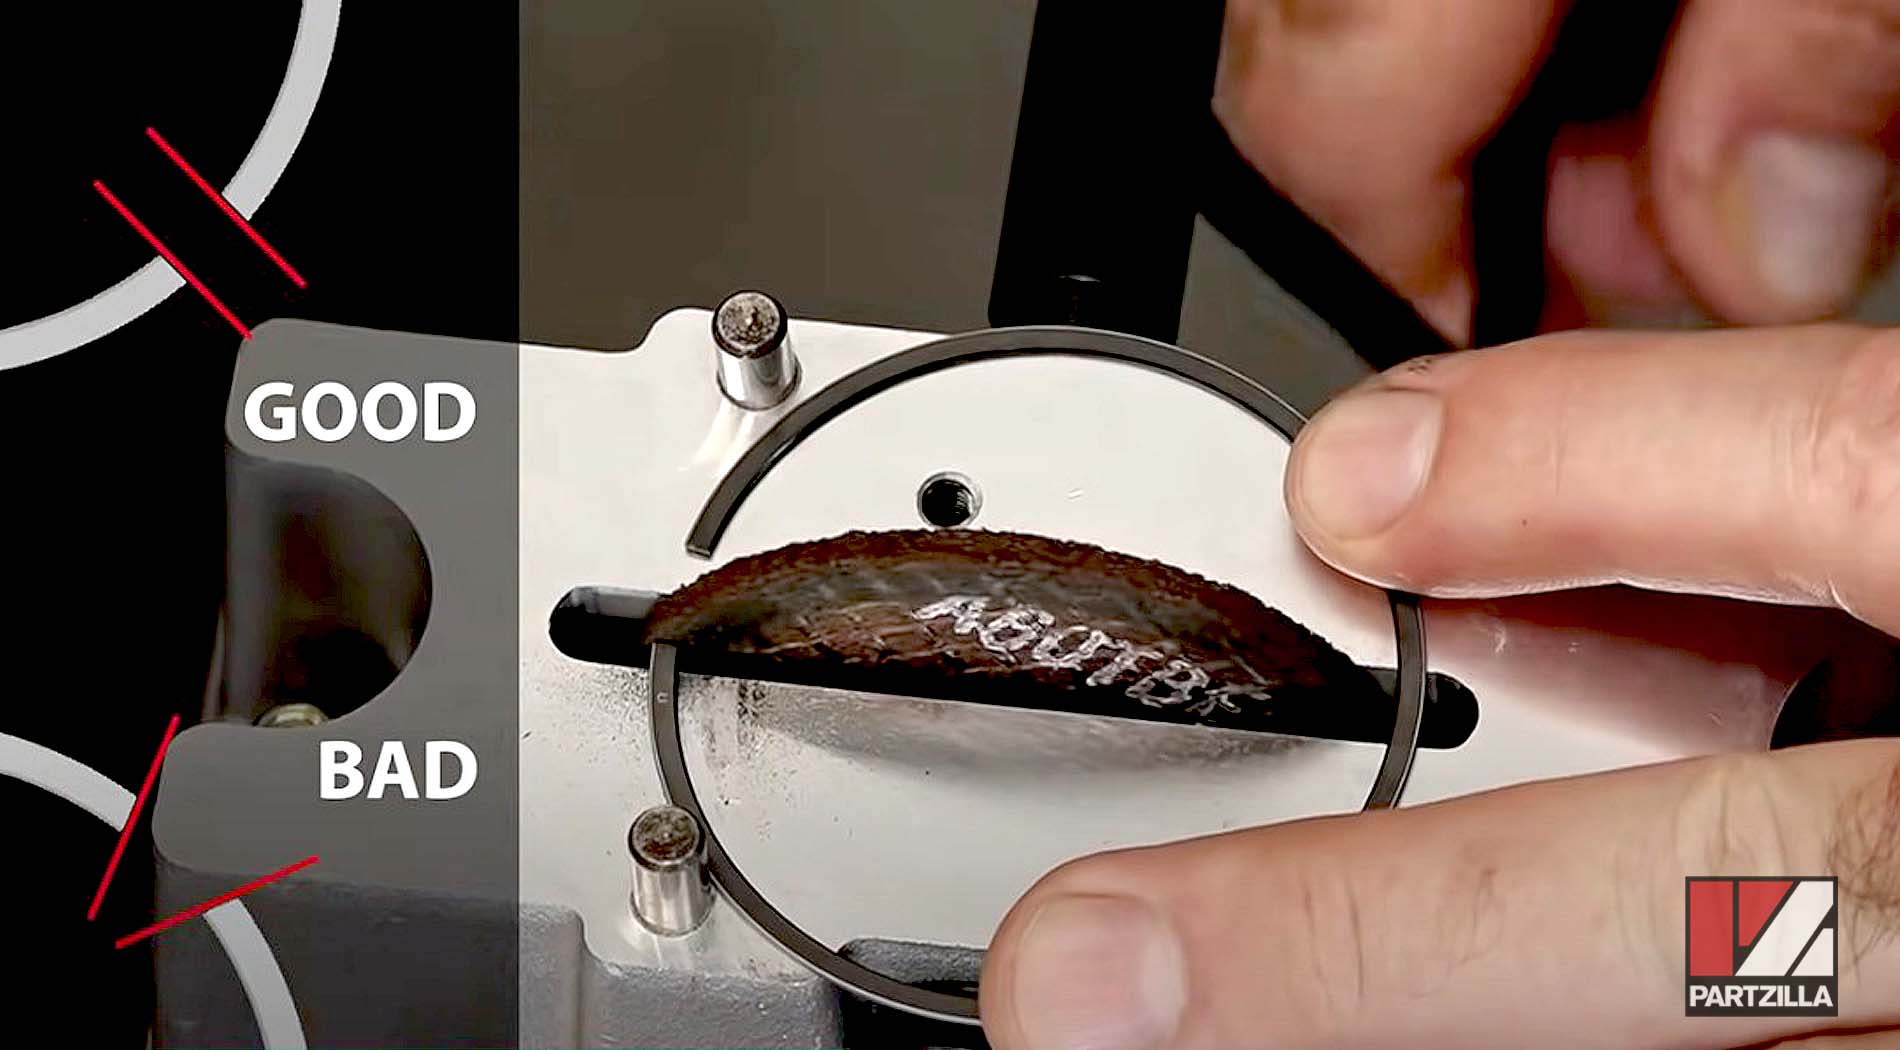
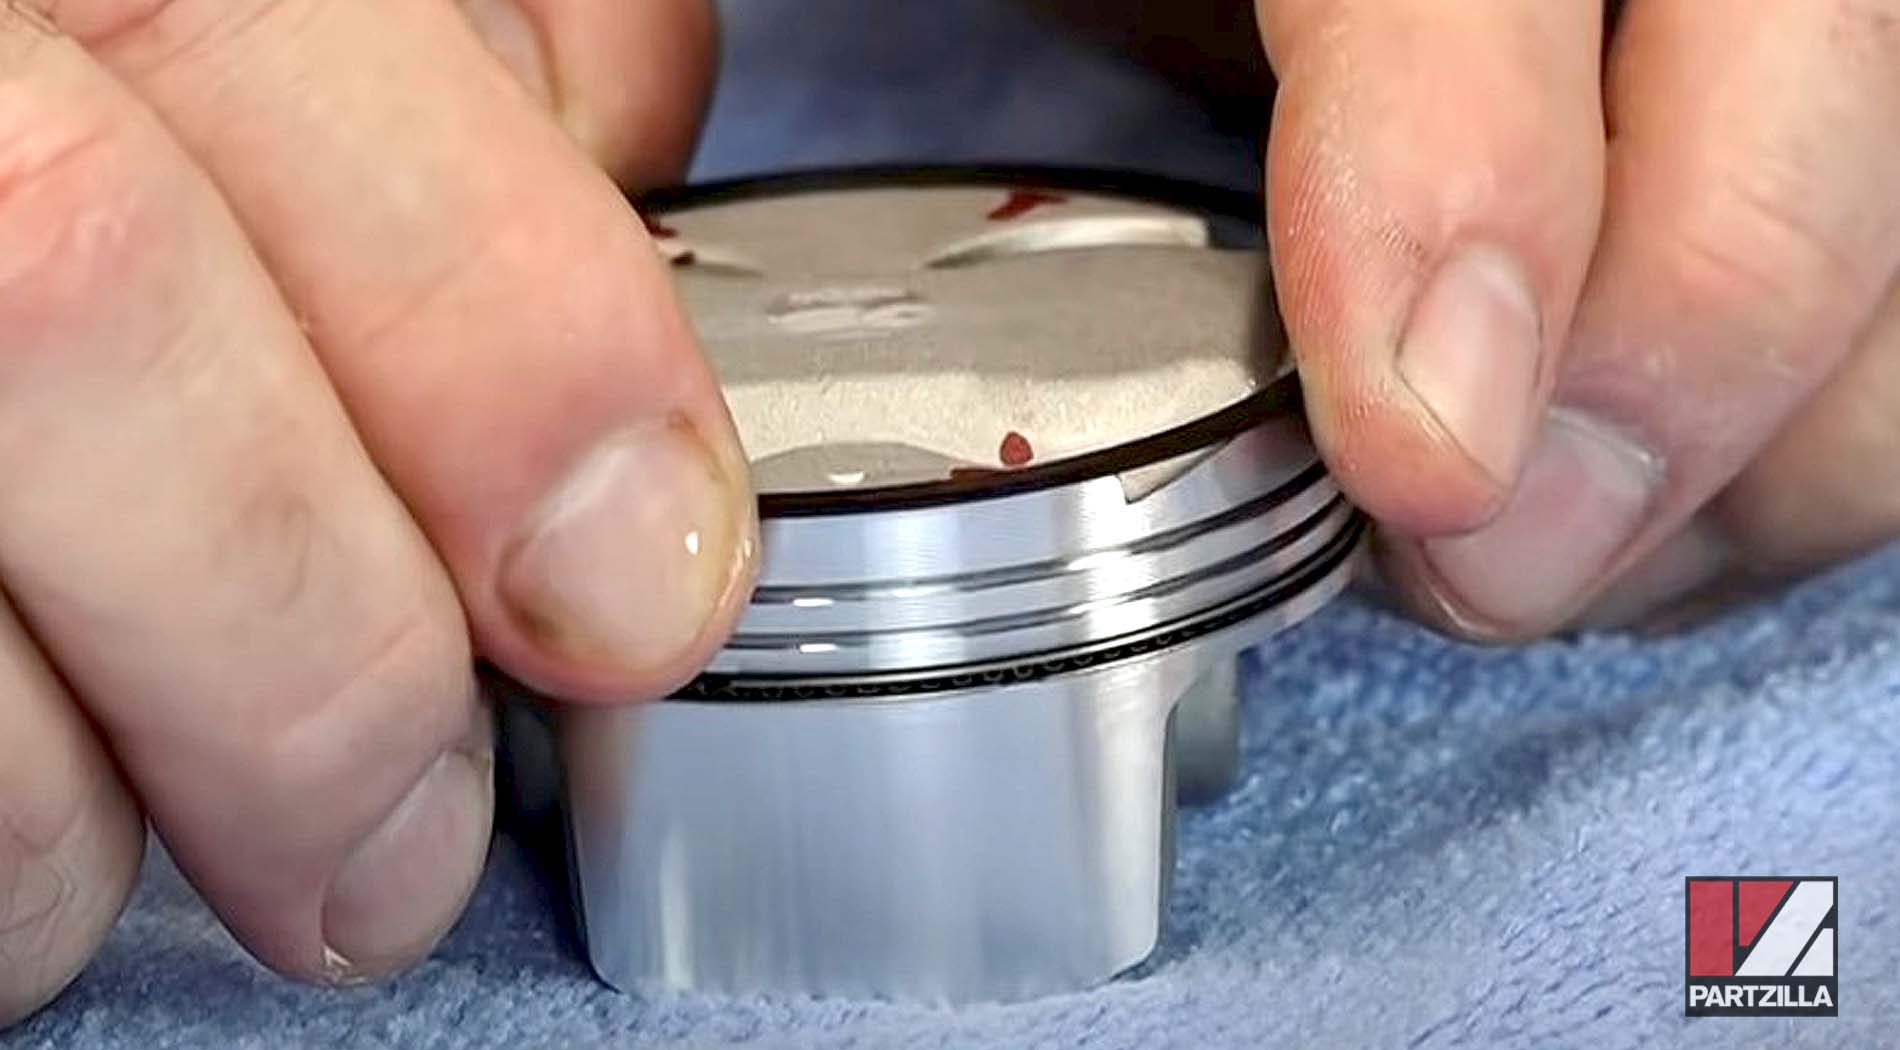
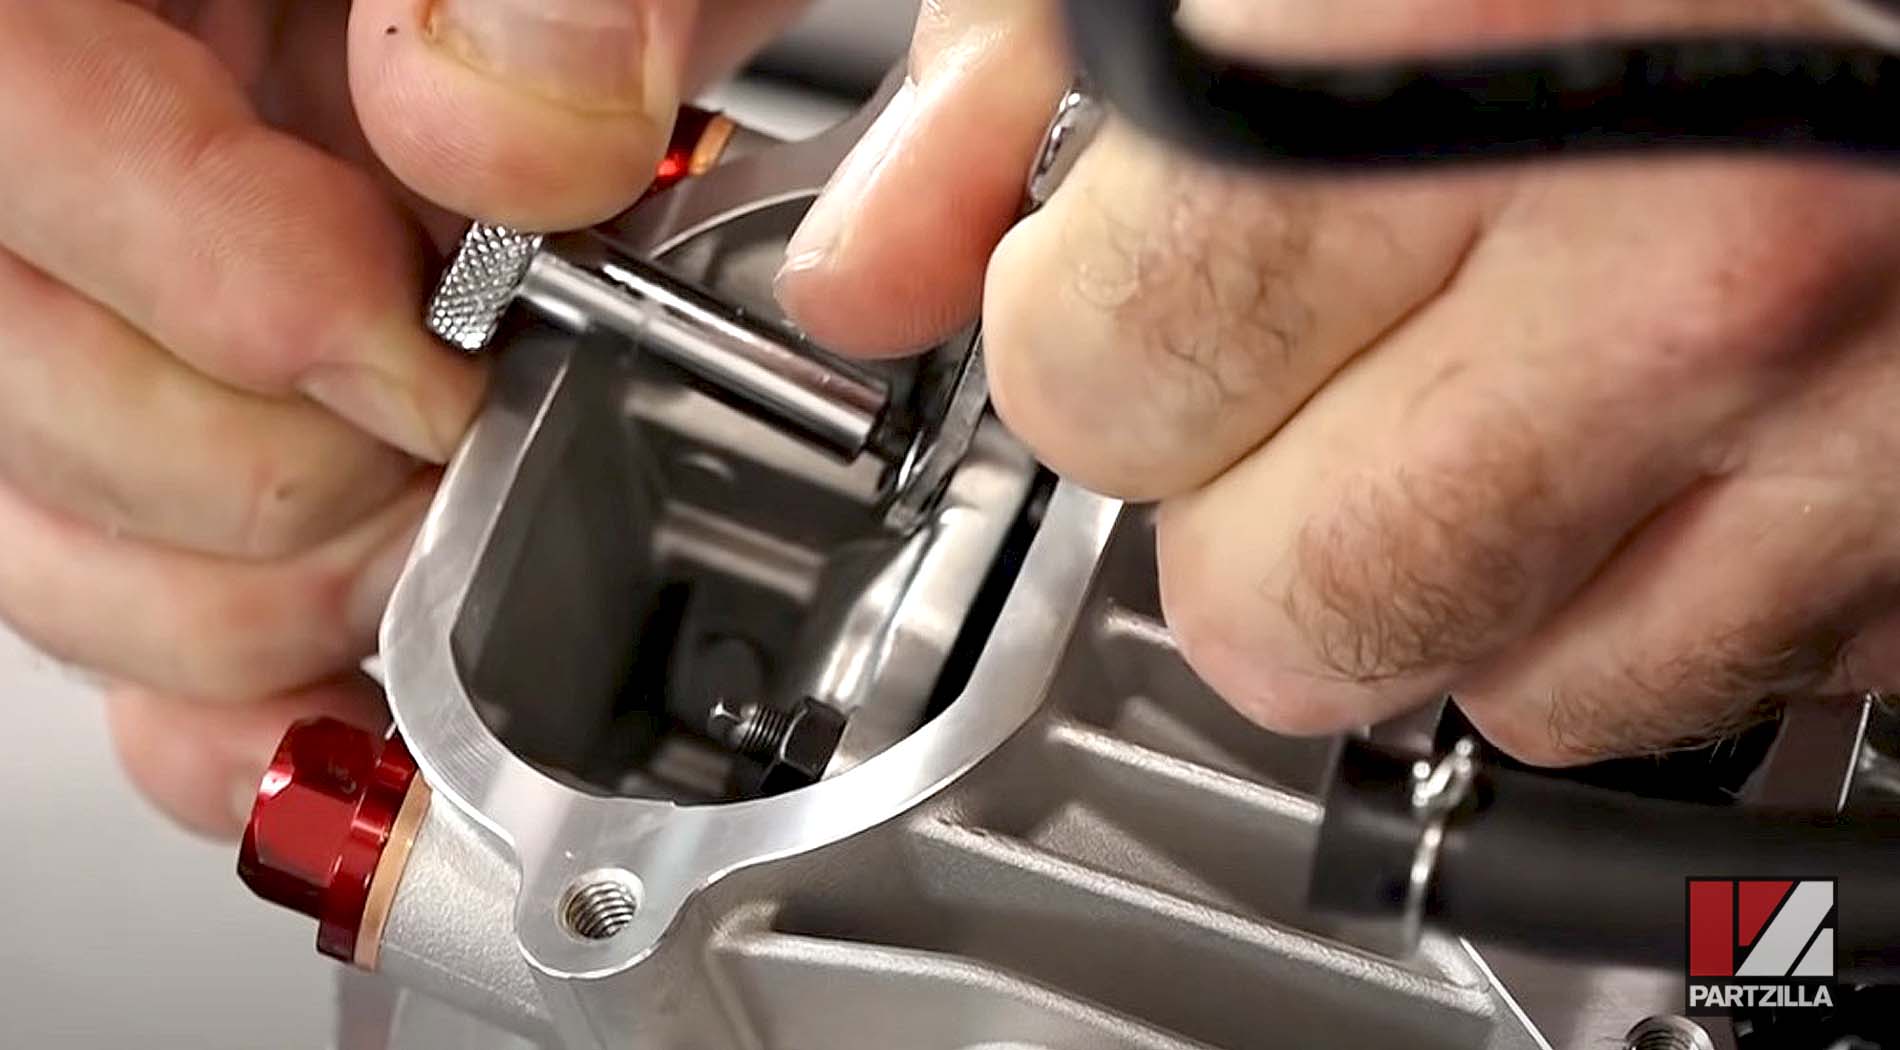
Step 1. Take the top piston ring and seat it in the cylinder using the piston. Use a feeler gauge to measure the clearance between the ends of the piston ring, and compare it to the piston manufacturer’s charts.
Step 2. Carefully remove a tiny amount of material from the end of the piston ring if the gap is too small by using a ring end gap grinder to correct the ring gap. Repeat the gap measuring process for the lower piston ring.
Watch the clip below to see the piston ring gap segment of our Honda Grom big bore kit installation video.
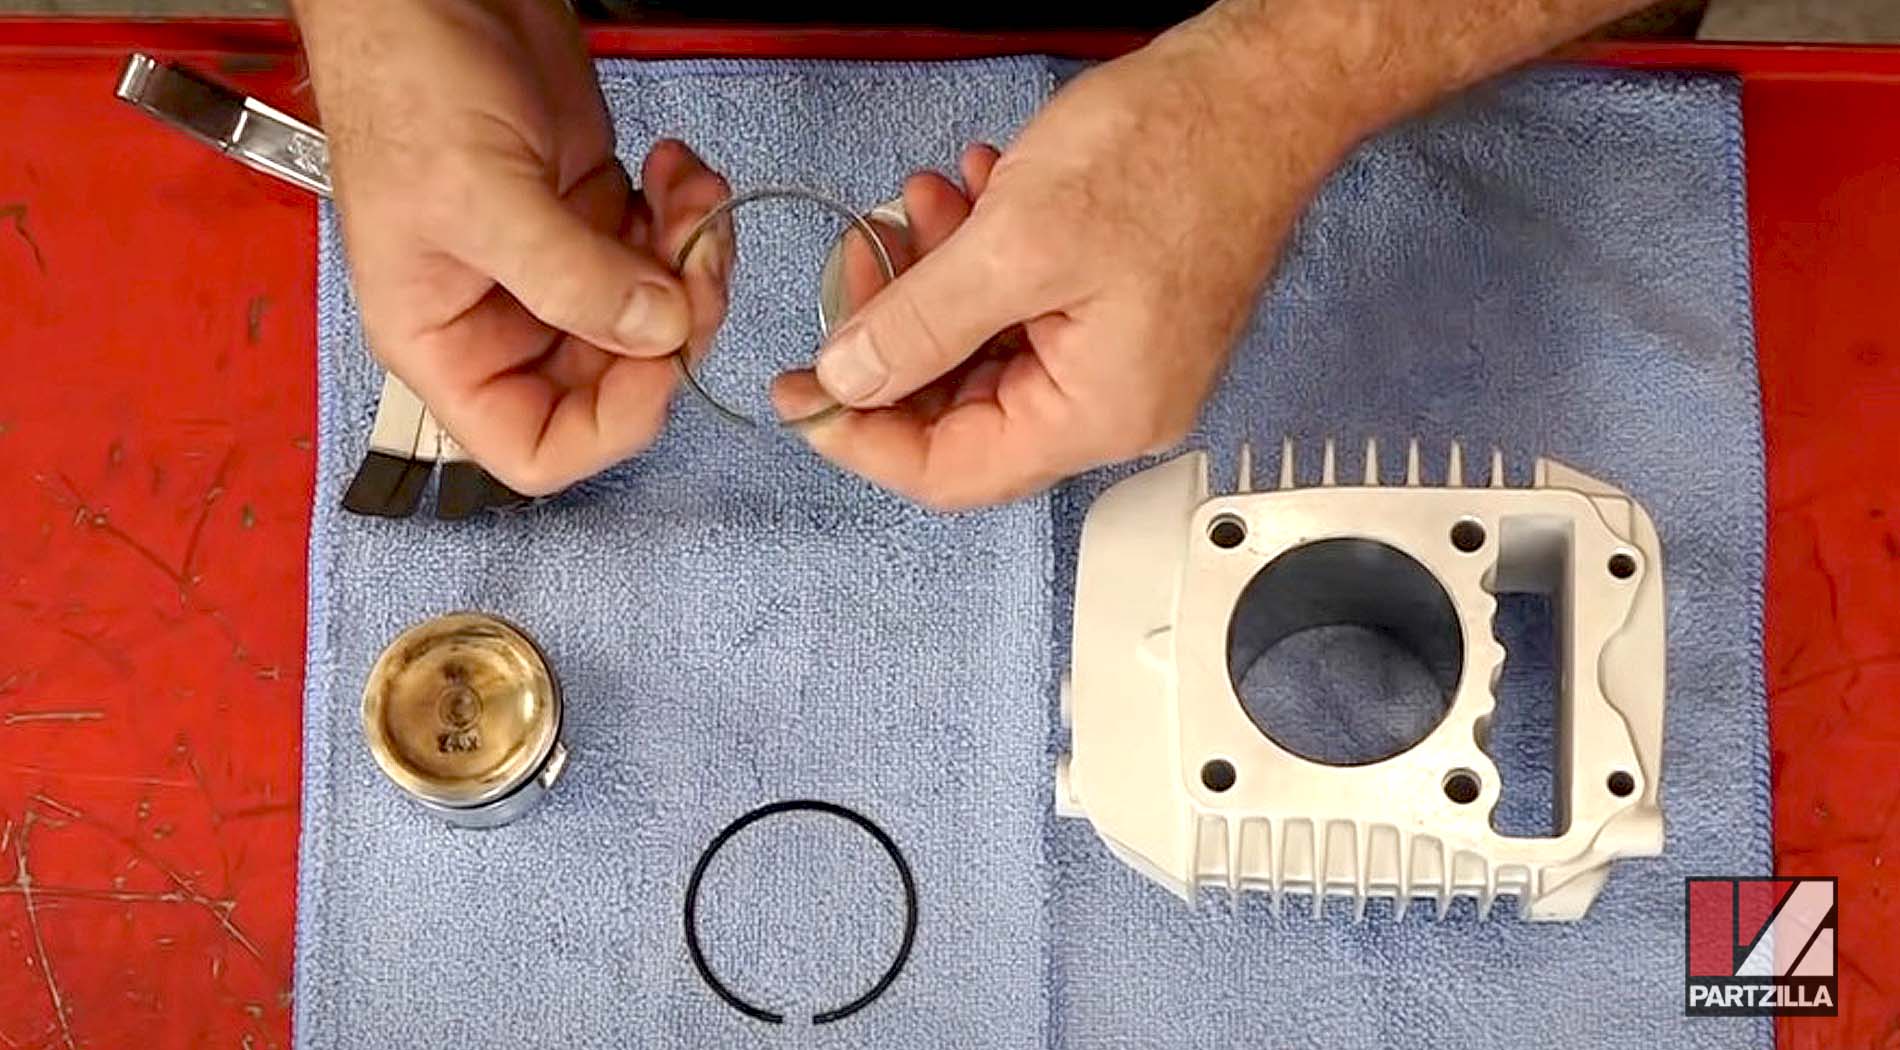
NOTE: It’s important that the new piston rings are set in the correct positions on the new piston (all included in the KOSO big bore kit) to prevent oil or combustion gasses from blowing past the piston.
Part 4: Honda Grom Piston Rings Installation
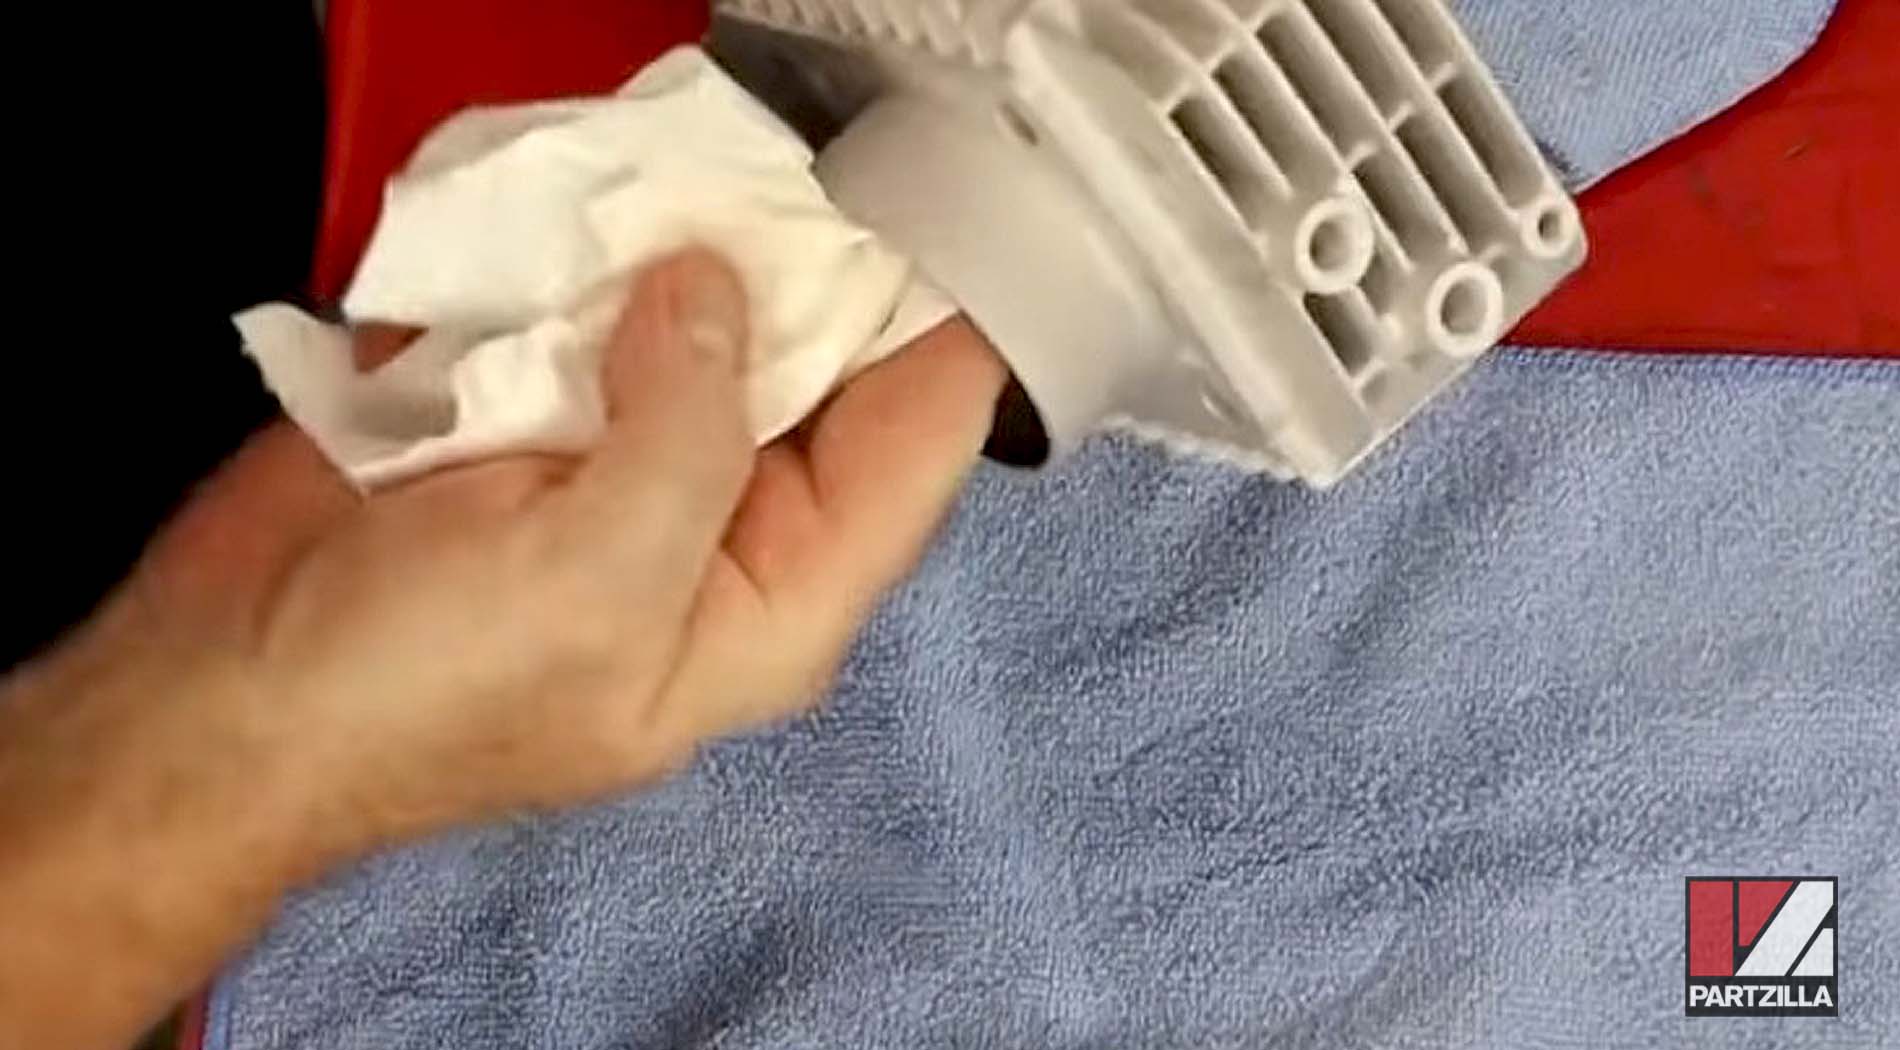
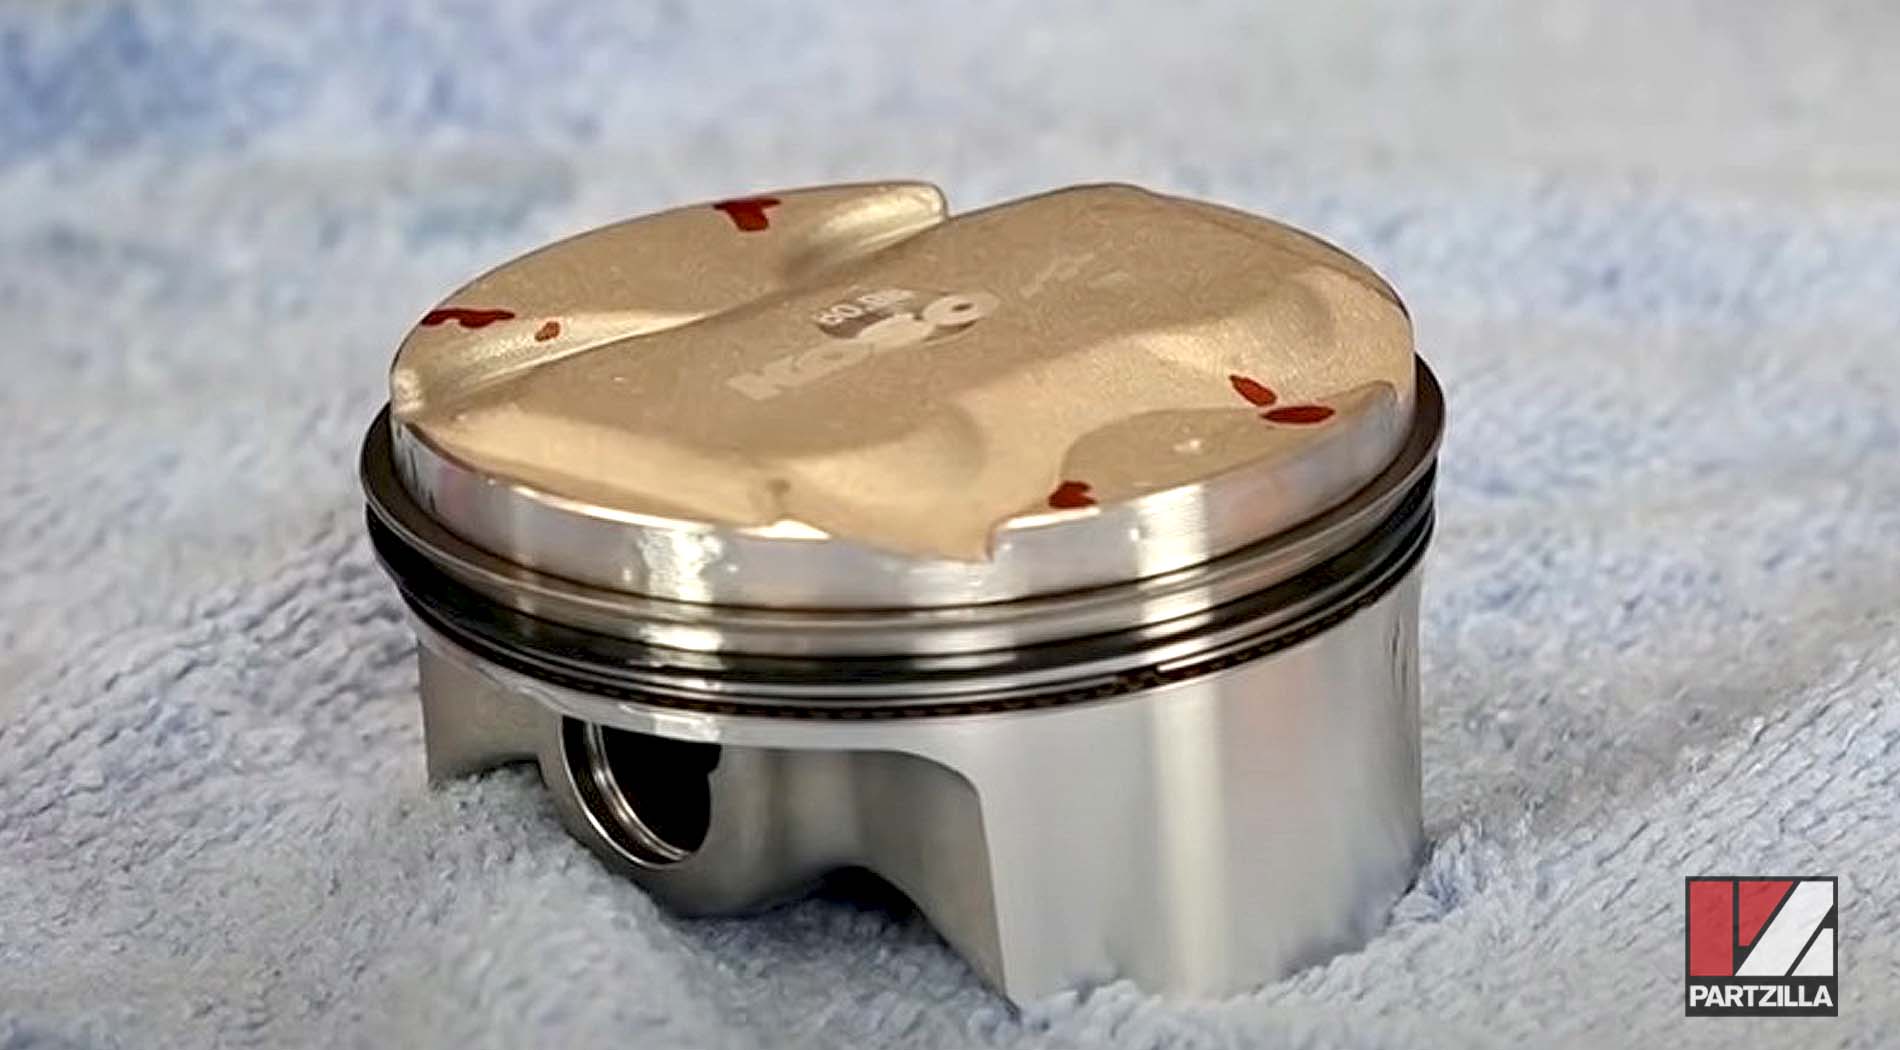
Step 1. Thoroughly clean the new piston, rings and cylinder head with contact/brake cleaner.
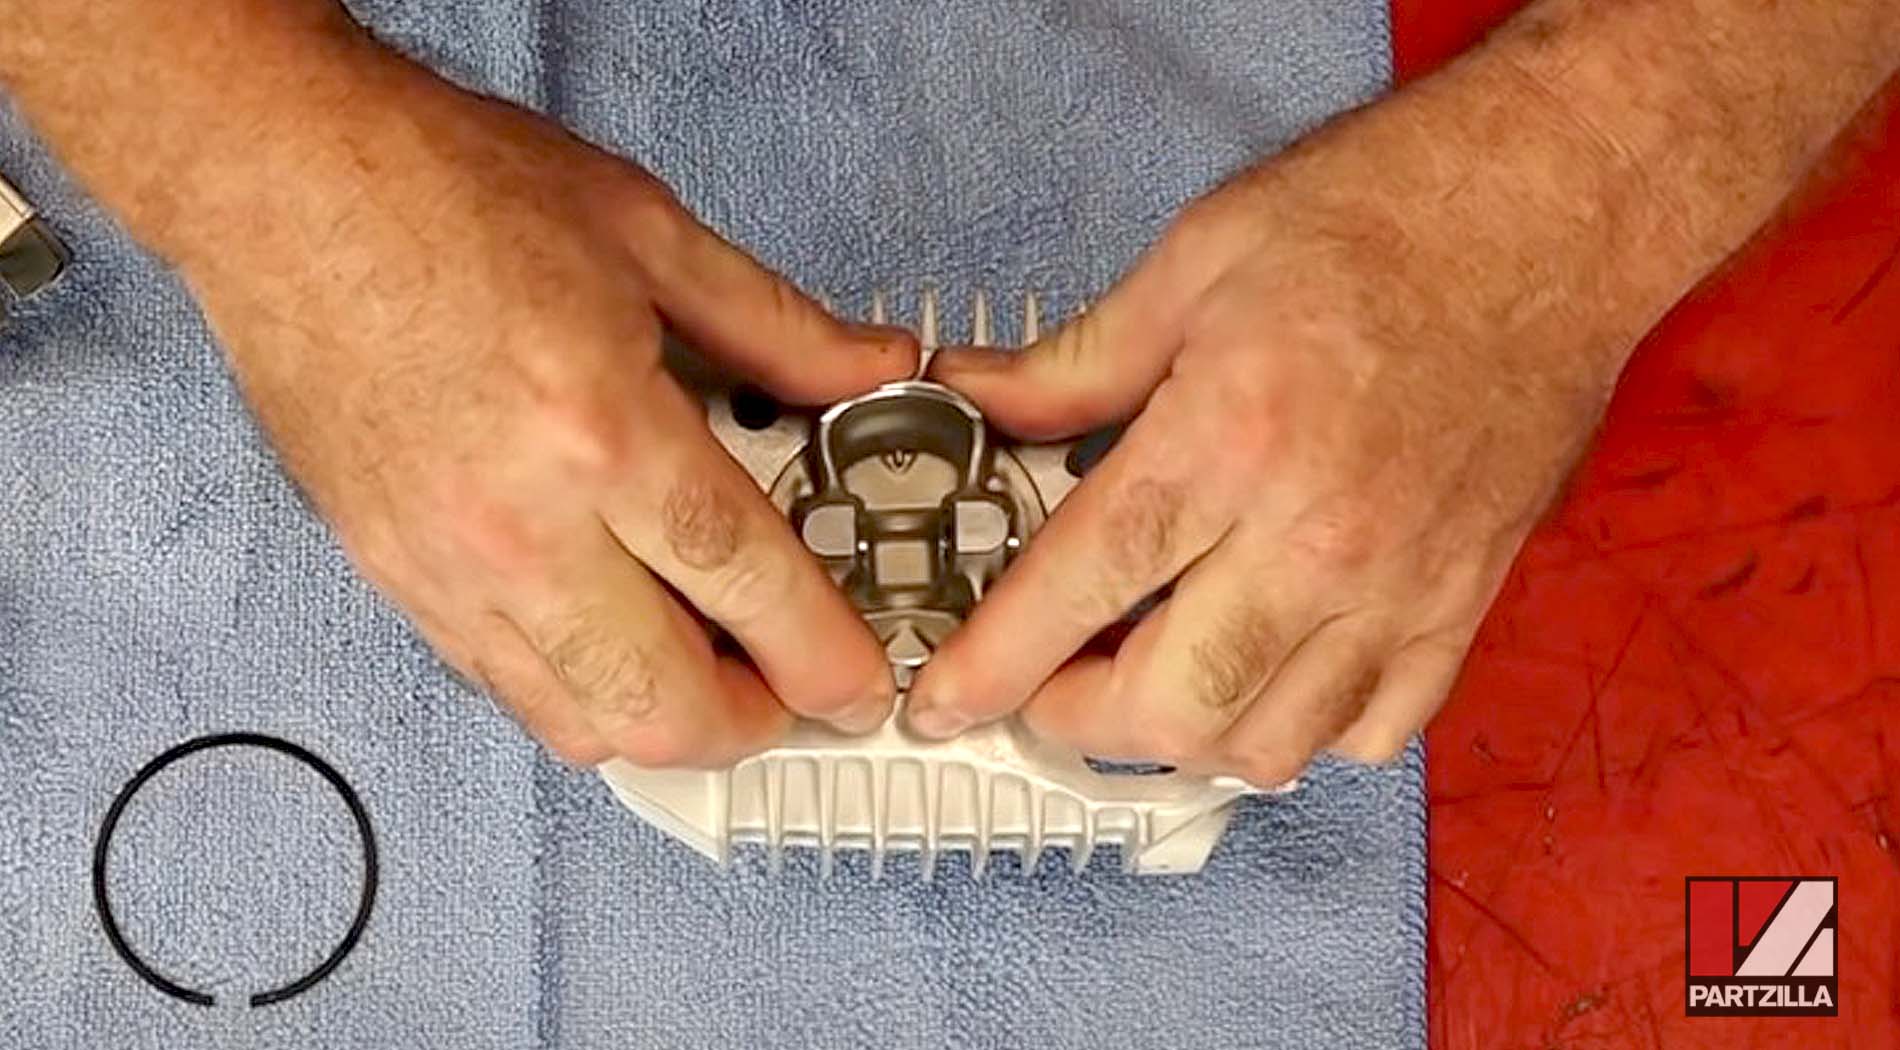
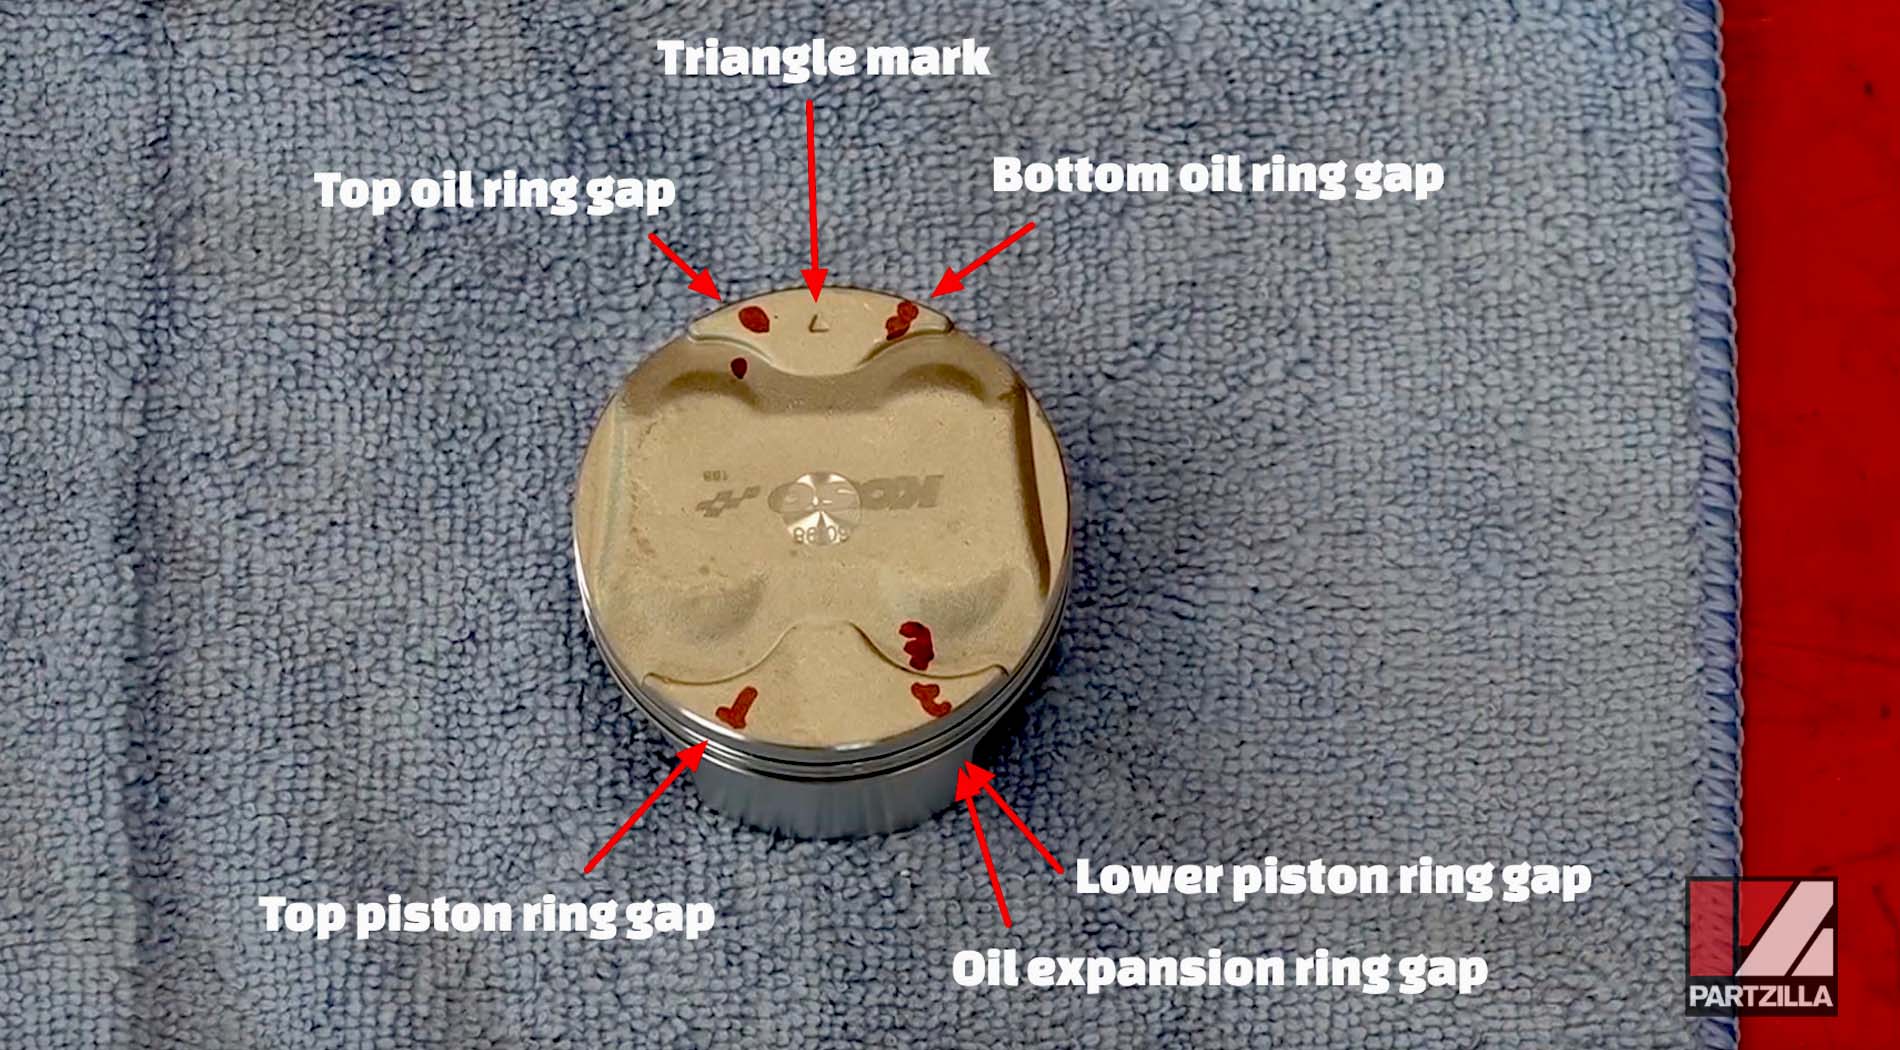
Step 2. Position the new piston so that the small triangle denoting the exhaust side of the piston is at 6 o'clock, then install the new piston rings in the following order and set each piston ring gap as follows:
- Bottom oil ring gap at approximately 7 o'clock
- Oil expansion ring gap at approximately 11 o'clock
- Top oil ring gap at approximately 5 o'clock
- Lower piston ring gap placed at approximately 11 o'clock
- Top piston ring gap at approximately 1 o'clock
Watch the clip below to see the piston rings installation segment of our Honda Grom big bore kit upgrade video.
Part 5: Honda Grom Piston Installation
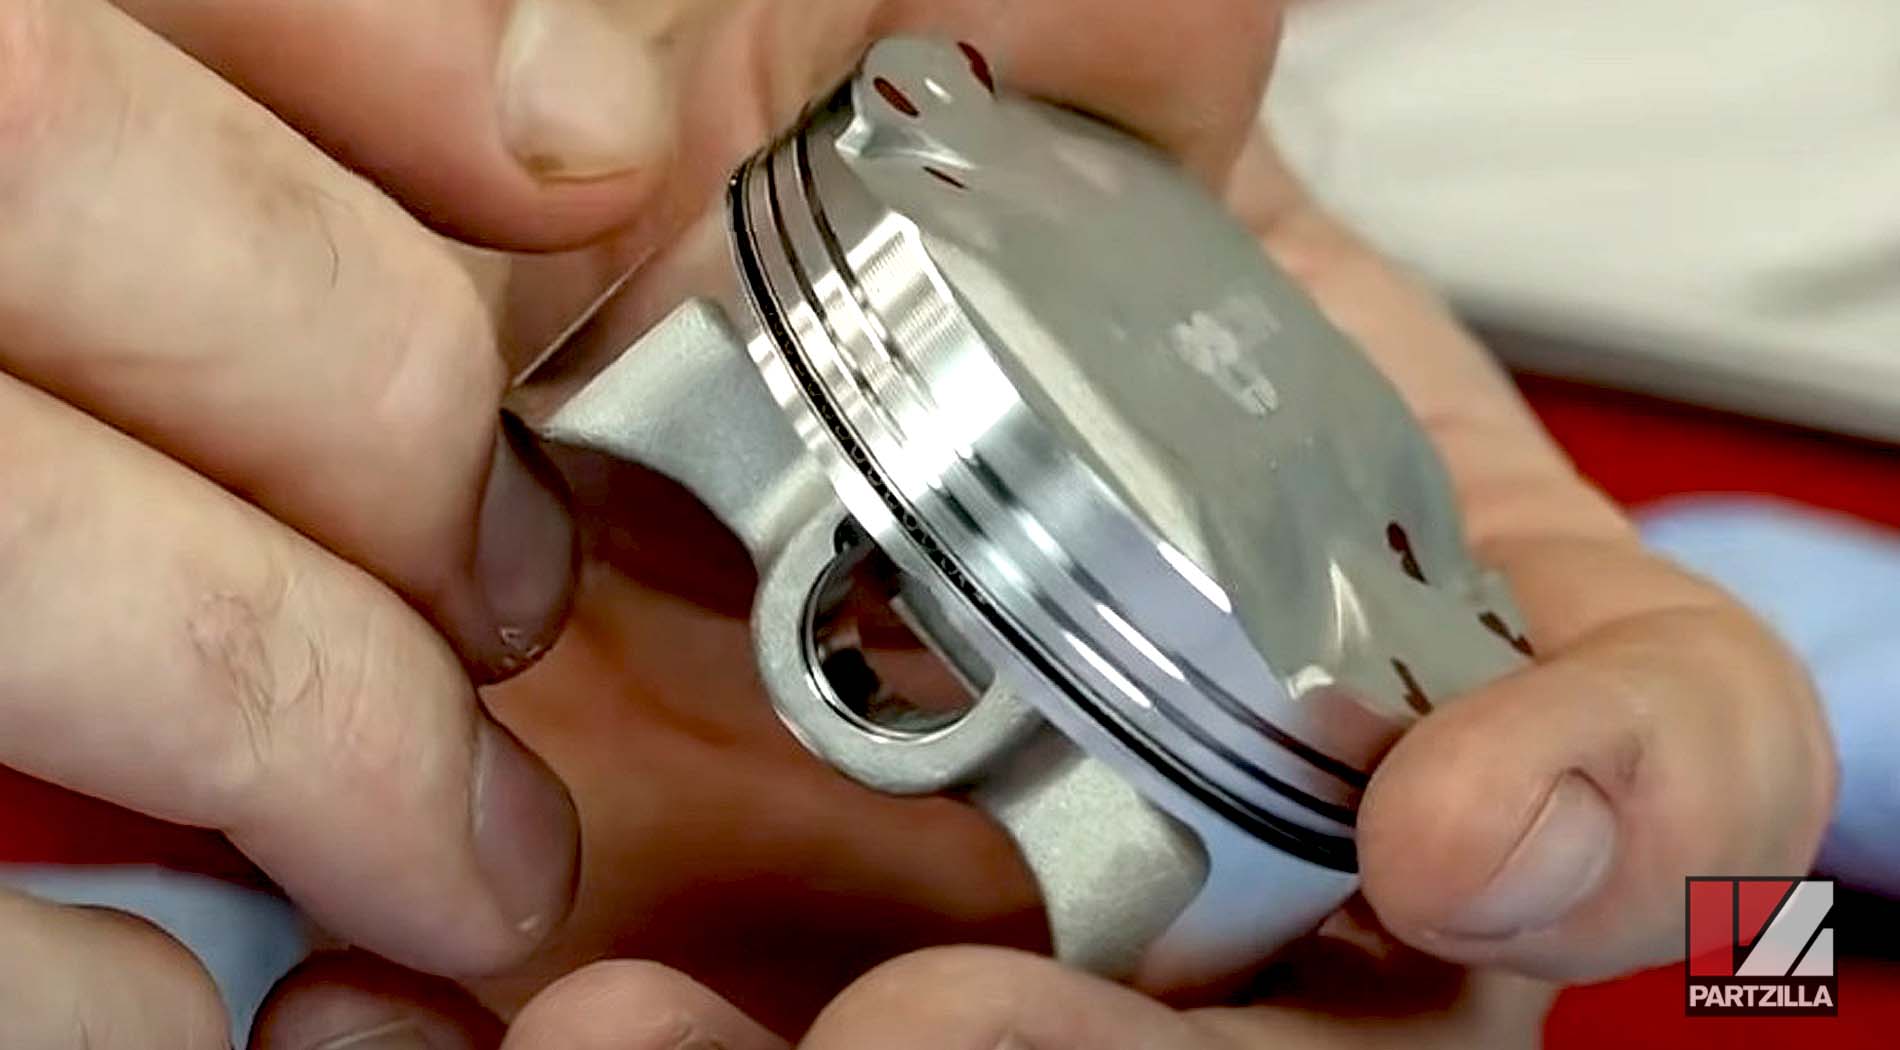
Step 1. Install one of the piston circlips into the new piston. Next, apply a film of assembly lube to the piston pin, and install the pin halfway into the piston.
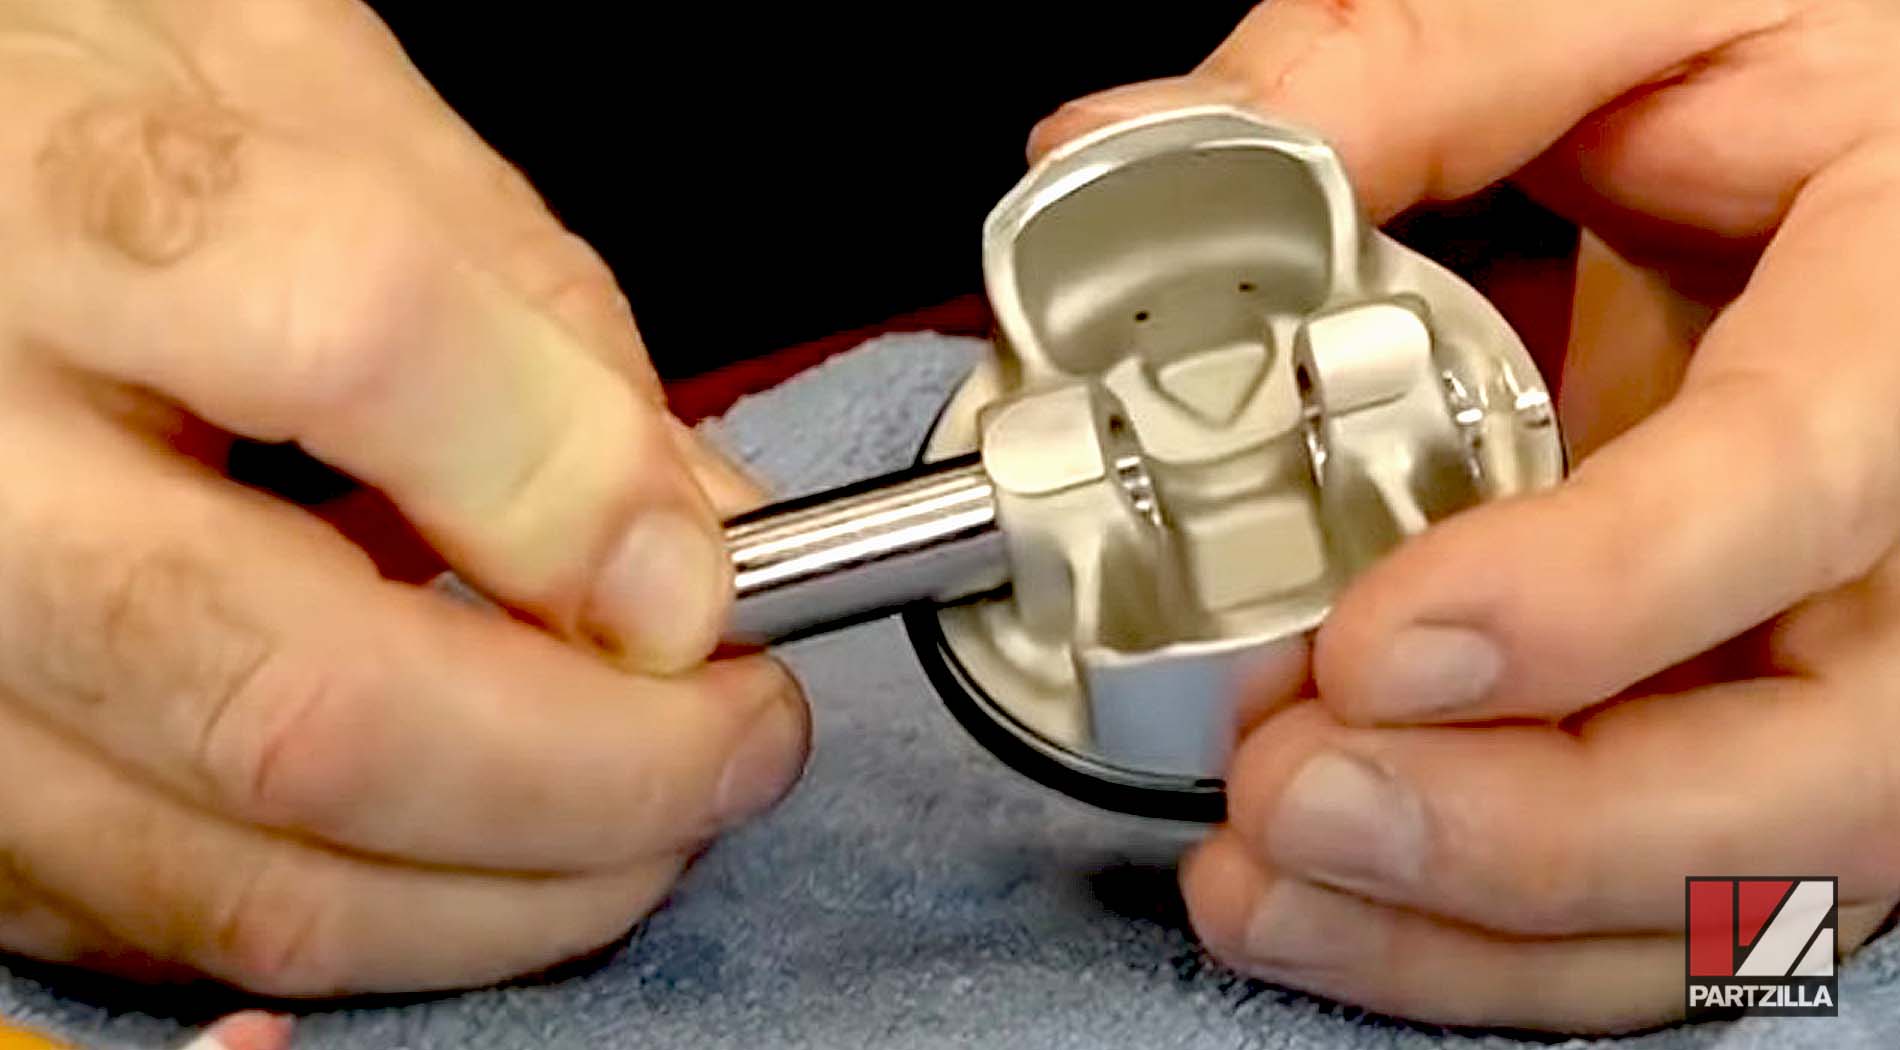
Step 2. Place the piston over the connector rod with the triangle mark facing down (toward where the exhaust will be once the engine is reassembled), then push the piston pin through the rod and install the second piston circlip.
Watch the clip below to see the piston installation segment of our Honda Grom Big Bore Kit video.
Part 6: Honda Grom Cylinder and Head Installation
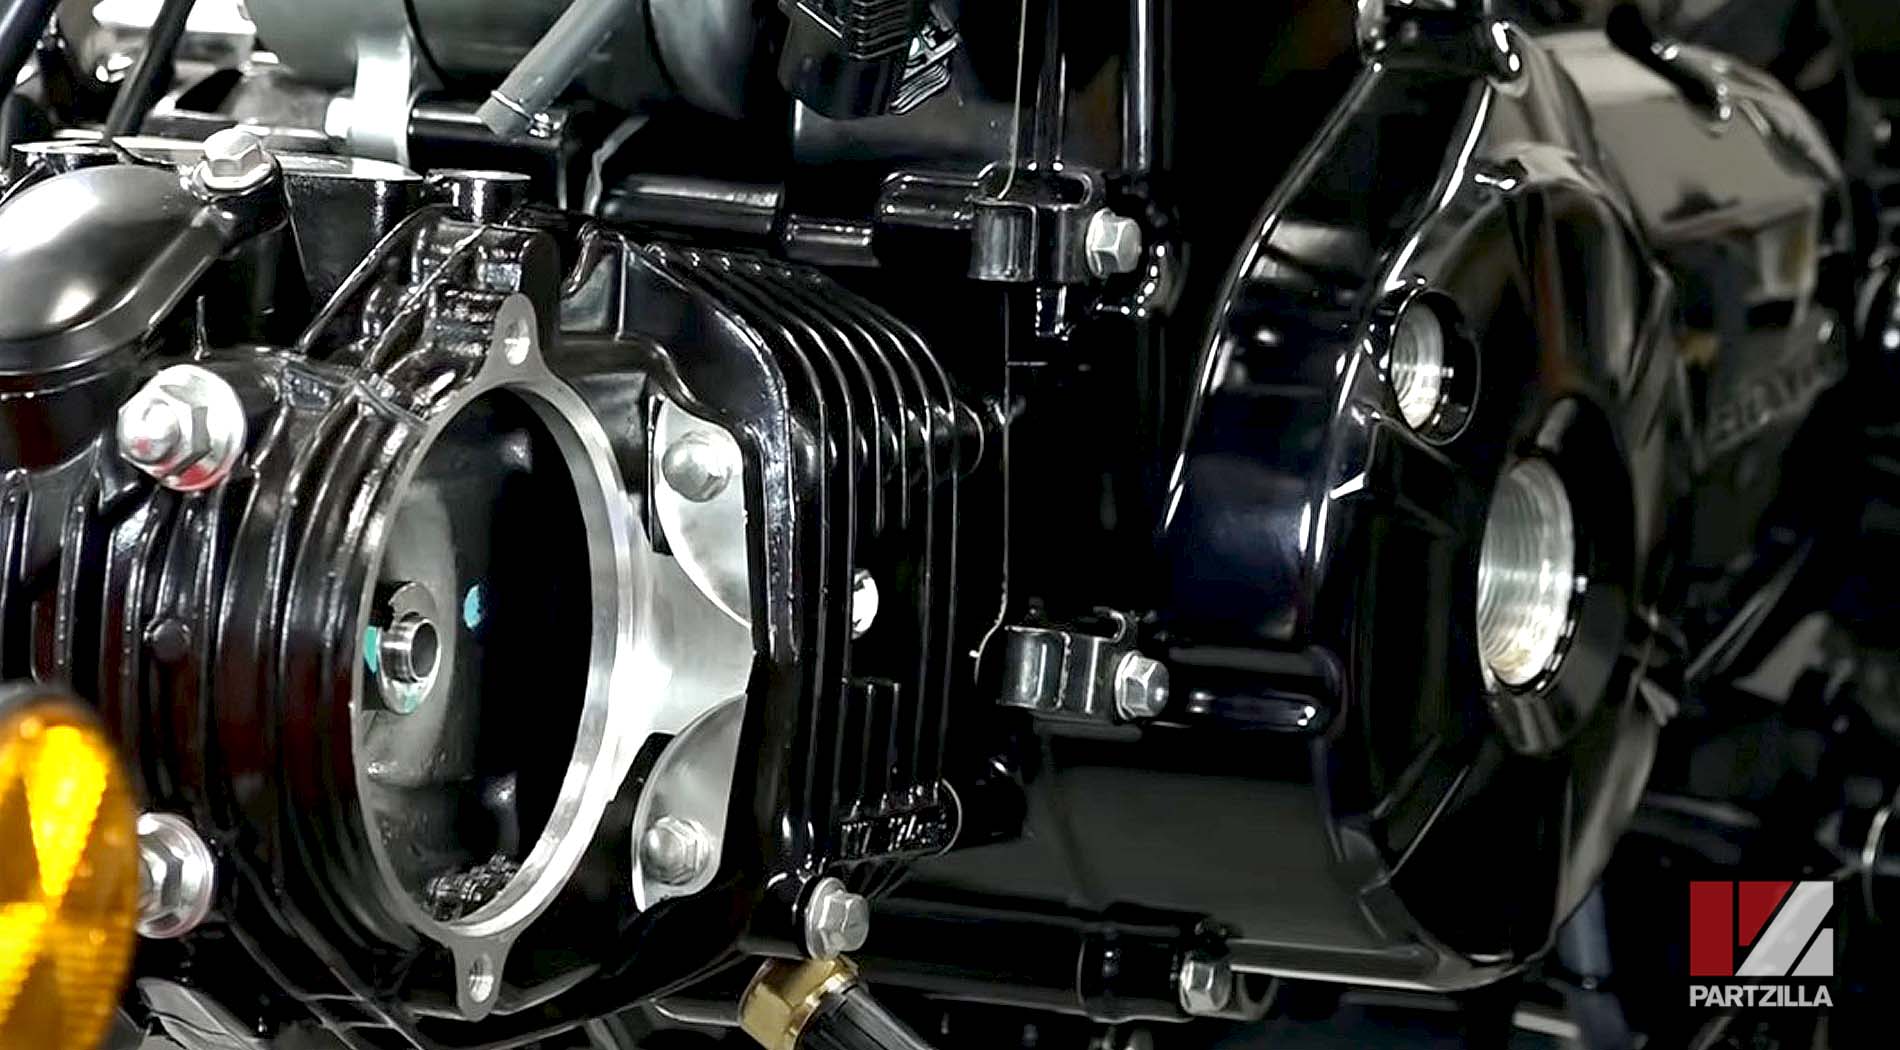
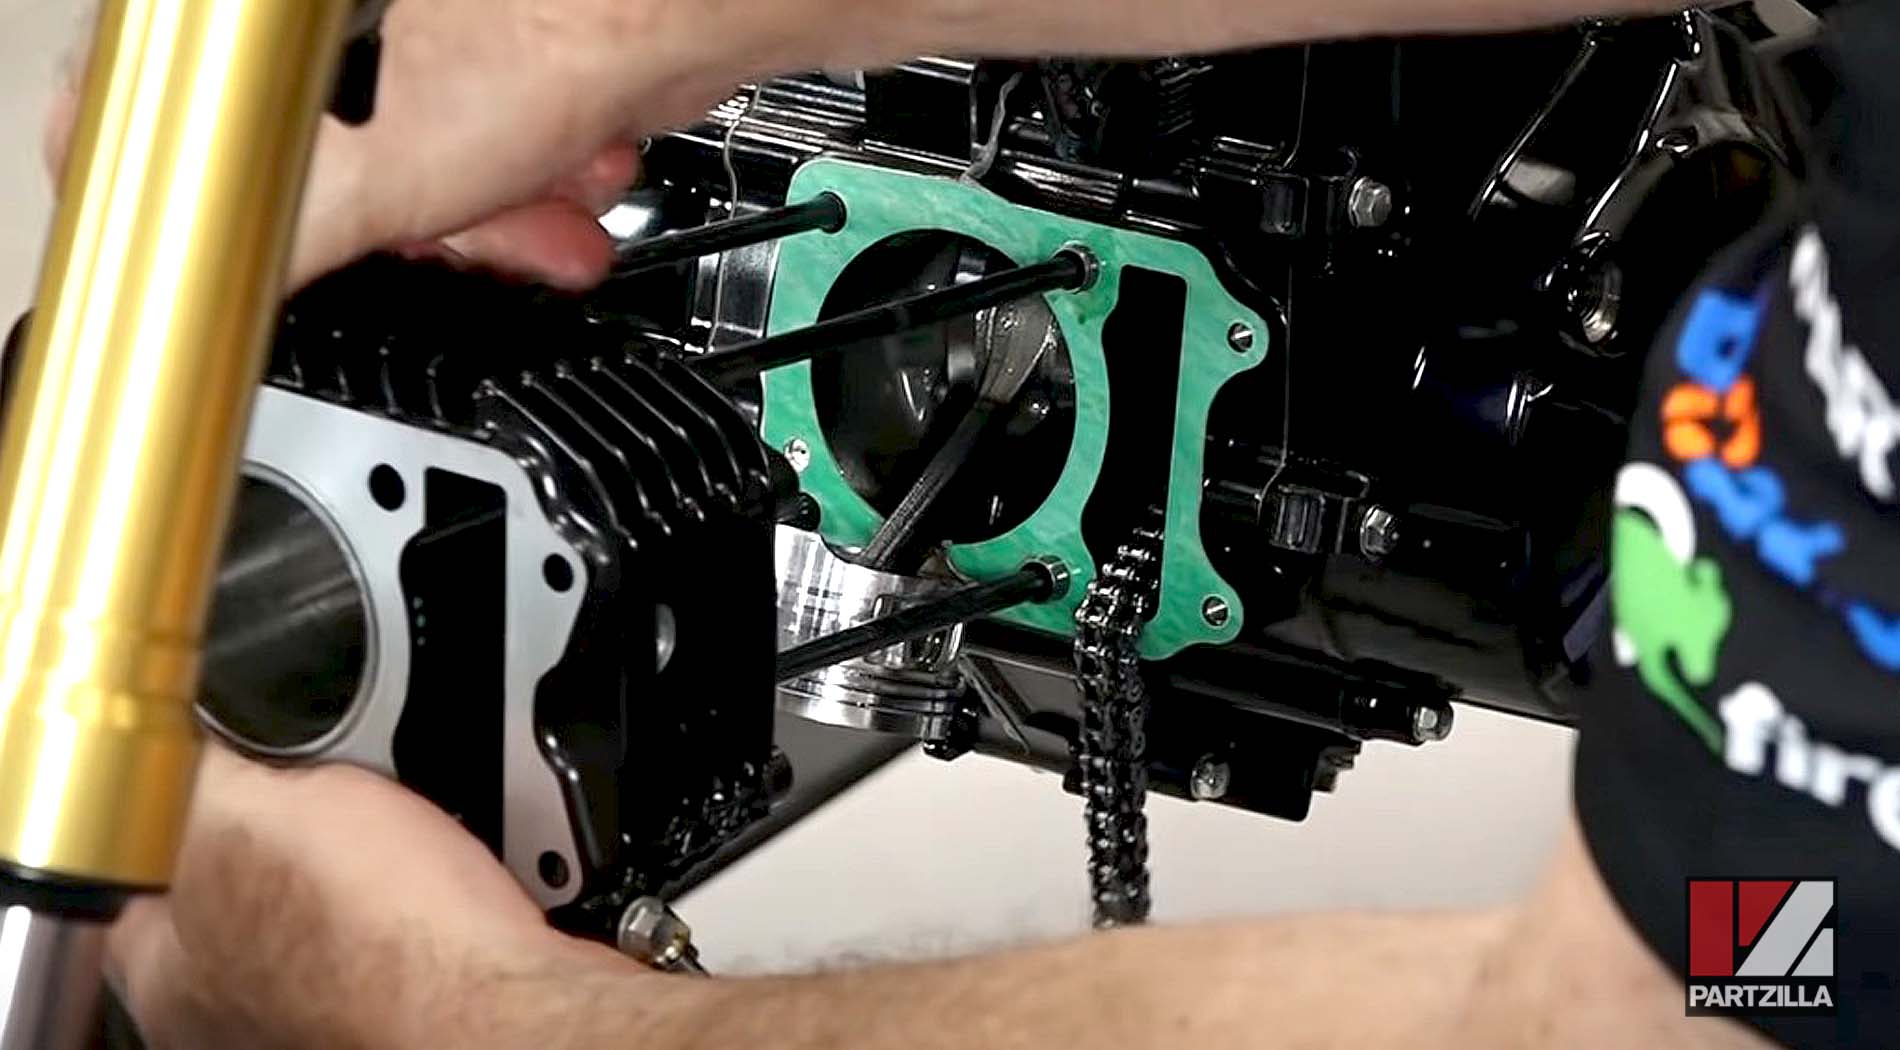
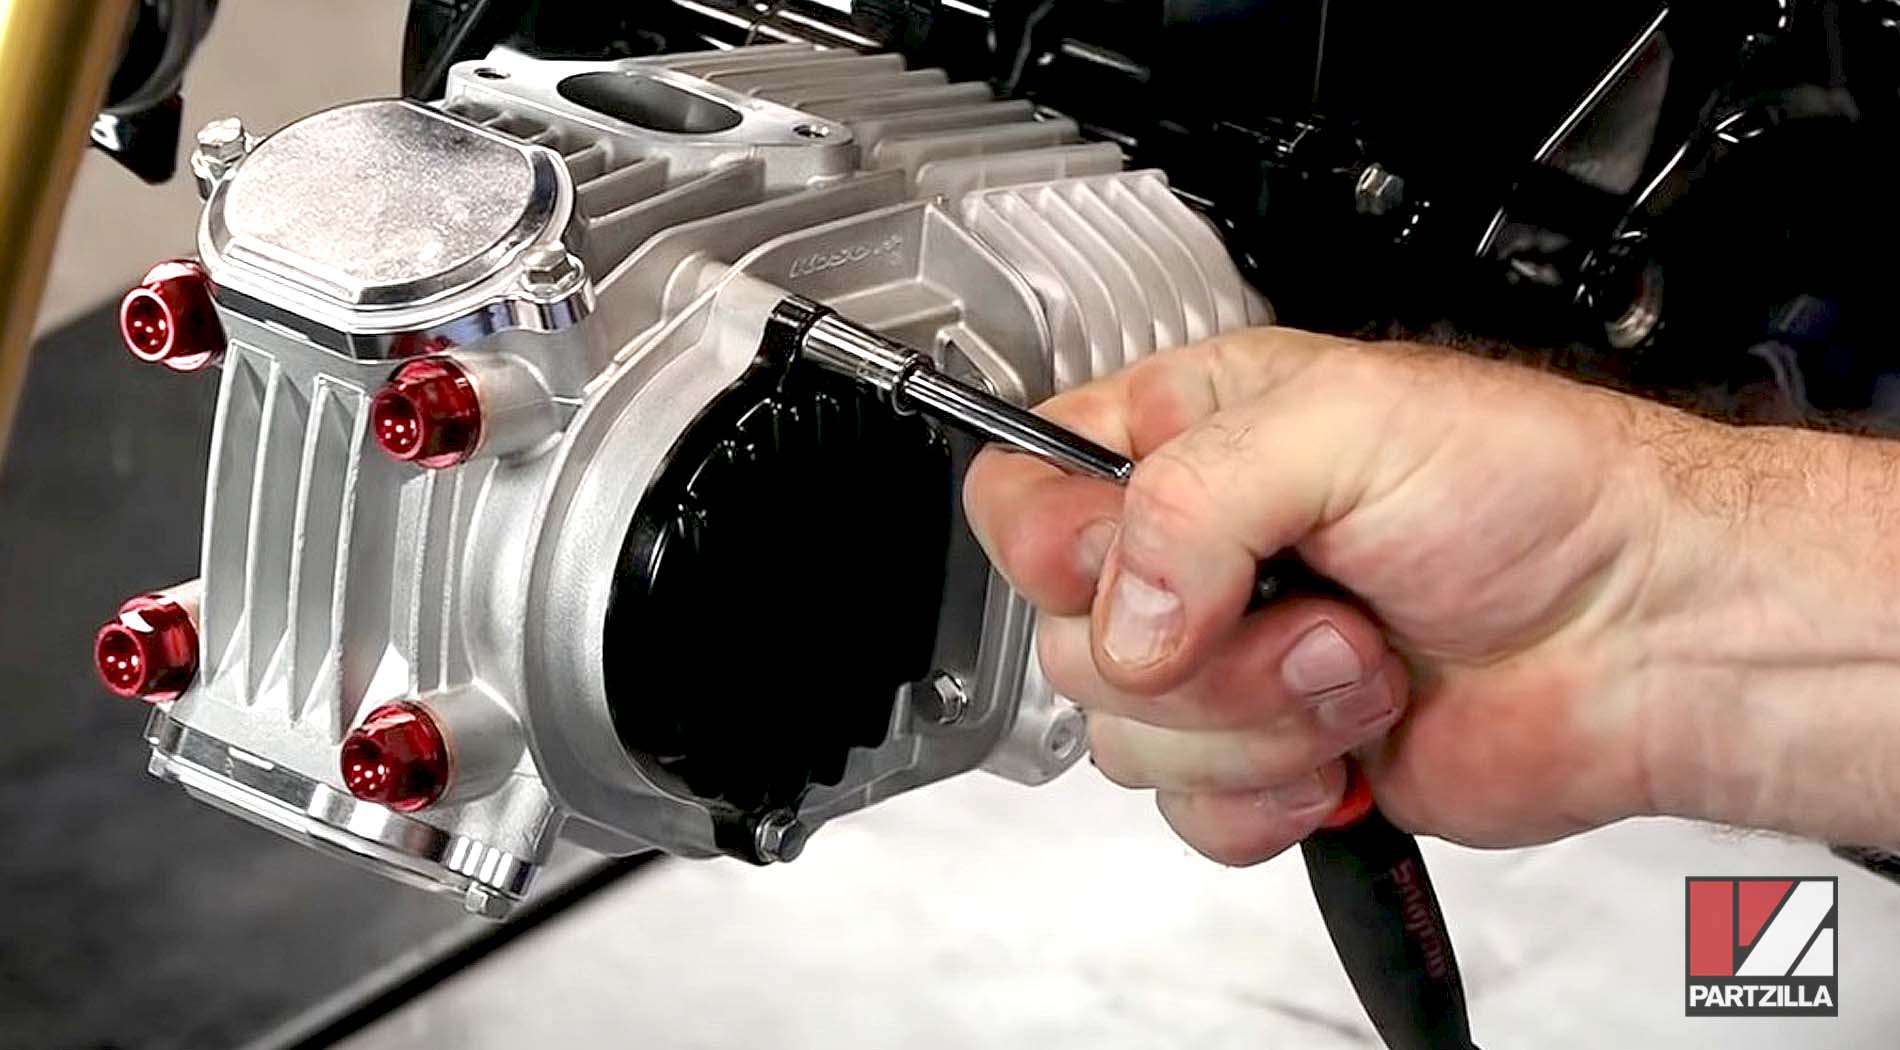
Step 1. Make sure the crankcase mating surface is perfectly clean before installing the new cylinder gasket.
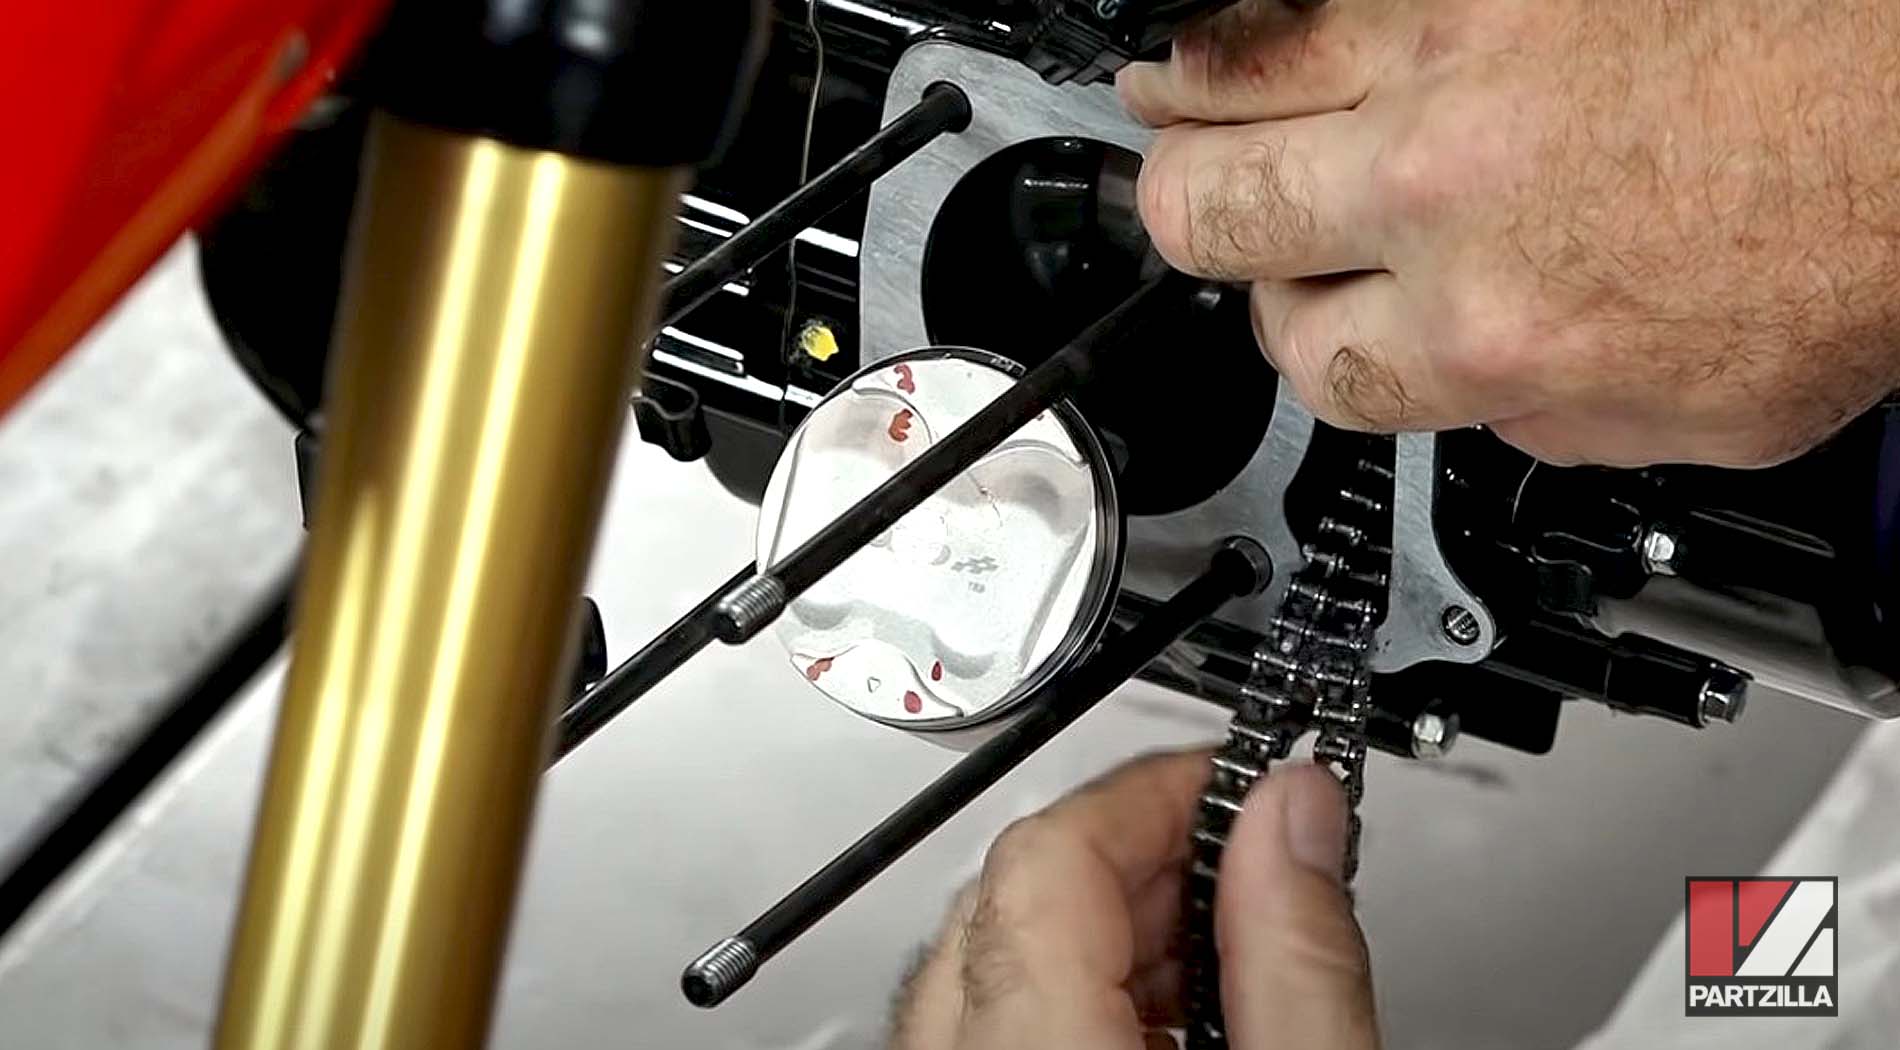
Step 2. Inspect the positioning of the piston ring gaps, and readjust them to the correct positions if they have moved, then install the new cylinder (included in the KOSO big bore kit) over the piston.

NOTE: Work slowly so you don’t damage the new piston, piston rings or cylinder.
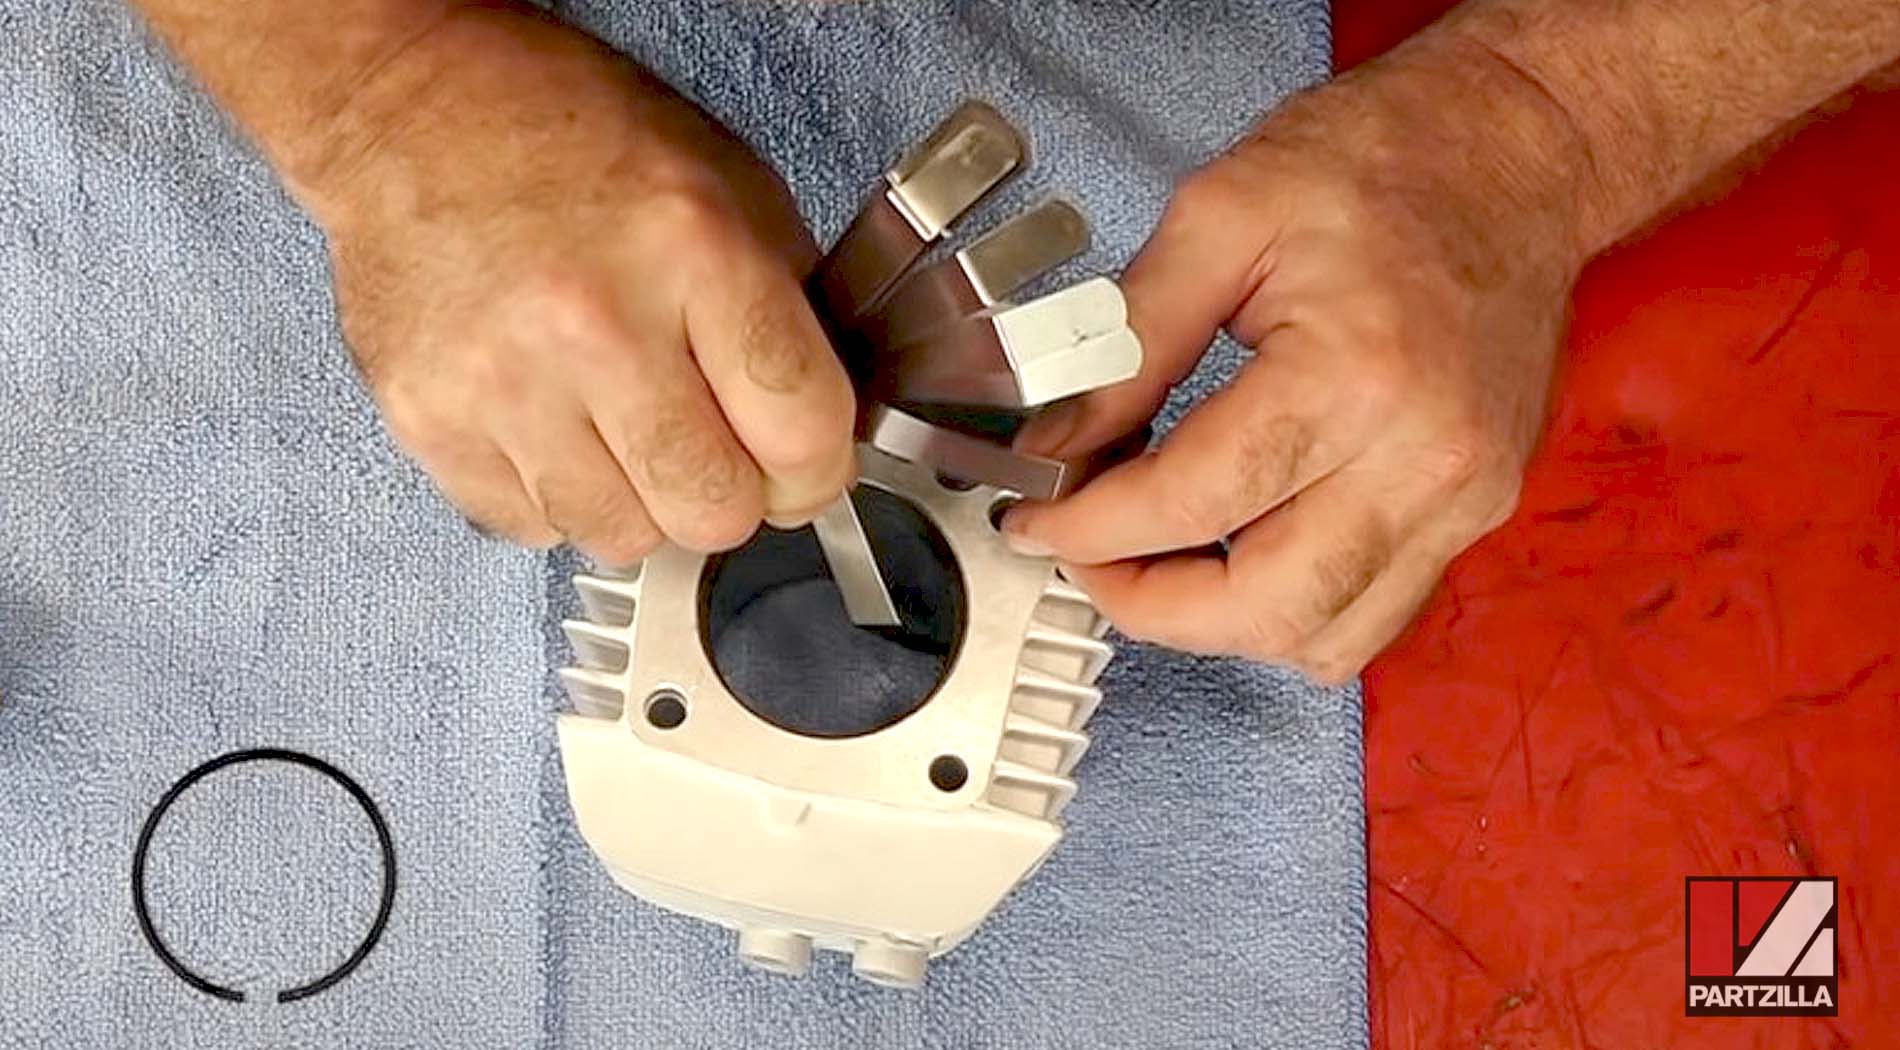
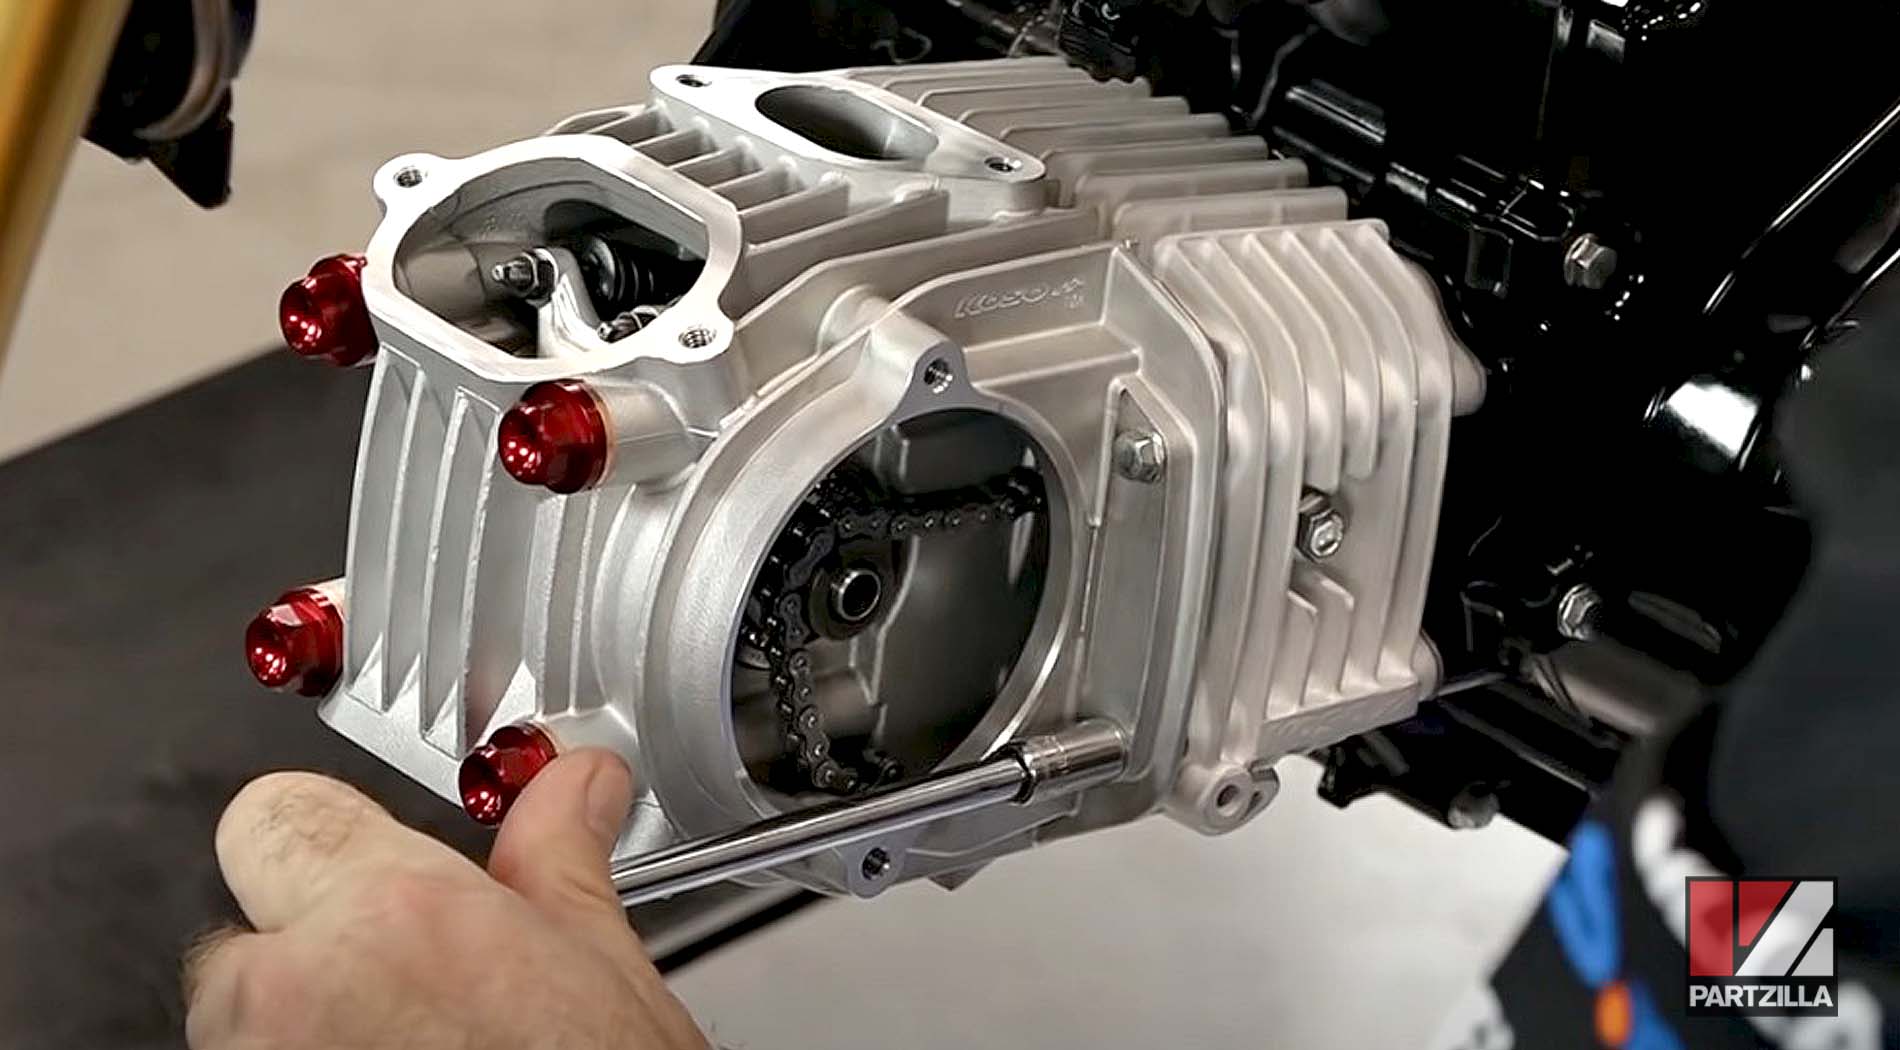
Step 3. Reinstall the cam chain guide roller and the washer and pin
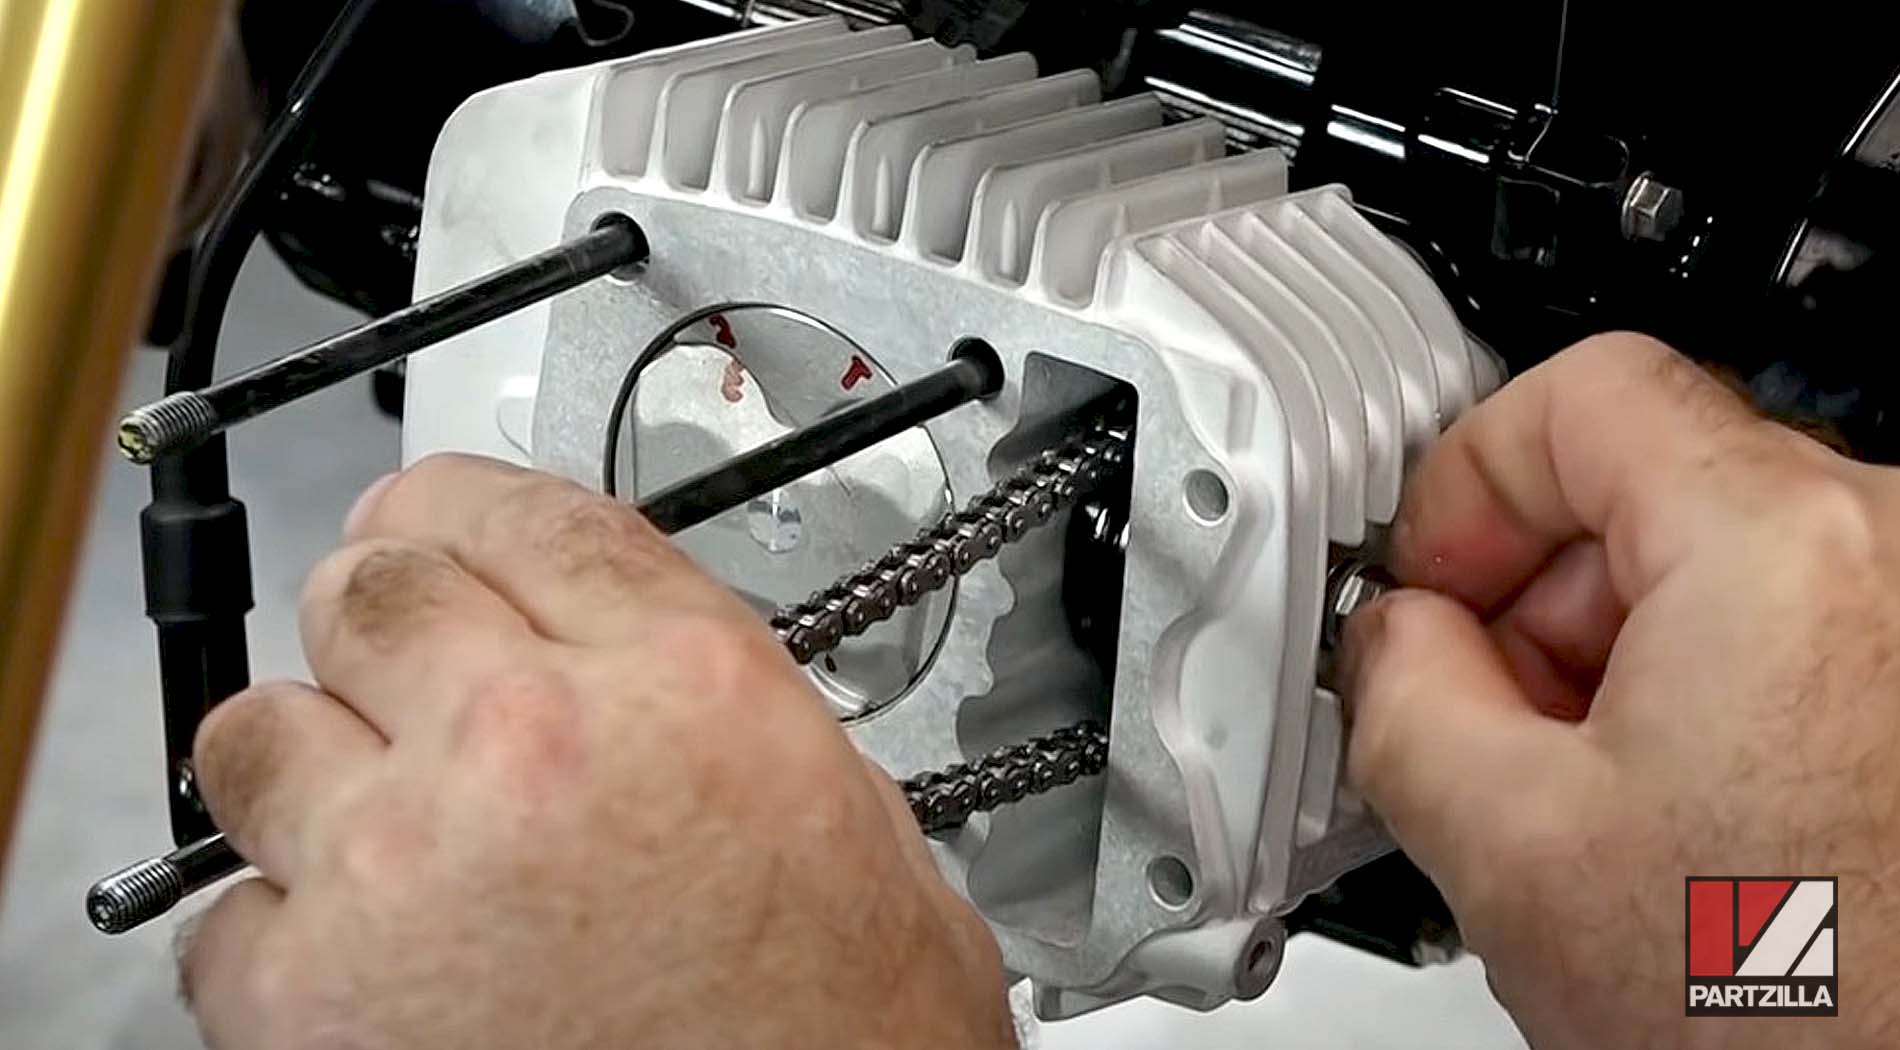
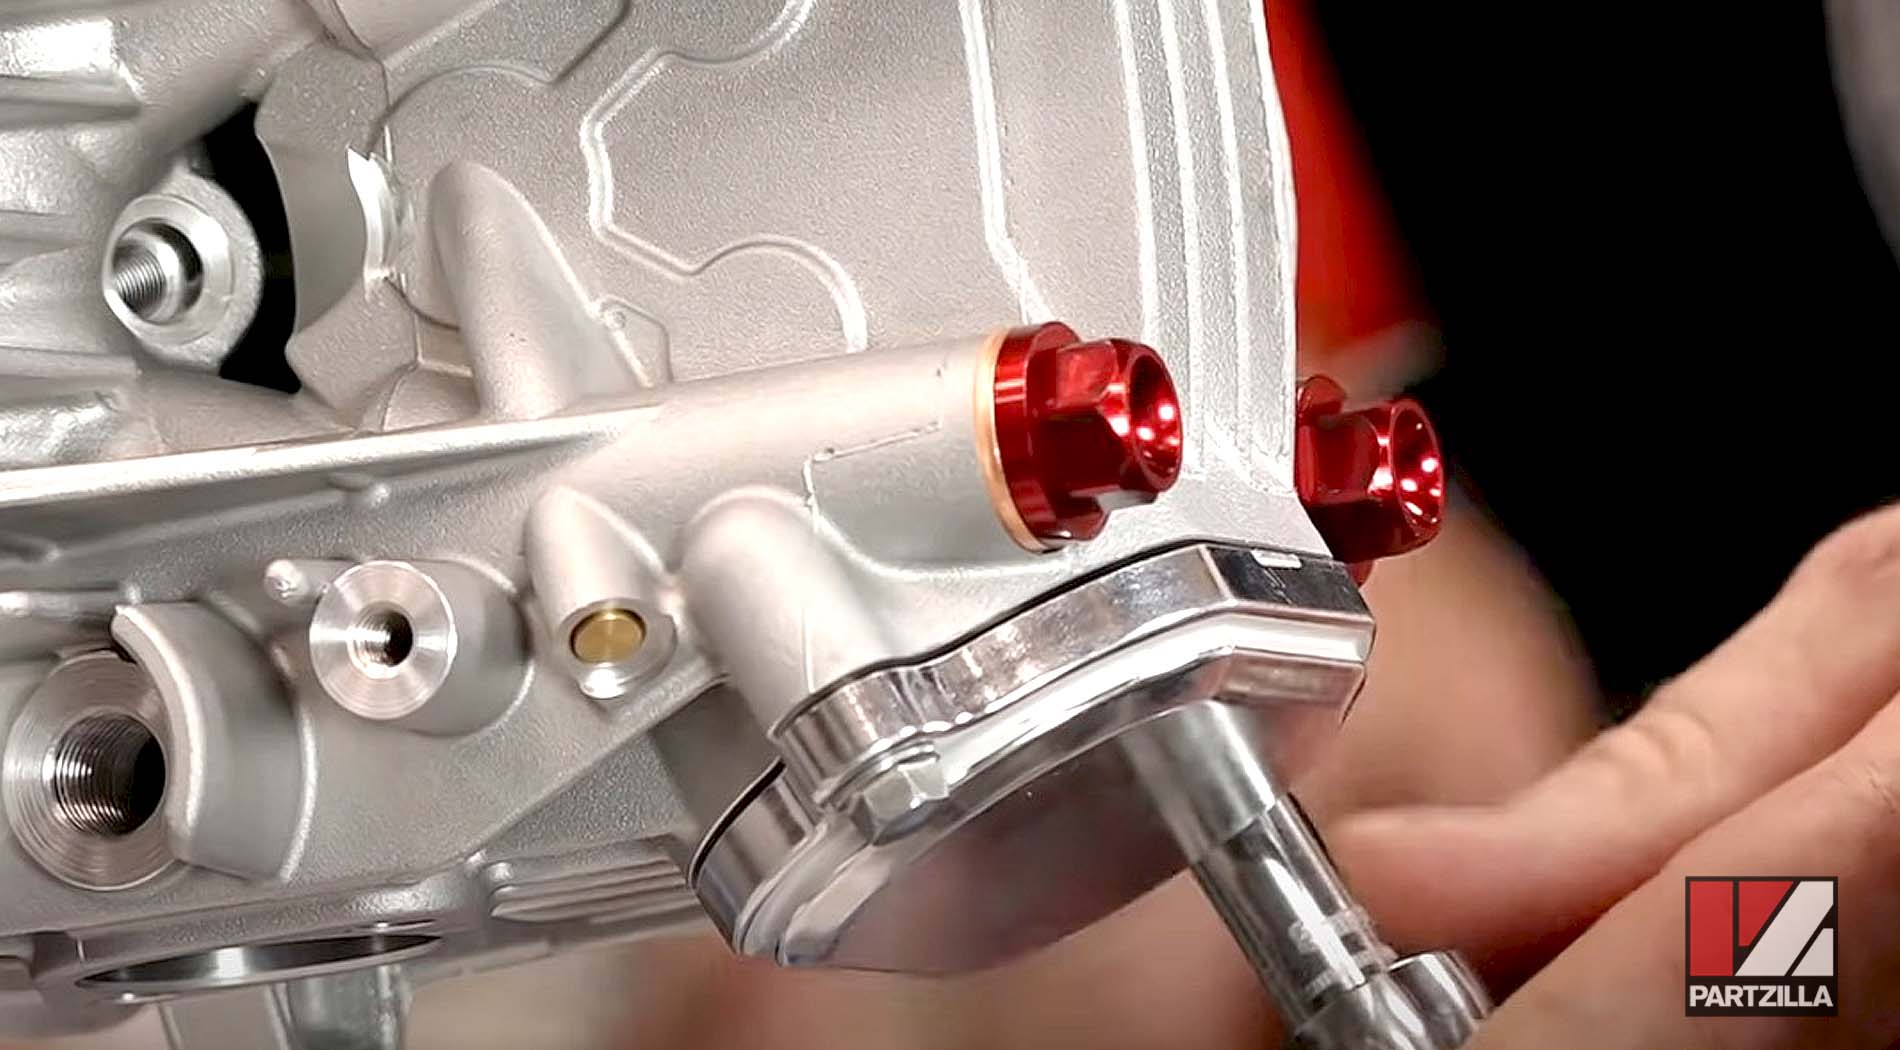
Step 4. Remove the dowels from the old cylinder head, and install them on the new cylinder head, then install a new cylinder head gasket.
Step 5. Make sure the mating surfaces are clean before installing the new cylinder head (included in the KOSO big bore kit).
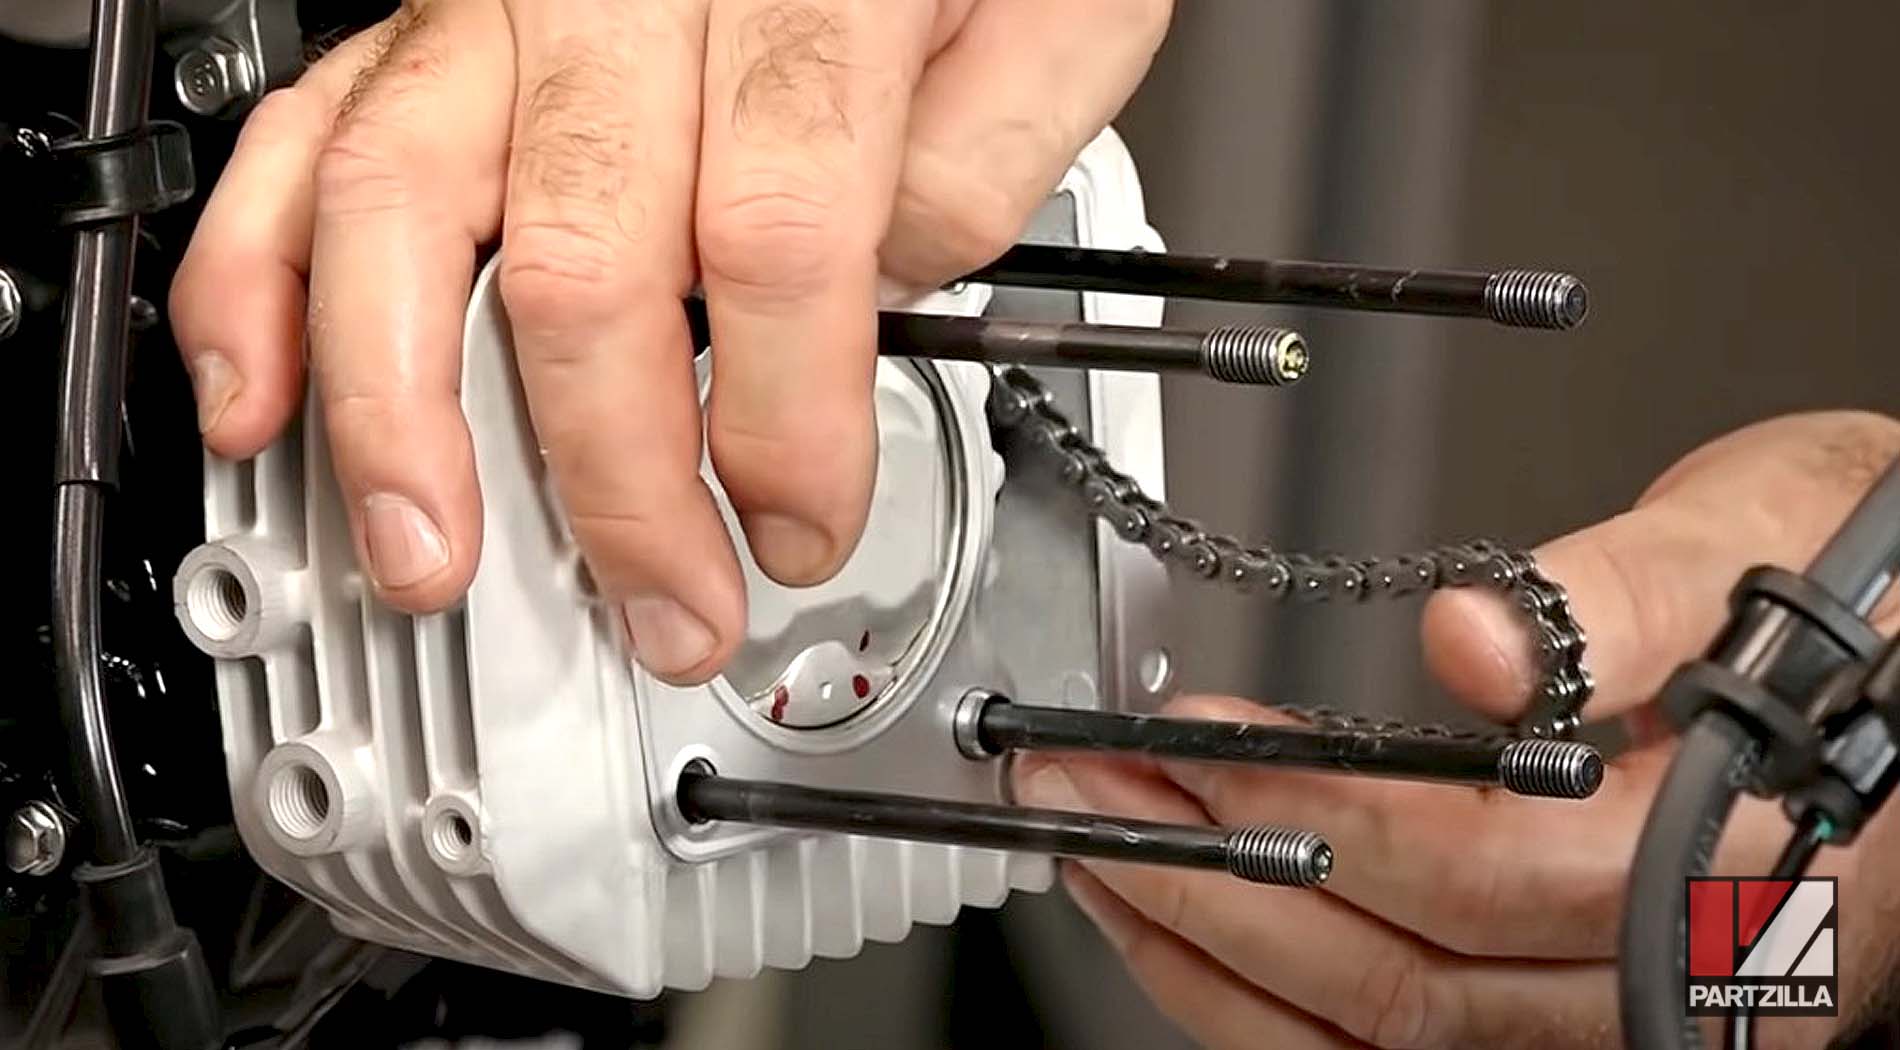
Step 6. Apply a thin layer of grease to the underside of the new cylinder head cap bolts. Install the bolts and washers, and torque the bolts to 18 foot-pounds.
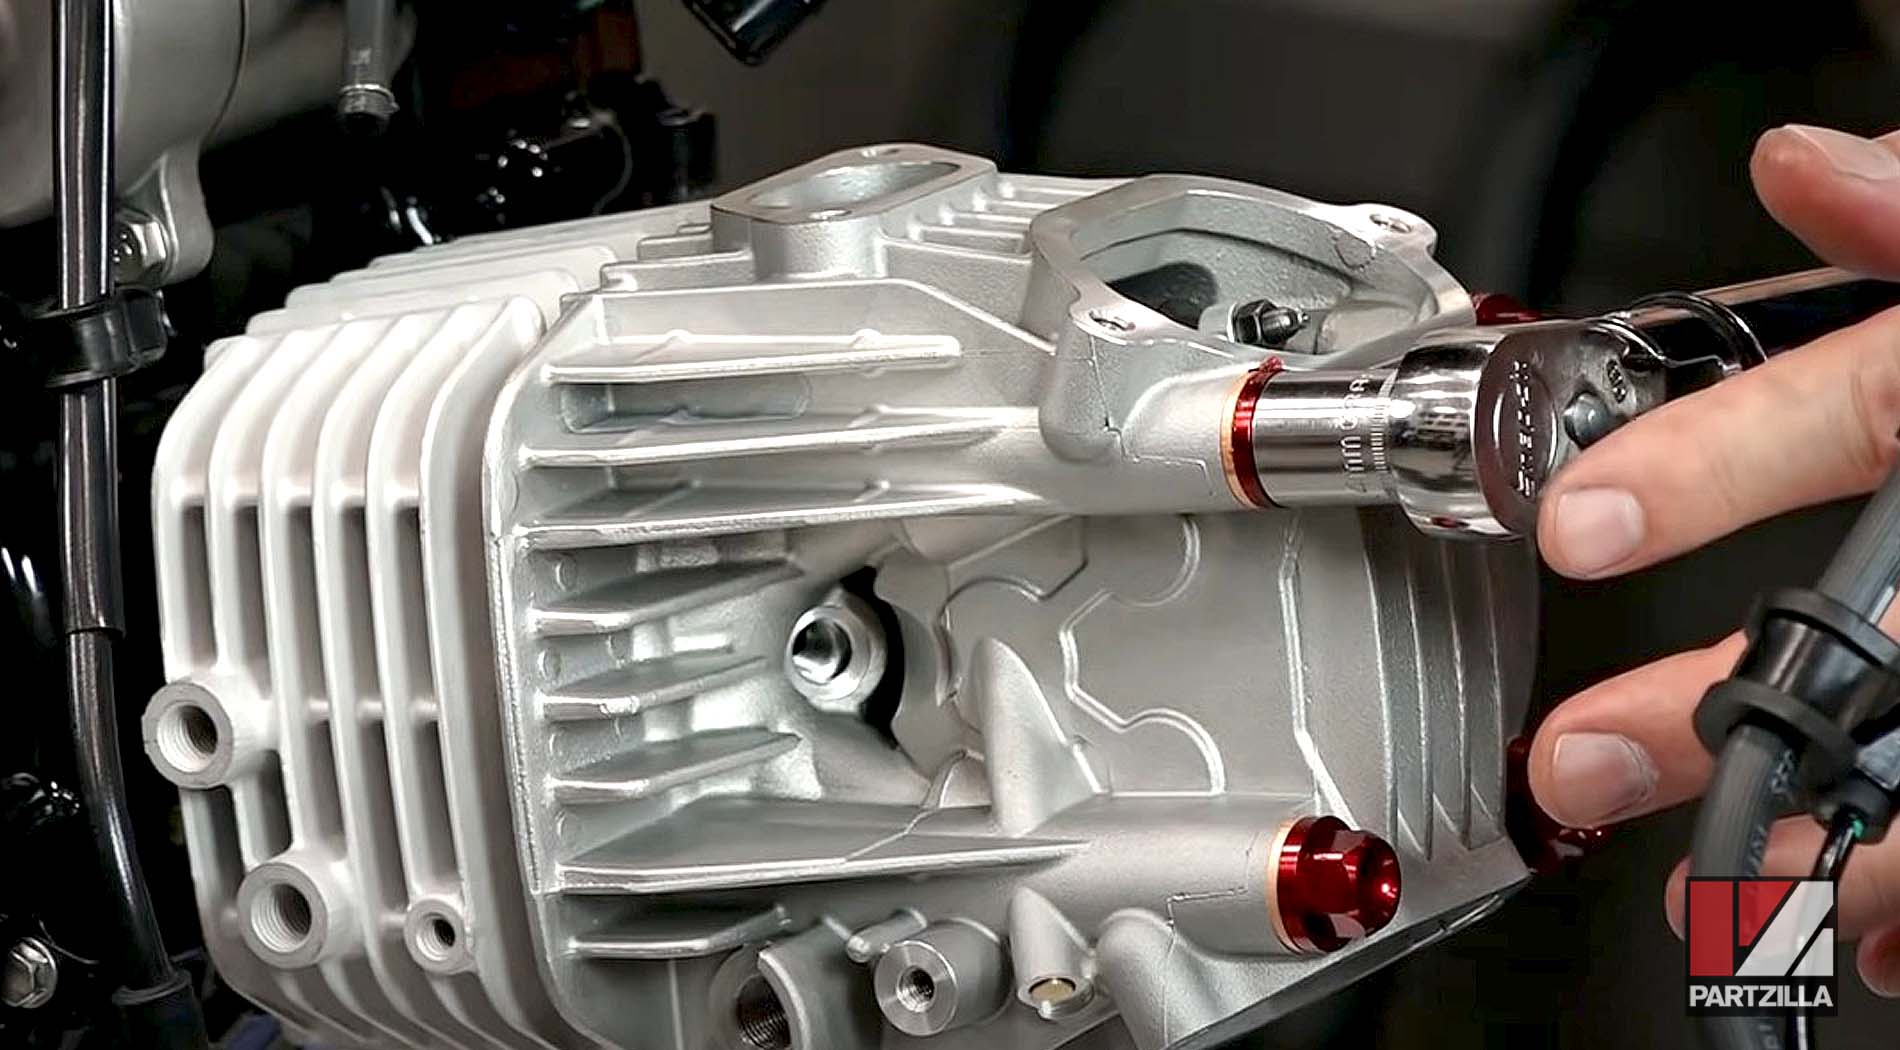
Step 7. Reinstall the two bolts mounting the left side of the cylinder head to the cylinder.
Watch the clip below to see the cylinder head installation segment of our Honda Grom big bore kit upgrade video.
NOTE: To correctly set the timing and valve lash, the engine must be at TDC. Check that the T mark is centered in the crankcase timing window, and put a socket on the crankshaft to hold the engine at TDC.
Part 7: Honda Grom Timing and Valve Clearance
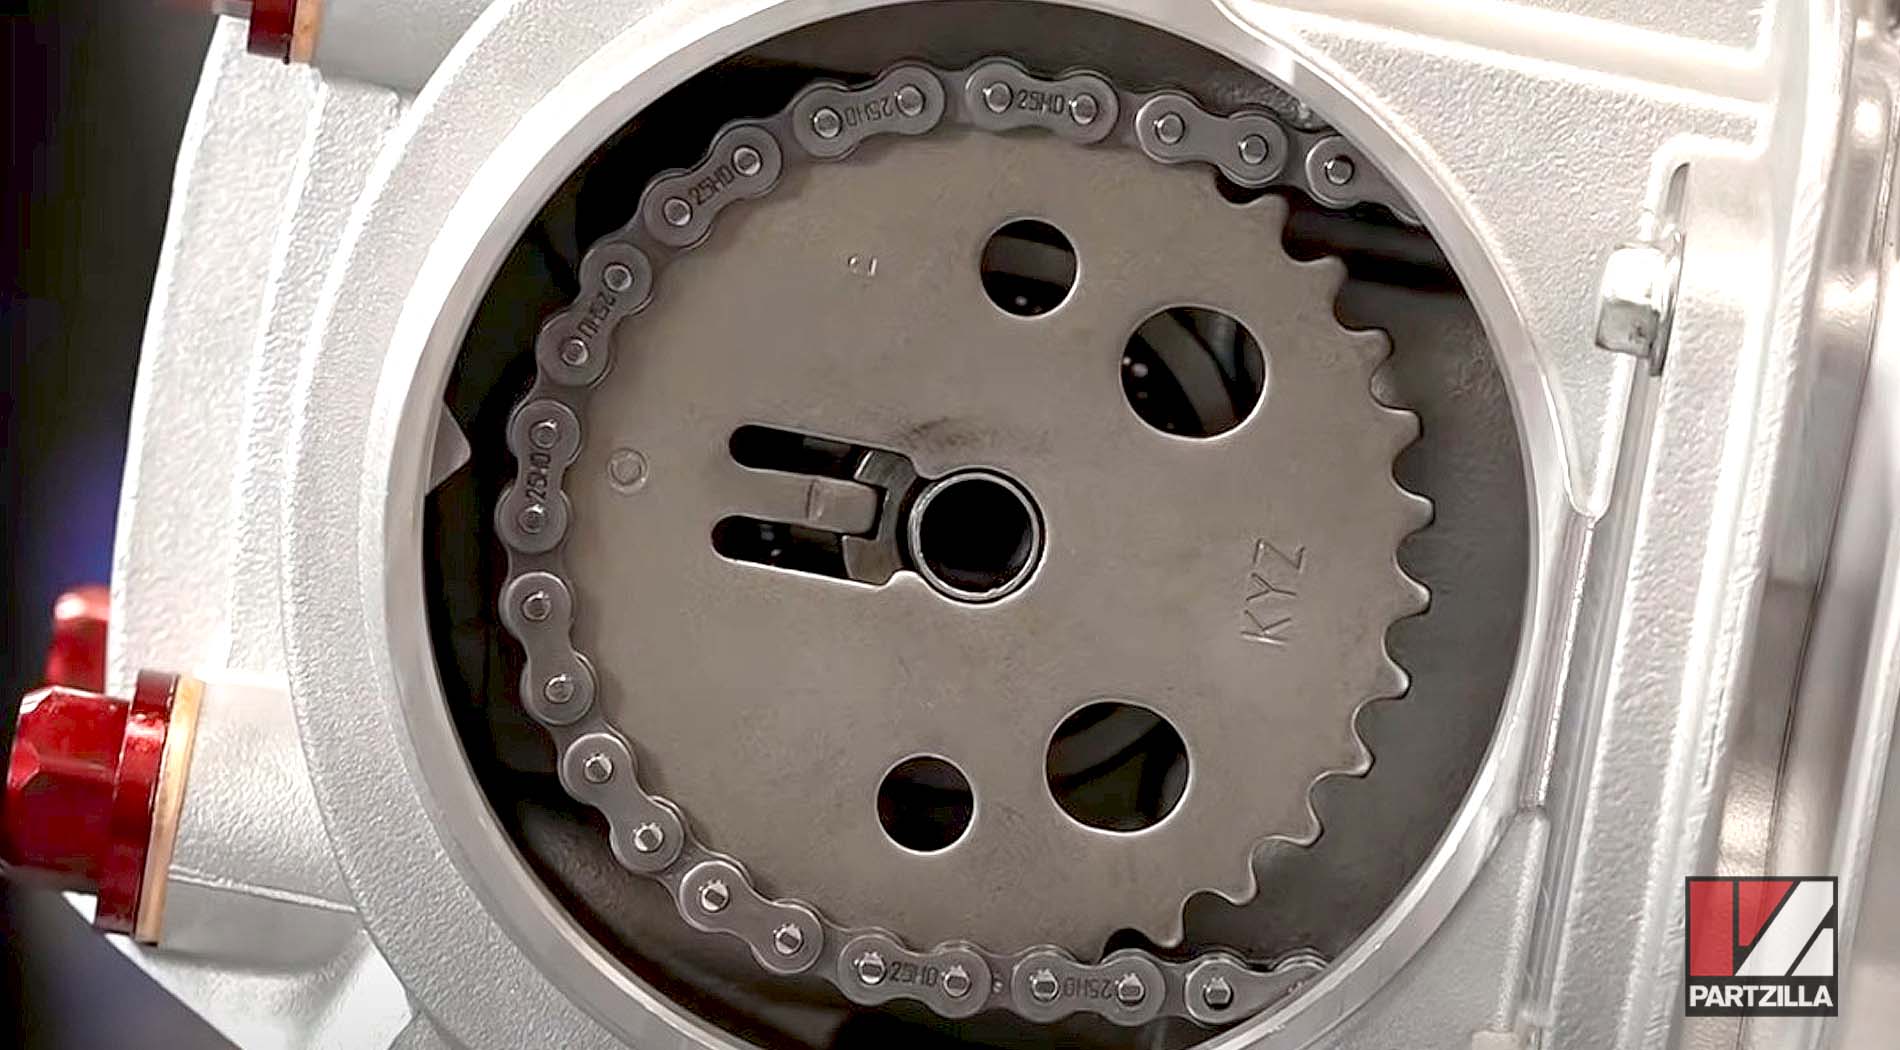
Step 1. Loop the timing chain back over the cam sprocket, and reinstall the cam sprocket with the timing mark aligned with the mark in the cylinder head.
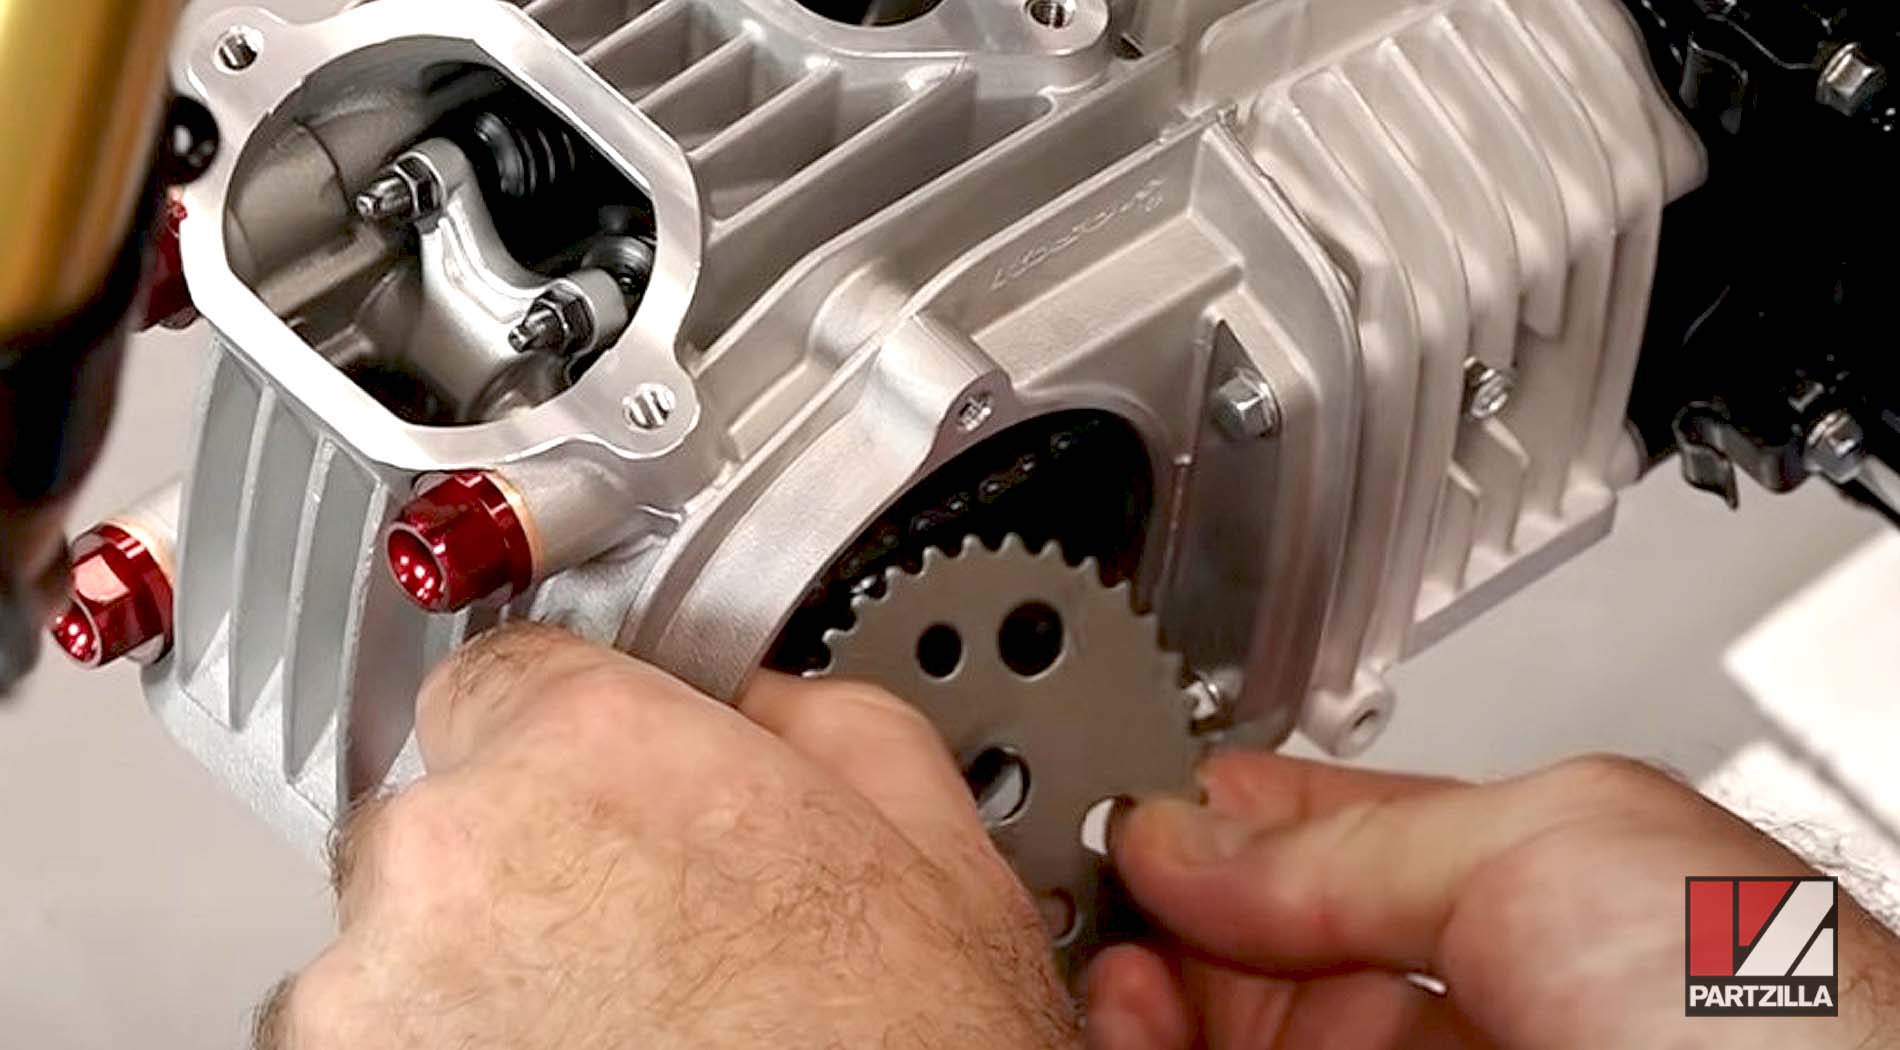
Step 2. Reinstall the cam sprocket bolt, and torque it to 20 foot-pounds while still holding the crankshaft to prevent it from moving.
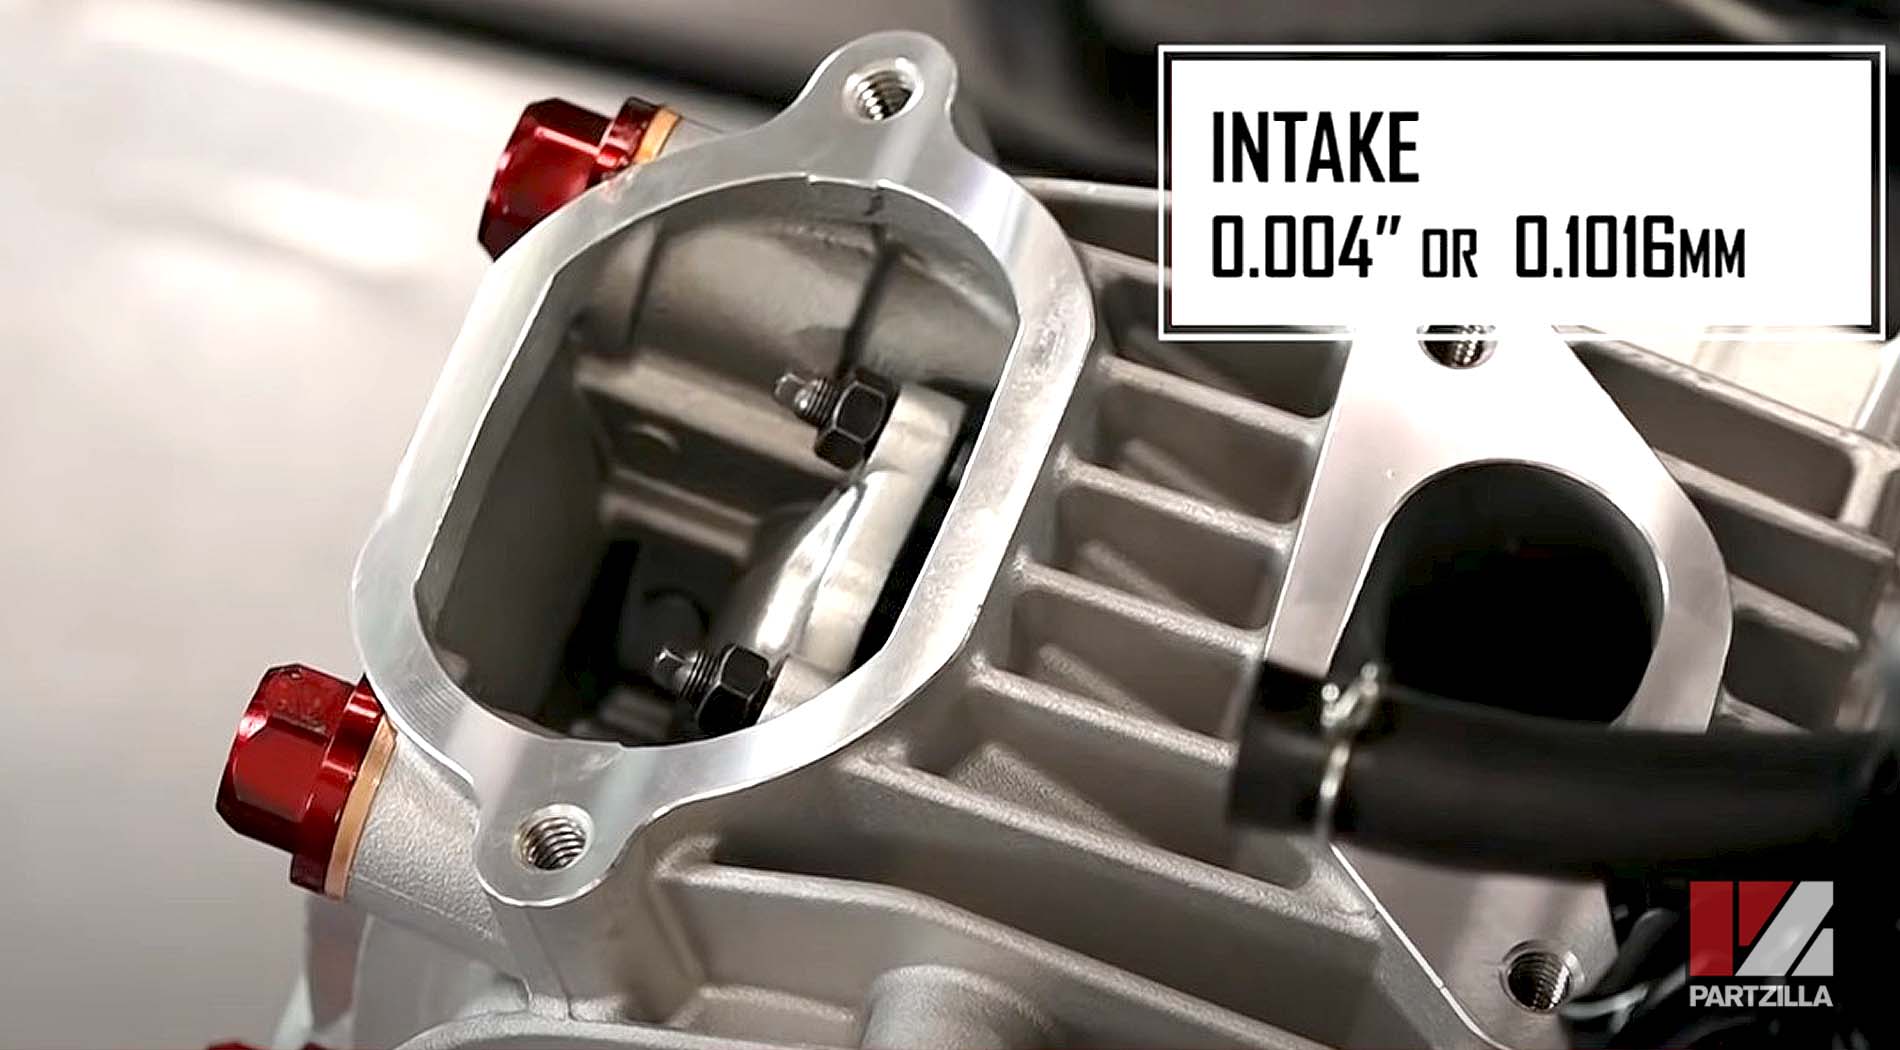
Step 3. With the engine at TDC, check the valve gaps with a feeler gauge. The intake valve gaps should be 0.004” or 0.1016mm. The exhaust valve gaps should be 0.007” or 0.1778mm. Adjust the valve gaps if necessary.
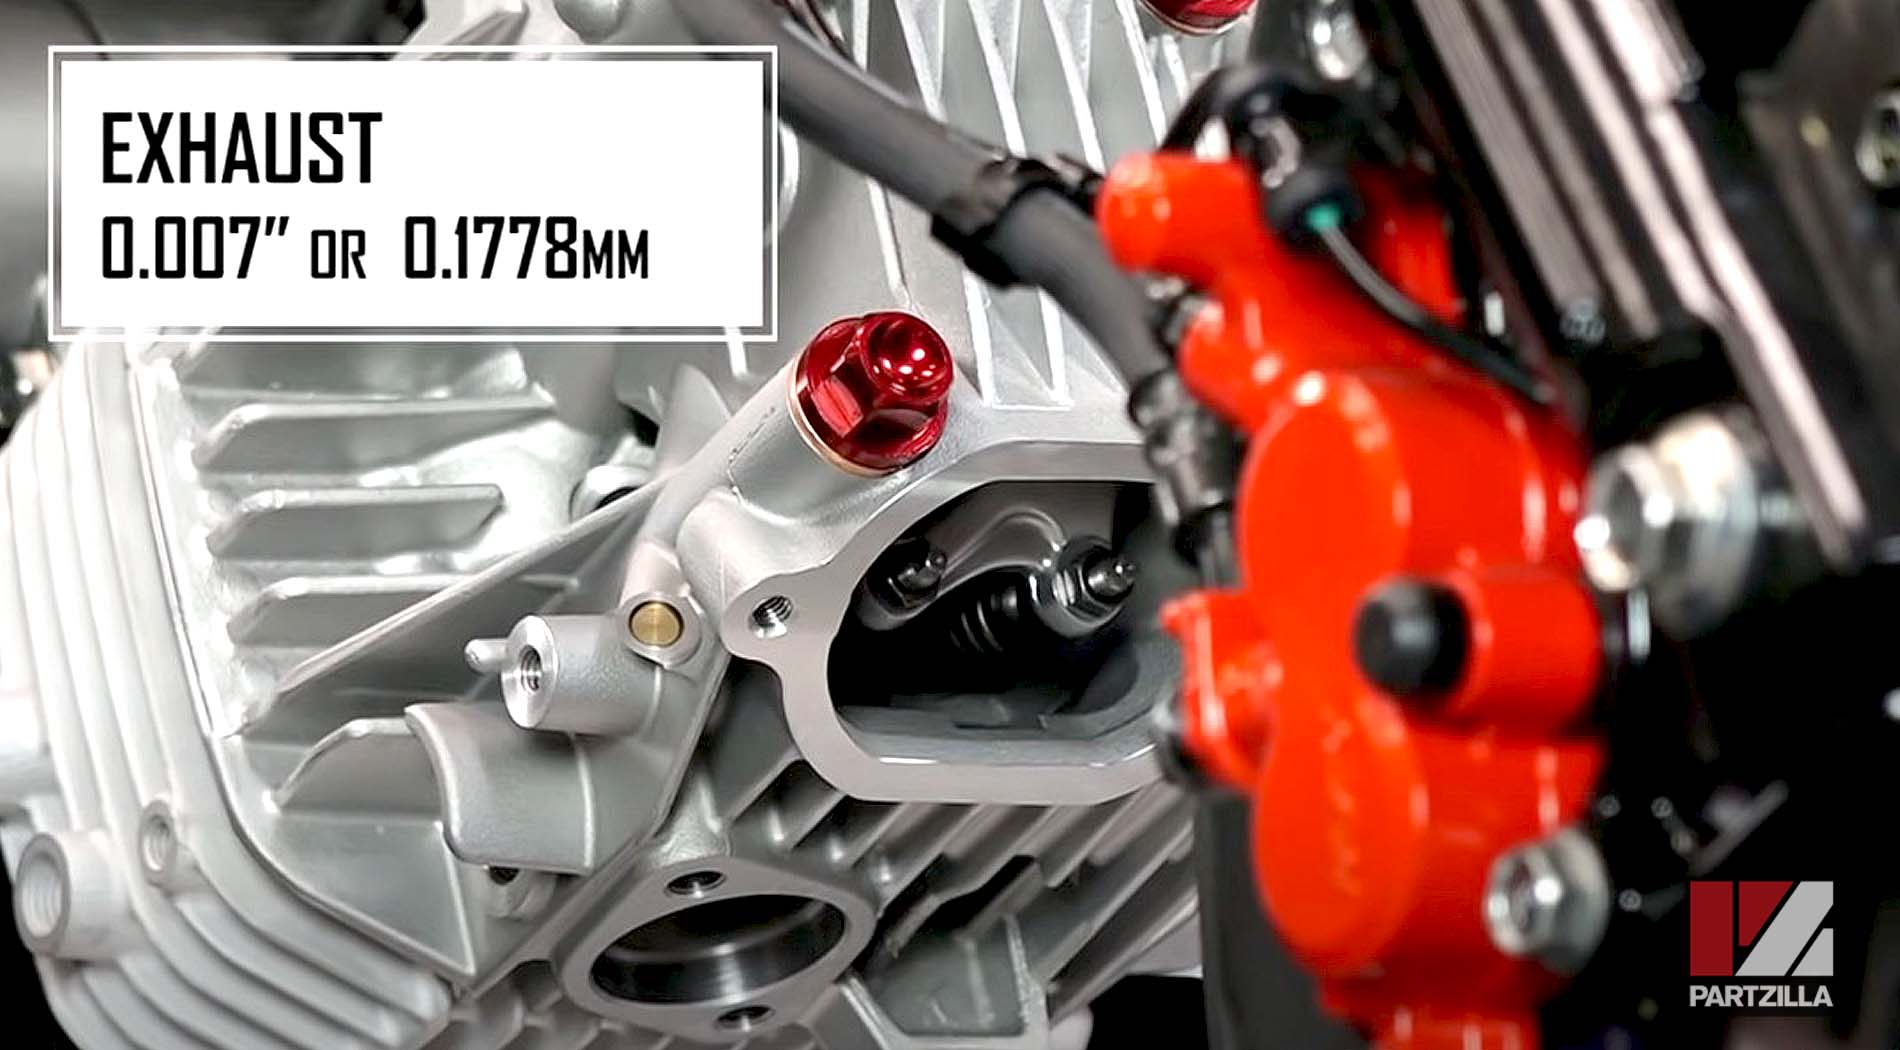
Step 4. Install the new valve covers with the small arrows pointing upward.
Watch the clip below to see the timing and valve lash segments of our Honda Grom big bore kit installation video.
Step 5. Reinstall the cam cover, followed by the timing cap and crankshaft cap into the left side crankcase cover.
Step 6. Take the thermostat from the old cylinder, install it in the new cylinder, and reattach the cable and bracket.
Now that the big bore kit is installed on our Honda Grom and the top end is rebuilt, our next project is to install a larger throttle body, a high-flow air filter, and an upgraded exhaust system.
Watch the video above to see our Honda Grom intake and exhaust installation video.