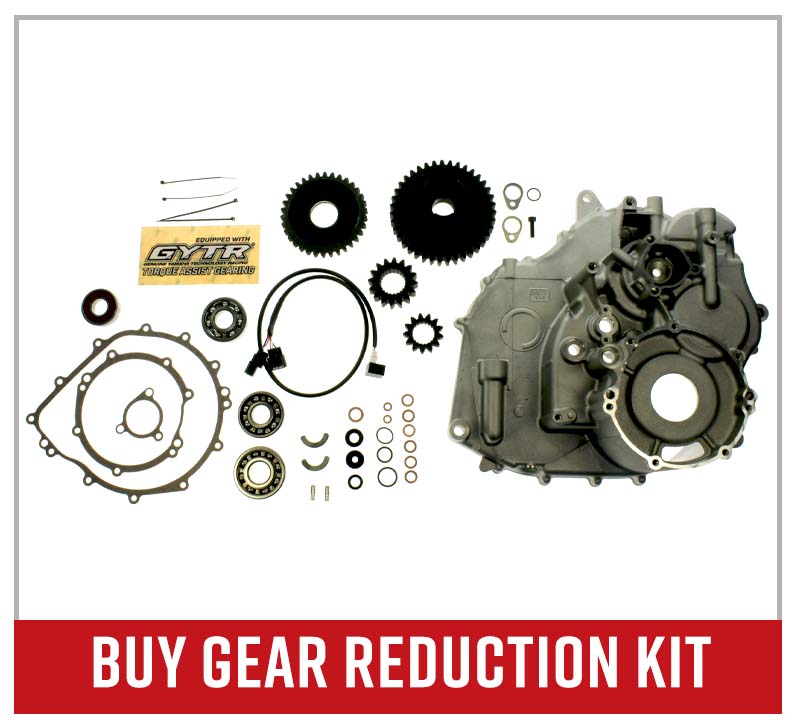
Yamaha YXZ1000R Gear Reduction Kit Installation
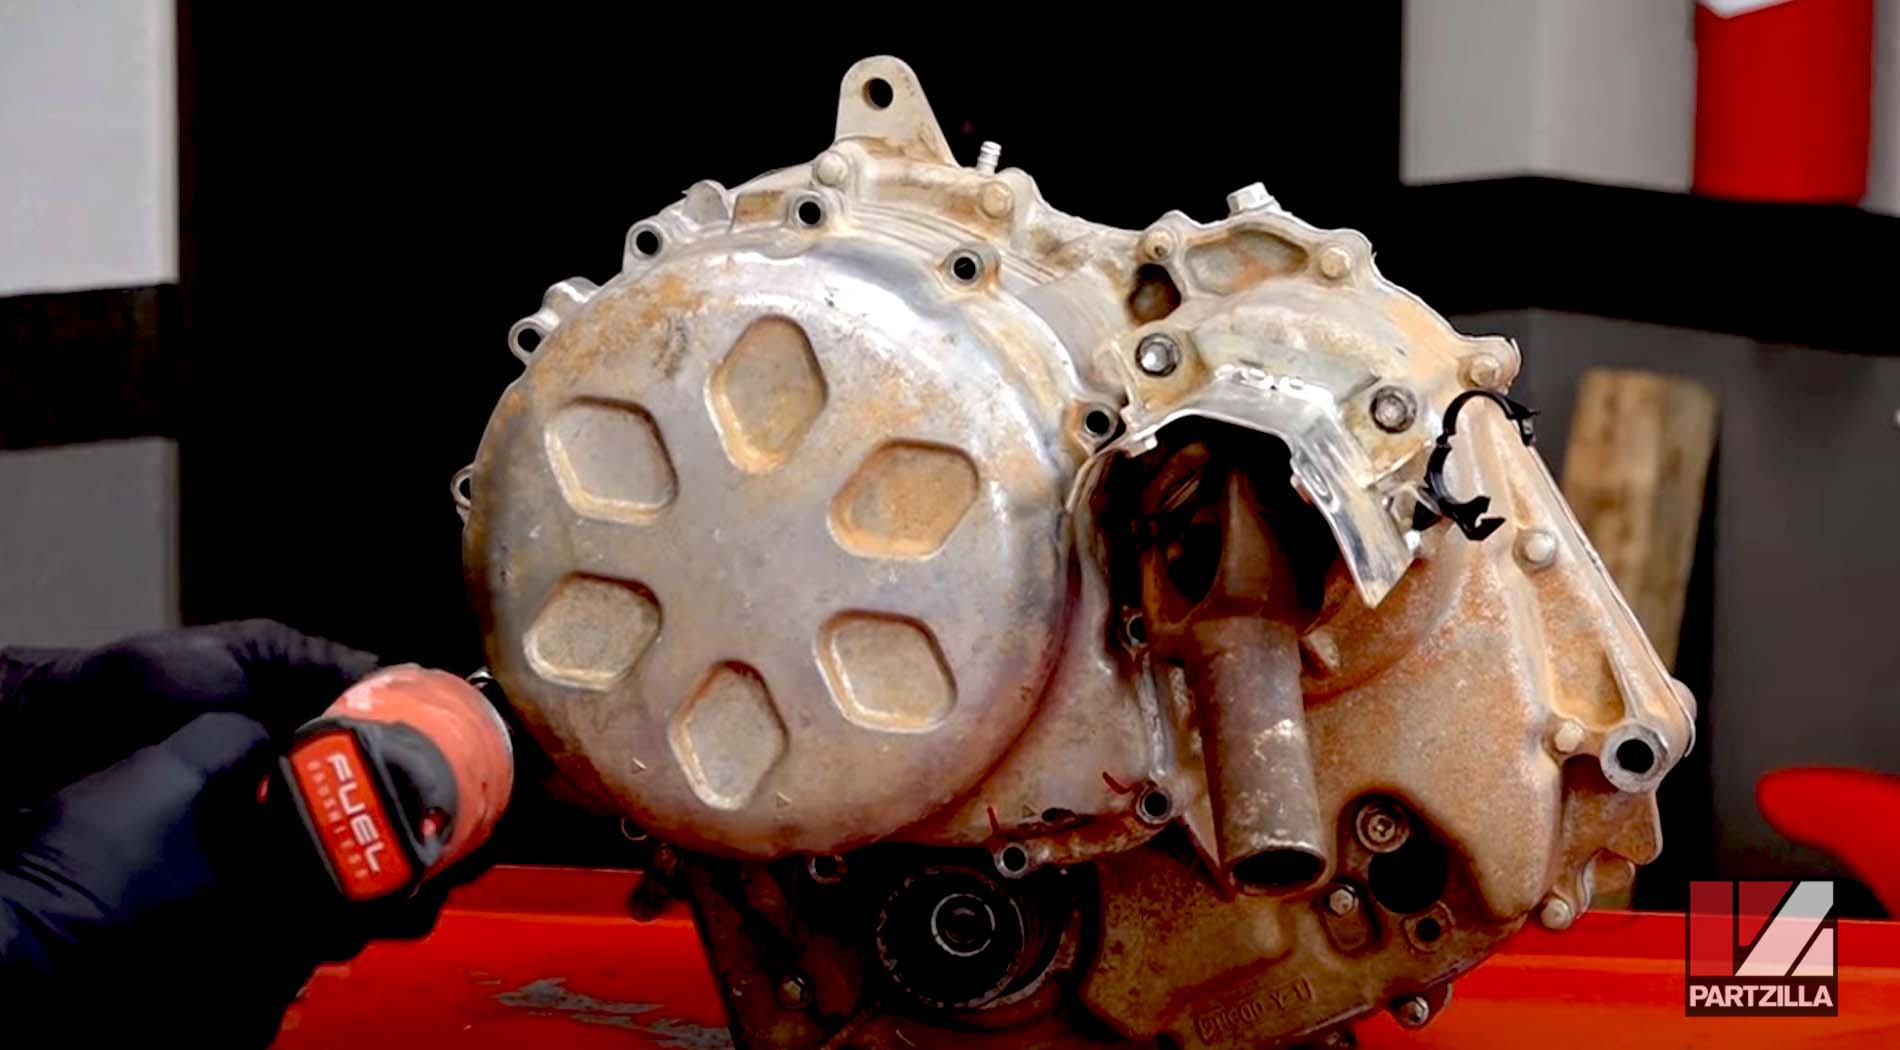
Our Yamaha side-by-side needed a transmission overhaul, and in this project we're breaking down the transmission of a 2016 YXZ1000R and installing what they call a gear reduction kit.
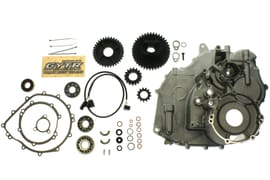
Yamaha produces this GYTR gear reduction kit for machines that ride in tight trails. Watch the video above and follow the steps below to do a Yamaha YXZ1000R gear reduction kit installation.
Tools & Parts - Yamaha YXZ1000 Transmission Gear Reduction Kit Installation
- Basic hand tools
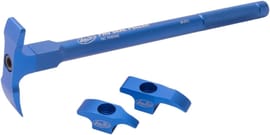
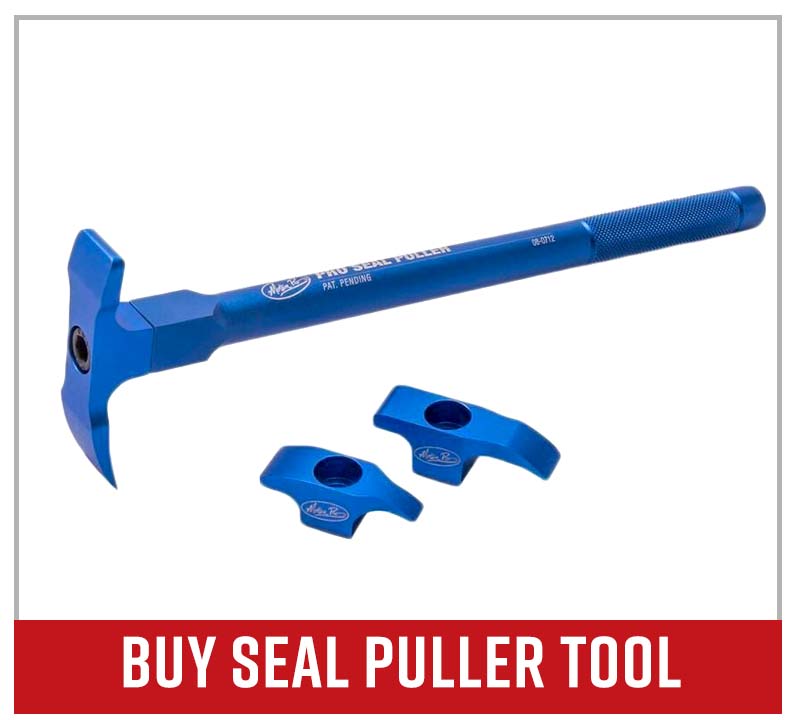
- Soft blow hammer
- Bearing driver
- Circlip pliers
- Transmission oil
- Impact driver
NOTE: The steps below are a summarized breakdown of the gear reduction kit installation. Watch the entire video above or the breakdown of clips below to get the full details on how to do this upgrade, including any additional tools and supplies needed.
Yamaha GYTR Gear Reduction Kit Installation Steps
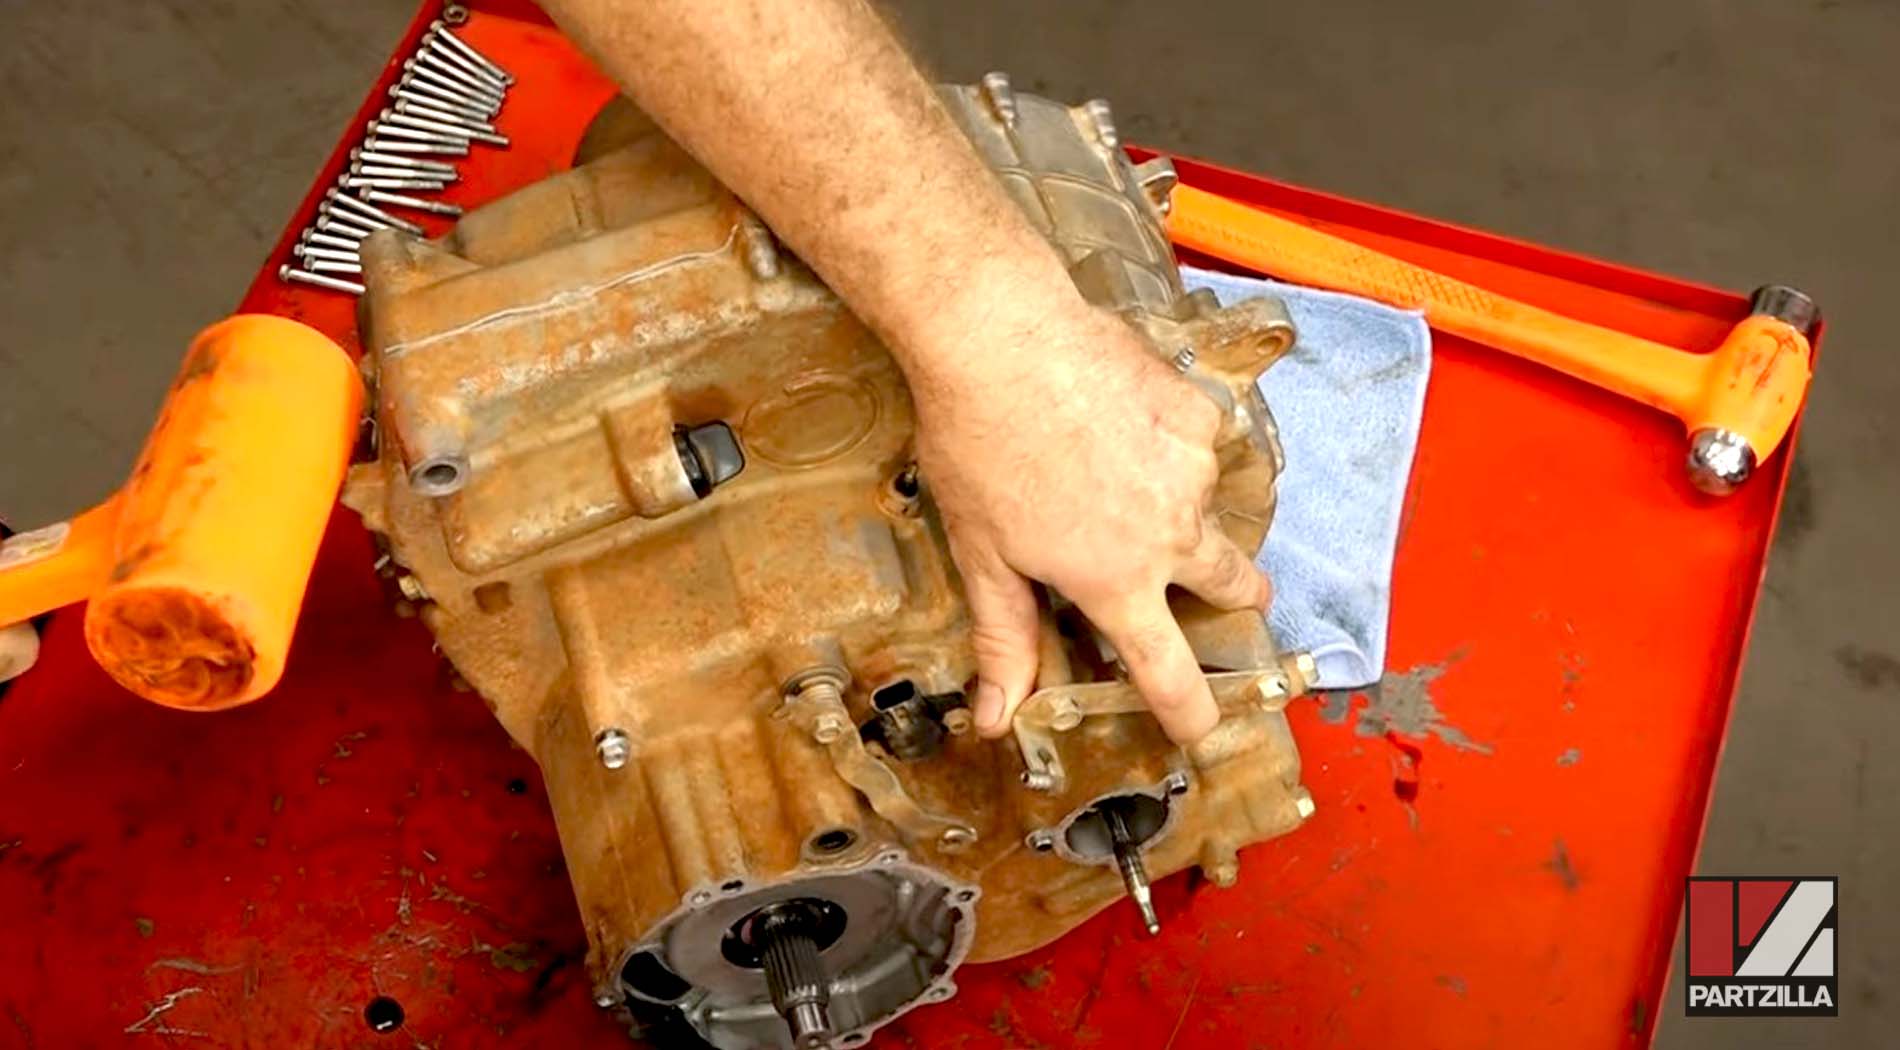
Step 1. Remove the clutch cover by taking off the 8mm bolts that hold it in place, then tapping it out gently with a soft-blow hammer.
PRO TIP: Use a marker to make note of any bolts that have a copper washer on the bolt so you don't miss them when you're putting everything back together.
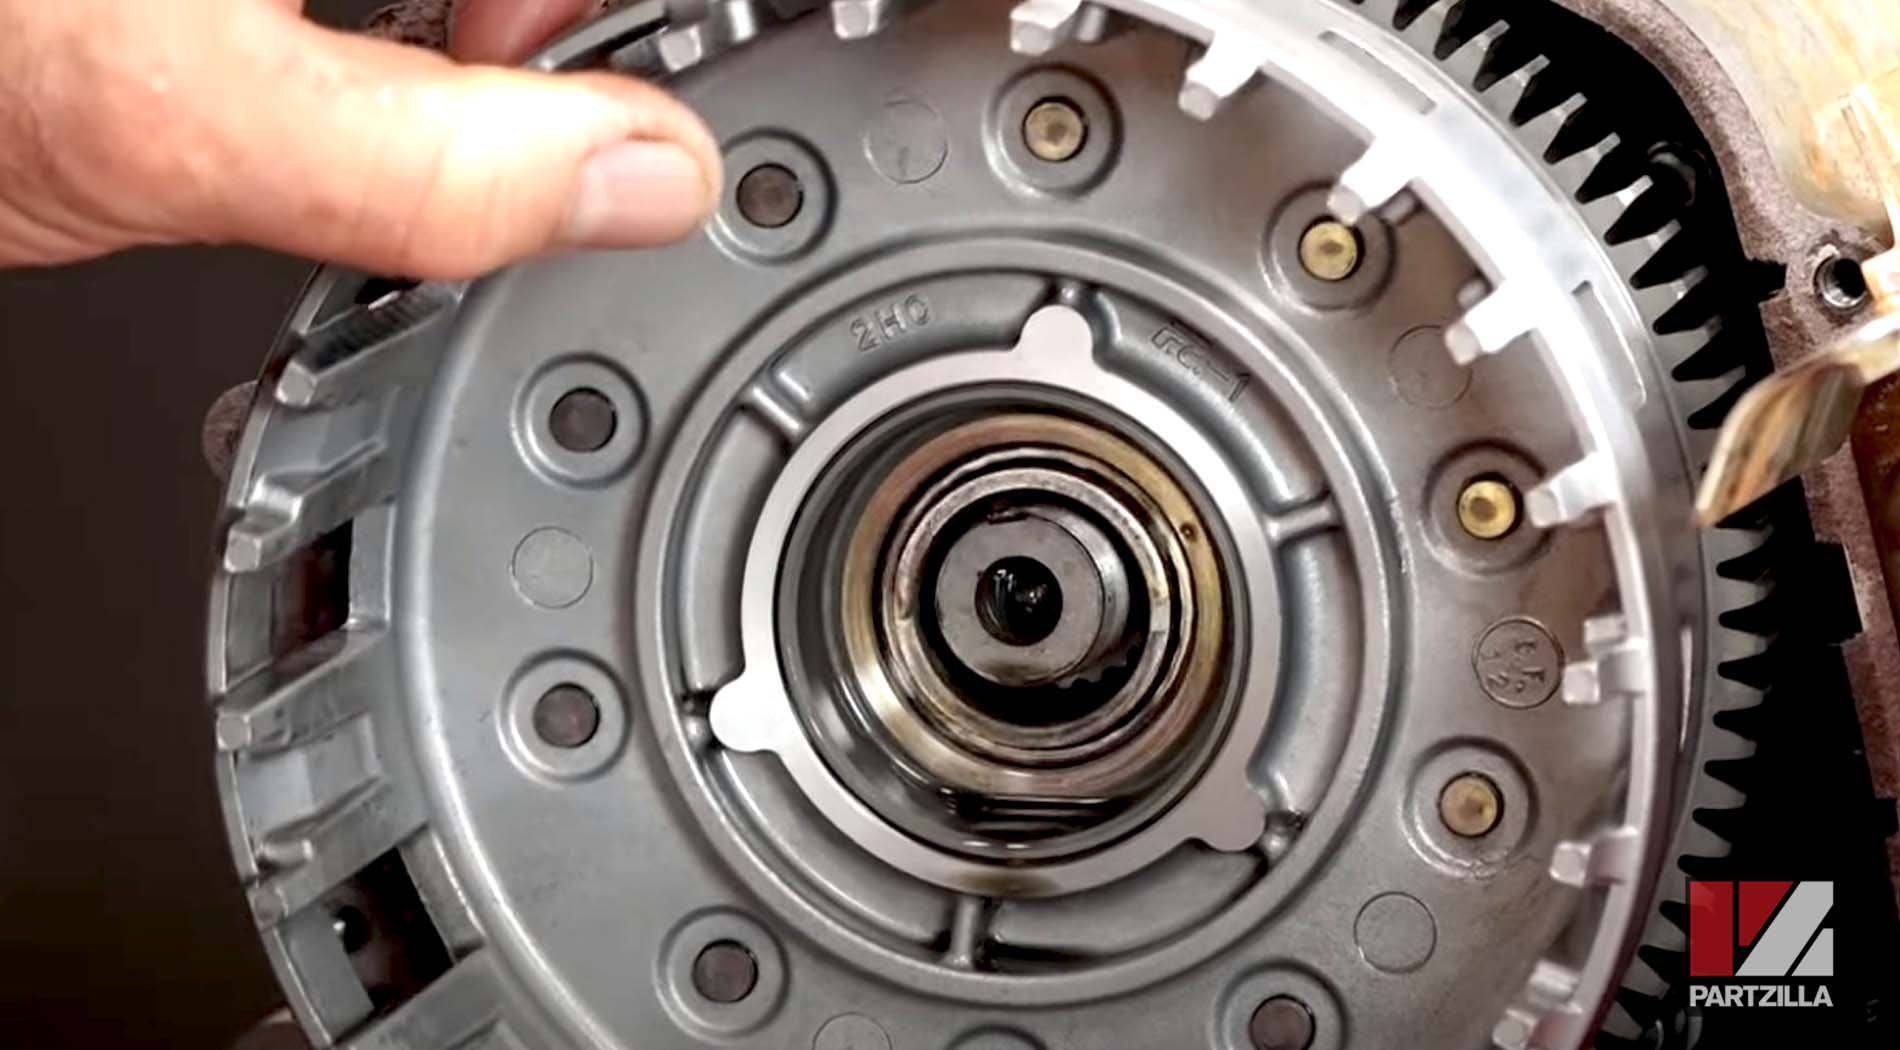
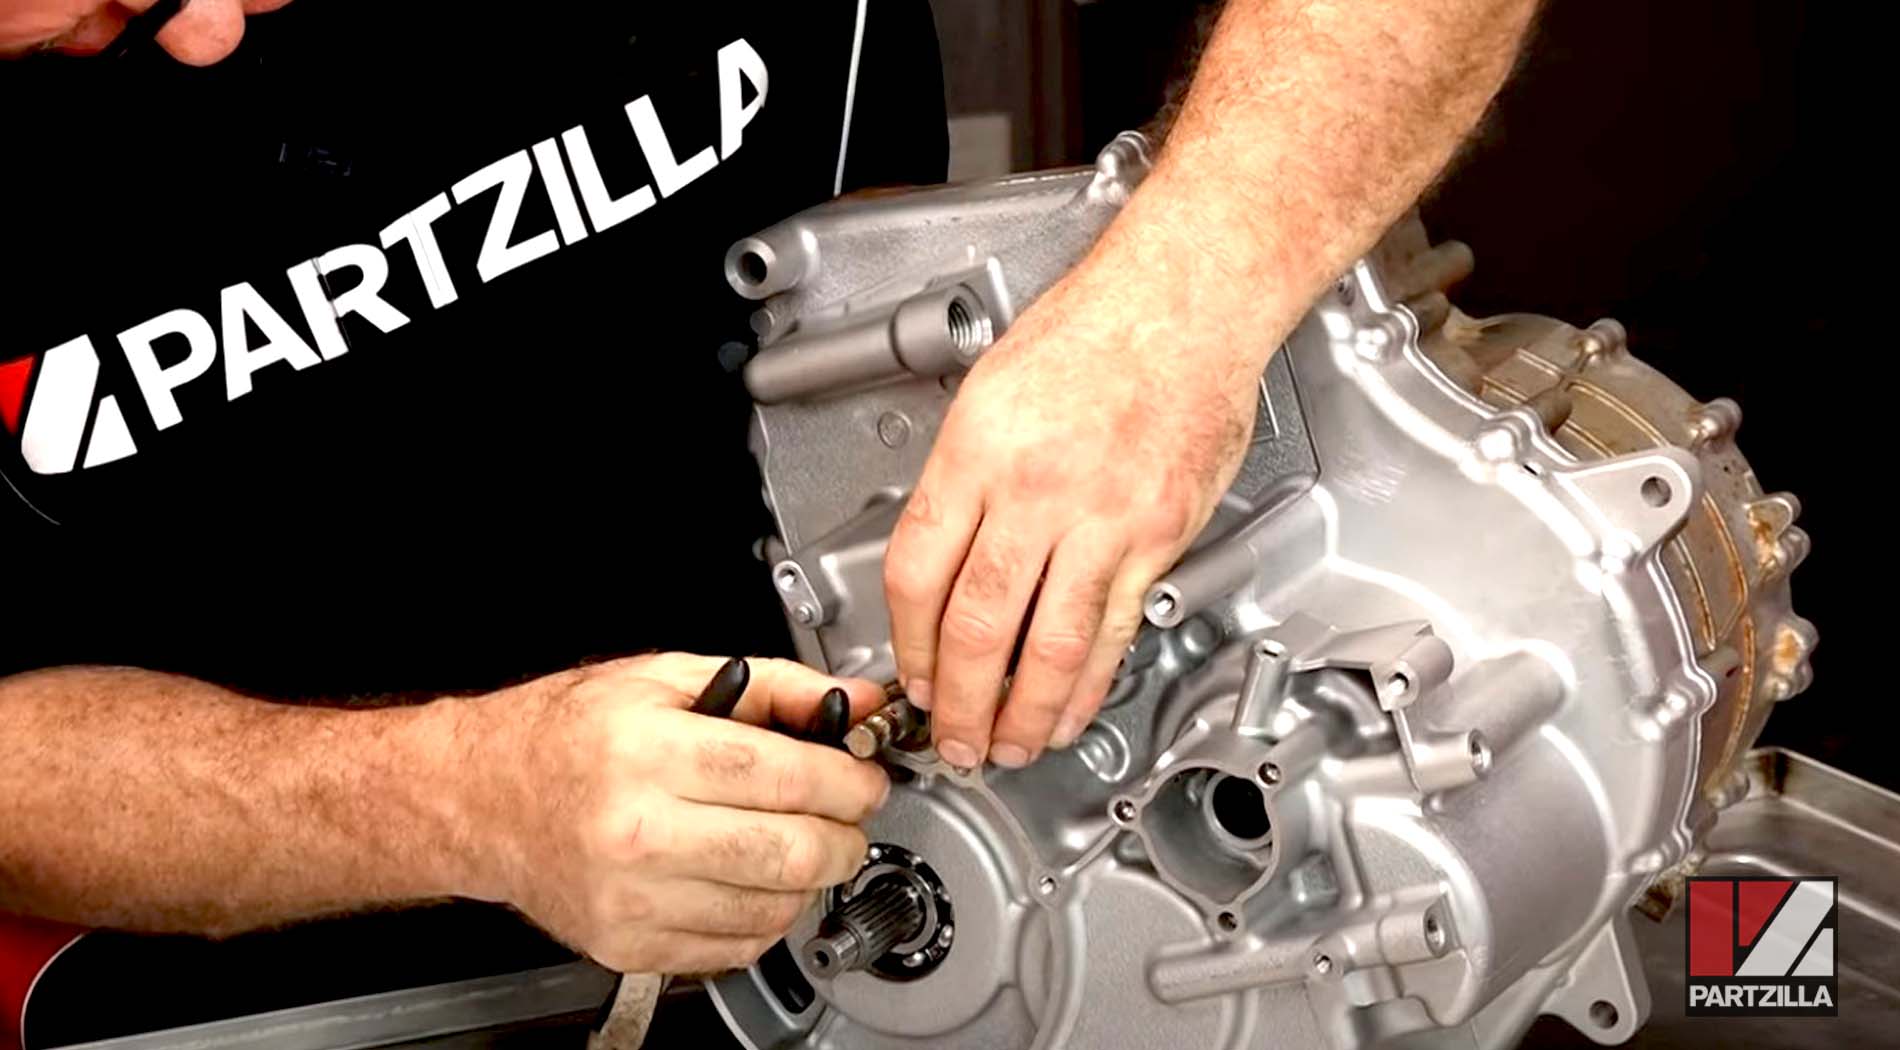
Step 2. Remove the 10mm bolts that hold the center clutch plate in place, followed by the clutch plates, the center bolt, the clutch basket and any other part of the clutch assembly. Use our YXZ1000R clutch parts diagram for reference.
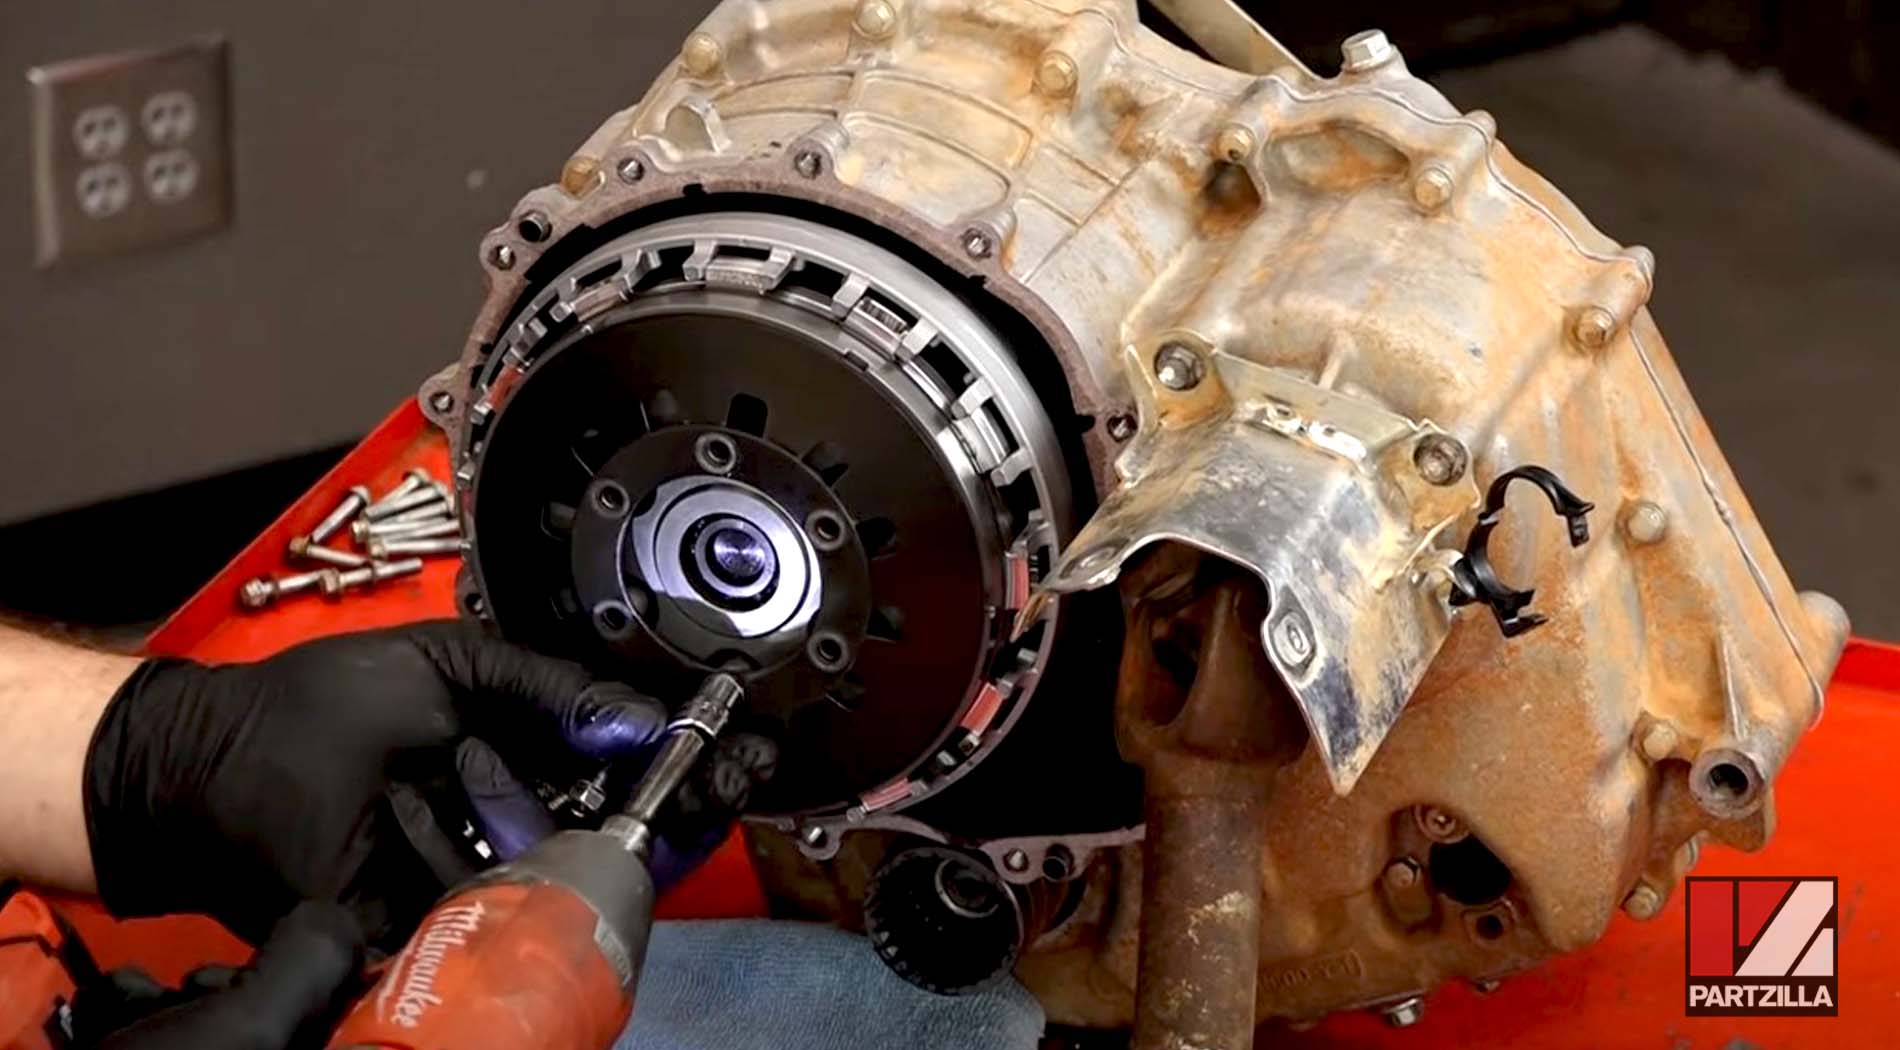
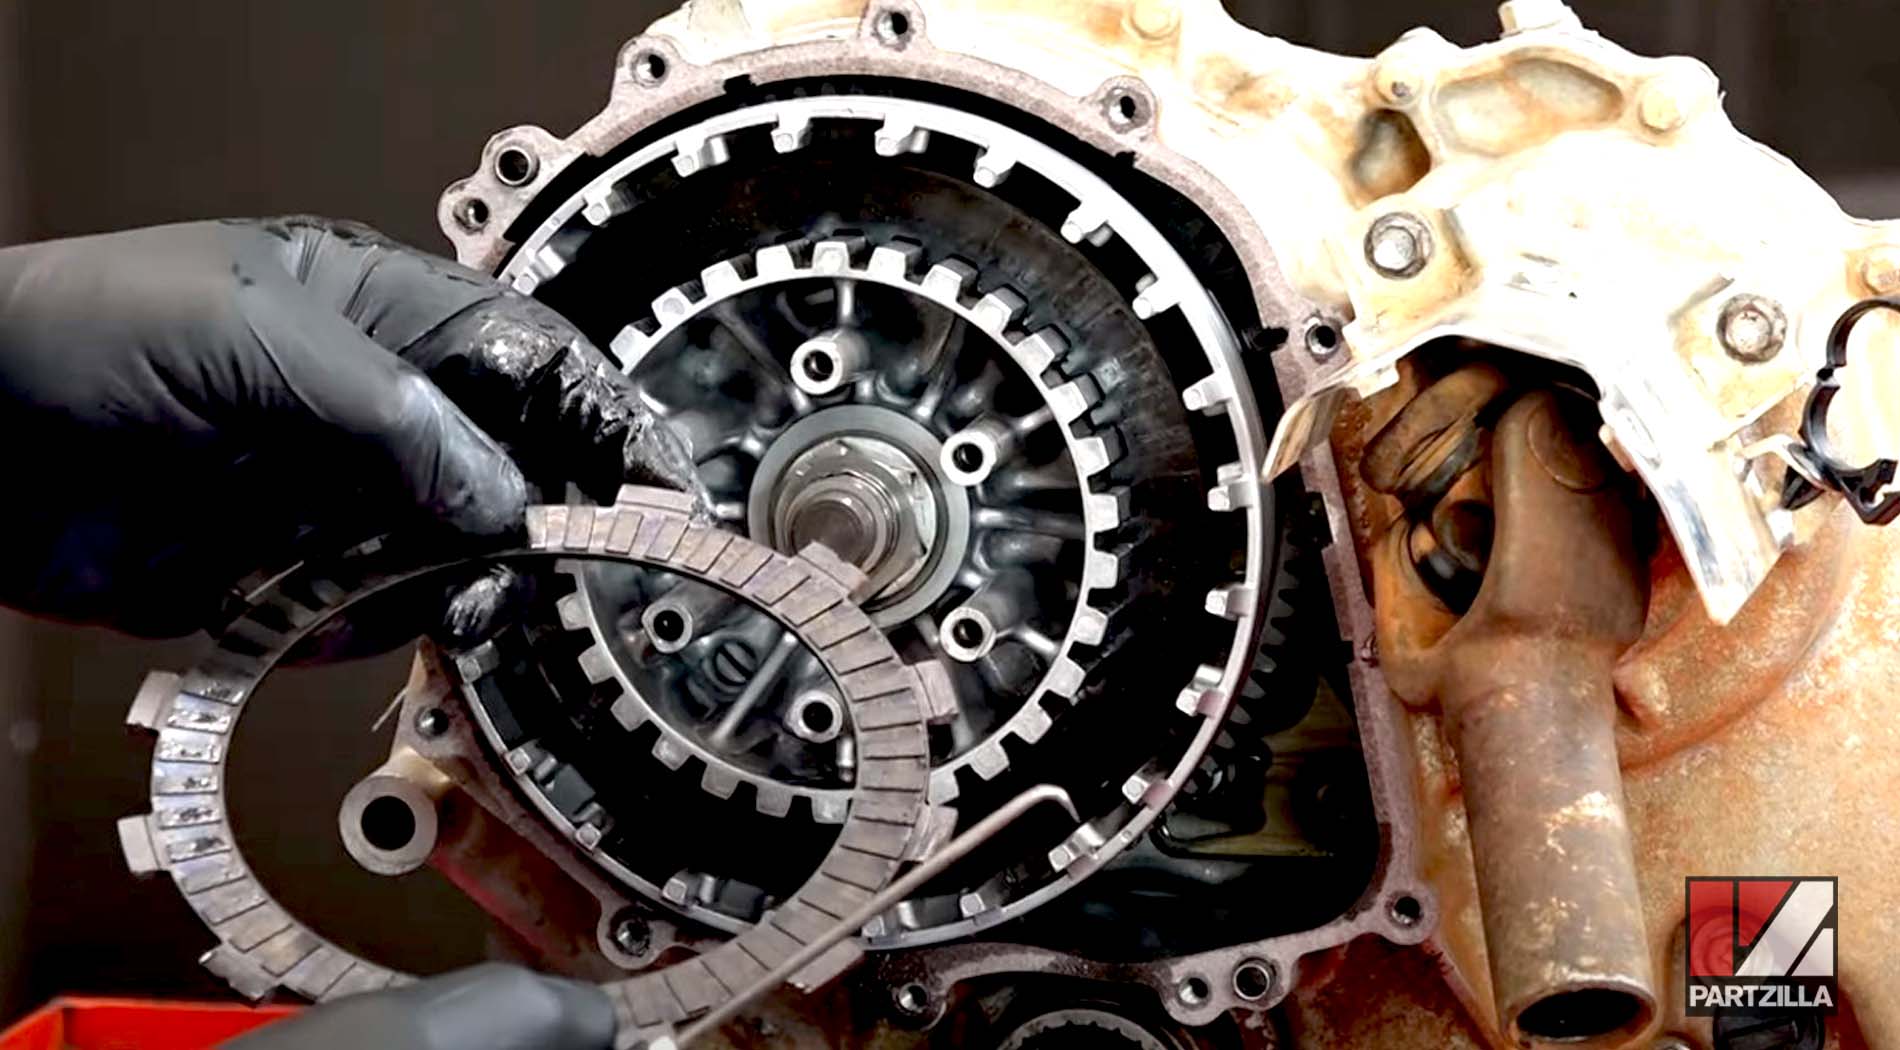
PRO TIP: Use a large impact driver or an air impact to remove the center bolt that holds the clutch assembly in place.
Watch the clip below to see the transmission teardown and clutch removal segments of our Yamaha YXZ1000 gear reduction kit installation video
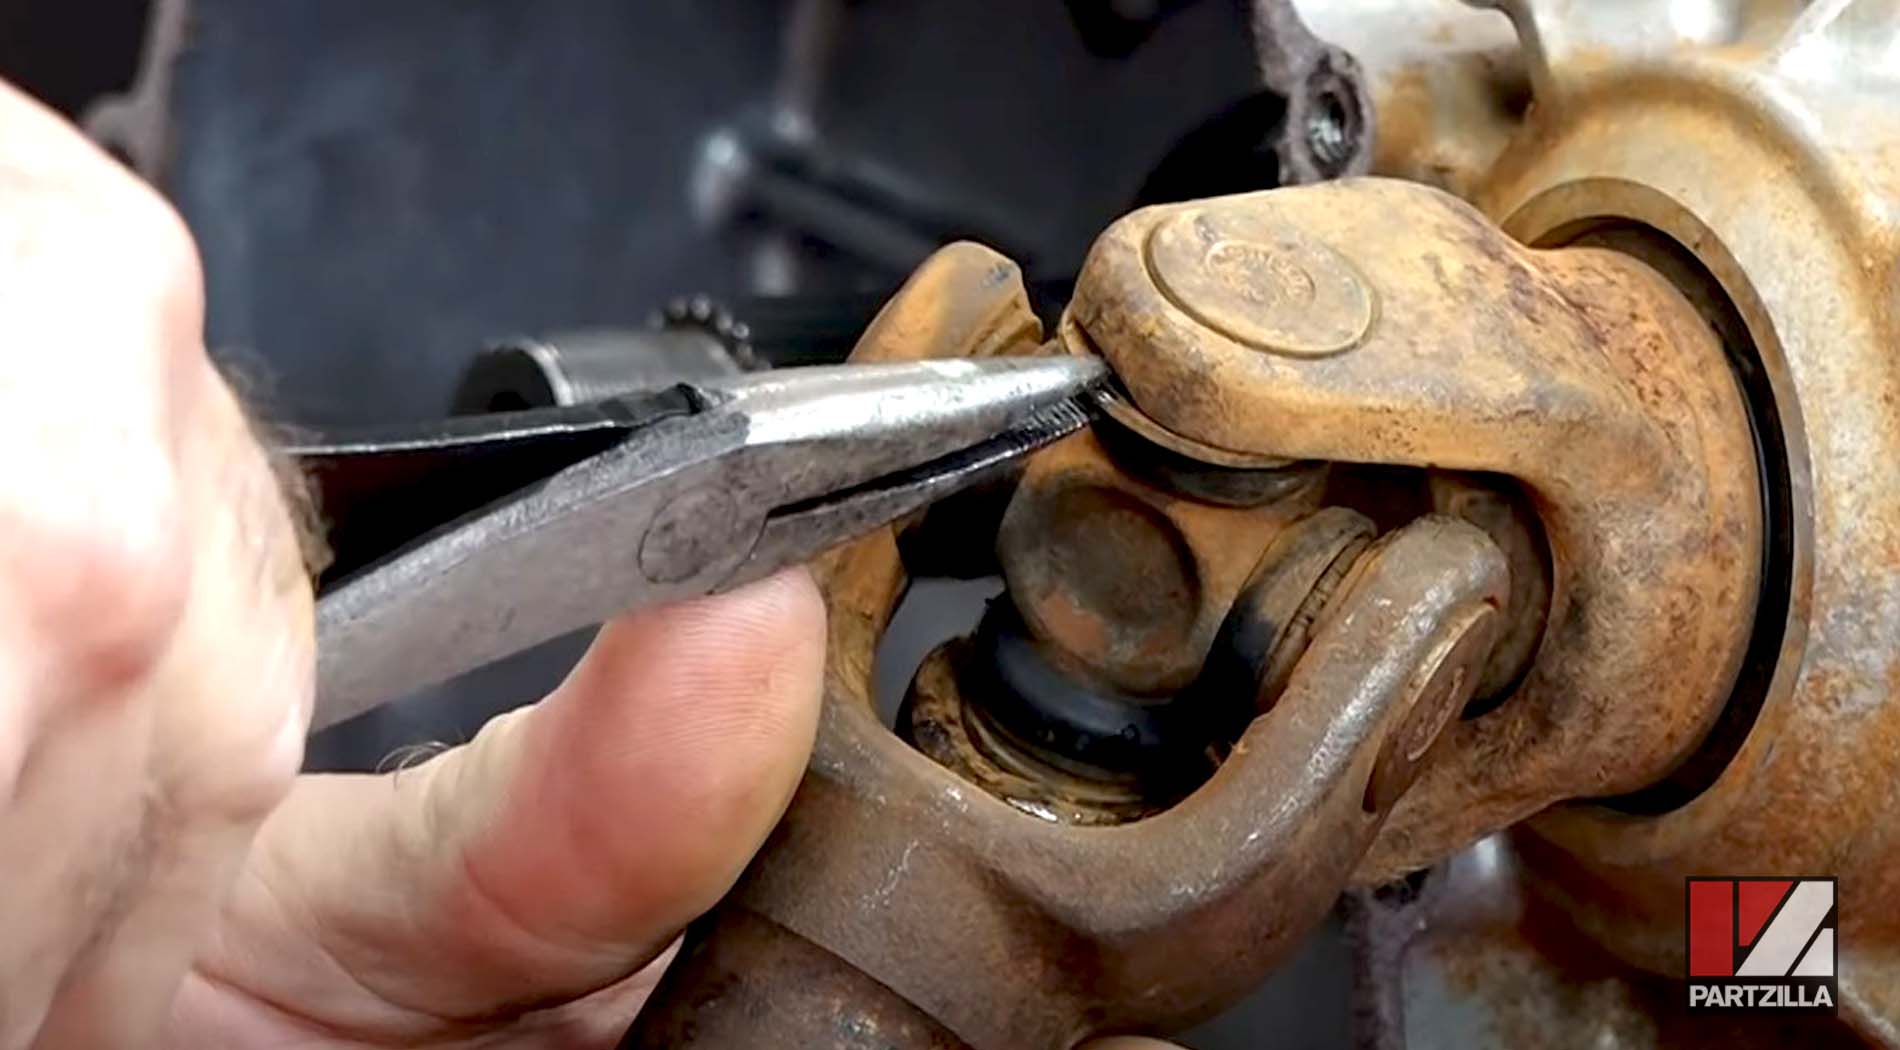
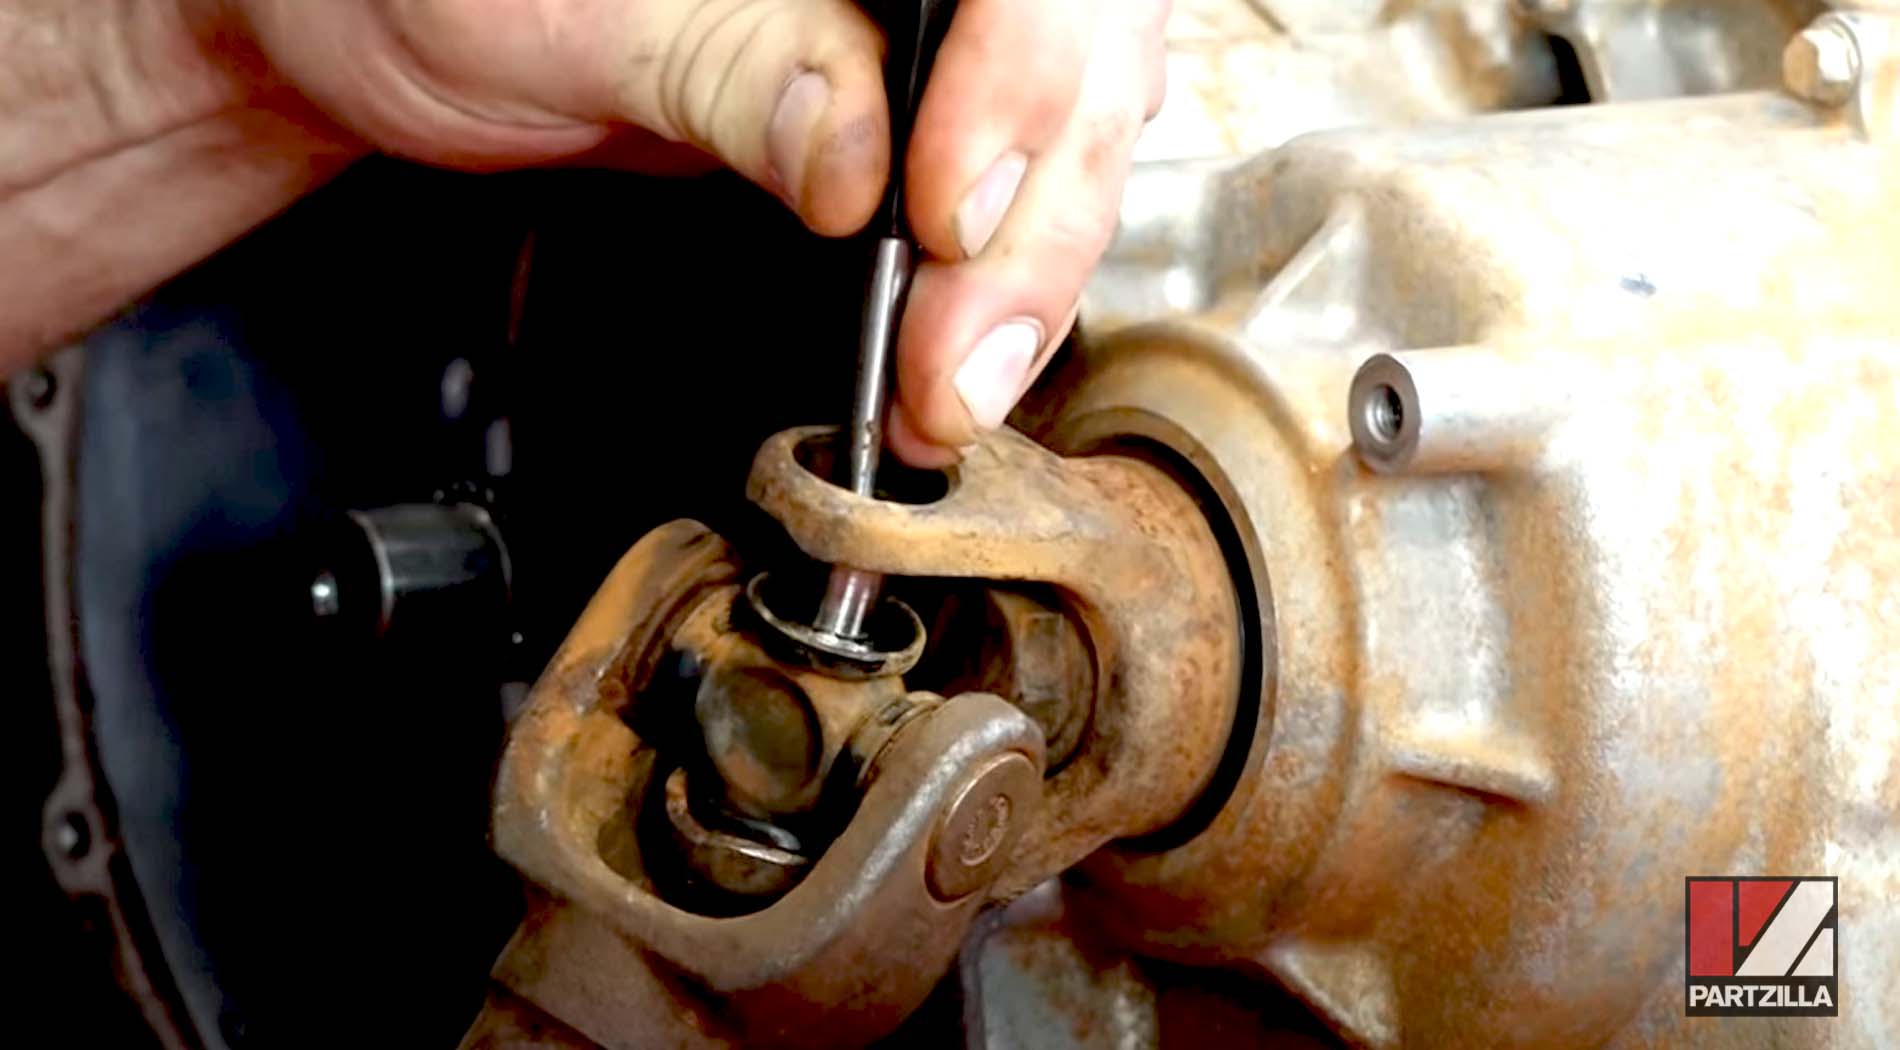
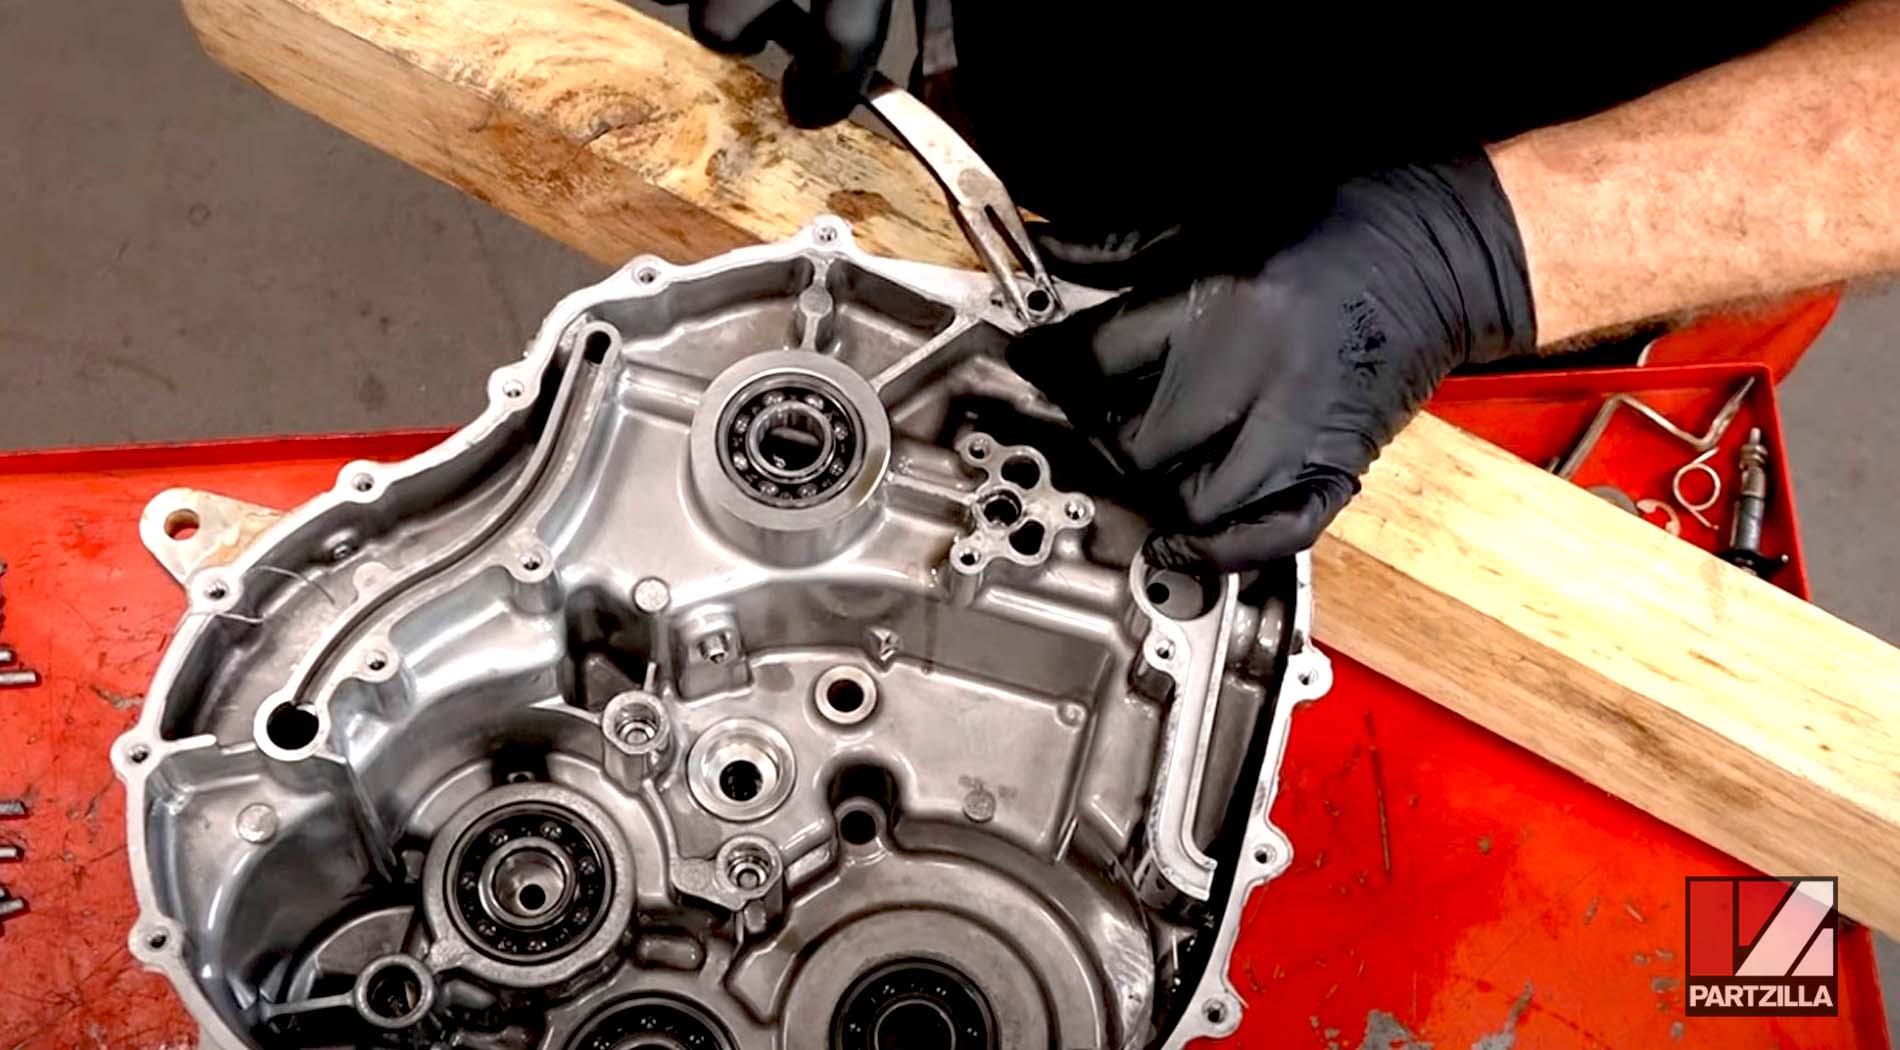
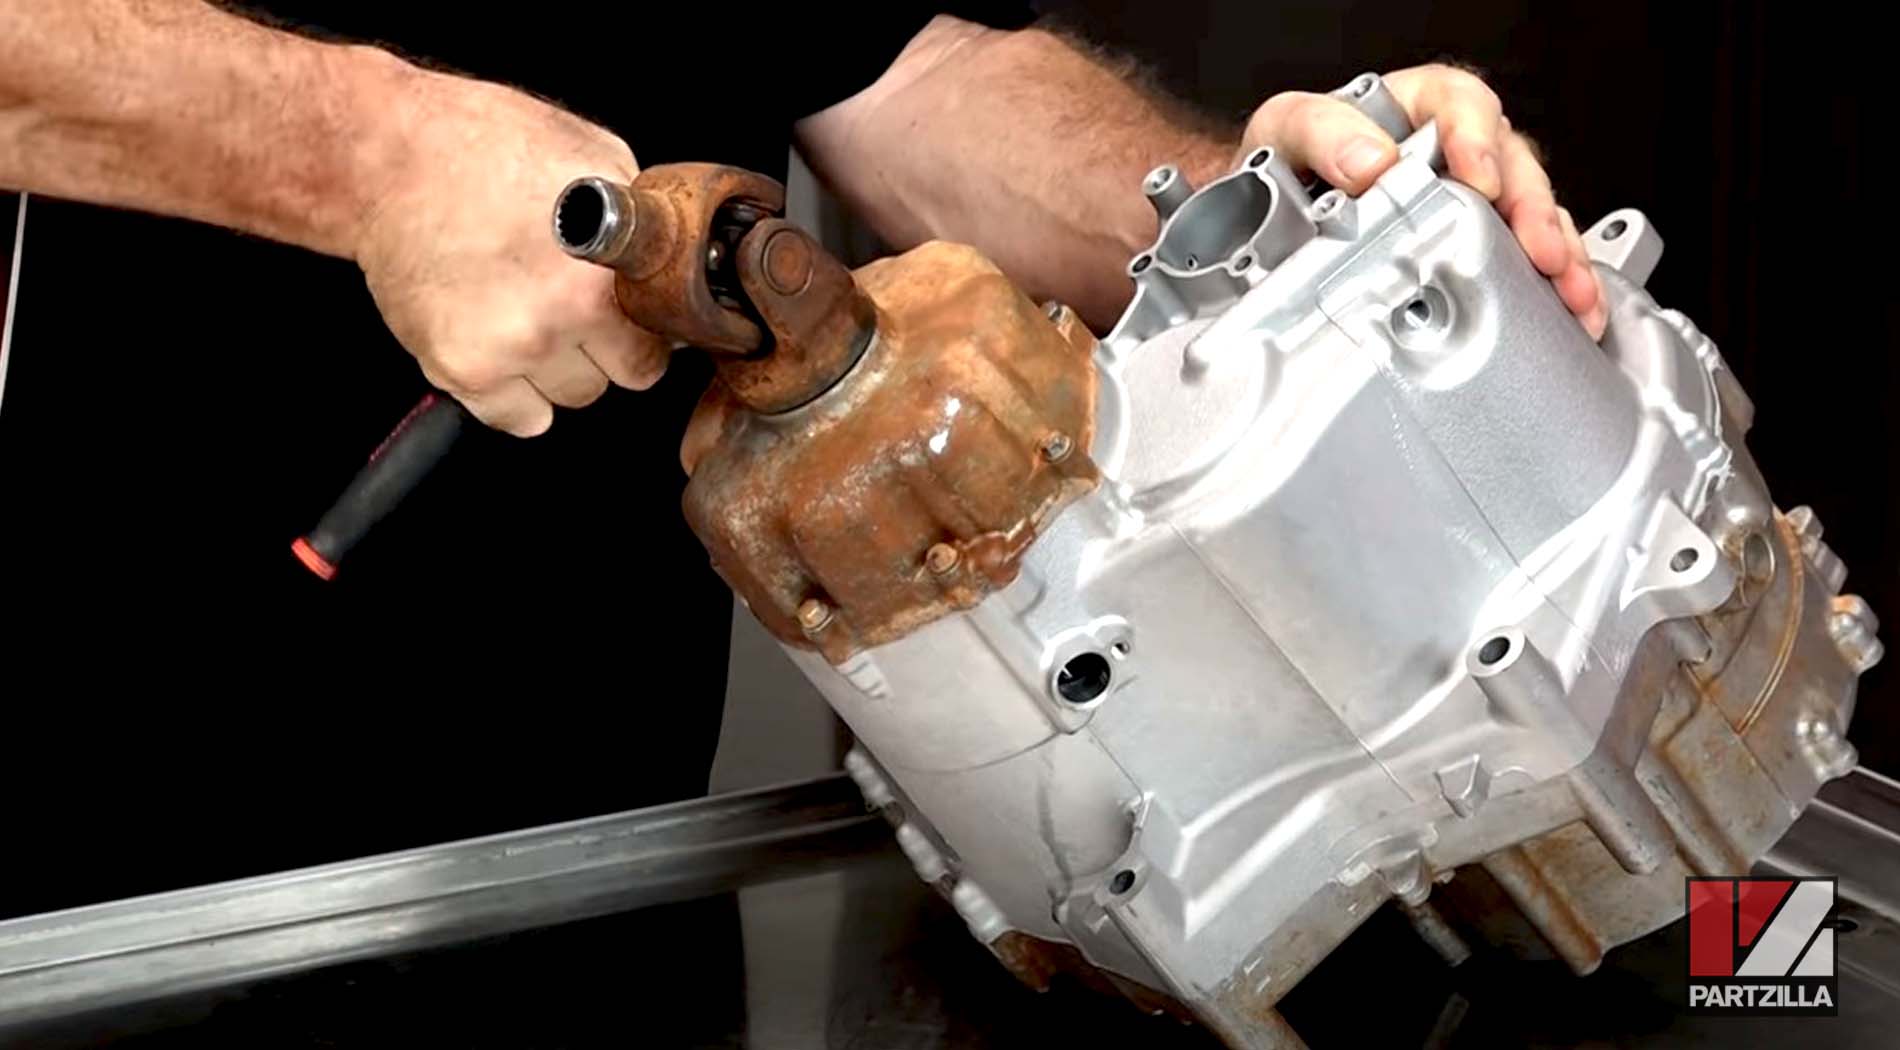
Step 3. Remove the upper cover of the primary drive universal joint, followed by its circlips and the joint itself.
NOTE: Use circlip pliers to remove the circlips, and a drift to break it loose.
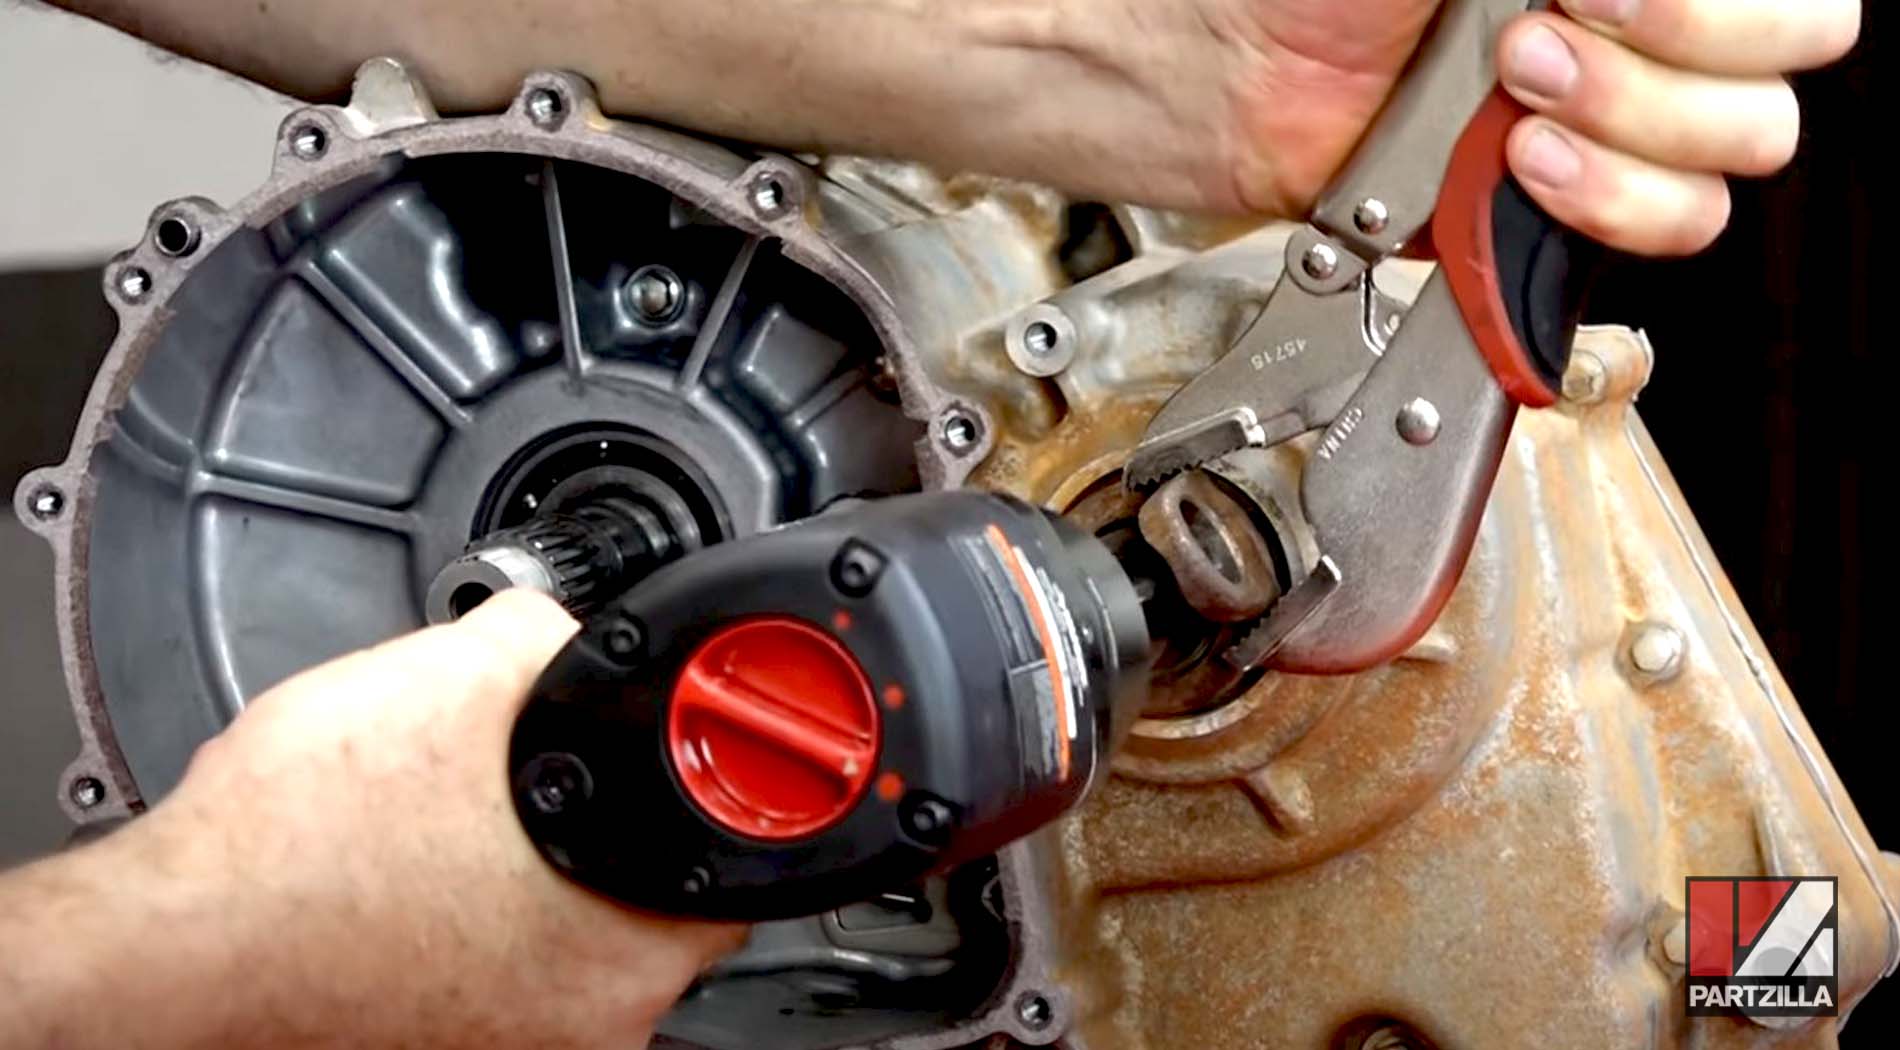
Step 4. Remove the coupling gear down low on the case.
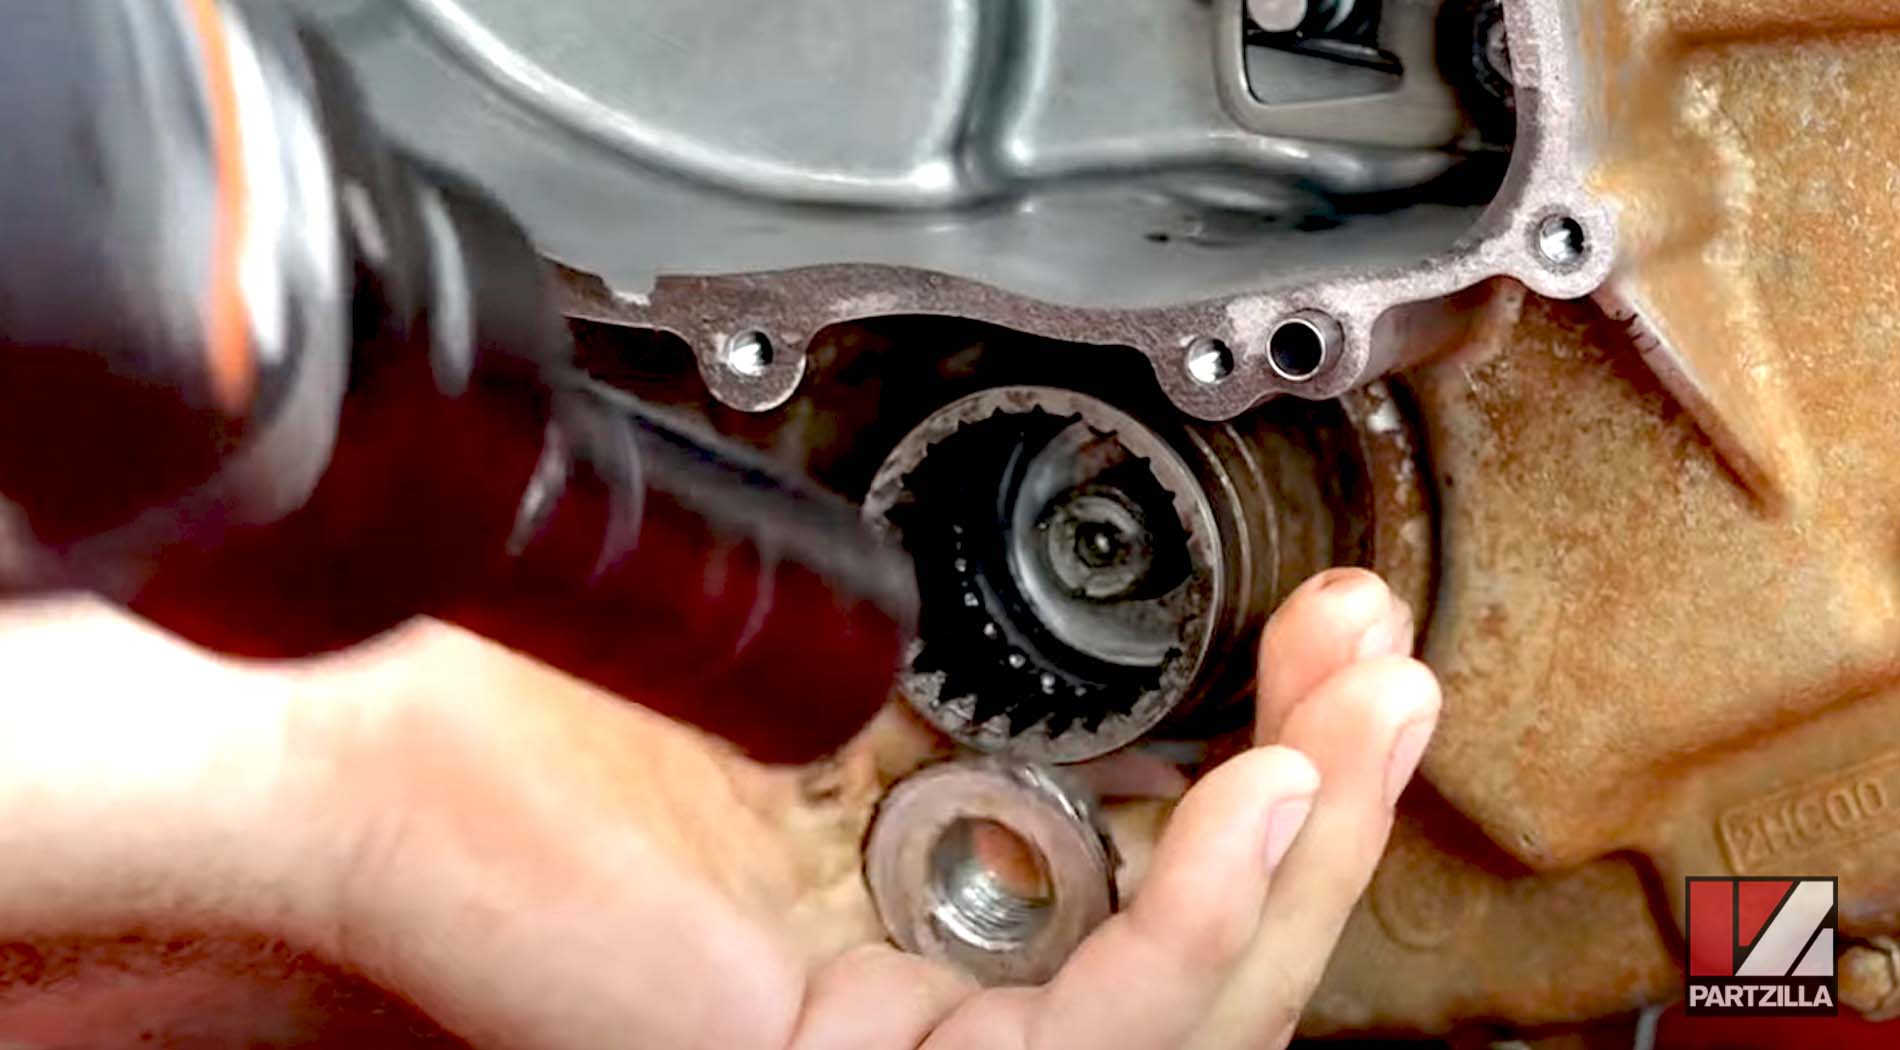
Step 5. Remove the shift shaft by getting the arm off of it, then pulling the back through the other side. Also, remove its circlip and washer before pulling it out.
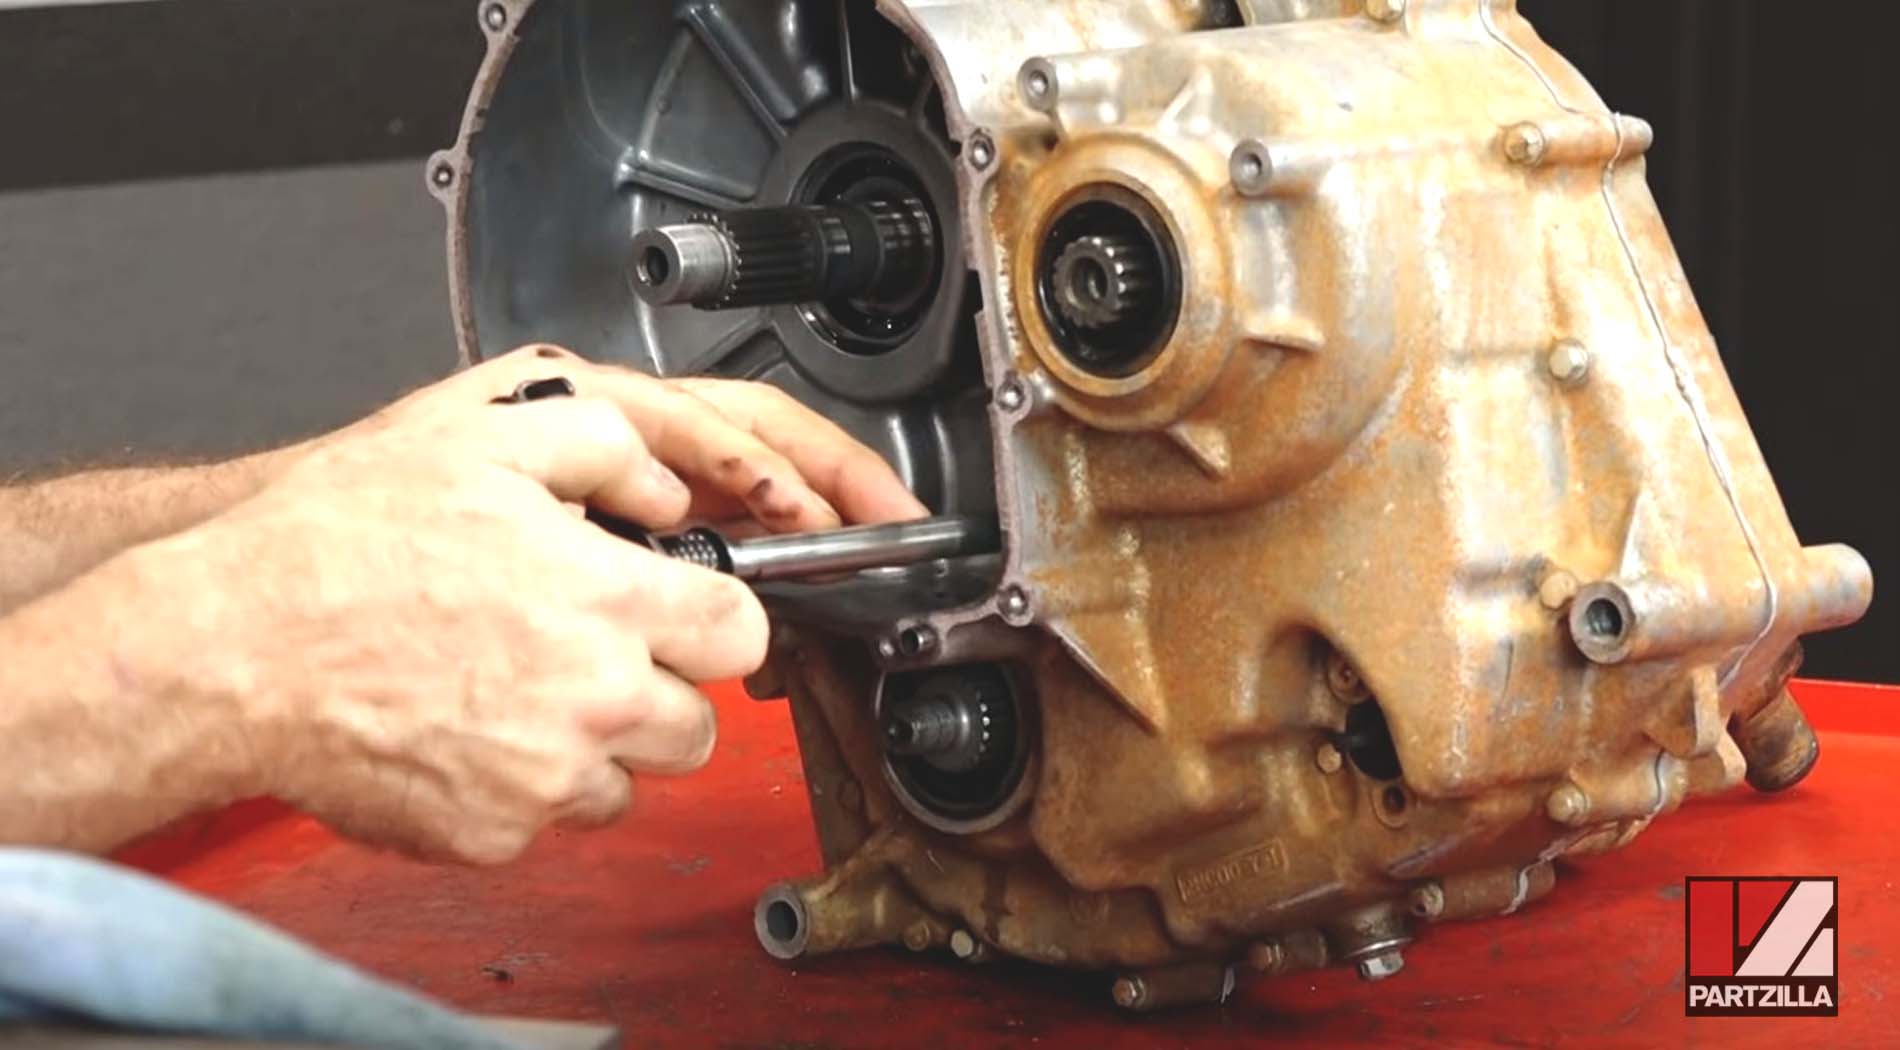
Step 6. Remove the detent.
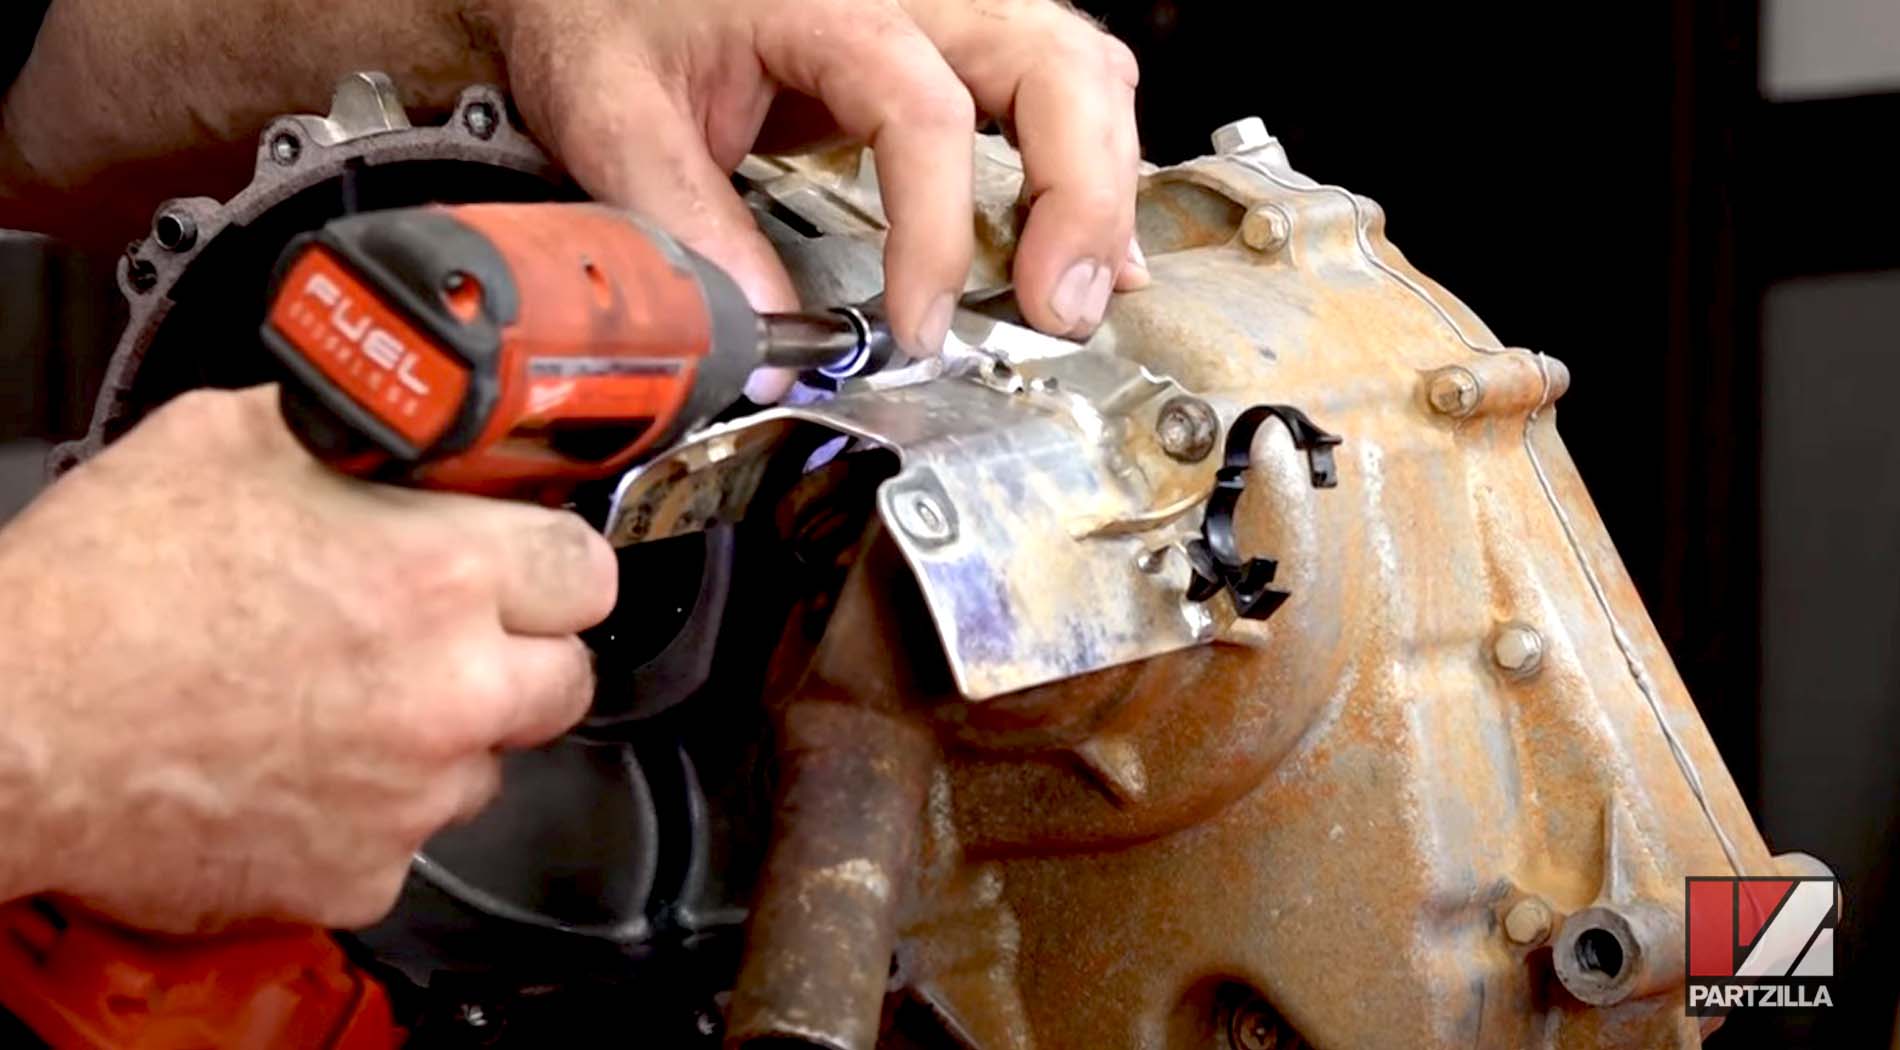
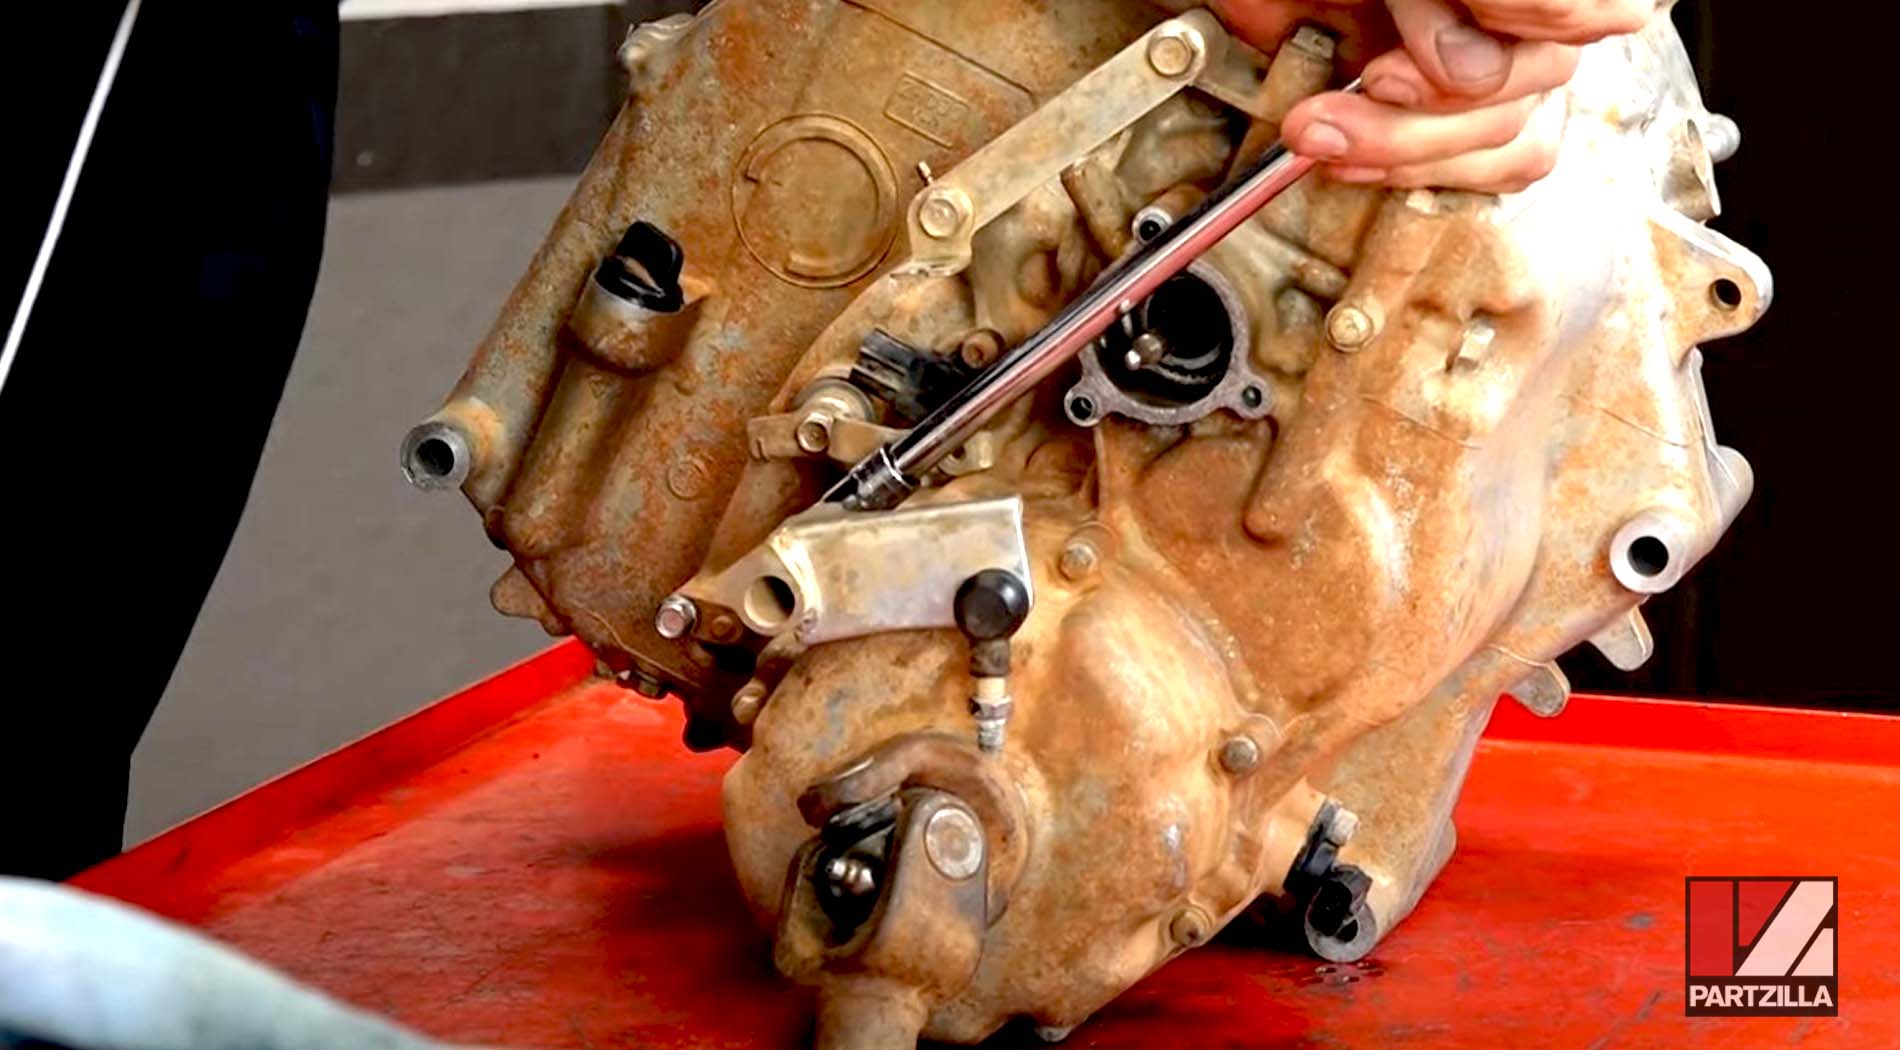
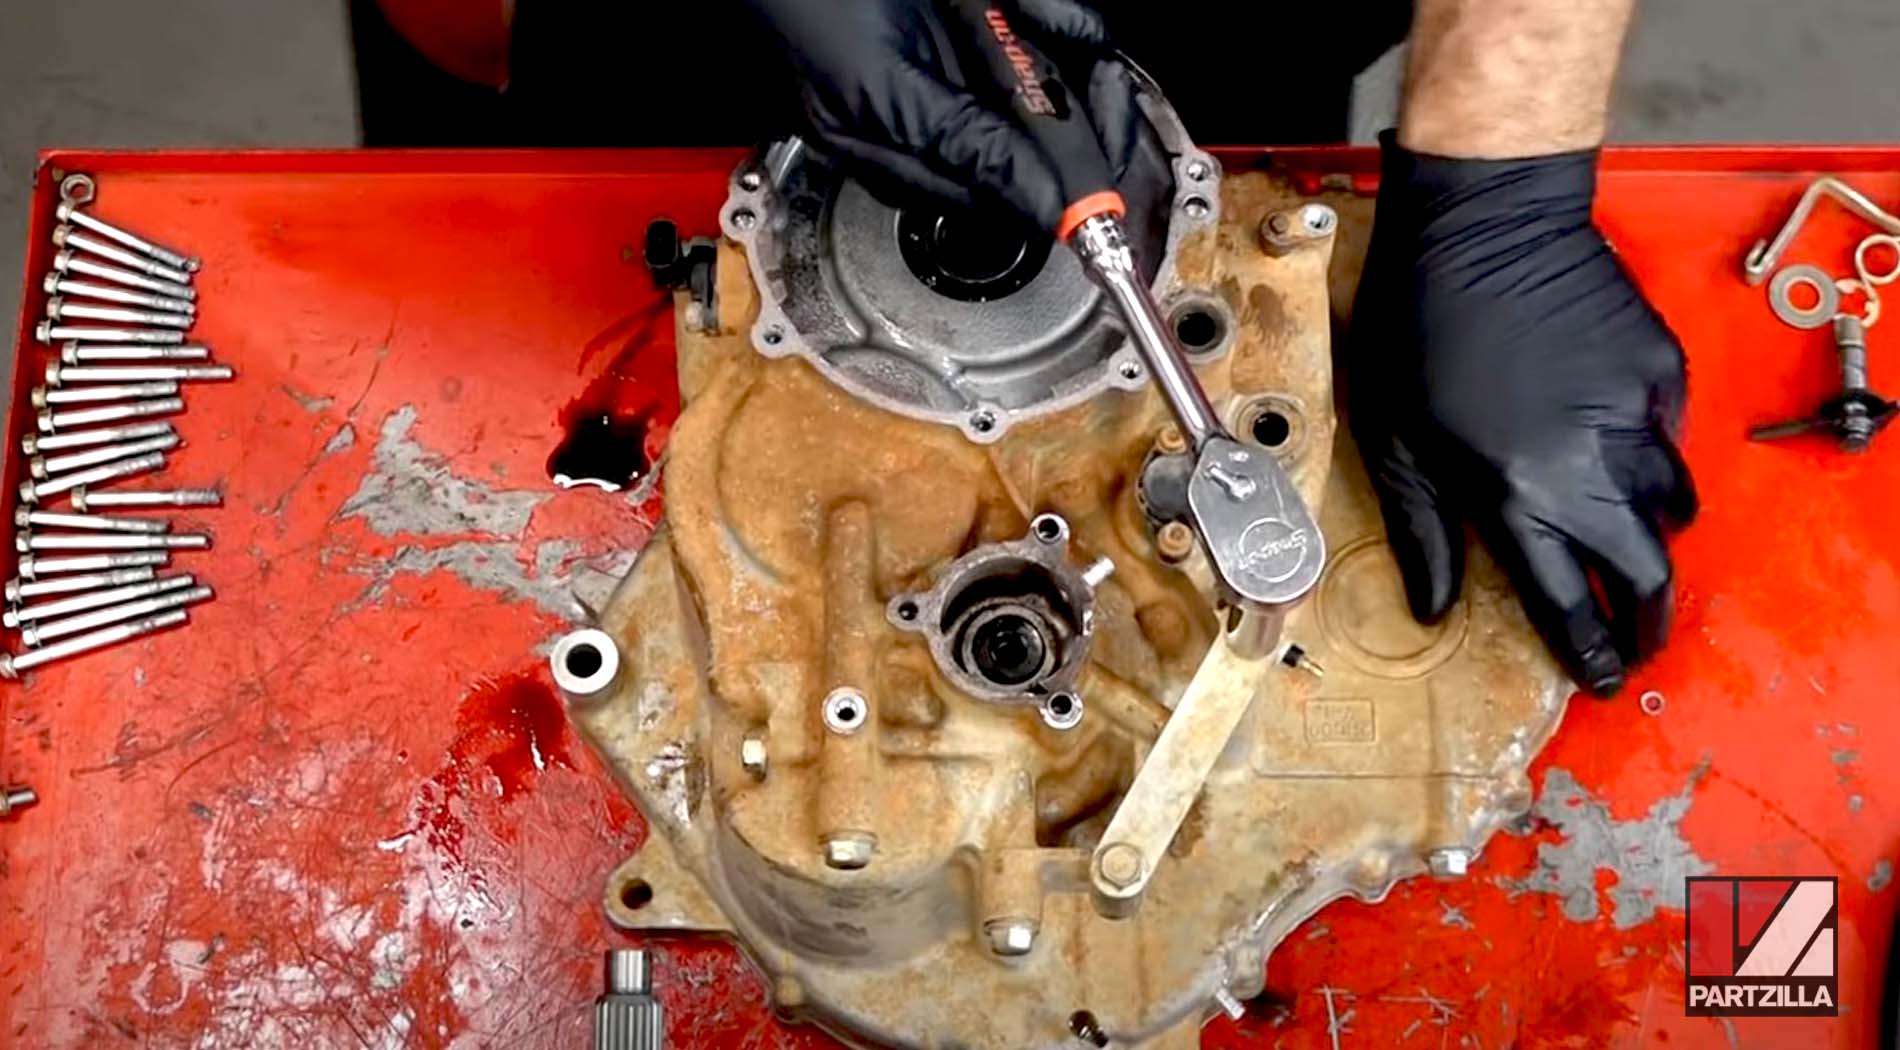
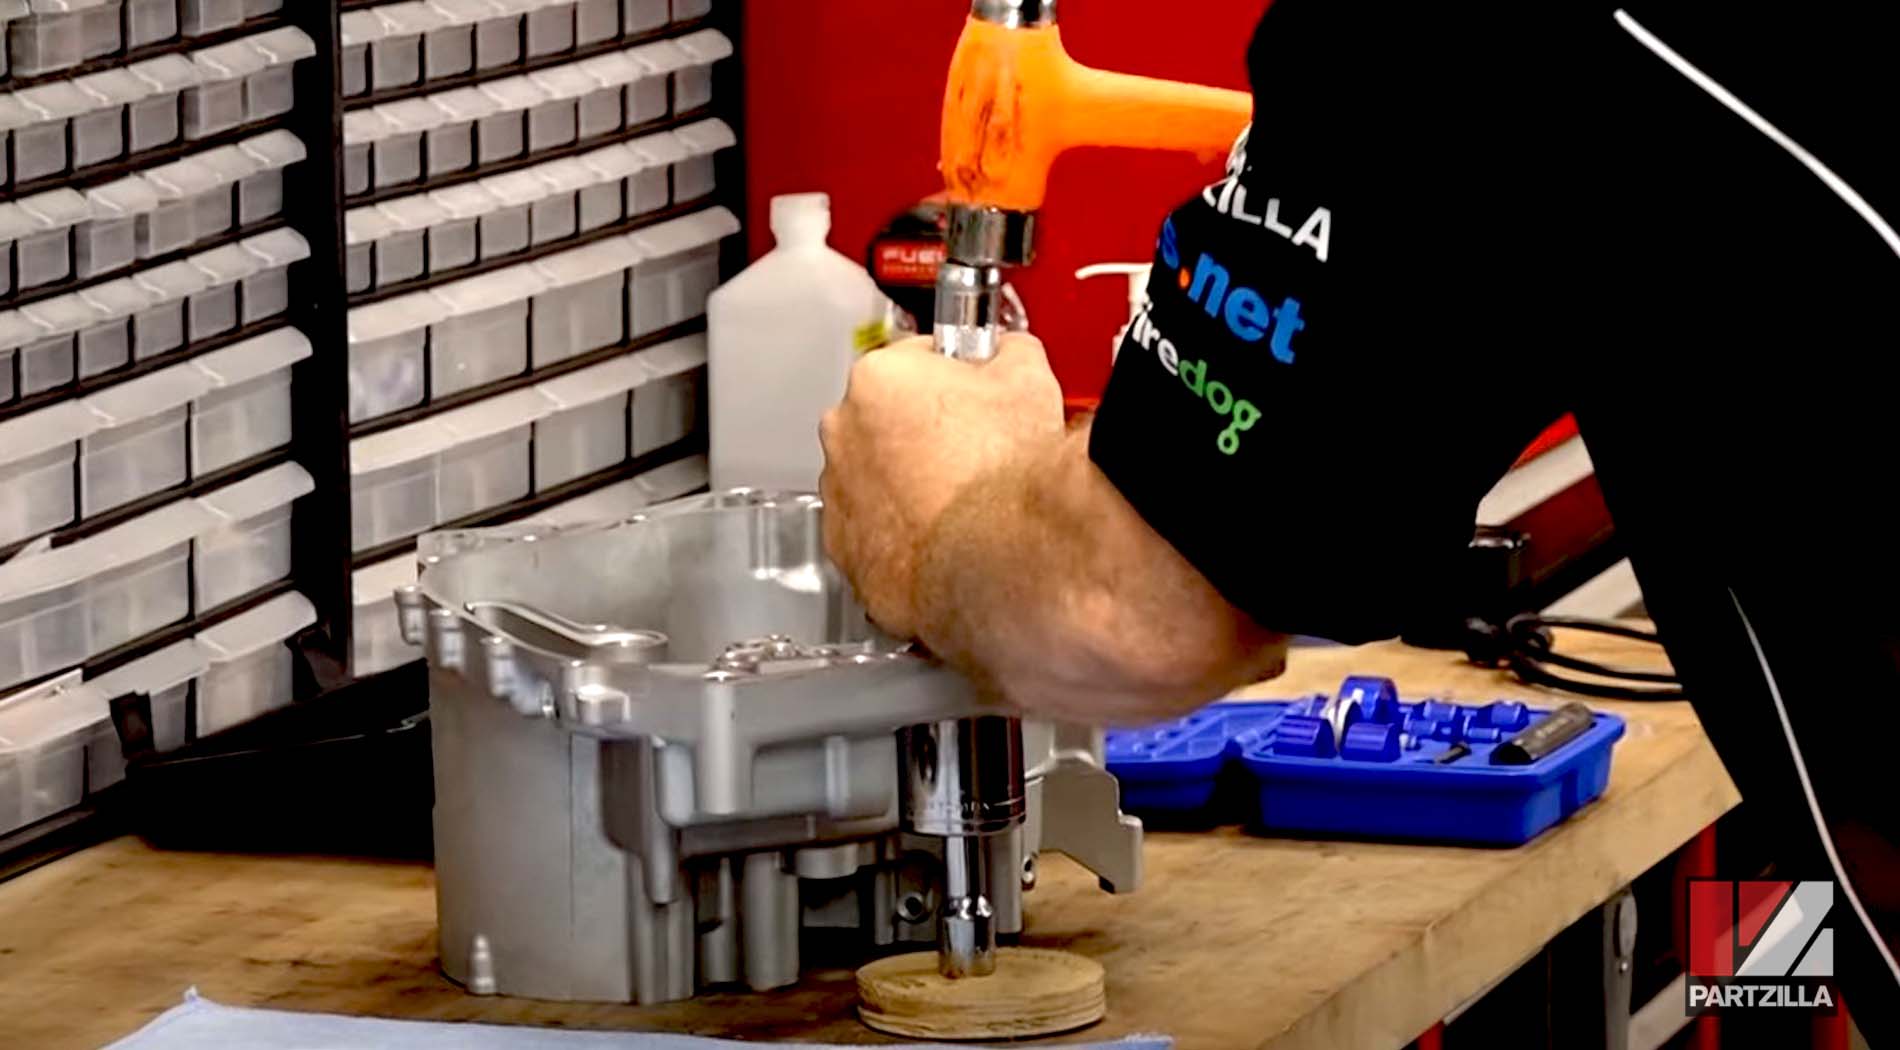
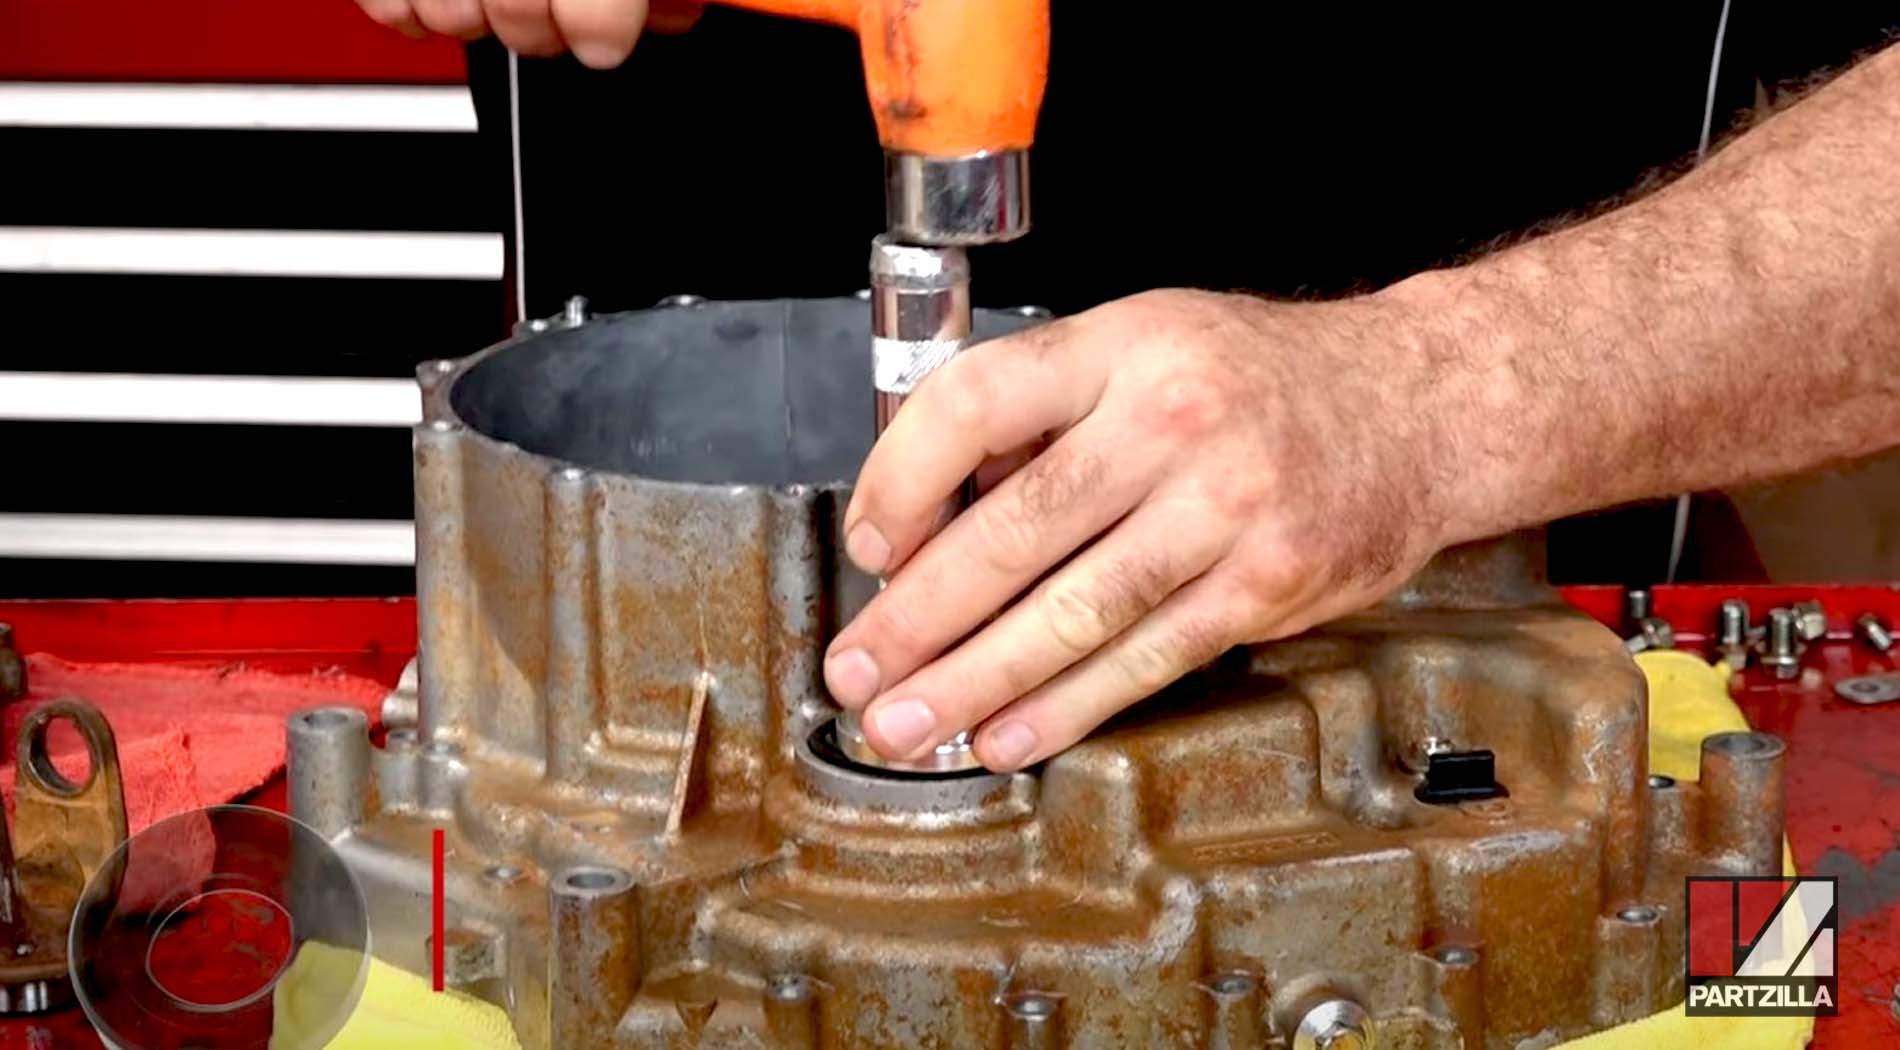
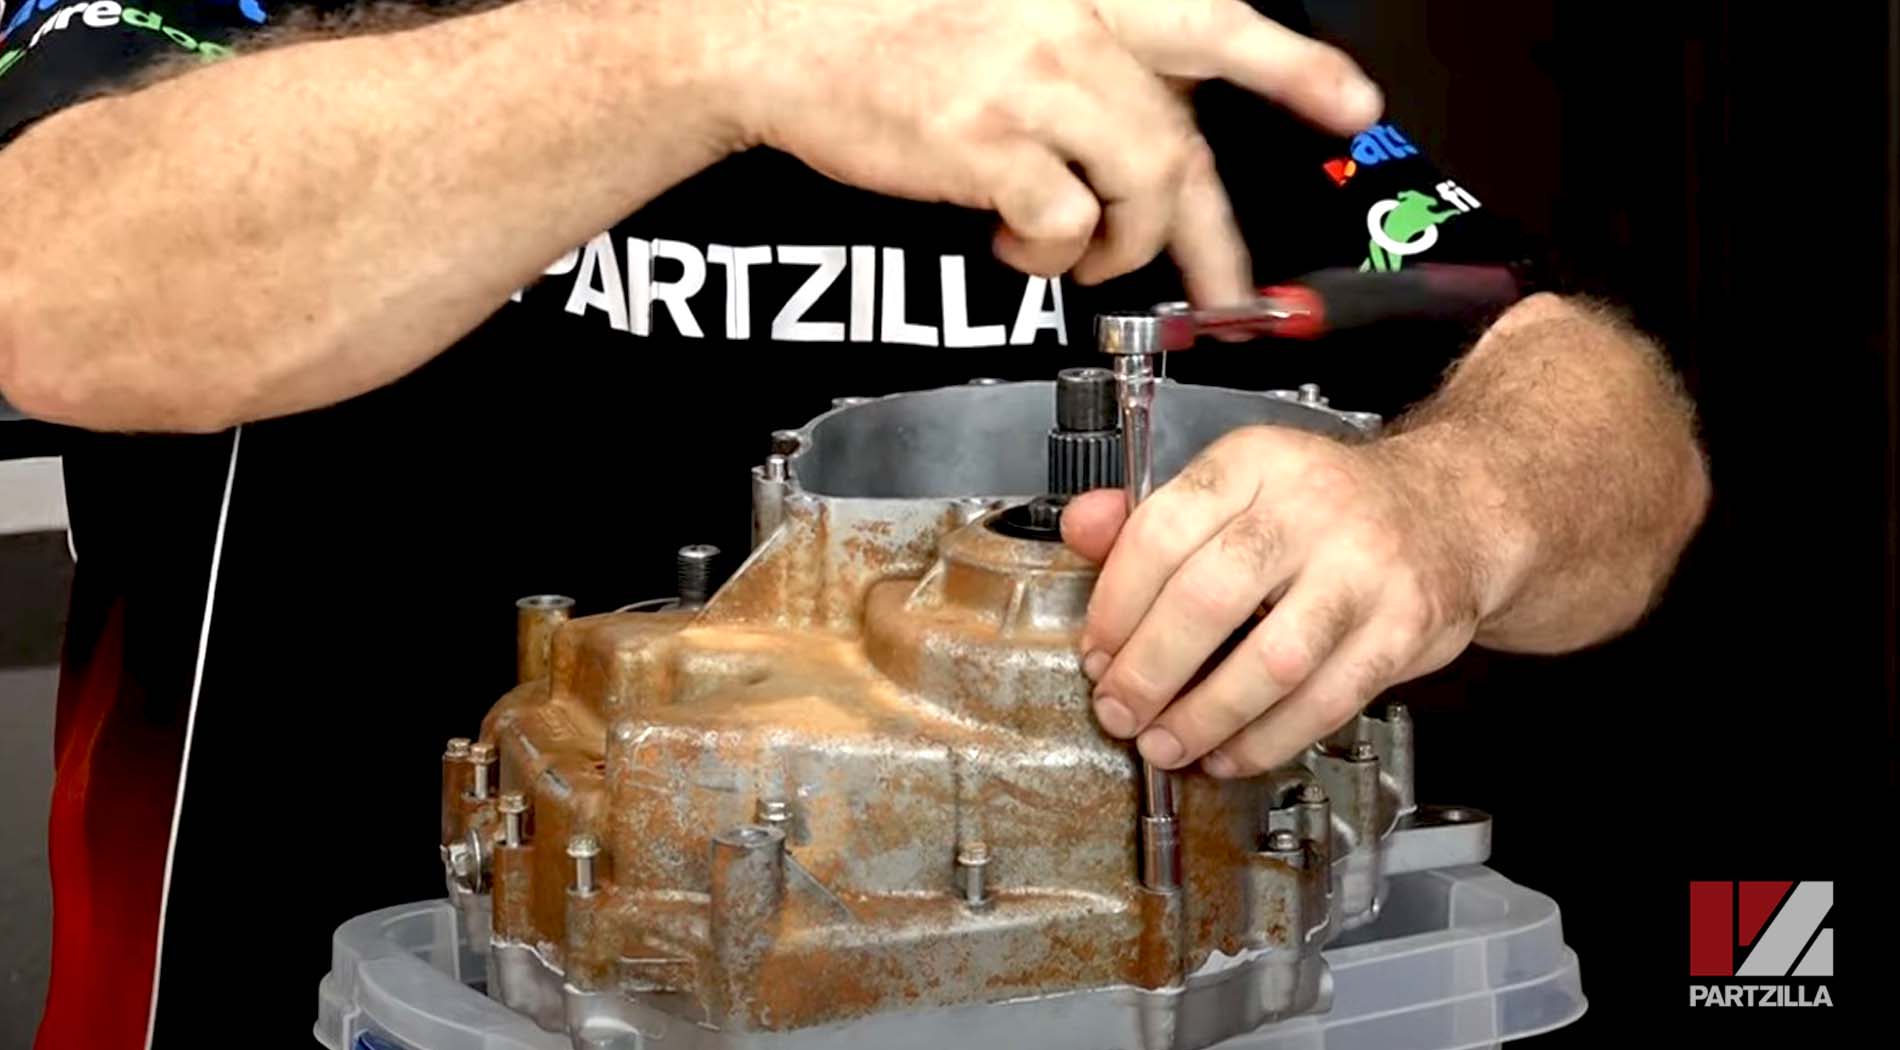
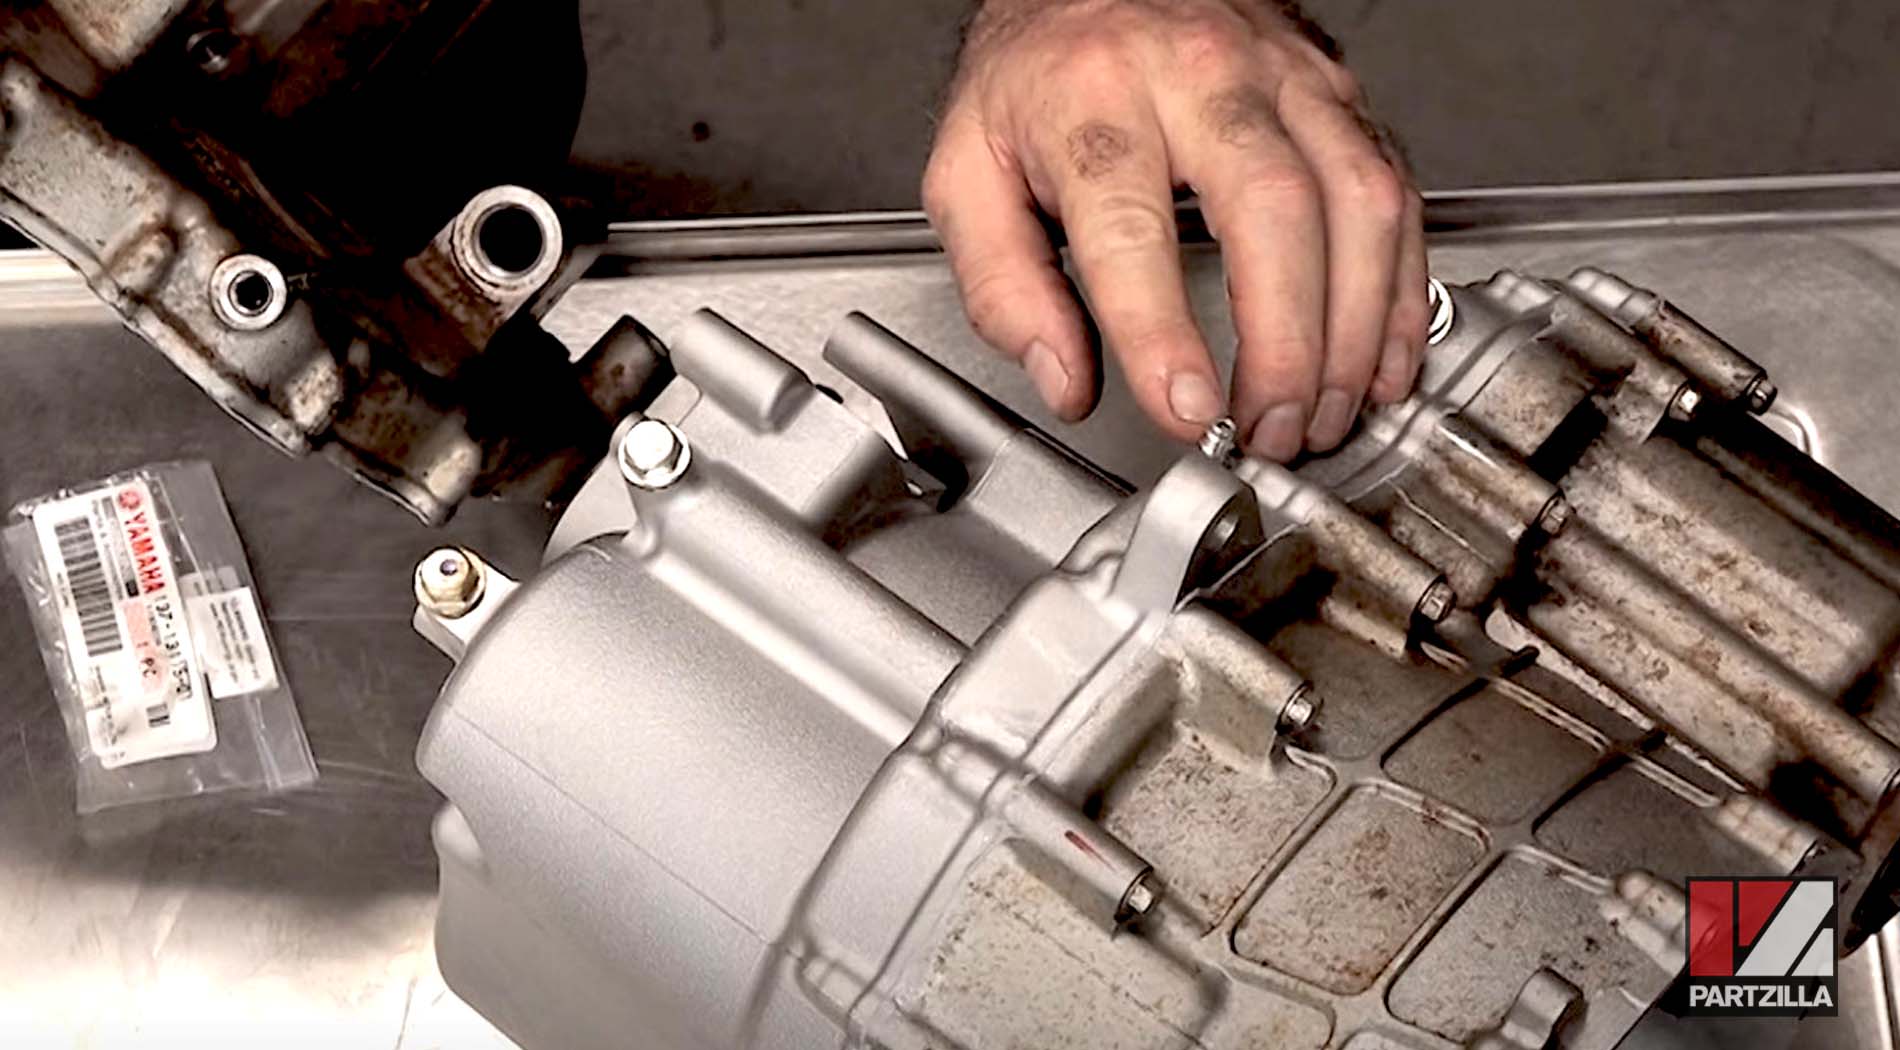
Step 7. Remove the output housing by taking out its bolts and tapping it out gently with a soft-blow hammer.
Watch the clip below to see the gearcase opening segment of our Yamaha YXZ1000 gear reduction kit installation video
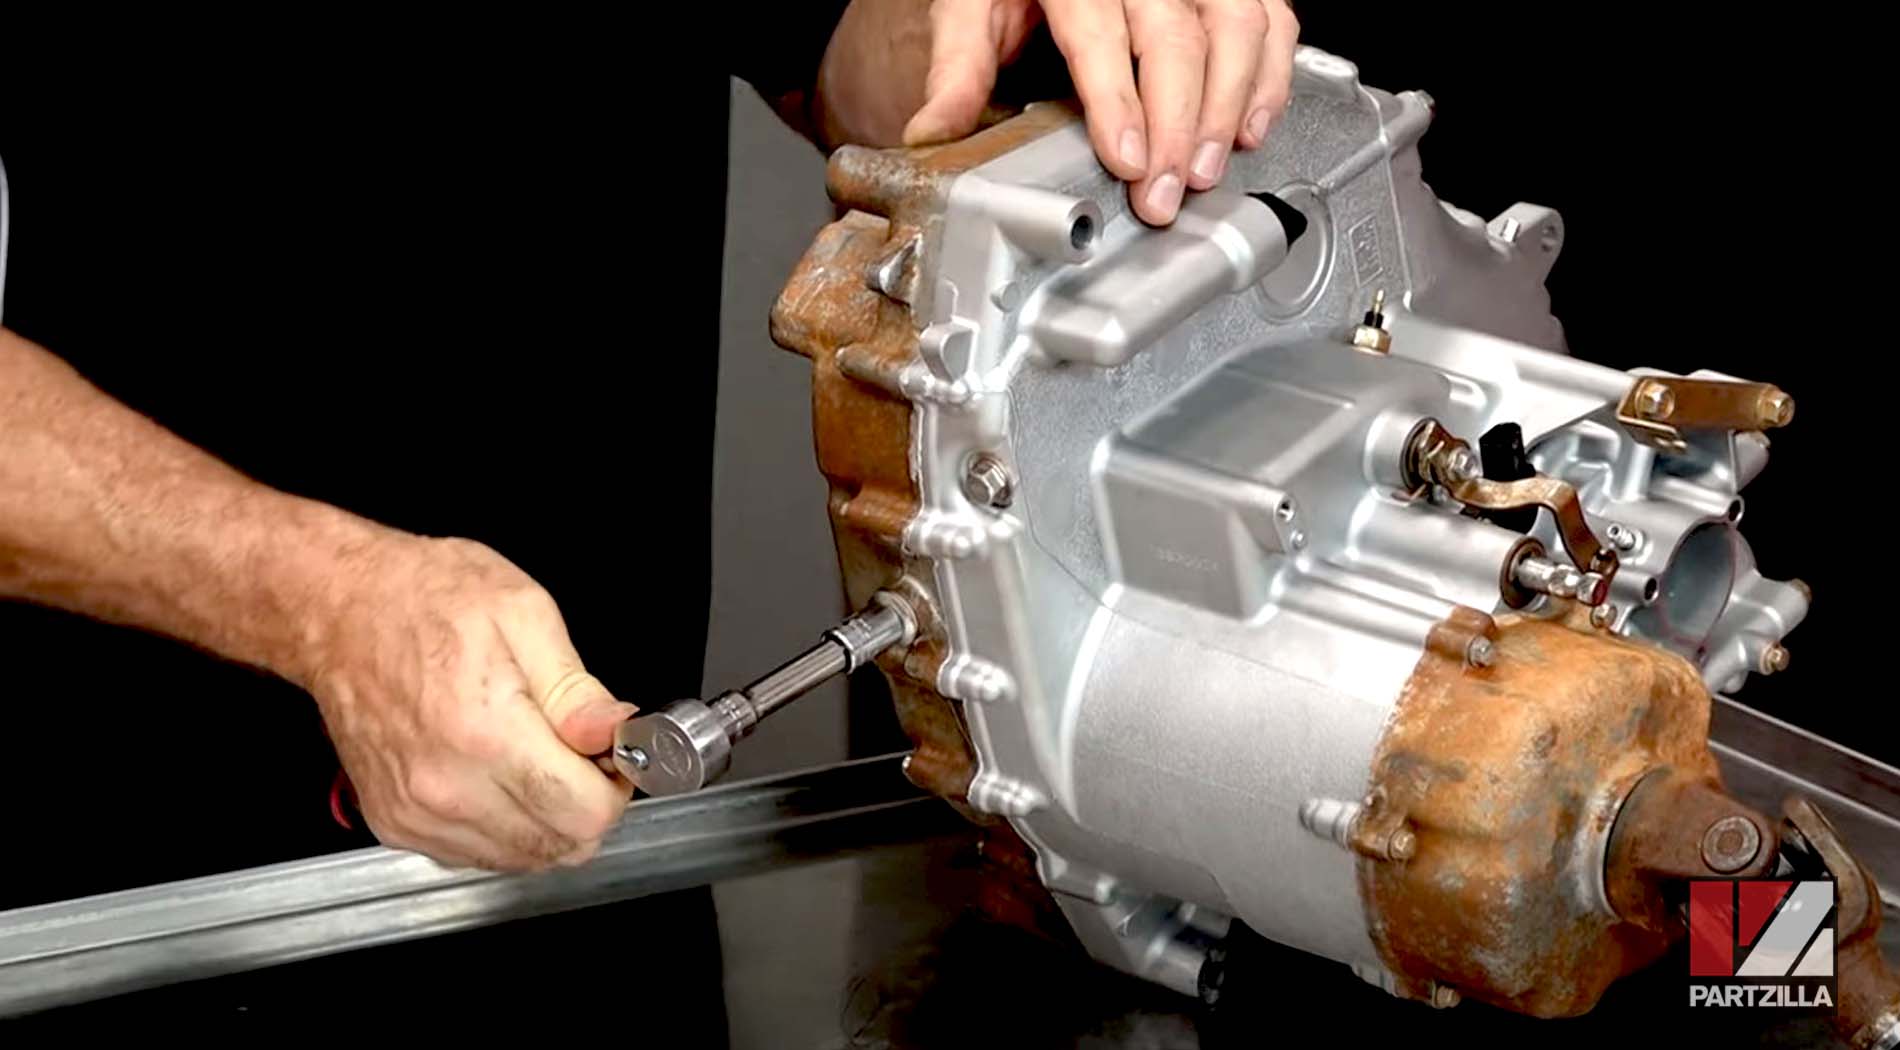
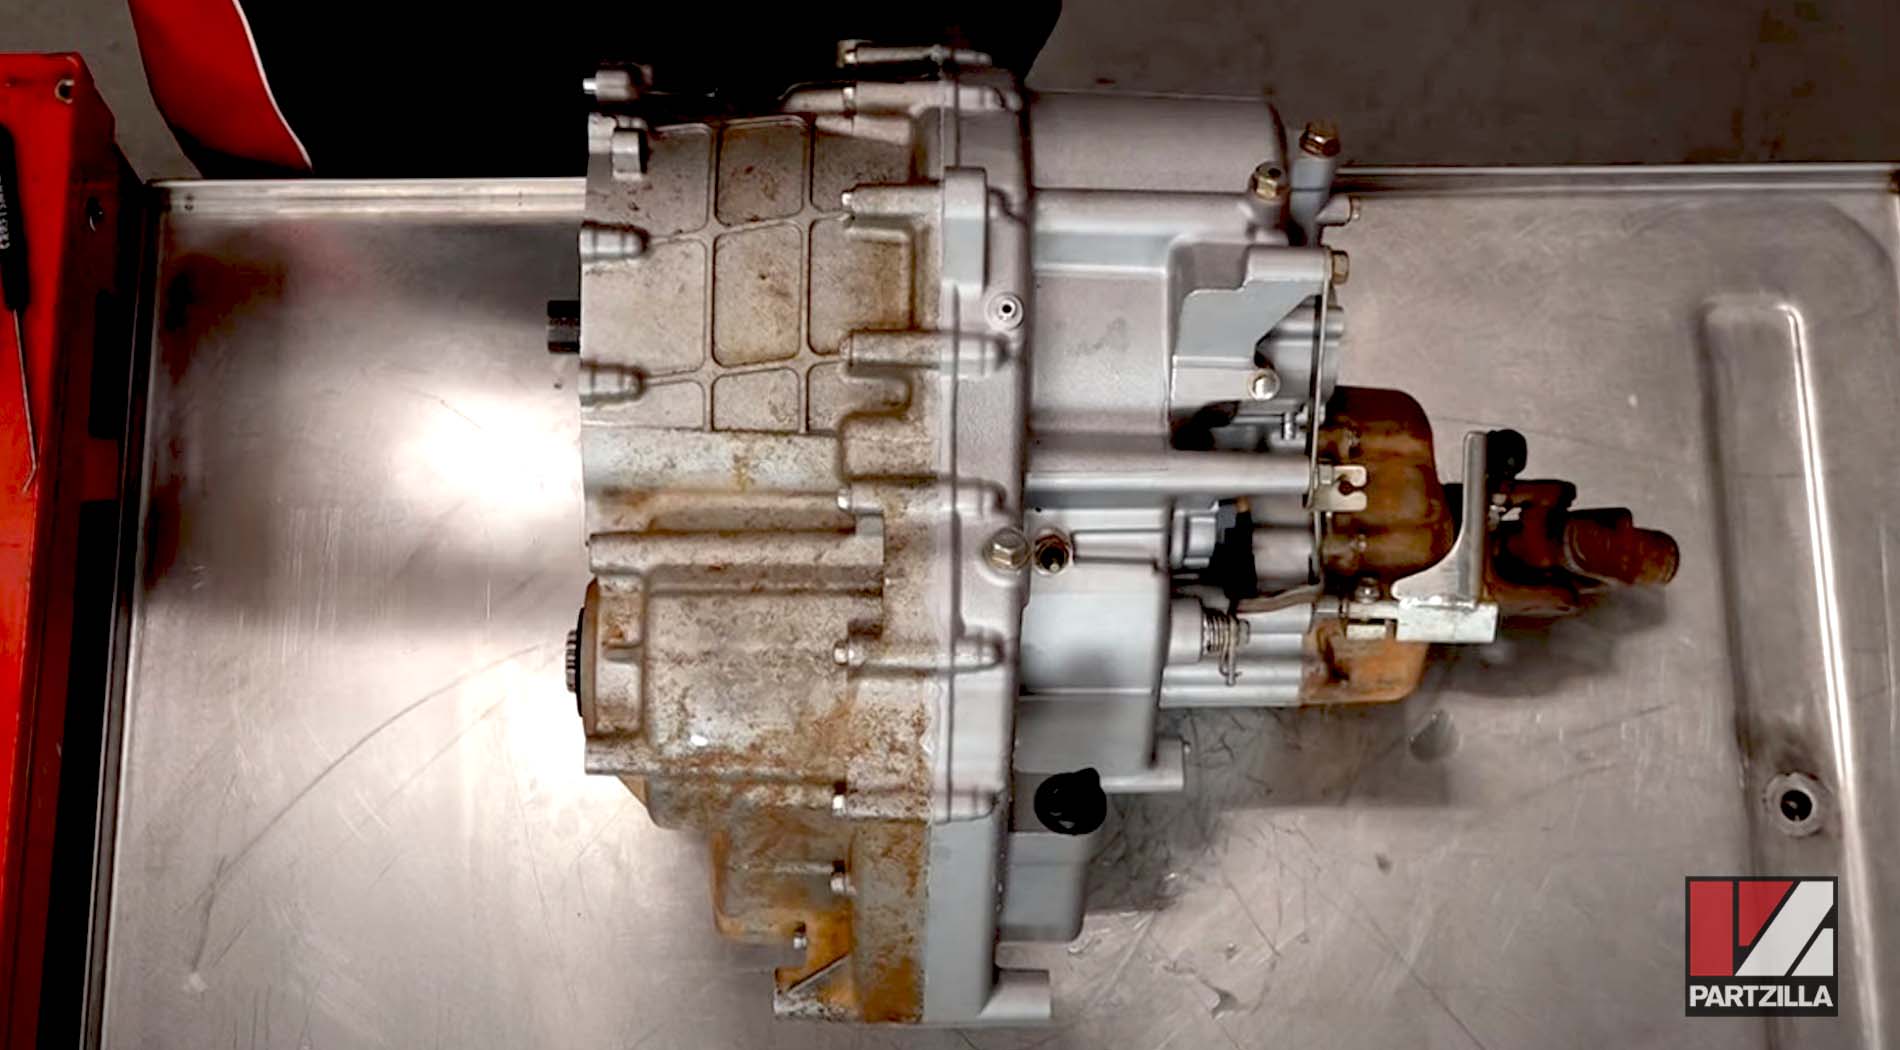
Step 8. Remove the bolts that hold the transmission cases together, then split the cases open using a soft-blow hammer.
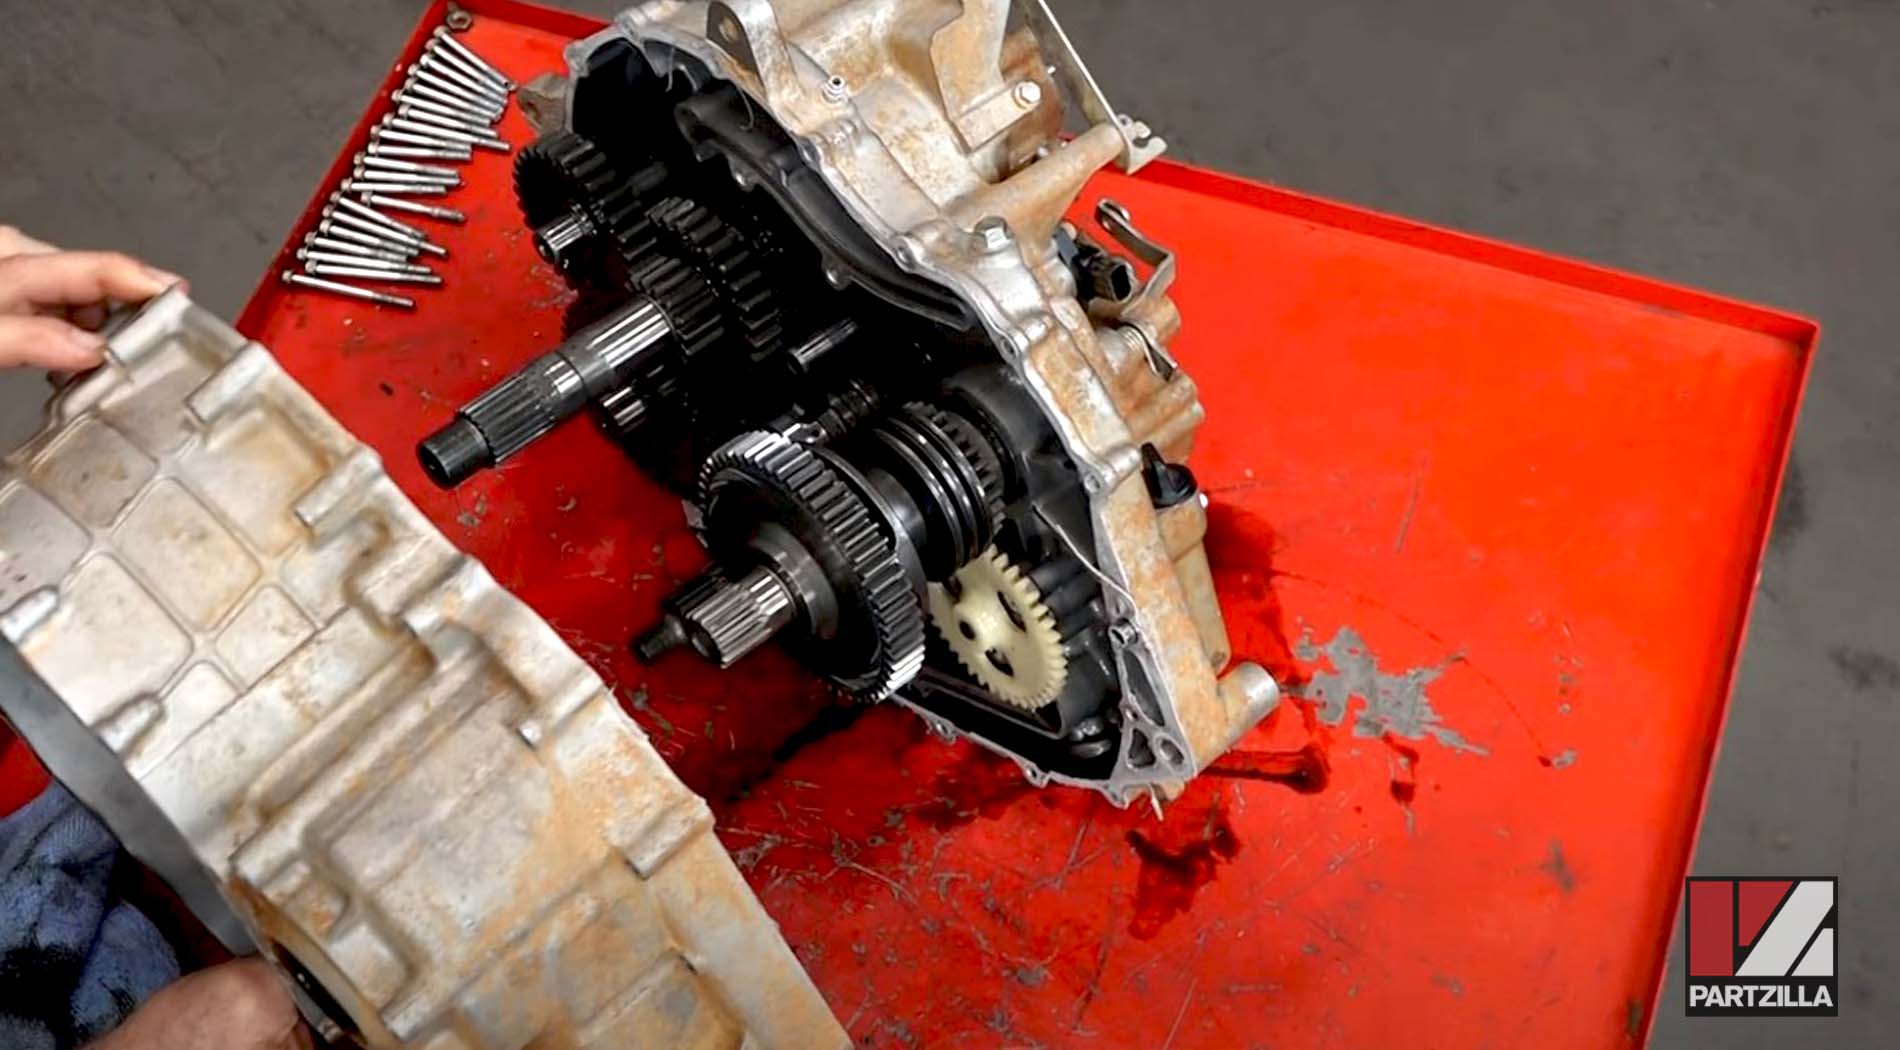
Watch the clip below to see the gearcase splitting segment of our Yamaha YXZ1000 gear reduction kit installation video
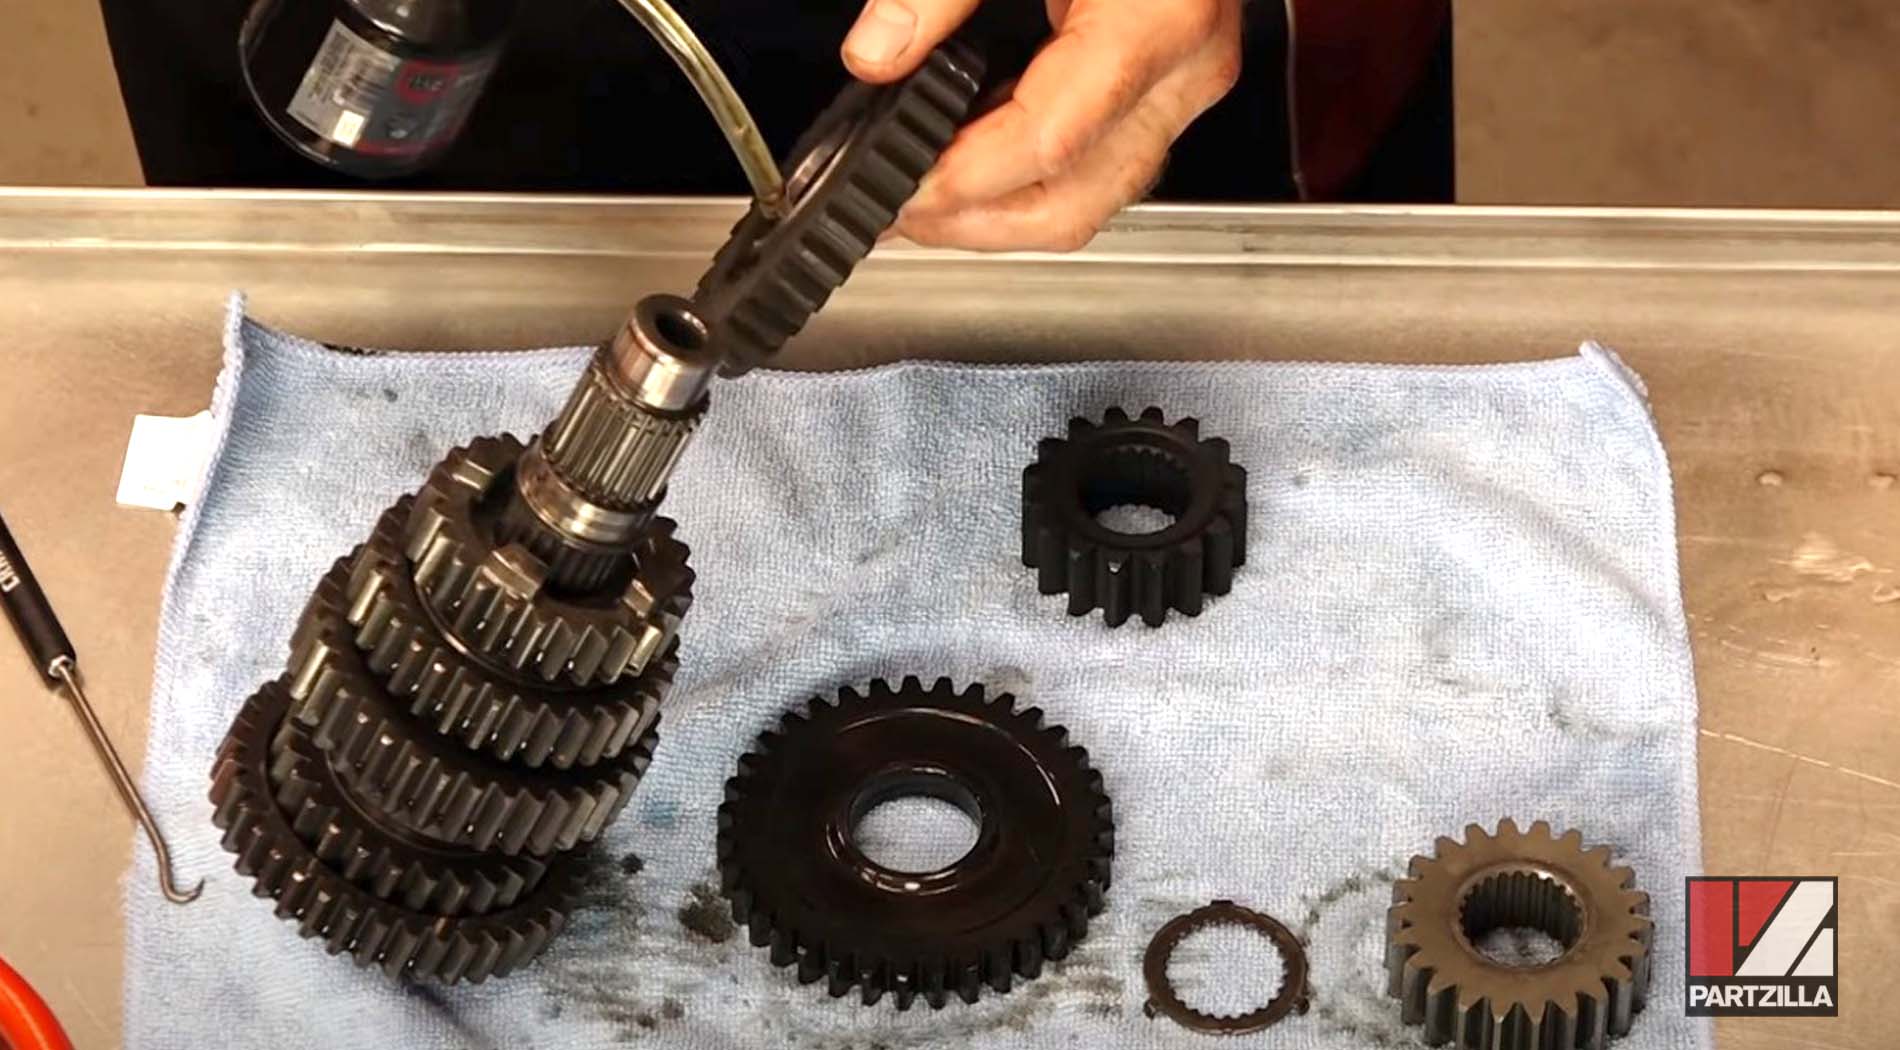
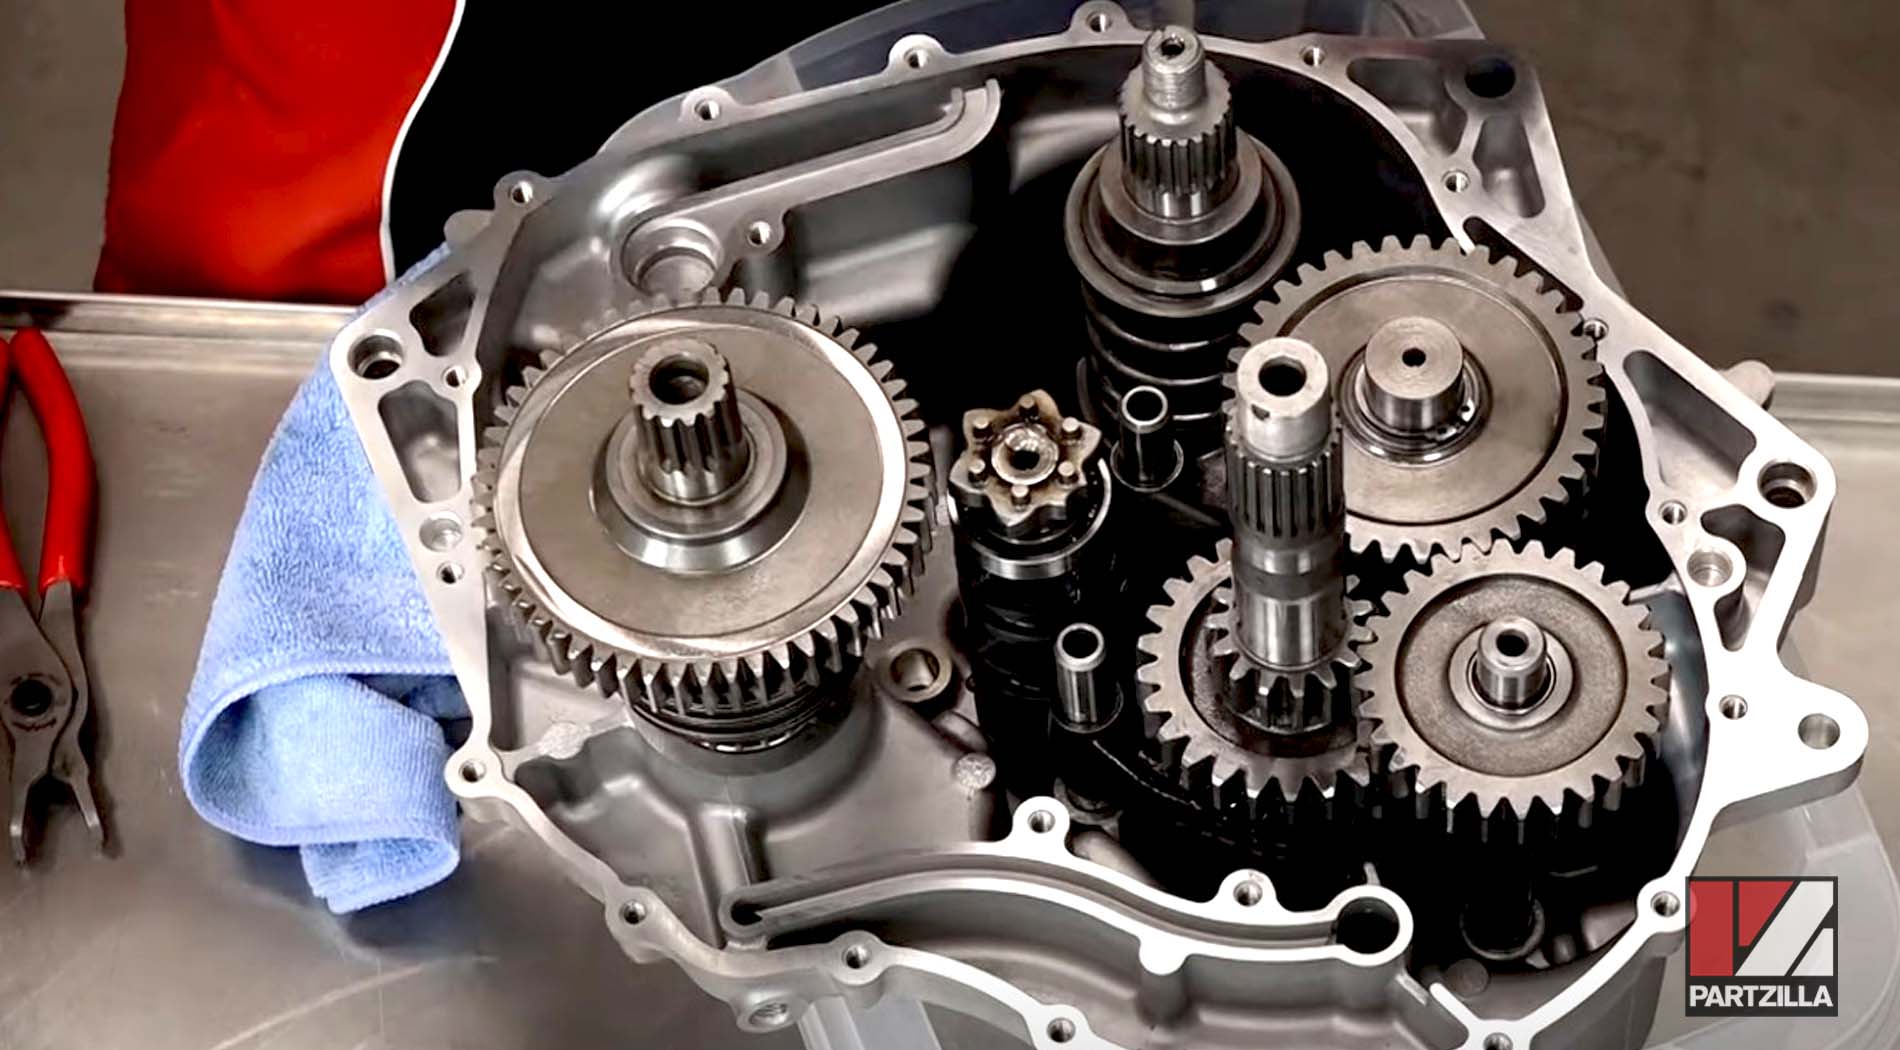
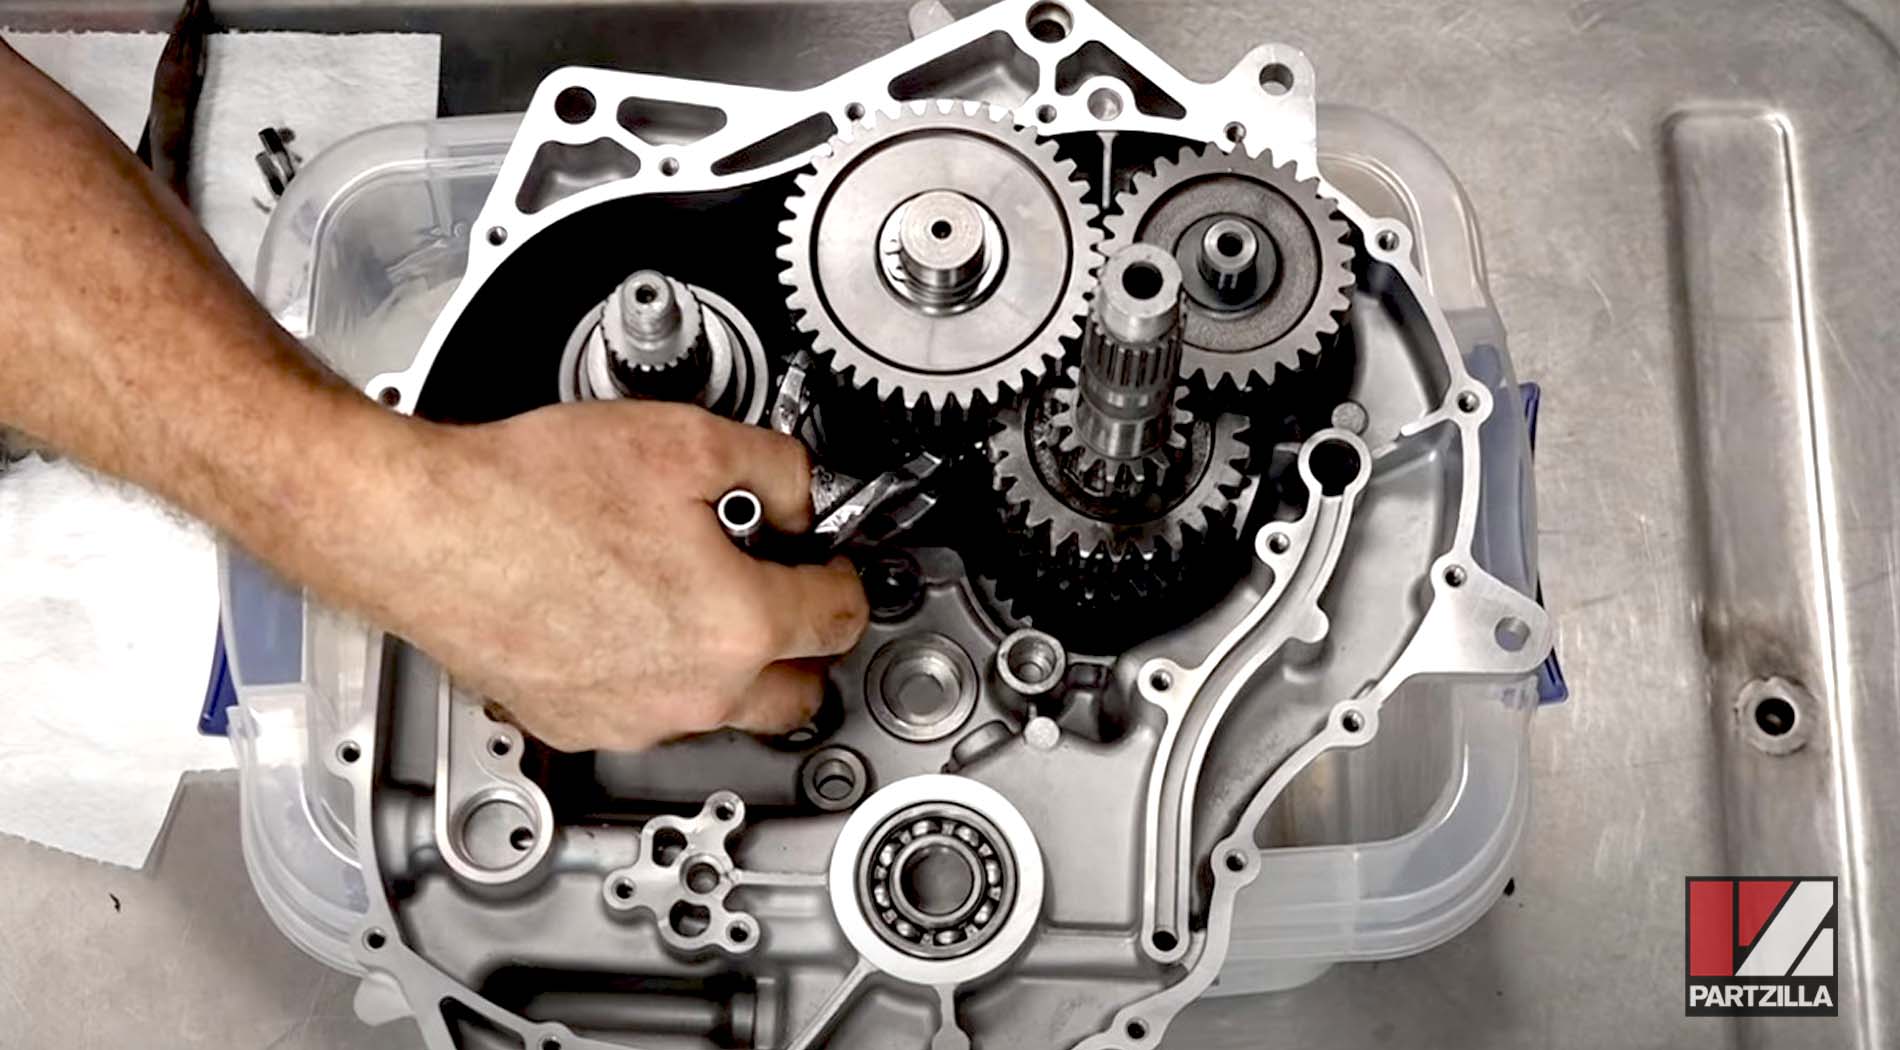
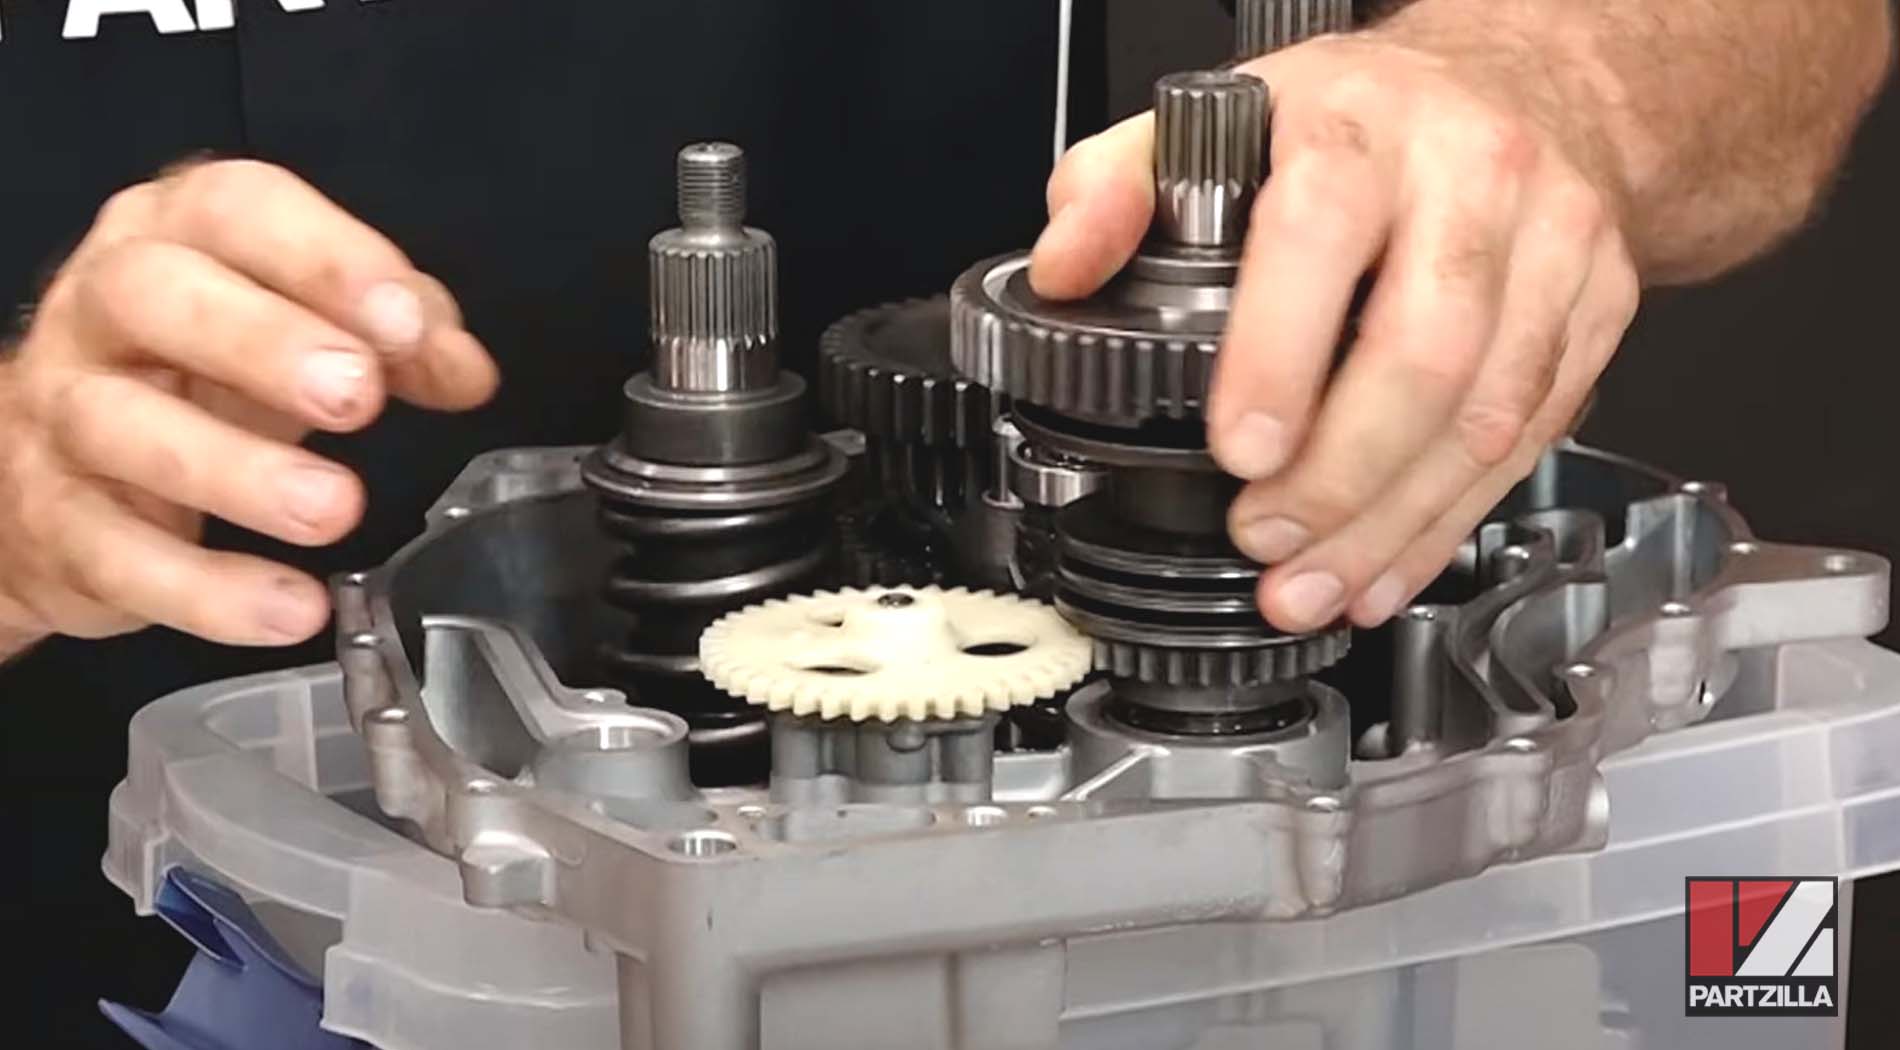
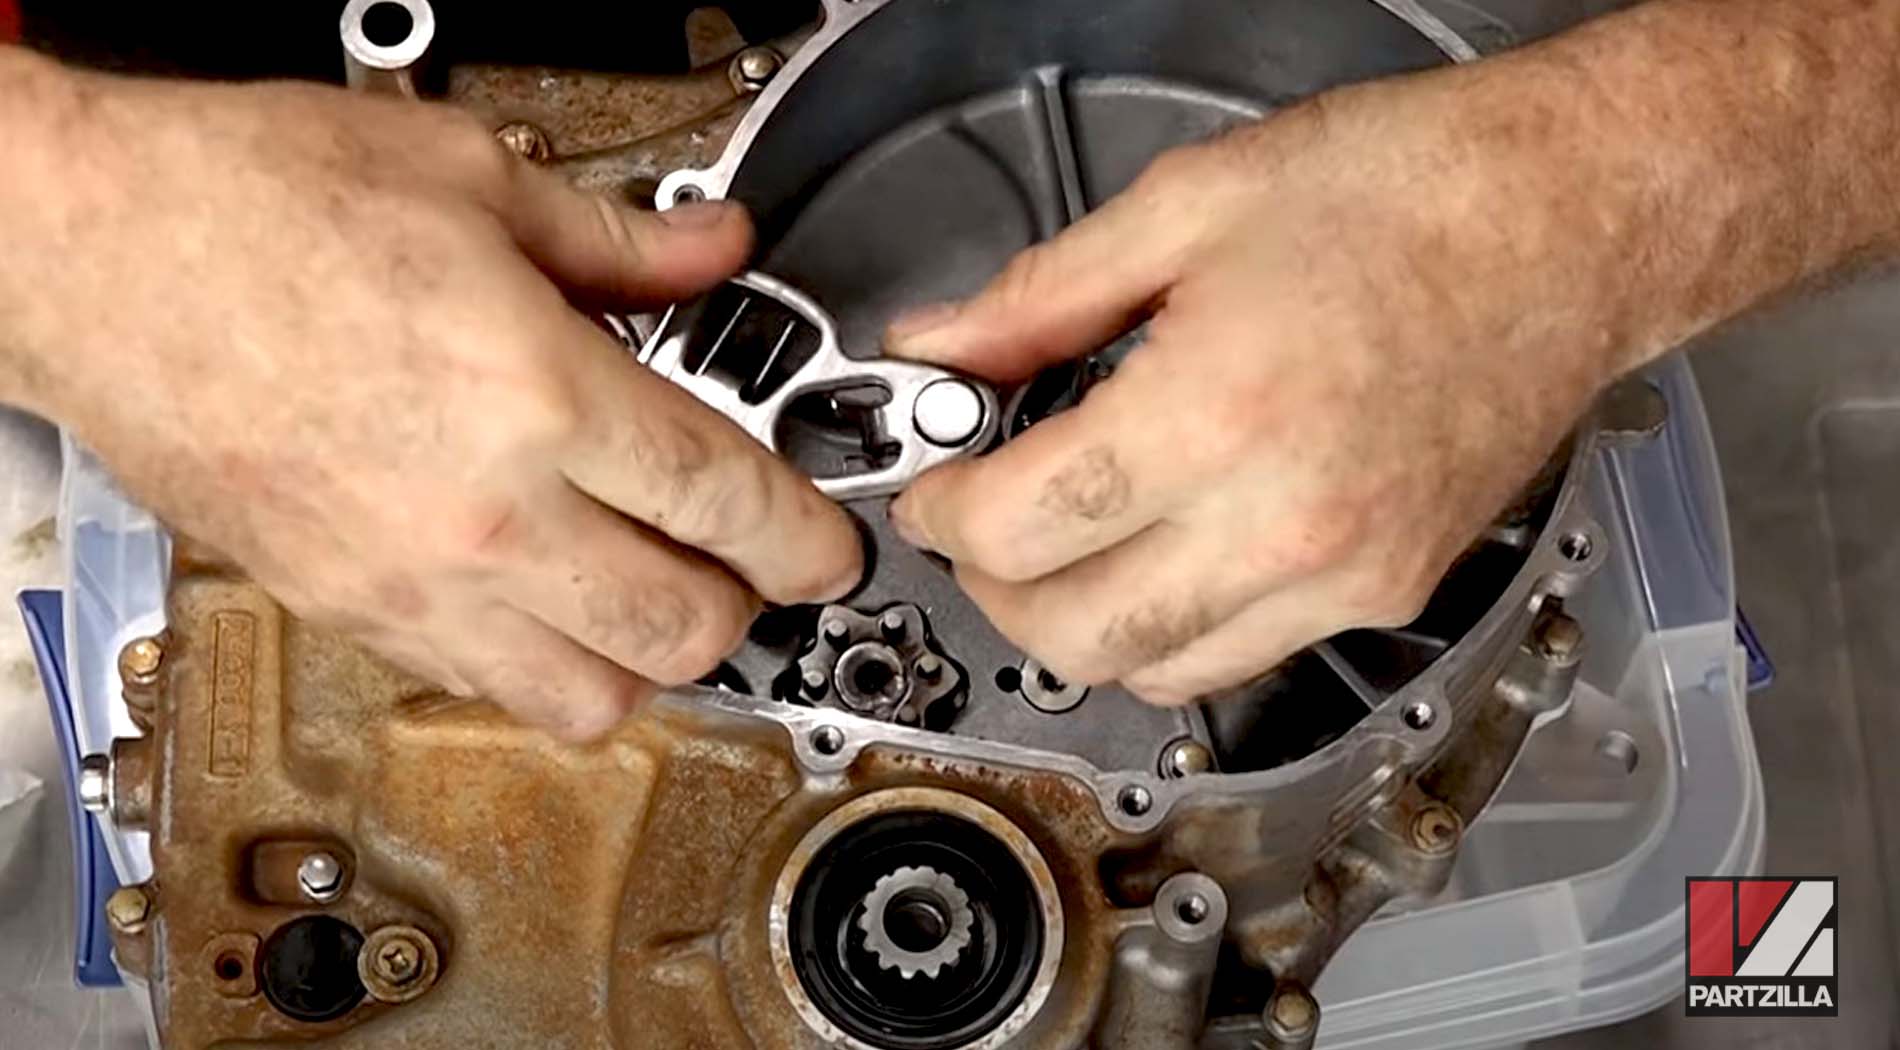
Step 9. Remove all of the gears and other components out of the gearcase half you’re not going to reuse, including the shift detent, the spring, the circlips, the shift drum, the dowels, sensors, brackets and bolts.
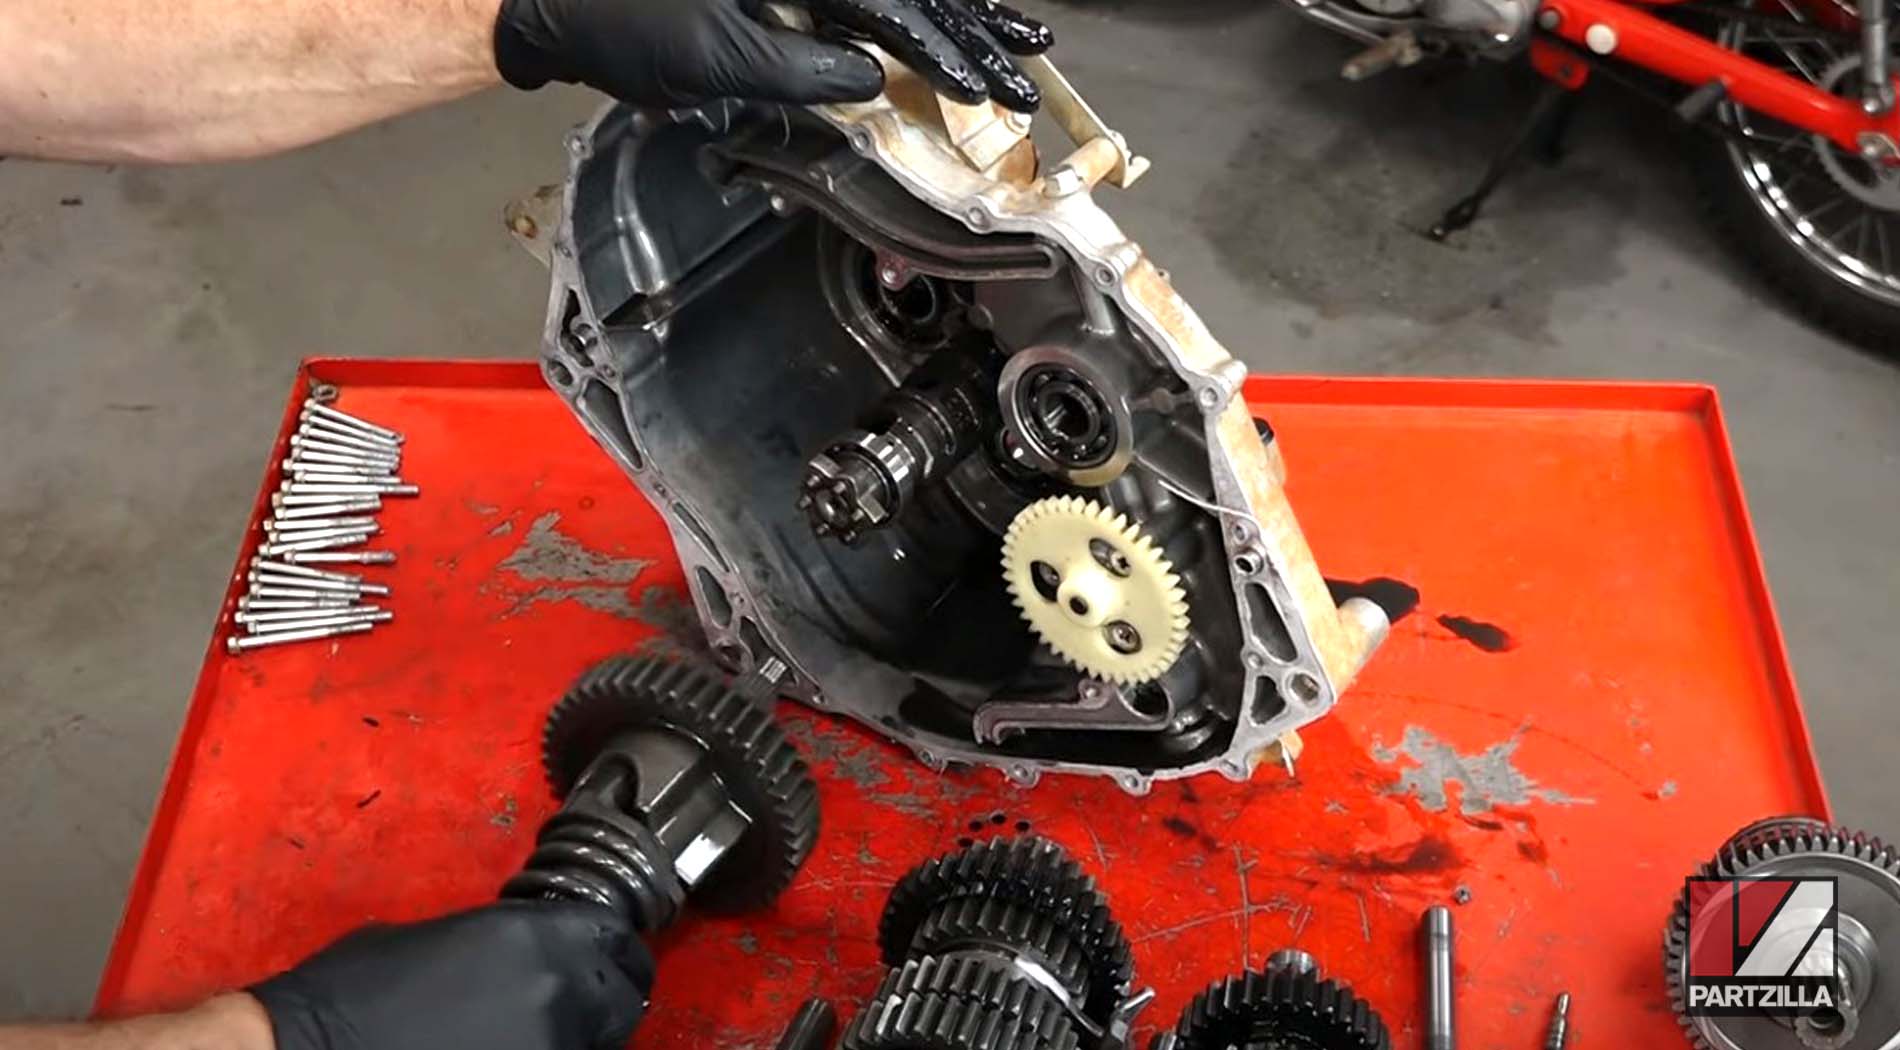
Watch the clip below to see the gear removal segment of our Yamaha YXZ1000 gear reduction kit installation video
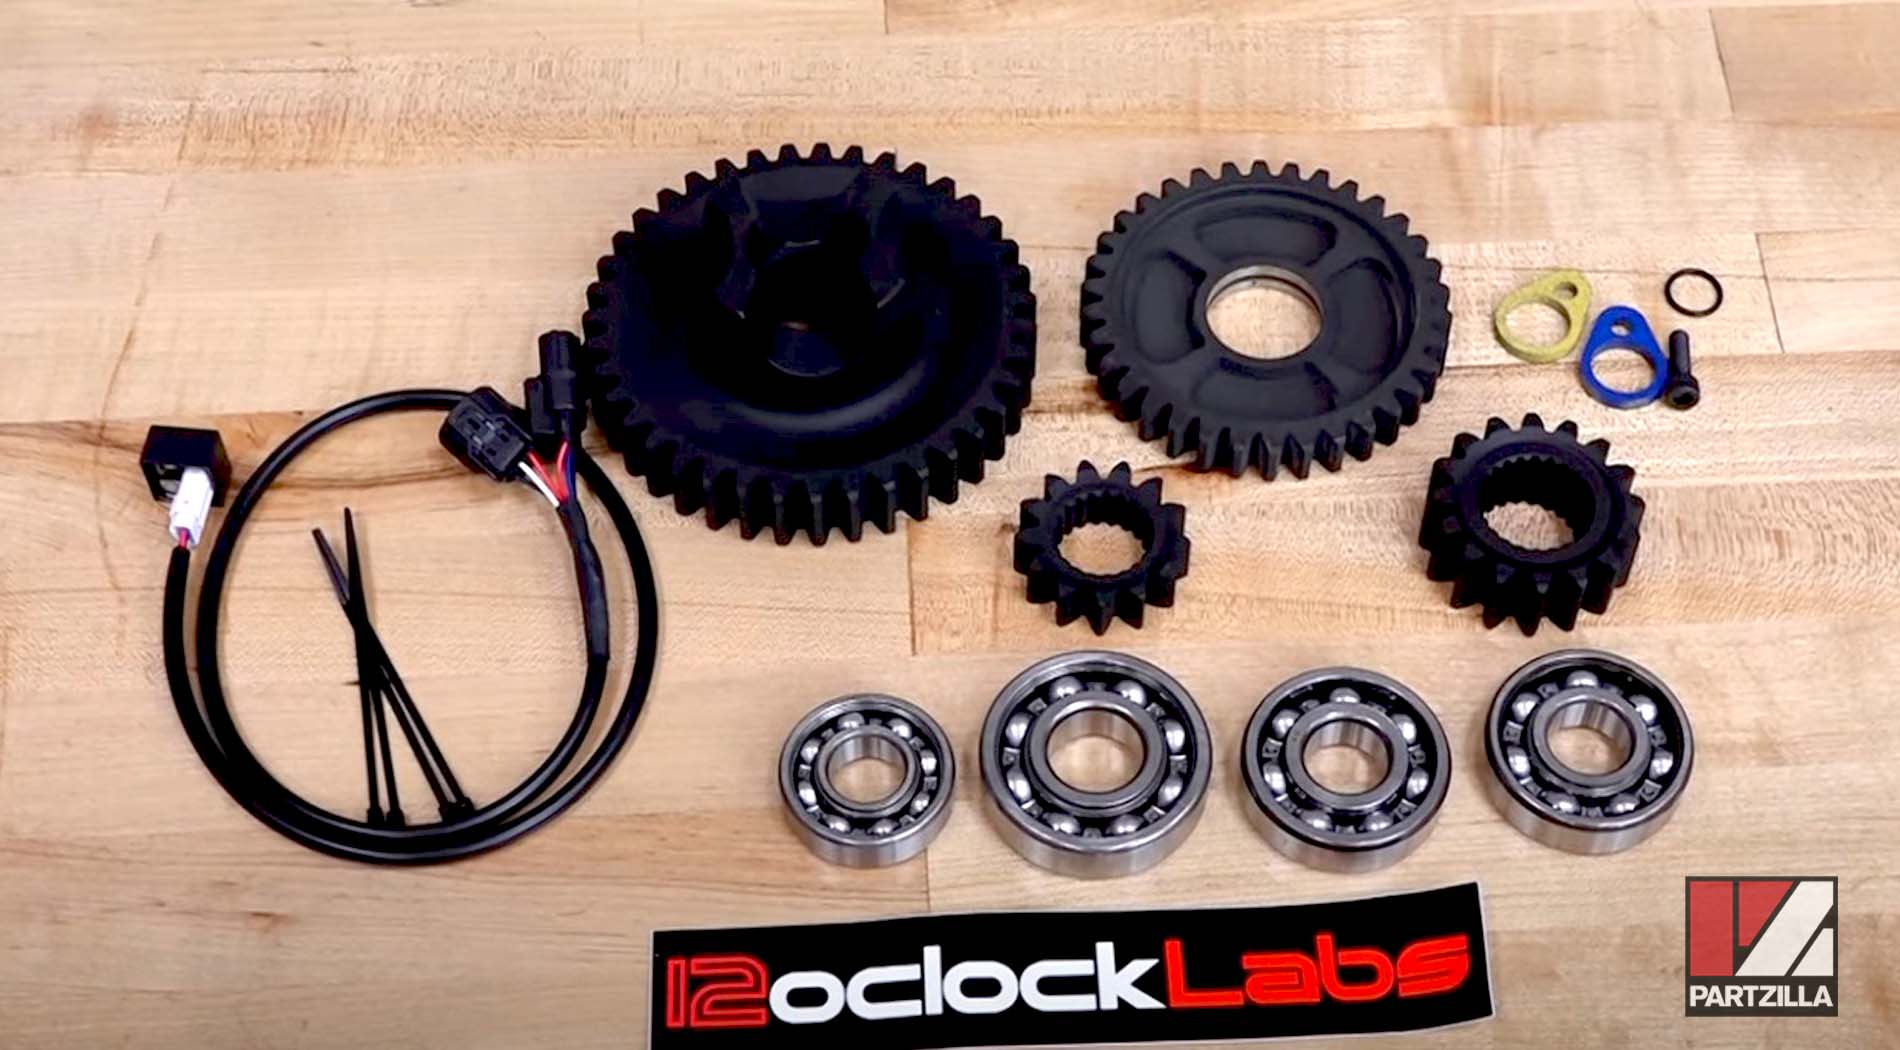
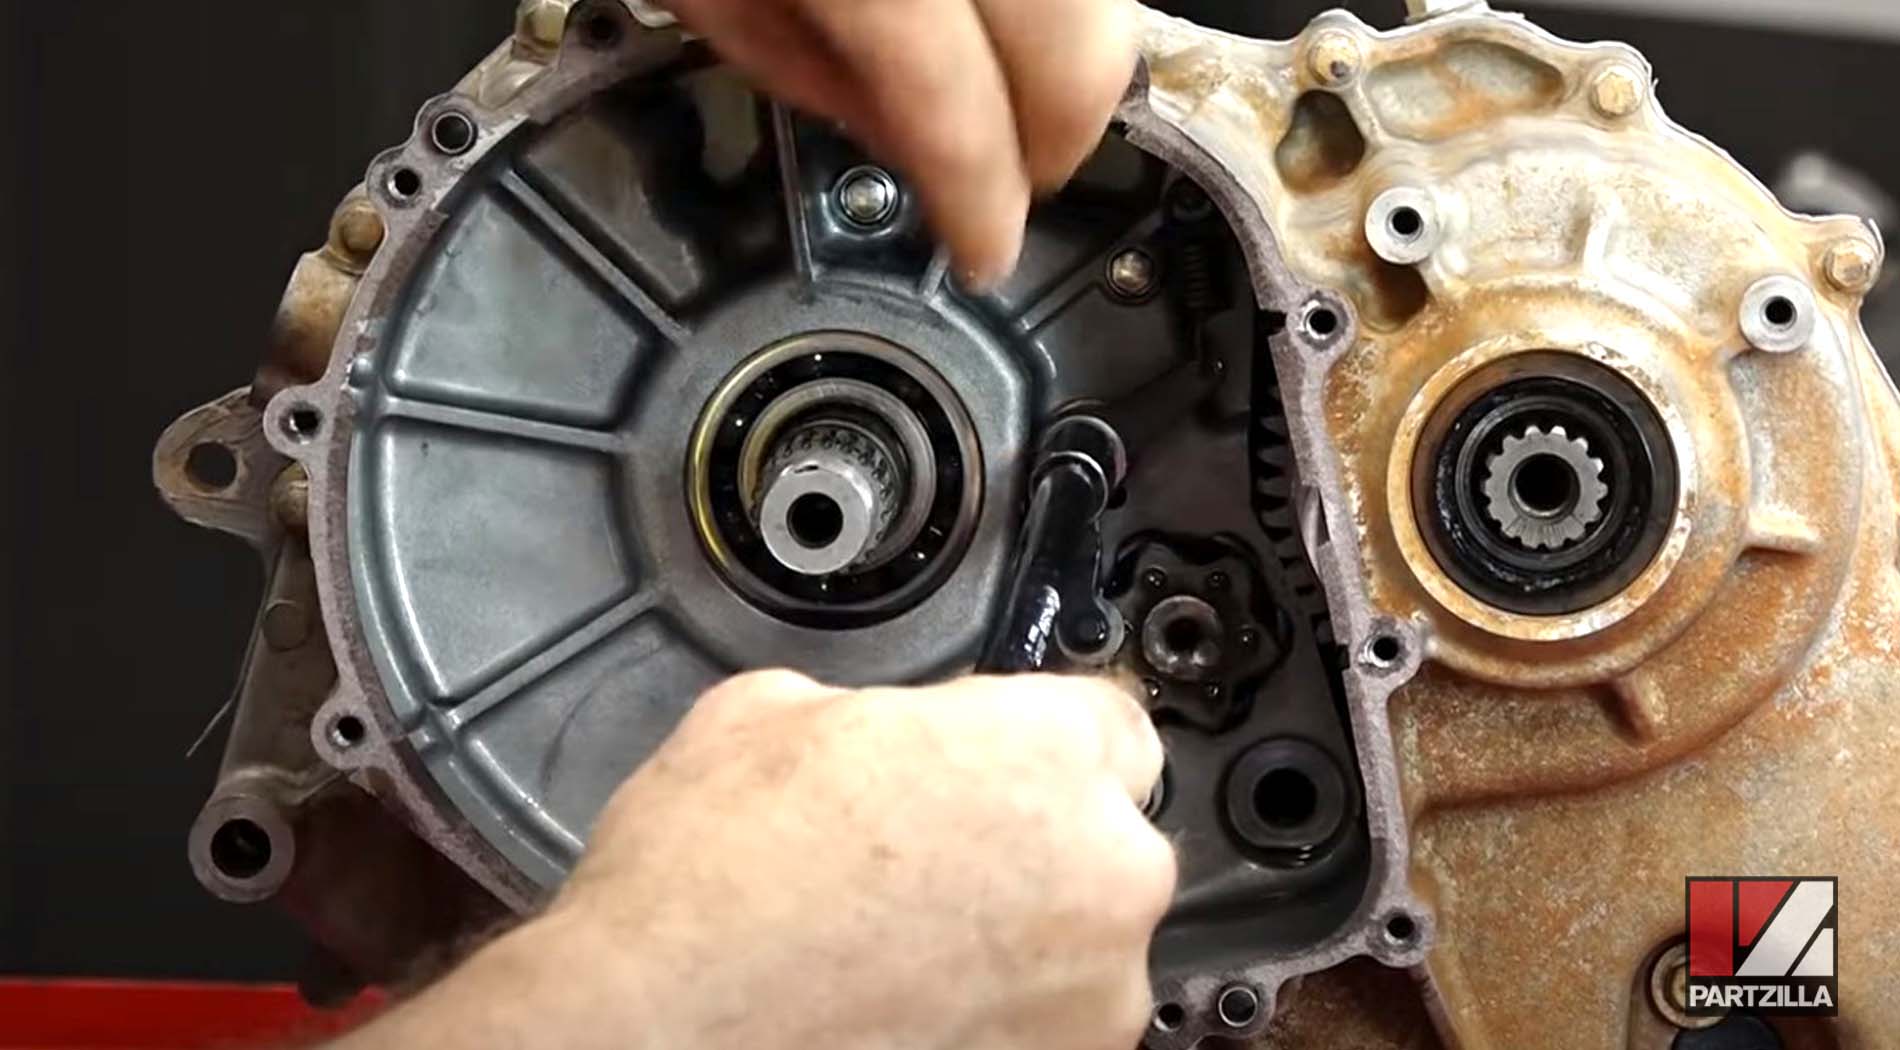
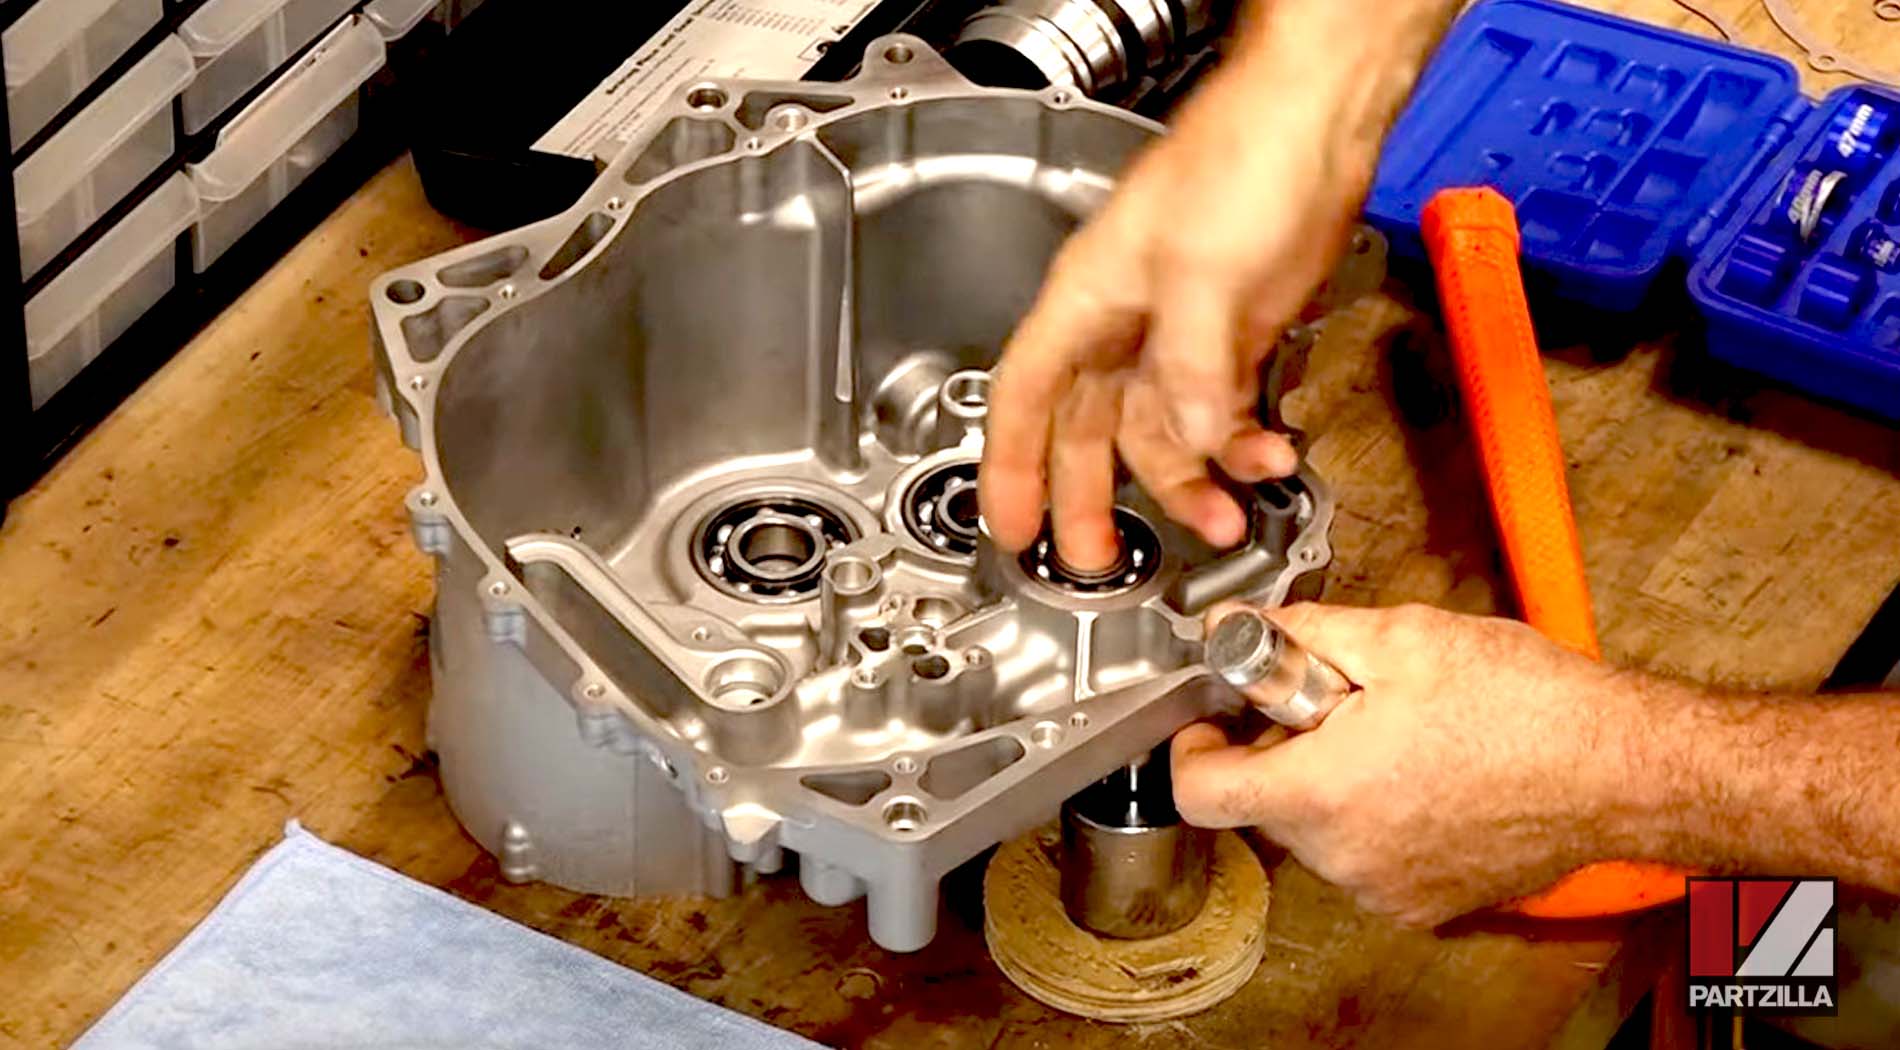
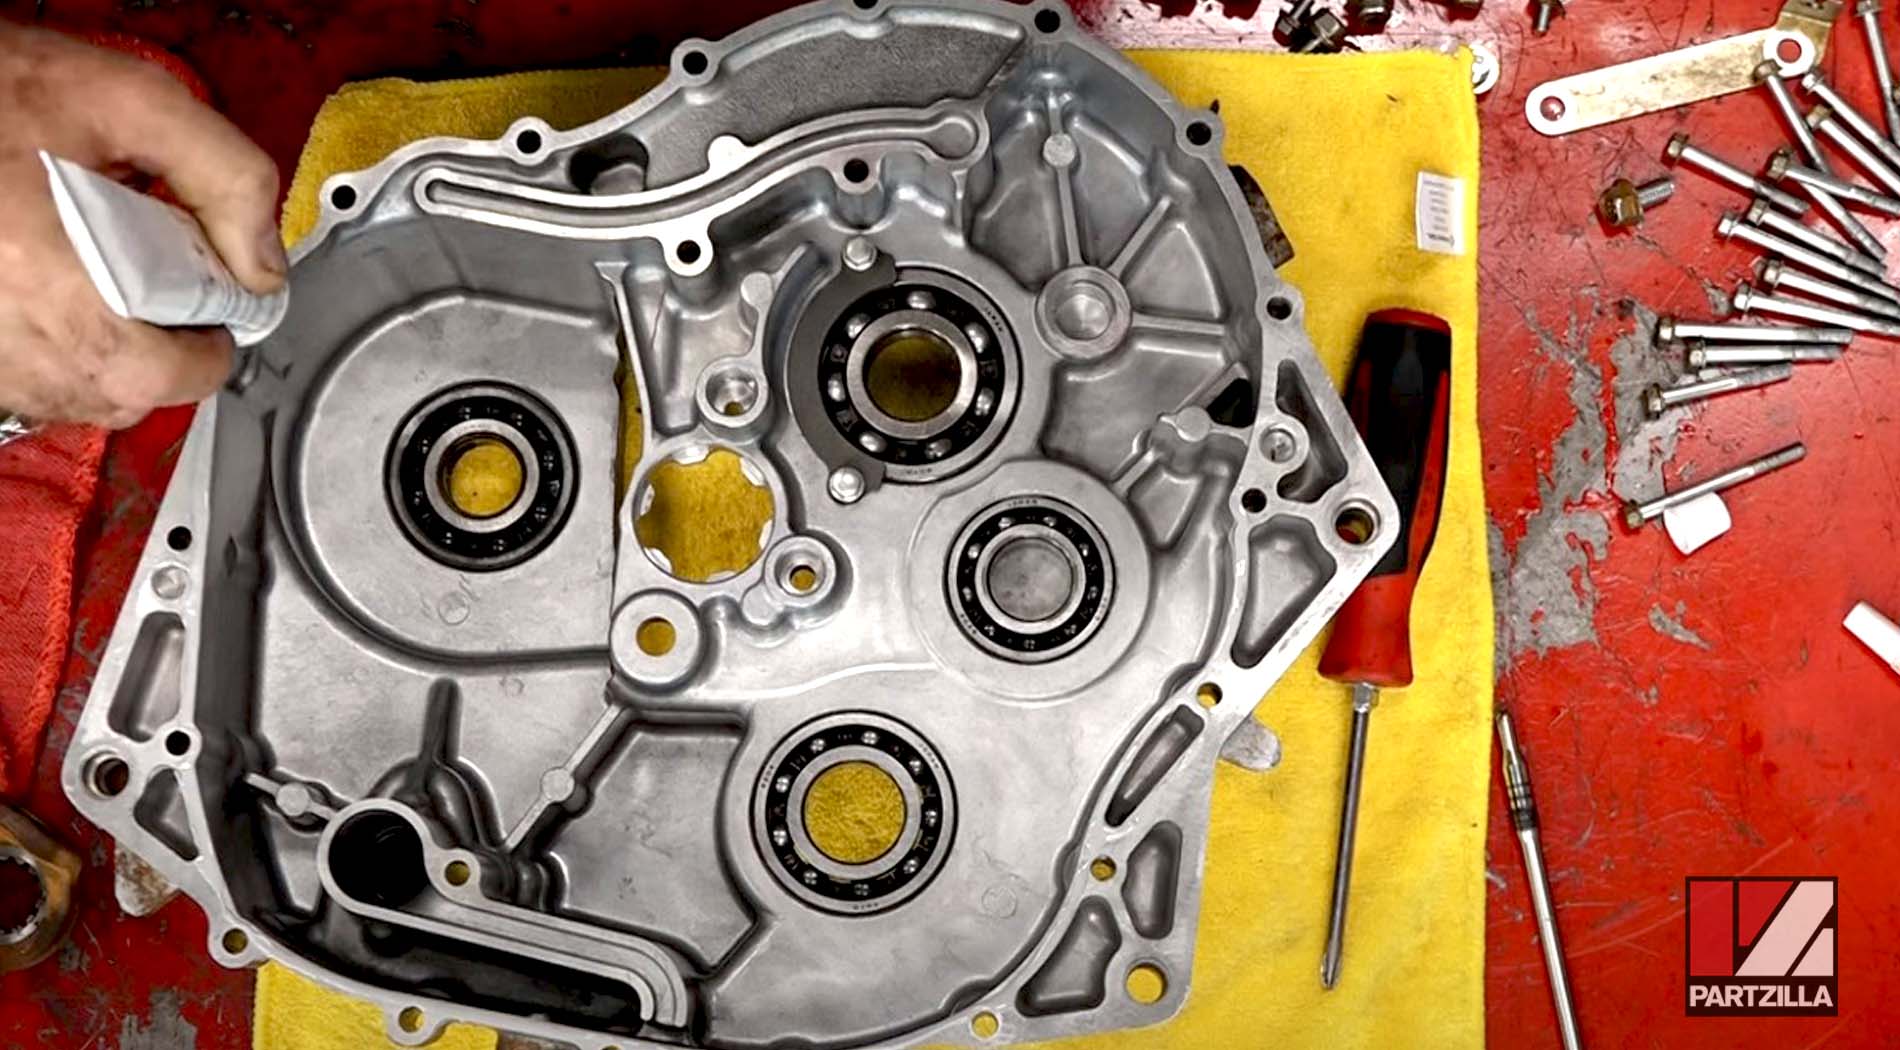
NOTE: Bring the new gearcase half over on a clean bench before assembling it, starting with the new bearings. Organize the bearings in a layout relative to how they’re going in. Keep in mind that two of the bearings are of the same diameter, with the difference being that one has a sealed side that goes in the location circled in the image below.
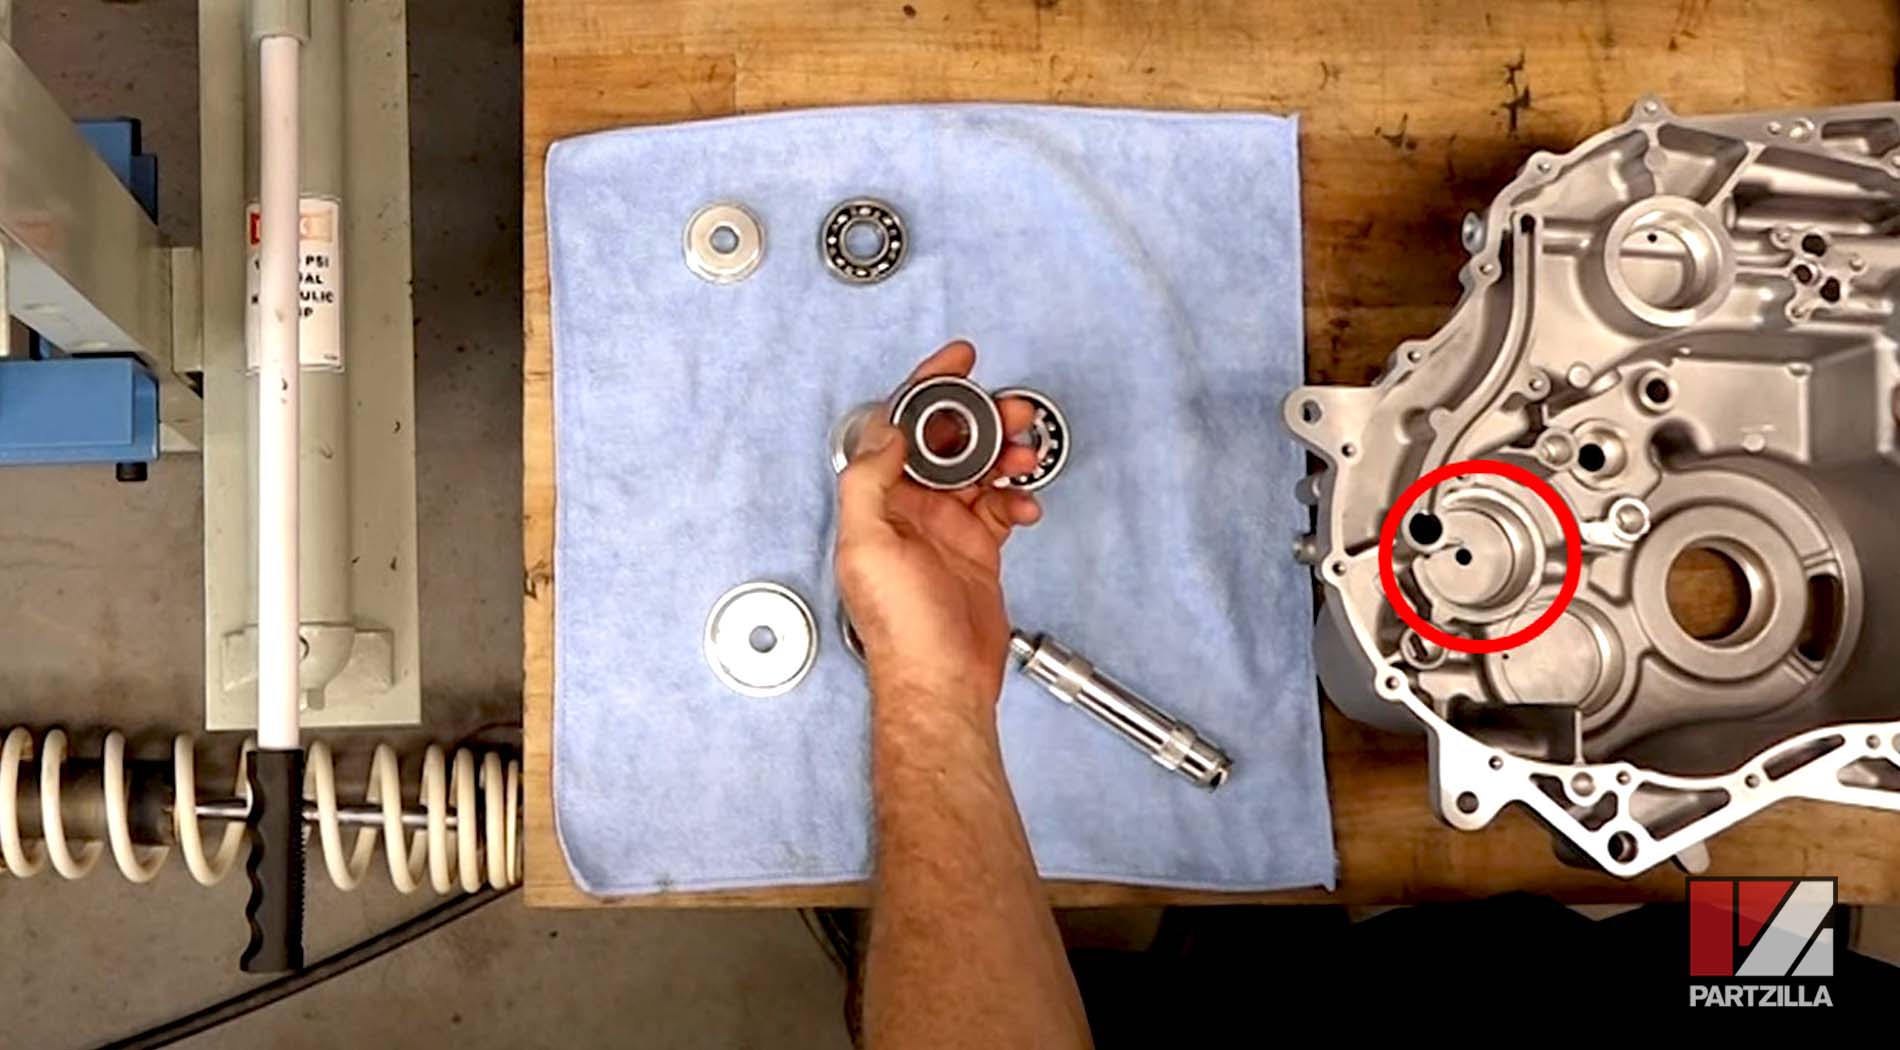
Step 9. Press in the new bearings, starting with the biggest one first, then working your way toward the smaller ones.
Step 10. Press in the seals, using a socket that best fits on the inside of the diameter of each one if they don’t press in easily by hand.
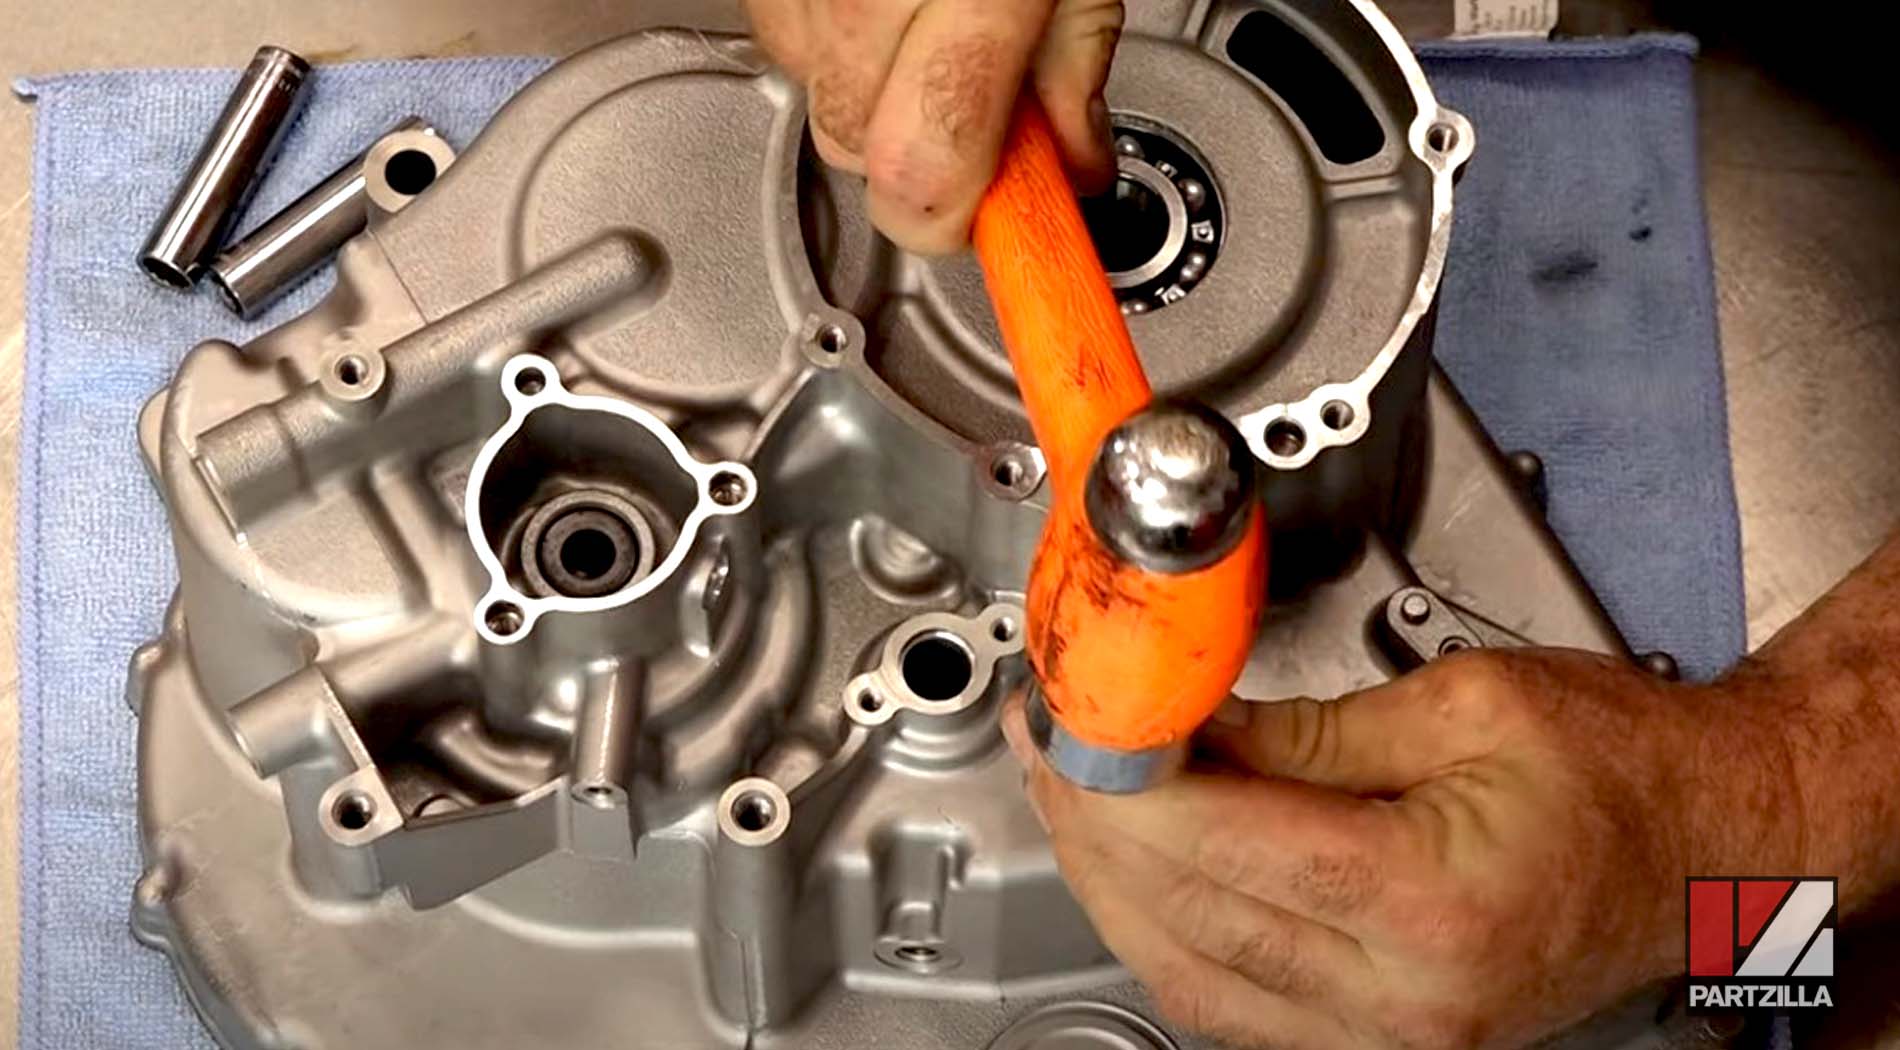
Step 11. Add some grease to the inside of each seal, then lube the bearings with a little bit of transmission oil.

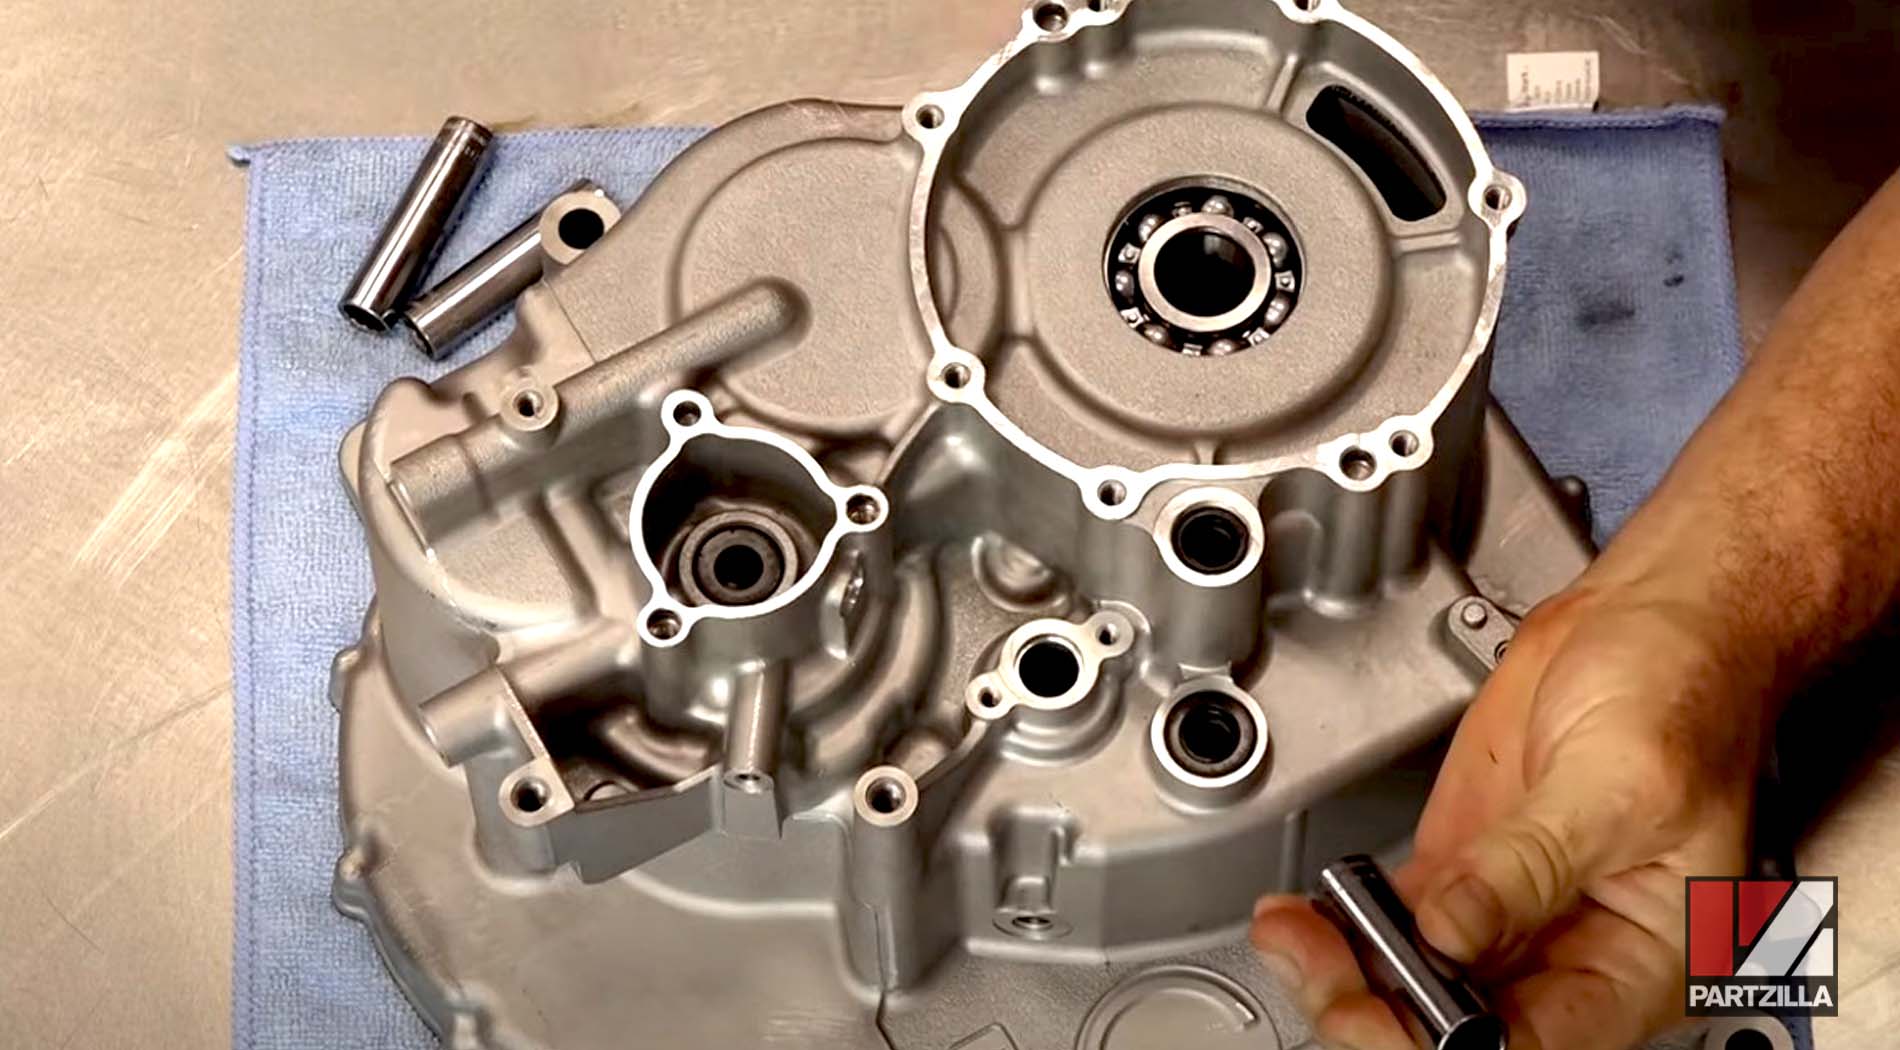
NOTE: Don’t make a mess when oiling the bearings, as the case halves need to be completely dry when you apply the bonding agent to each half.
Watch the clip below to see the bearing press segment of our Yamaha YXZ1000 gear reduction kit installation video
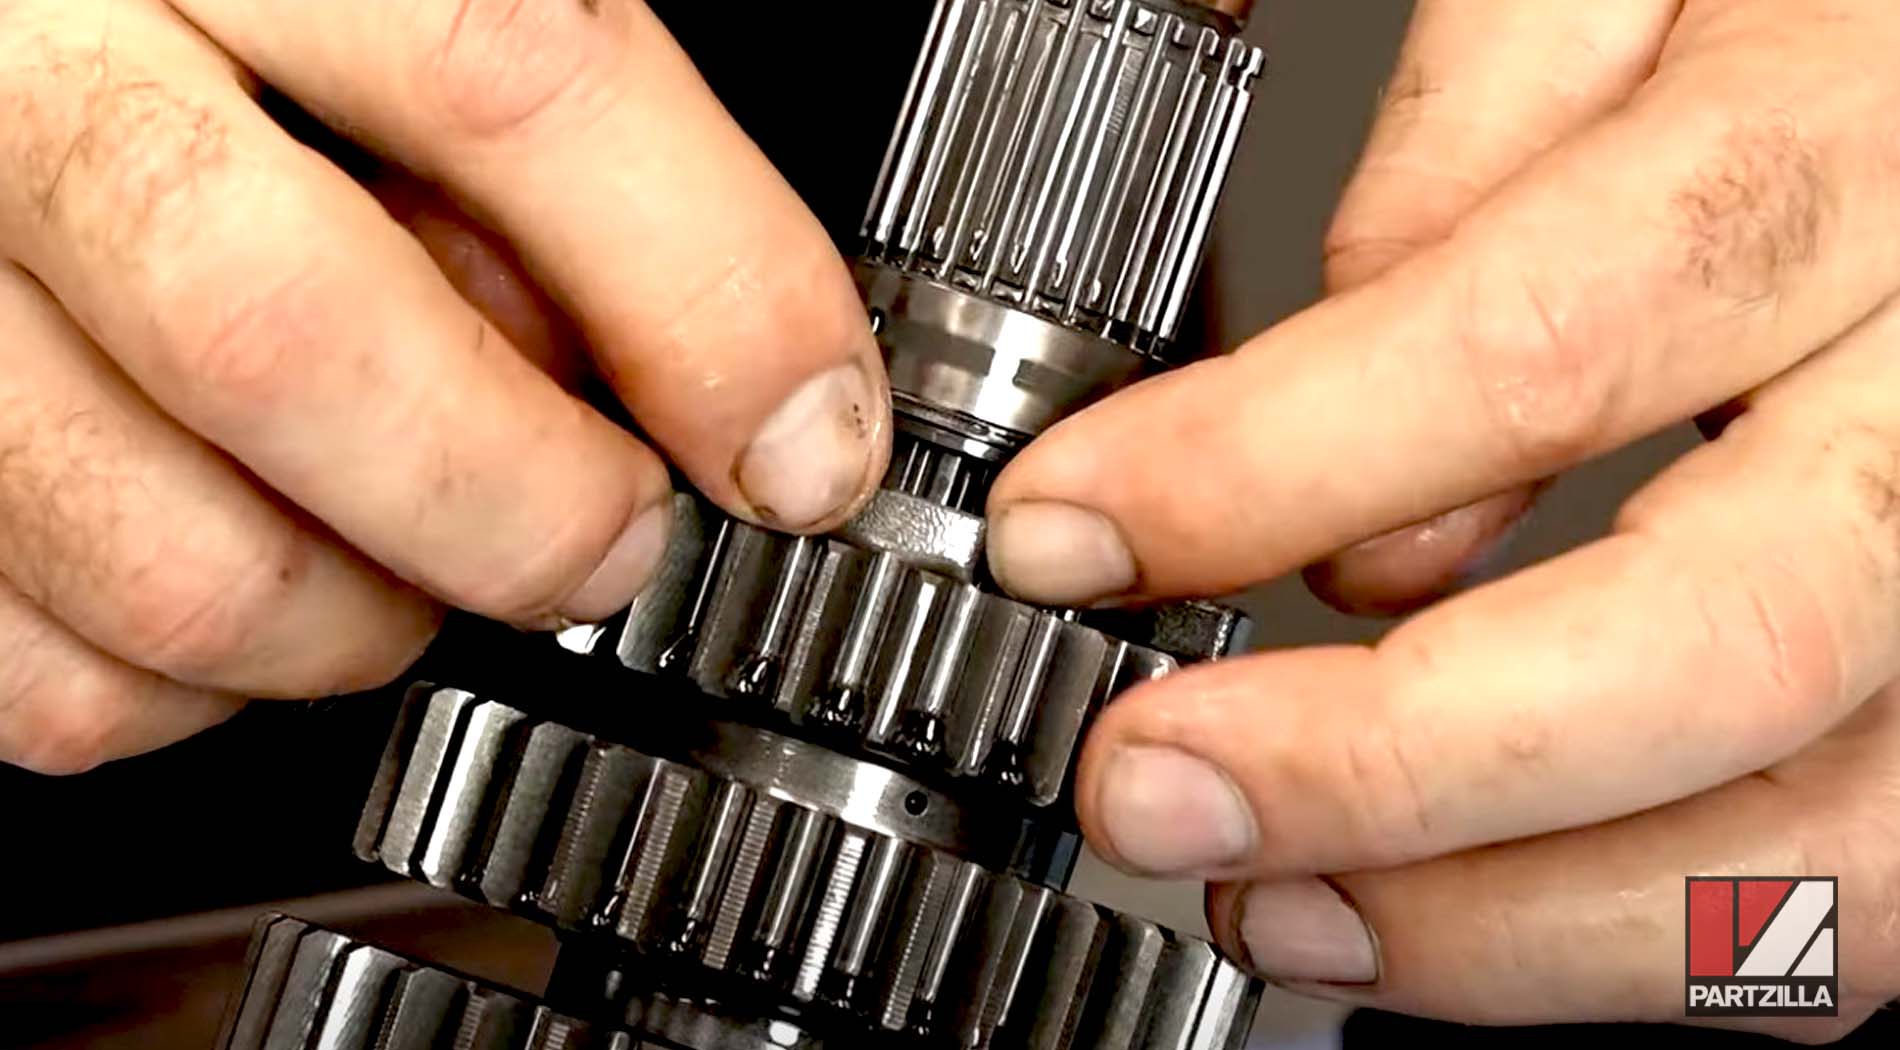
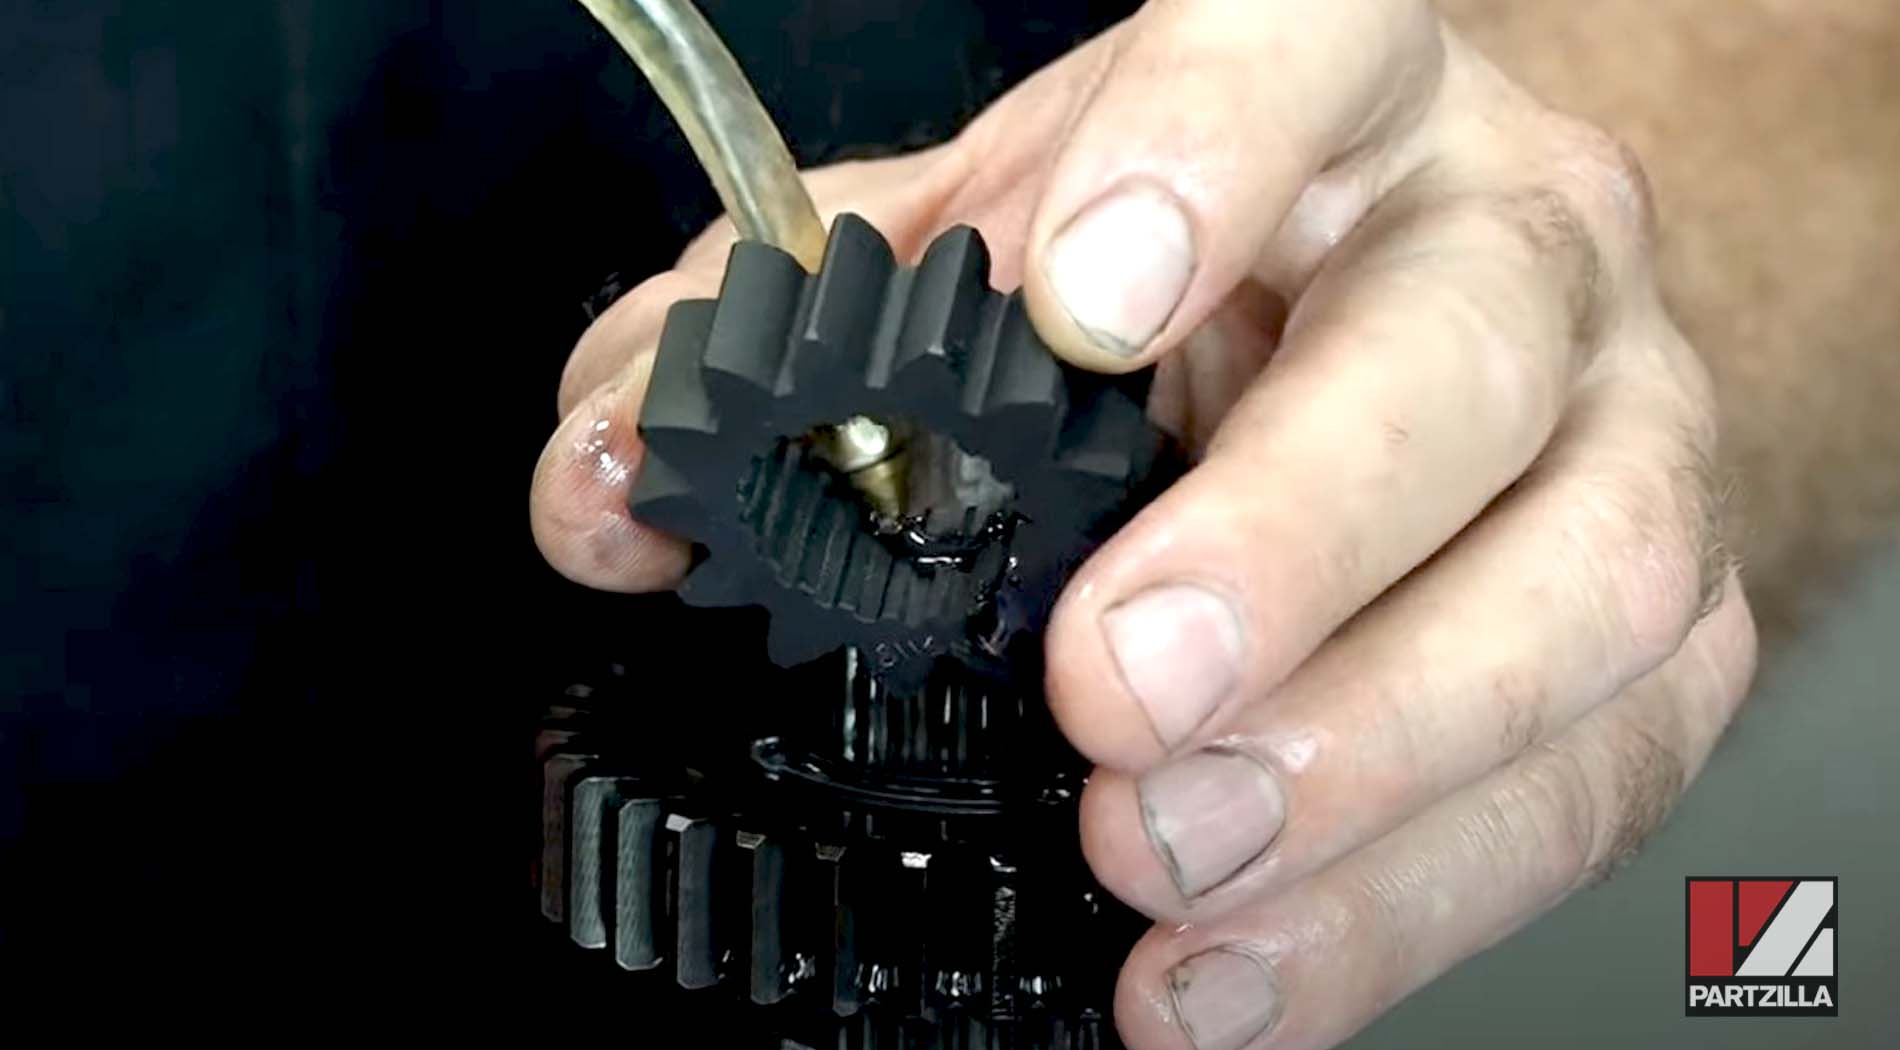
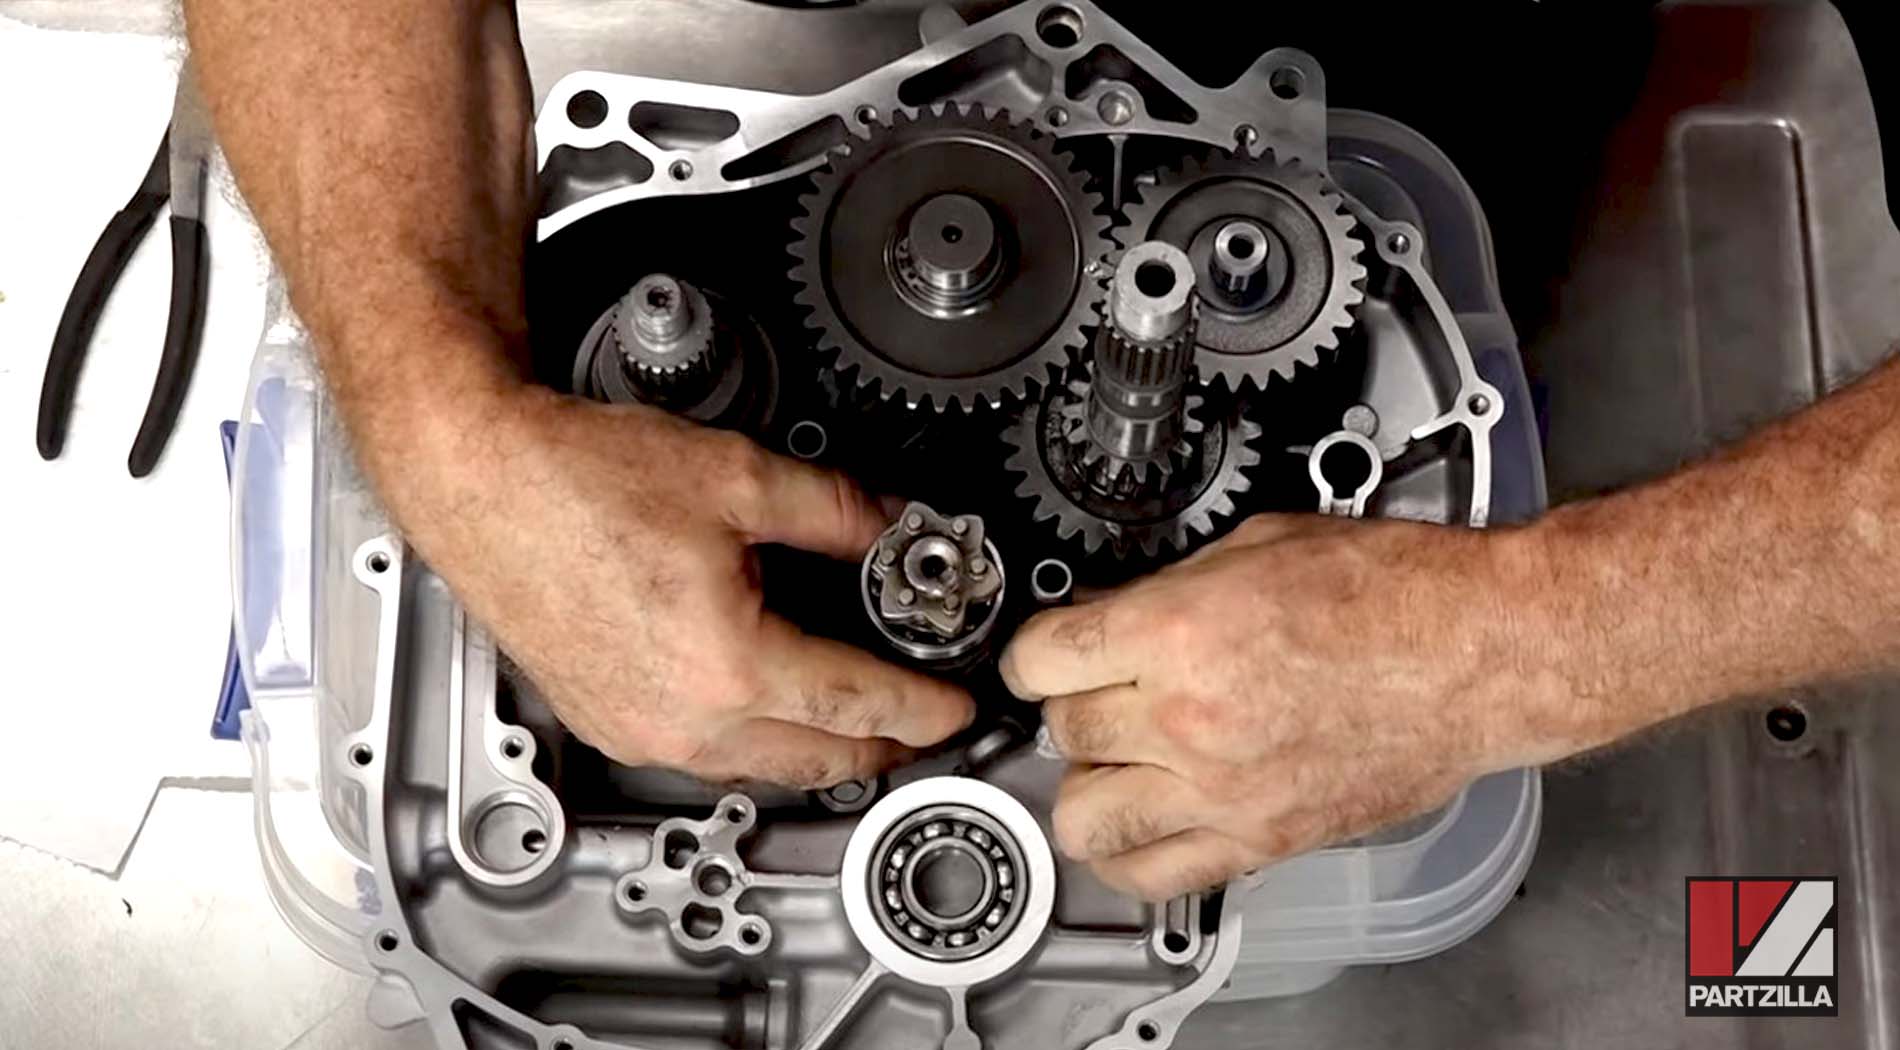
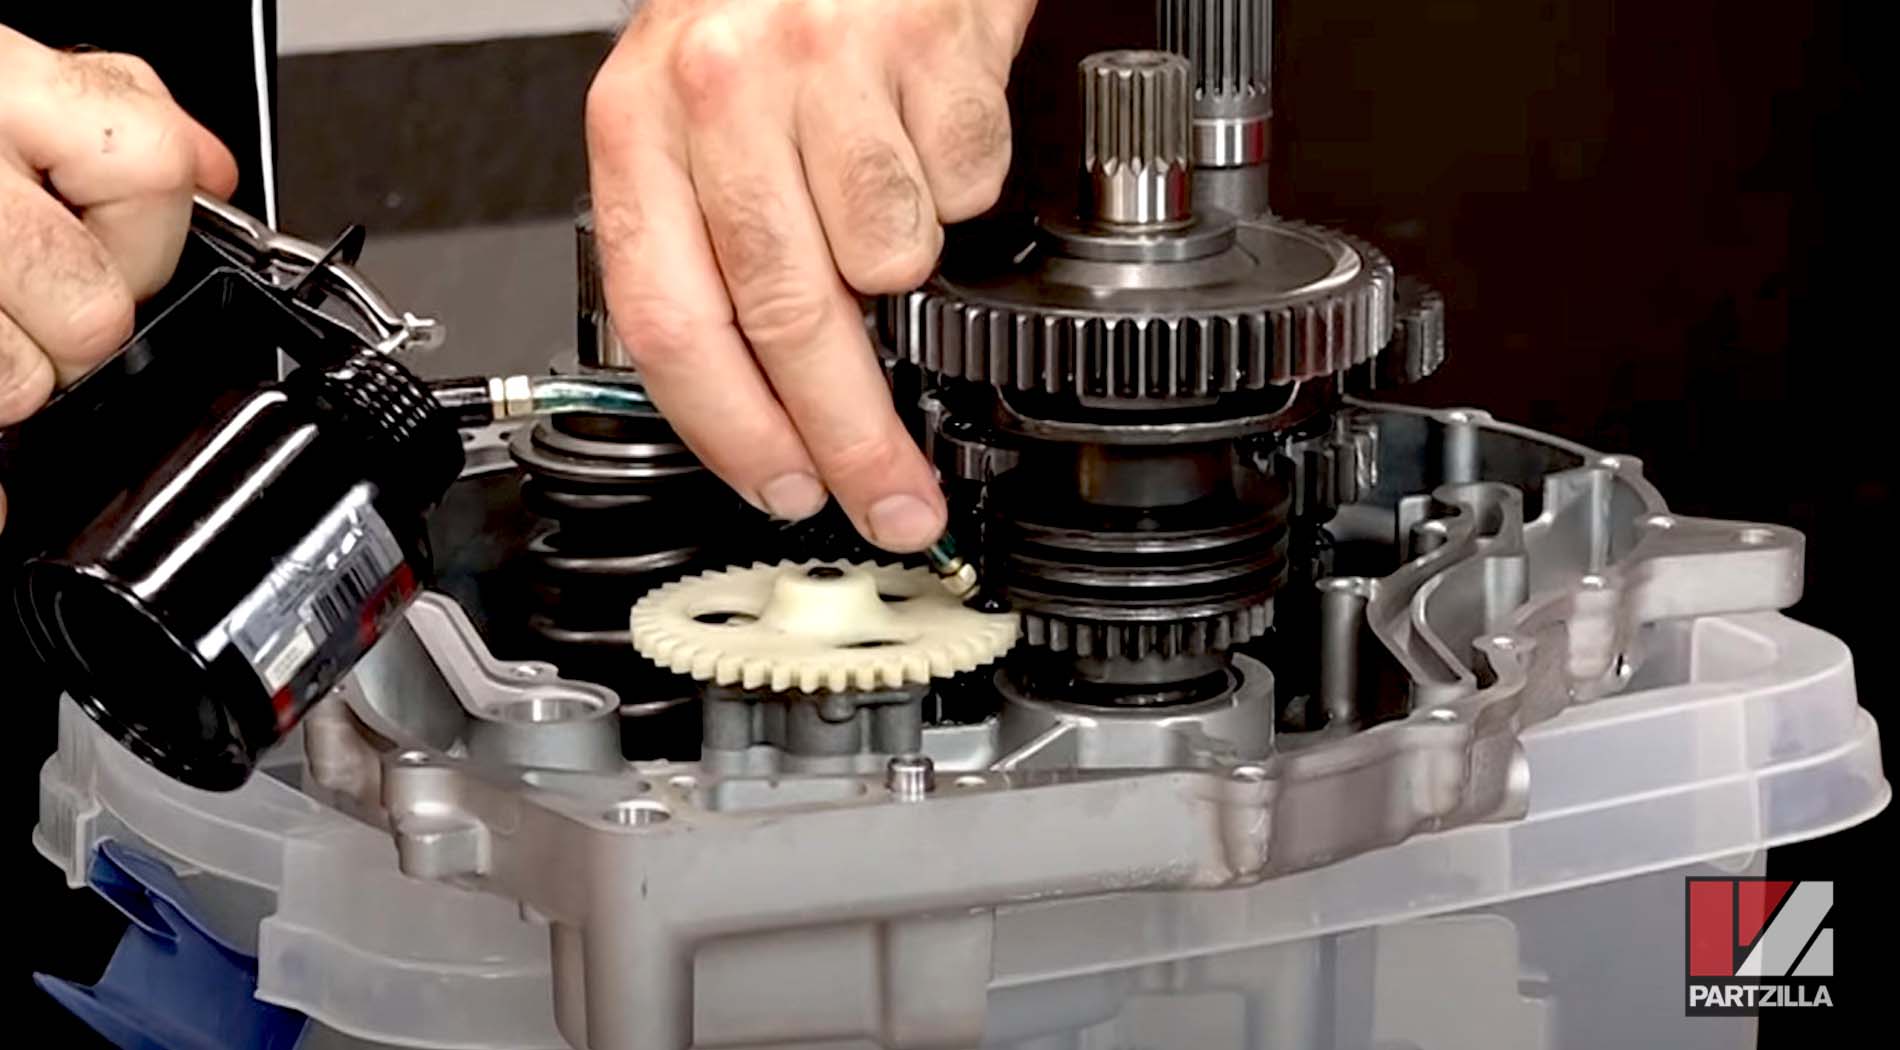
Step 12. Replace the first gear and the middle drive gear on the drive axle, including their snap rings. Add a little bit of transmission oil to each gear before installing it onto the axle.
NOTE: When installing the new gears, inspect the other gears, the shaft and everything else and replace anything that’s damaged or worn.
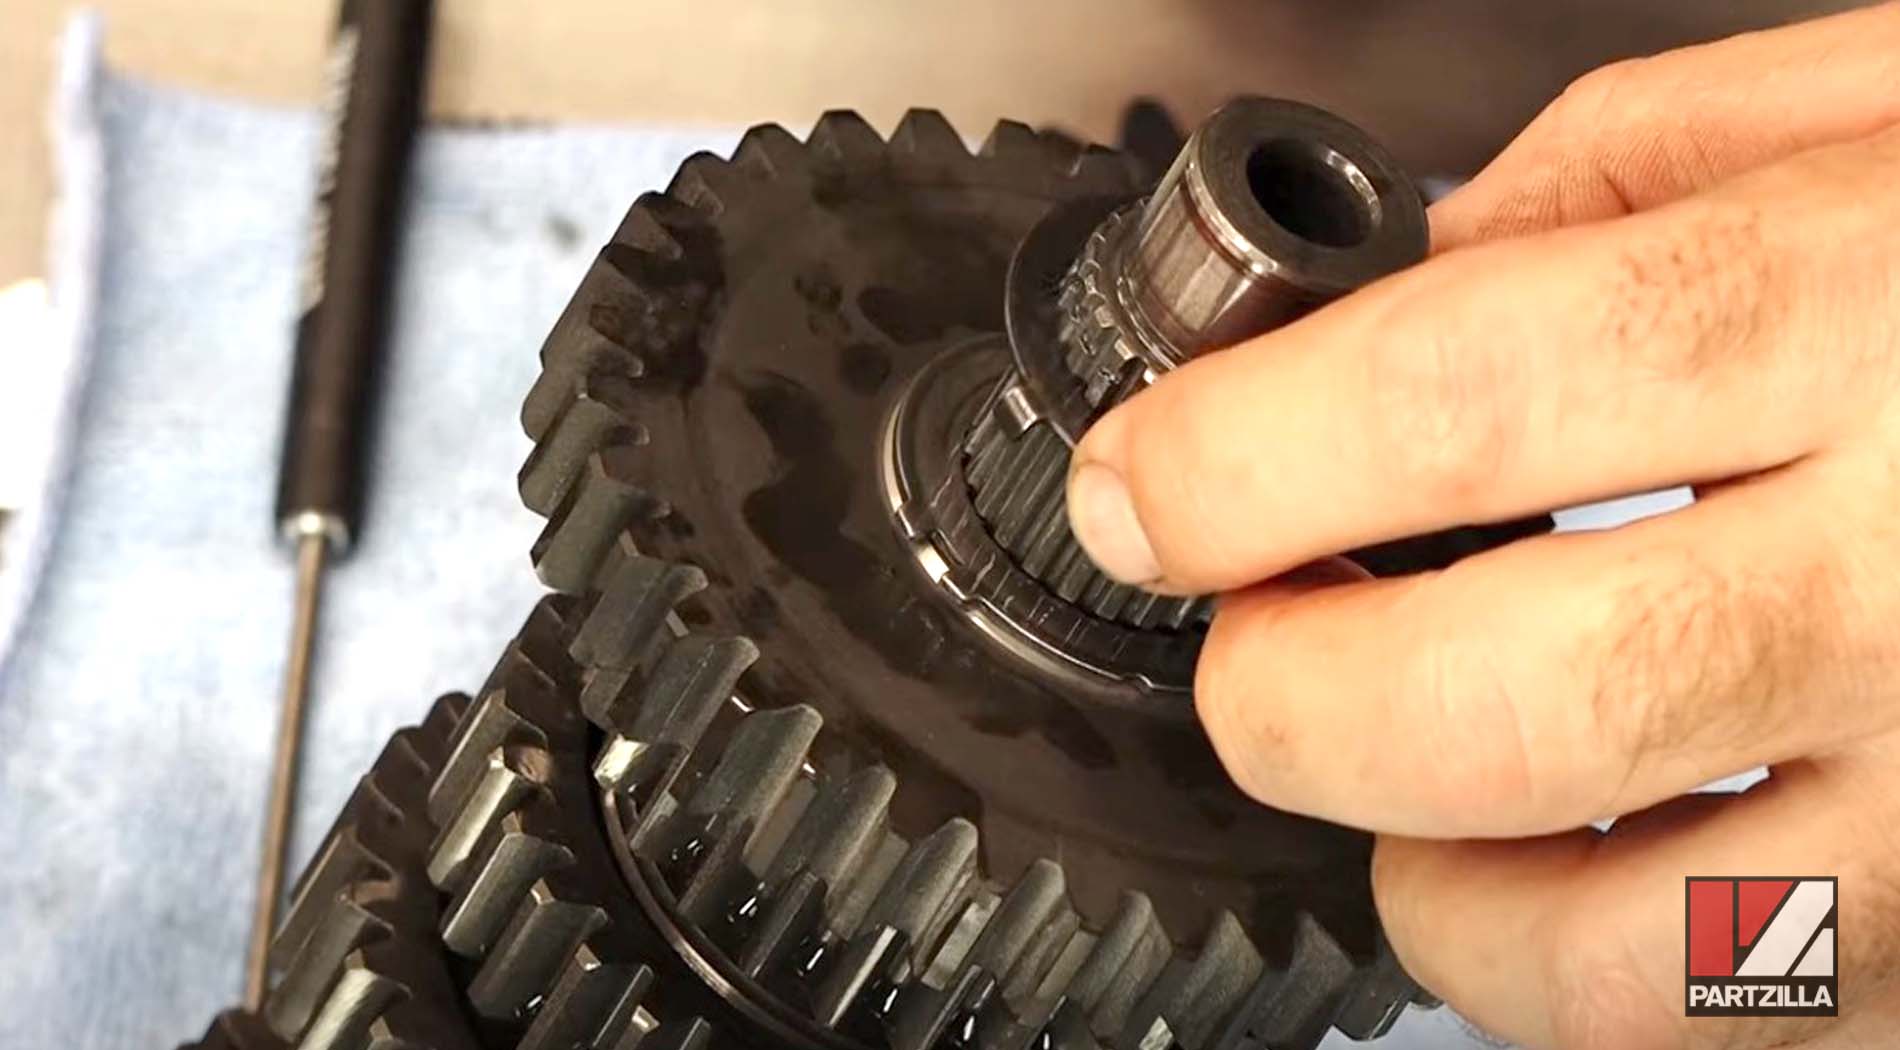
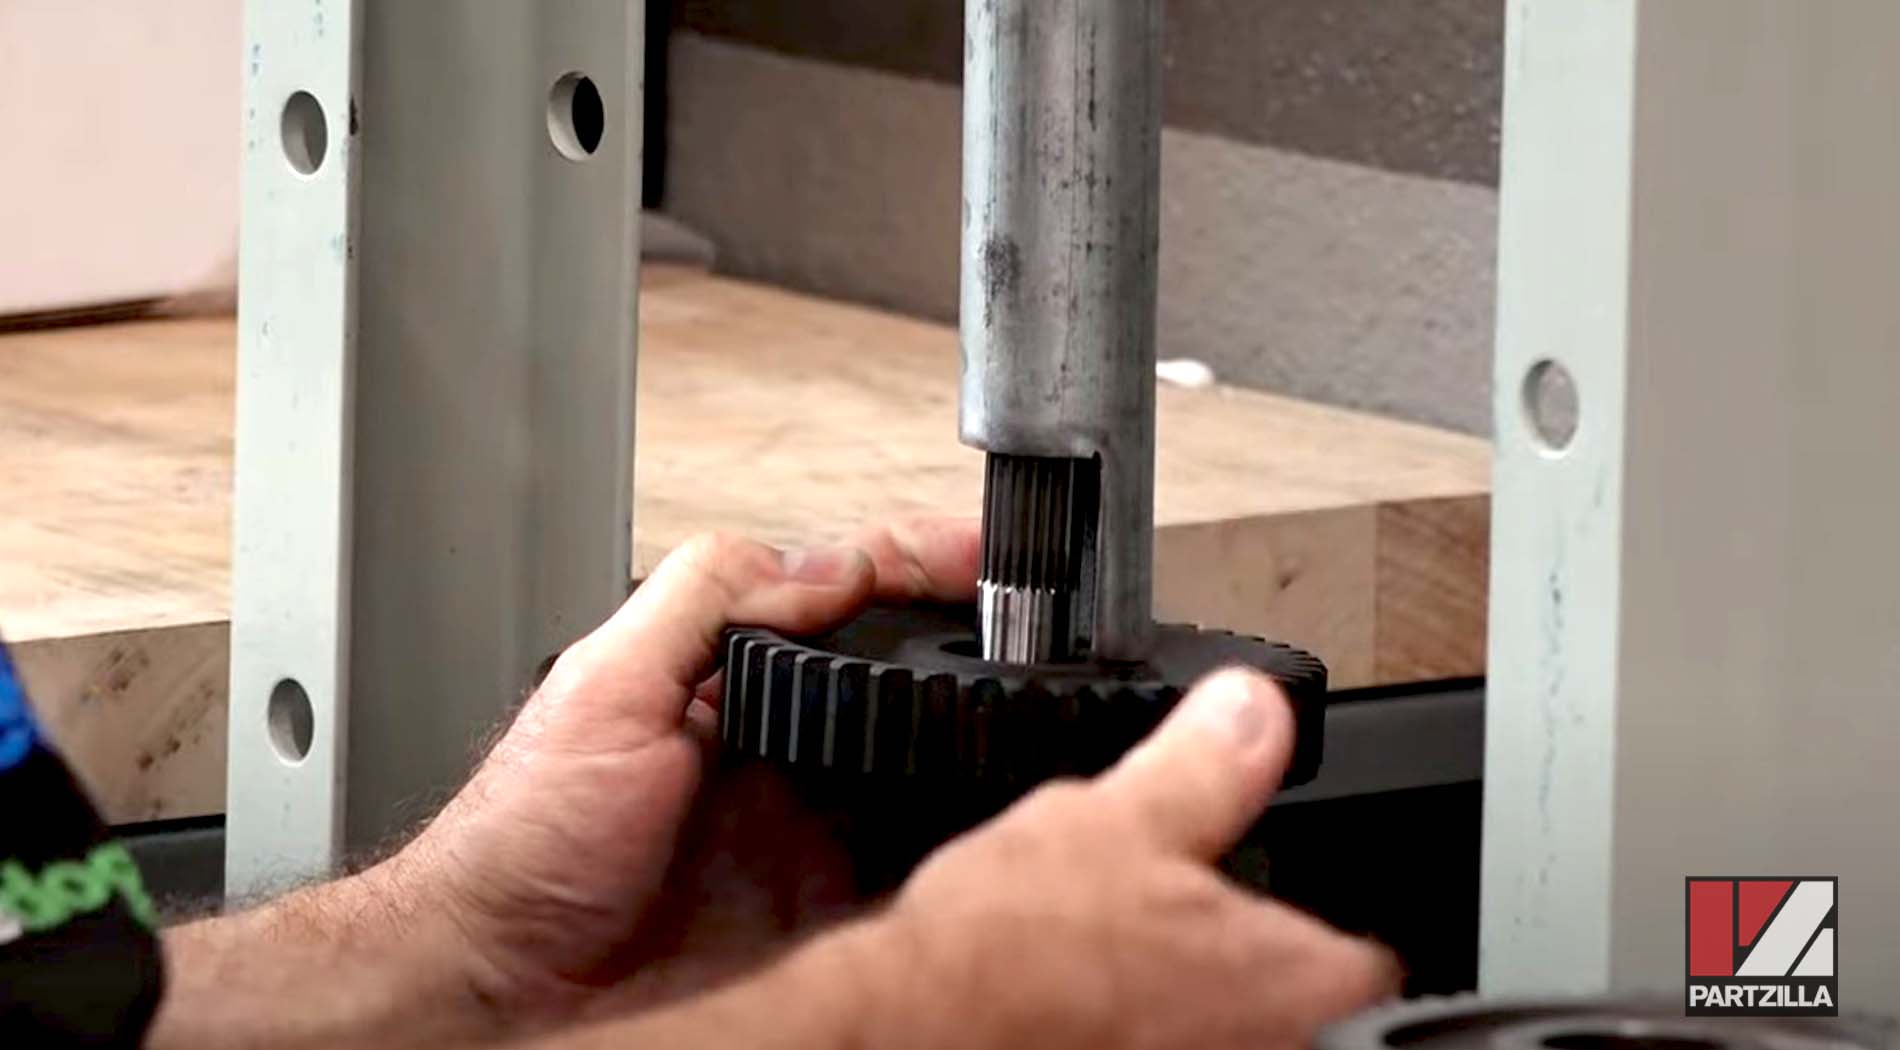
Step 13. Lube and install the new pinion gear with its circlips onto the main axle.
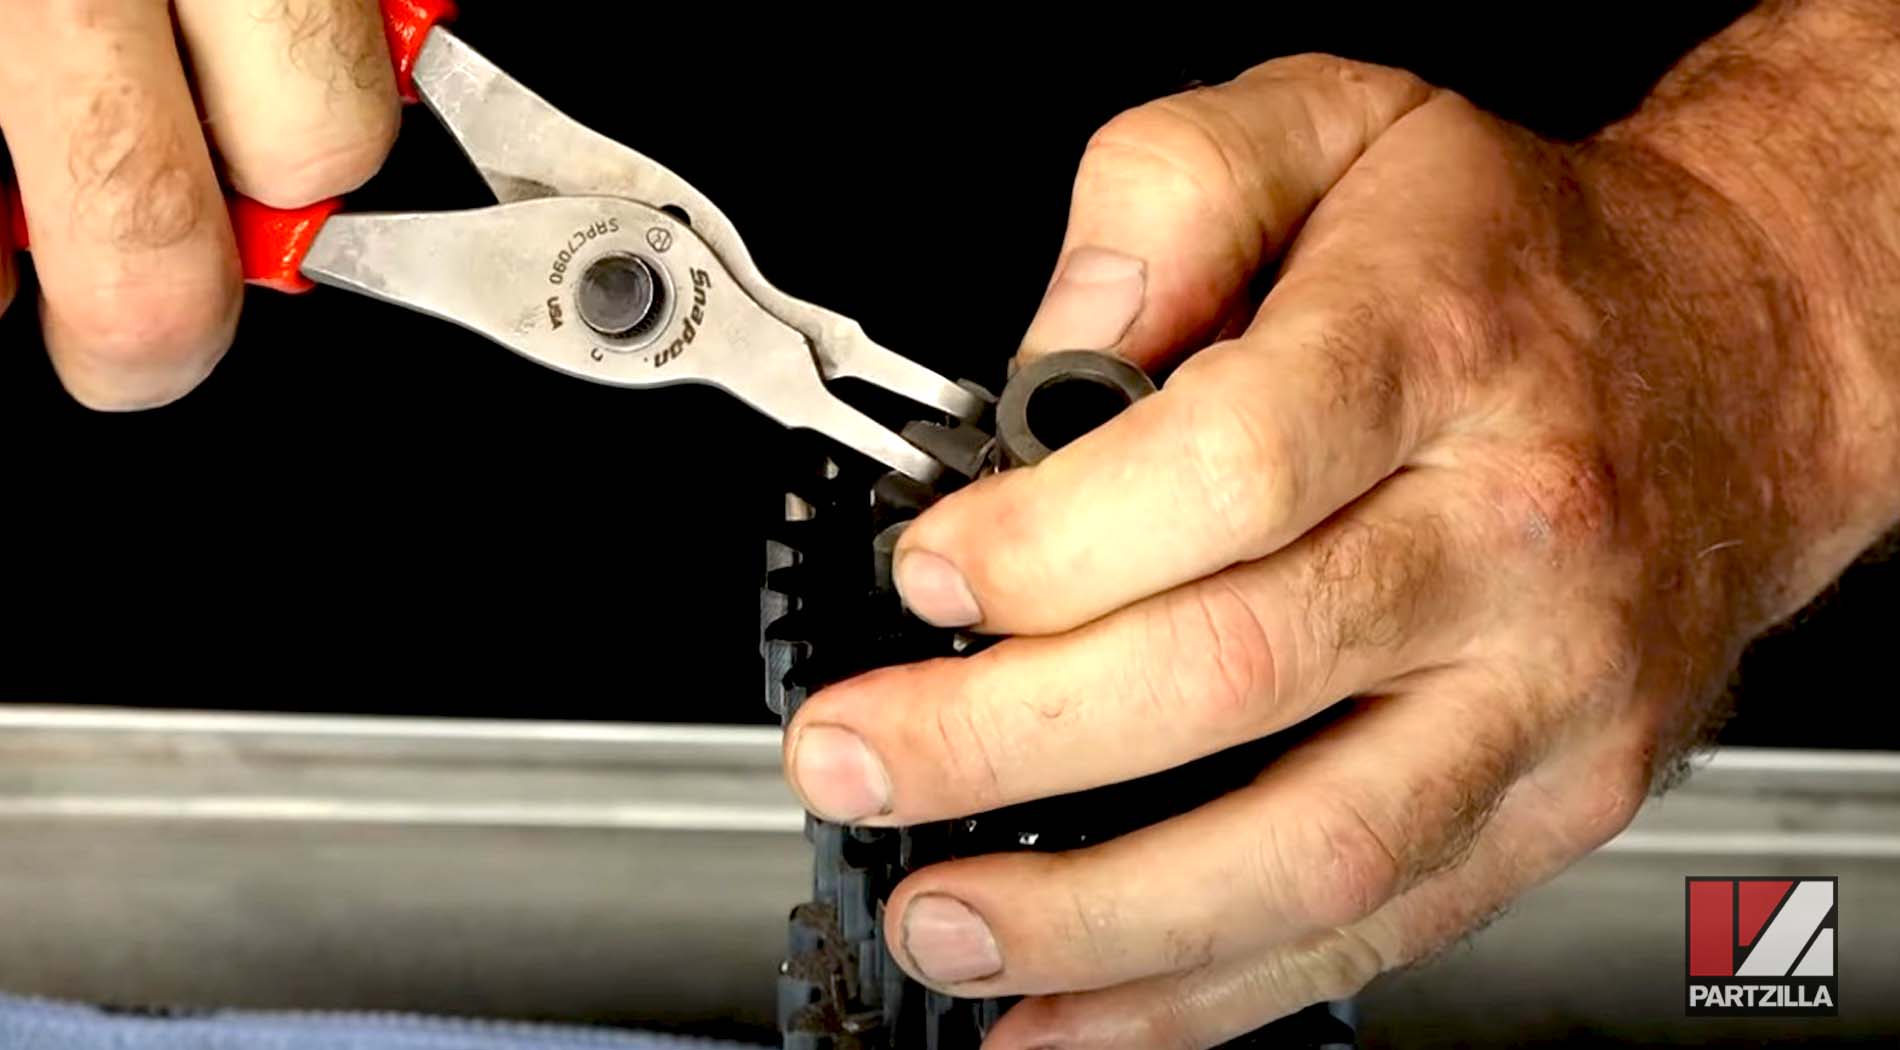
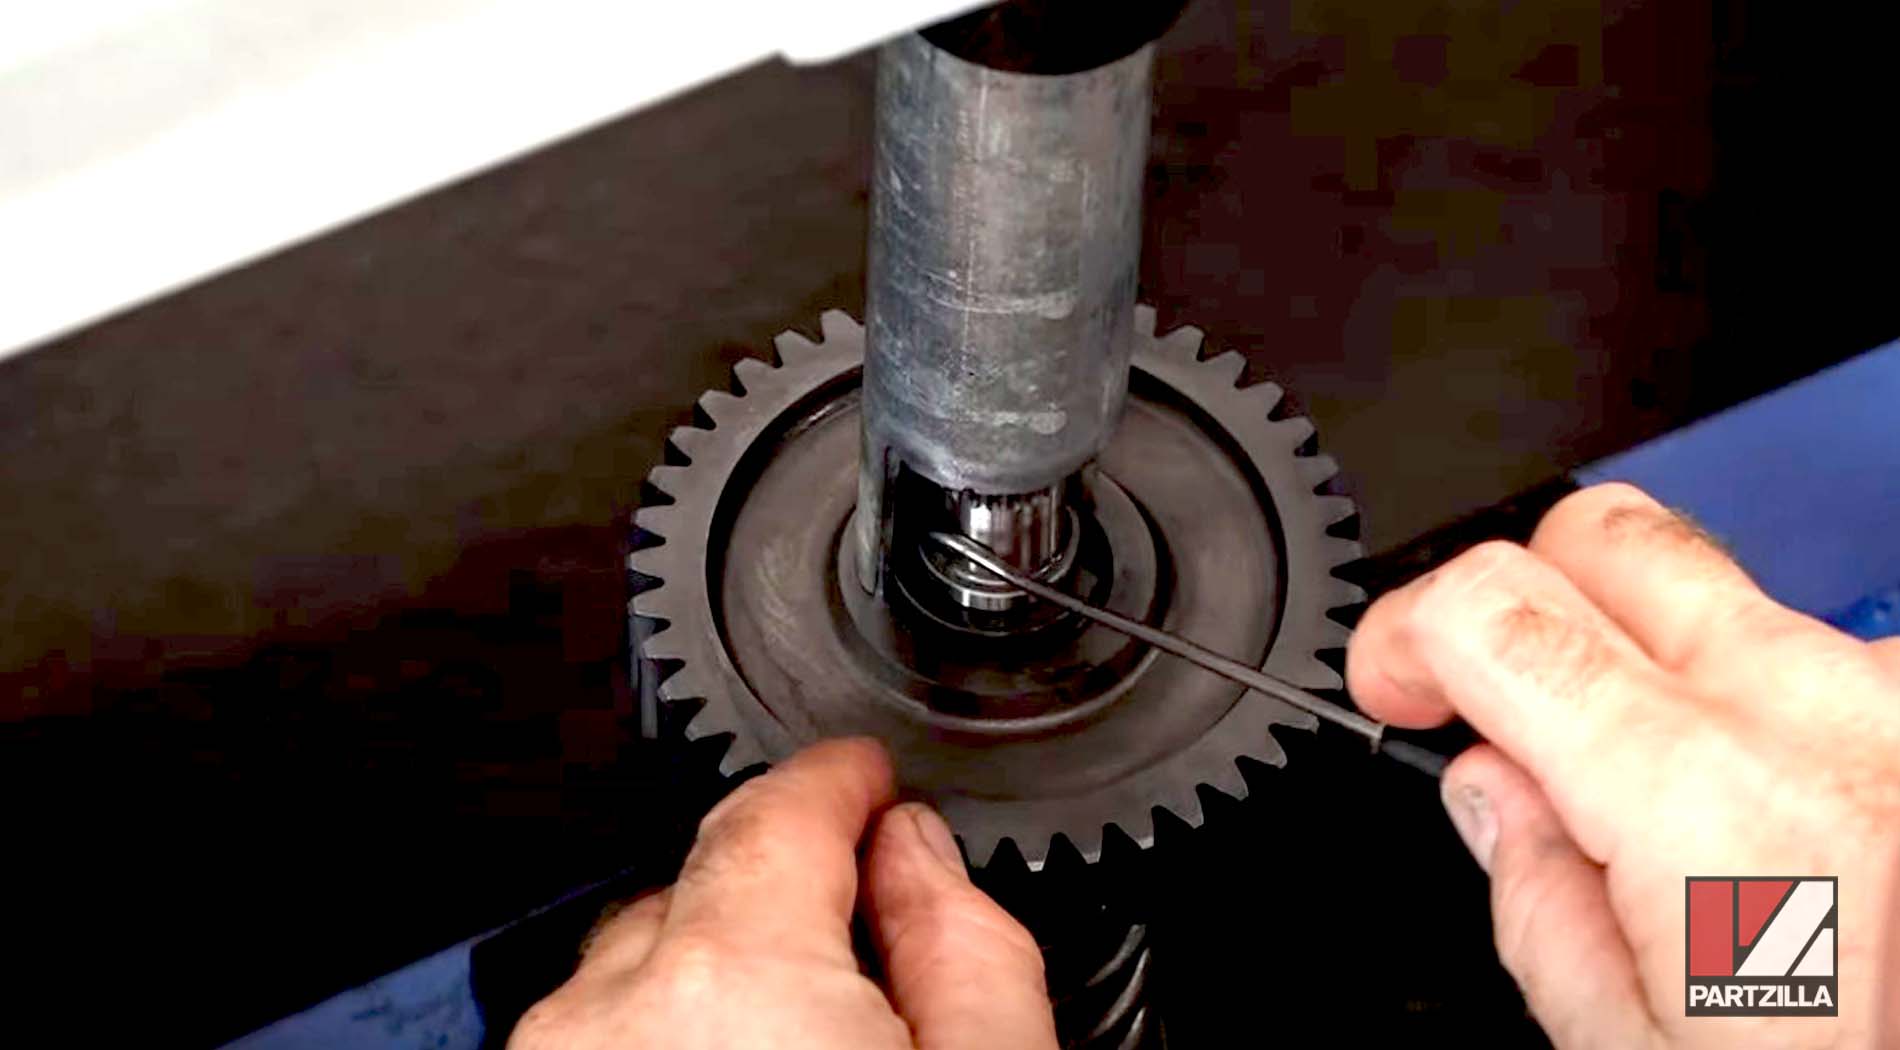
Step 14. Install the new the middle driven gear onto the middle driven shaft, which has a large spring below it that needs to be compressed to get out the gear’s two keepers. Use a press and a cupped (roughly) 1 ½ inch cut piece of EMT pipe with the top of the press to press it down just far enough to lift out the two keepers and the washer. Replace the old gear, its keepers and washers, then use the special EMT tool to press the new gear and its keepers in place.
Watch the clip below to see the gear installation segment of our Yamaha YXZ1000 gear reduction kit installation video.
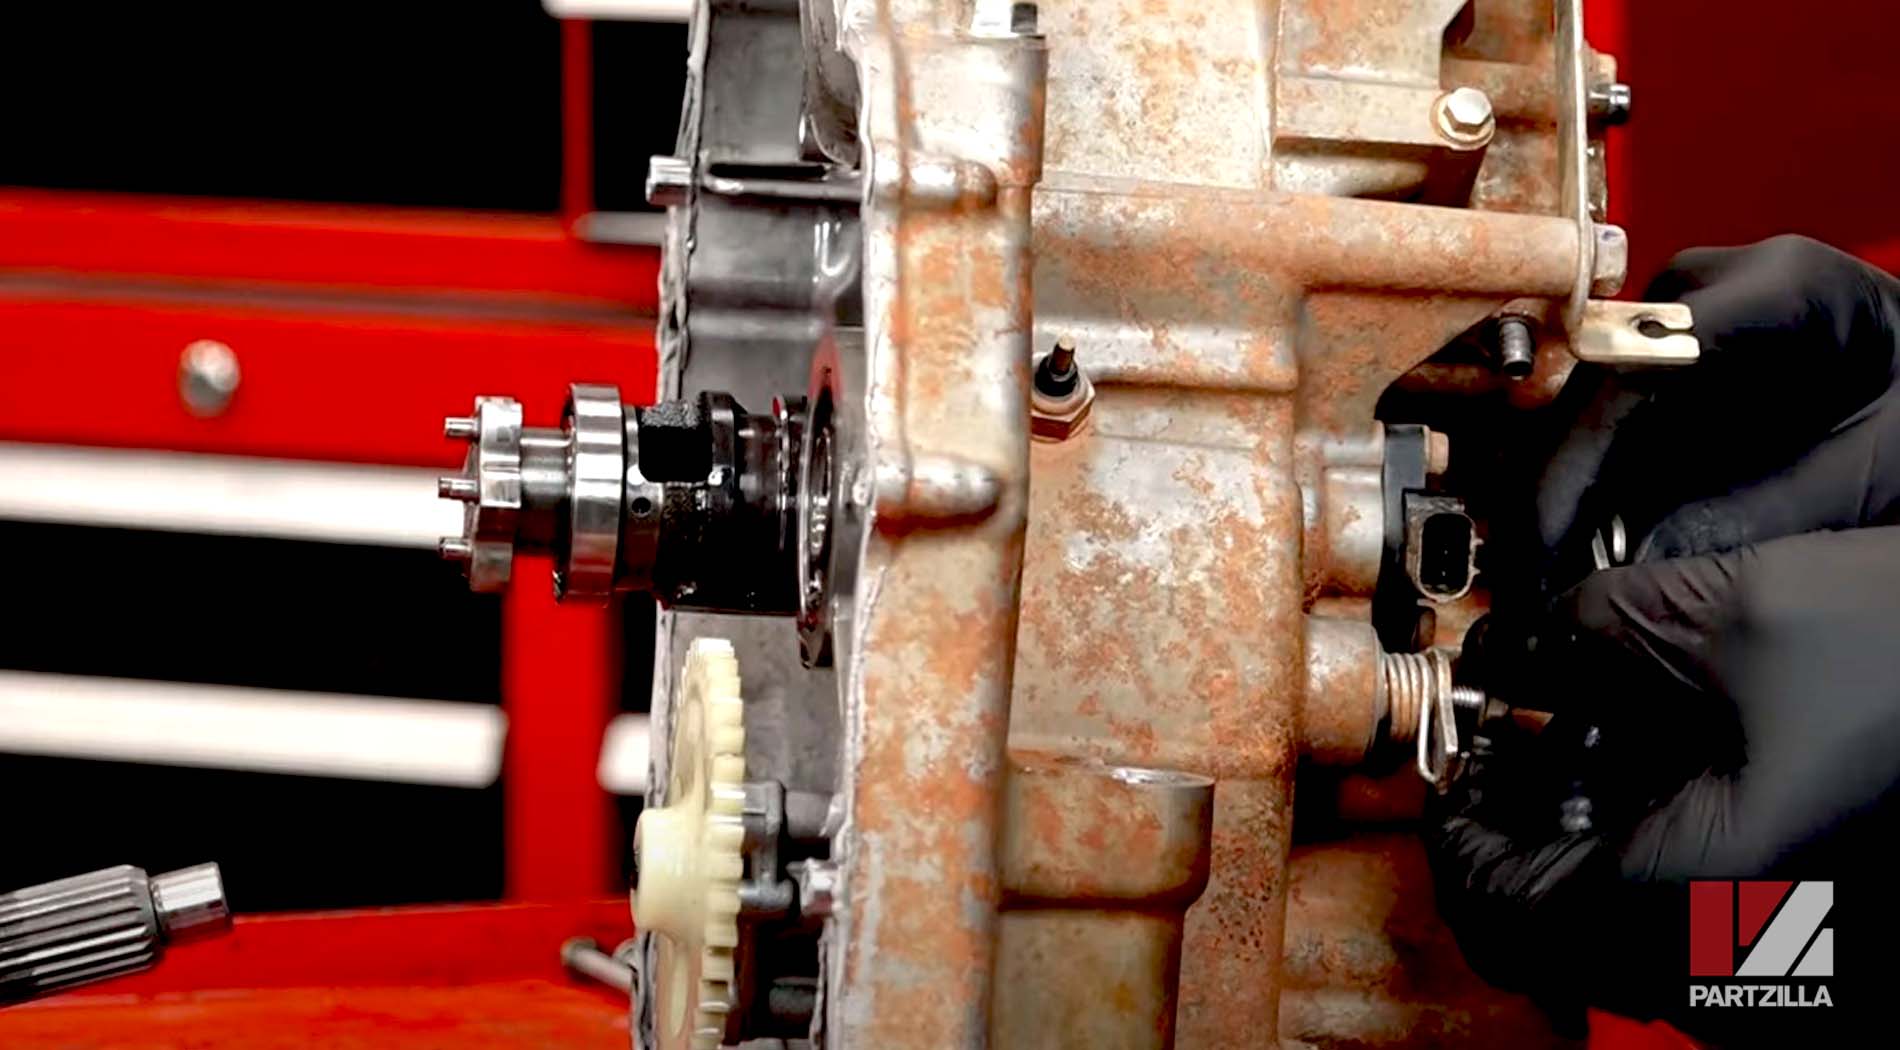
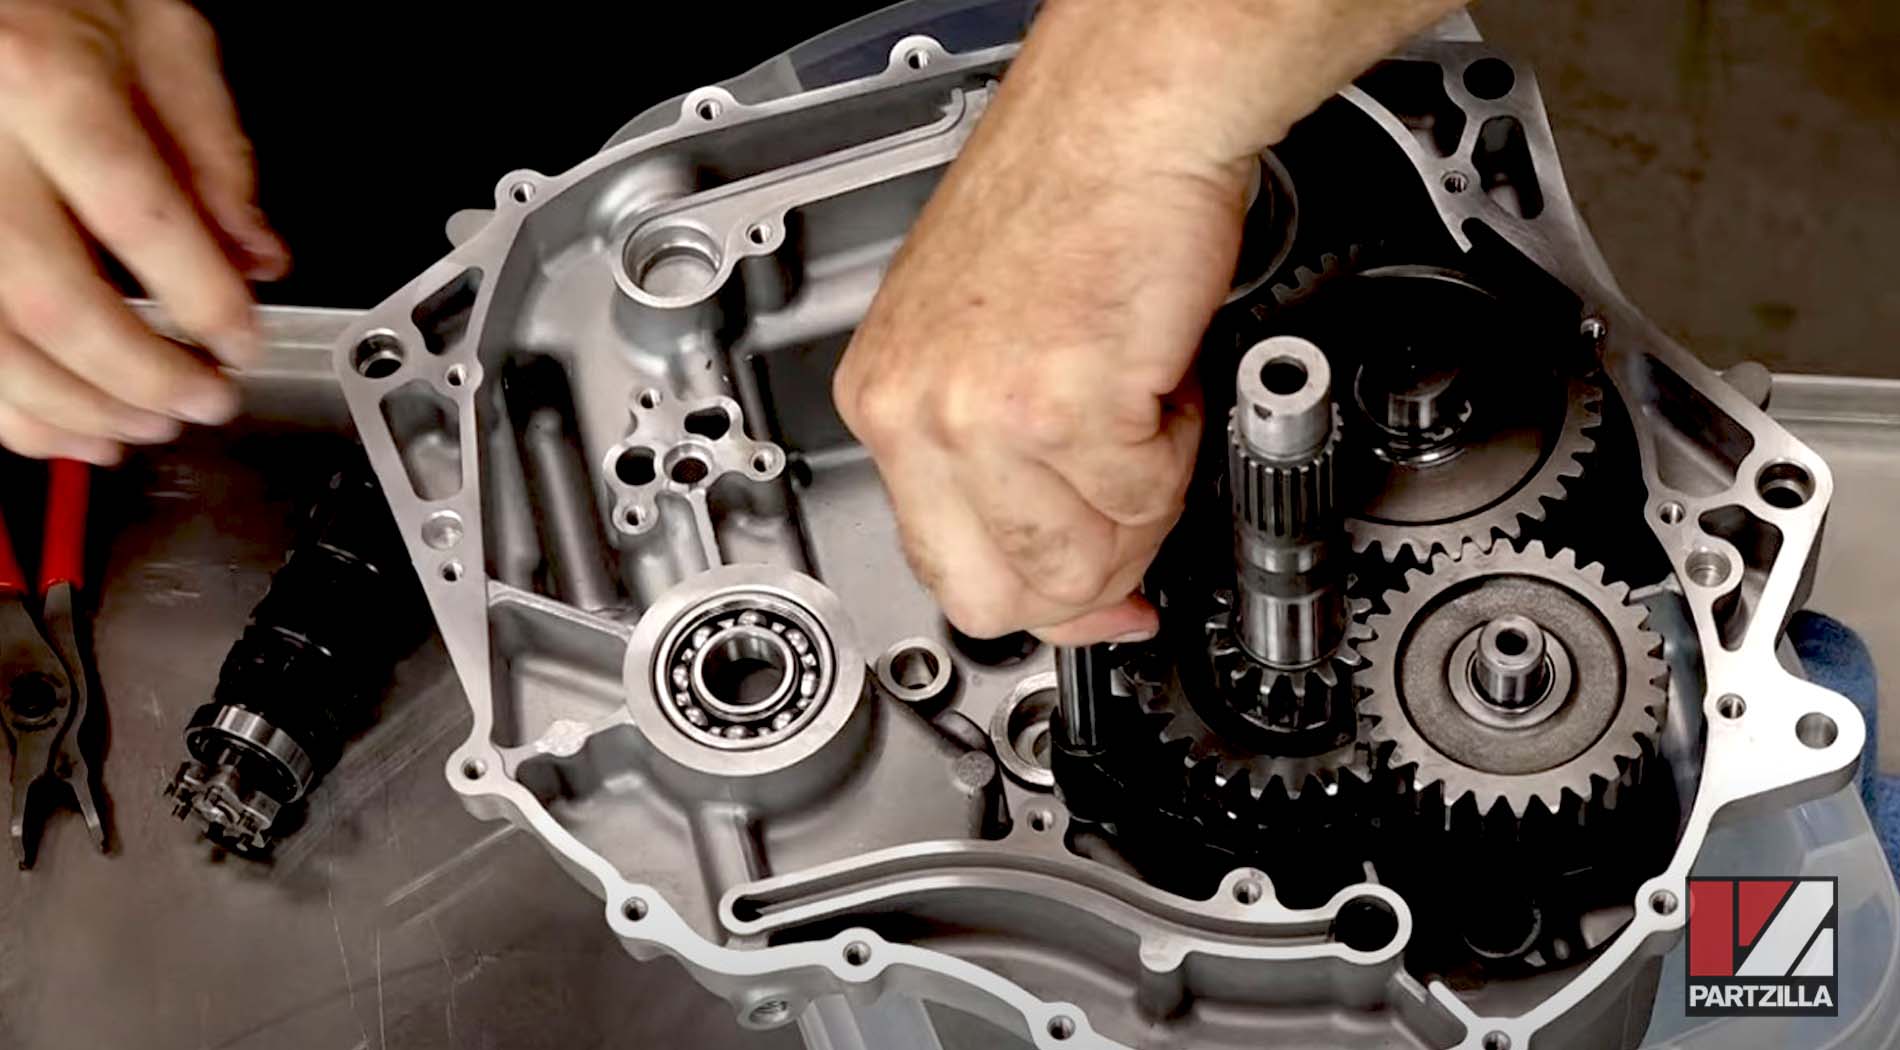
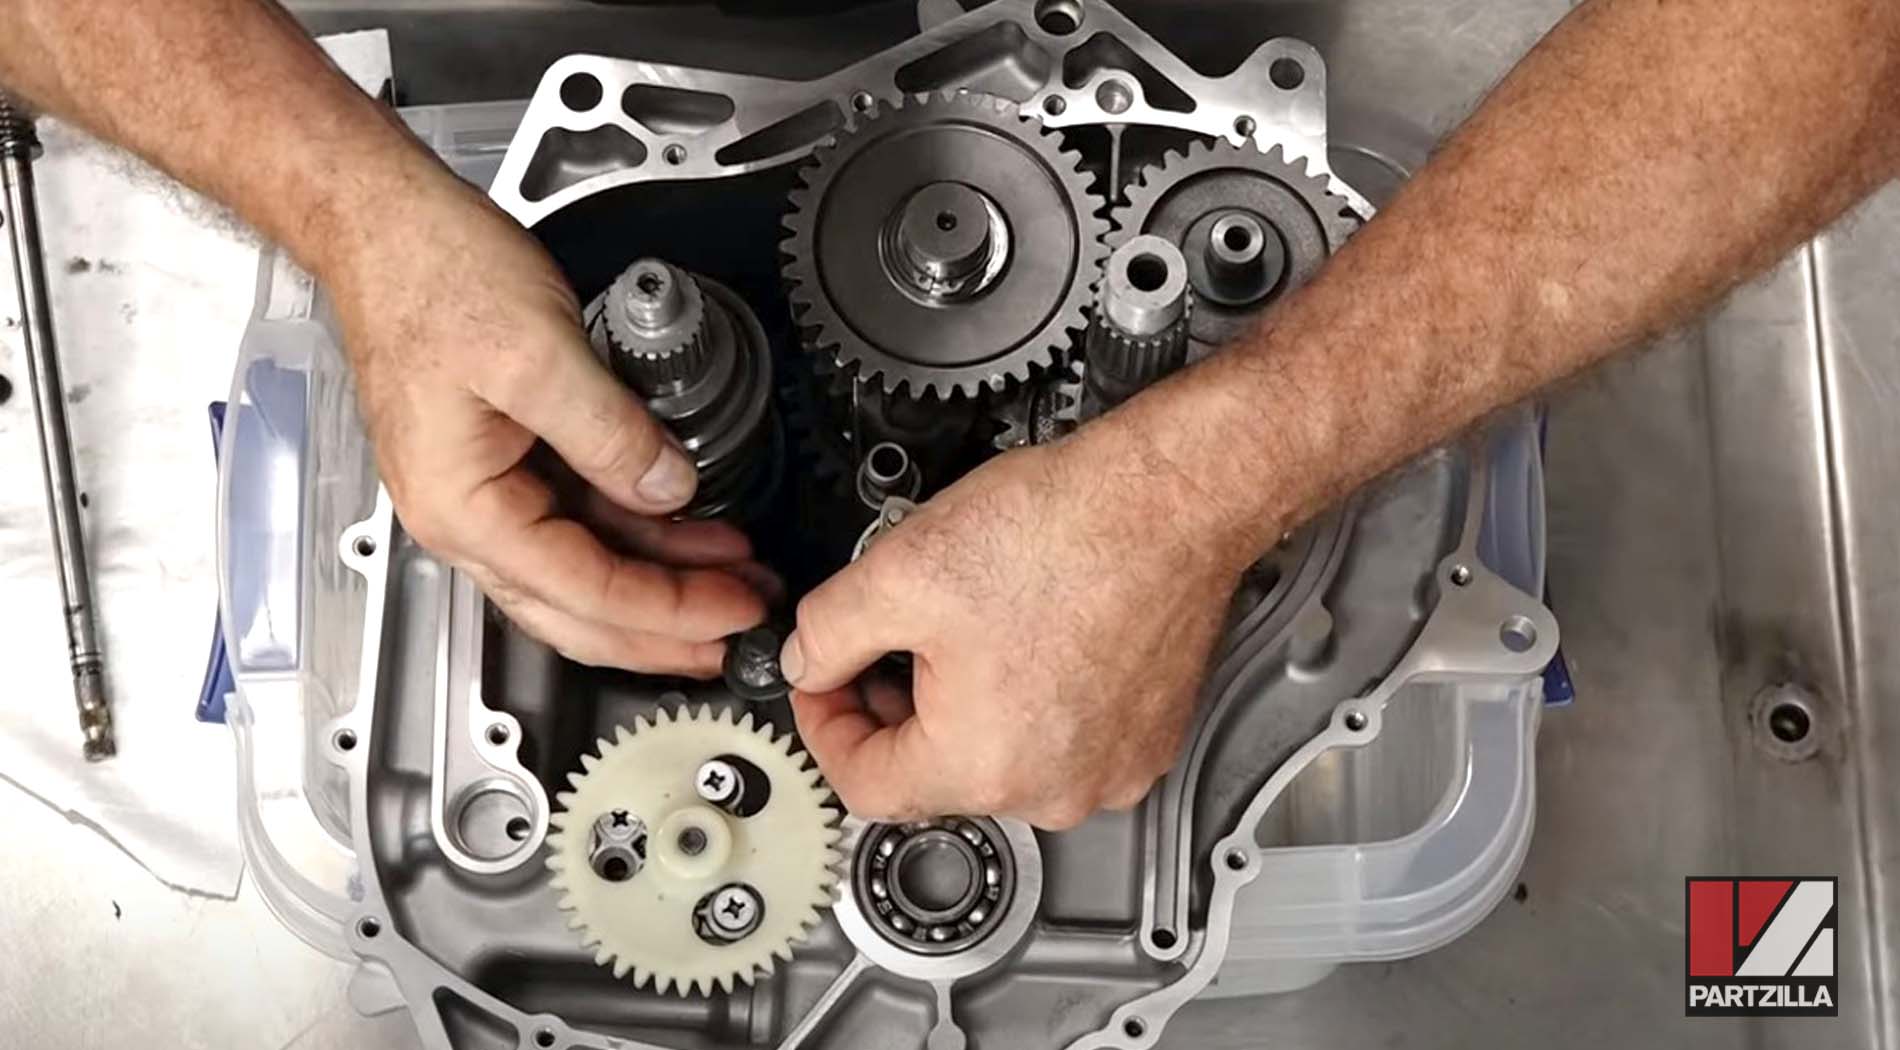
Step 15. Reinstall all the gears and components removed from the old case half into the new case half. Use our YXZ1000 transmission parts diagram for reference.
Watch the clip below to see the case half reassembly segment of our Yamaha YXZ1000 gear reduction kit installation video.
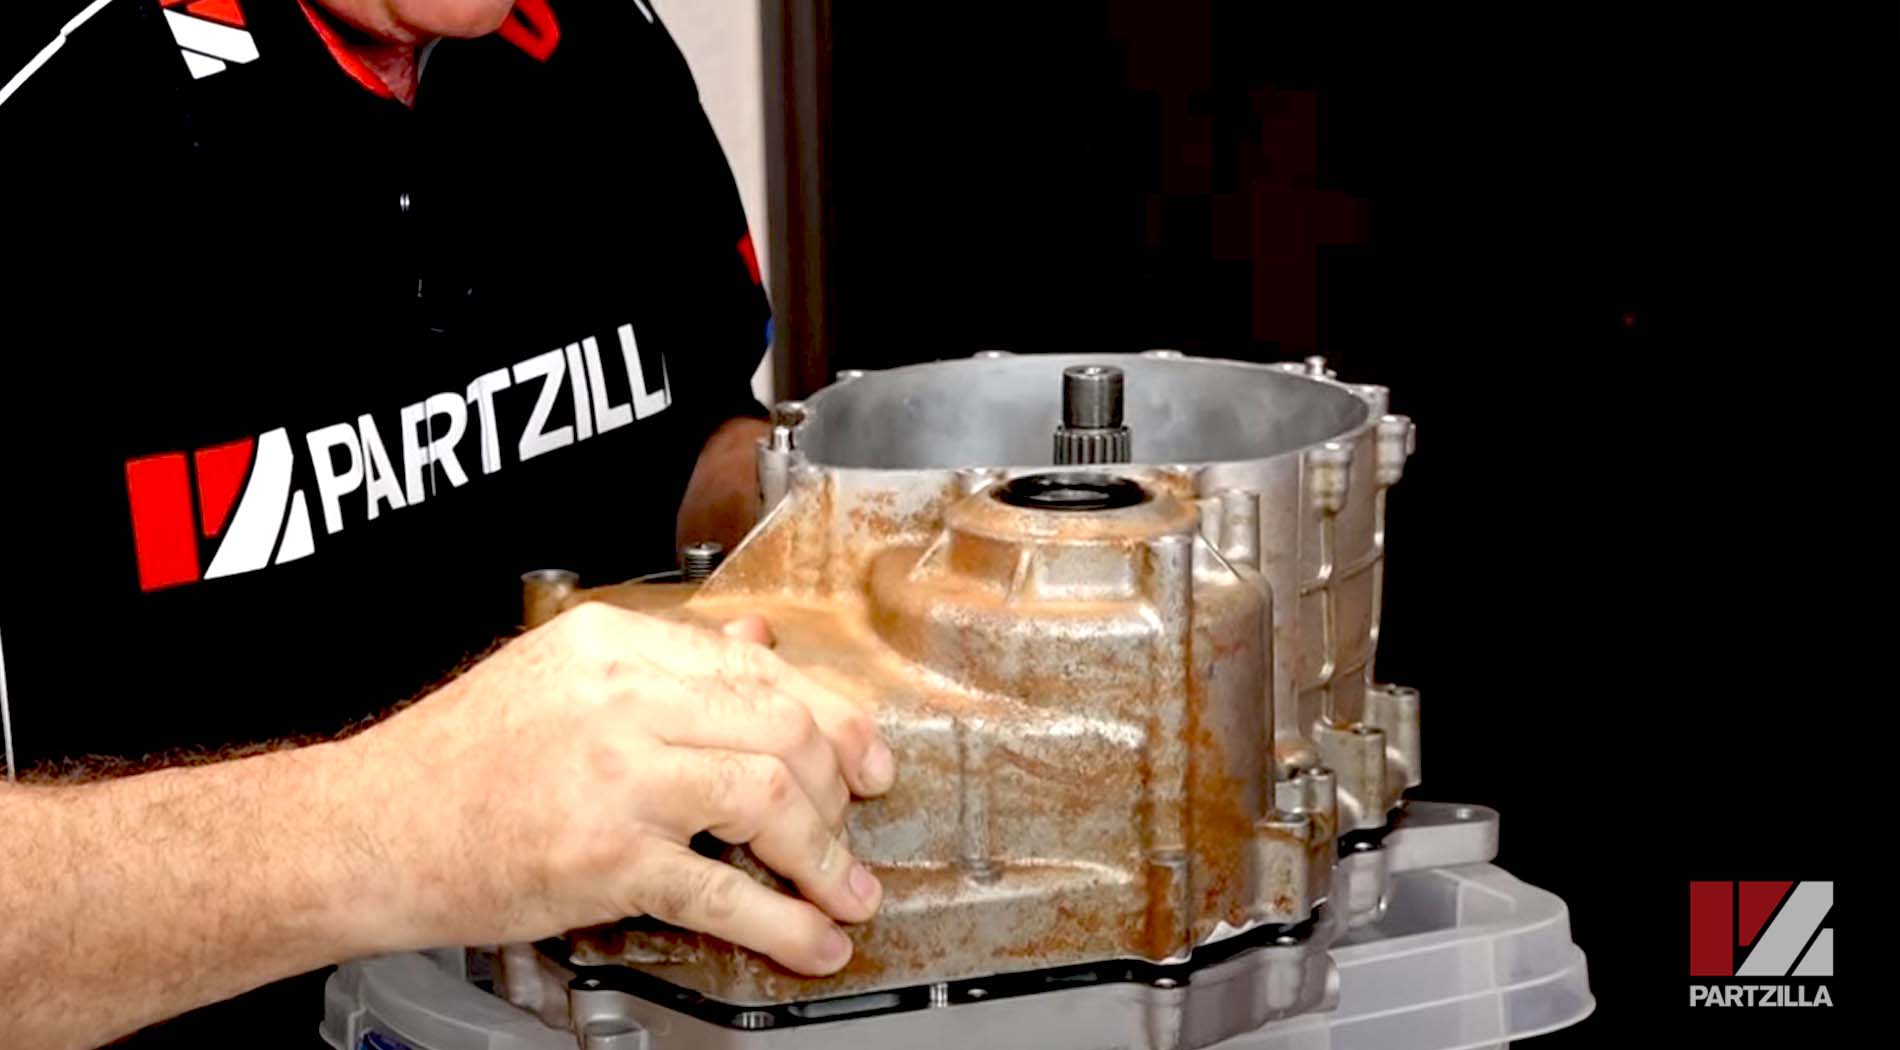
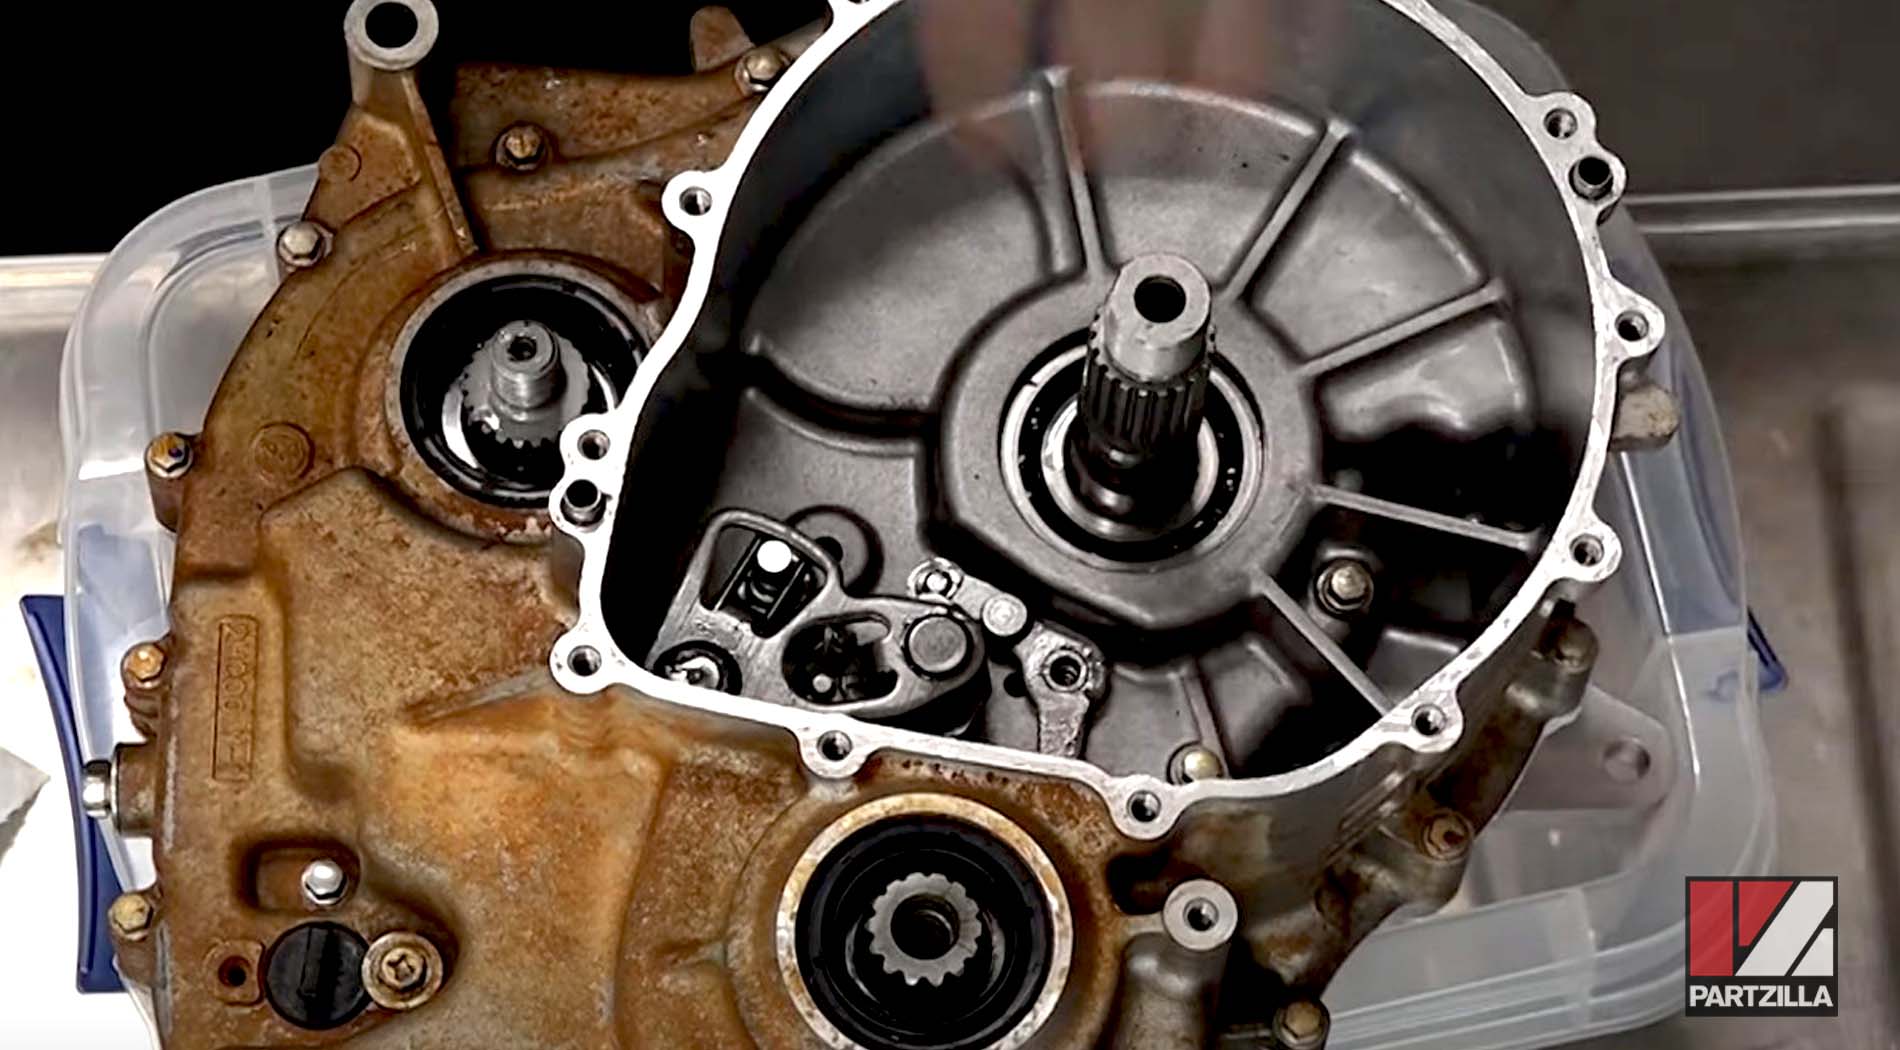
Step 16. Clean up the other half of the case by scraping off the old gasket gently and using a shop towel to catch any of the debris that could get into the bearings, then using contact cleaner to spray and wipe any gasket debris off.
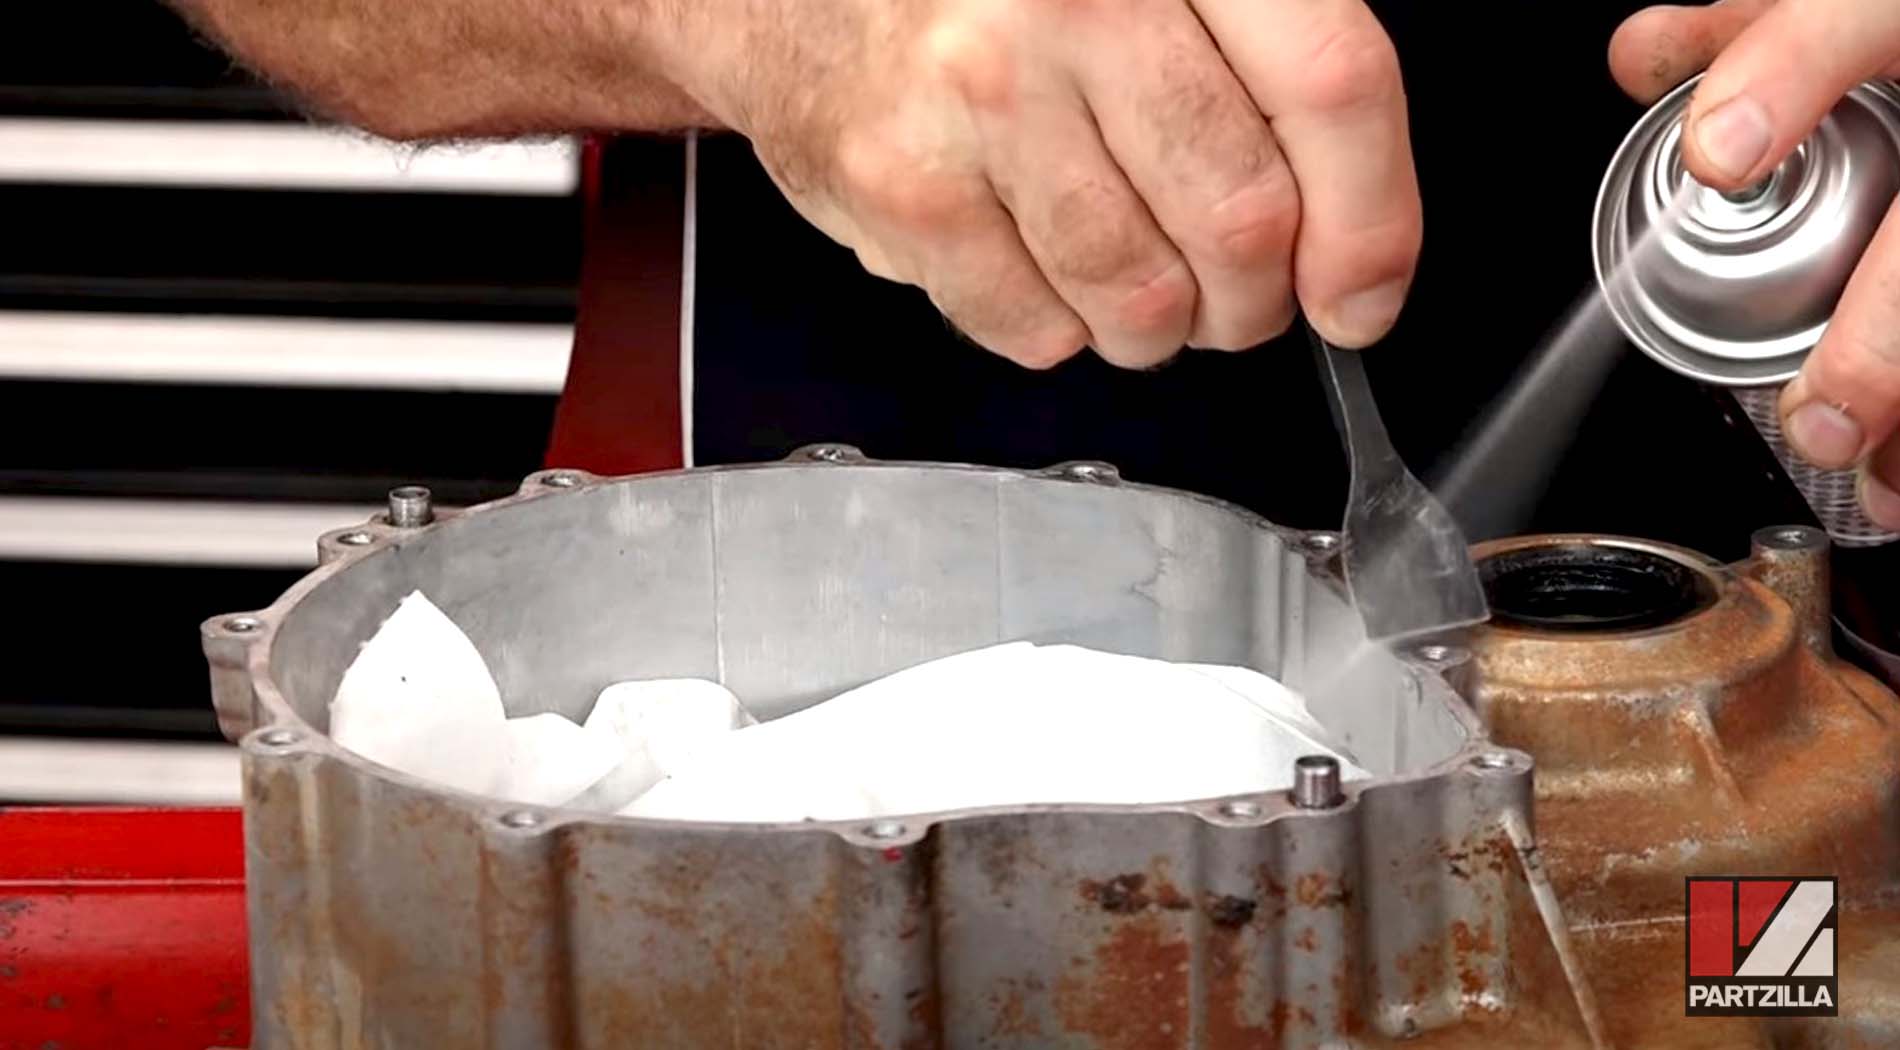
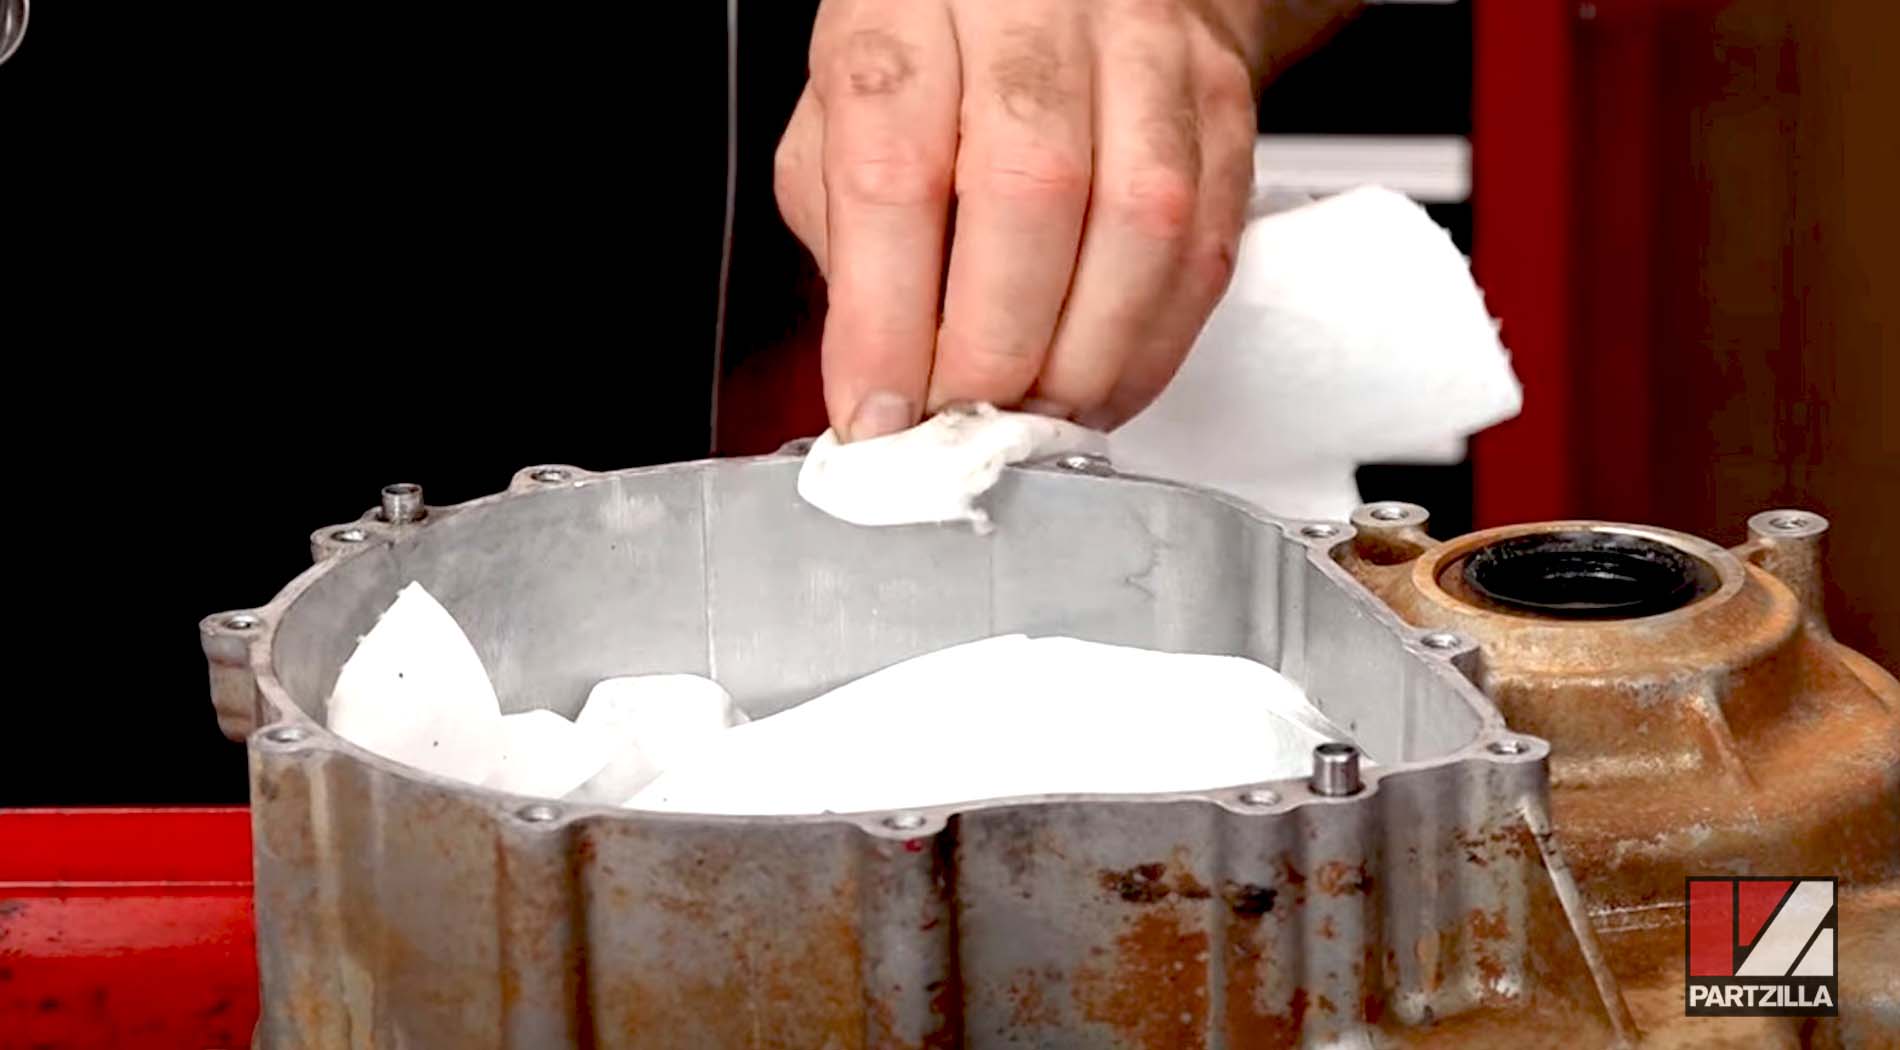
Watch the clip below to see the case half cleaning segment of our Yamaha YXZ1000 gear reduction kit installation video.
Step 17. Use a seal puller tool to take out the old oil seals from the case half, and press in the new seals with a bearing driver and a soft blow hammer. Next, pack some grease in around the seals.
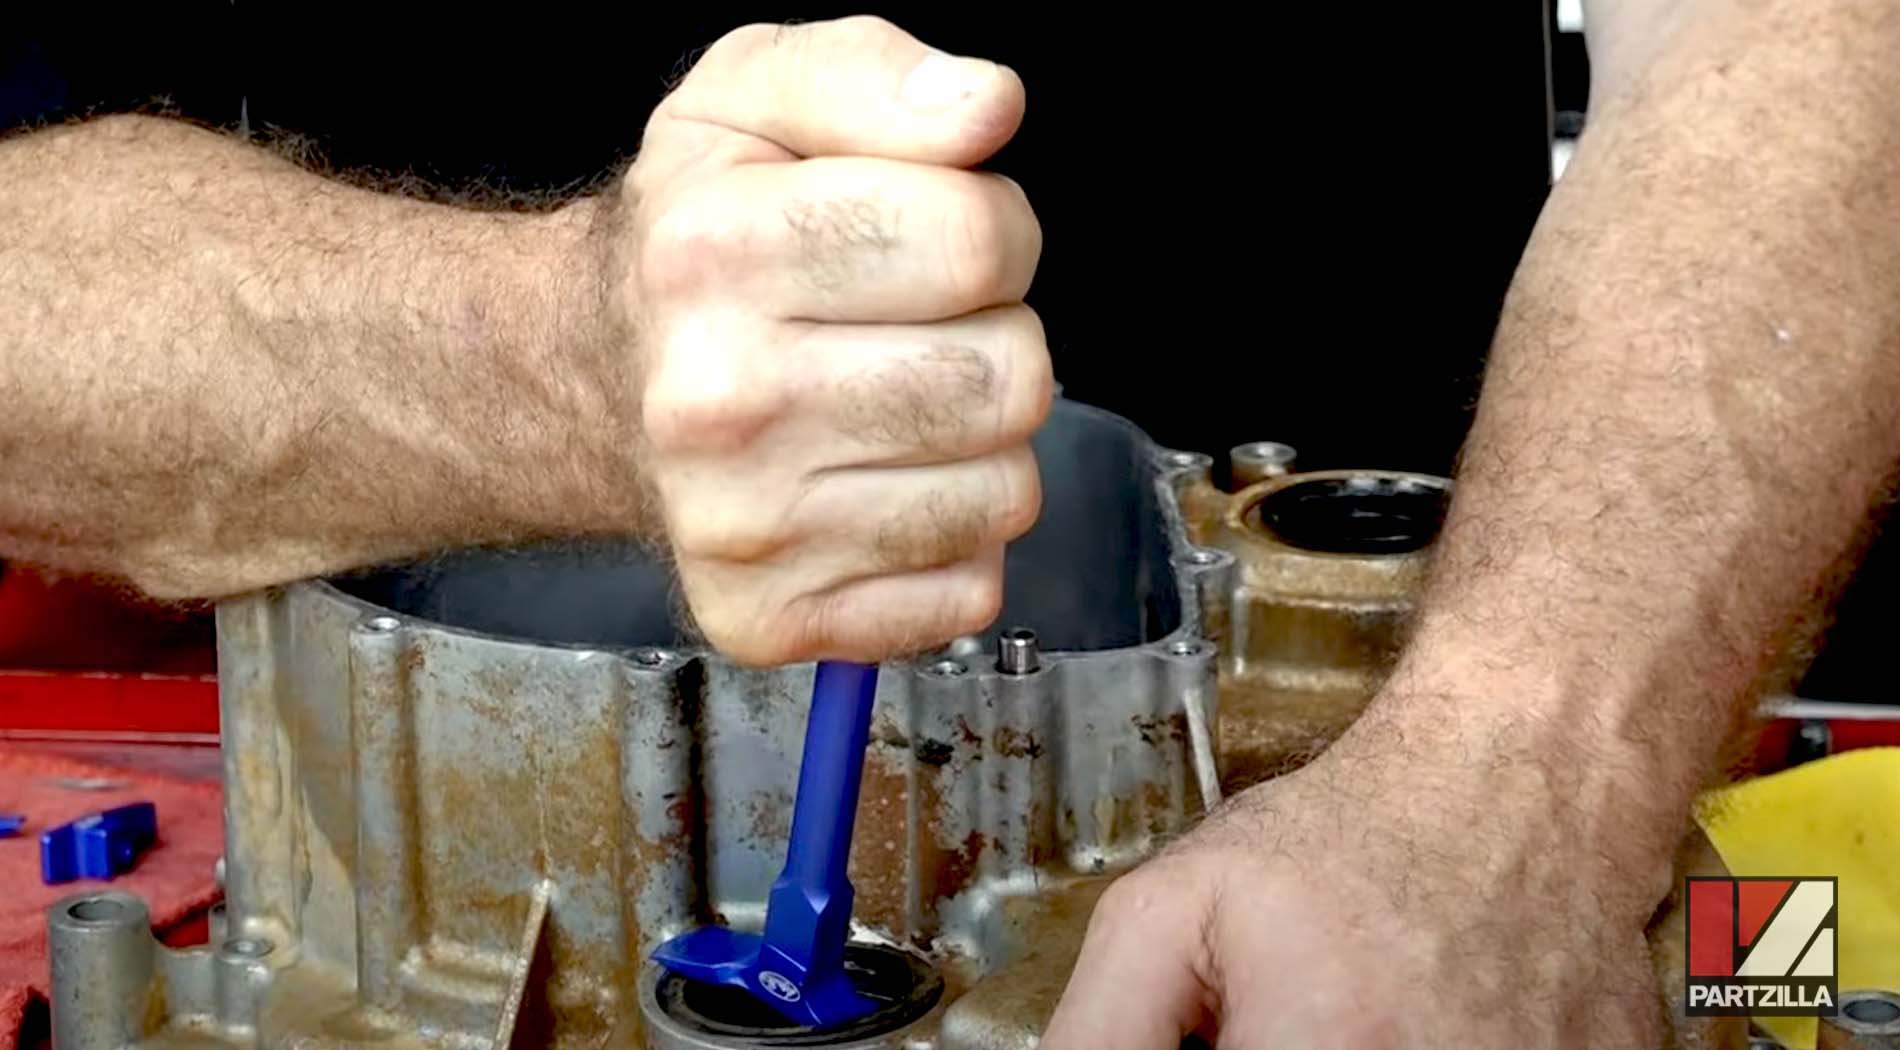
Watch the clip below to see the seal removal and replacement segment of our Yamaha YXZ1000 gear reduction kit installation video.
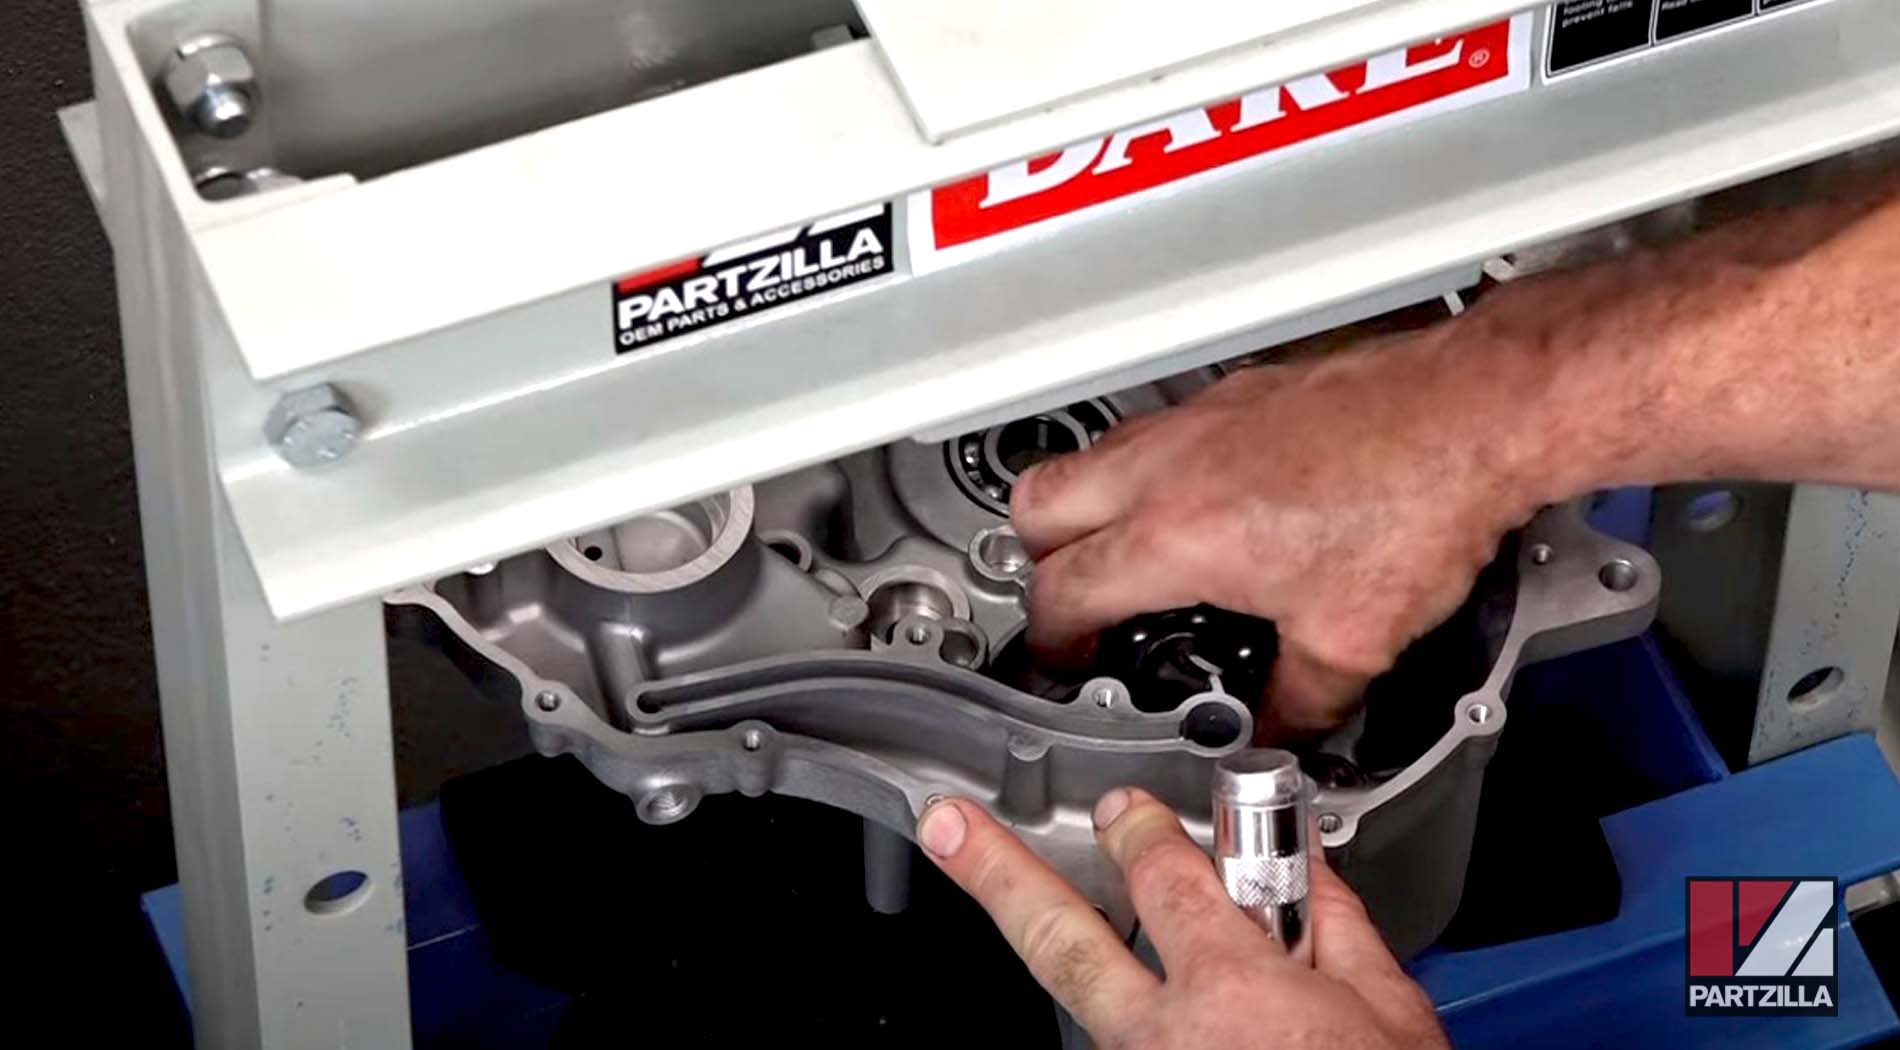
Step 18. Install the shift forks and get them engaged into the gears, then install the shift drum. Next, bring up the shift forks and engage them into the grooves of the shift drum.
Watch the clip below to see the shift fork installation segment of our Yamaha YXZ1000 gear reduction kit installation video.
Step 19. Install the reverse shift shaft.
Step 20. Install the oil pump, applying blue threadlocker on its bolts before putting them in place and tightening them down. Next, install the primary drive assembly, being careful not to damage the plastic oil gear, then lube all of the moving parts with a little transmission oil.
Watch the clip below to see the oil pump installation segment of our Yamaha YXZ1000 gear reduction kit installation video.
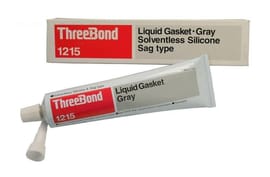
Step 21. Put a light, even coat of silicone gasket maker all the way around the edge of the gearcase, keeping it away from the oil galleys.
Step 22. Lay the top gearcase half onto the bottom gearcase half to join them together.
Watch the clip below to see the case closing segment of our Yamaha YXZ1000 gear reduction kit installation video.
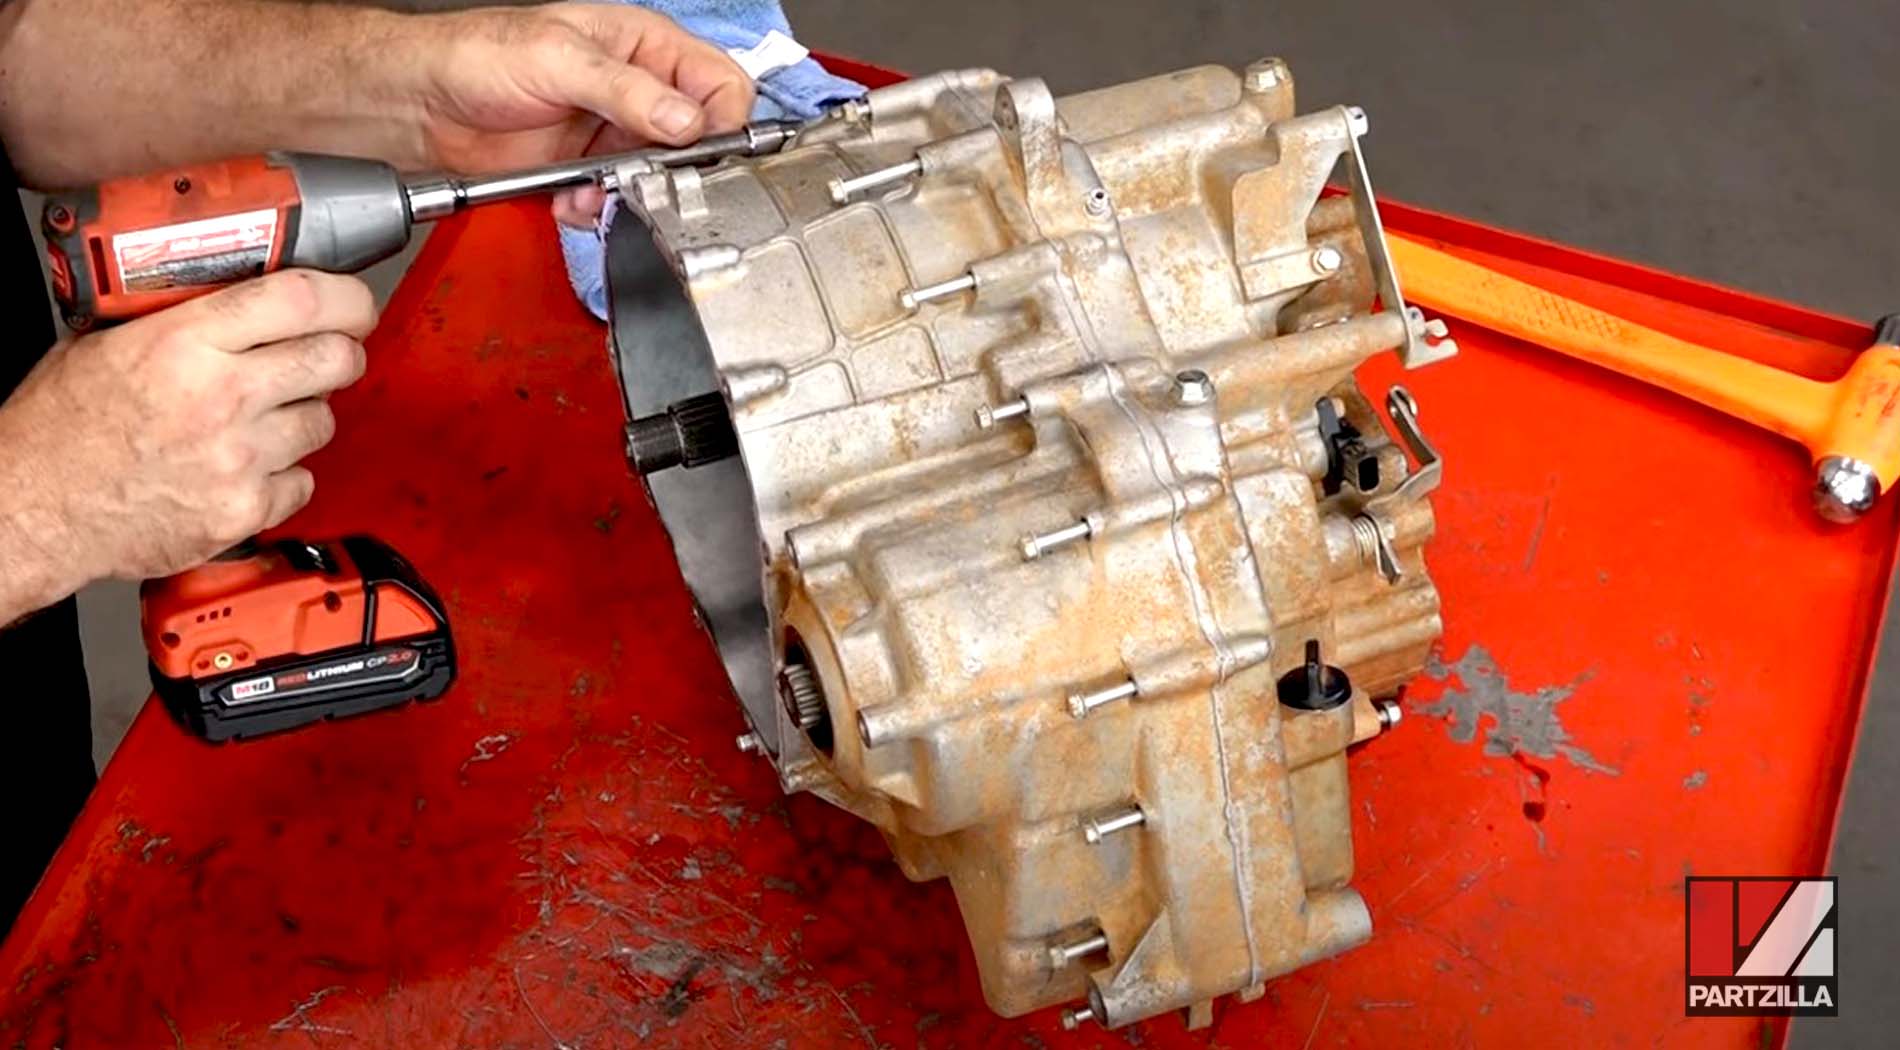
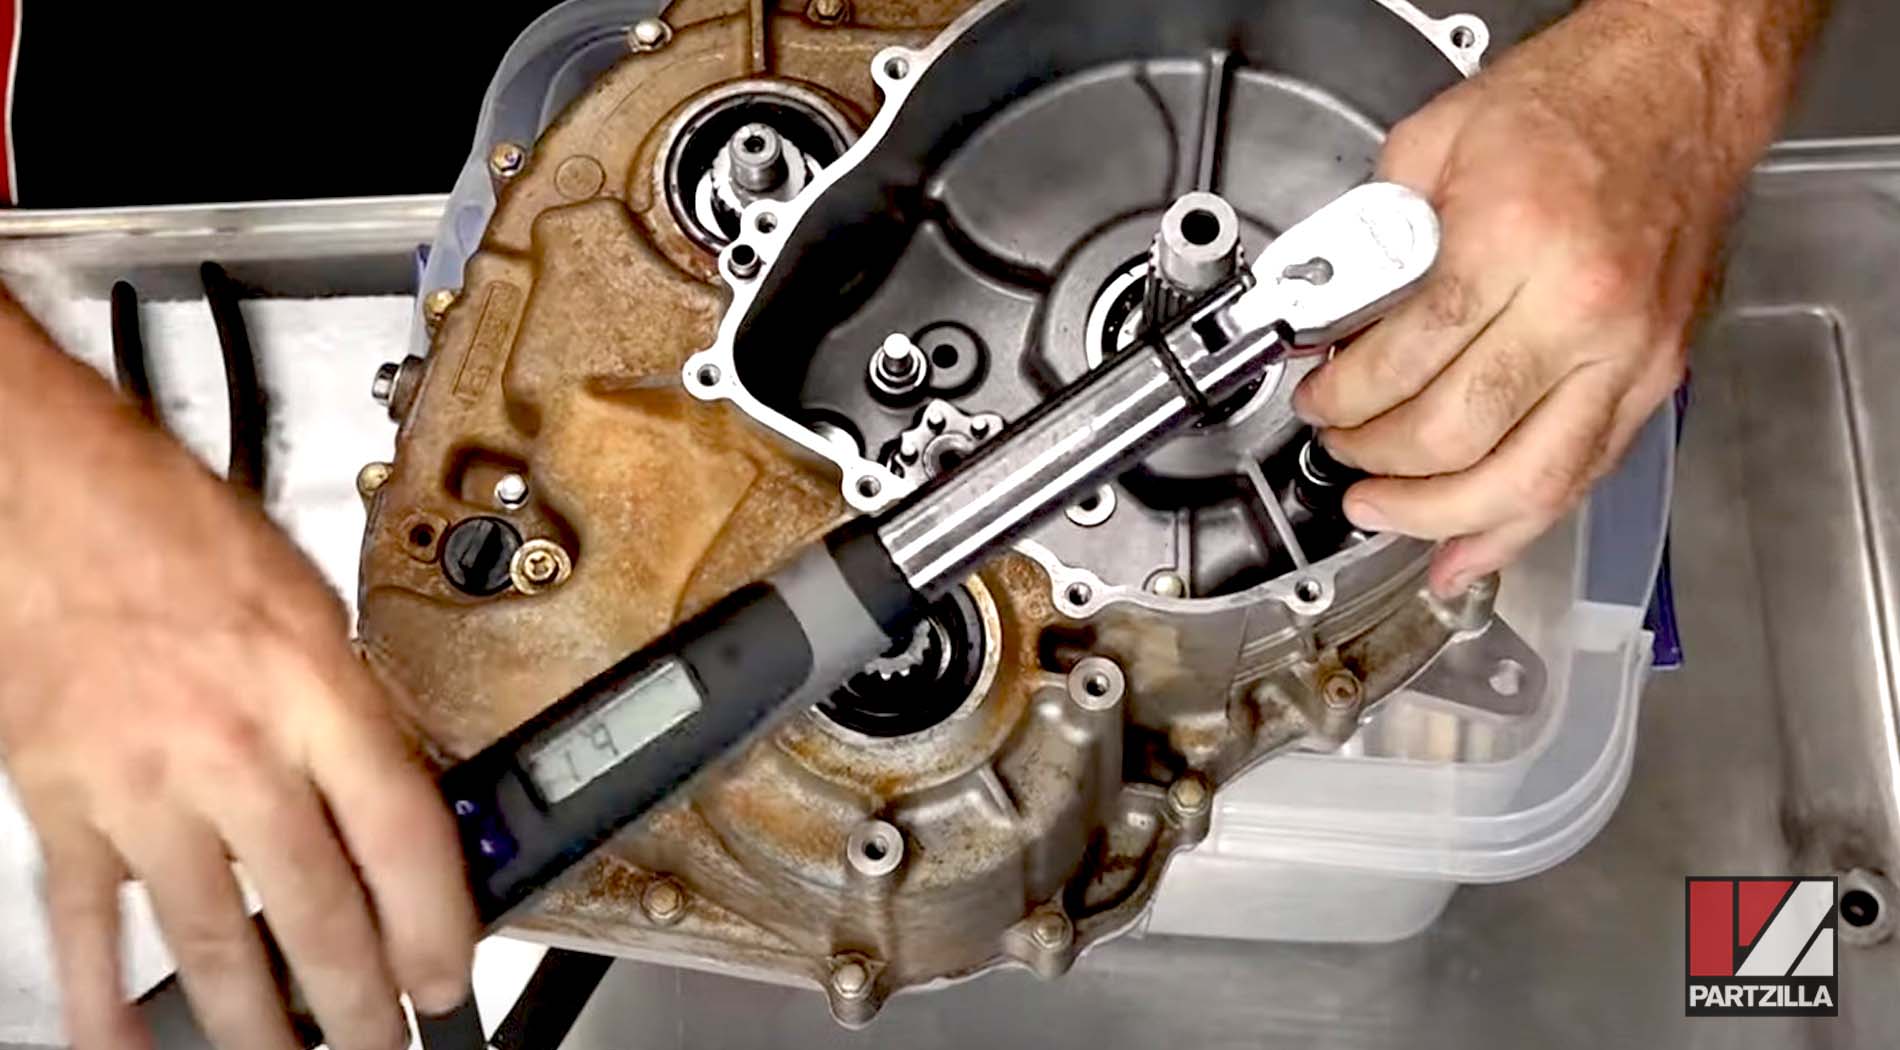
Step 23. Reinstall the gearcase bolts, going around and snugging them down to begin with, then torqueing each bolt to 7.2 foot-pounds. For the two bolts inside of the case, add a little bit of red threadlocker before installing them.
Step 24. Grease and then reinstall the shift shaft, followed by the detent and the spring next to it.
Step 25. Reinstall the washer and retaining clip on the other side.
Step 26. Push the remaining outer breathers of the gearcase in carefully, then tap them in with a soft blow hammer.
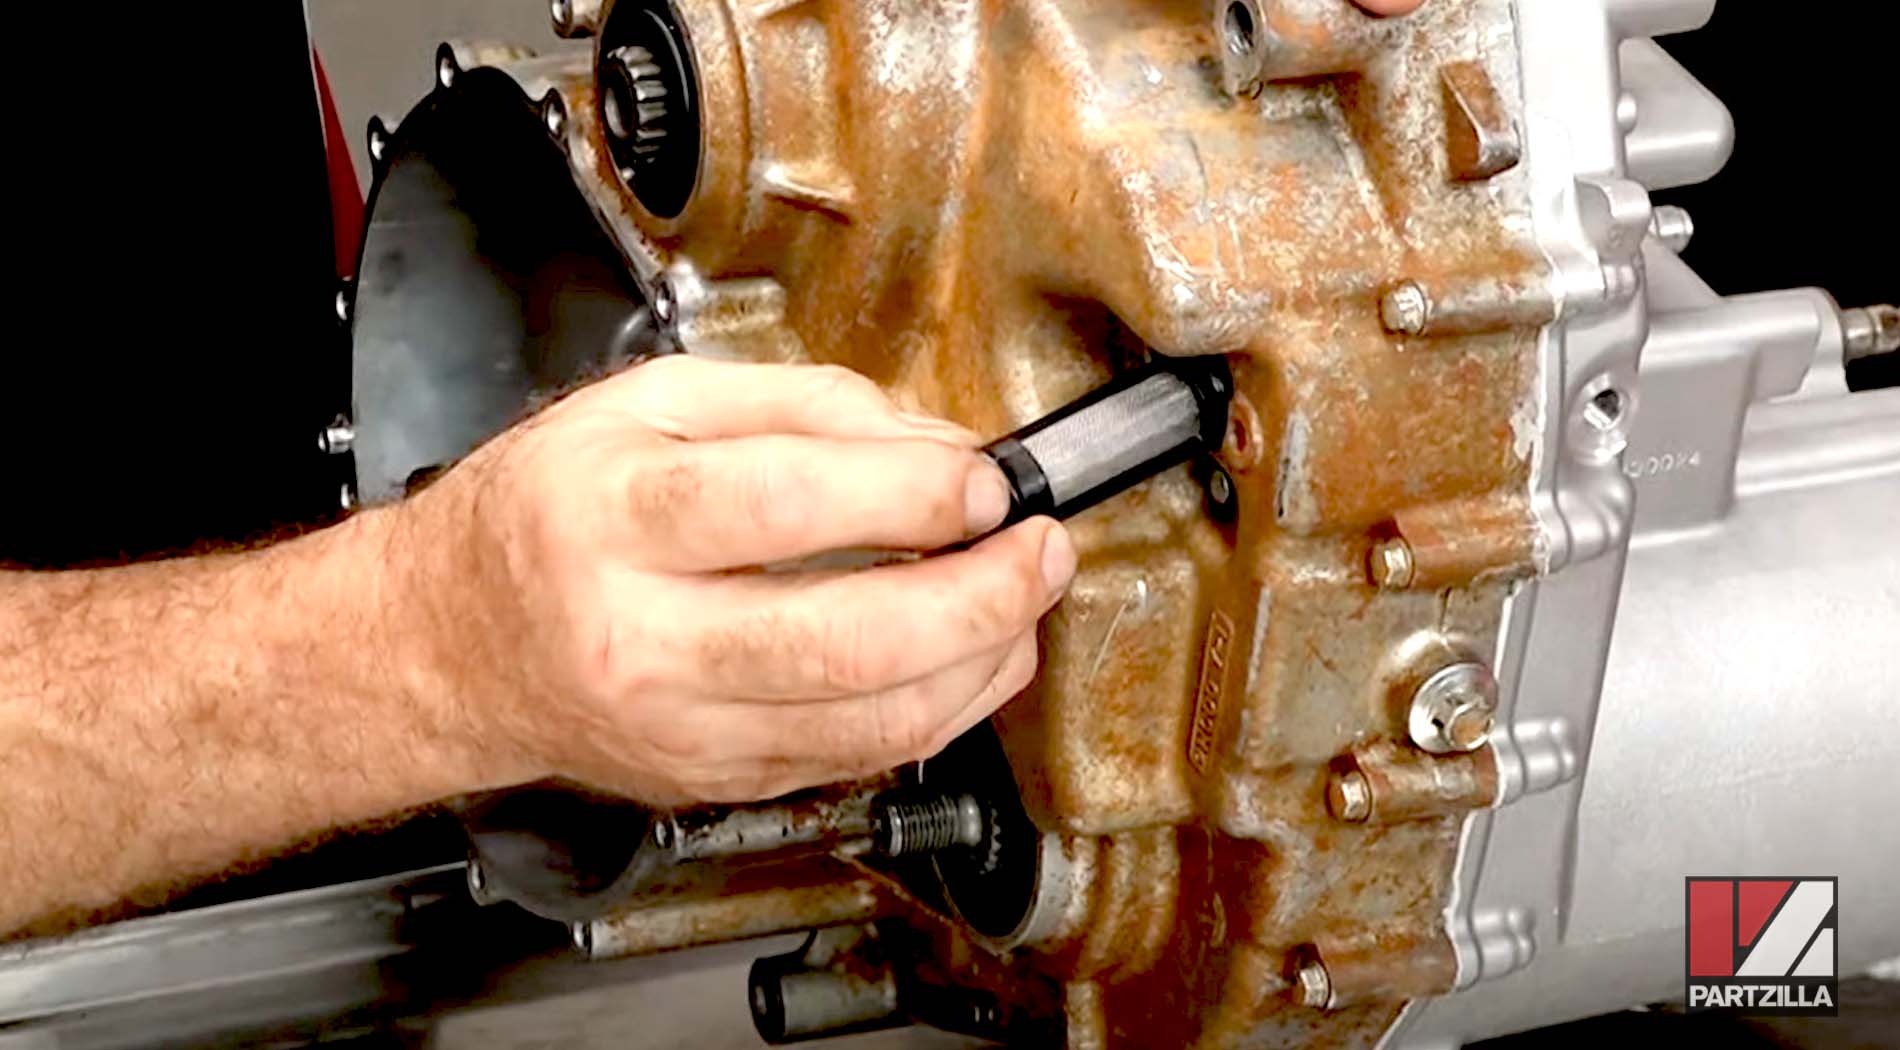
Step 27. Reinstall the oil strainer, making sure its O-ring is in place.
Watch the clip below to see the case bolting segment of our Yamaha YXZ1000 gear reduction kit installation video.
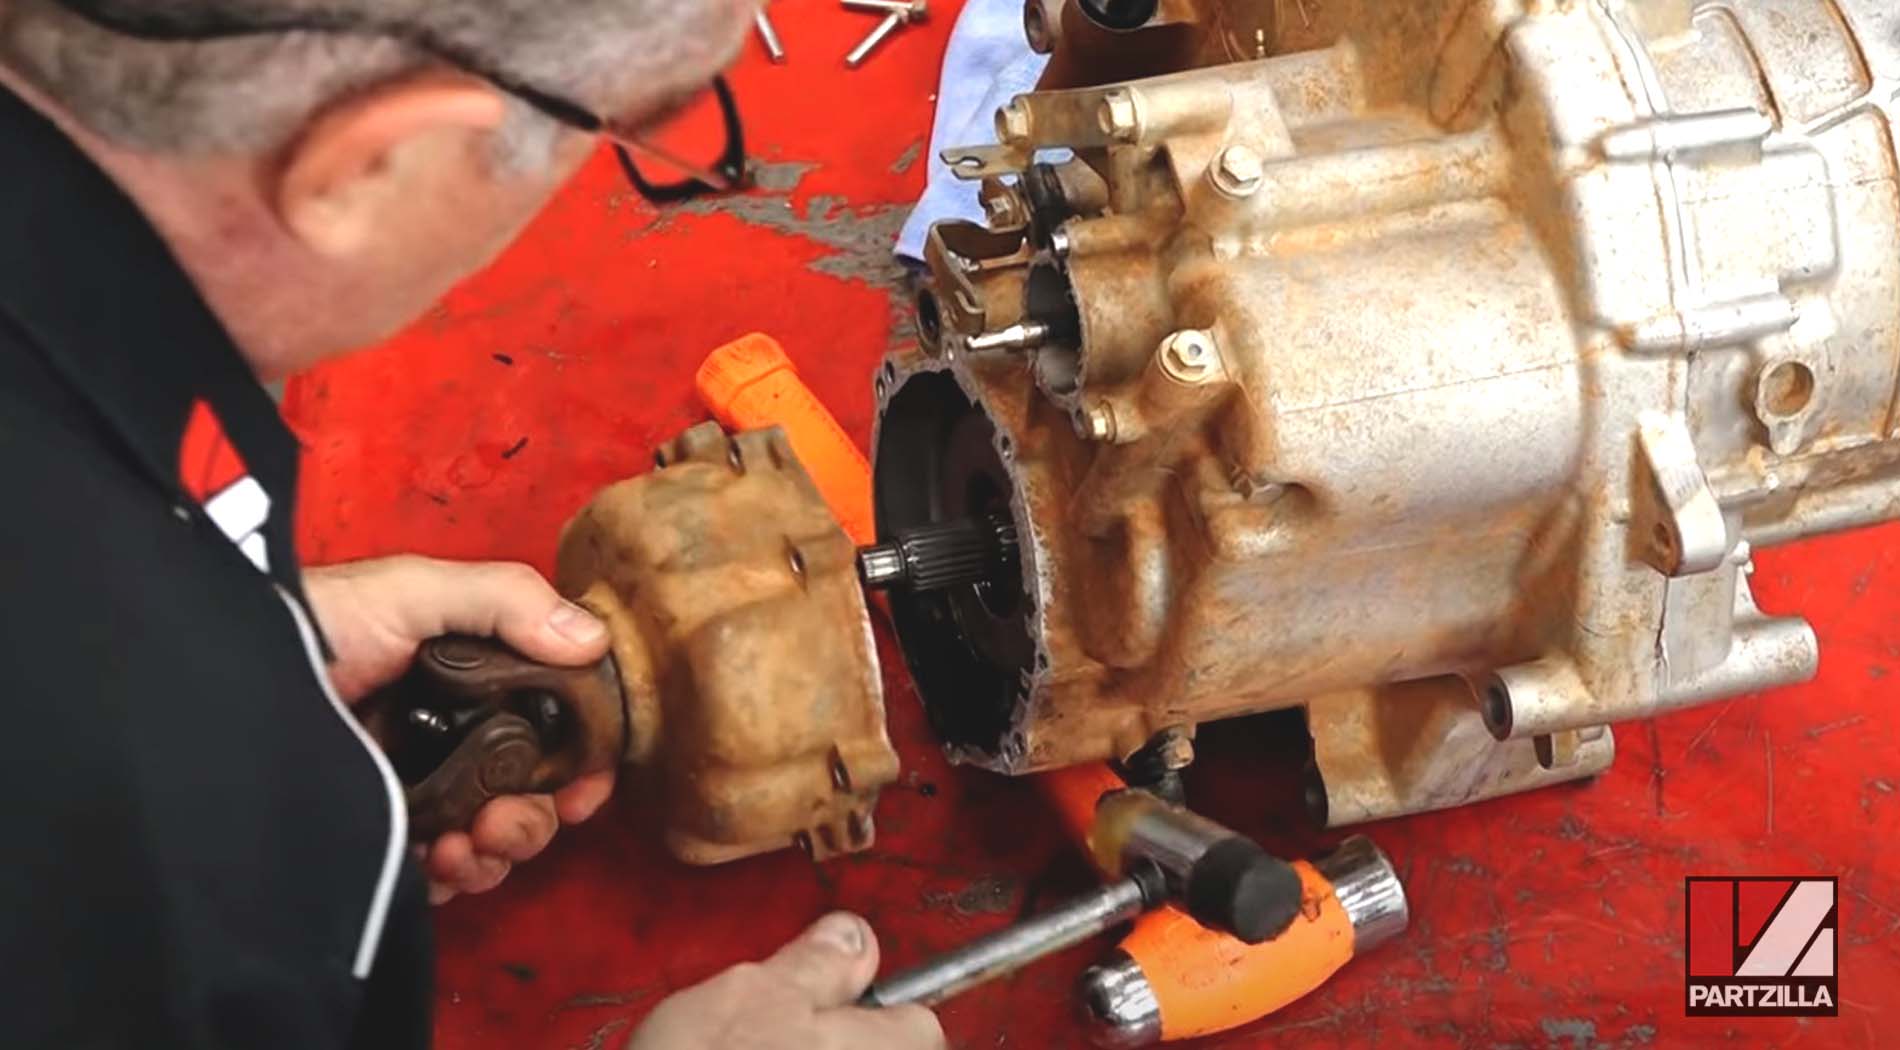
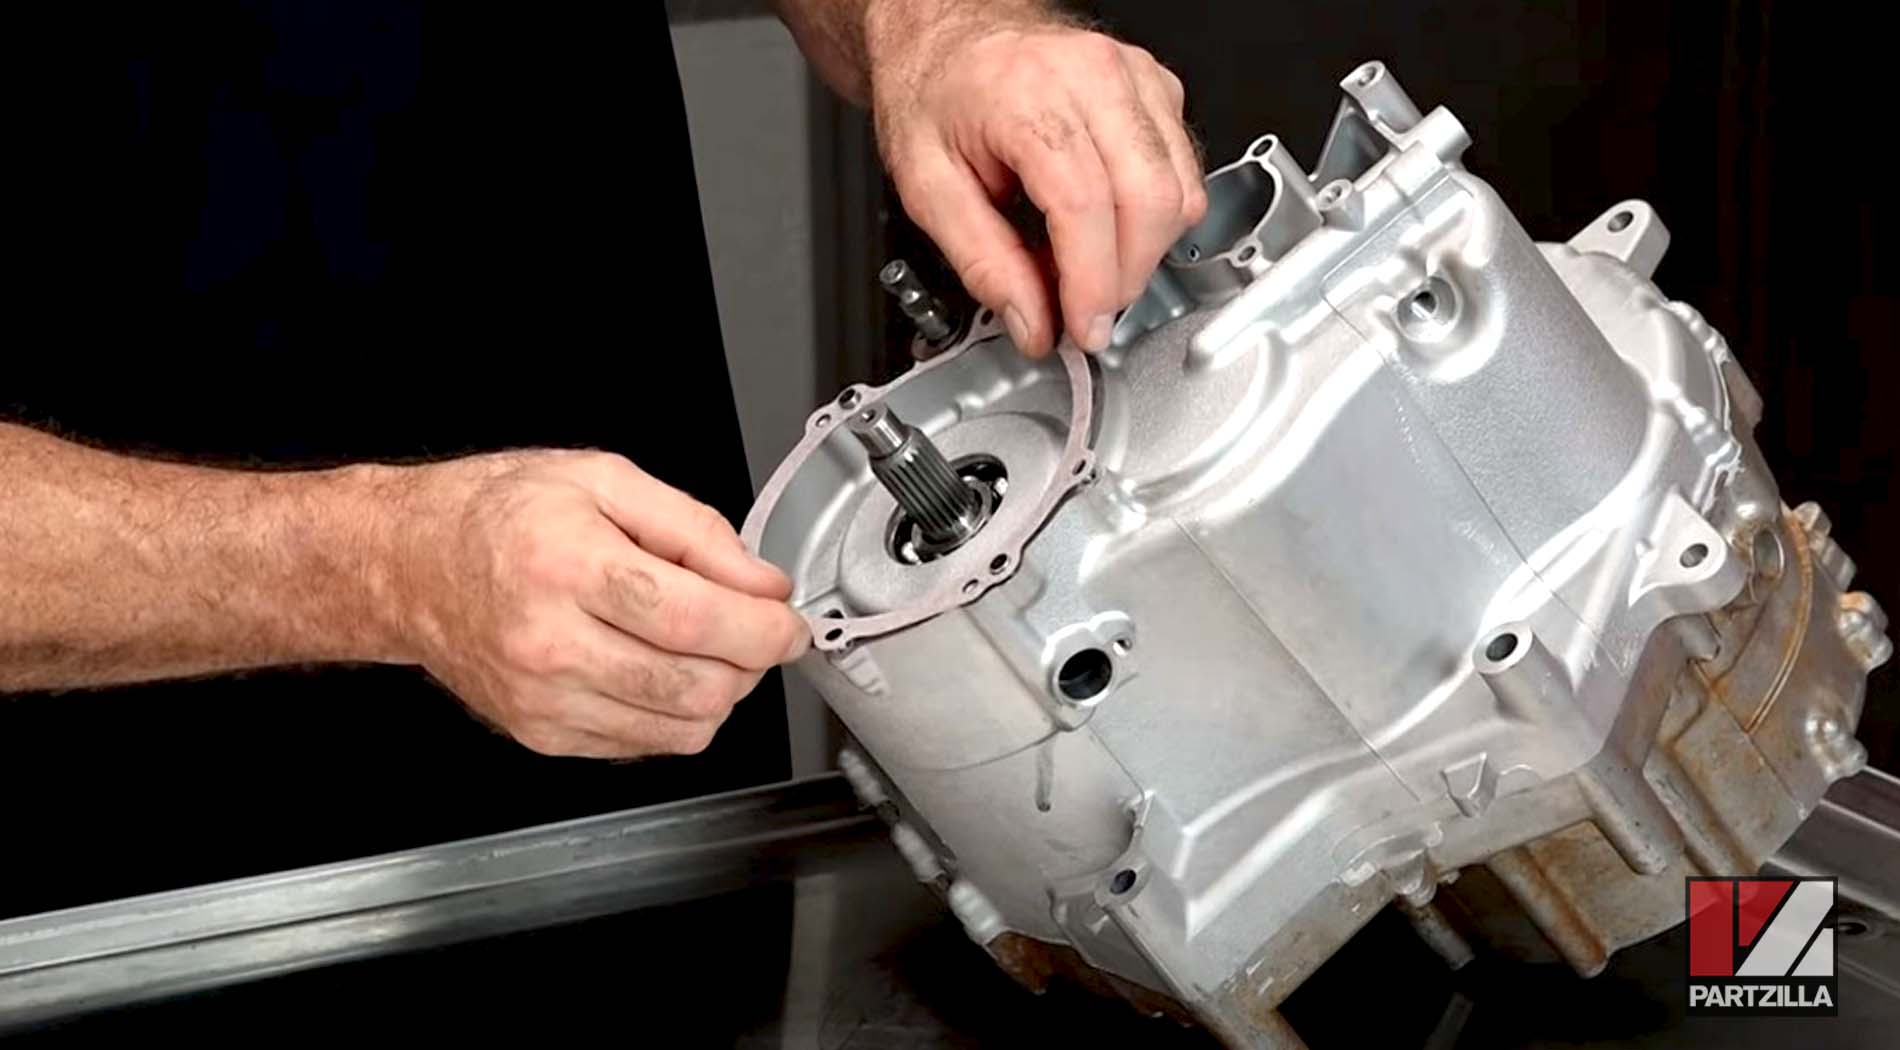
Step 28. Install the gasket for the torque limiting gear output housing, followed by the housing itself. Place in all of the bolts for the housing, then snug them down in a crisscross pattern and torque them to 7.2 foot-pounds.
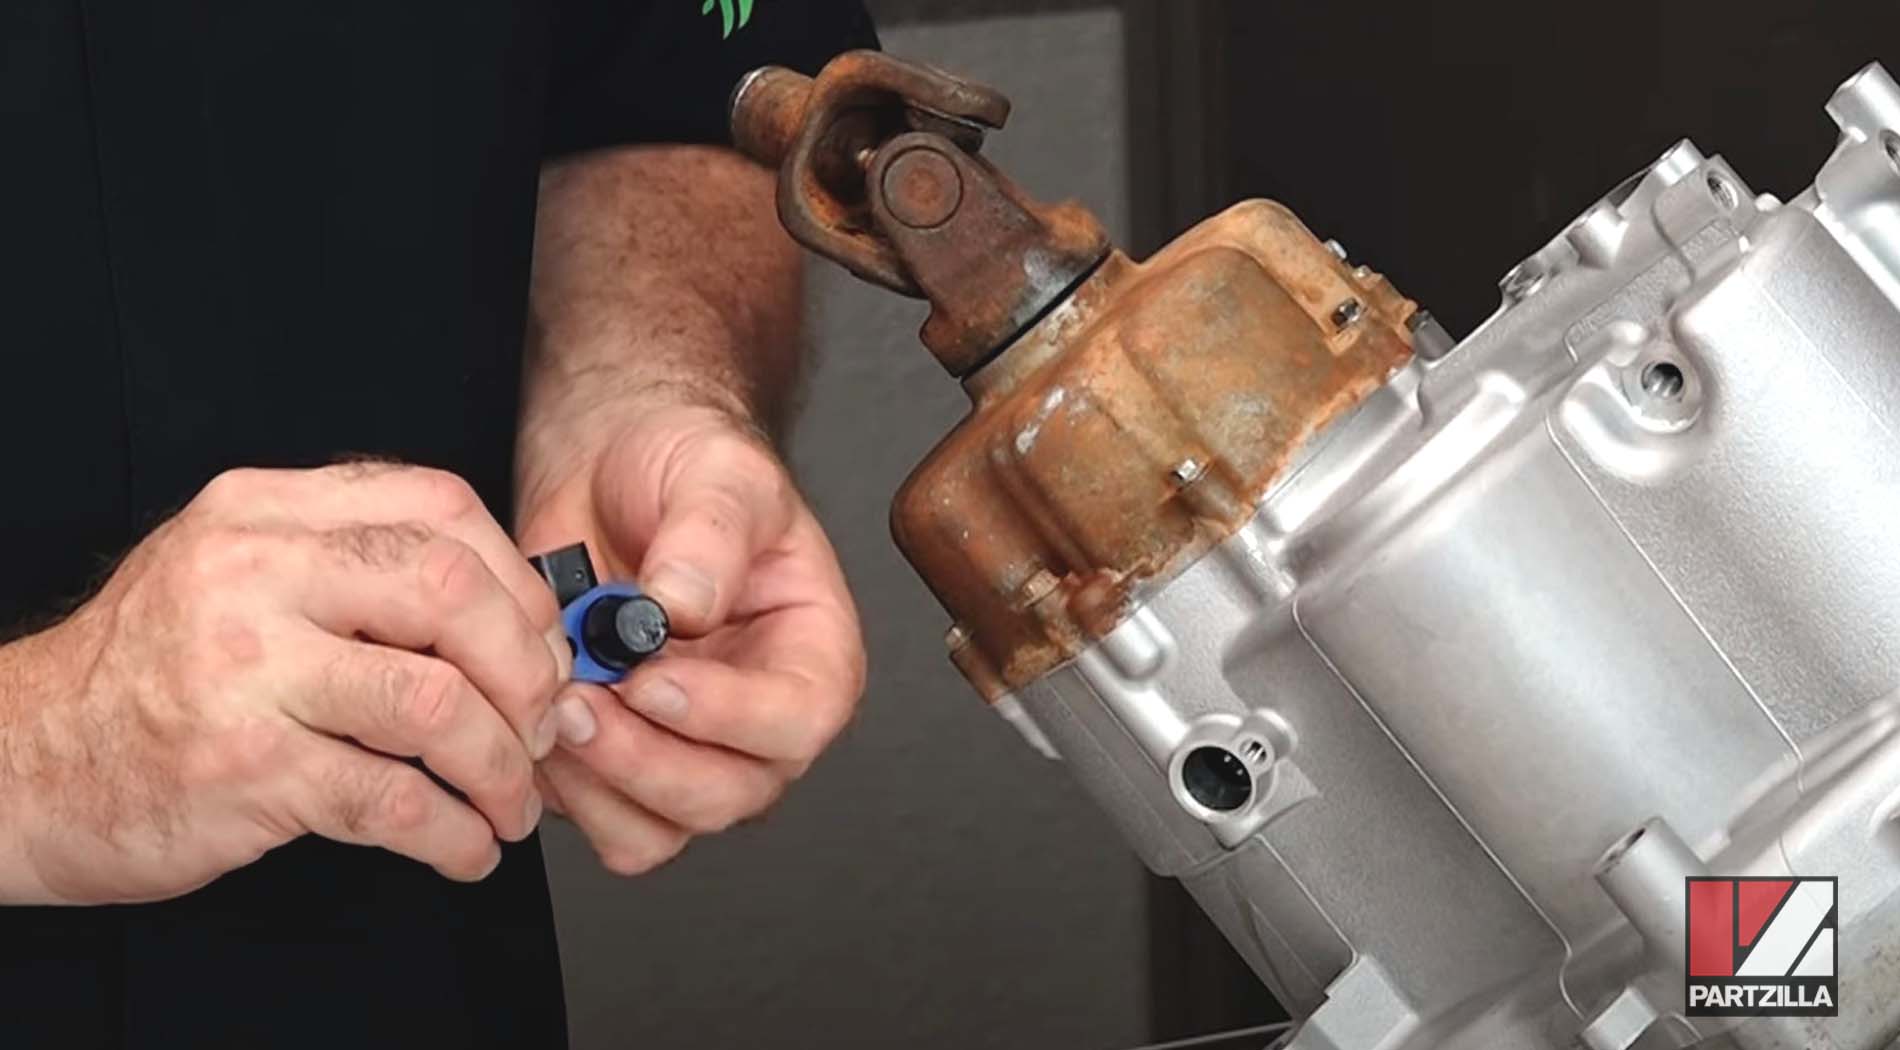
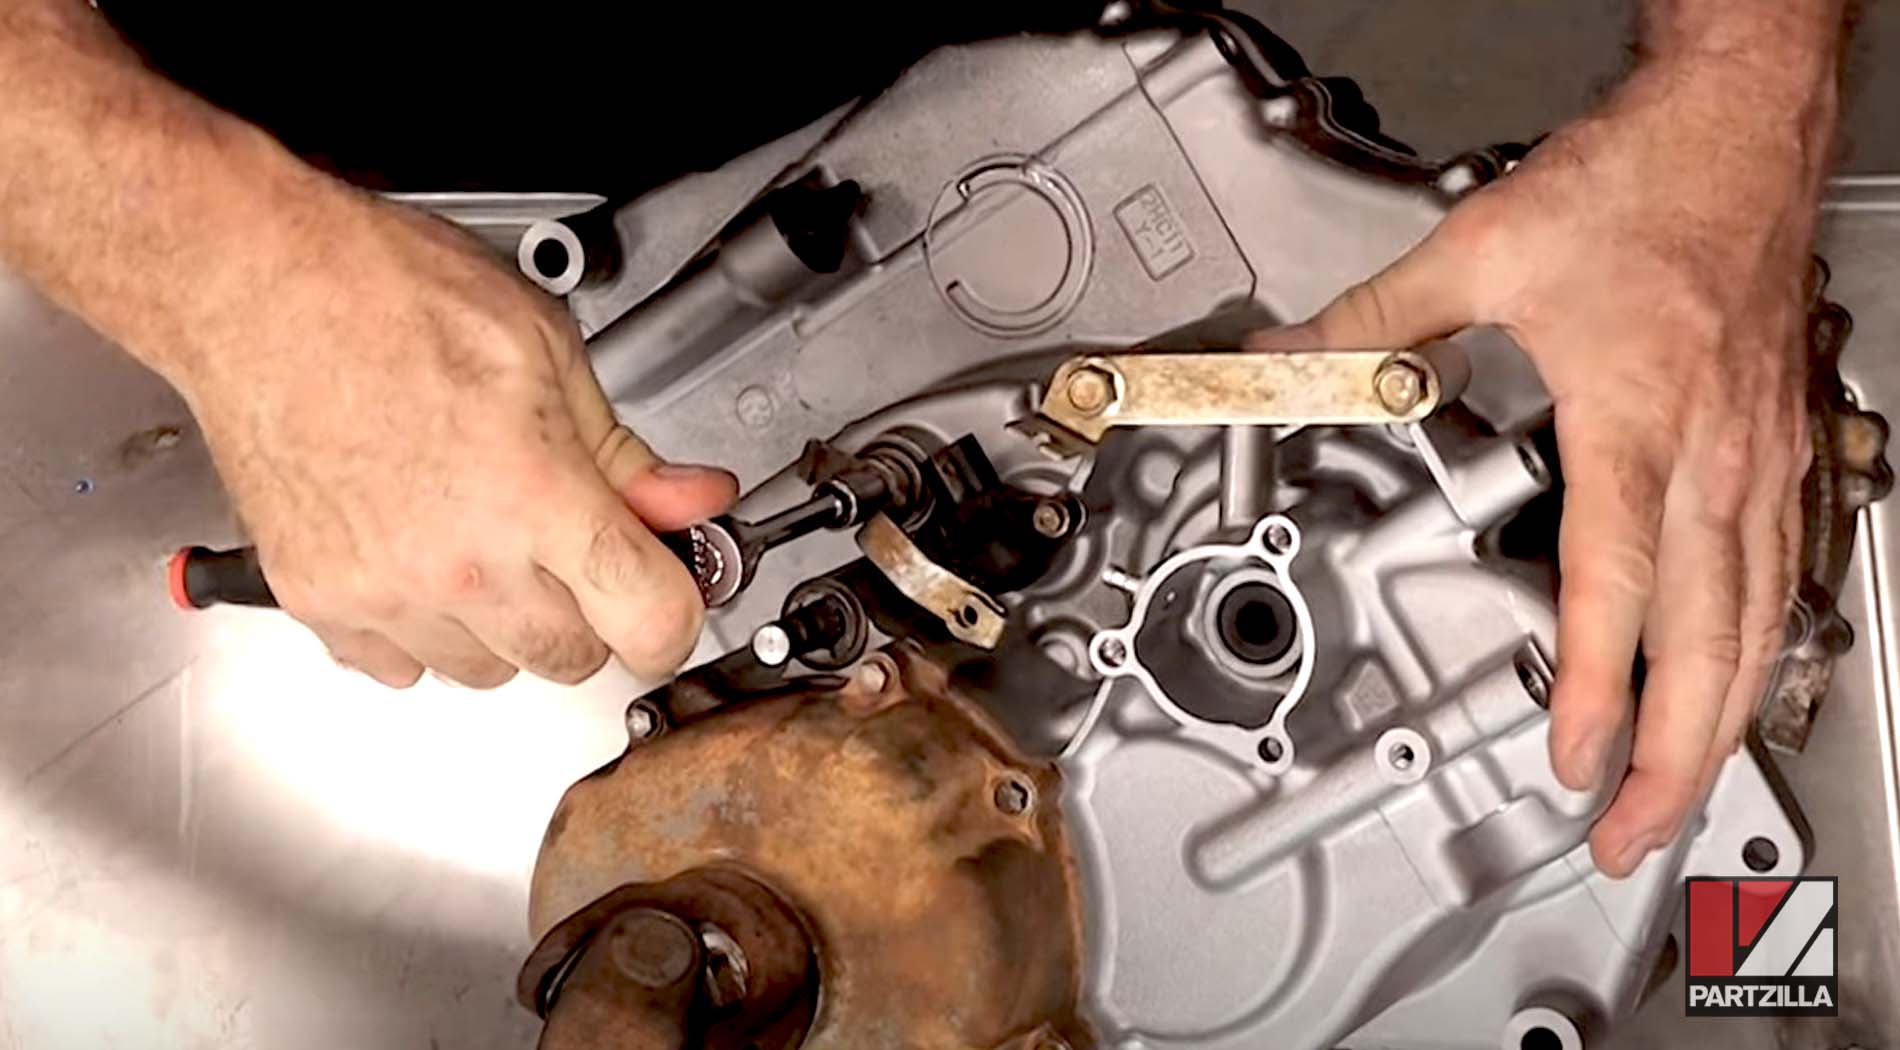
Step 29. Install the gear position switch, making sure you line up the letter D with the end of the shaft. Use a little bit of blue threadlocker on each one of its bolts before installing them.

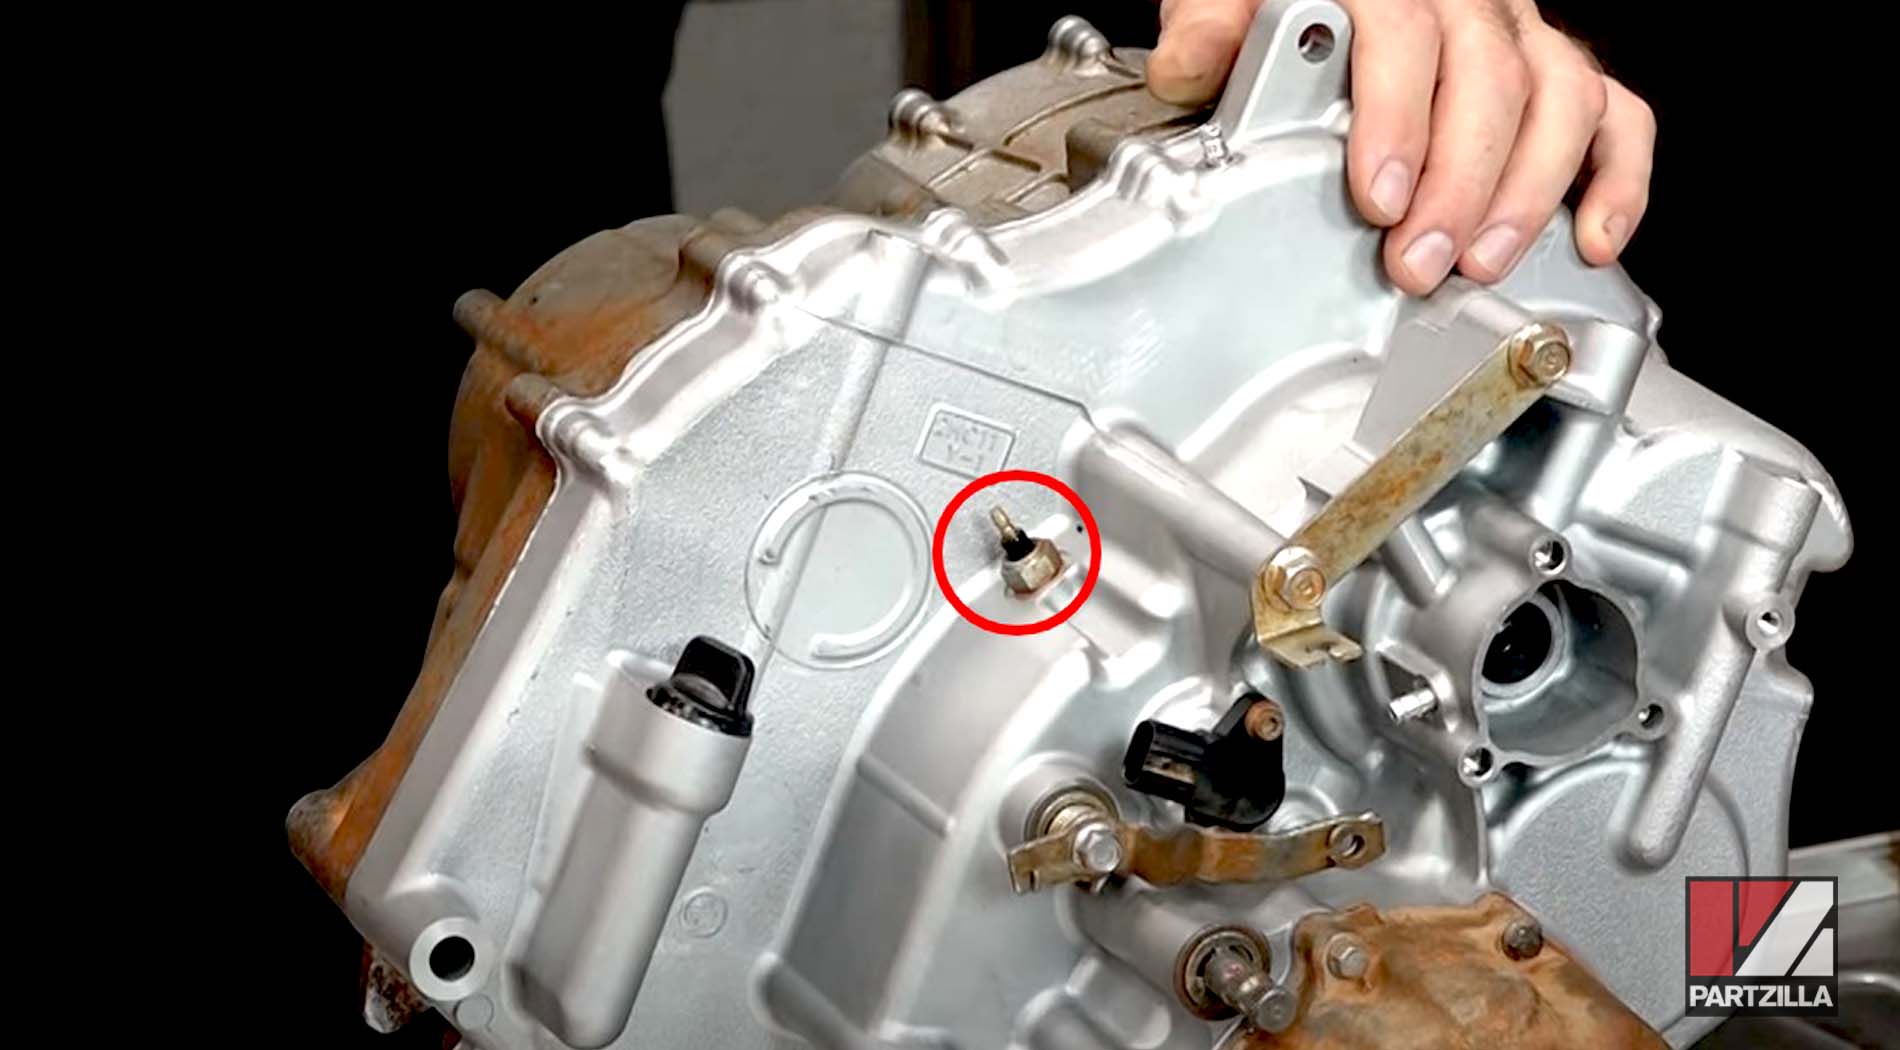
Step 30. Install the dipstick with the new O-ring, followed by the speed sensor. Take the old O-ring off the speed sensor first, then get the spacer and the new O-ring on.
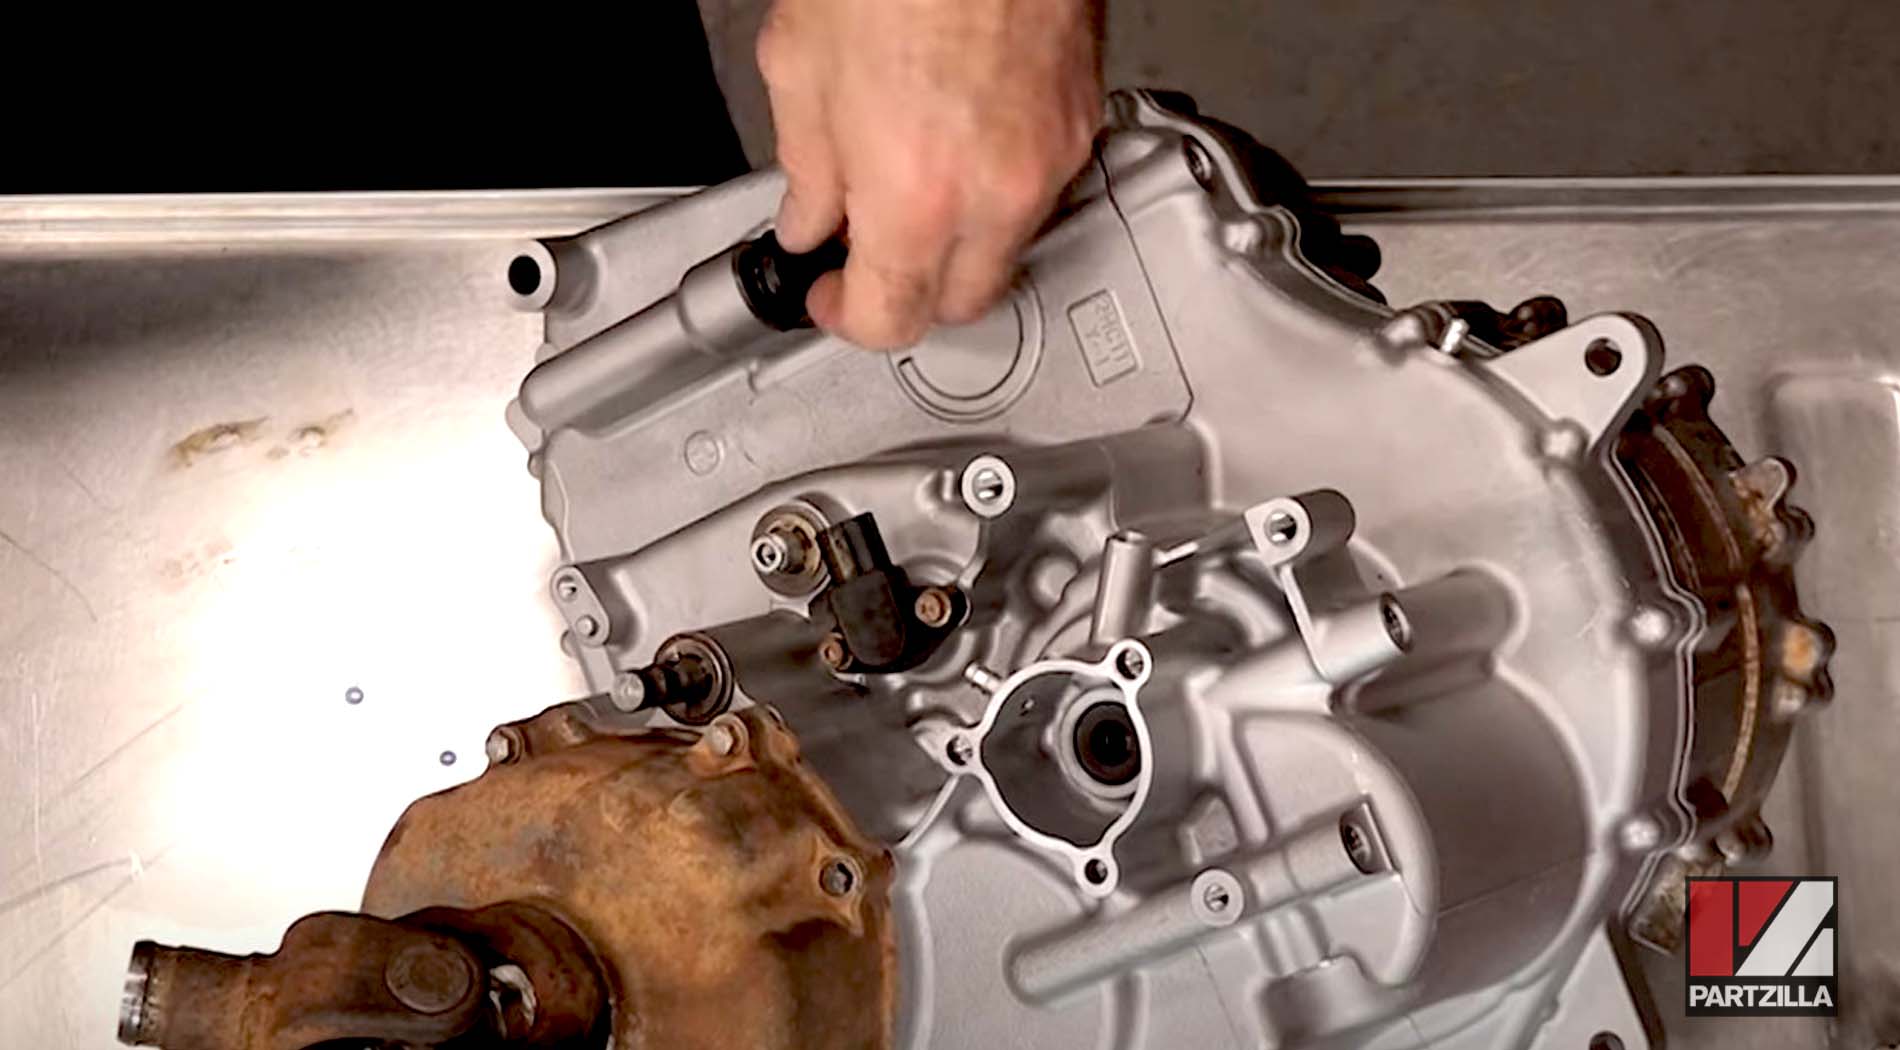
NOTE: Before you install the speed sensor, make sure that you choose the correct spacer depending on which case you have. If you've got a B5J, use the yellow spacer. However, if you have a 2HC, use the blue one.
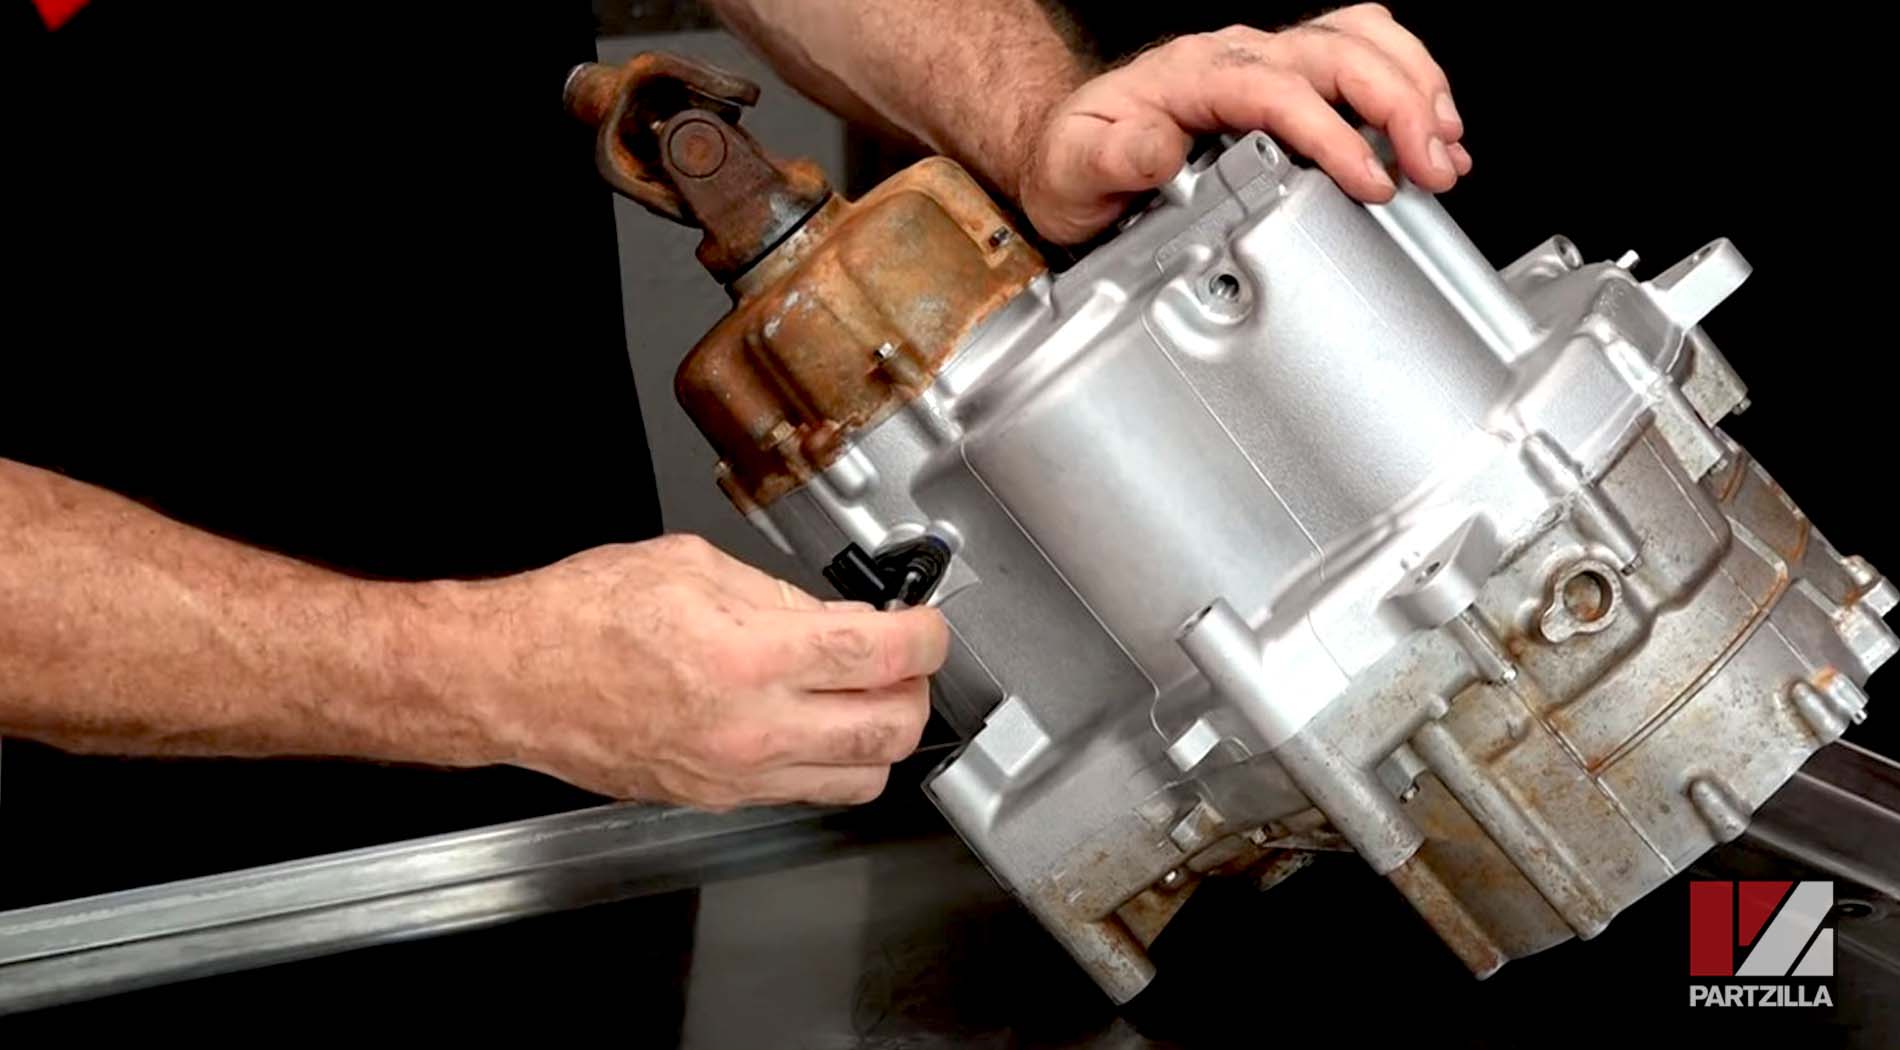
Step 31. Install the bracket for the reversing cable, followed by the spring for the reverse arm and the reverse arm itself.
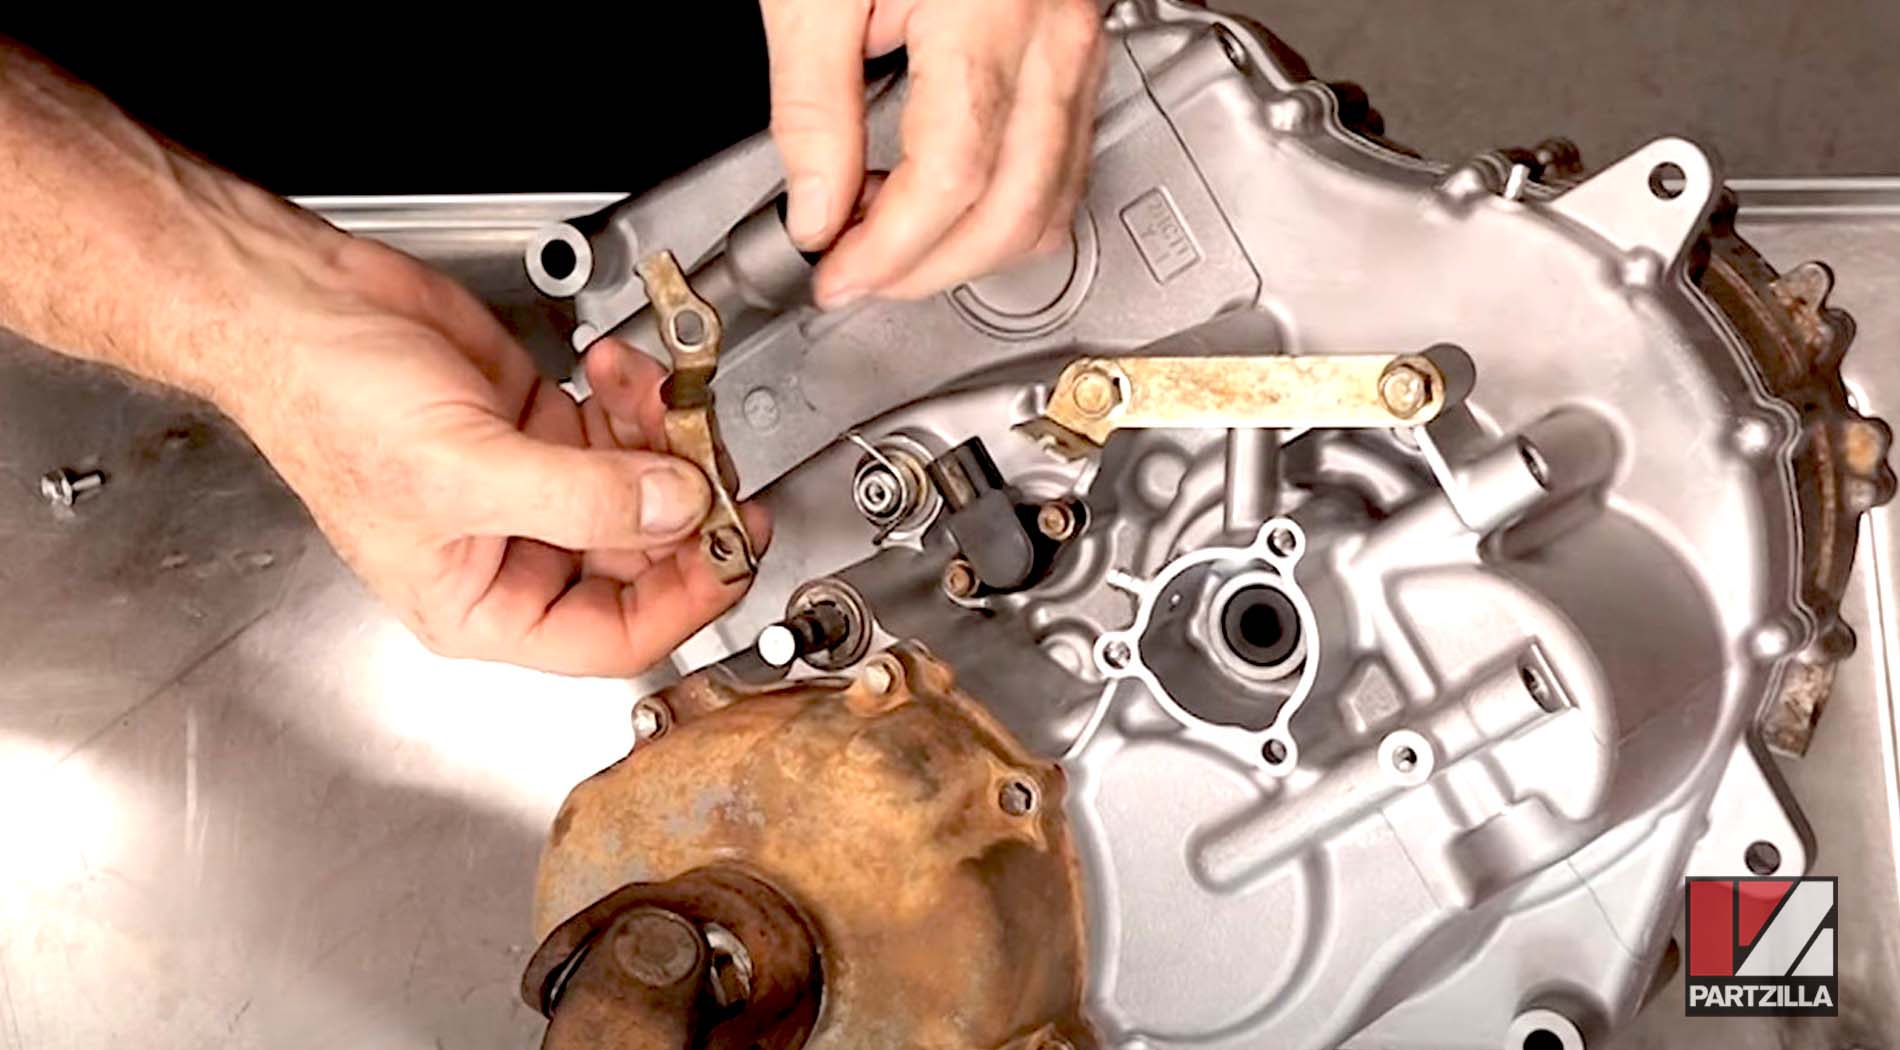
Step 32. Install the neutral sensor, followed by all of the remaining bolts, including the drain bolt.
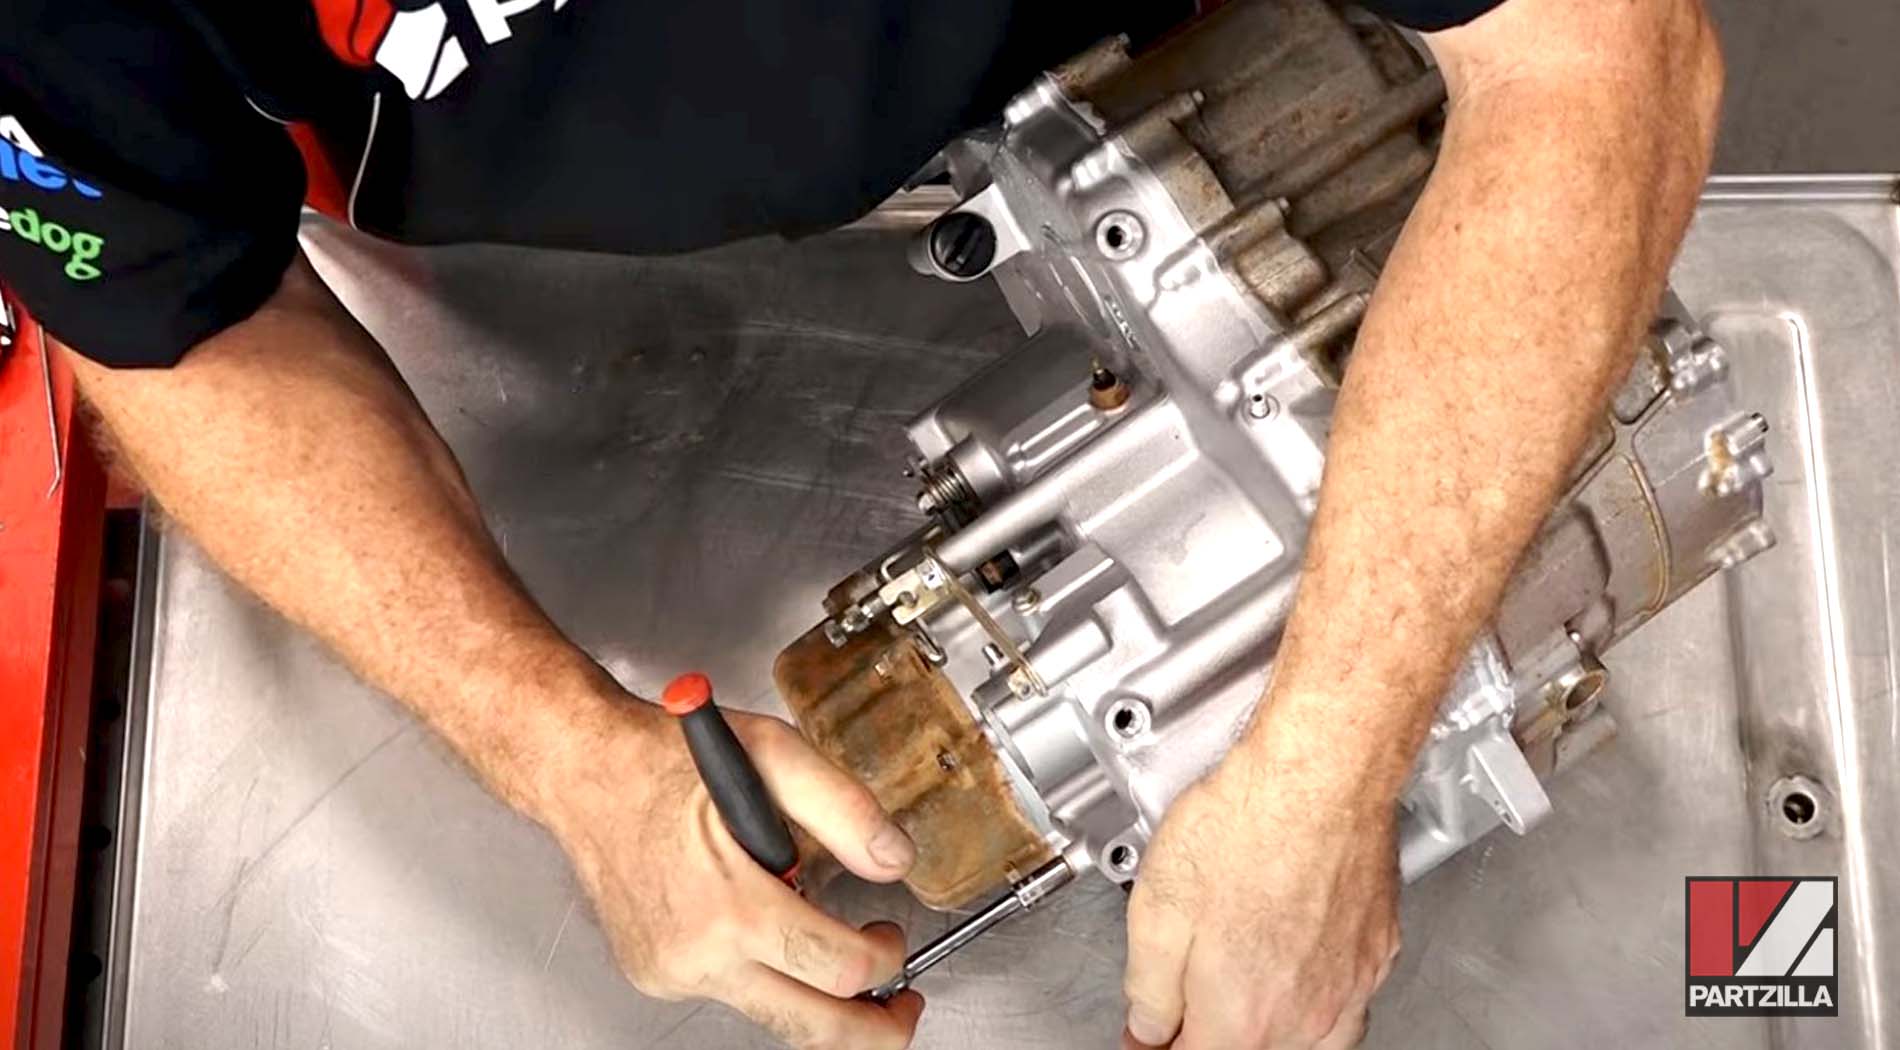
Step 33. Install the shift arm and you’re done.

Watch the clip below to see the final assembly segment of our Yamaha YXZ1000 gear reduction kit installation video.