Yamaha YXZ1000R Engine Teardown
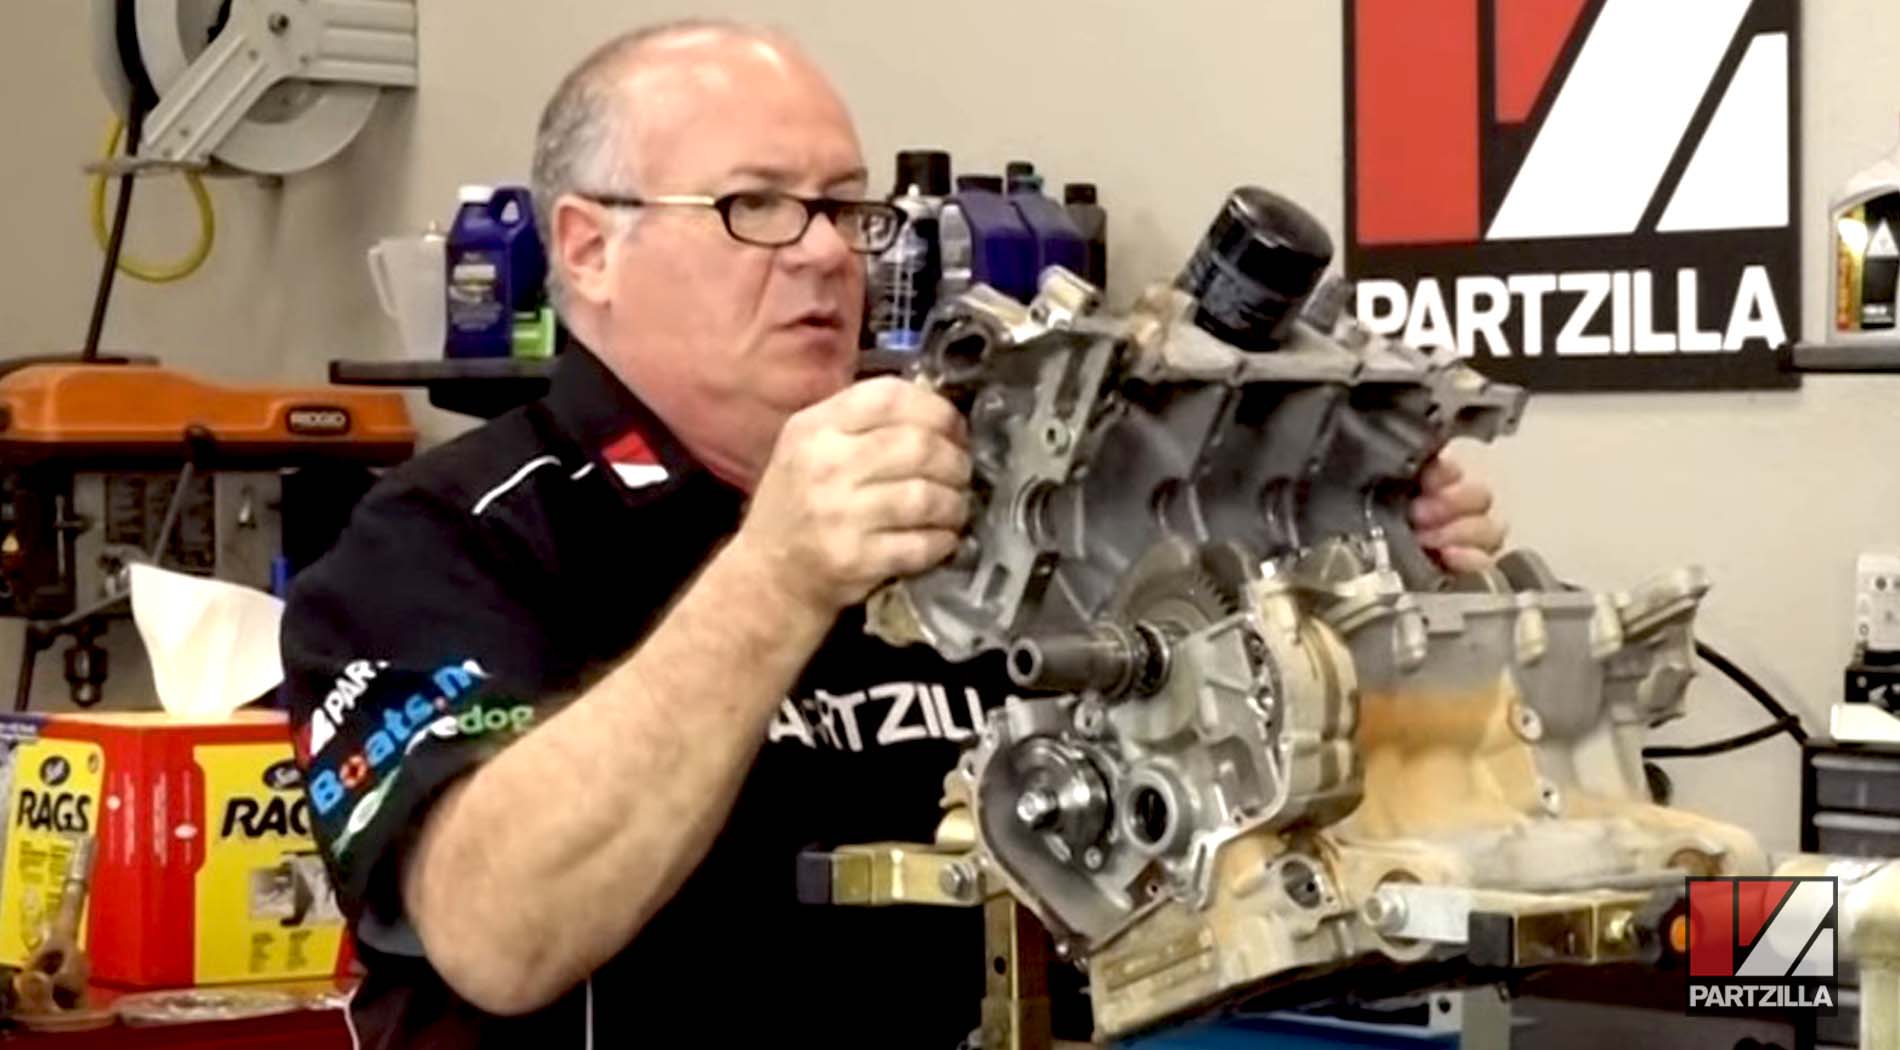
Welcome to the beginning of our 2016 Yamaha YXZ1000R engine rebuild, in which we tear down the engine piece by piece for a future turbo upgrade.
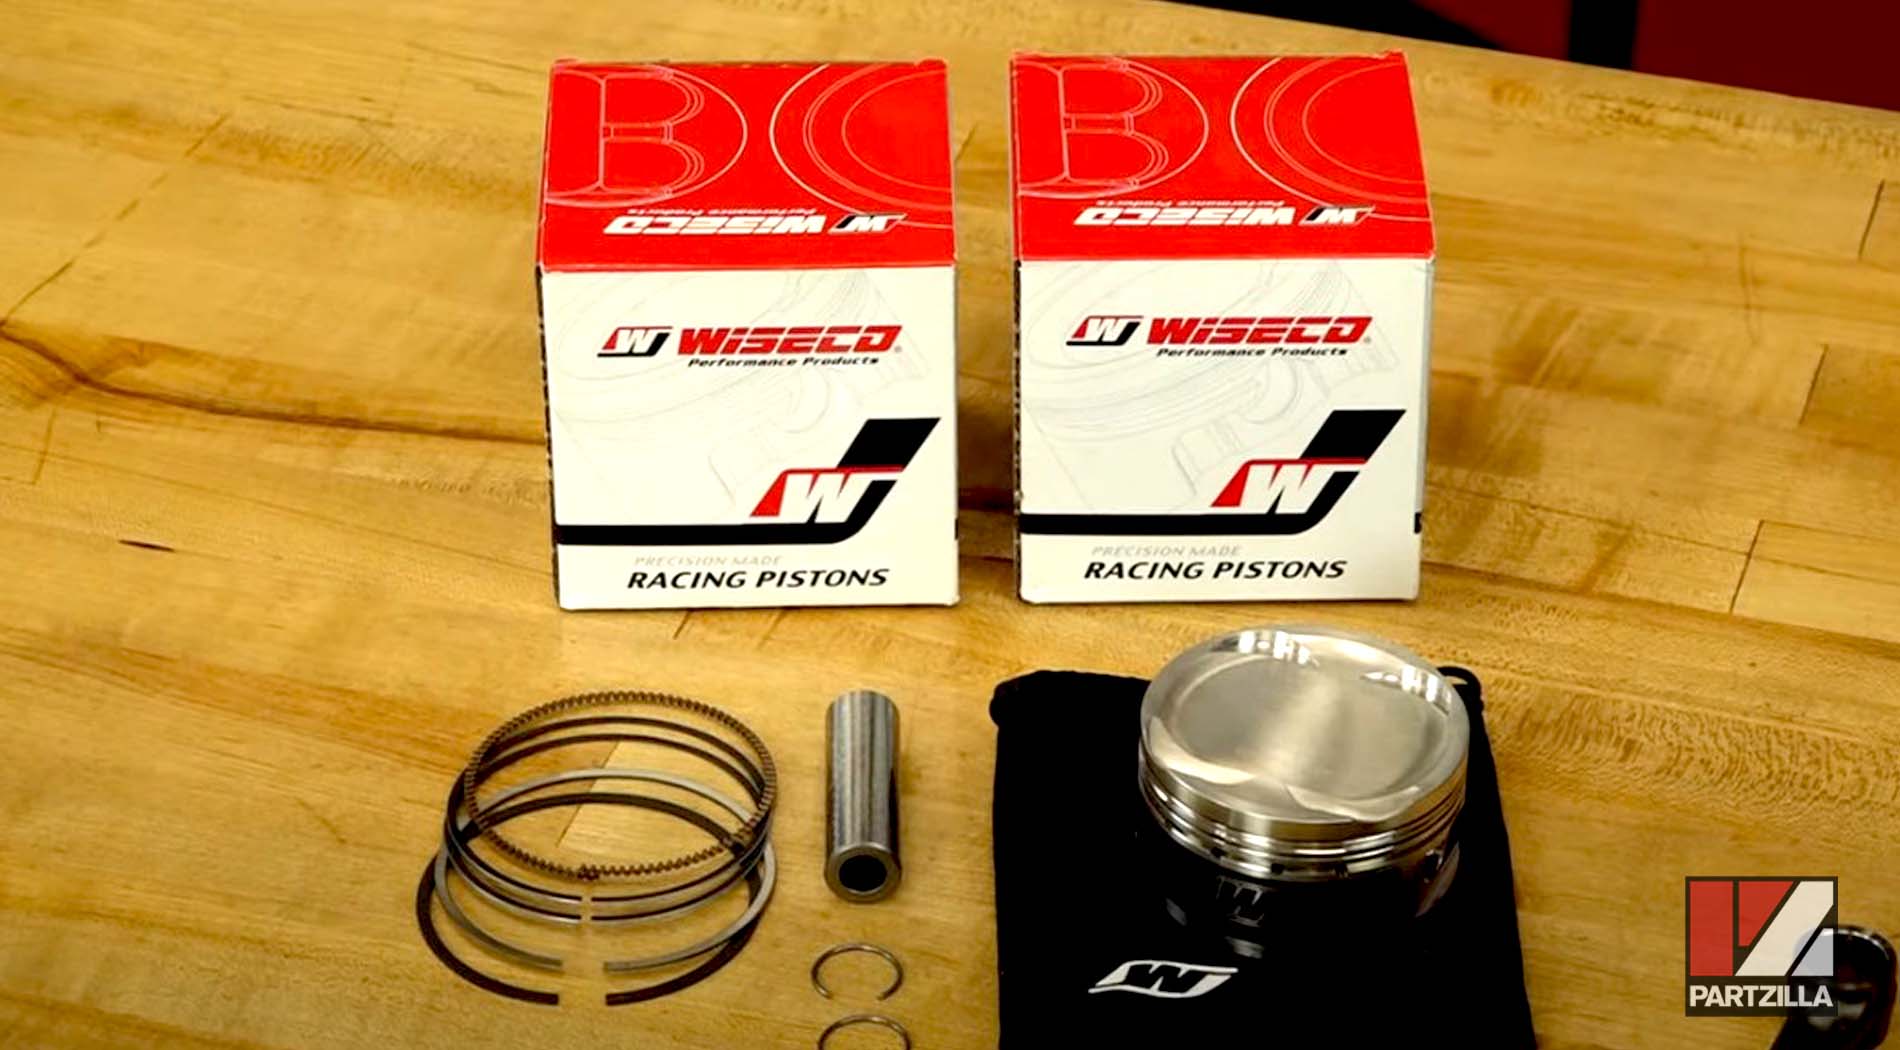
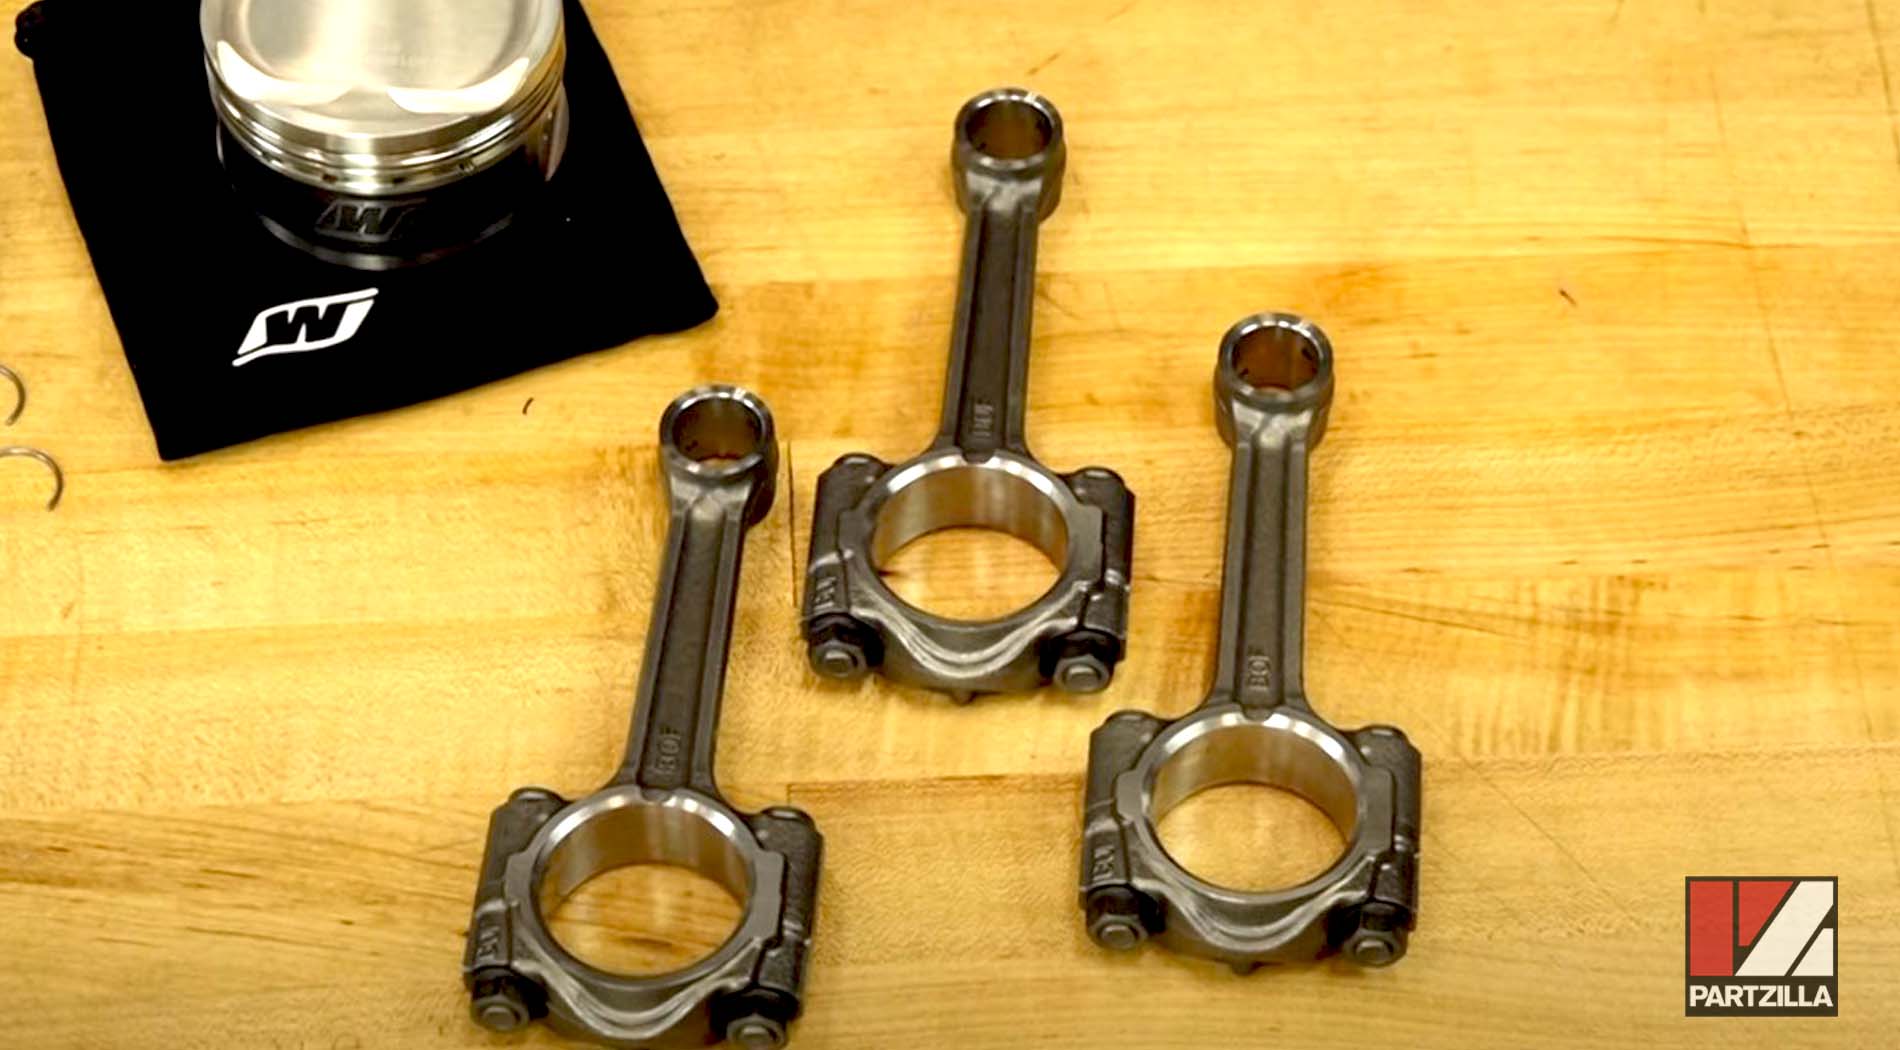
There’s nothing particularly wrong with our Yamaha side-by-side engine, but its 11.3 to 1 compression ratio and the connector rods it has aren’t going to work for this upcoming turbo build. For this part of the rebuild, we're pulling it apart, checking everything out, and later on for the rebuild we'll upgrade the connector rods, drop the compression ratio with new pistons, and then it'll be ready for a turbo application.
For the low compression setup, Wiseco forged pistons will be installed.
As for changing out the connecting rods, the ones in the 2016 model aren’t up to the task because they're a little bit too thin, so they’ll be updated to rods for a newer model.
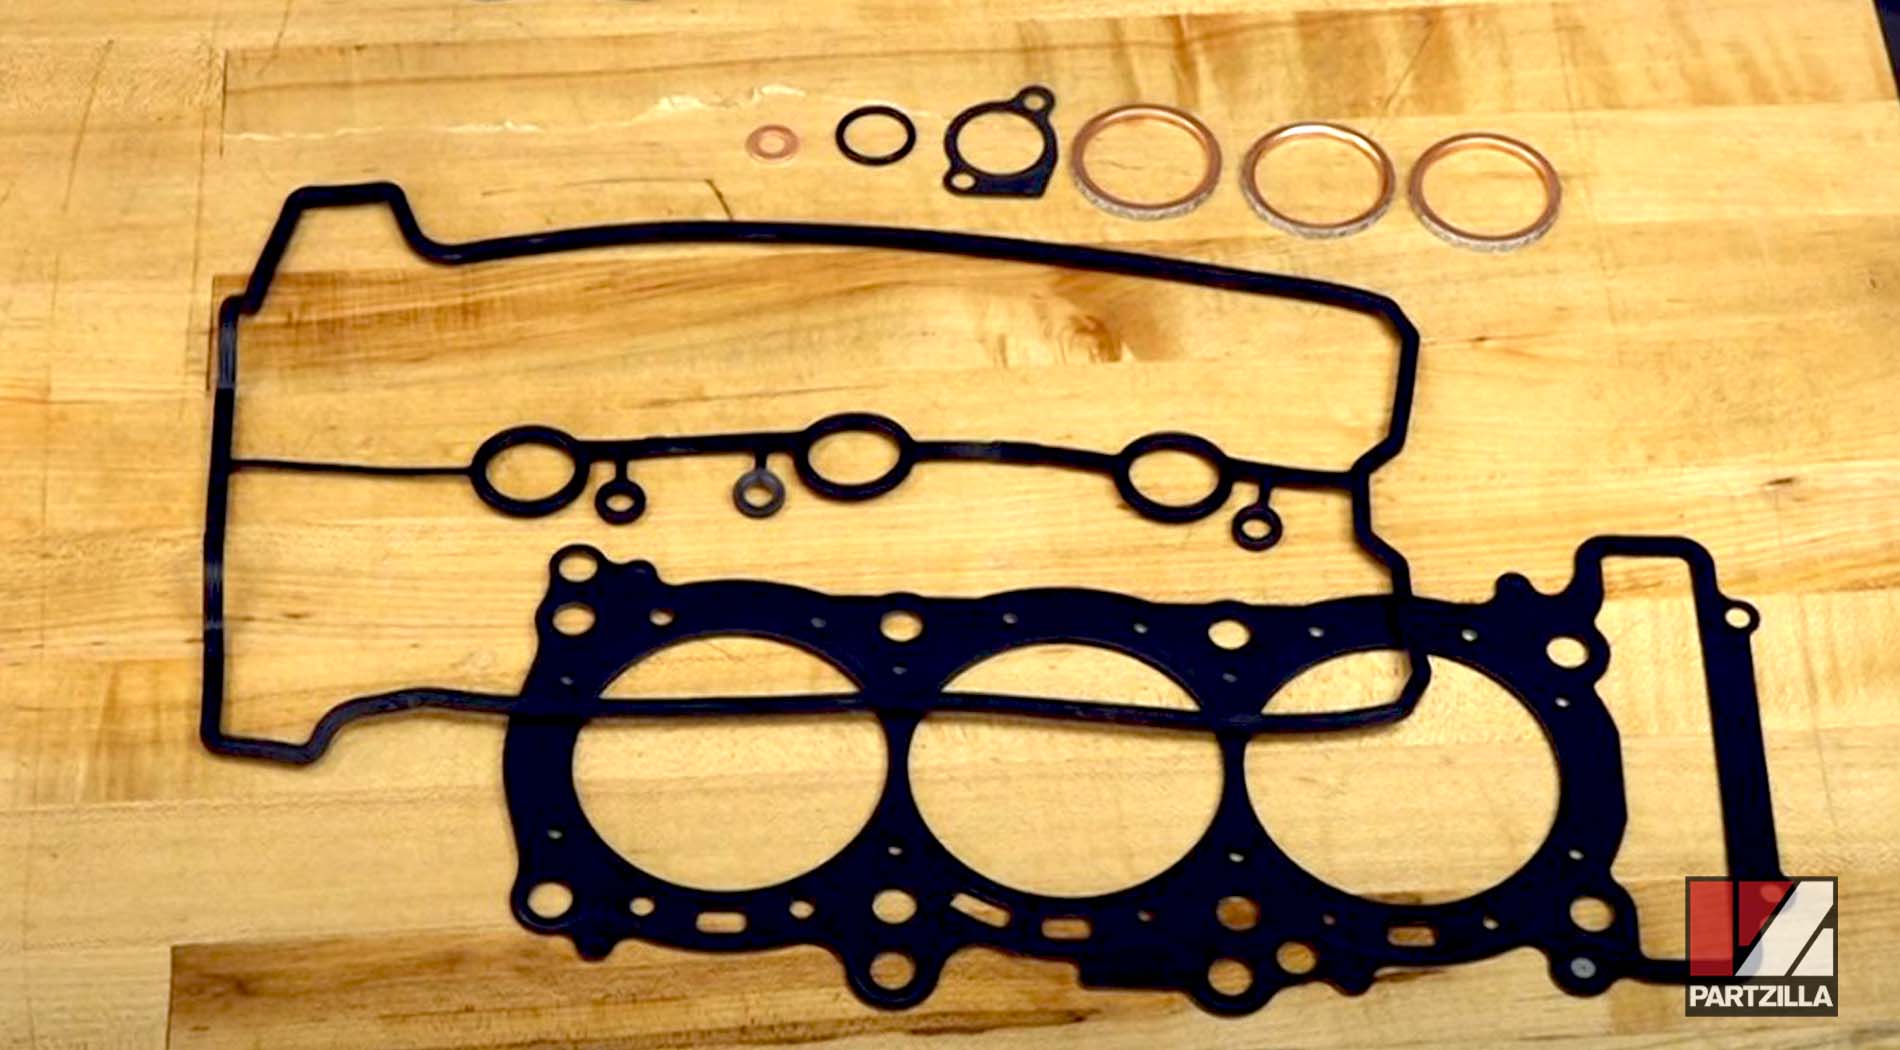
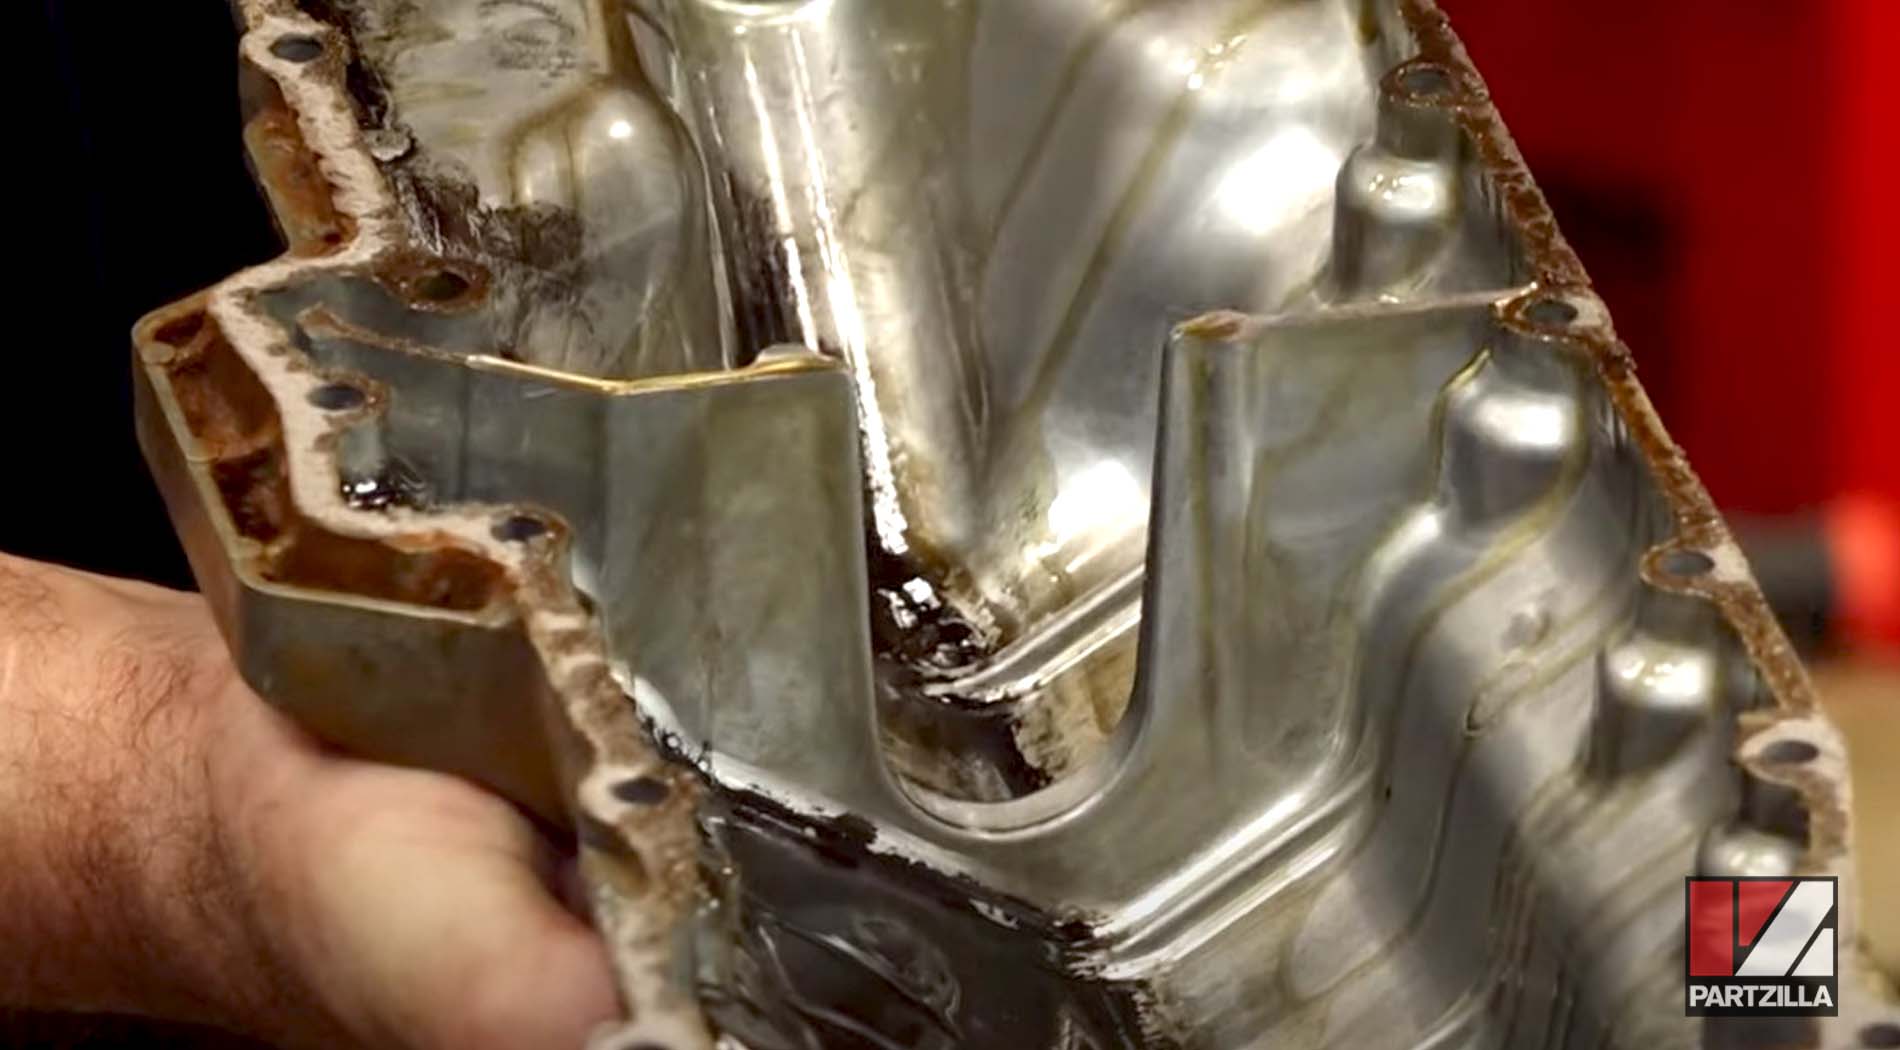
Other upgrades for the upcoming rebuild include installing a top-end gasket set and a new gasket for the oil pan.
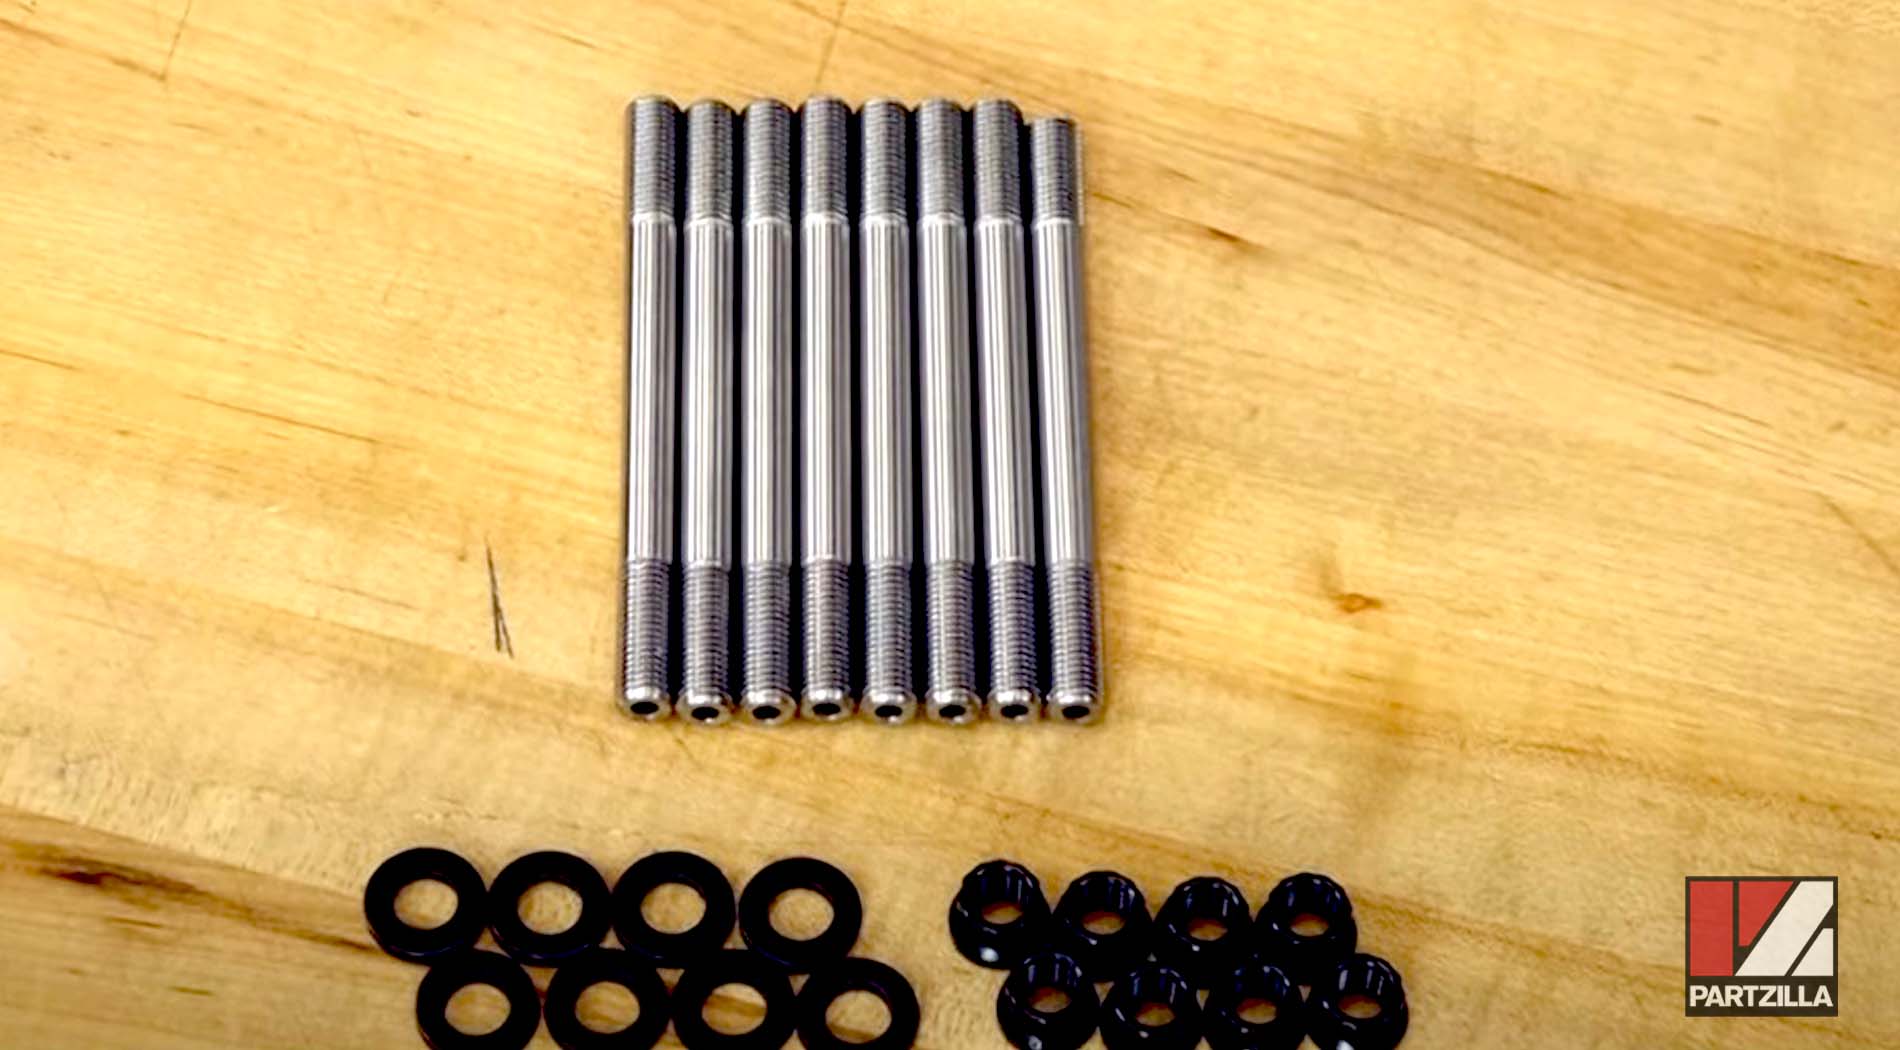
For this turbo build, an ARP stud kit will also be installed, since a full turbo application is probably not going to survive having the stock studs in place.
Other parts needed will be determined as the engine is broken down, but the connector rod bearings and the main bearings for the crankshaft will likely be replaced. Those will be determined by markings on the crankshaft and the and the block.
Watch the video above or read on below to learn how to tear down a Yamaha YXZ1000R engine to prepare it for a turbo upgrade.
Tools Needed - Yamaha YXZ1000R Engine Teardown
- Standard tools (wrenches, Allens, screwdrivers, ratchet and sockets, etc.)
- Pry bar
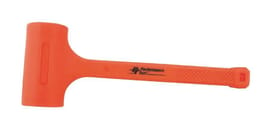
- Dead blow hammer

PRO TIP: Have a marker and ziplock bags ready when you're pulling apart an engine so you can organize and label all of the parts for when it’s time to put the engine back together.
Yamaha YXZ1000R Engine Teardown - Remove Wiring and Throttle Bodies
Step 1. Remove all the different venting and the intake, and any of the wiring still attached to the engine.
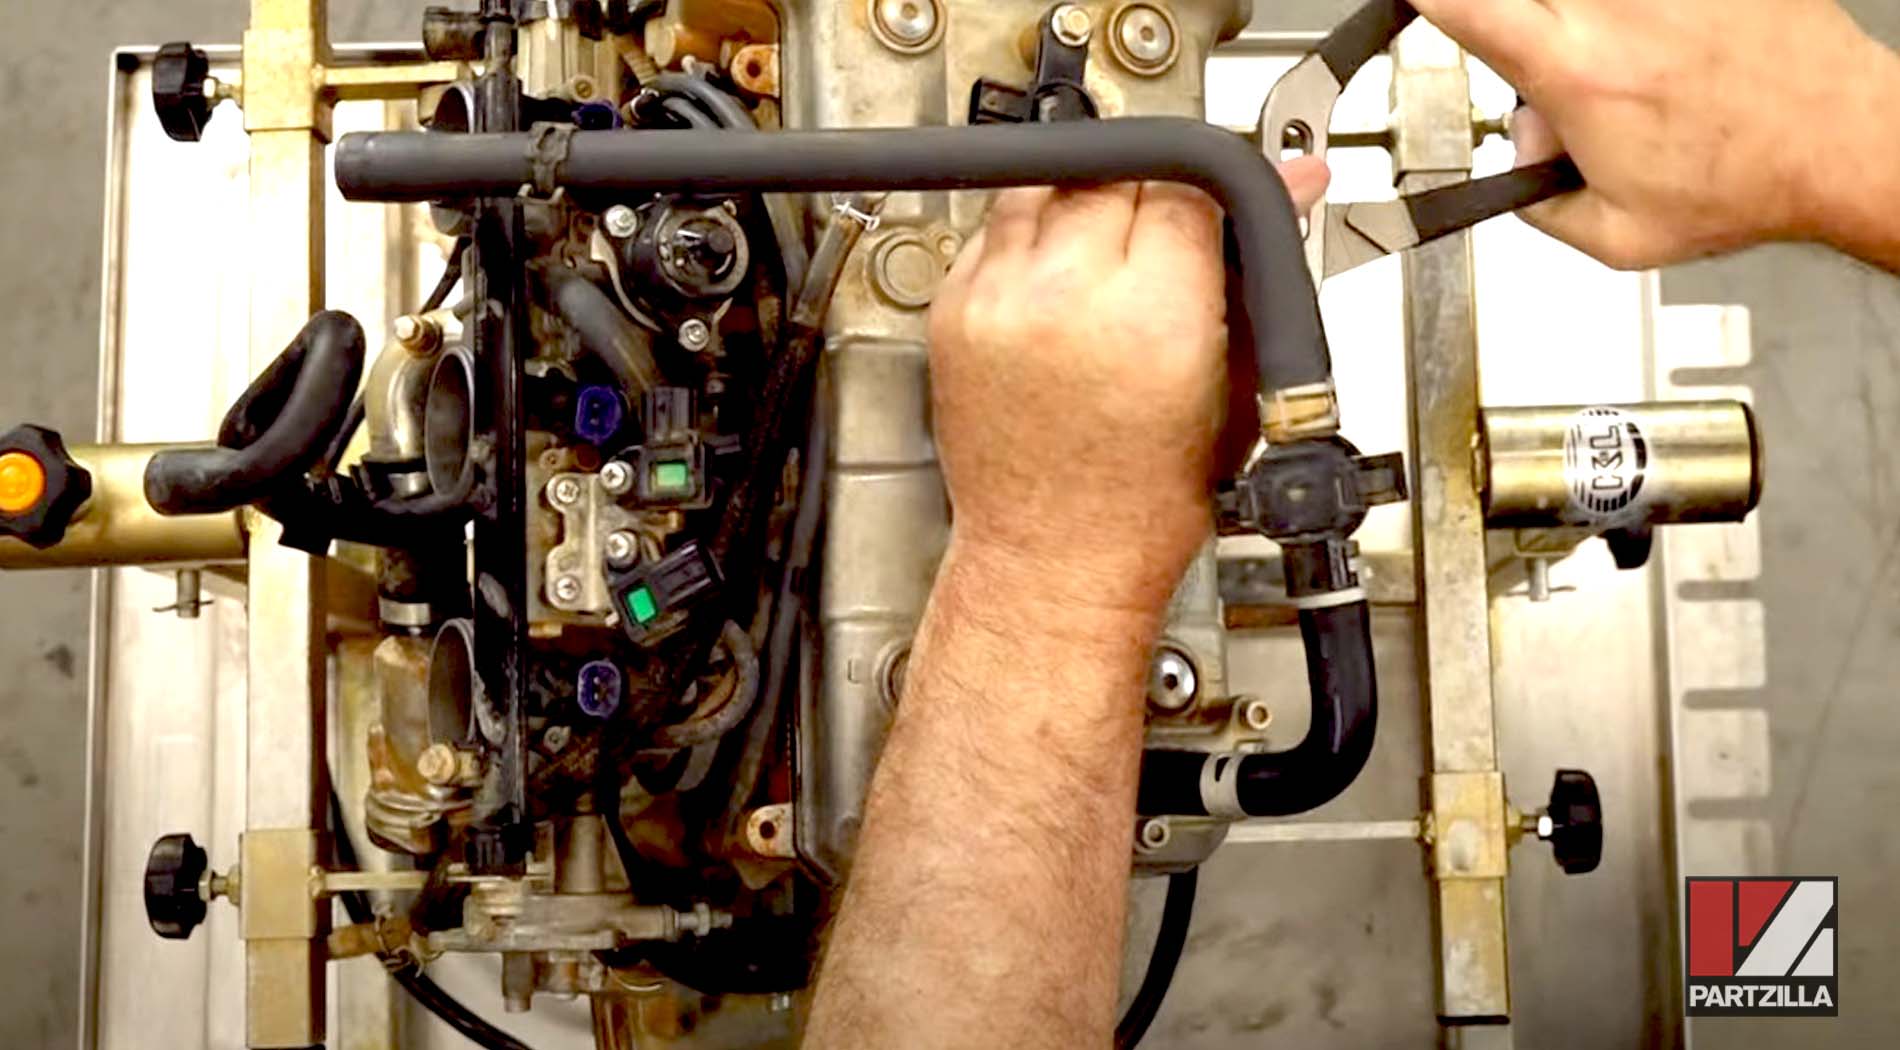
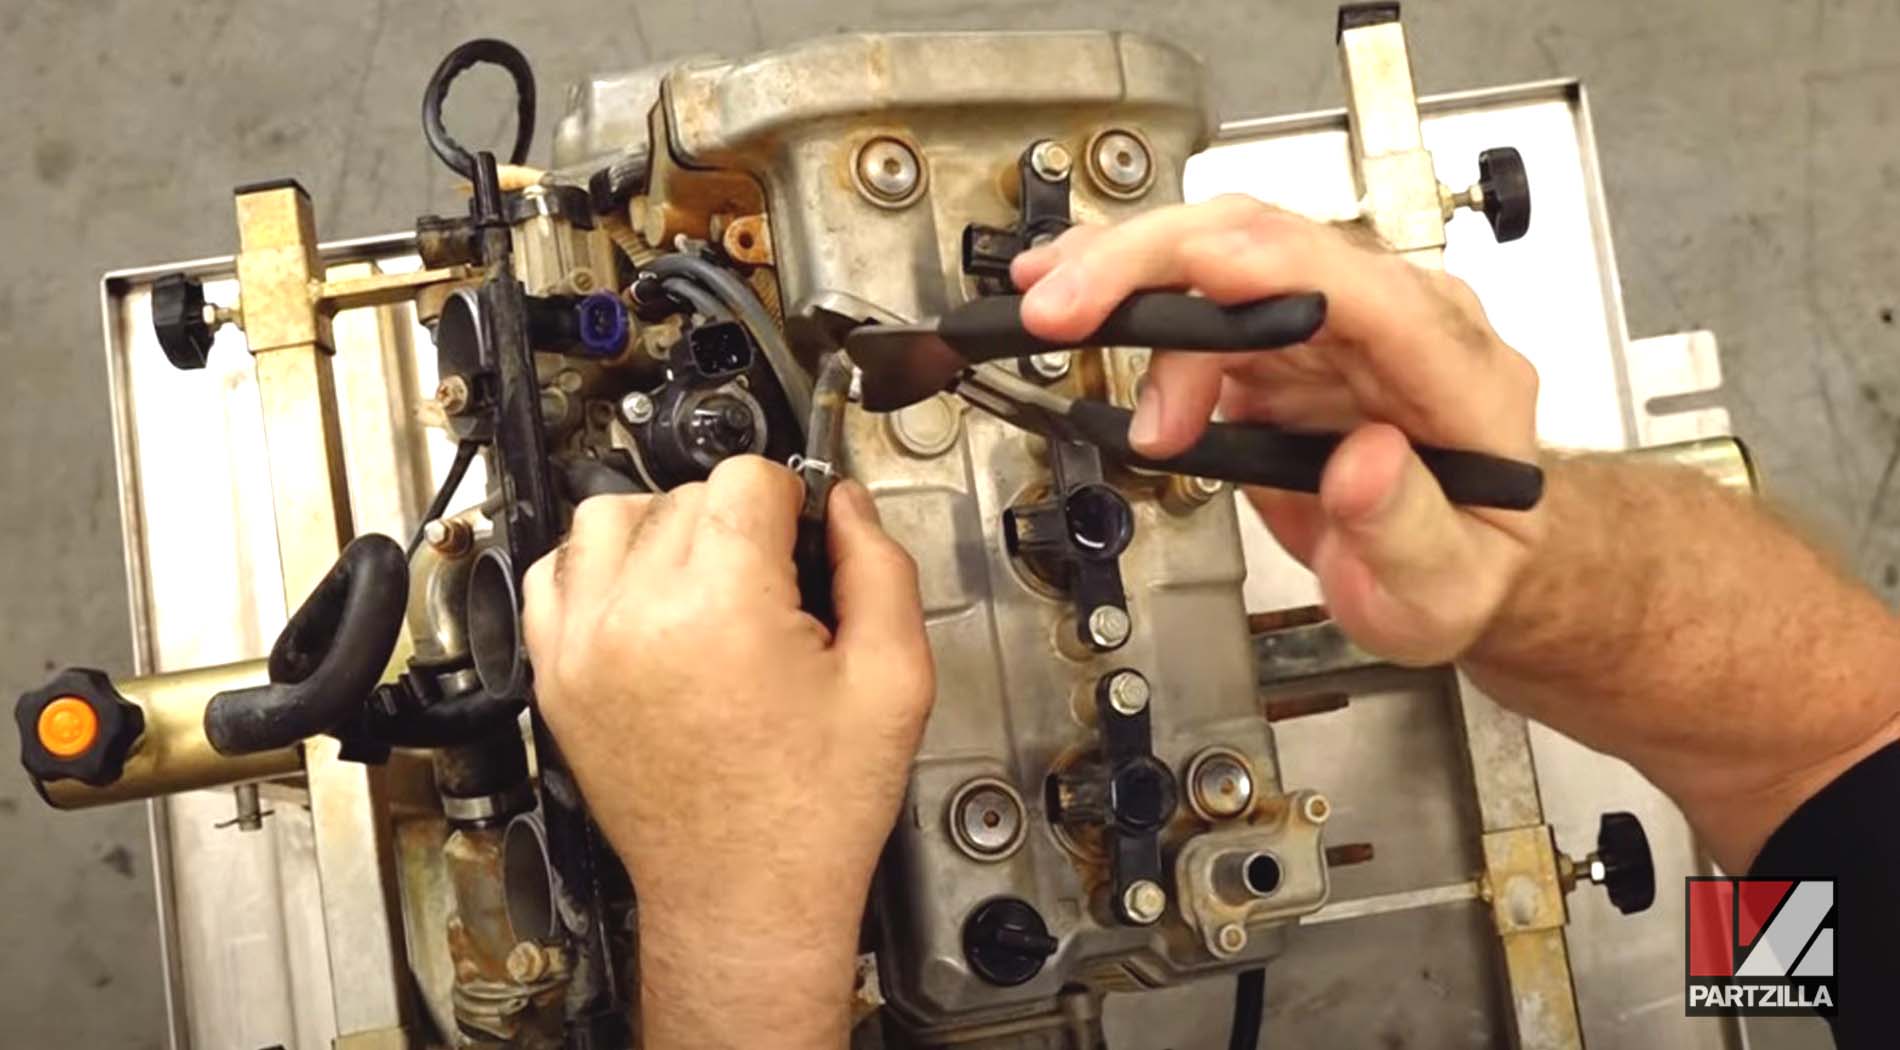
Step 2. Remove the throttle bodies. The best way to do that is to take them off by leaving the adapters in place and pulling them out of the adapters.
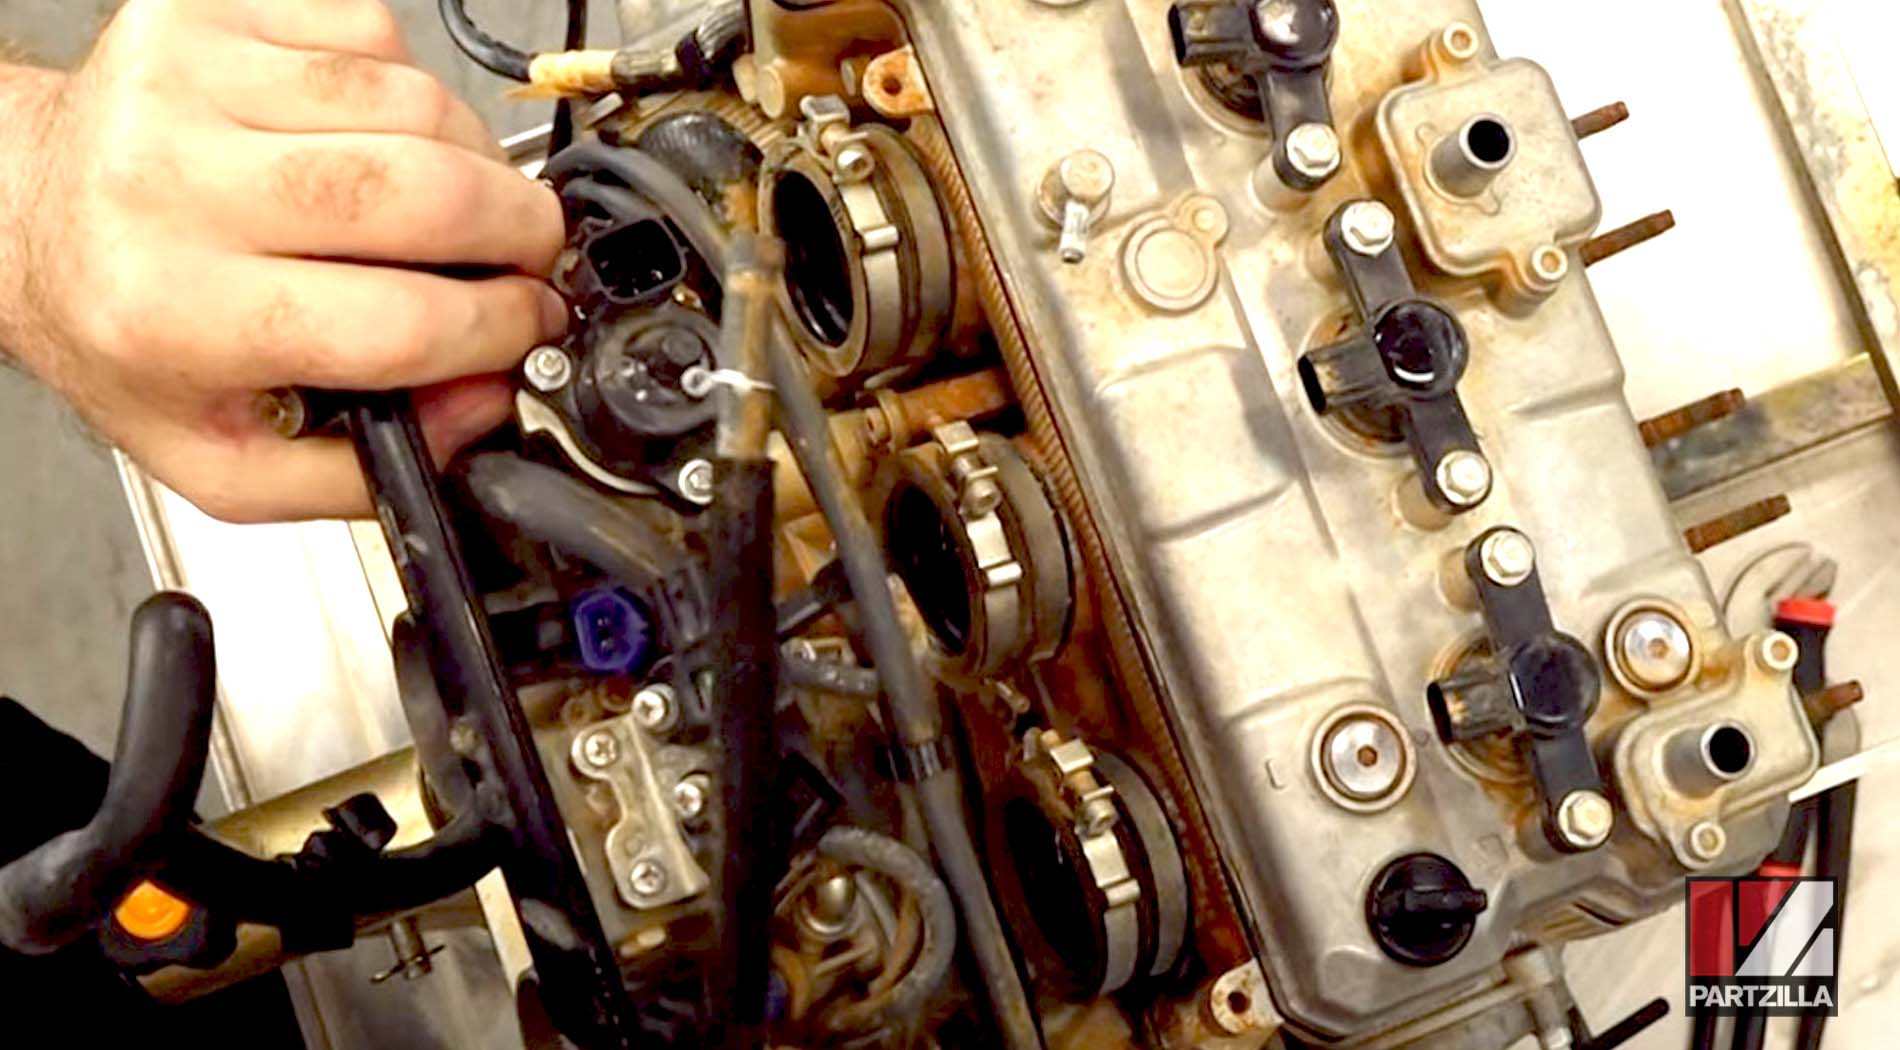
NOTE: Expect a fair amount of resistance here because there's a lip more or less locking them in, so be careful not to damage anything when pulling it apart.
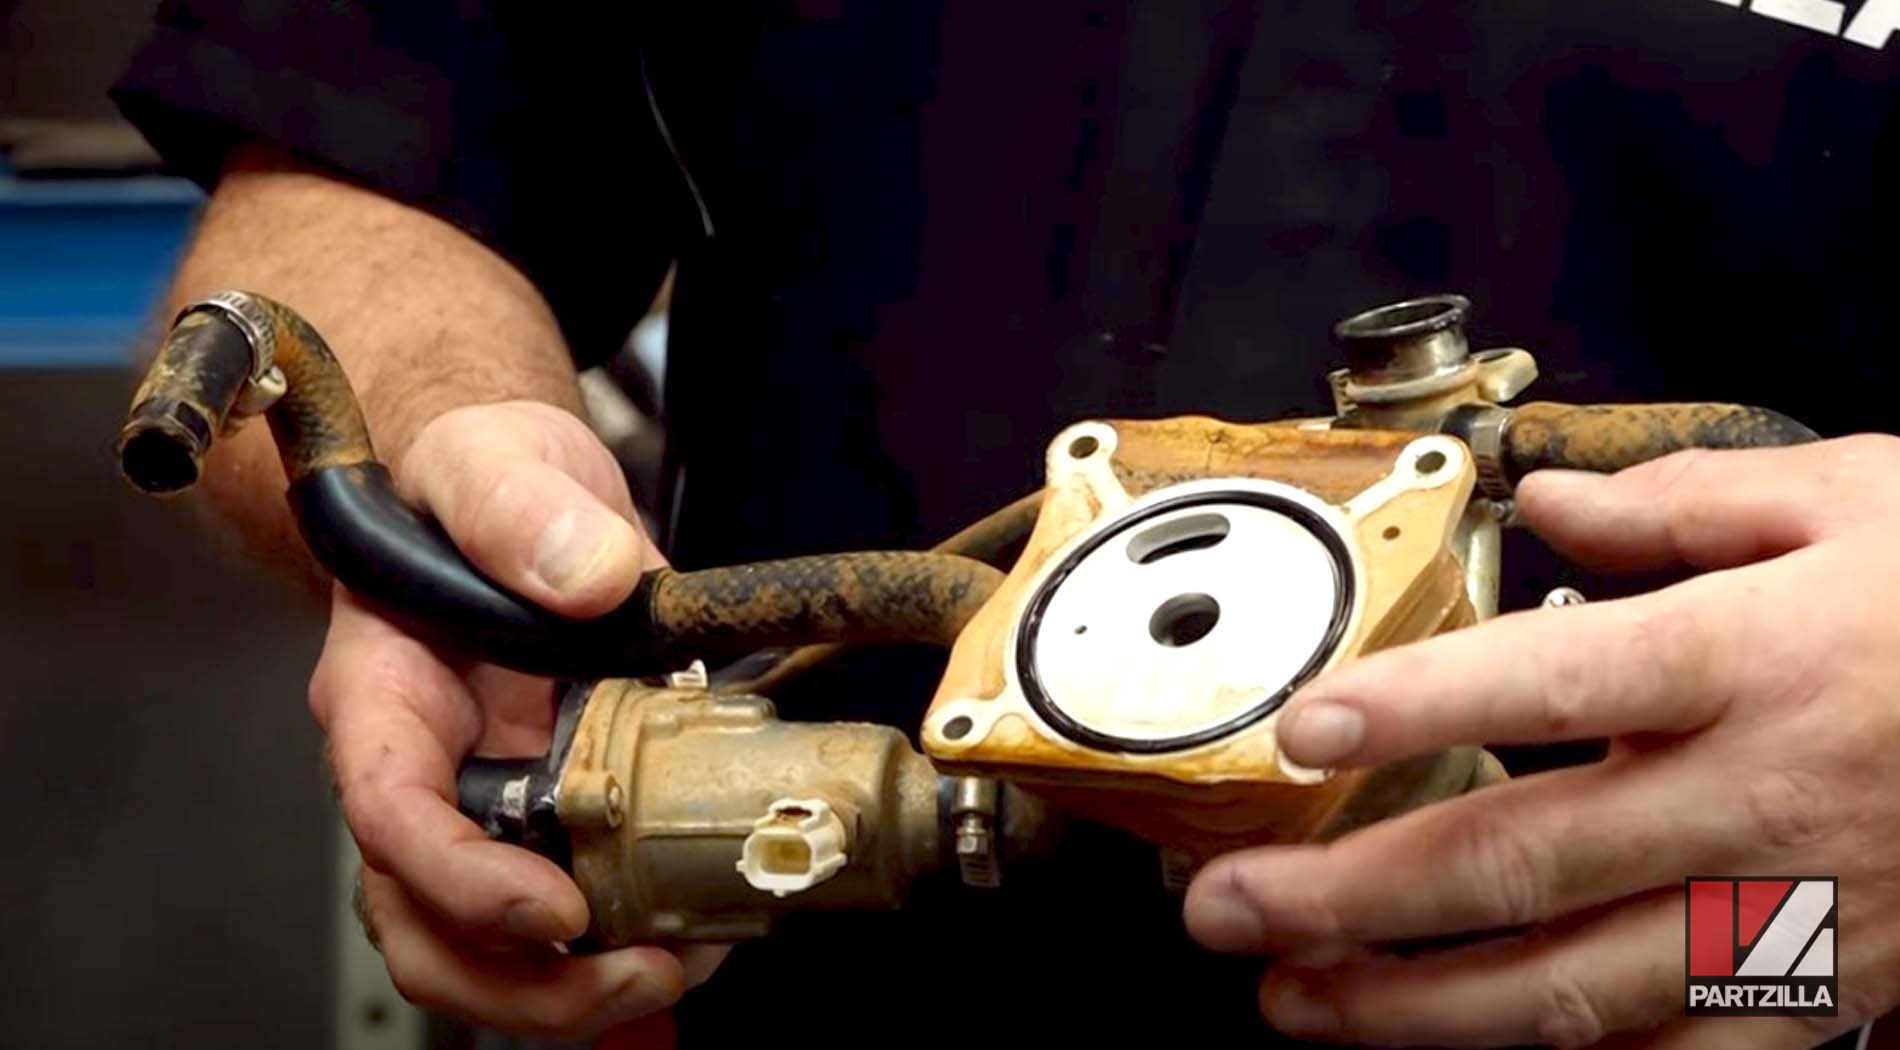
Step 3. Remove the cooling lines and the oil cooler as an assembly.
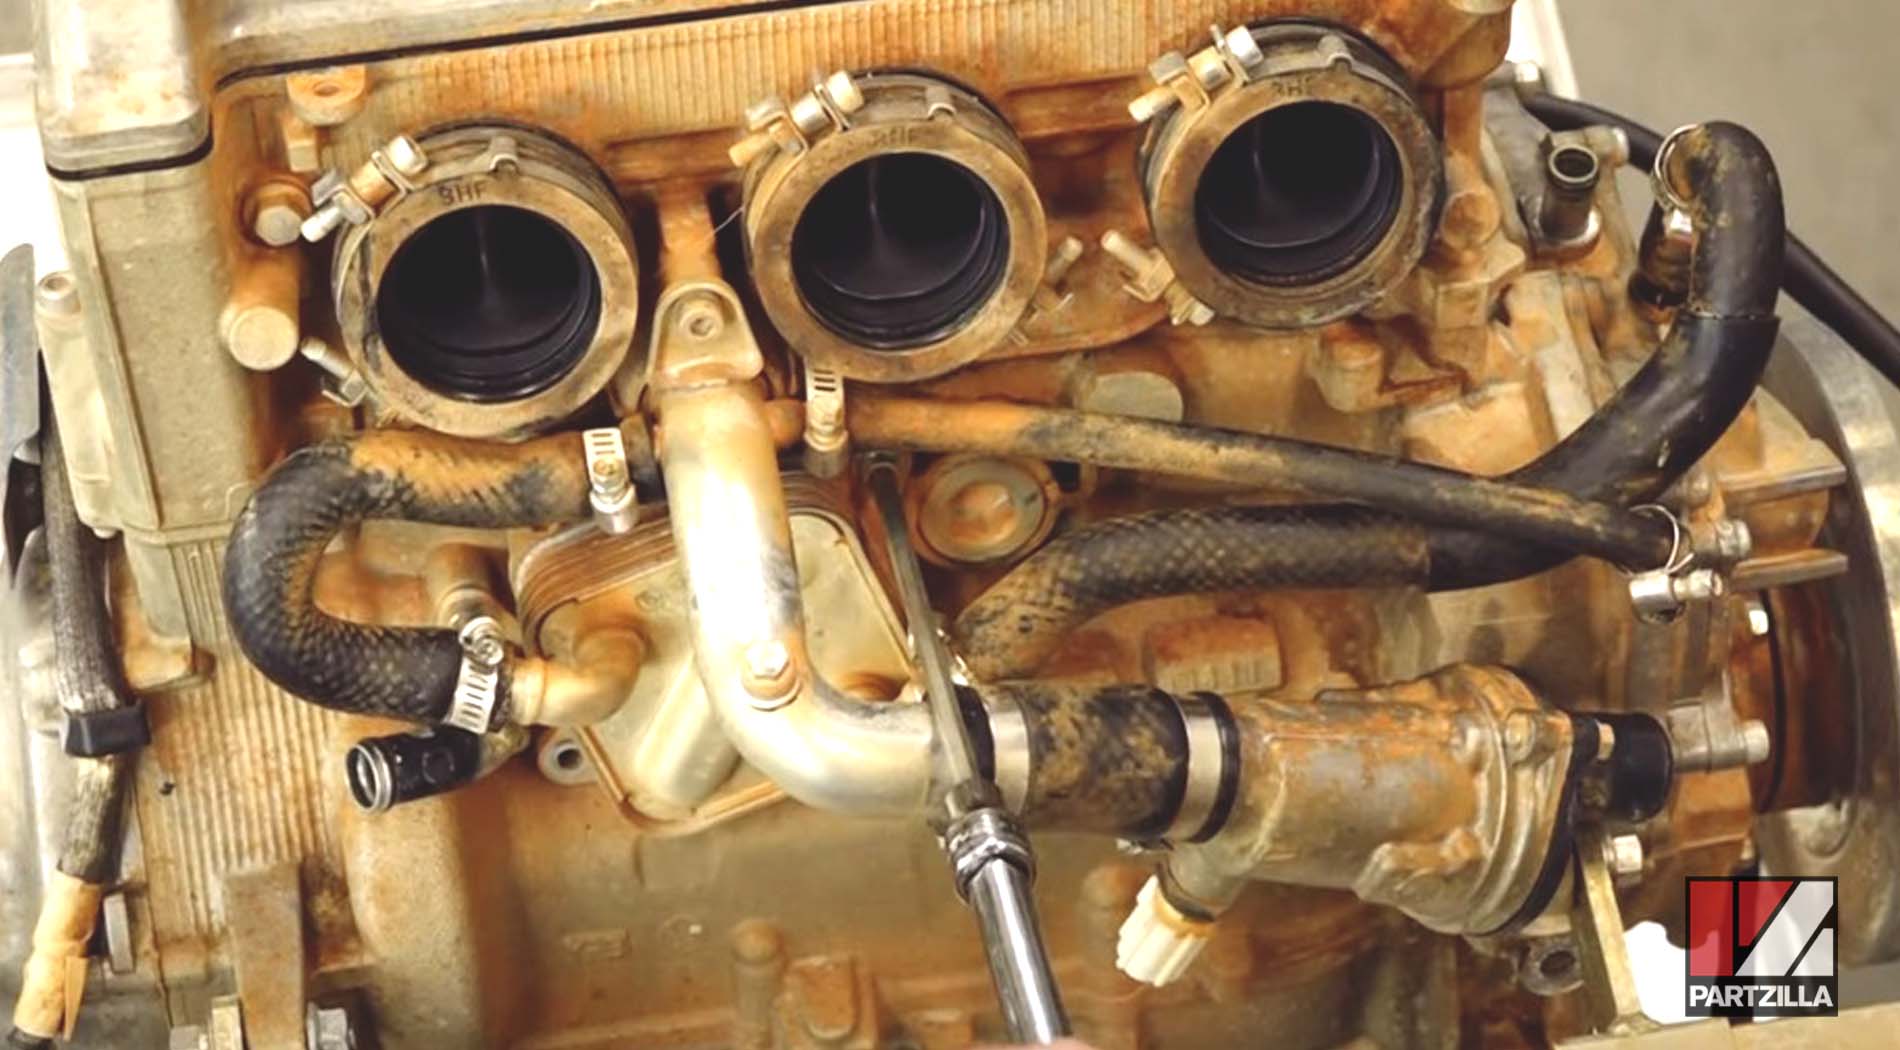
Step 4. Remove any electrical components that are in the way, including the coils up top.
Watch the clip below to see the wiring and throttle bodies removal segment of our Yamaha YXZ1000R engine teardown video.
Yamaha YXZ1000R Engine Teardown - Remove Valve Cover
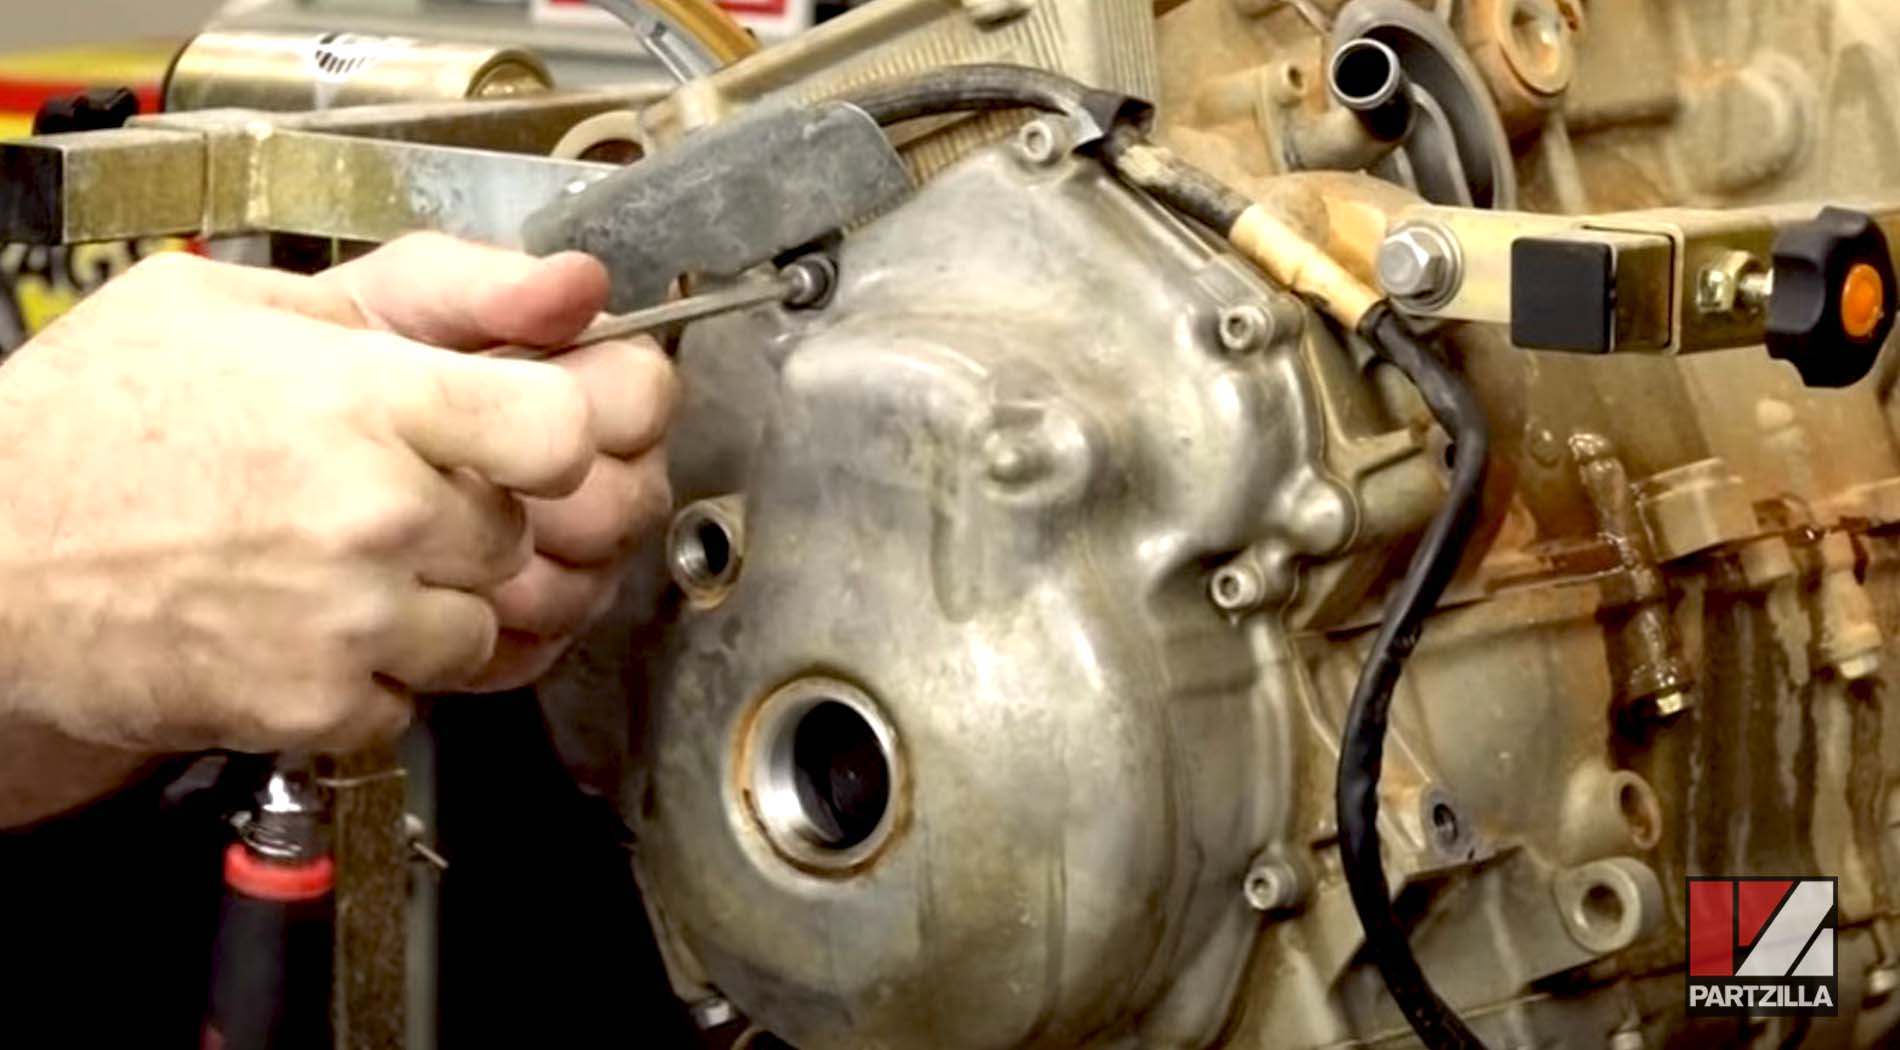
Step 5. Remove the inspection covers and the valve cover from the engine.
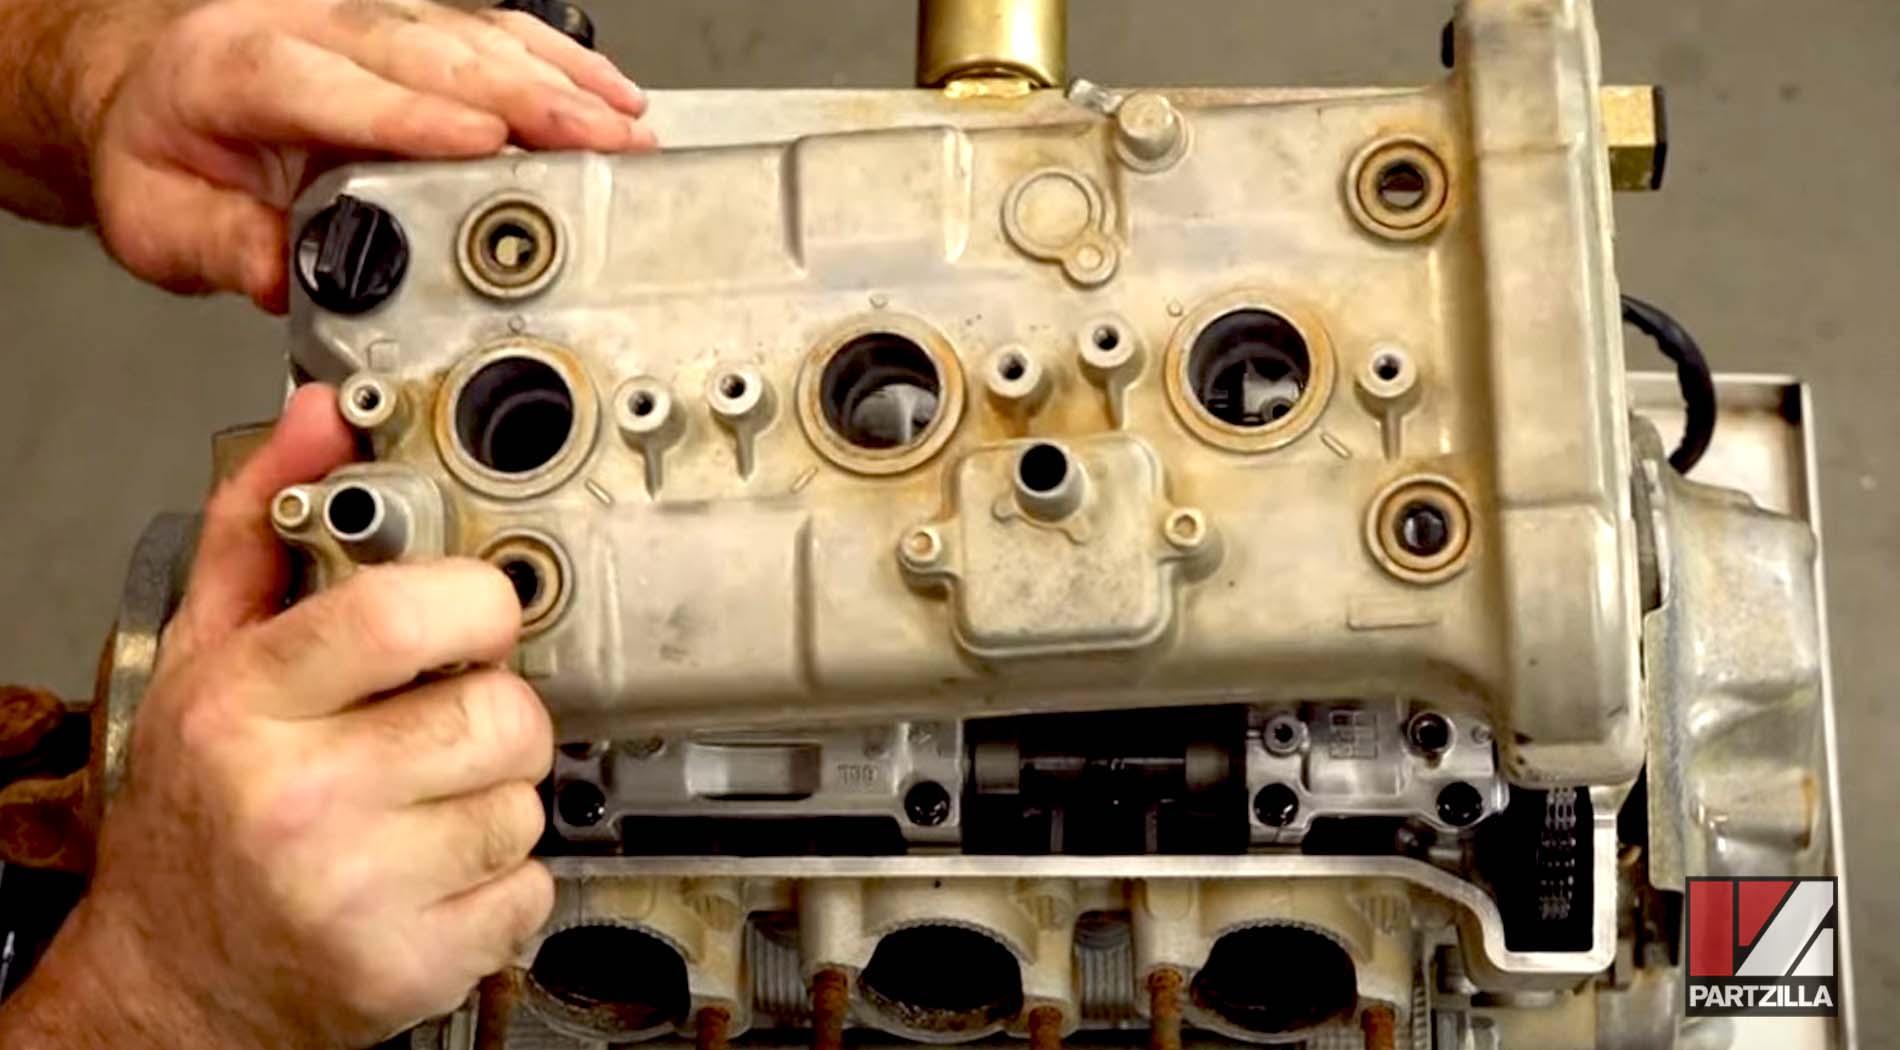
Watch the clip below to see the valve cover removal segment of our Yamaha YXZ1000R engine teardown video.
Yamaha YXZ1000R Engine Teardown - Find Top Dead Center
Step 6. Bring the engine to top dead center by looking for the TDC mark through the inspection hole and lining up the TDC marks on top.
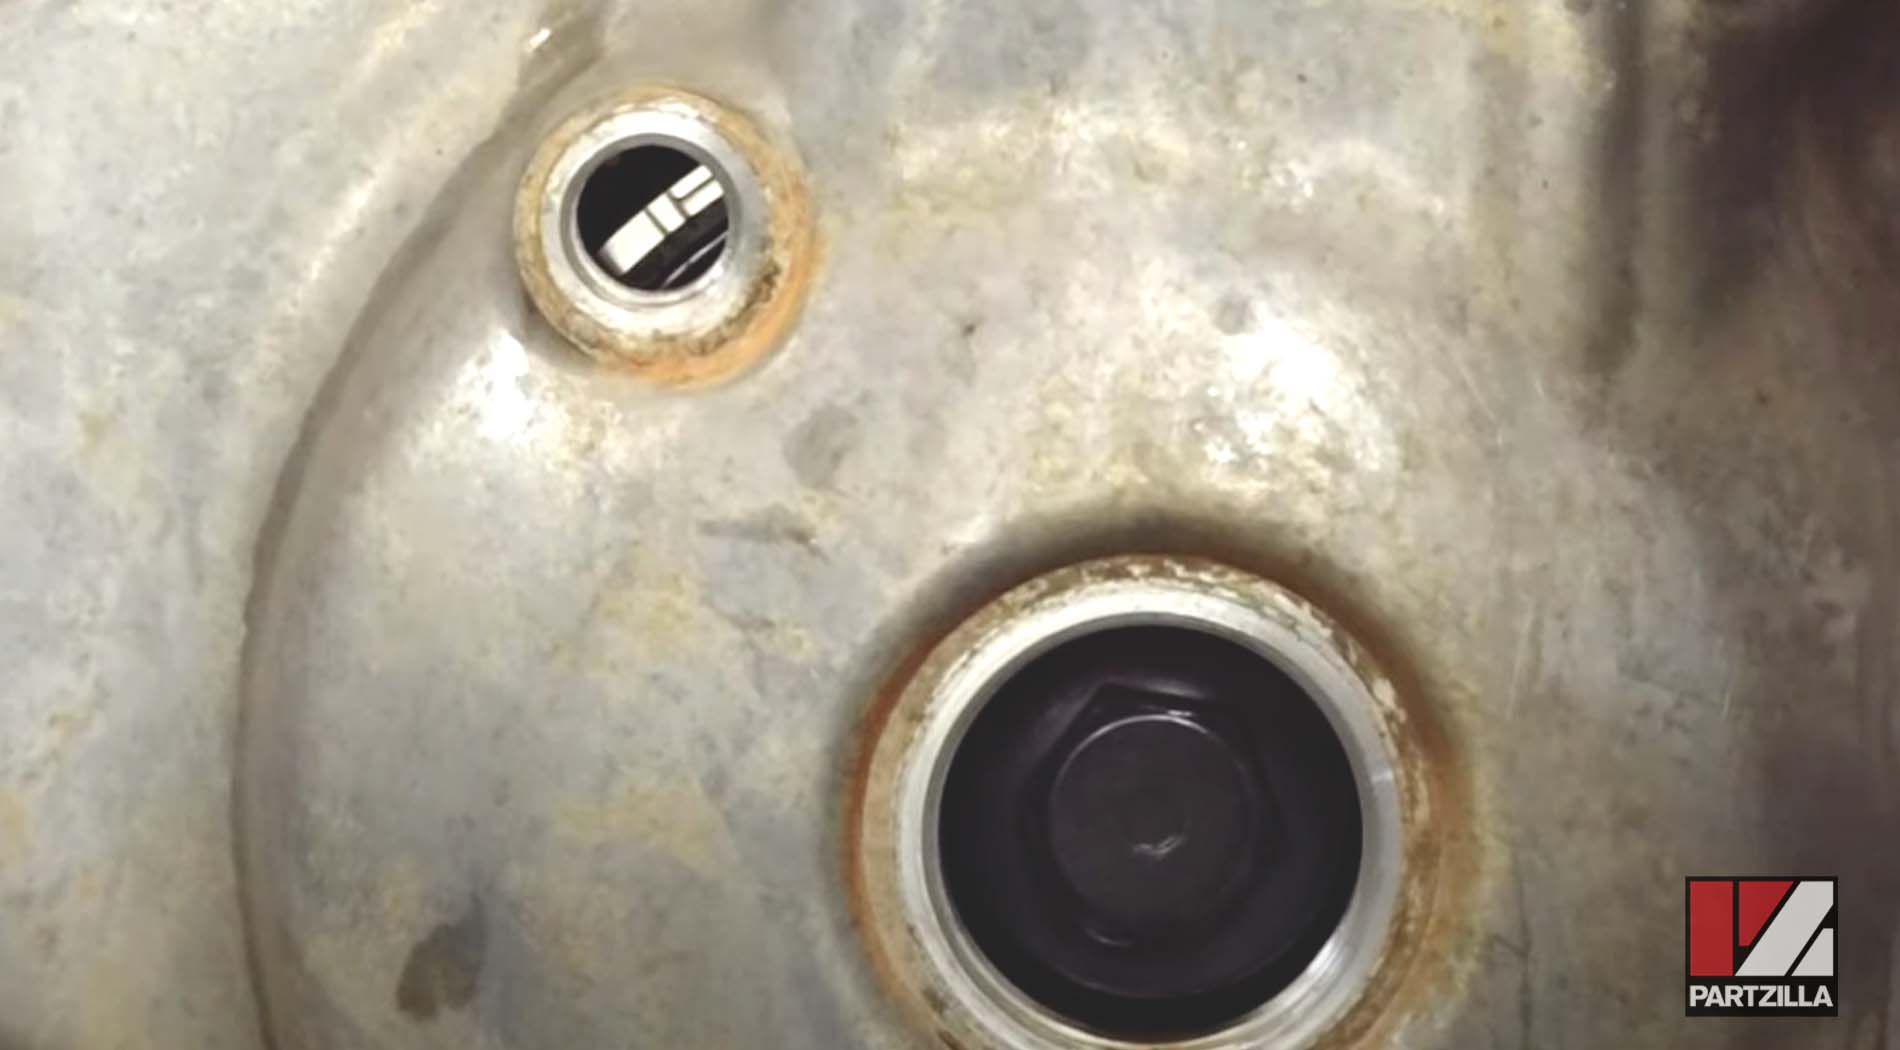
Step 7. Remove the chain tensioner from the engine.
Watch the clip below to see the finding top dead center segment of our Yamaha YXZ1000R engine teardown video.
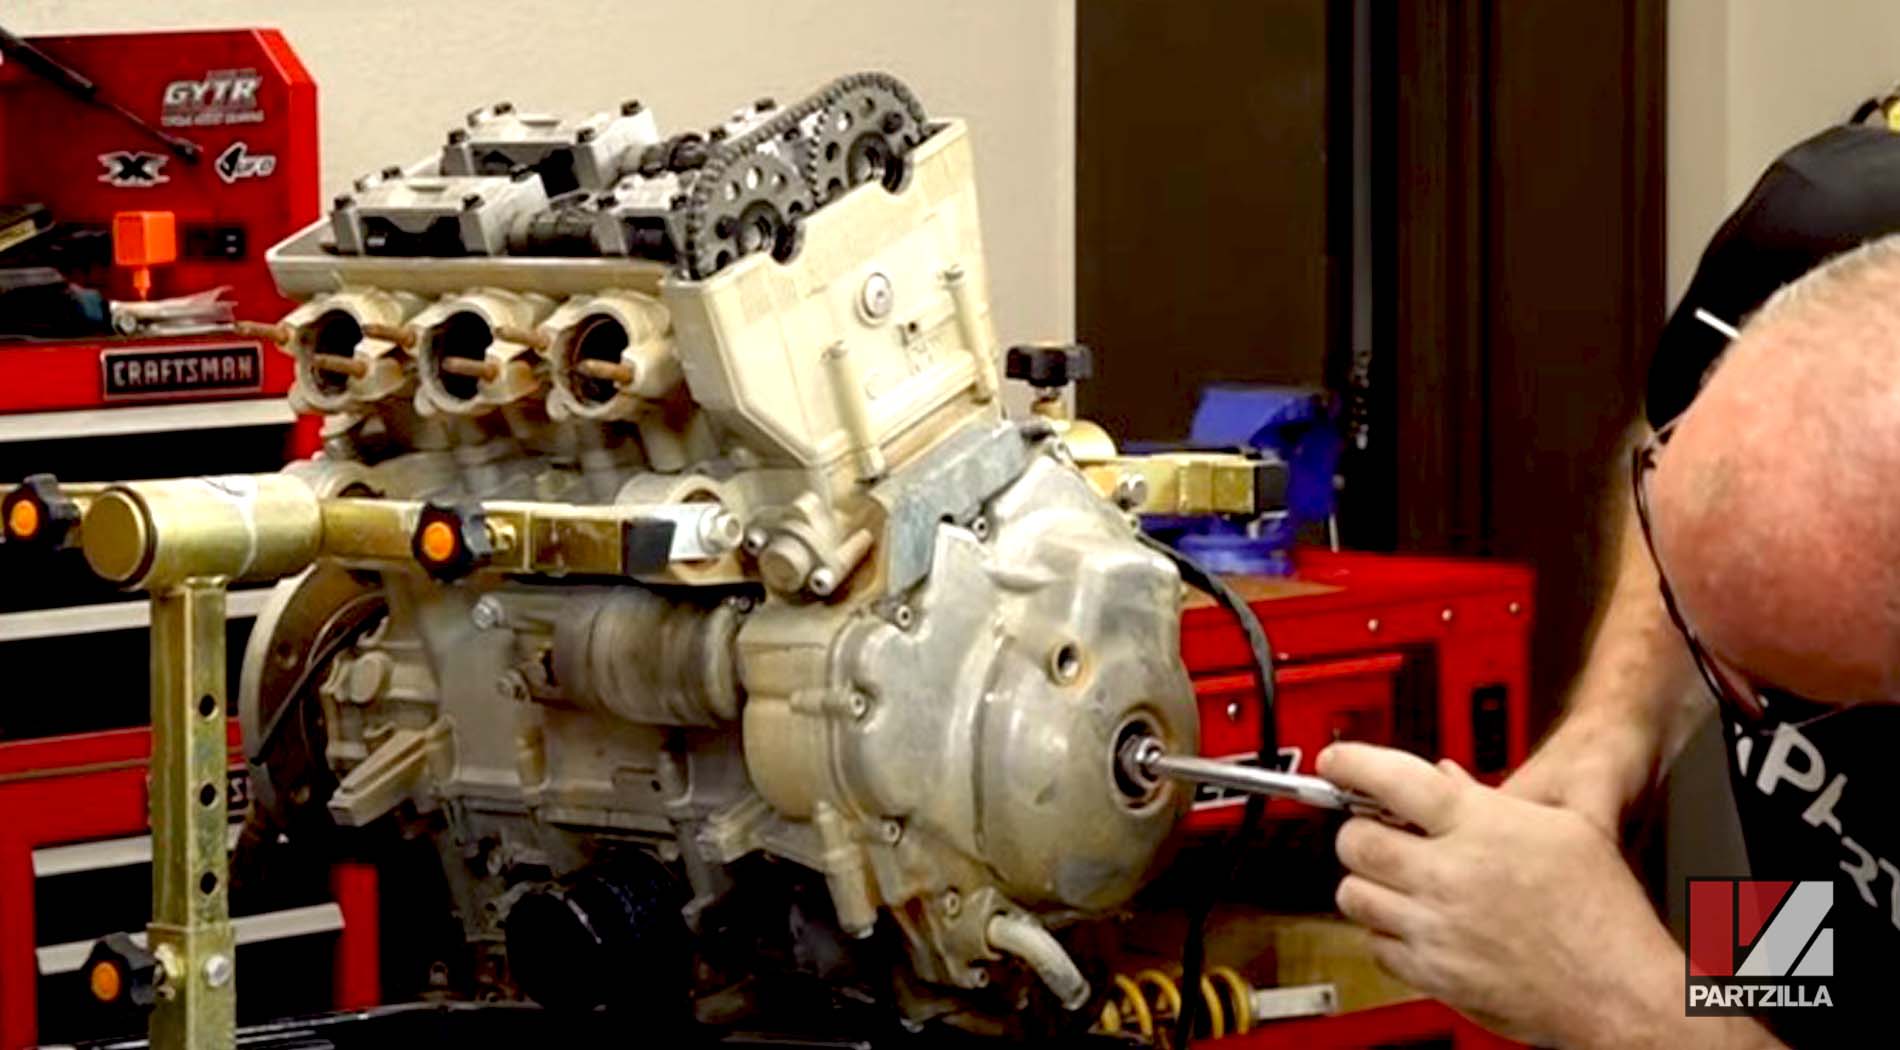
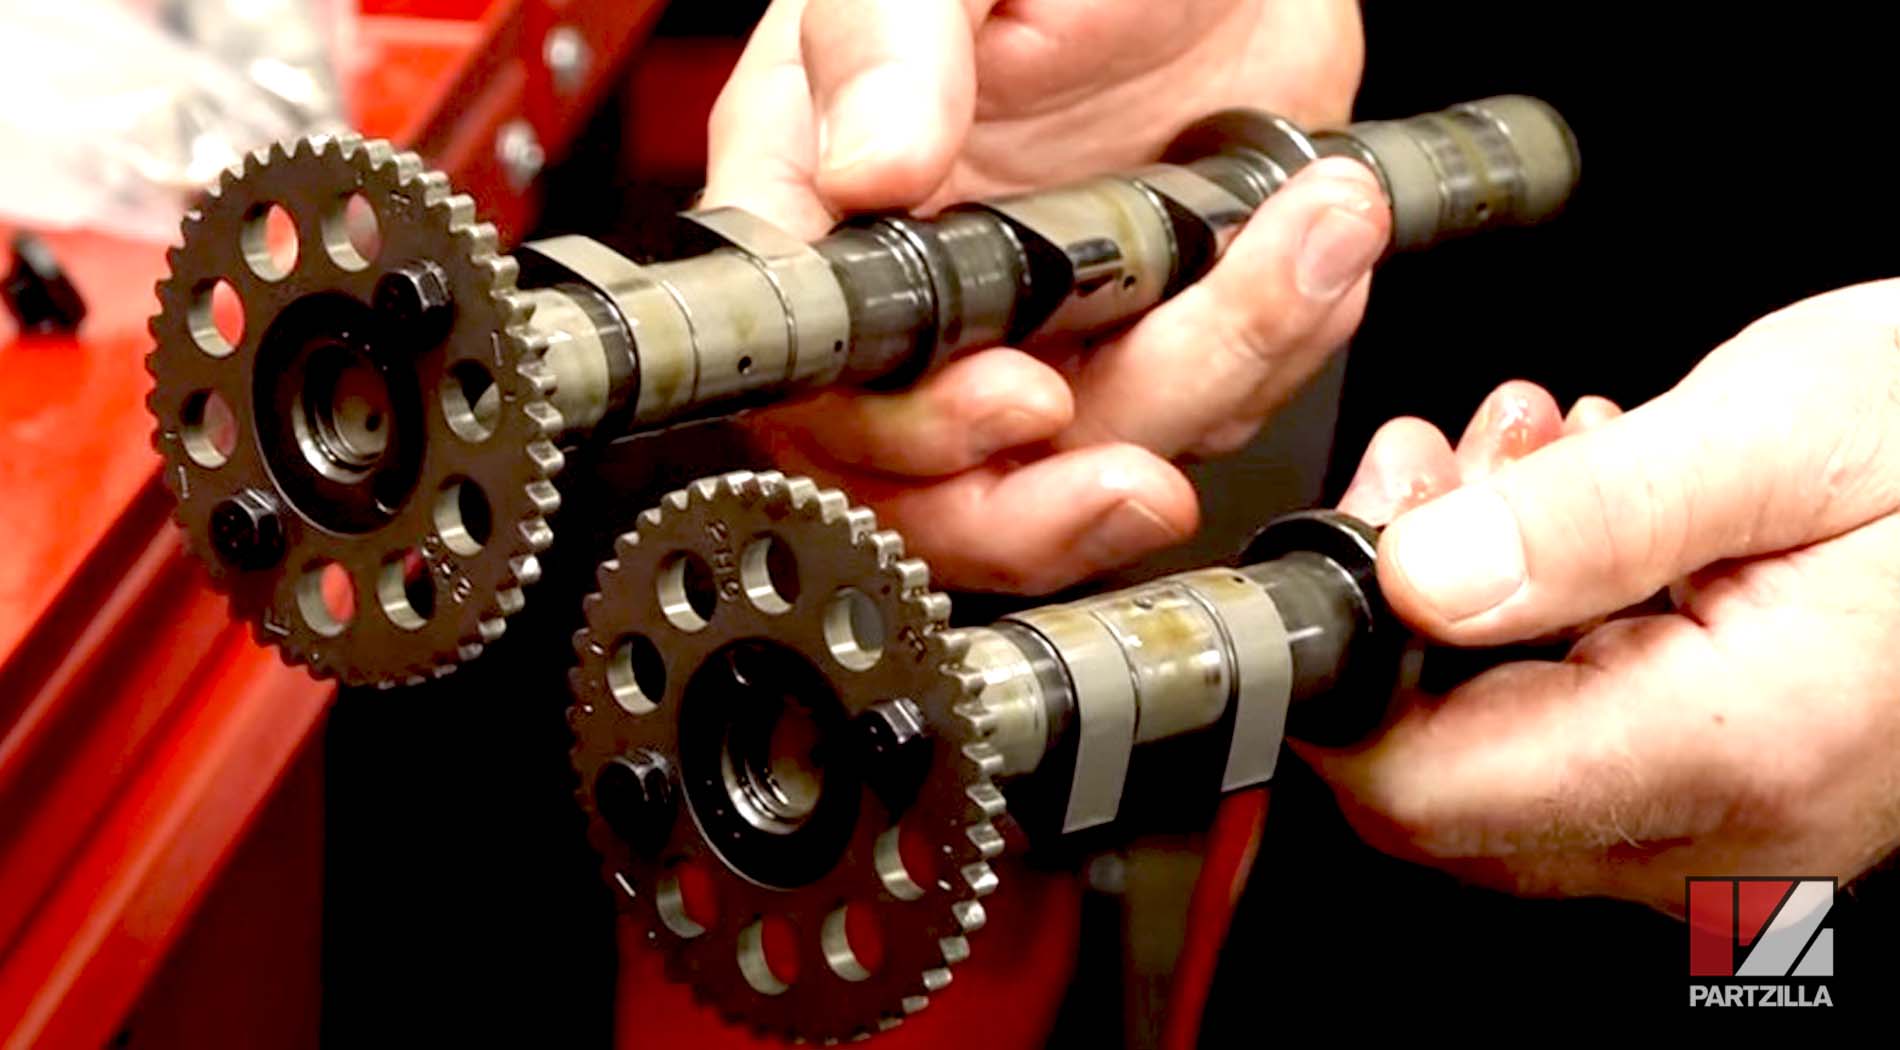
Yamaha YXZ1000R Engine Teardown - Remove Camshafts
Step 8. Remove the camshaft caps from the engine, followed by the cams themselves.
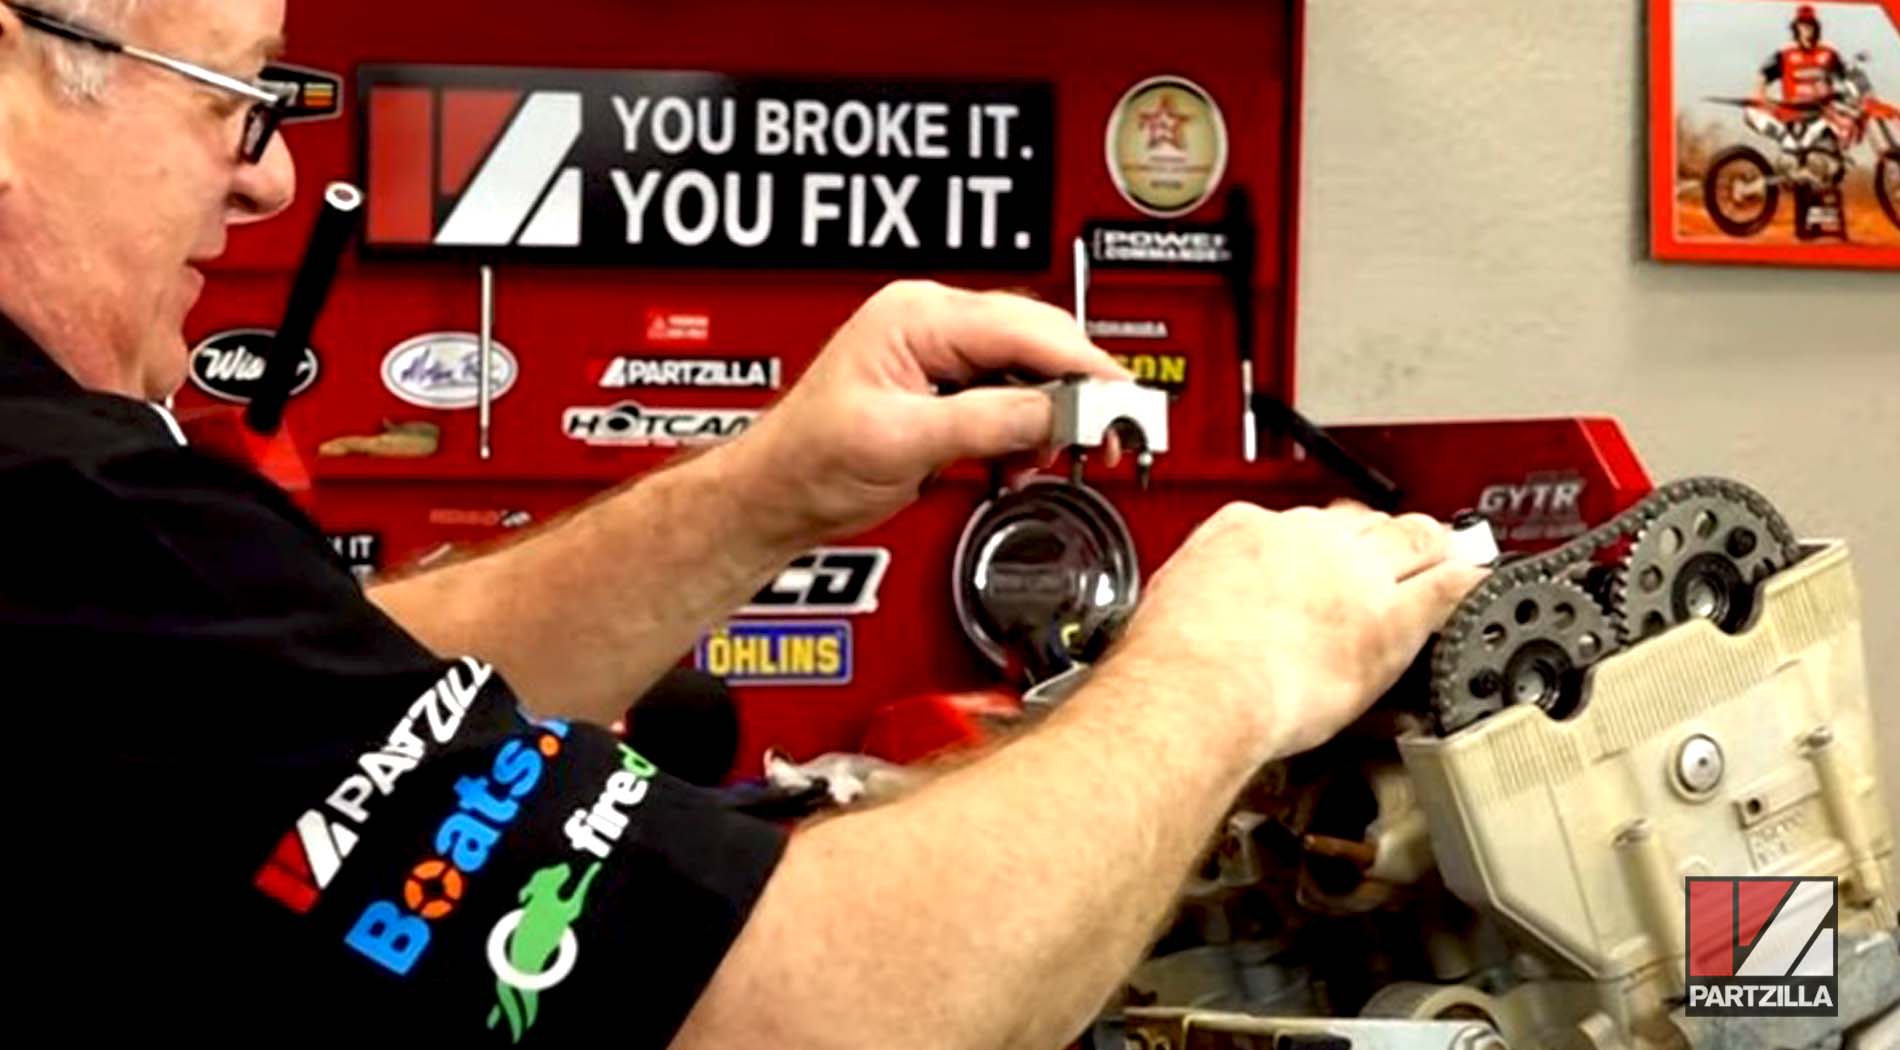
NOTE: The difference between the intake and exhaust cams is the intake cam has a larger middle section than what’s on the exhaust cam.
Watch the clip below to see the camshaft removal segment of our Yamaha YXZ1000R engine teardown video.
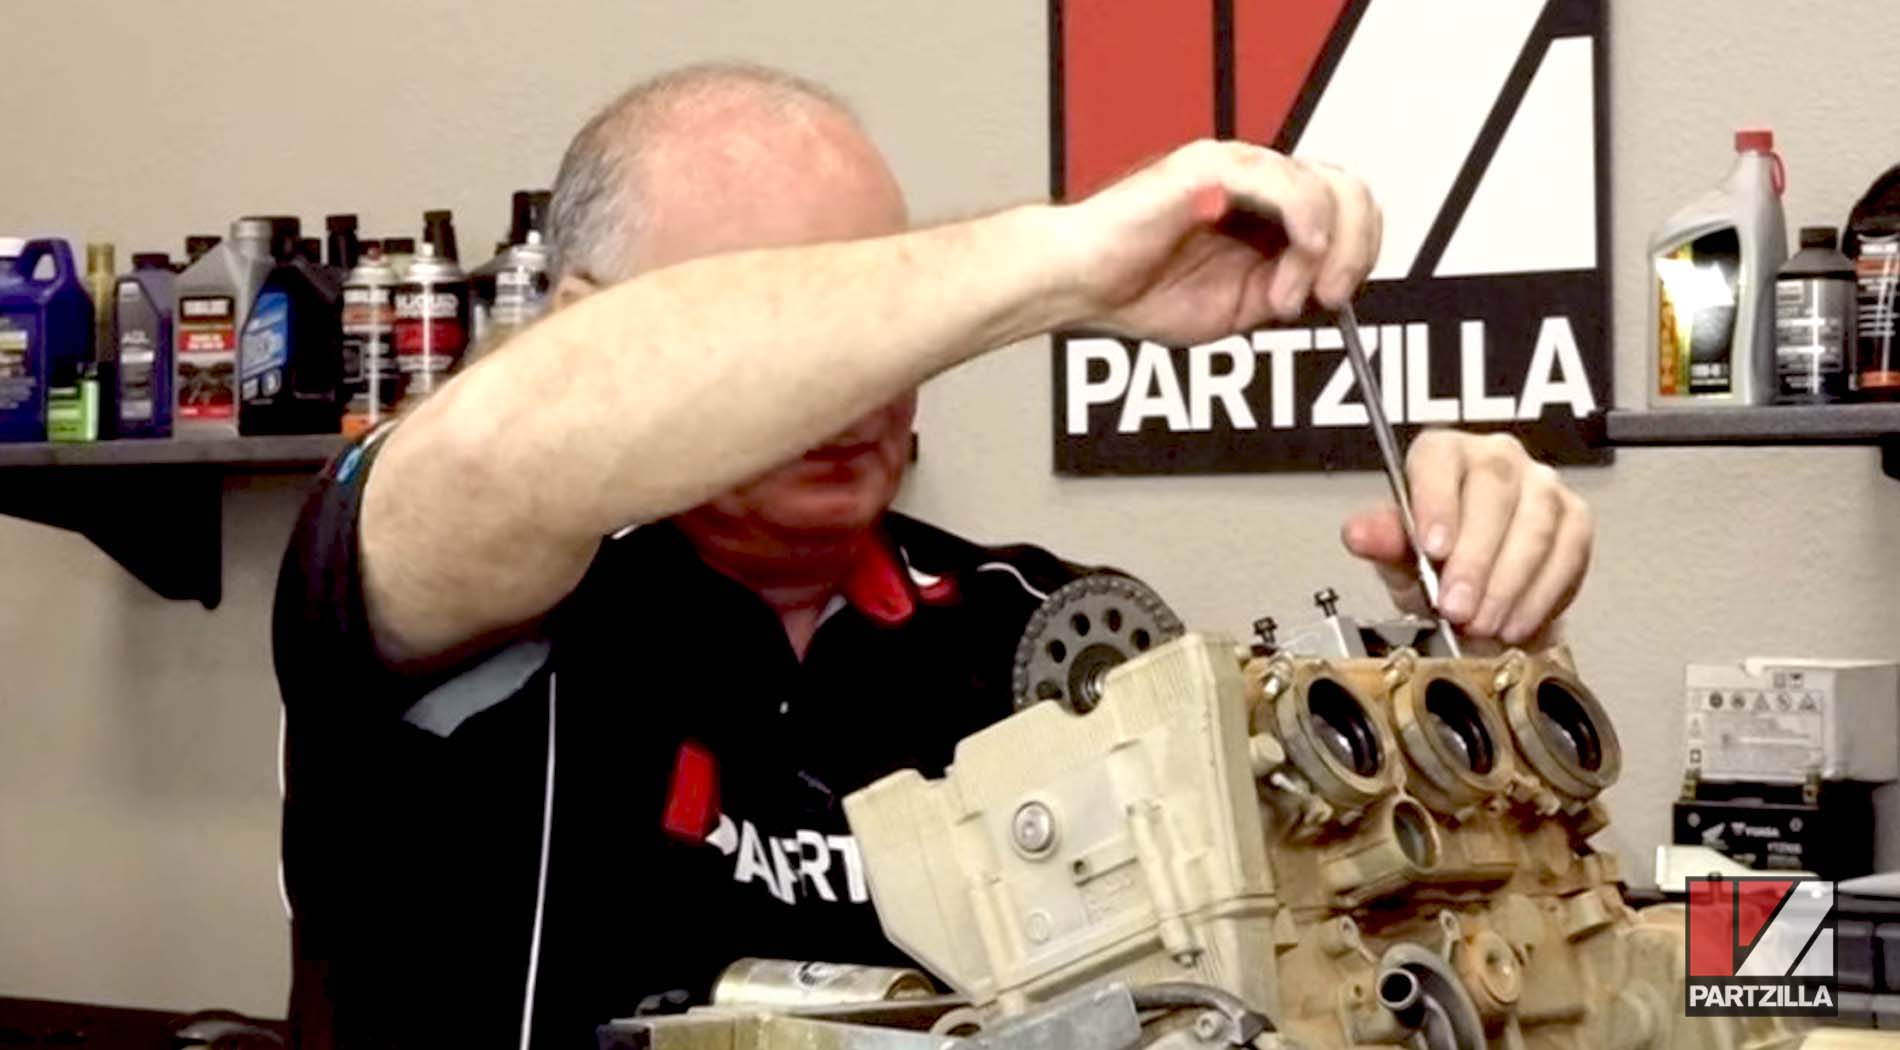
Yamaha YXZ1000R Engine Teardown - Remove the Head
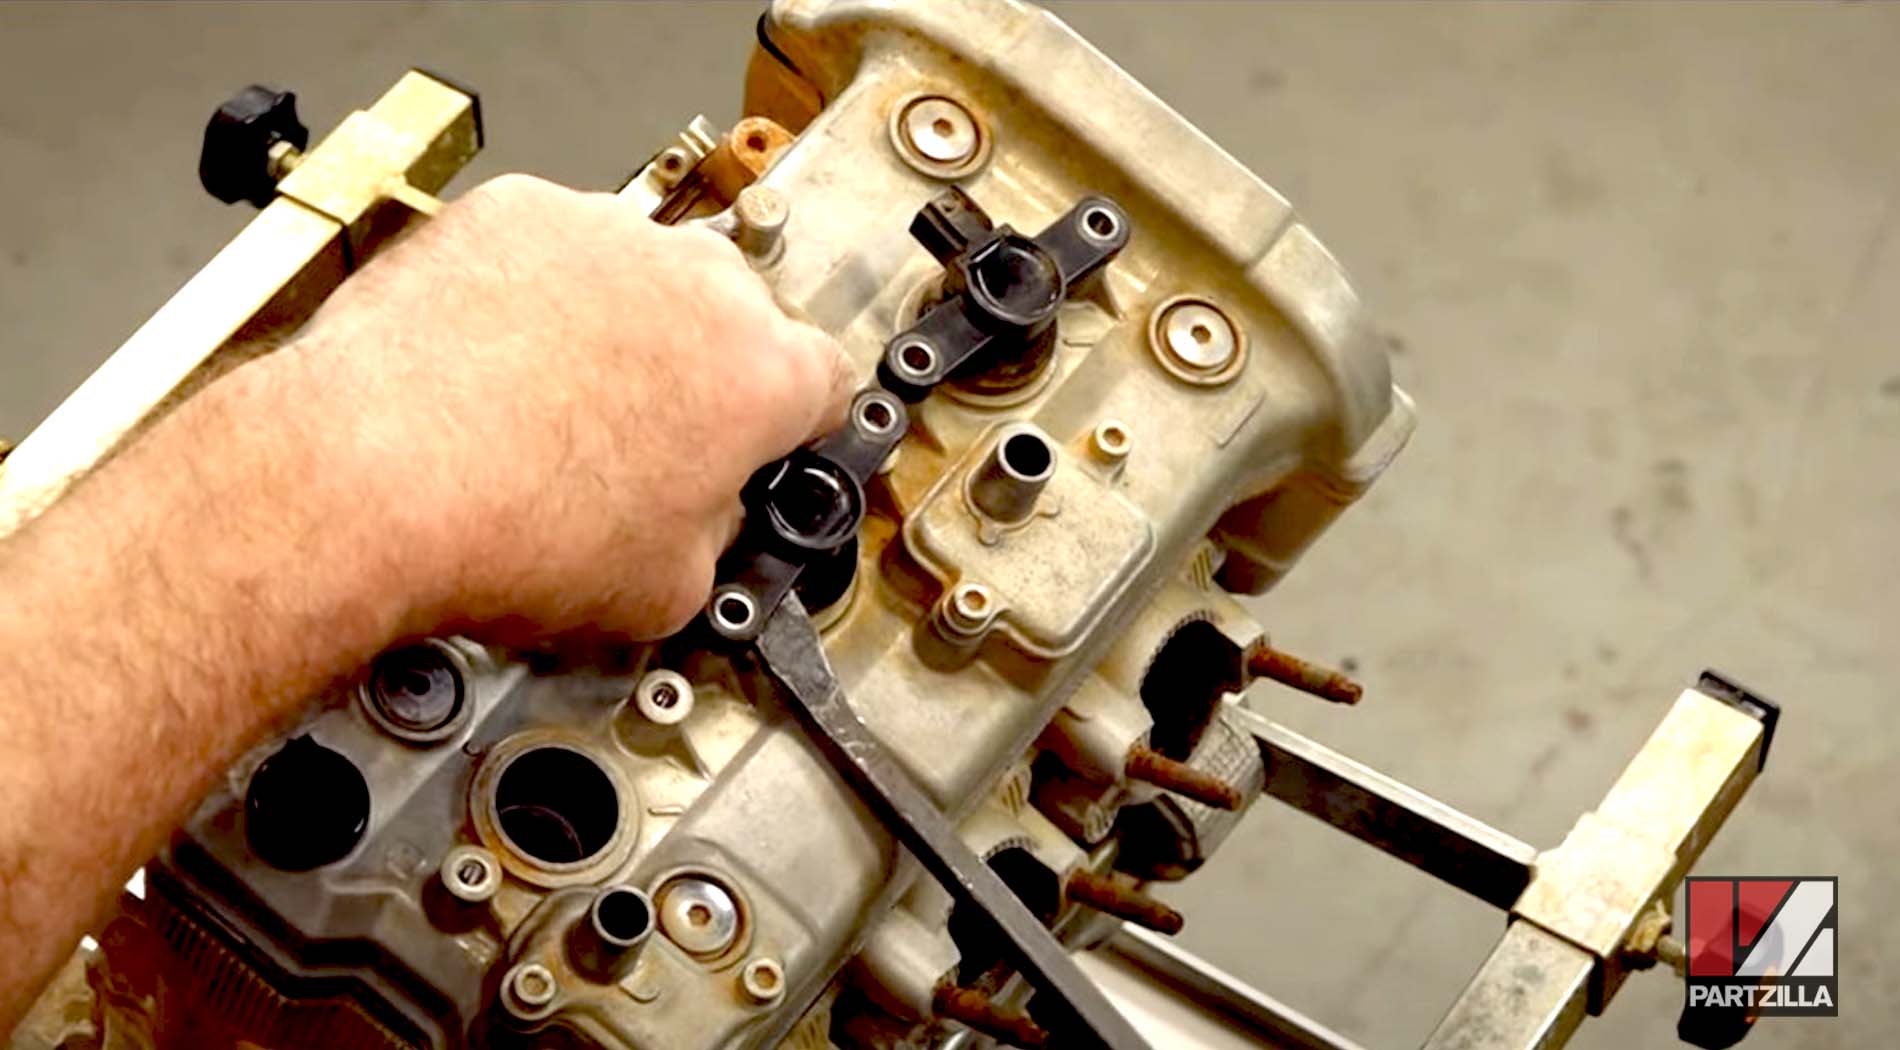
Step 9. Remove the center support bolt, followed by the head bolts in sequence.
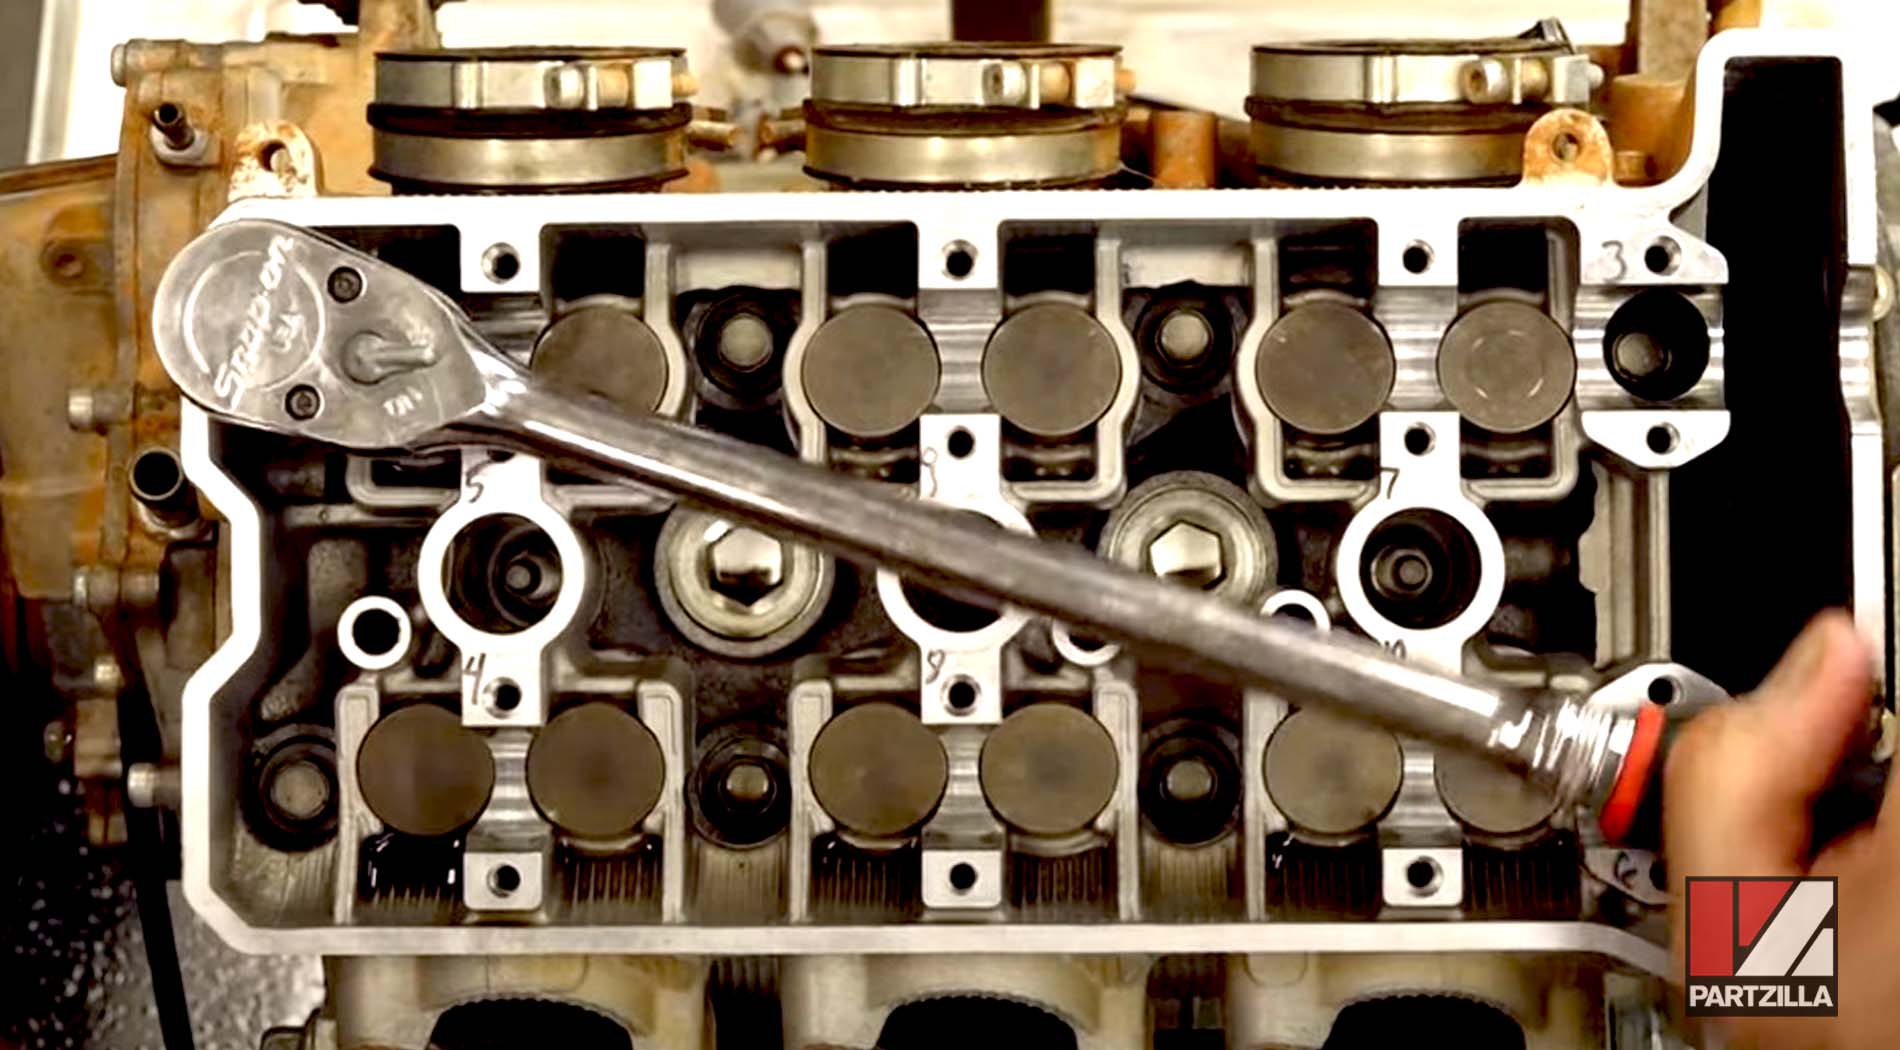
NOTE: The head bolts in the picture above are labeled 3 thru 10 since the first two bolts on the side had already been removed. For disassembling the head, each bolt was loosened in sequence order at about a half a turn per bolt to release pressure on the head evenly. Doing it this way reduces the chances of warping the head.
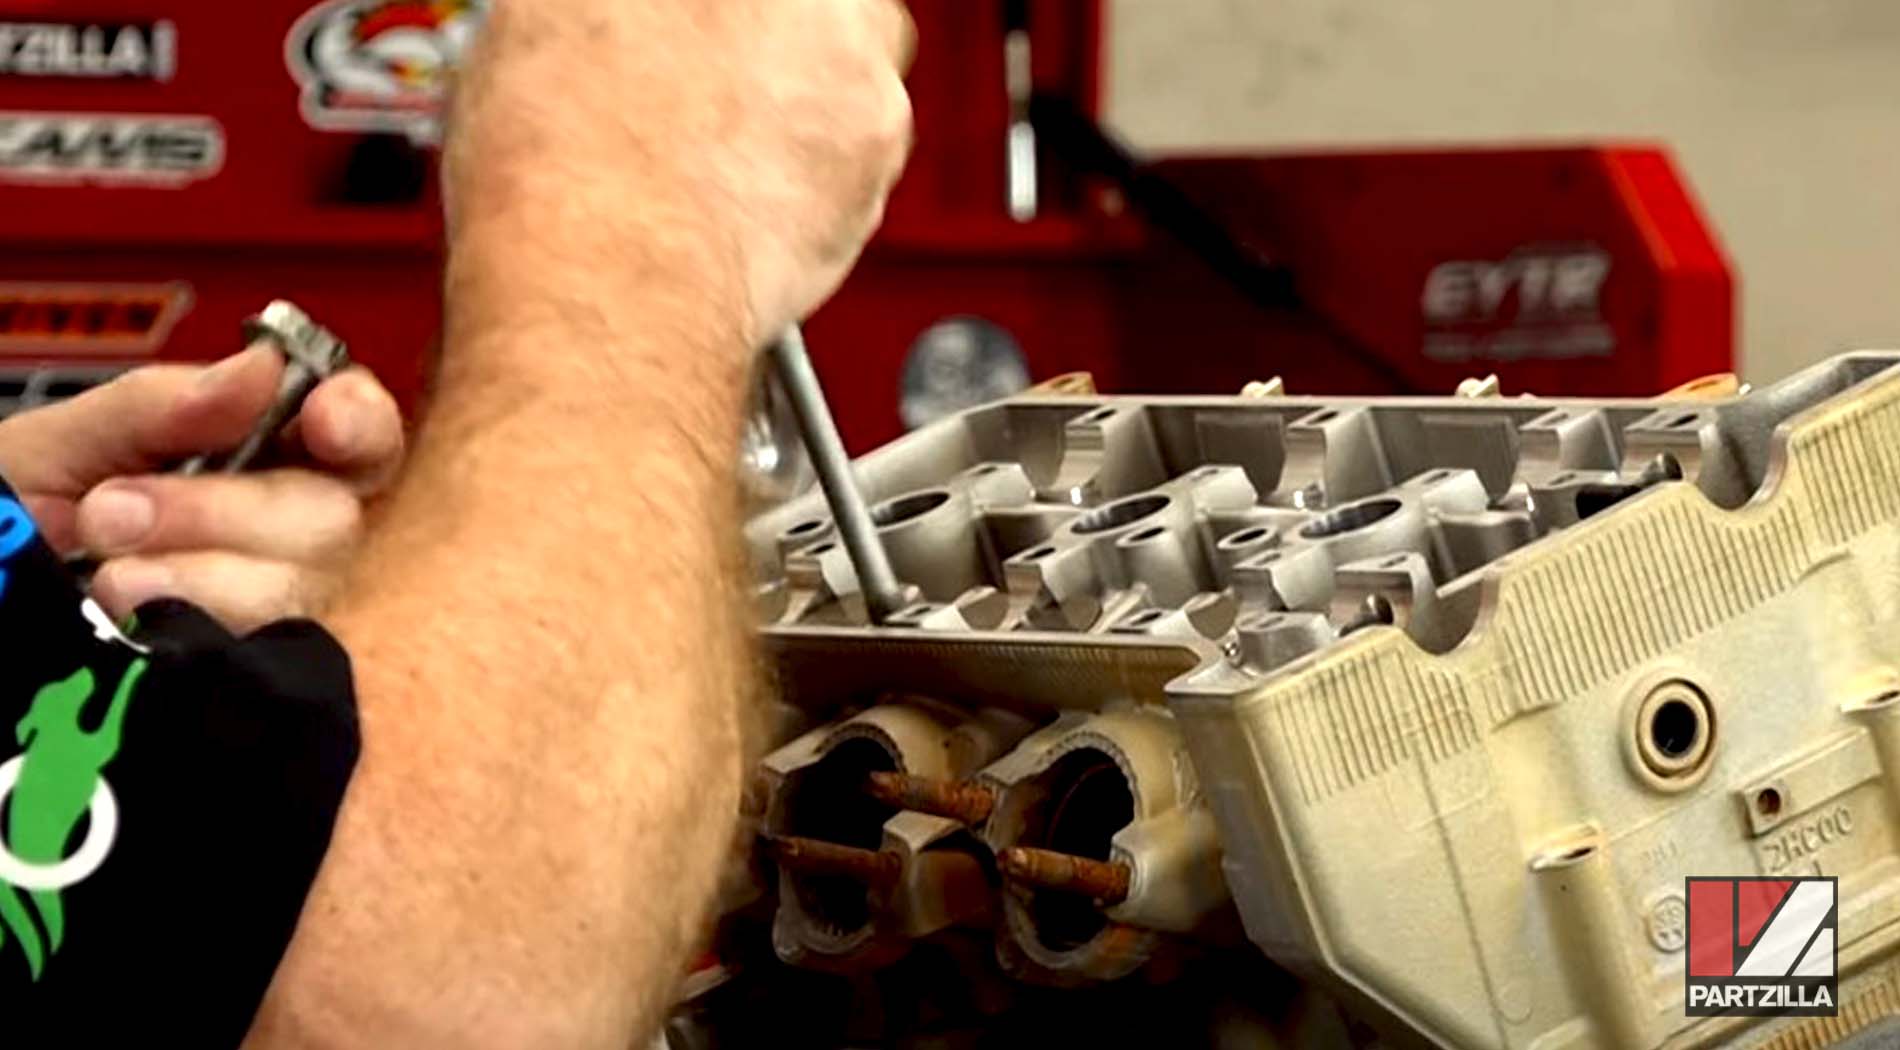
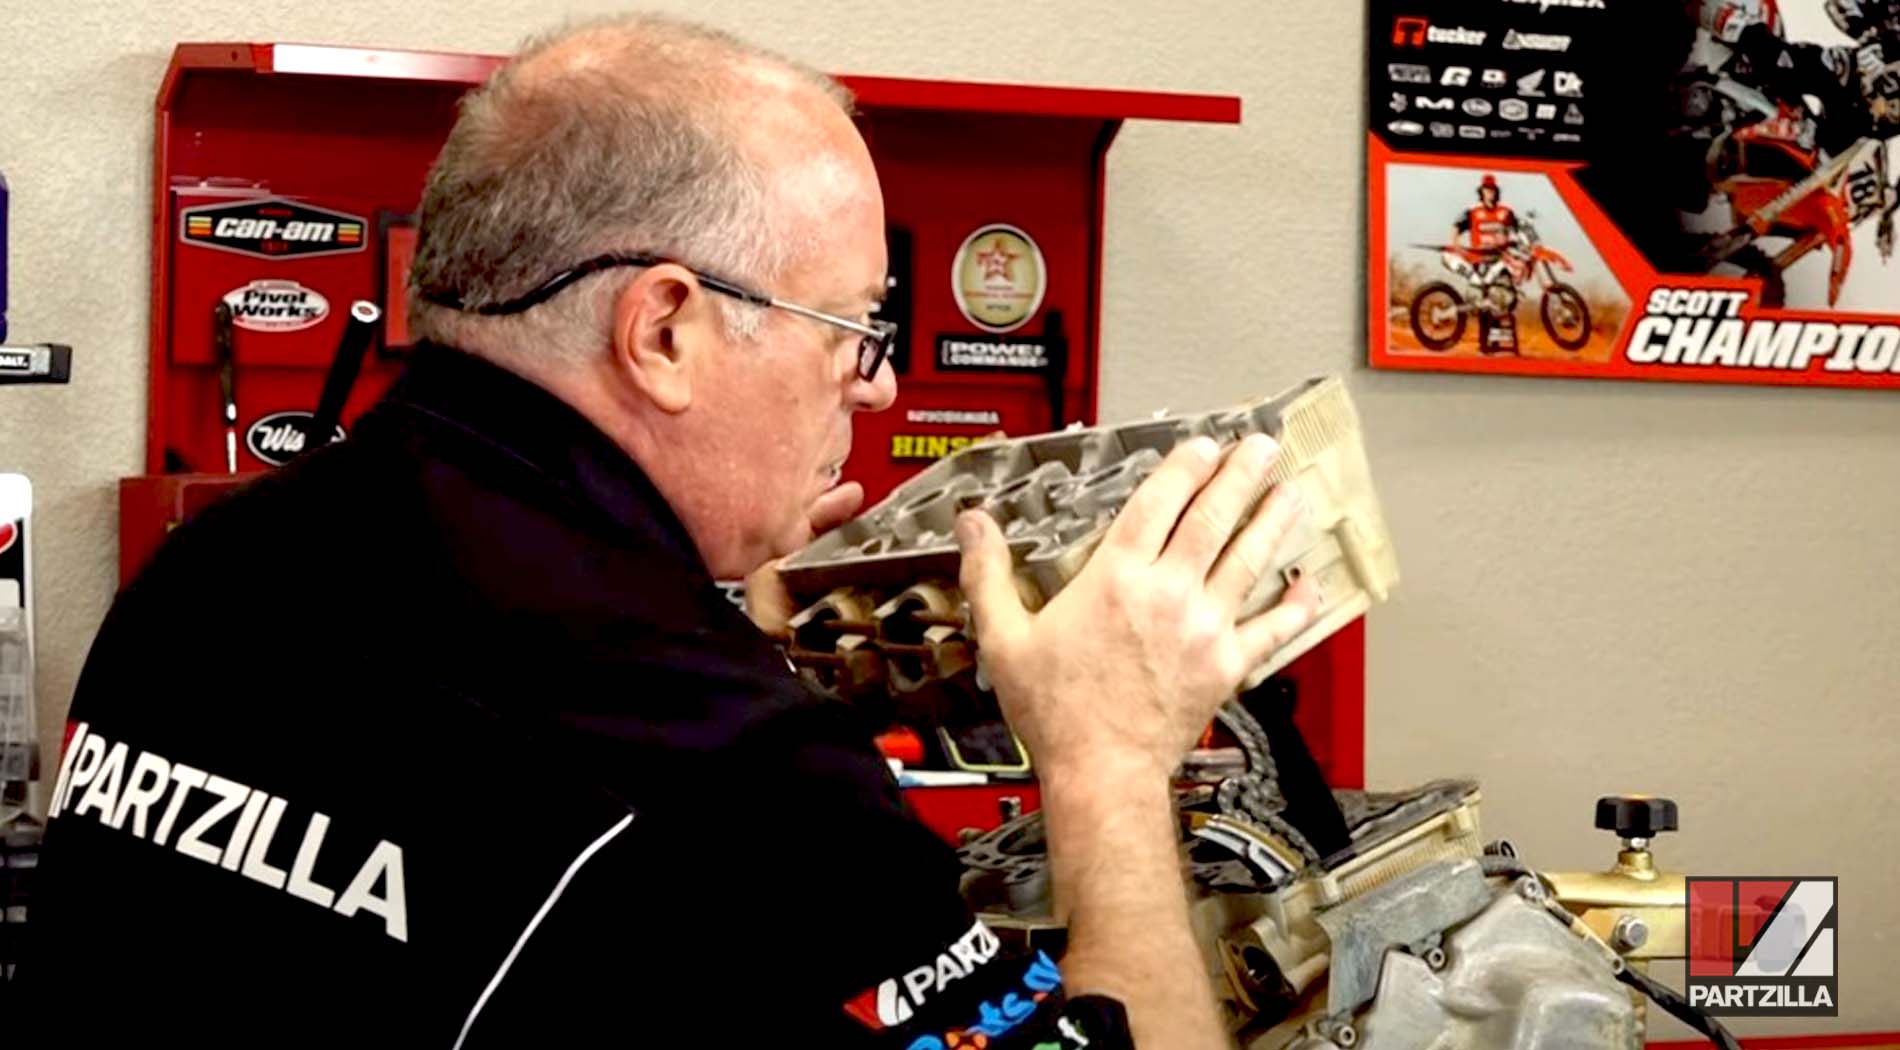
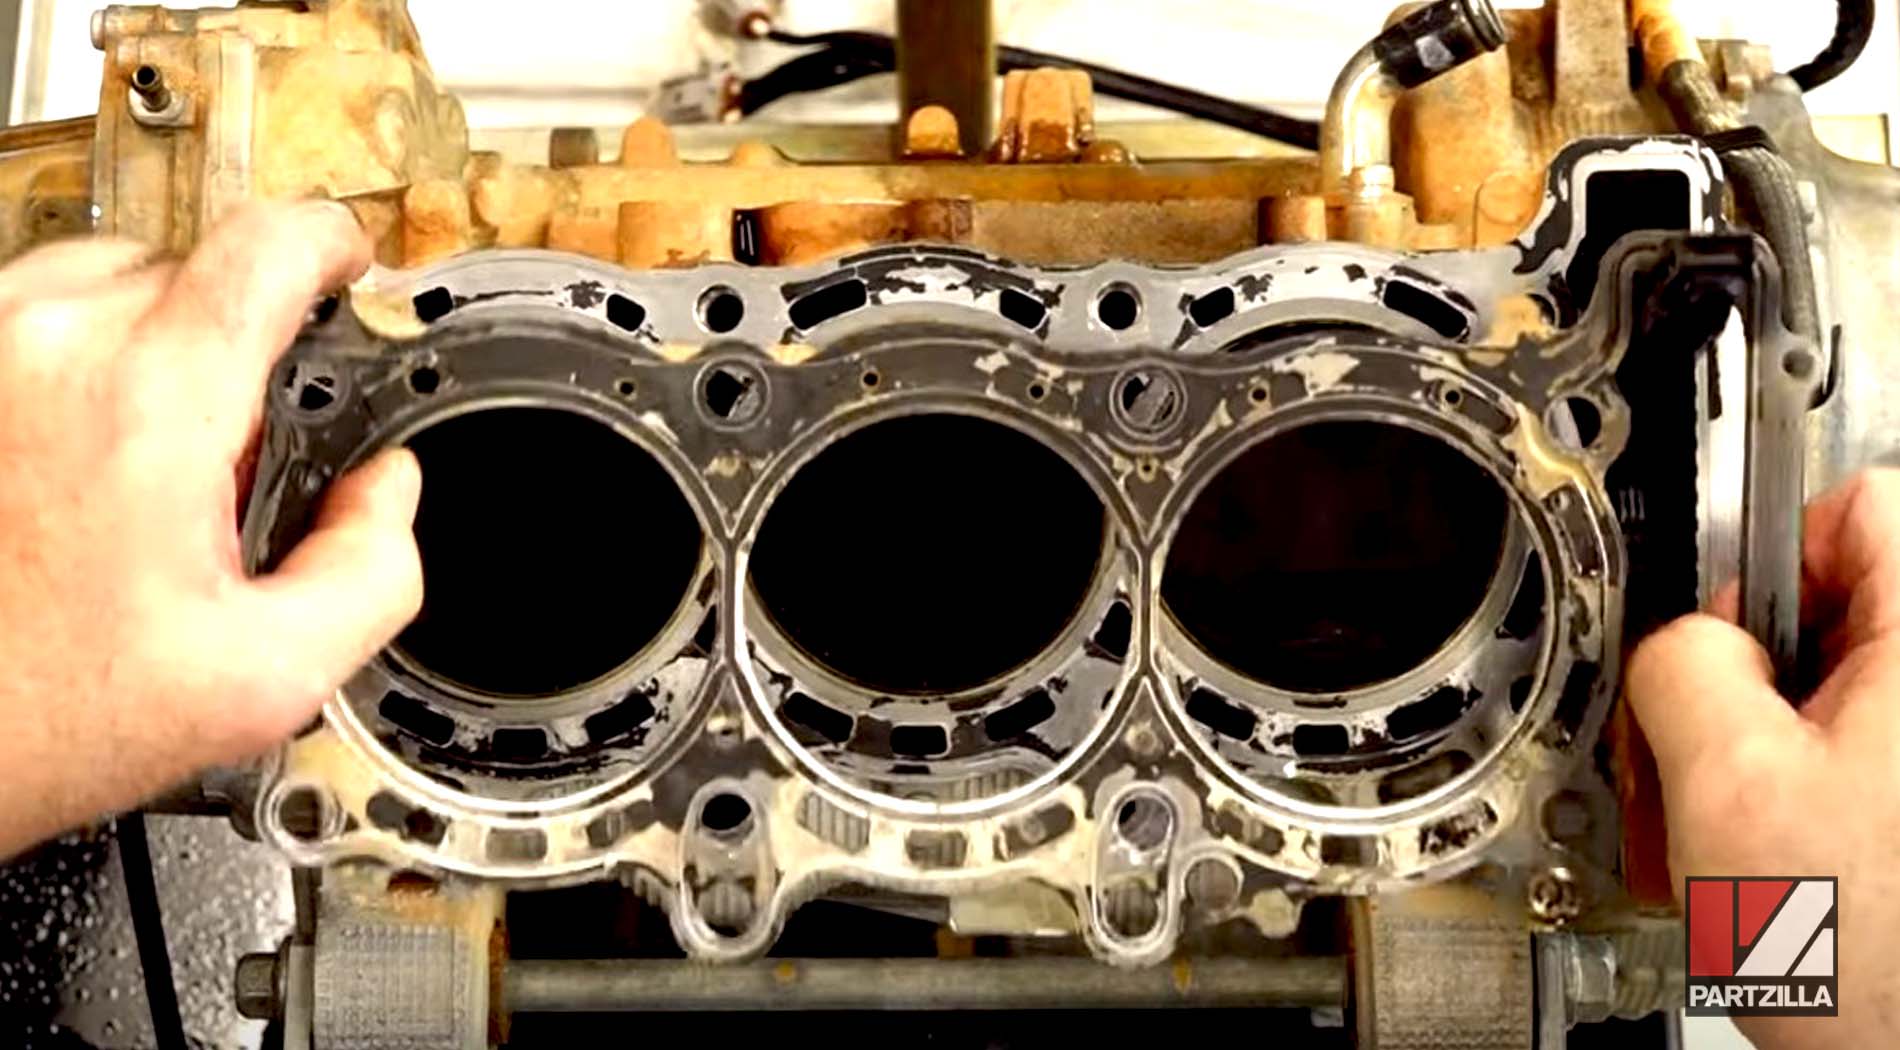
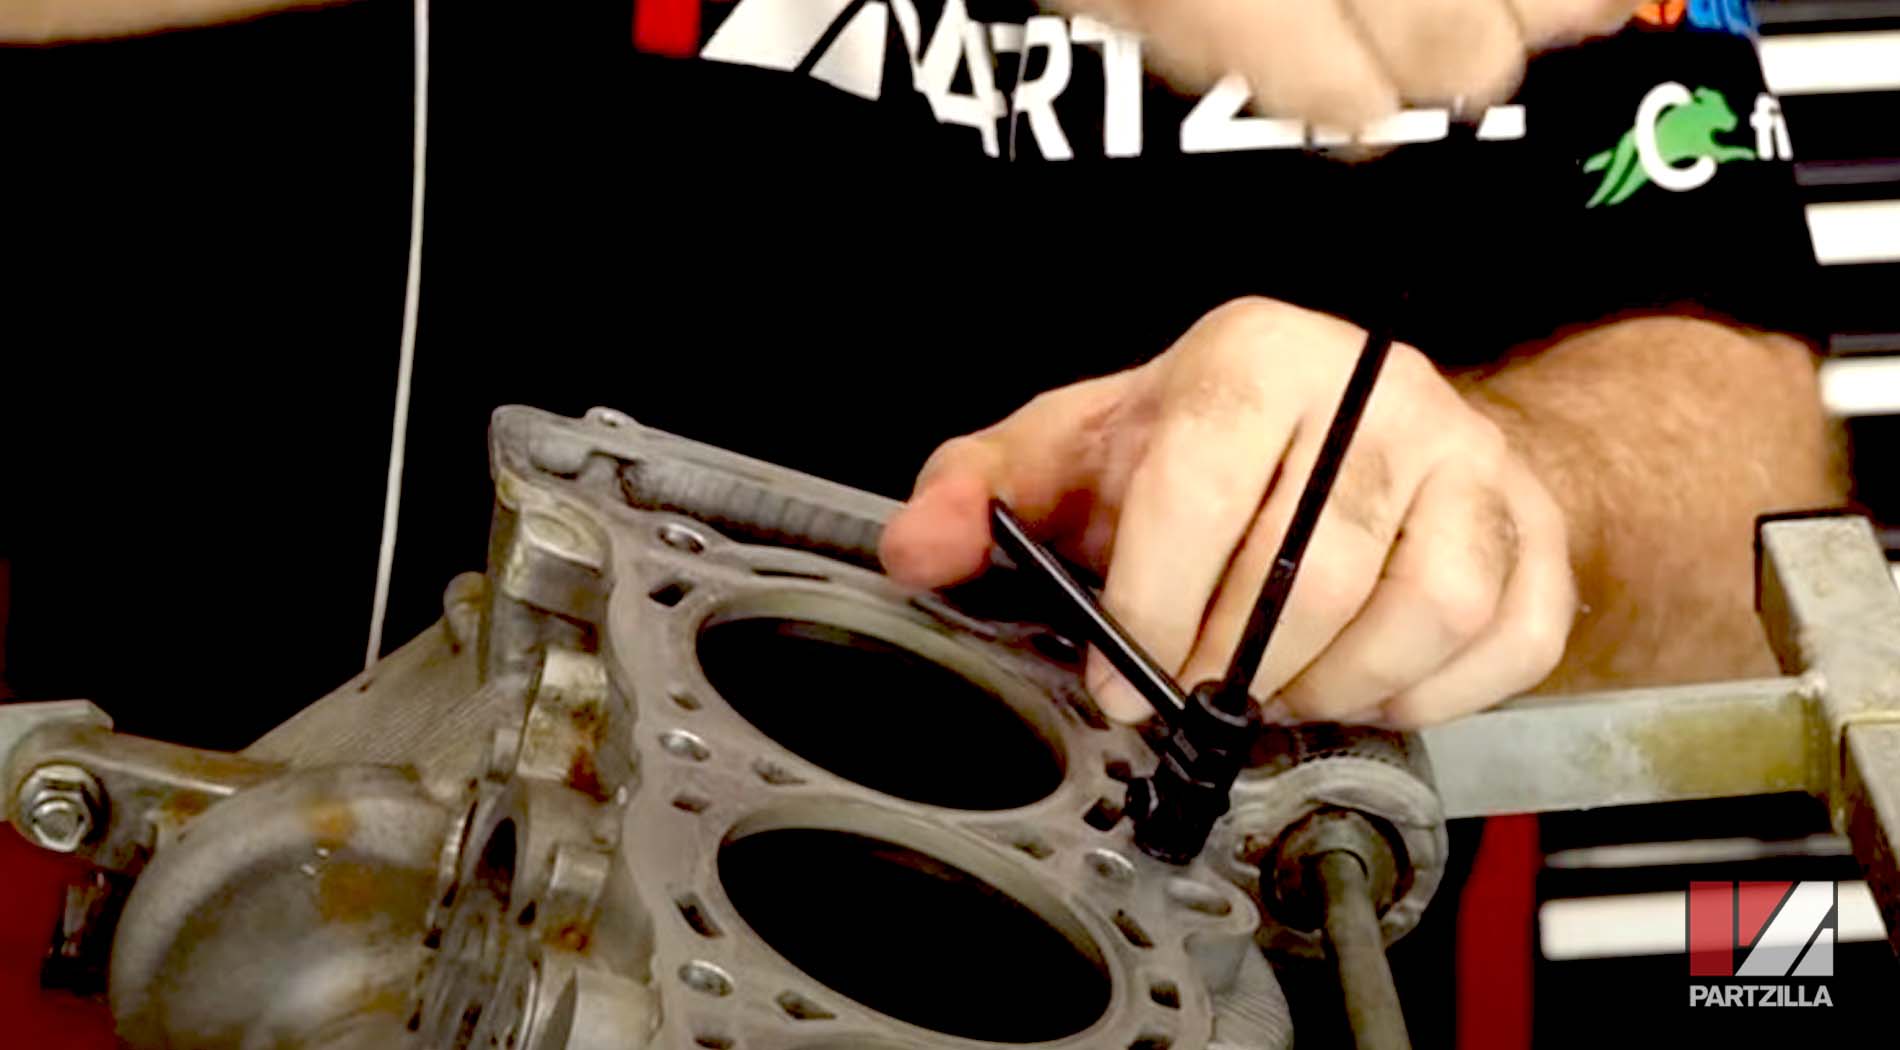
Step 10. Pry the head off the engine and lift it out carefully because if you tip it over, the shims are going to fall out. Next, remove the cylinder head gasket.
Watch the clip below to see the head removal segment of our Yamaha YXZ1000R engine teardown video.
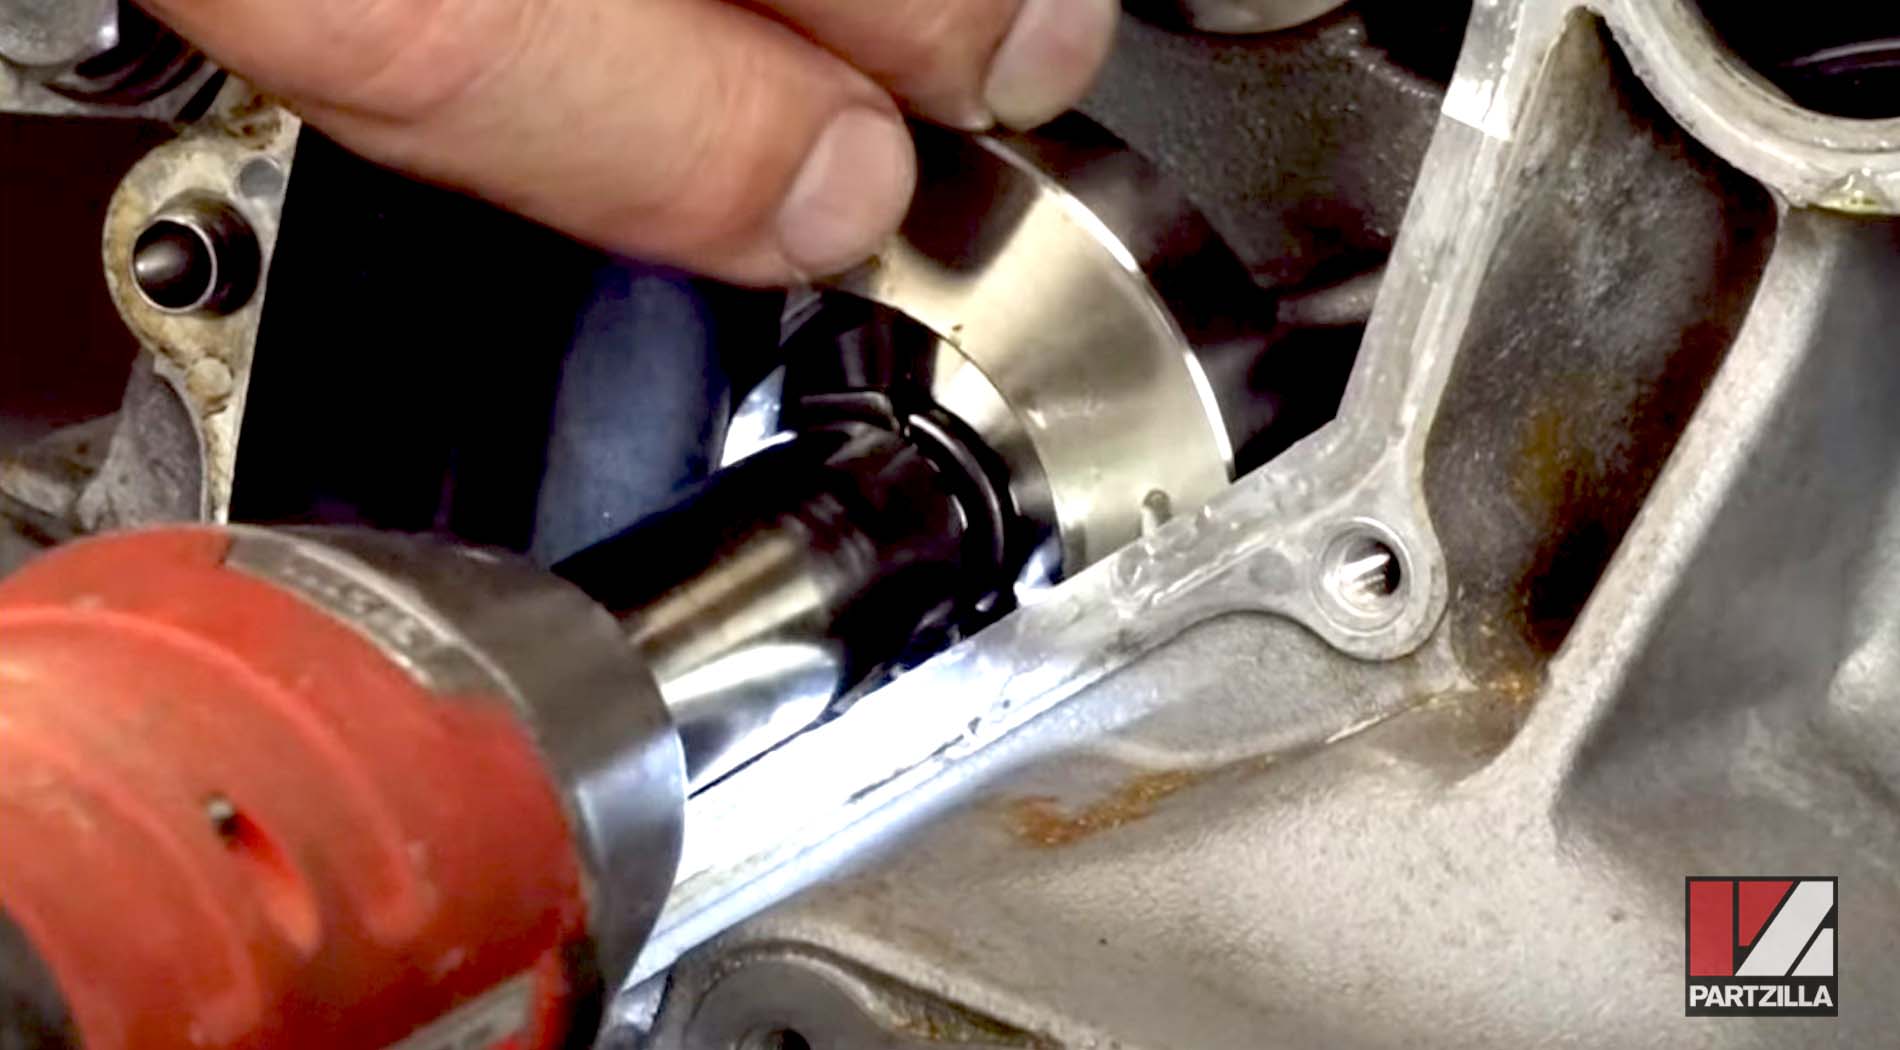
Yamaha YXZ1000R Engine Teardown - Remove the Rotor, Flywheel and Output Shaft
Step 11. Remove the bolts from the crankcase cover, which has the stator under it, followed by the crankcase cover itself.
NOTE: The cover bolts are all the same except for the one that was holding the pipe in. The top two bolts have washers on them, and the cover has arrows indicating which bolts have washers. Be careful when removing the cover, as there’s a magnet from the rotor trying to keep it in there, so don't let it pinch your fingers.
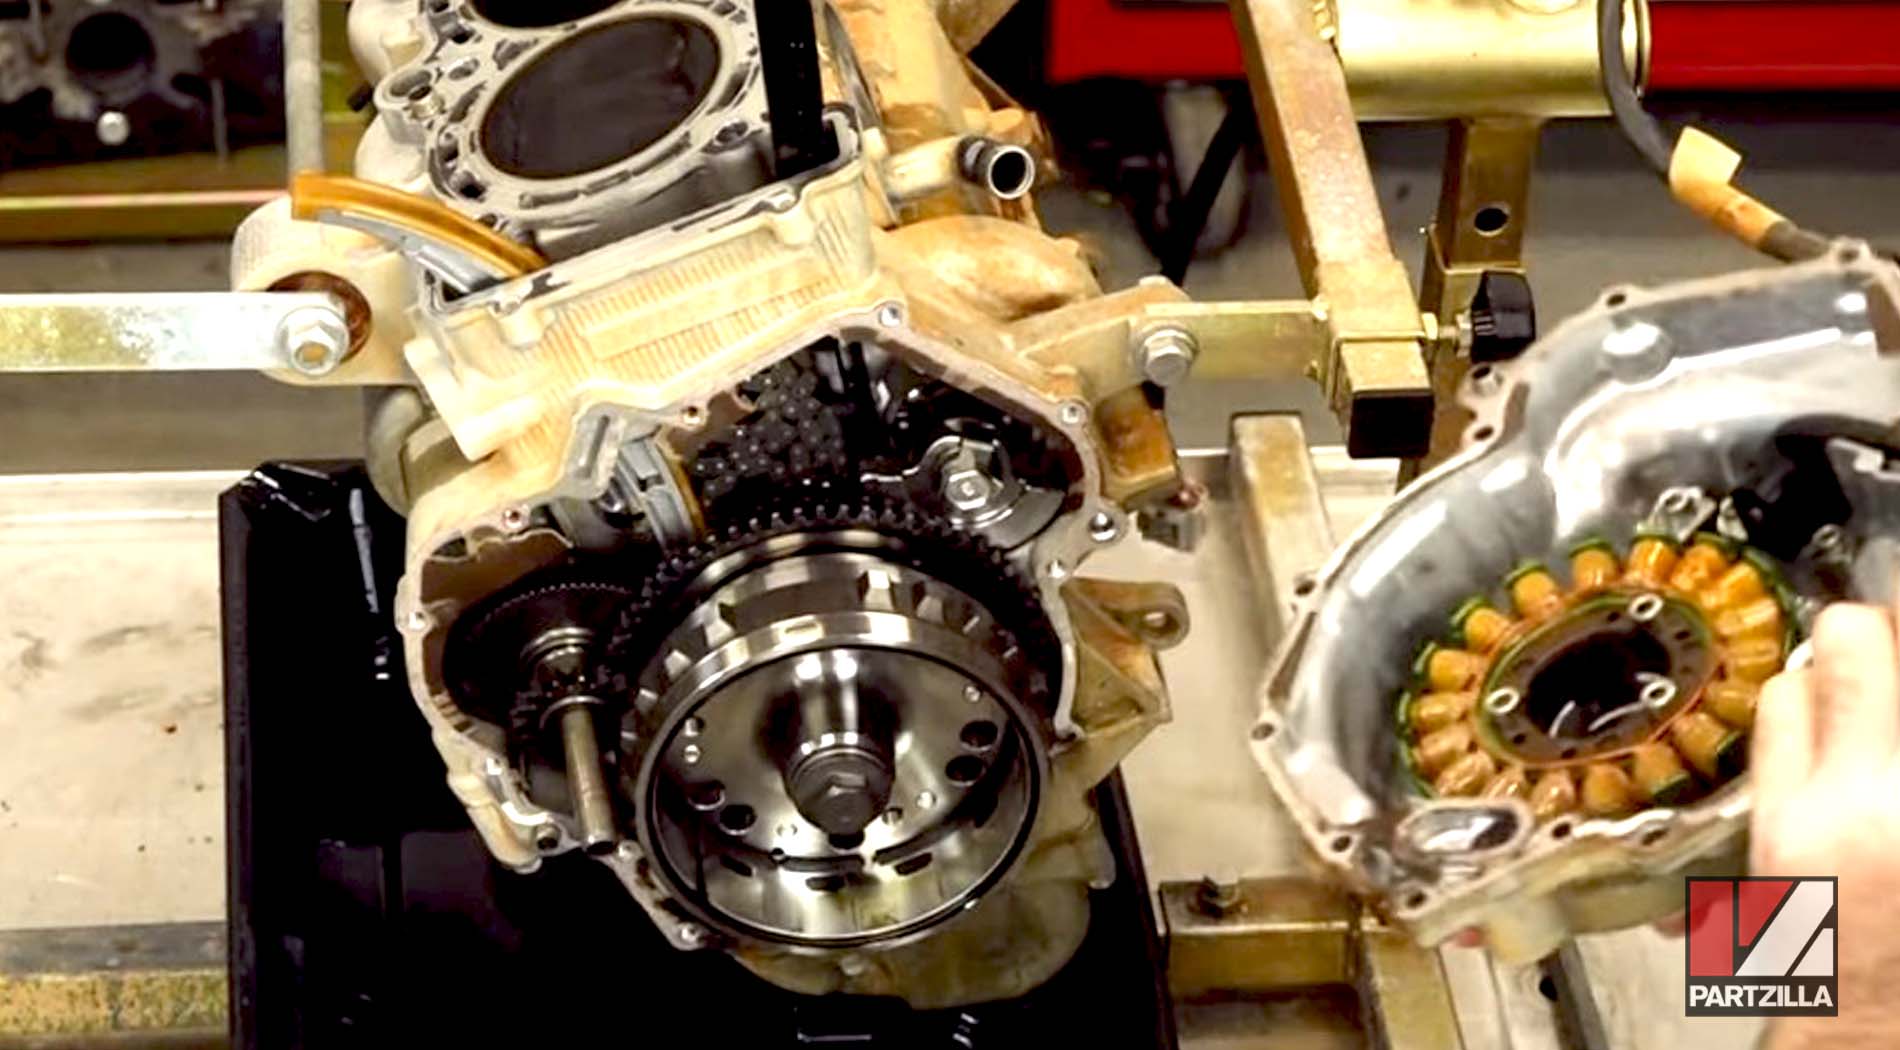
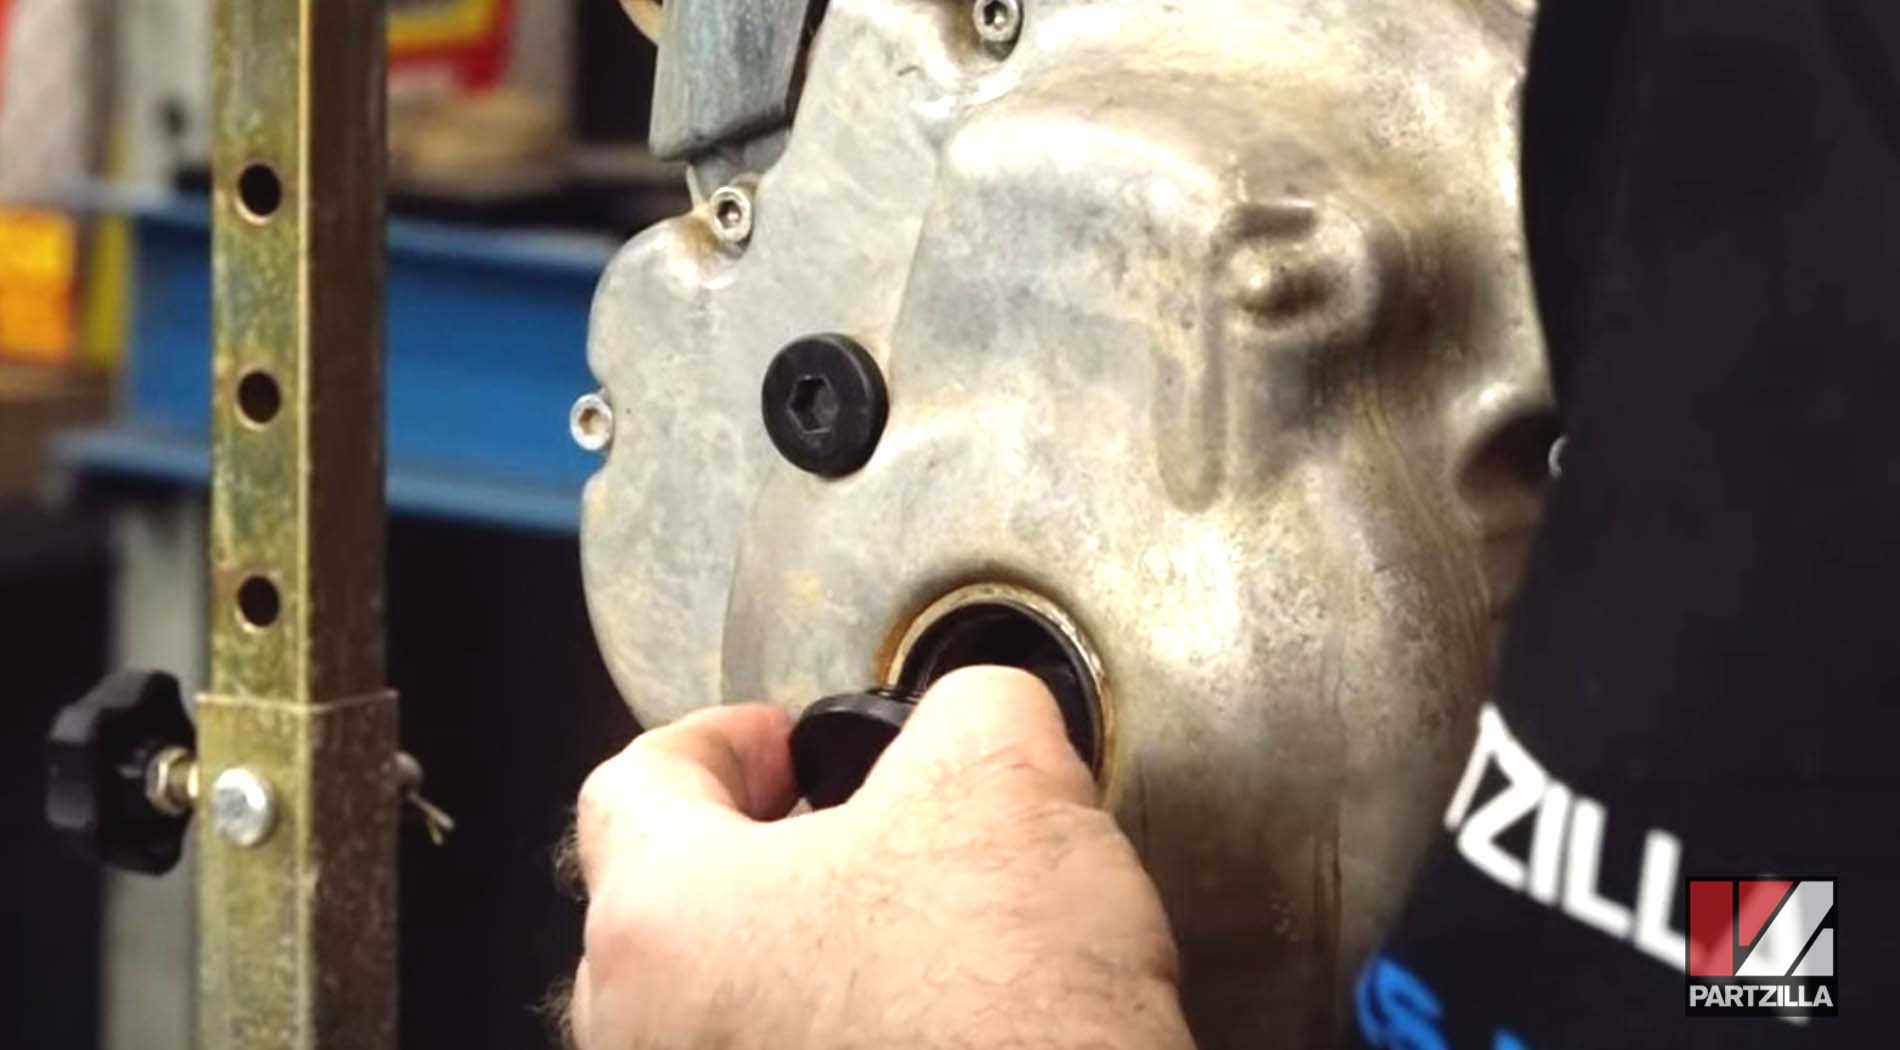
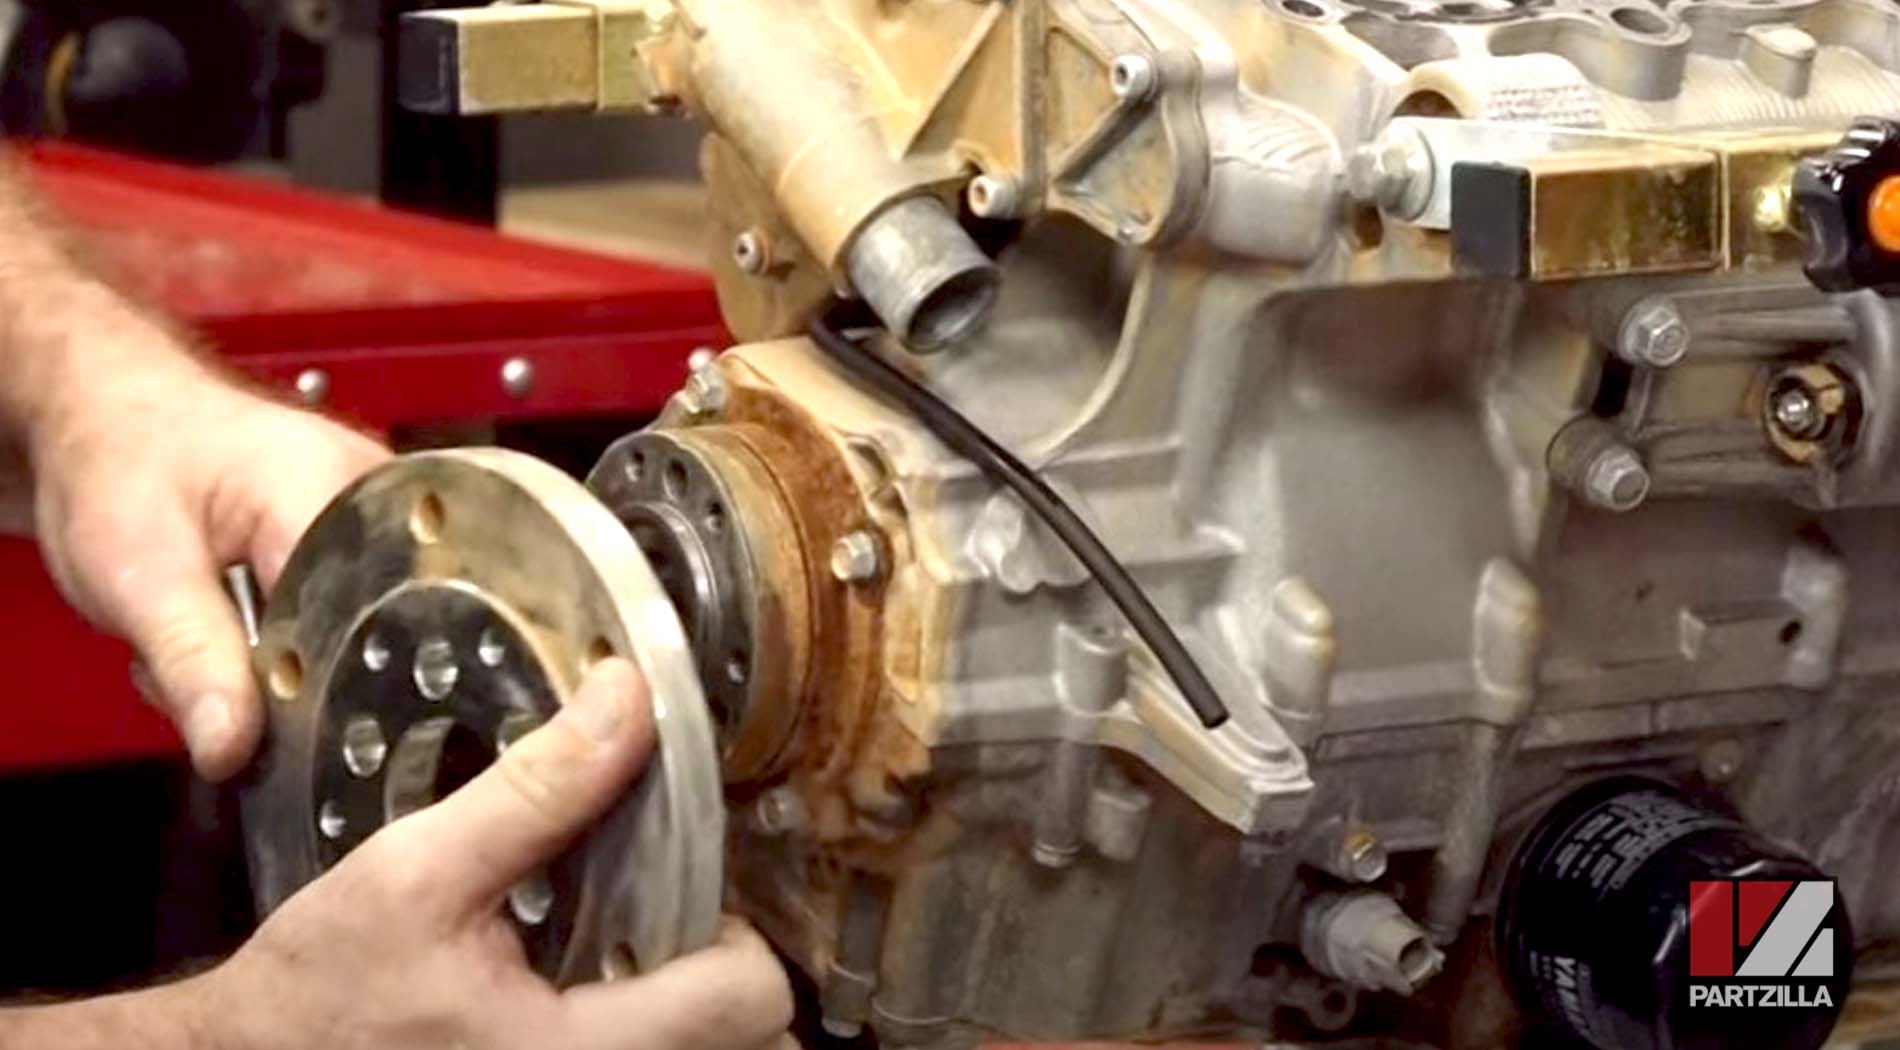
Step 12. Remove the starter reduction gear, followed by the rotor.

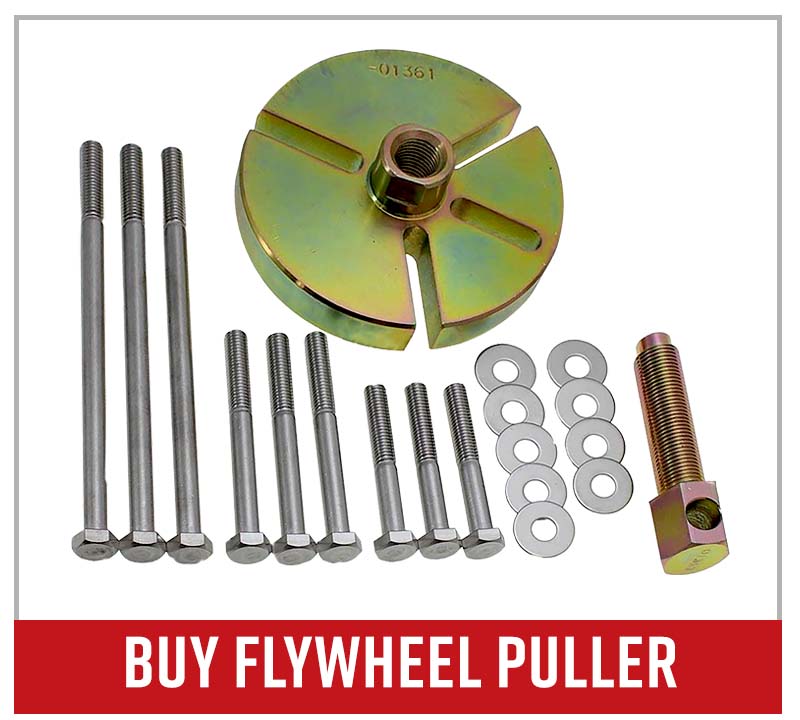
PRO TIP: Use a basic flywheel puller if you don’t have the one made by Yamaha, which is pricey. Make sure that whatever puller you use doesn’t damage the end of the crankshaft.
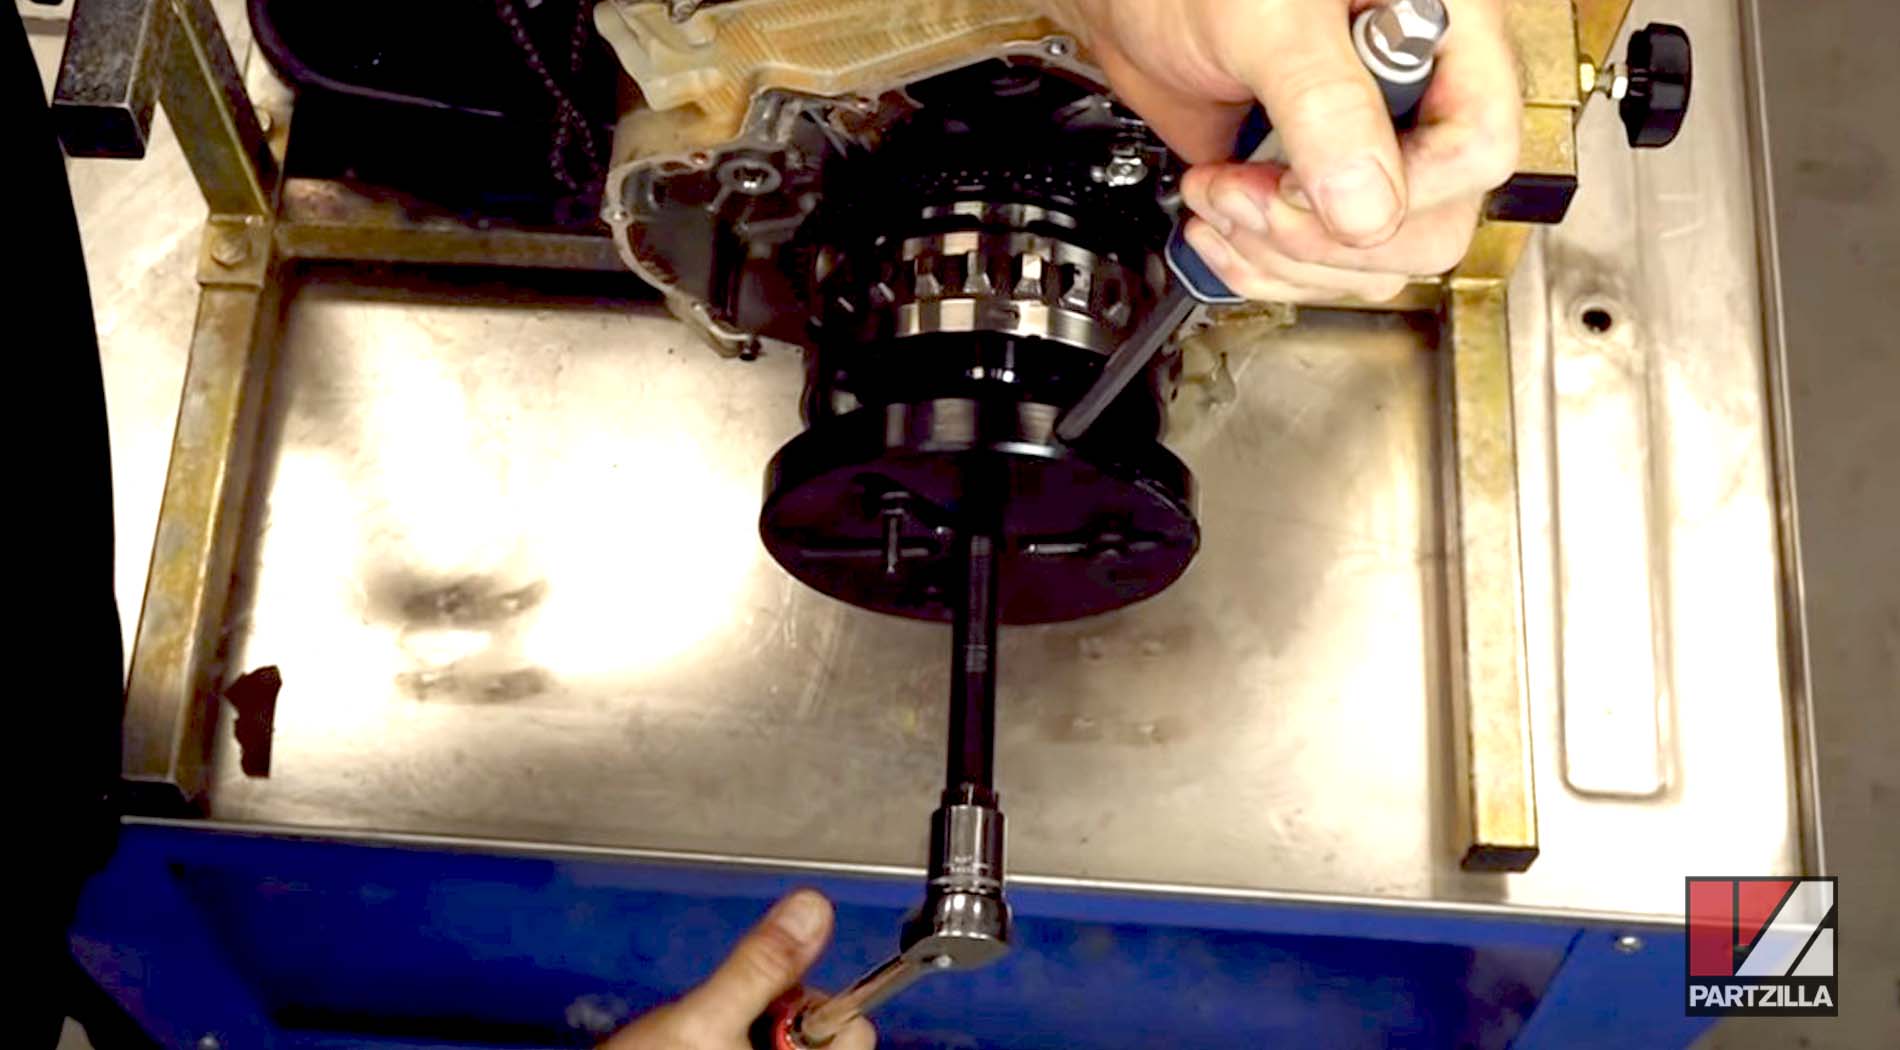
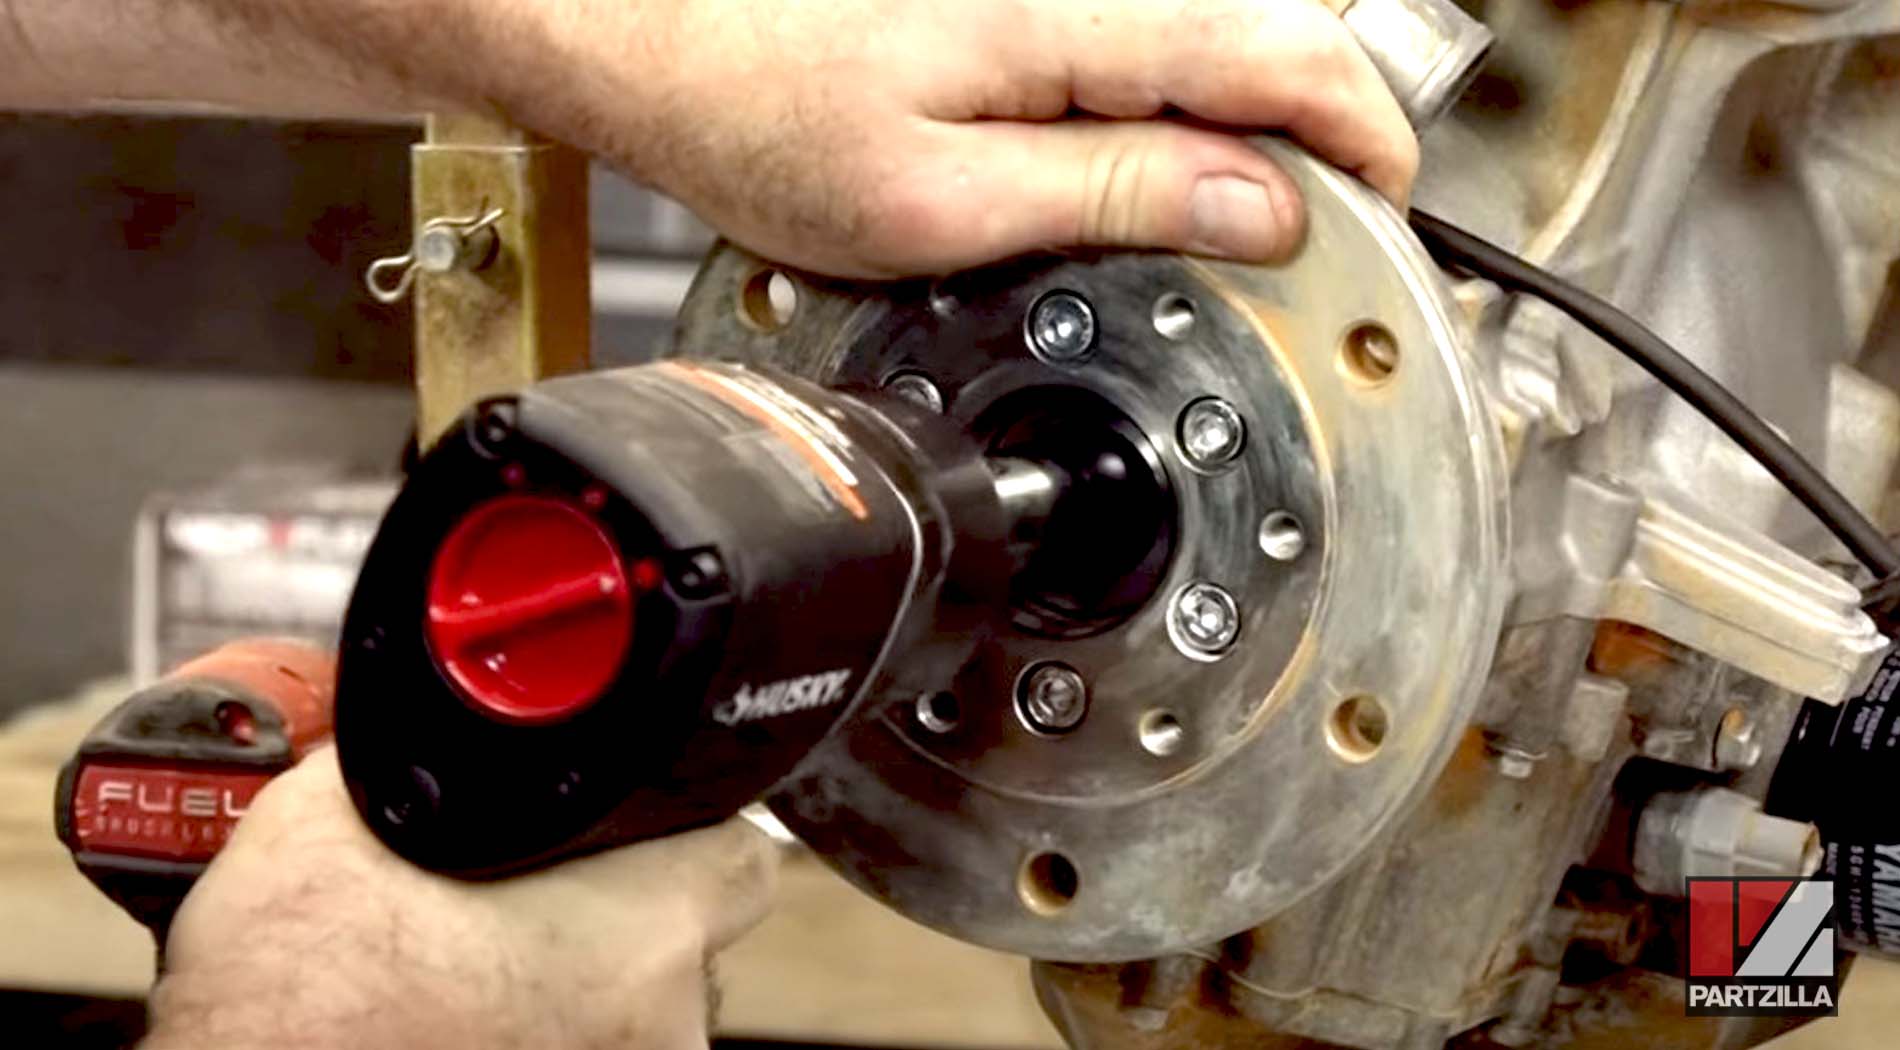
Step 13. Spin the engine around and remove the output shaft retaining bolts, followed by the output shaft itself.
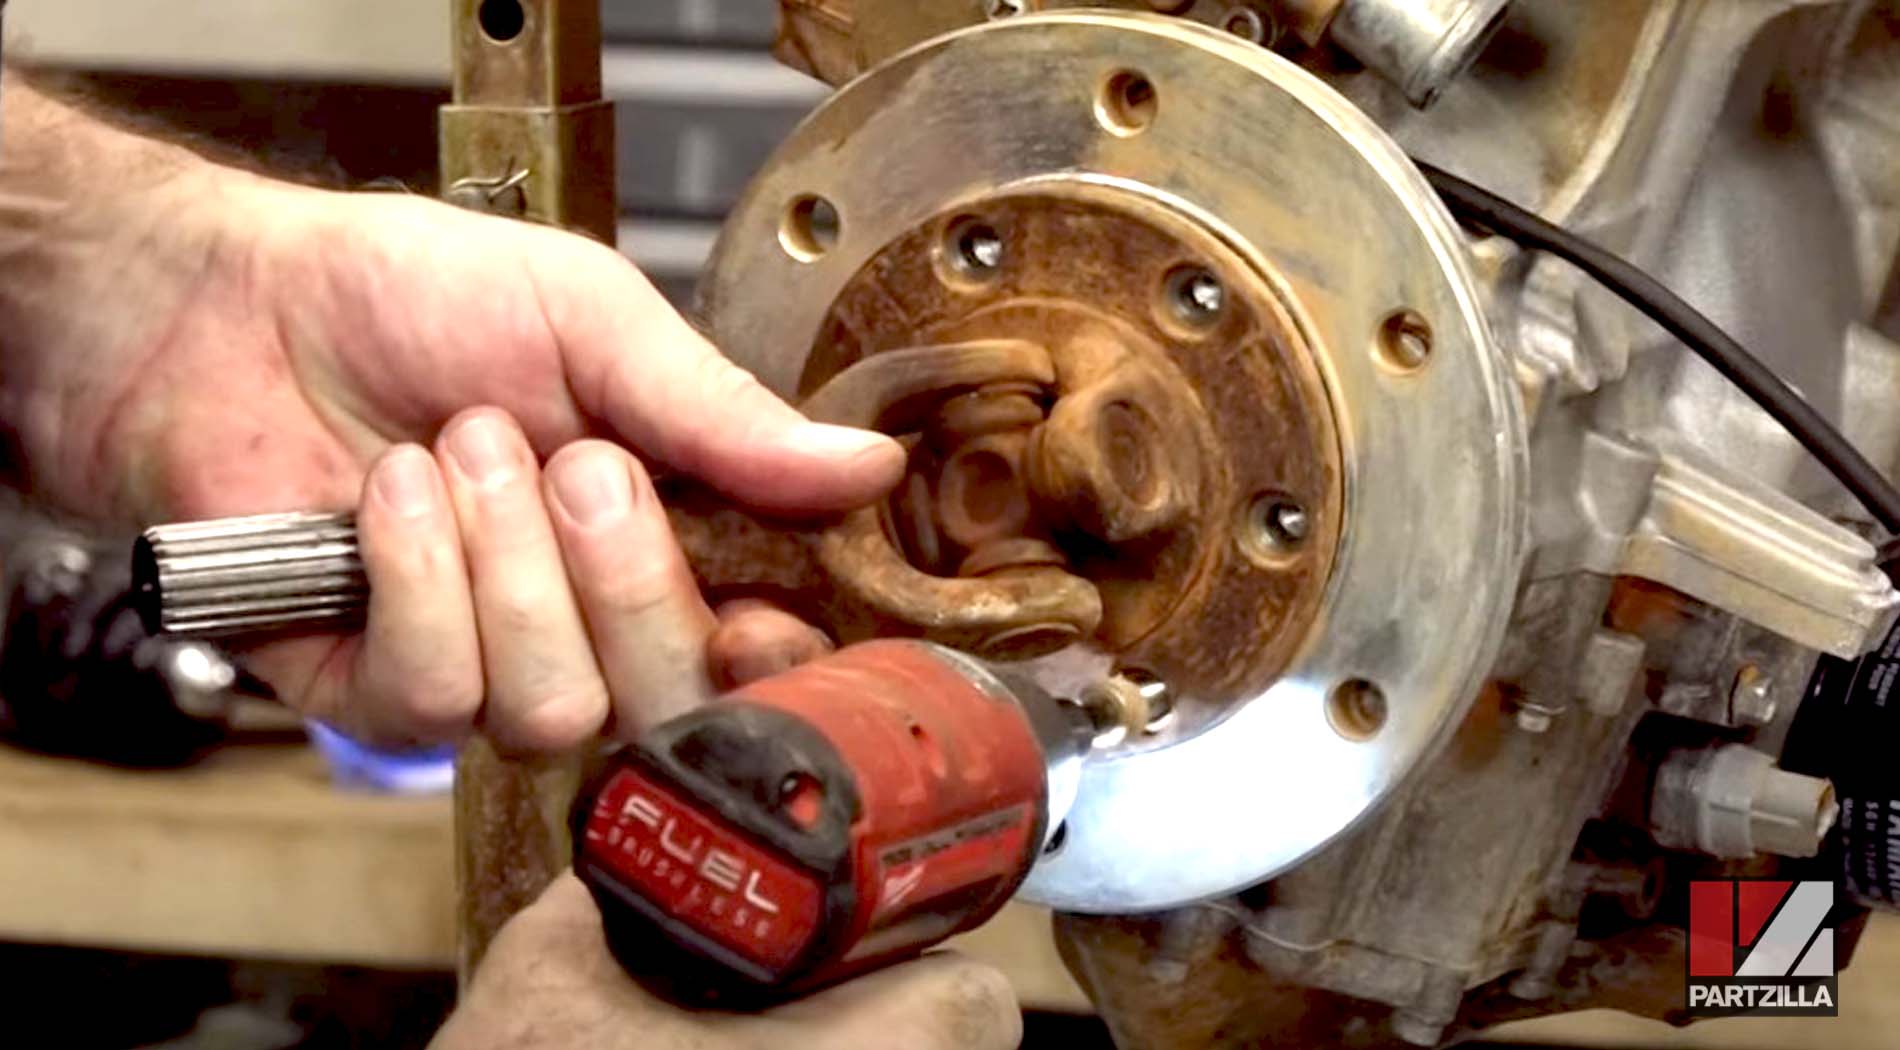
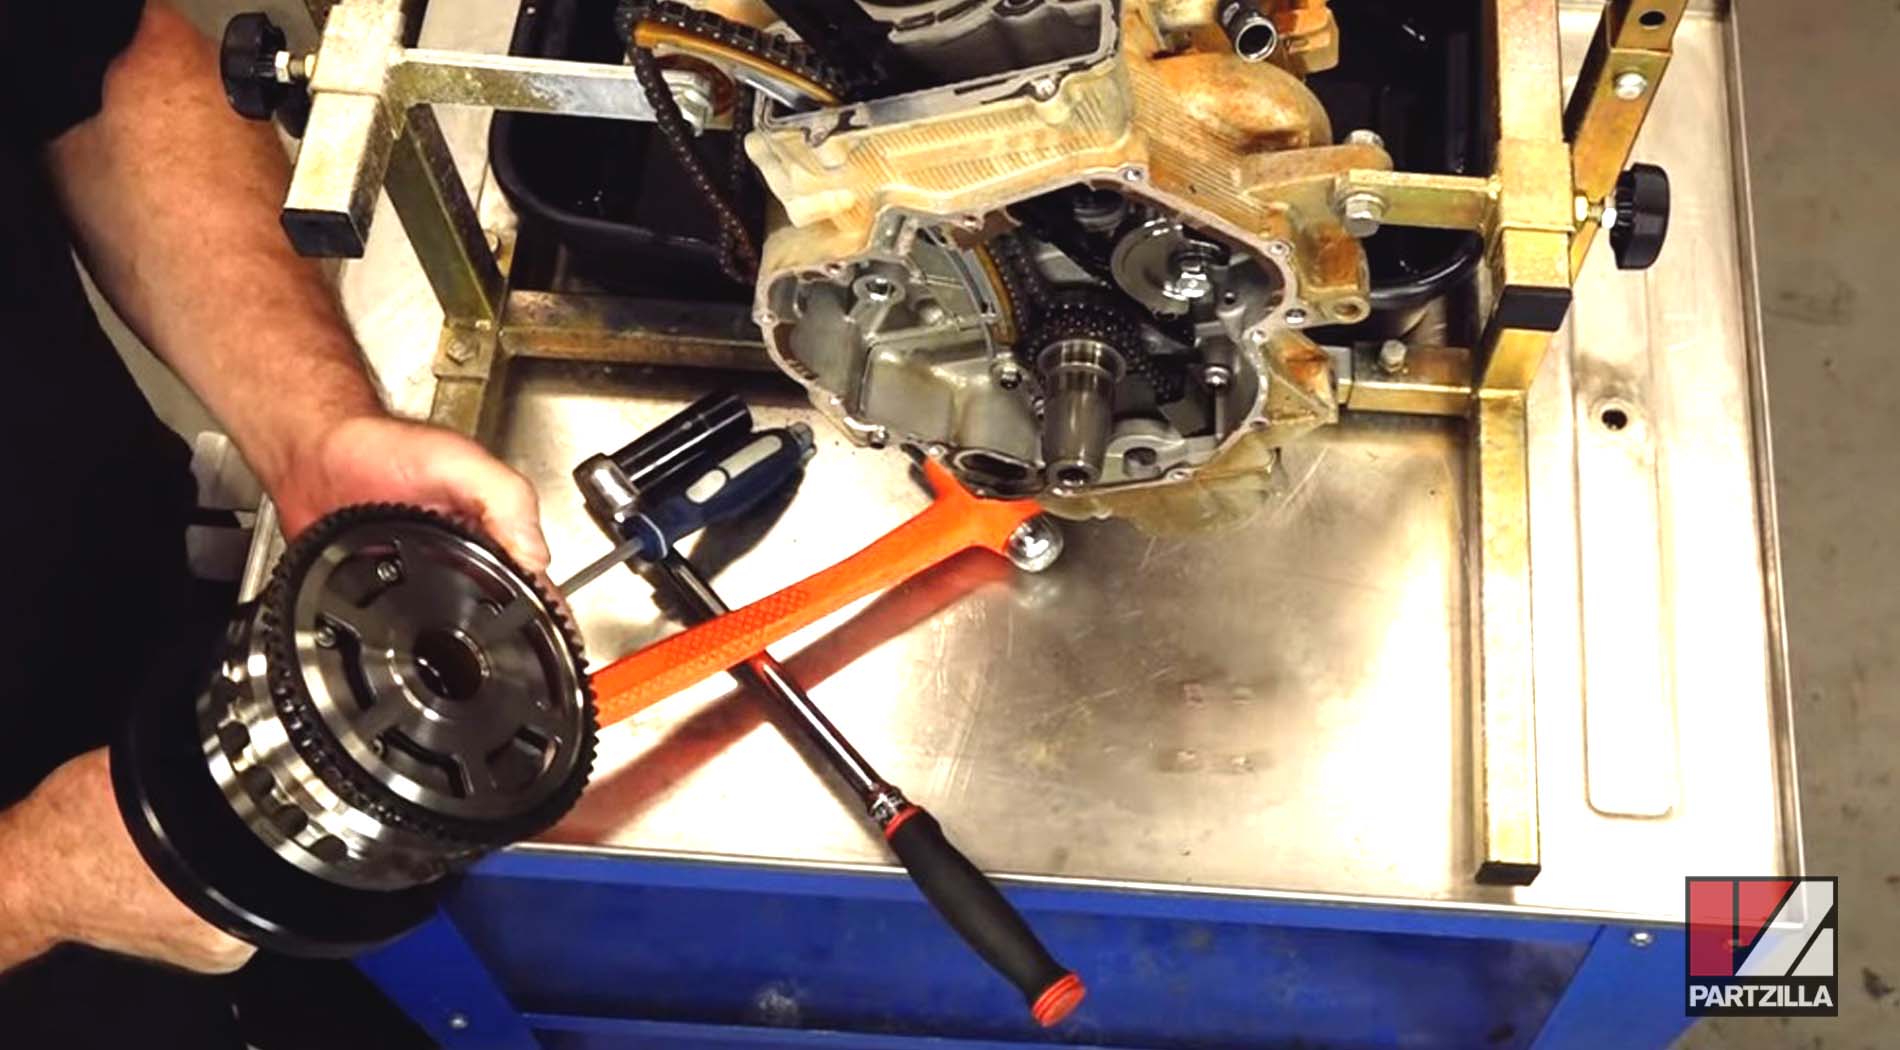
Step 14. Remove the flywheel bolts, followed by the flywheel itself.
Step 15. Remove the timing chain guides, then turn the engine upside down and remove the starter motor.

Watch the clip below to see the rotor, flywheel and output shaft removal segments of our Yamaha YXZ1000R engine teardown video.
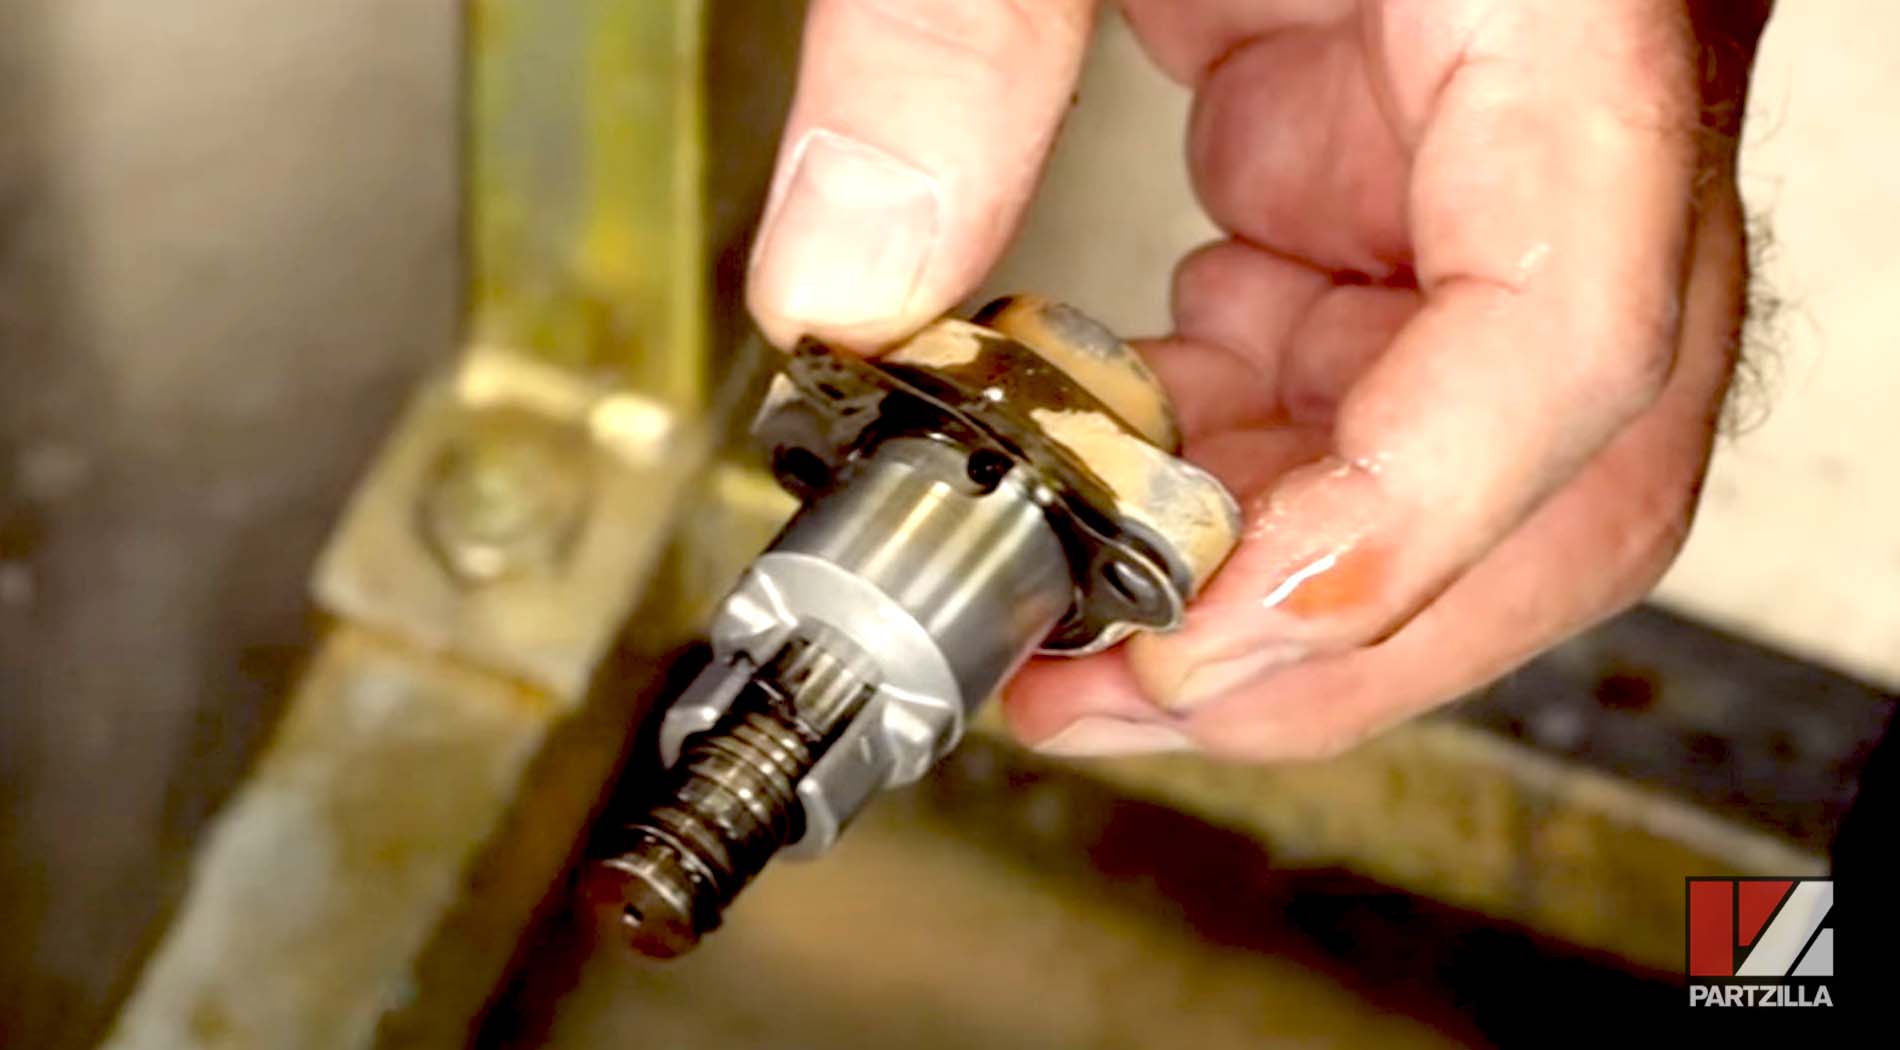
Yamaha YXZ1000R Engine Teardown - Remove the Oil Pump
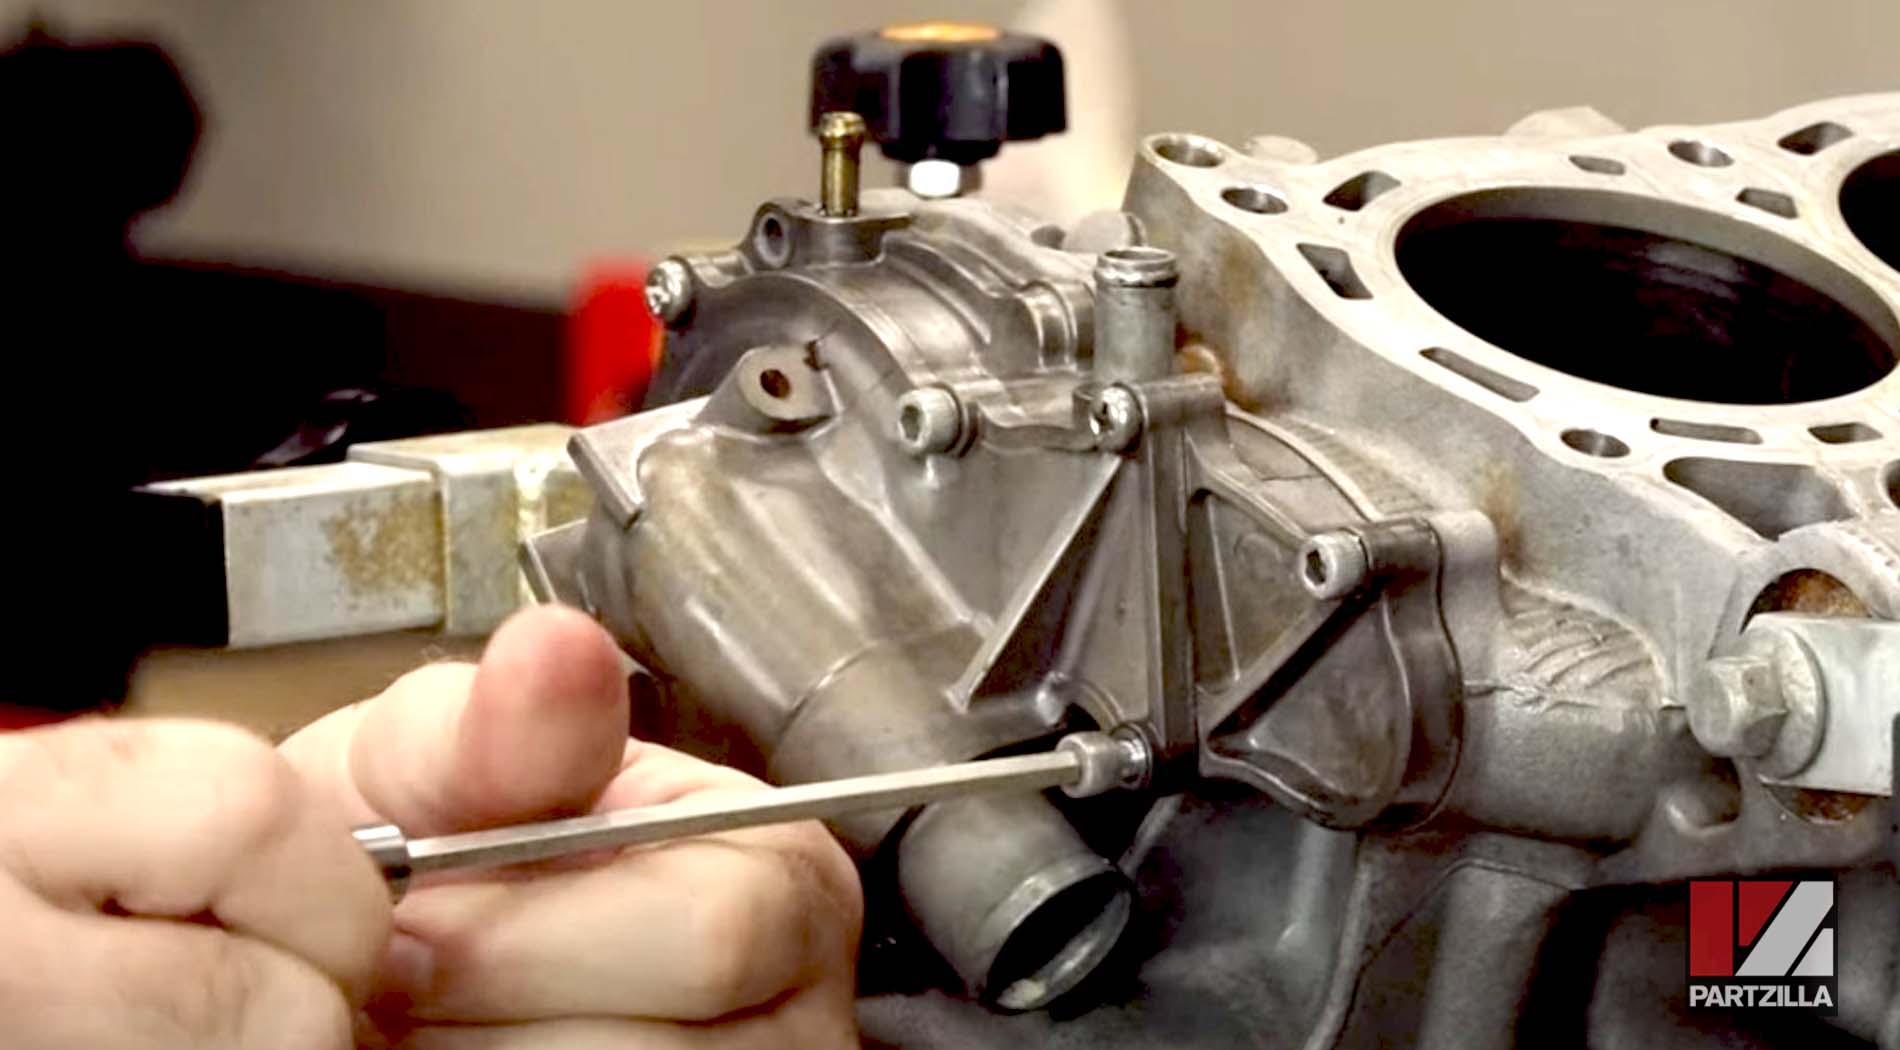
Step 16. Remove the 5mm Allens from the oil pump cover, then carefully pry the cover off.
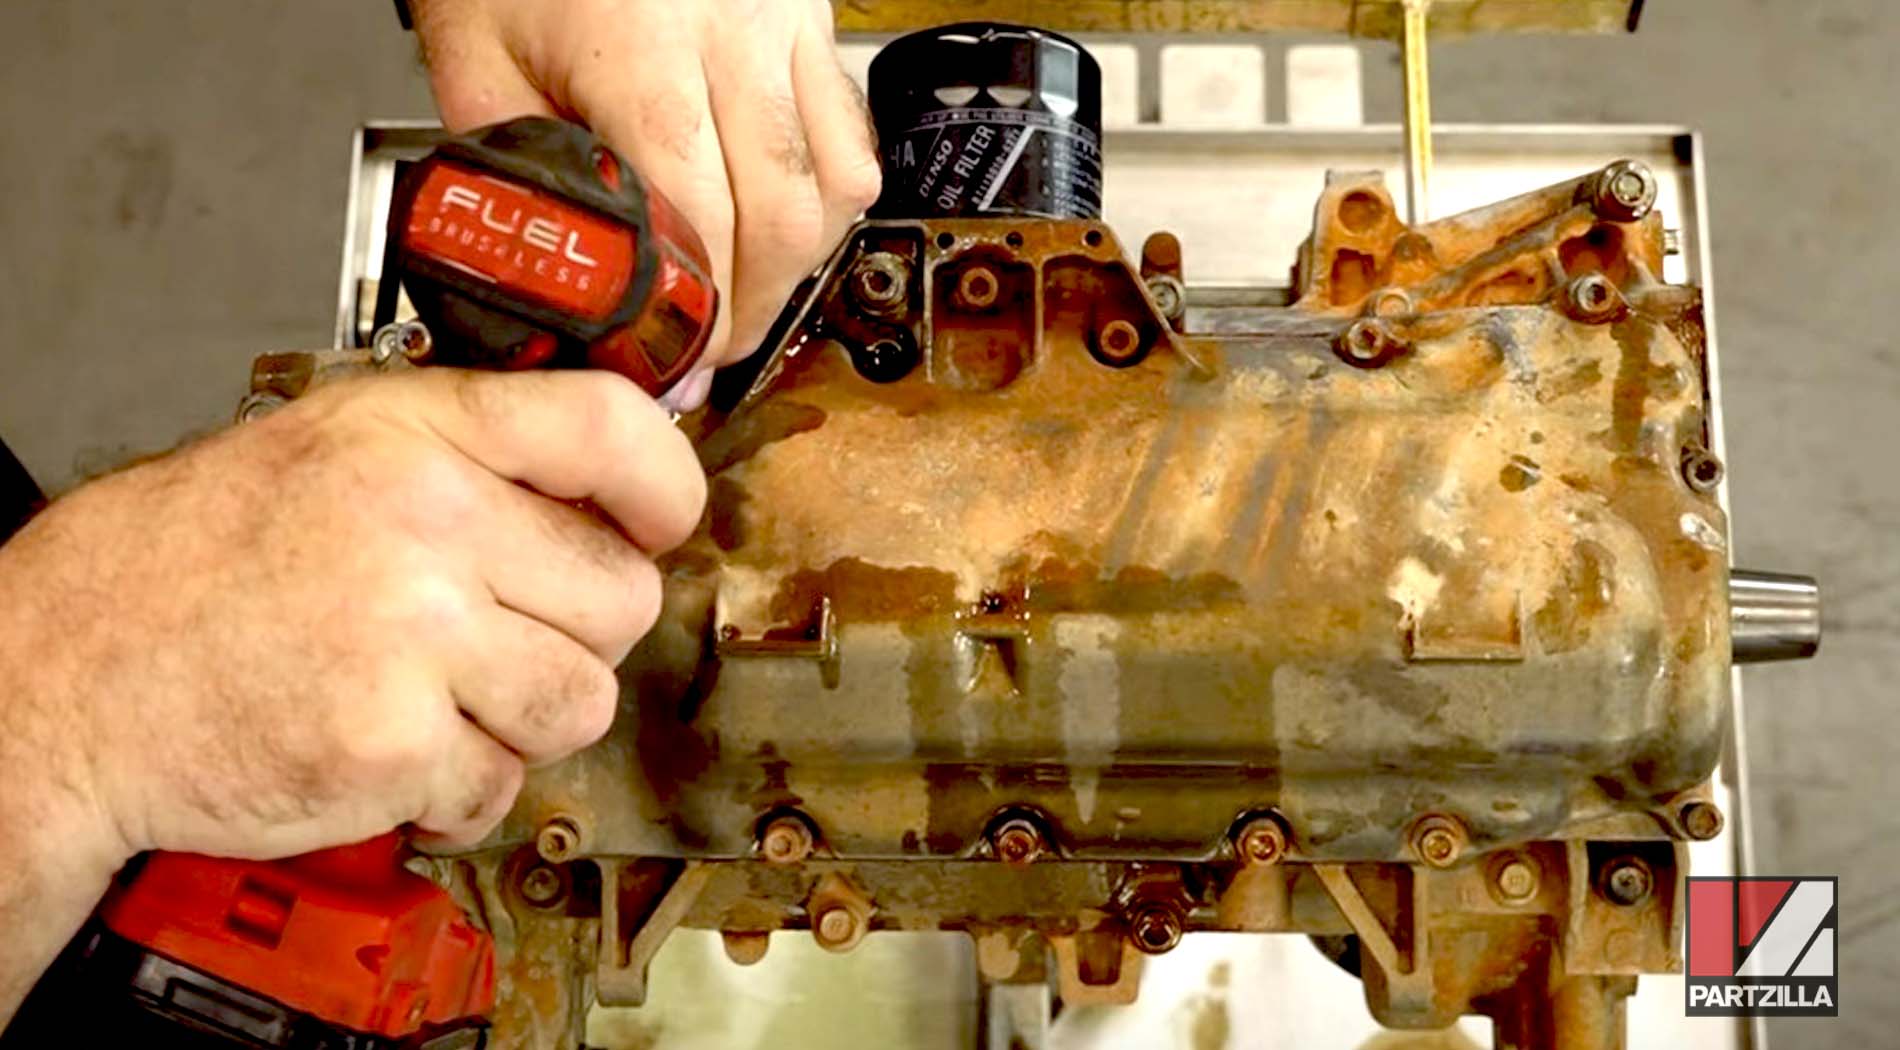
Step 17. Remove the oil pump assembly.
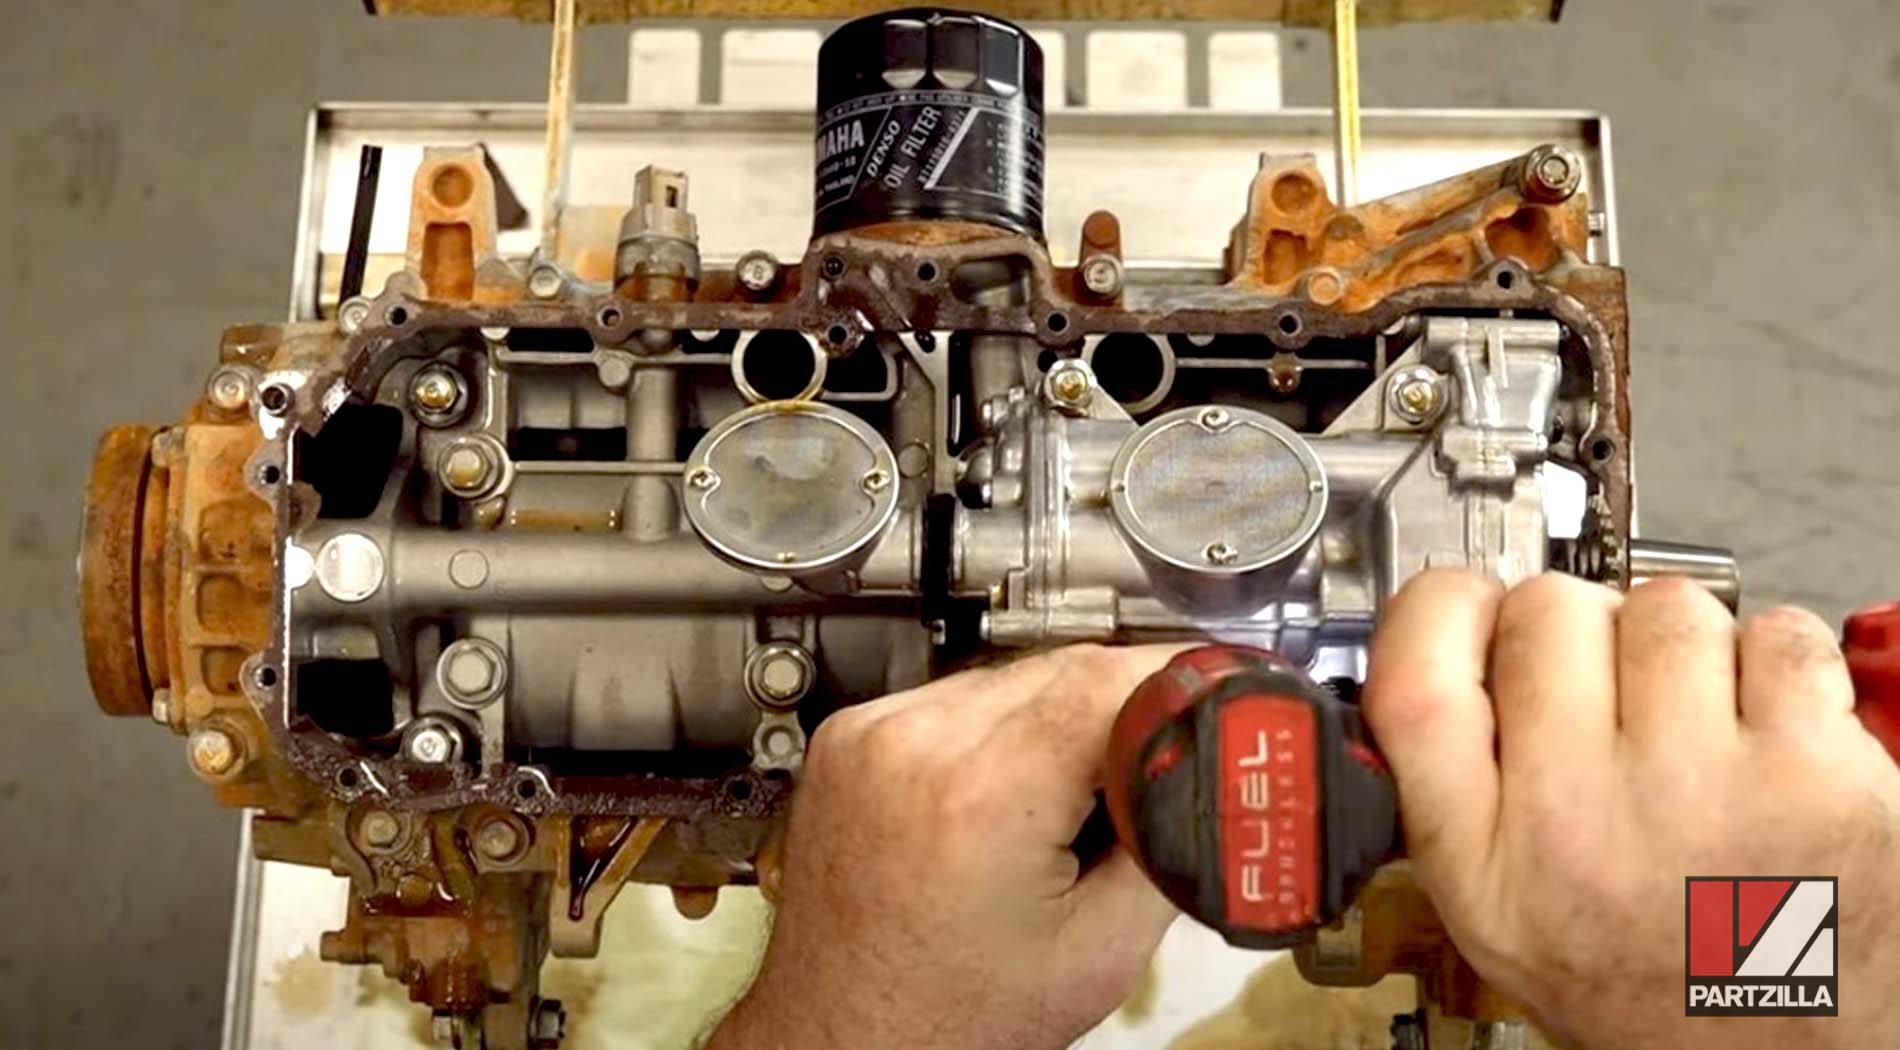
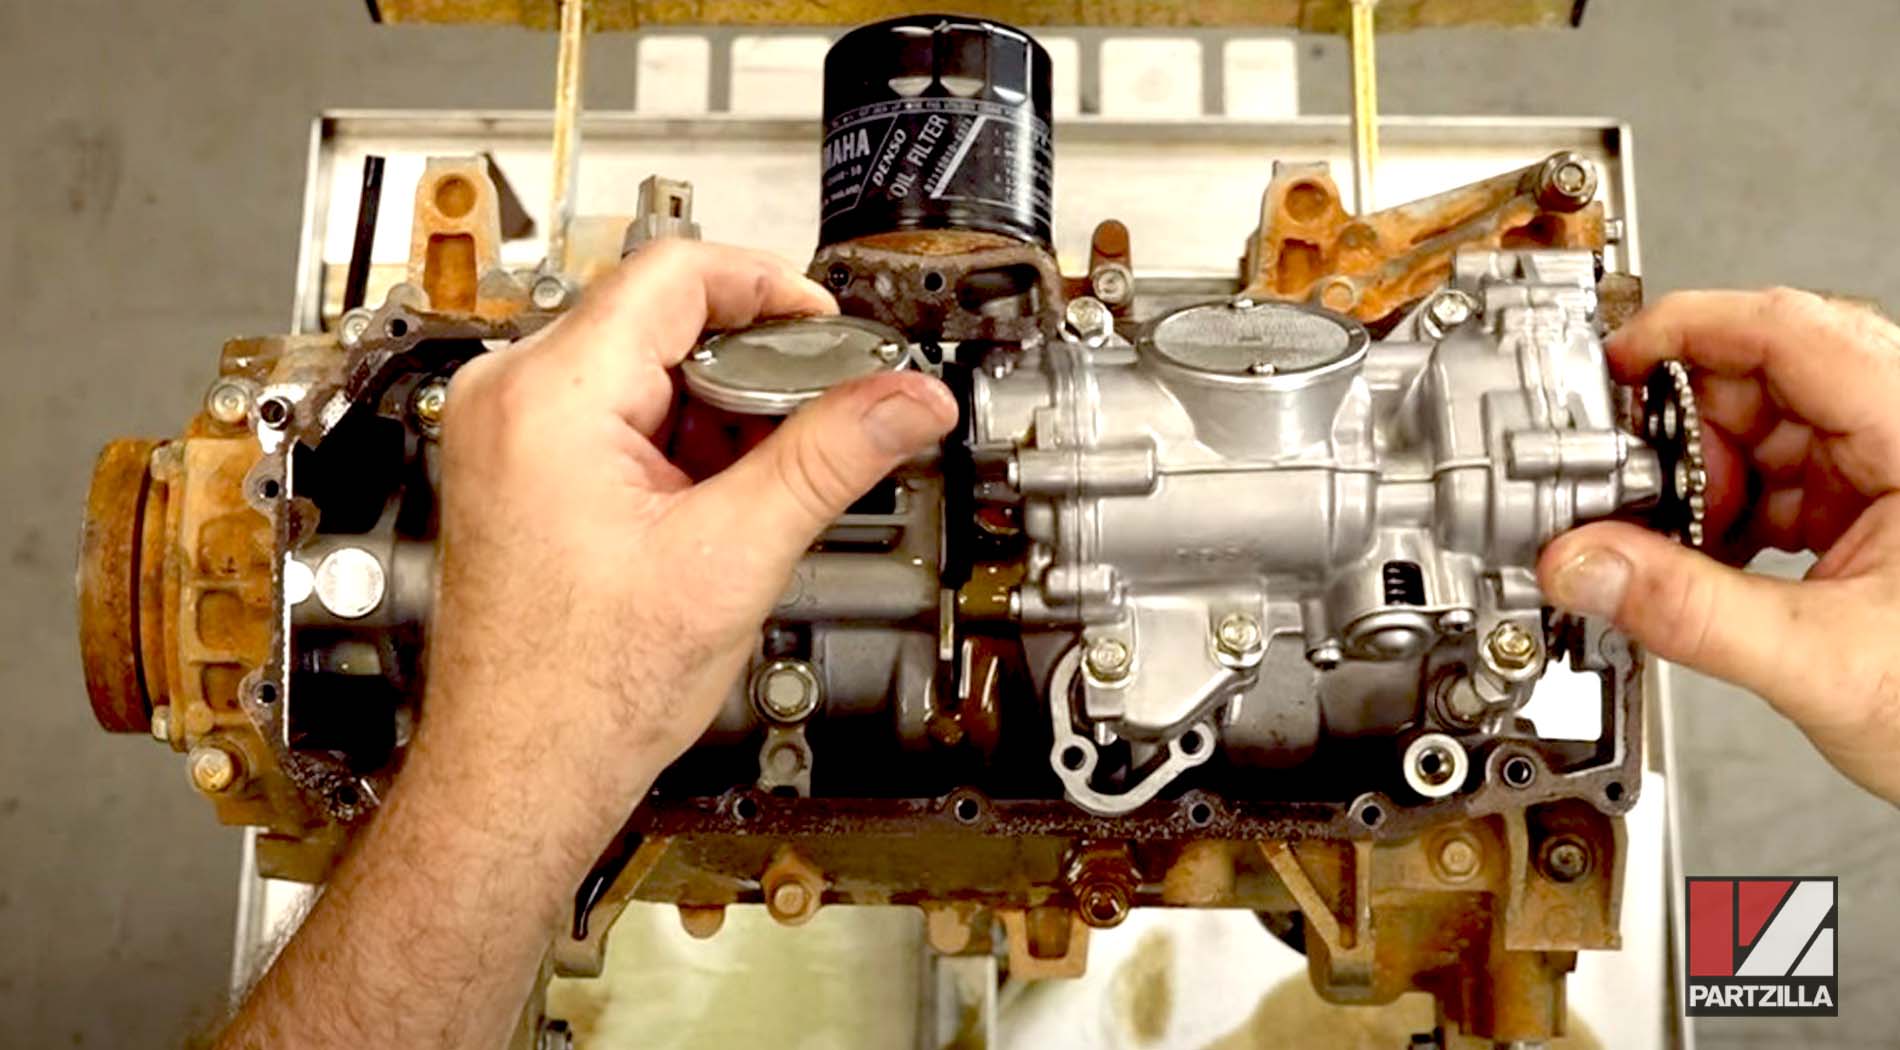
Watch the clip below to see the oil pump removal segment of our Yamaha YXZ1000R engine teardown video.
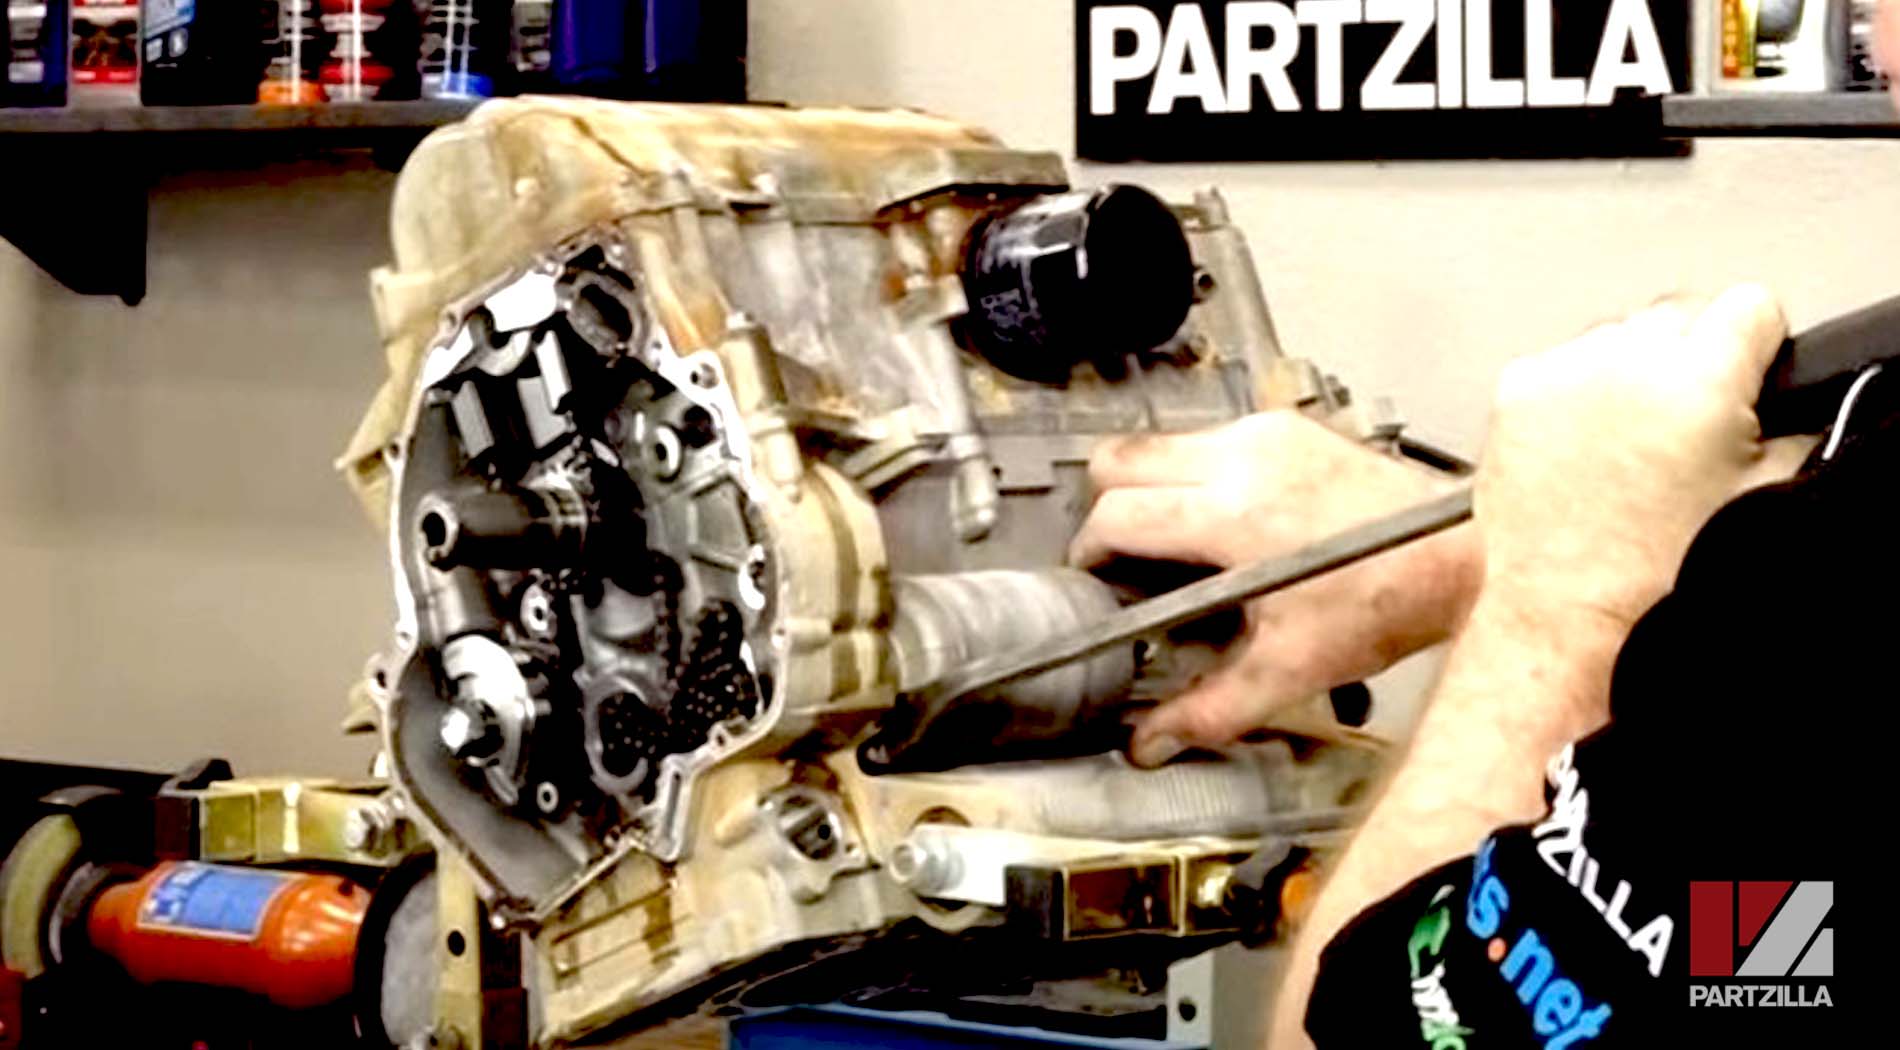
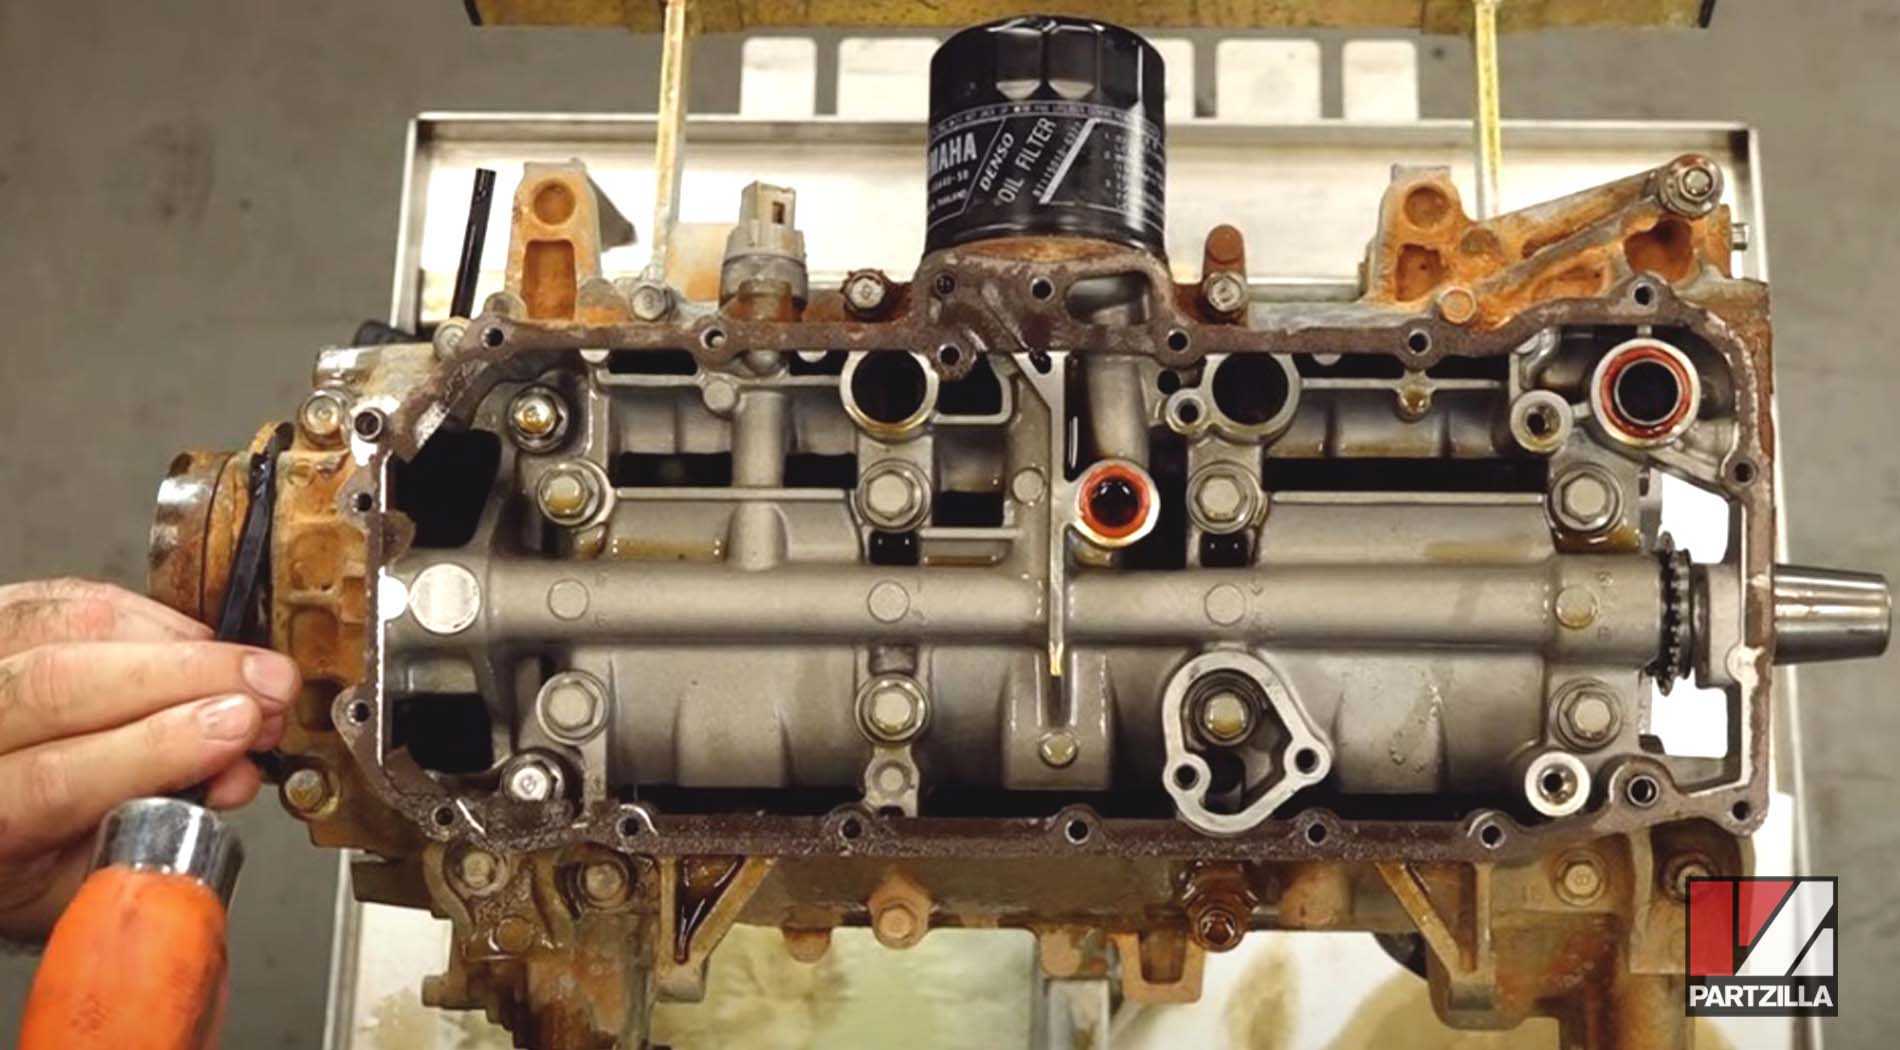
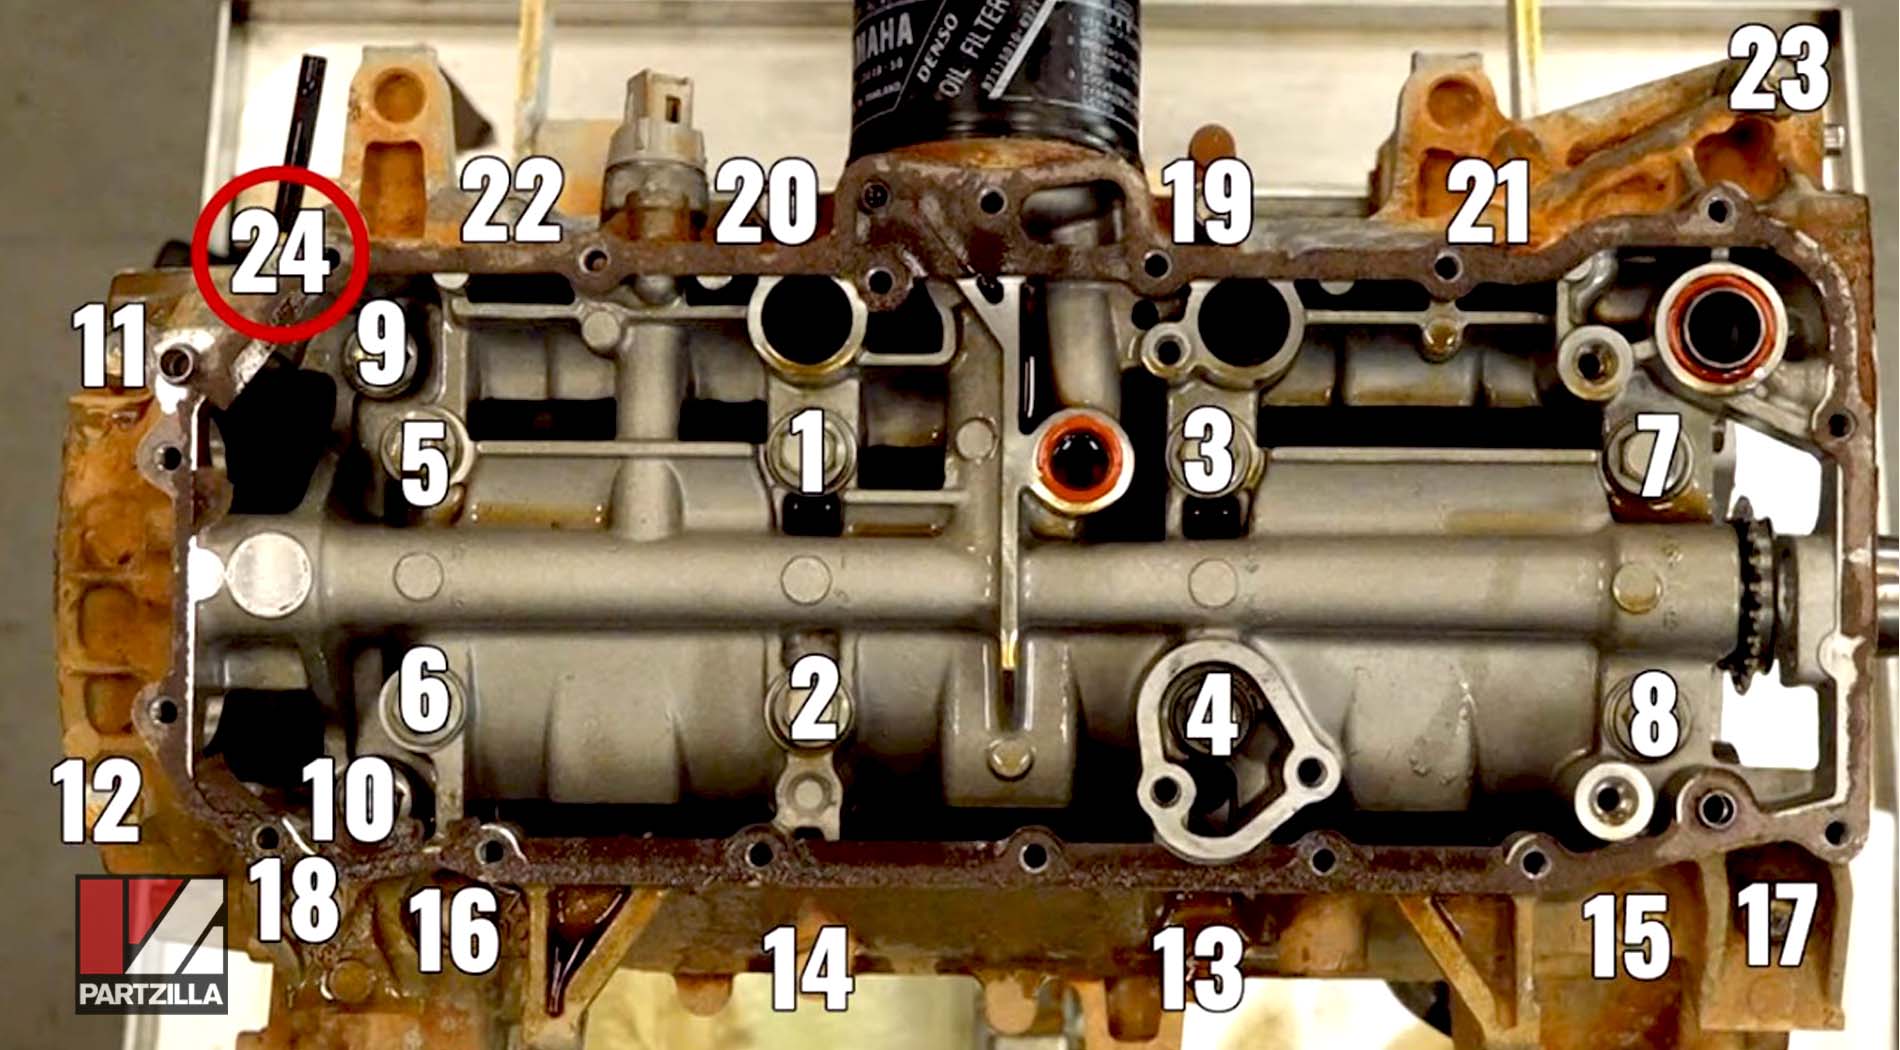
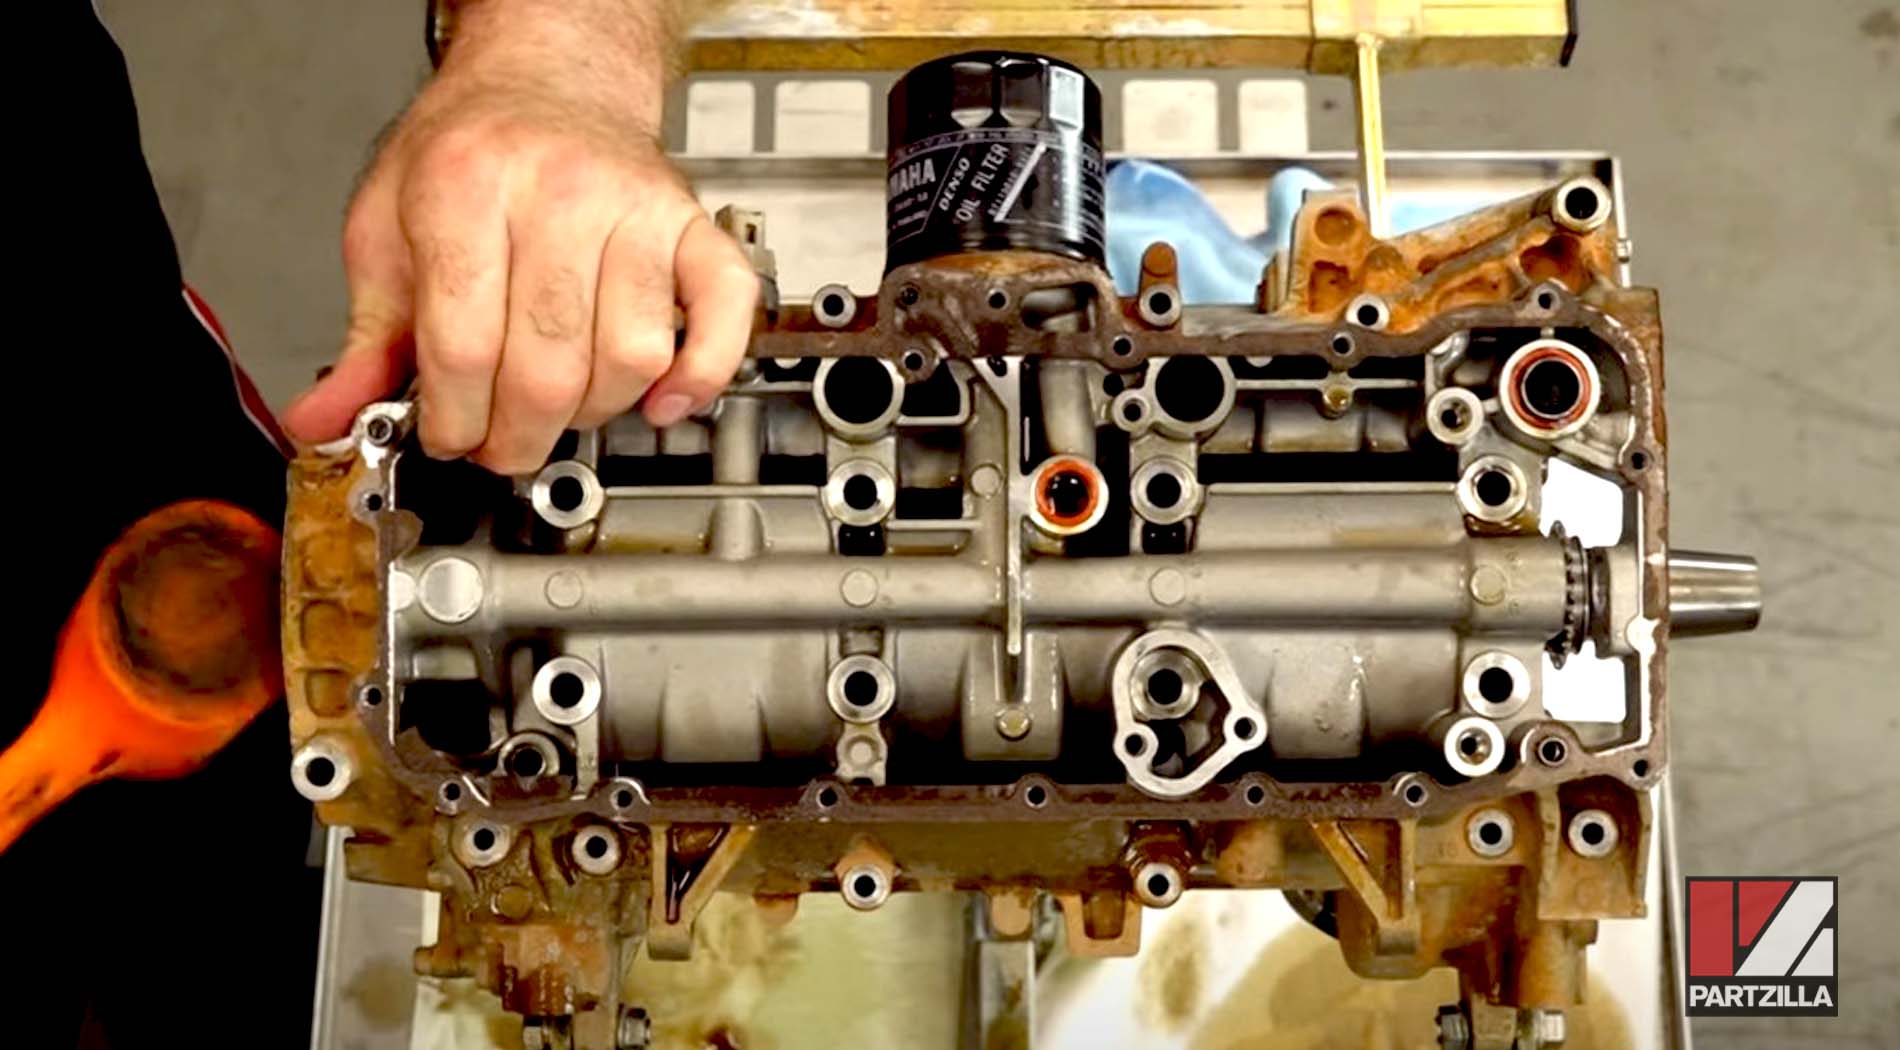
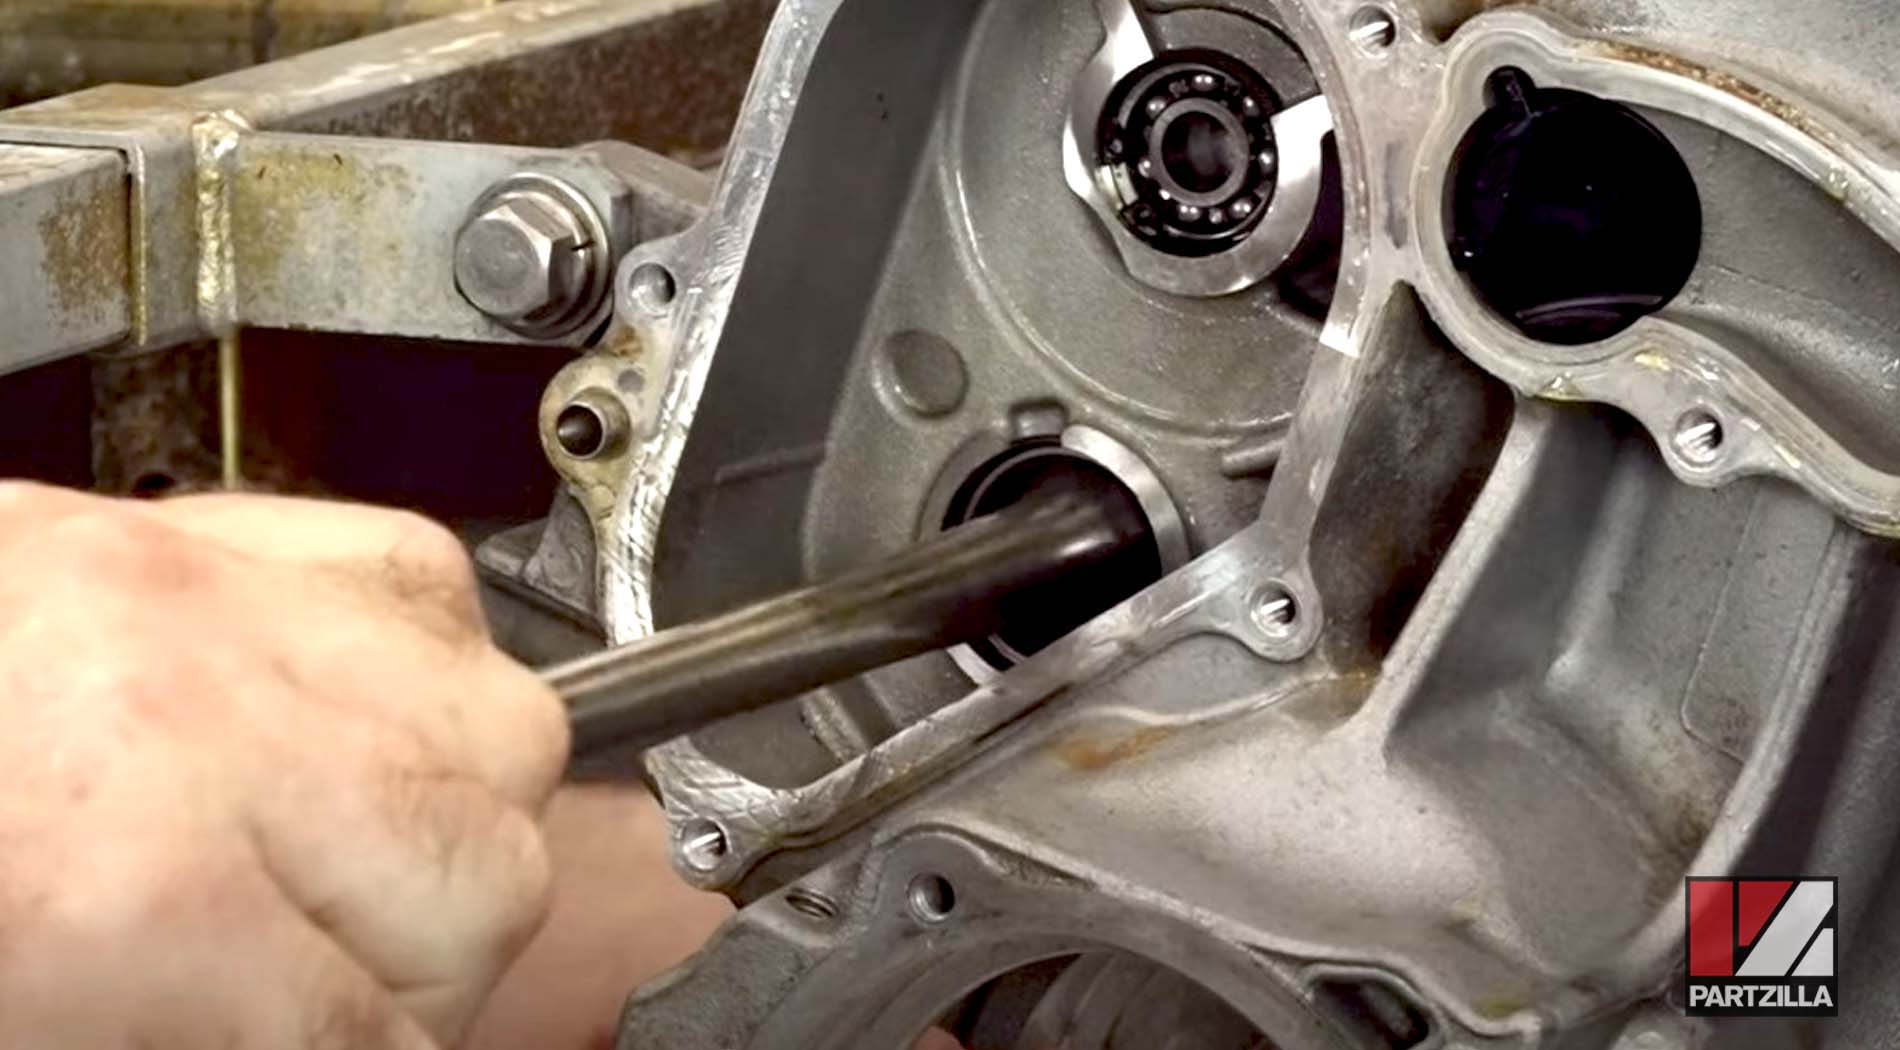
Yamaha YXZ1000R Engine Teardown - Split the Crankcase
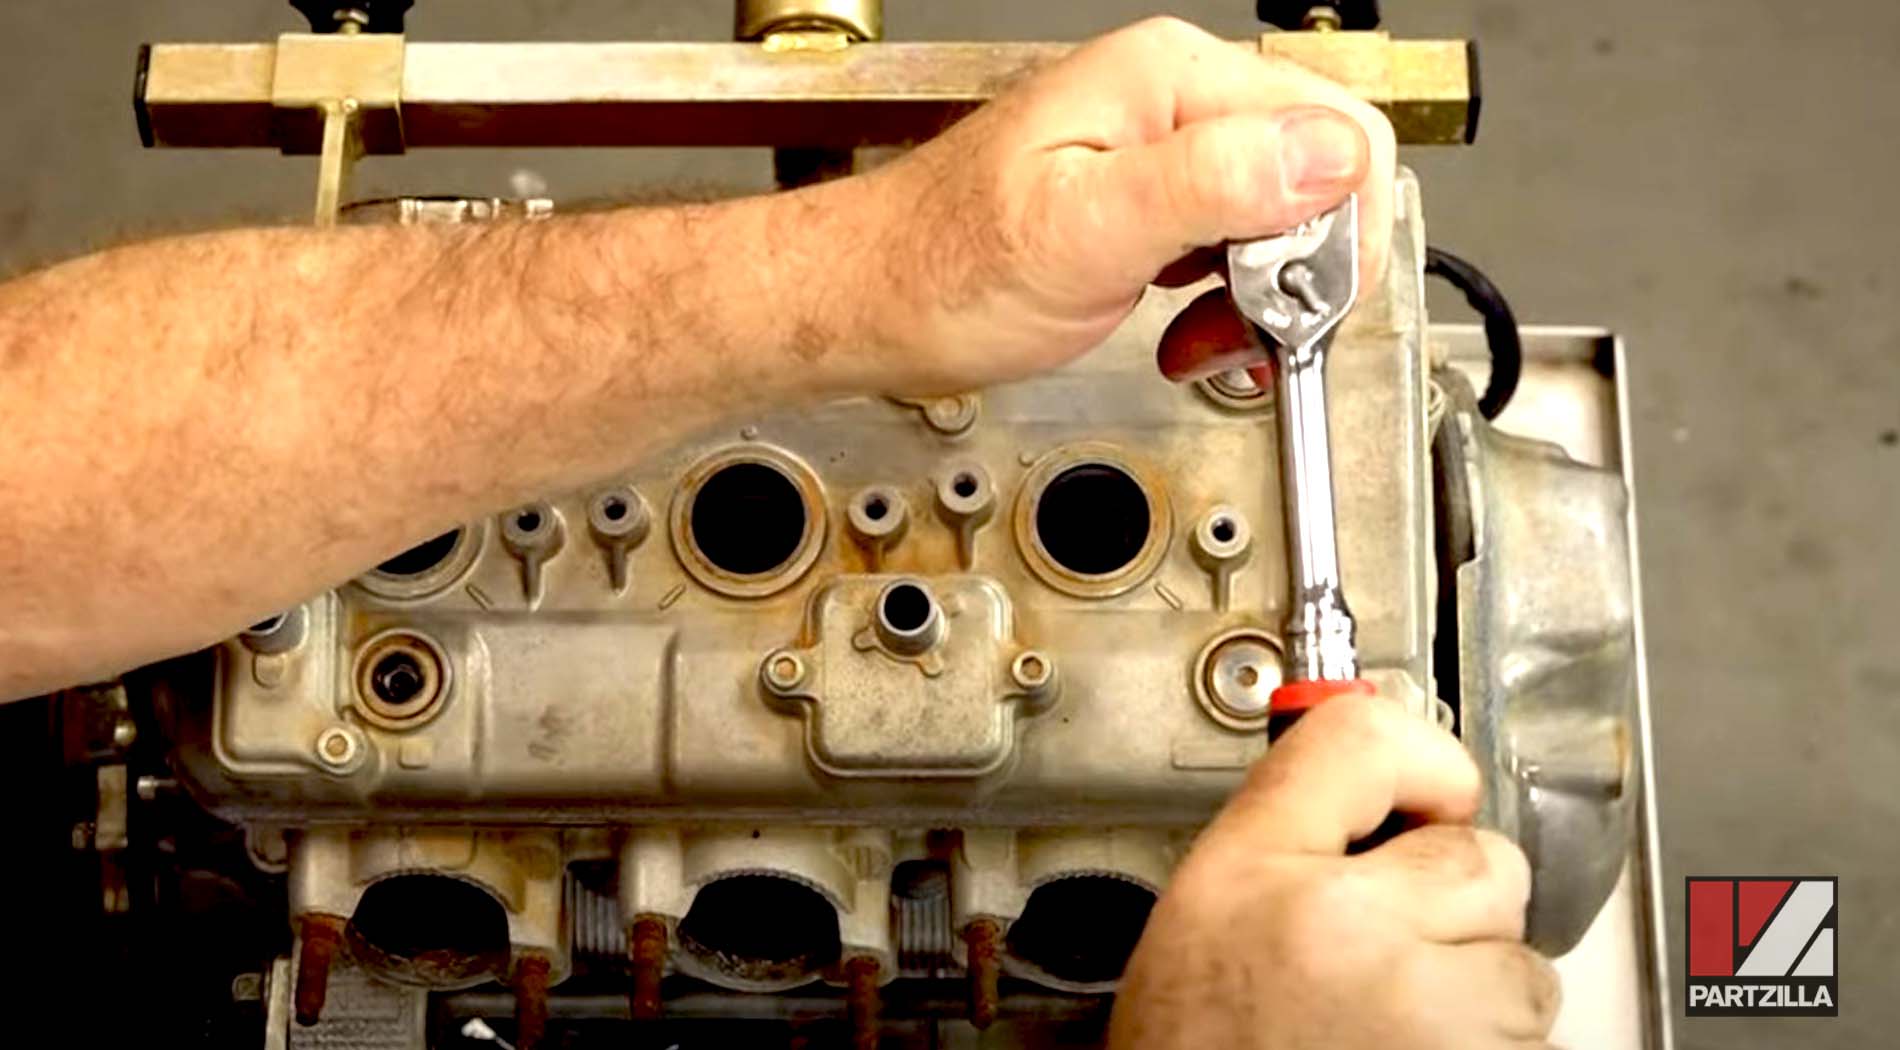
Step 18. Loosen the crankcase bolts out one half turn at a time, going from number 24 down to number 1 (as pictured below). Start with number 24 first, then work your way down in sequence.
Step 19. Remove the timing chain out of the way, then split the crankcase open carefully. Use a pry bar first (don’t pry on it too hard), then a dead blow hammer to tap it loose, and pull the crankcase apart.
Watch the clip below to see the crankcase splitting segment of our Yamaha YXZ1000R engine teardown video.
Yamaha YXZ1000R Engine Teardown - Remove the Pistons and Crankshaft
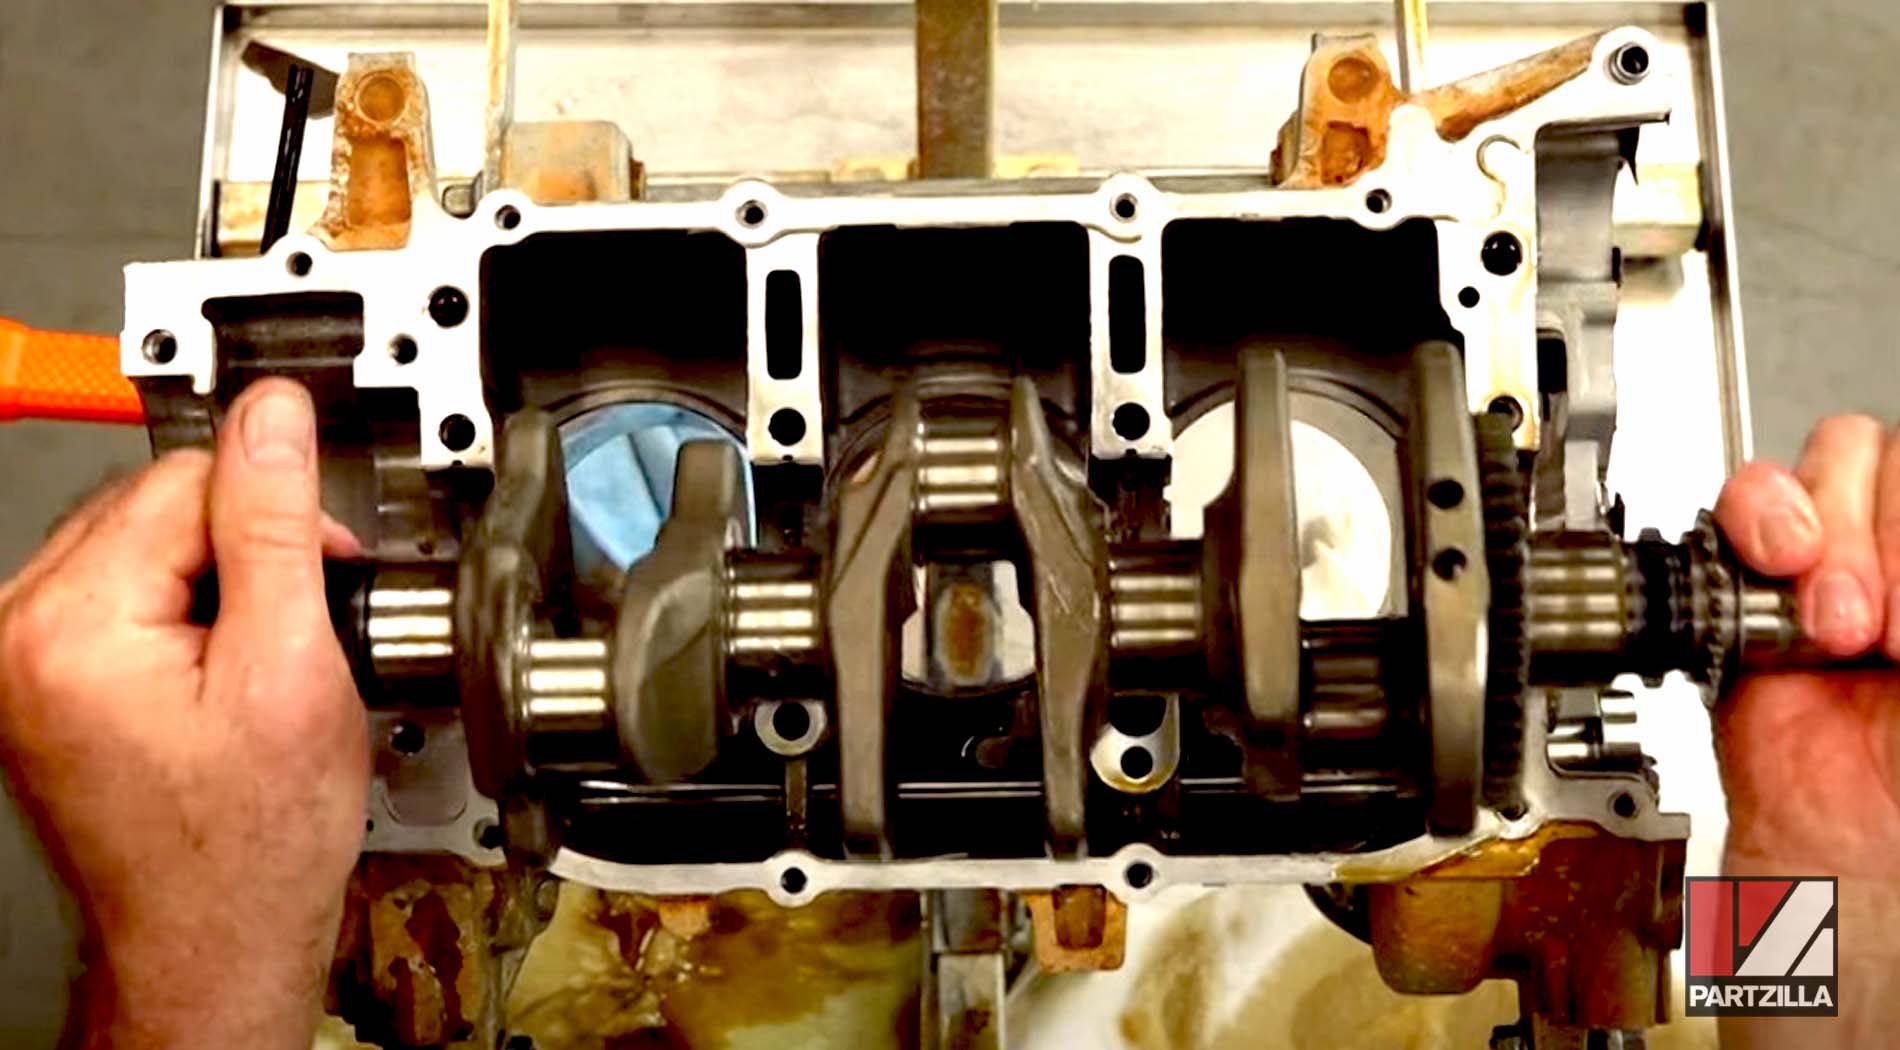
Step 20. Remove the connecting rod bolts and bearings, then pull the pistons out from the bottom of the crankcase one by one.
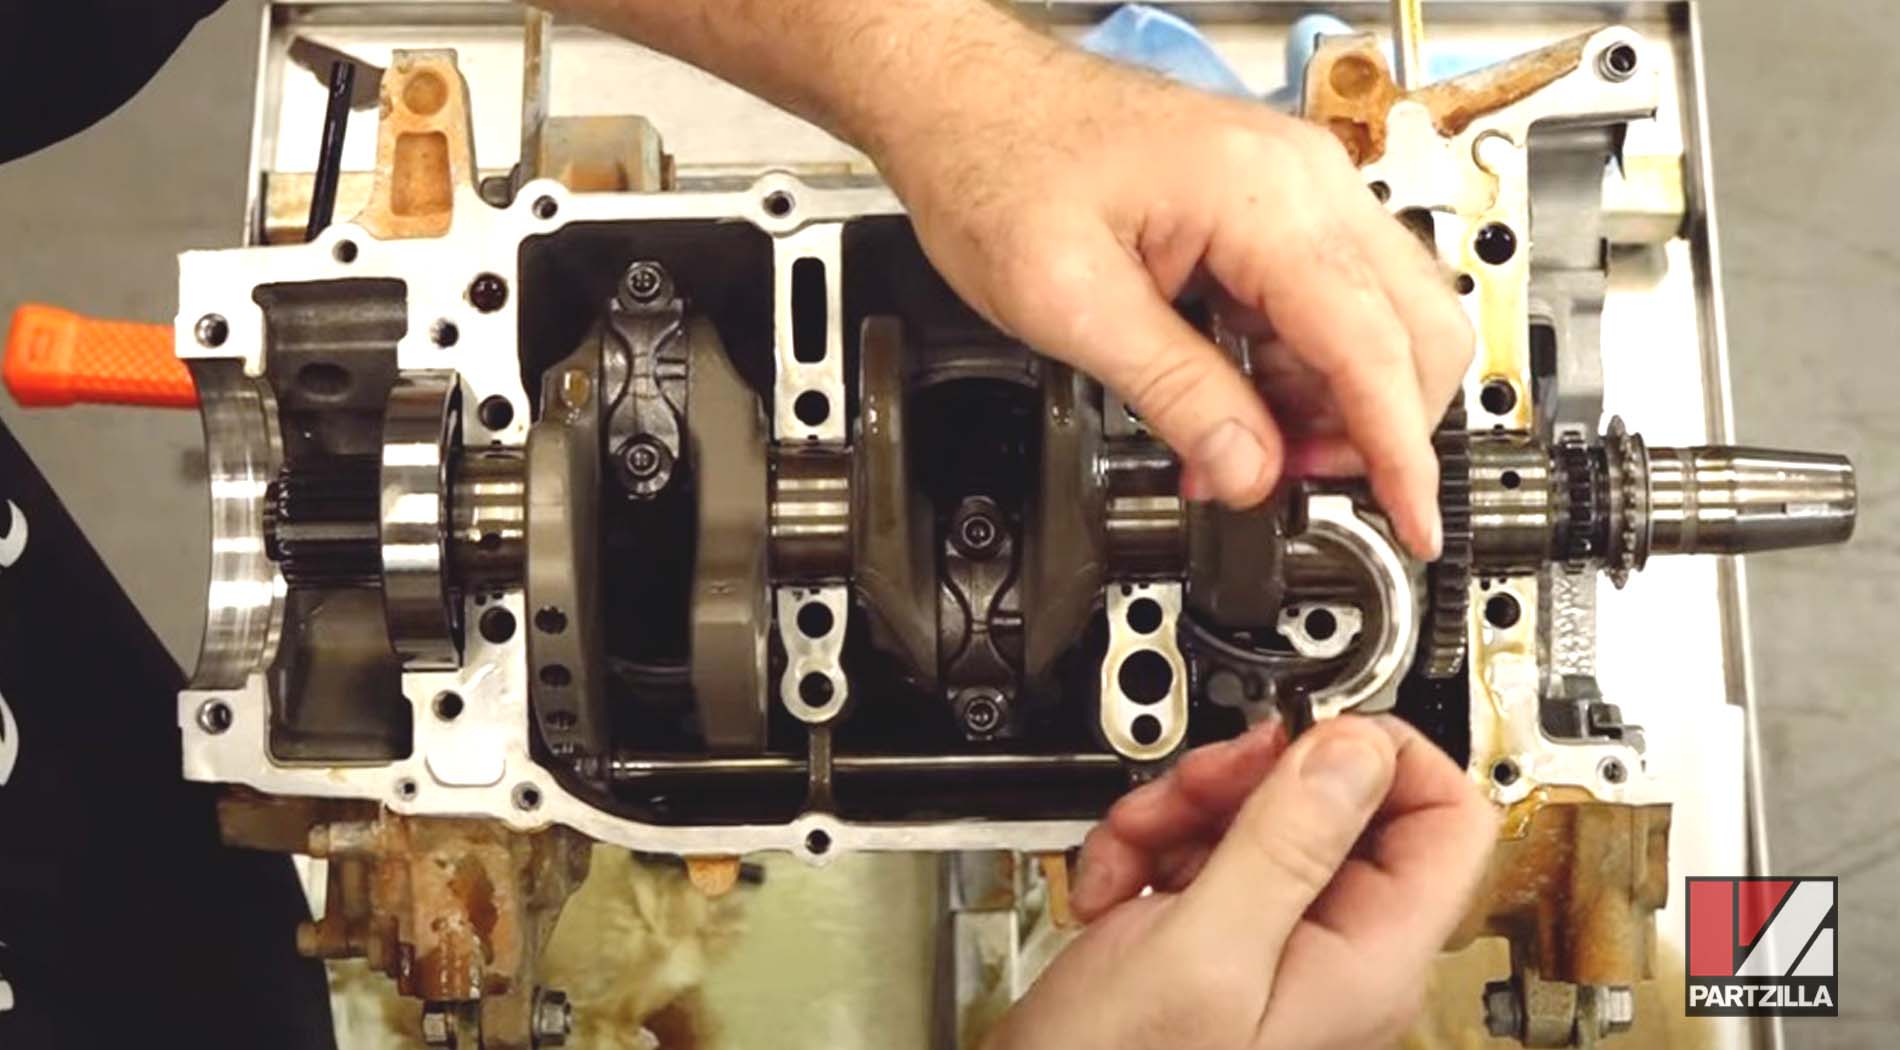
Step 21. Lift out and remove the crankshaft.
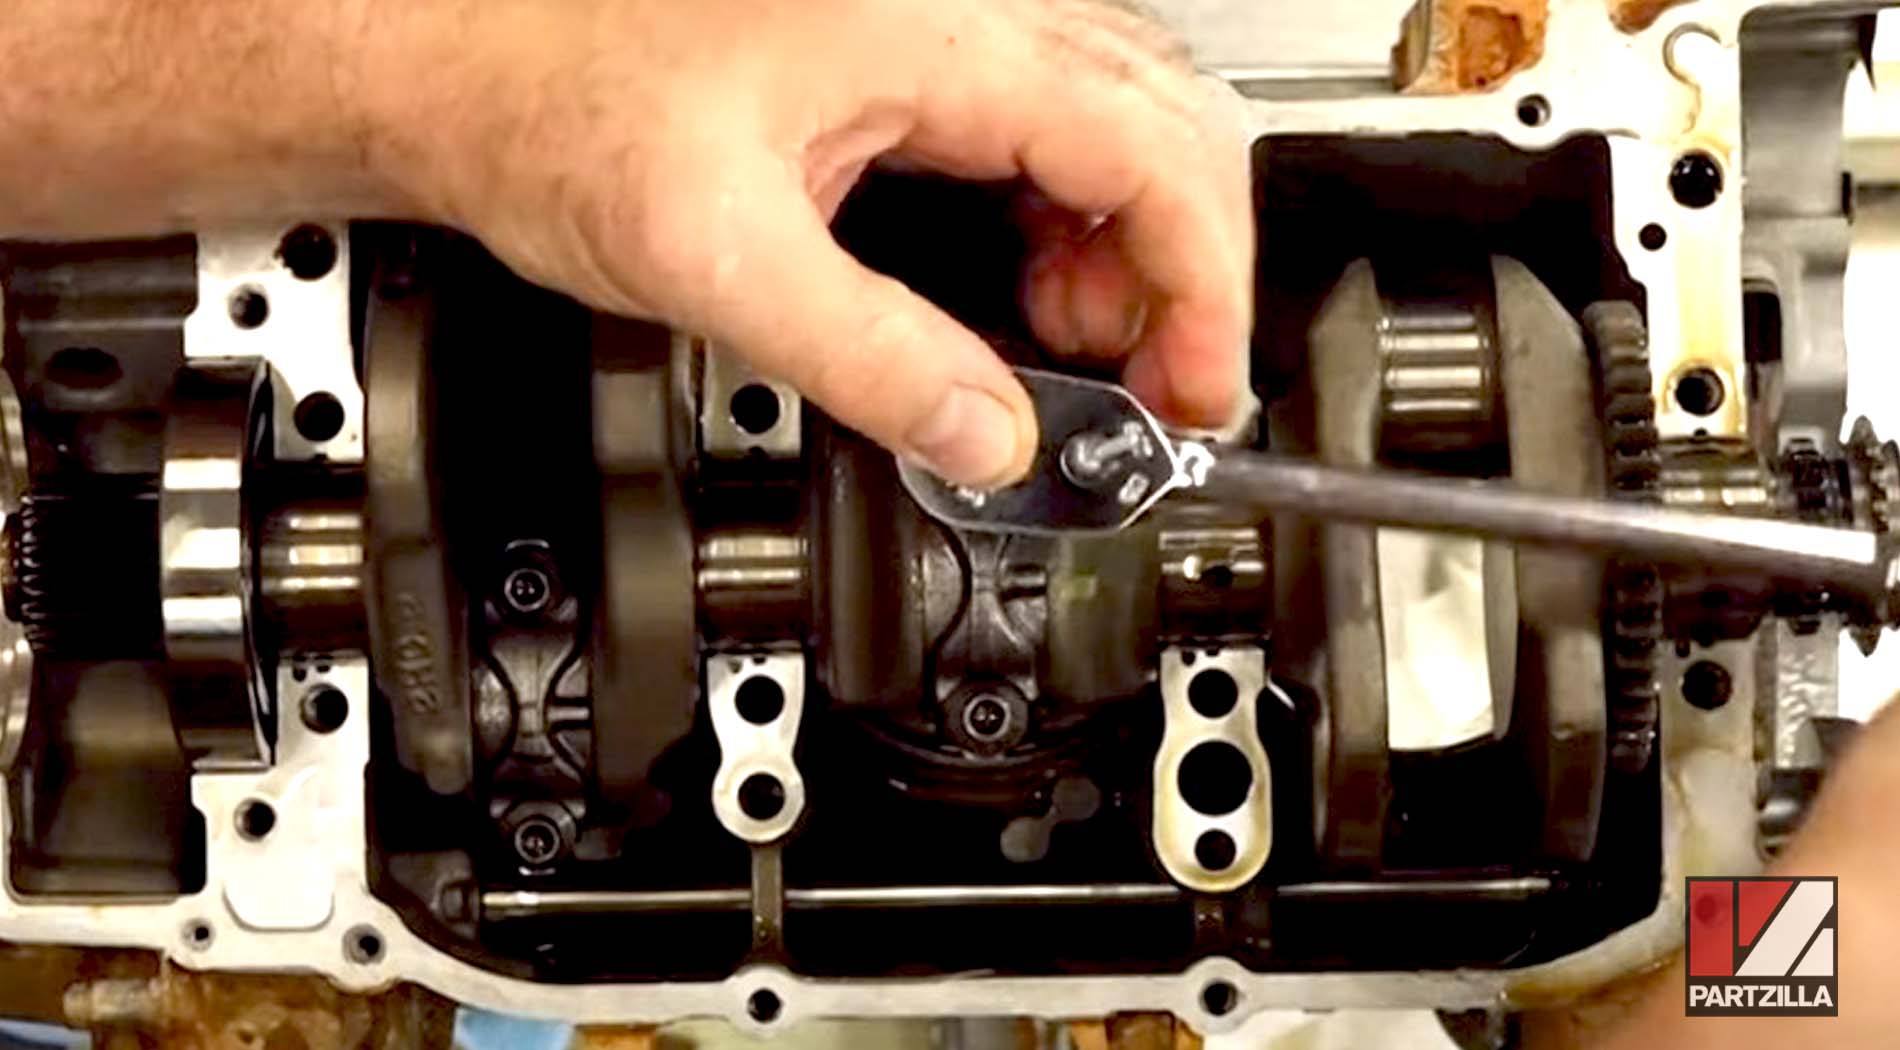
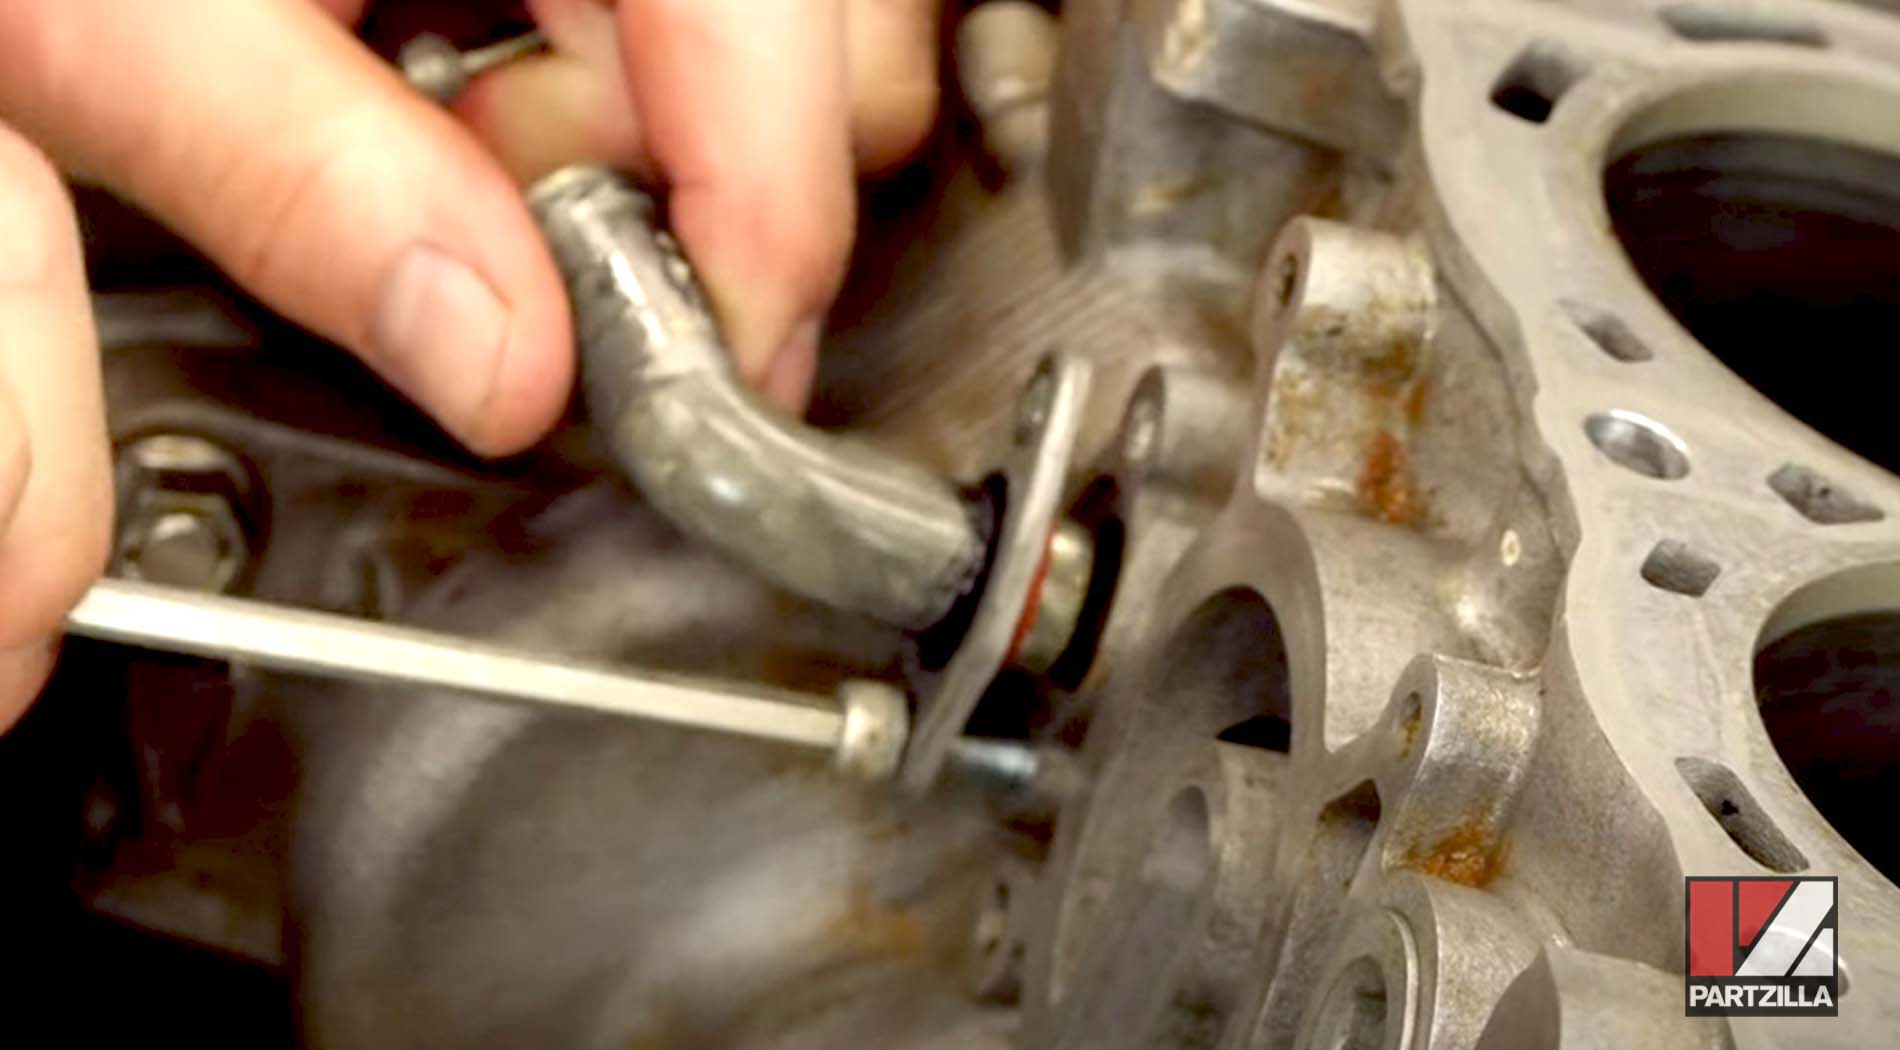
Step 22. Remove the counterbalance, which is held in by a bolt on either side that has a tab you need to bend to remove it. You’ll also need to remove the water pump assembly on the other side to get the counterbalance out.
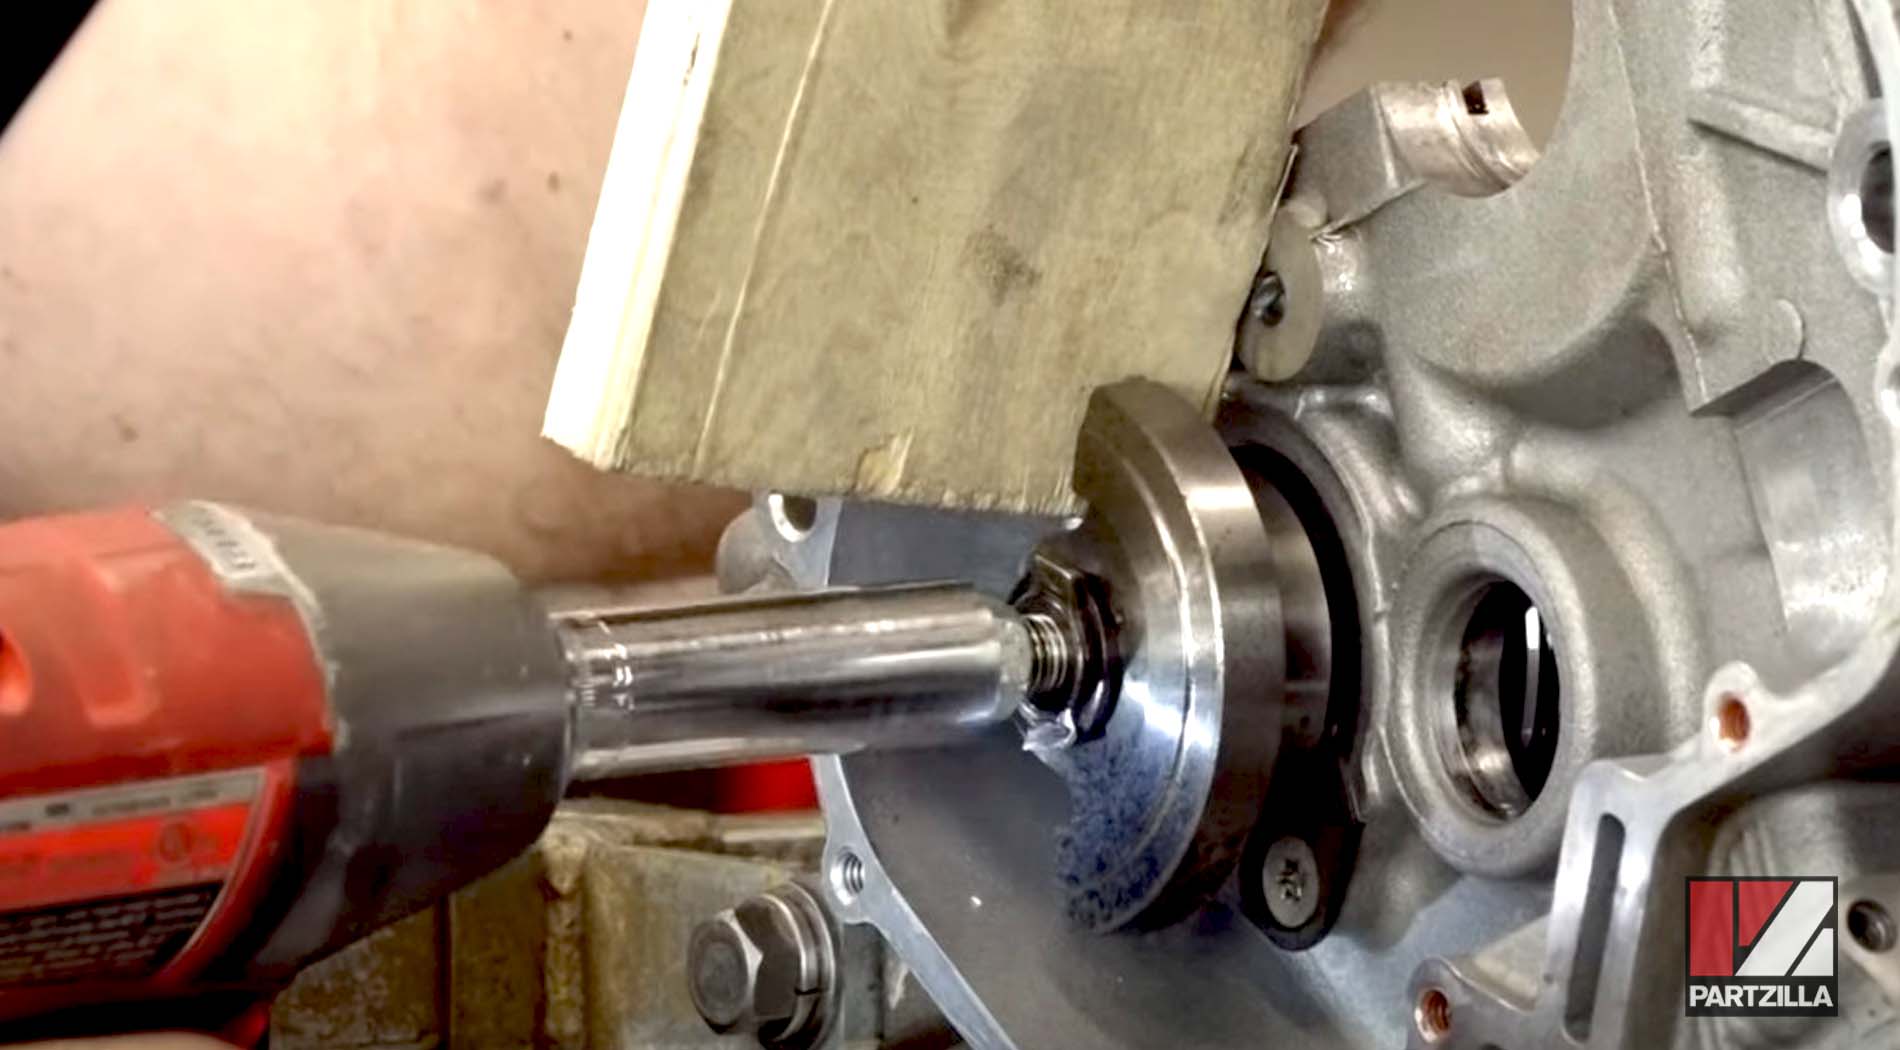
PRO TIP: Use a small piece of wood to keep the counterbalance from rotating while you’re disassembling its components.

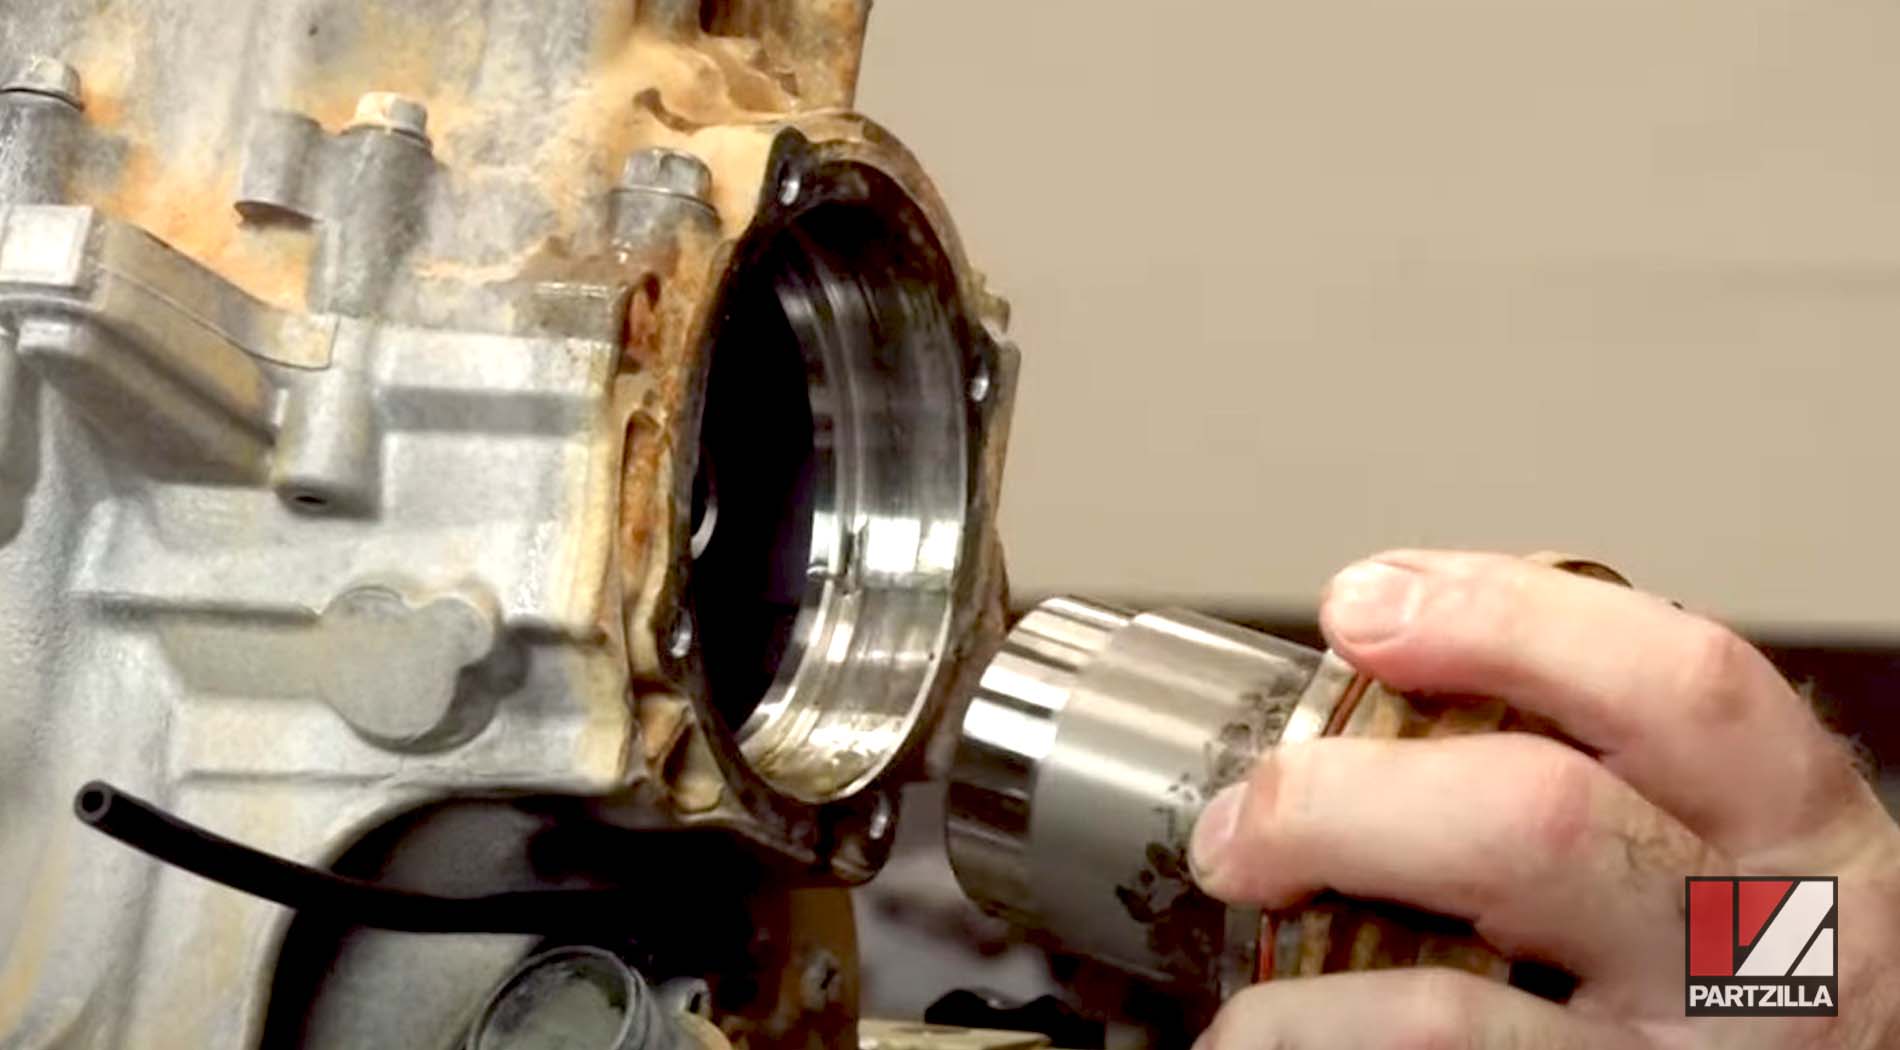
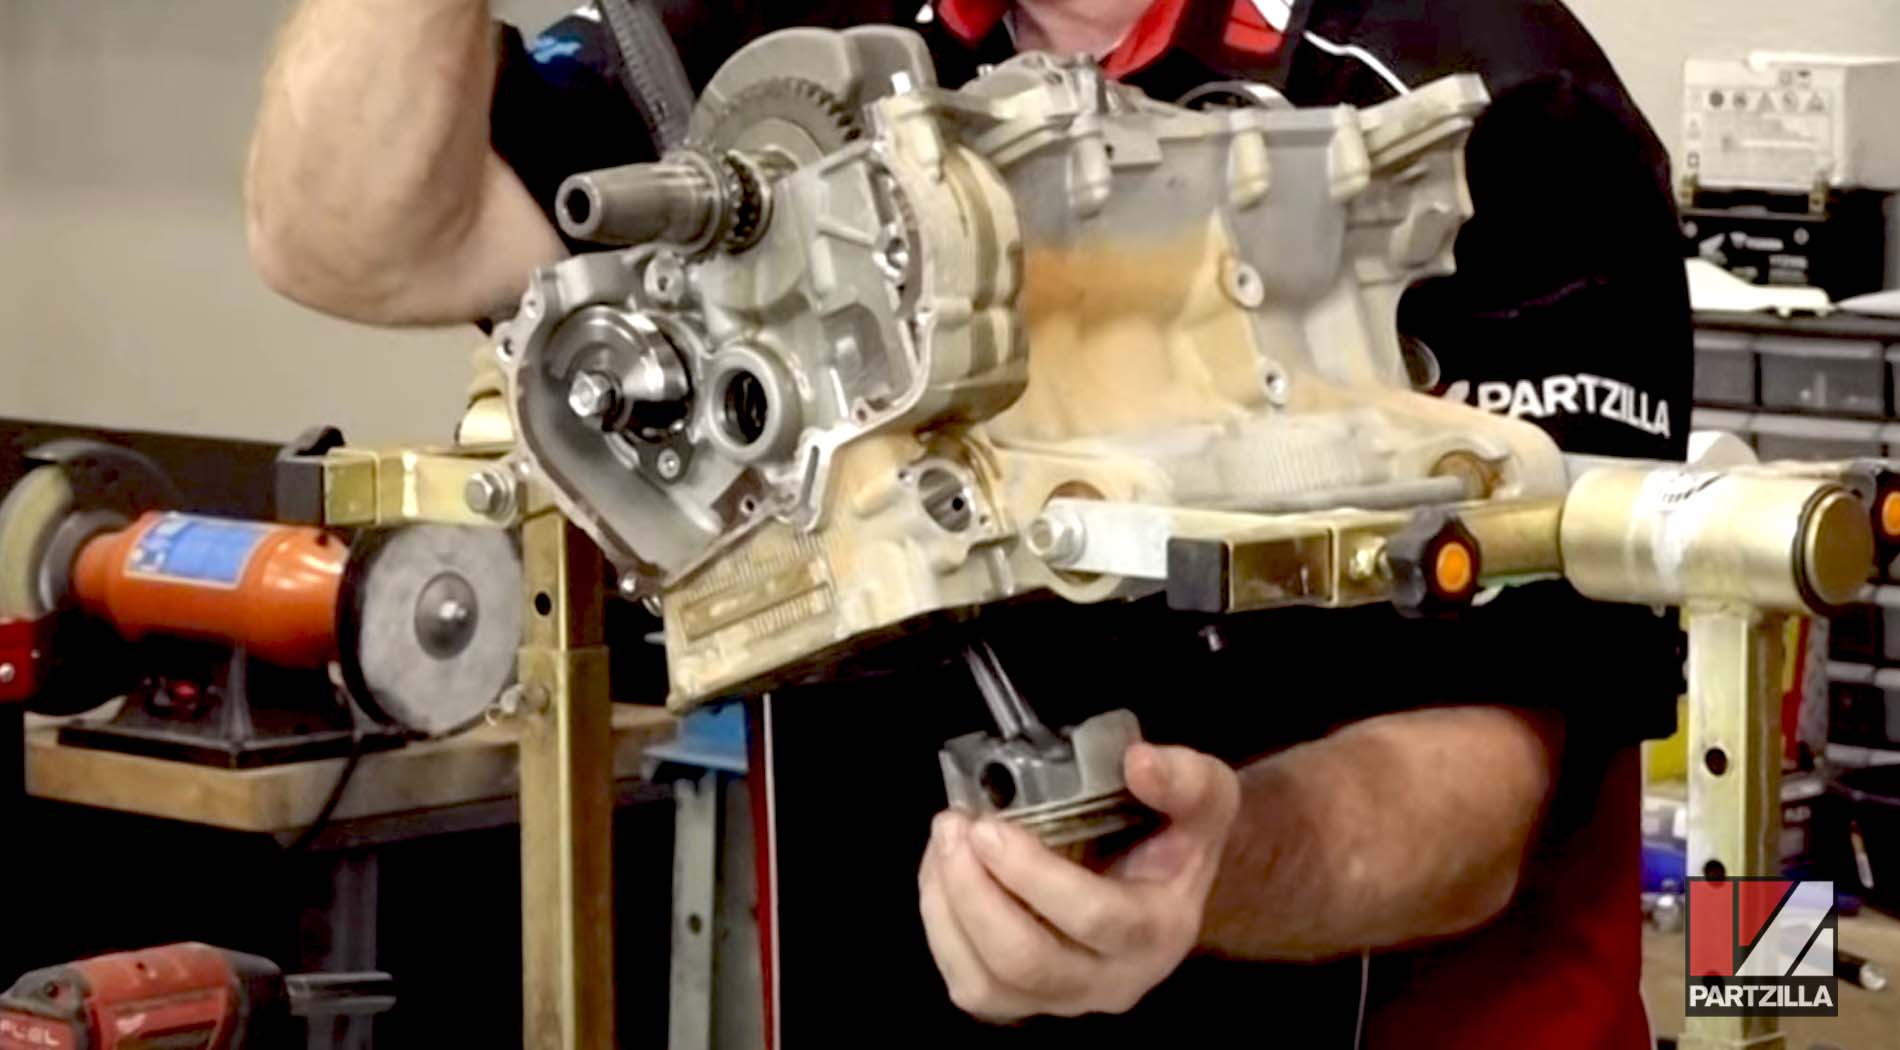
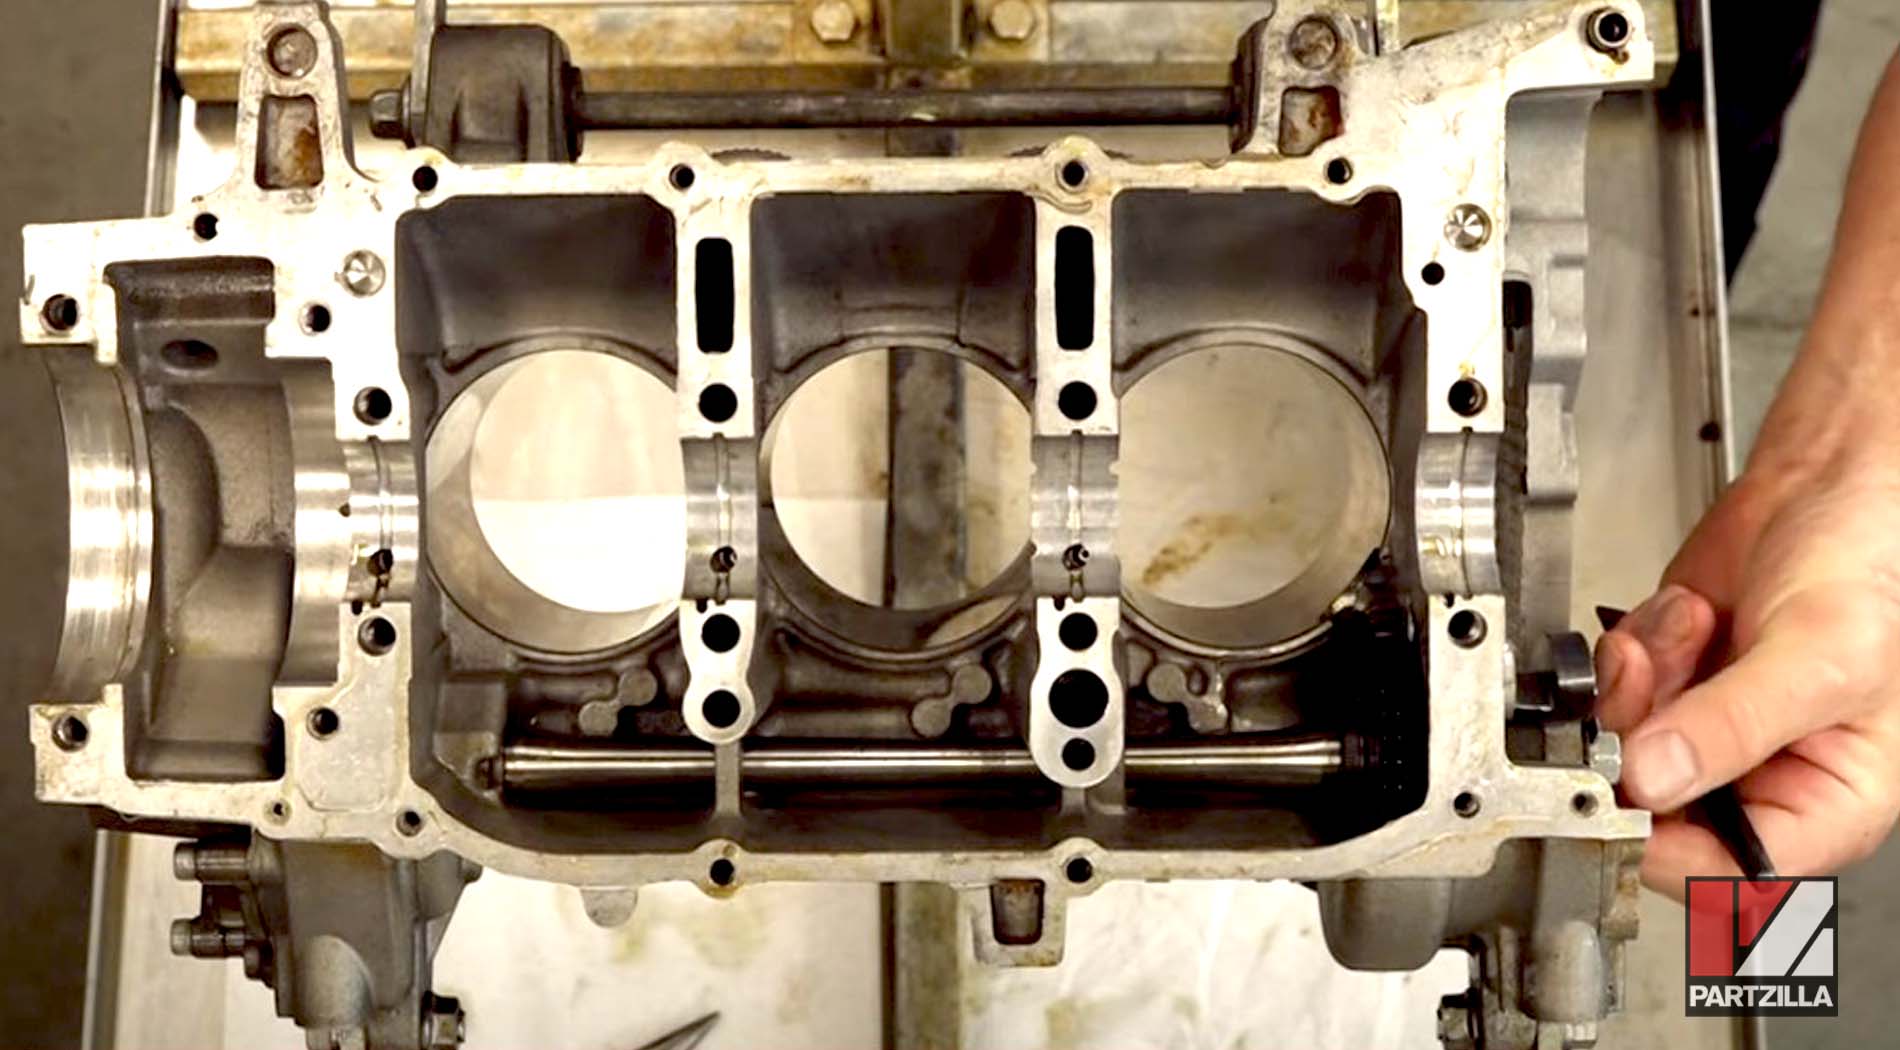
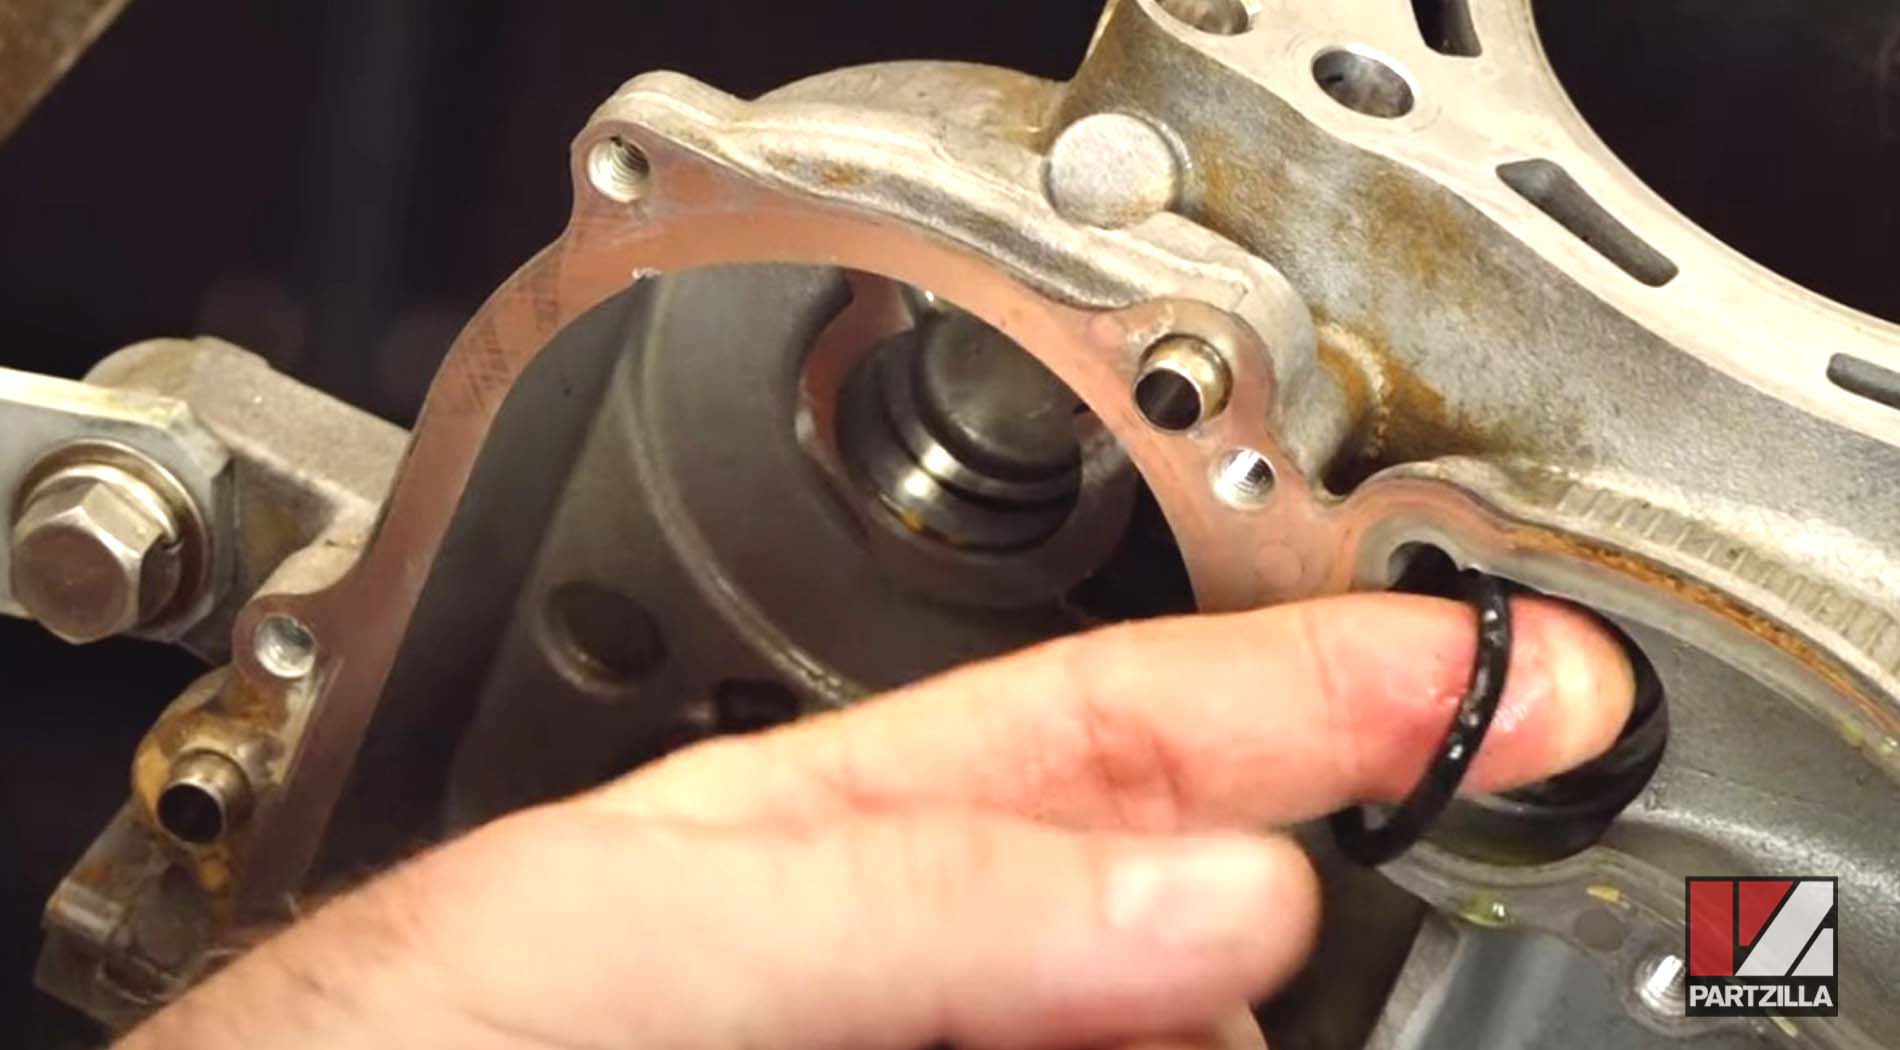
Step 23. Remove all the bearings, O-rings, cooling line, dowels and any other components left on the crankcase.

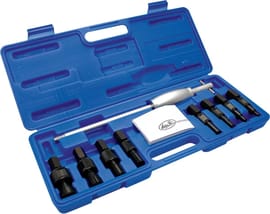
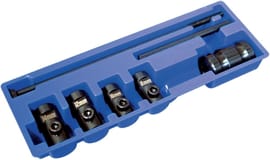
PRO TIP: Use a blind bearing puller kit to remove the remaining bearings from the crankcase.
PRO TIP: Use a dowel pin puller tool to remove the dowels from the crankcase.
Watch the clip below to see the pistons and crankshaft removal segment of our Yamaha YXZ1000R engine teardown video.