Suzuki GSXR1000 Chain & Sprockets Change
When it's time to replace the chain or a sprocket on a Suzuki motorcycle, it's best to replace them all at once. A new chain on old sprockets won't last very long, neither will a new sprocket mated to an old chain.
If you want your chain and sprockets to last and not have to go to the trouble of replacing them again, you should change them in tandem. Watch the video above and follow the steps below to learn how to change the chain and sprockets on a Suzuki GSXR 1000.
Tools and Parts - Suzuki GSXR 1000 Chain & Sprockets Replacement
- Ratchet and extensions
- 8mm, 32mm, 36mm sockets
- 6mm Allen
- 10mm, 12mm wrenches
- Torque wrench
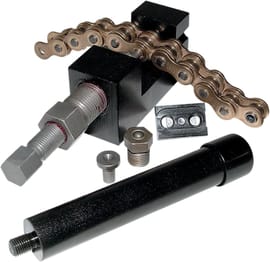
- Jumbo chain tool kit
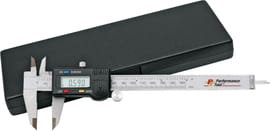
- Digital caliper
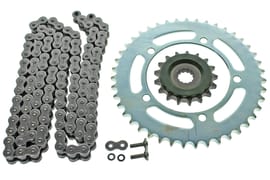
- Drive chain kit
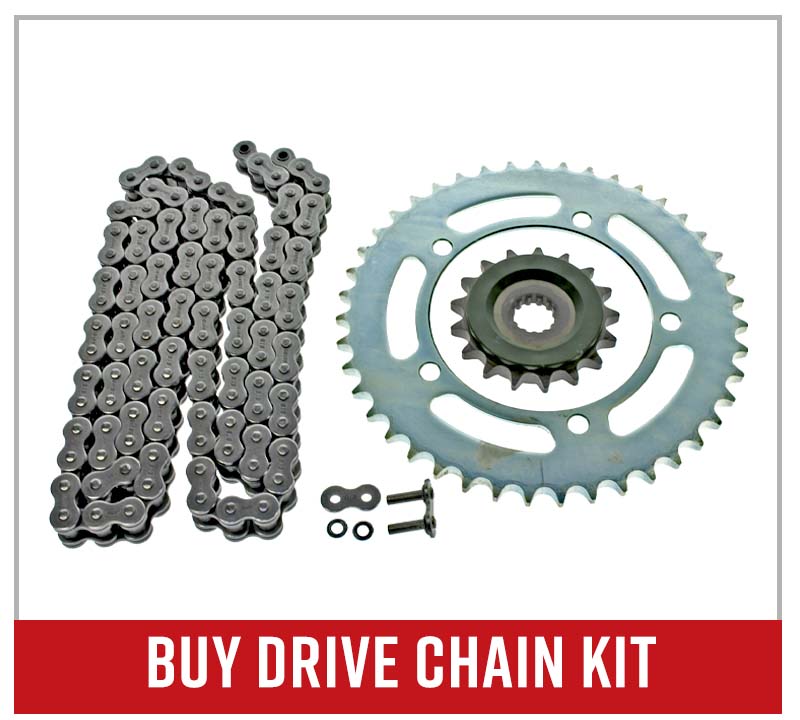
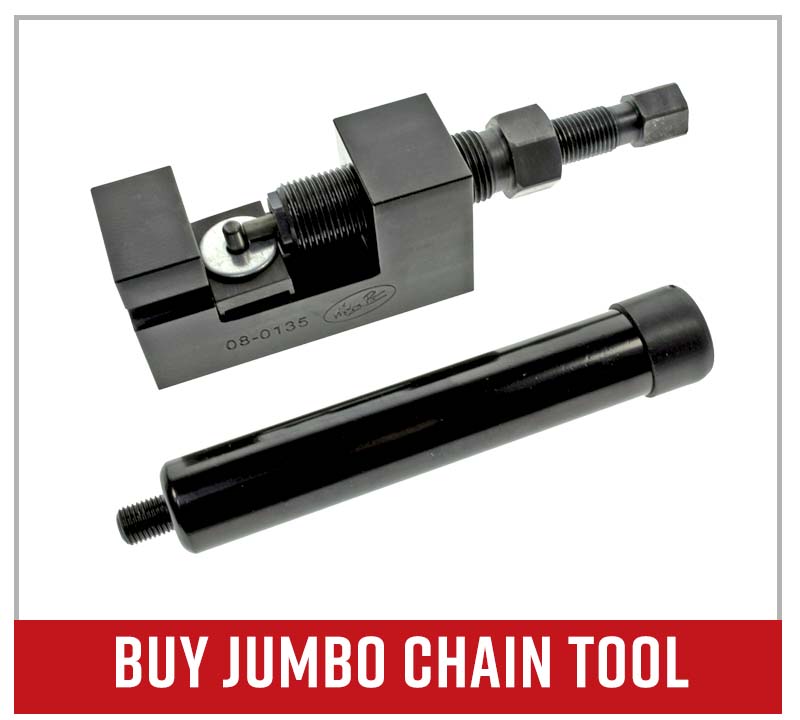
NOTE: The only part you need is a drive chain kit. You can buy the chain and drive sprockets separately, but the OEM drive chain kit from Suzuki contains the two sprockets and the chain, and is more affordable as a bundle. There are also two specialty tools you'll need for this job: a jumbo chain tool to break apart the old chain and assemble the new one; and a digital caliper to make precise measurements.
How to Replace Suzuki GSX-R1000 Chain and Sprockets
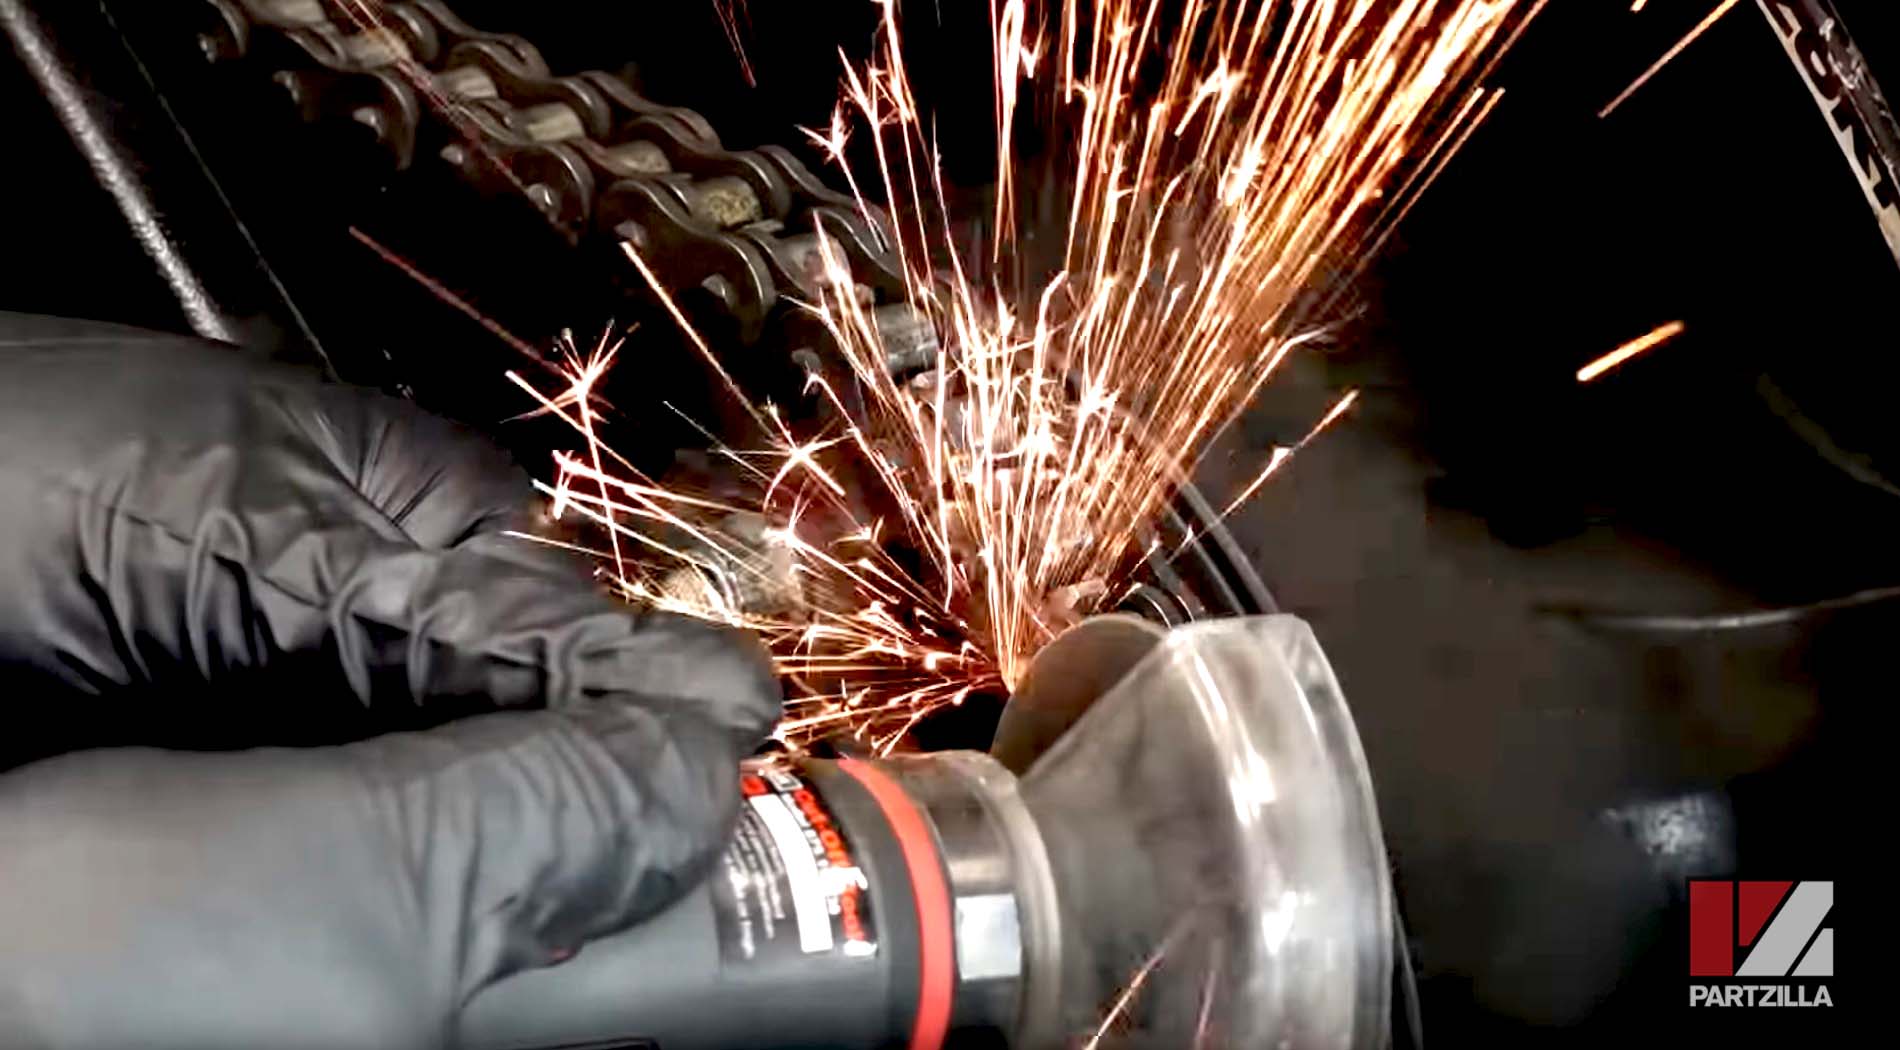
Step 1. Remove the old chain by either using the chain tool to drive the pins out of a chain link to get the link out, or by grinding off the pin heads from a chain link and knocking that link out.
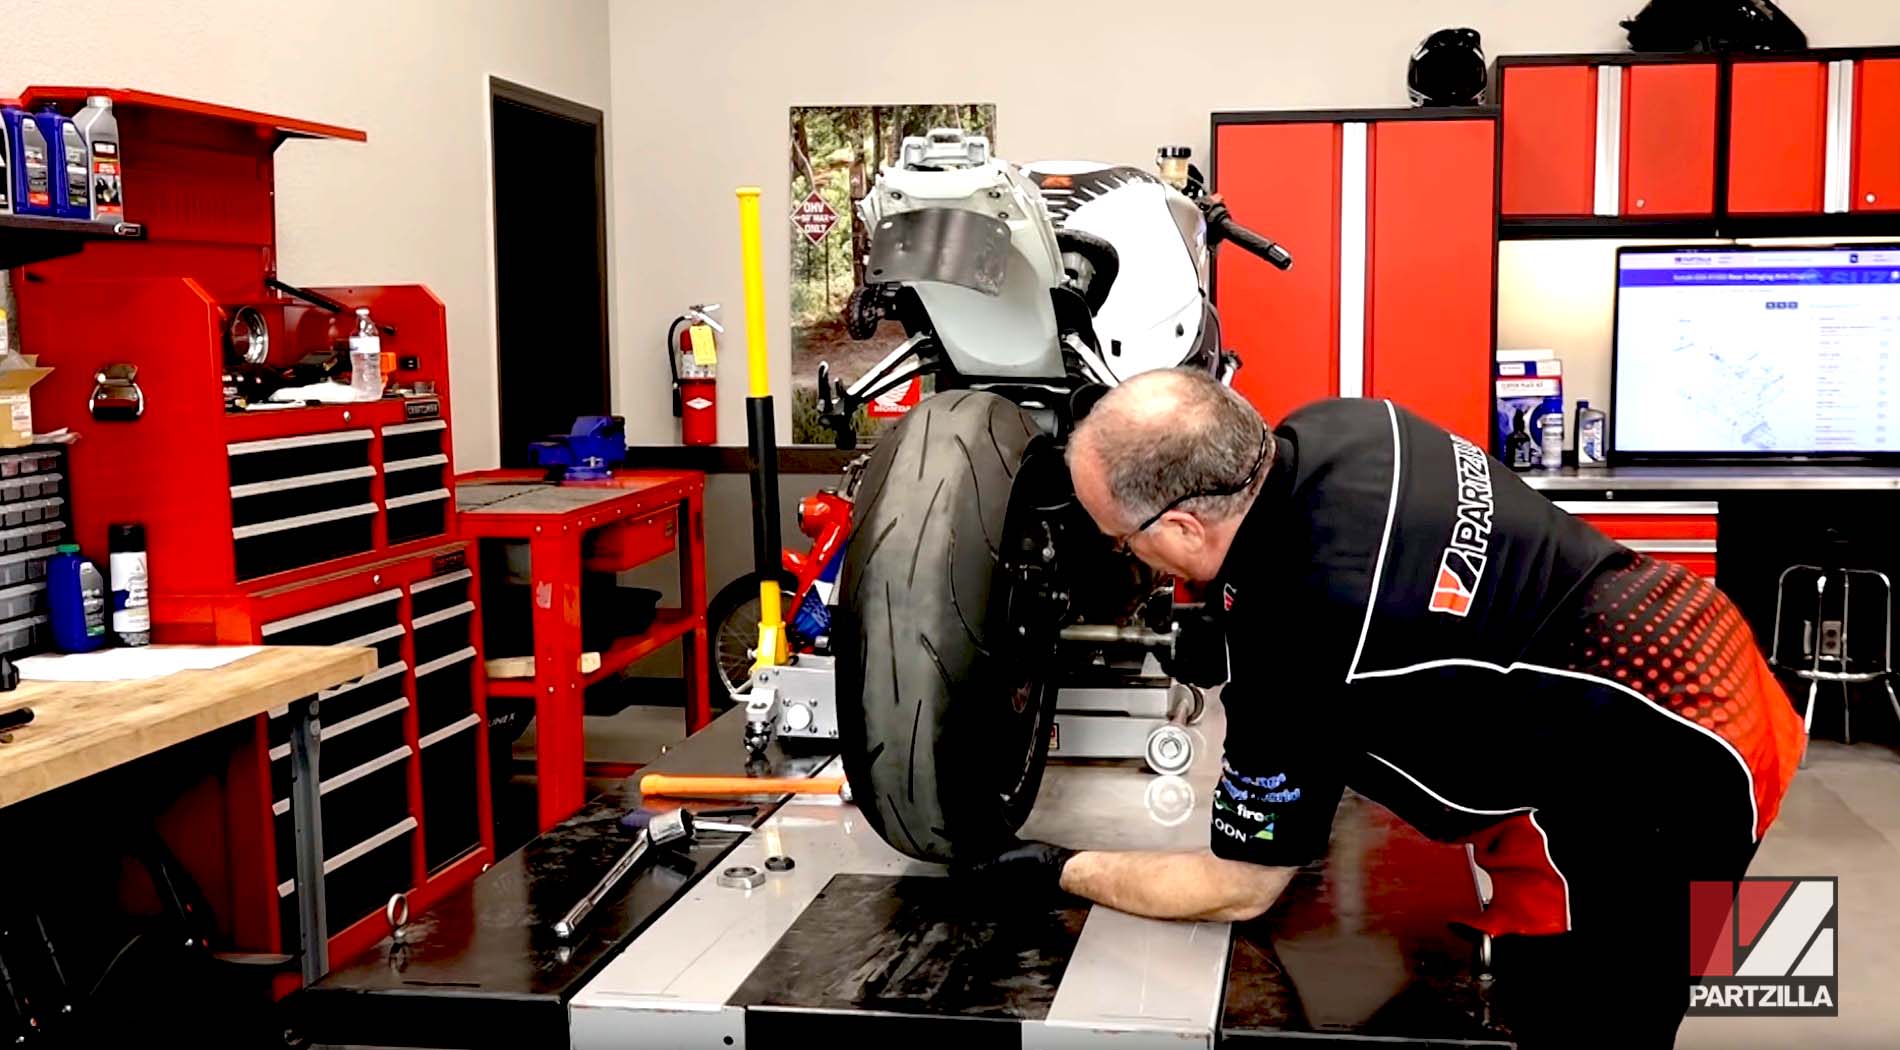
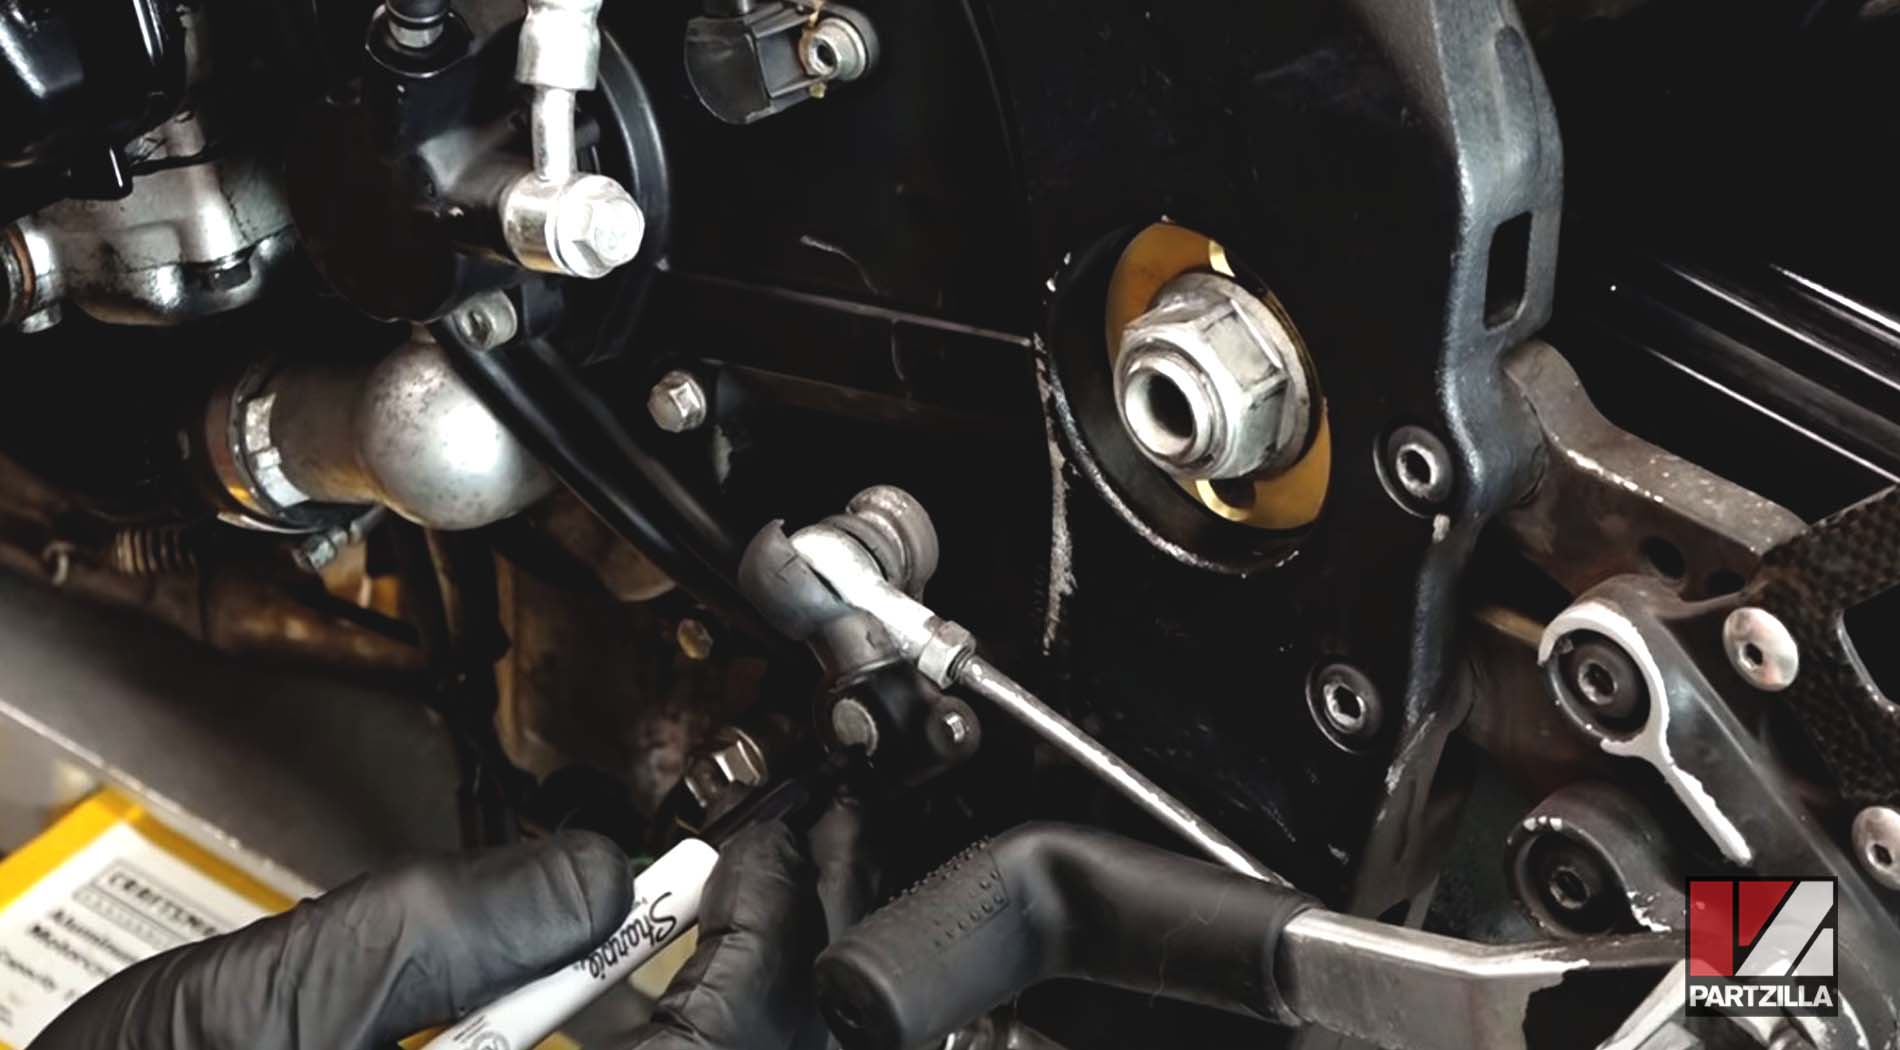
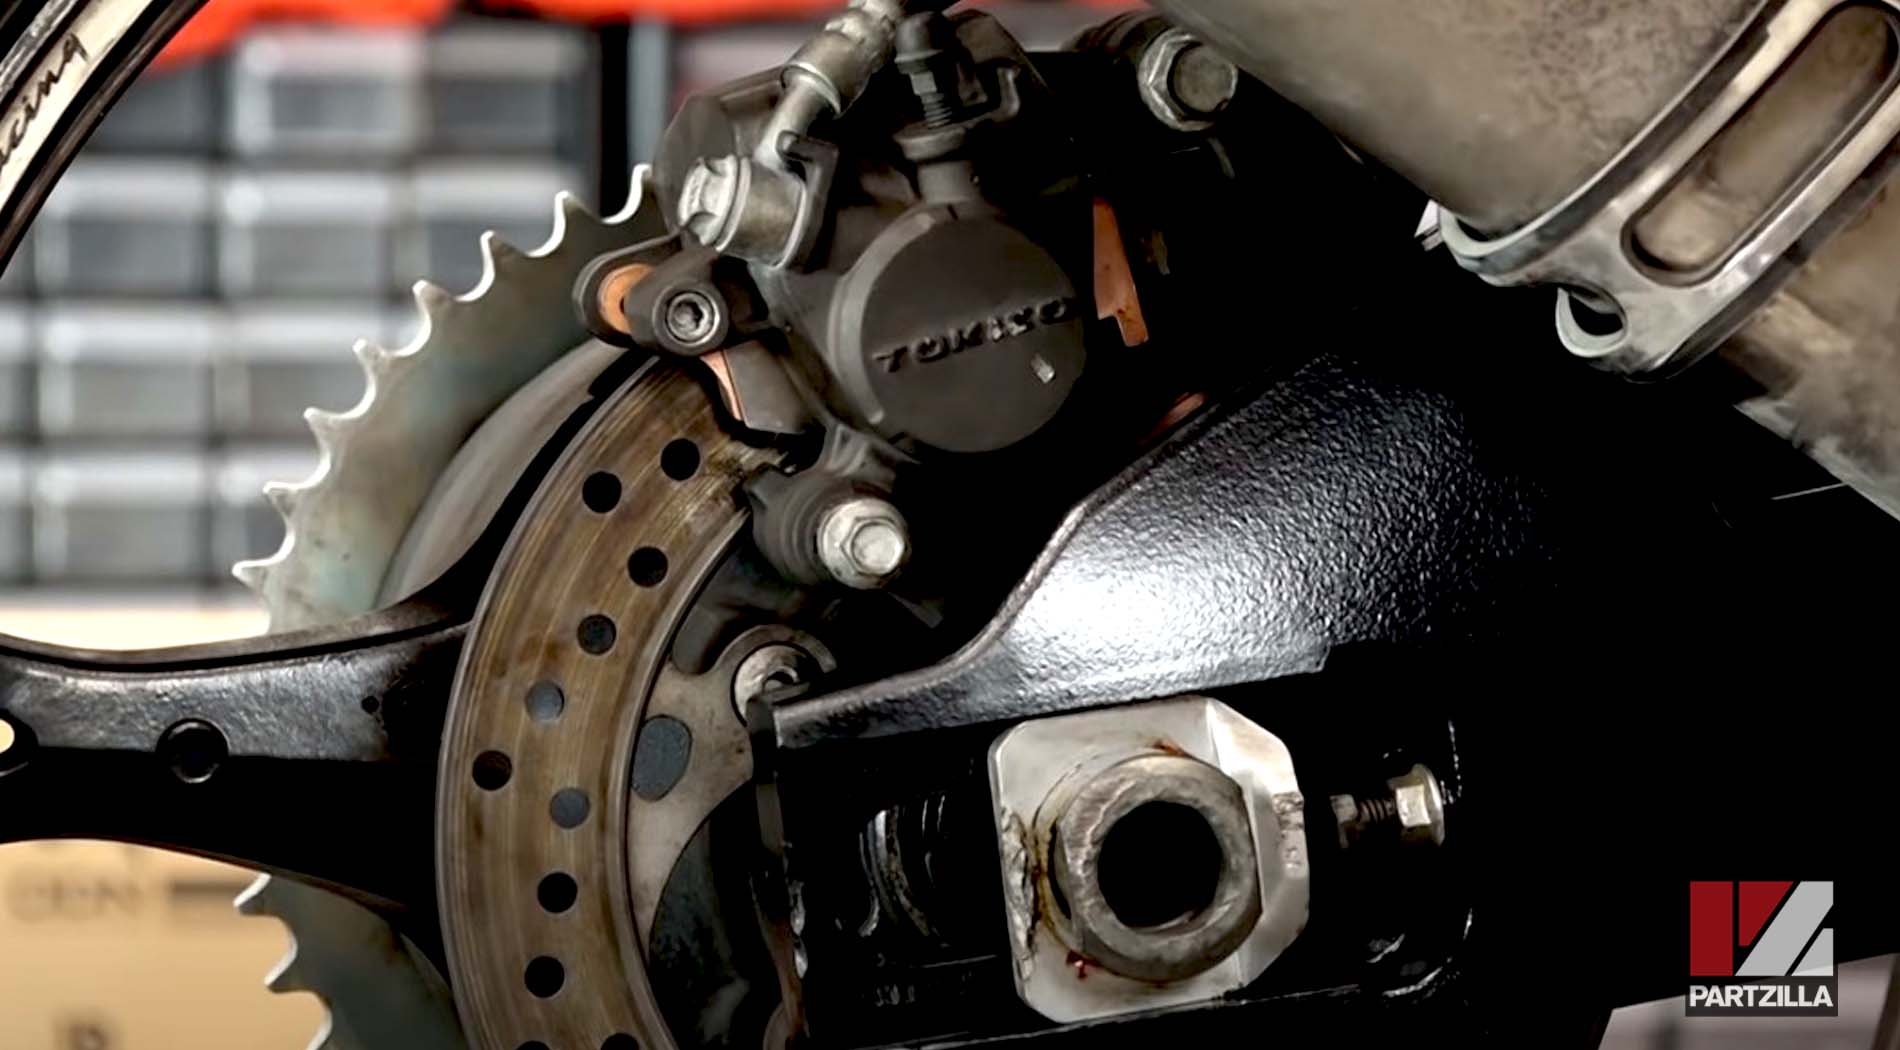
Step 2. Remove the 36mm axle nut from the rear wheel and pull the axle out, then move the rear brake caliper assembly out of the way.
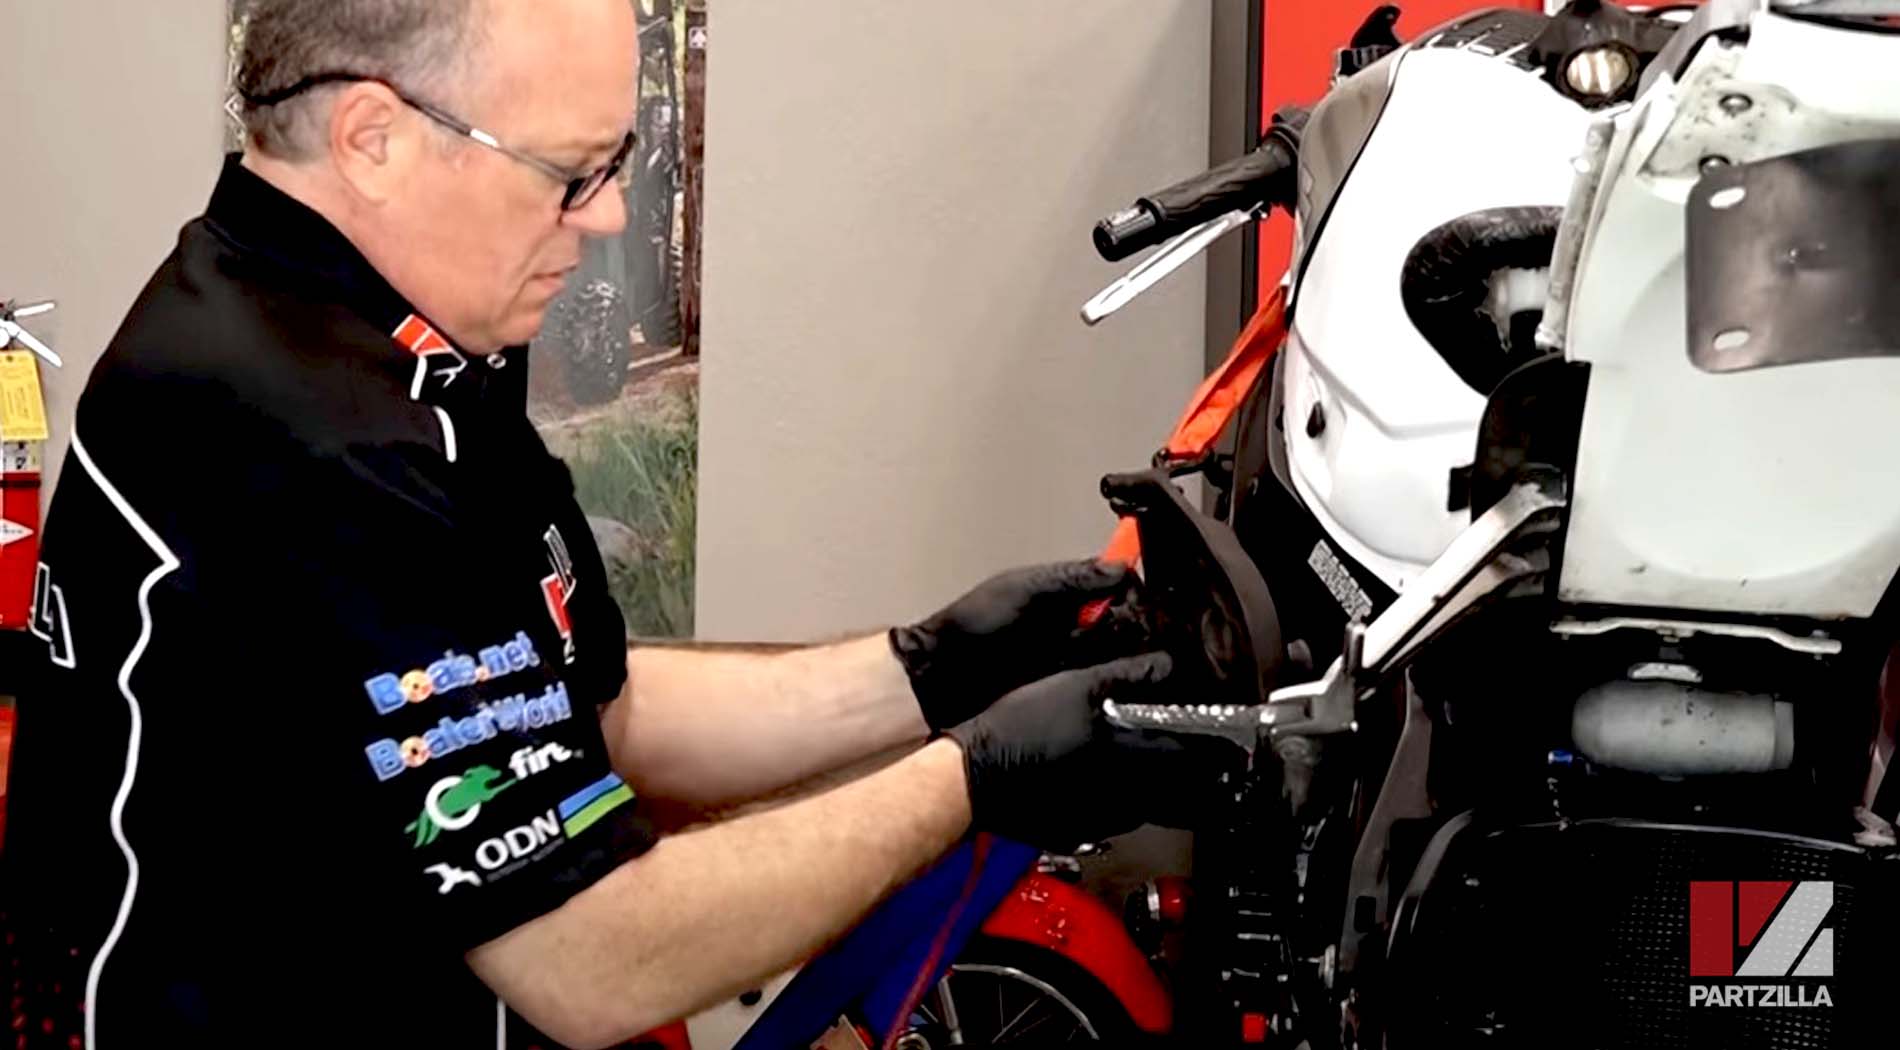
Step 3. Remove the shifter pedal linkage, making sure to mark the linkage and its mounting spline so you can reinstall the linkage in the exact same position later.
Step 4. Unbolt the engine sprocket cover and move it up and out of the way.
NOTE: You don't need to completely remove the sprocket cover.
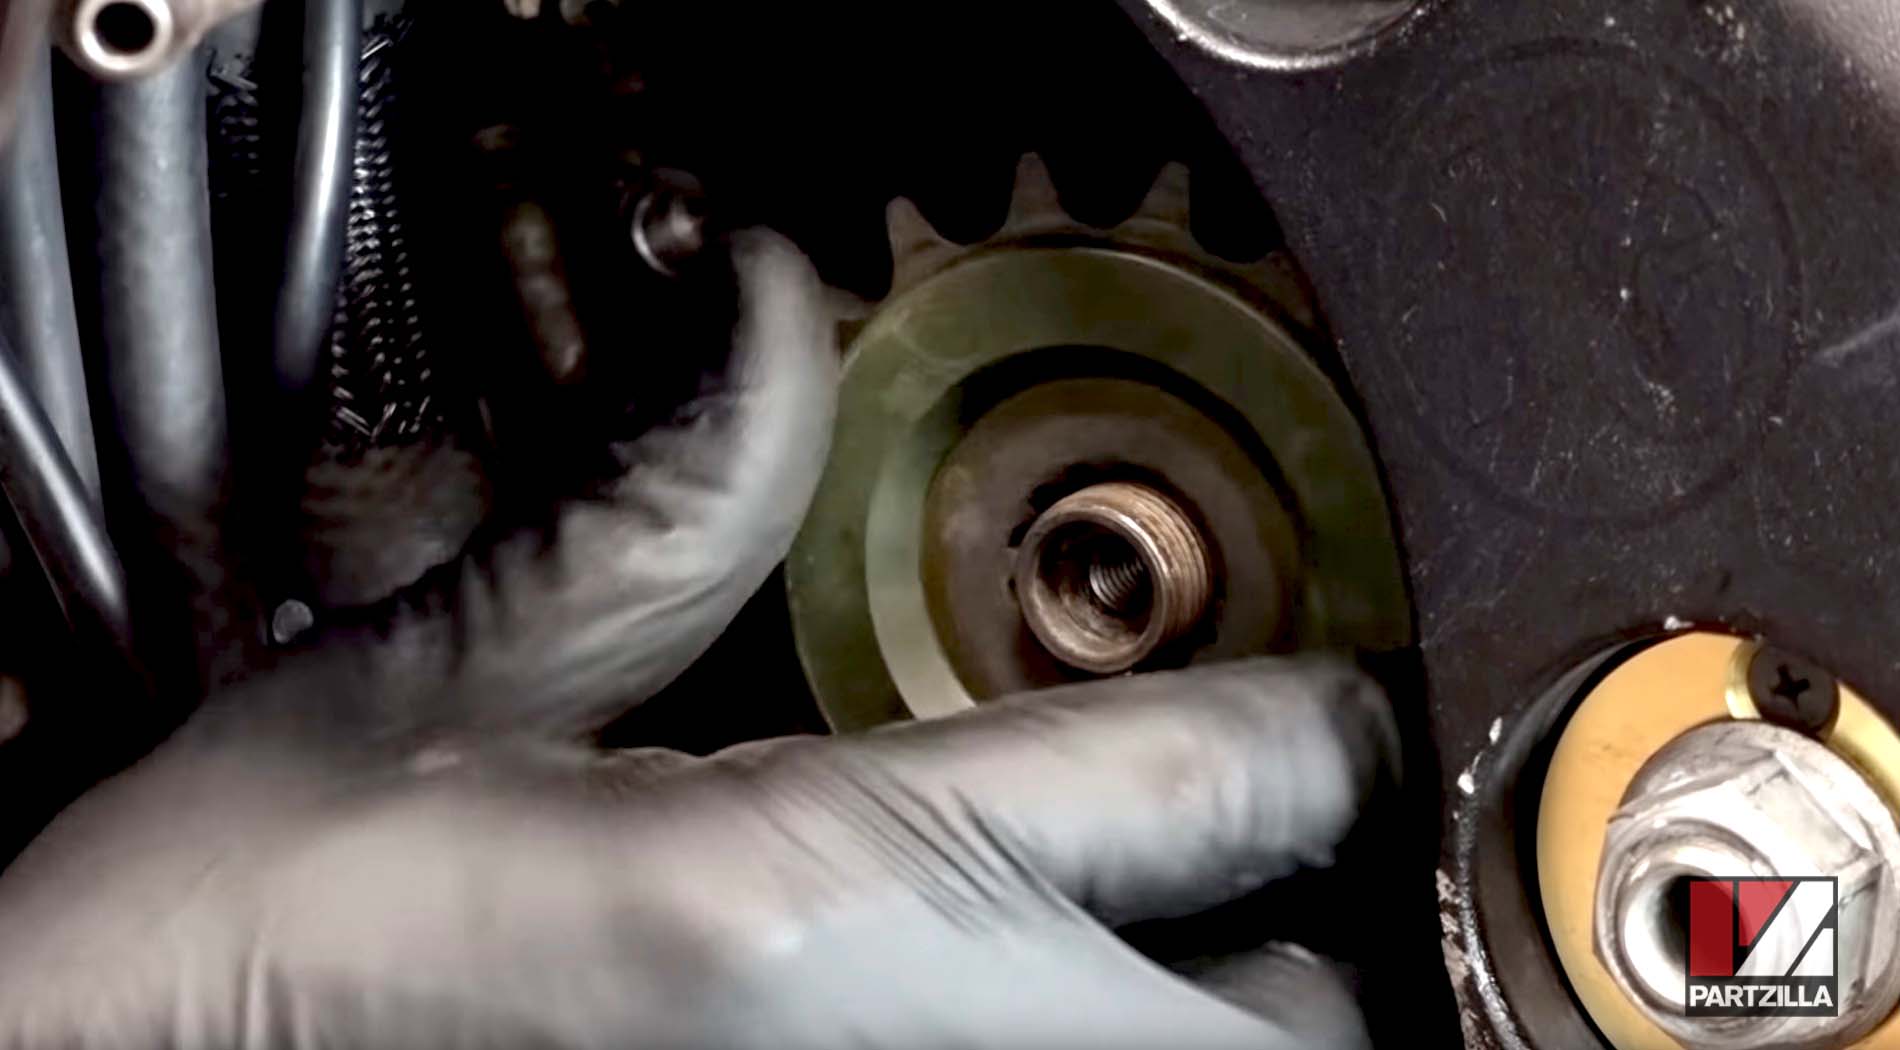
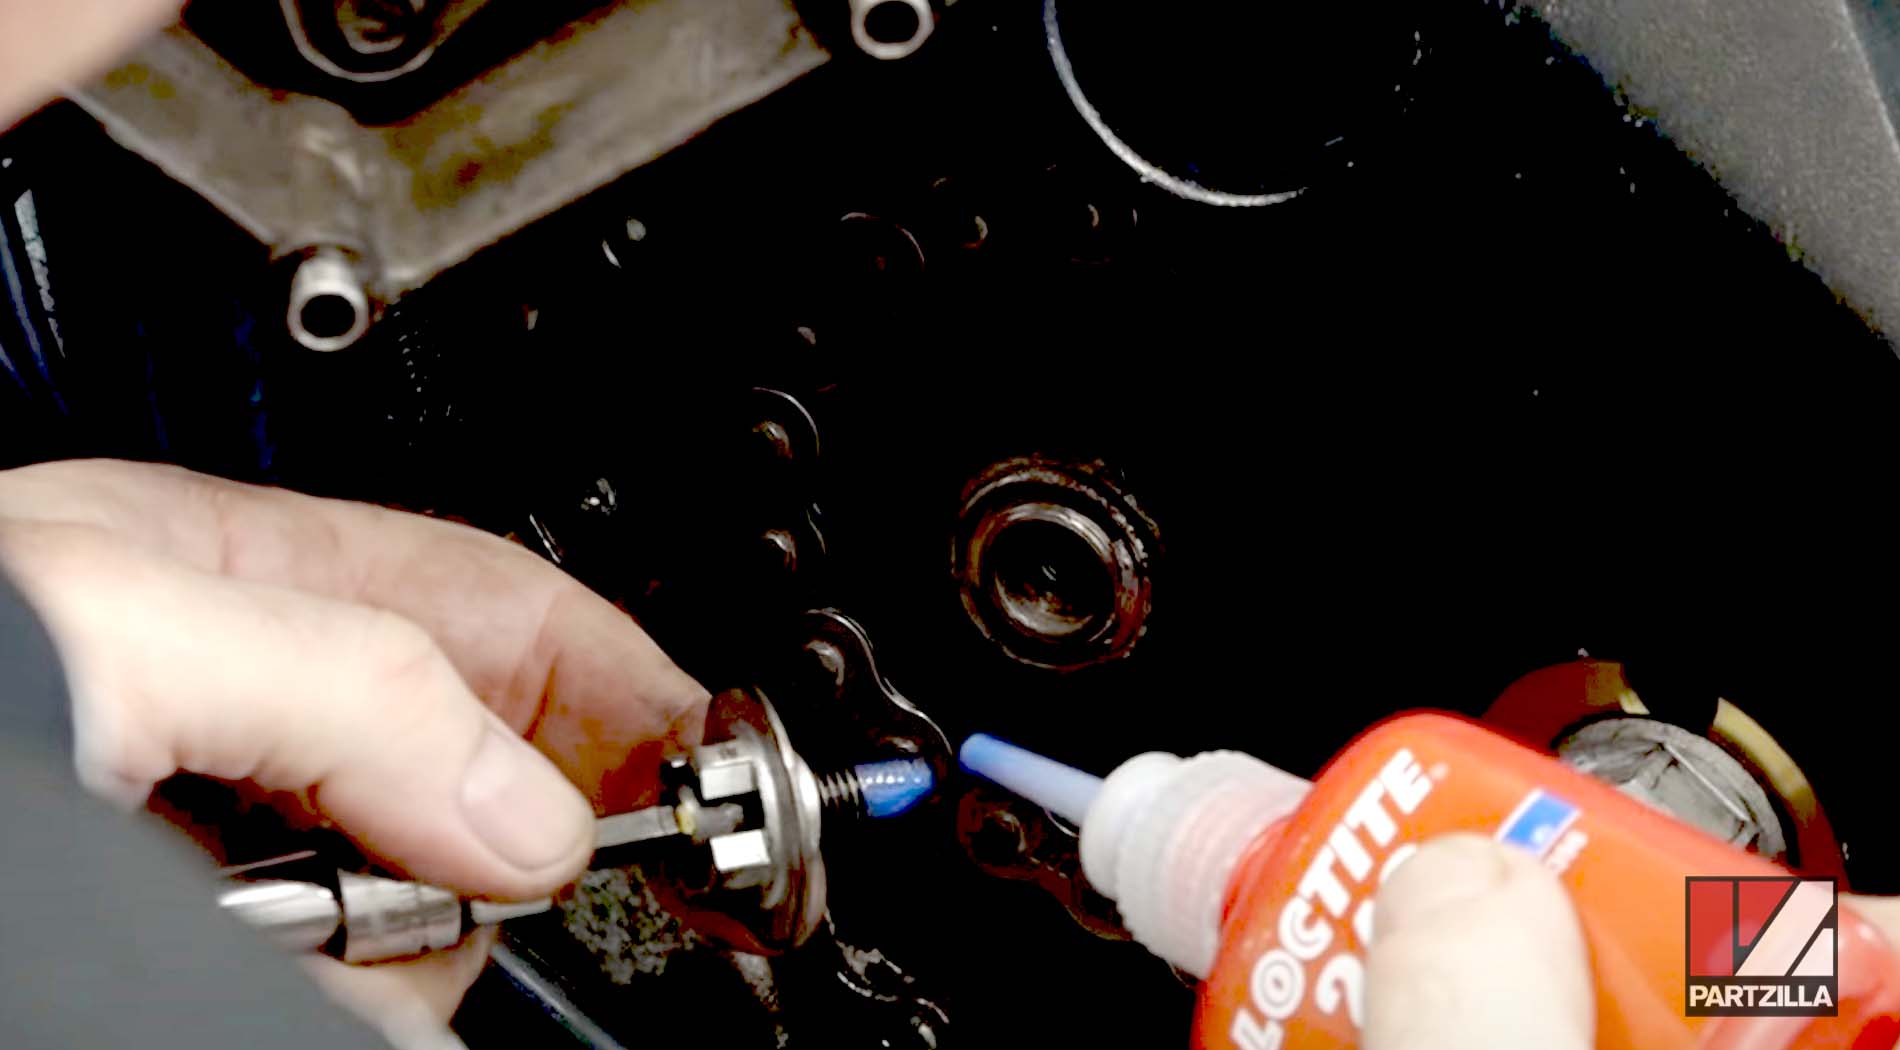
Step 5. Remove the speed sensor rotor and the engine sprocket nut beneath it.
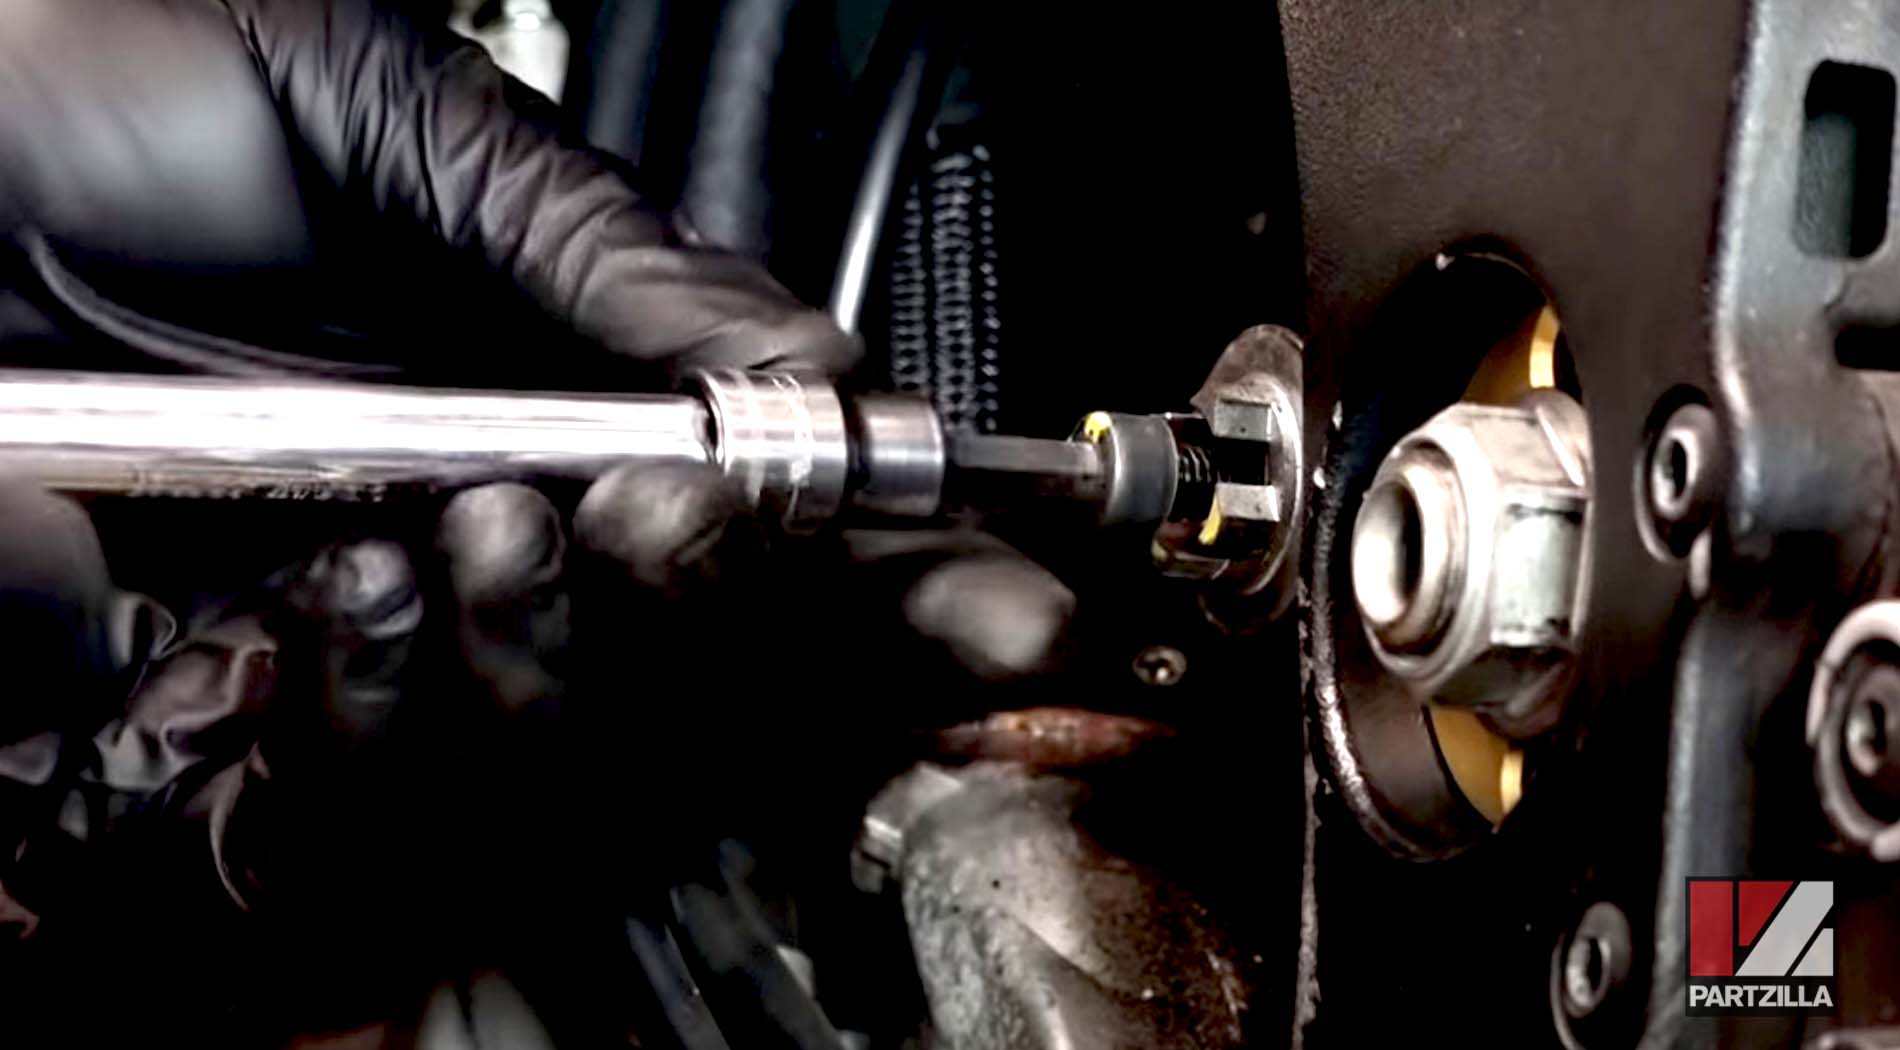
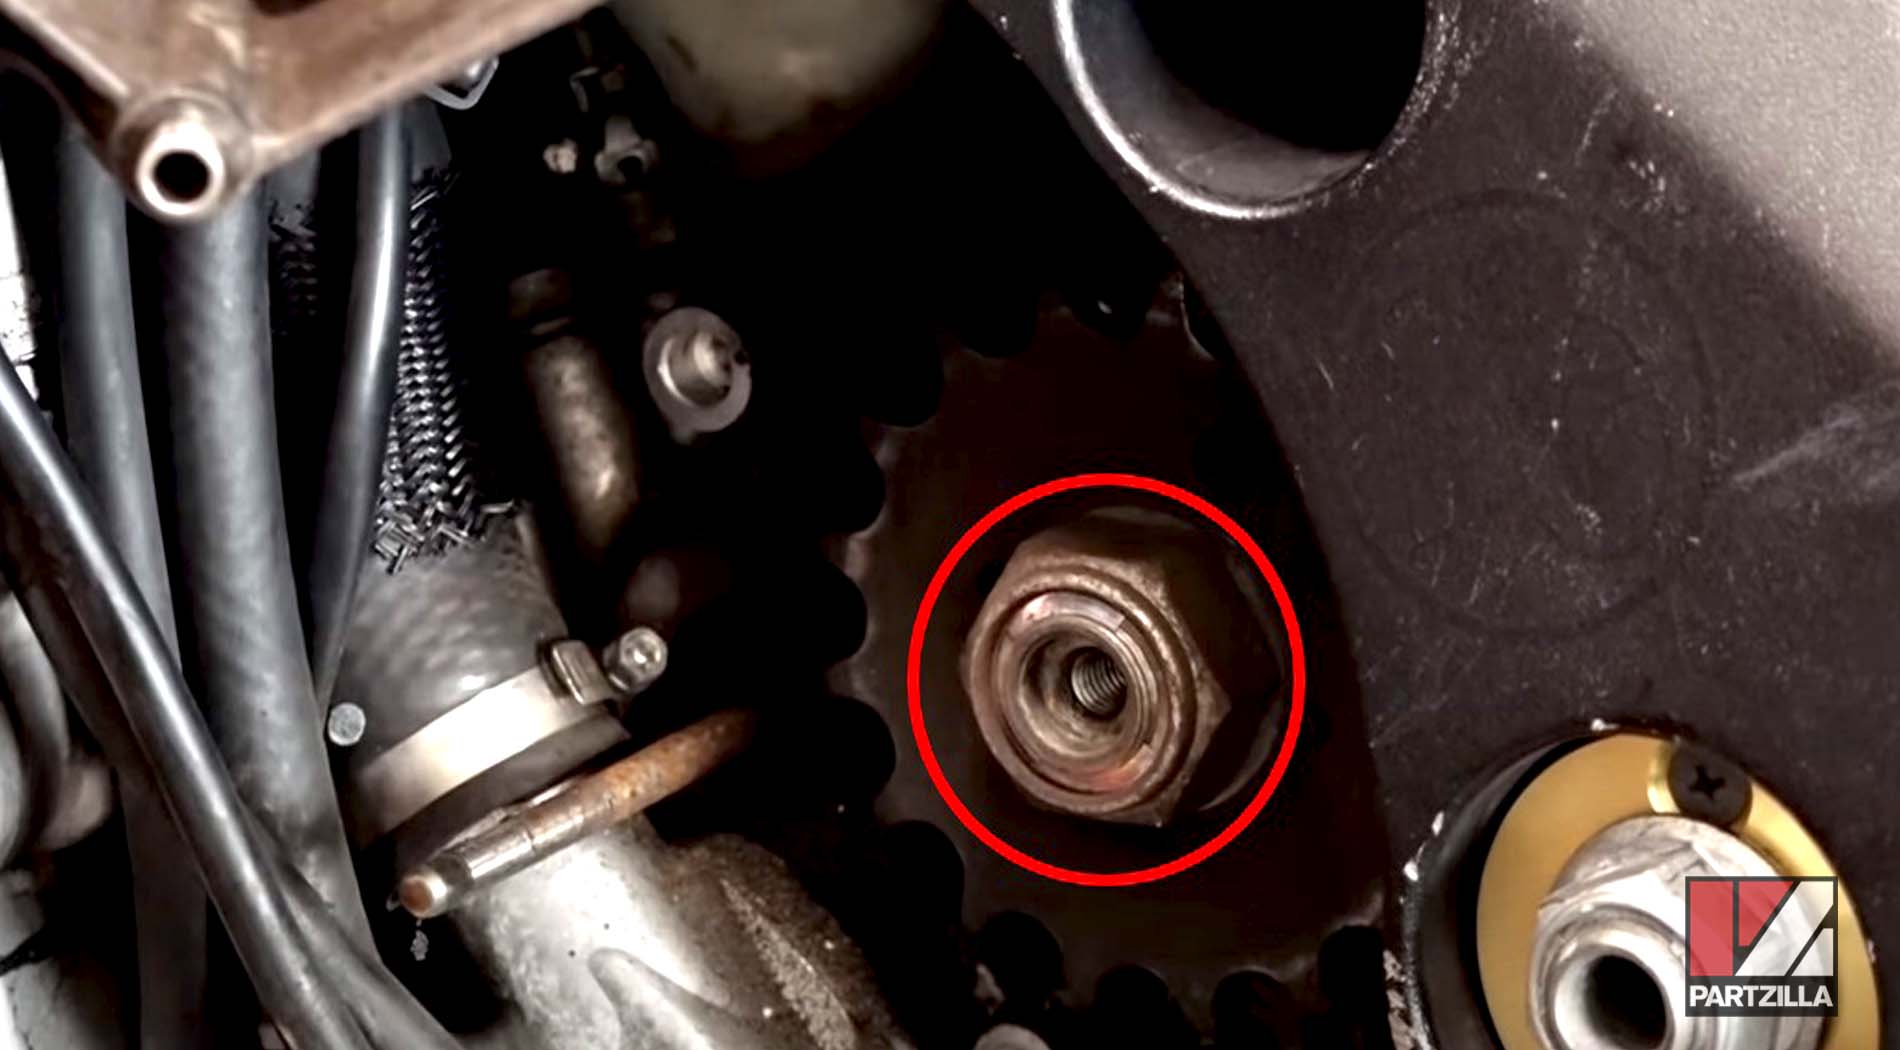
Step 6. Remove the old engine sprocket, then install the new engine sprocket and the sprocket nut.
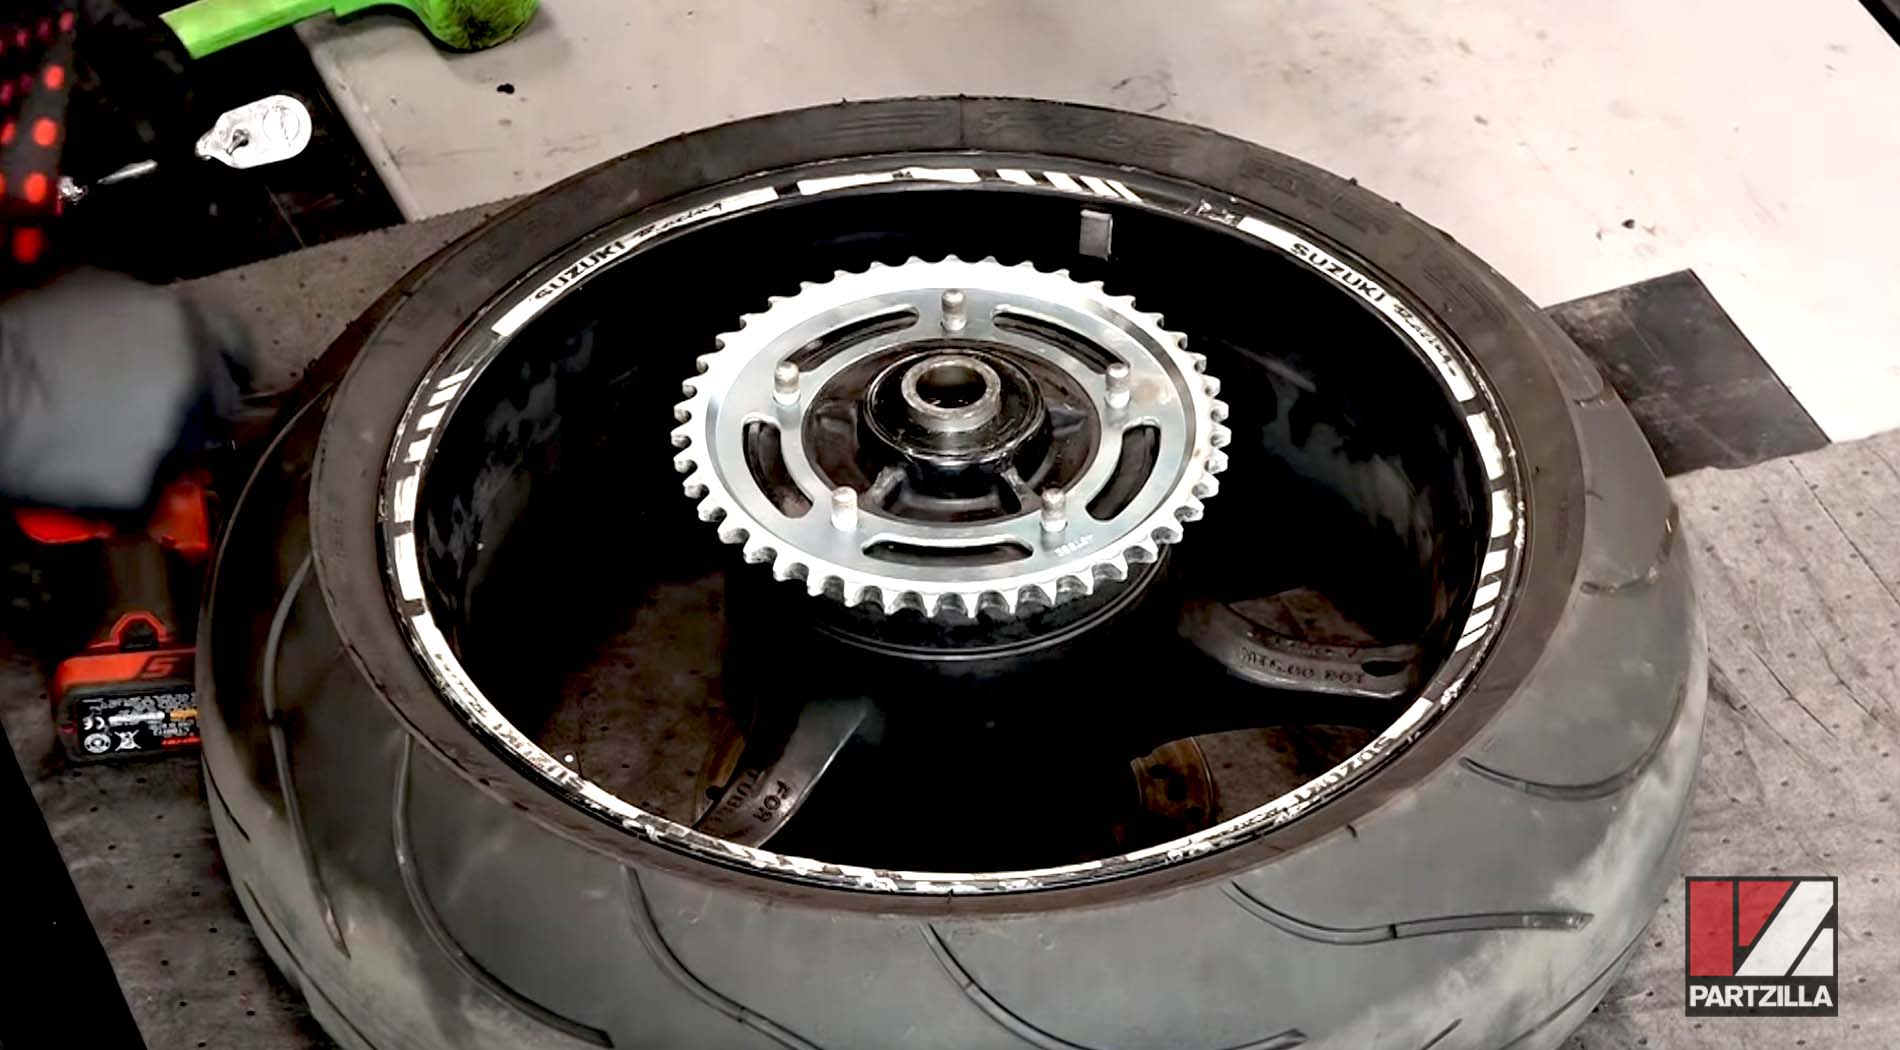
Step 7. Remove the five rear sprocket bolts and the old sprocket from the rear wheel.
Step 8. Install the new rear sprocket with its beveled edge facing outward. Reinstall the sprocket bolts and torque them to 44 foot-pounds.
Step 9. Remount the rear wheel onto the swingarm and reinstall the axle, making sure the flat side of the axle is flush with the flat side of the chain adjuster. Make sure the chain adjusters are both backed off, and that the wheel is mounted as fully forward as possible. Reinstall the brake caliper assembly over the brake rotor.
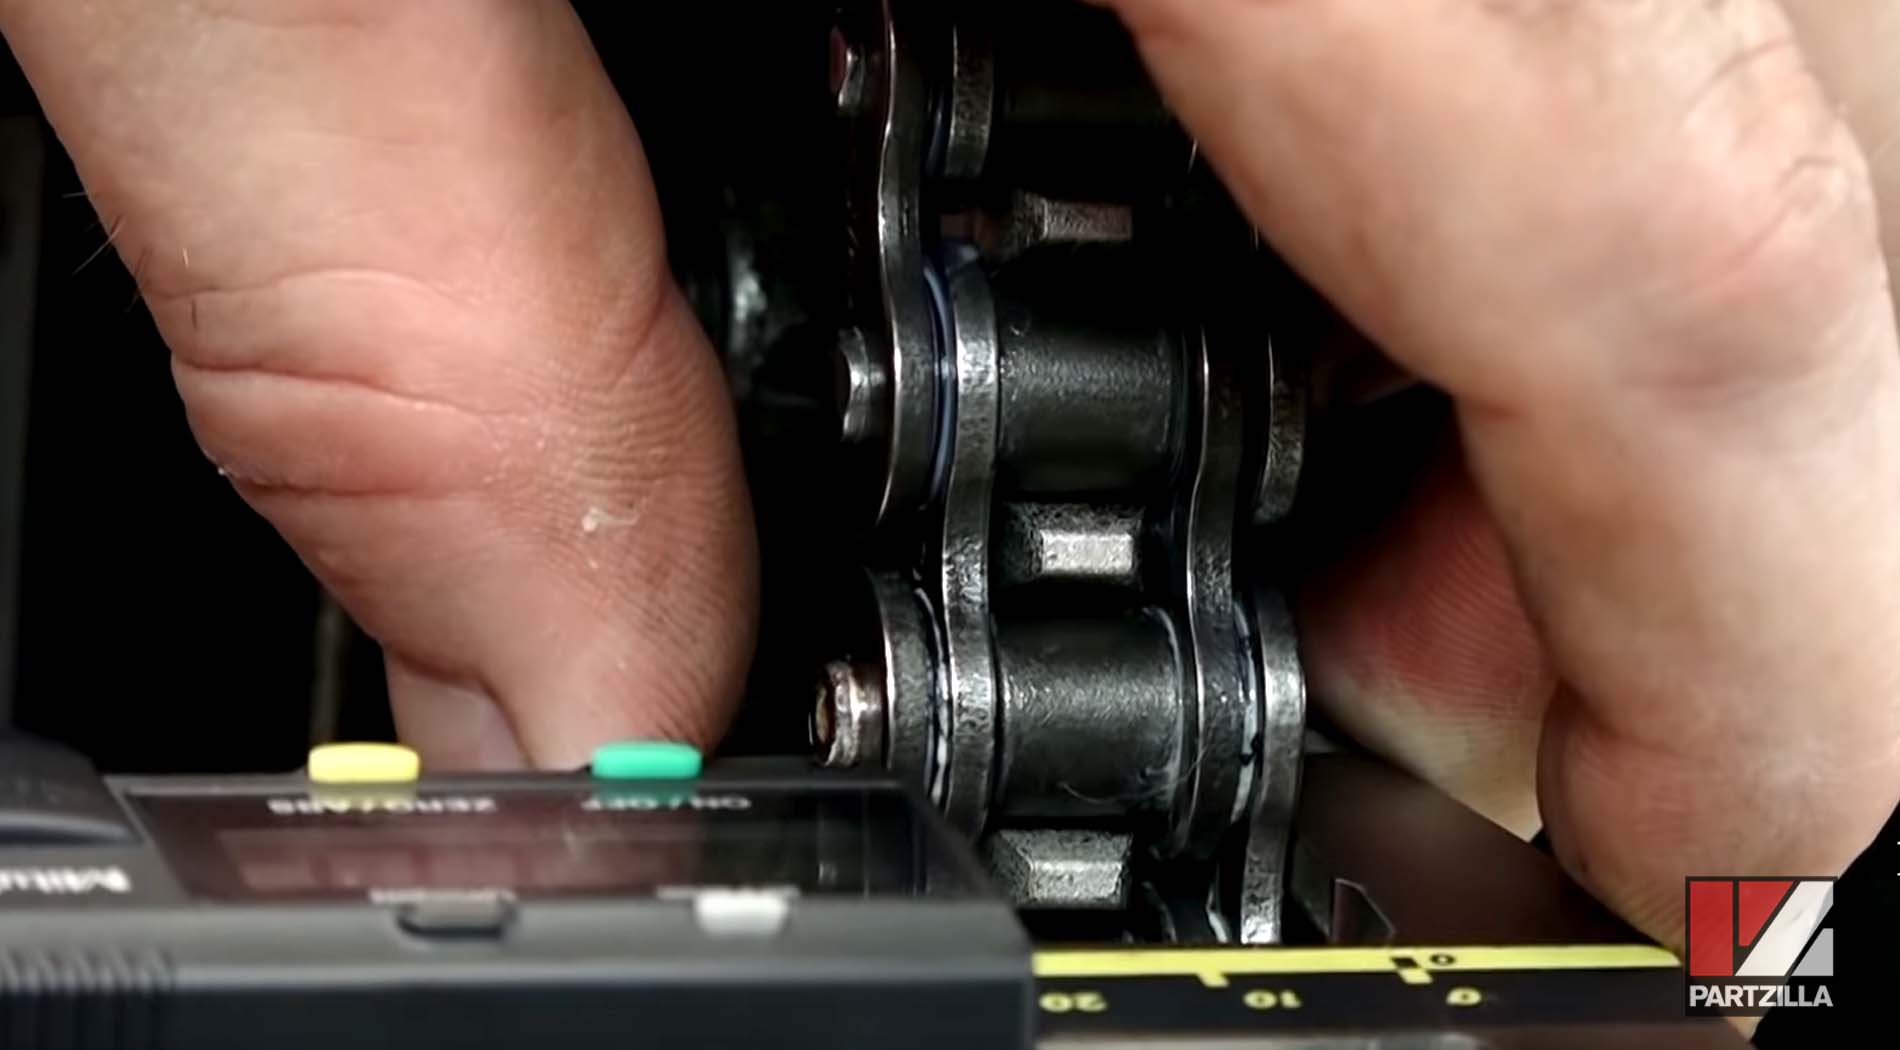
Step 10. Run the new chain over the engine sprocket and rear sprocket, and install the master chain link with two of the O-rings on the inside and the other two O-rings on the outside.
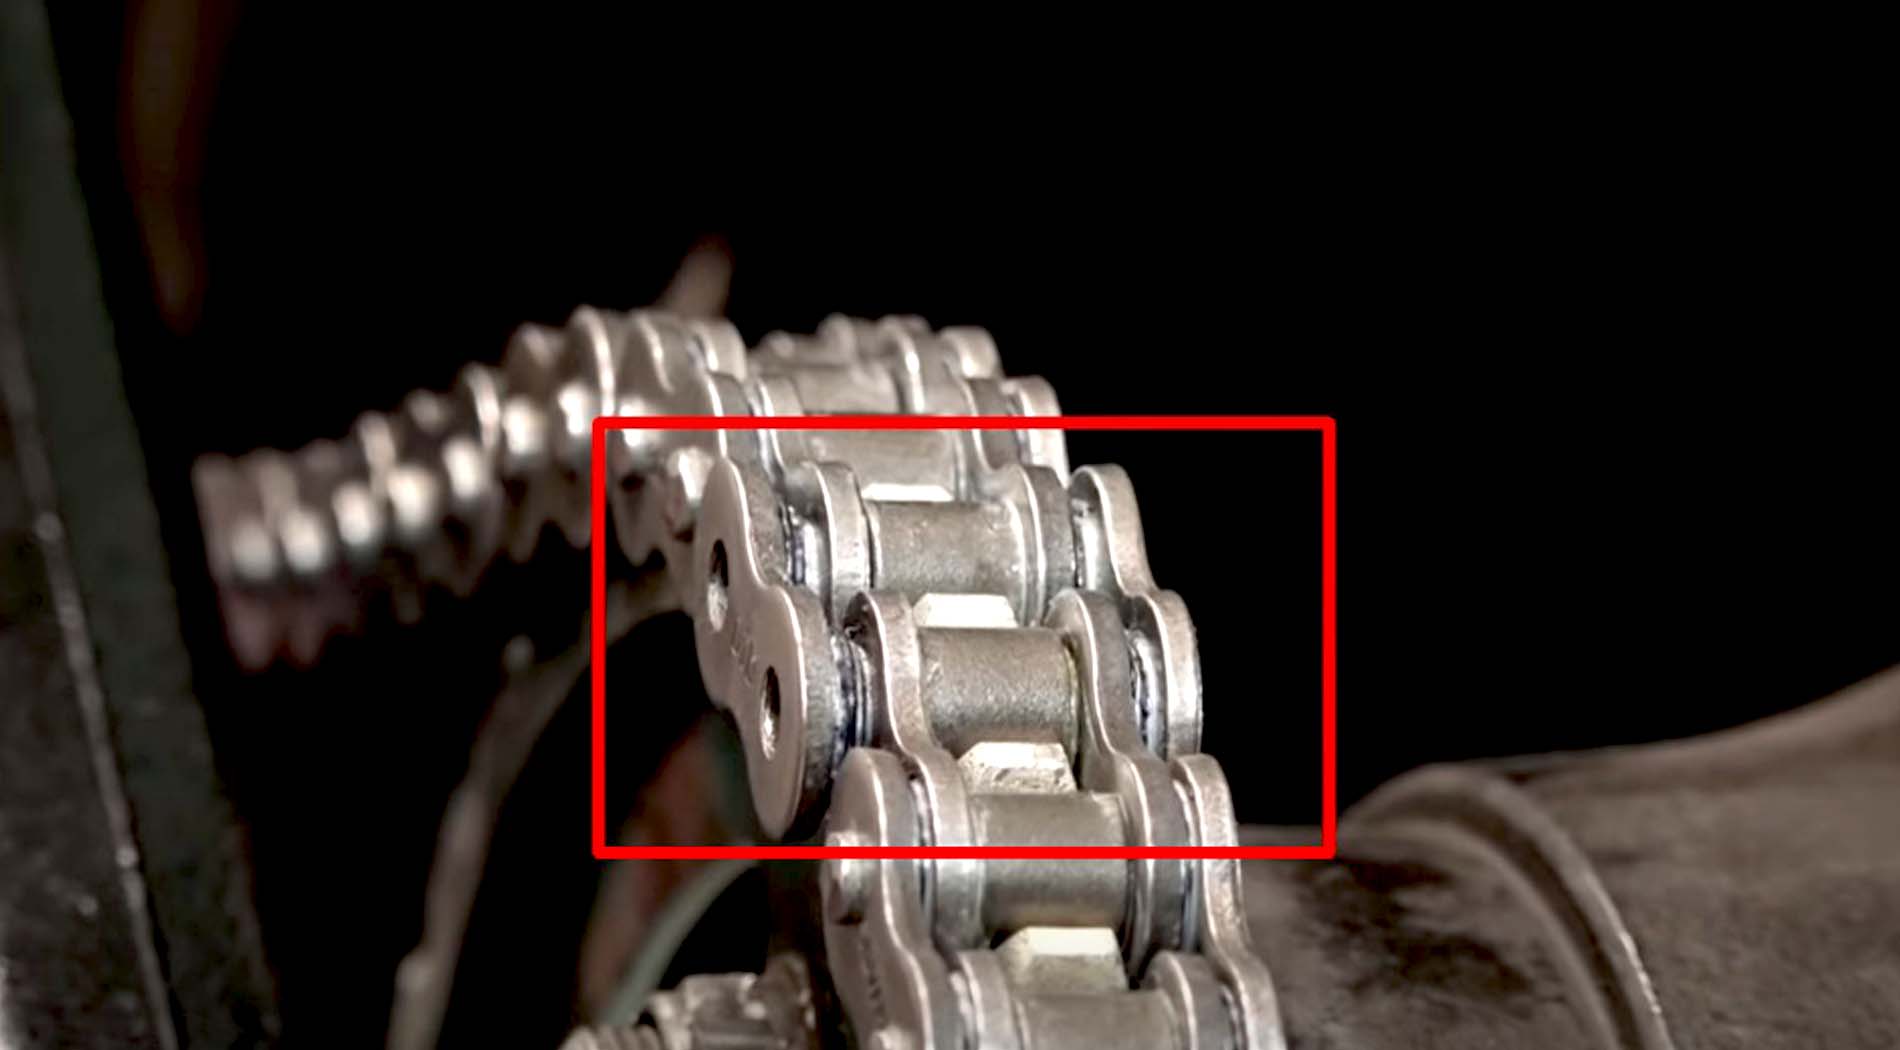
Step 11. Install the master chain link's outer plate, making sure it isn't installed too tightly or it'll compress the O-rings and kink the chain. When the outer plate is installed correctly, the distance between the two outer plates should be between 21.1mm and 21.3mm. Using the chain tool, slowly tighten and press the new outer plate onto the chain, frequently stopping to measure with a digital caliper.
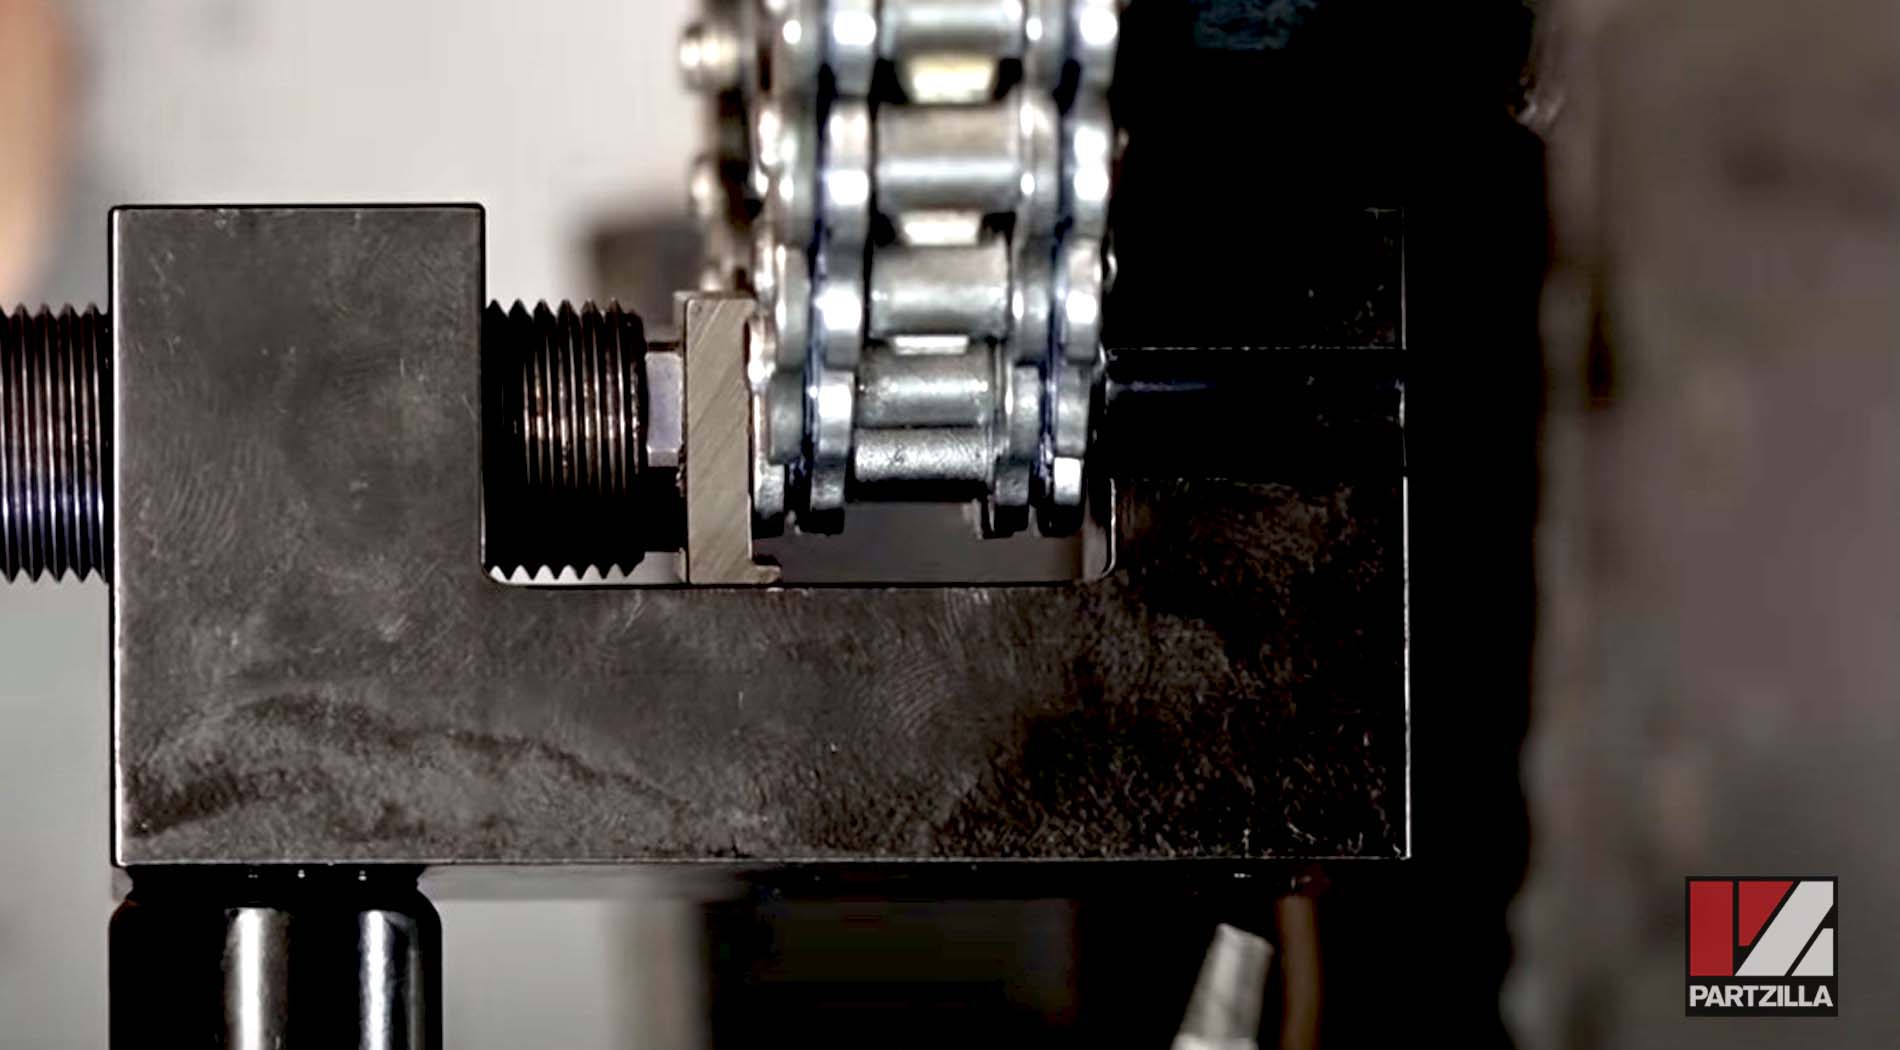
NOTE: Be patient and tighten the chain outer plate very slowly because if you overtighten it, you can't back it out again.
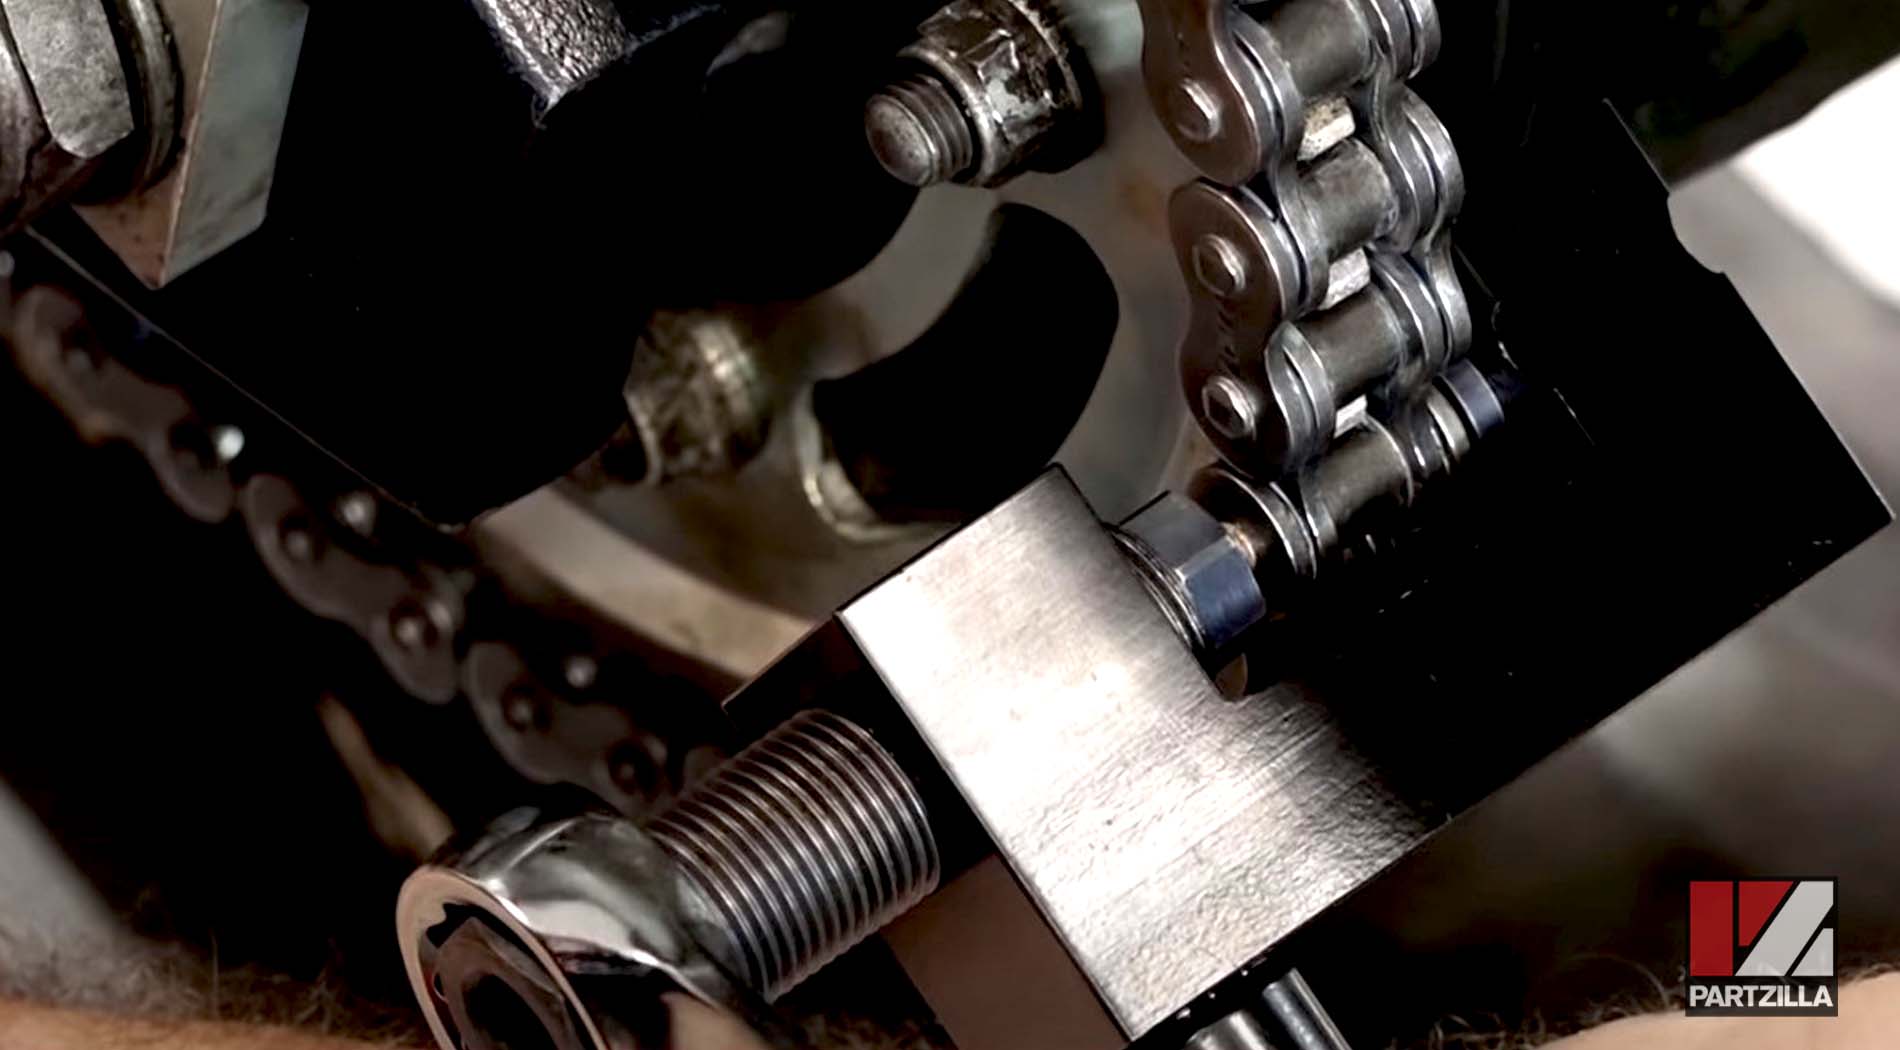
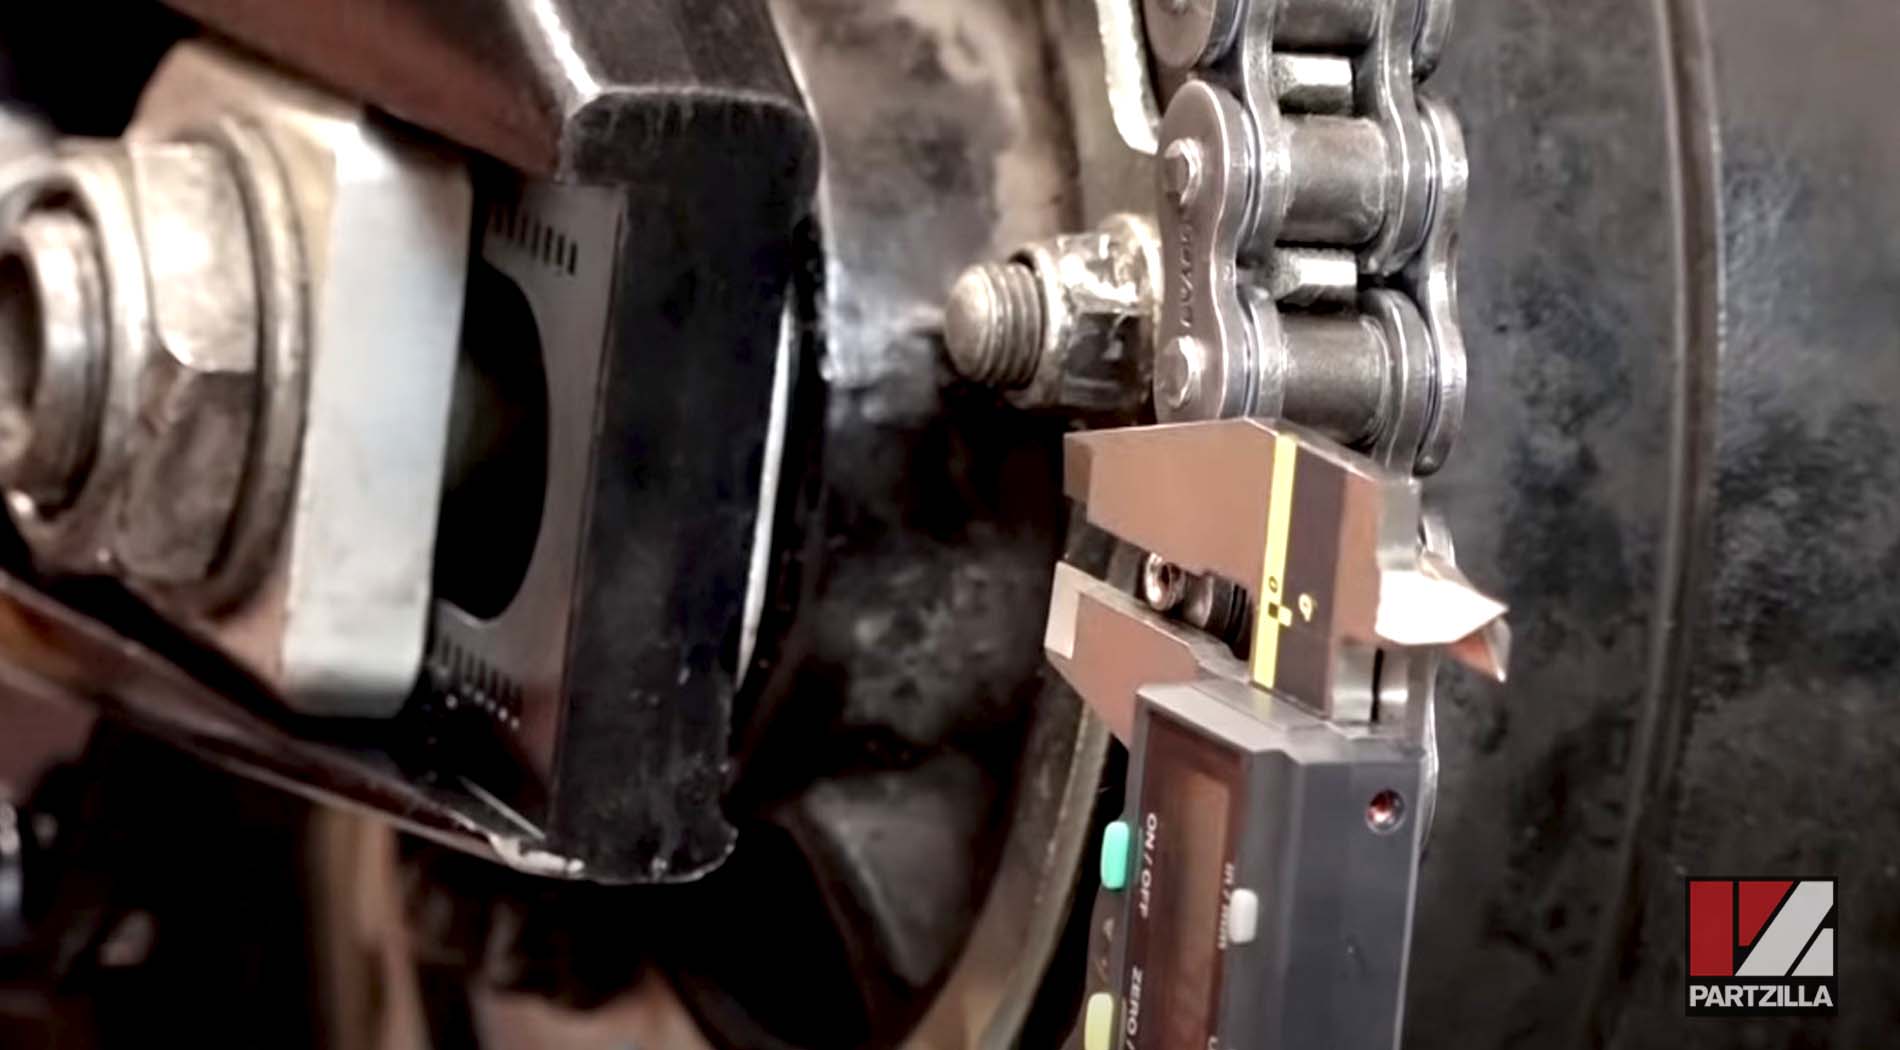
Step 12. Flare out the pins on the new master chain link by using the chain tool to flare each pin so it's between 5.5mm and 5.8mm. Work slowly and stop frequently to measure with the digital caliper.
Step 13. Hold the foot brake, and torque the engine sprocket nut to 72.5 foot-pounds. Put a drop of threadlocker on the speed sensor rotor and torque it to 18 foot-pounds.
Step 14. Reinstall the engine sprocket cover and the shifter pedal linkage, making sure to align the markings you made when removing it.
Step 15. Adjust the chain so it has 1 inch of play in it as measured from its mid-point below the rear swingarm. Adjust the left side chain adjuster until the chain is at the correct tension. Note where the adjuster is on the adjustment scale stamped into the swingarm, and adjust the right side chain adjuster so that it's in the same position.
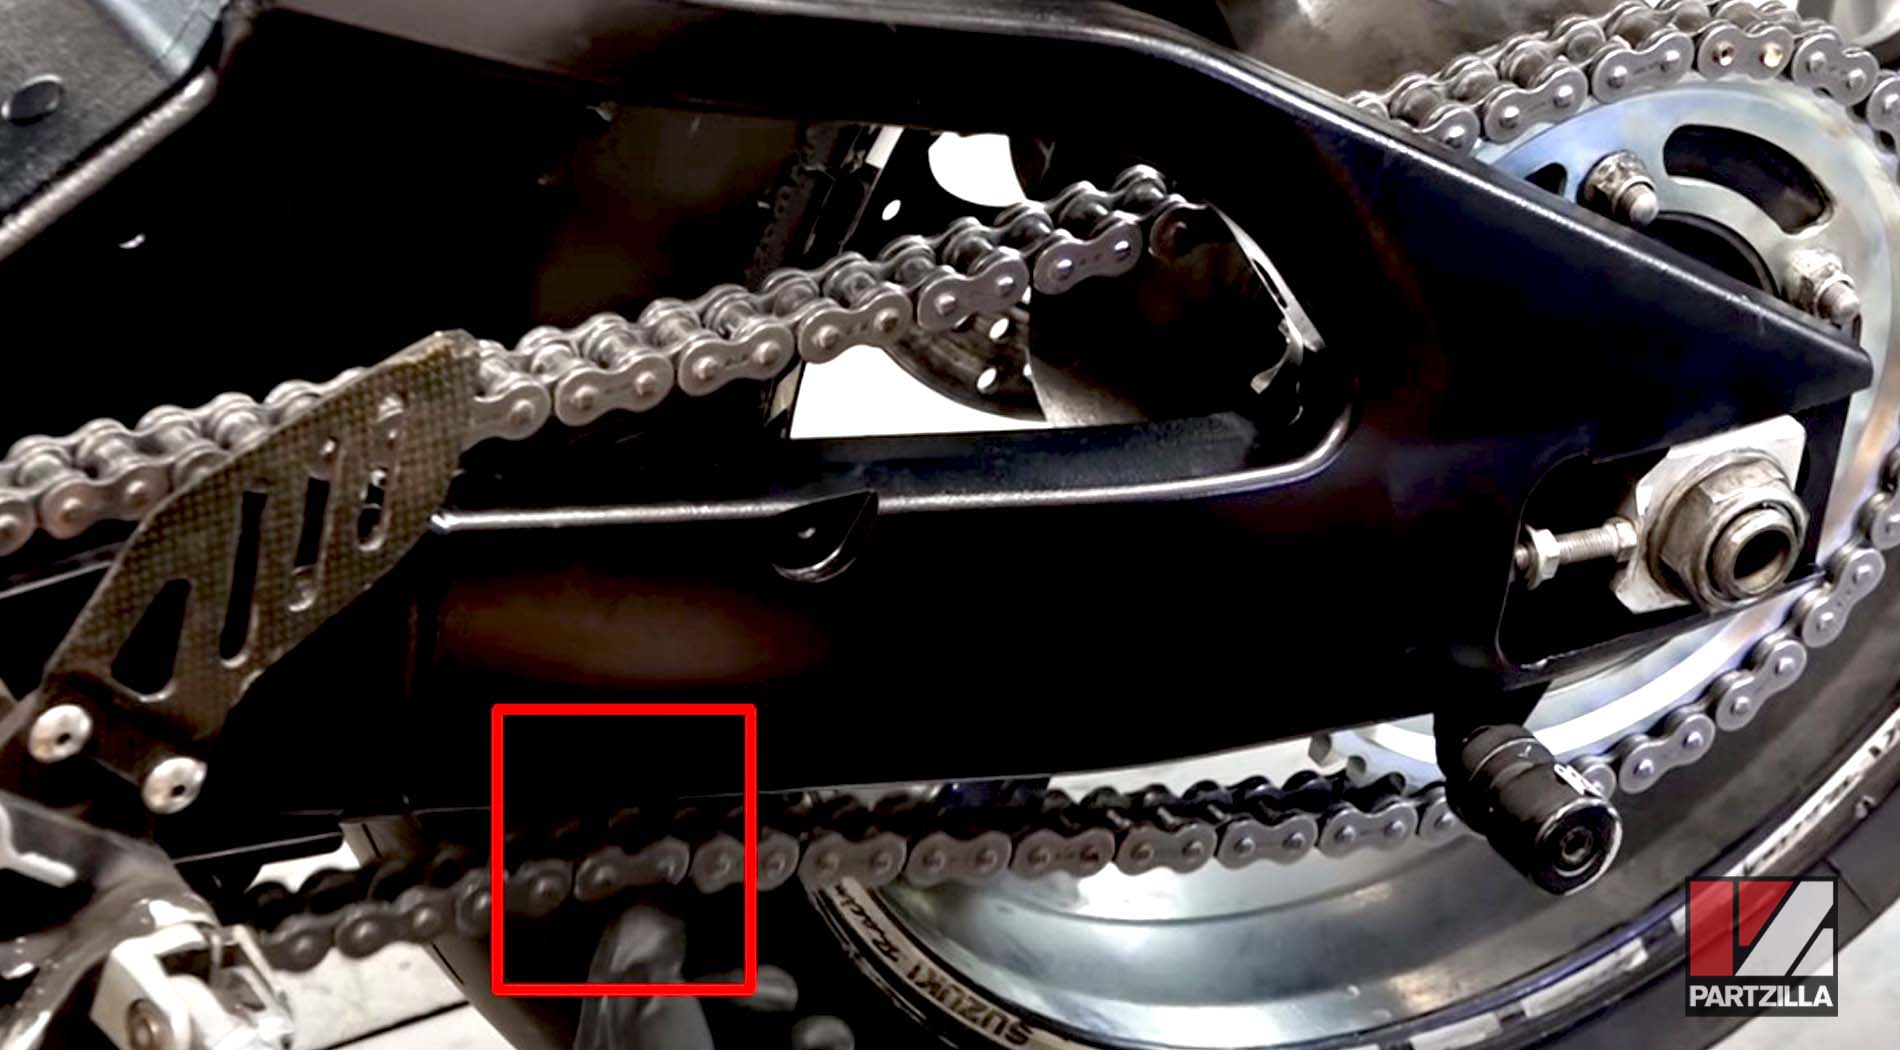
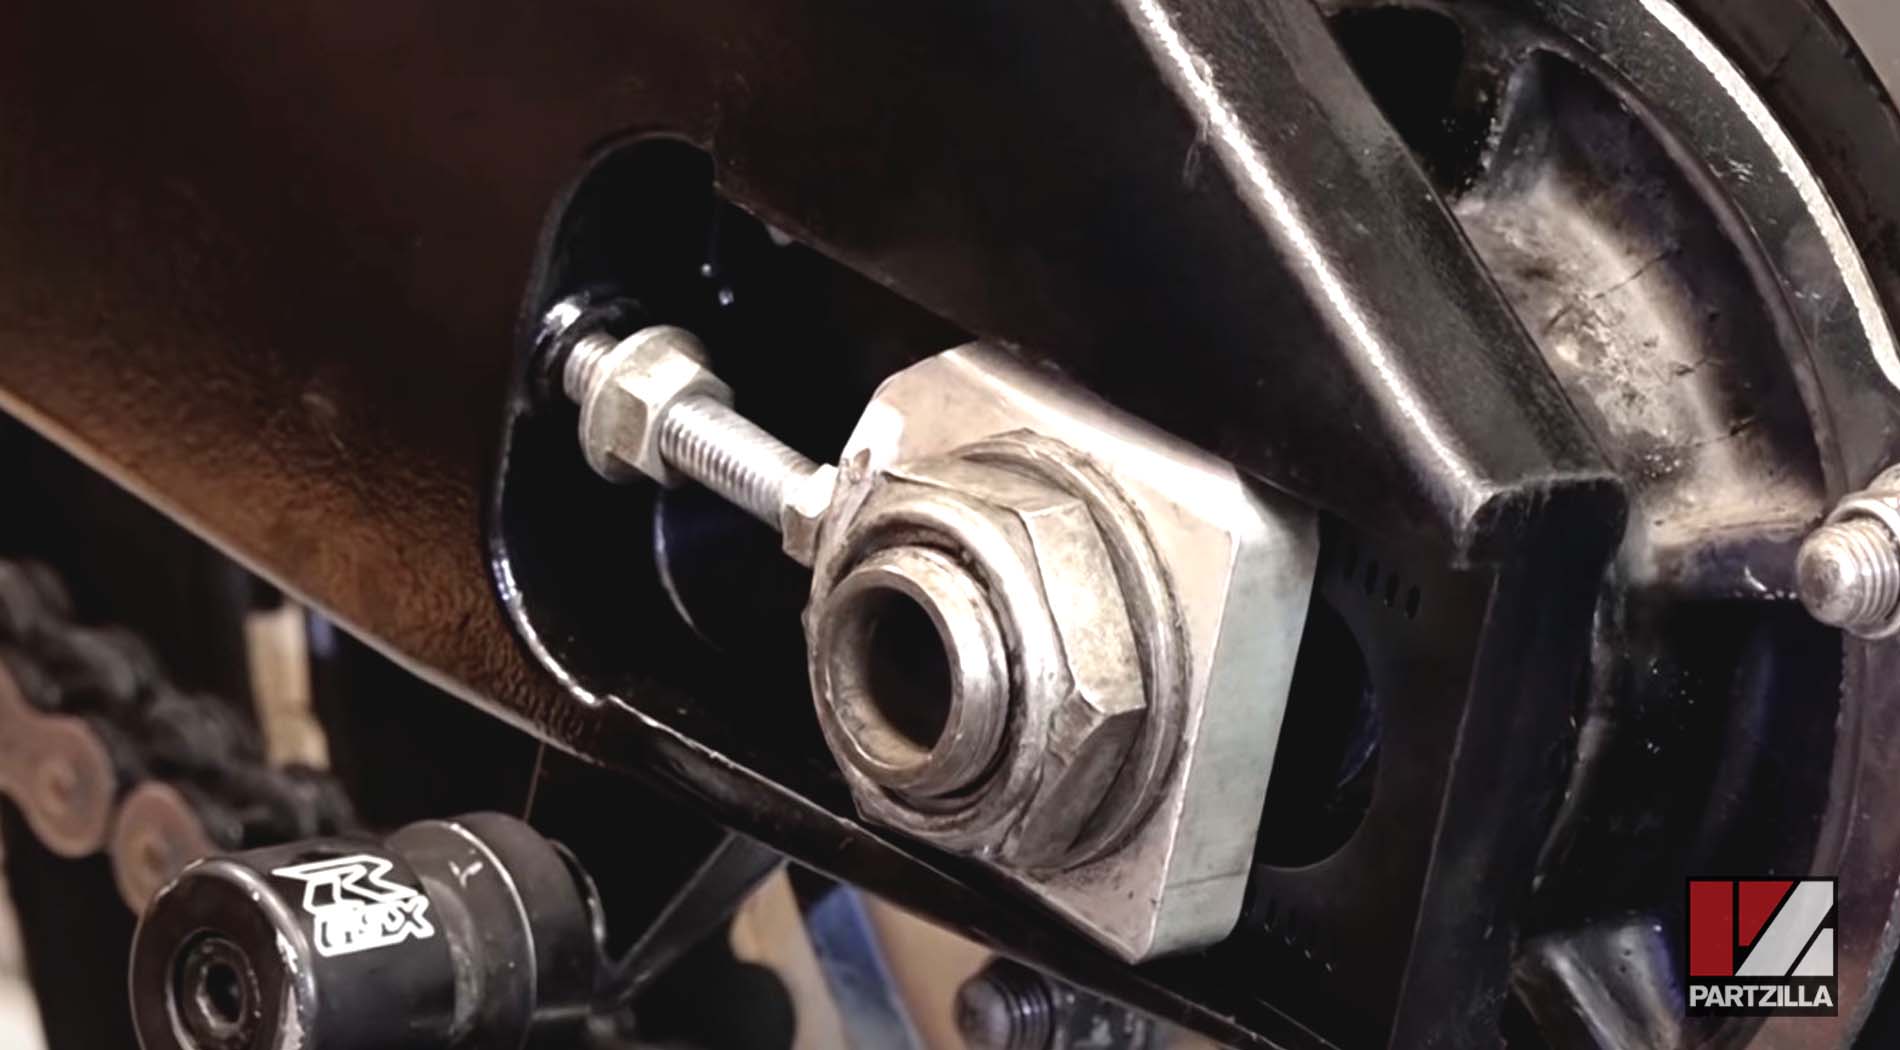
Step 16. Torque the axle nut to 72.5 foot-pounds. Double-check that the chain still has an inch of play (readjust it if the tension has changed) and tighten down the chain adjuster lock nuts.
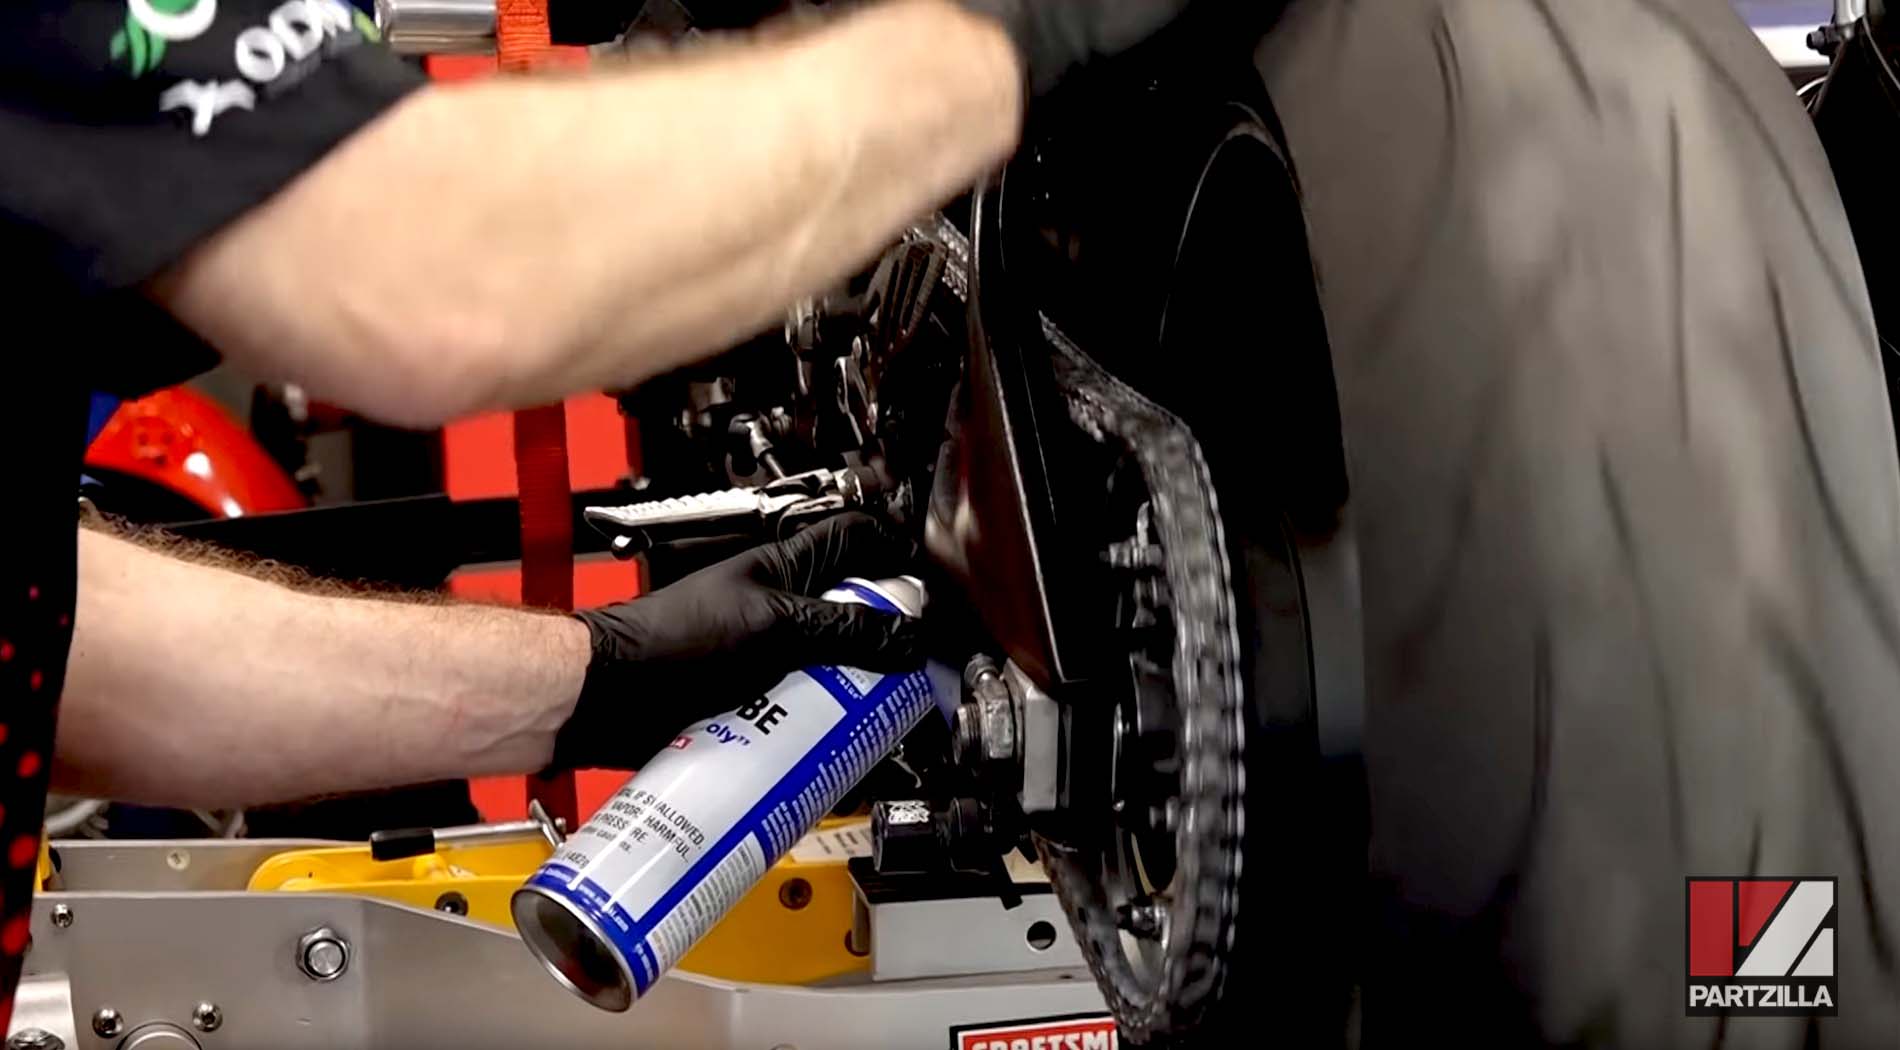
Step 17. Give the new chain a good coating of chain lube and you're done.