How to Install Can-Am Defender Side Mirrors
There are countless aftermarket parts for Can-Am side-by-sides, but for side mirrors on the Defender Max, it’s best to stick with the OEM mirror installation kit.
Watch the video above and follow the steps below to install a side mirror on a Can-Am Defender using the OEM kit.
Tools and Parts - Can-Am Defender Side Mirror Installation
- T30 Torx driver
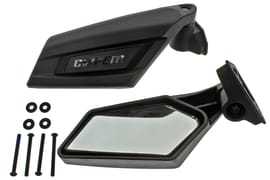
- Can-Am Defender Max side mirror kit
NOTE: If you’re installing side mirrors on both the right and left sides, the same part number is used for both sides.


Can-Am Defender Max Side Mirror Replacement
Step 1. Remove the two T30 Torx bolts where the side mirrors go.
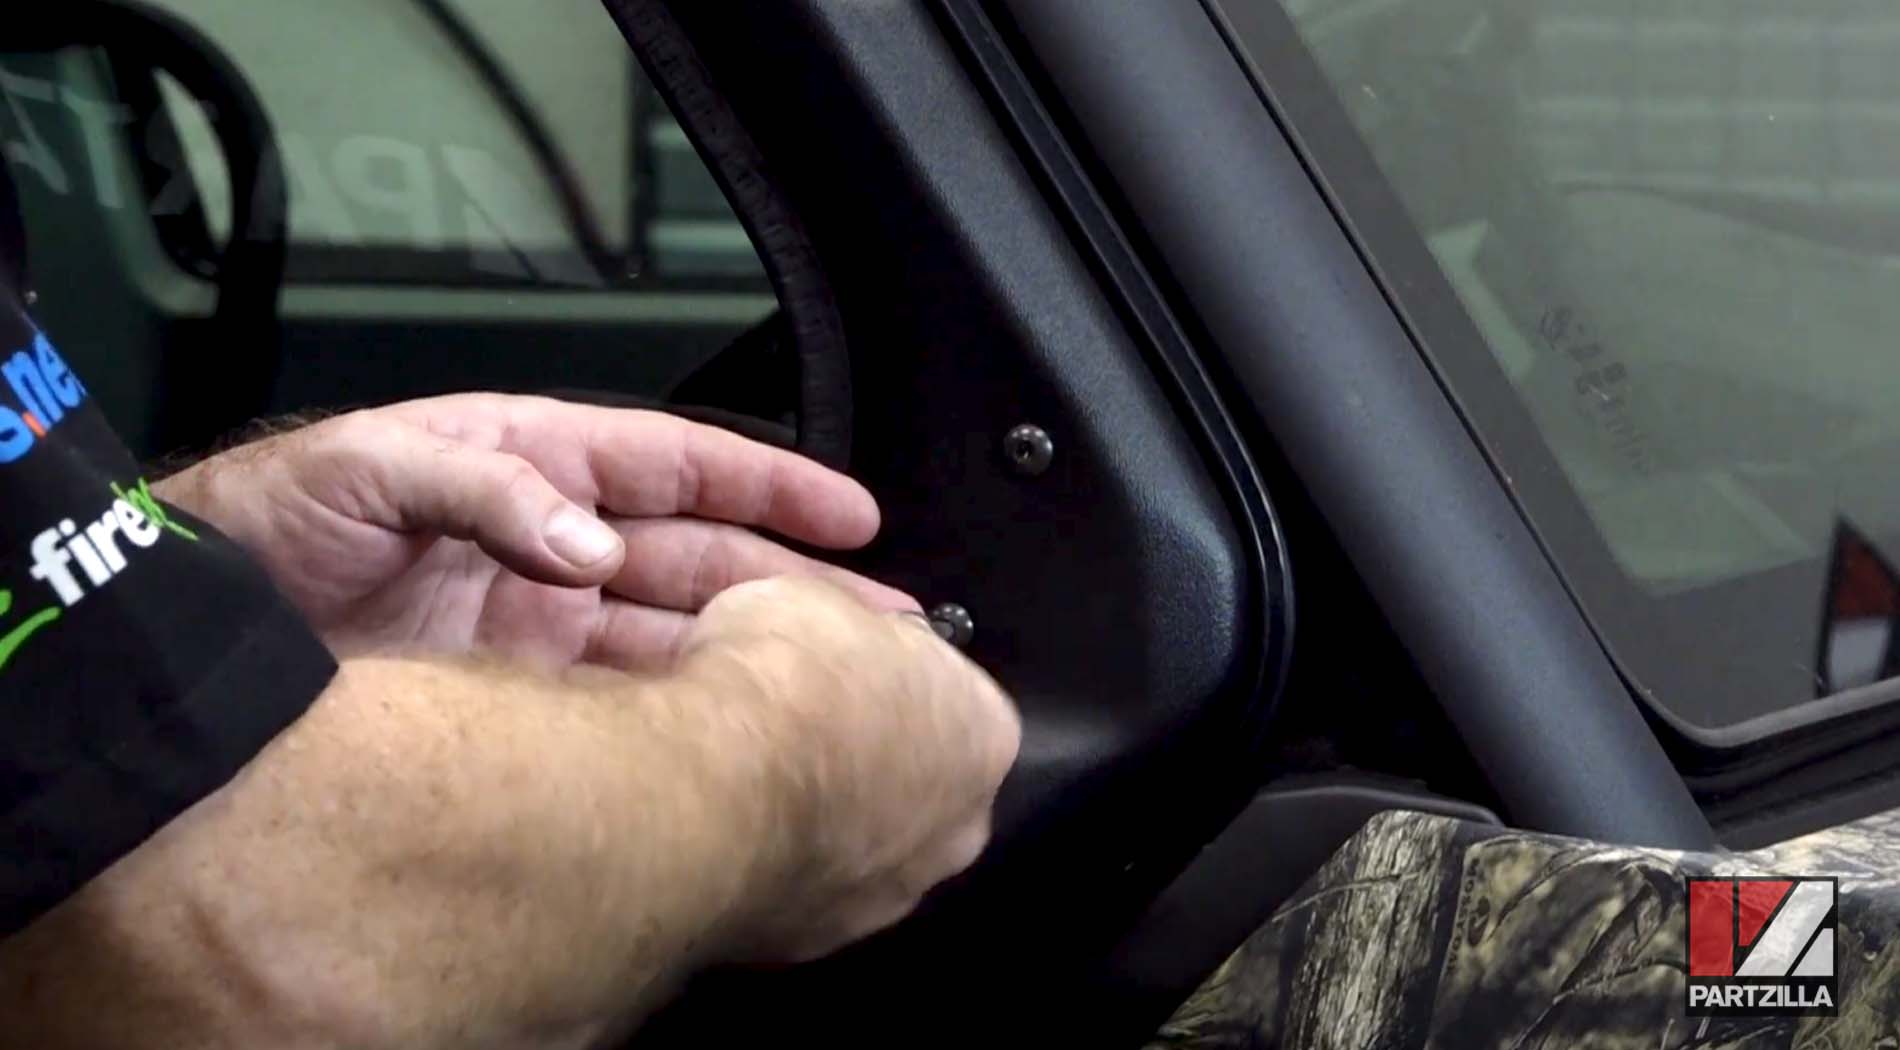
NOTE: The Can-Am side mirror kit comes with all the necessary bolts, so you don’t have to reuse the ones you removed from the machine.
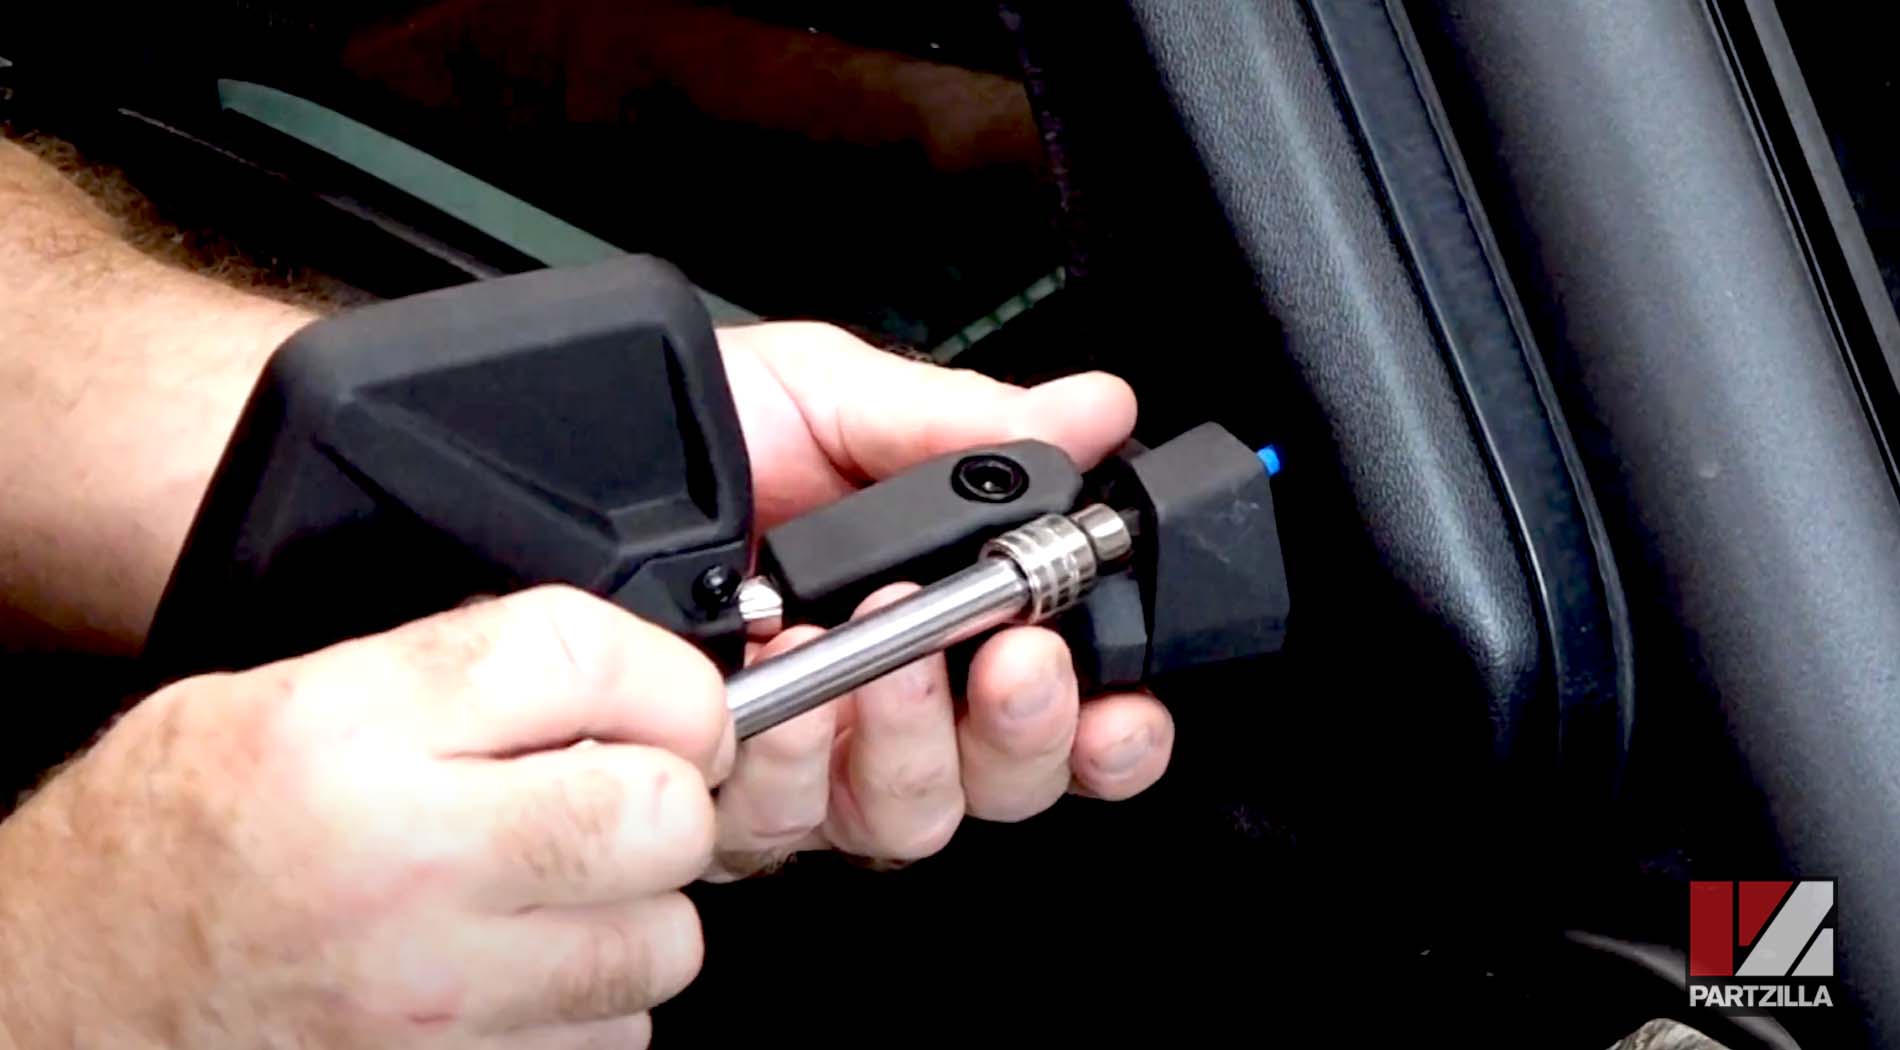
Step 2. Attach the adapters for both the right (R) and left (L) using the two short 16mm M6 screws. Make sure not to cross-thread these screws.
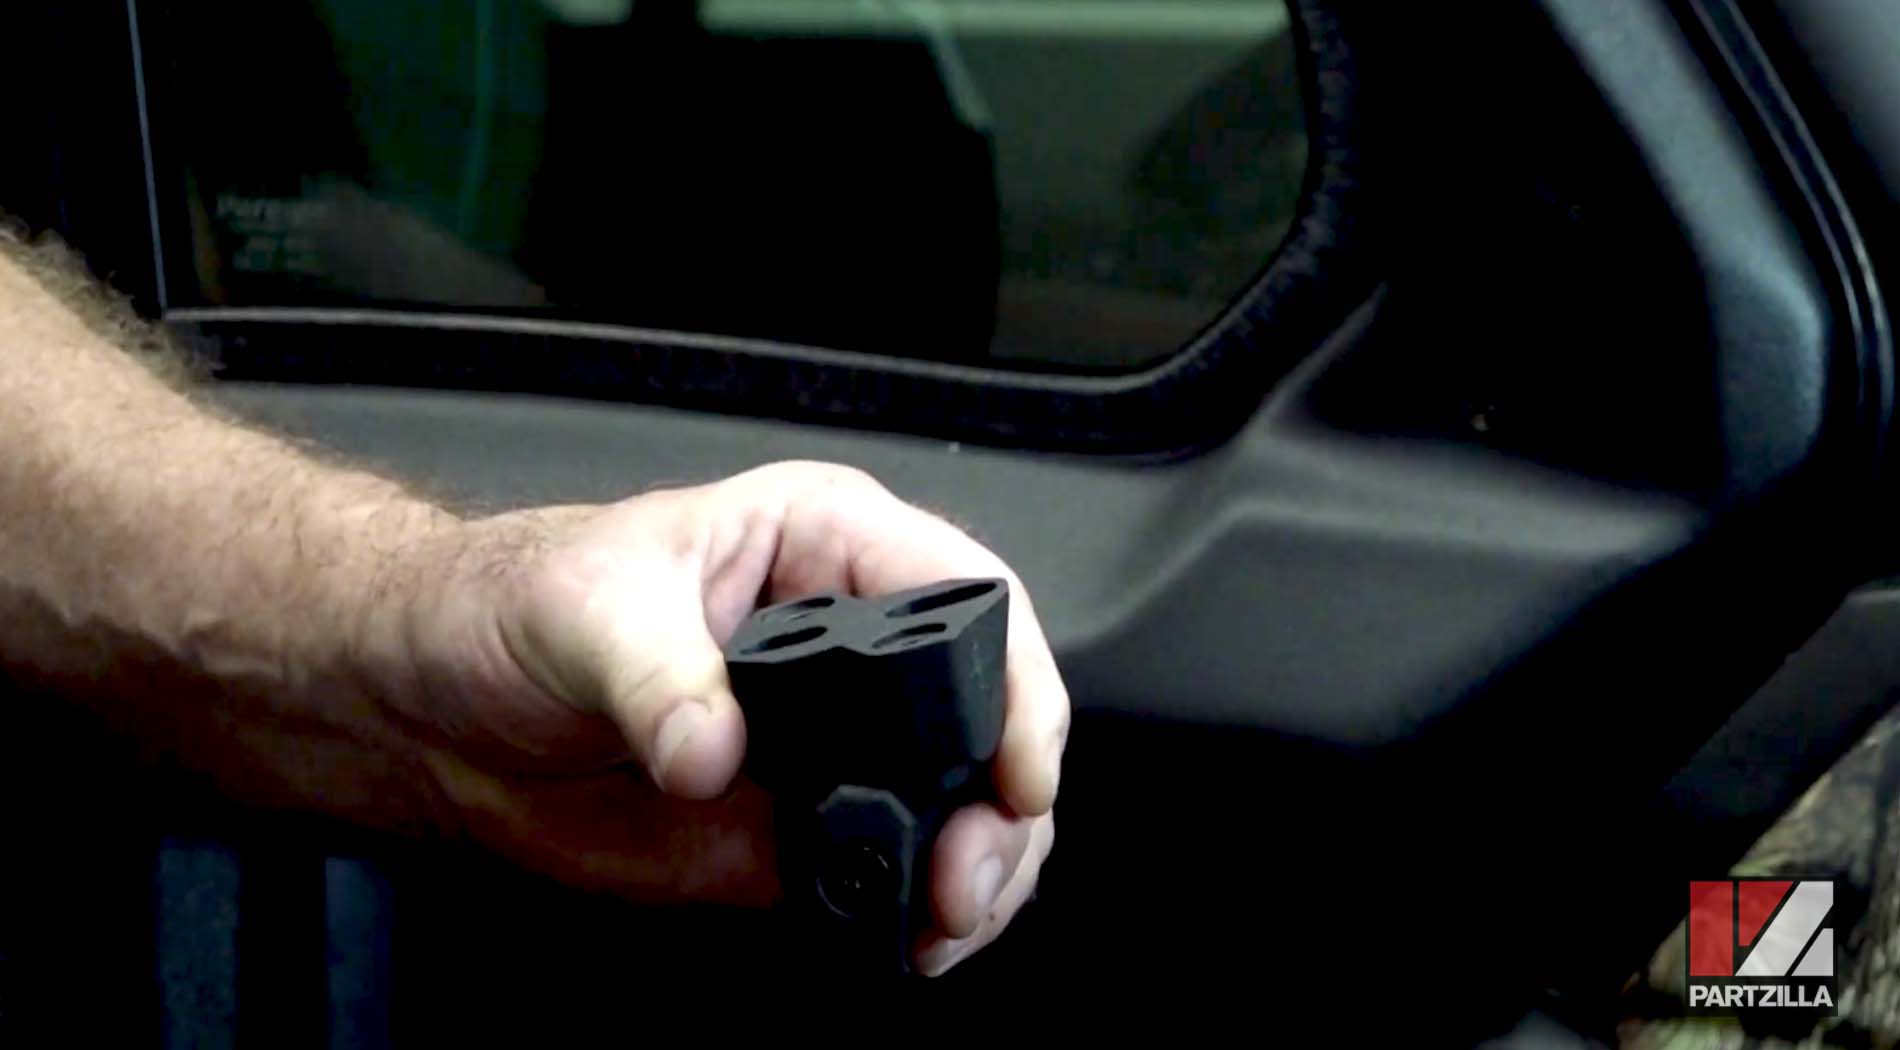
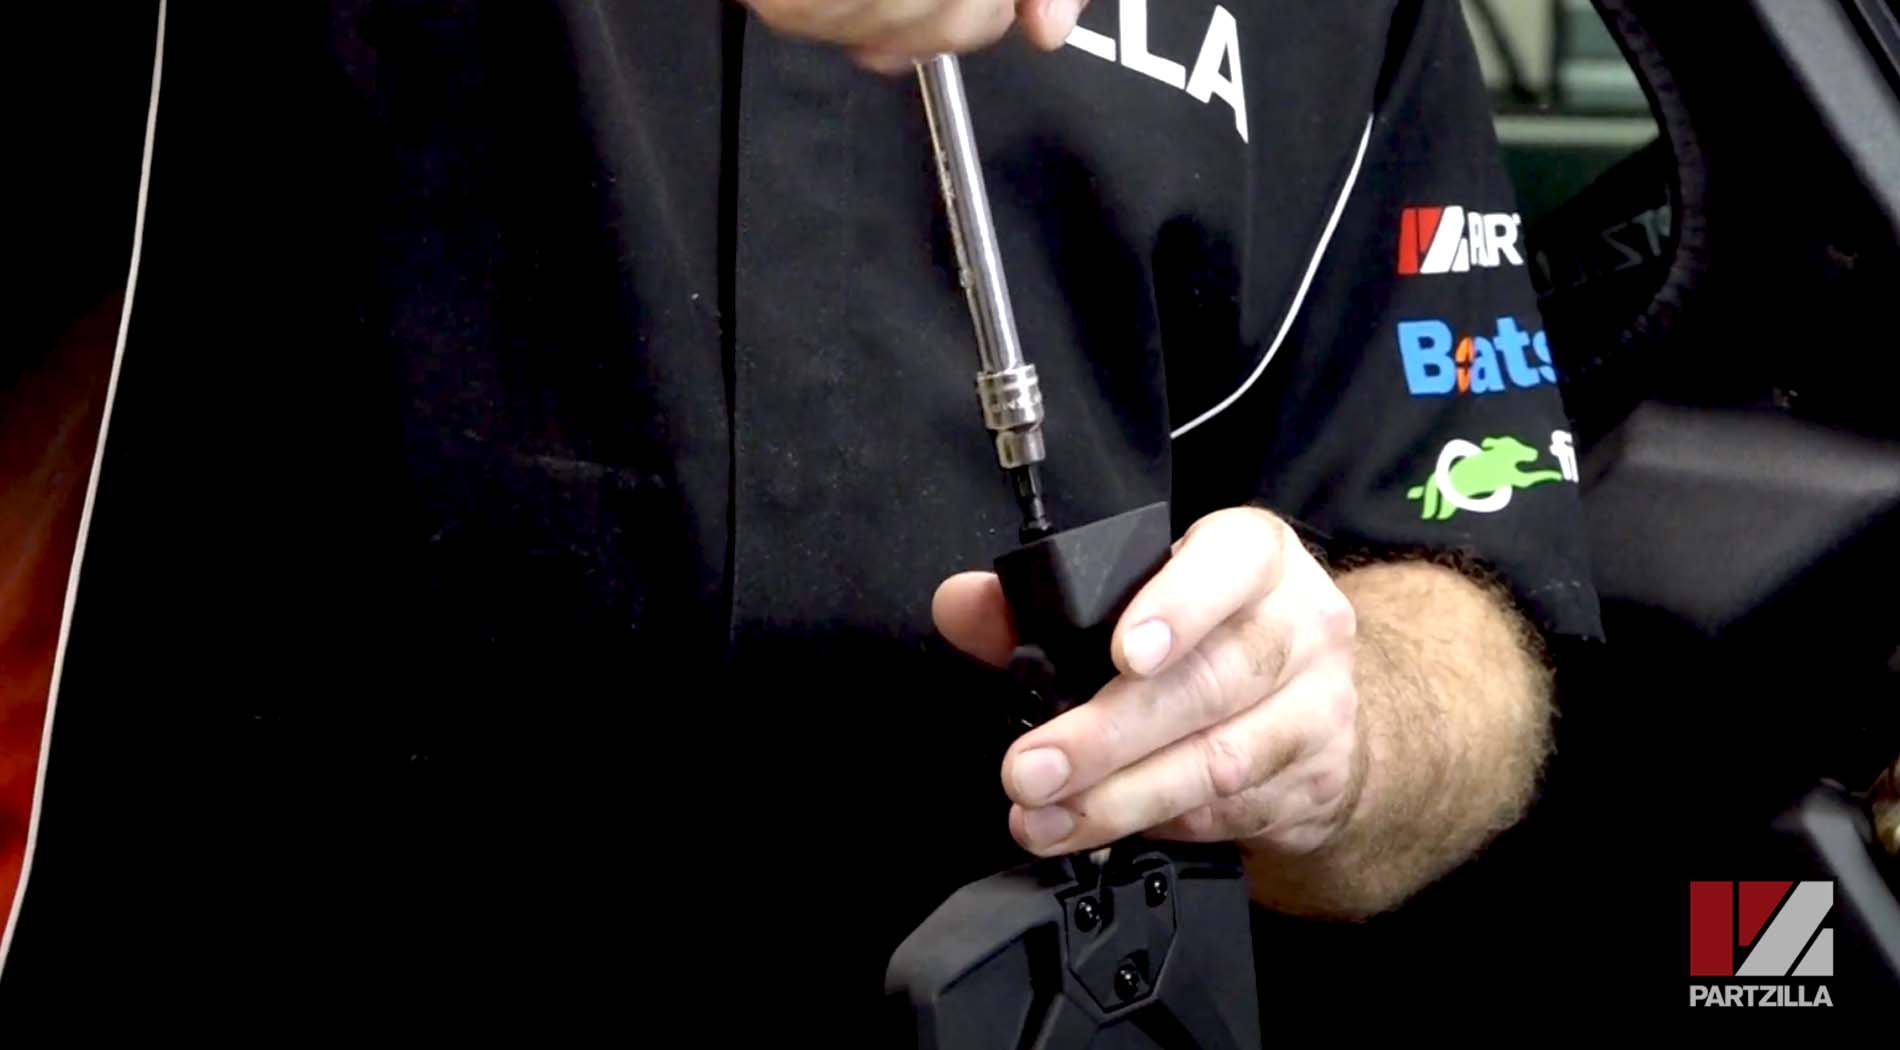
NOTE: The bolts that come with the kit already have threadlocker applied, so you don’t need to add any more.
Step 3. Attach the mirror to the doorframe using the two long 25mm M6 screws. They go in the holes left open when you removed the old screws in step 1. Install both screws evenly before you tighten them down to make sure the alignment is correct.
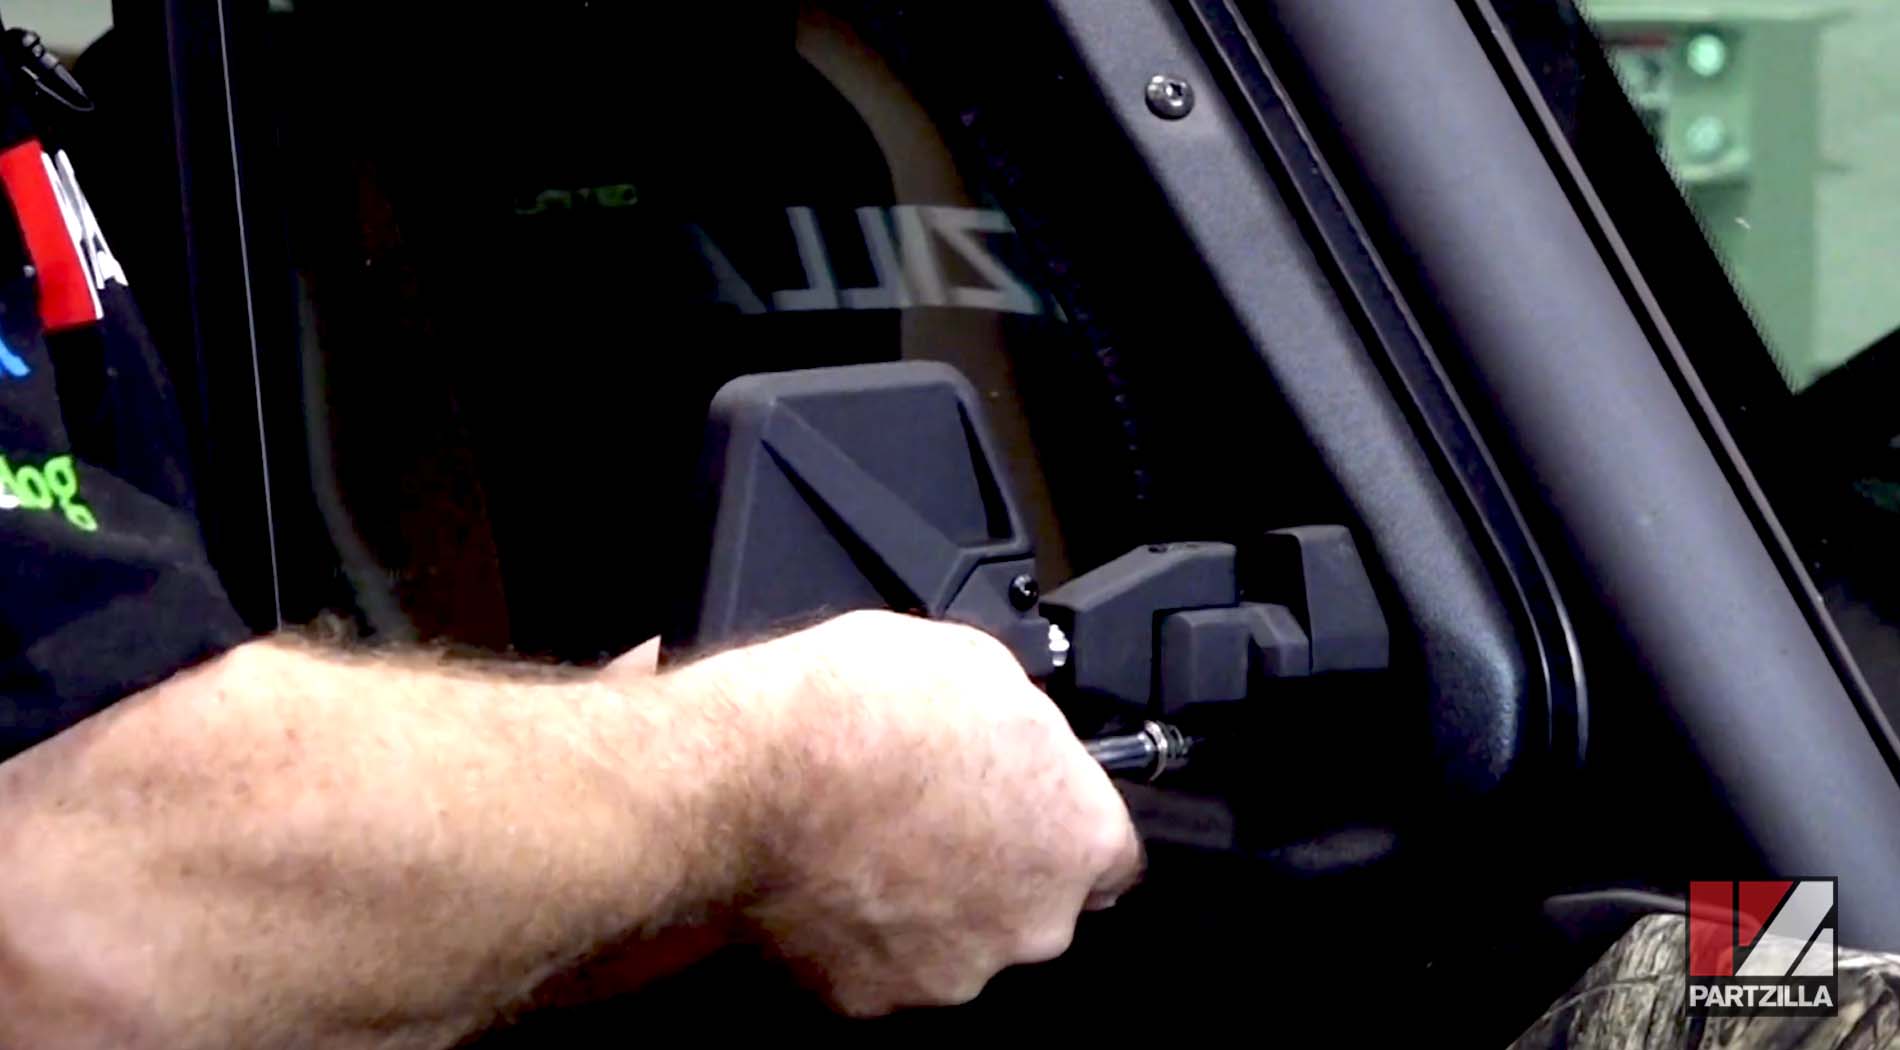
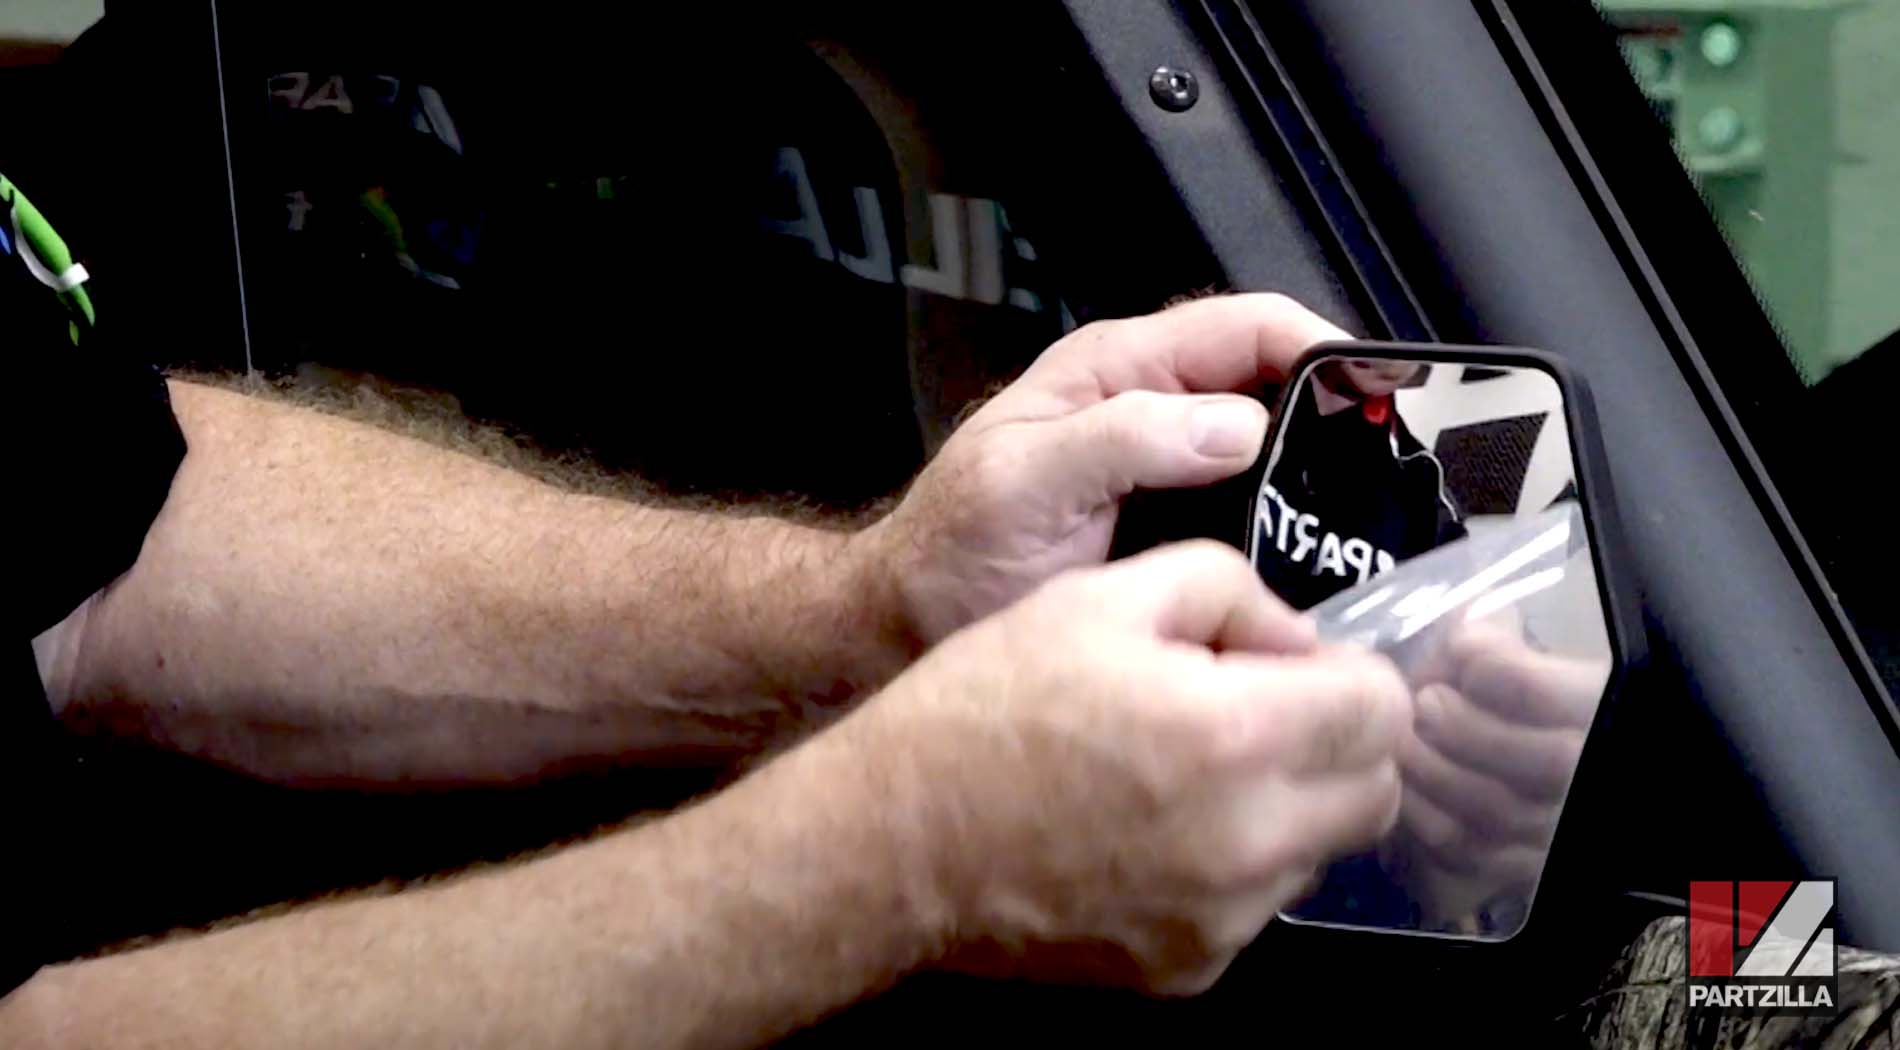
Step 4. Remove the protective film over the mirror and you’re done.