Yamaha YXZ1000R Clutch Installation
After installing a gear reduction kit on our 2016 Yamaha YXZ1000R, the next project for this side-by-side is to upgrade the clutch.
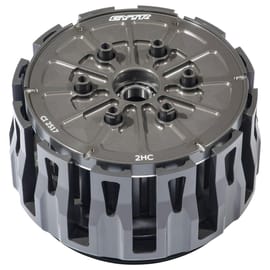
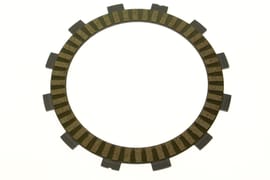
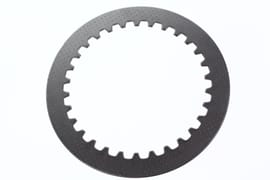
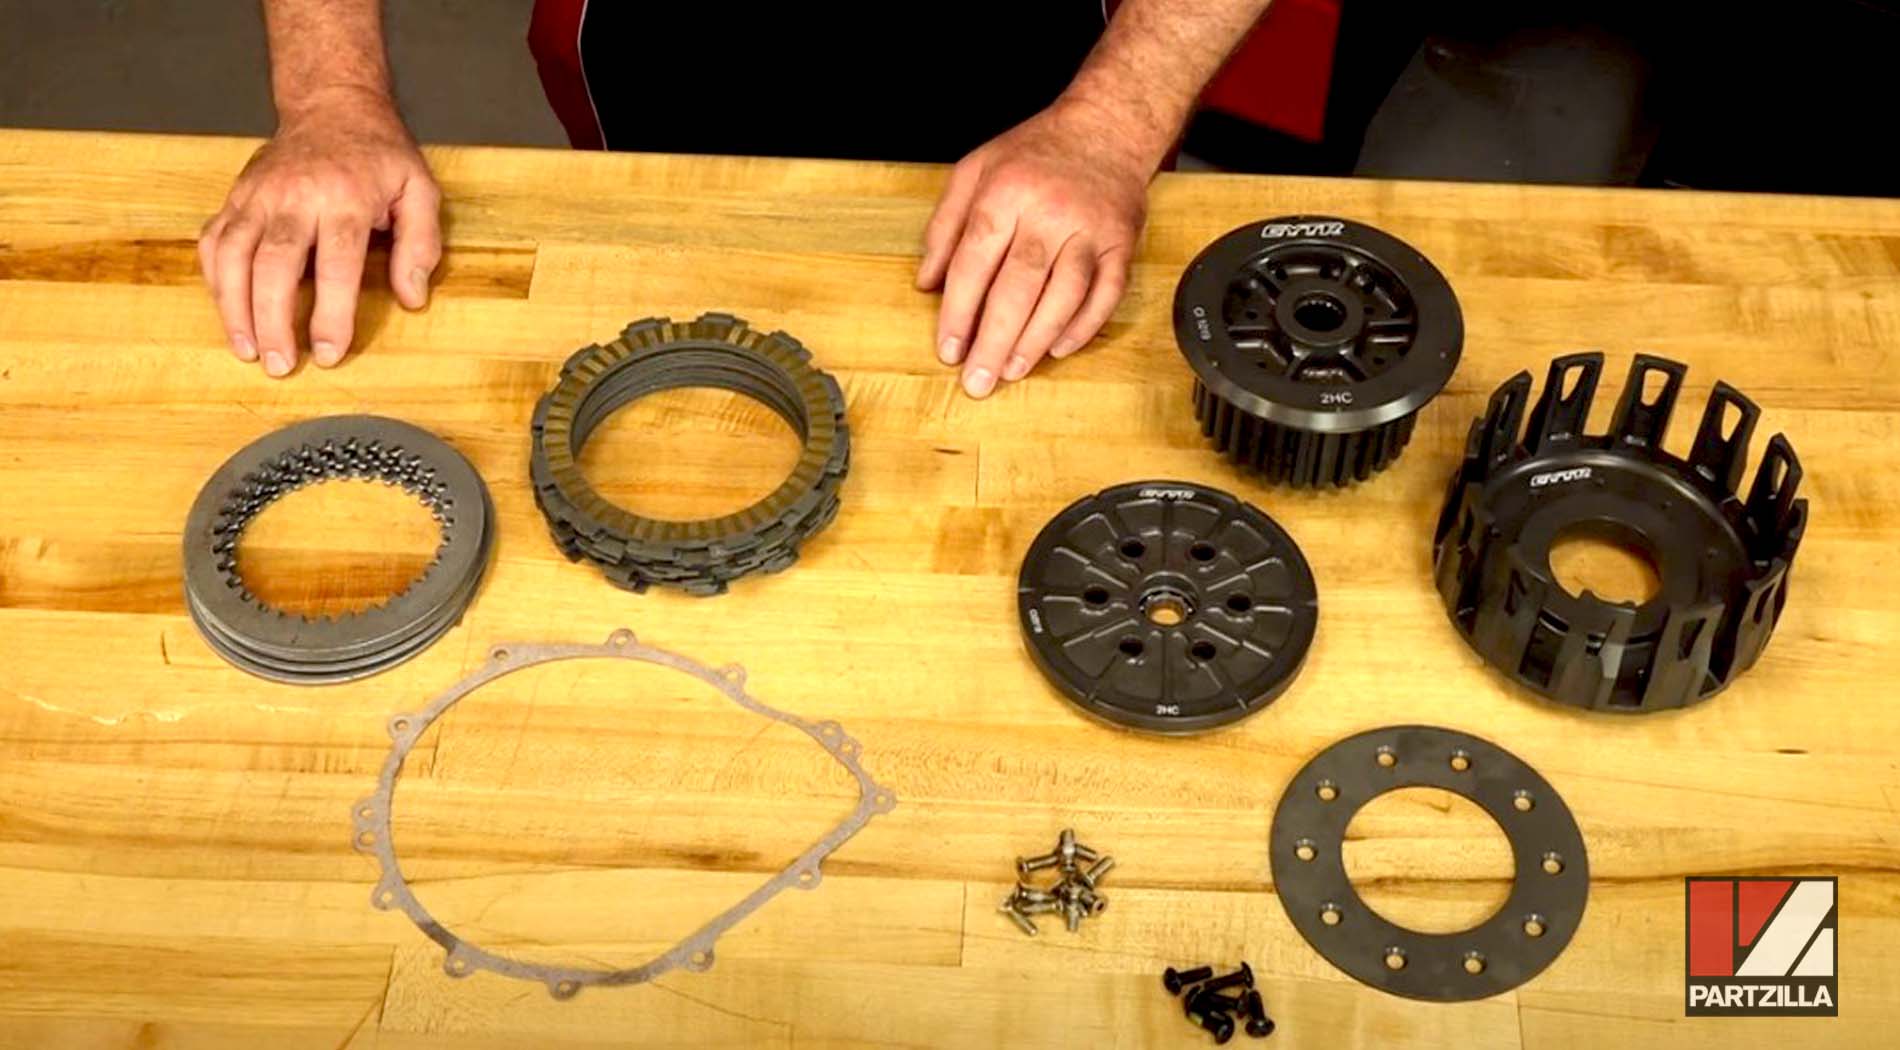
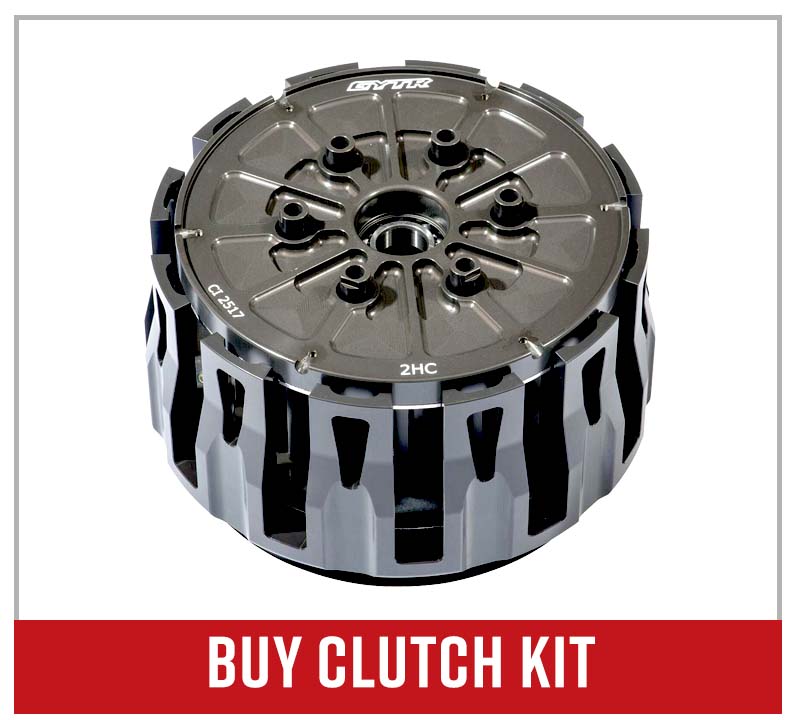
This project is a Yamaha GYTR clutch kit installation, which can handle about 25 percent more power than a standard clutch and comes in handy when cranking up the boost. Along with the GYTR kit, you'd also need to order the necessary metal and fiber discs or plates (13 fiber discs and 12 metal discs), plus a gasket to complete this upgrade.
Watch the video above and follow the steps below to do a GYTR clutch upgrade on a Yamaha YXZ1000R.
Tools and Parts - YXZ1000R GYTR Clutch Upgrade Installation
- Basic hand tools
- Digital torque wrench
- Clutch holder tool
- Impact wrench
- Engine oil
- Threadlocker (red and blue)
- Fiber clutch friction plates (x13)
- Metal clutch plates (x12)
- Clutch cover gasket
- GYTR billet clutch kit

Yamaha YXZ1000R Clutch Upgrade Steps
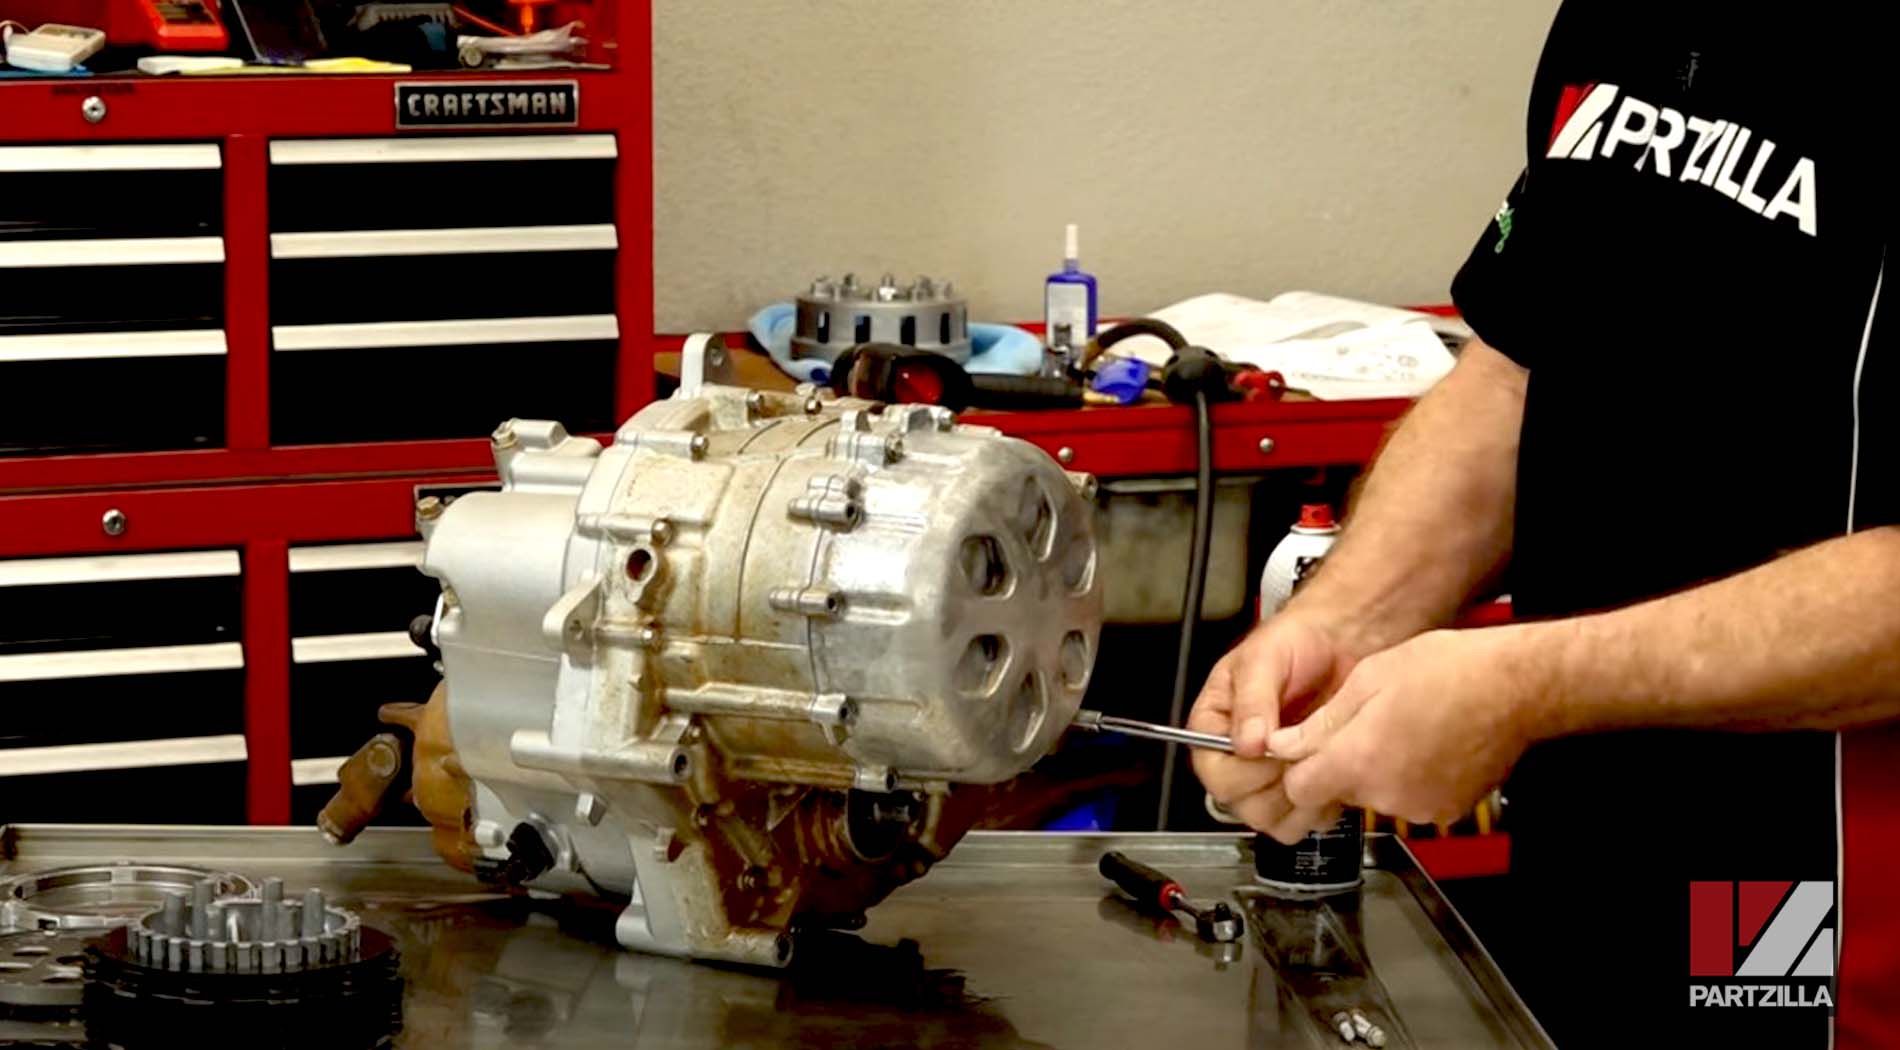
Step 1. Remove the outer clutch cover, which is held in place by several 8mm bolts.
NOTE: The three bolts at the bottom have copper washers, so make note of where those come out so you can get them back in the right place. If you forget which locations they go in, Yamaha placed arrows down on that section that point to where they go.
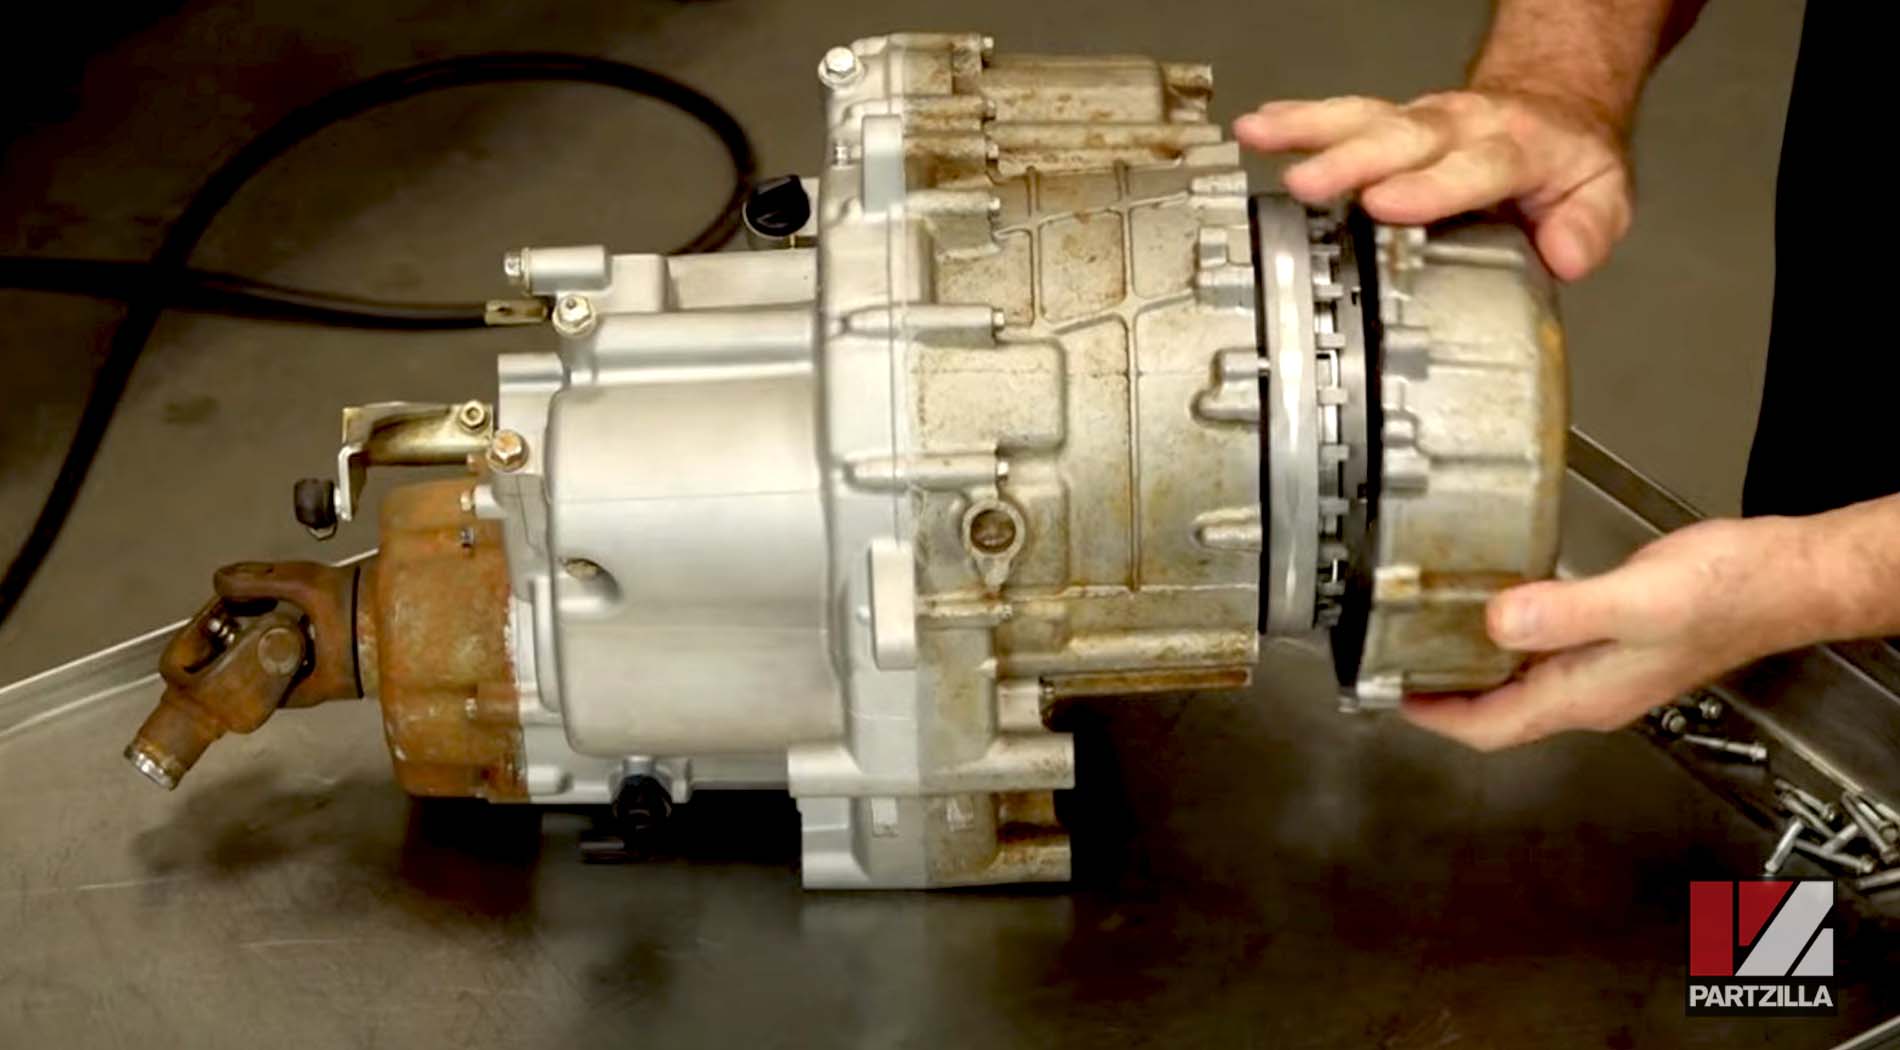
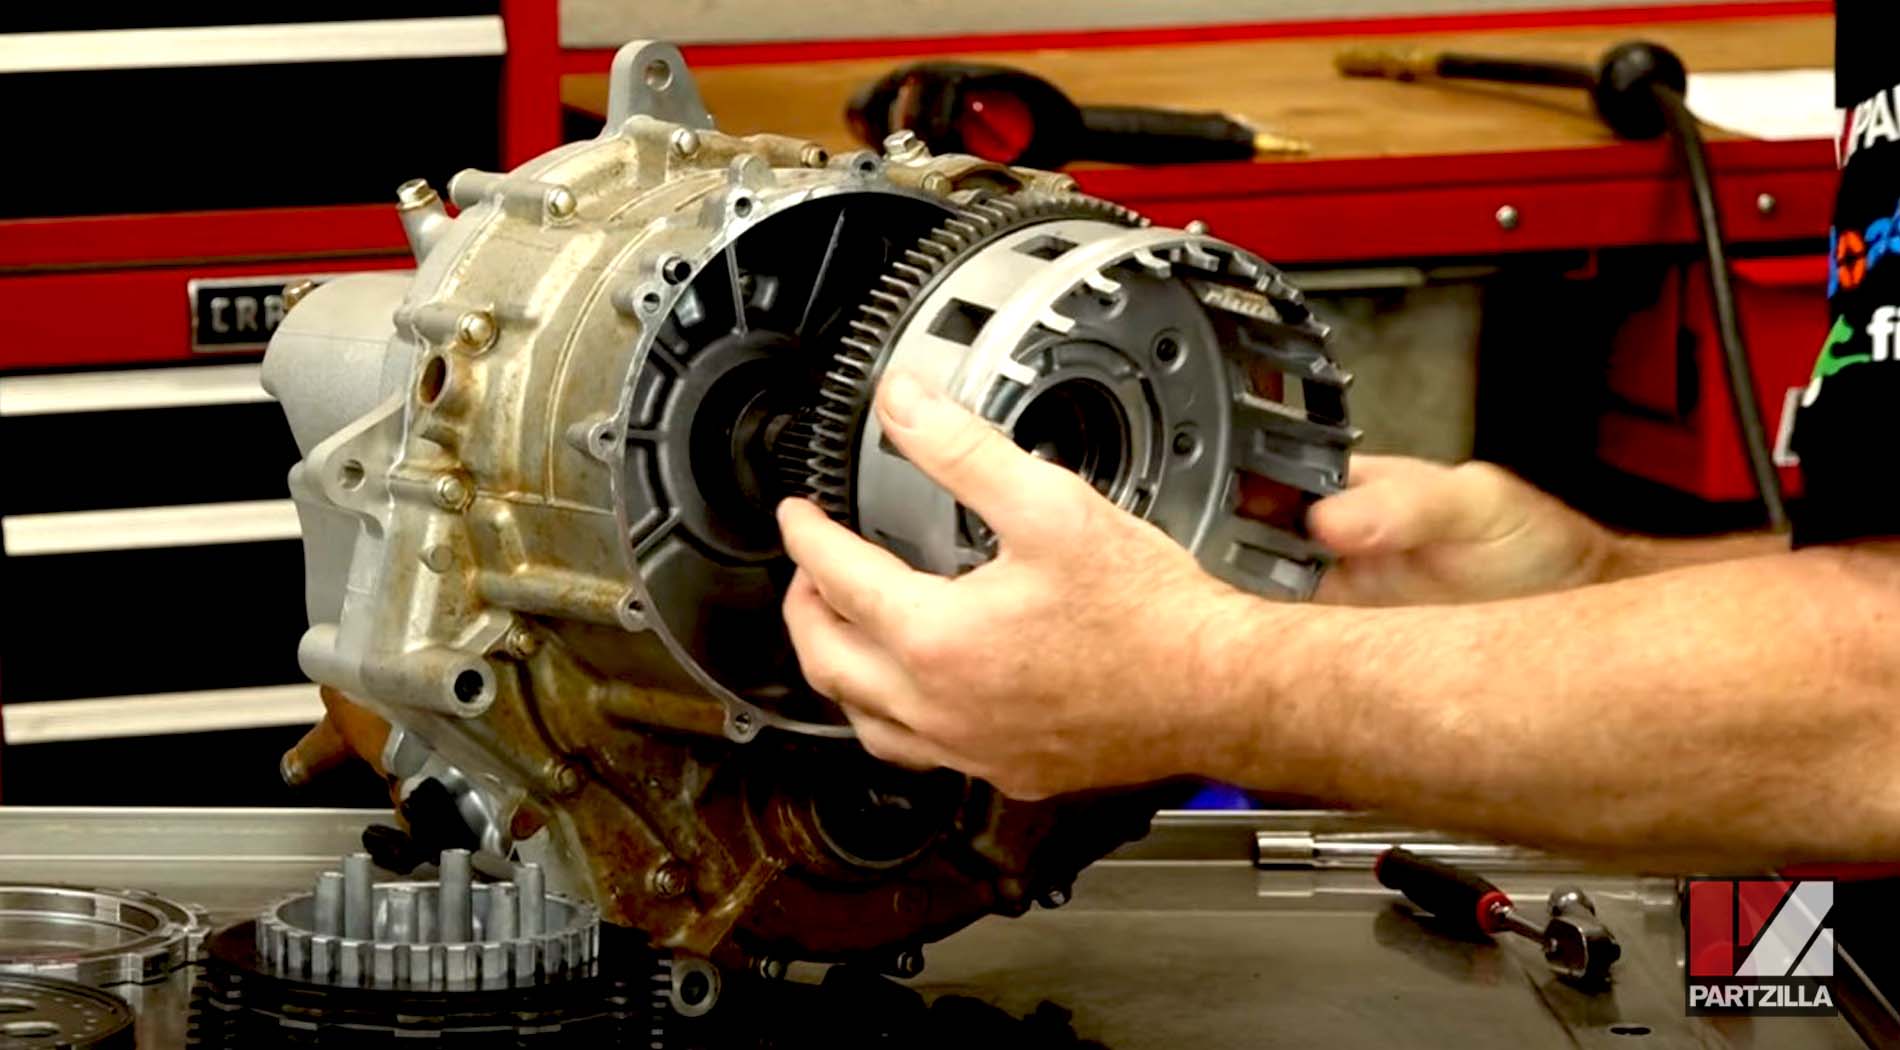
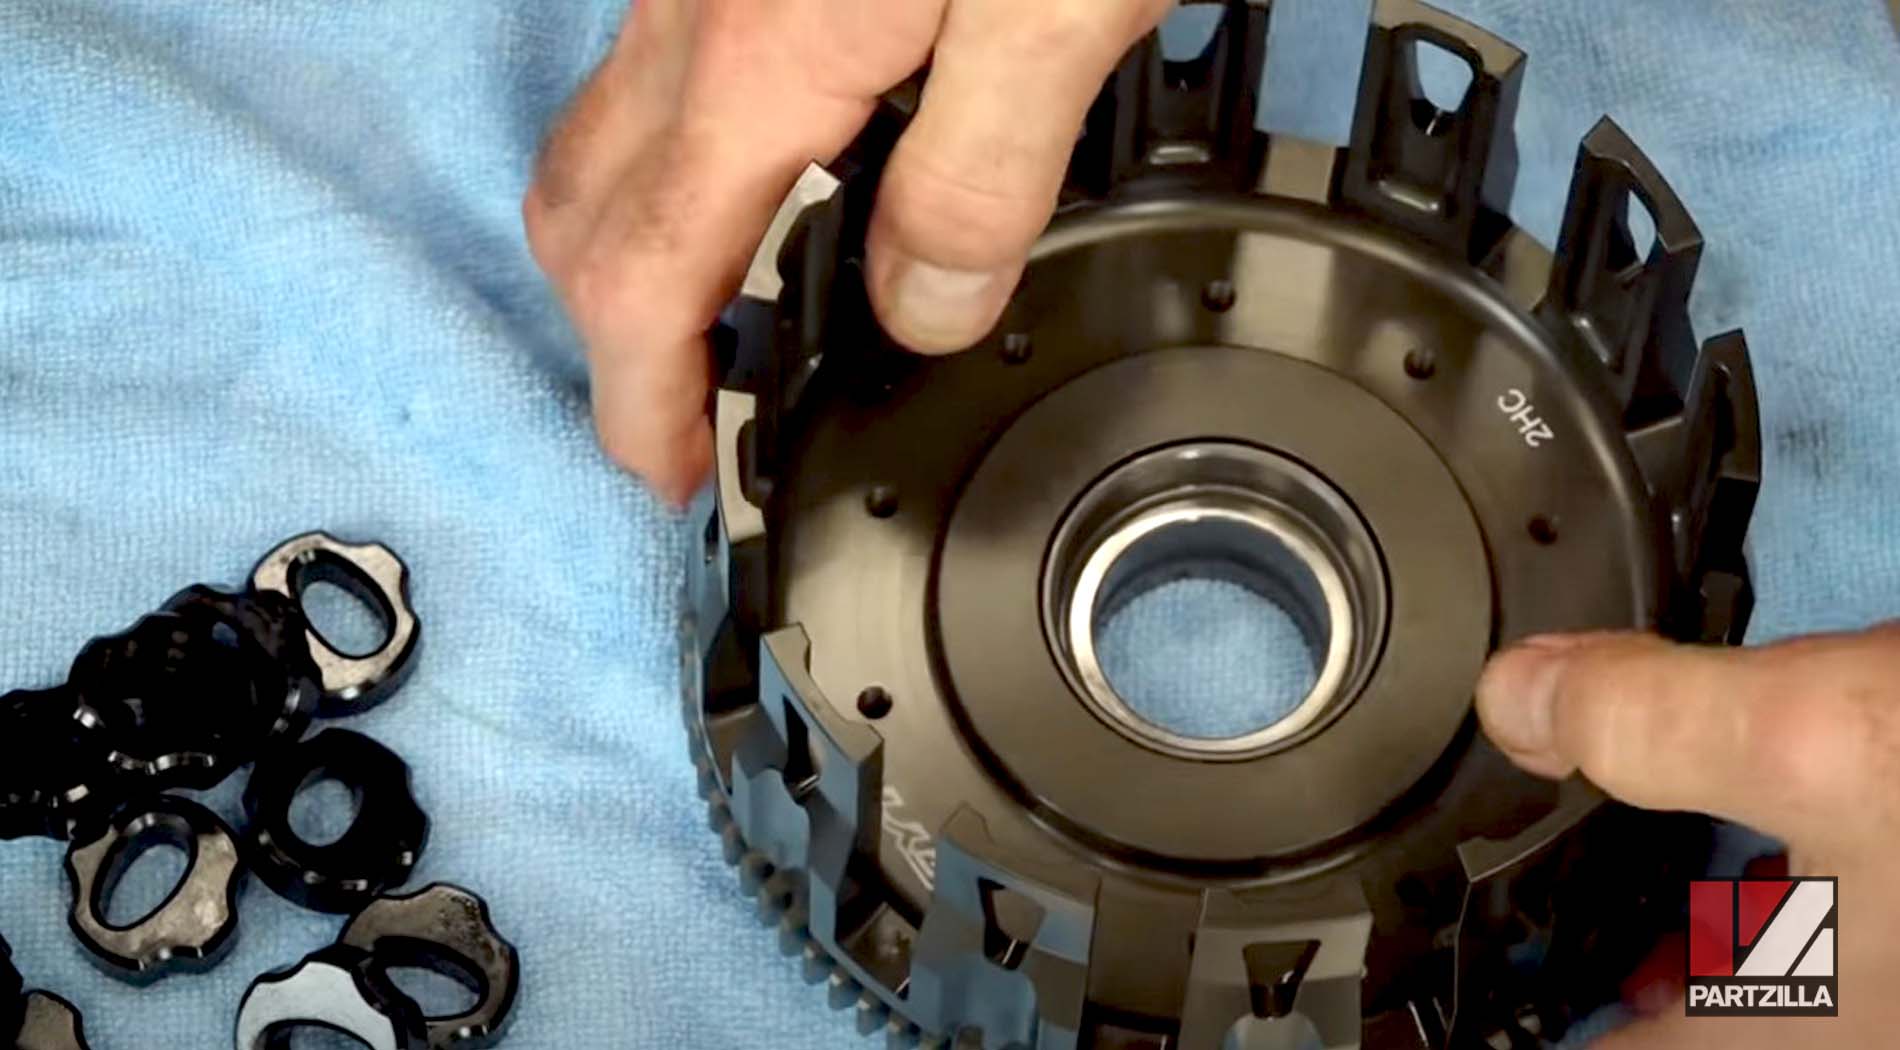
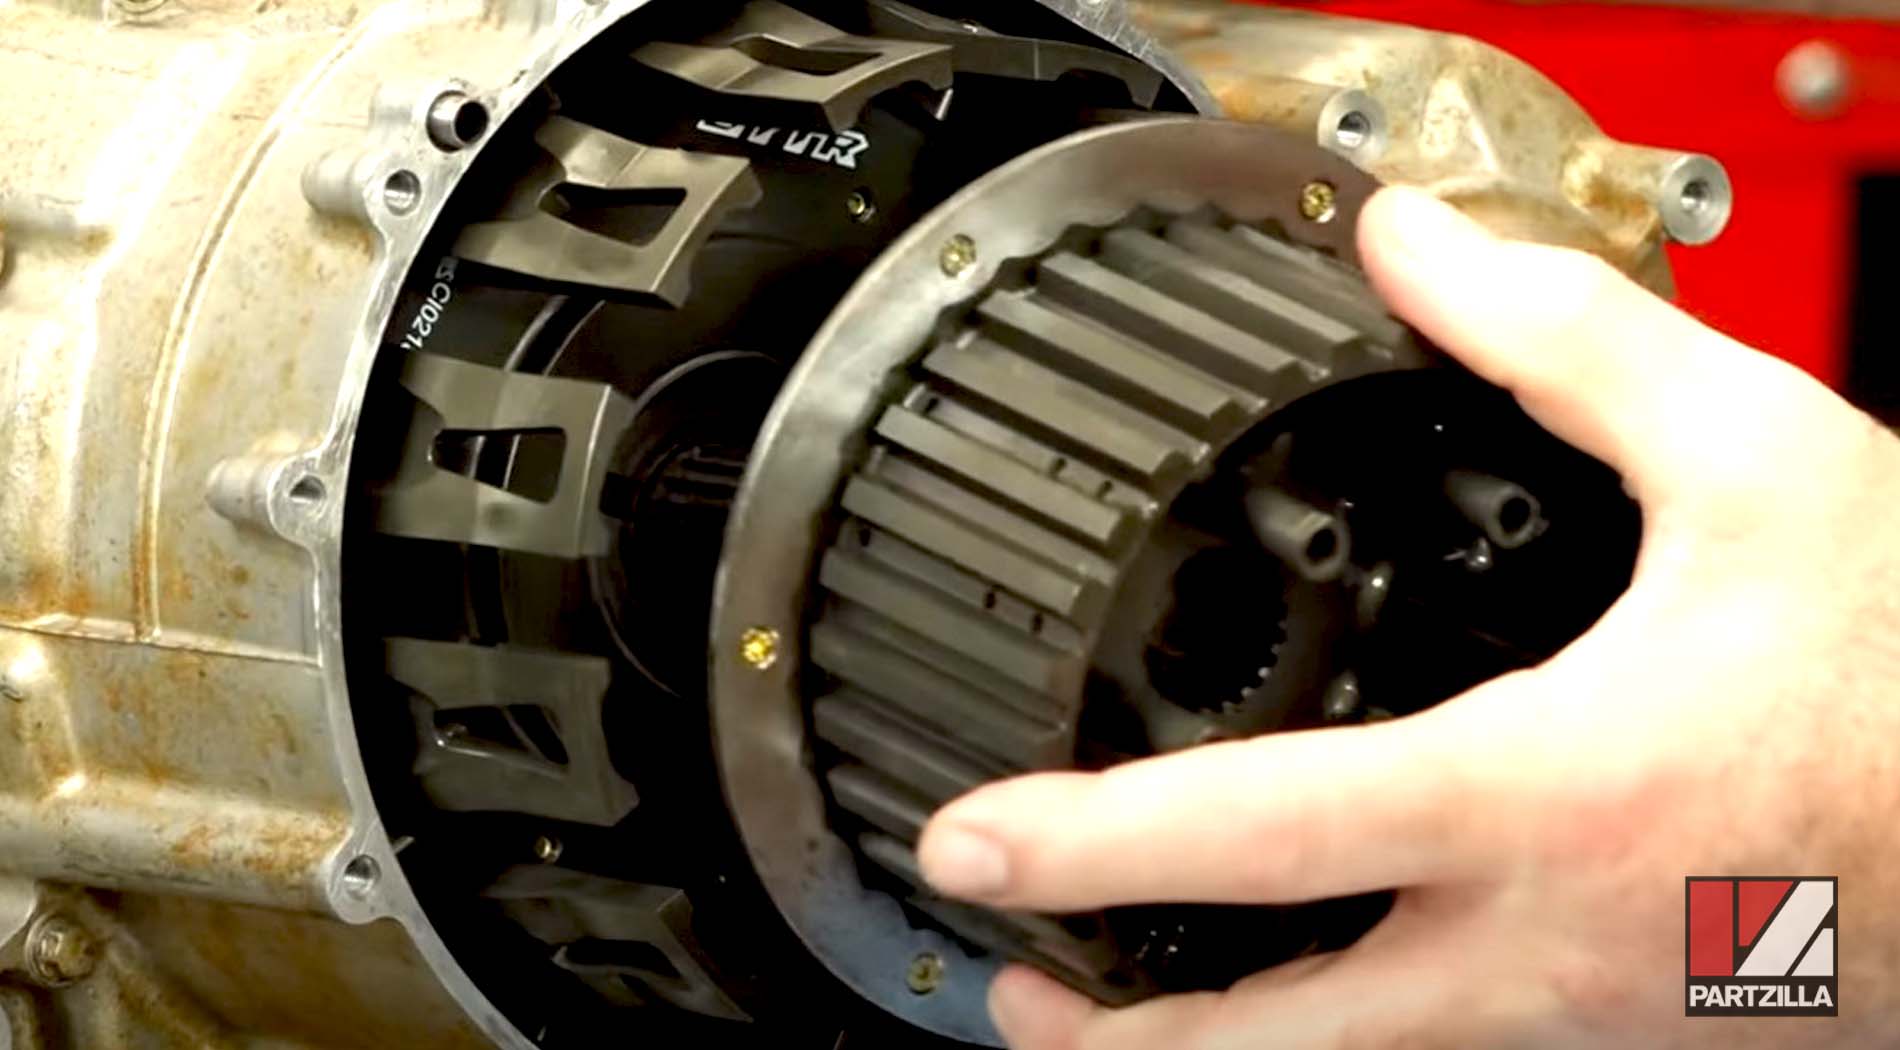
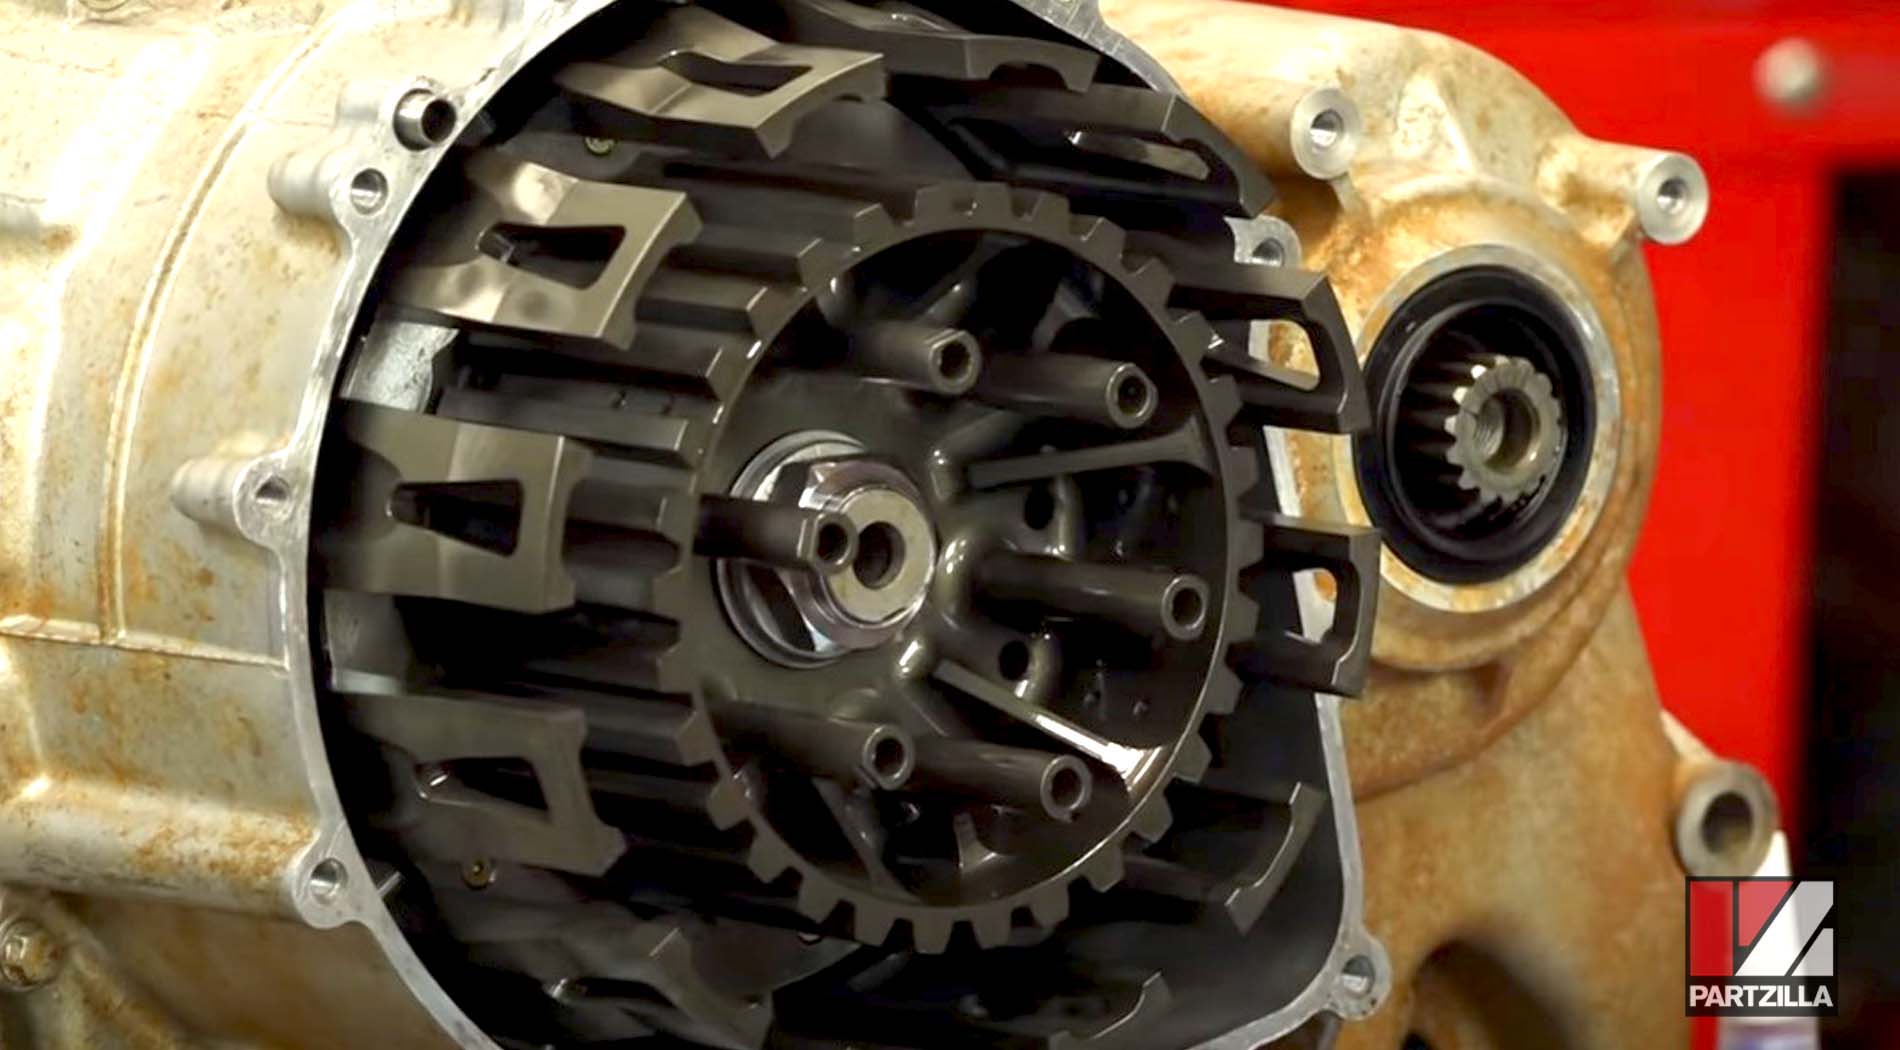
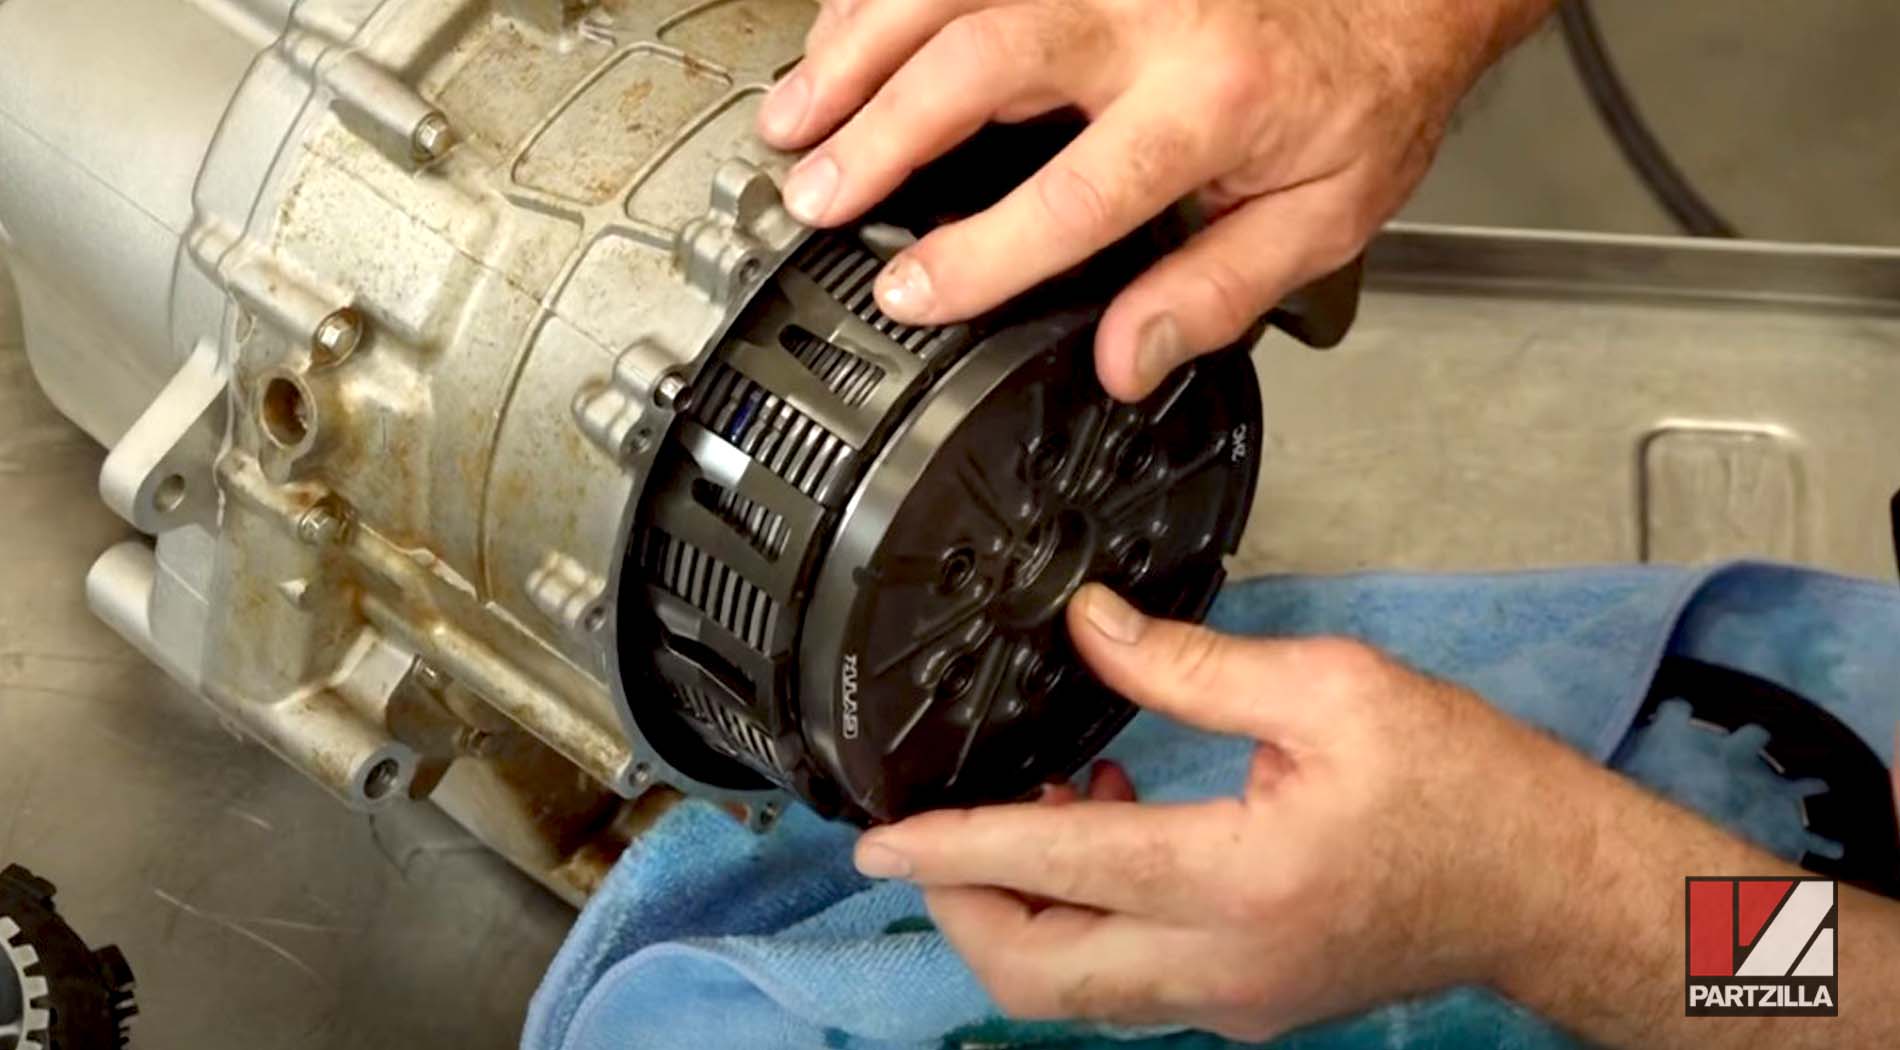
Step 2. Remove the spring, which is the big plate in the middle held in place by six 10mm bolts. Next, remove the entire clutch assembly, including the clutch basket.
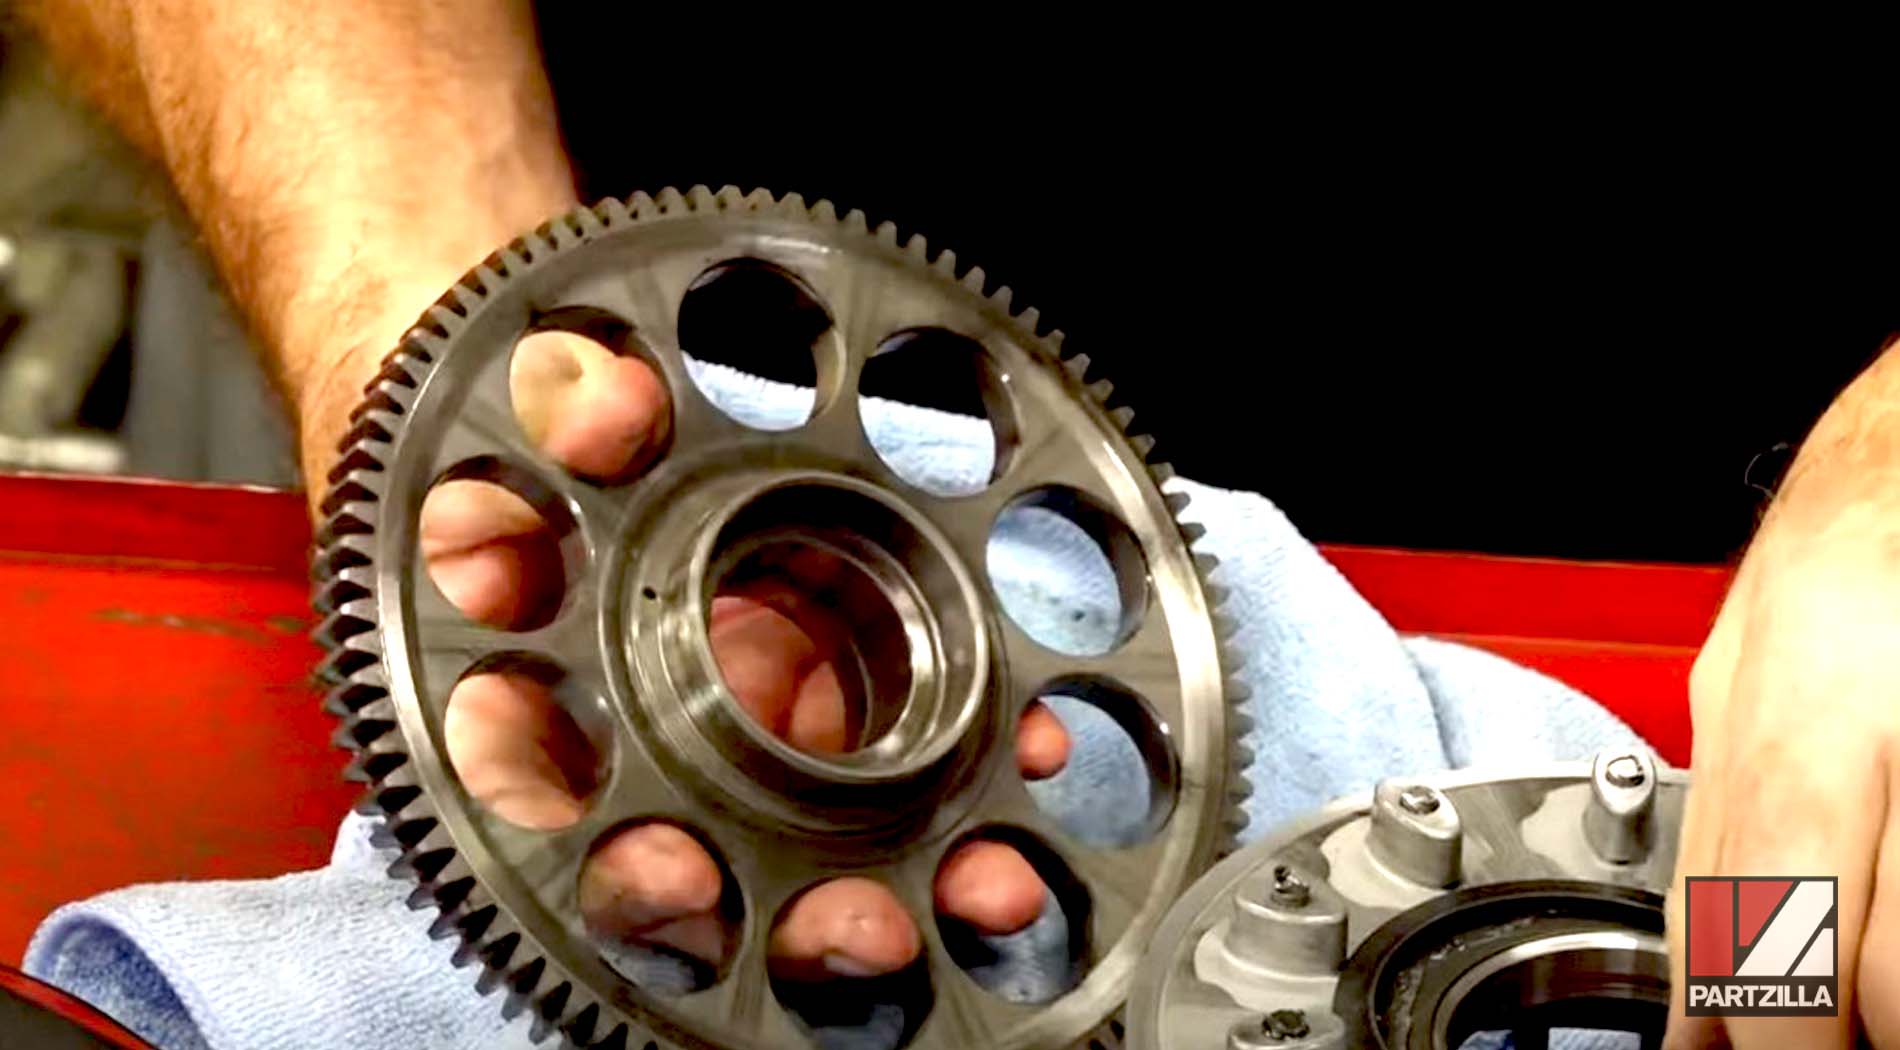
NOTE: We’re reusing the outer gear in the inner-section on the back side of the clutch basket, which we're going to transfer over to the GYTR clutch. You'll need a 30mm wrench and an impact wrench to take it apart. Use our YXZ1000 parts diagram for reference on how the clutch parts come apart and back together again. This unit had been modified with a Rekluse clutch kit. If yours is completely stock, you're going to have a different combination of jutter plates and springs and half disk.


Step 3. Soak the new fiber clutch discs for 15-20 minutes in oil.
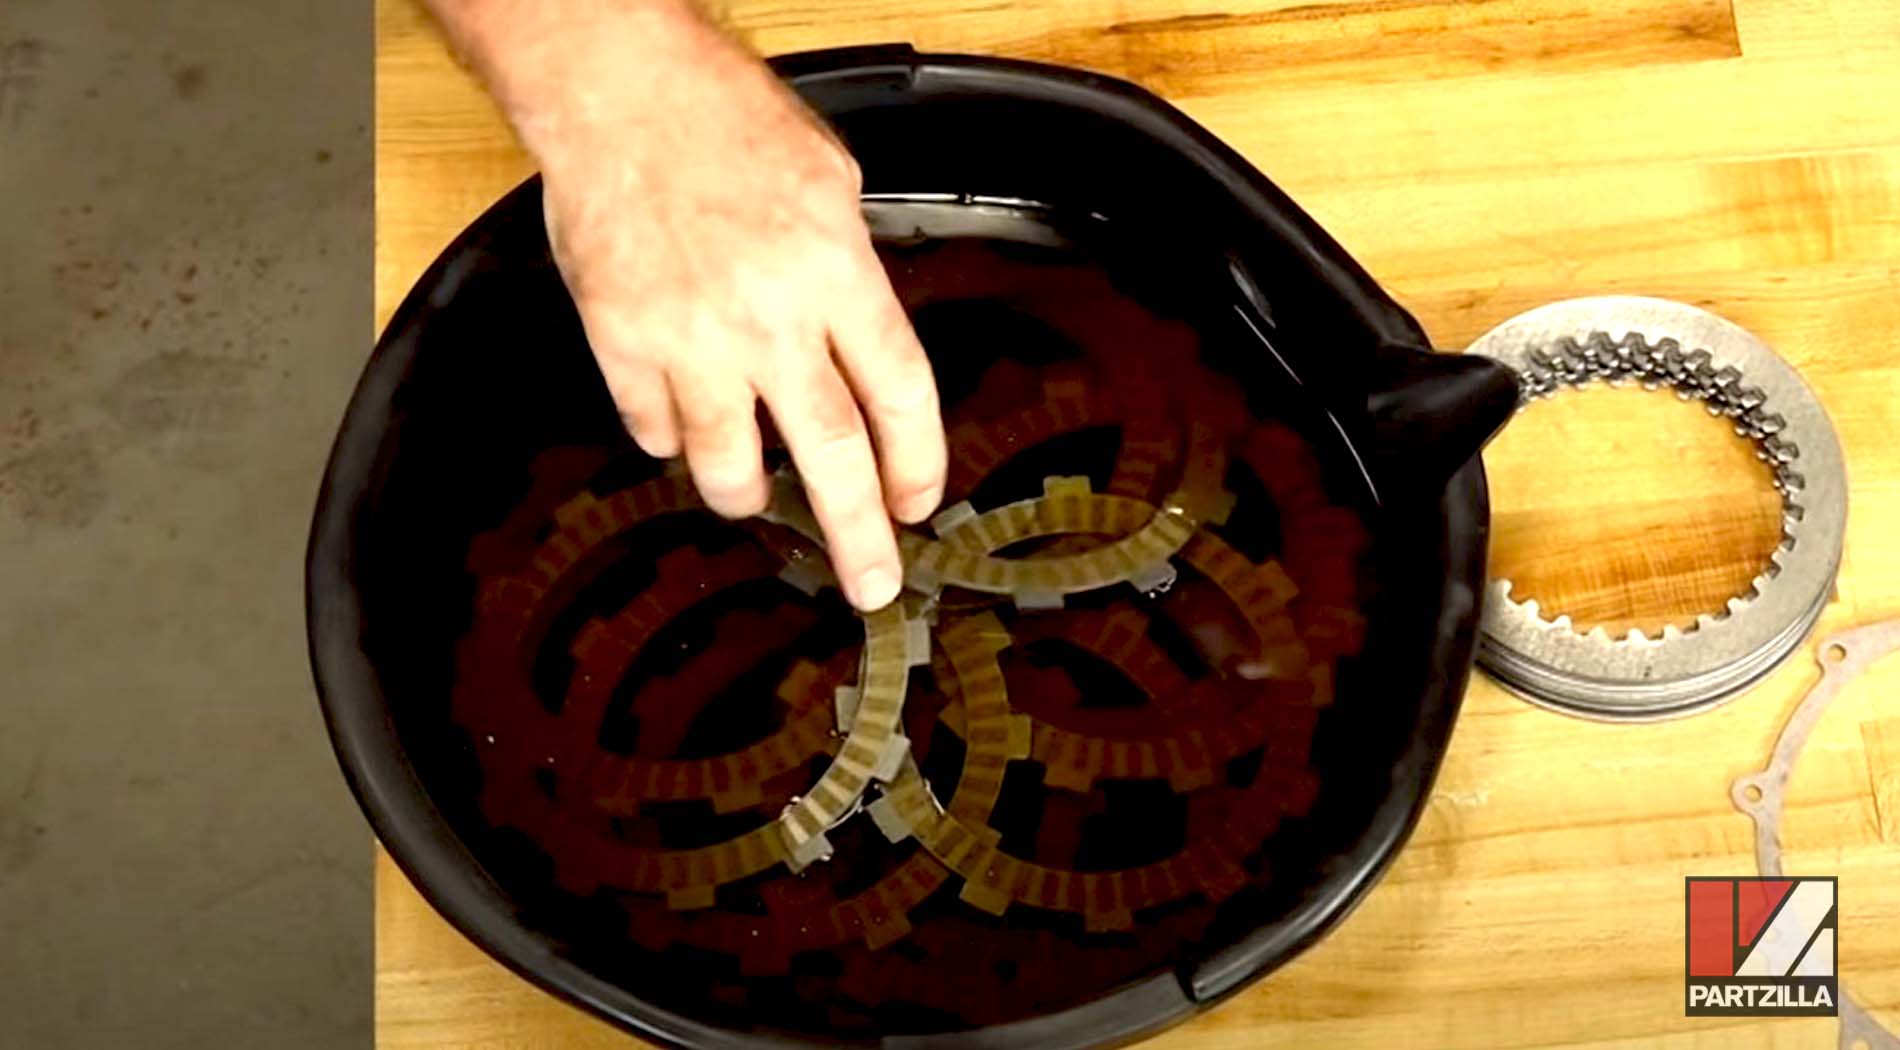
NOTE: You can use standard oil for this step, just make sure the fibers are all well permeated with oil before installing them.
Watch the clip below to see the clutch opening segment of our YXZ1000R clutch installation.
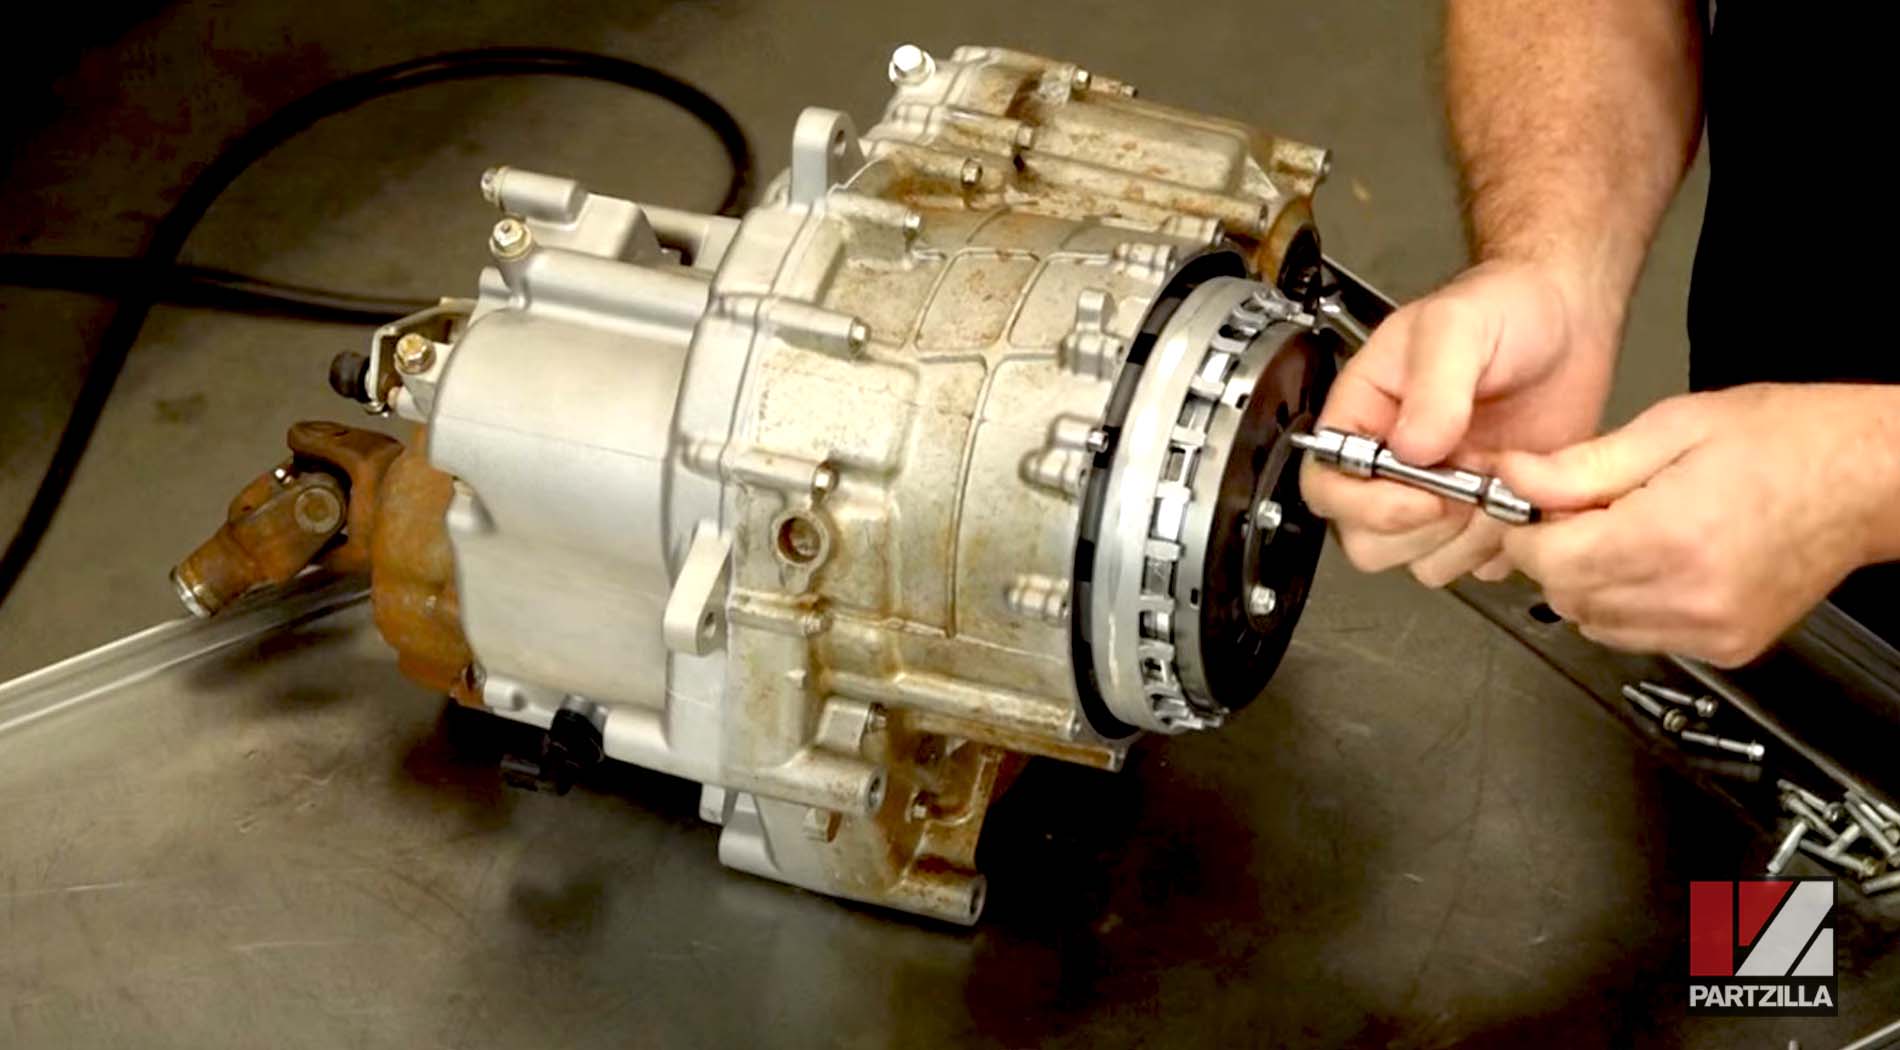
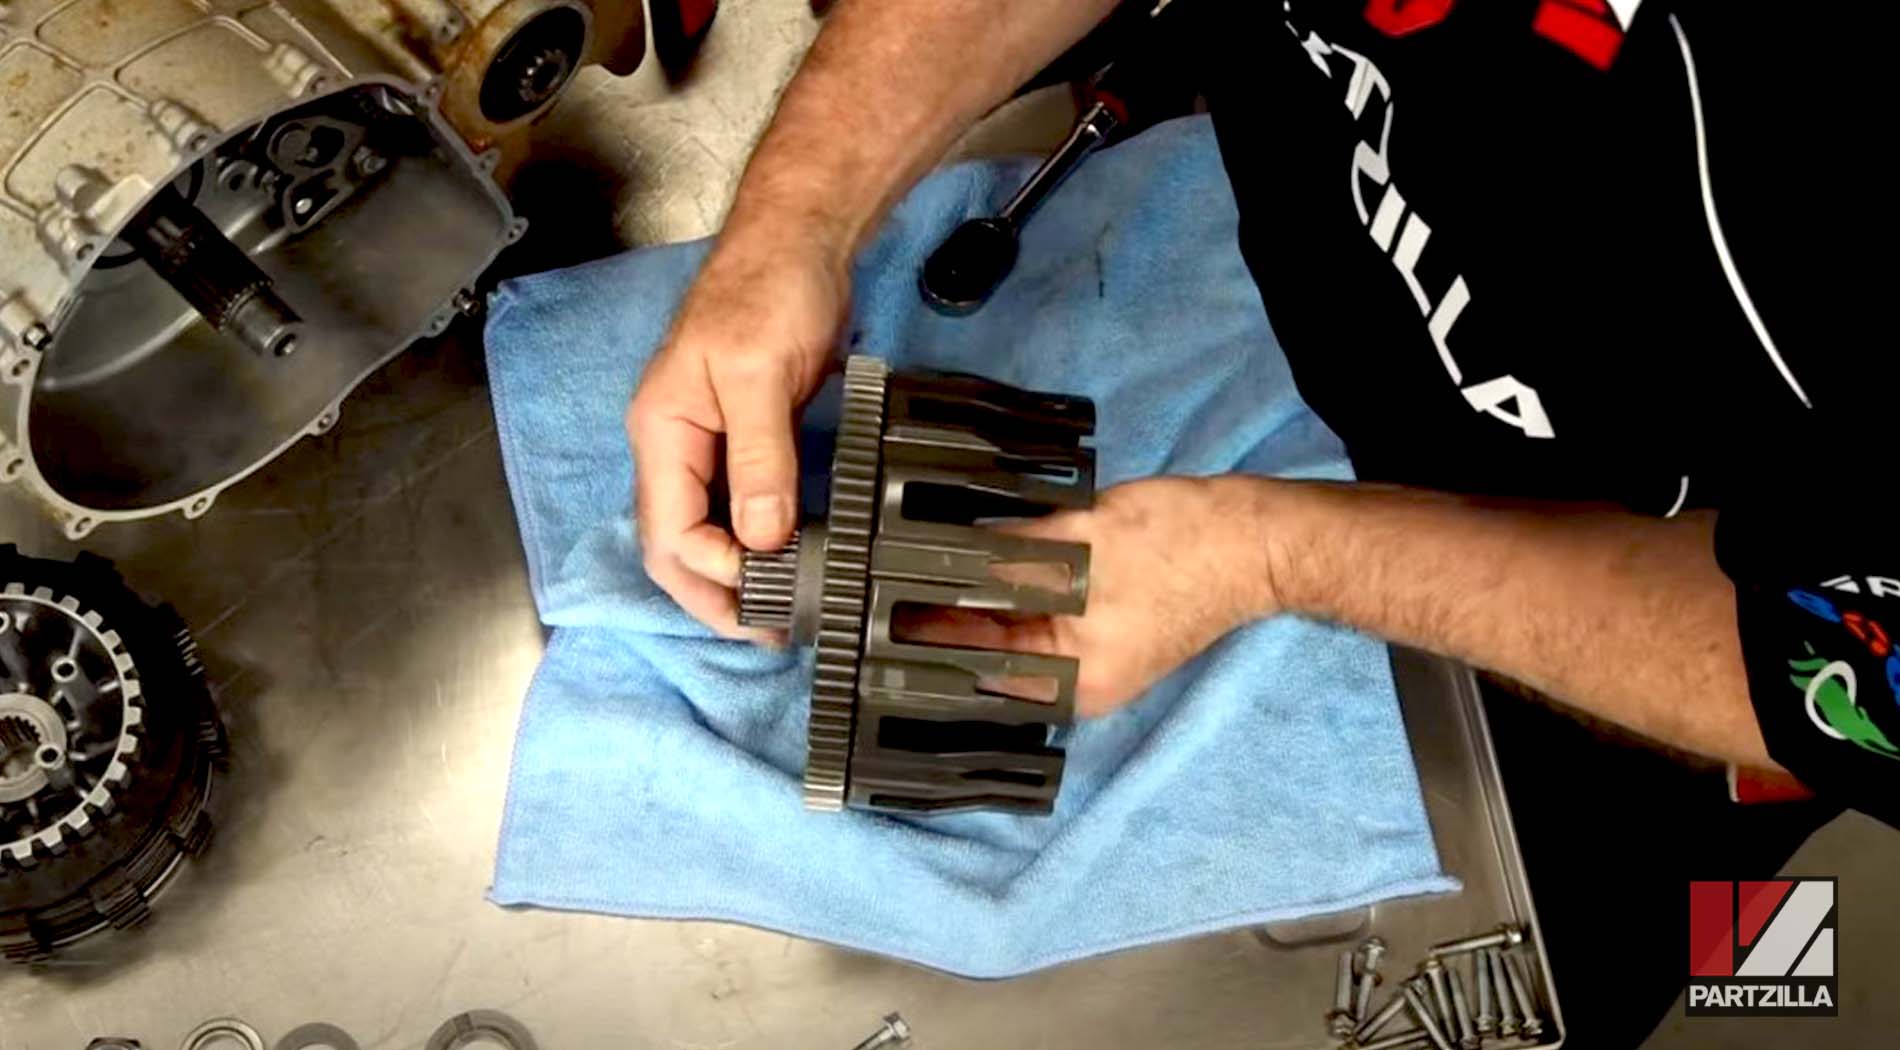
Step 4. Remove the outer gear with a side grinder, hitting it from the side and cutting the bolts off even with the plate, then lifting it off.

NOTE: Make sure all your other clutch pieces are out of the way during this process, because all of the metal debris is going to fly around a good distance and you don't want to contaminate the brand new parts you’re going to install.
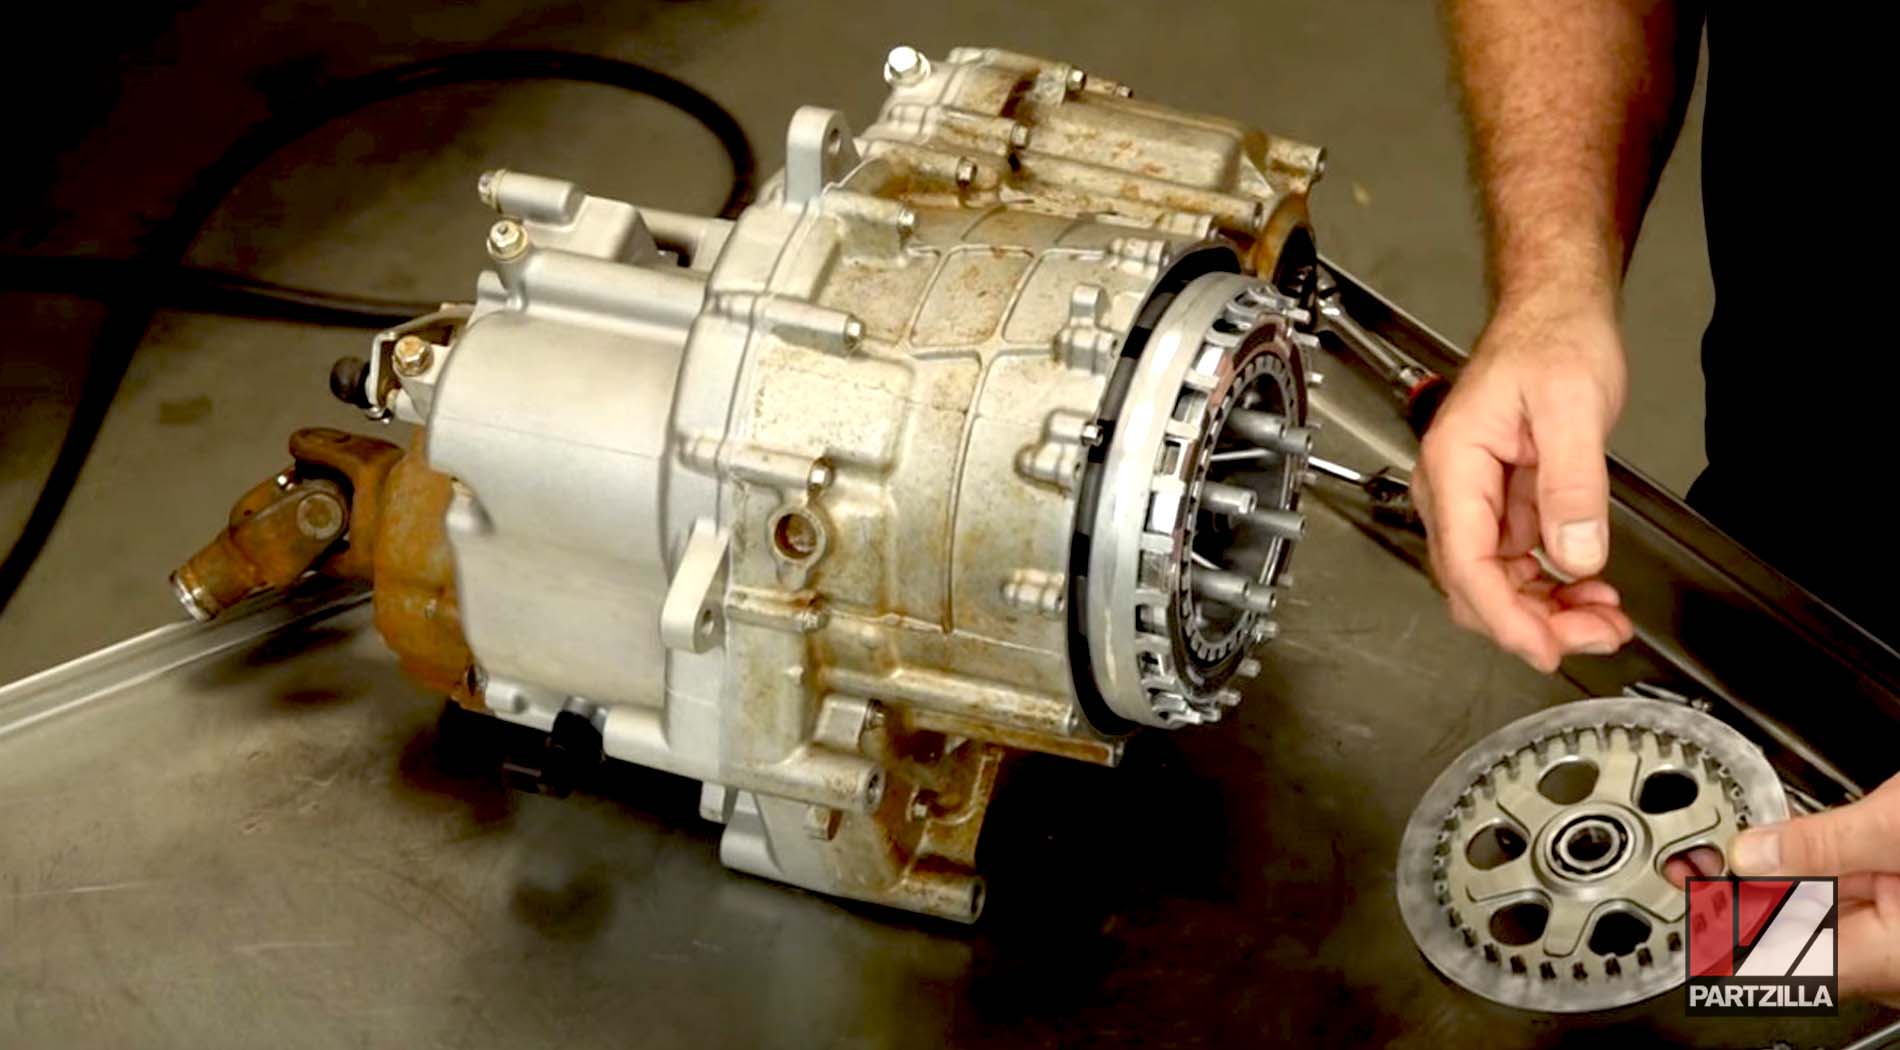
Step 5. Remove each one of the cushions from the outer gear with a flathead screwdriver, then separate the gear from the basket with the screwdriver.
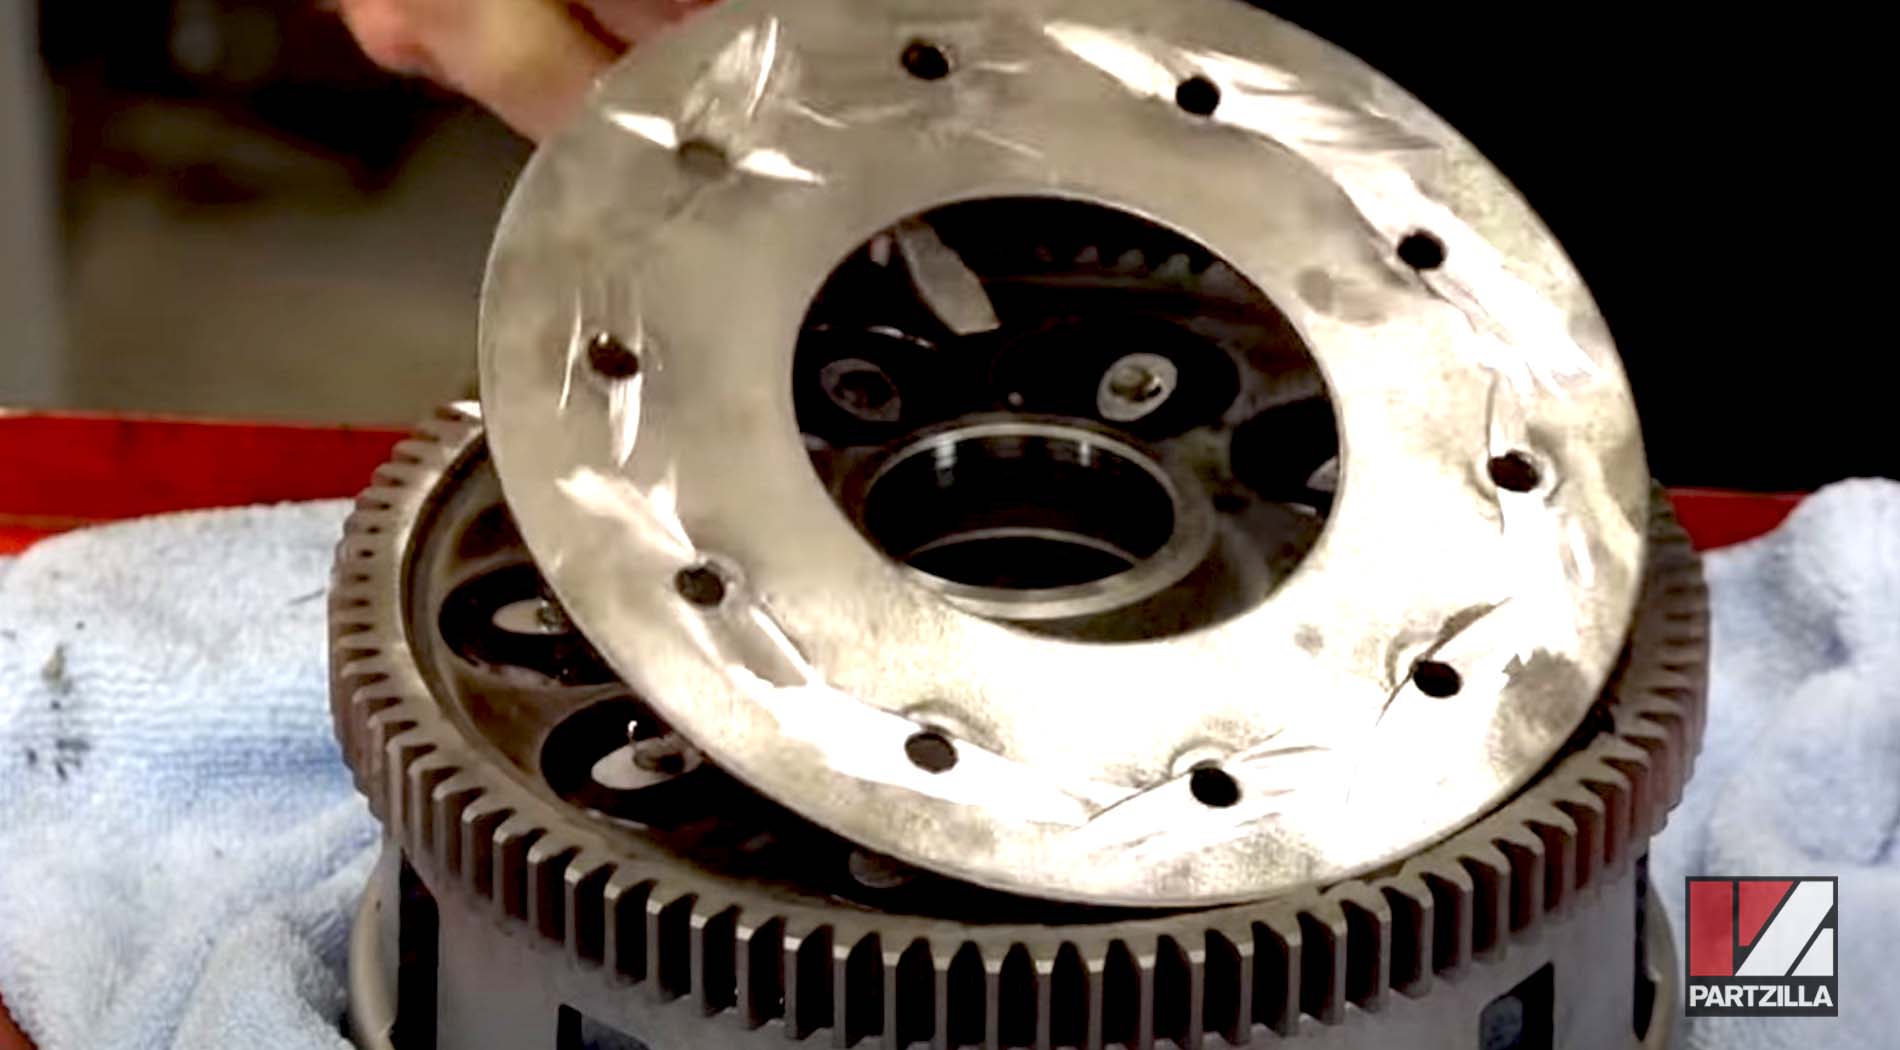
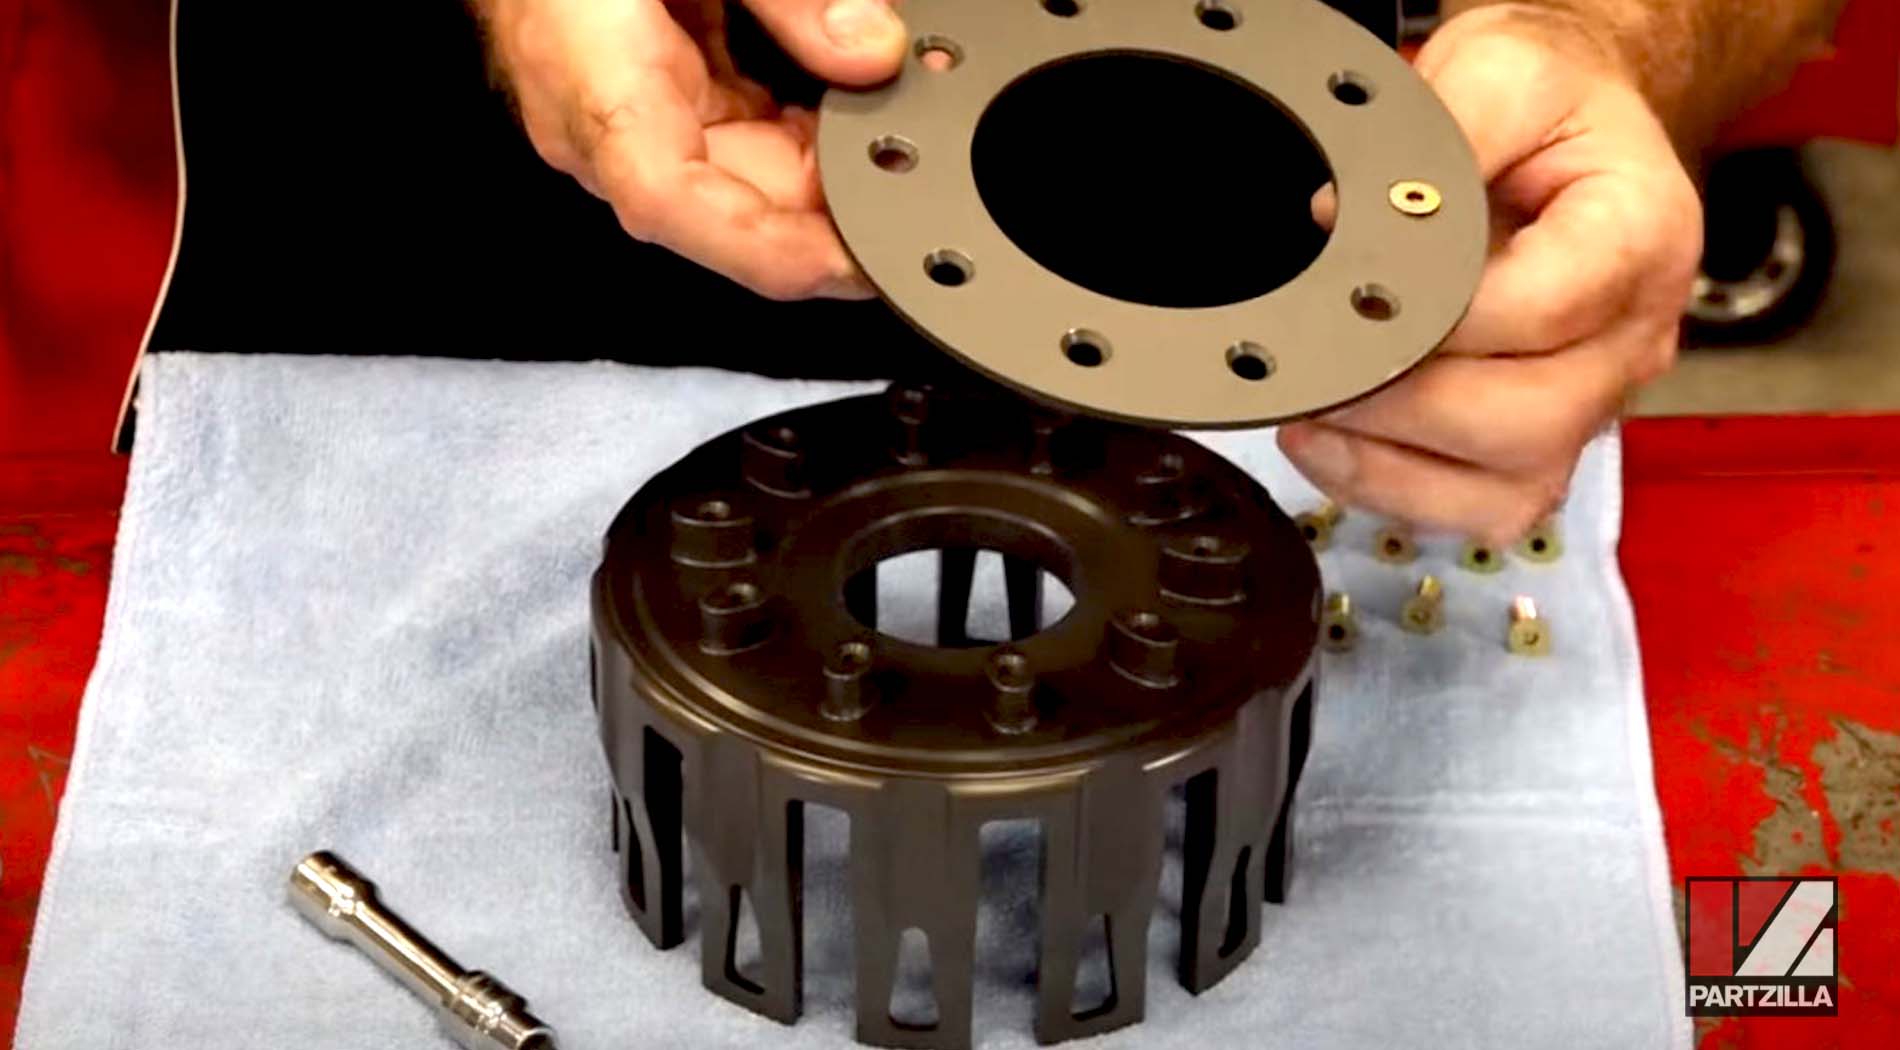
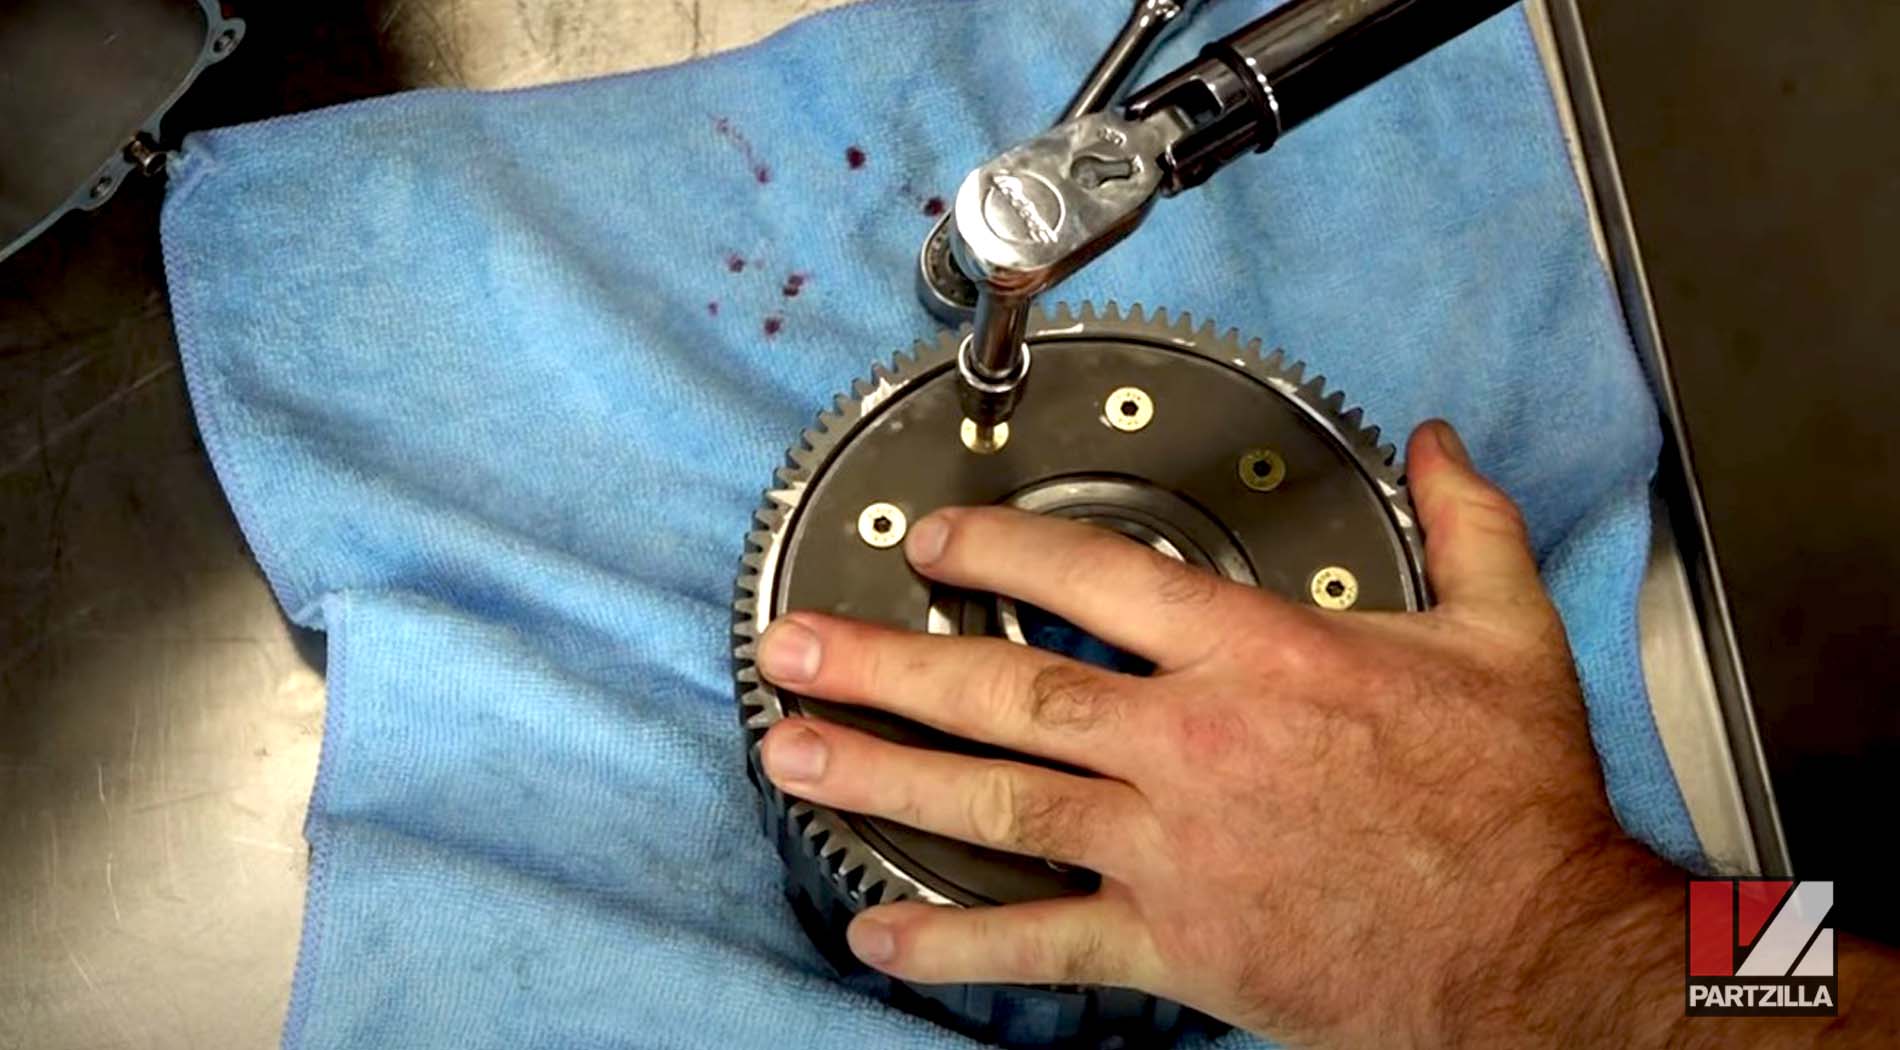
Step 6. Prep the clutch basket by removing the ten 4mm hex bolts that hold the retaining plate in place.
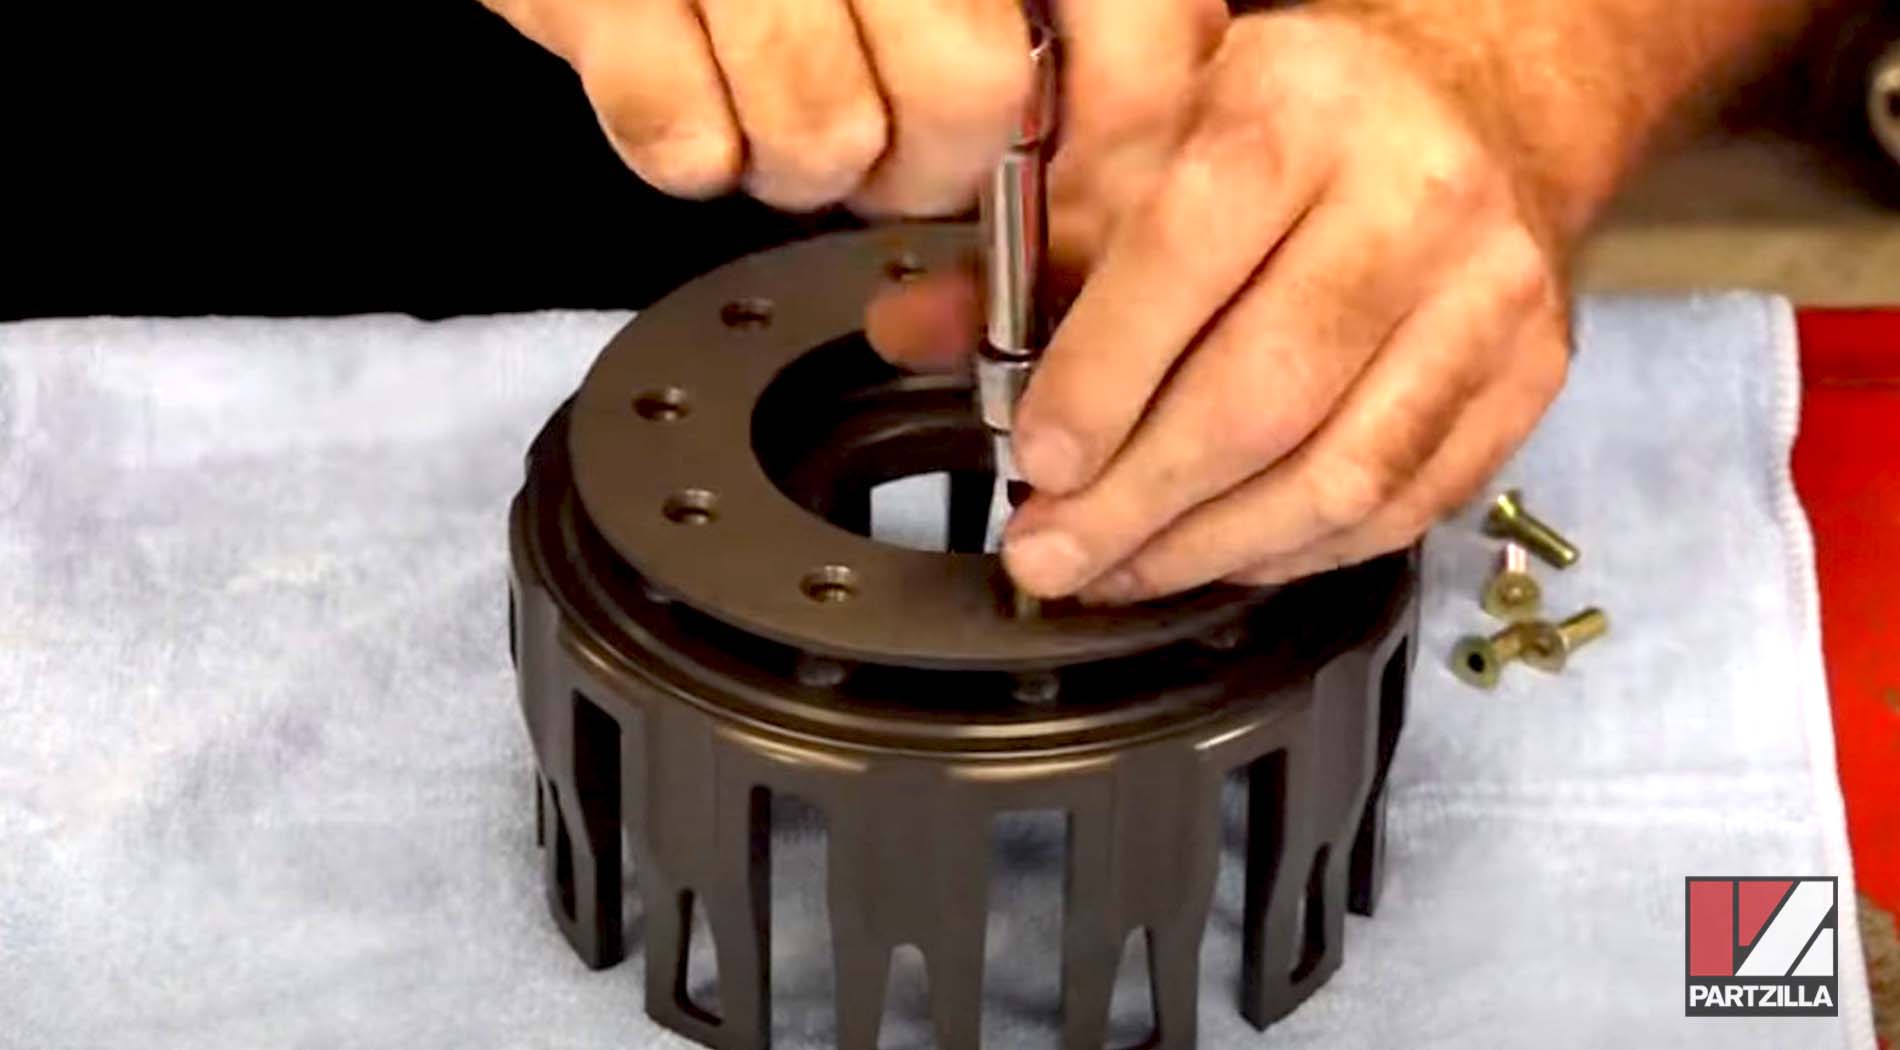
NOTE: Notice the beveled edges for the side that's going to be facing out. Don't reverse it when you reinstall the plate.
Watch the clip below to see the outer gear removal segment of our YXZ1000R clutch installation.
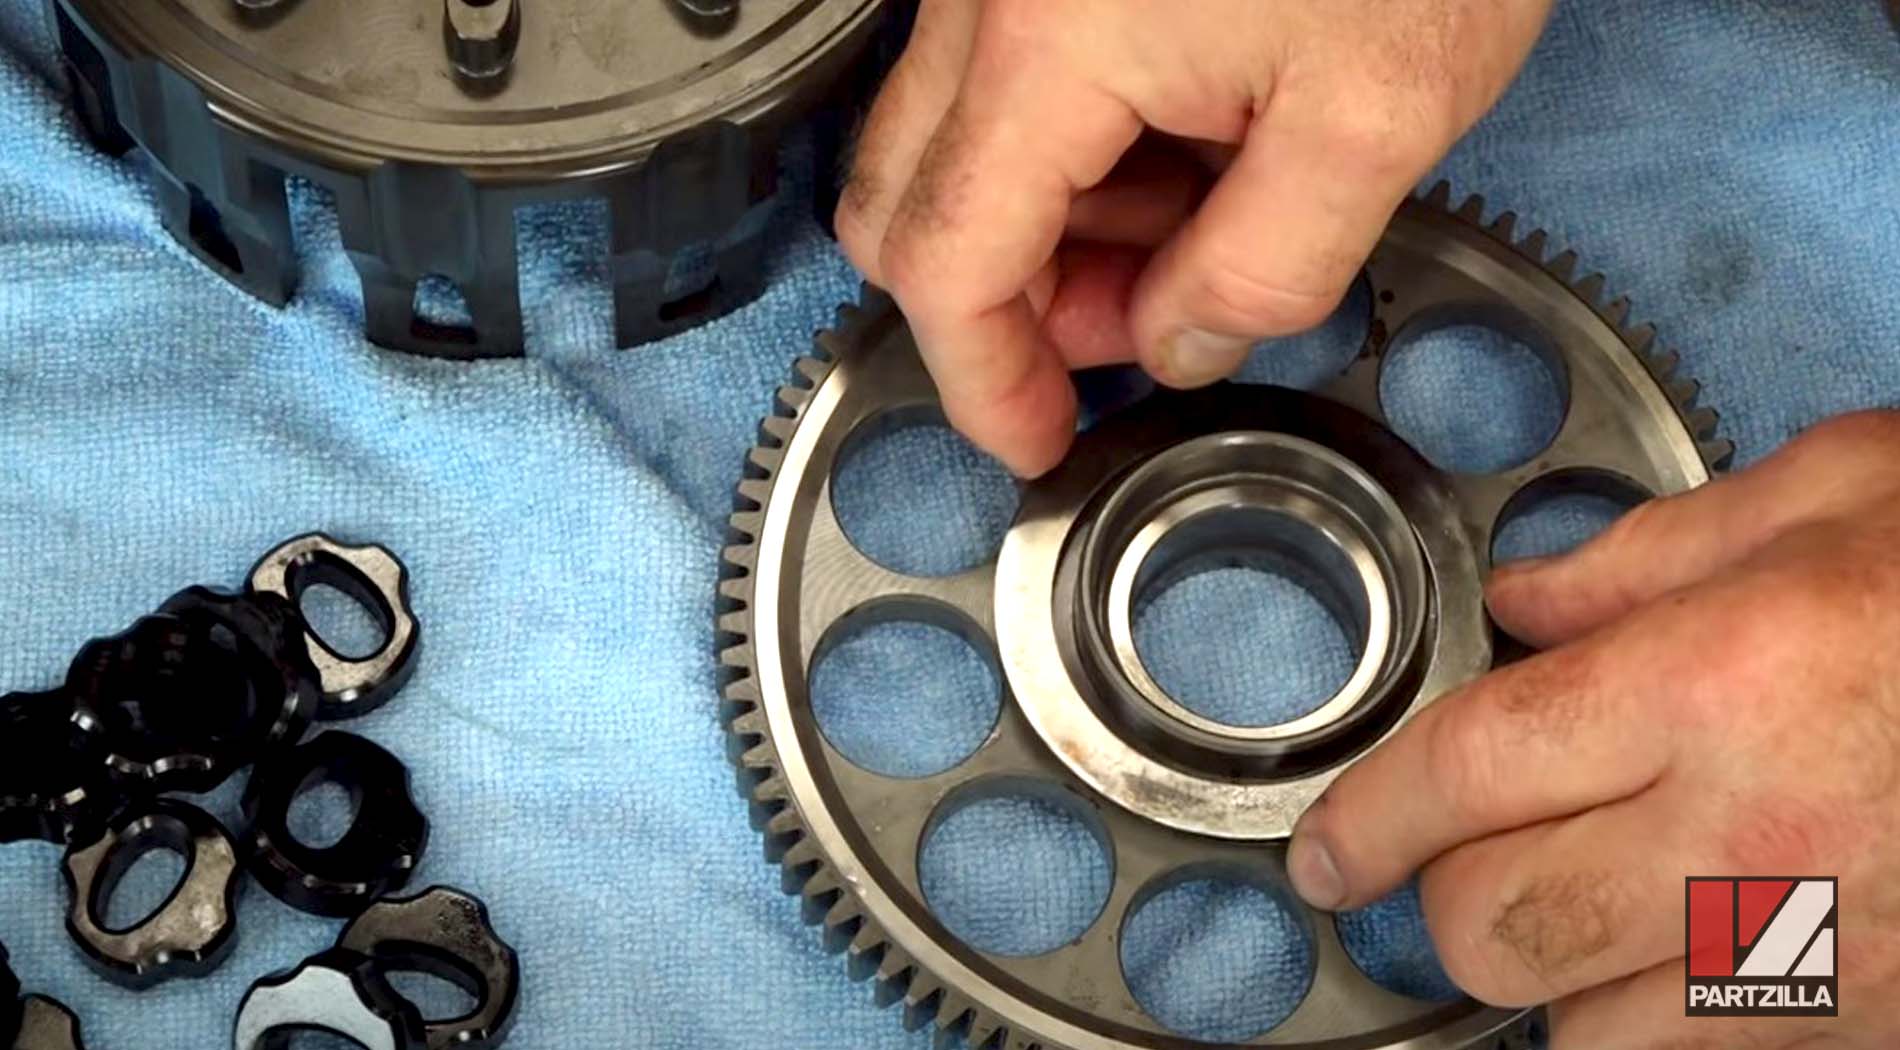
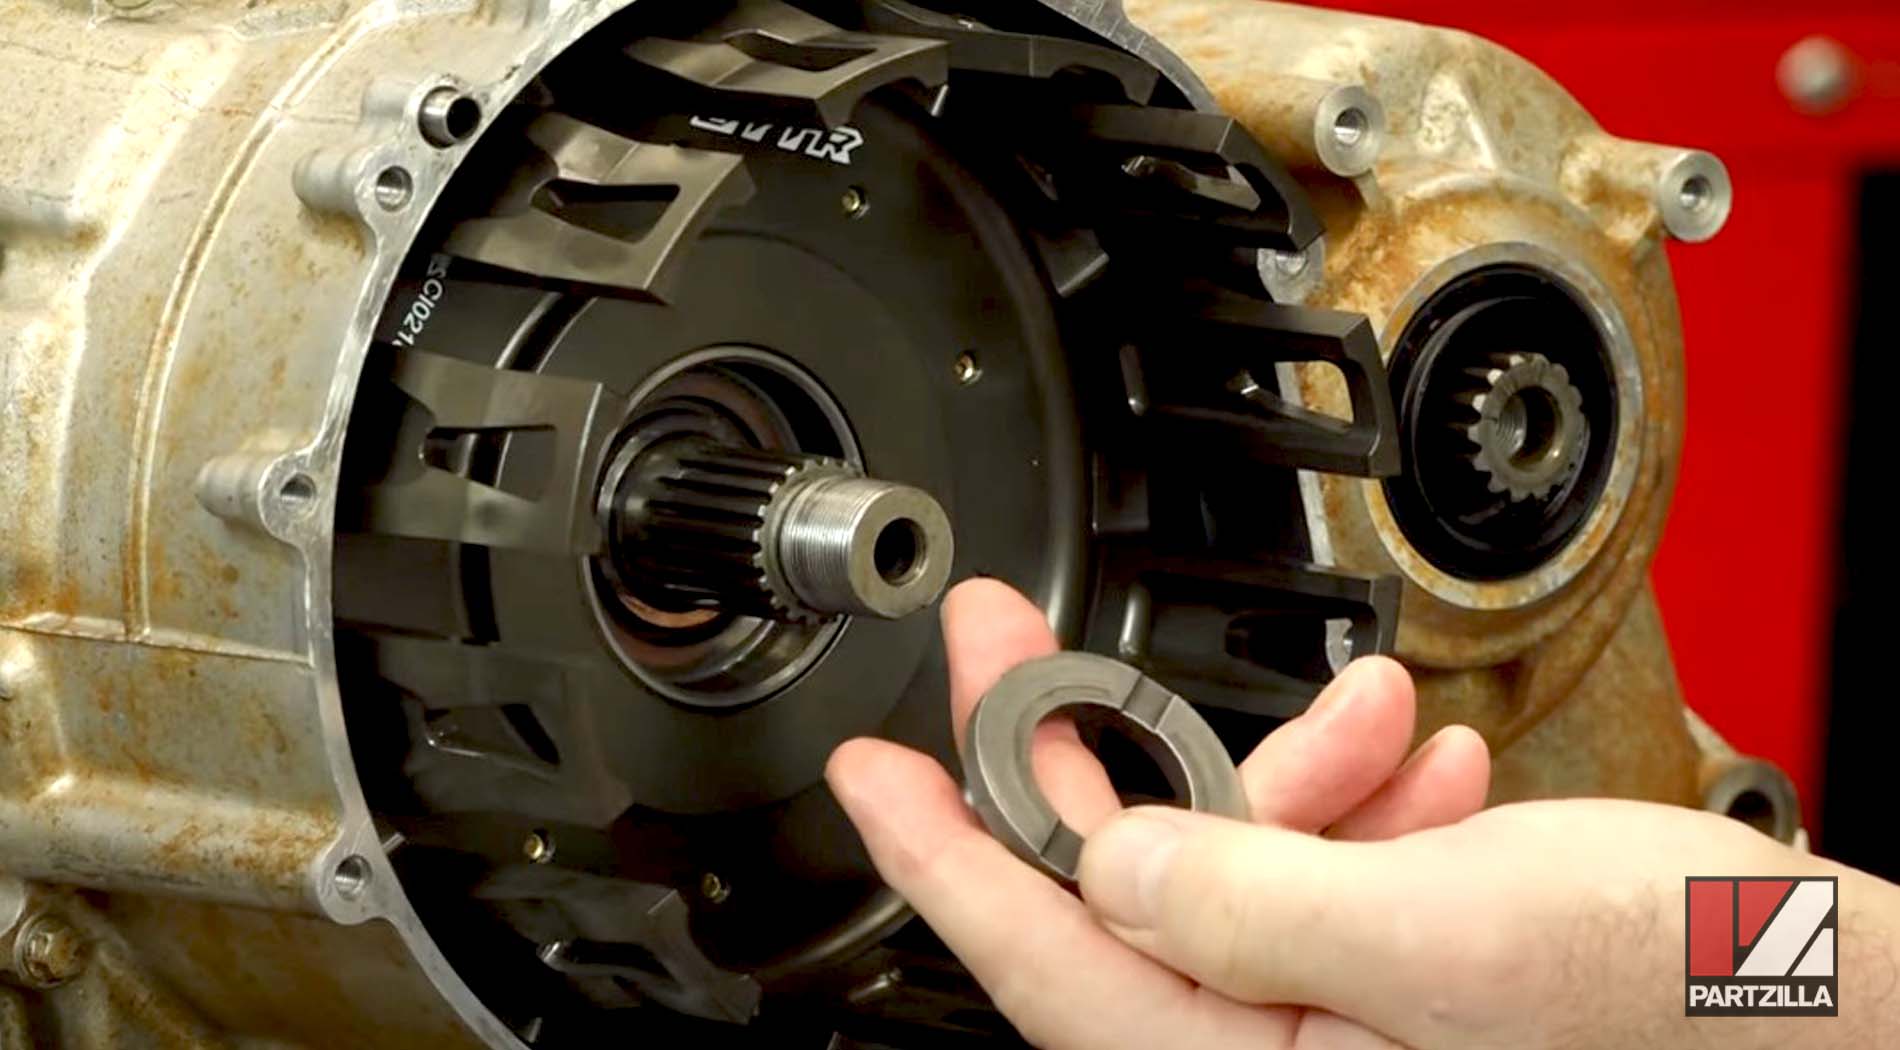
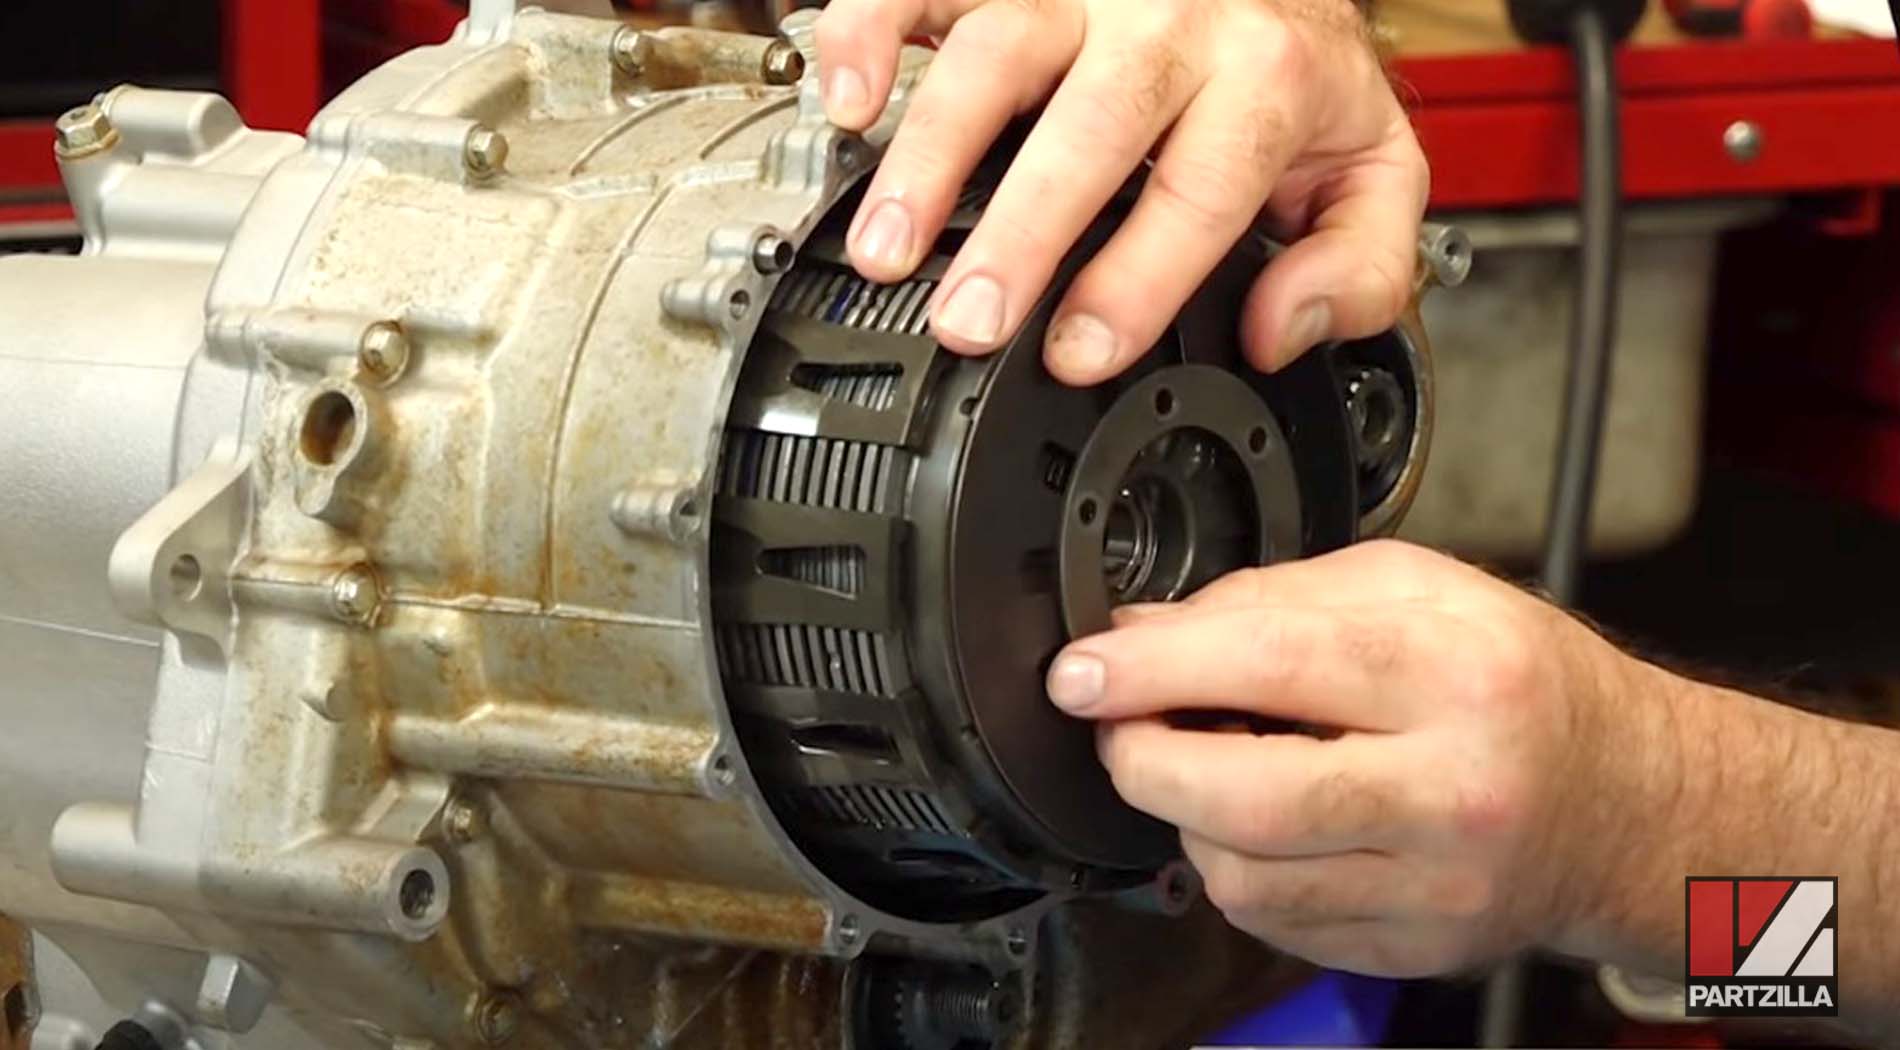
Step 7. Install the new shim and the thrust washer onto the outer gear, making sure everything lines up correctly, then bring the basket all the way down over them.
Watch the clip below to see the clutch basket assembly segment of our YXZ1000R clutch installation.
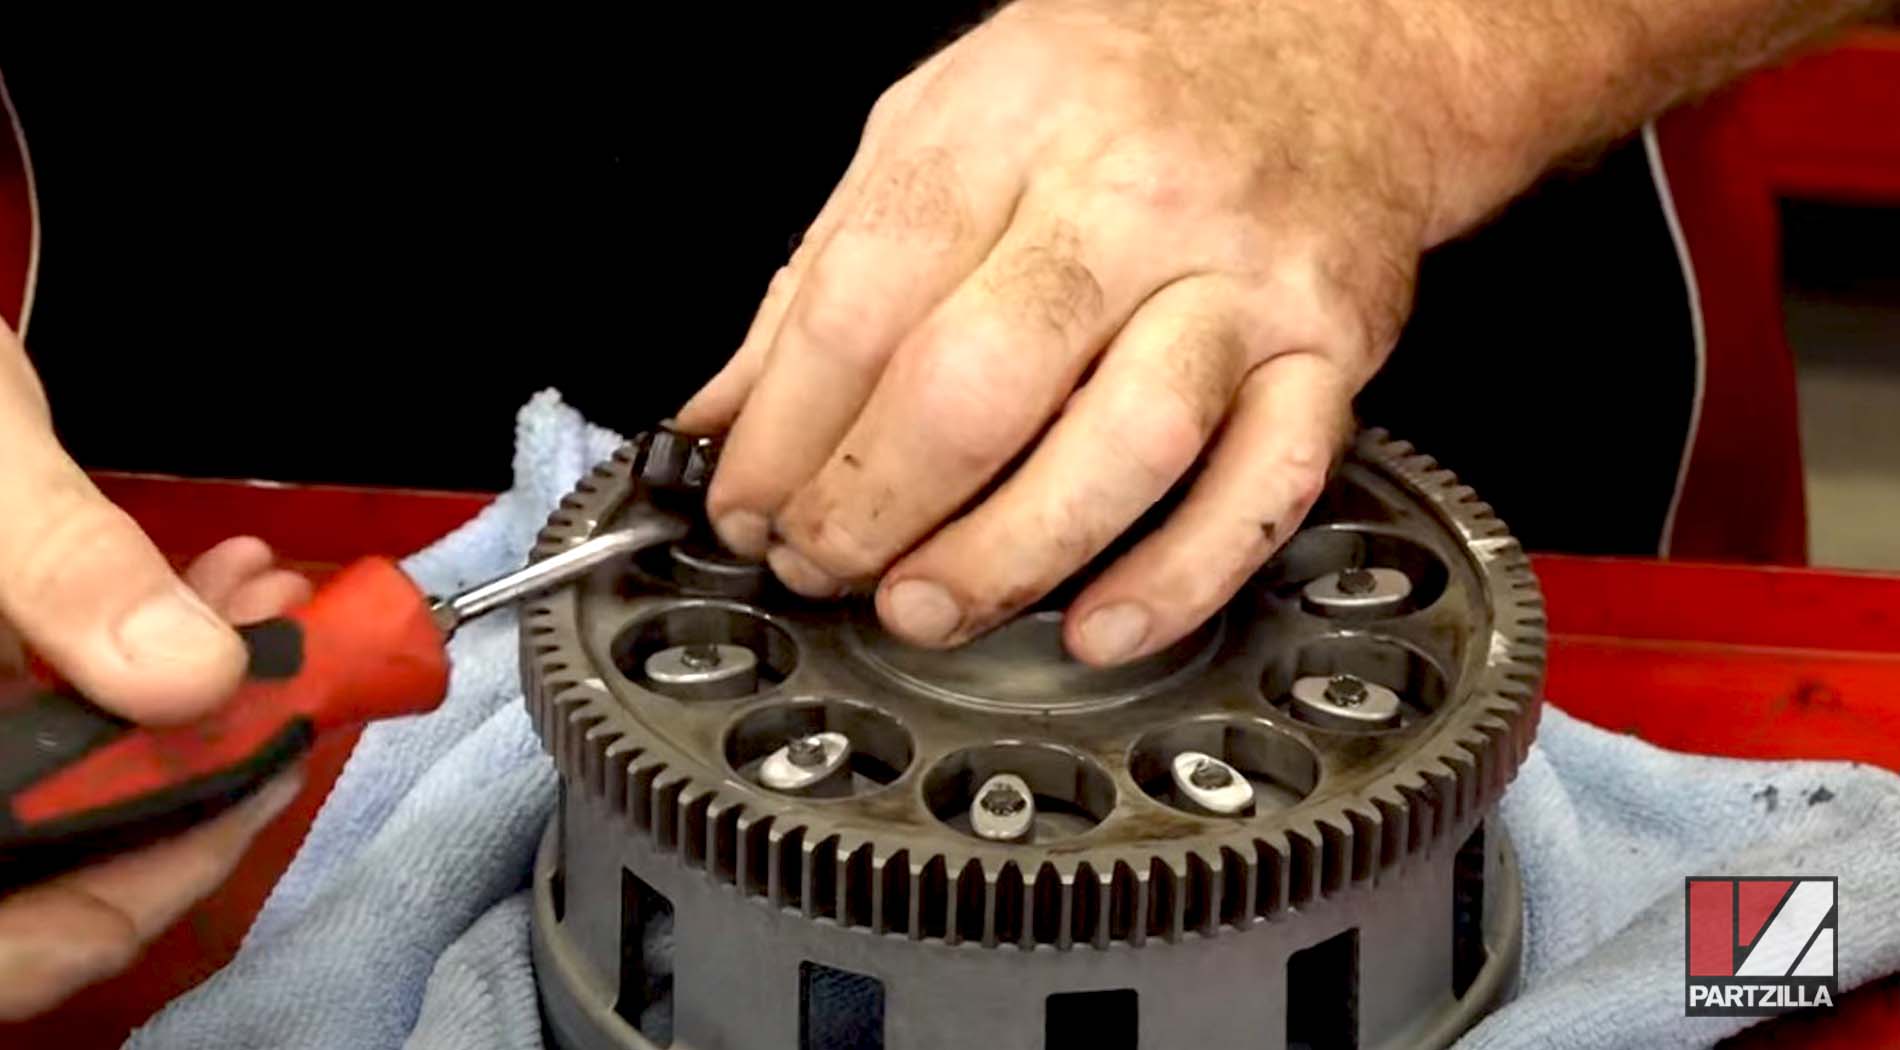
Step 8. Add a little bit of red threadlocker to the hex bolts that came with the kit, then install the retaining plate and the bolts and tighten them to 7.4 foot-pounds in a pattern that alternates from one side to another.
Step 9. Install the collar and the needle bearing onto the clutch basket.
Step 10. Install the clutch basket, followed by the spacer or washer that has the grooves cut in it.
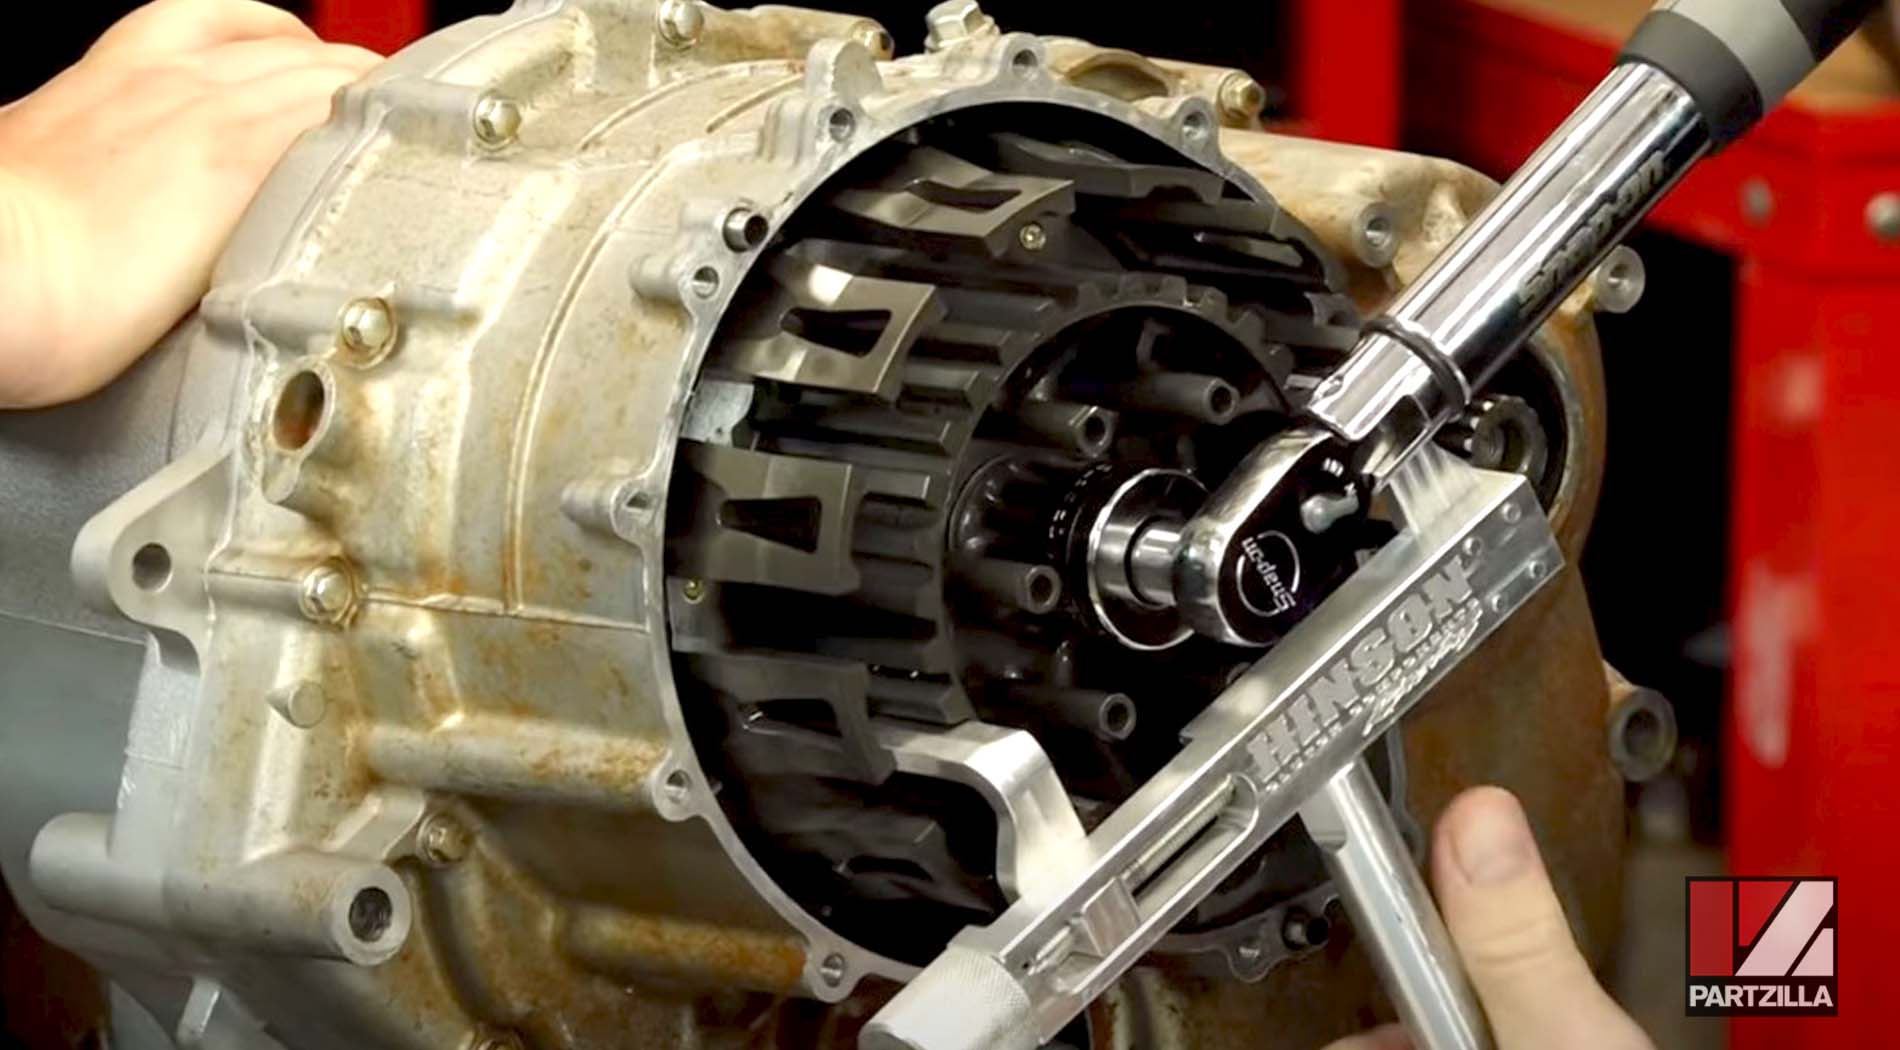
Step 11. Install the clutch boss, followed by the flat washer and then the washer that has the word "out" on it (facing out). Next, install a new central nut.
Step 12. Use a clutch boss holder, a torque wrench and an assistant to hold the assembly down, then tighten the central nut.
Watch the clip below to see the clutch basket installation segment of our YXZ1000R clutch installation.

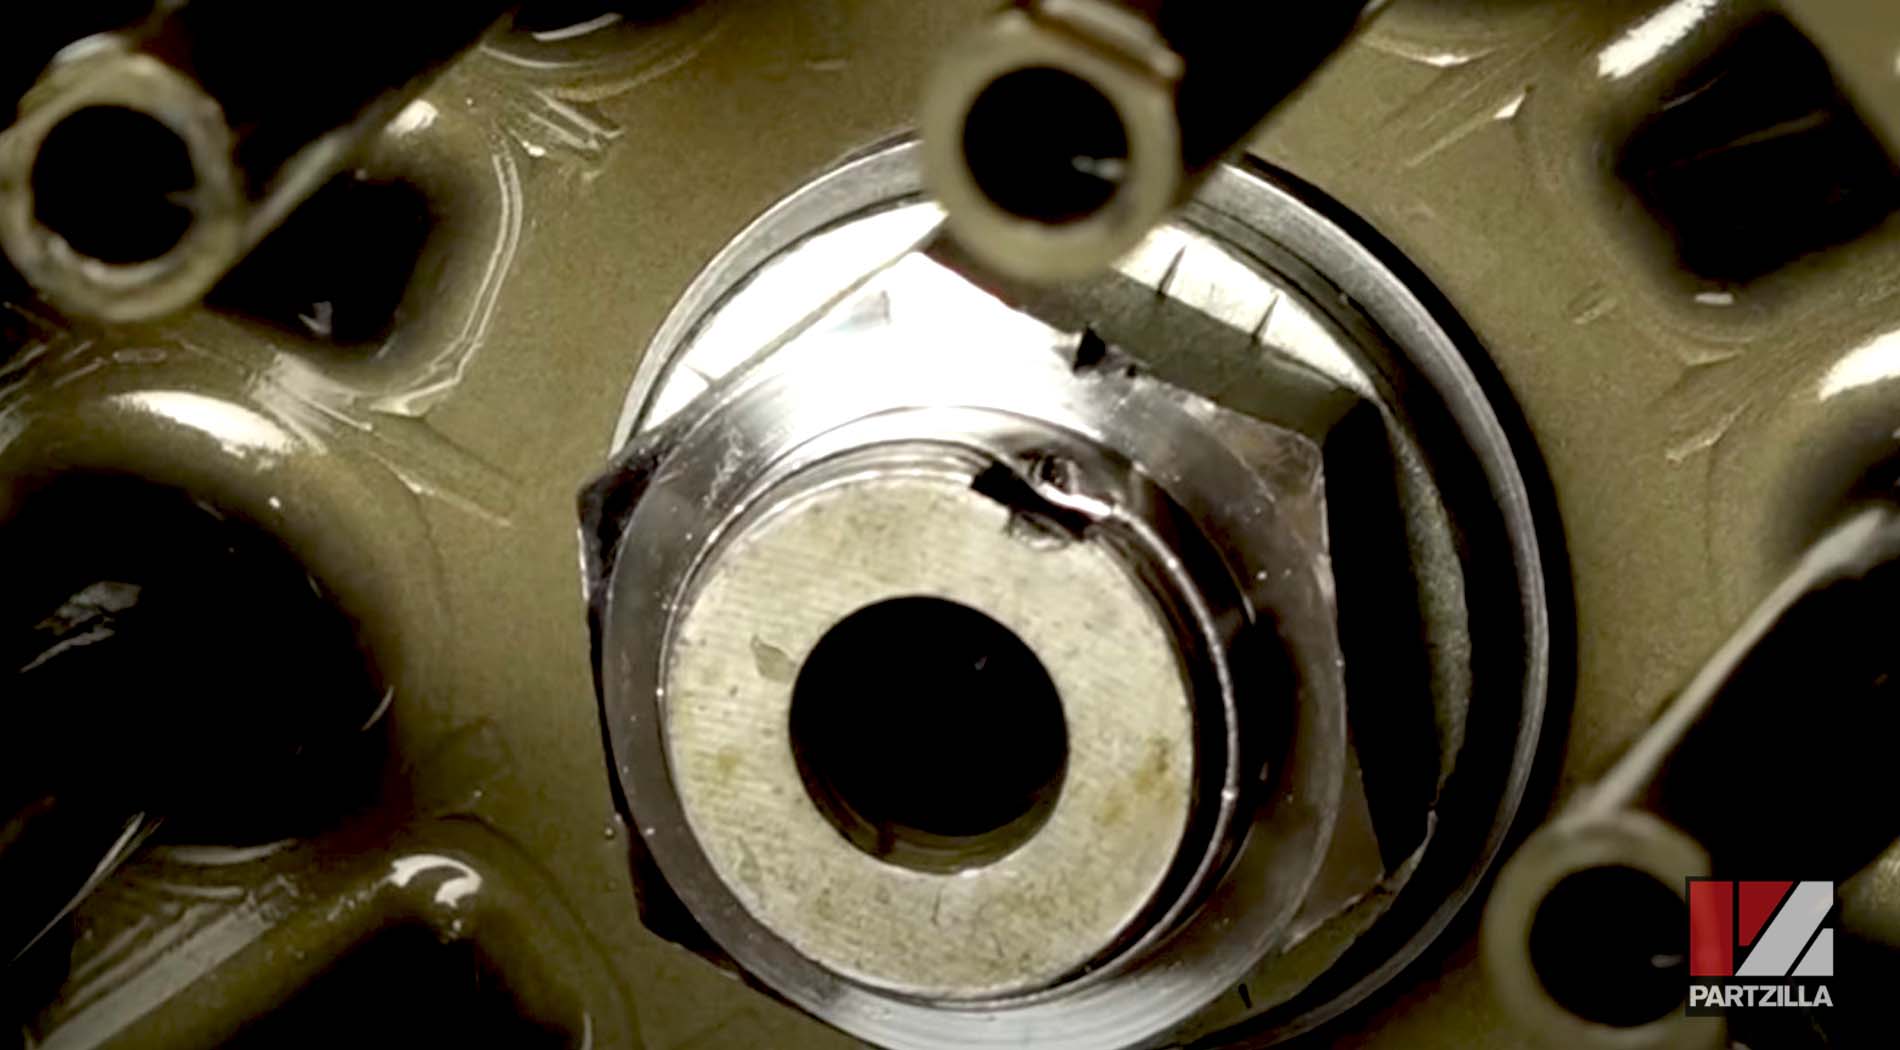
Step 14. Stake the central nut just enough to make sure it doesn't move.
Watch the clip below to see the clutch plates installation segment of our YXZ1000R clutch installation.
Step 15. Install the pin, then add a little bit of oil into the bearing.
Step 16. Install the wear ring, which should self-align.

Step 17. Install the clutch spring and its T30 Torx head bolts, then torque the bolts to 5.86 foot-pounds in a crisscross pattern.
PRO TIP: Use a soft screwdriver on the underside to hold everything still while you torque the bolts.
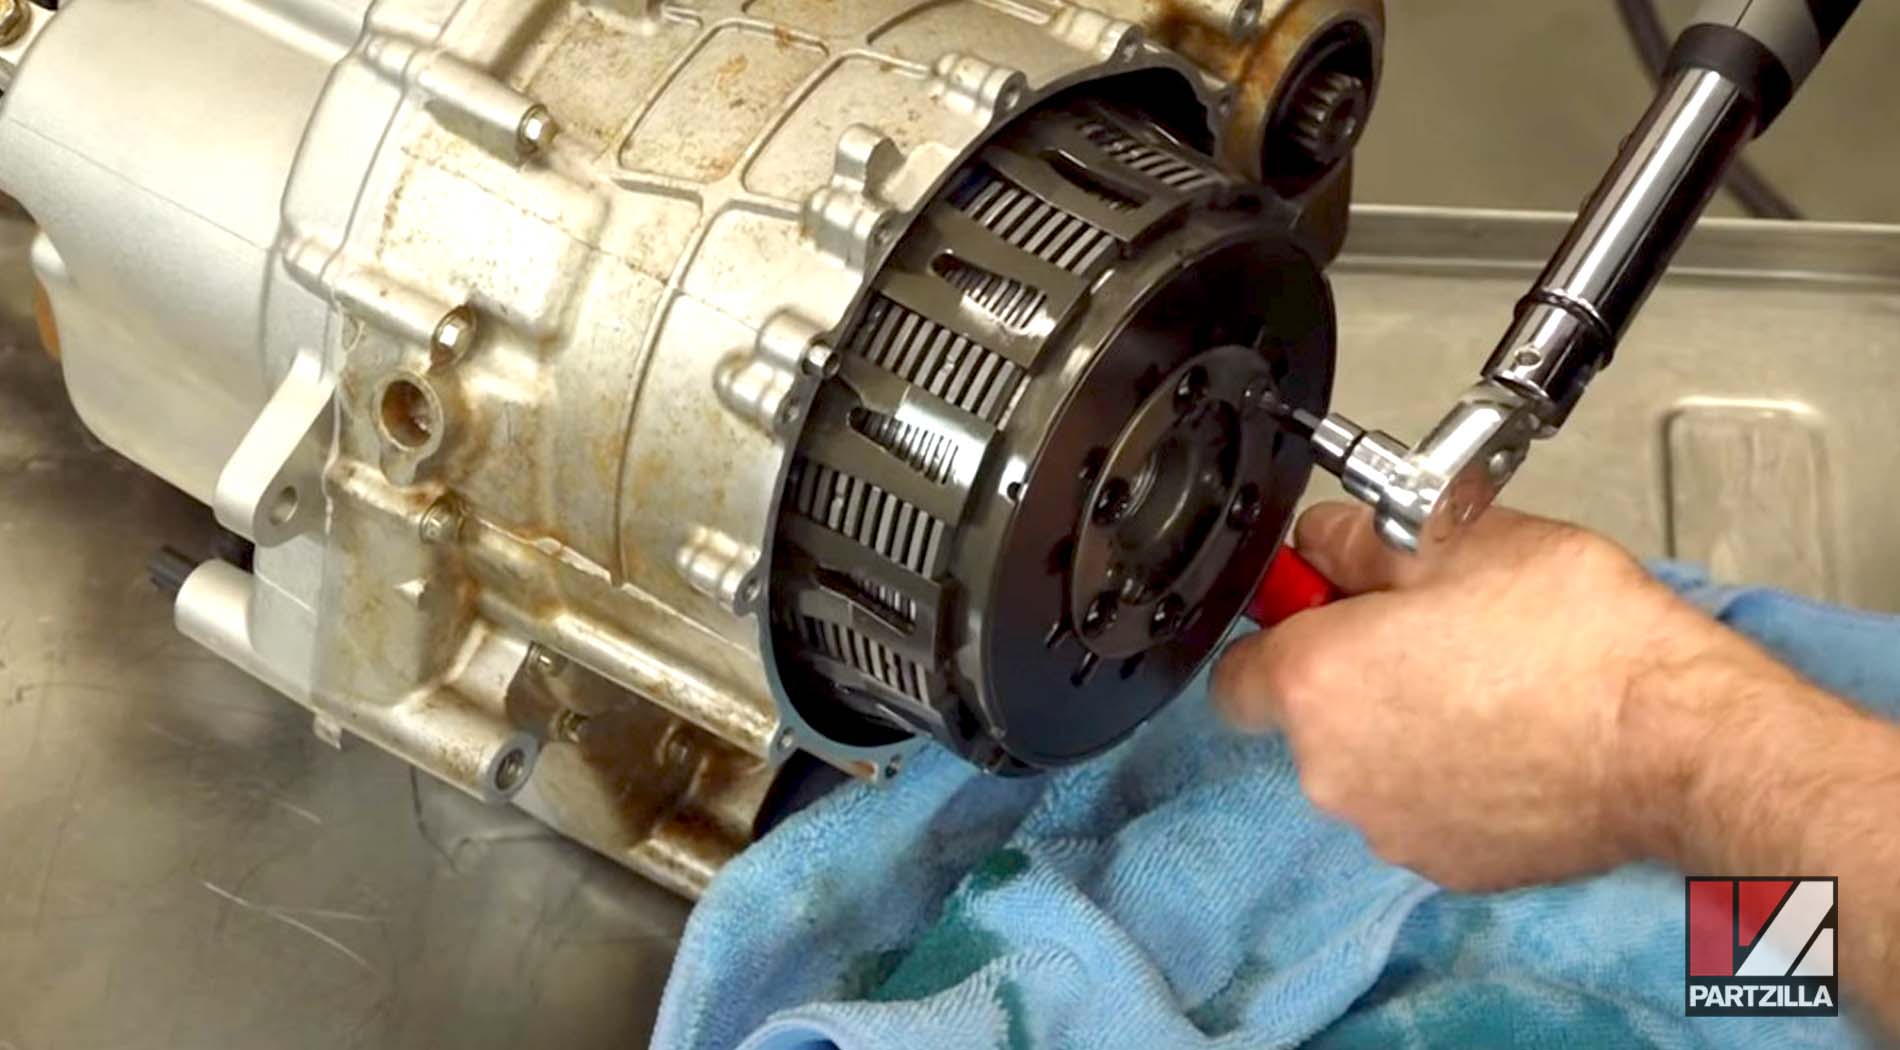
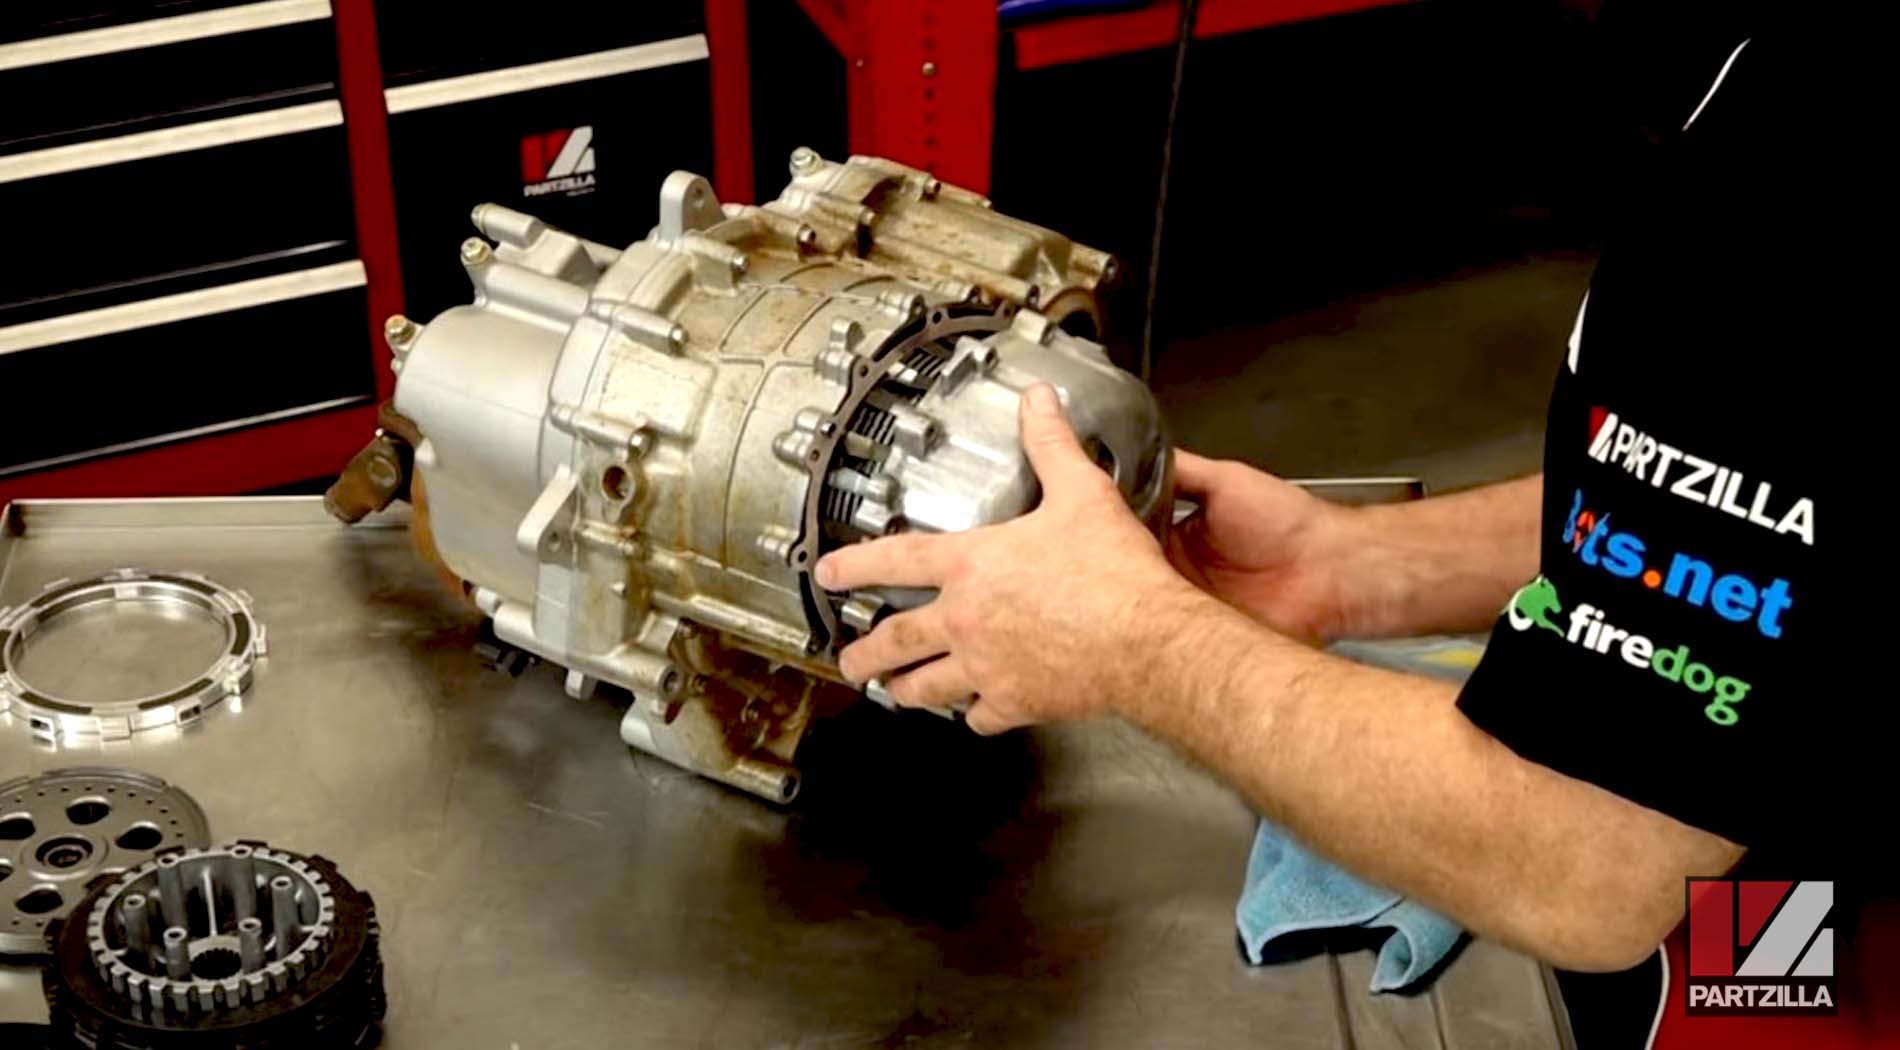
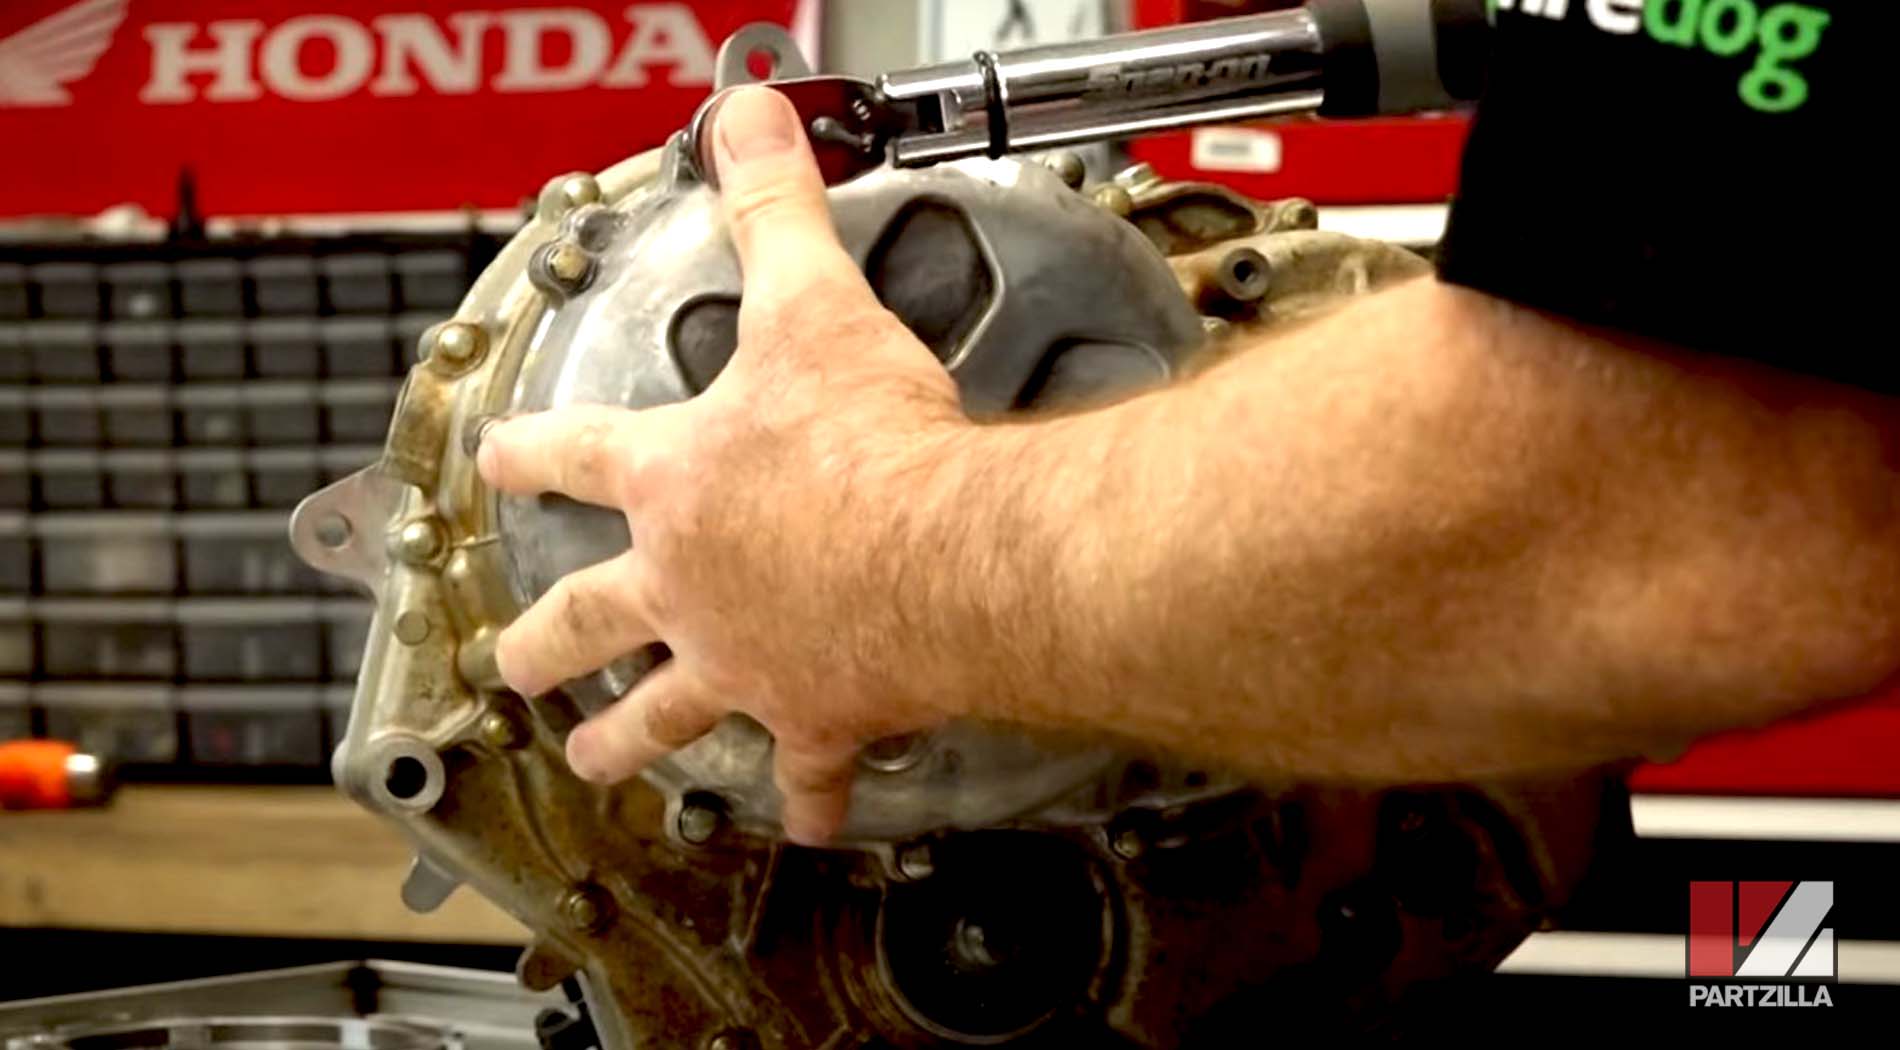
Step 18. Install the gasket, followed by the outer clutch cover and its bolts. Tighten all the bolts down to 7.2 foot-pounds.
NOTE: Don't forget the bottom three bolts have copper washers, and there are arrows pointing to their locations.
Watch the clip below to see the clutch closing segment of our YXZ1000R clutch installation.
After installing the clutch kit, there's still one more thing to do: the machine needs to be told where the clutch engagement point is going to be set, and the only way to do that is using the YDS system, which is proprietary to Yamaha. You need to take it to a dealership to have them complete this.