Yamaha R6 Engine Rebuild Part 2: Piston Install
Welcome to the second part of our step-by-step guide to rebuilding a Yamaha R6 engine: installing the pistons and reassembling the crankcase.
If you missed the first part of our Yamaha R6 motor rebuild, find it here.
Watch the video above and follow the steps below to do a piston installation and rebuild on a Yamaha R6 engine. Use our Yamaha R6 engine exploded parts diagrams for additional reference.
Tools and Parts - Yamaha R6 Engine Rebuild Piston Installation
- Ratchet and extensions
- Set of sockets
- 5mm, 6mm, 8mm,10mm Allens
- 10mm wrench
- T30 Torx
- Screwdriver
- Magnet
- Pick tool
- Flywheel holder tool
- Torque wrench
- Punch tool
- Pliers
- Piston ring pliers
- Soft blow hammer
- Stud removal-installation set
- Feeler gauge
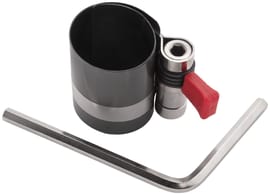
- Piston ring compressor
- Clutch holder tool
- Angle meter
- Red threadlocker
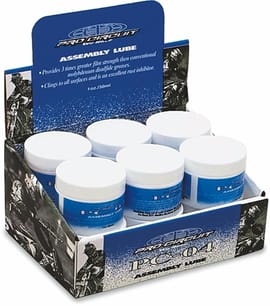
- Assembly lube
- Crankcase sealant
NOTE: The OEM Yamaha R6 parts you'll need to rebuild a Yamaha R6 motor will vary according to the amount of wear on your engine.


PRO TIP: Keep parts for individual cylinders together, and note the direction the parts were originally installed. This is important, as you'll want to reinstall parts in the cylinder they originally came from in the same direction.
Yamaha R6 Engine Rebuild Part 2: Piston Install to Head Install
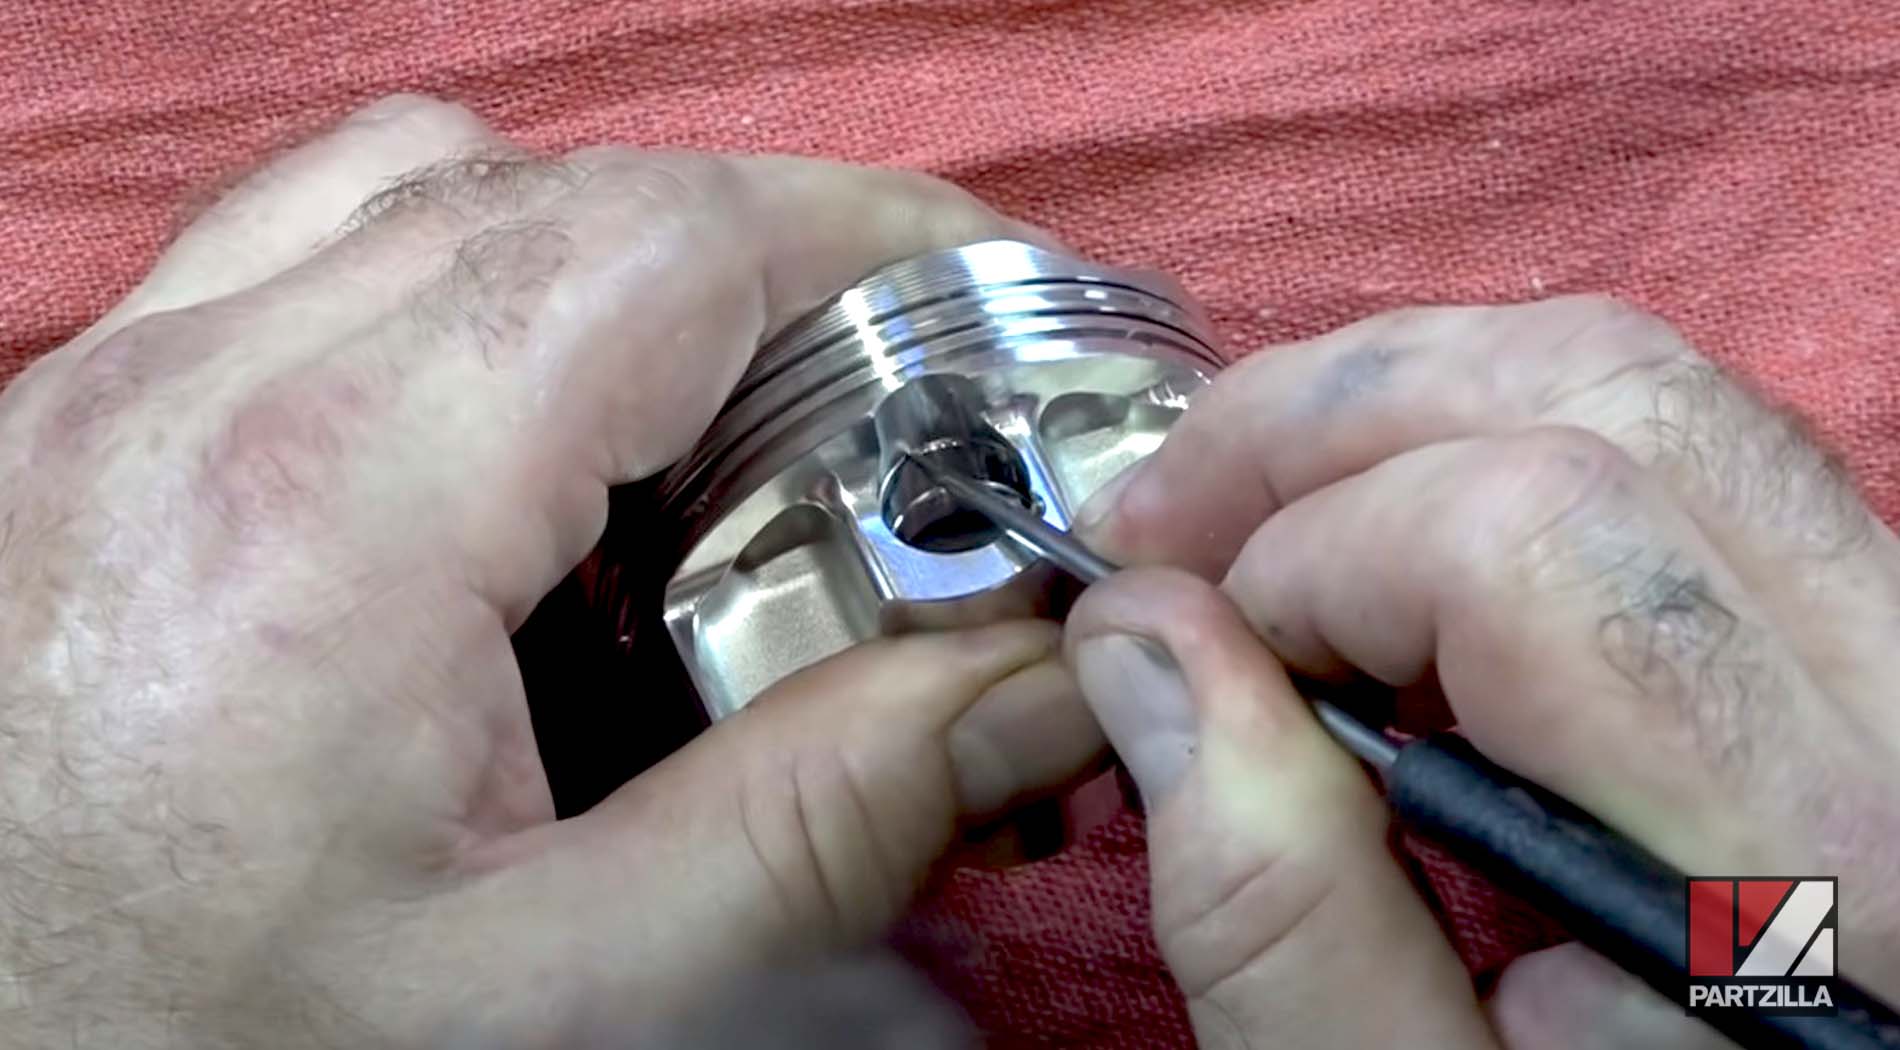
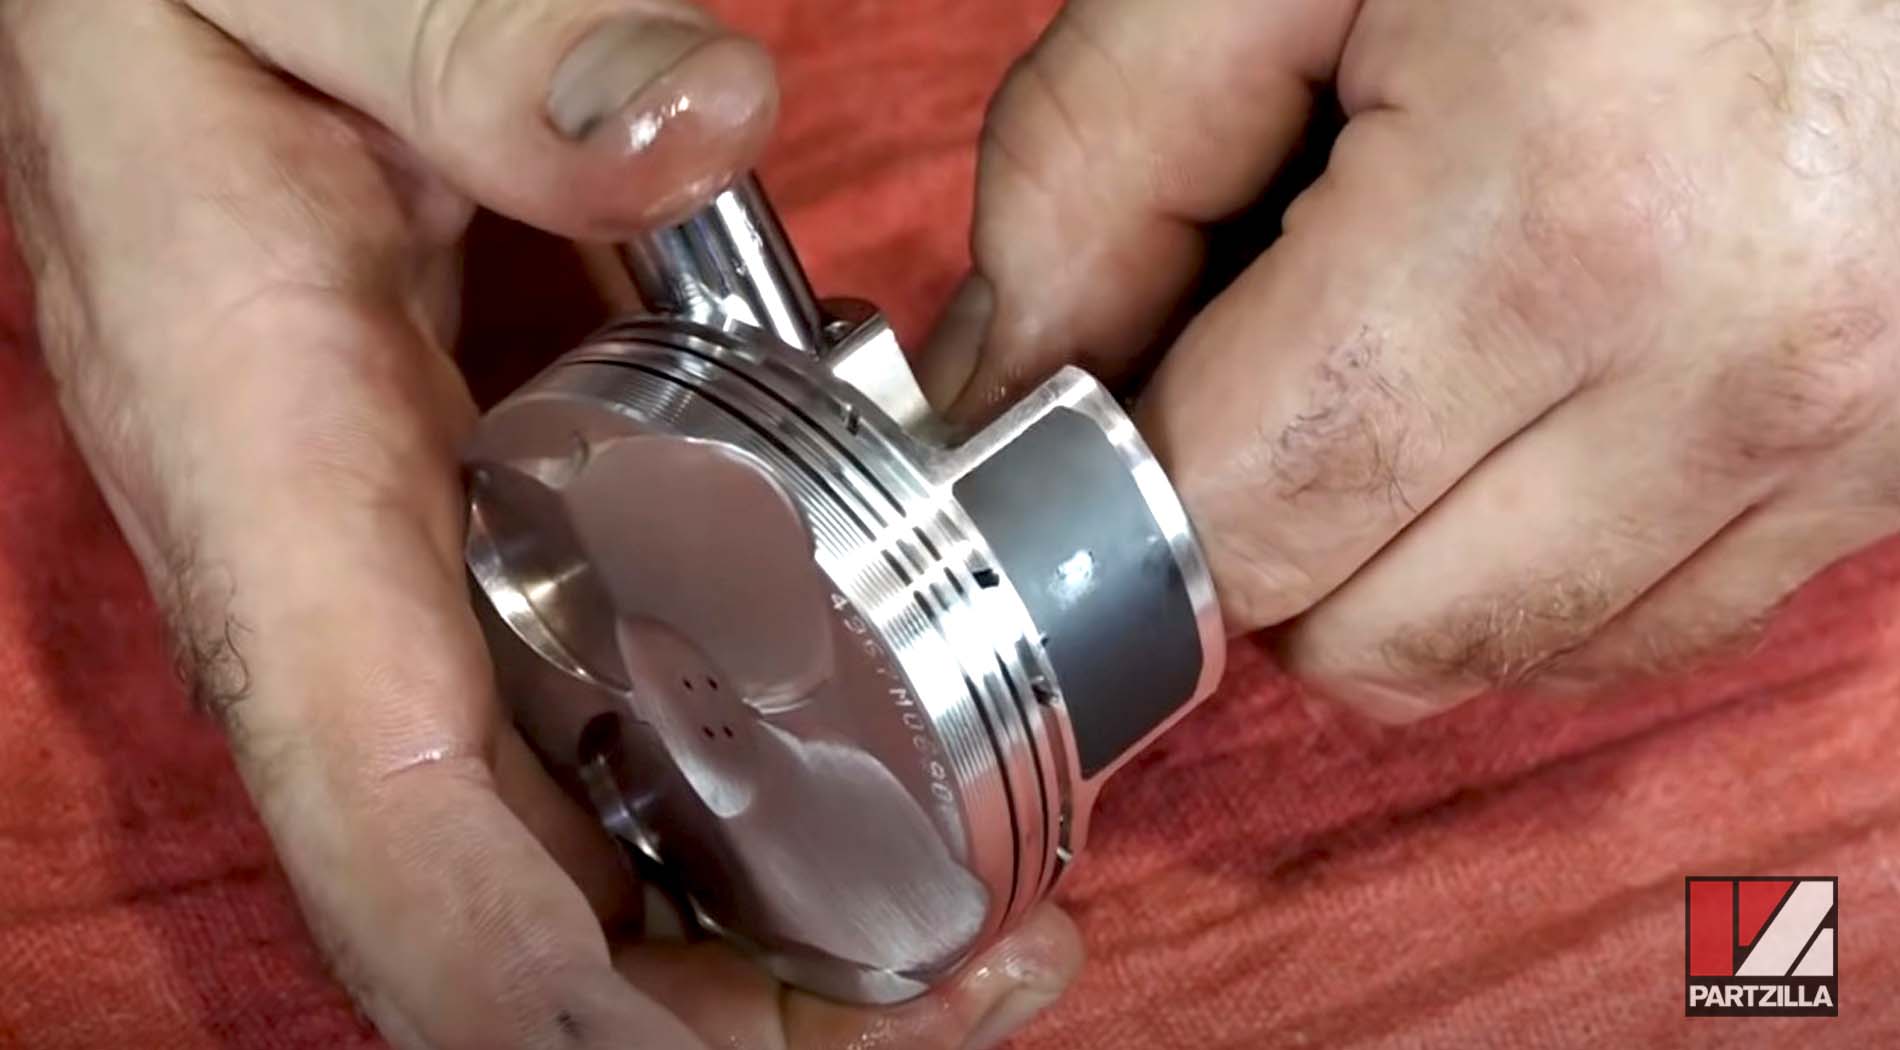
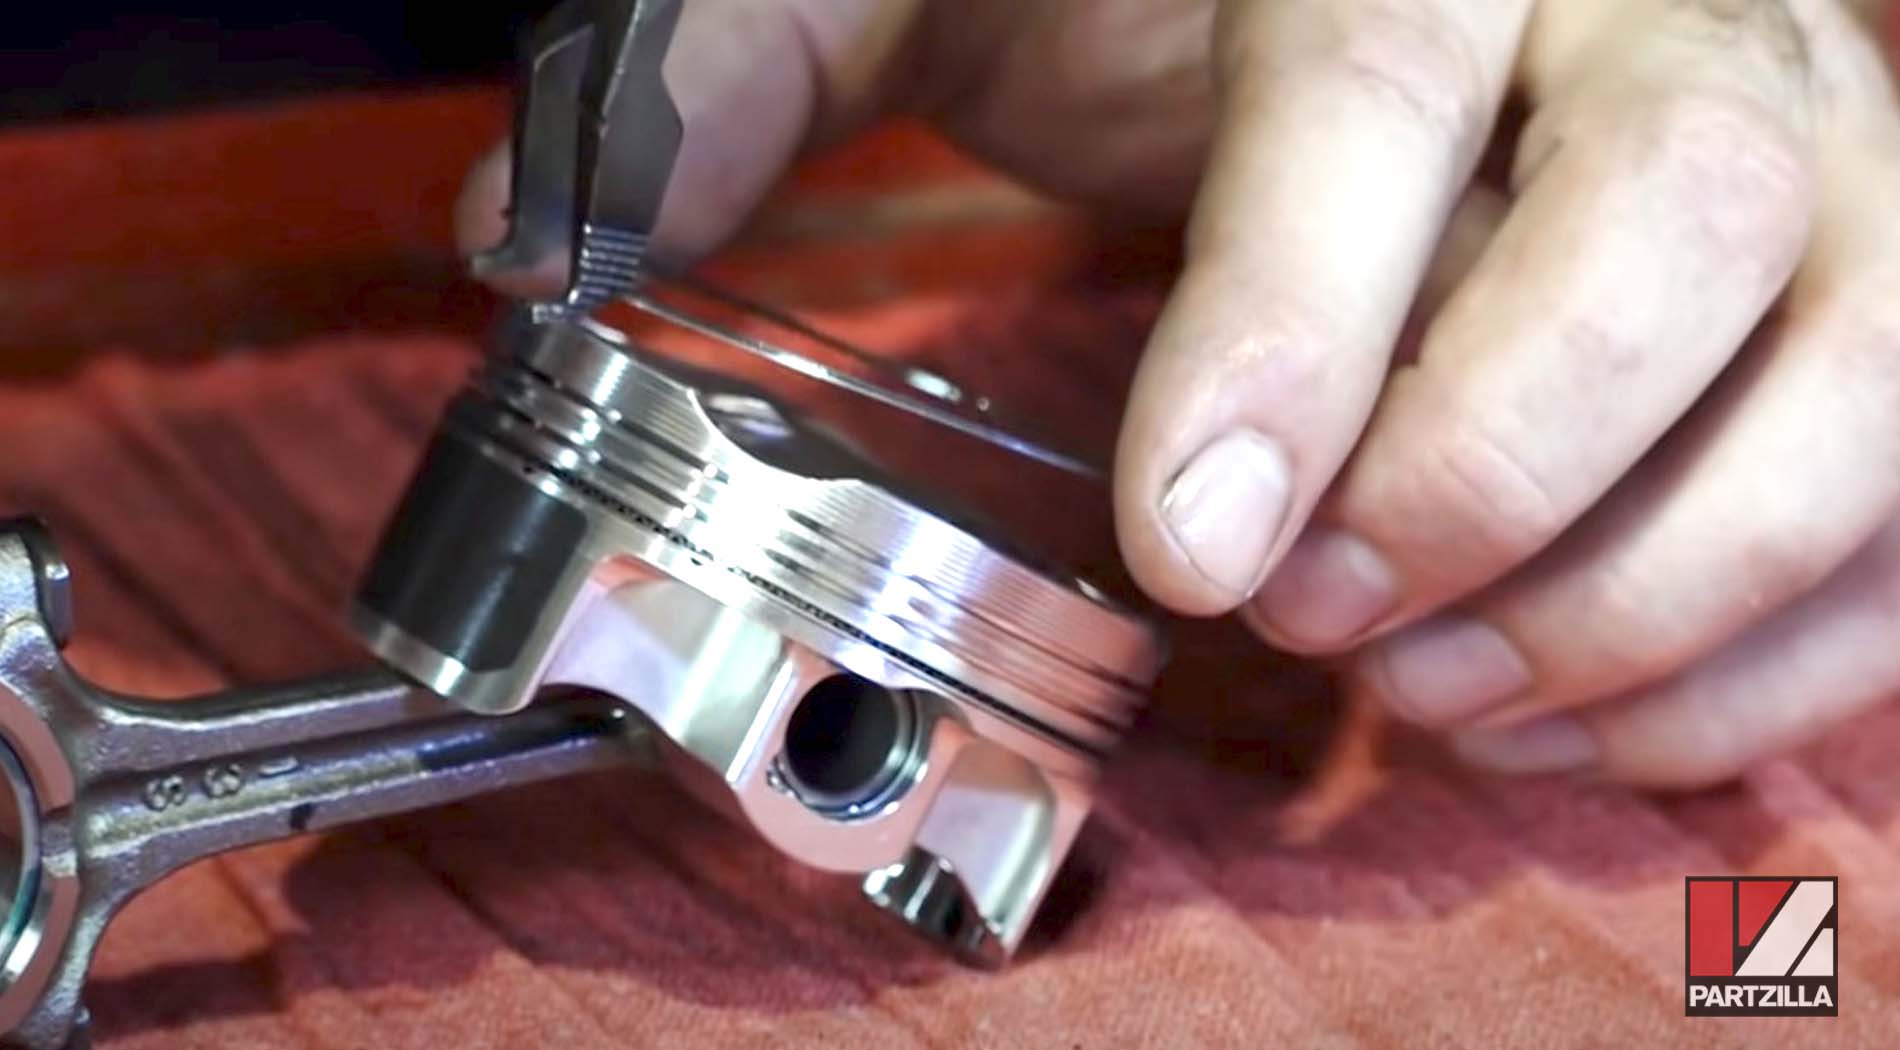
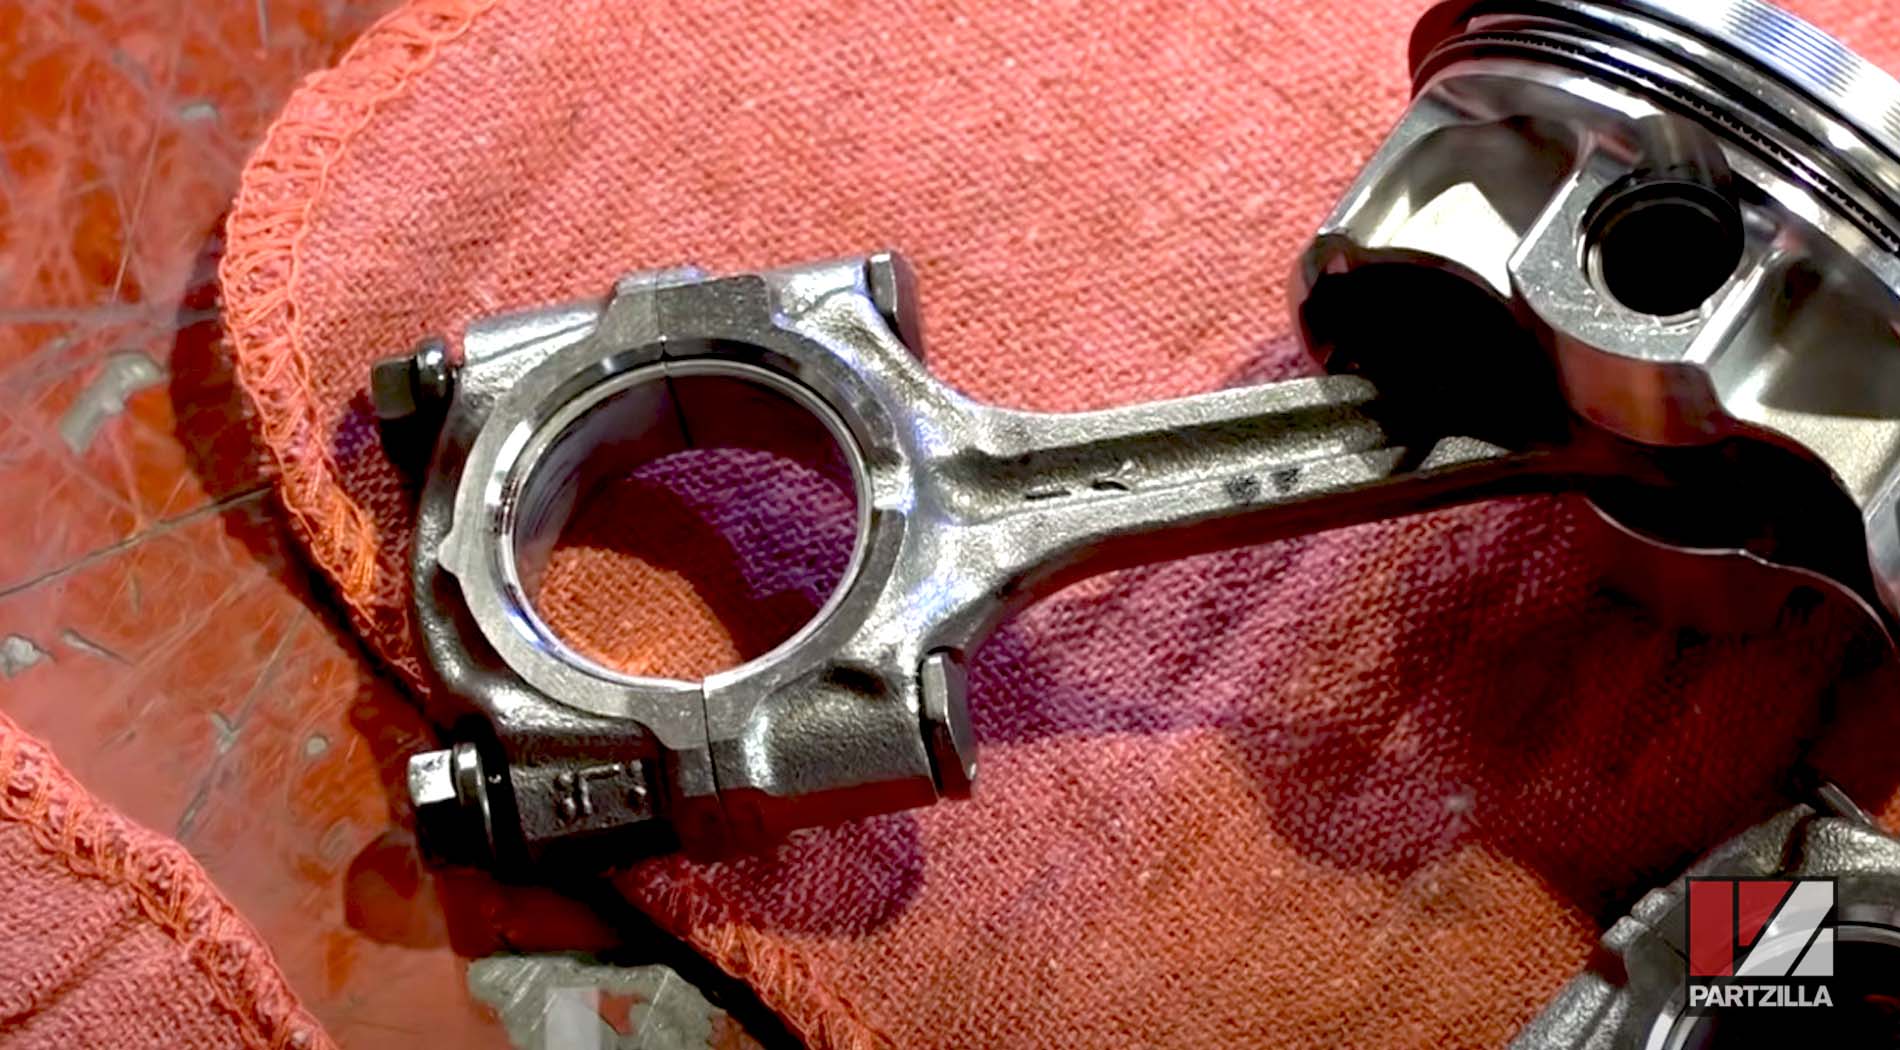
Step 1. To reassemble the pistons, install one of the piston pin circlips into the piston head, then the connecting rod, the piston pin and the second piston pin circlip. Oil the piston pin before installing it, and try not to bend the circlips in too much or they'll lose their tension. Repeat for all four pistons.
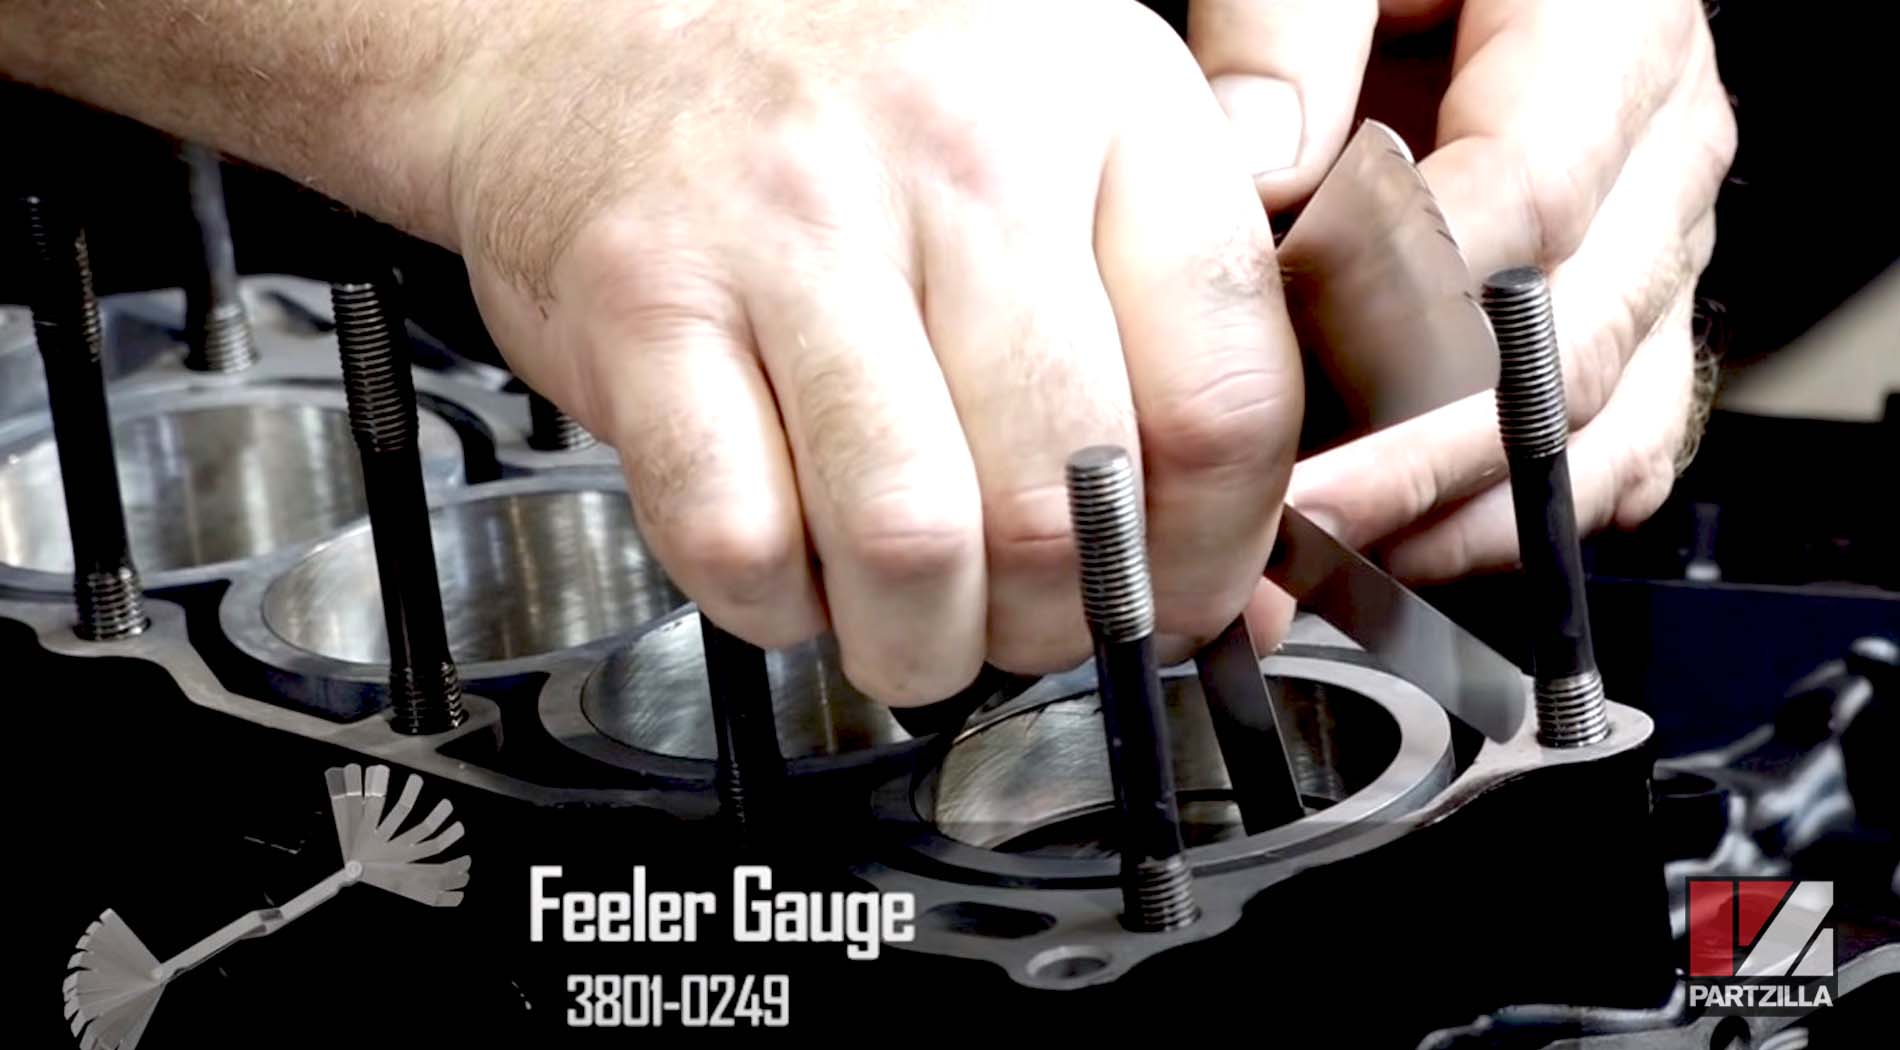
Step 2. Check the top piston ring and center piston ring gaps by placing a single ring at a time into the cylinder bore, pressing the ring down into the cylinder about an inch using the piston, then using a feeler gauge to measure the ring gap. Compare the results against the piston ring manufacturer's specifications, and carefully file down the end of the piston ring to create a slightly bigger gap if necessary. Repeat for all the top and center piston rings.
Step 3. Install the lower piston ring (consisting of an oil ring and two retention rings) onto the piston head. Install the center and top rings. Coat each ring in a film of oil before you install them, and position the ring gaps 180 degrees from the previous ring gap.
Step 4. Remove the old connecting rod bolts, and discard them because they're one-time use only. Install new connecting rod bolts, and gently tap them into place.
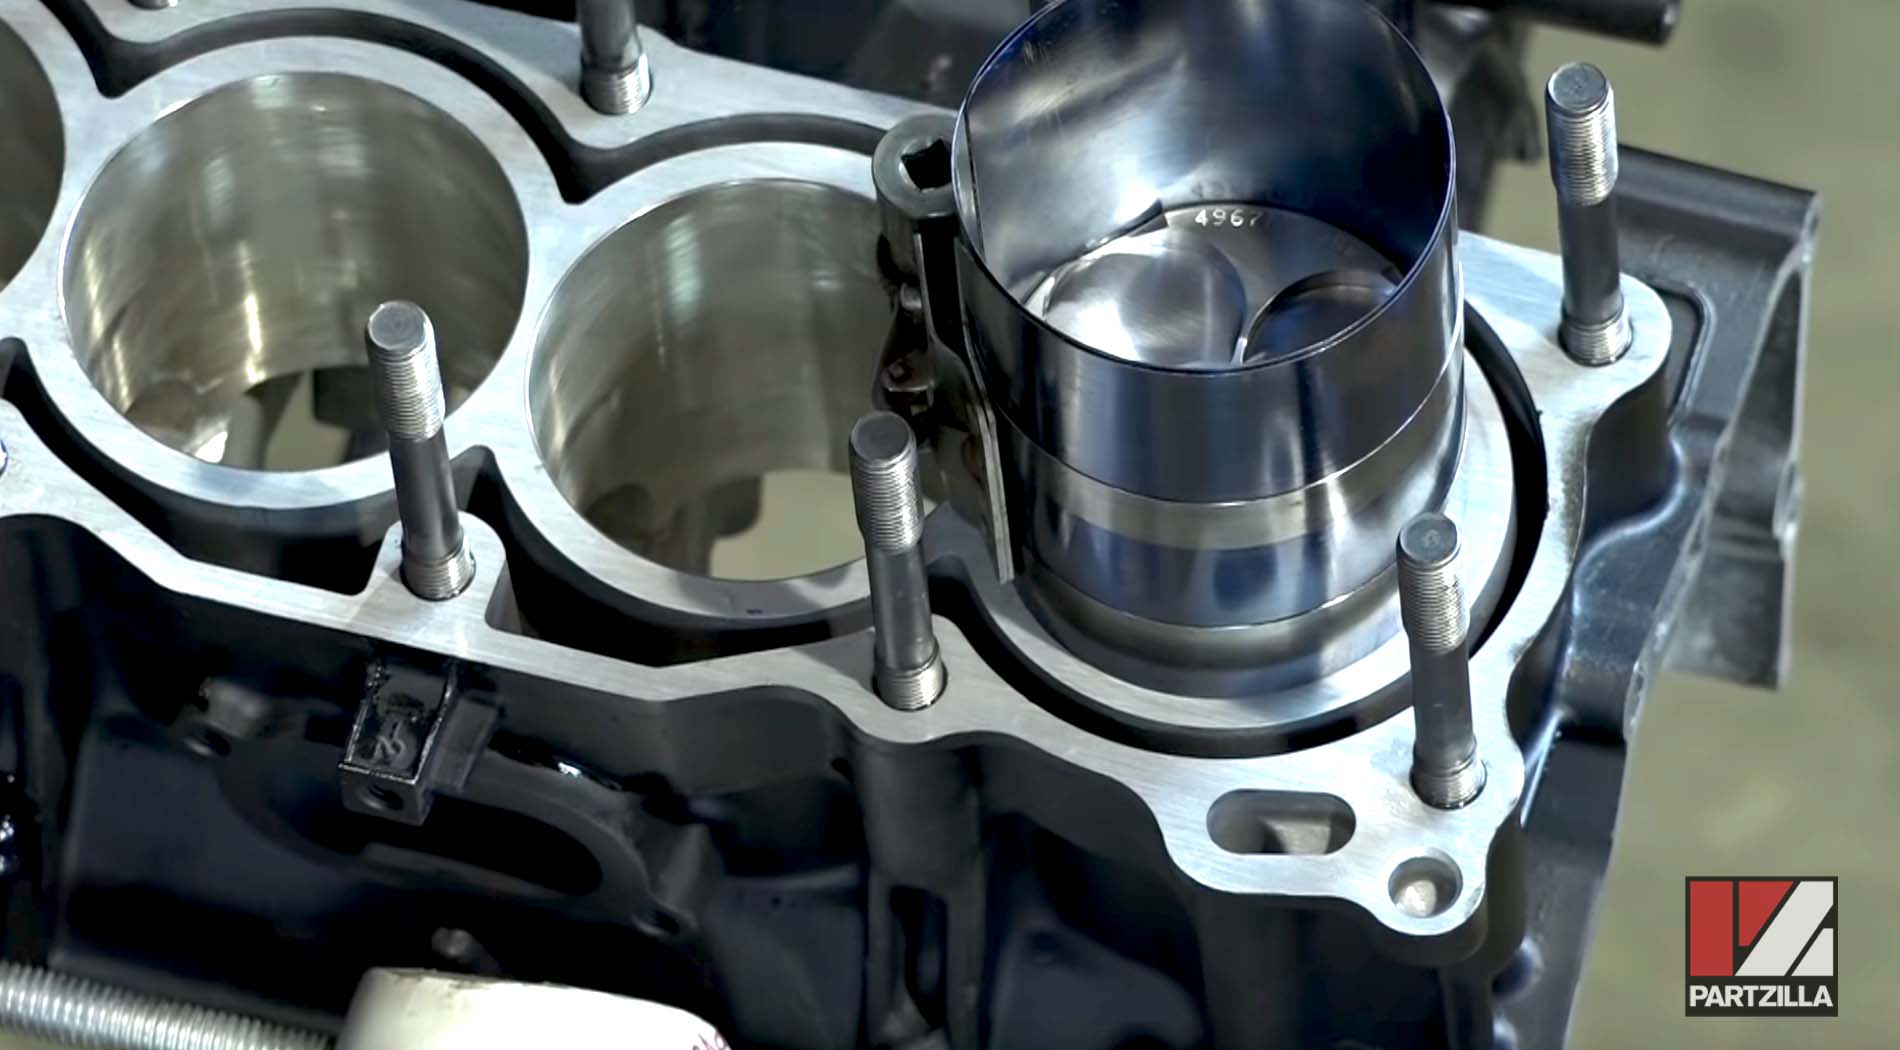
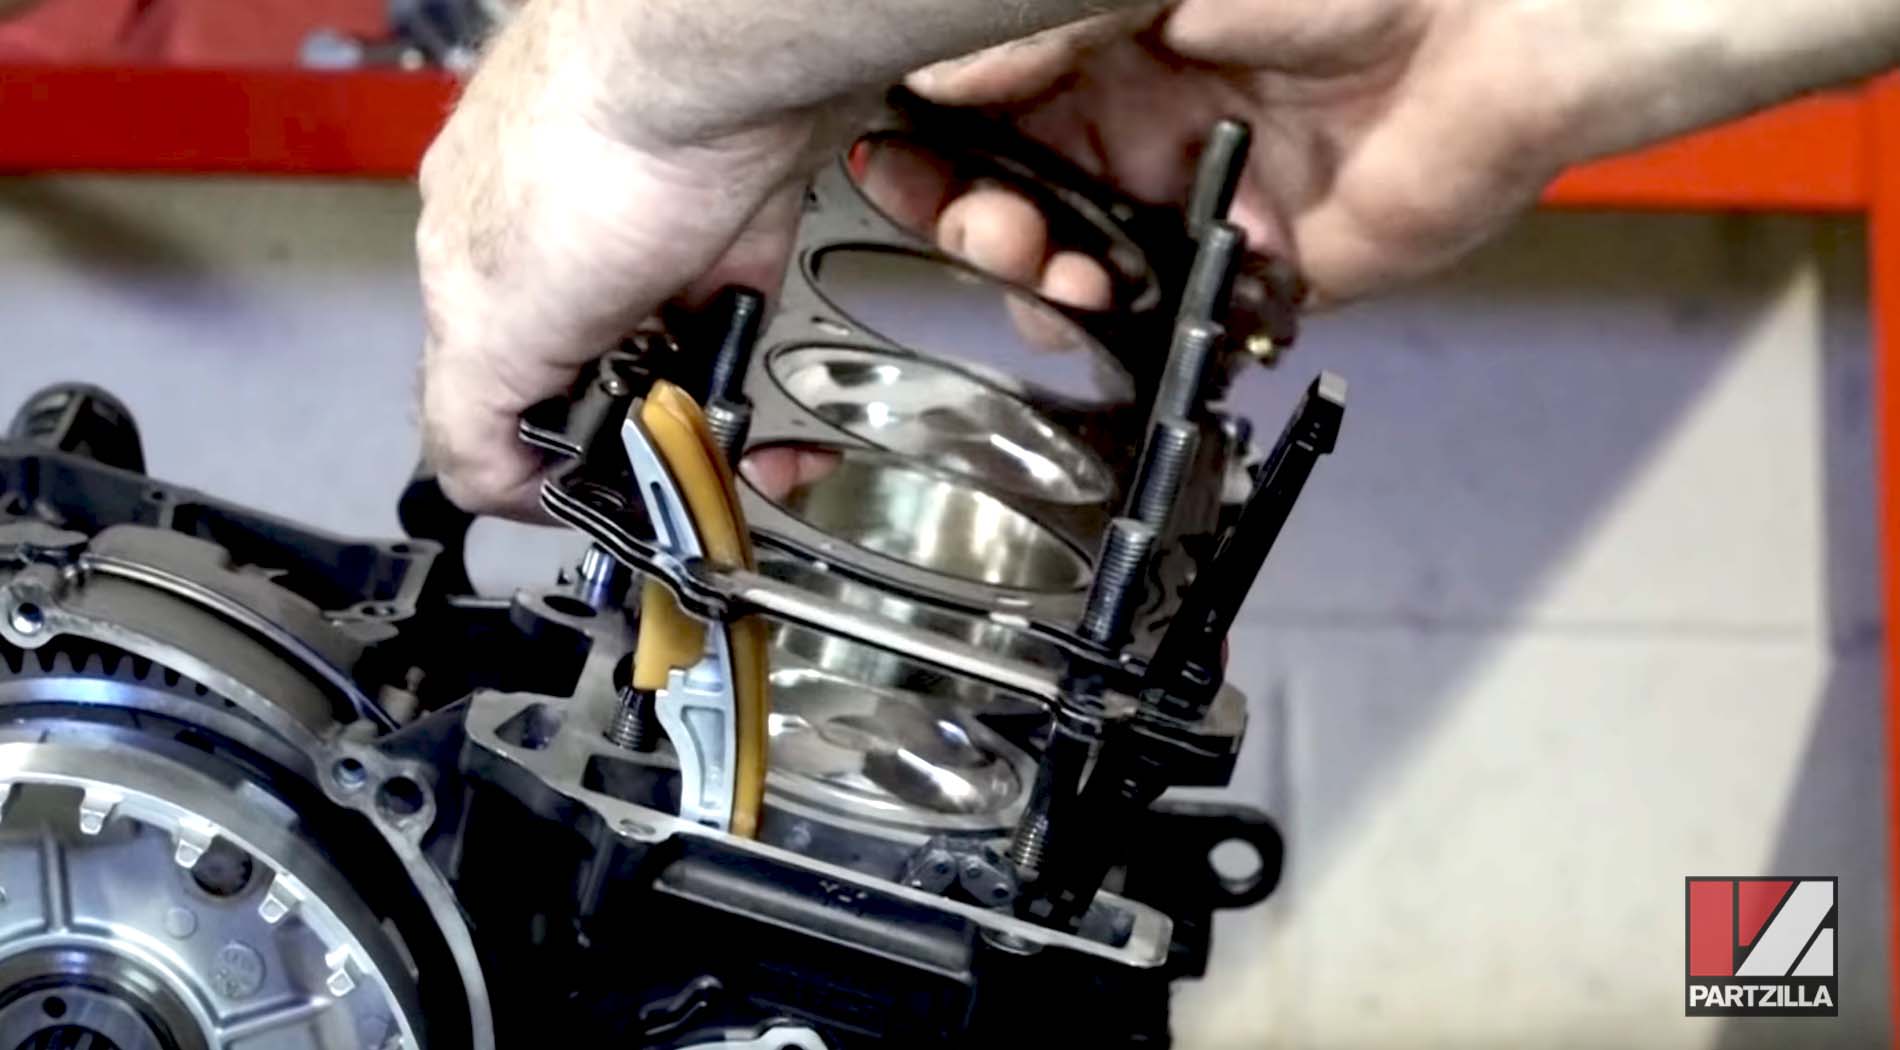
Step 5. Install the pistons into the crankcase cylinders by putting a piston ring compressor over the piston. Smear a film of oil onto the cylinder bores, and gently tap each piston about an inch down into the cylinder bores. Use the markings on the pistons to make sure they're correctly oriented toward the intake and exhaust valves.
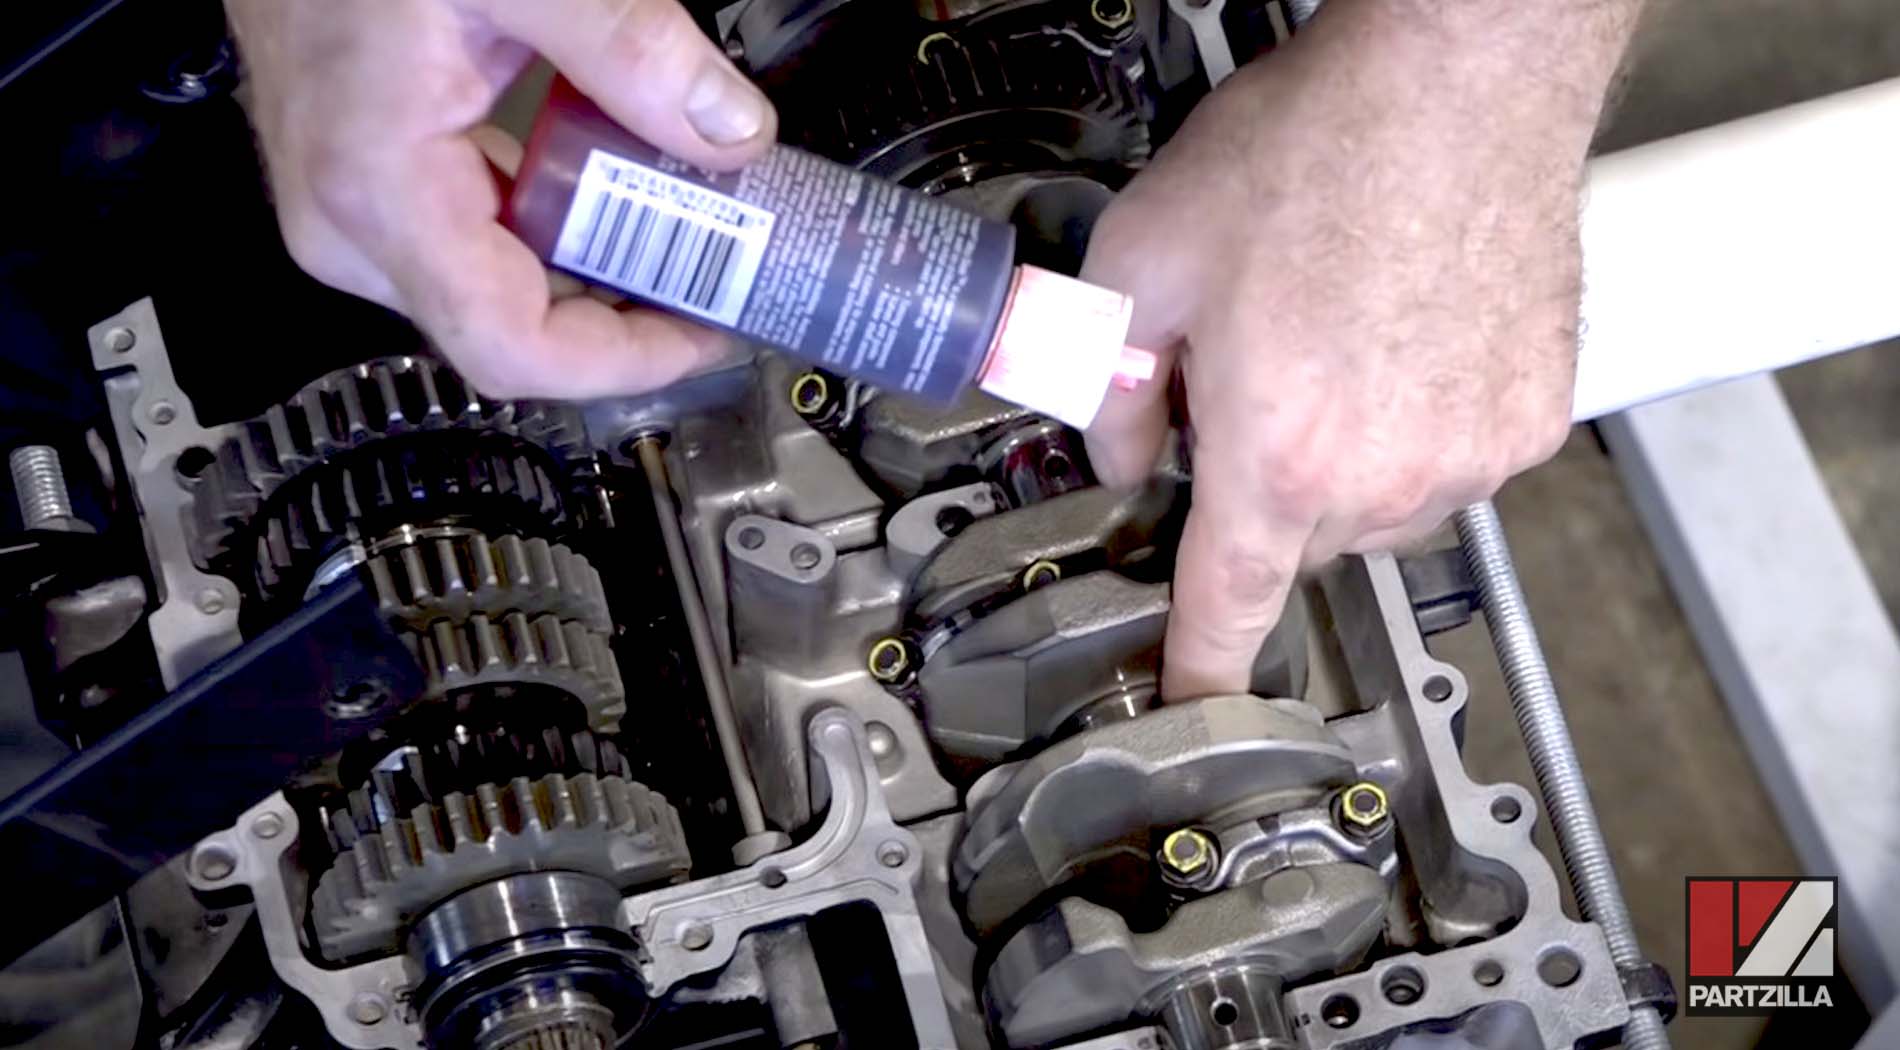
Step 6. Install the crankshaft bearings into the upper crankshaft bearing holders, and smear assembly lube on each bearing.
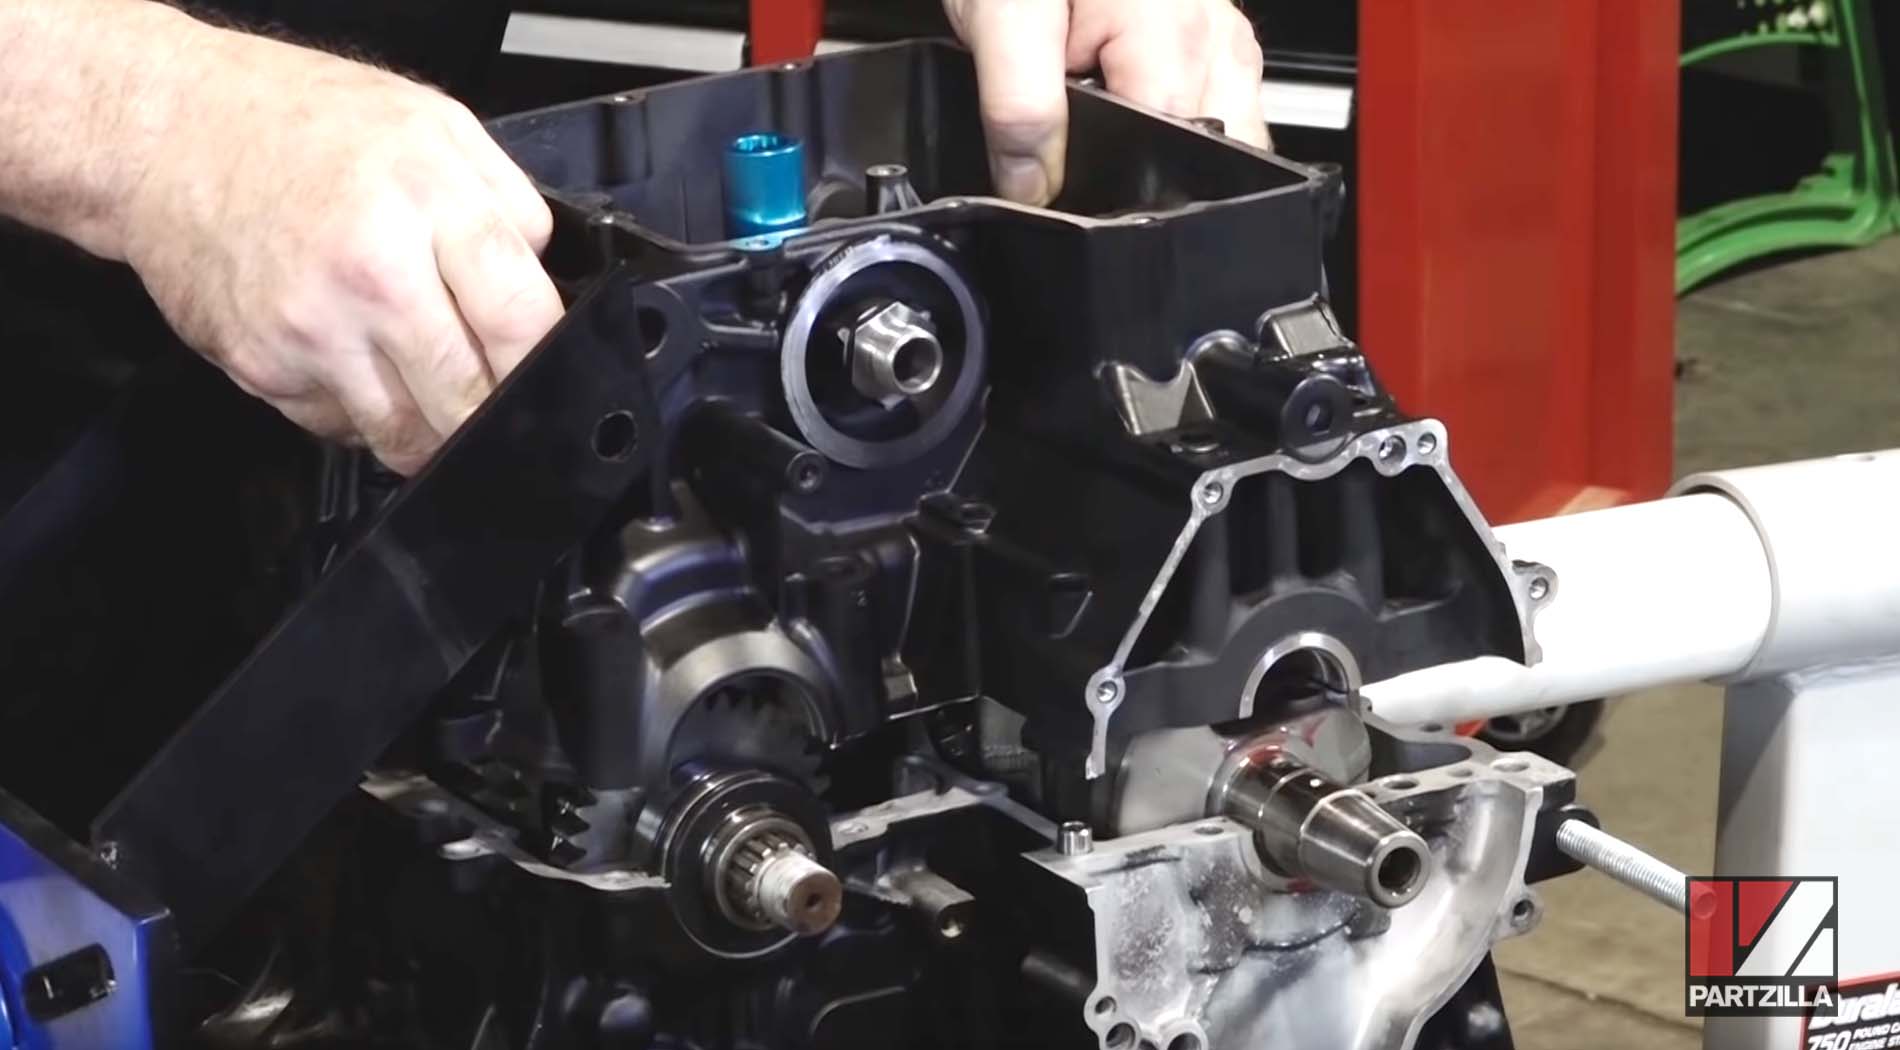
Step 7. Install the crankshaft into the upper half of the crankcase. Reattach the connecting rods' lower bearings, torque the connecting rod nuts to 11 foot-pounds, and then use an angle meter to tighten the nuts by another 175-185 degrees of rotation.

Step 8. Install the drive axle into the upper half of the crankcase's transmission housing. Make sure you're using a new outer oil seal (never reuse the drive axle's old oil seal). Align the shift forks, and drop the drive axle into place.
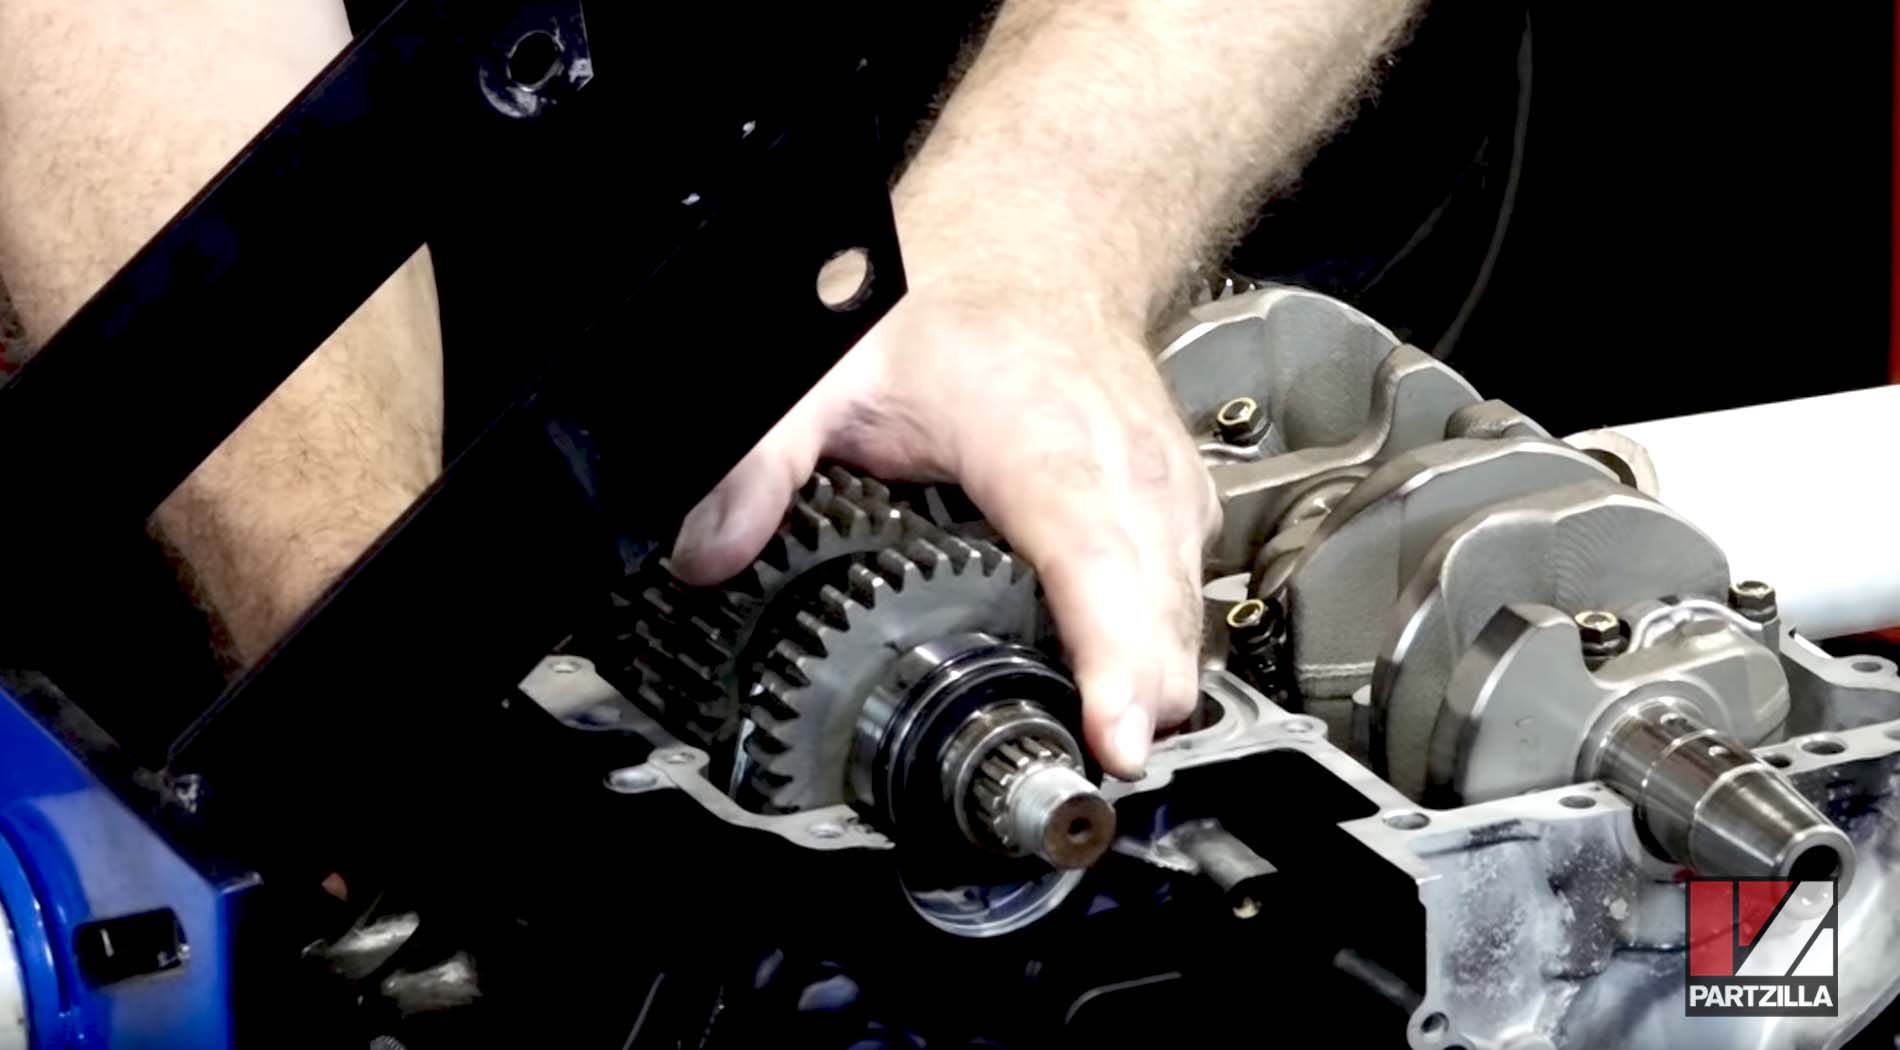
Step 9. Install the three crankcase dowels into the upper half of the crankcase. Add a drop of assembly lube to the crankshaft journals, and hang the timing chain in place over the crankshaft.
Step 10. Apply a thin bead of crankcase sealant around the face of the lower half of the crankcase. Be careful not to put too much sealant near the oil channels and risk blocking them up.
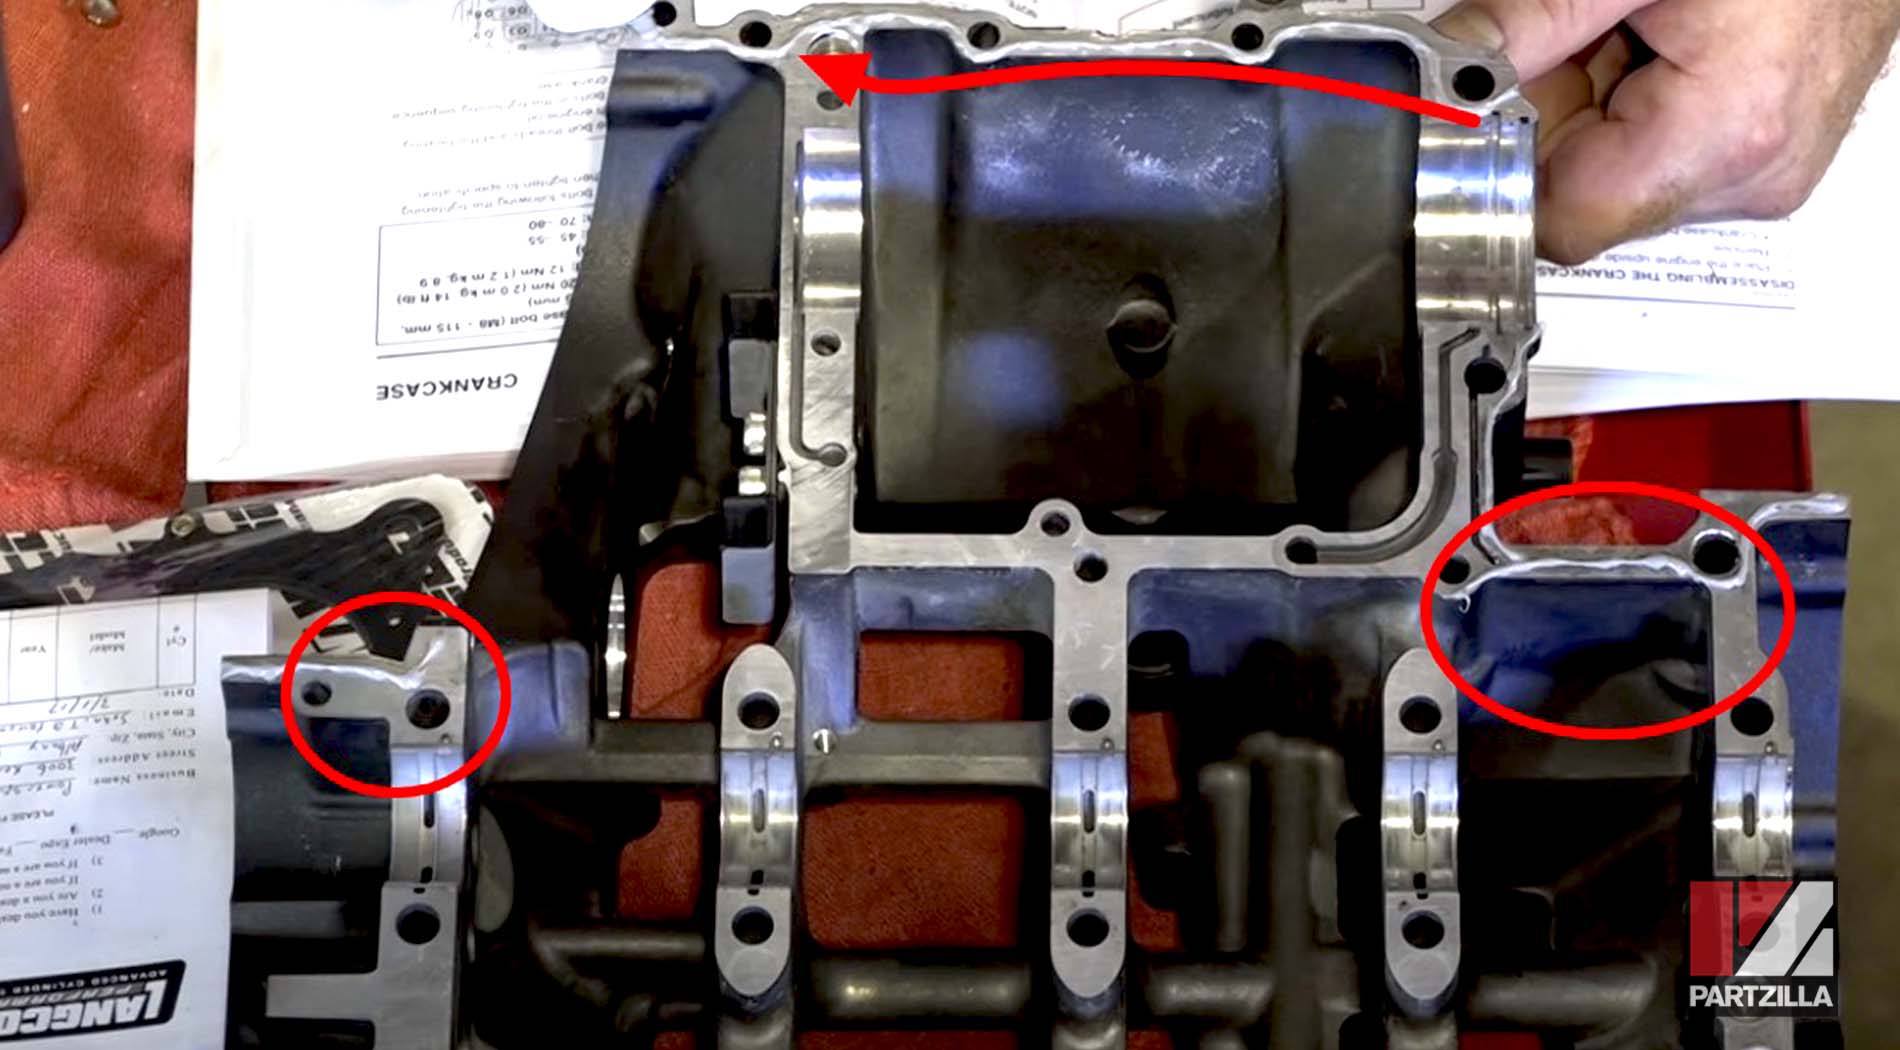
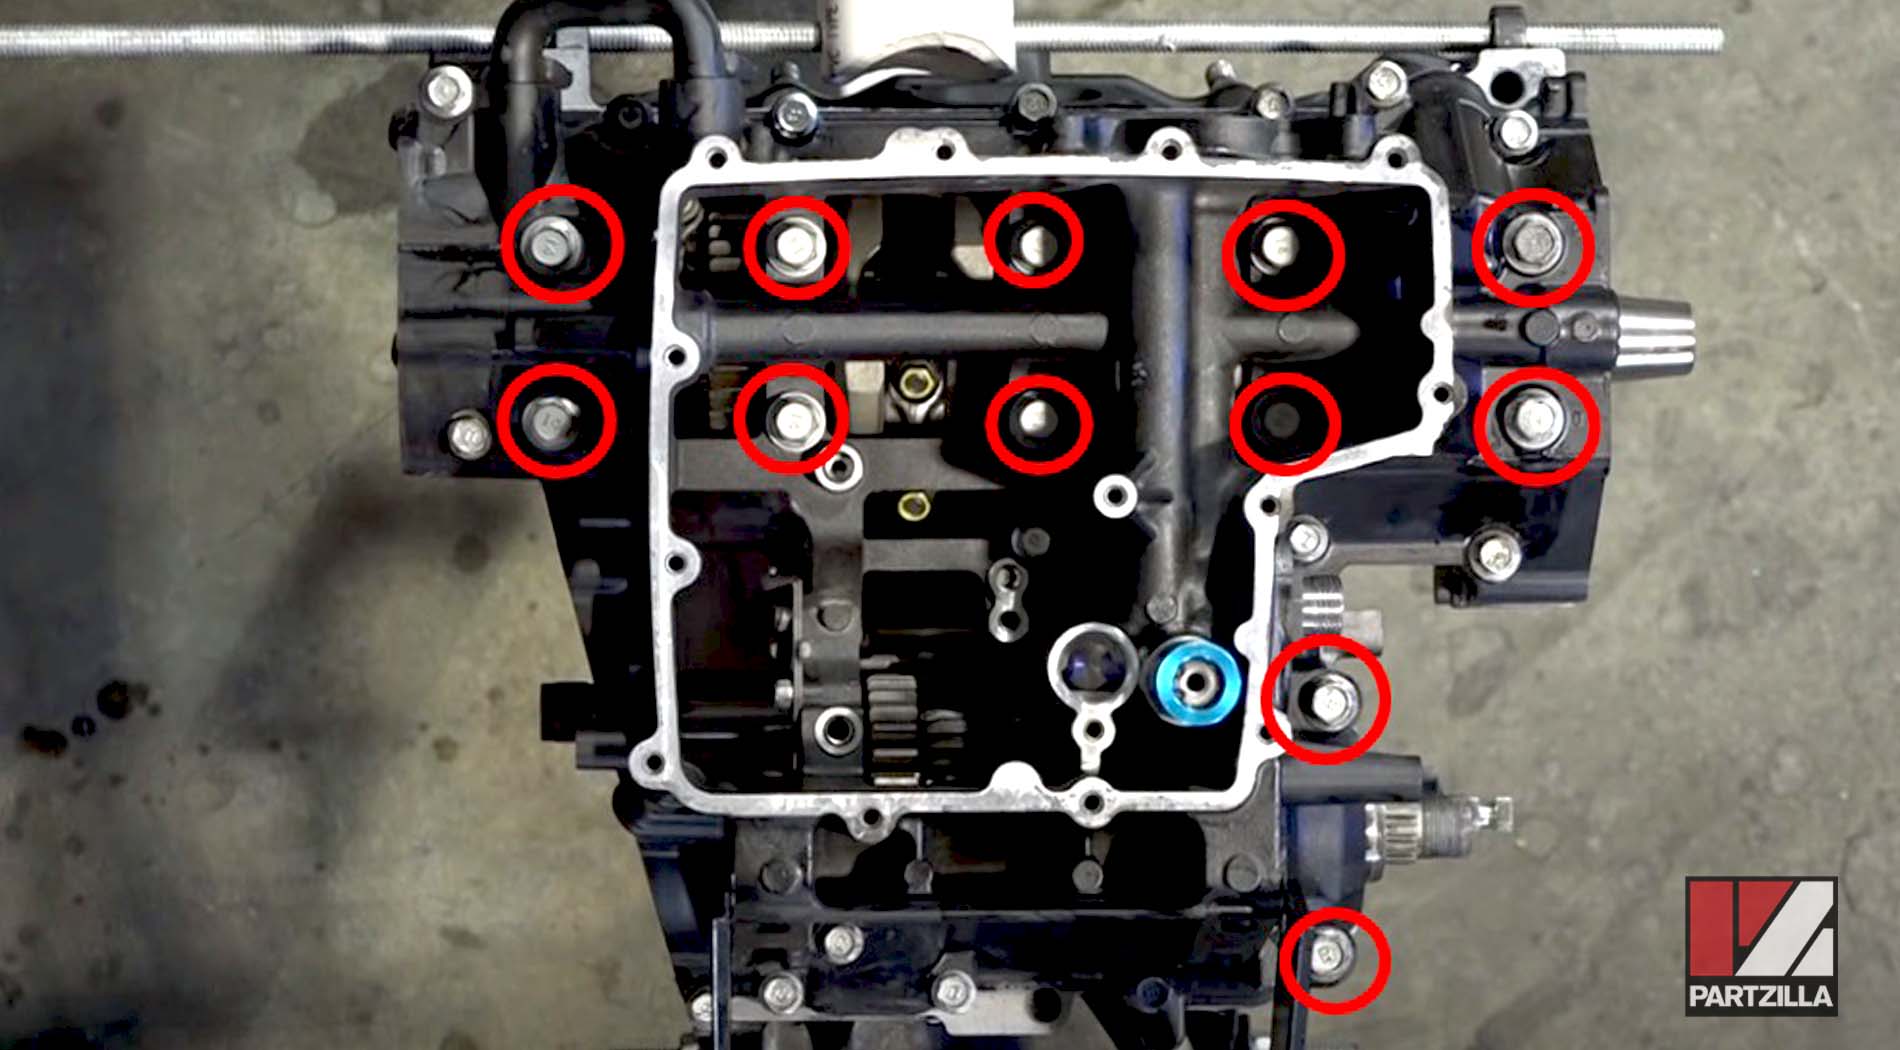
Step 11. Reattach the lower half of the crankcase to the upper half of the crankcase. Gently tap the two halves together, then reinstall the crankcase bolts. Apply a drop of oil to each bolt, and finger-tighten them.
1. The bolts must be fully tightened in a specific order. A number is embossed on the crankcase beside each bolt, and represents the order the bolts should be tightened in.
2. The ten 12mm bolts holding the crankshaft (five on each side) must also be tightened in a special sequence:
a) First torque the bolts to 14 foot-pounds, then loosen them off again and re-torque them to 8.9 foot-pounds.
b) Further tighten the bolts by rotating them between 45 and 55 degrees.
c) Loosen the bolts off again, re-torque them to 8.9 foot-pounds, then further tighten them by rotating them between 75 and 85 degrees.
3. The two 12mm bolts at the transmission output shaft should be torqued to 17 foot-pounds.
4. The remaining 10mm bolts should be torqued to 7.2 foot-pounds, with the exception of bolt #28, which will be installed when the oil pump is reinstalled (Step 14).
Step 12. Install the timing chain rotor and retaining nut over the timing chain.
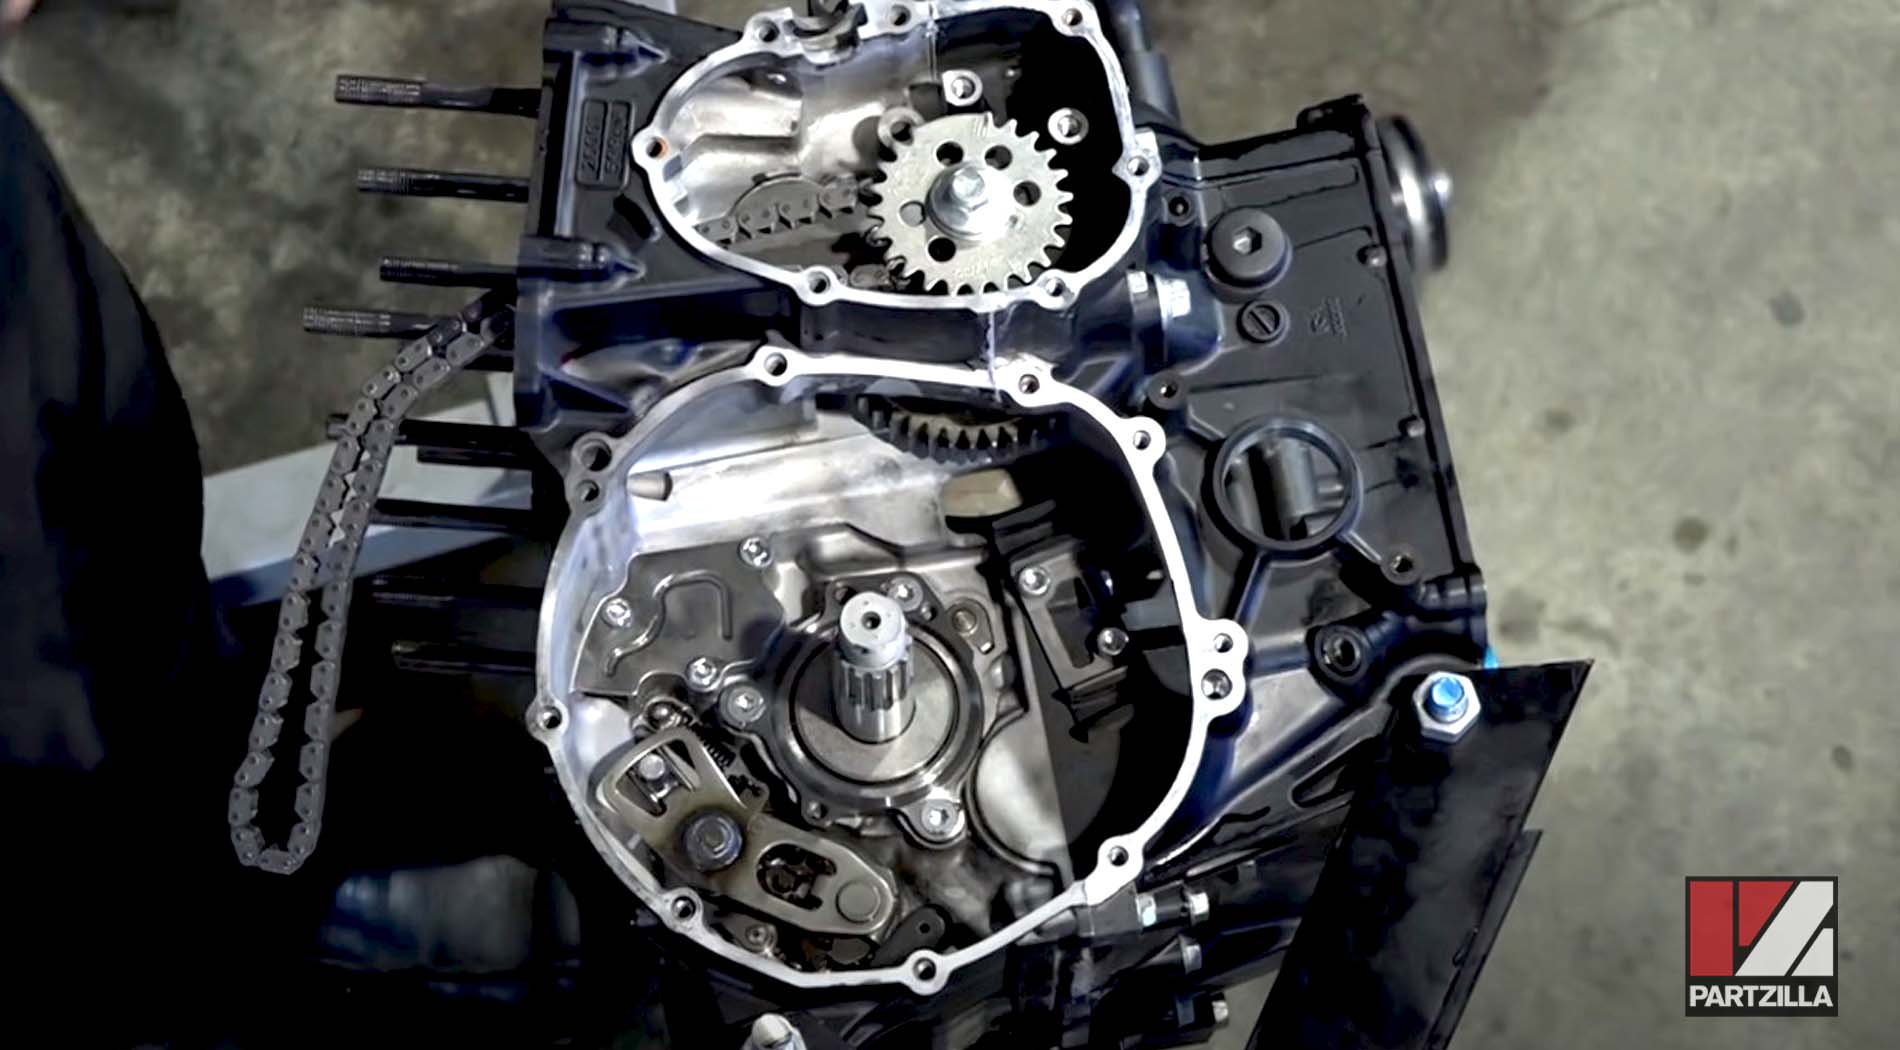
Step 13. Install the washers, collar and bearing over the drive axle, and install the clutch basket over the bearing.

Step 14. Install the oil pump, then reattach the oil pump chain and once the pump is in position, install the dowels and crankcase bolt #28. Torque the oil pump bolts to 7 foot-pounds.
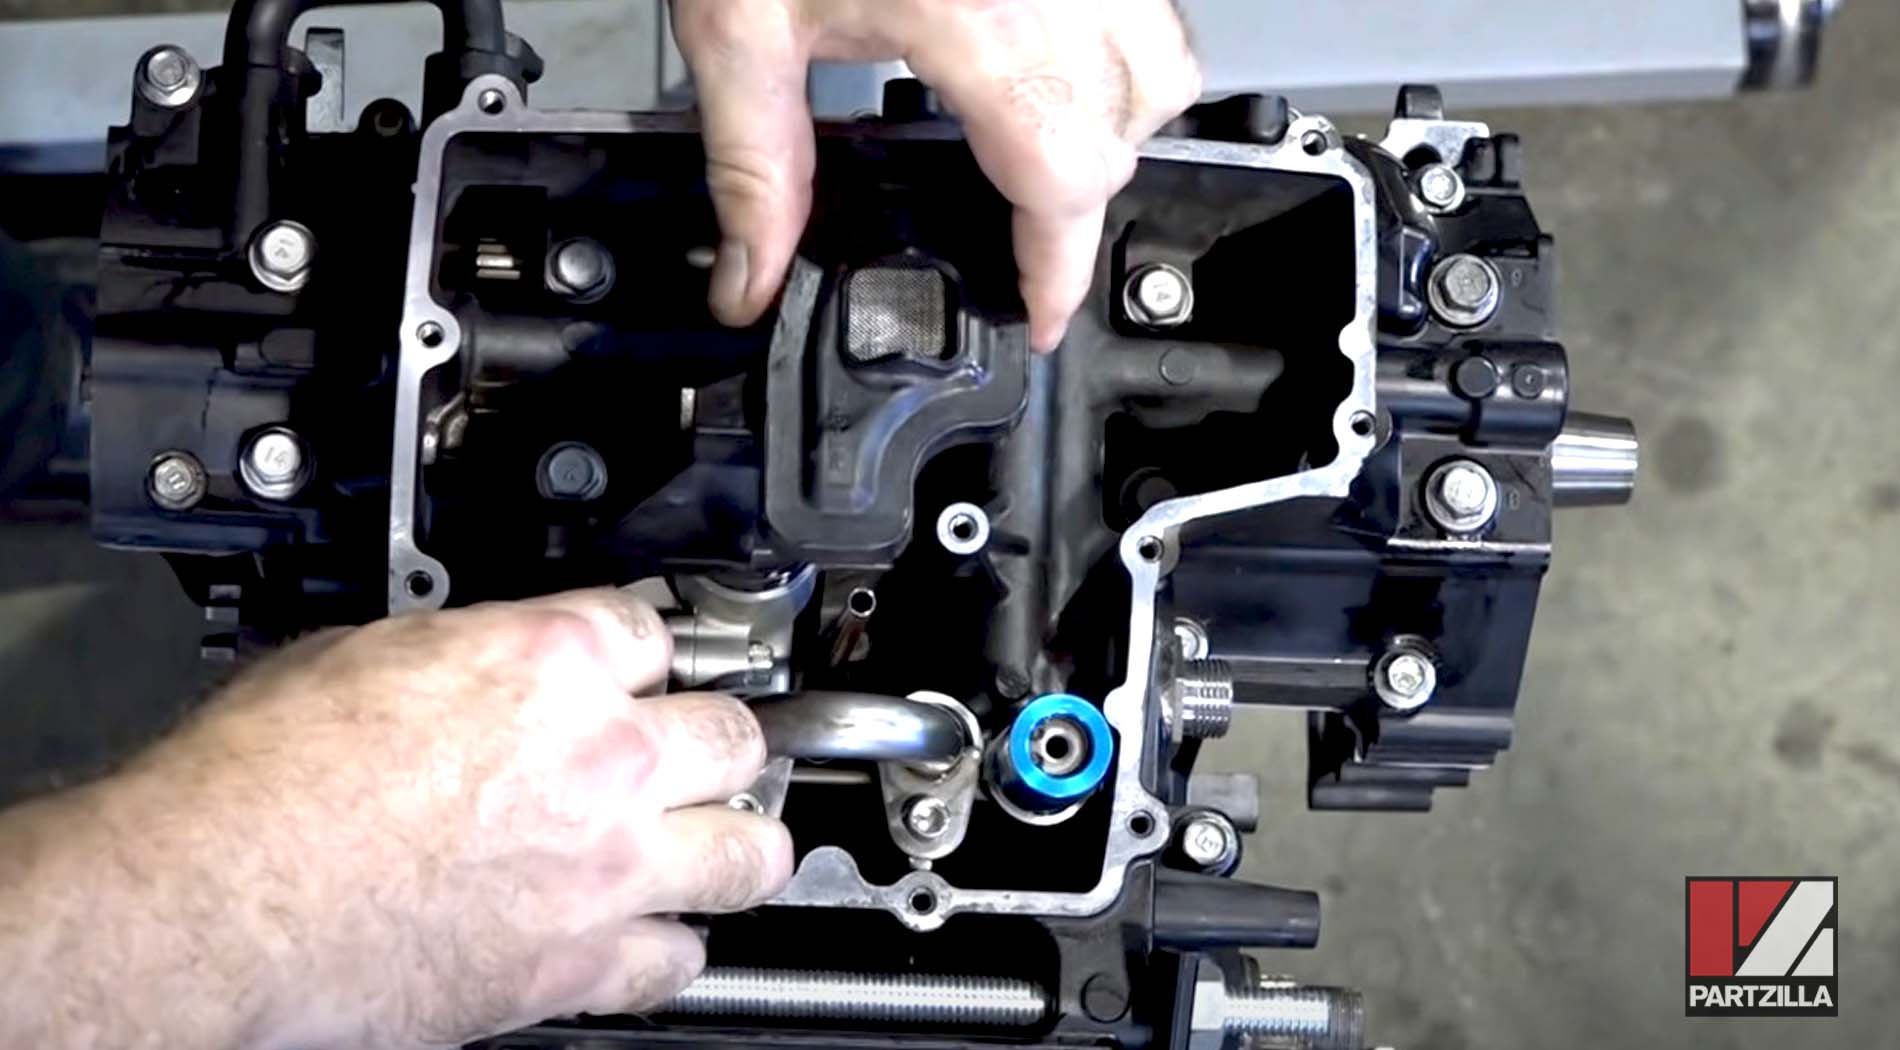
Step 15. Install the crankcase oil pipes, oil pickup, oil strainer gasket, and the oil pan.
Step 16. Bring the engine to top dead center by rotating the timing chain rotor clockwise until the T-mark is aligned with the line created by the two halves of the crankcase. Reinstall the timing chain guides.

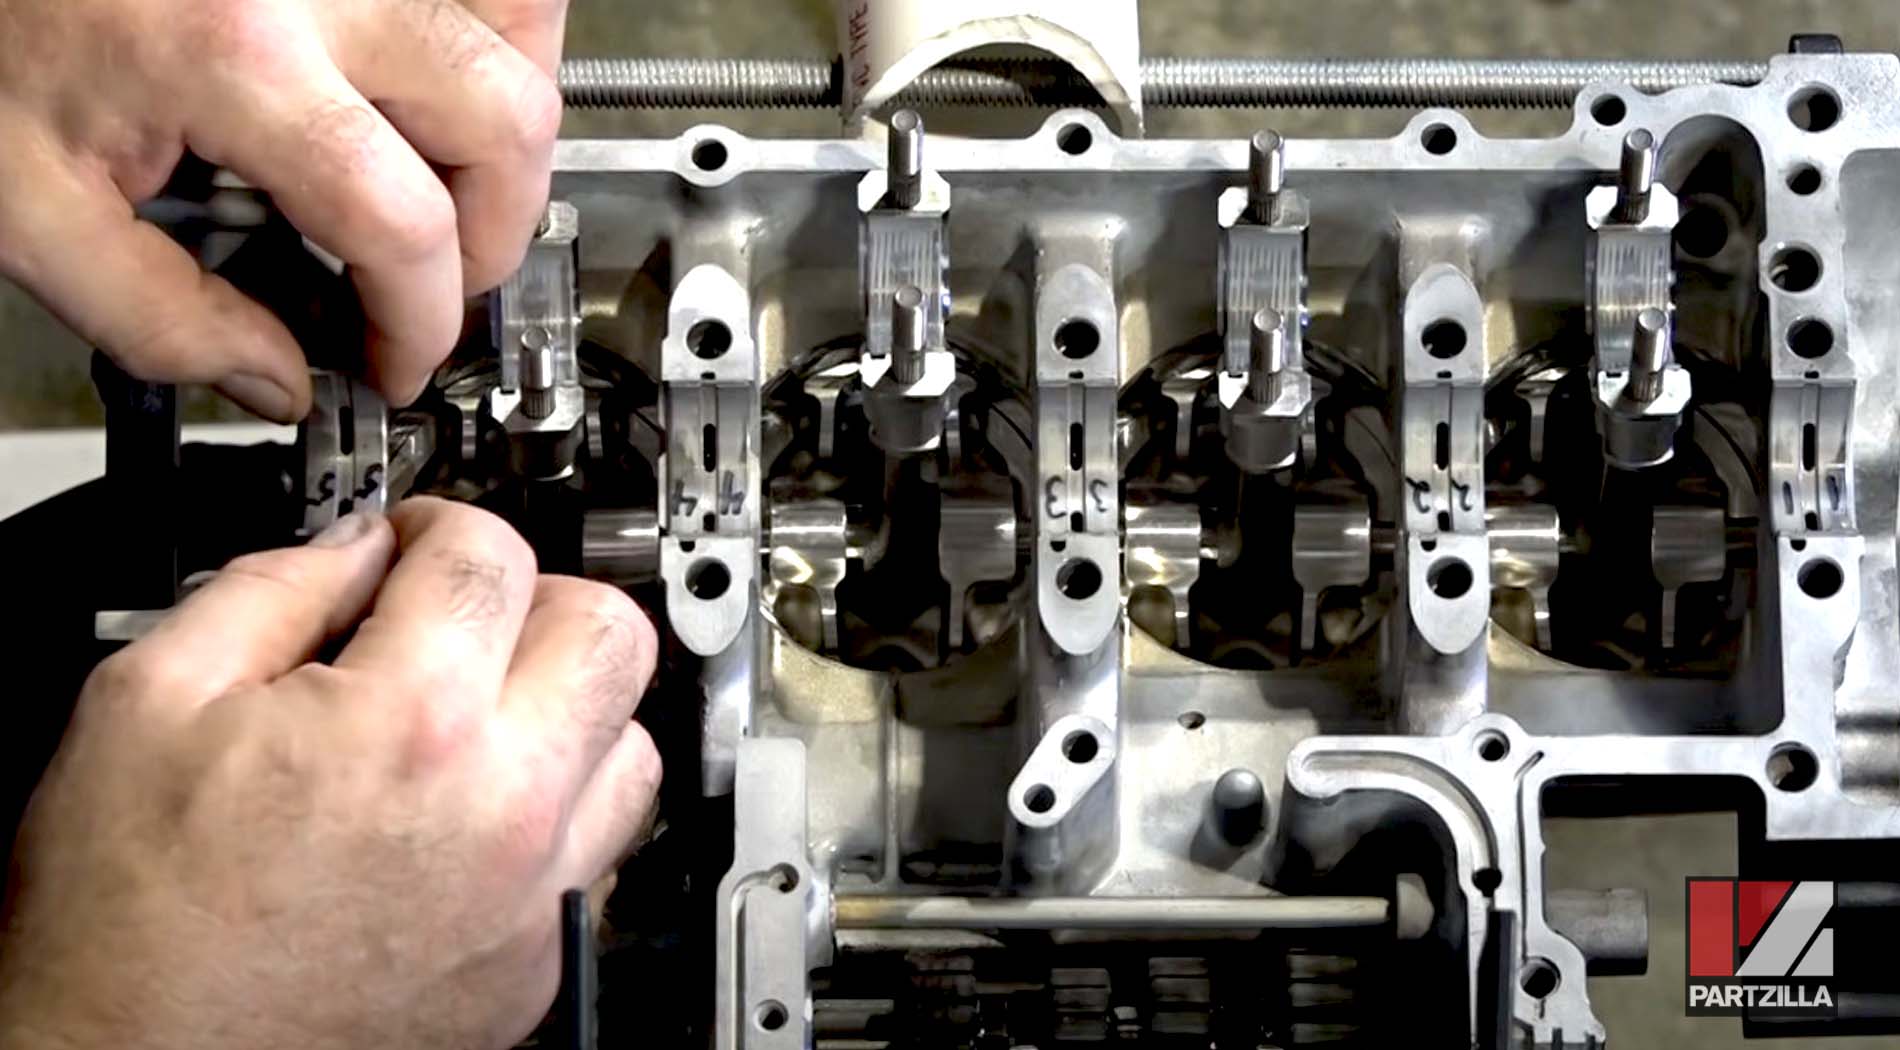
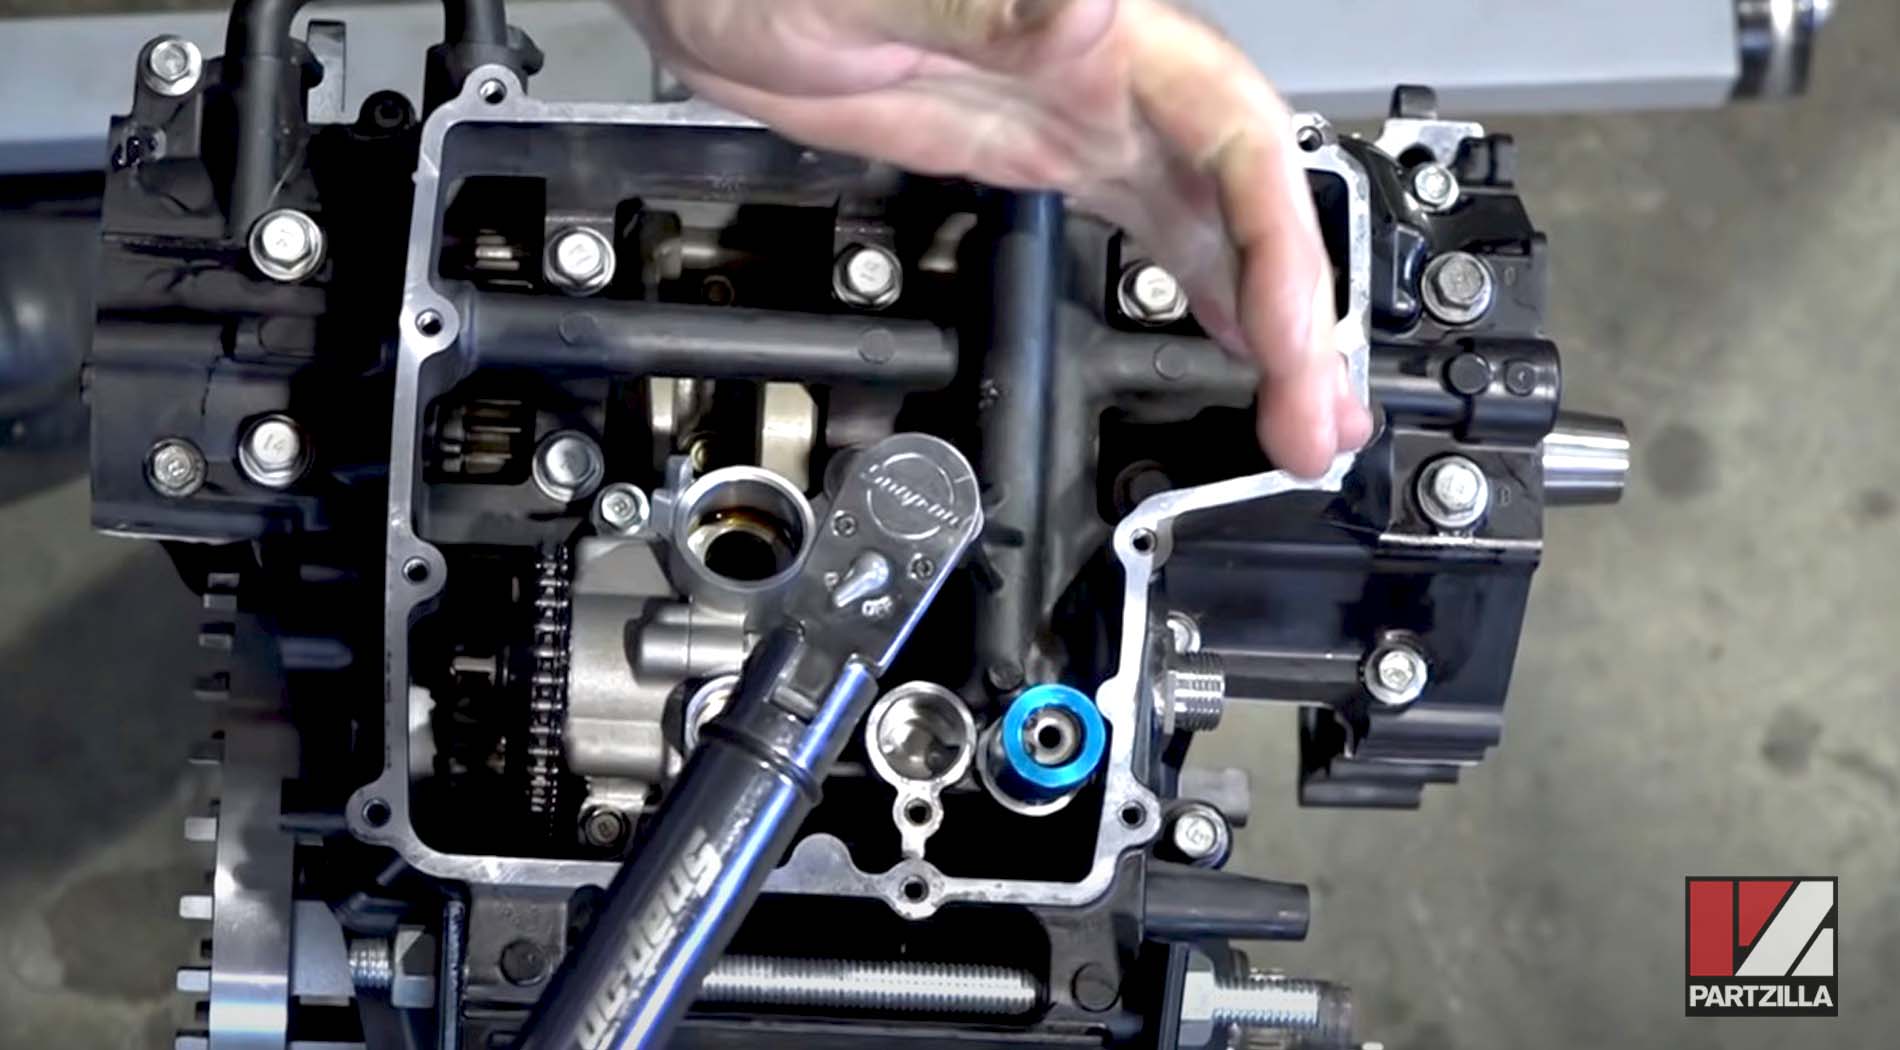
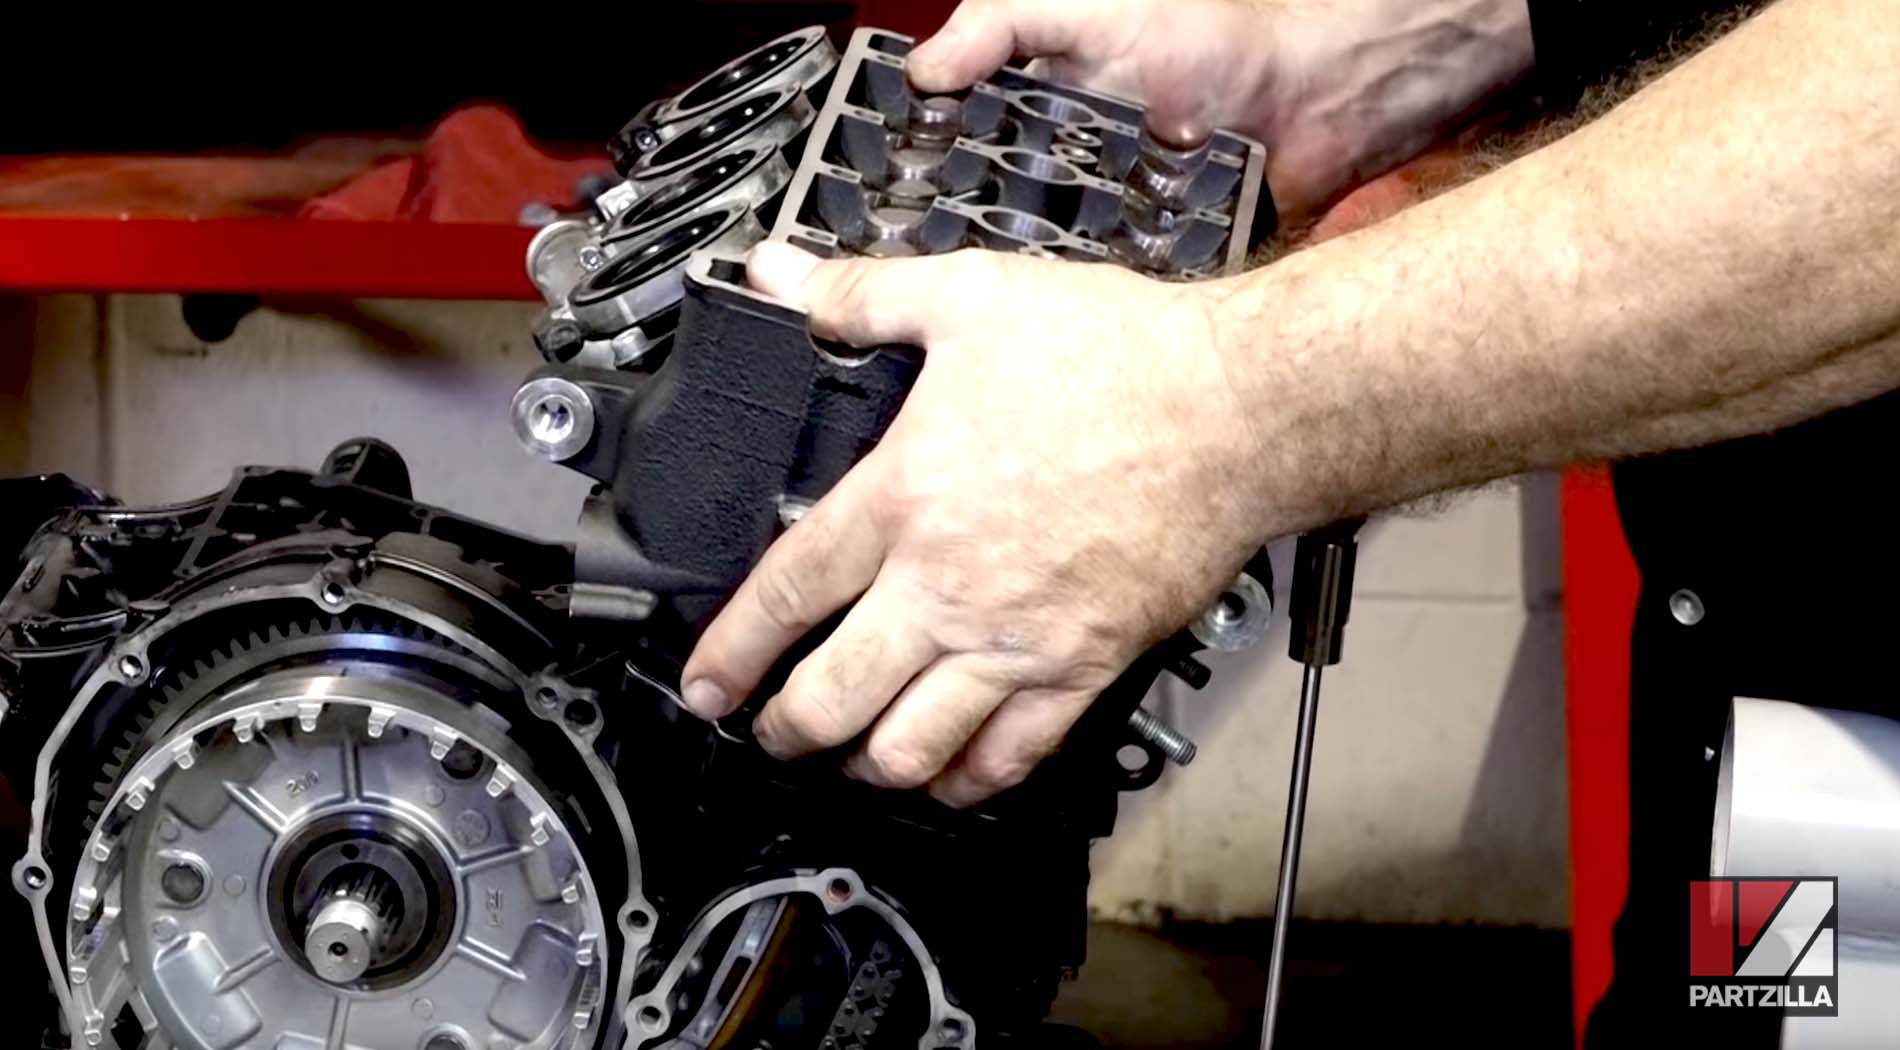
Step 17. Install the two dowels in the top of the crankcase, clean all the joining surfaces on the crankcase and the cylinder head, and put a new cylinder head gasket onto the crankcase.
Step 18. Replace the cylinder head back onto the crankcase.
Watch the video below for the final steps: Yamaha R6 Engine Rebuild Part 3: Head Install & Completion.
Watch the video below to see Part 1 of our Yamaha R6 Engine Rebuild: Bottom End to Piston Install.