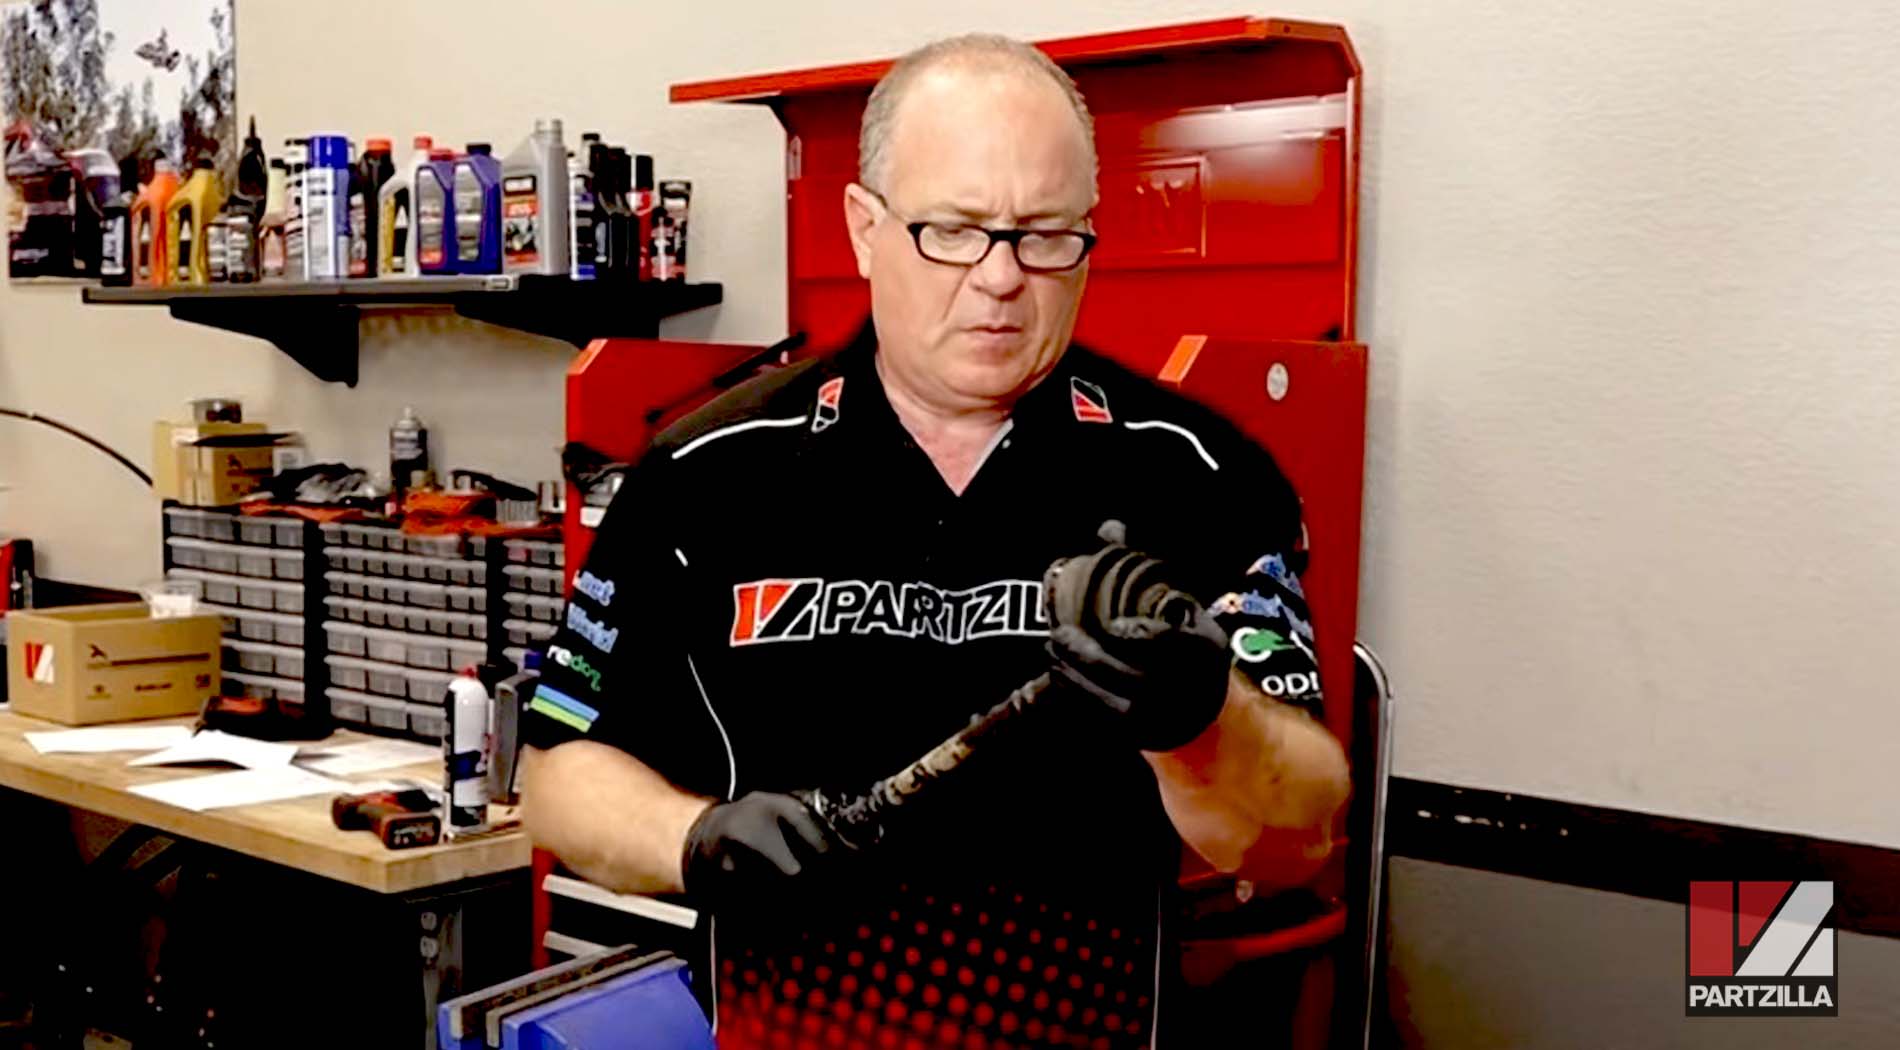
How to Replace Yamaha Grizzly YFM700 Front CV Boots
A tear in a CV boot quickly lets protective grease out and dirt in, which leads to CV joint damage. Anytime you replace one front CV boot on a Yamaha ATV, replace the one at the other end of the axle as well.
If you don’t install a new CV boot while the half shaft is off the ATV, you’ll have to take everything apart again in a month or so when the other CV boot wears out. Watch the video above and follow the steps below to change a Yamaha Grizzly YFM700 front CV boot.
Tools and Parts – Yamaha Grizzly 700 Front CV Boot Replacement
- Ratchet and extensions
- 12mm, 17mm, 19mm, 27mm sockets
- 14mm wrench
- Punch tool
- Flathead screwdriver
- Pliers
- Hammers
- Torque wrench
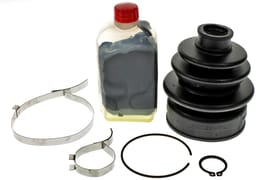
- CV boot set (double offset joint)
- CV boot set (ball joint)
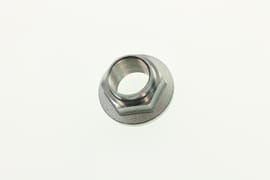
- Axle nut

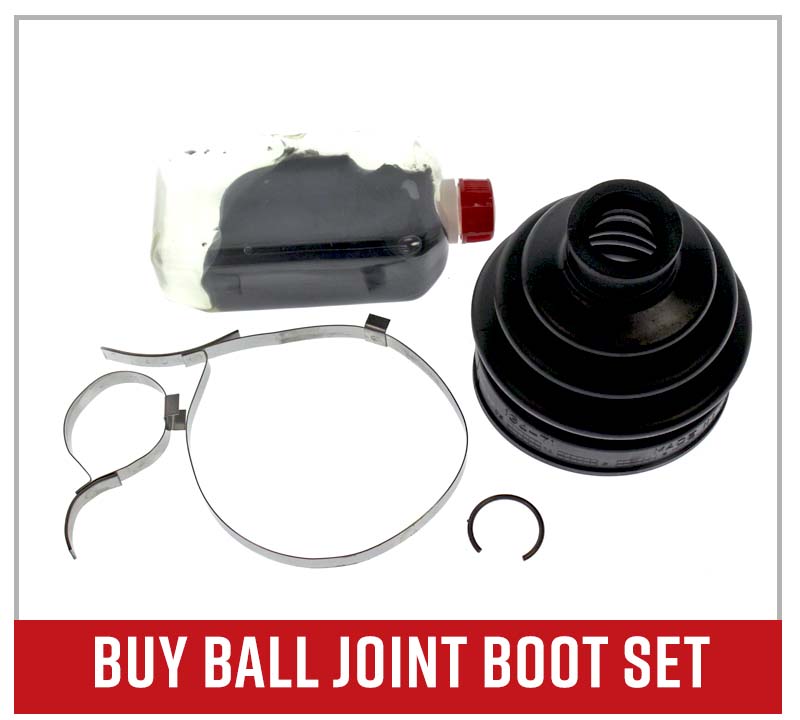
NOTE: The front CV boot sets for the Yamaha Grizzly are slightly different from one another. The CV boot set (double offset joint) is for the outer CV joint while the CV boot set (ball joint) is for the inner CV joint.
How to Change Yamaha YFM700 Grizzly Front CV Boot
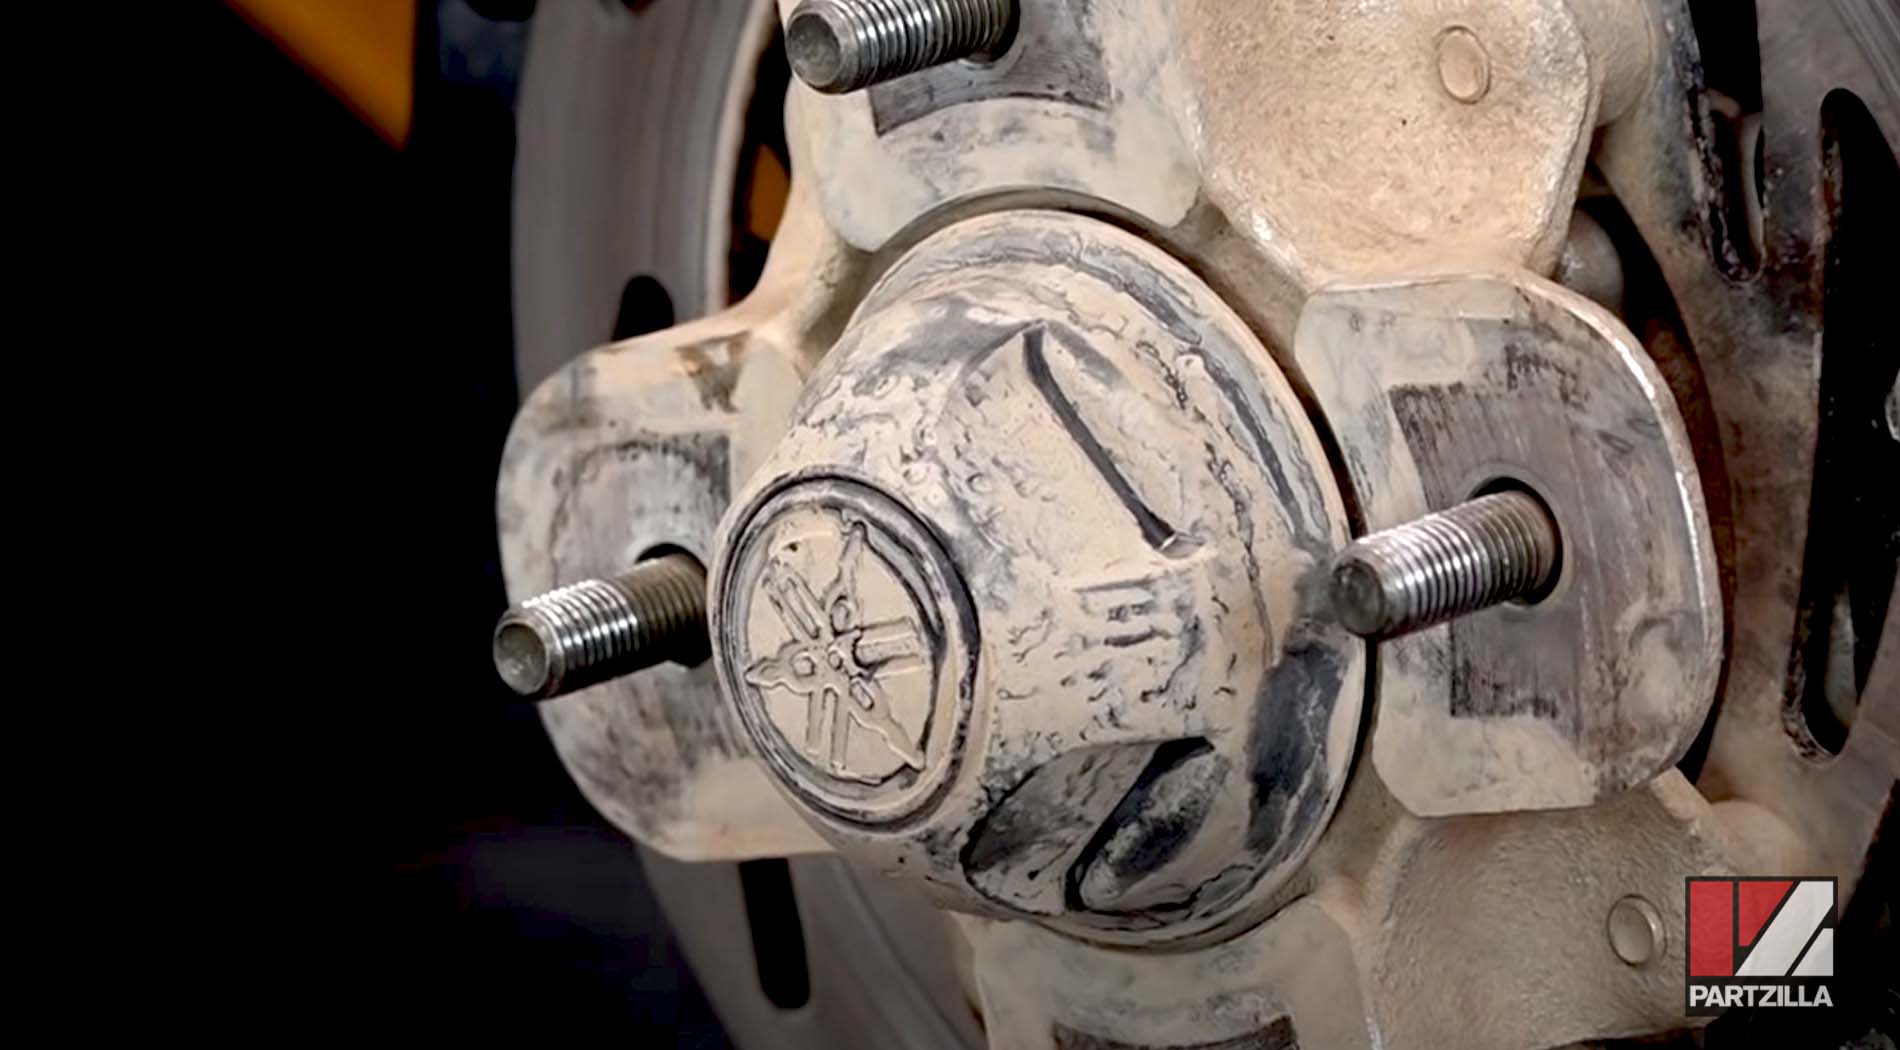
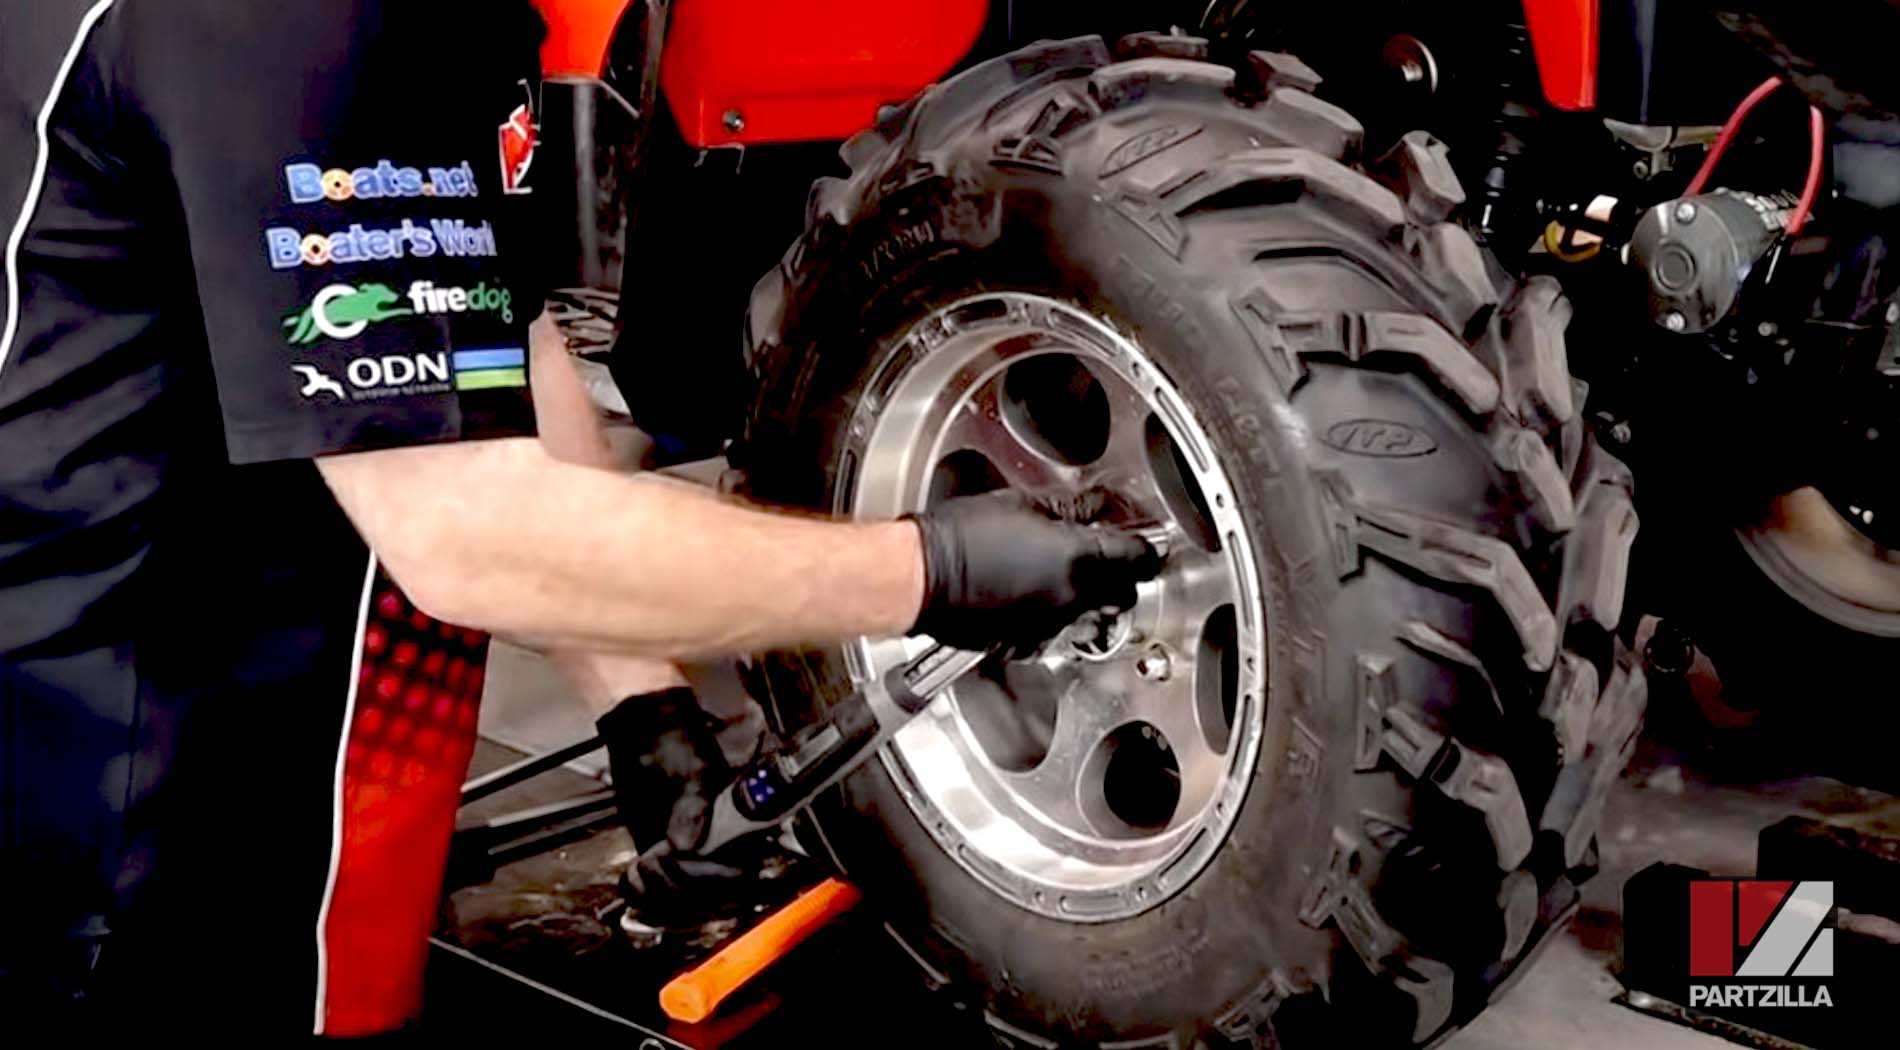
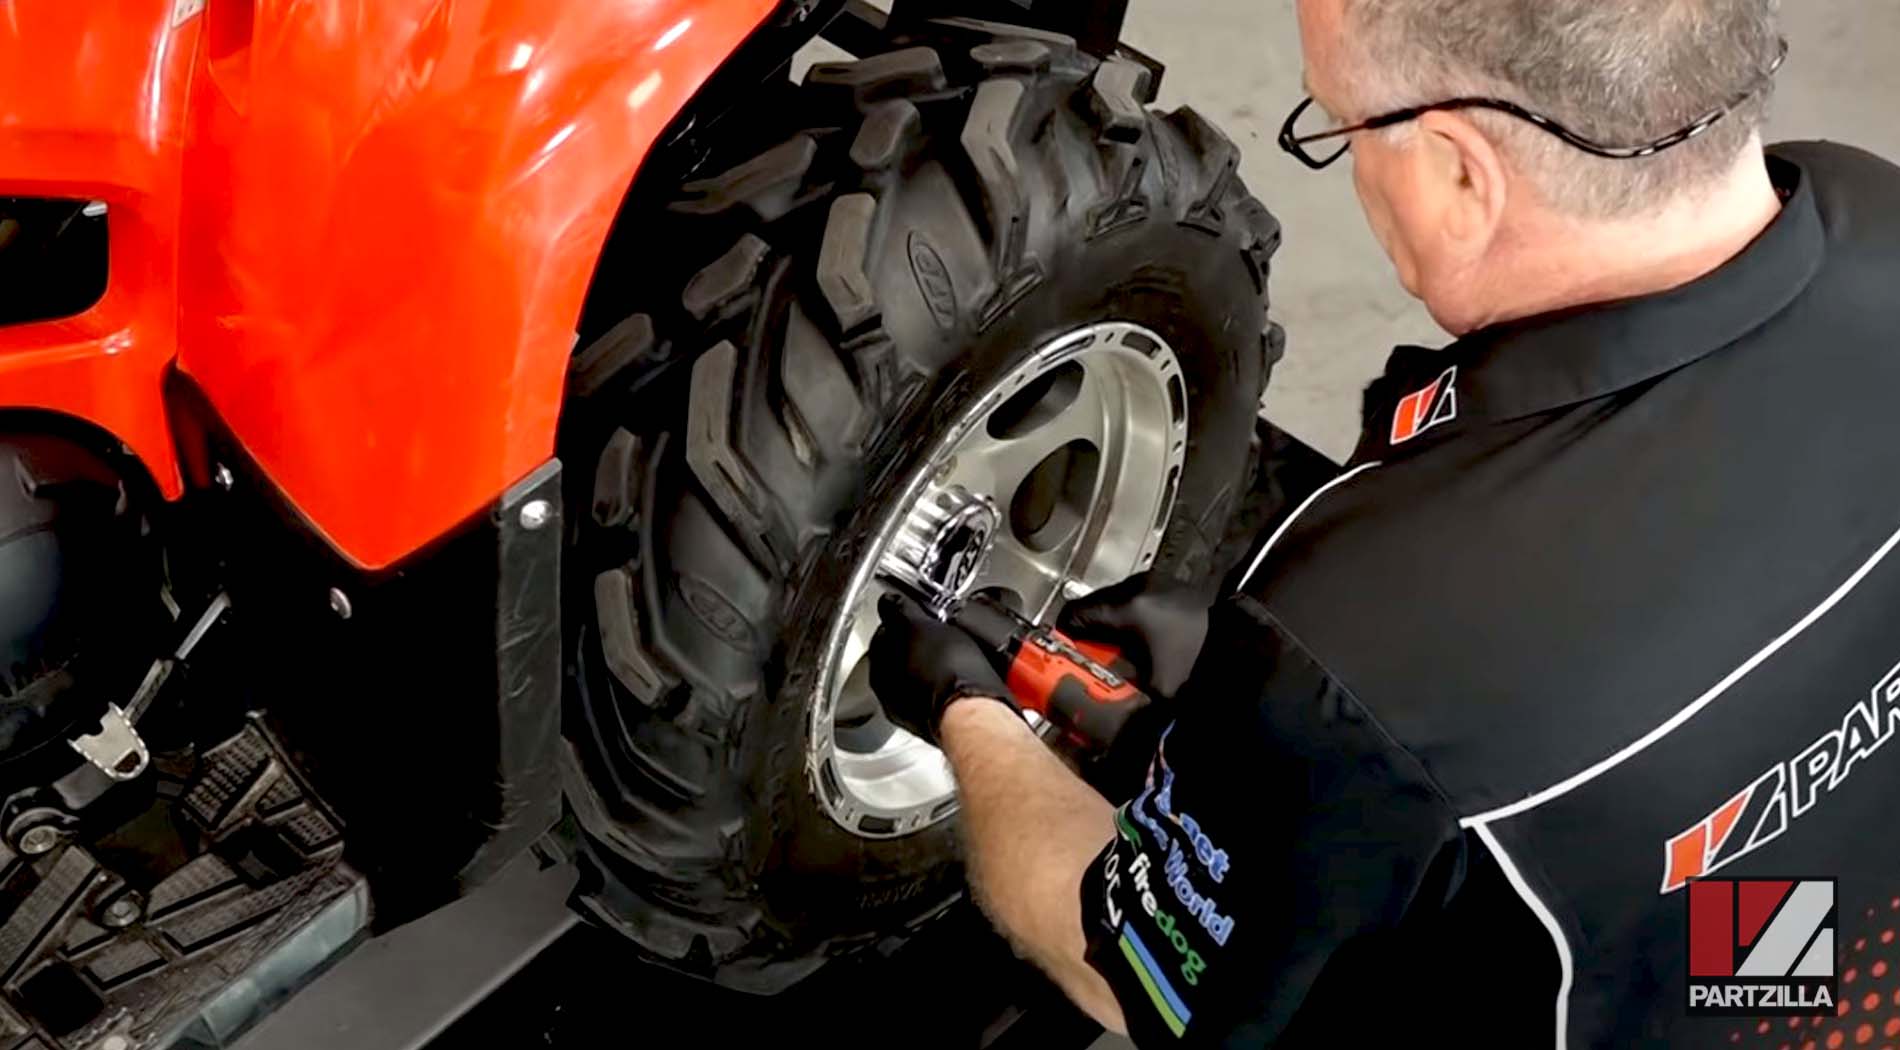
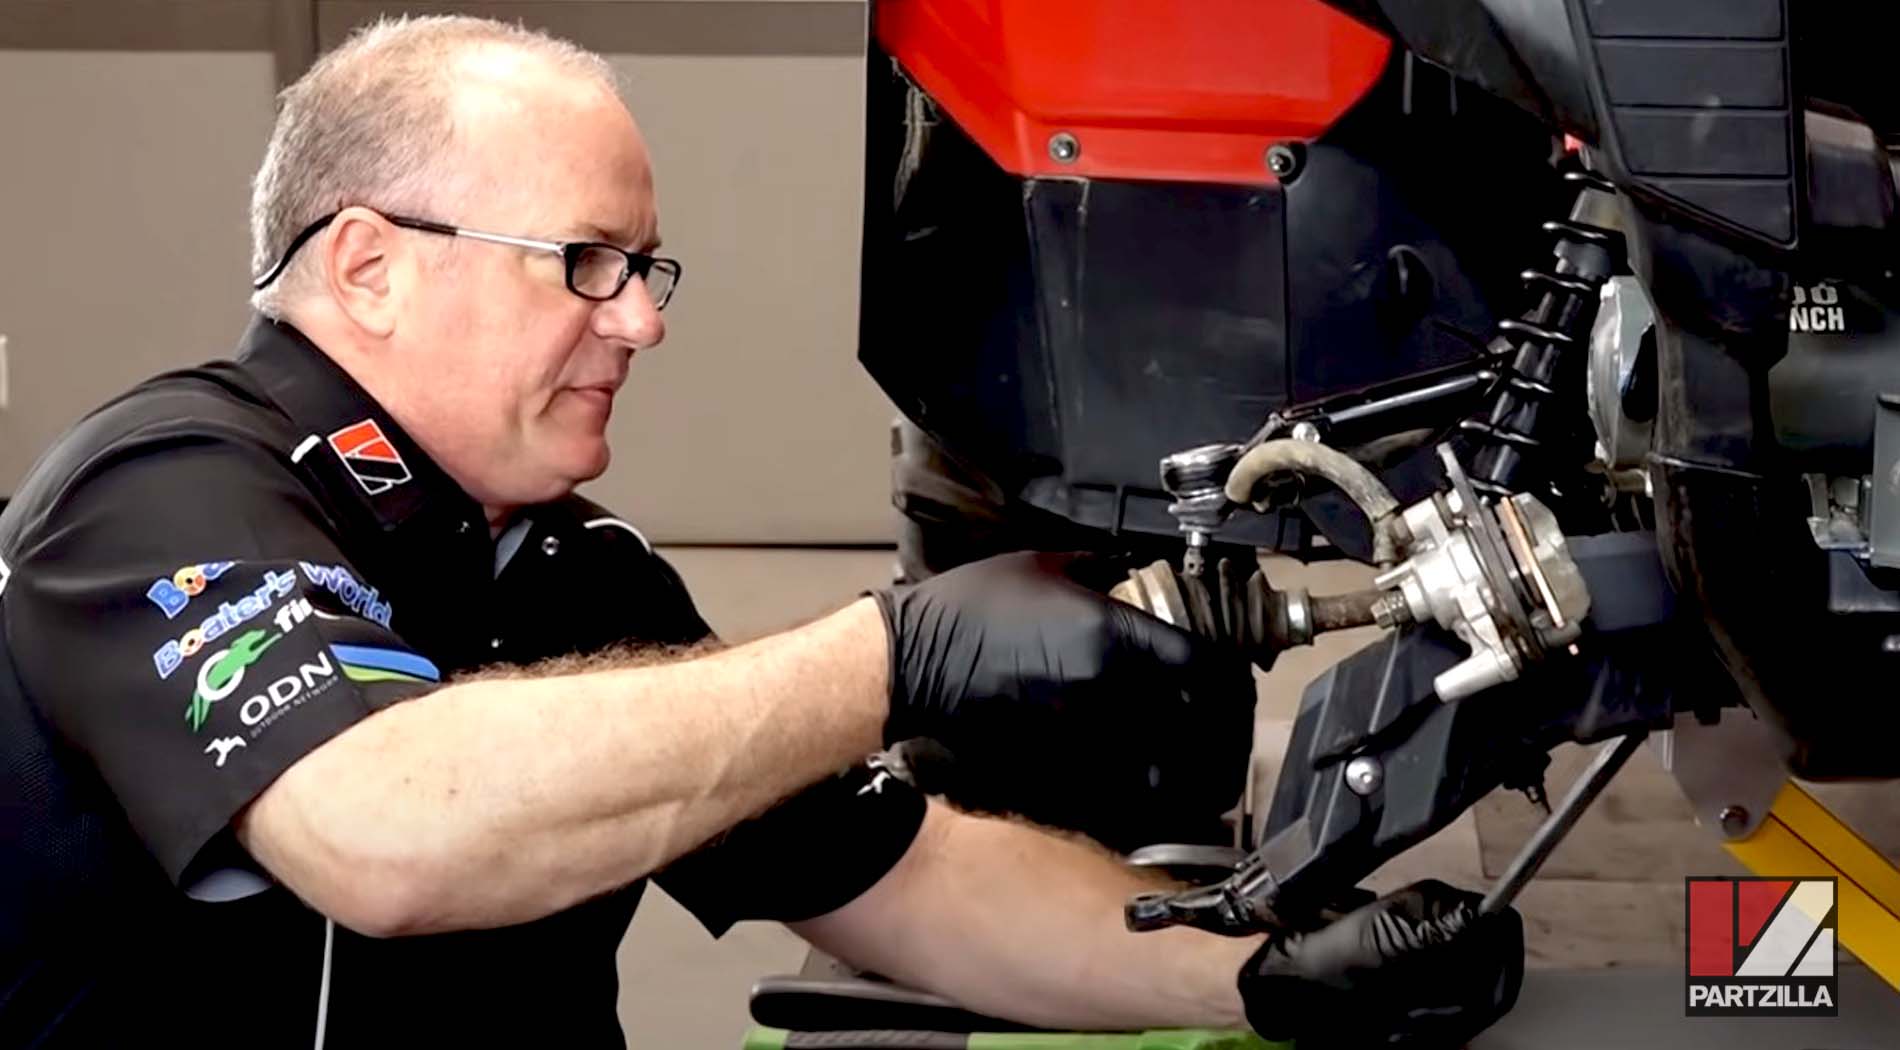
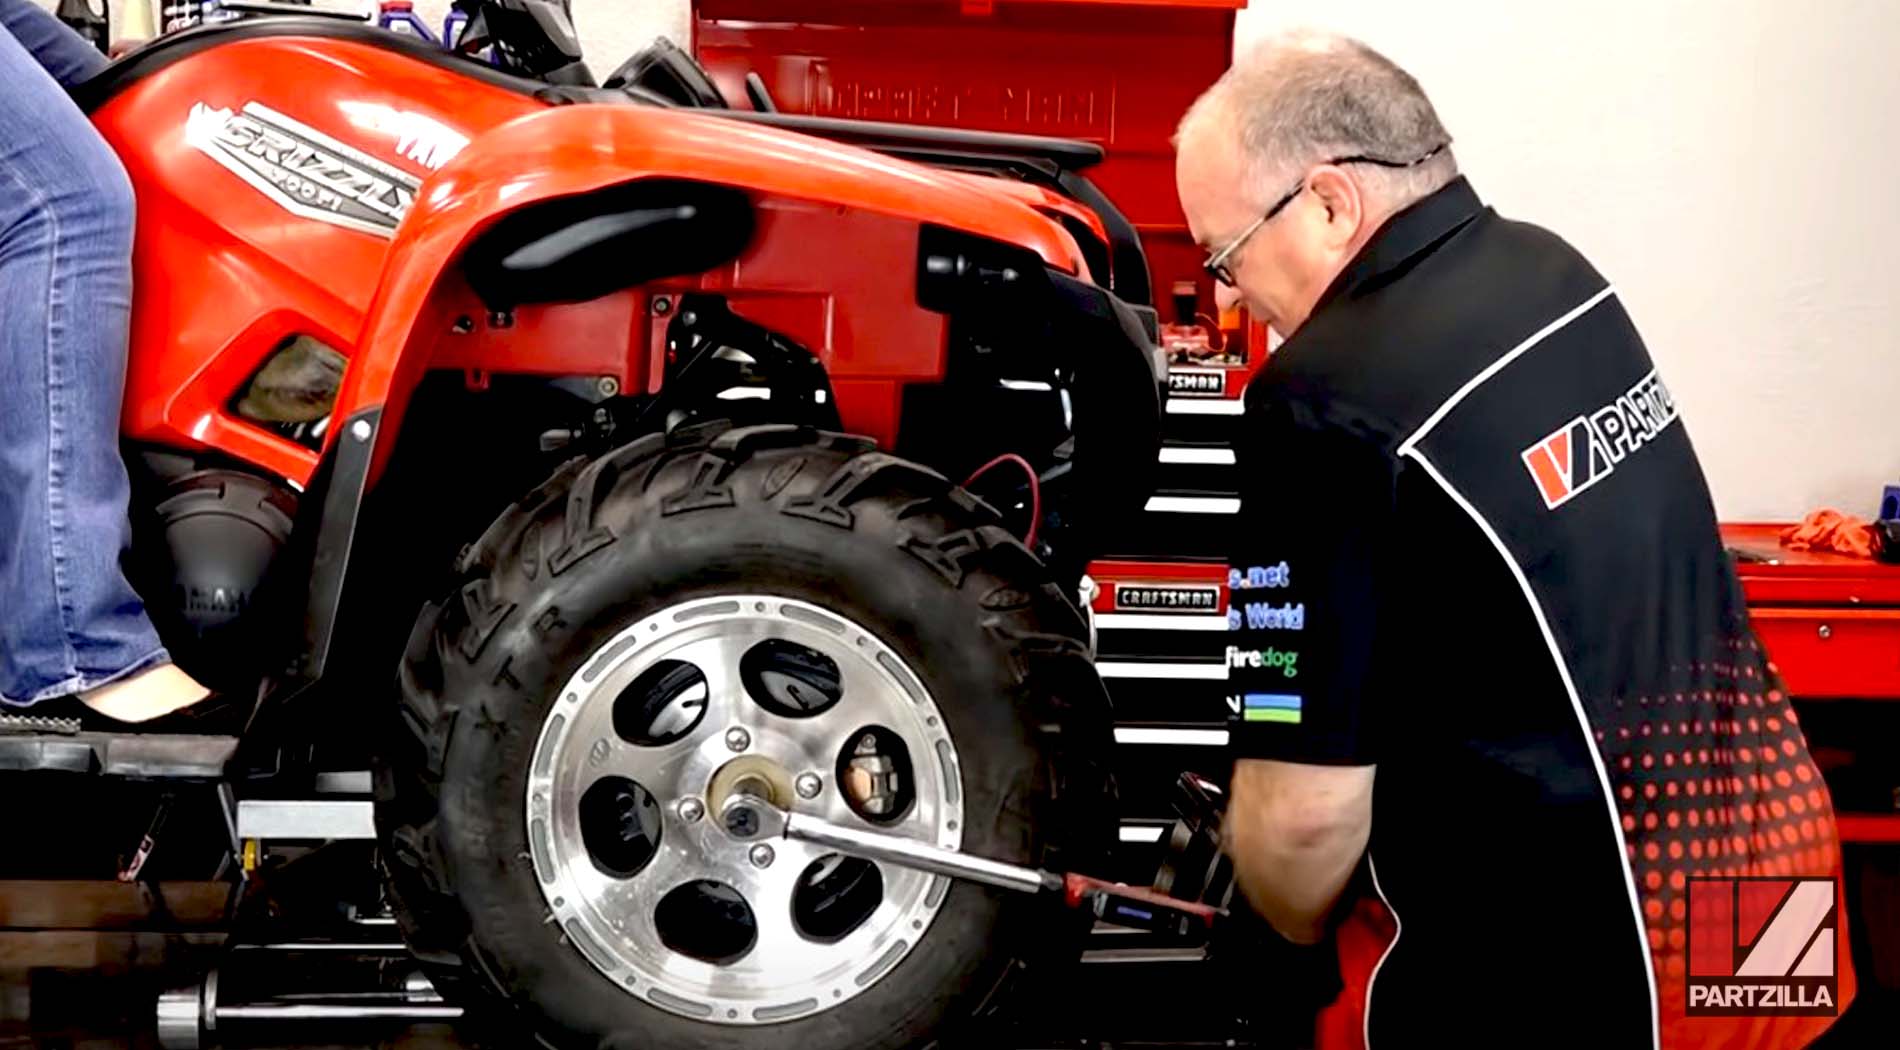
Step 1. Remove the front wheel and the central dust cap beneath it.
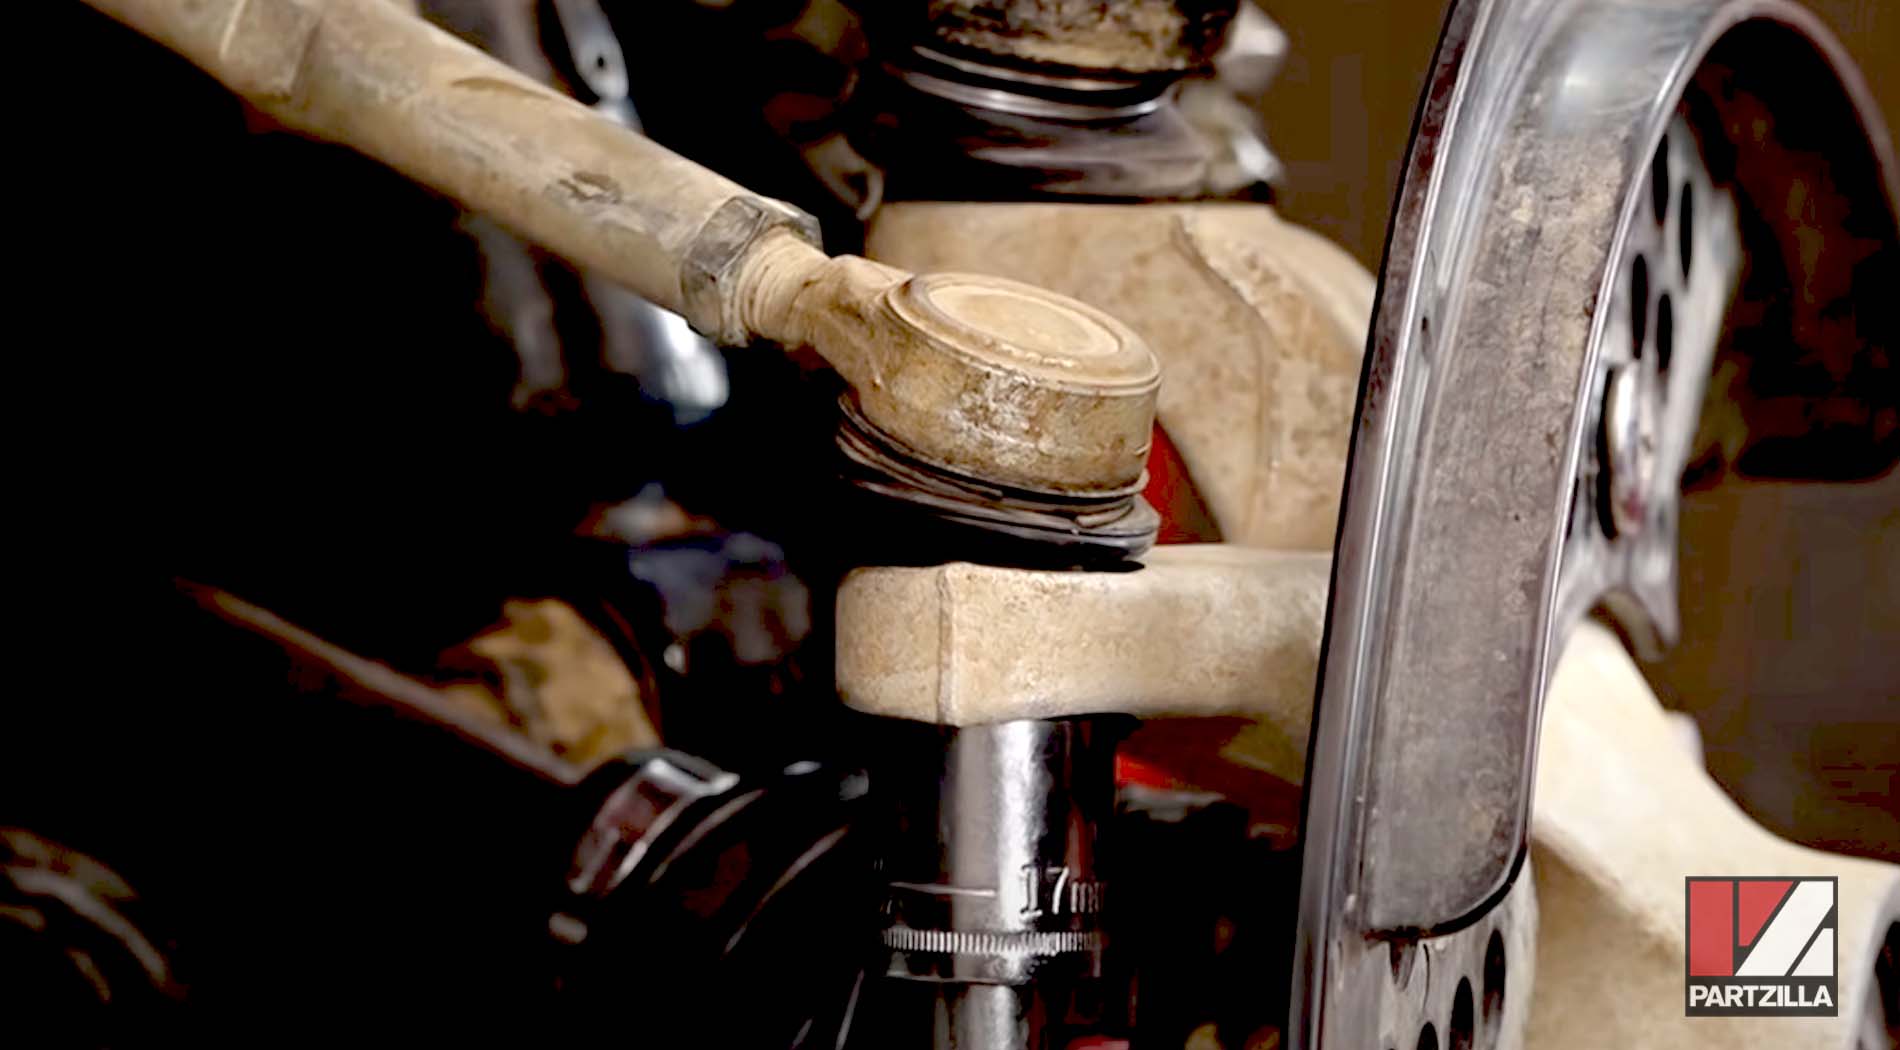
Step 2. Use a punch tool to bend back the rim of the axle nut where it’s bent against the axle, then remove the axle nut.
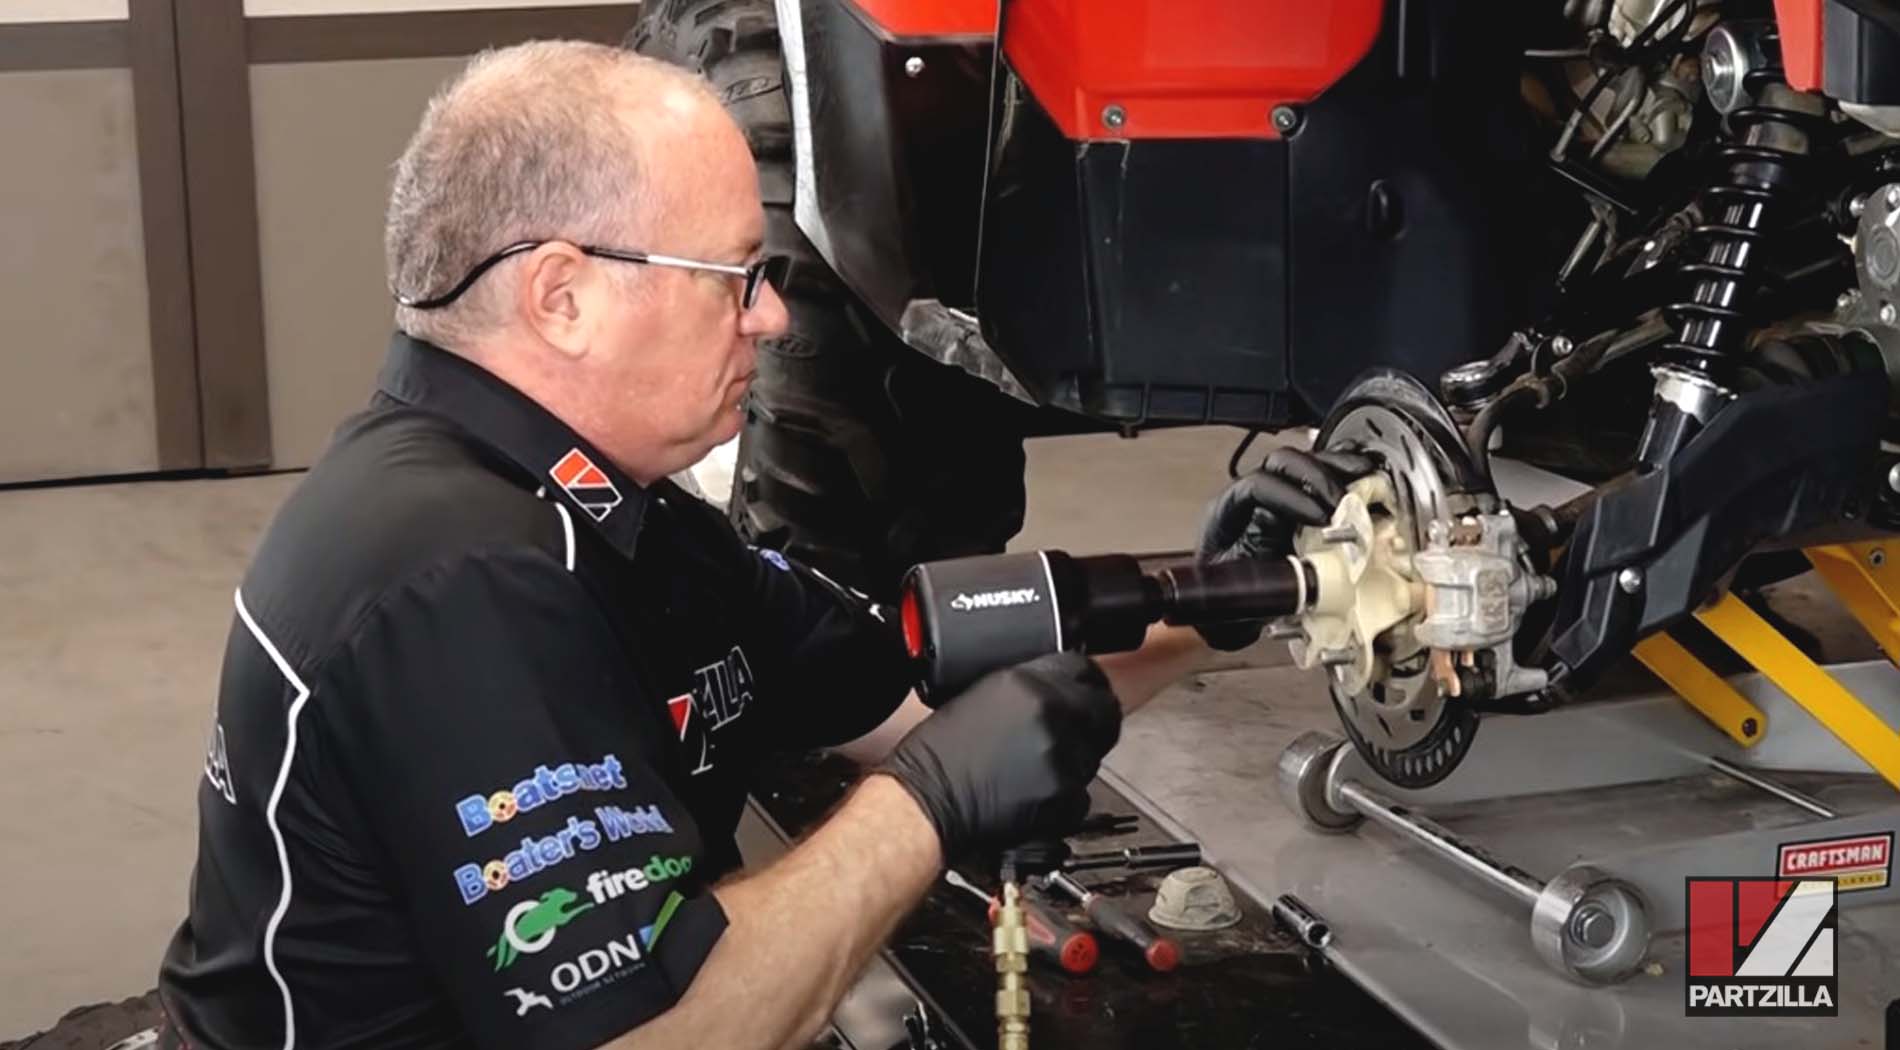
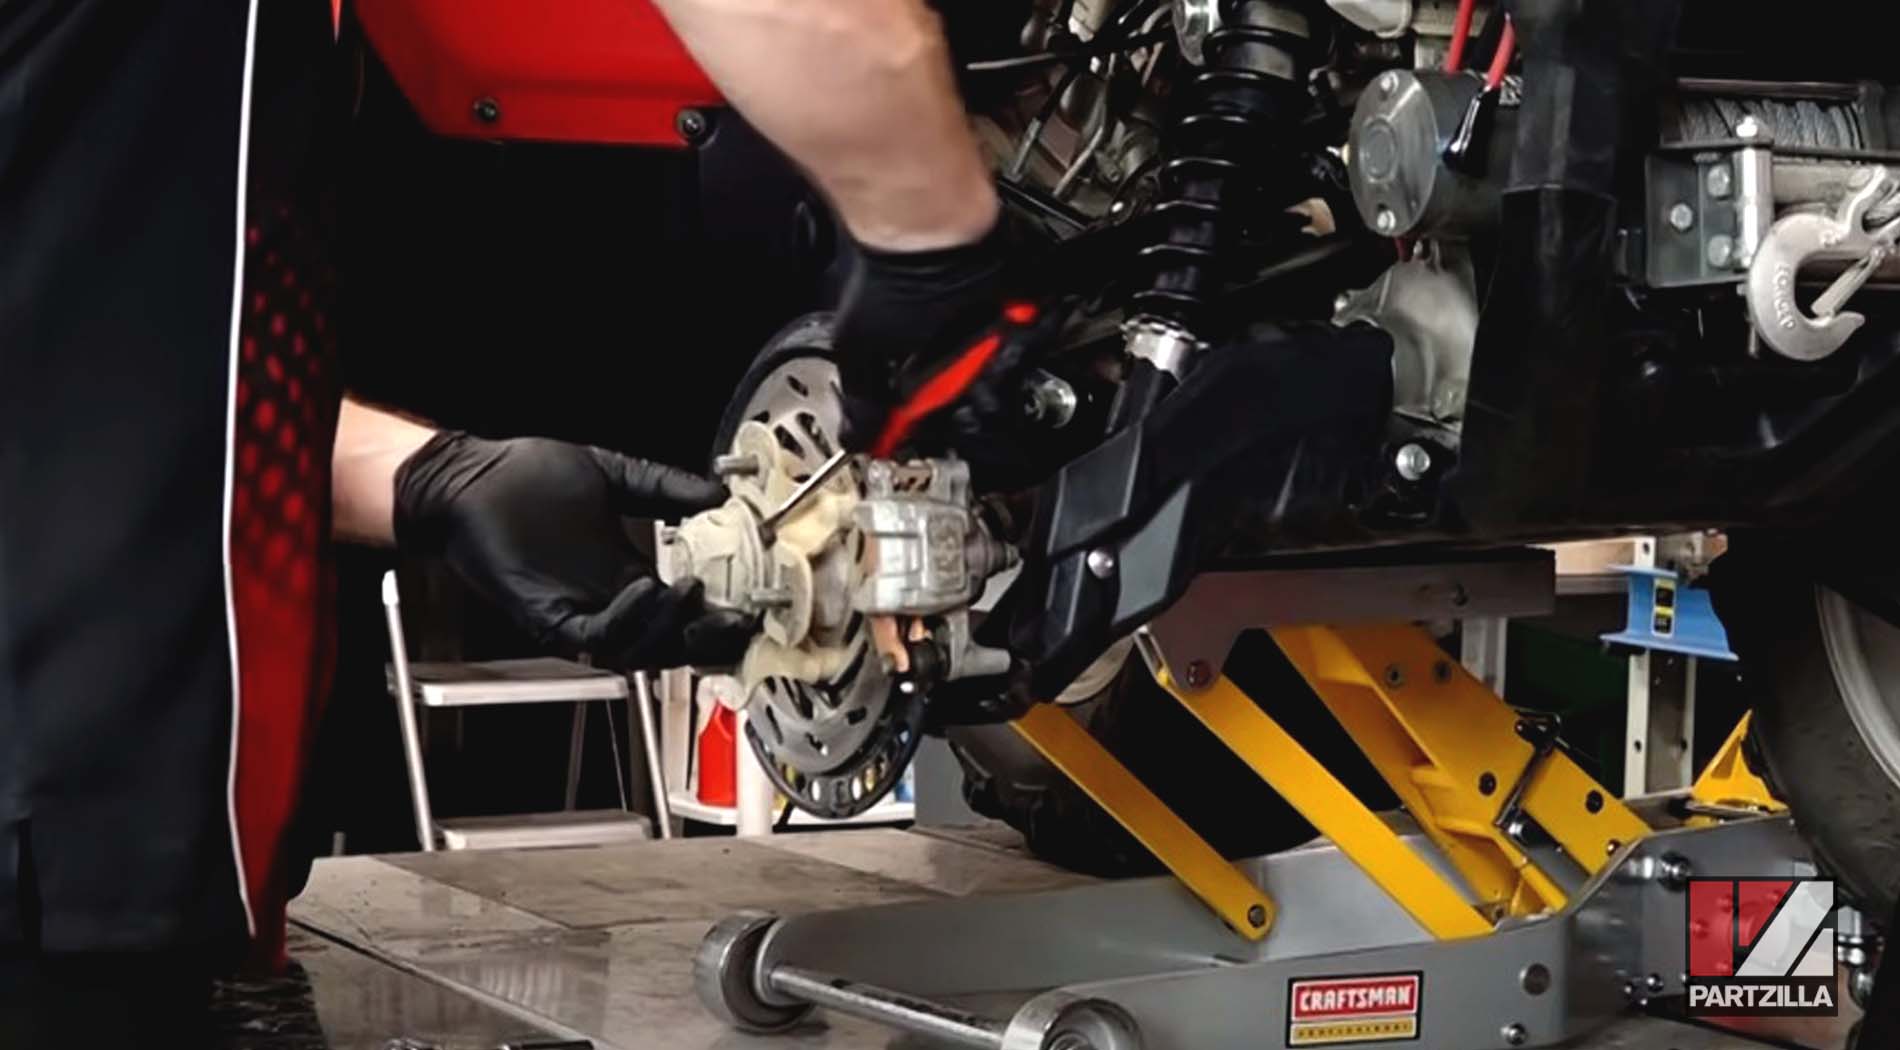
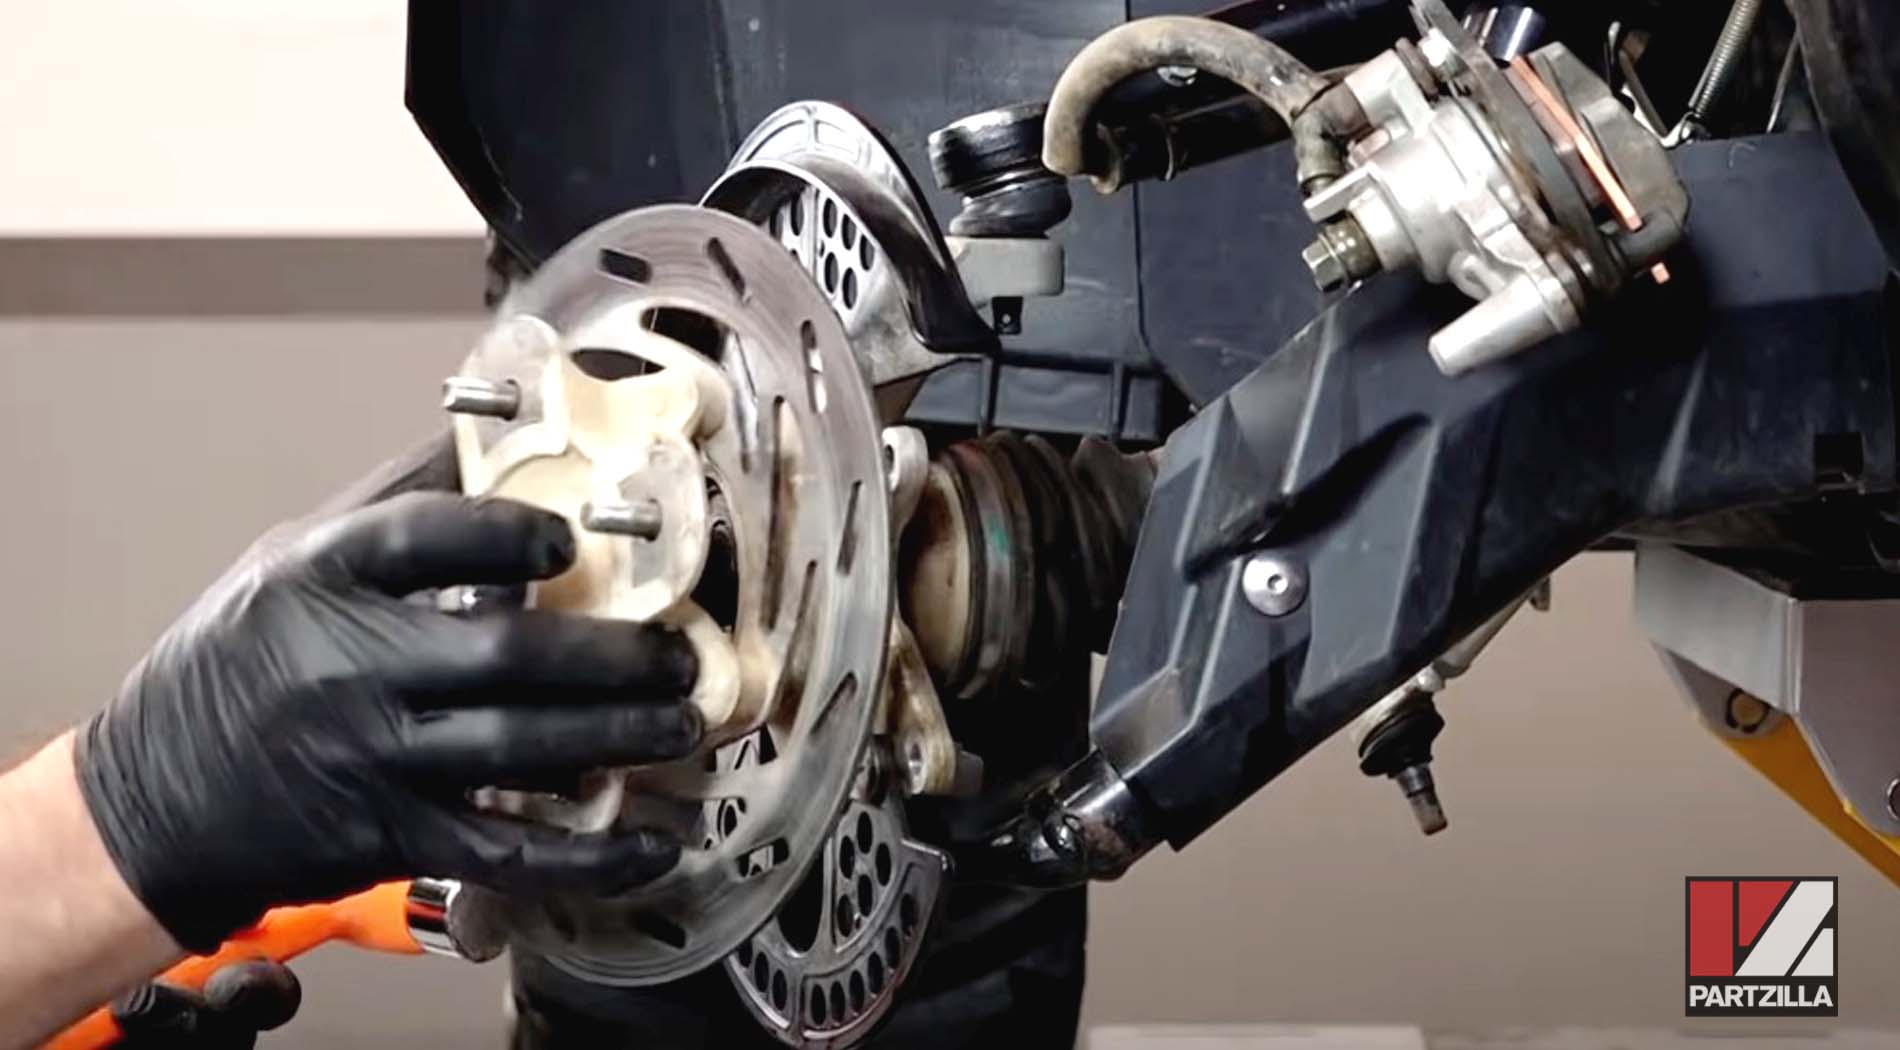
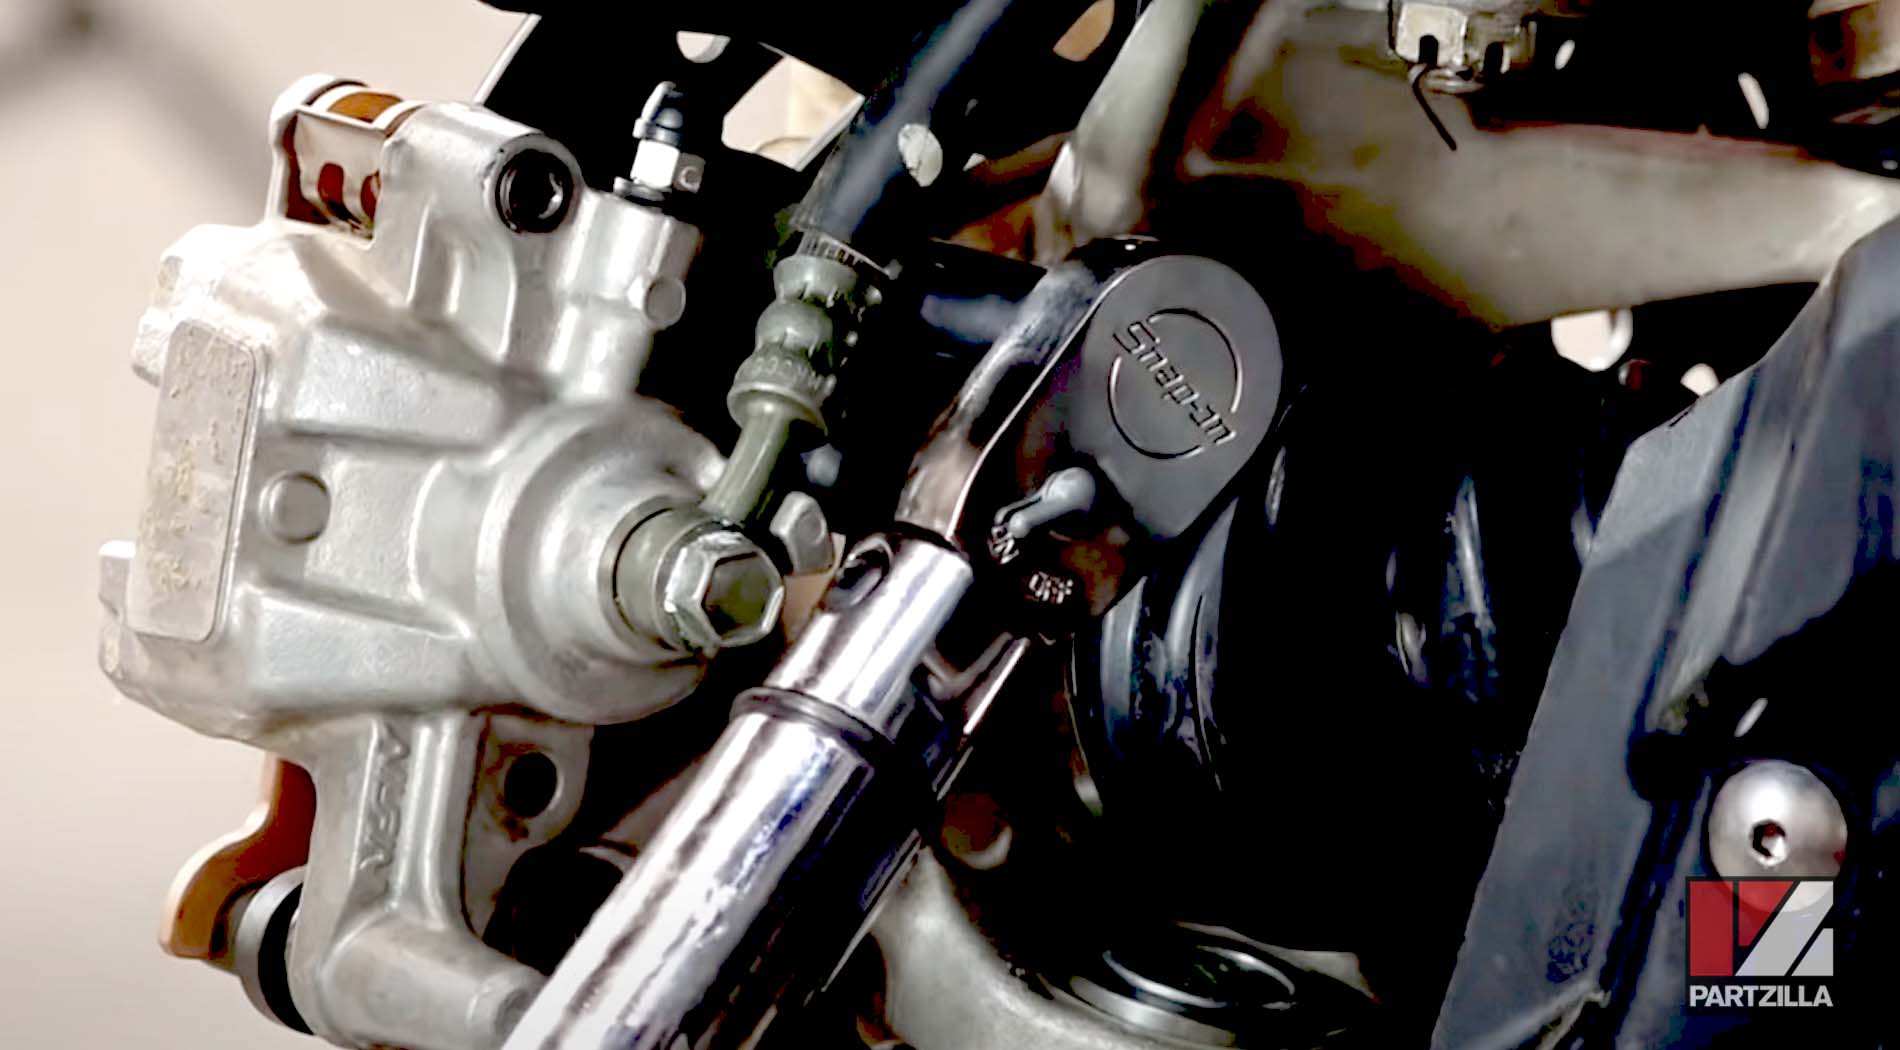
Step 3. Remove the two 12mm caliper mounting bolts, and slide the brake caliper assembly off the brake rotor.
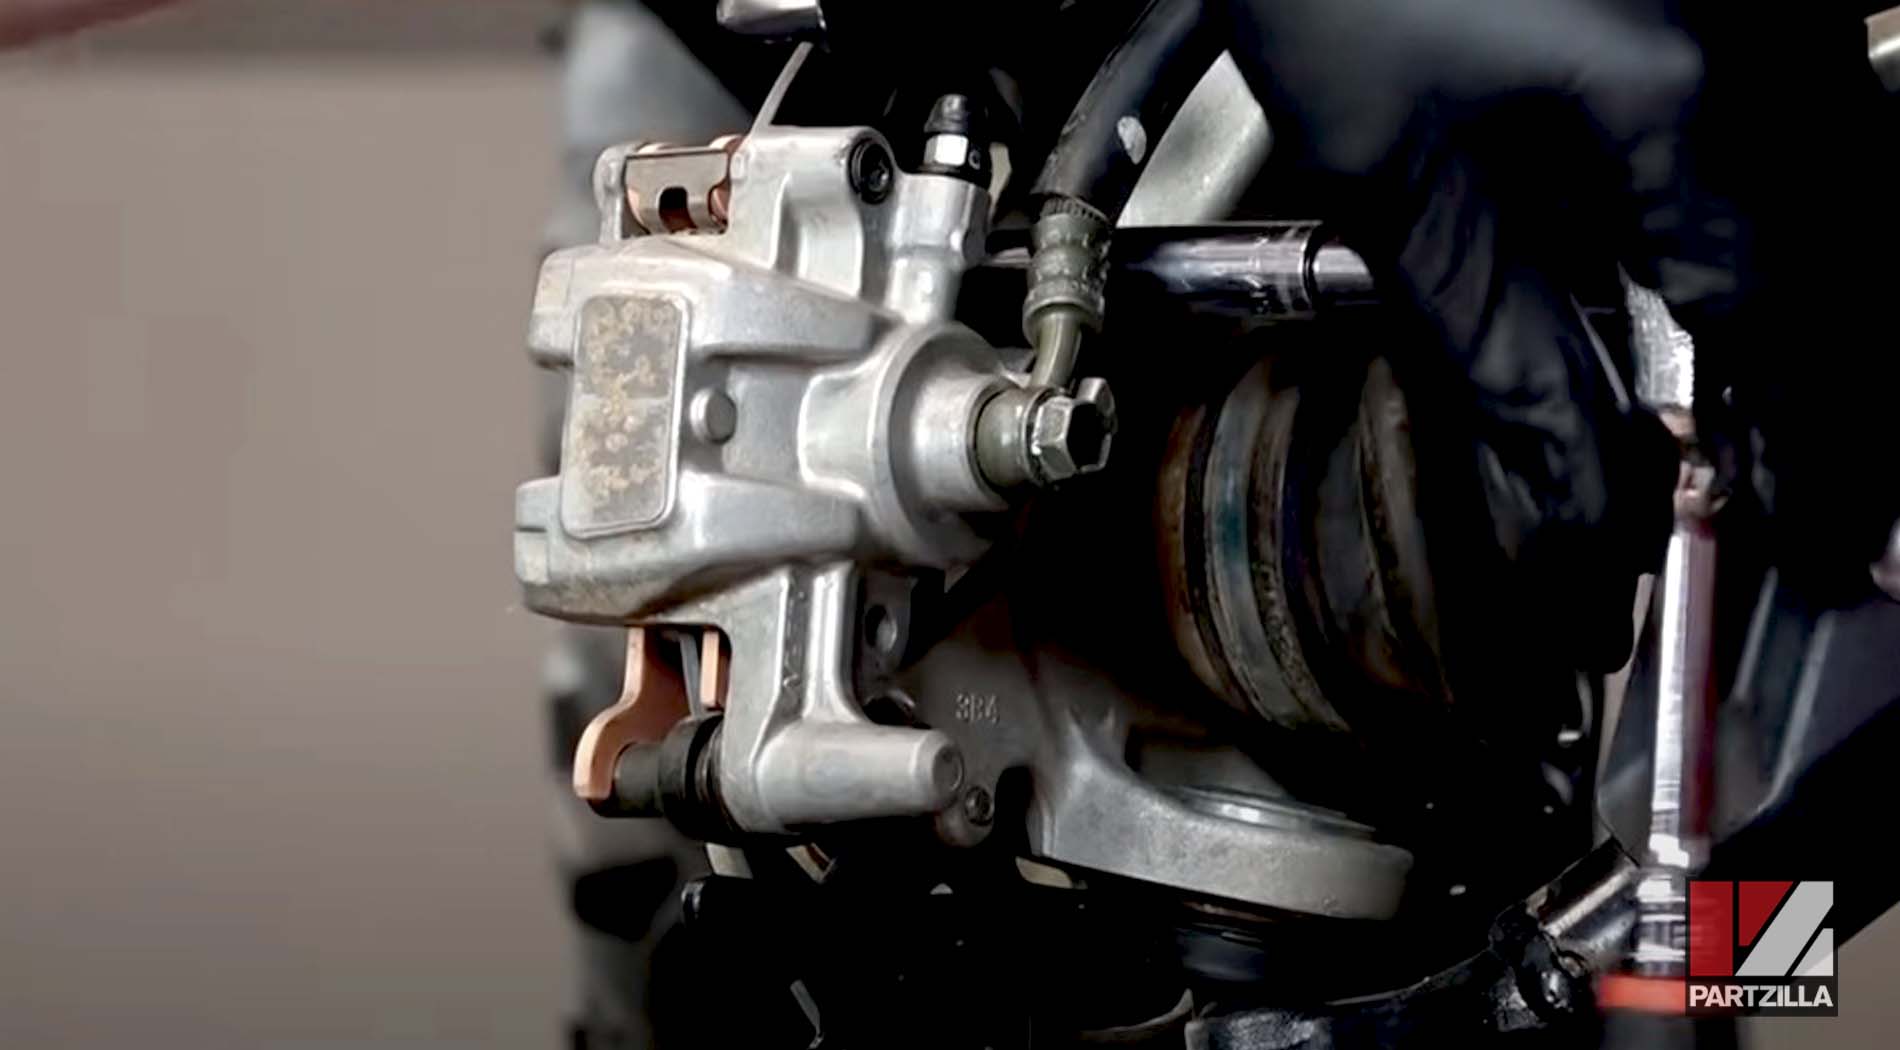

PRO TIP: Use a cable tie to hold the caliper assembly up and out of the way against the shock absorber spring.
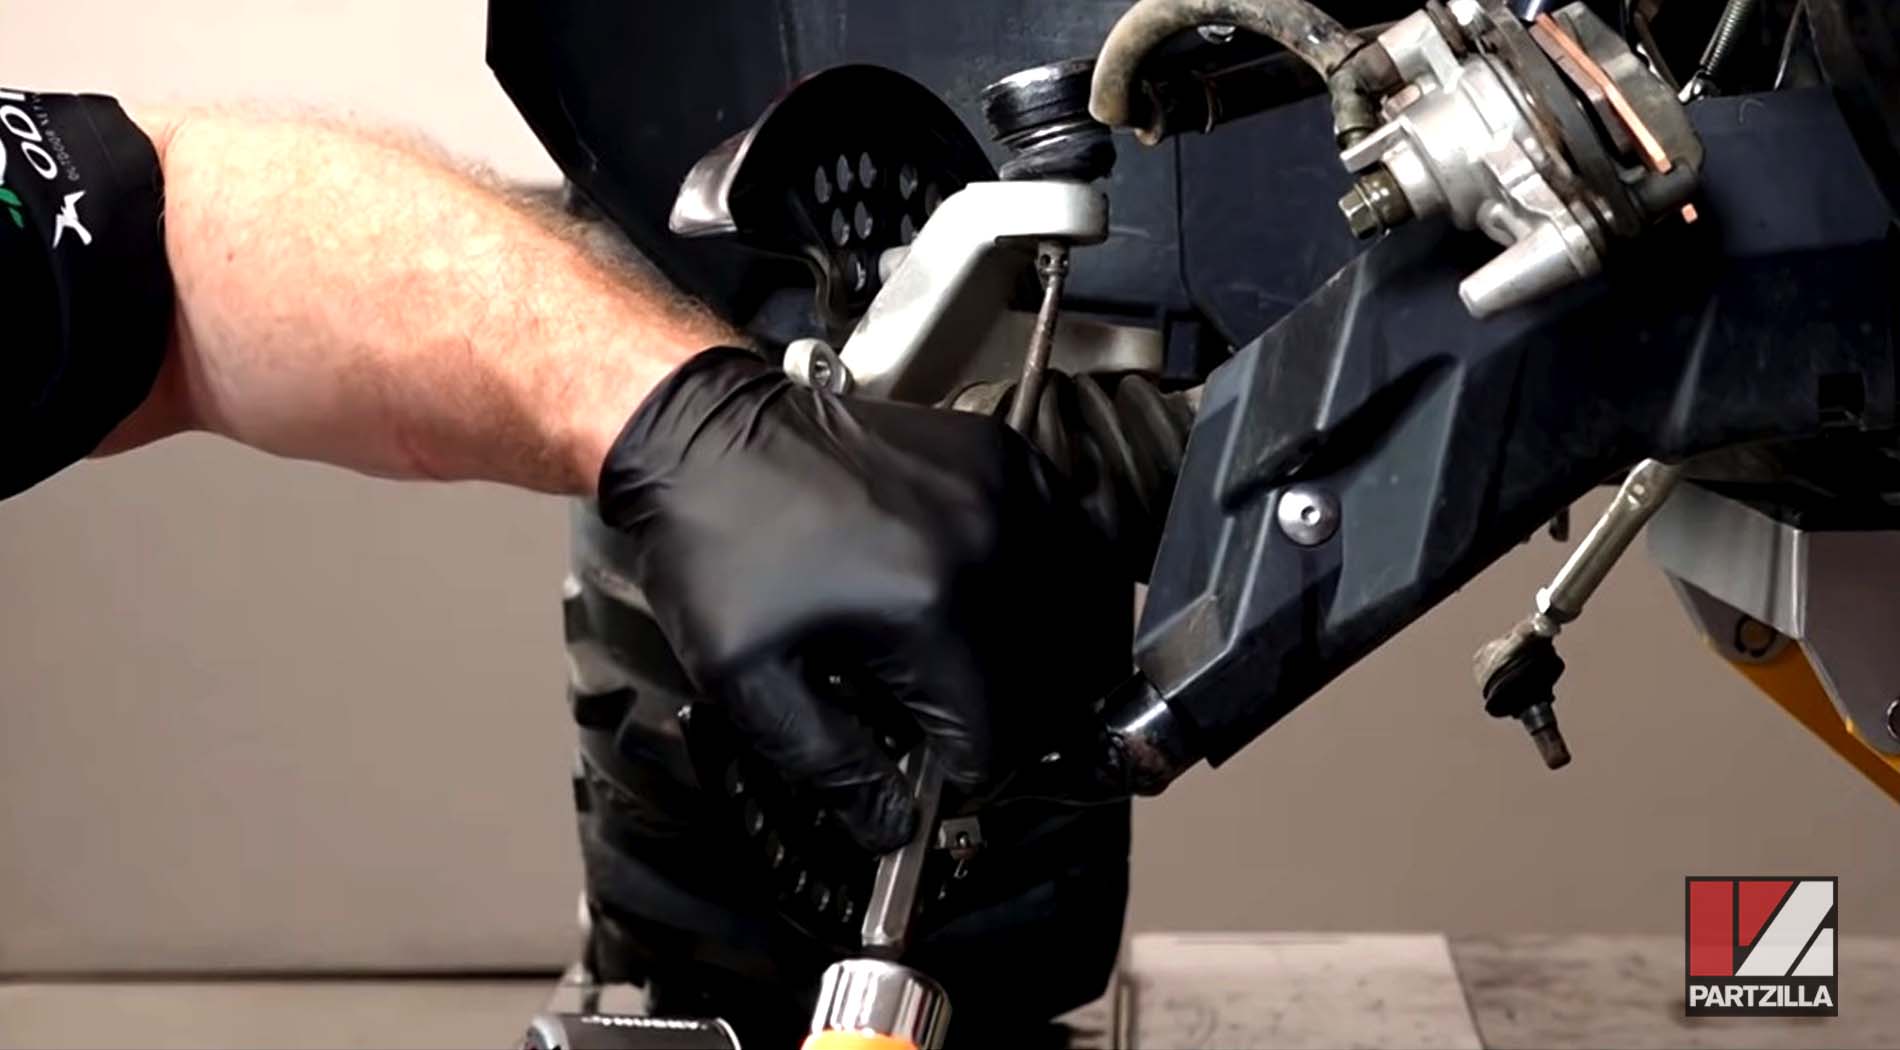
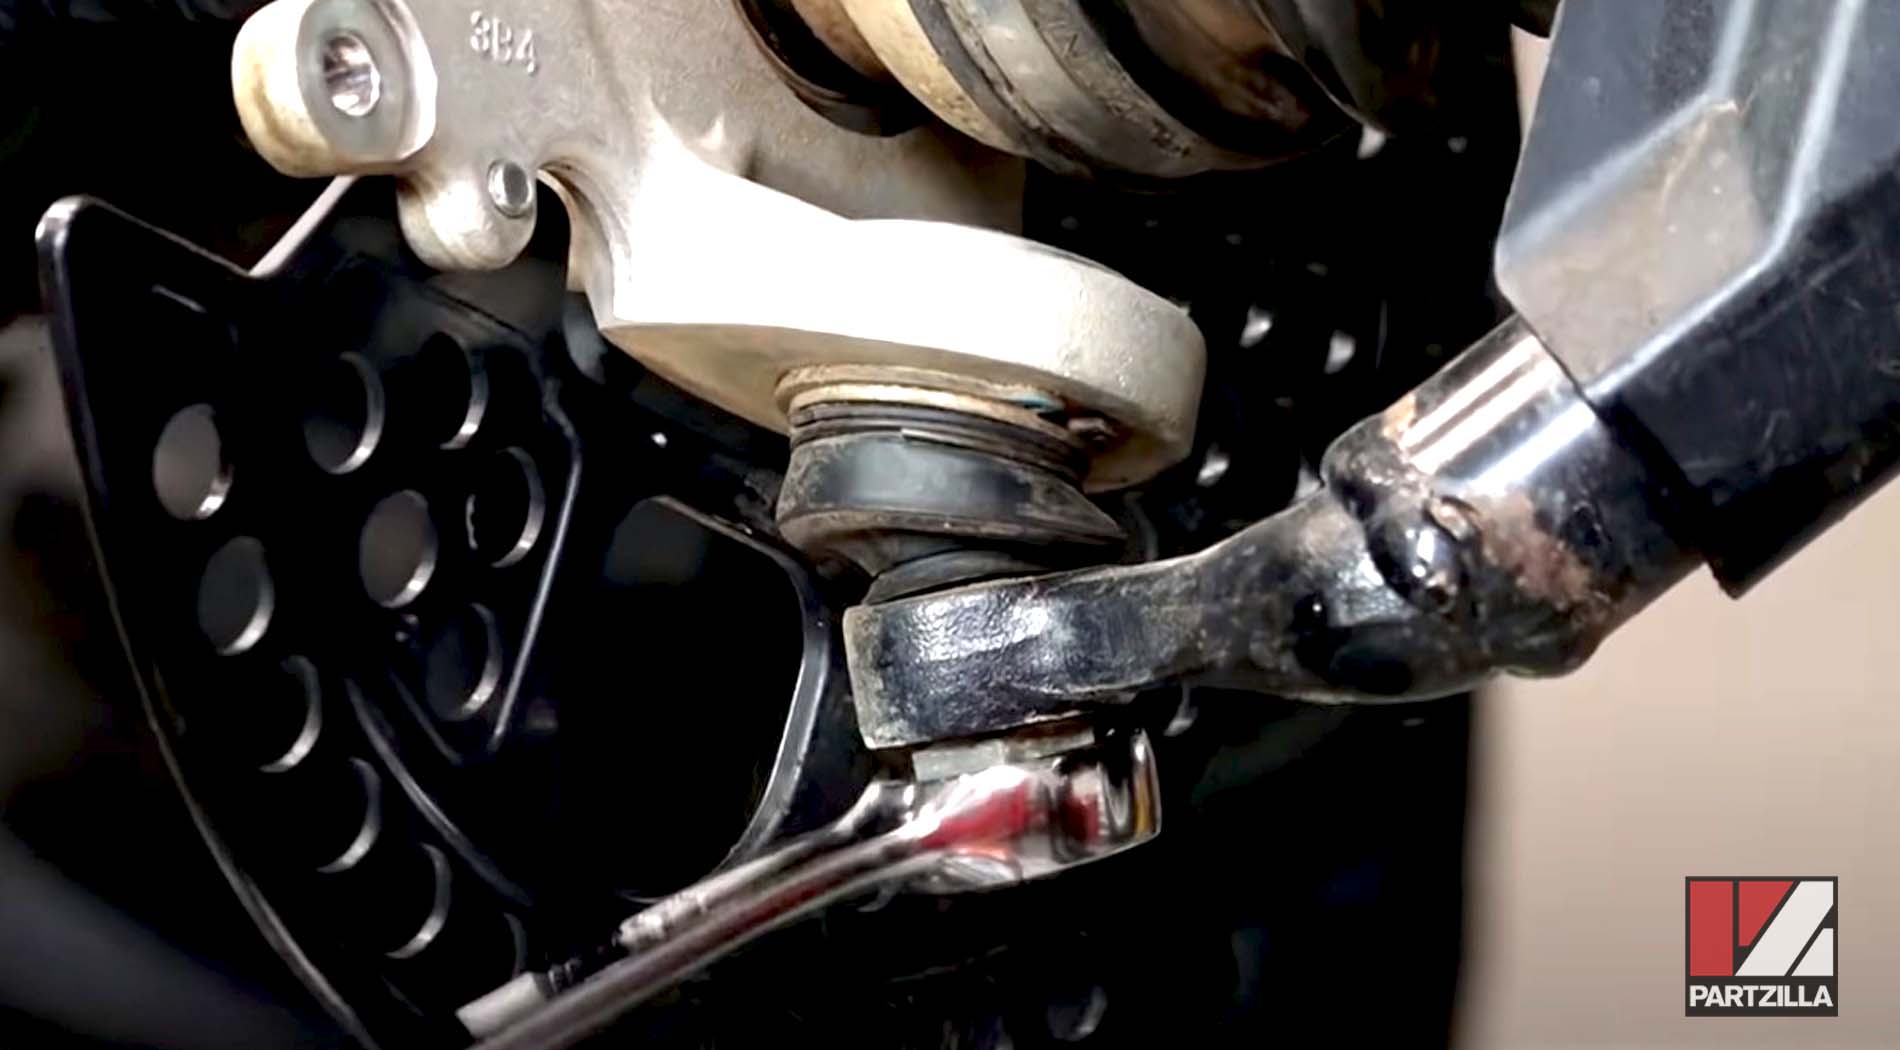
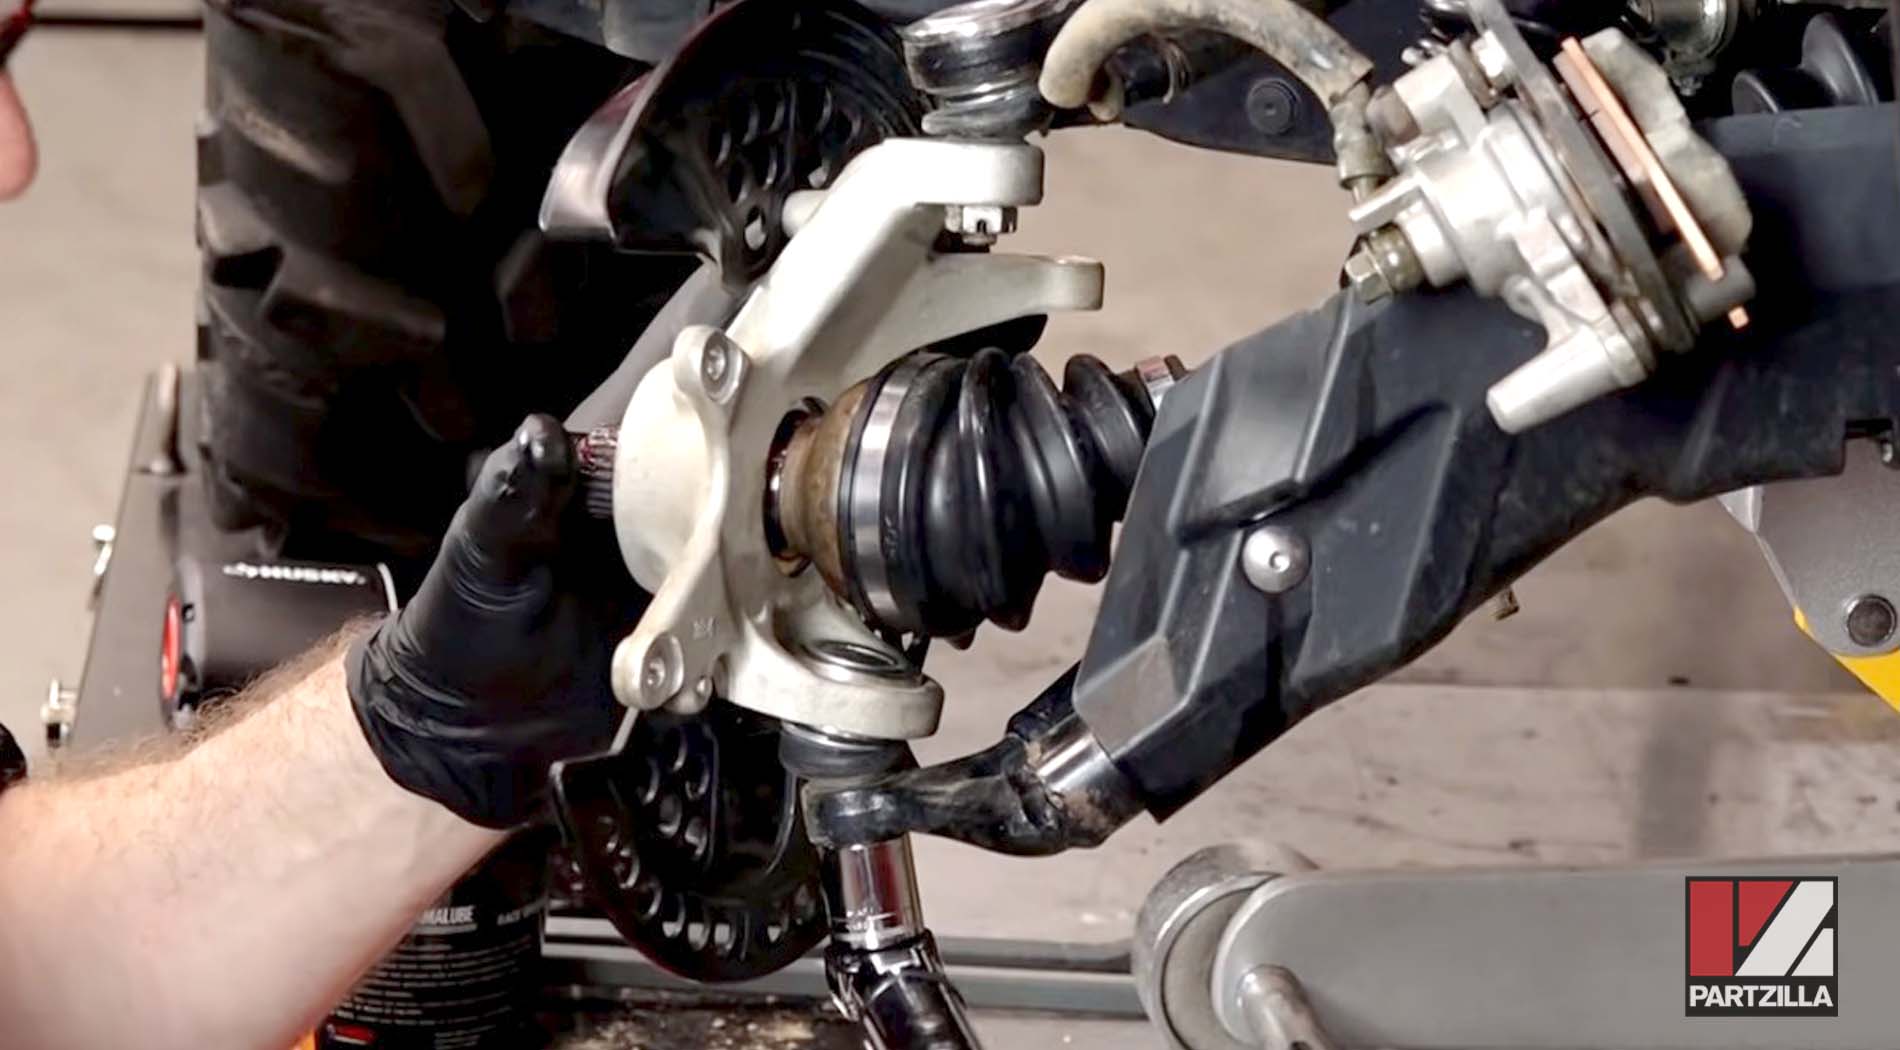
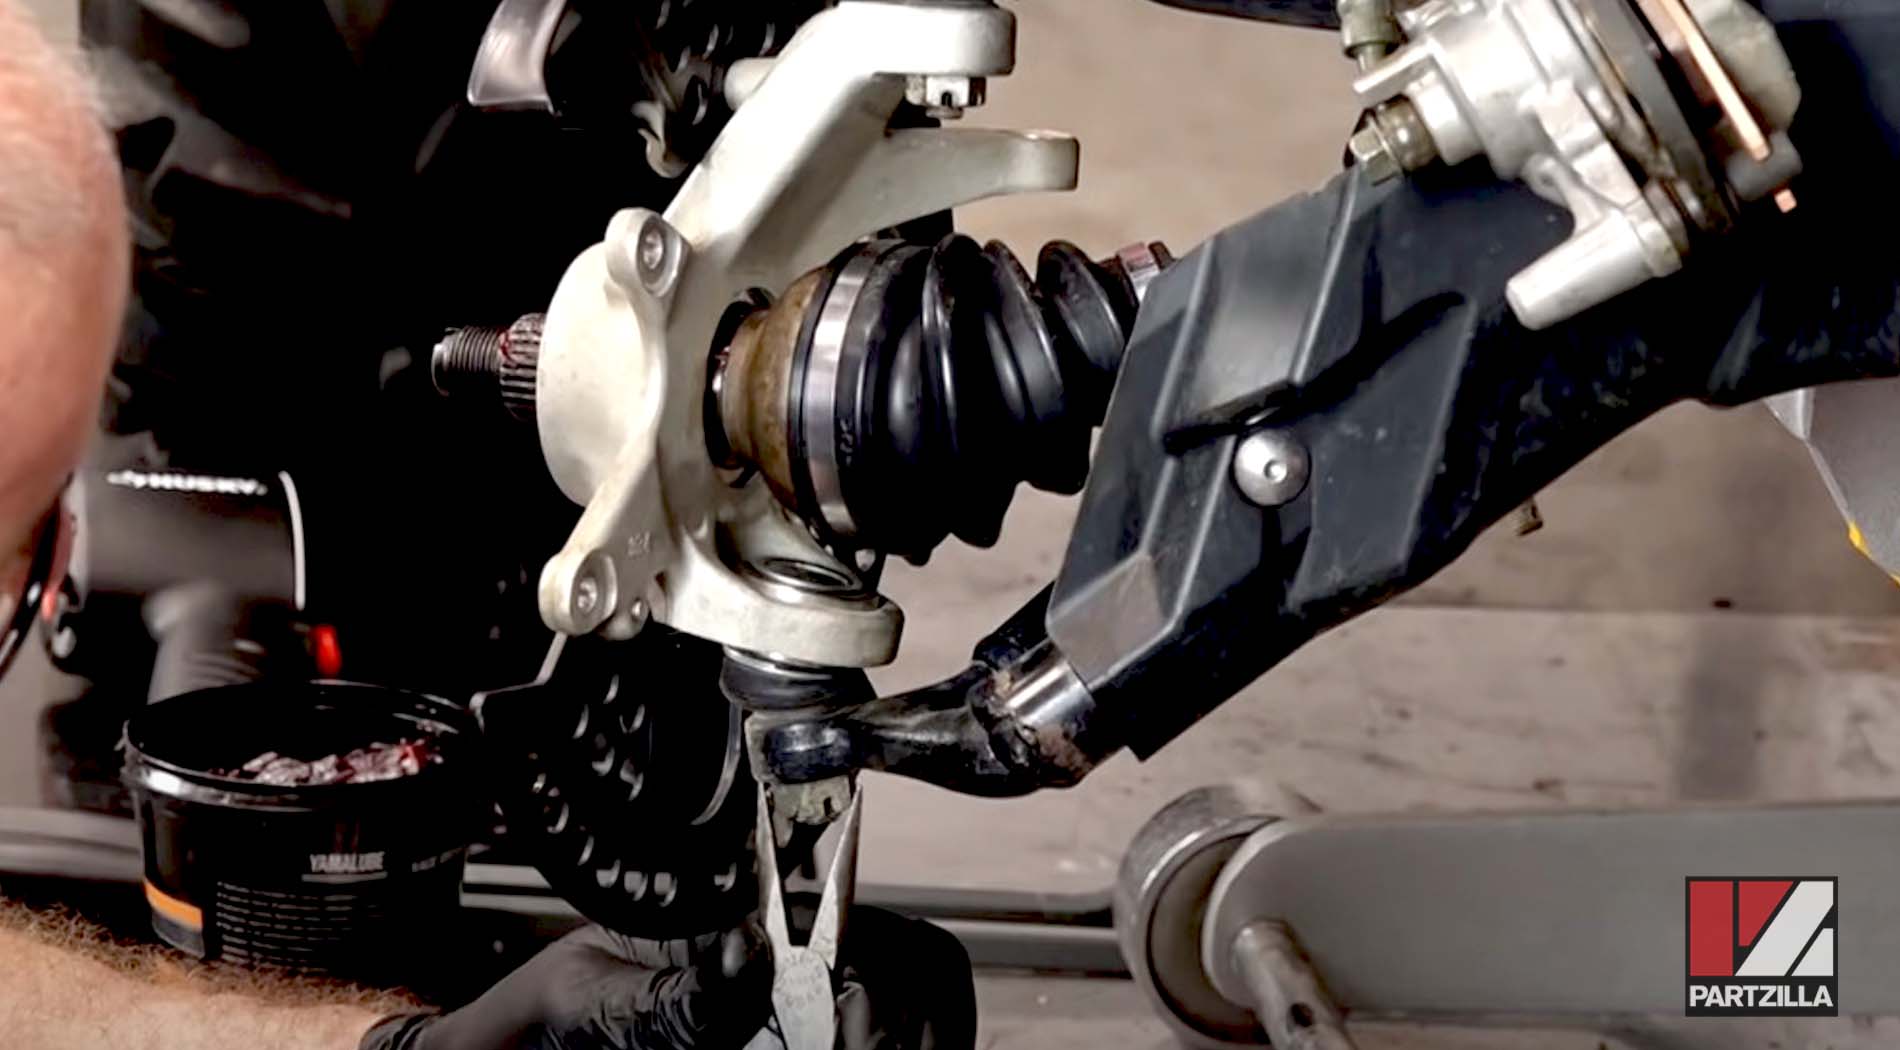
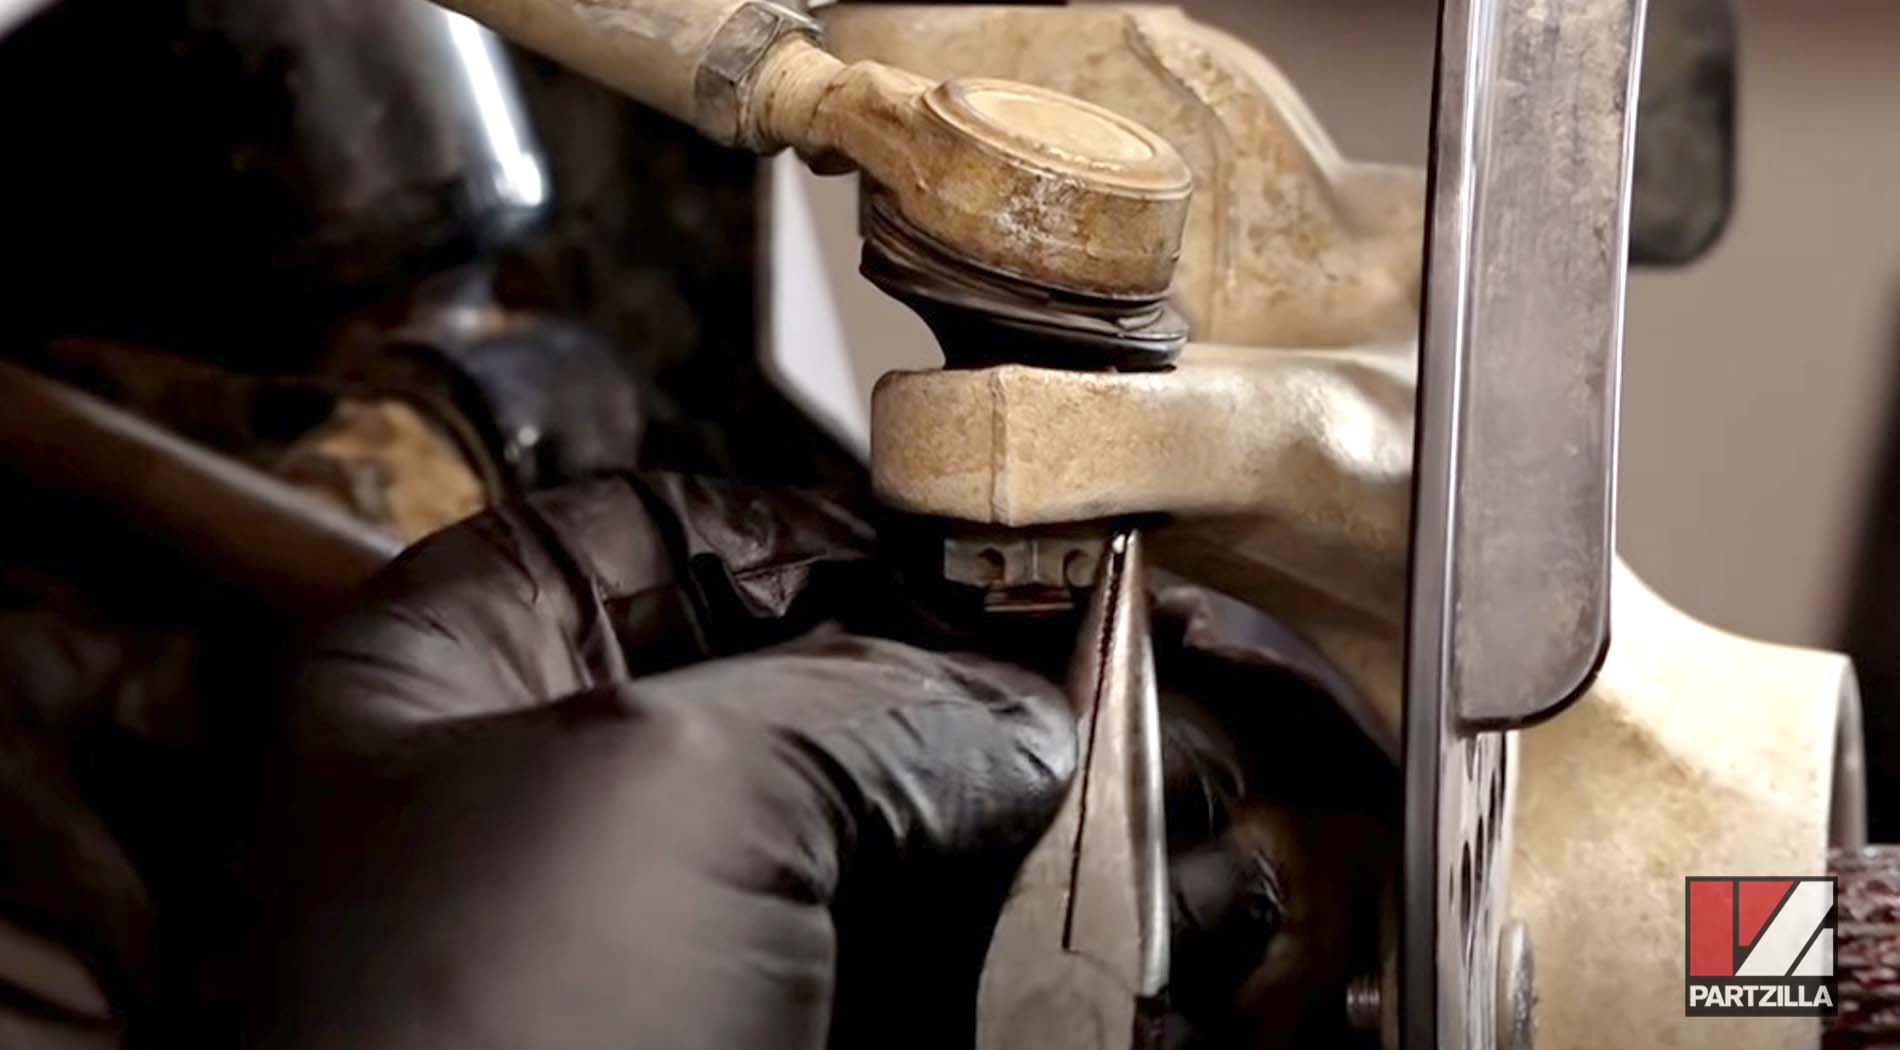
Step 4. Remove the cotter pin from the steering arm ball joint nut, followed by the nut and washer. Tap the steering arm ball joint out of the steering knuckle using a soft blow hammer.
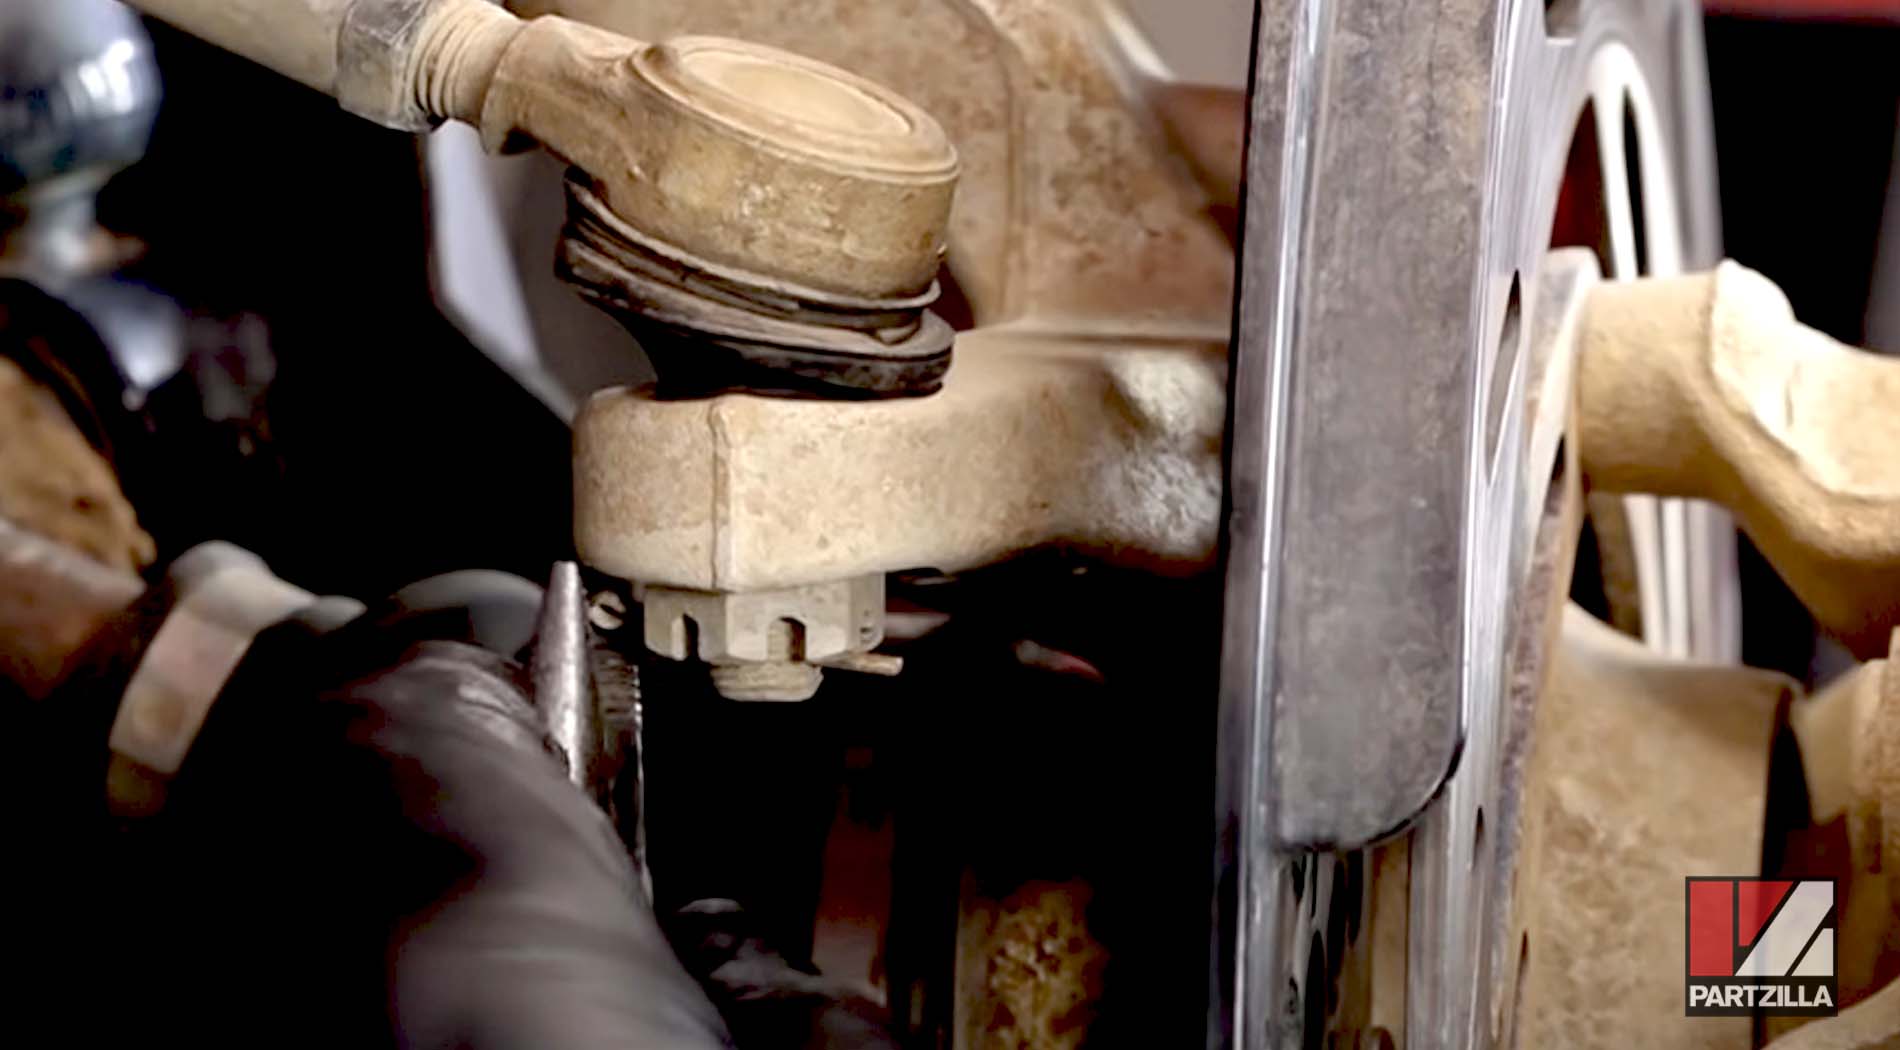
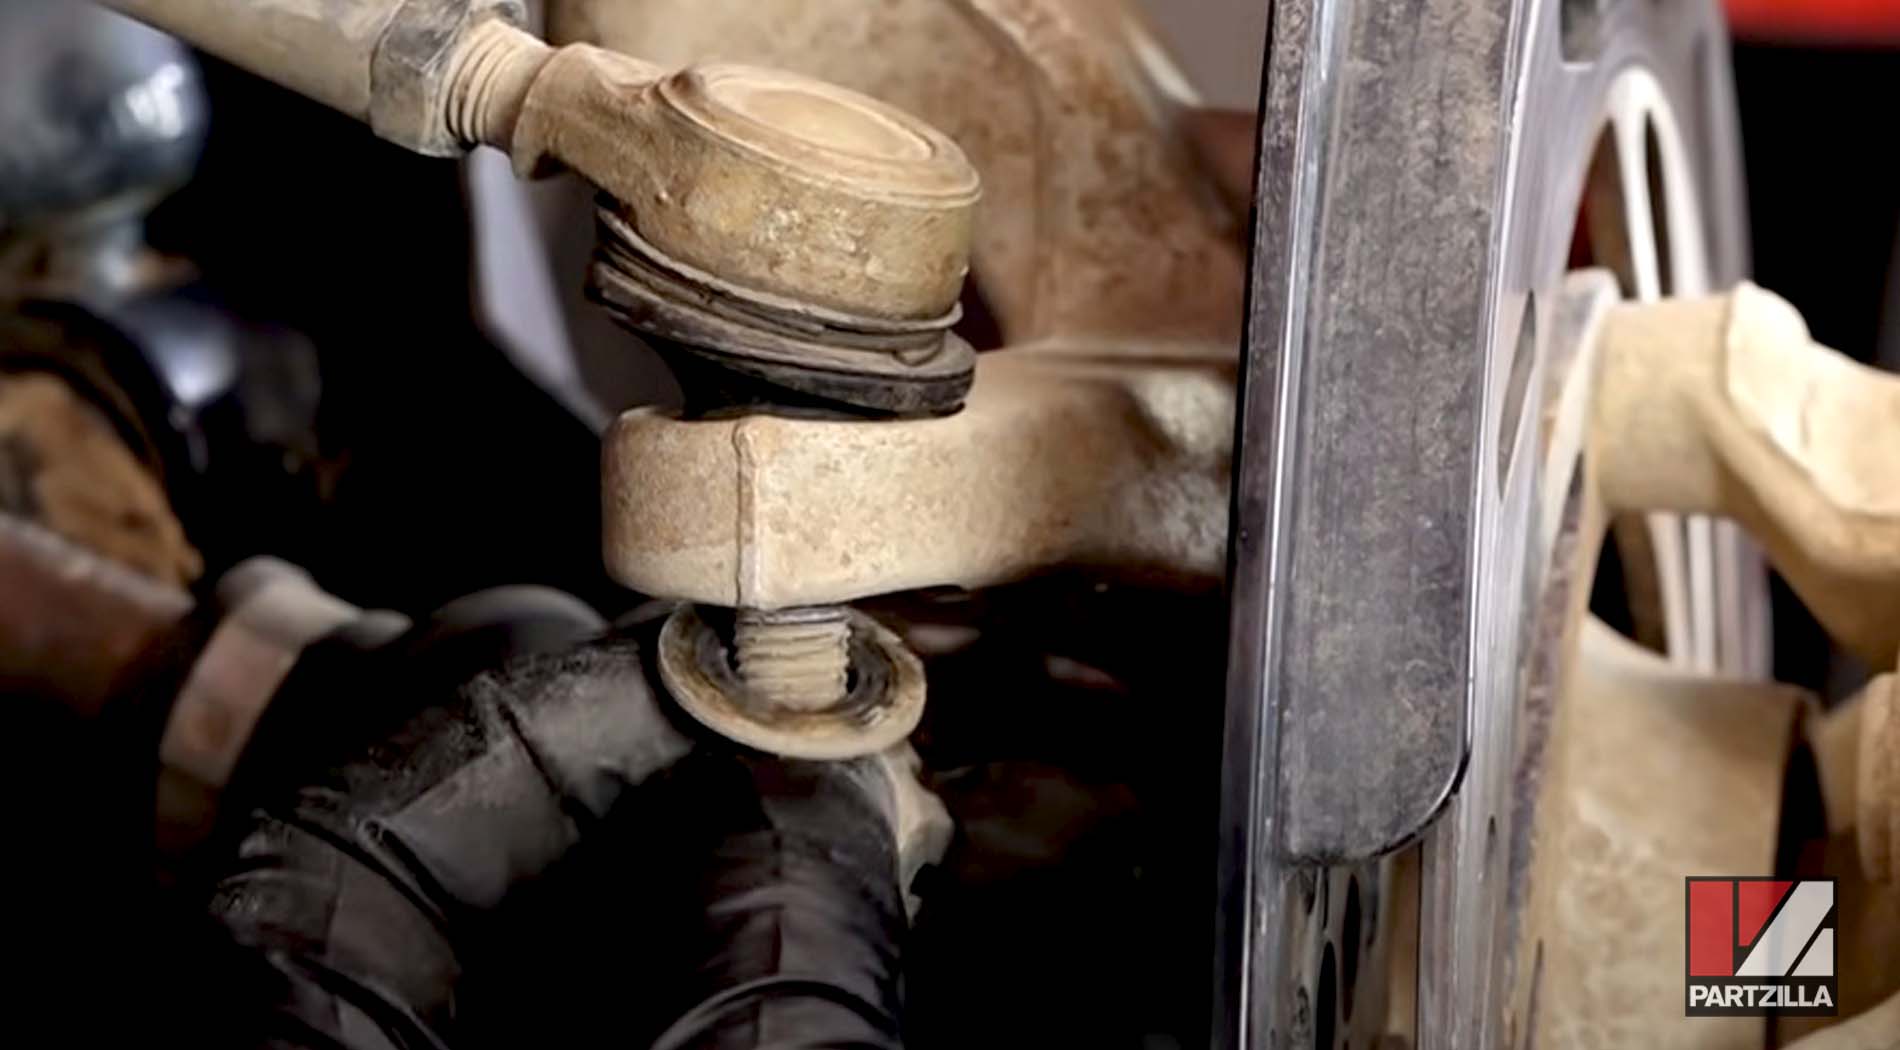
PRO TIP: If the steering arm ball joint refuses to come out, put the castle nut on the screw thread backwards and strike it with a regular hammer to jolt the ball joint free.
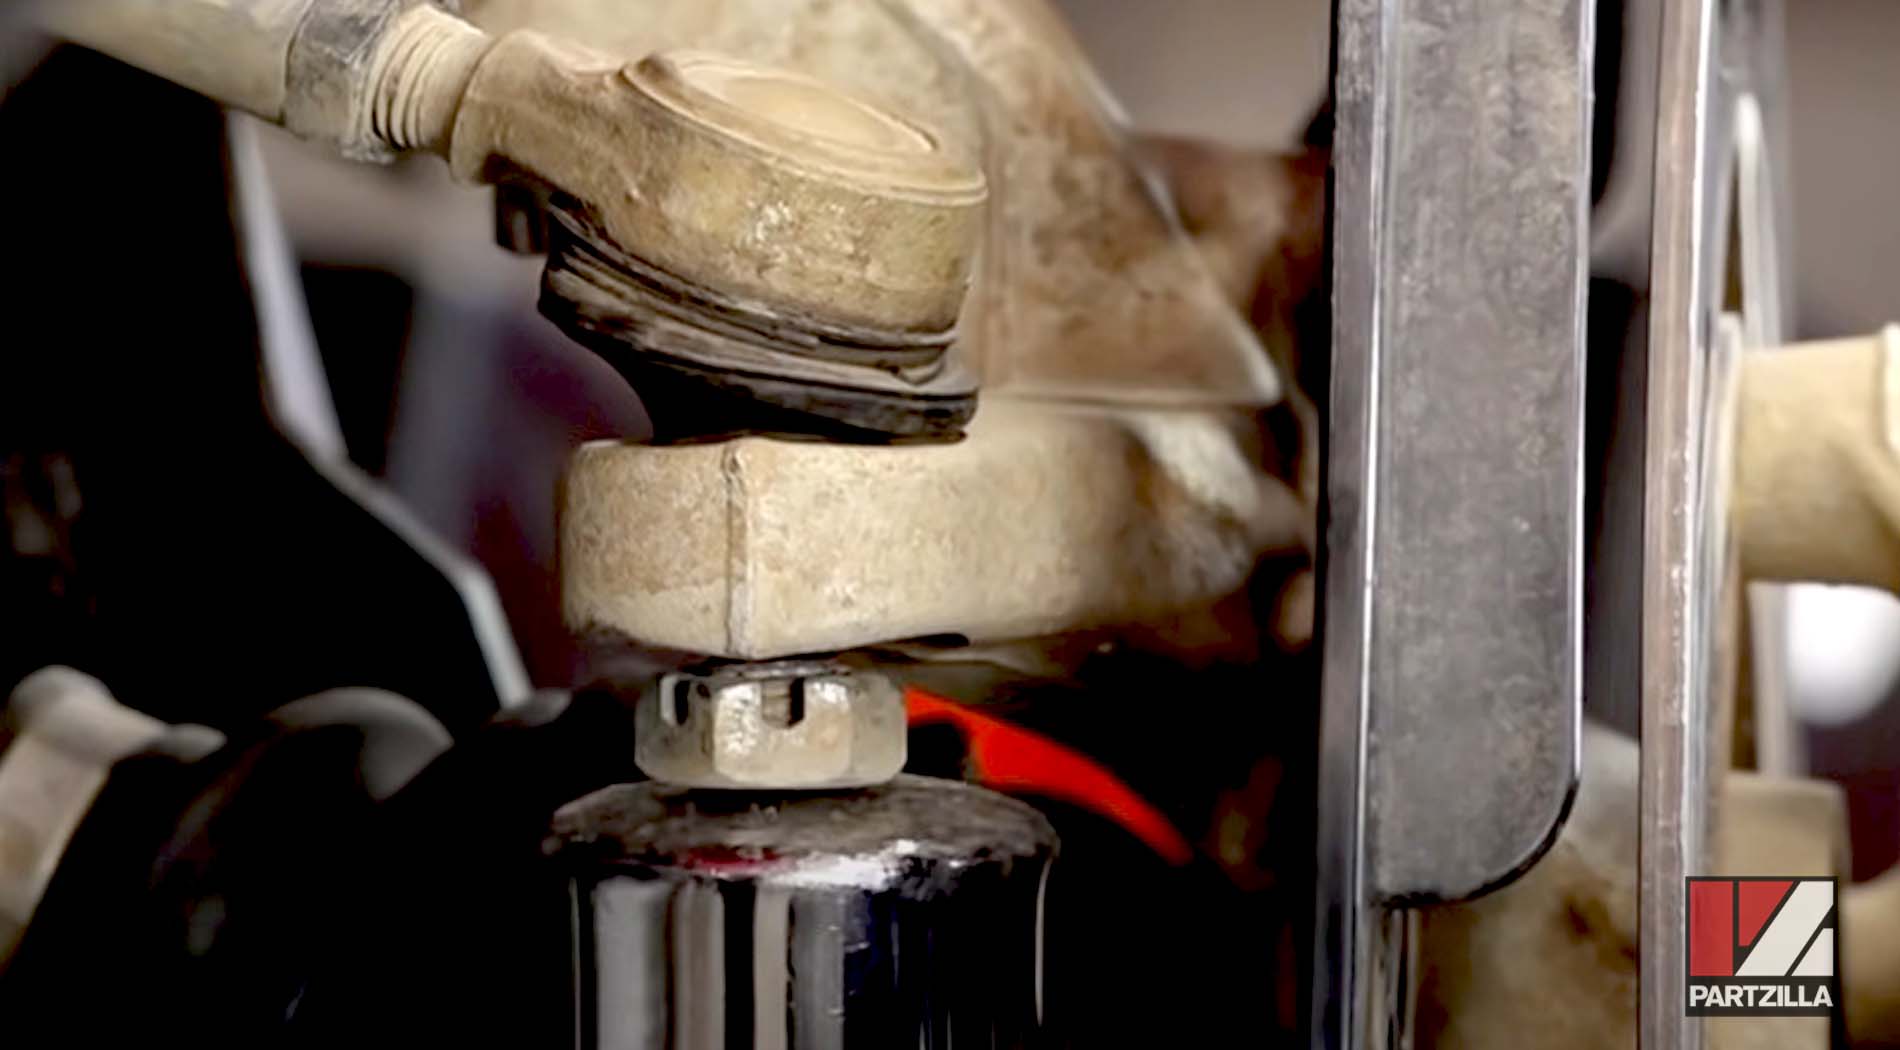
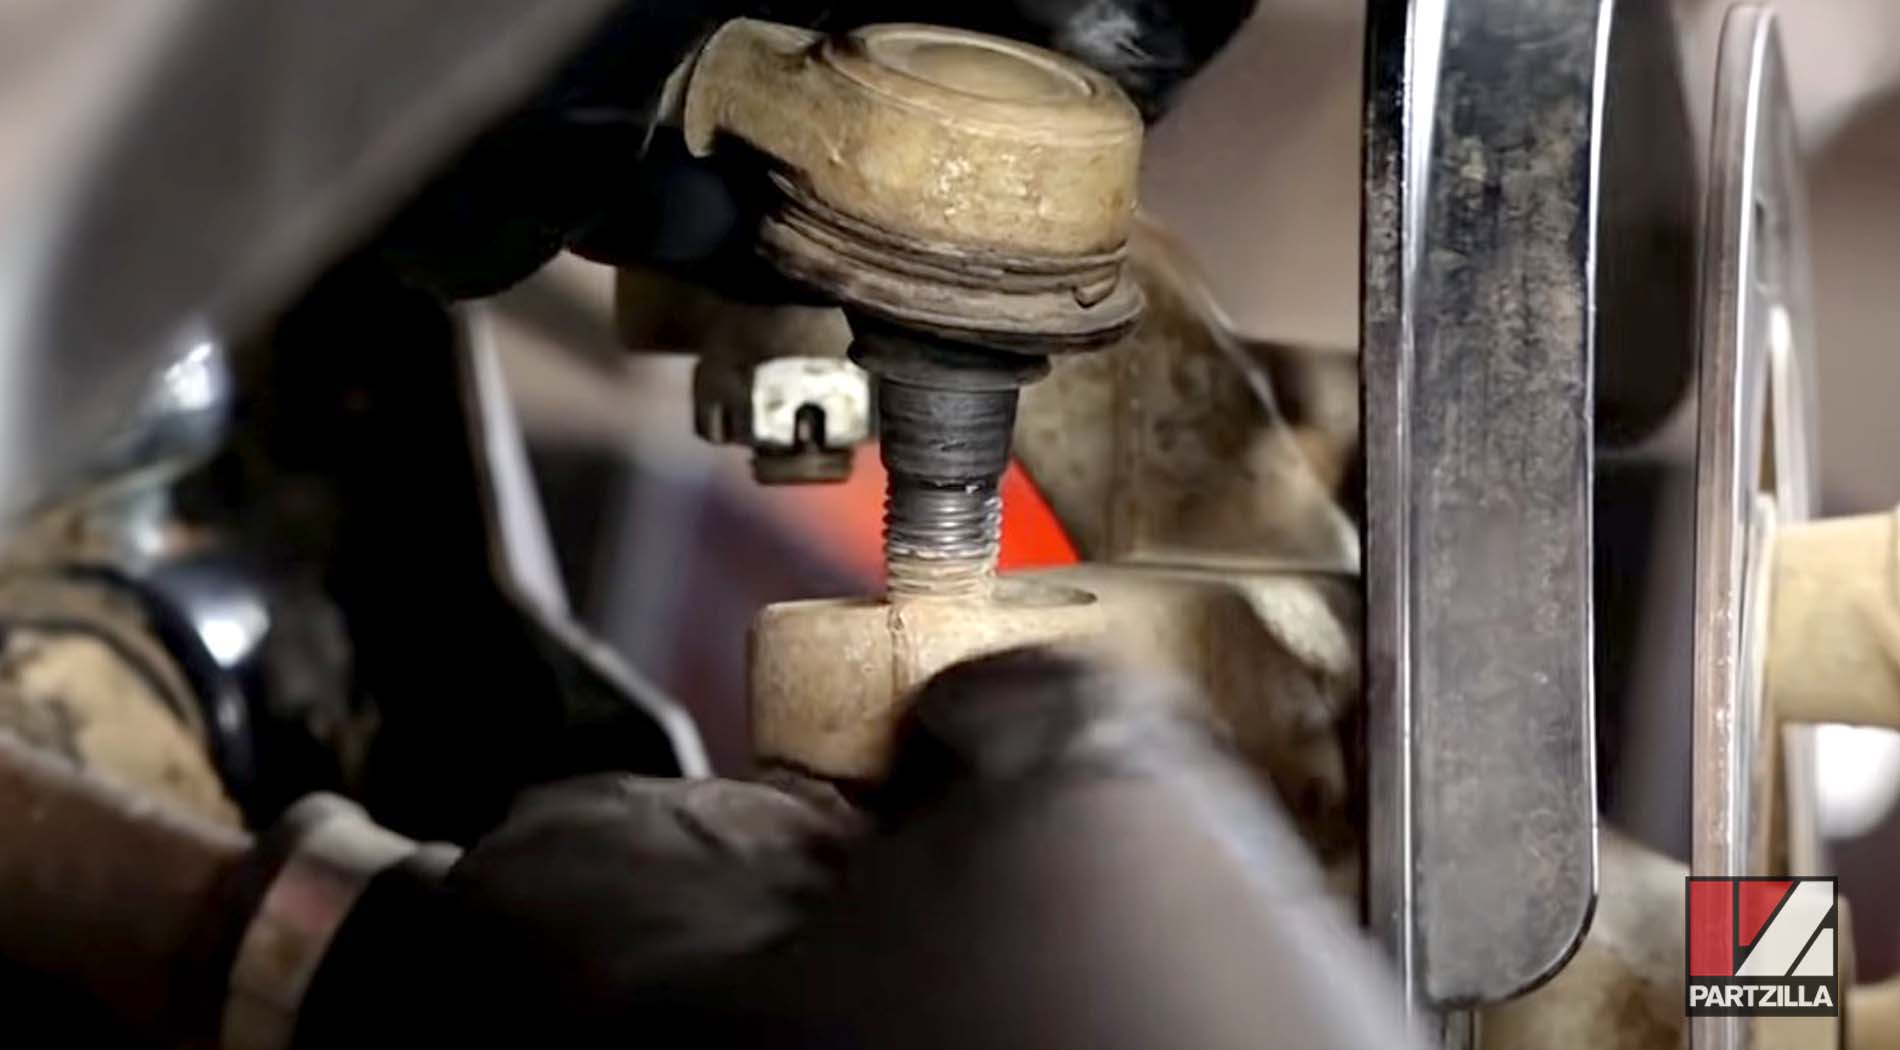
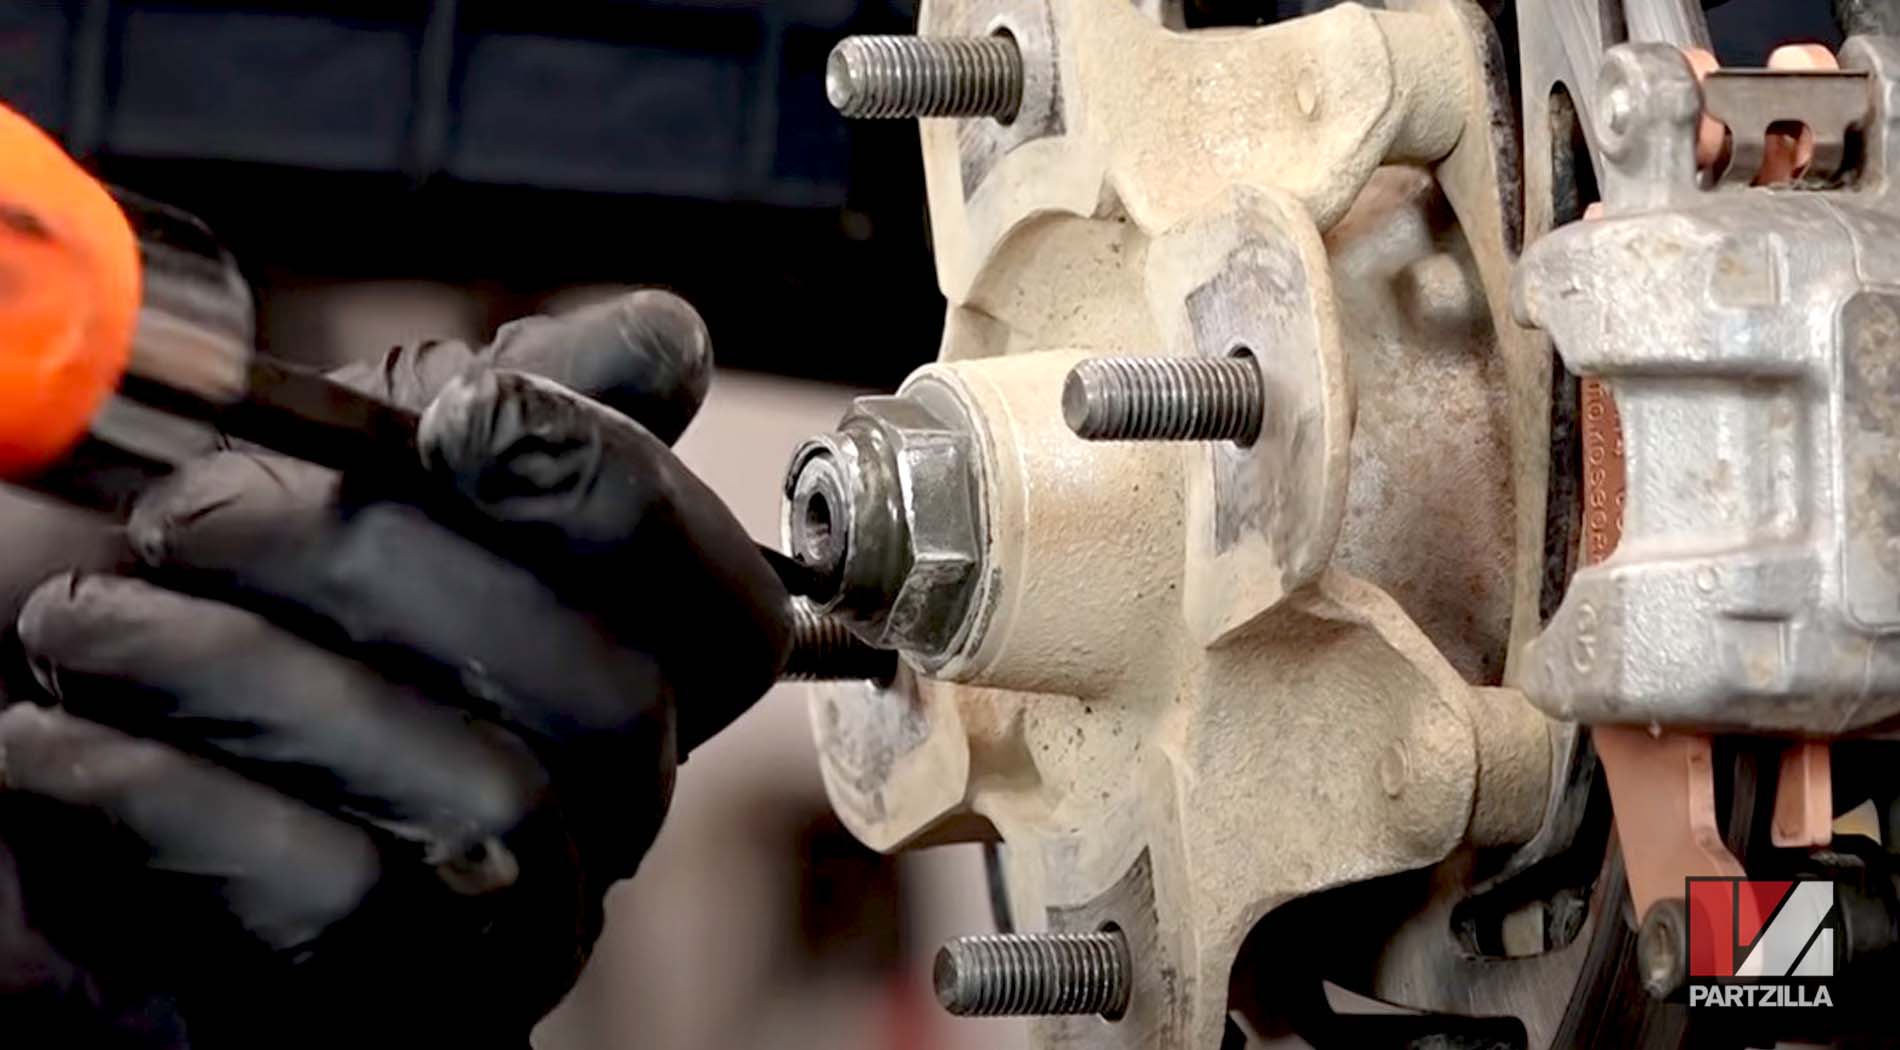
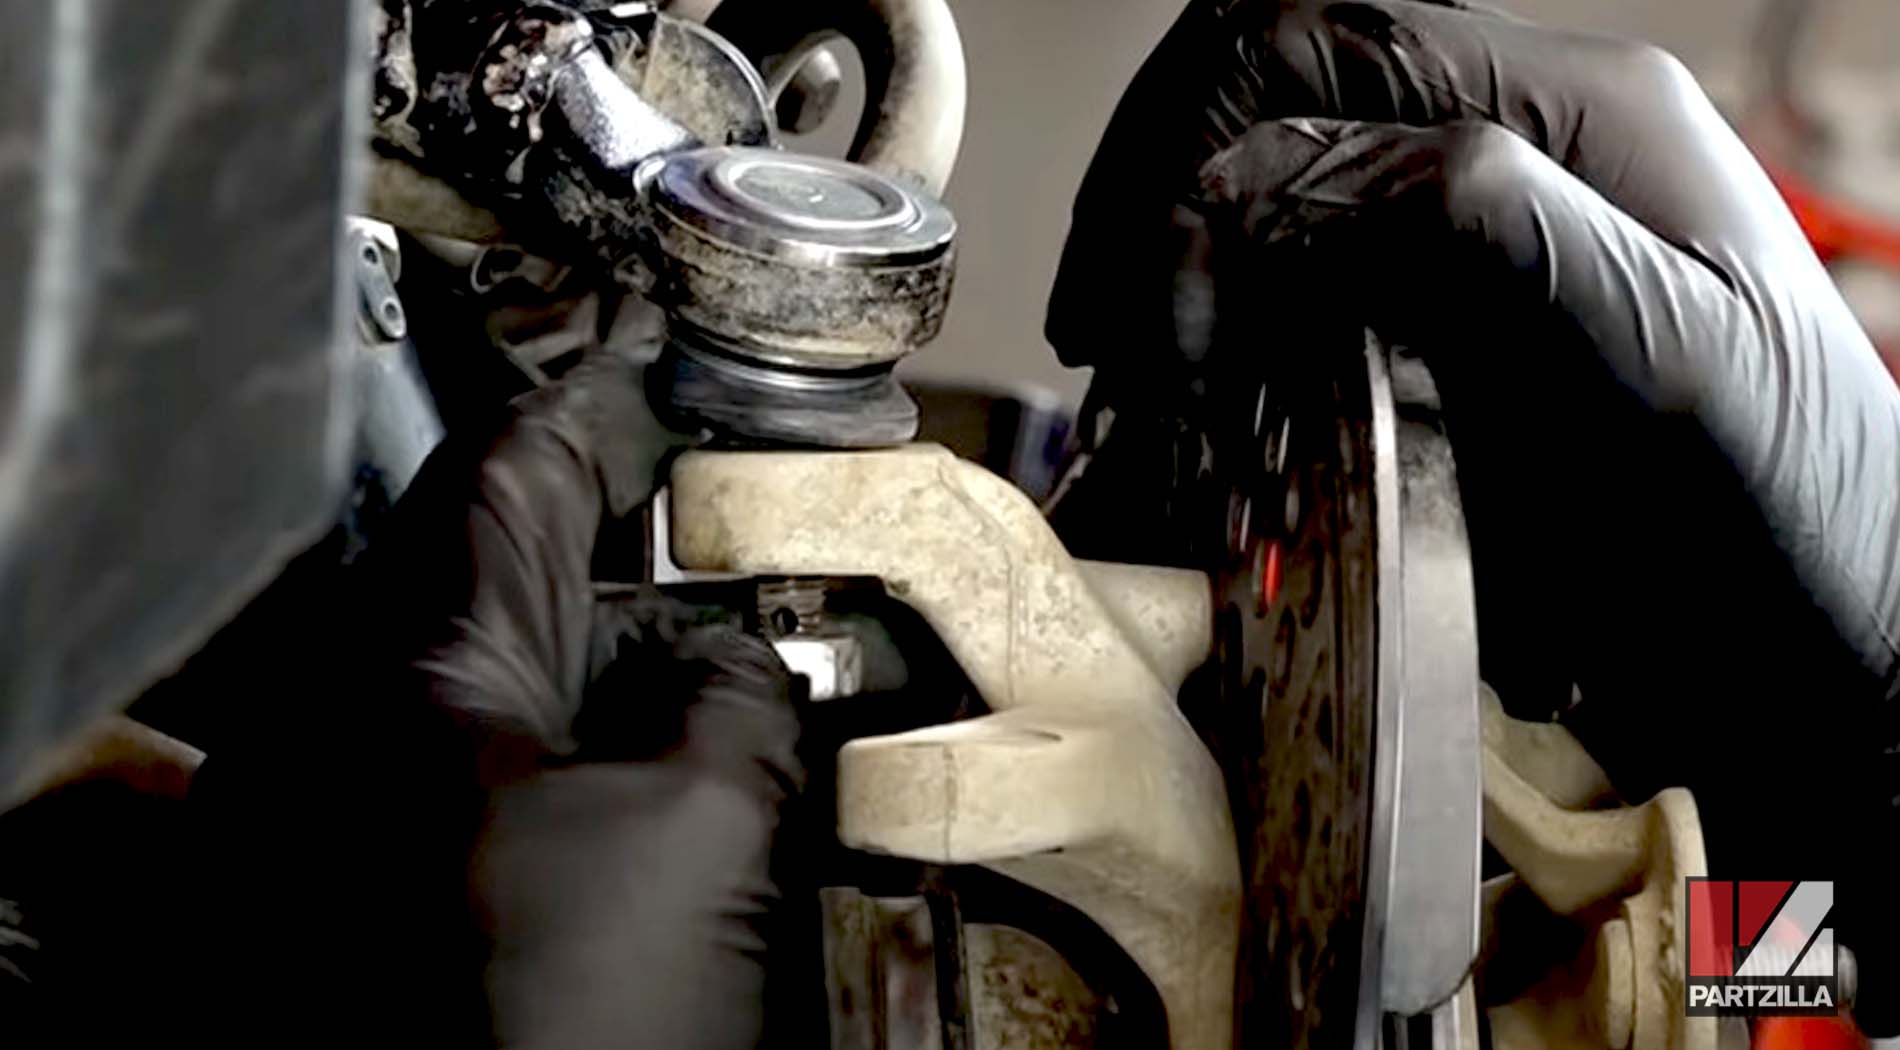
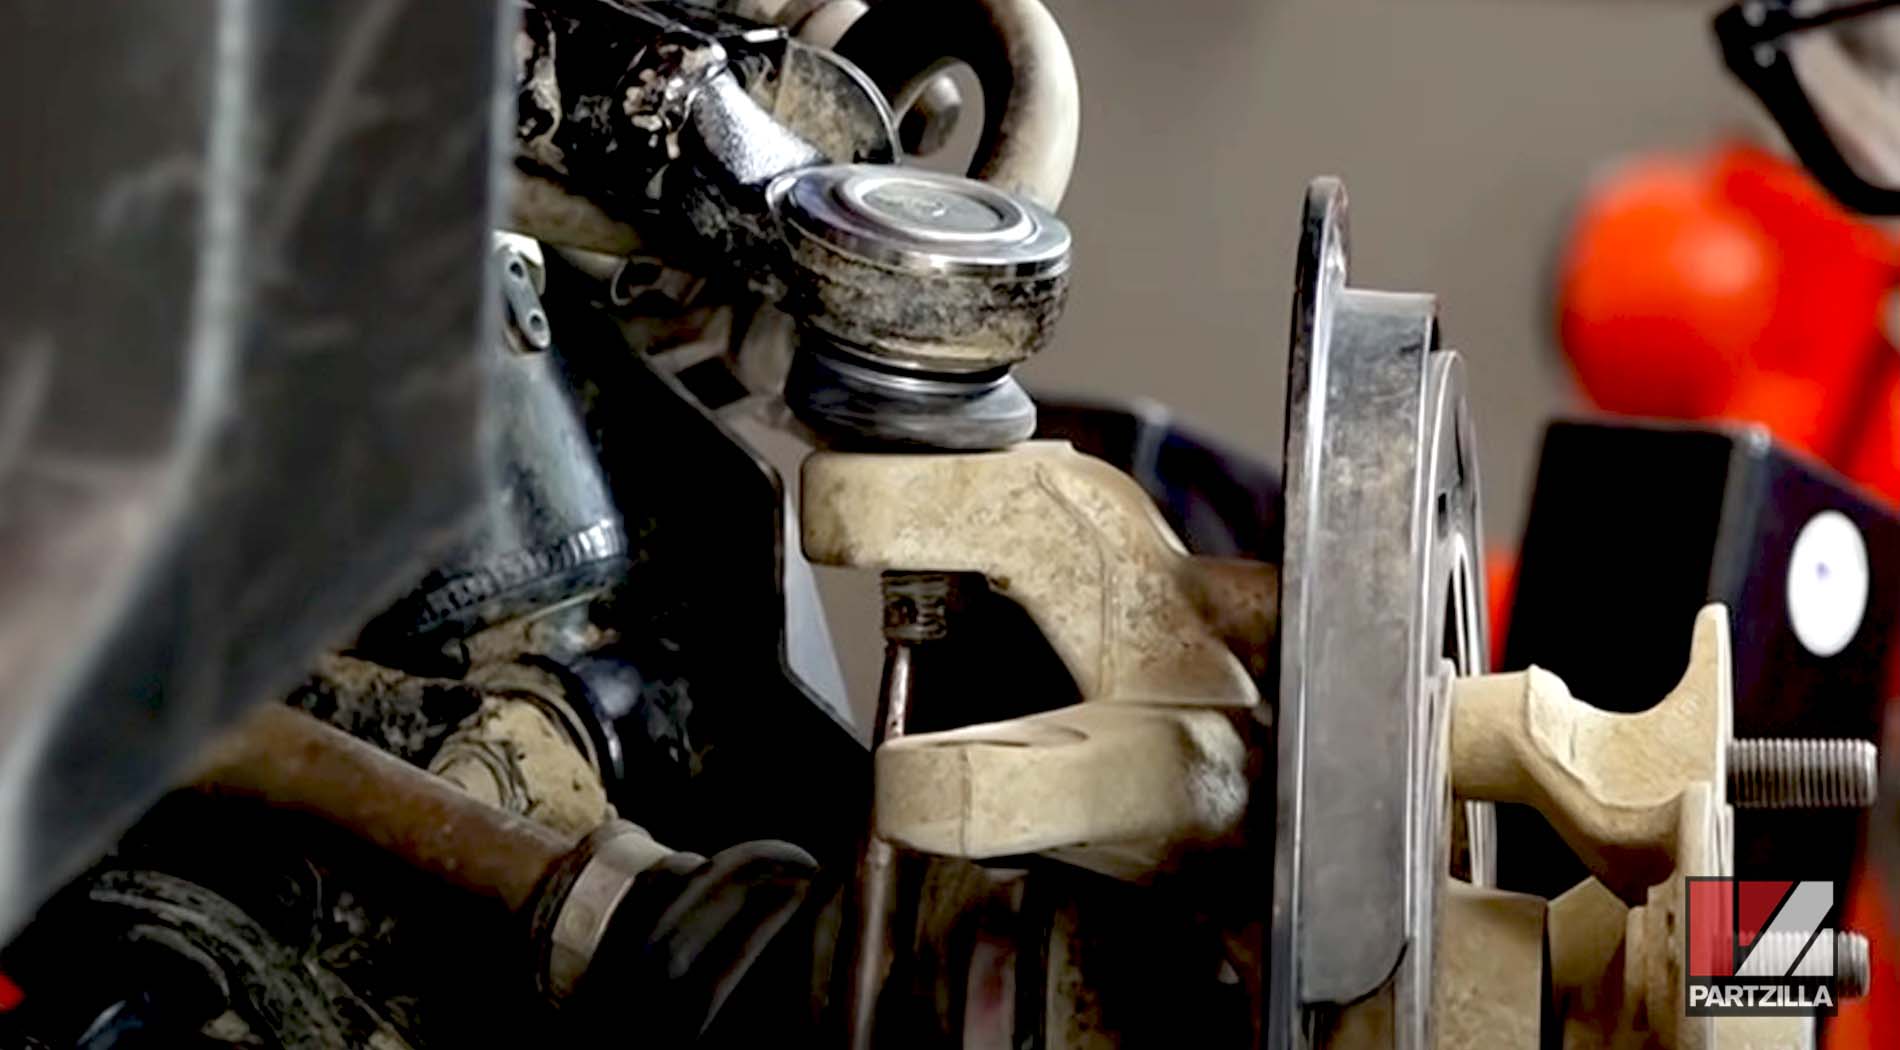
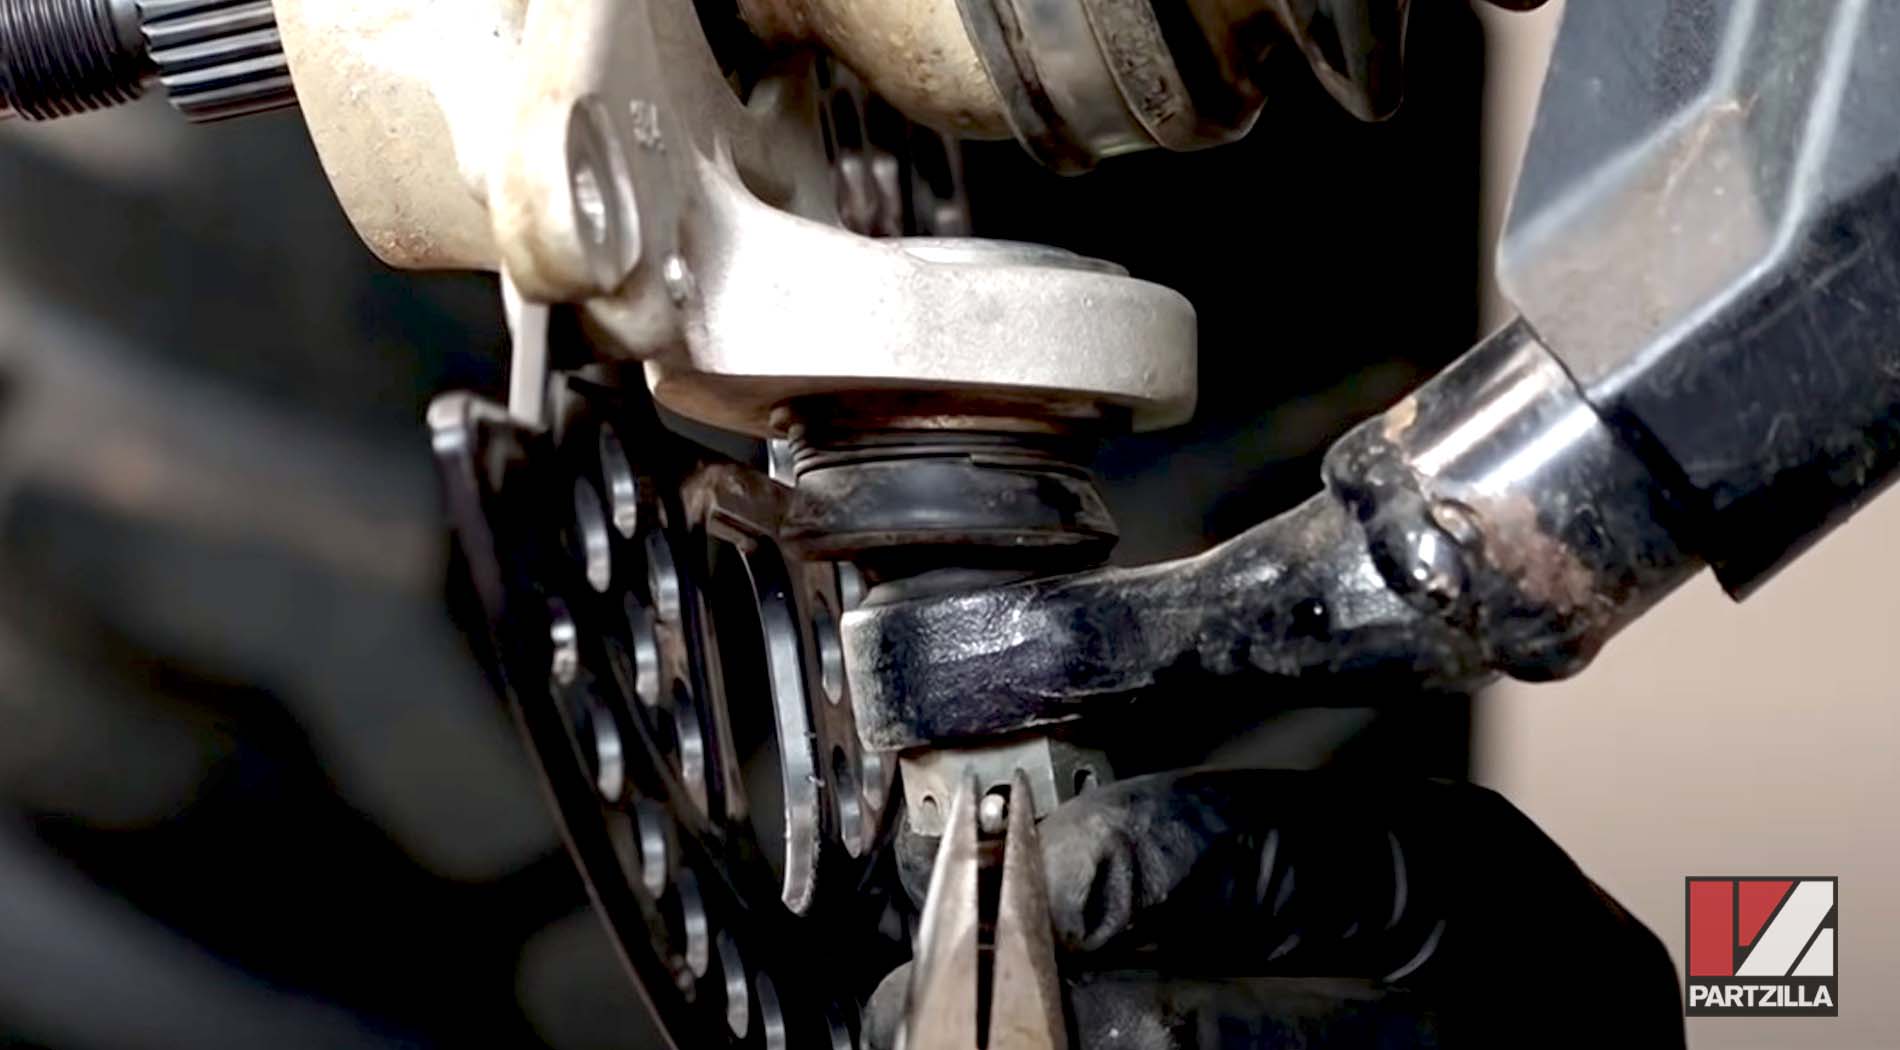
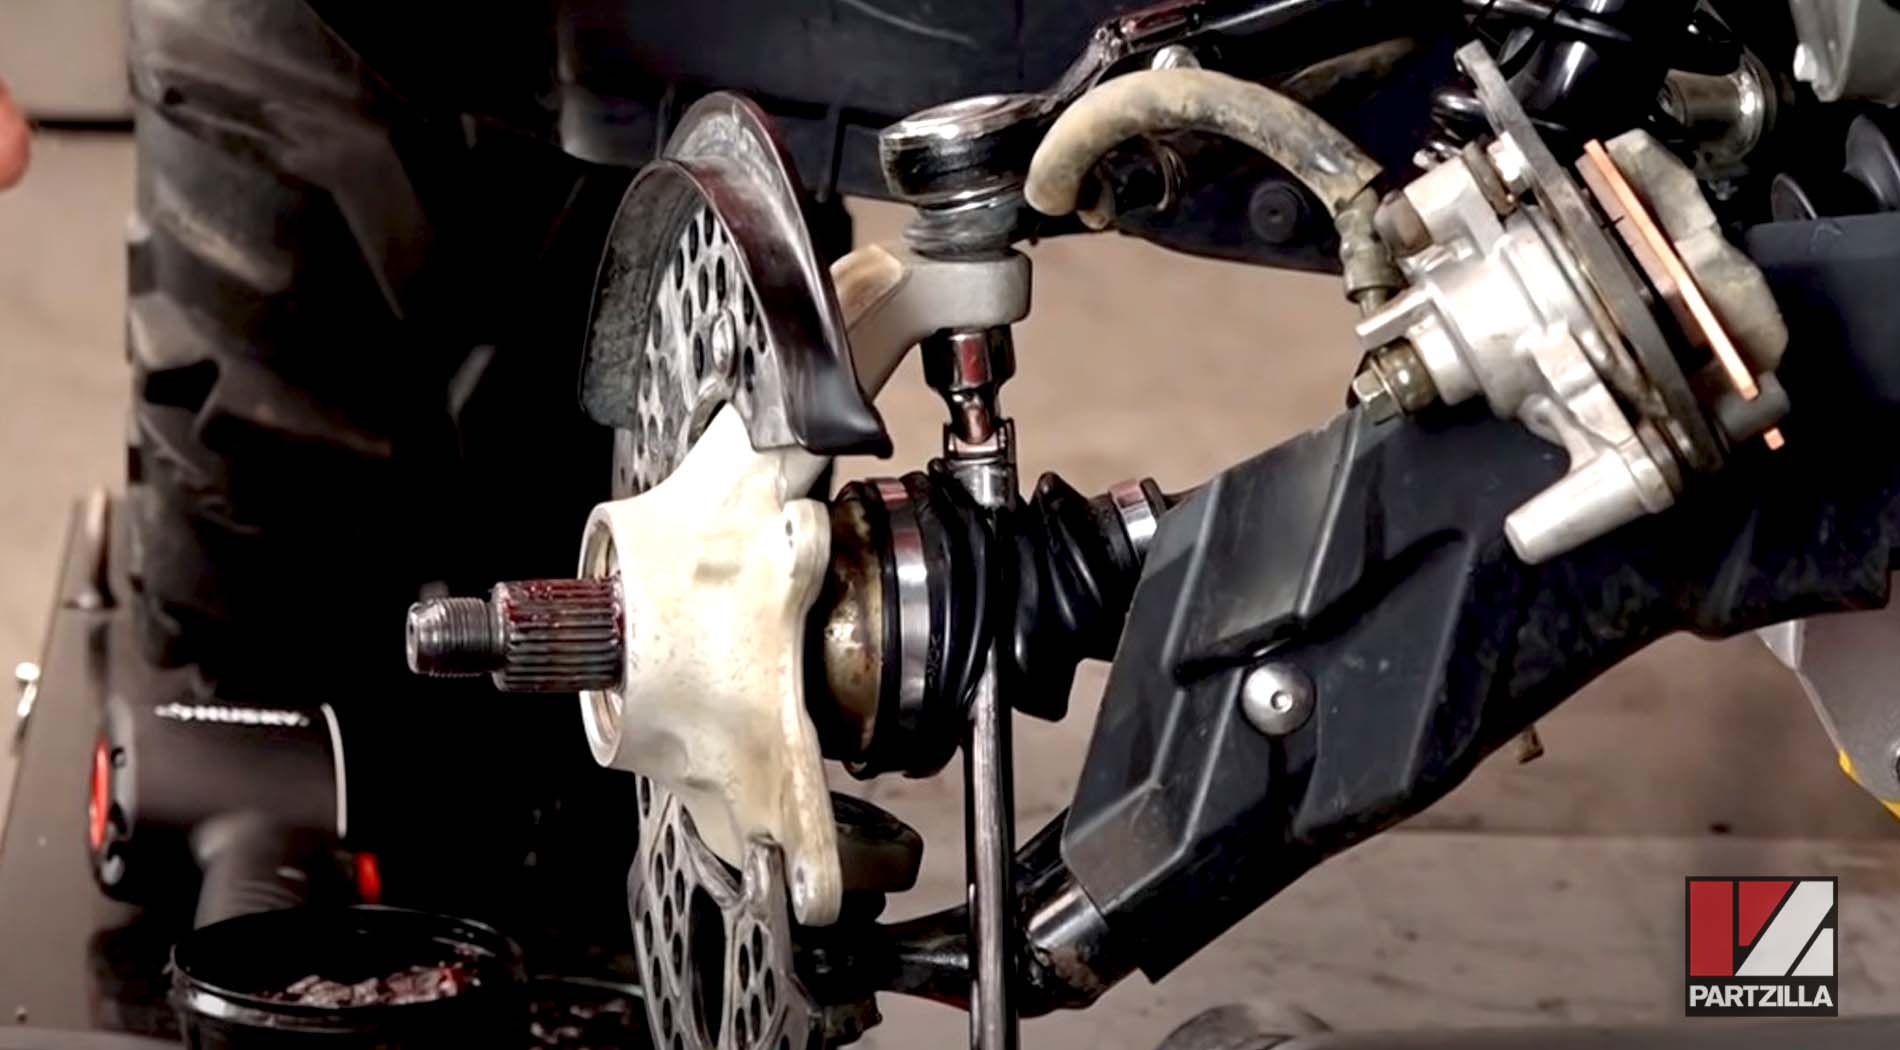
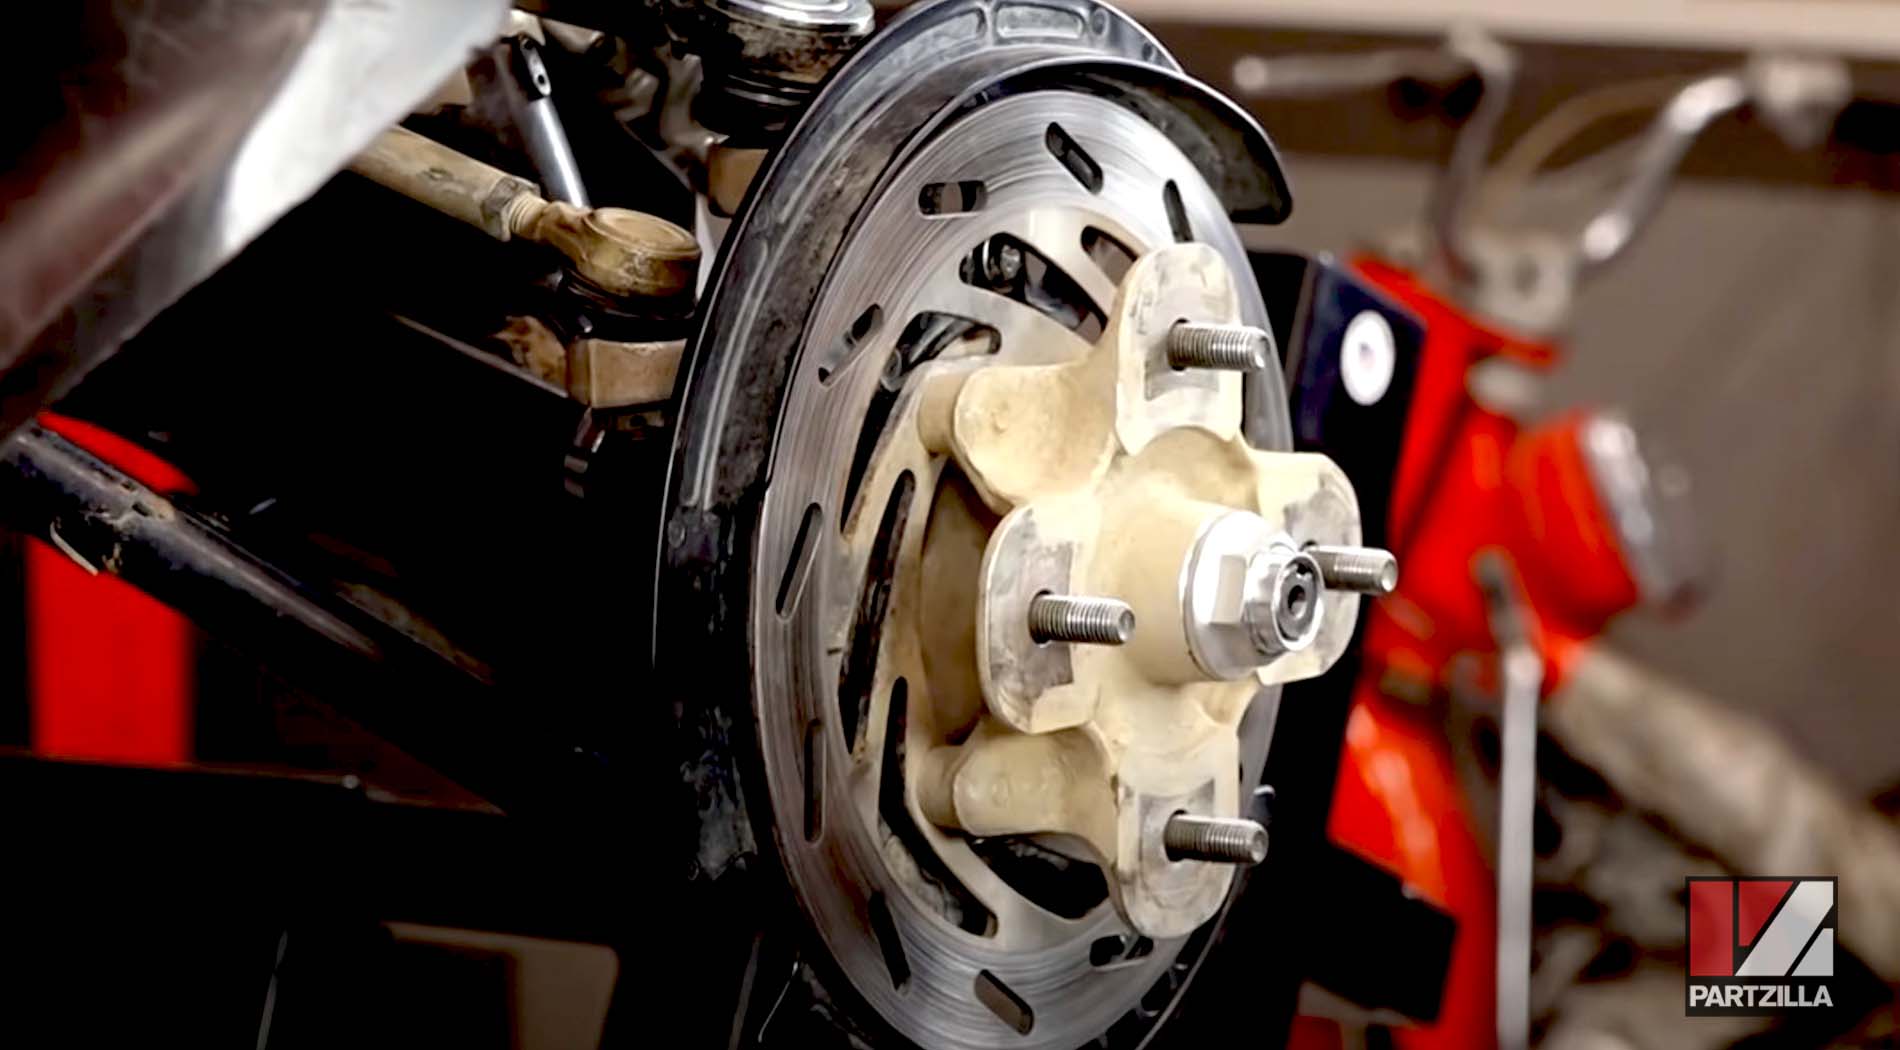
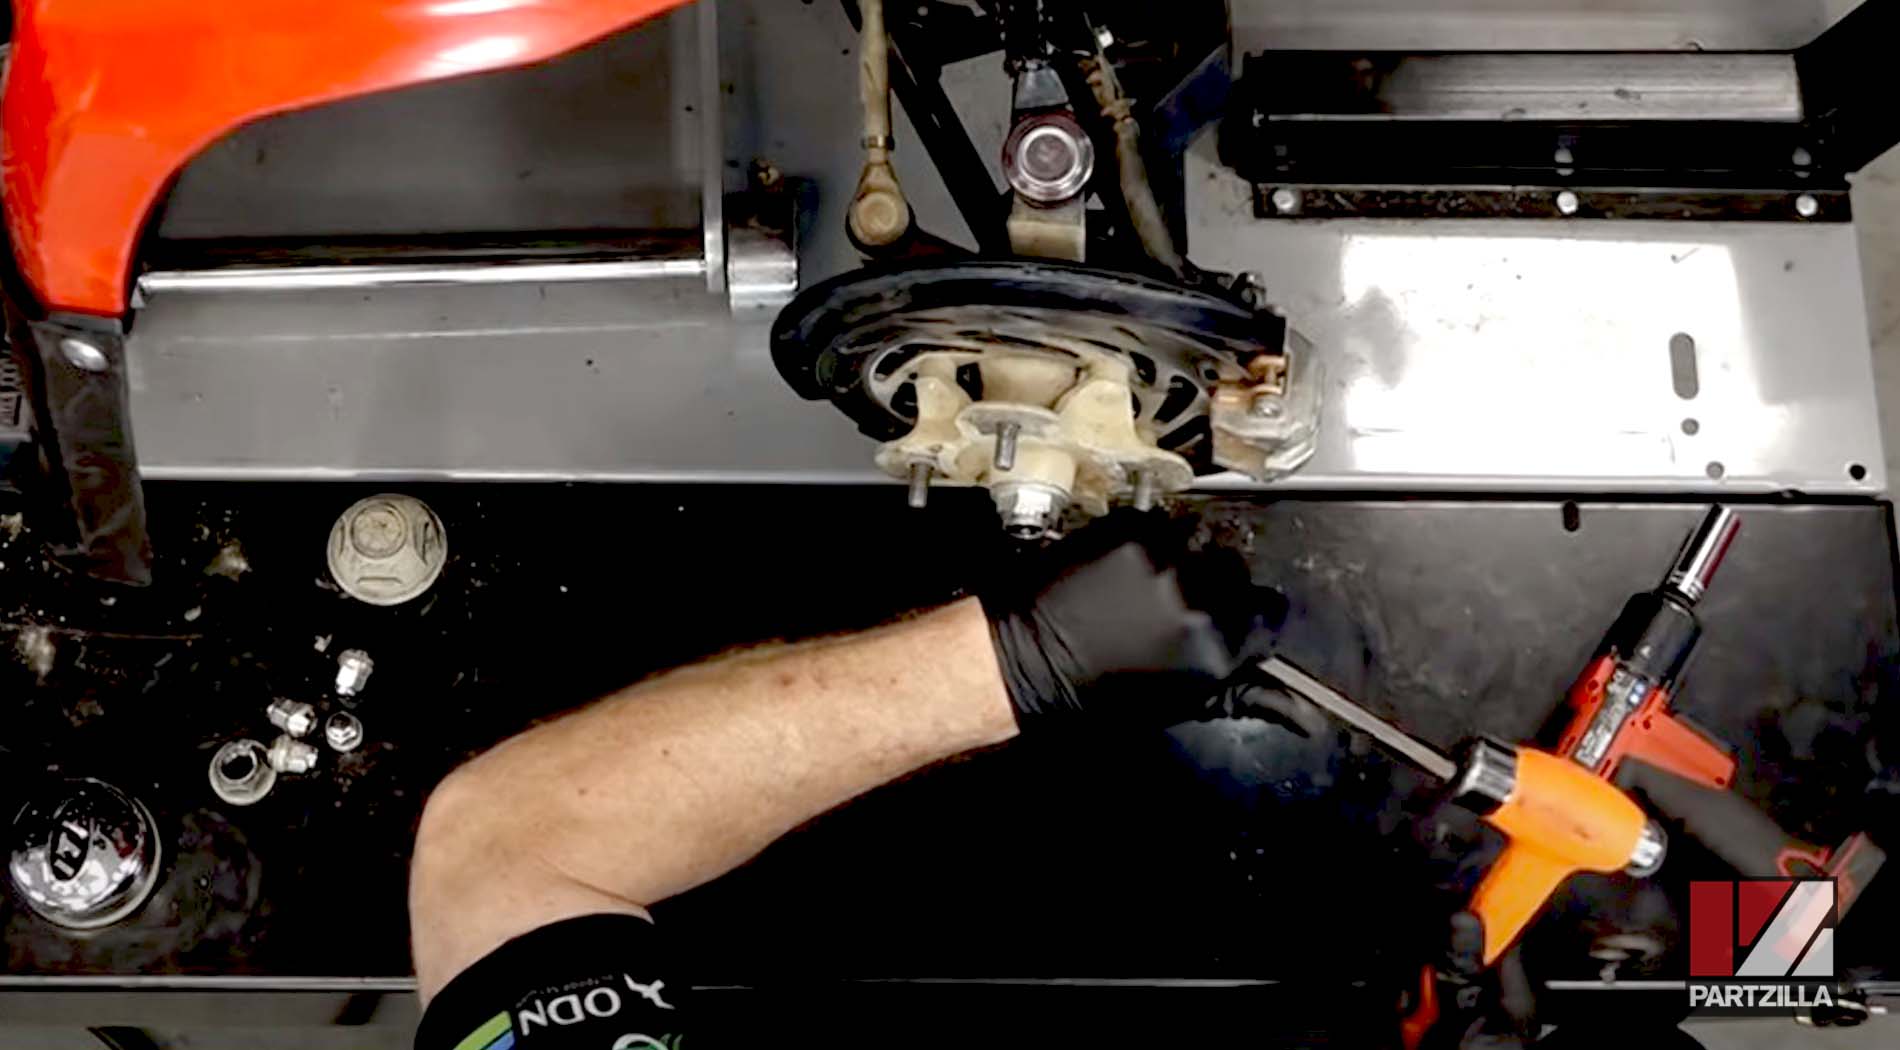
Step 5. Remove the cotter pin from the lower ball joint nut, then remove the nut. Tap the lower arm ball joint out of the steering knuckle using a dead blow hammer and a punch tool. Also, remove the brake rotor and the wheel hub.
NOTE: If the lower ball joint is stubborn, use the method in the PRO TIP from Step 4.
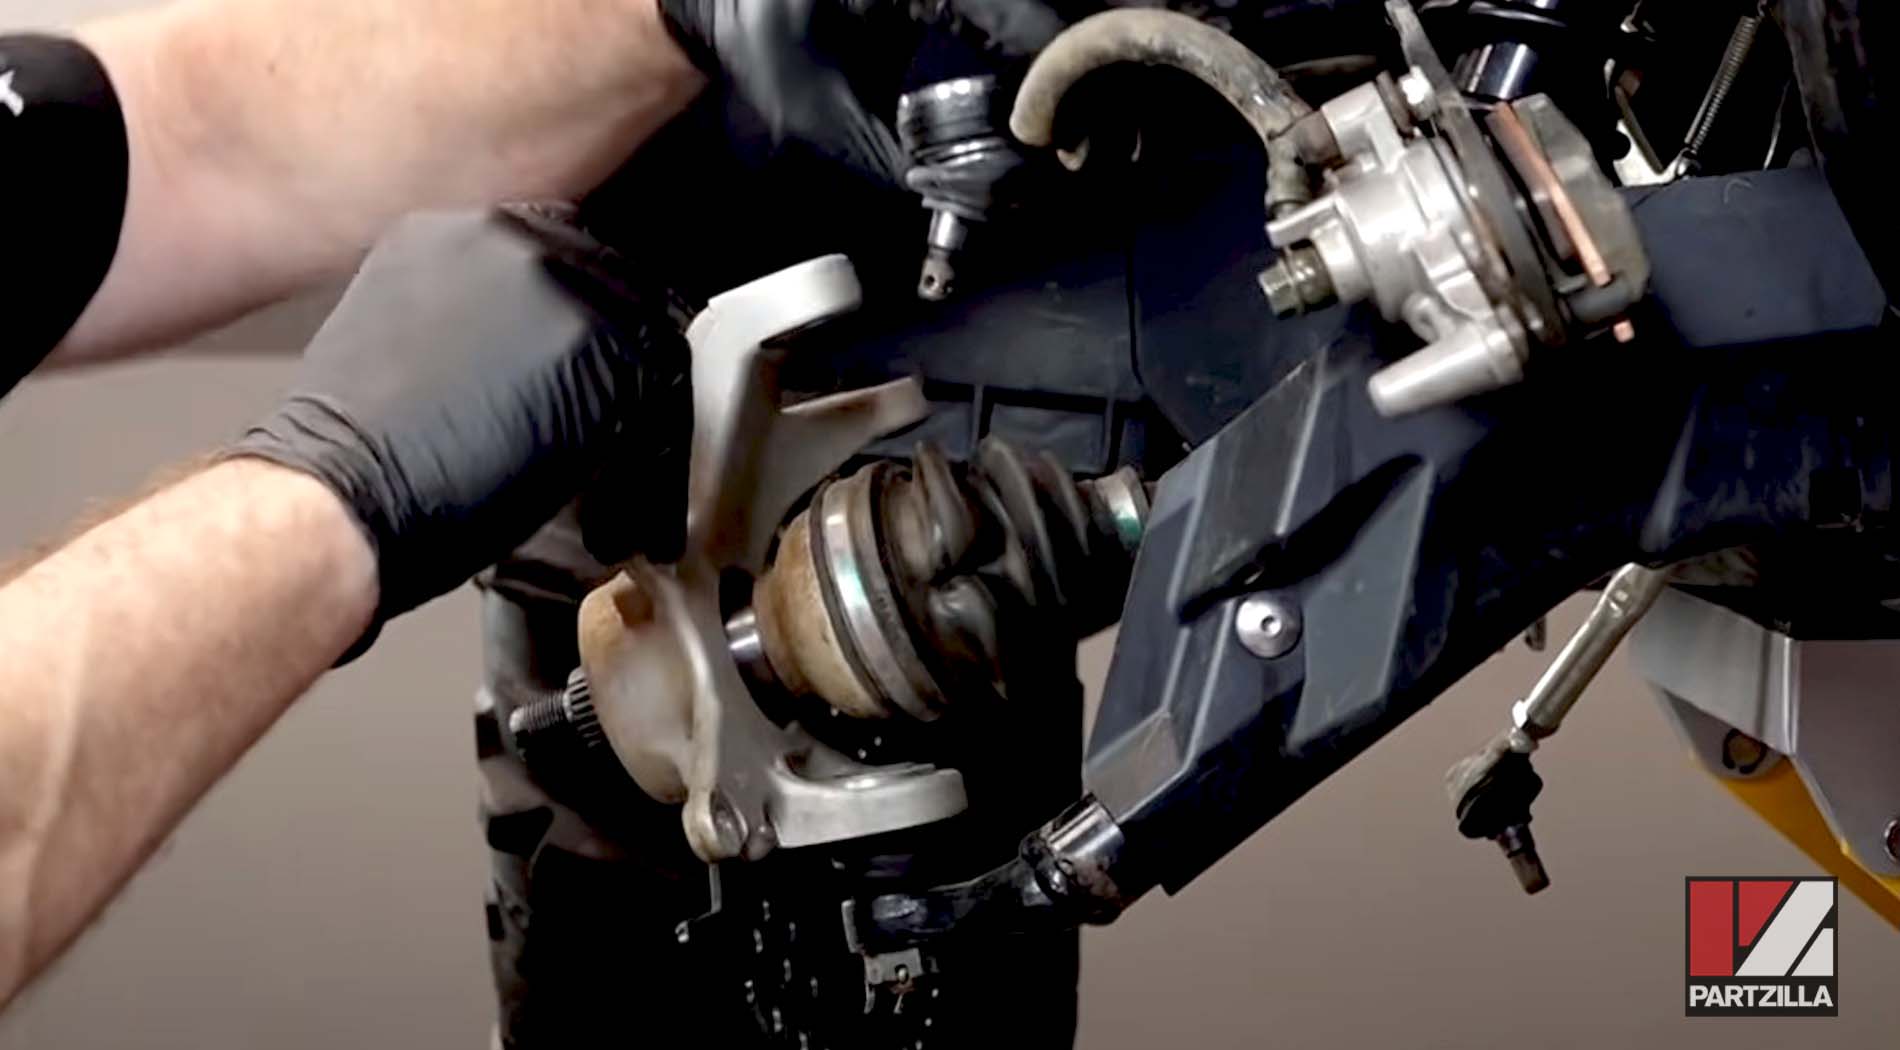
Step 6. Remove the steering knuckle and set it aside.
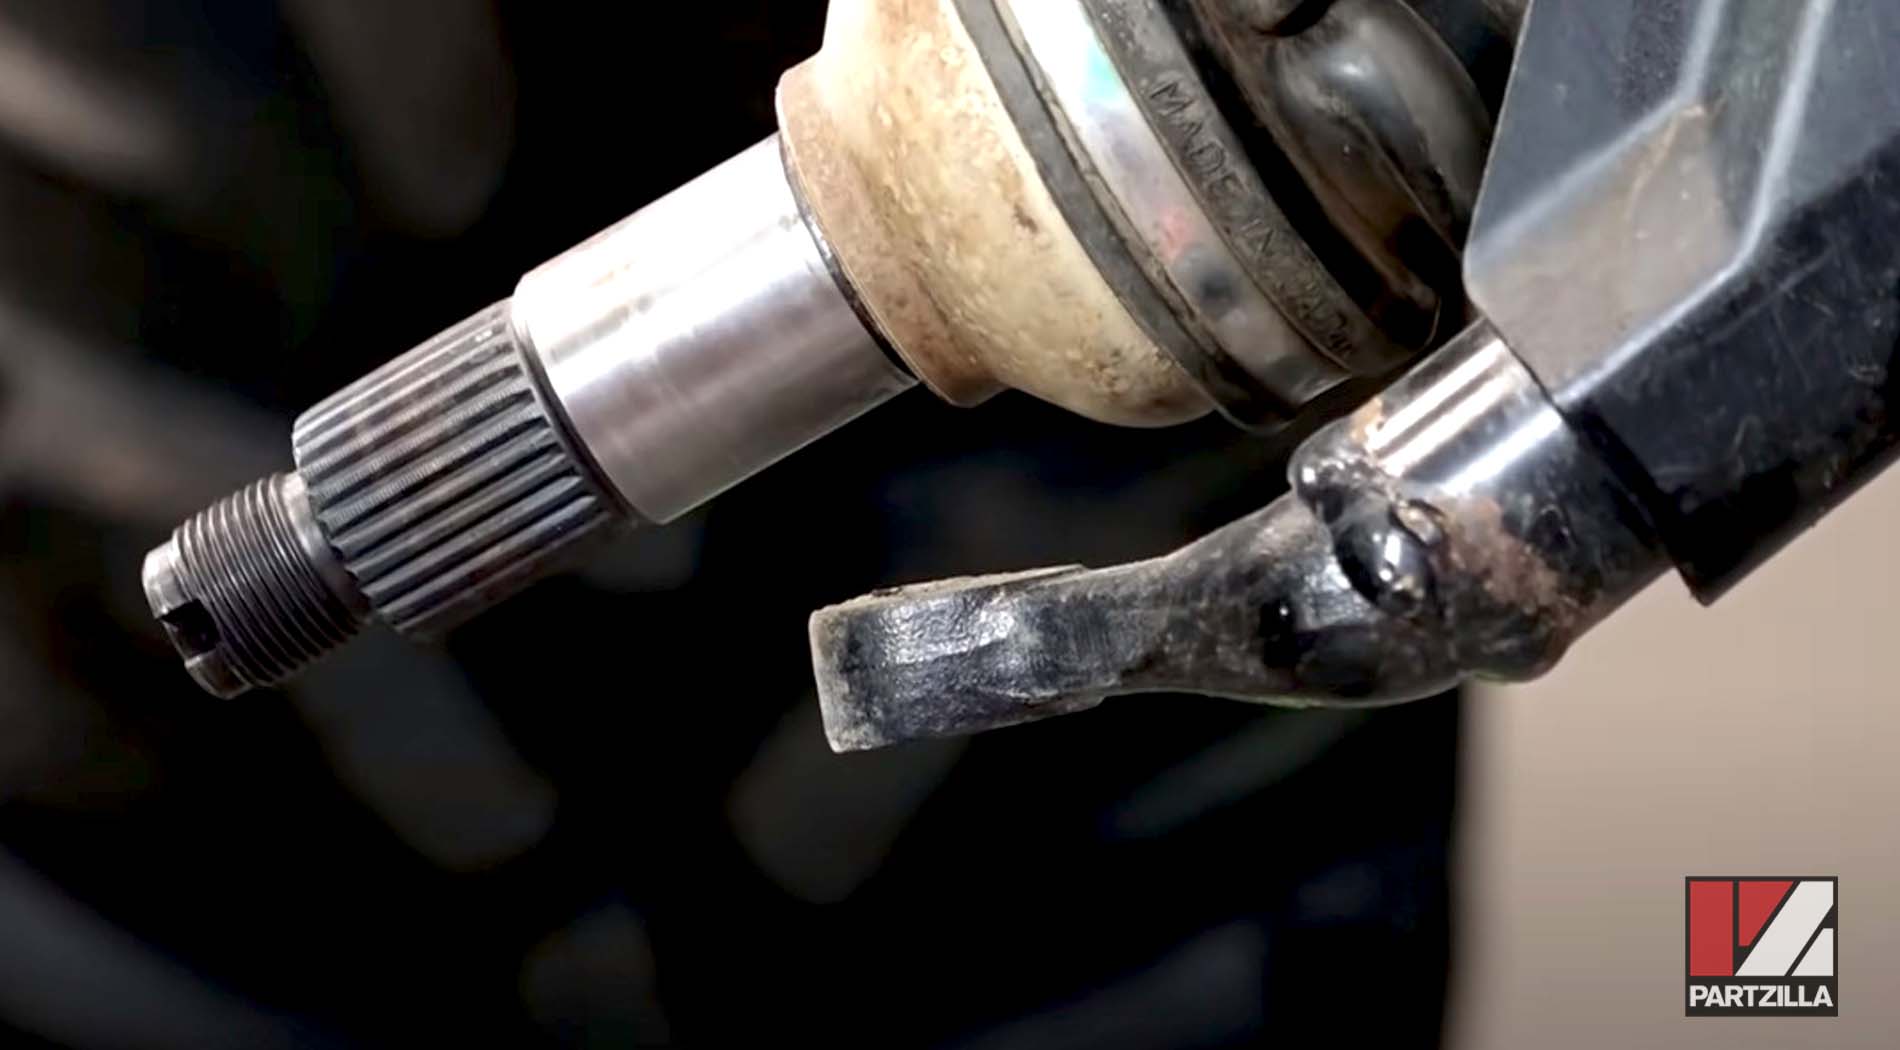
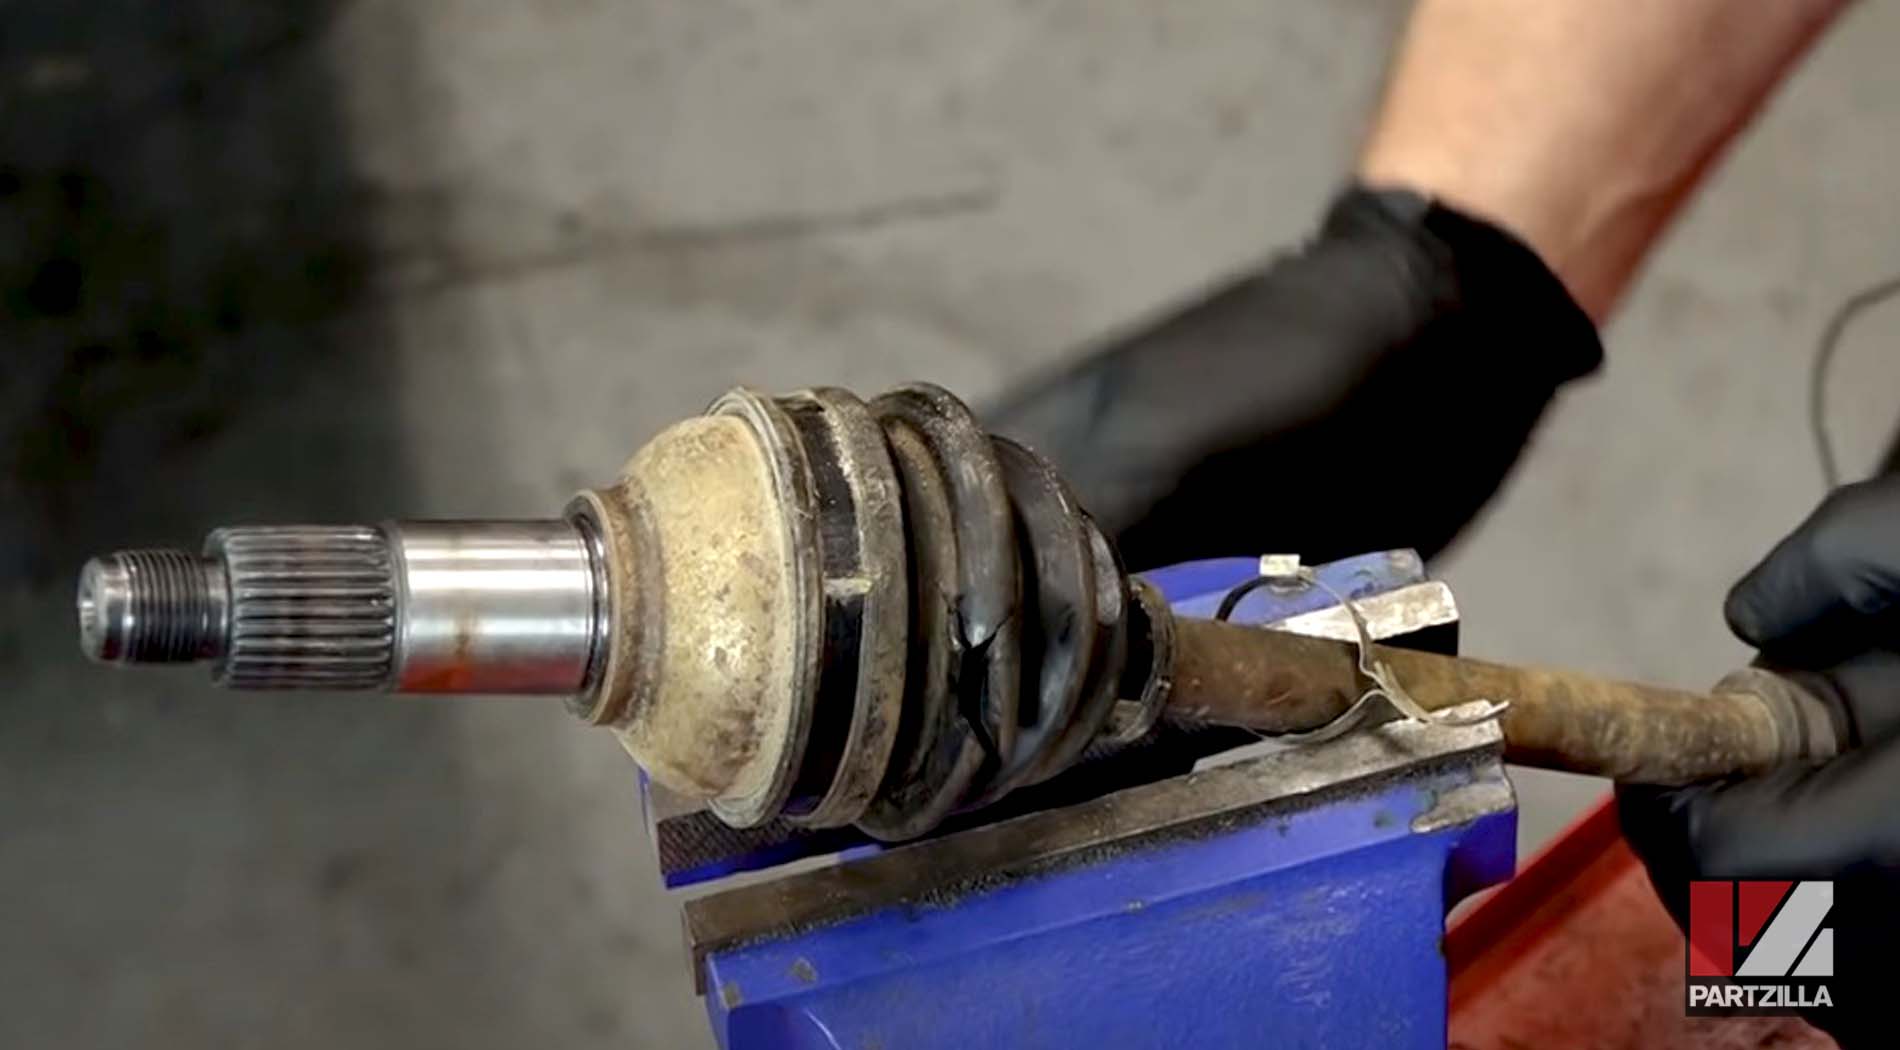
Step 7. Remove the half shaft by swiftly pulling it outward.
PRO TIP: If you can’t jerk the half shaft out this way, use a pry bar to put pressure on one of the webs on the shaft, and then swiftly pull the half shaft out.
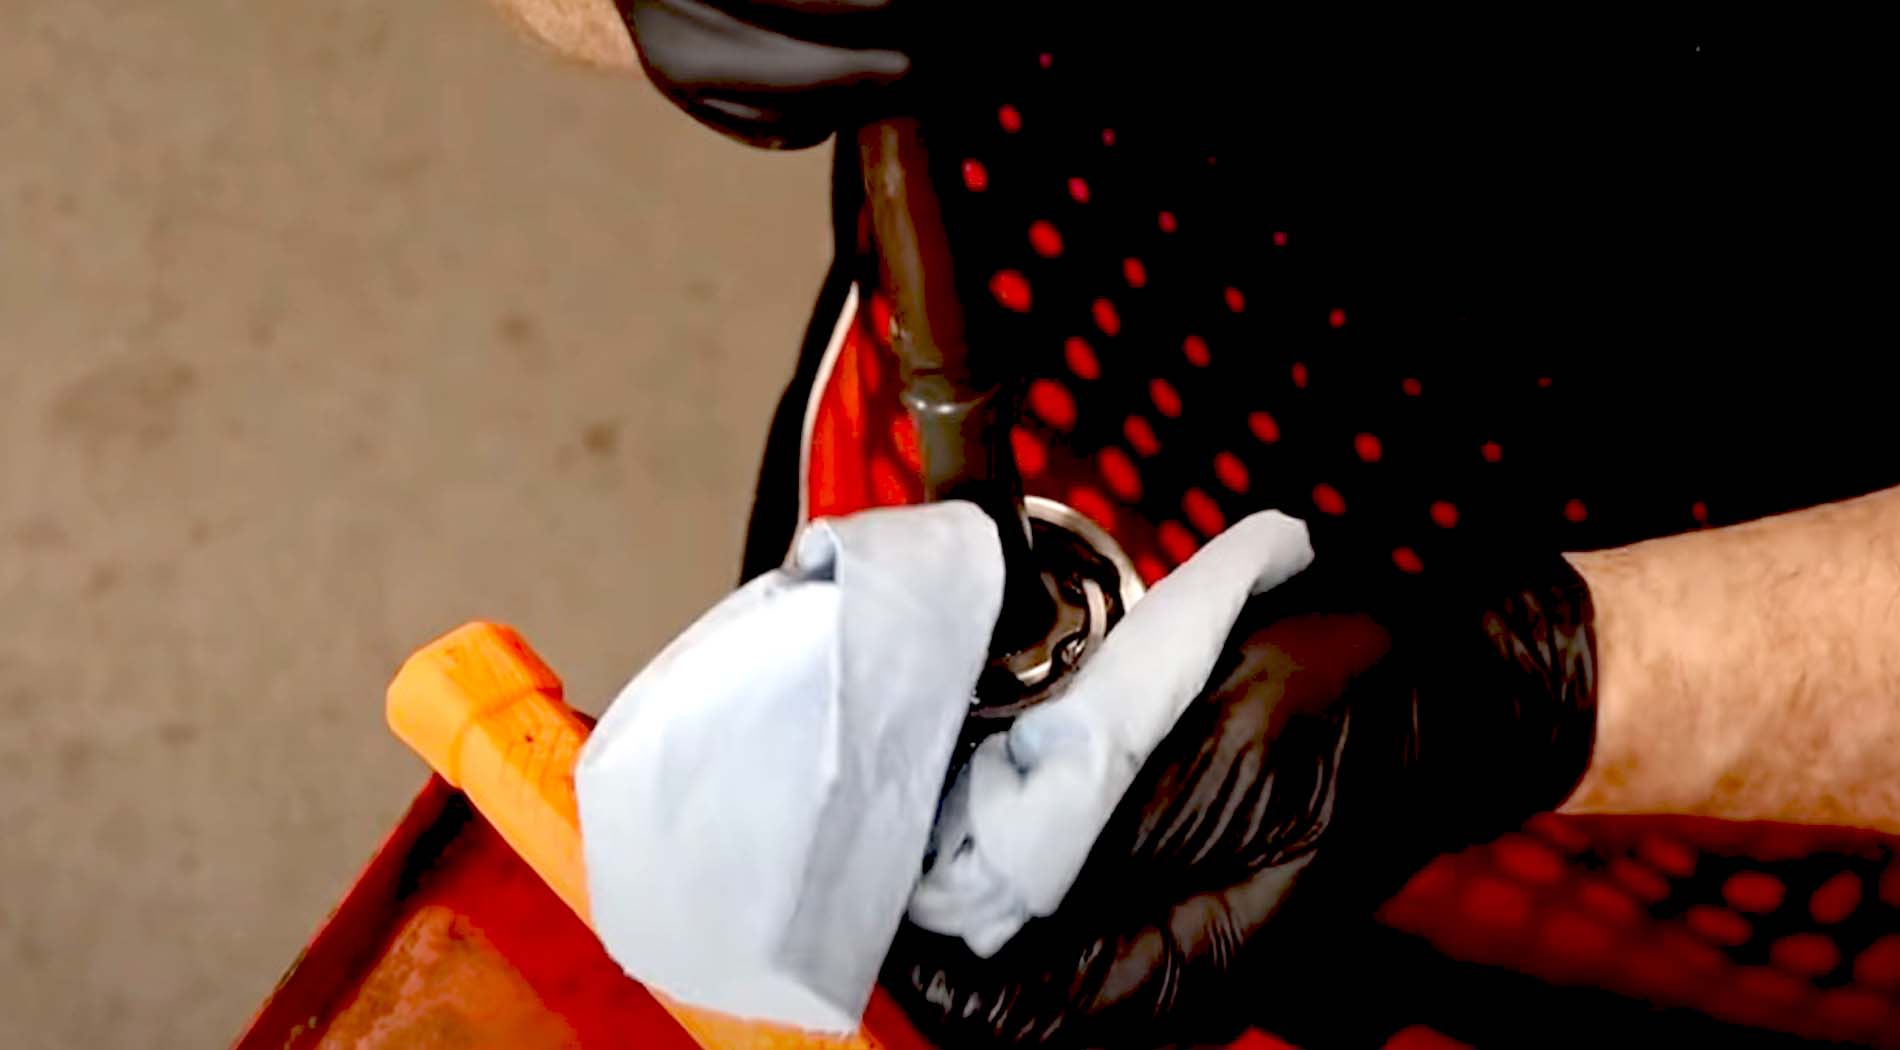
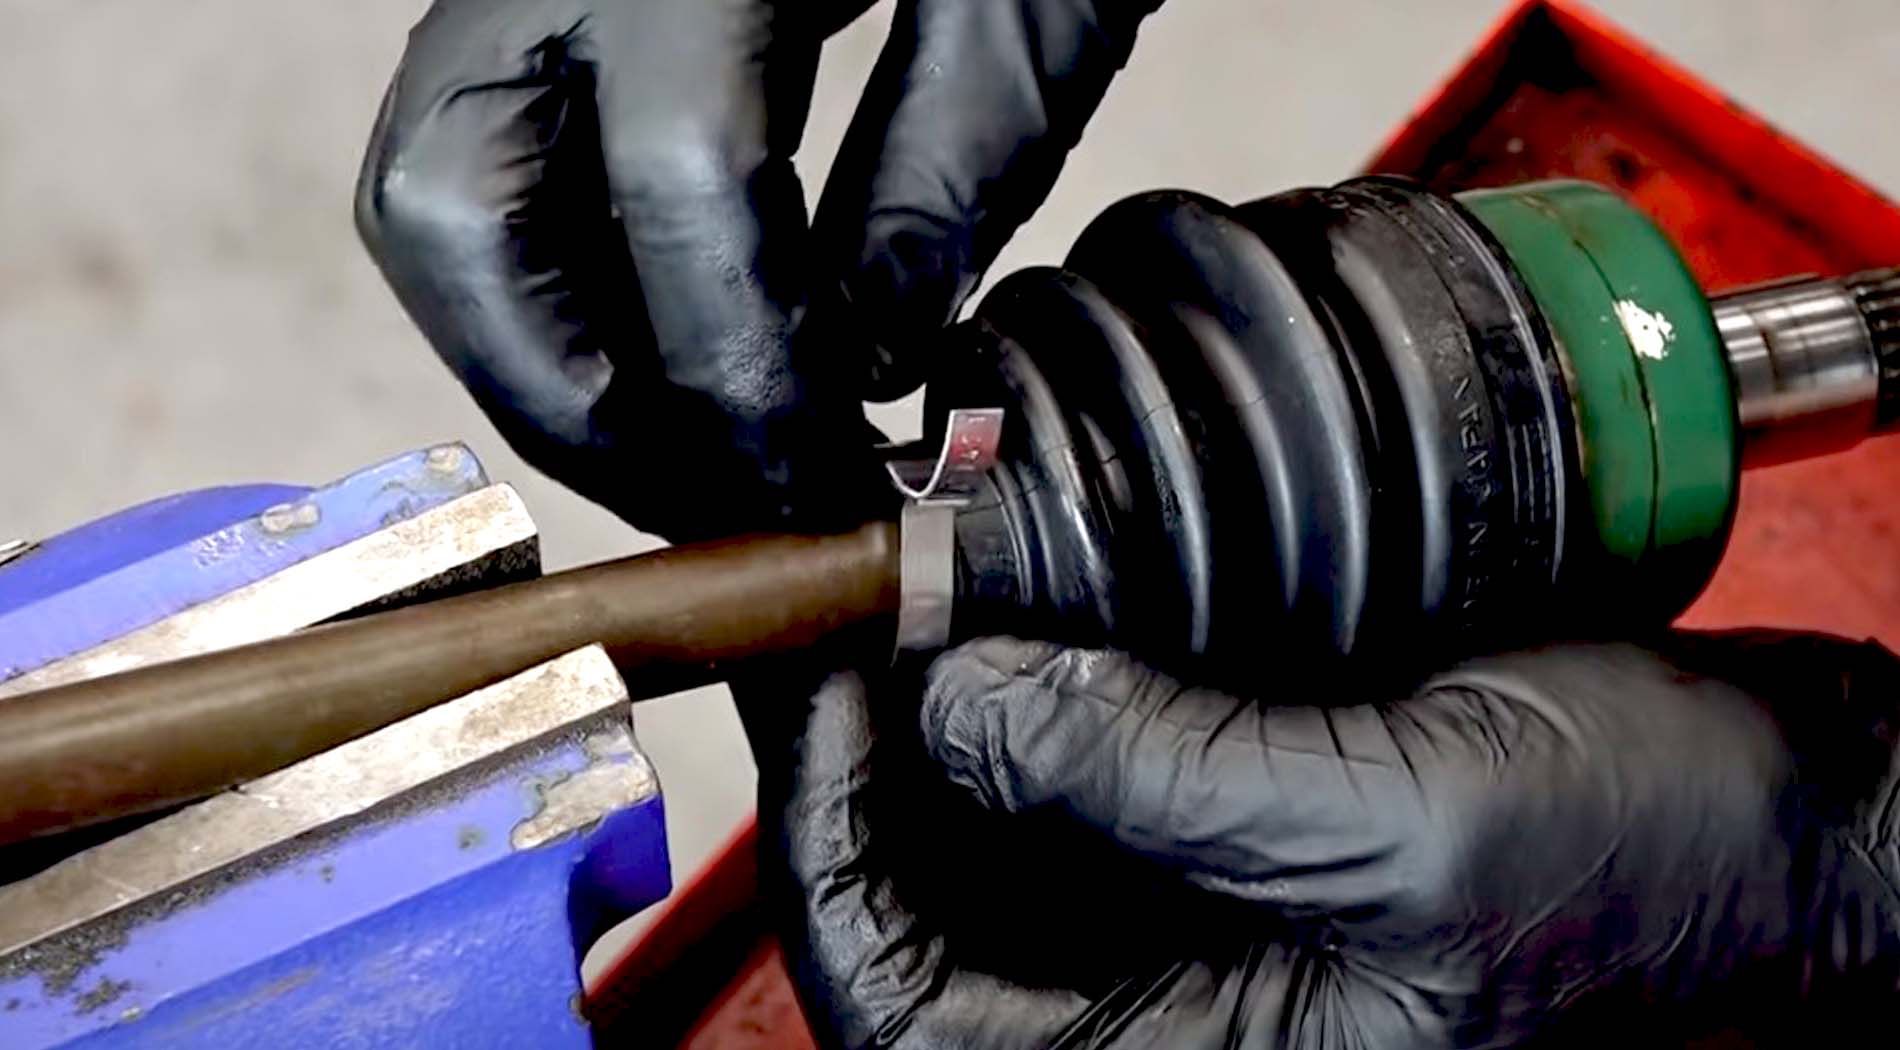
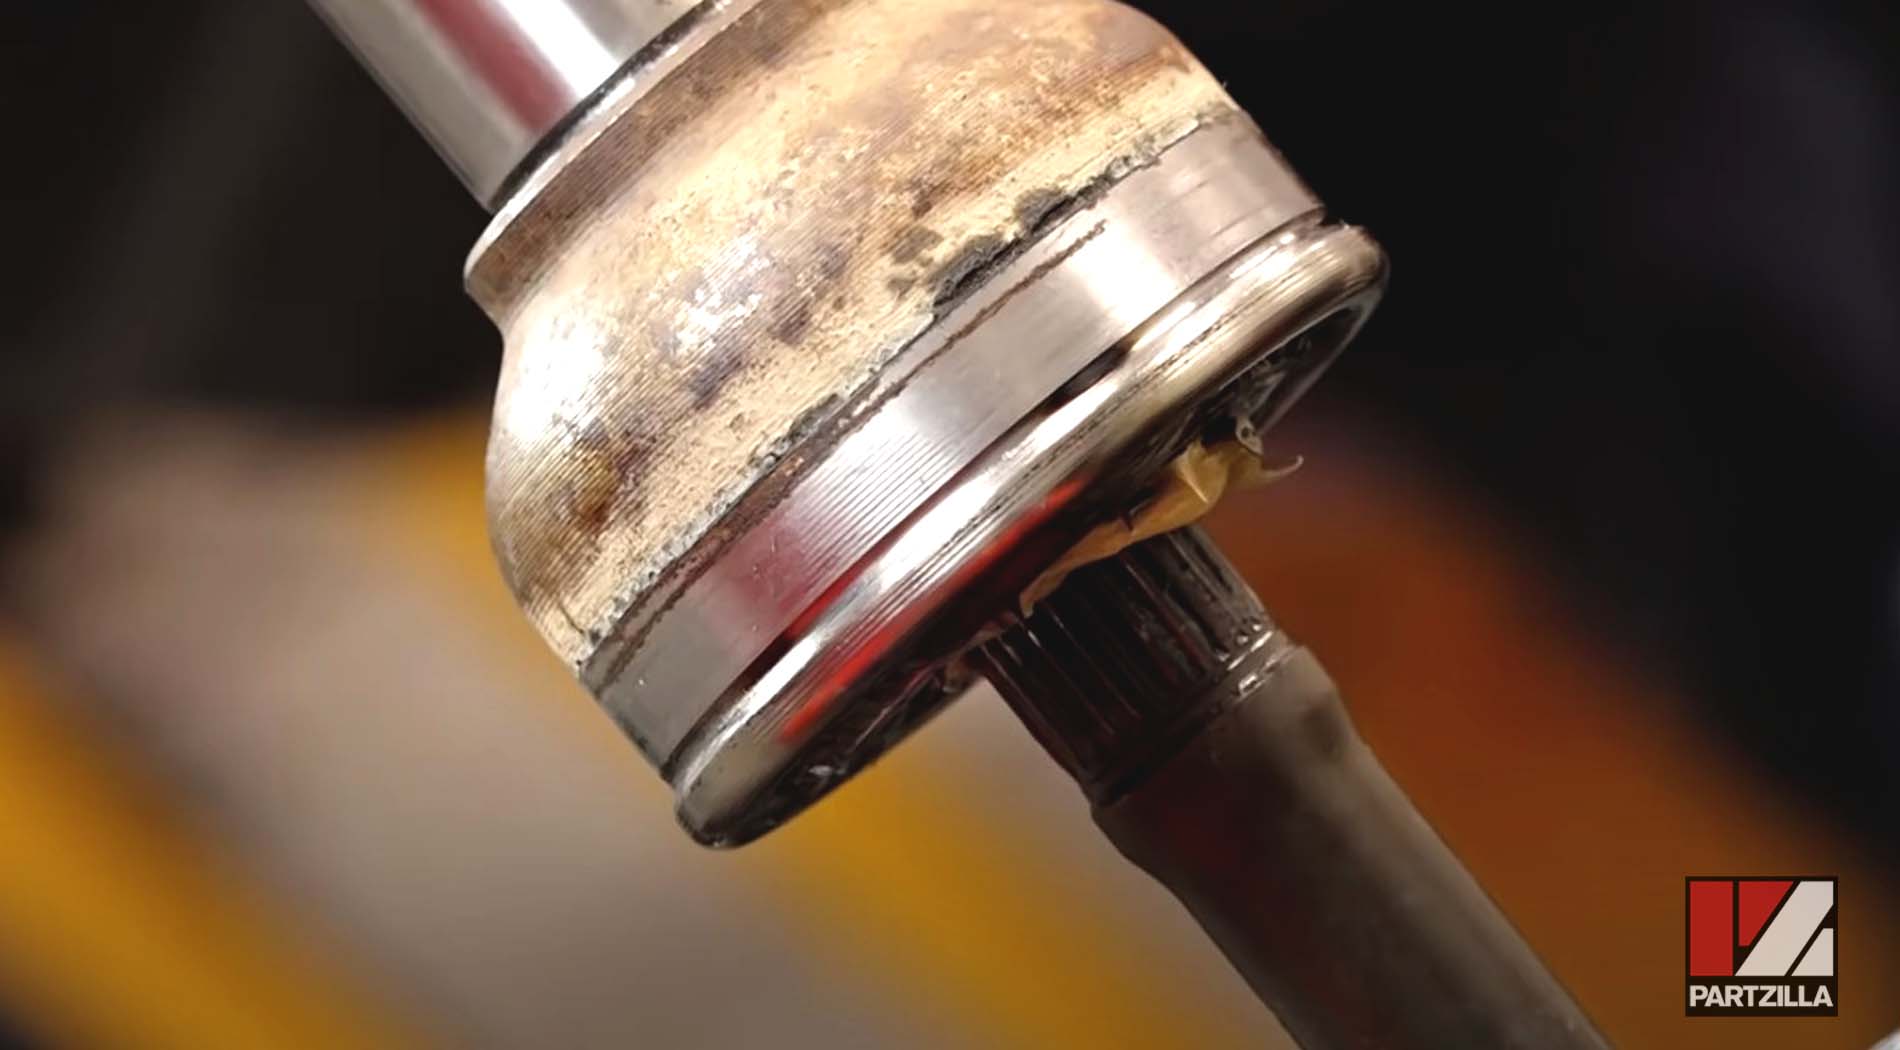
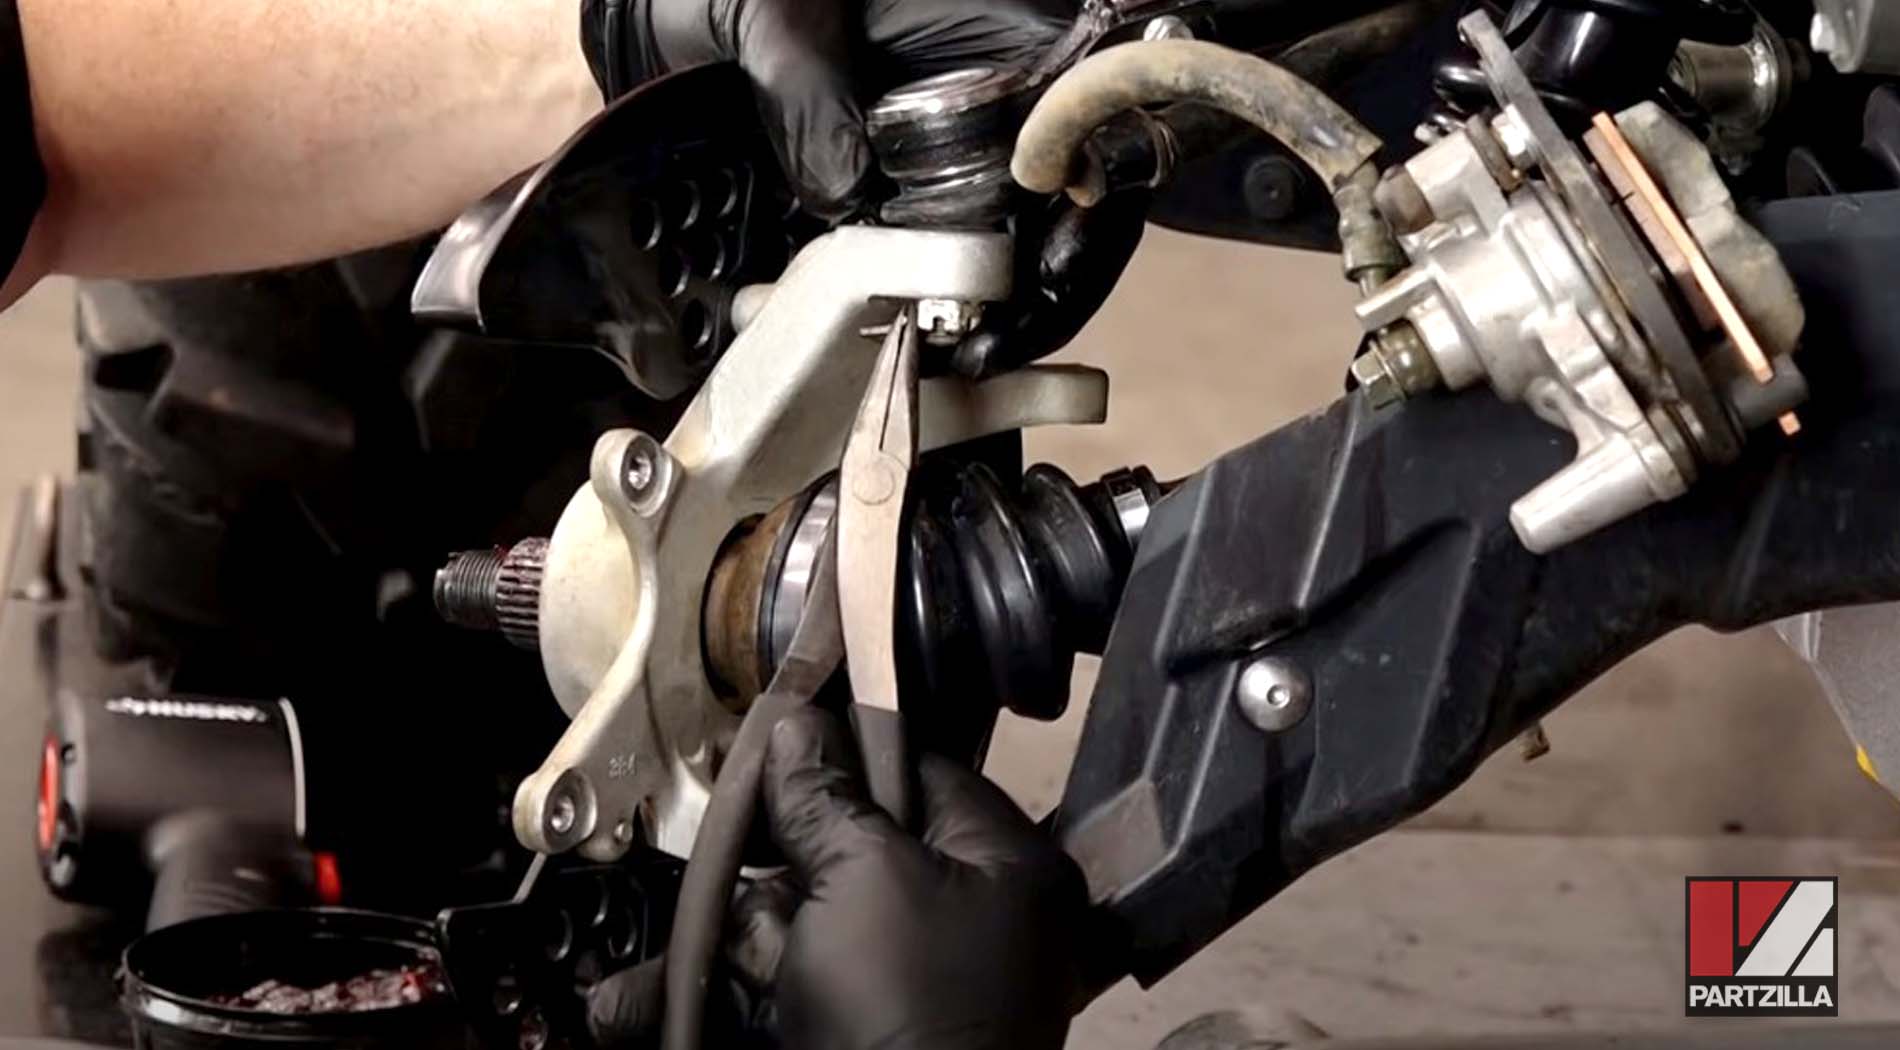
Step 8. Starting with the outer CV boot, bend back the tabs on the two metal clamps and remove the clamps from the CV boot.
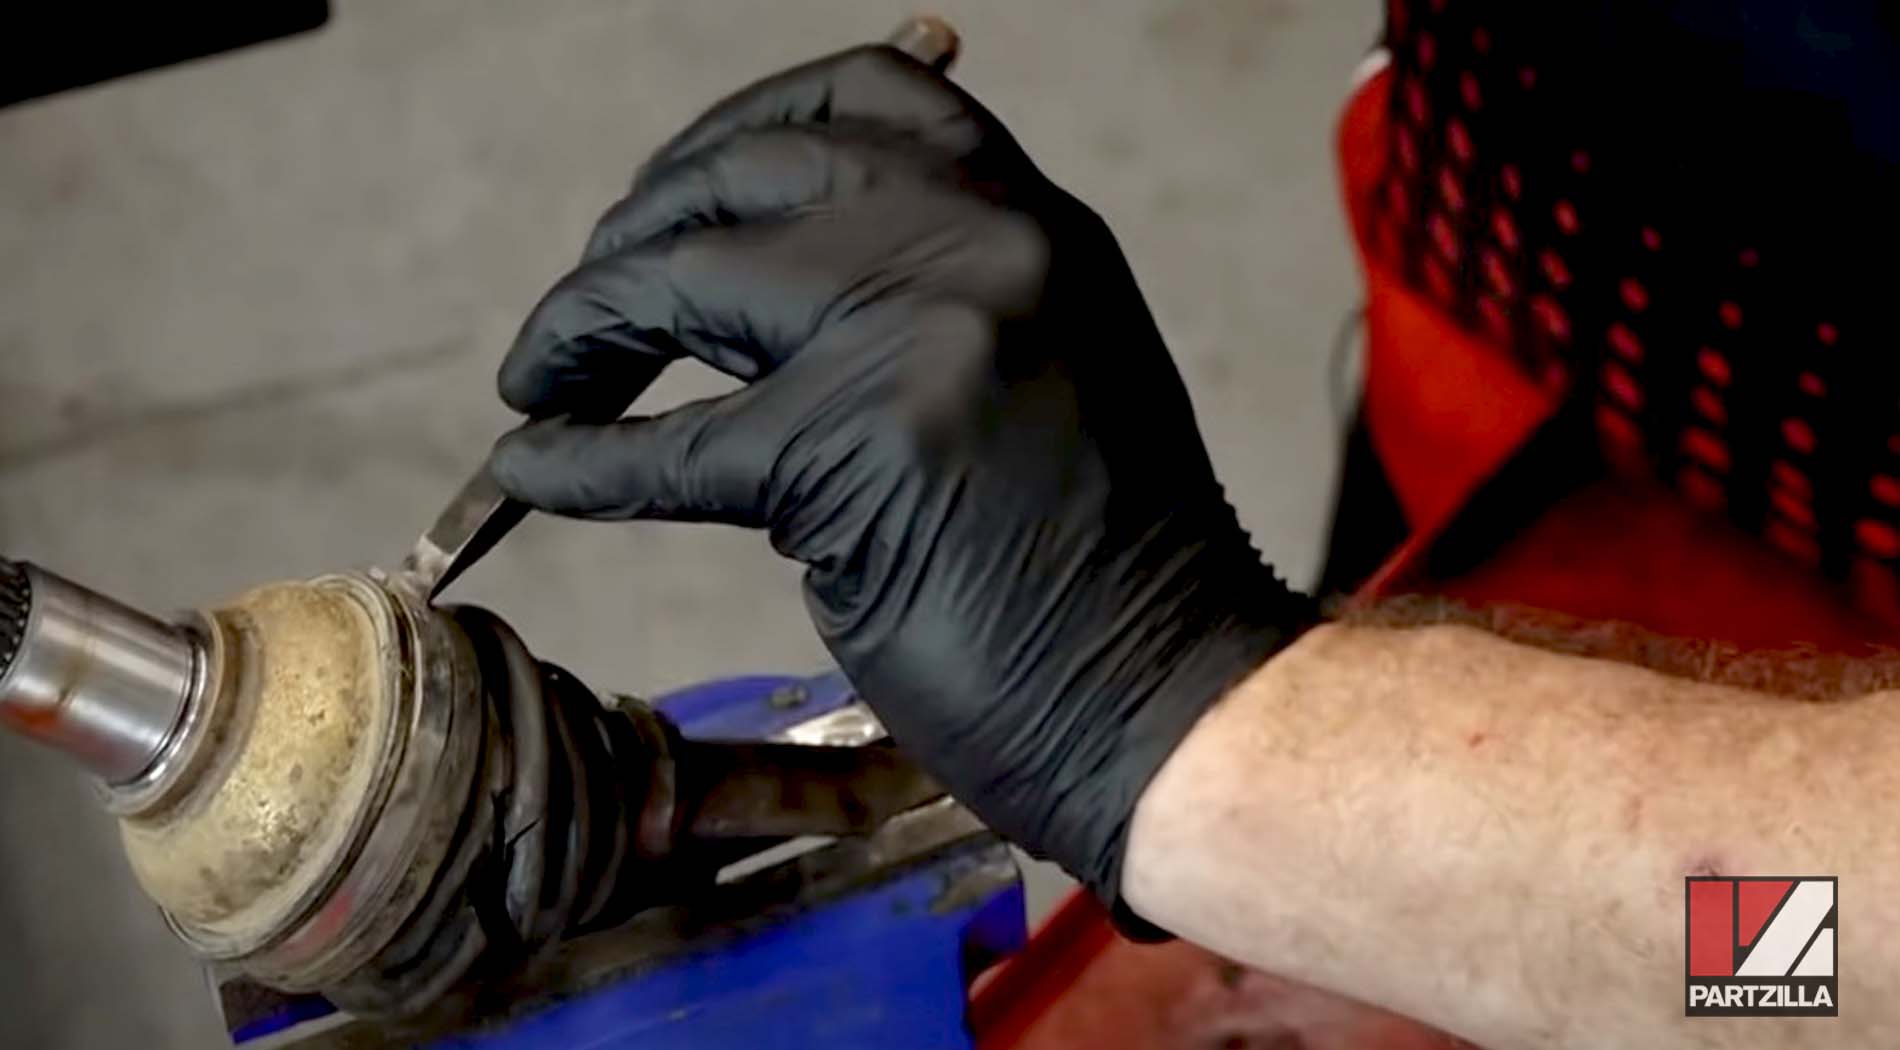
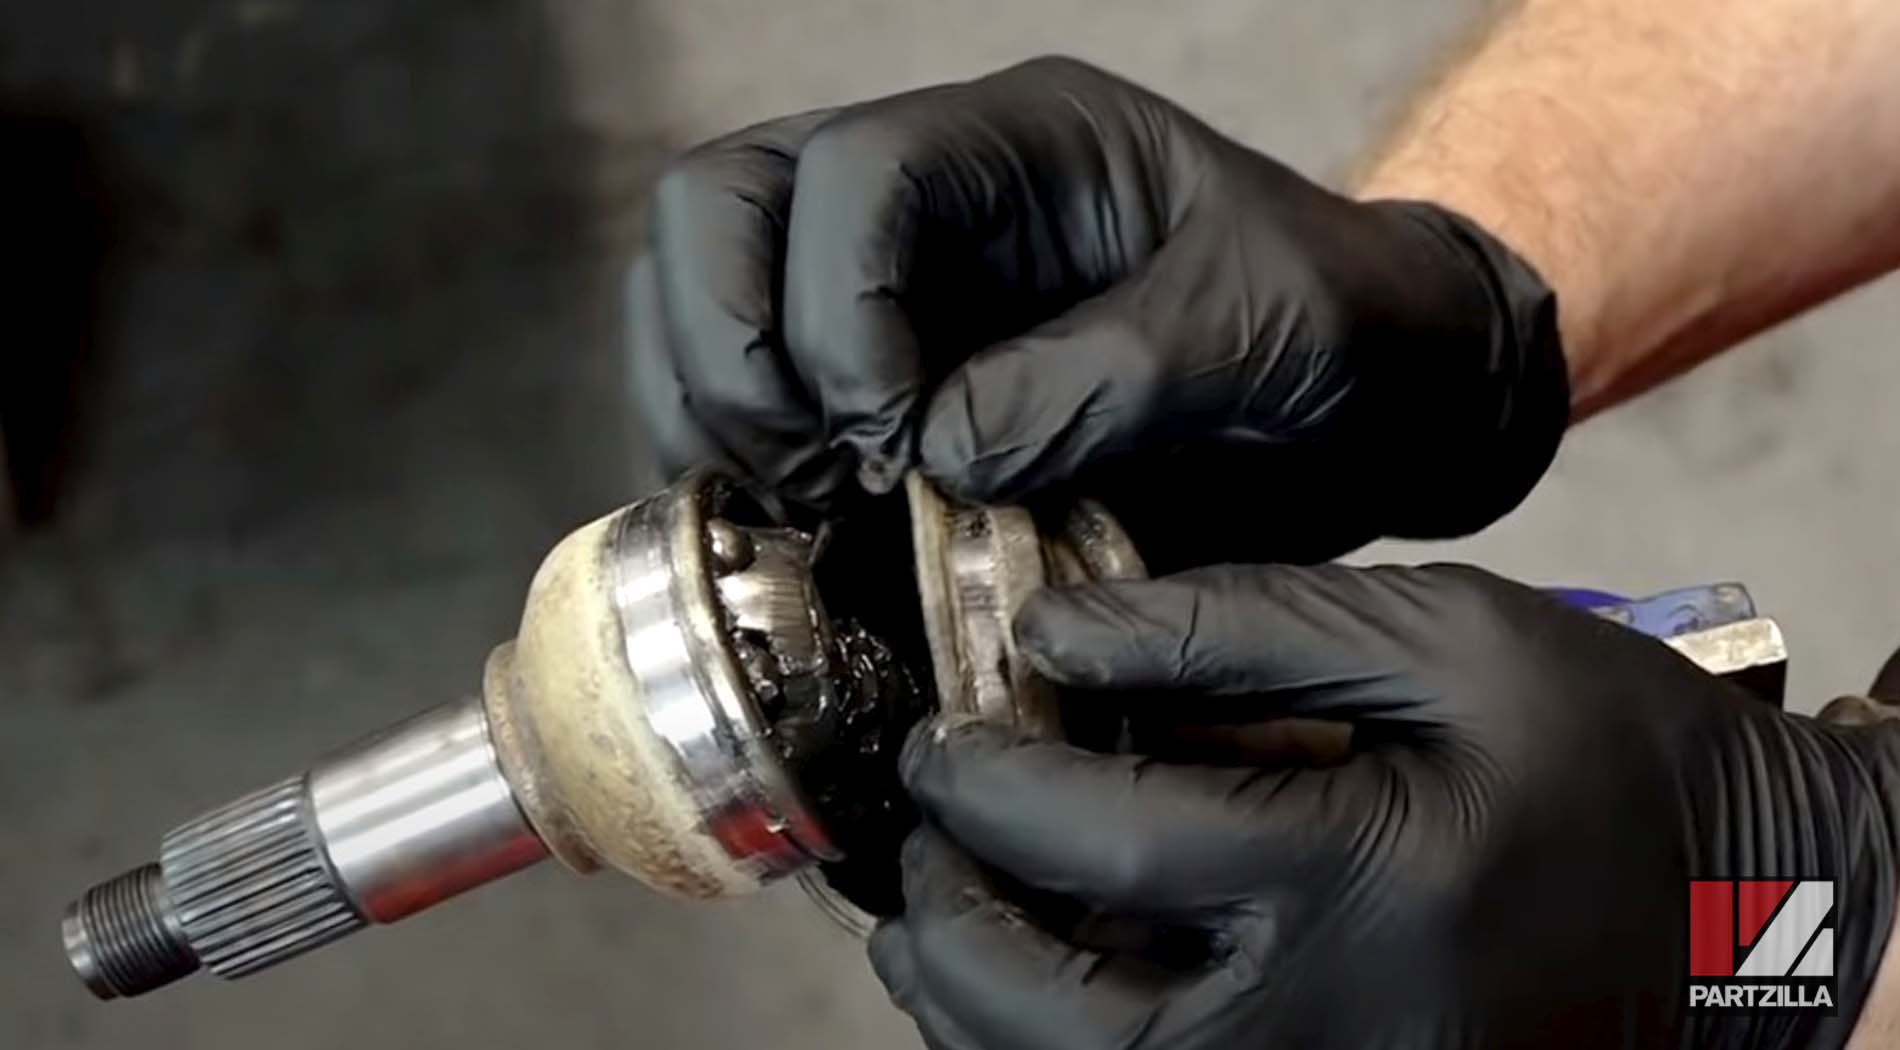
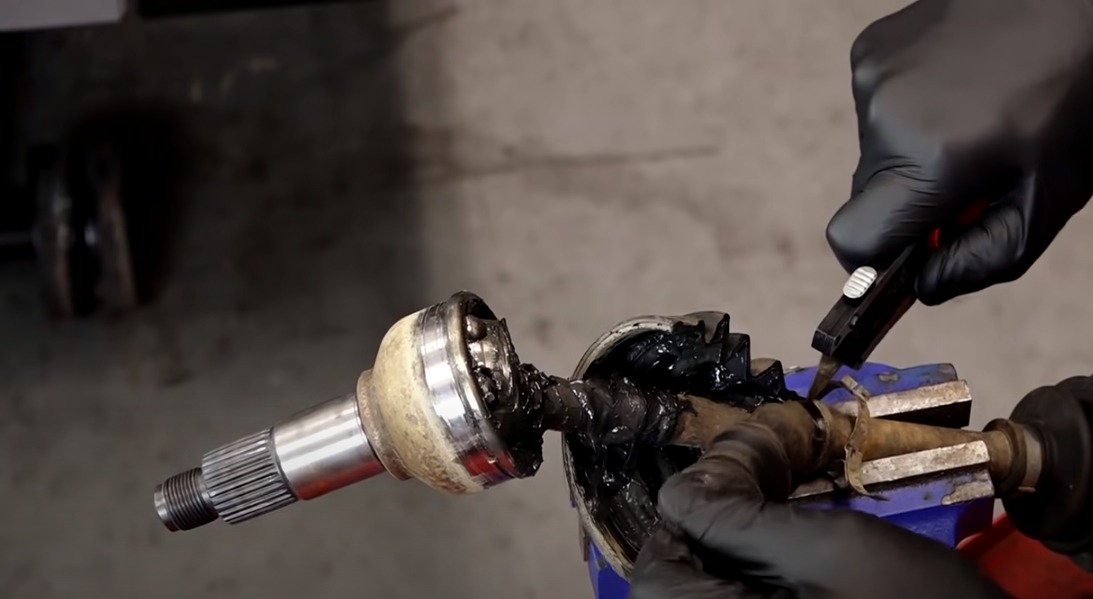
Step 9. Cut off the CV boot, and wipe away the old grease to expose the CV joint.
PRO TIP: Don’t use brake/contact cleaner to remove the grease, as it’ll dilute the grease packed deep down in the CV joint and lead to excessive wear.
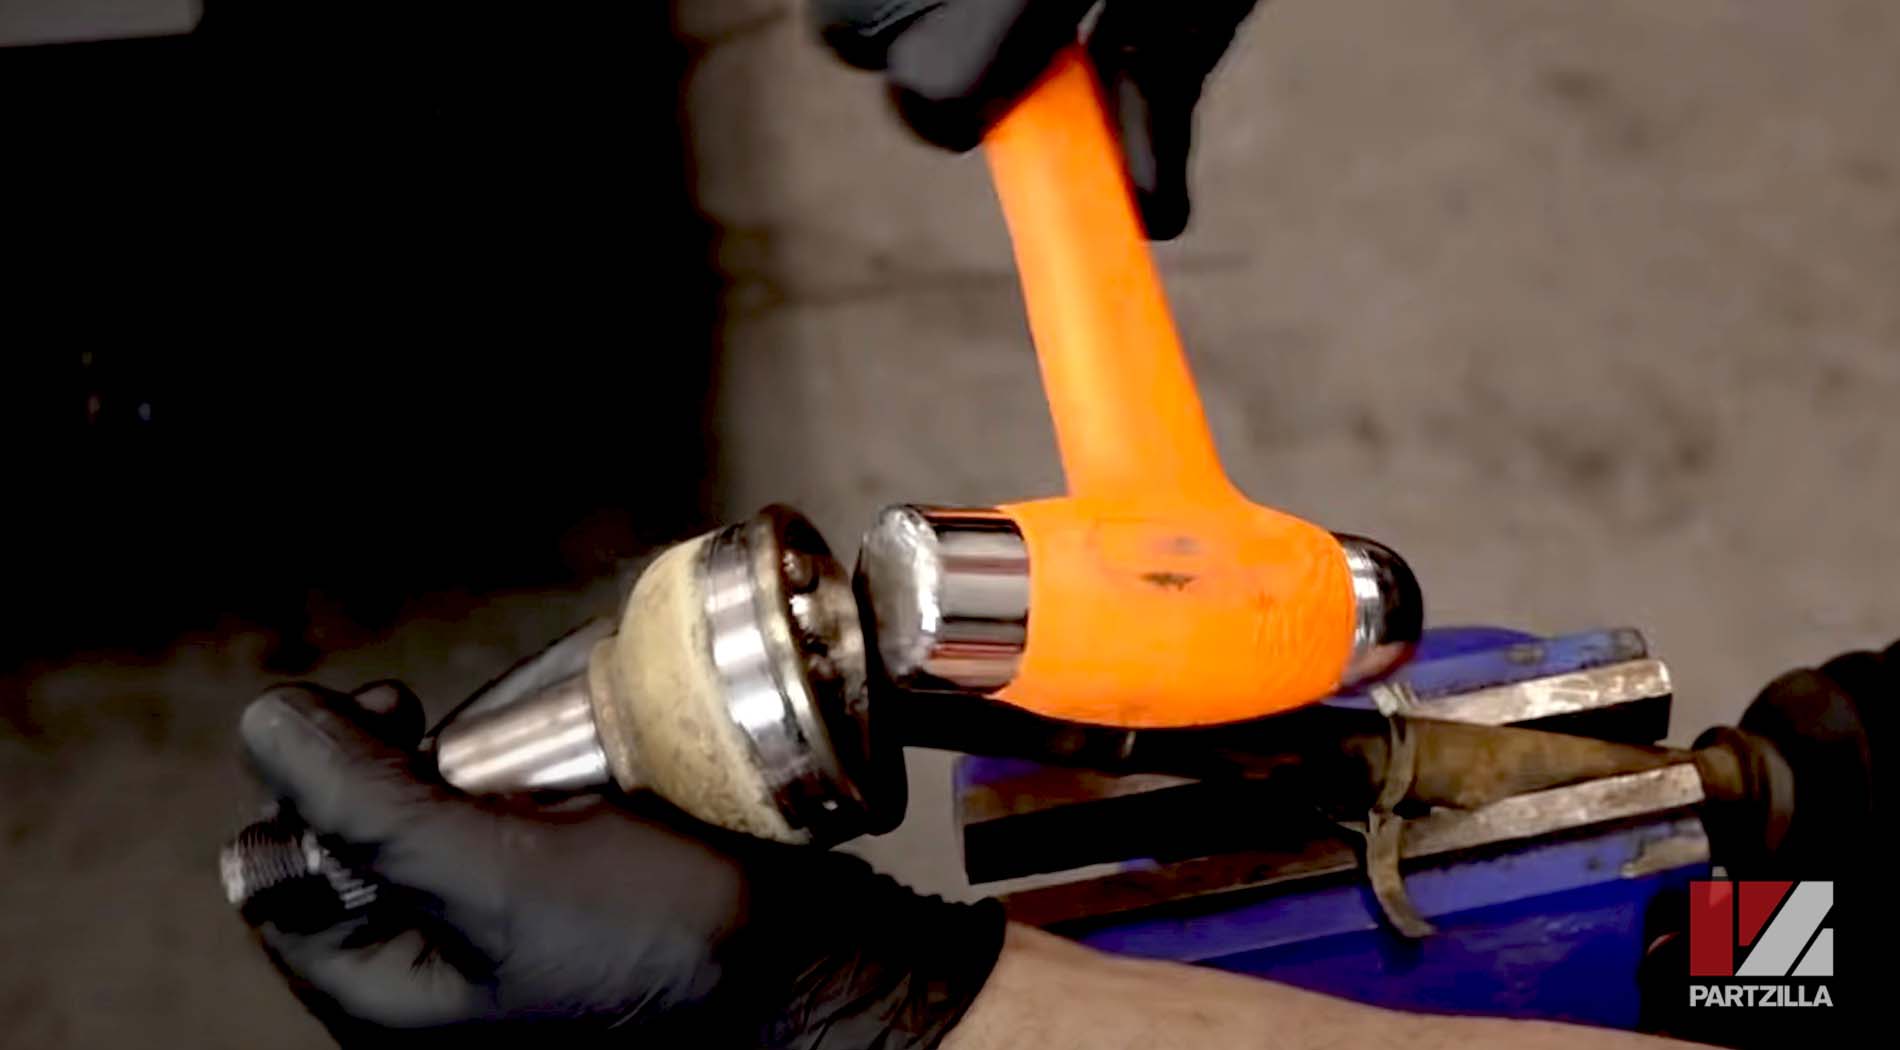
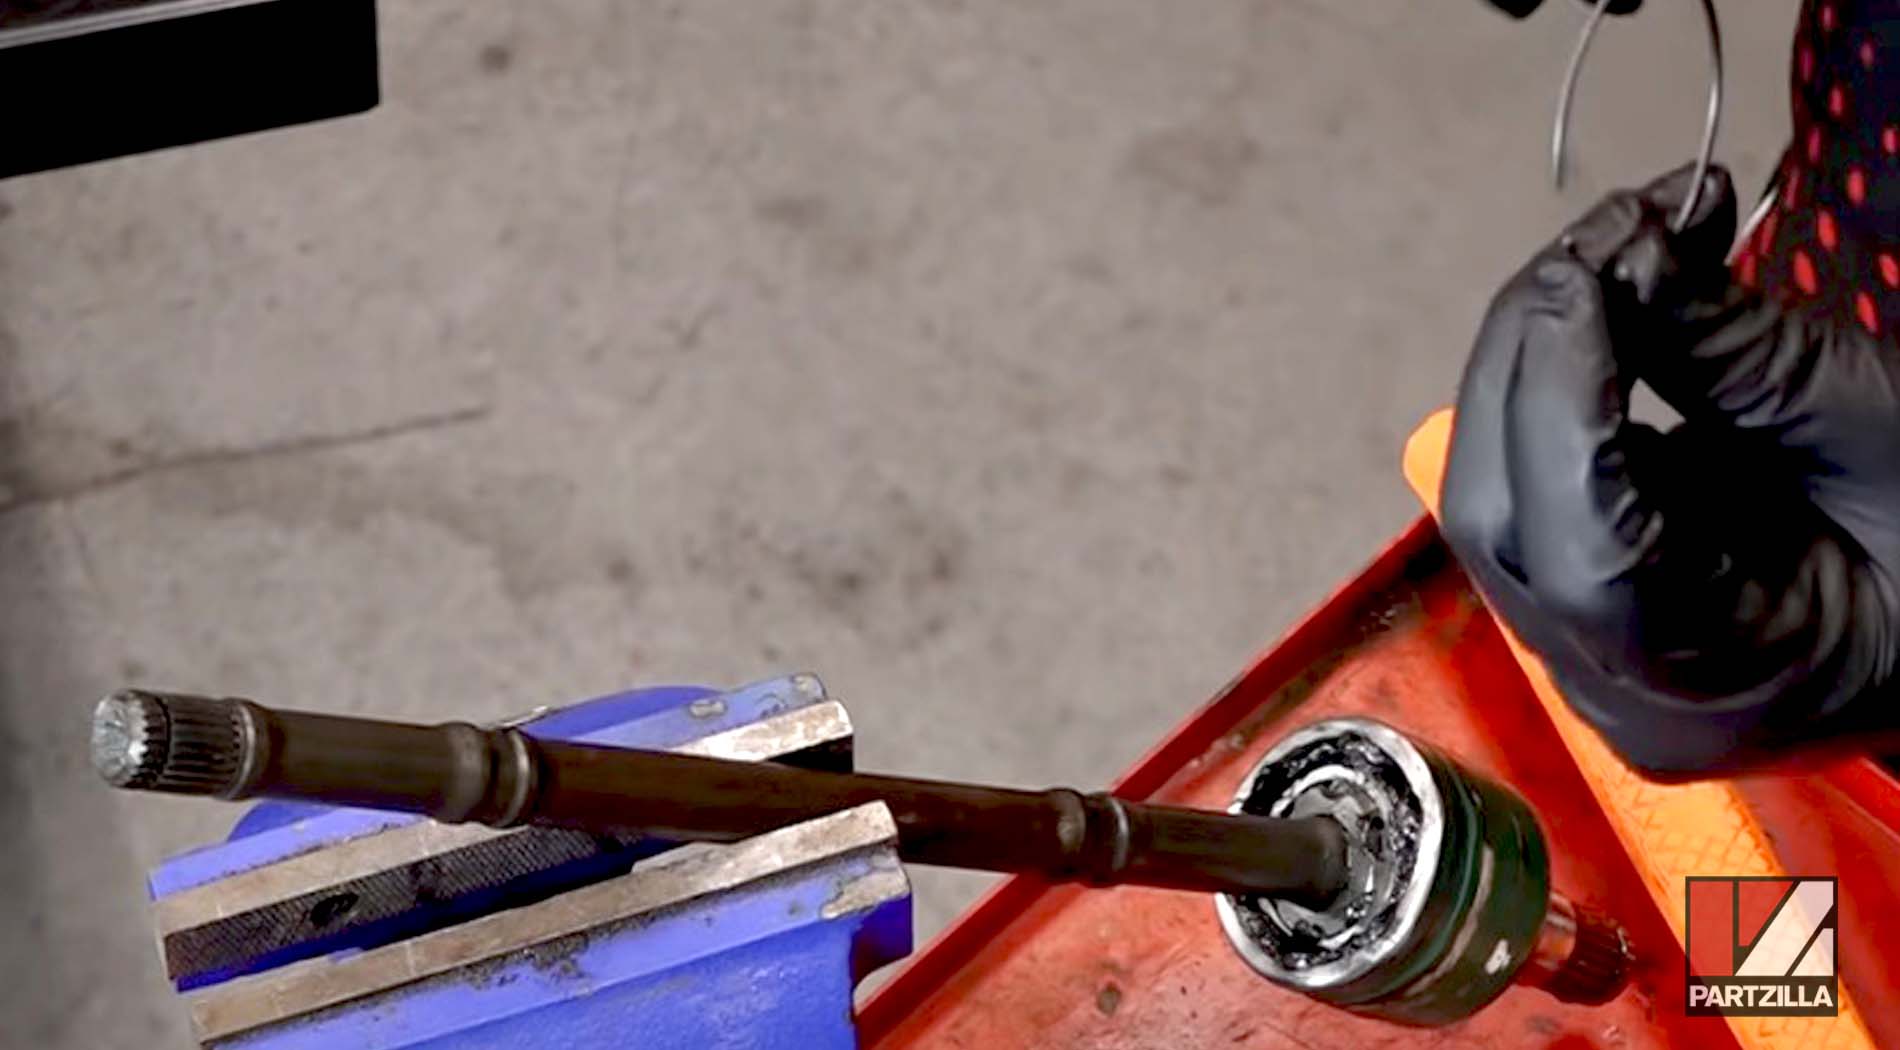
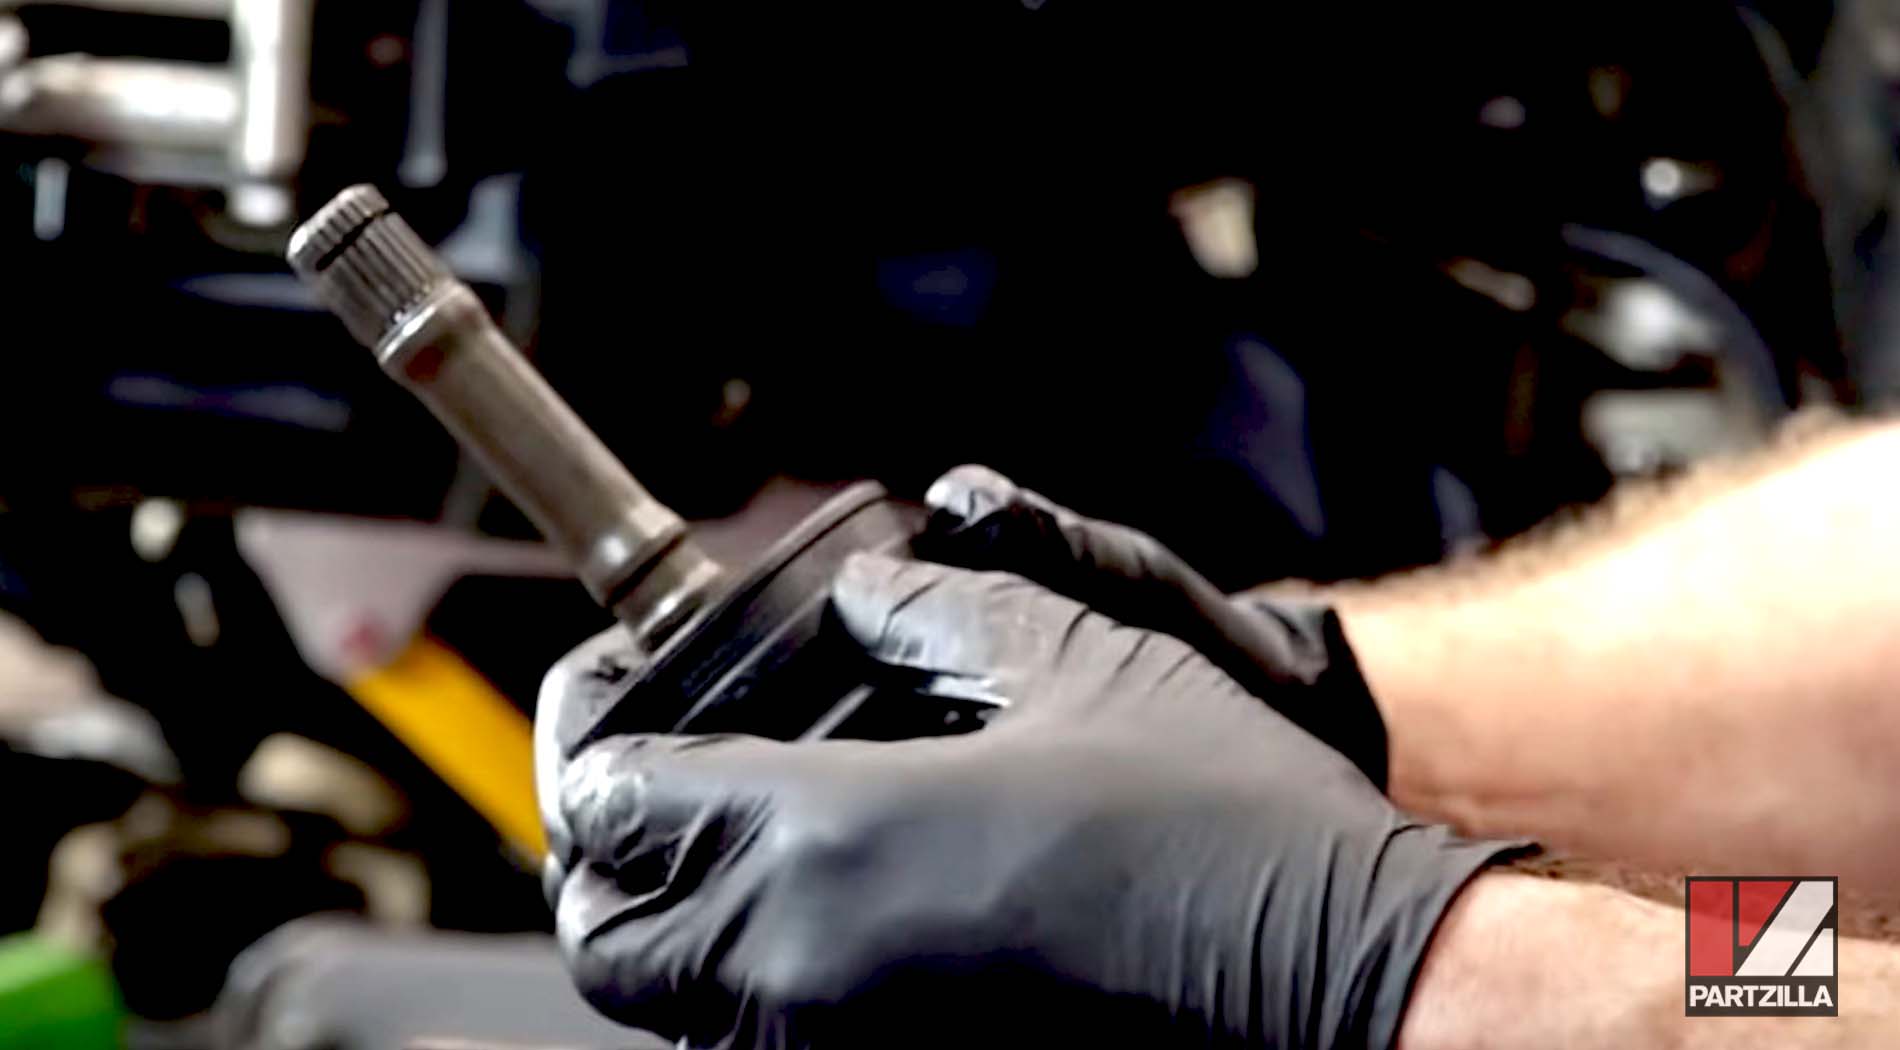
Step 10. Carefully strike the innermost part of the CV joint (where it meets the half shaft) with a hammer to knock it off the half shaft.
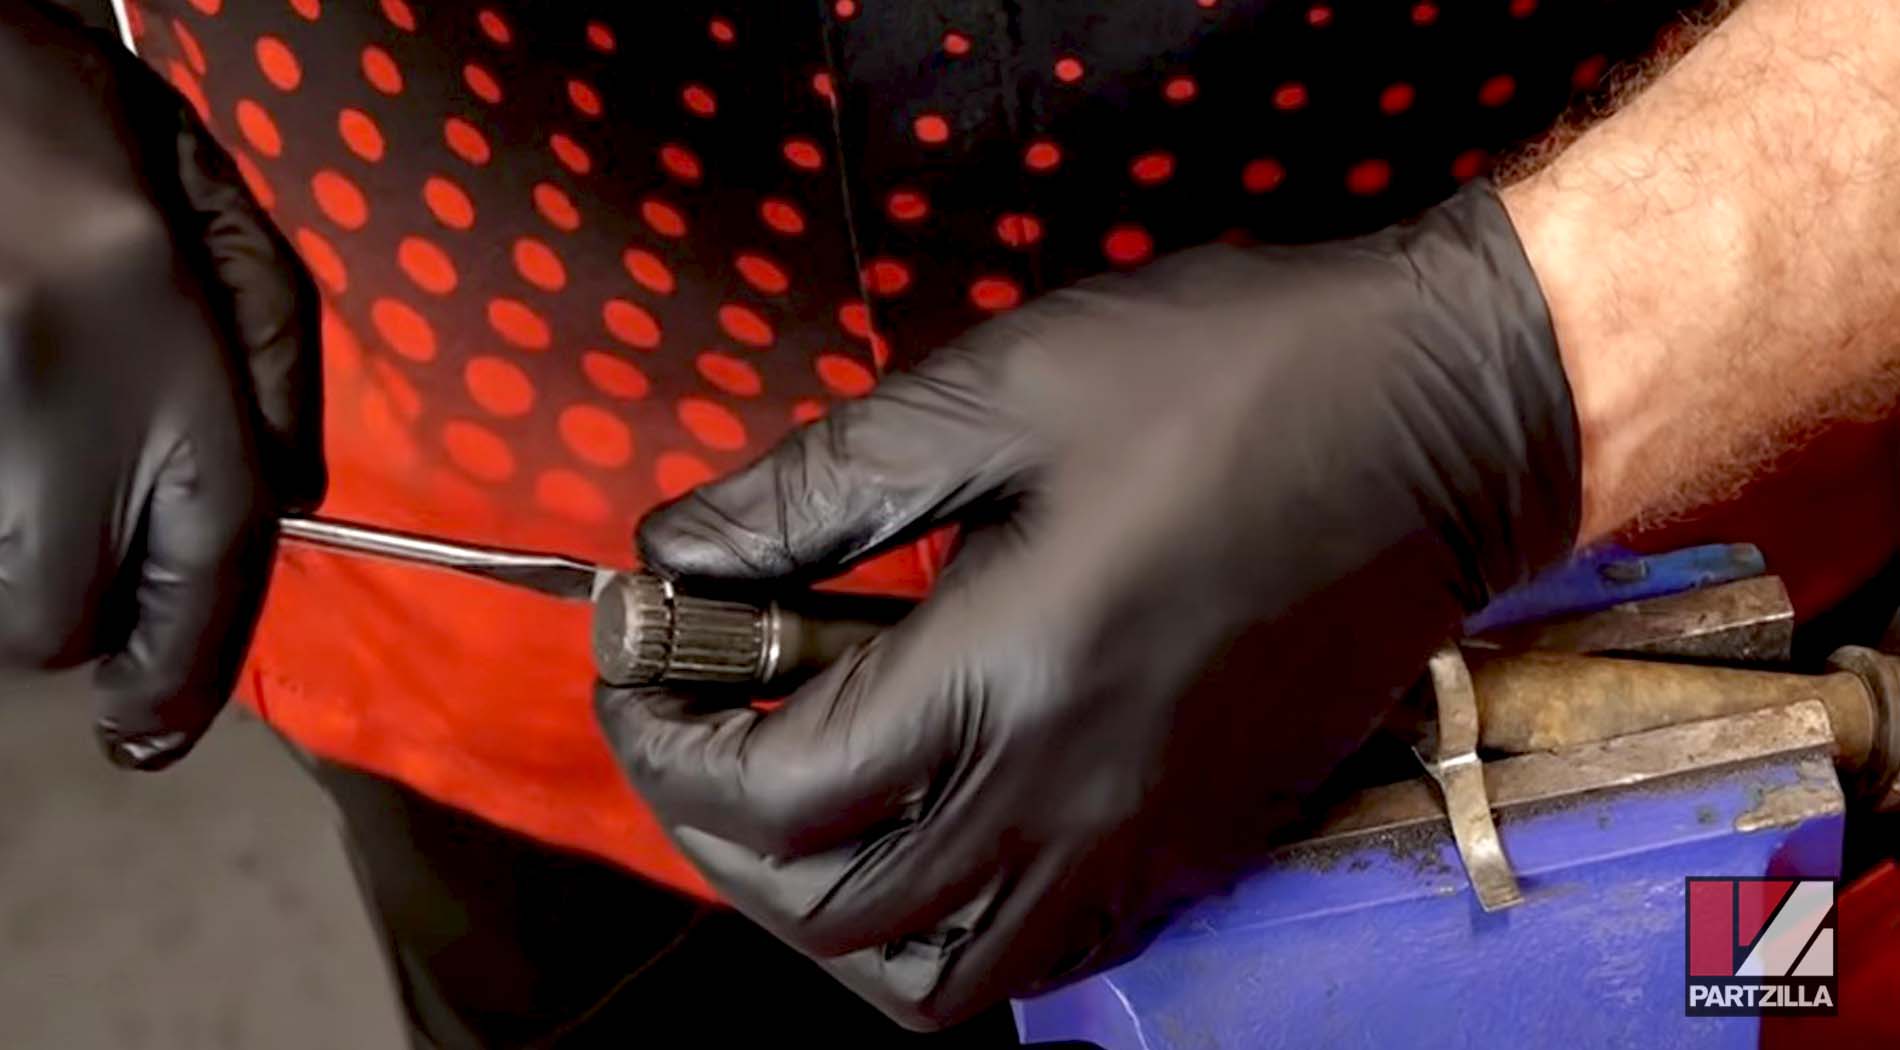
Step 11. Remove the circlip from the end of the half shaft.
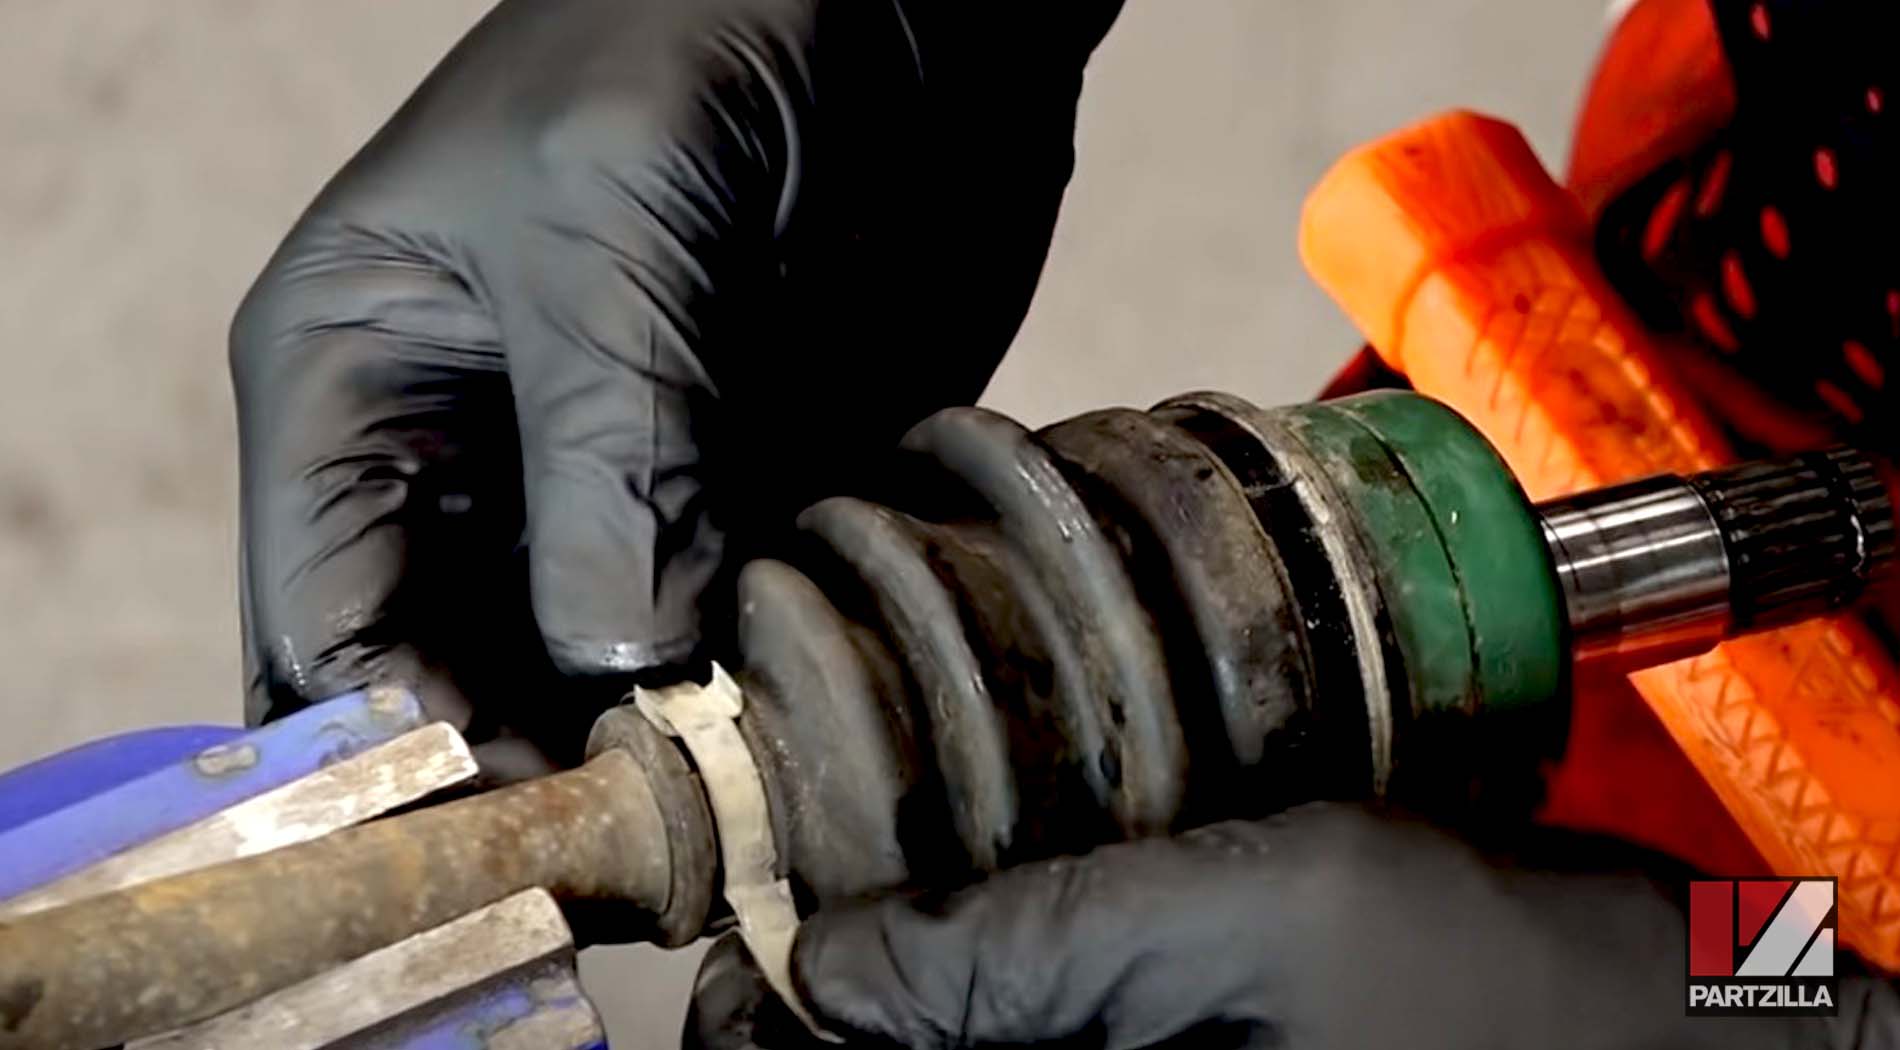
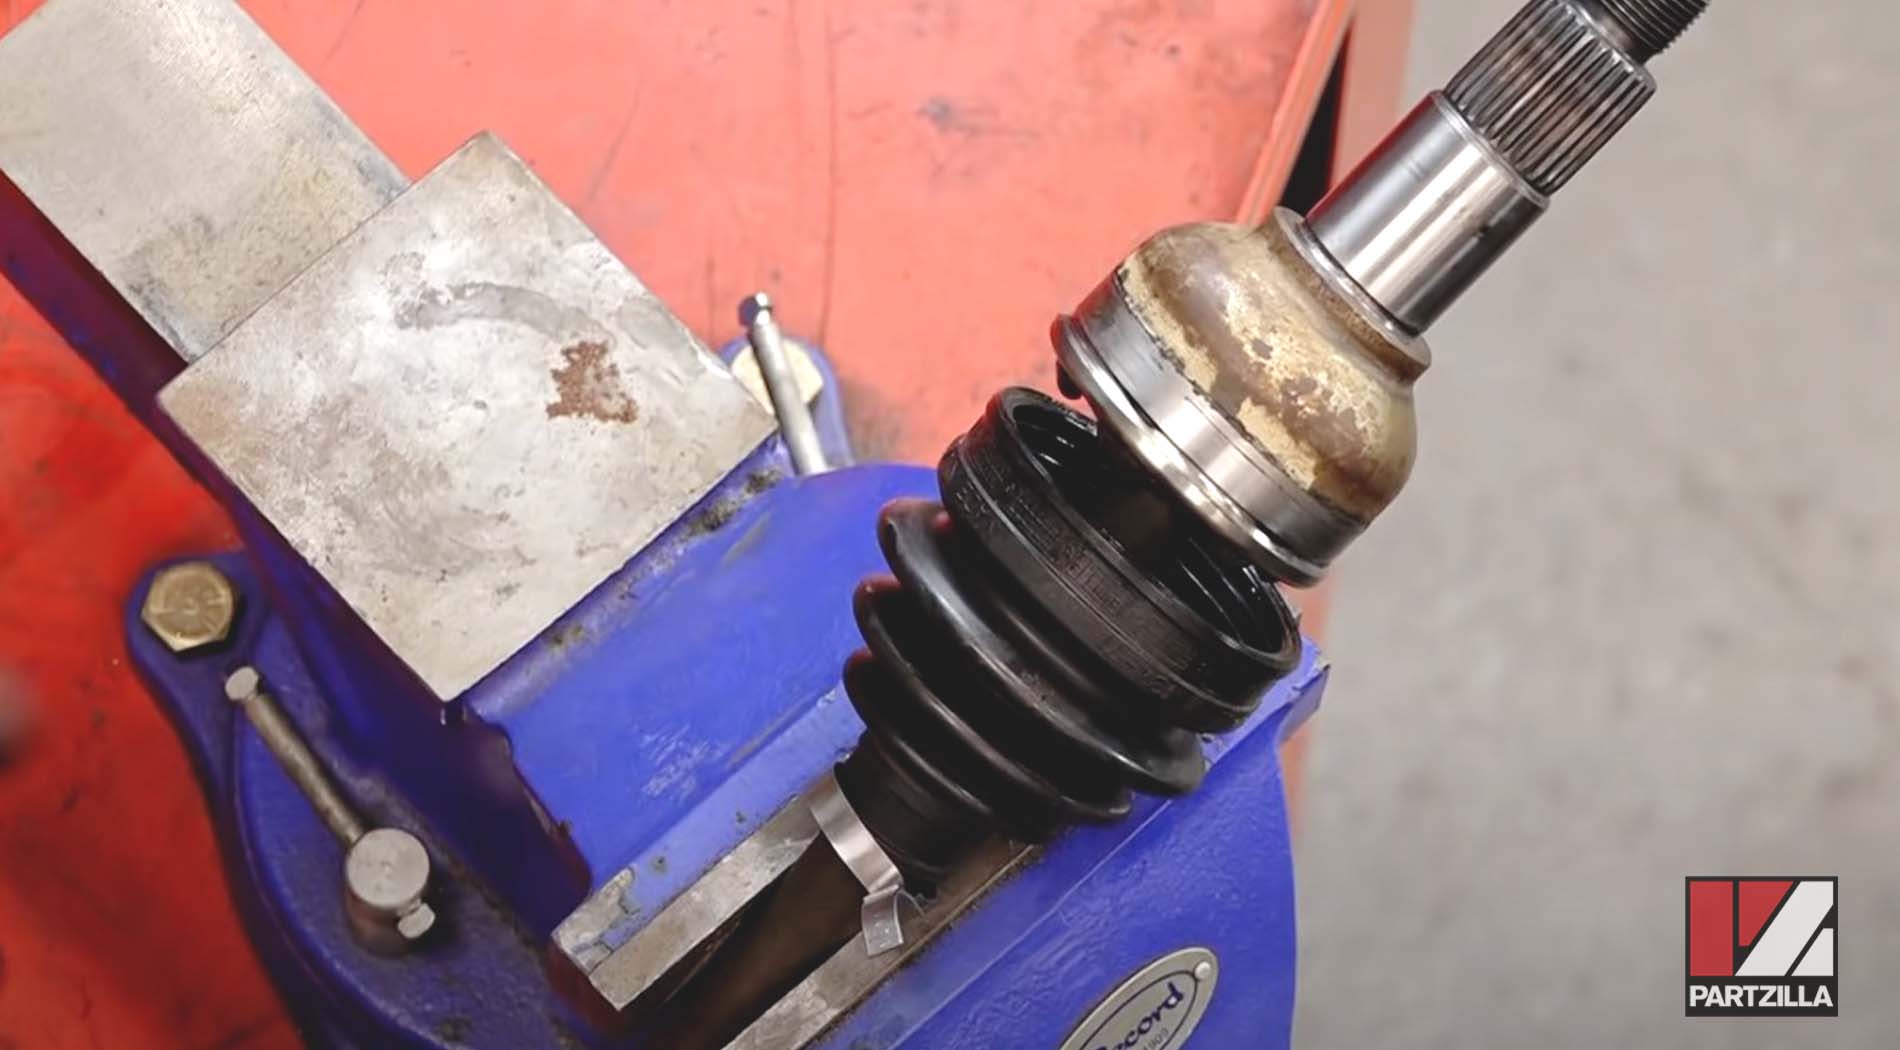
Step 12. Remove the inner CV boot by taking off the metal clamps, then cutting off the old CV boot or sliding it off the half shaft.

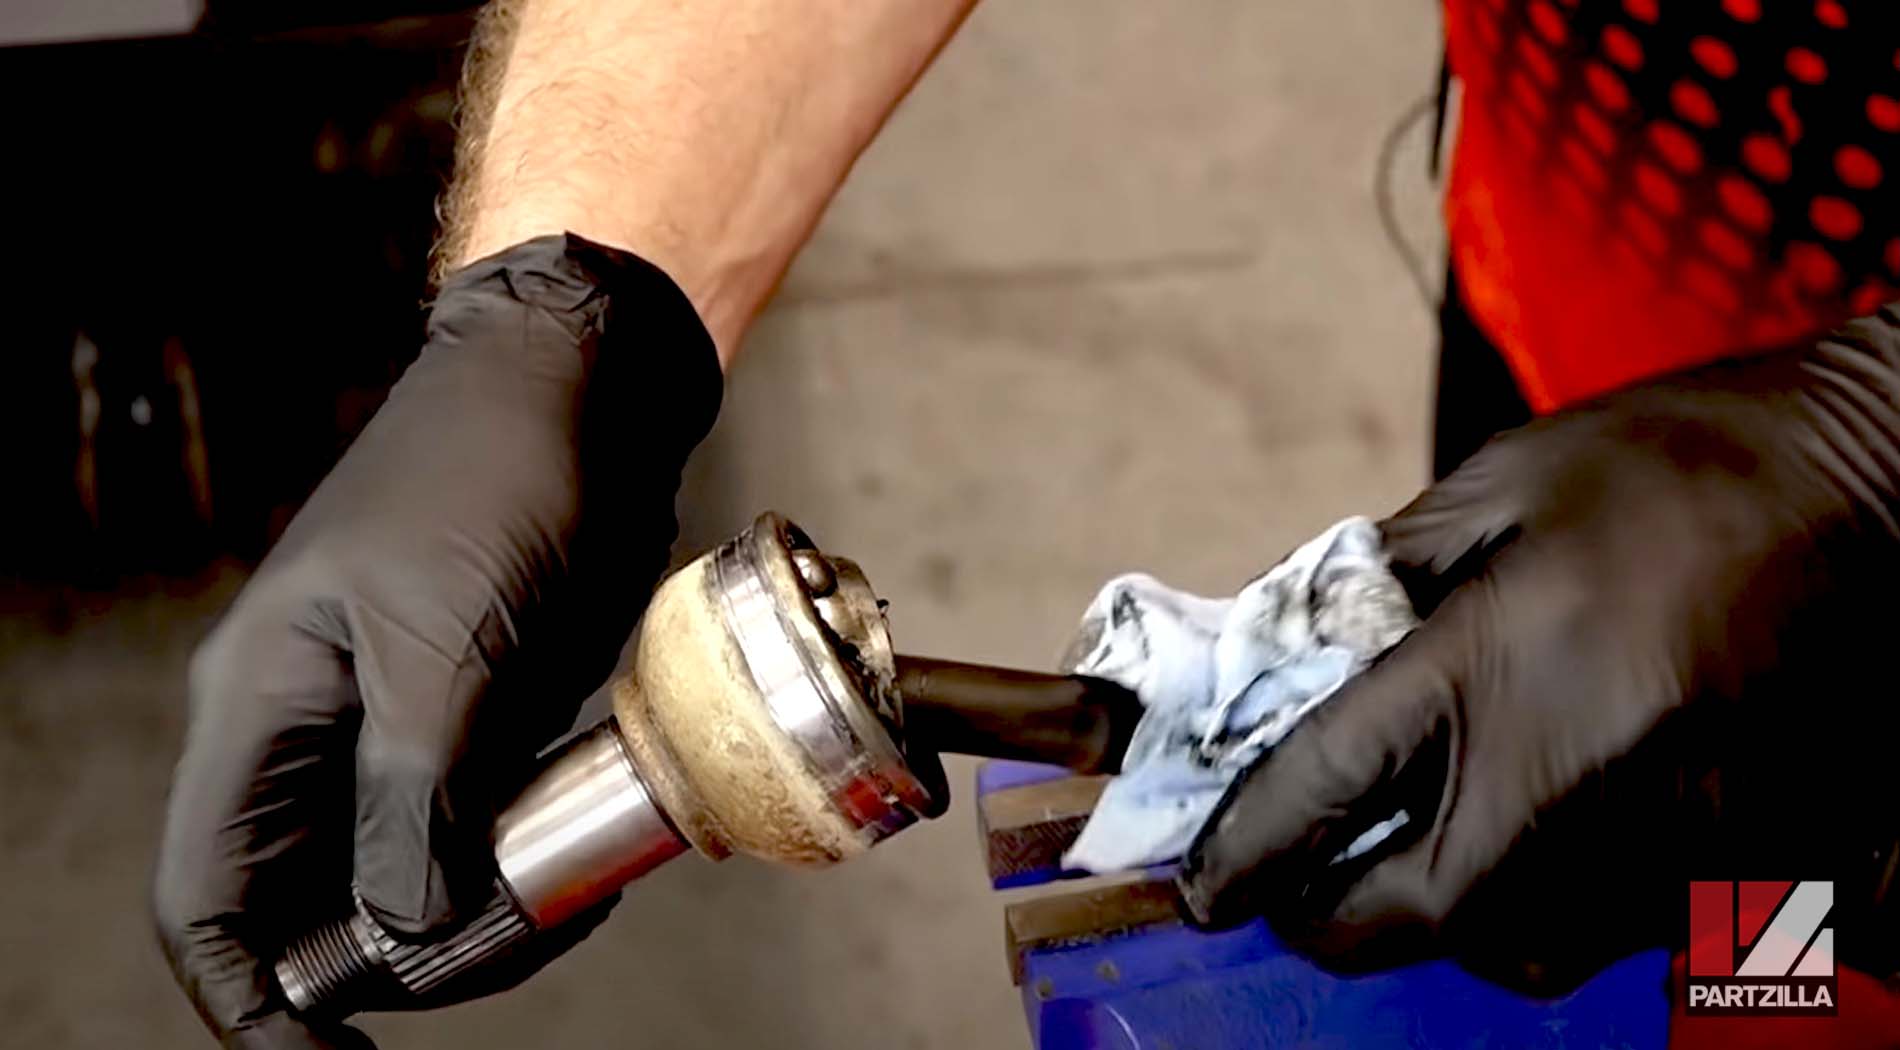
Step 13. Wipe away the old grease from the half shaft and CV joint, and remove the circlip from the end of the half shaft.
Step 14. Pack the inner CV joint with grease, and slide a new inner CV boot down the half shaft and into the channel in the CV joint. Slide the smaller end of the CV boot into the channel on the half shaft.
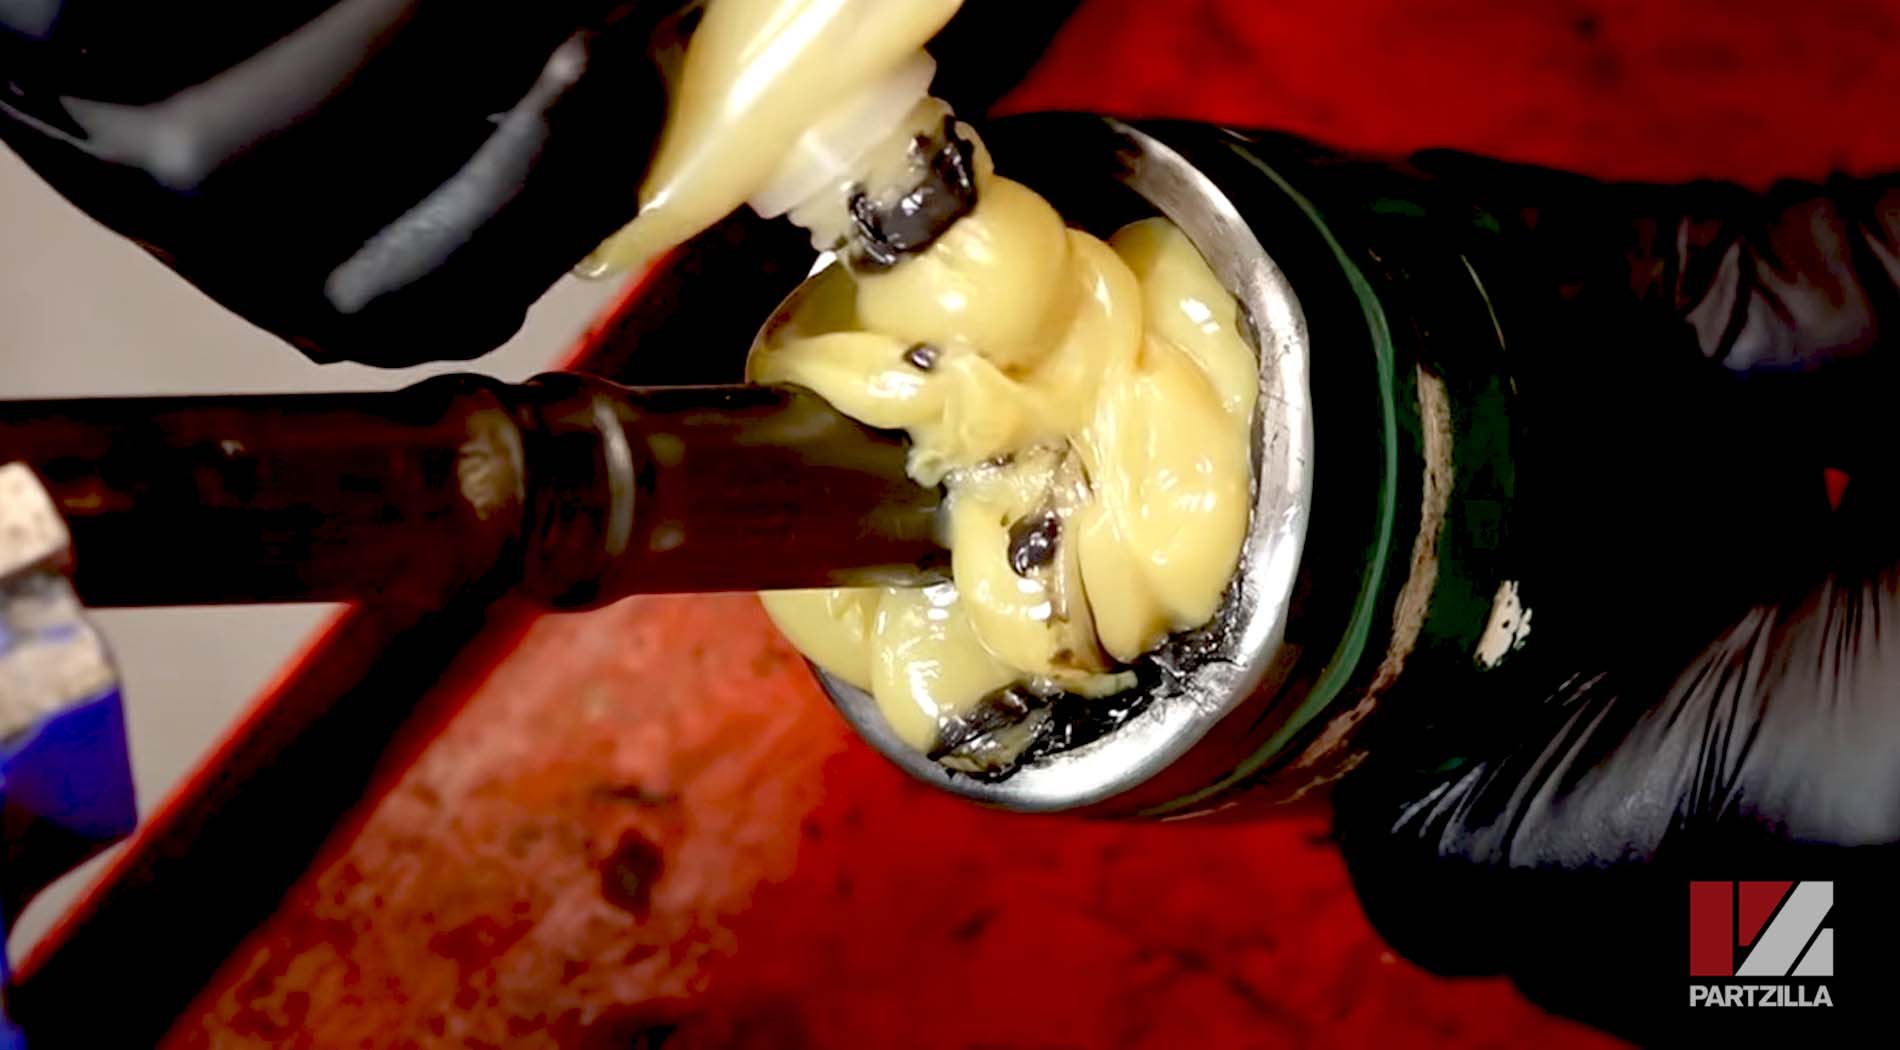
PRO TIP: Avoid getting any grease into the channels where the CV boot connects to the CV joint and half shaft, because grease between the two will compromise the connection and cause the CV boot to slip off the CV joint or half shaft.
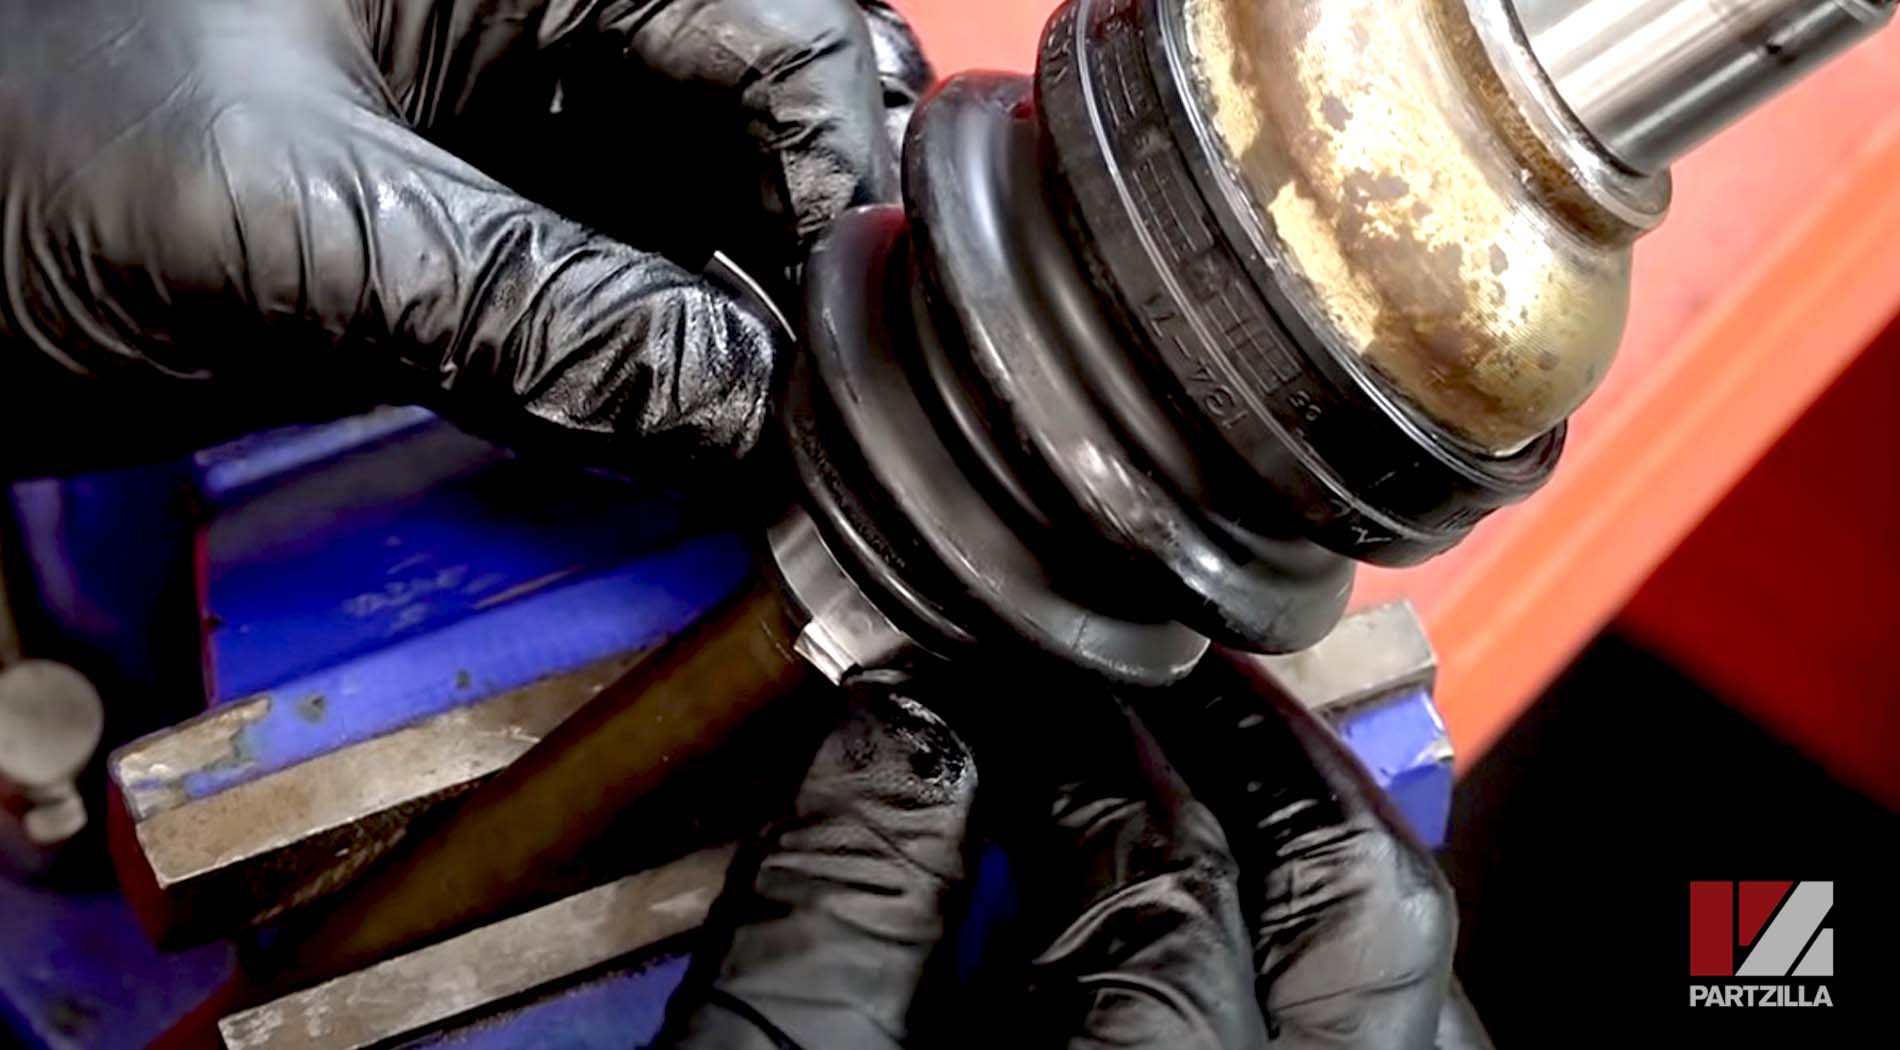
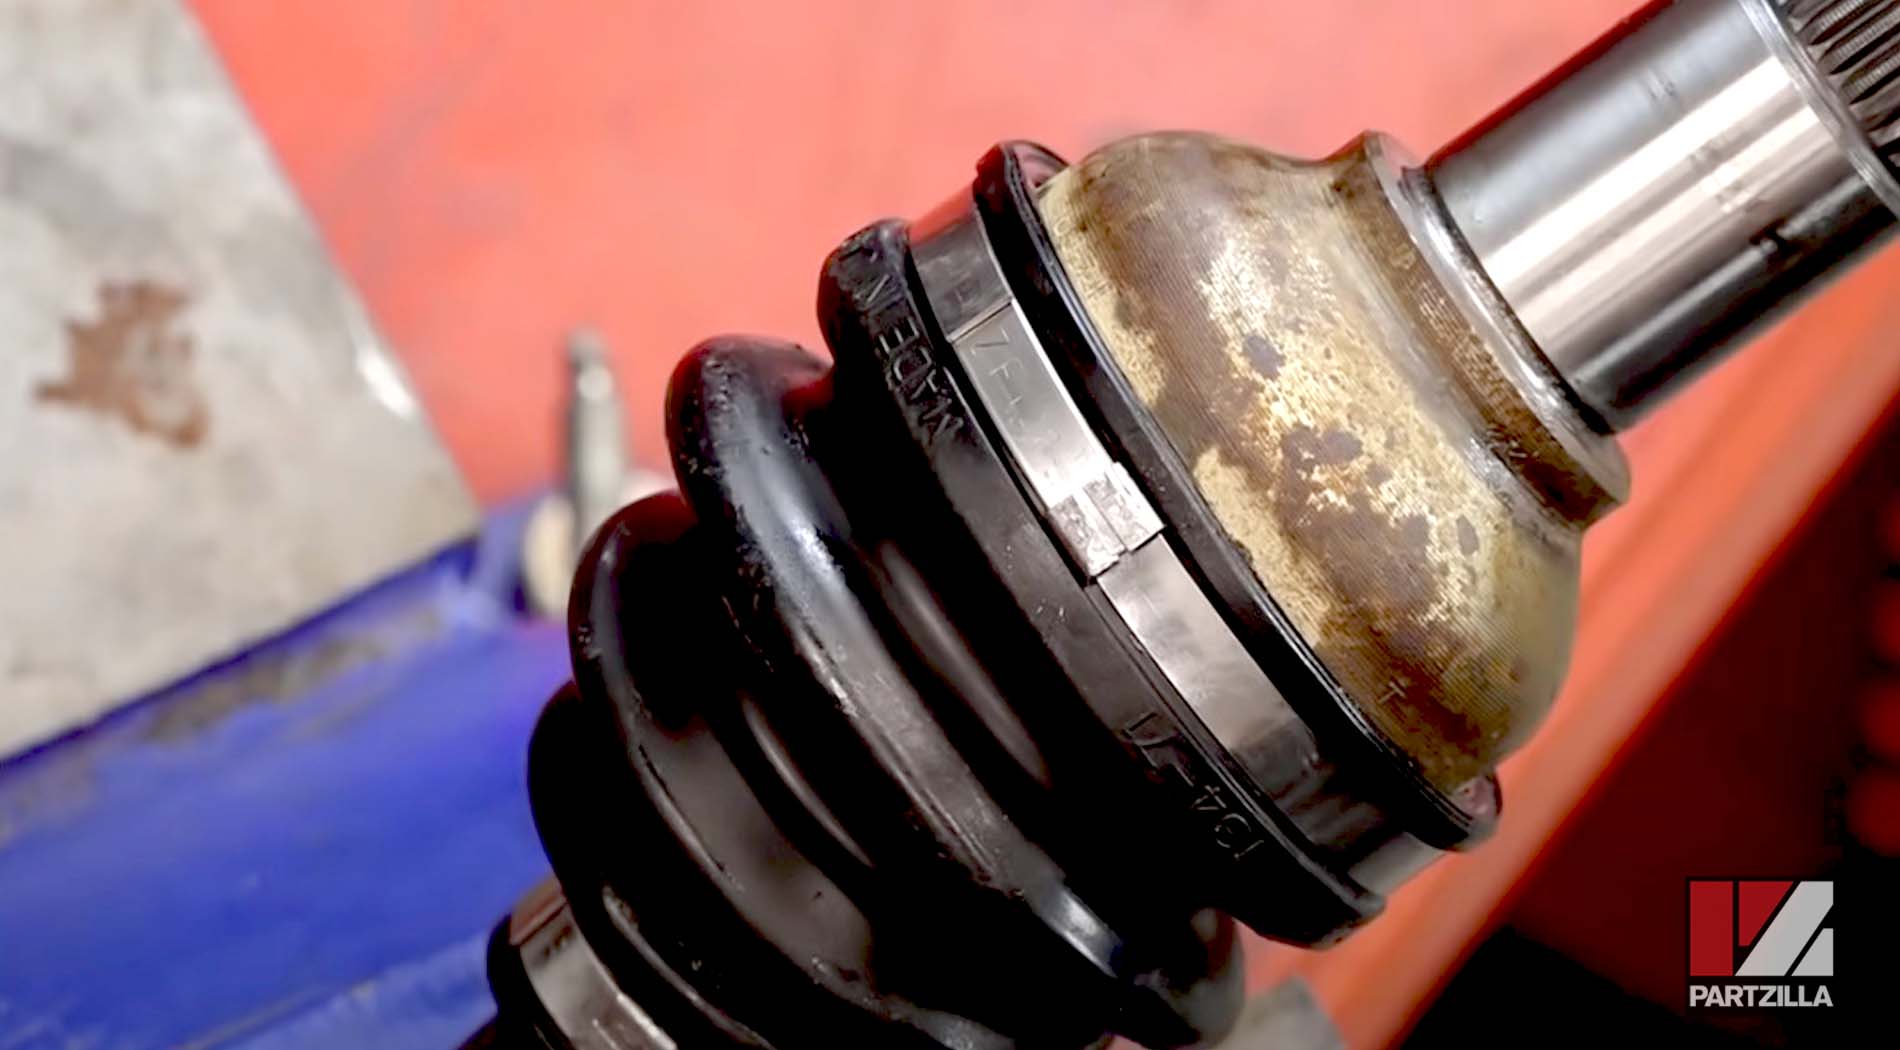
Step 15. Install new clamps onto the CV boot, and bend down the tabs to fully secure them. Make sure the leading edge of the clamps are facing the half shaft’s direction of rotation. This minimizes the chances of anything hitting the trailing edge of the clamps and lifting them up when you’re riding your Grizzly.

Step 16. Install a new small CV boot clamp and CV boot onto the half shaft.
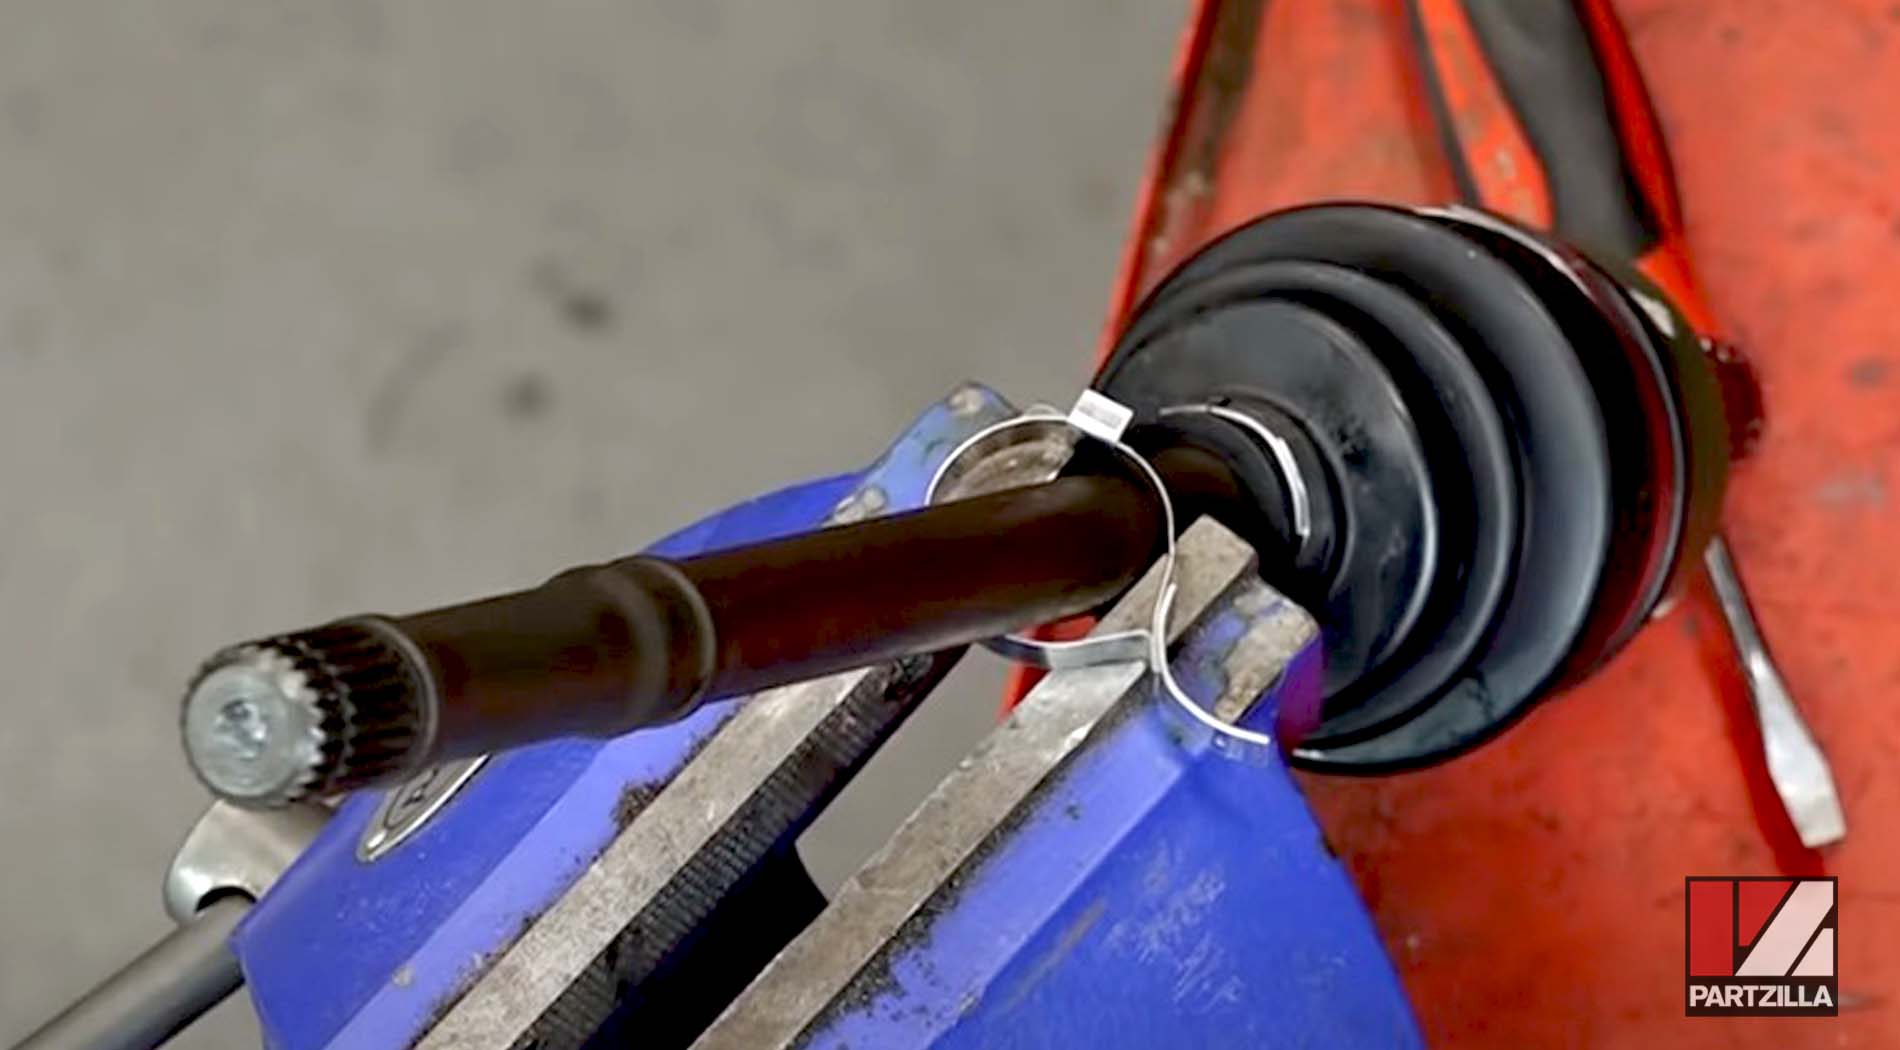
NOTE: Make sure you install the small clamp first, otherwise you’ll never get it onto the half shaft once the CV boot is in place.
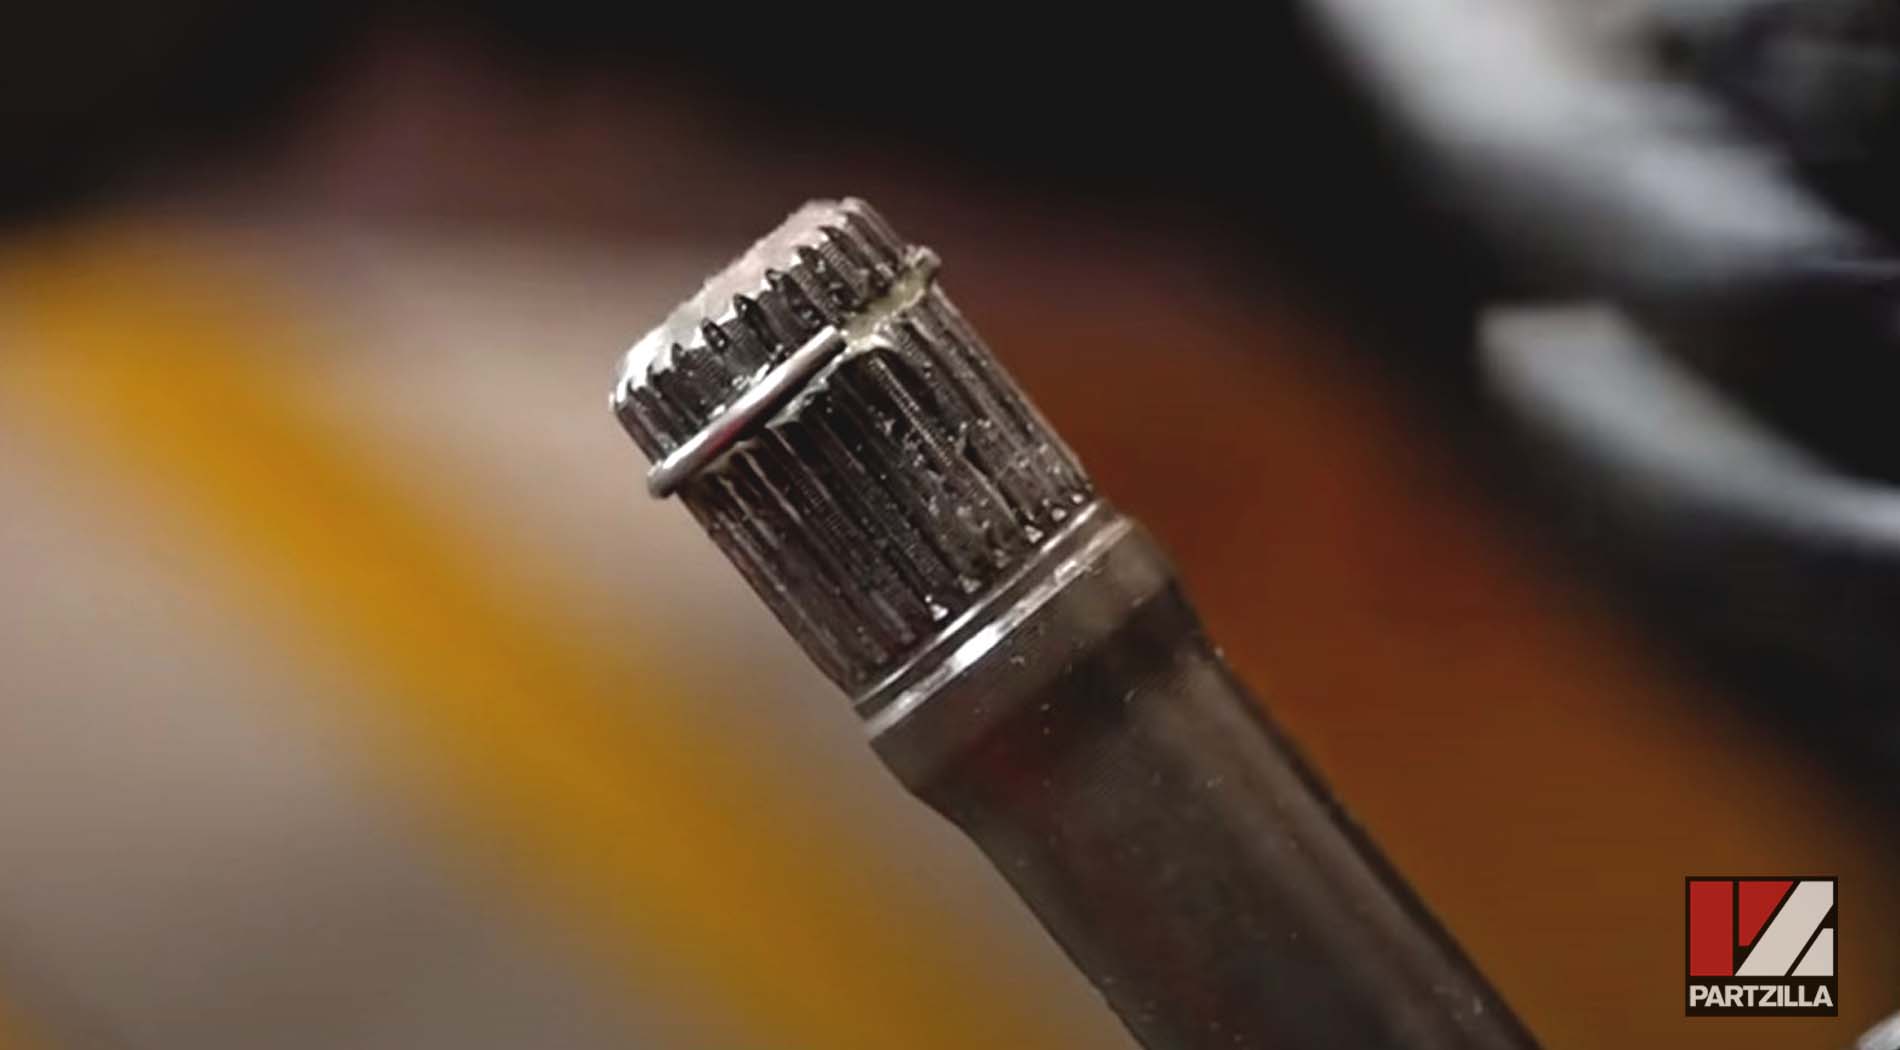
Step 17. Install a new circlip onto the end of the half shaft.
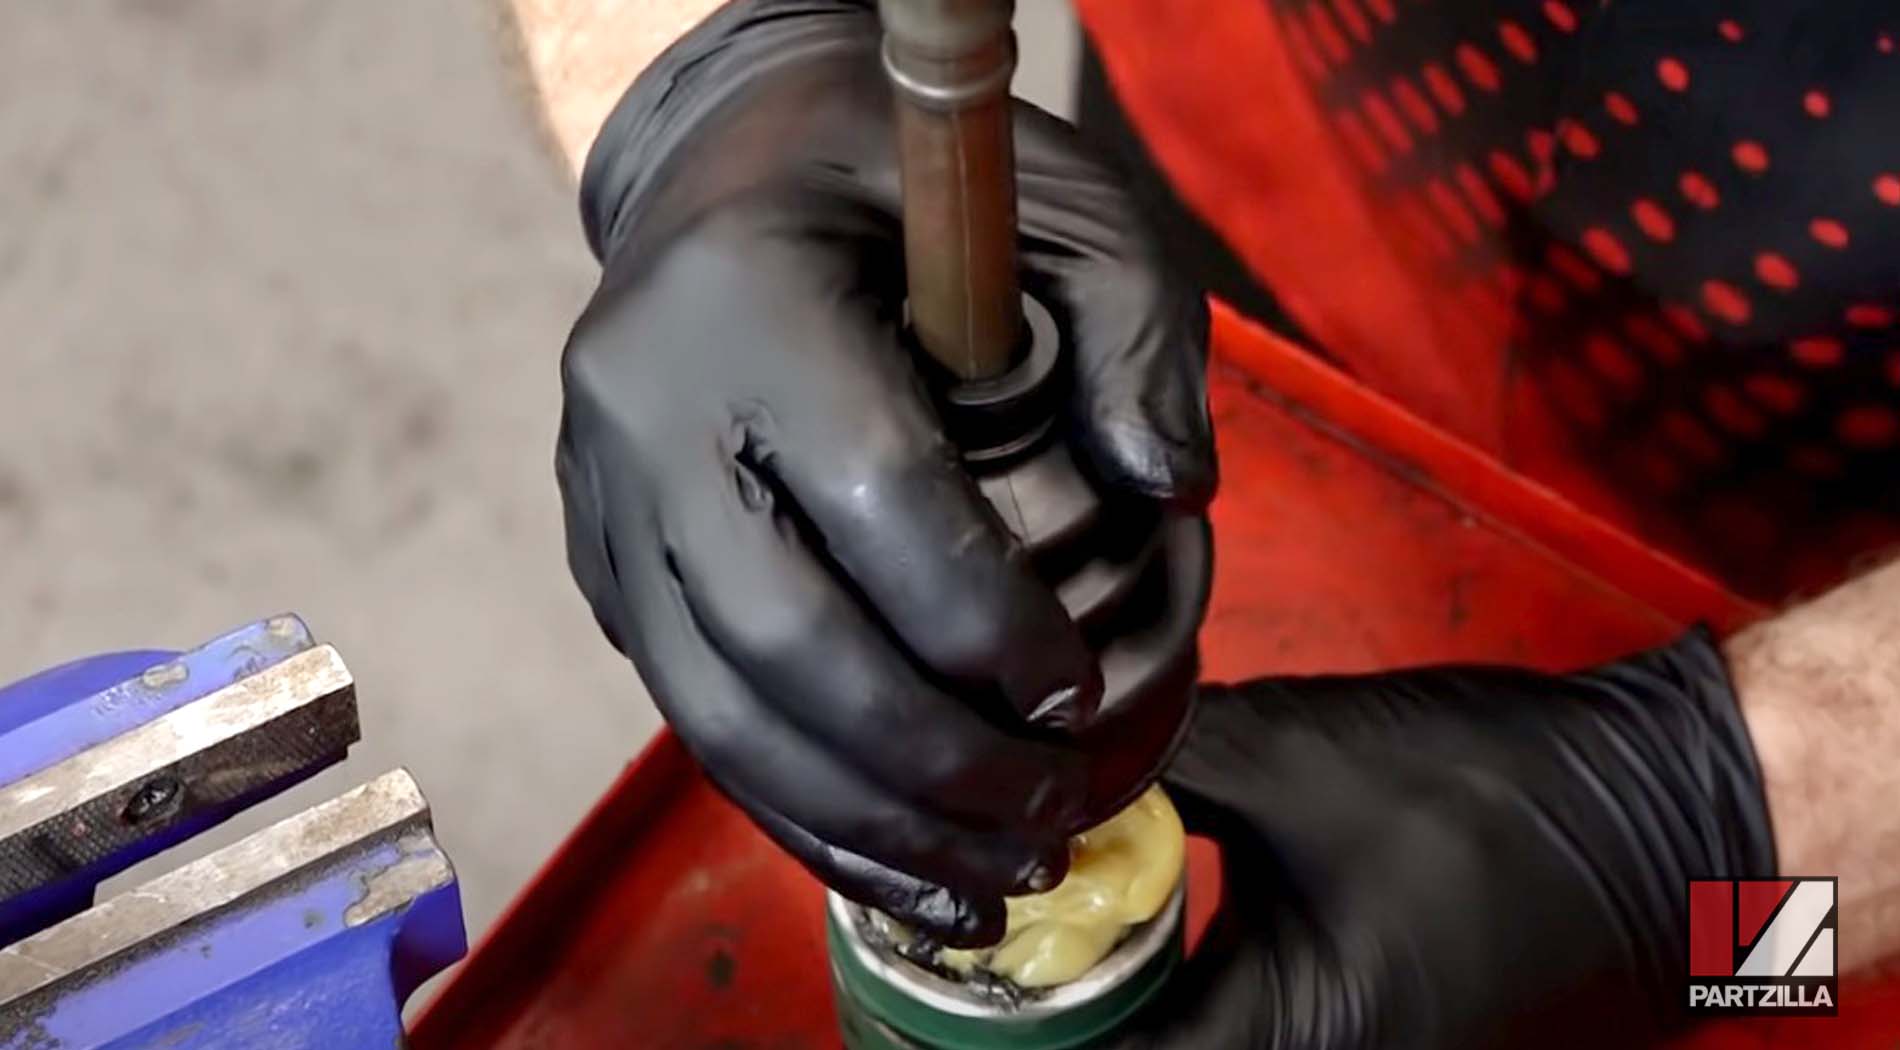
Step 18. Pack the outer CV joint with grease, making sure it’s aligned with the splines on the half shaft, and tap it back onto the half shaft.
Step 19. Slide the CV boot into the channels in the CV joint and the half shaft. Tighten the small clamp, and install and tighten the large CV boot clamp. Once again, make sure the leading edge of the clamps face the half shaft’s direction of rotation.

Step 20. Lightly grease the splines on the inner end of the half shaft, and tap the half shaft back into the transmission housing.
Step 21. Lightly grease the splines on the inner end of the half shaft, and reinstall the steering knuckle.
Step 22. Slide the lower ball joint and upper ball joint back into the steering knuckle, and reinstall the ball joints’ nuts. Torque the lower ball joint nut to 22 foot-pounds and the upper ball joint nut to 18 foot-pounds. Replace the cotter pins in the upper and lower ball joints.
Step 23. Slide the steering arm ball joint back into the steering knuckle, and reinstall the washer and ball joint nuts. Torque the ball joint nut to 18 foot-pounds. Replace the cotter pin.
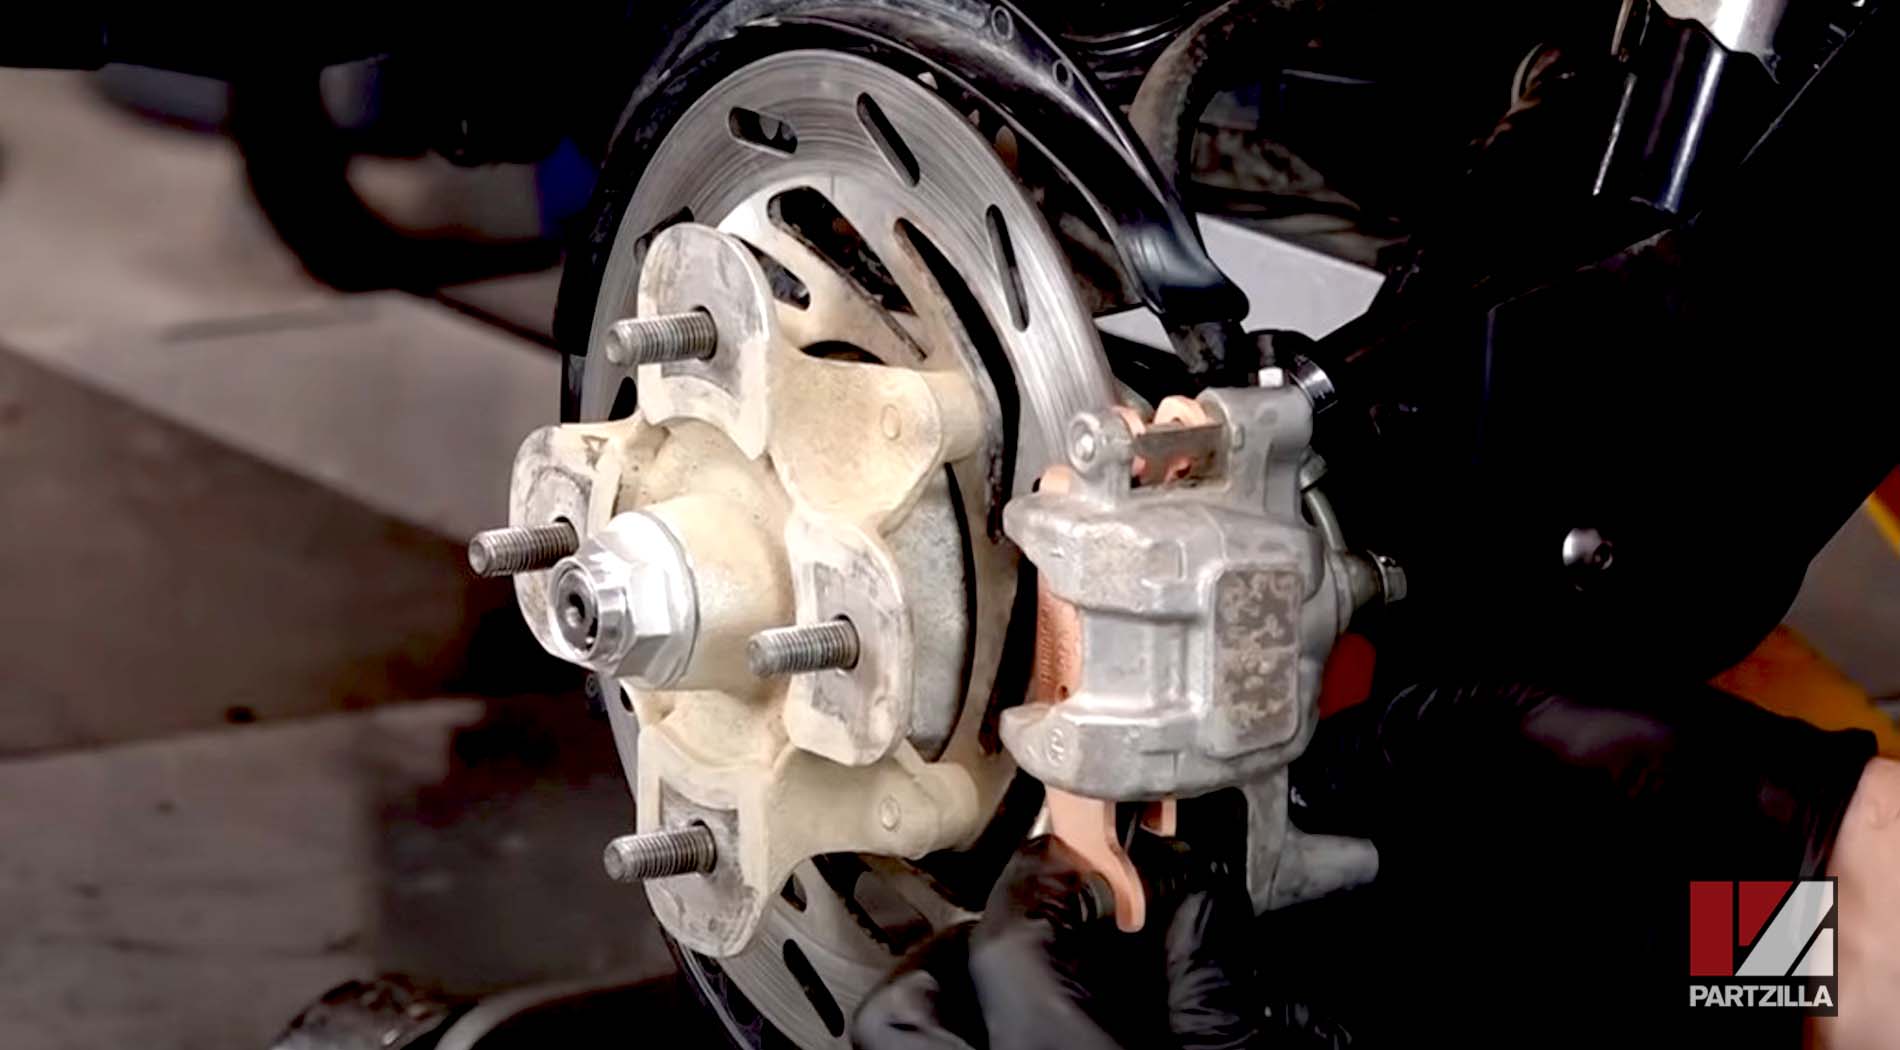
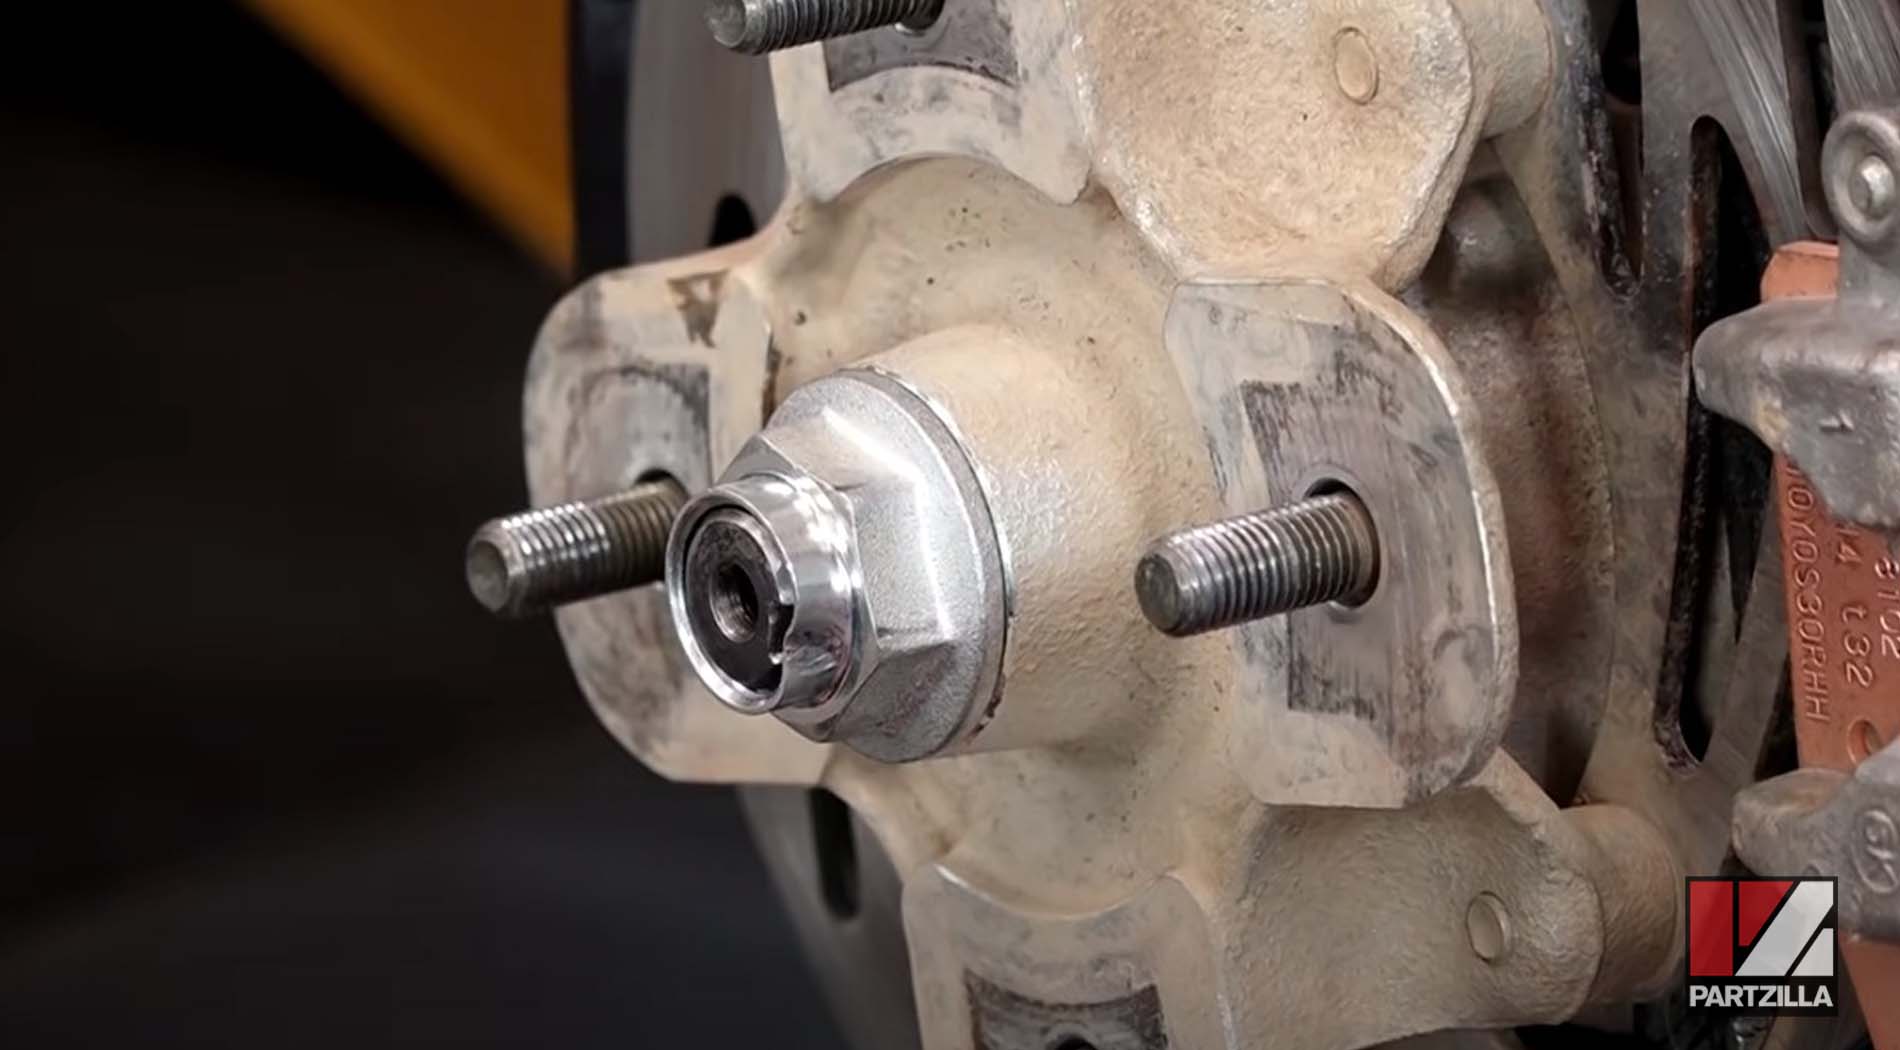
Step 24. Reinstall the brake rotor and wheel hub, and install a new axle nut.
Step 25. Reinstall the brake caliper assembly back over the brake rotor, and torque the two 12mm caliper mounting bolts to 22 foot-pounds.
Step 26. Torque the axle bolt to 190 foot-pounds.
PRO TIP: The easiest way to do this is to replace the wheel, sit the Grizzly on the ground, and have someone apply the brakes to hold the machine in place as you torque it.
Step 27. Remove the wheel, and stake the new axle nut with a punch tool to secure it in place.
Step 28. Reinstall the central dust cap and the wheel, then torque the lug nuts to 40 foot-pounds and you’re done.