How to Replace Suzuki GSXR Swingarm & Suspension Bearings
When the back end of your GSXR is sliding all over the place and there is play in the swingarm when you lift your bike, the swingarm and suspension bearings in your Suzuki GSX-R1000 need replacing.
It could just be one bearing or several, but the only way to find out is to remove the rear swingarm and take a look. If you went to the trouble of disassembling the rear end of your motorcycle, you should replace ALL the bearings at once, because if one has worn out, the others aren’t far behind.
Watch our Suzuki GSX-R1000 swingarm bearing removal and replacement video above and follow the steps below to get this job done. Use our GSX-R1000 swingarm and GSX-R1000 shock absorber exploded parts diagrams for additional reference.
Tools and Parts Needed – Suzuki GSXR Swingarm and Suspension Bearings Replacement
Tools
- Ratchet and extensions
- 8mm up to 36mm sockets
- 8mm up to 27mm wrenches
- Flathead screwdrivers
- Pliers
- Pick tools
- Hammers
- Breaker bar
- Torque wrench
- Chain tool
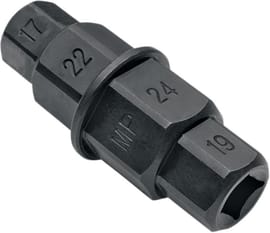
- Hex axle tool
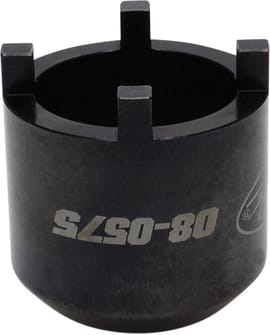
- Spanner nut socket
- Digital caliper
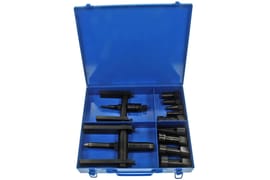
- Bearing remover set
- Bearing puller and extractor set
Parts
Find the parts needed to complete this job here.
Replacing Suzuki GSX-R1000 Swingarm & Suspension Bearings
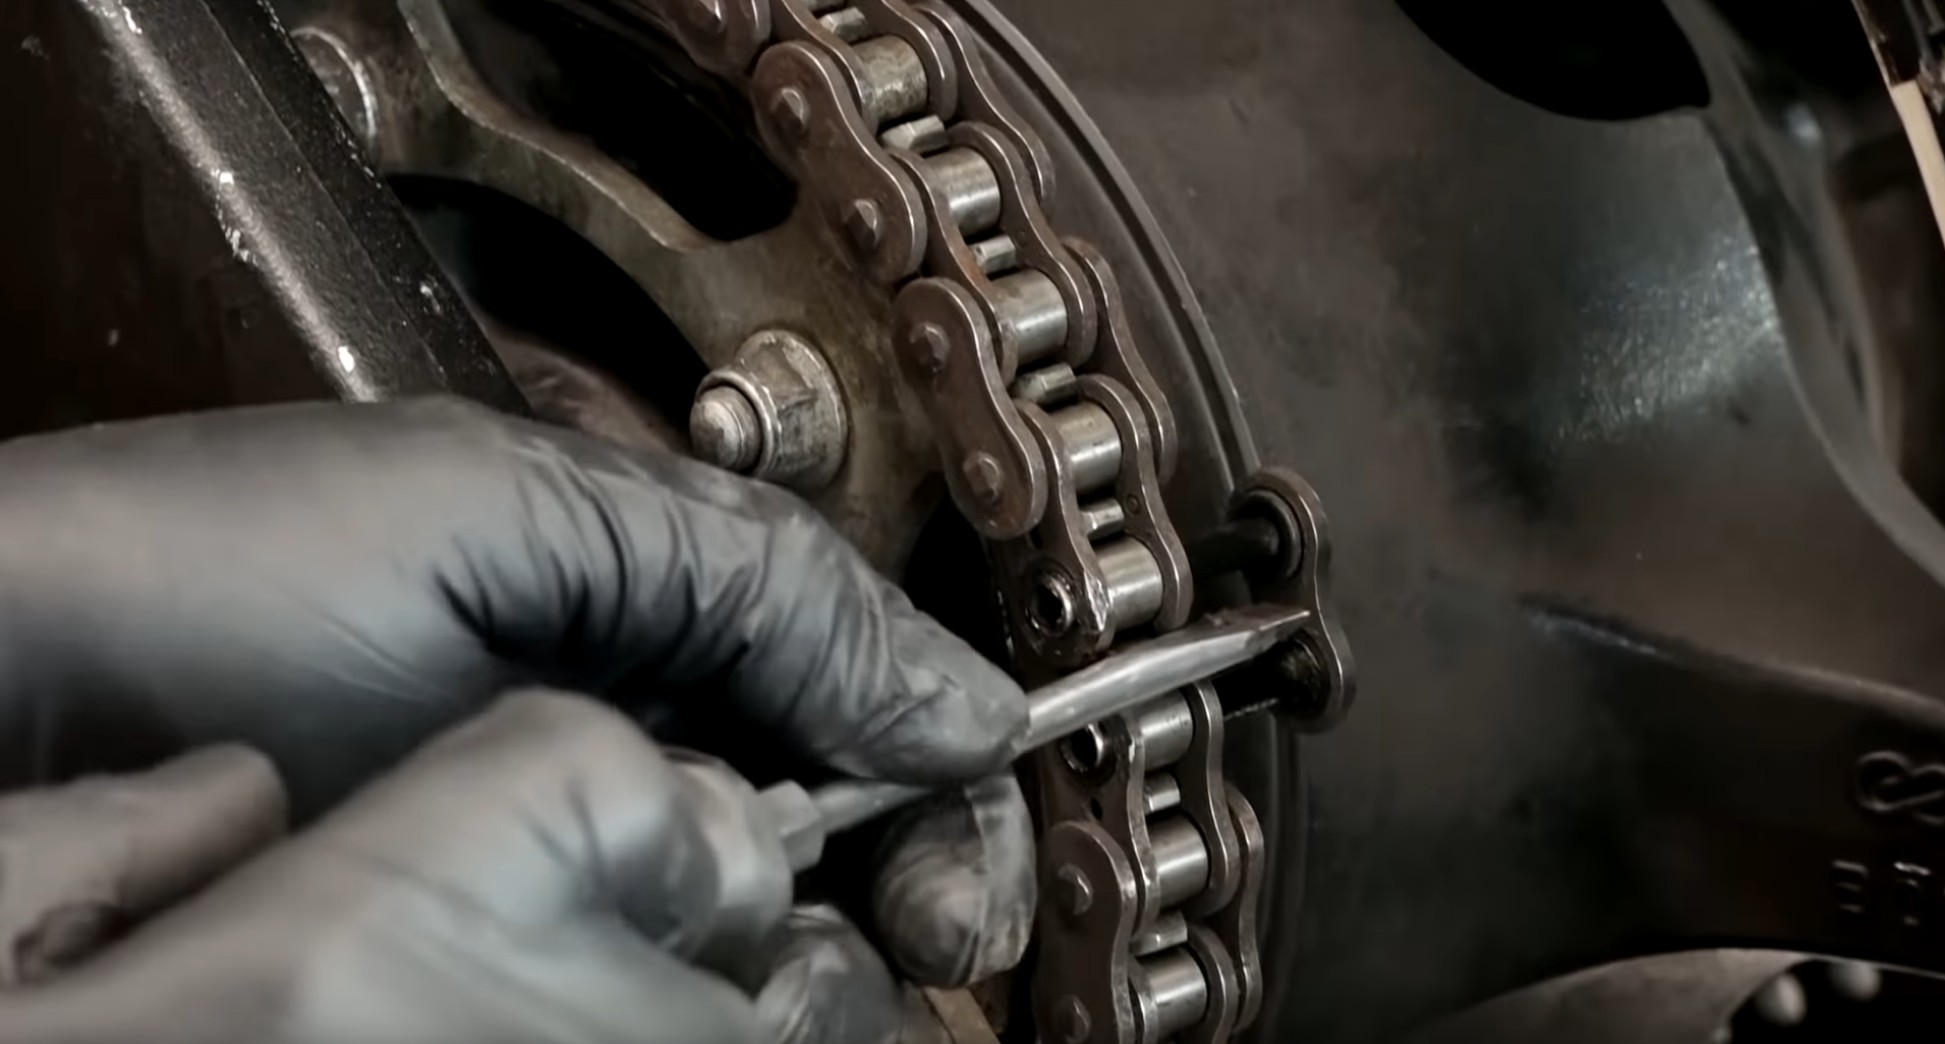
Step 1. Remove the chain by either grinding off the pin flares from one of the links and pushing the rest of the link out, or using a chain tool to press a link out from the chain.
Step 2. Remove the 36mm axle nut, then pull the axle out from the wheel and swingarm, and remove the rear wheel.
Step 3. Remove the rear brake hose bracket from the right swingarm, and move the rear brake caliper up onto the seat so it’s out of the way.
Step 4. Remove the exhaust mufflers to make more room to work around the rear shock absorber and swingarm.
Step 5. Remove the shock absorber lower mounting bolt holding the shock to the cushion lever. The lower mounting bolt has a 12mm head and a 14mm nut.
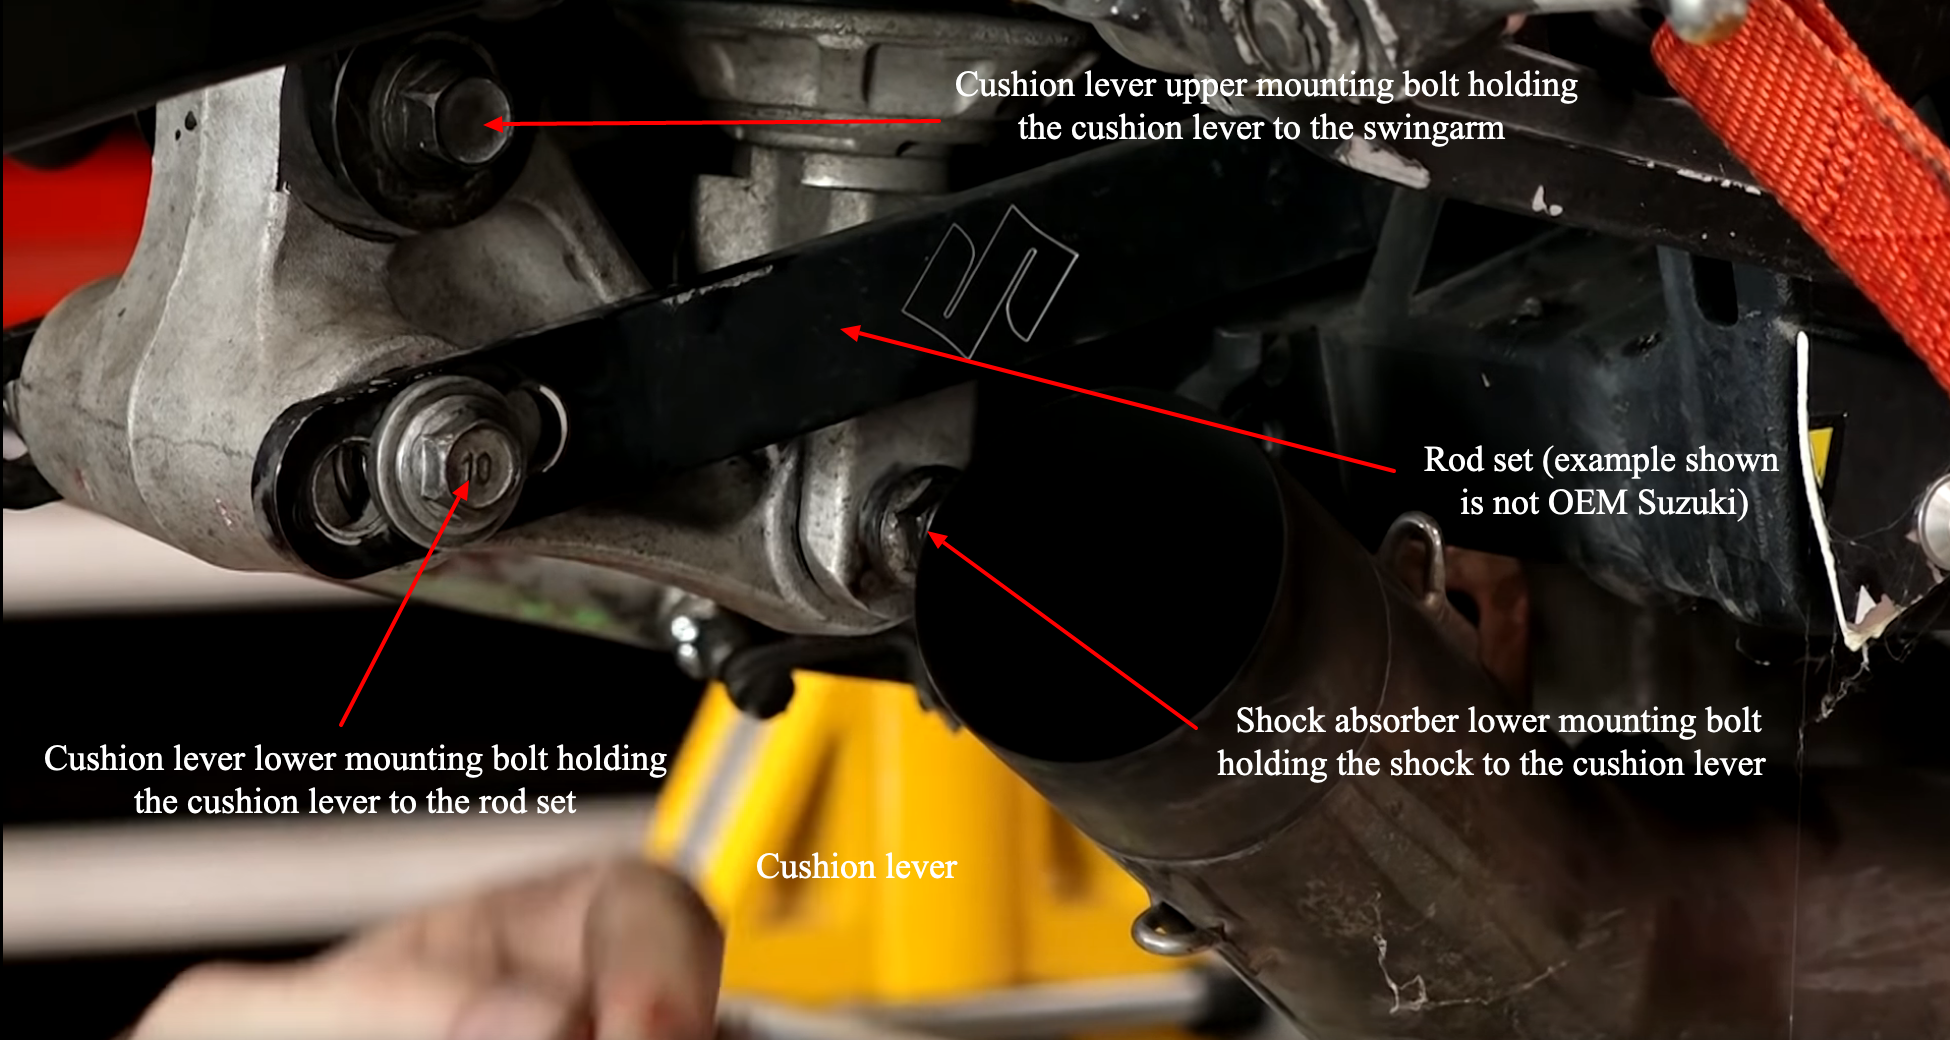
Step 6. Remove the cushion lever lower mounting bolt that holds the cushion lever to the rod set.
Step 7. Remove the shock absorber upper mounting bolt, and lift out the shock absorber.
Step 8. Remove the swingarm pivot lock nut from the right side of the swingarm using a spanner nut socket.

Step 9. Insert a 19mm hex axle tool into the swingarm axle to hold it in place, then break loose the swingarm pivot nut on the left side of the swingarm. Once the left side nut is loose, unscrew the swingarm axle from the right side using the hex axle tool, then remove the axle from the swingarm, and the swingarm from the motorcycle.

Step 10. Remove the cushion lever upper mounting bolt that holds the cushion lever to the swingarm, then remove the cushion lever.
Step 11. Remove the chain buffer from the swingarm.
NOTE: If the chain buffer or the chain guard are worn, now is the perfect time to replace them with the swingarm off the bike.
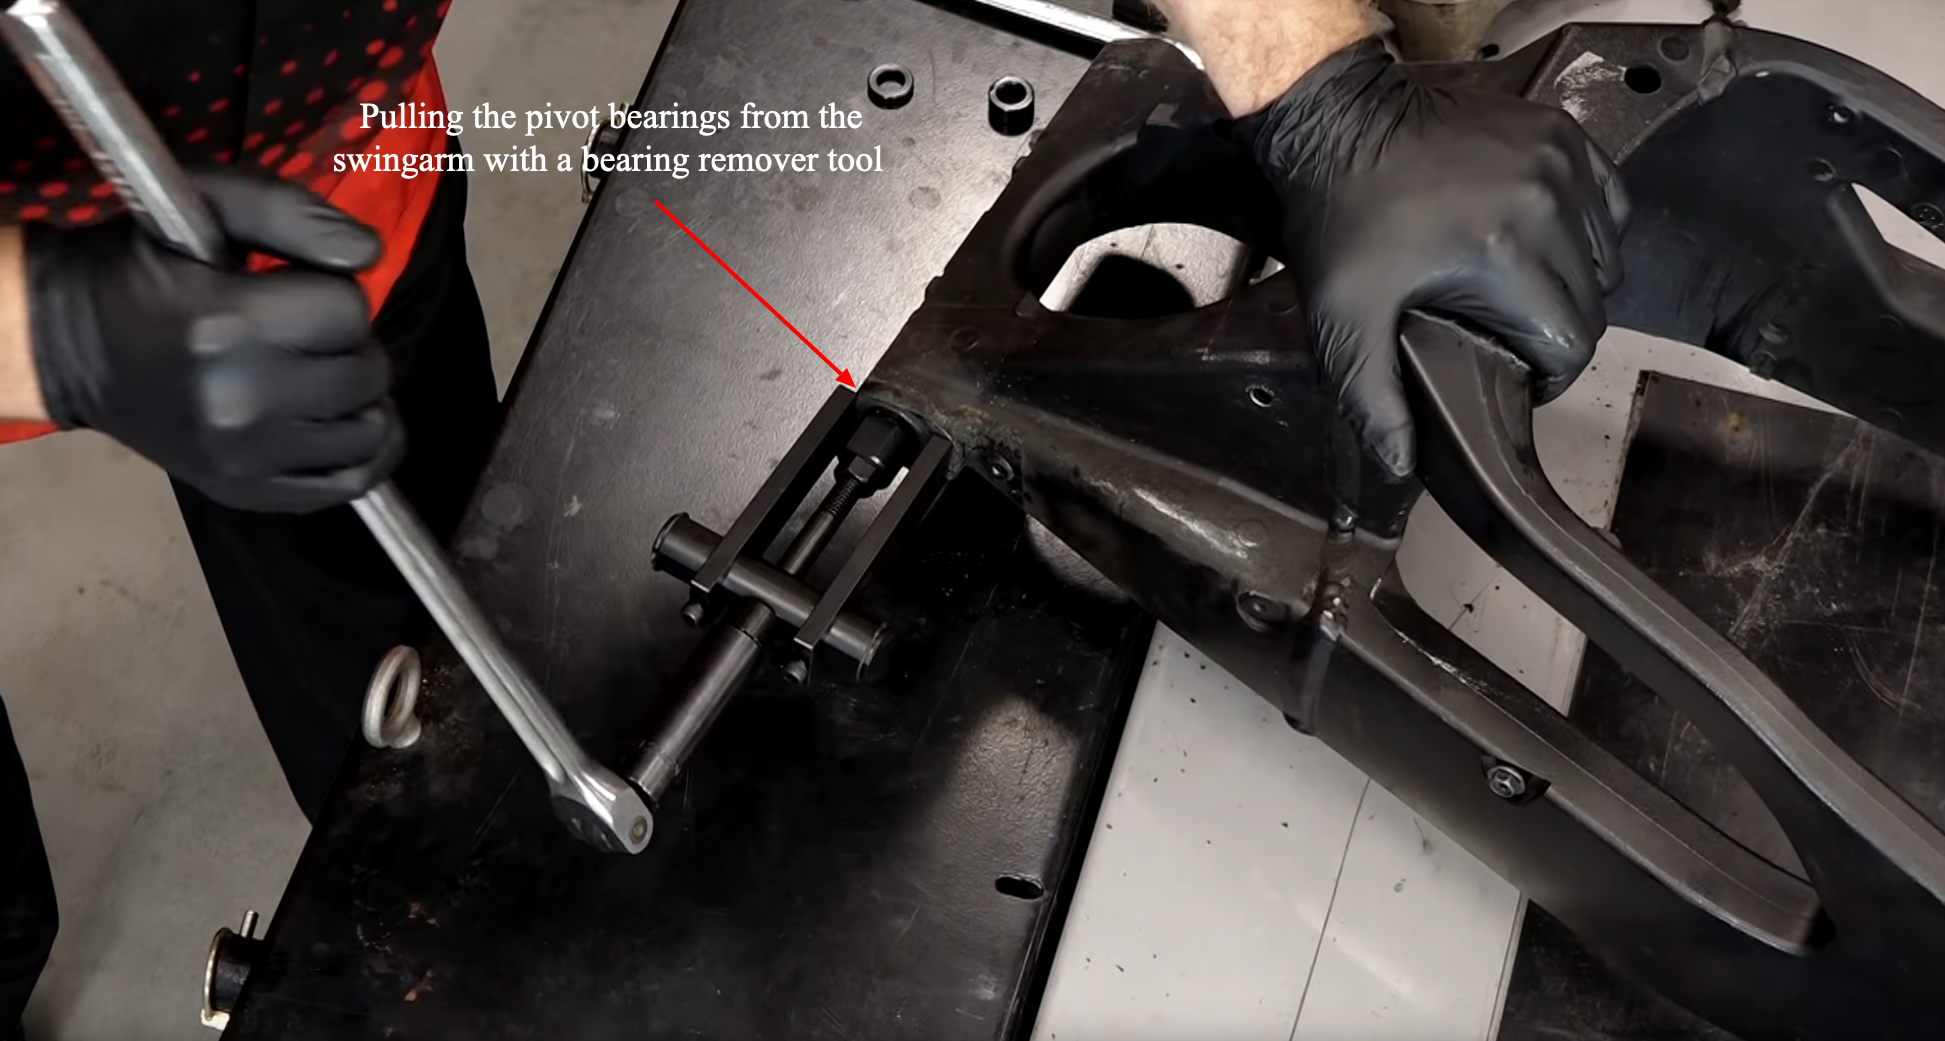
Step 12. Remove the spacer collars from the swingarm to access the swingarm pivot bearings. Use a 28mm bearing remover to pull the pivot bearings from the swingarm.
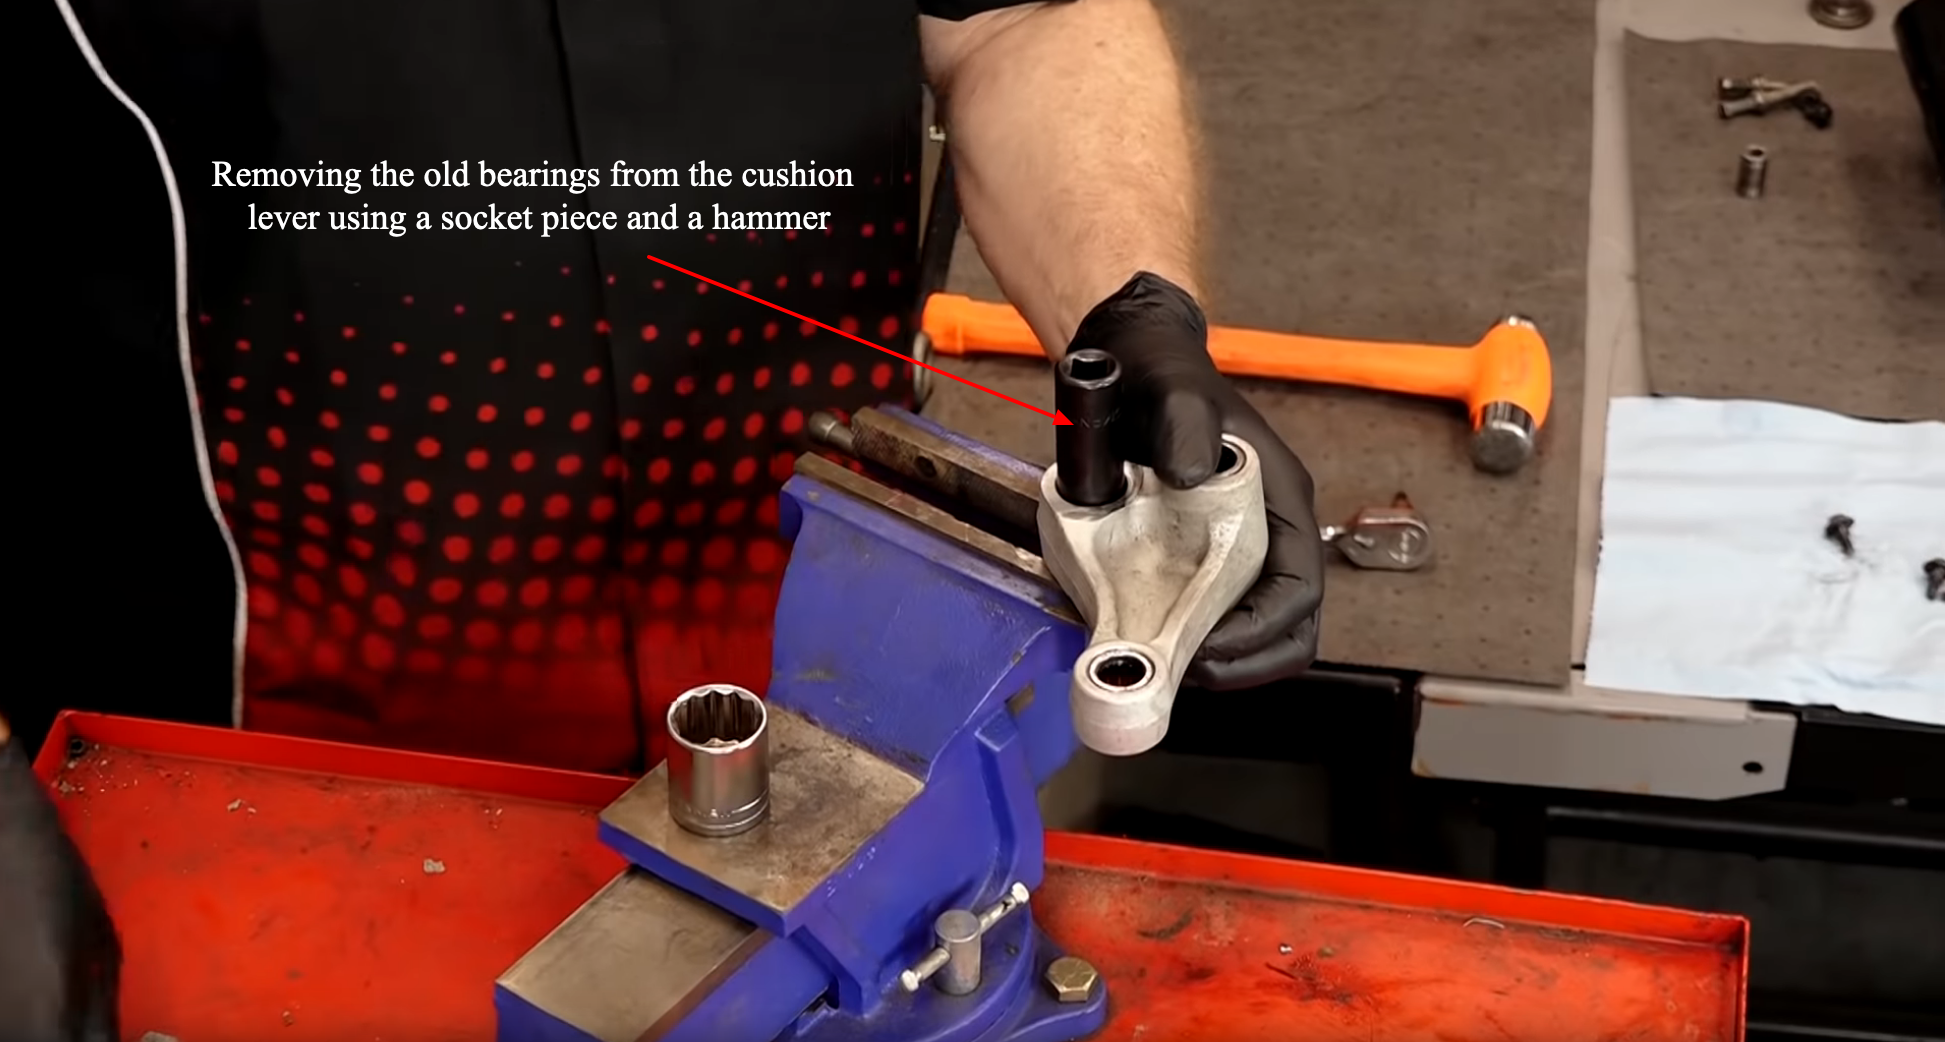
Step 13. Remove the front bearing, upper bearing and two lower bearings from the cushion lever.
PRO TIP: Bearing removers are ideal for this task, but you might be able to push the bearings out using socket pieces and a hammer.
Step 14. Install the new front bearing and the new upper bearing into the cushion lever. Using the threaded rod from a bearing puller set and a socket the same diameter as the bearings, carefully press the bearings into the cushion lever until they are recessed by half a millimeter below the face of the cushion lever.
PRO TIP: You could use a length of threaded rod and some washers from a hardware store if you don’t have a bearing puller set. Don’t hammer the bearings into the cushion lever, as the bearings’ rollers are fragile and easily damaged. This goes for all the bearings you’ll be replacing.
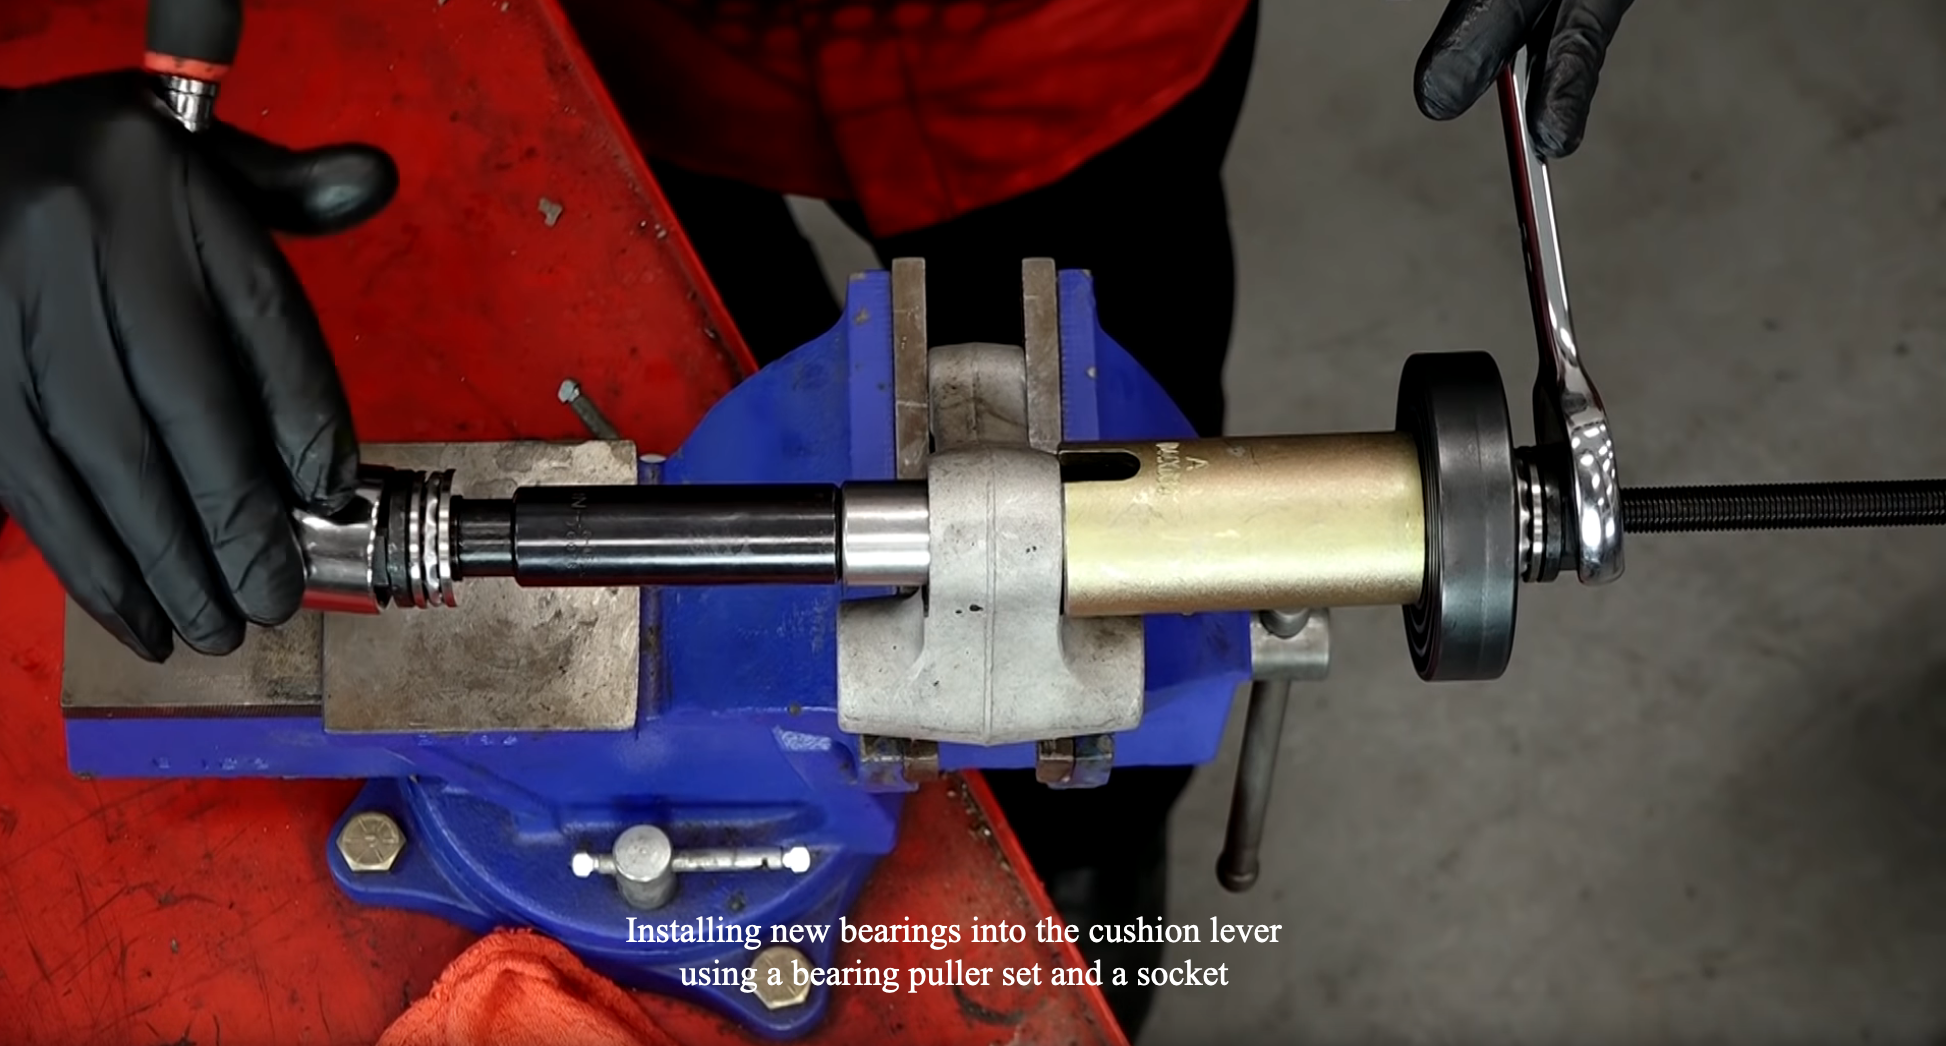
Step 15. Install the two new lower bearings into the cushion lever. Make sure the ends of the bearings with the stamped lettering face outward from the cushion lever. Use the same installation technique as with the previous bearings, but this time recess the lower bearings to 1mm below the face of the cushion lever.
Step 16. Grease the cushion lever bearings, and install new spacers into them.
NOTE: Always fit new spacers with new bearings, as old spacers will quickly wear out the new bearings.

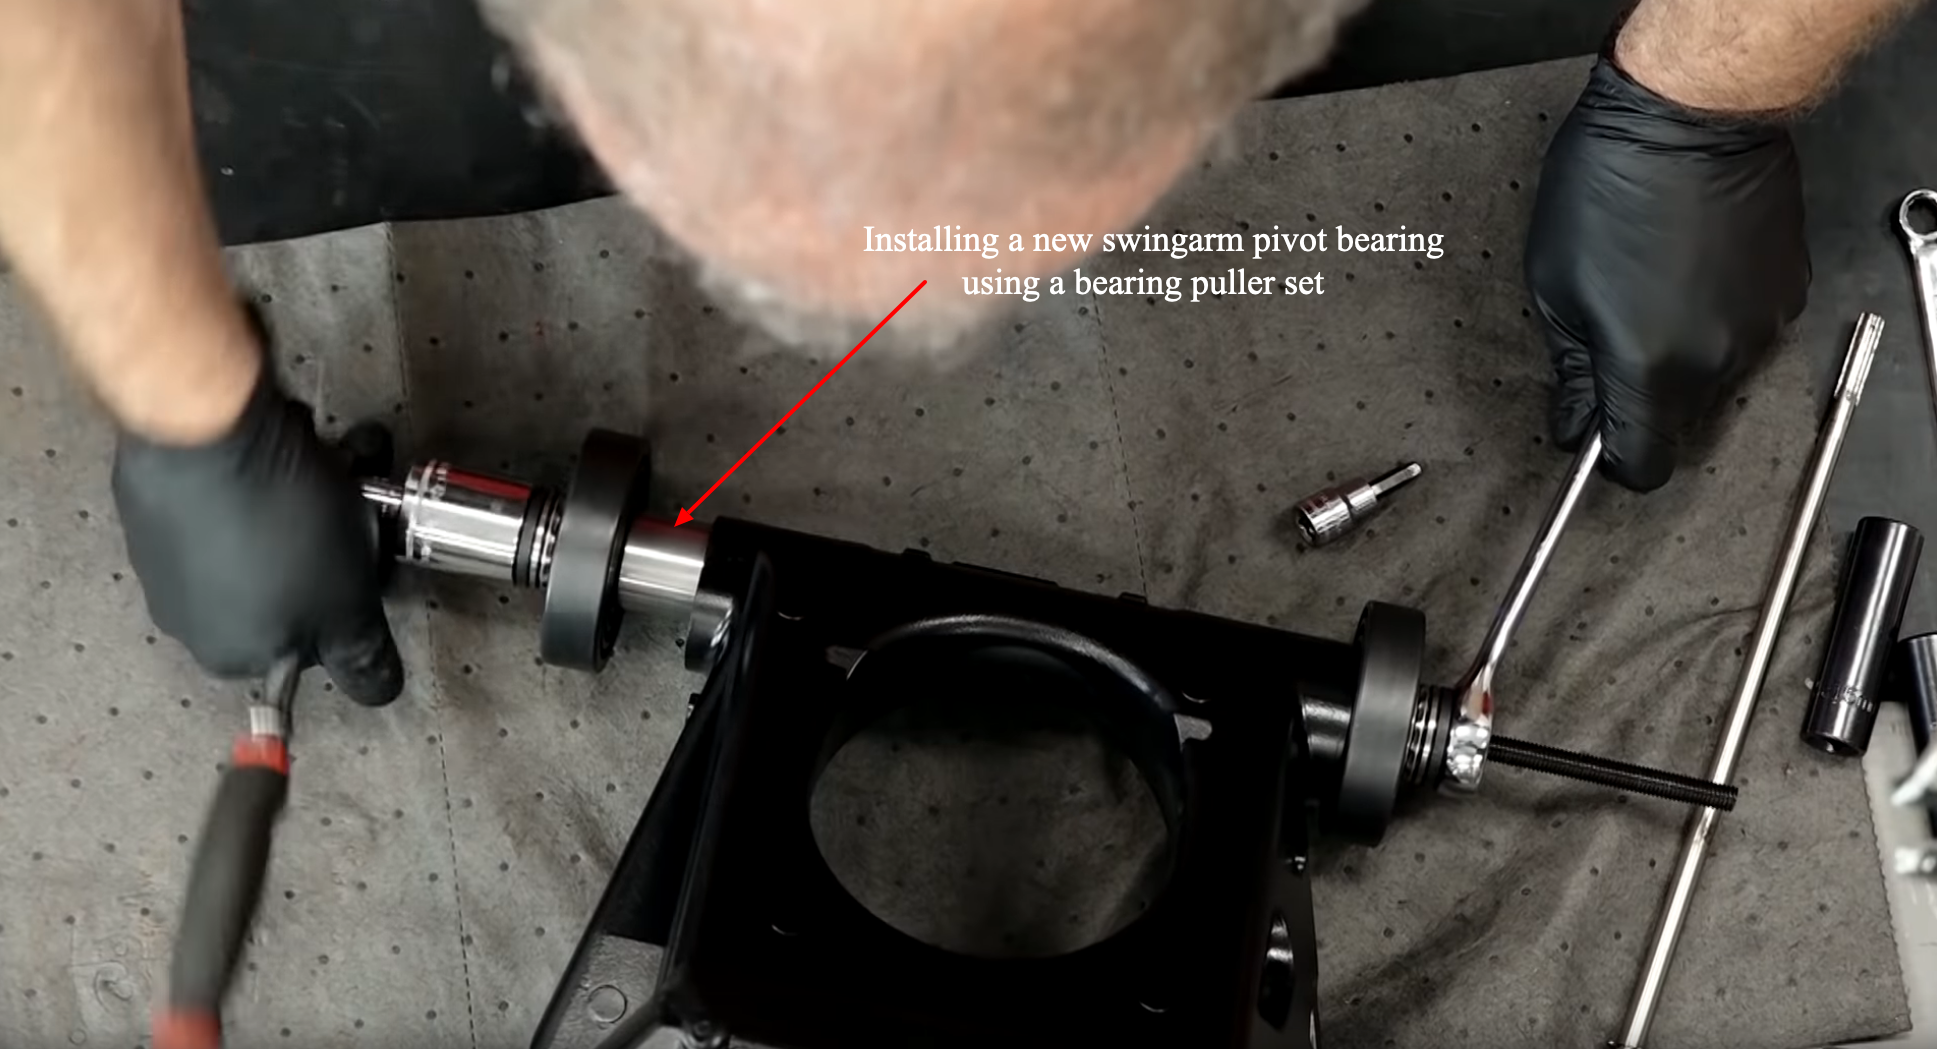
Step 17. Install the new swingarm pivot bearings, making sure the stamped lettering on the bearings is facing outward. Use the same installation technique as for the cushion lever bearings, but the pivot bearings only need to be flush with the swingarm, not recessed.
NOTE: Don’t forget to install the center spacer before installing the second of the two pivot bearings.
Step 18. Remove the rod set mounting bolt, then take the rod set off the motorcycle.
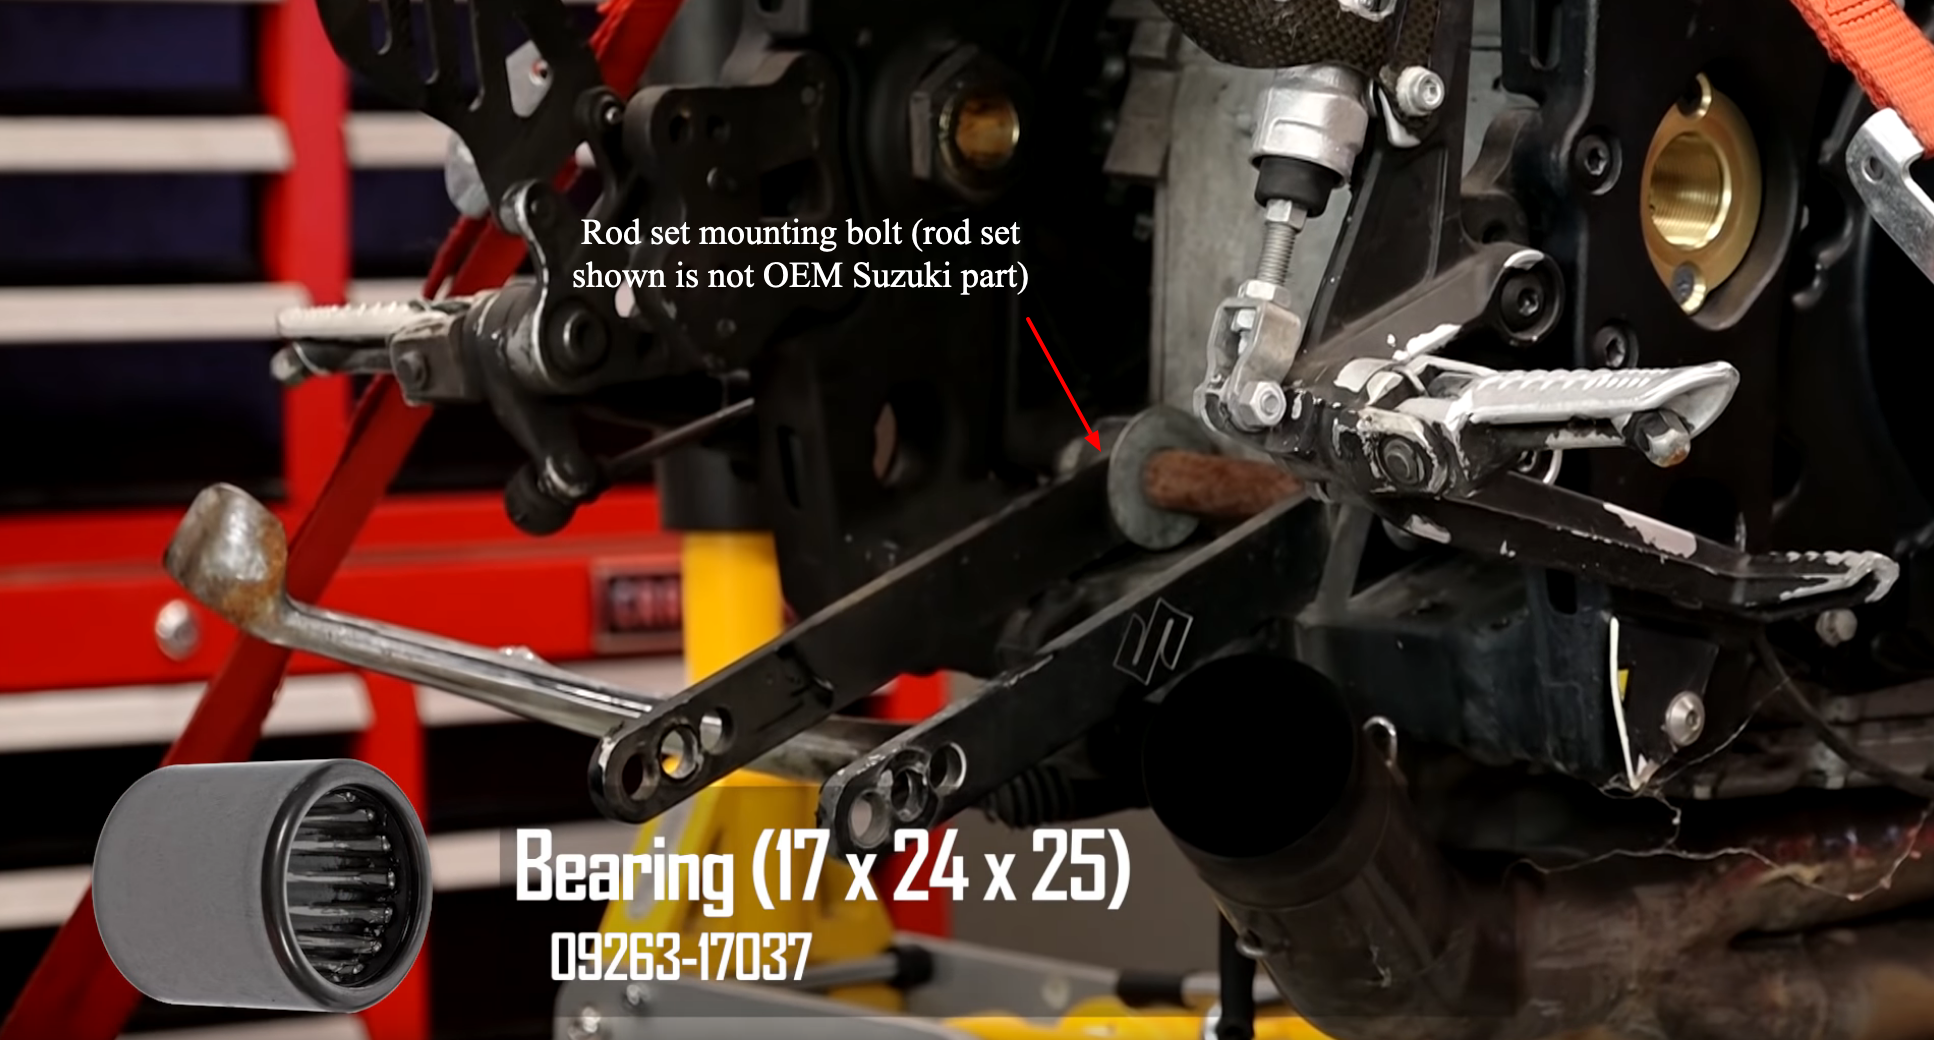
Step 19. Remove the two rod bearings with a bearing remover, or push the bearings out using socket pieces and a hammer.
Step 20. Install the new rod bearings, making sure the stamped lettering on the bearings is facing outward. Use the same installation technique as you did for all the previous bearings.
Step 21. Clean and grease the rod set mounting bolt, and reinstall the rod set into the motorcycle. Torque the mounting bolt to 71 foot-pounds.
Step 22. Grease the swingarm pivot bearings, then install new spacer collars into the swingarm bearings, and reinstall the chain buffer and chain guide.
Step 23. Clean and grease the swingarm axle, then hold the swingarm in place and slide the swingarm axle back in from the right side. Tighten the axle until it bottoms out, then torque it to 11 foot-pounds using the hex axle tool.
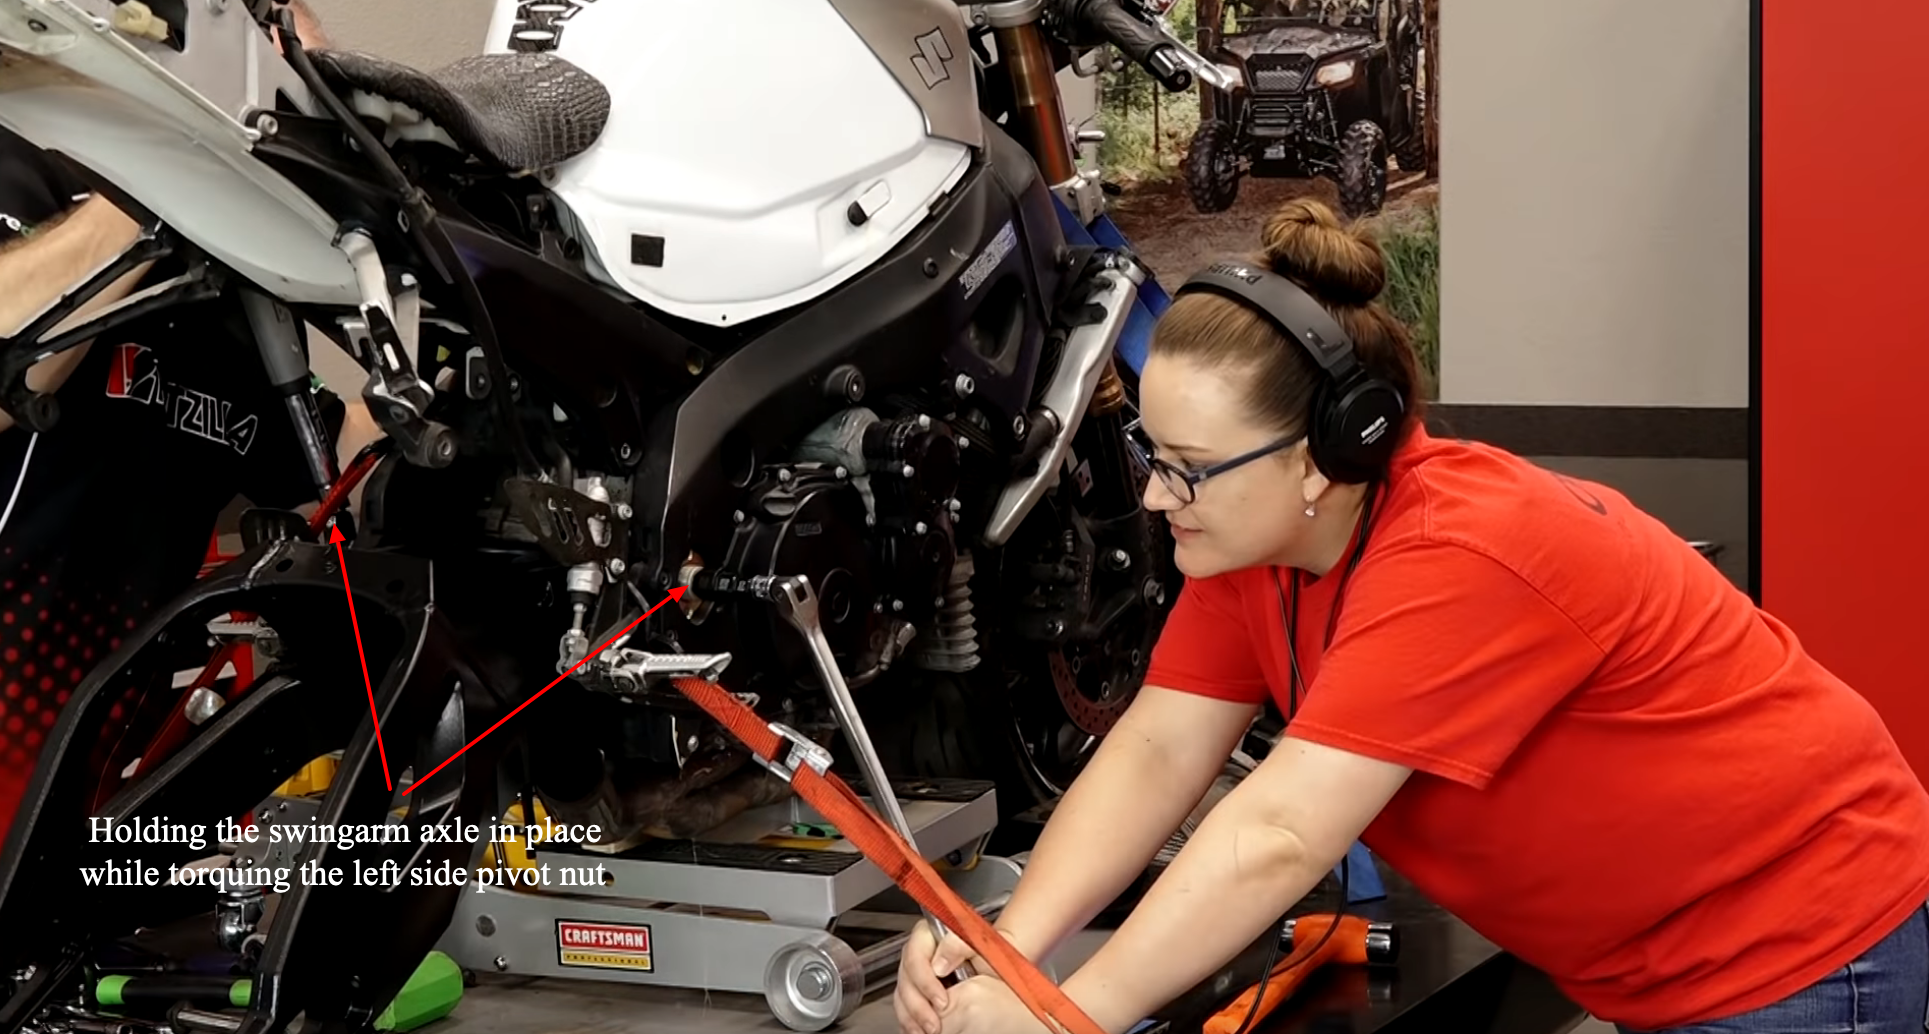
Step 24. Reinstall the swingarm pivot nut to the left side of the swingarm and torque it to 72.5 foot-pounds.
PRO TIP: Get an assistant to hold the swingarm axle in place for this step.
Step 25. Reinstall the swingarm pivot lock nut to the right side of the swingarm using the spanner nut socket, and torque it to 65 foot-pounds.
Step 26. Clean and grease the cushion lever upper mounting bolt, and reinstall the cushion lever to the swingarm. Torque the bolt to 71 foot-pounds.
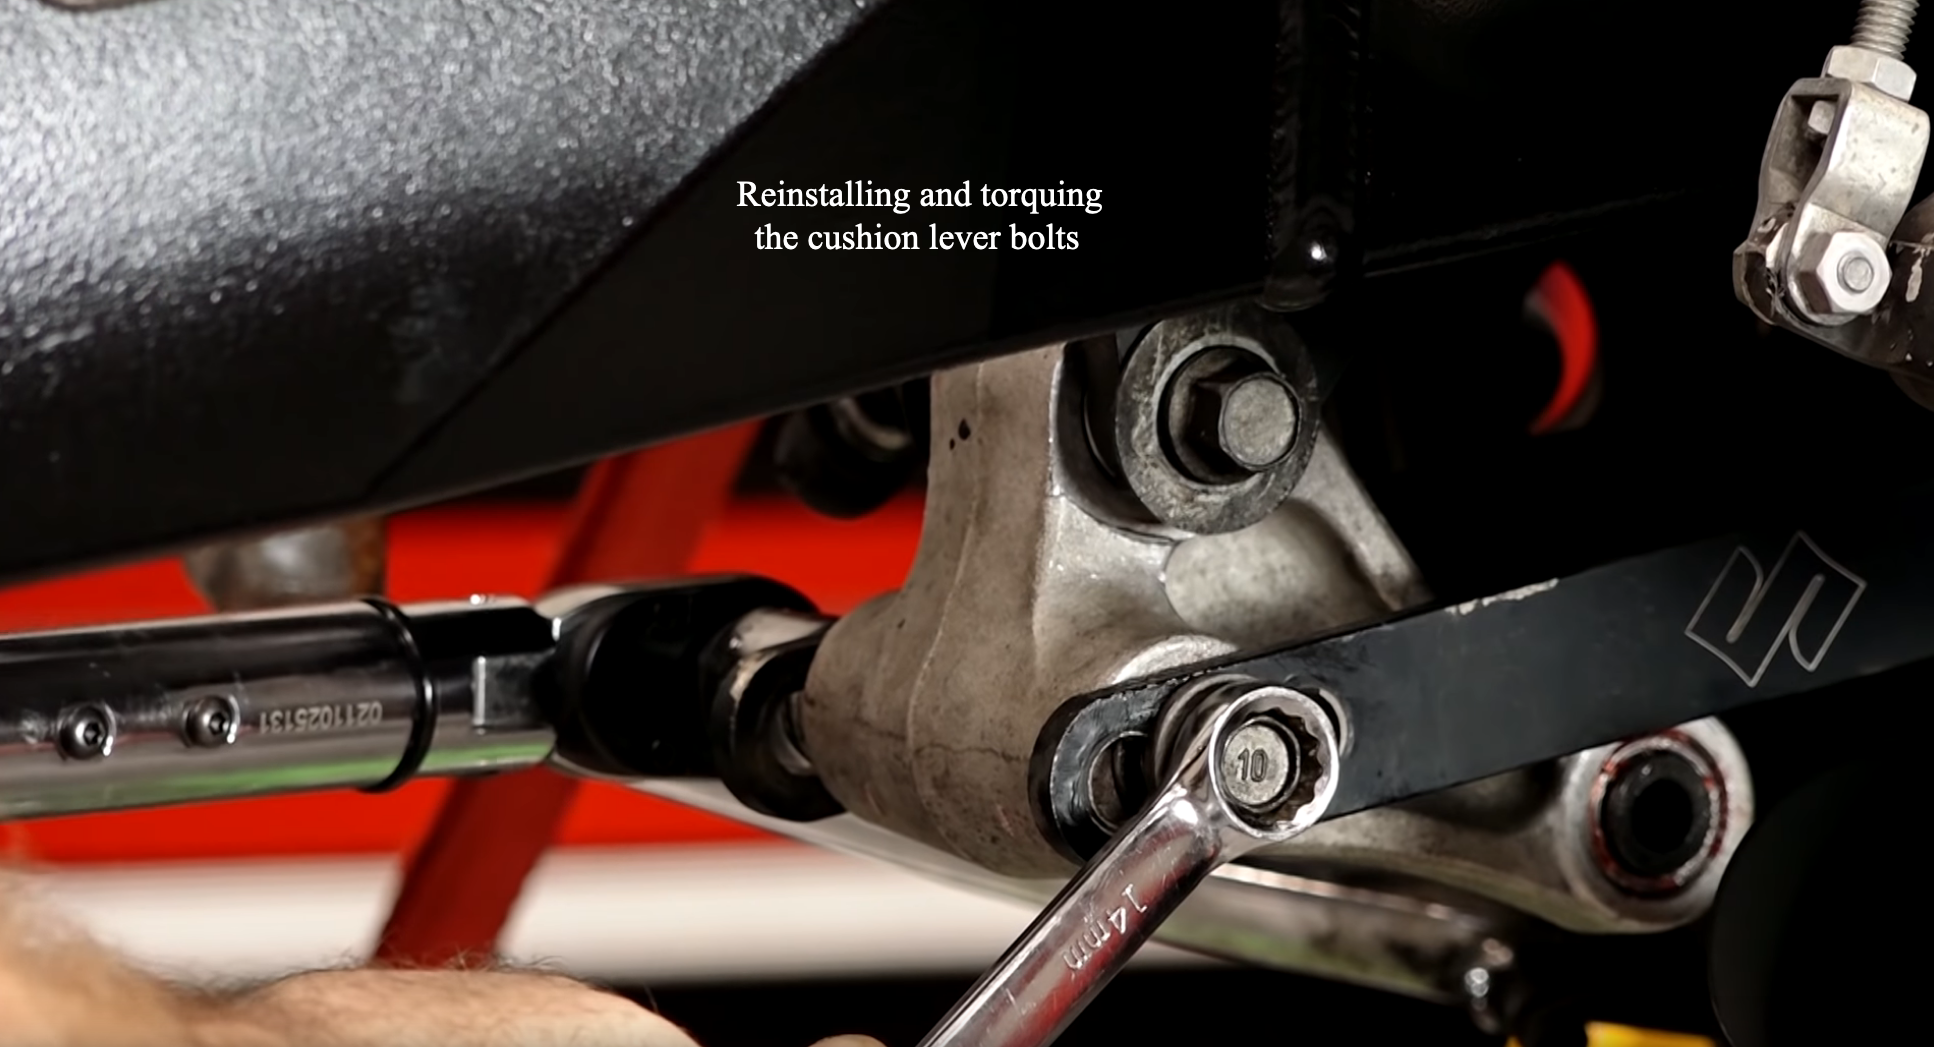
Step 27. Clean and grease the cushion lever lower mounting bolt, and reinstall the cushion lever to the rod set. Torque the bolt to 56 foot-pounds.
Step 28. Clean and grease the upper and lower shock absorber mounting bolts, and reinstall the shock absorber. Torque both bolts to 36 foot-pounds.
After the swingarm and rear suspension bearings are replaced on your Suzuki GSX-R1000, all that’s left for you to do is reinstall the rear brake caliper, remount the wheel, re-stake the chain and adjust it to the correct tension.
Watch the video above to see how to replace and adjust a Suzuki GSX-R1000 chain and sprockets.