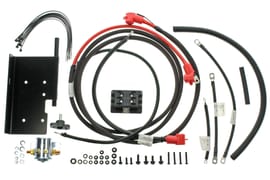
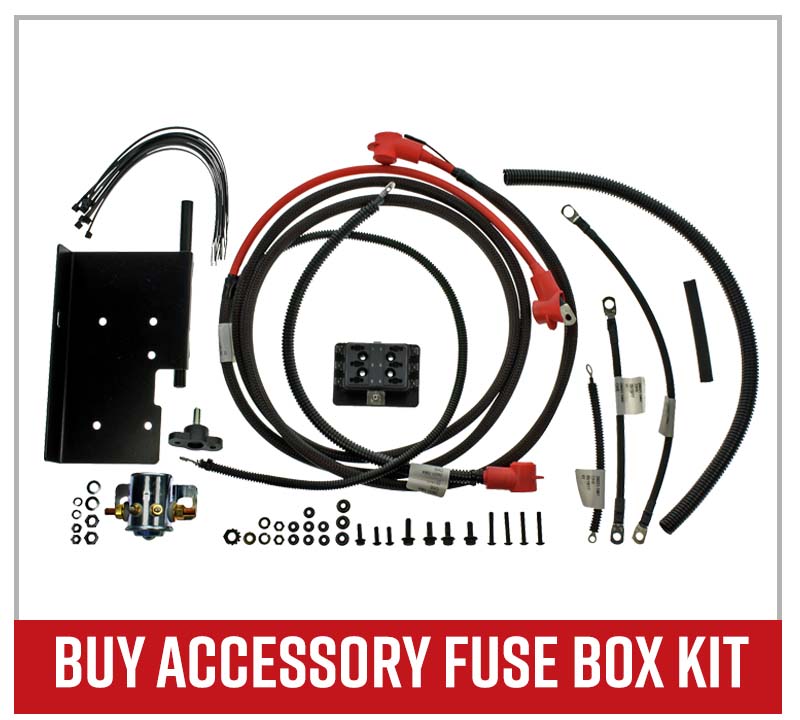
Kawasaki Mule Accessory Fuse Box Install
A Kawasaki Mule Pro-FXT UTV that's ripe for upgrades such as bigger winches, light bars and other electrical components needs an accessory fuse box to handle the additional electrical loads.
Installing an accessory fuse box on a Mule doesn't require any fancy equipment. All you need are a few basic tools you probably already have in your toolbox, and the OEM Kawasaki accessory fuse box kit. Watch the video above and follow the steps below to install an accessory fuse box kit on a Kawasaki Mule PRO FXT.
Tools and Parts - Kawasaki Mule Accessory Fuse Box Installation
- Ratchet and extensions
- 8mm, 10mm, 12mm, 14mm sockets
- 8mm, 10mm, 12mm, 13mm wrenches
- Screwdrivers
- Needle nose pliers
- Push pin pliers
- Drill and drill bits
- 3mm Allen
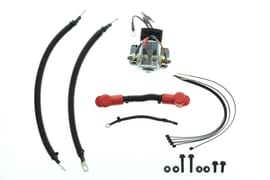
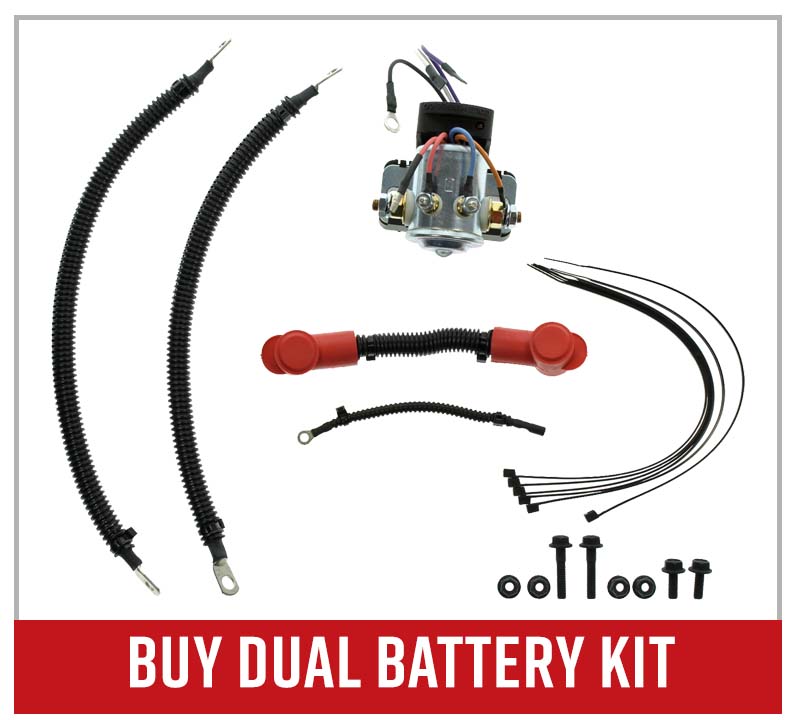
- Kawasaki accessory fuse box kit
Prepping Kawasaki Mule PRO-FXT Accessory Fuse Box Installation
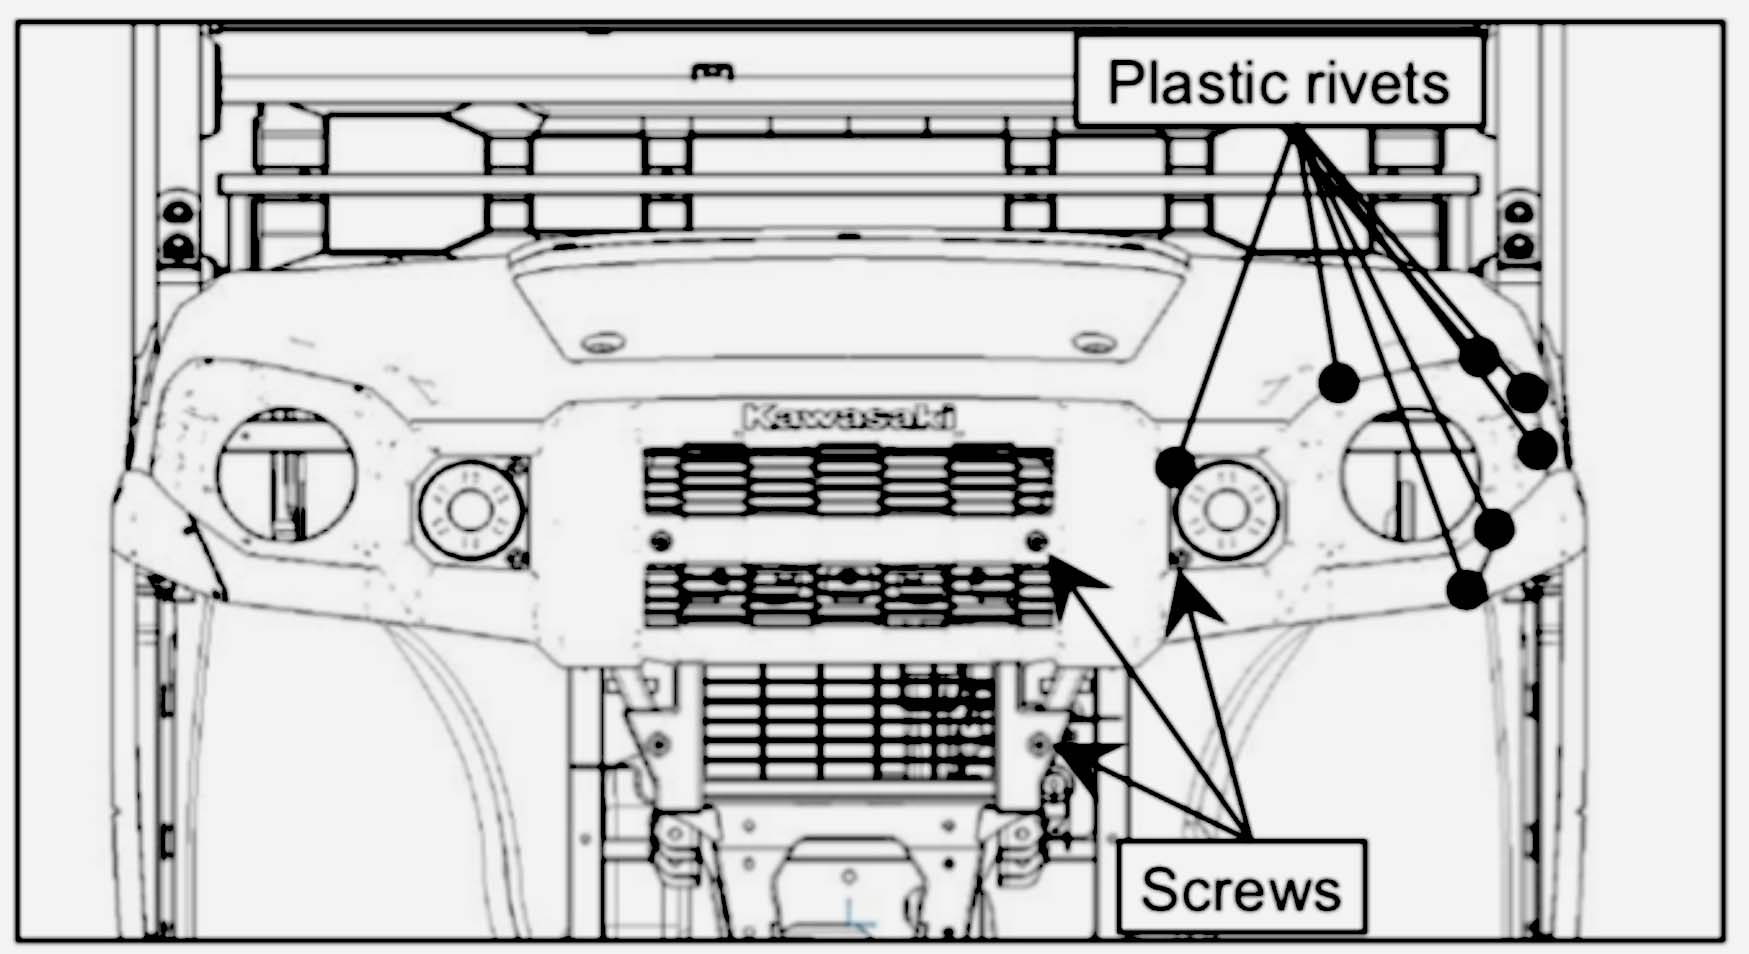
Step 1. Remove the three Philips screws and the seven plastic push pin rivets on each side of the headlight grill. Use push pin pliers to avoid damaging the push pin rivets.
Step 2. Once the grill is loose, carefully pull it away from the Mule and unclip the headlight connectors behind each headlight enclosure. Lift the grill out and set it aside.
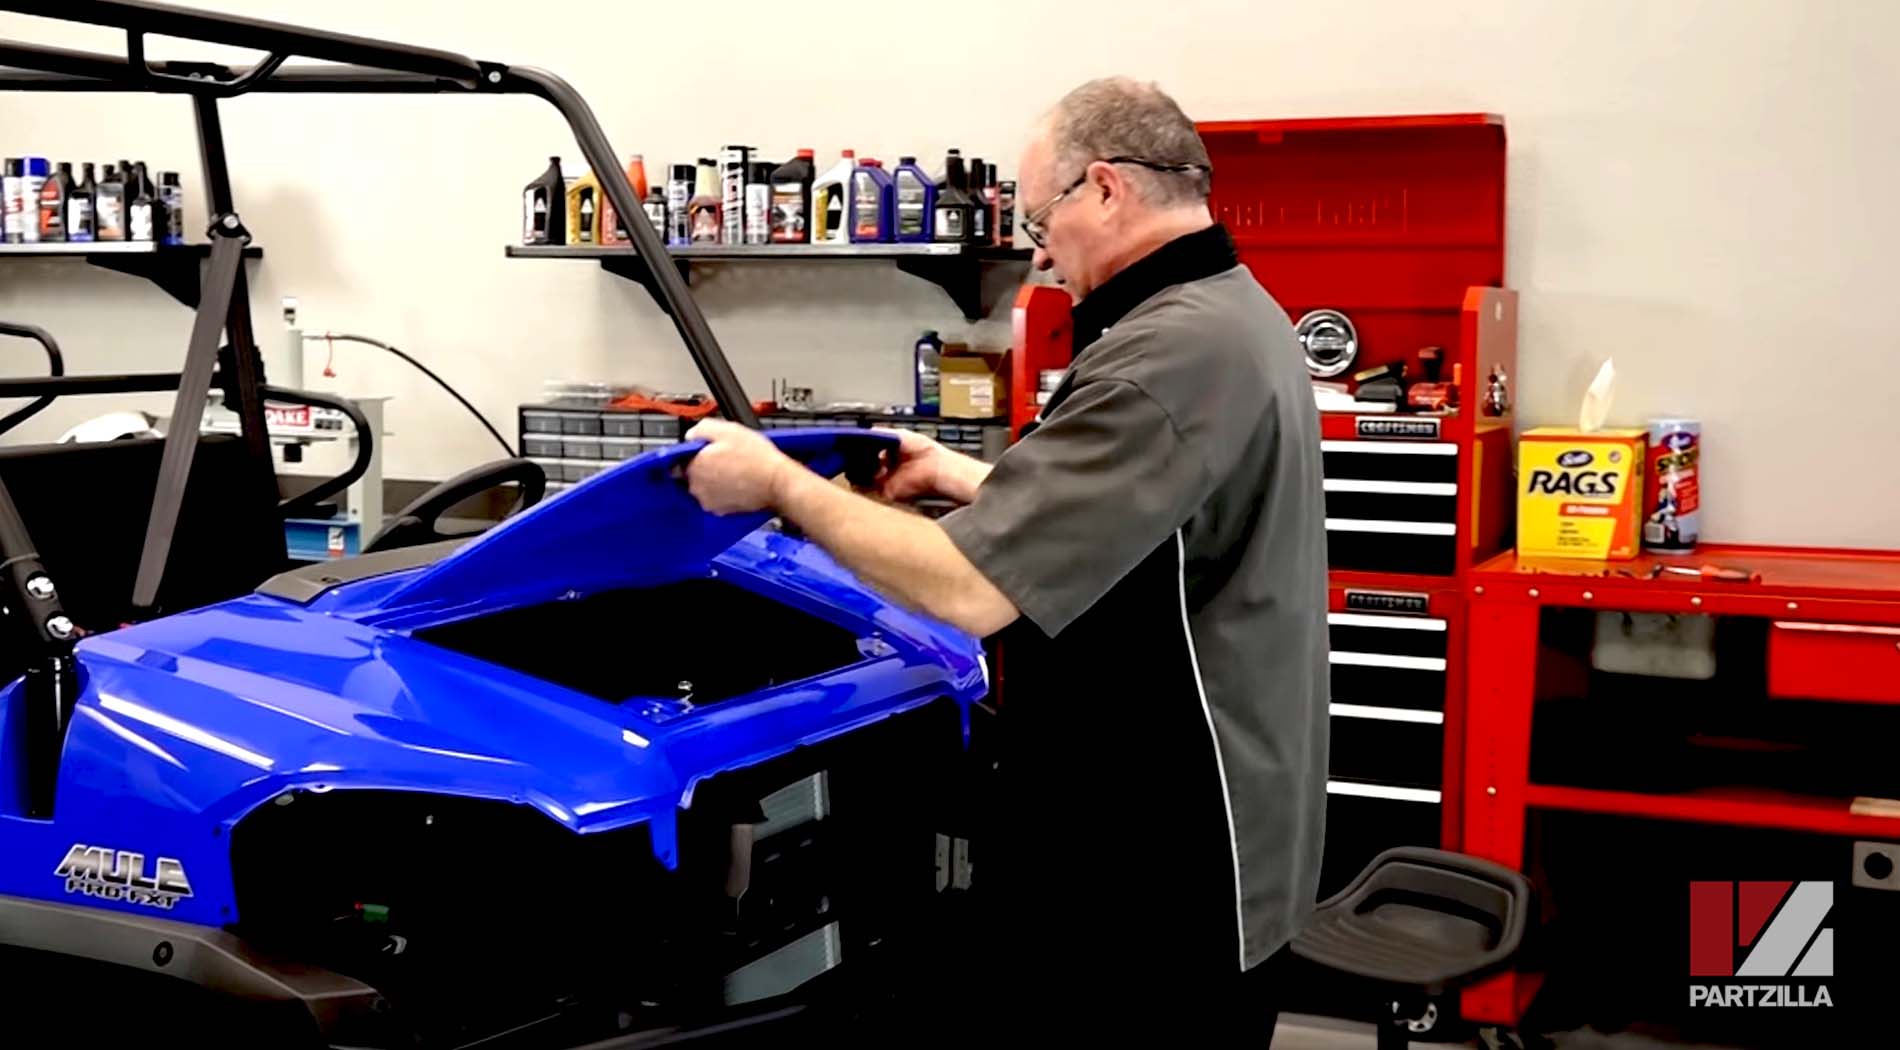
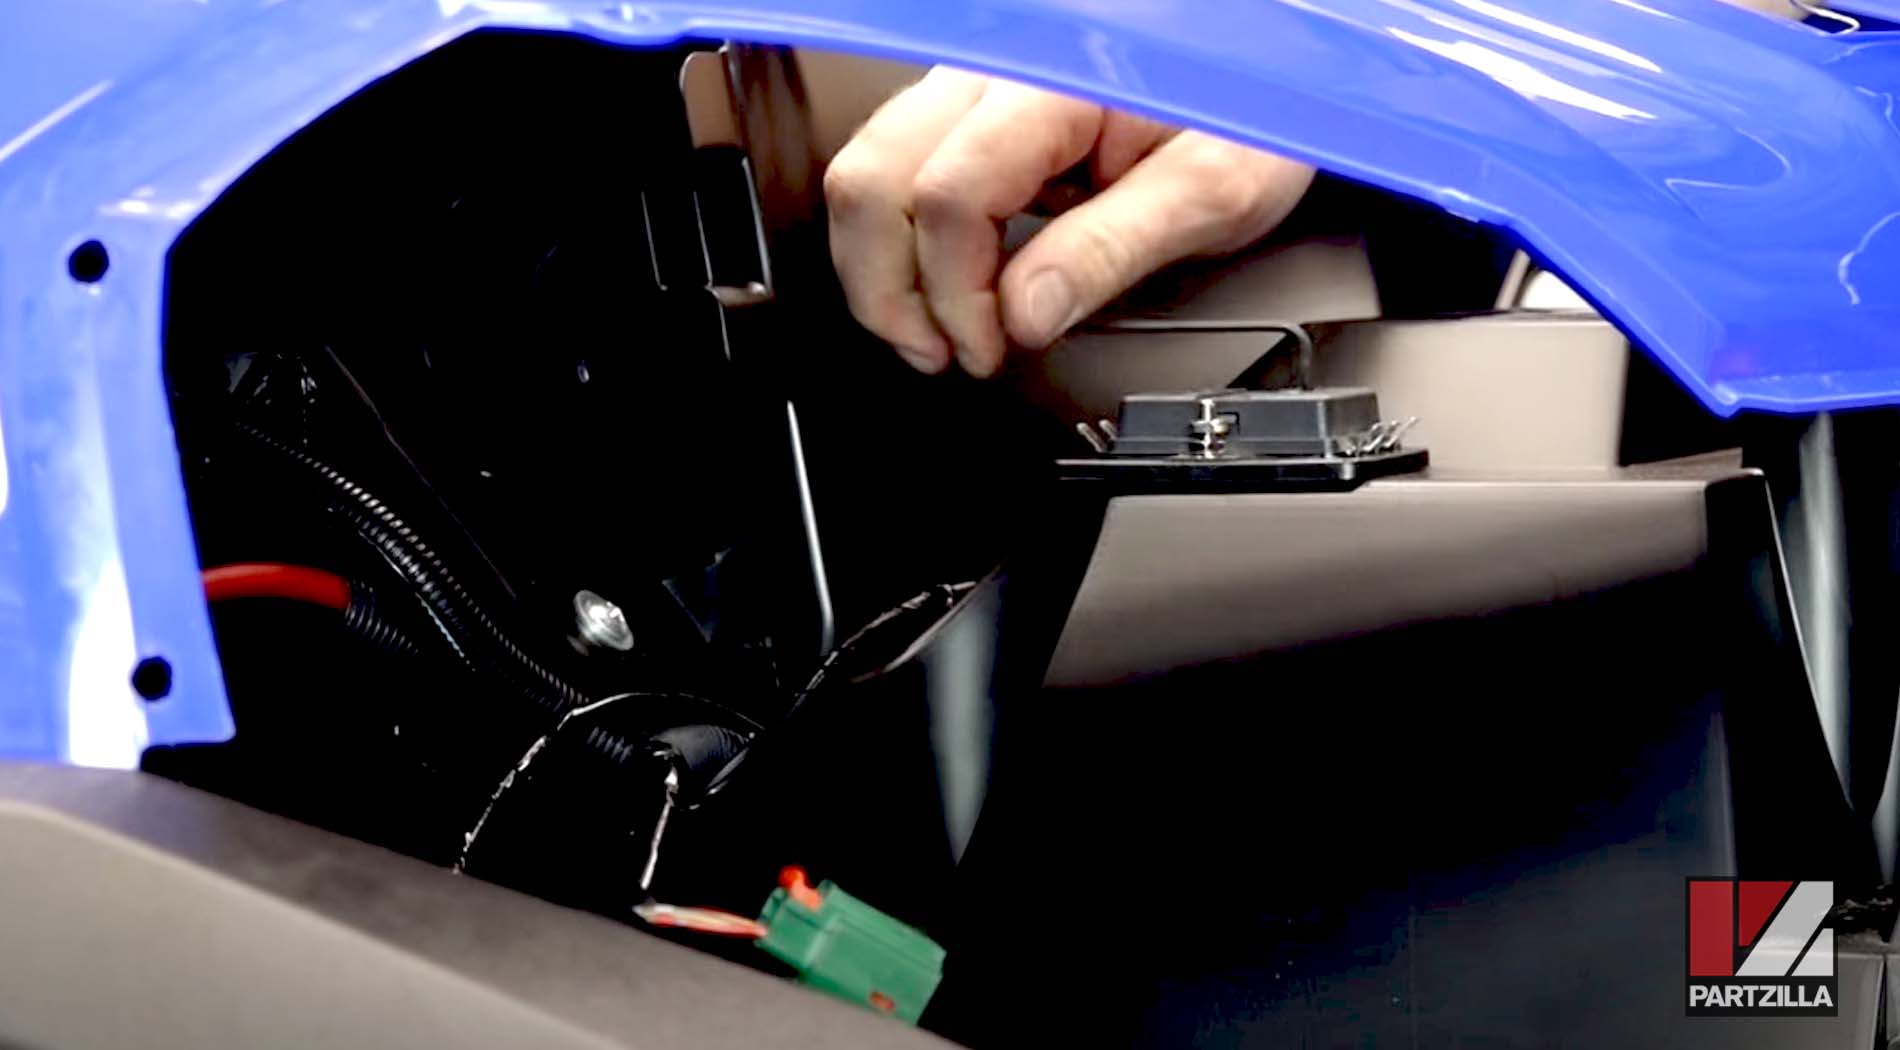
Step 3. Remove the front compartment cover and set it aside.
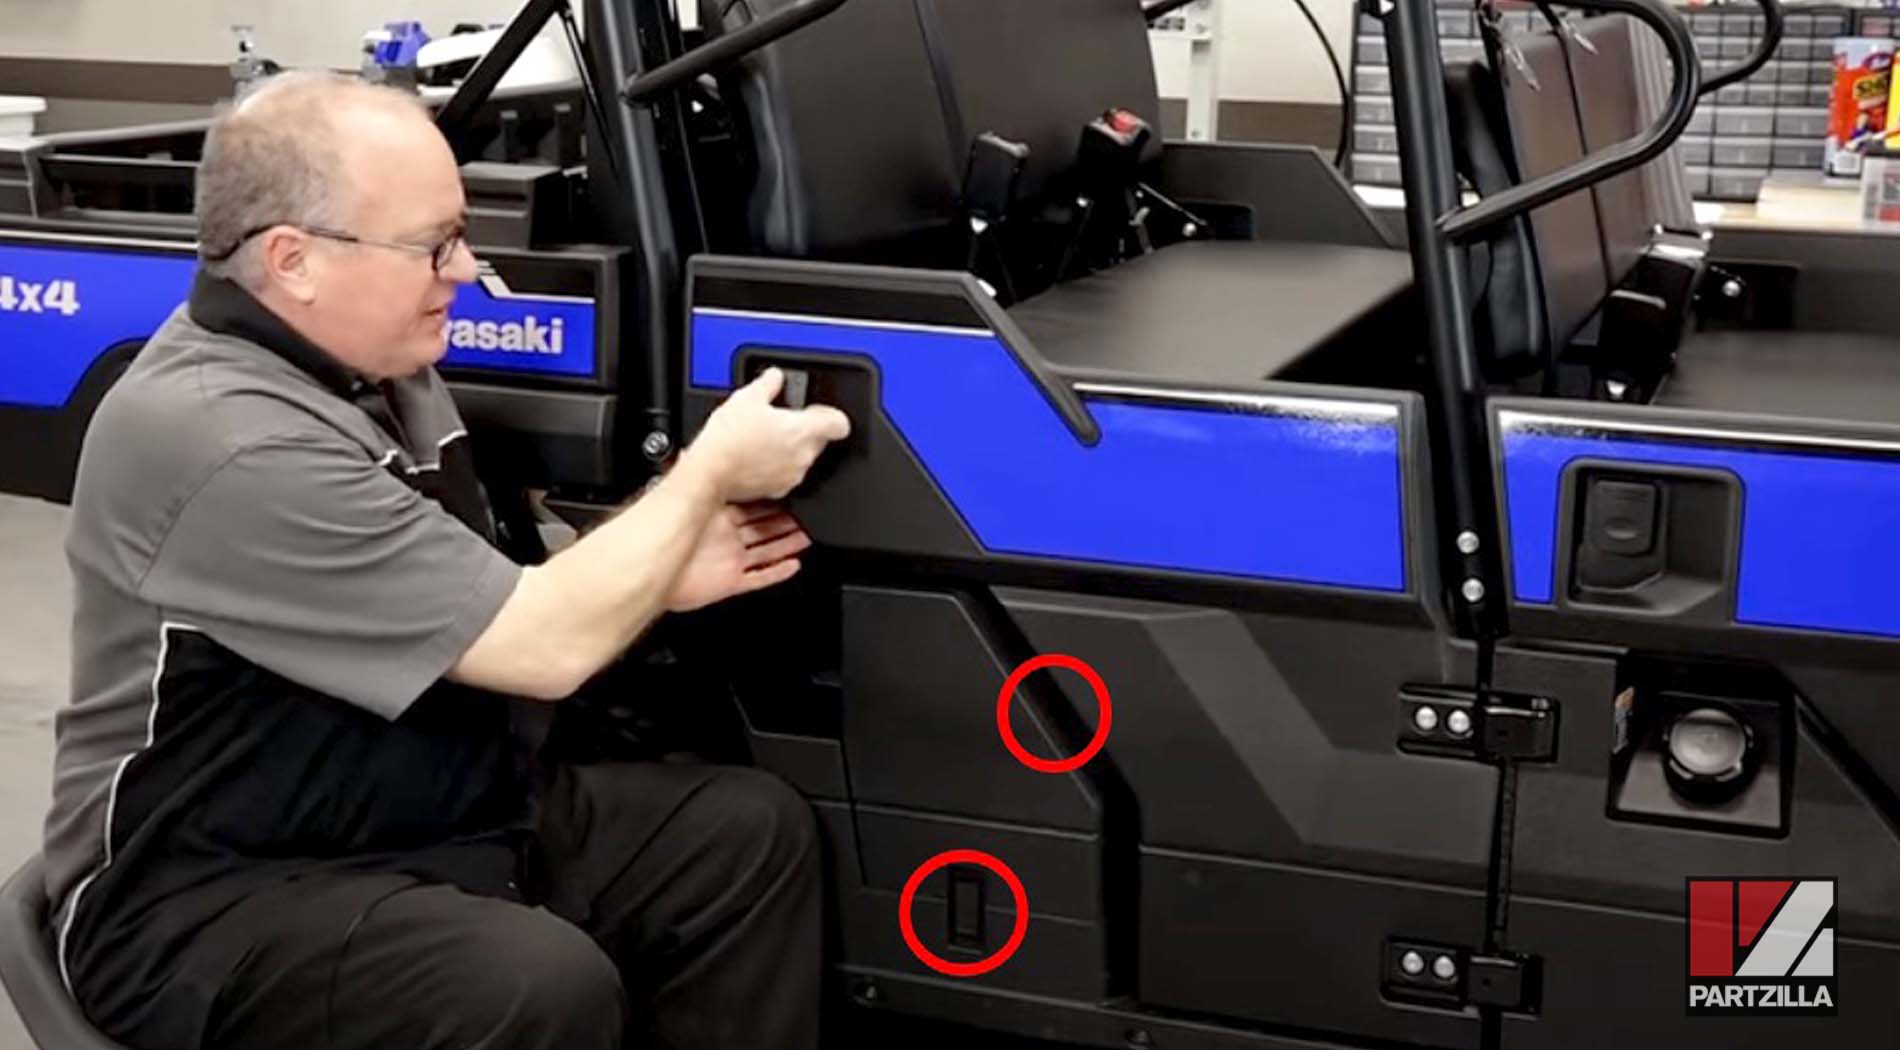
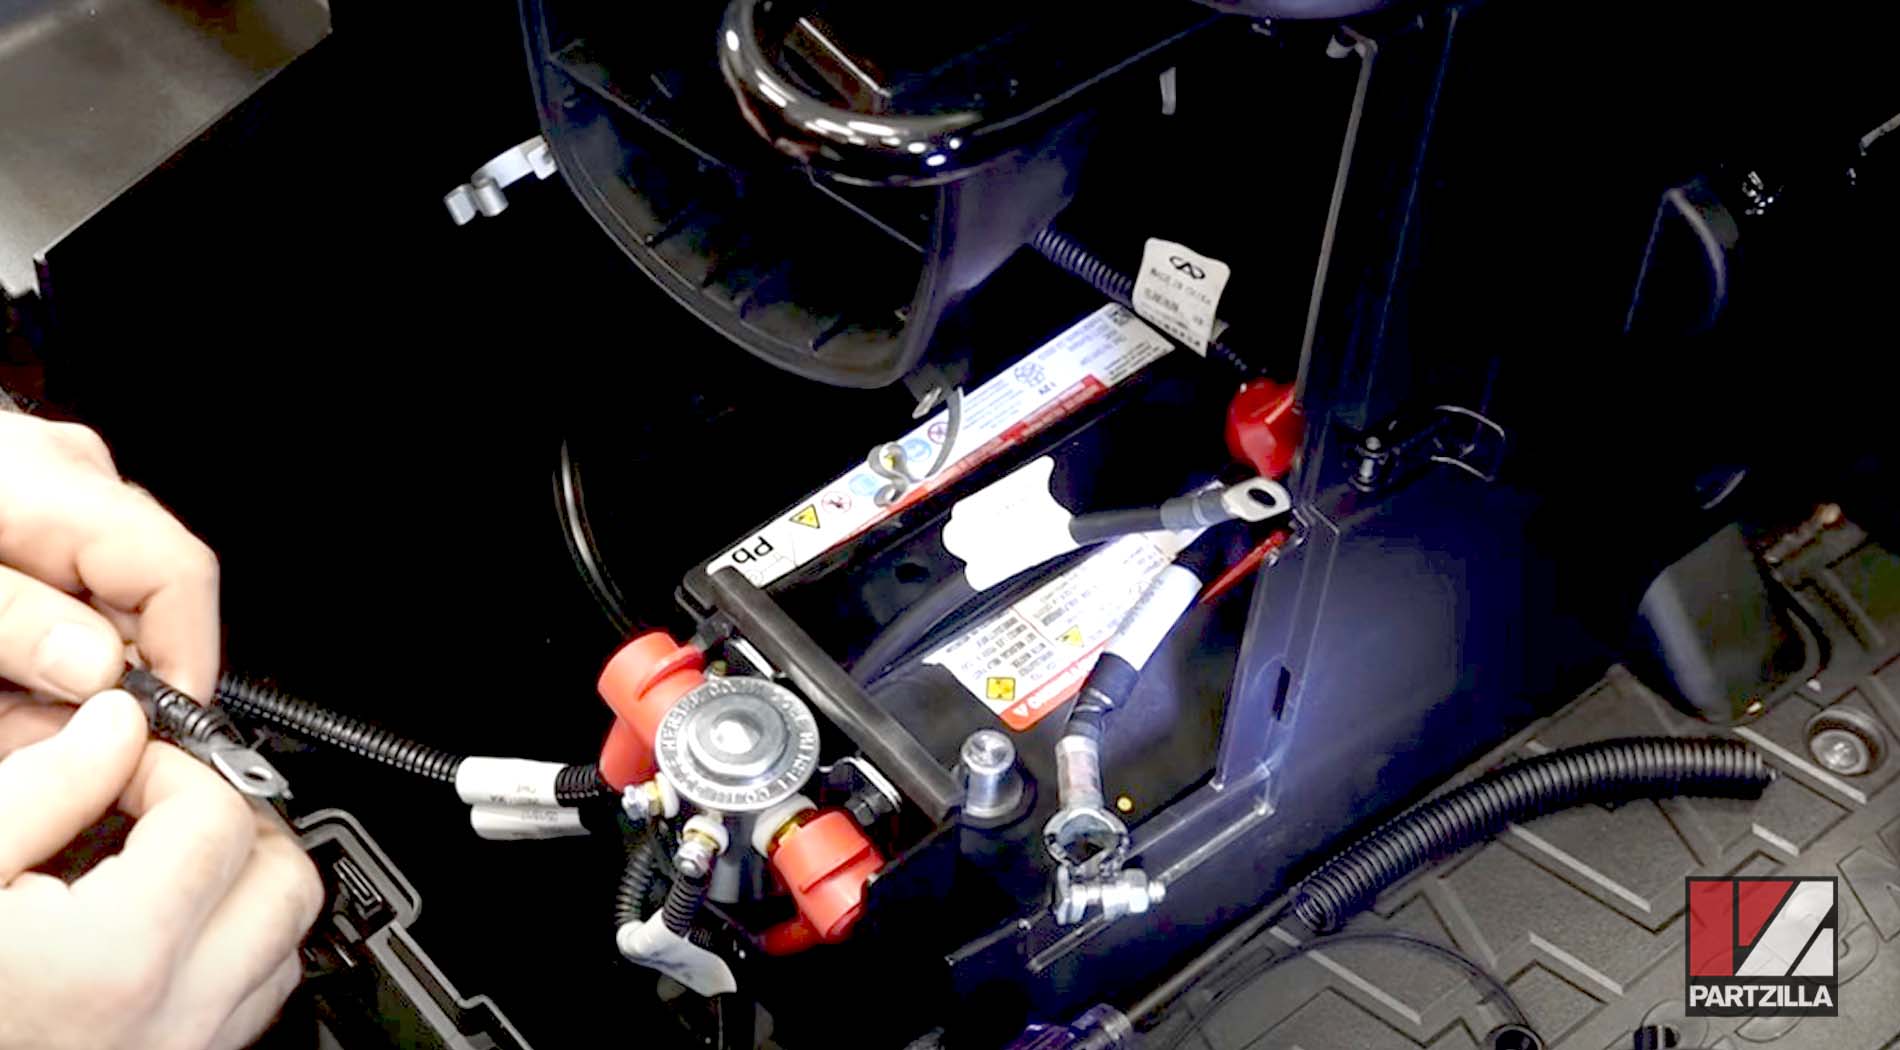
Step 4. Remove the battery cover located behind the right side door. The battery cover is secured in place by two latches.
Step 5. Unclip the airbox cover above the battery, and remove the airbox cover and air filter so you'll have a little extra room to work in.
Assembling Kawasaki Mule PRO-FXT Fuse Box Relay
Step 1. Attach the 6-inch ground cable to the front of the relay panel, and the 8-inch cable wire to the back of the relay panel.
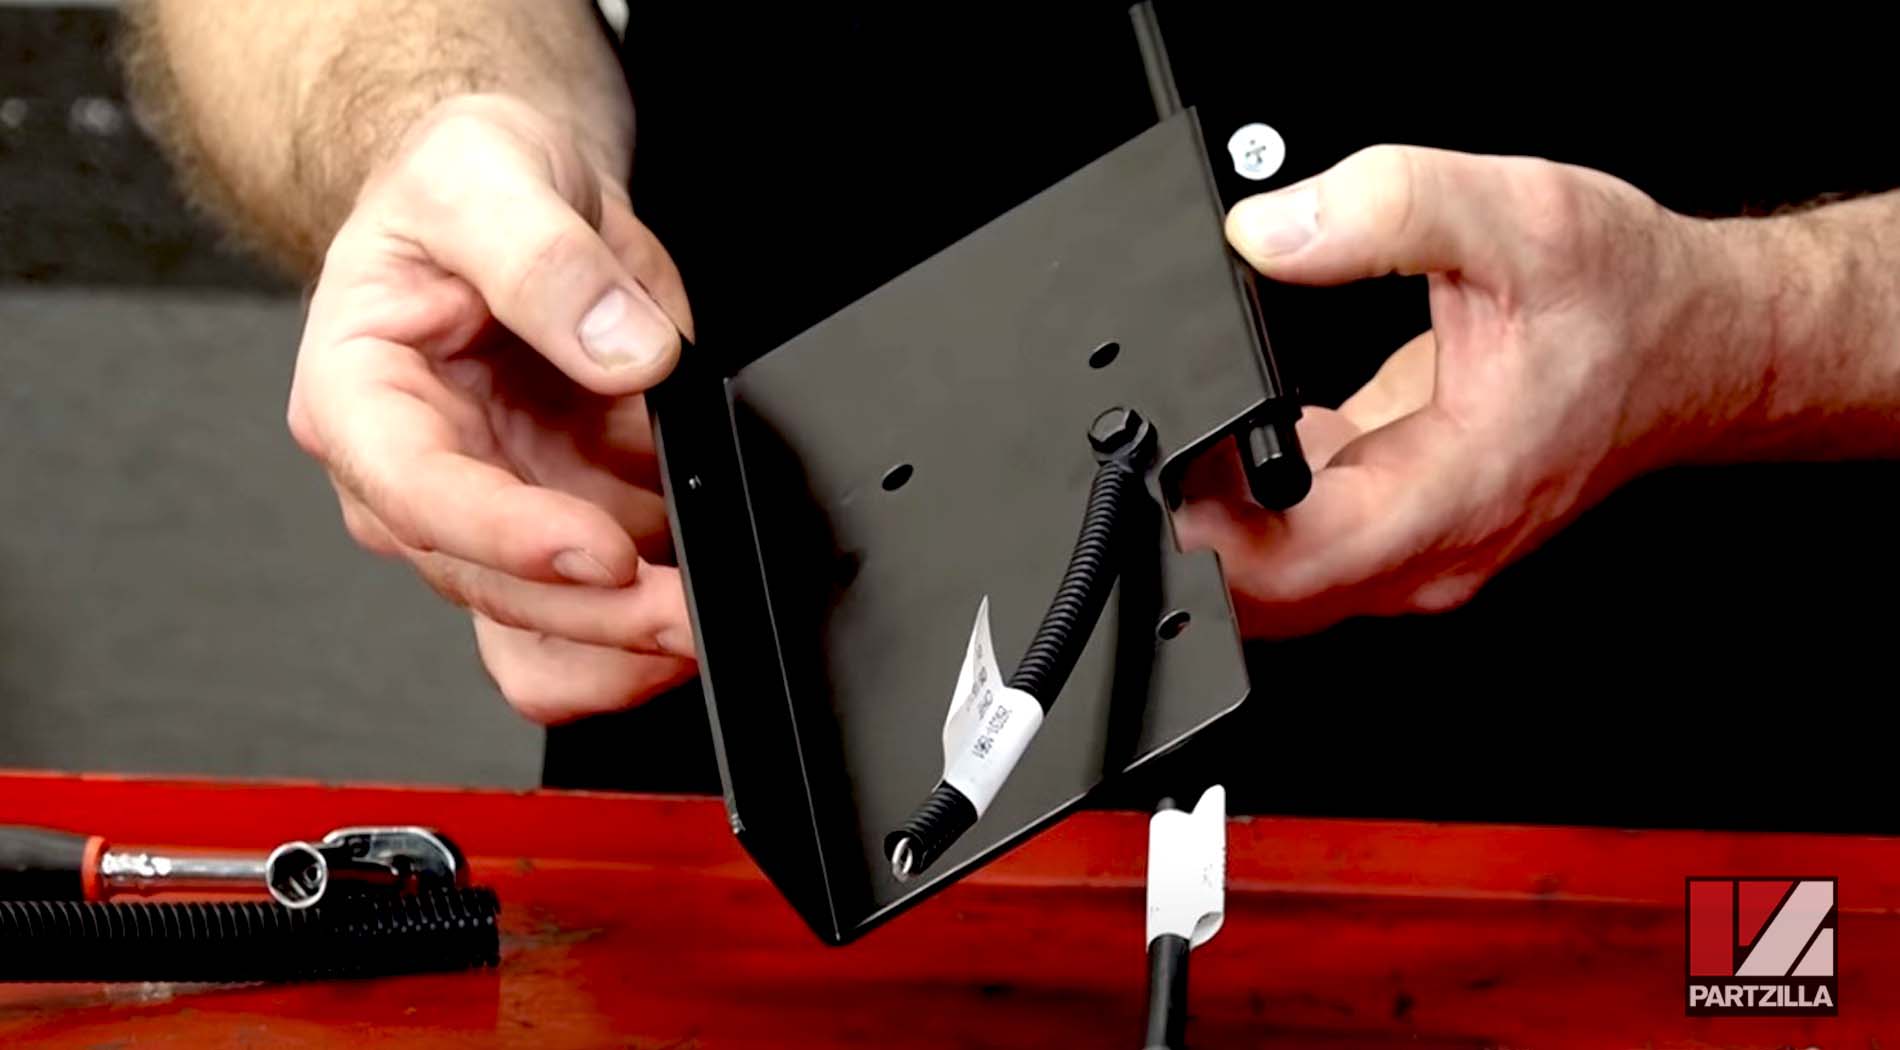
Step 2. Install the edge protector along the top edge of the relay panel.
Step 3. Mount the accessory fuse box relay onto the relay panel using two 10mm bolts and locknuts.
Installing Kawasaki Mule PRO-FXT Fuse Box Relay
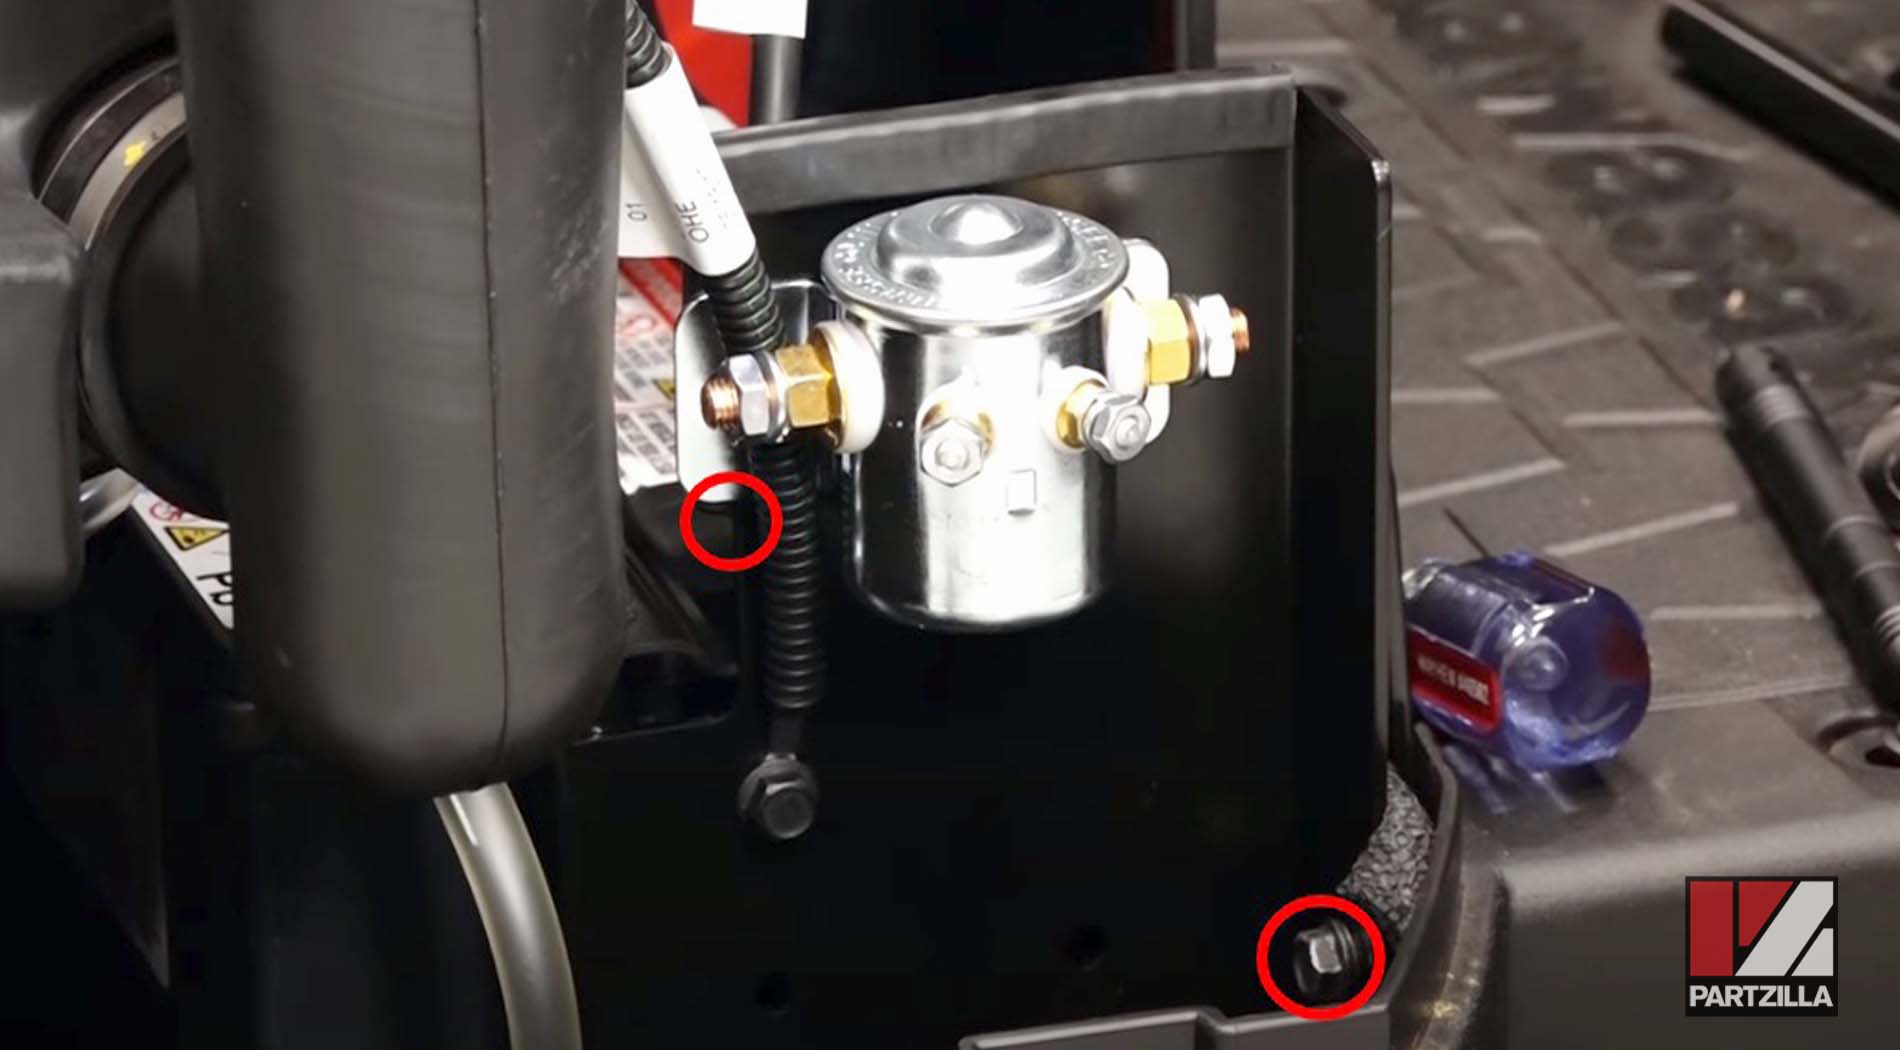
Step 1. Disconnect the ground cable from the negative battery terminal to break the electrical circuit and prevent any accidental grounding.
Step 2. Position the relay panel in front of the battery, and install mounting bolts located to the upper left of the panel and lower right of the panel.
Step 3. Remove the plugs from each end of the corrugated tube that runs from behind the battery up to the front compartment.

Step 4. Take the main accessory fuse box cable and feed it into the corrugated tube in the front compartment. Work it through until it comes out of the corrugated tube behind the battery.
PRO TIP: To make working the main cable through the corrugated tube easier, remove the rubber end cap and the protective corrugated covering from the main cable, then bend back and tape the smaller brown wire to the main cable. This should minimize the chances of the main cable catching on the inside of the corrugated tube as it passes through.
Watch the clip below to see this step in action.
Step 5. Once the main cable is through to the area behind the battery, cut the smaller brown wire free, then replace the protective corrugated covering to the main cable and reinstall the rubber end cap.
Watch the clip below to see this step in action.
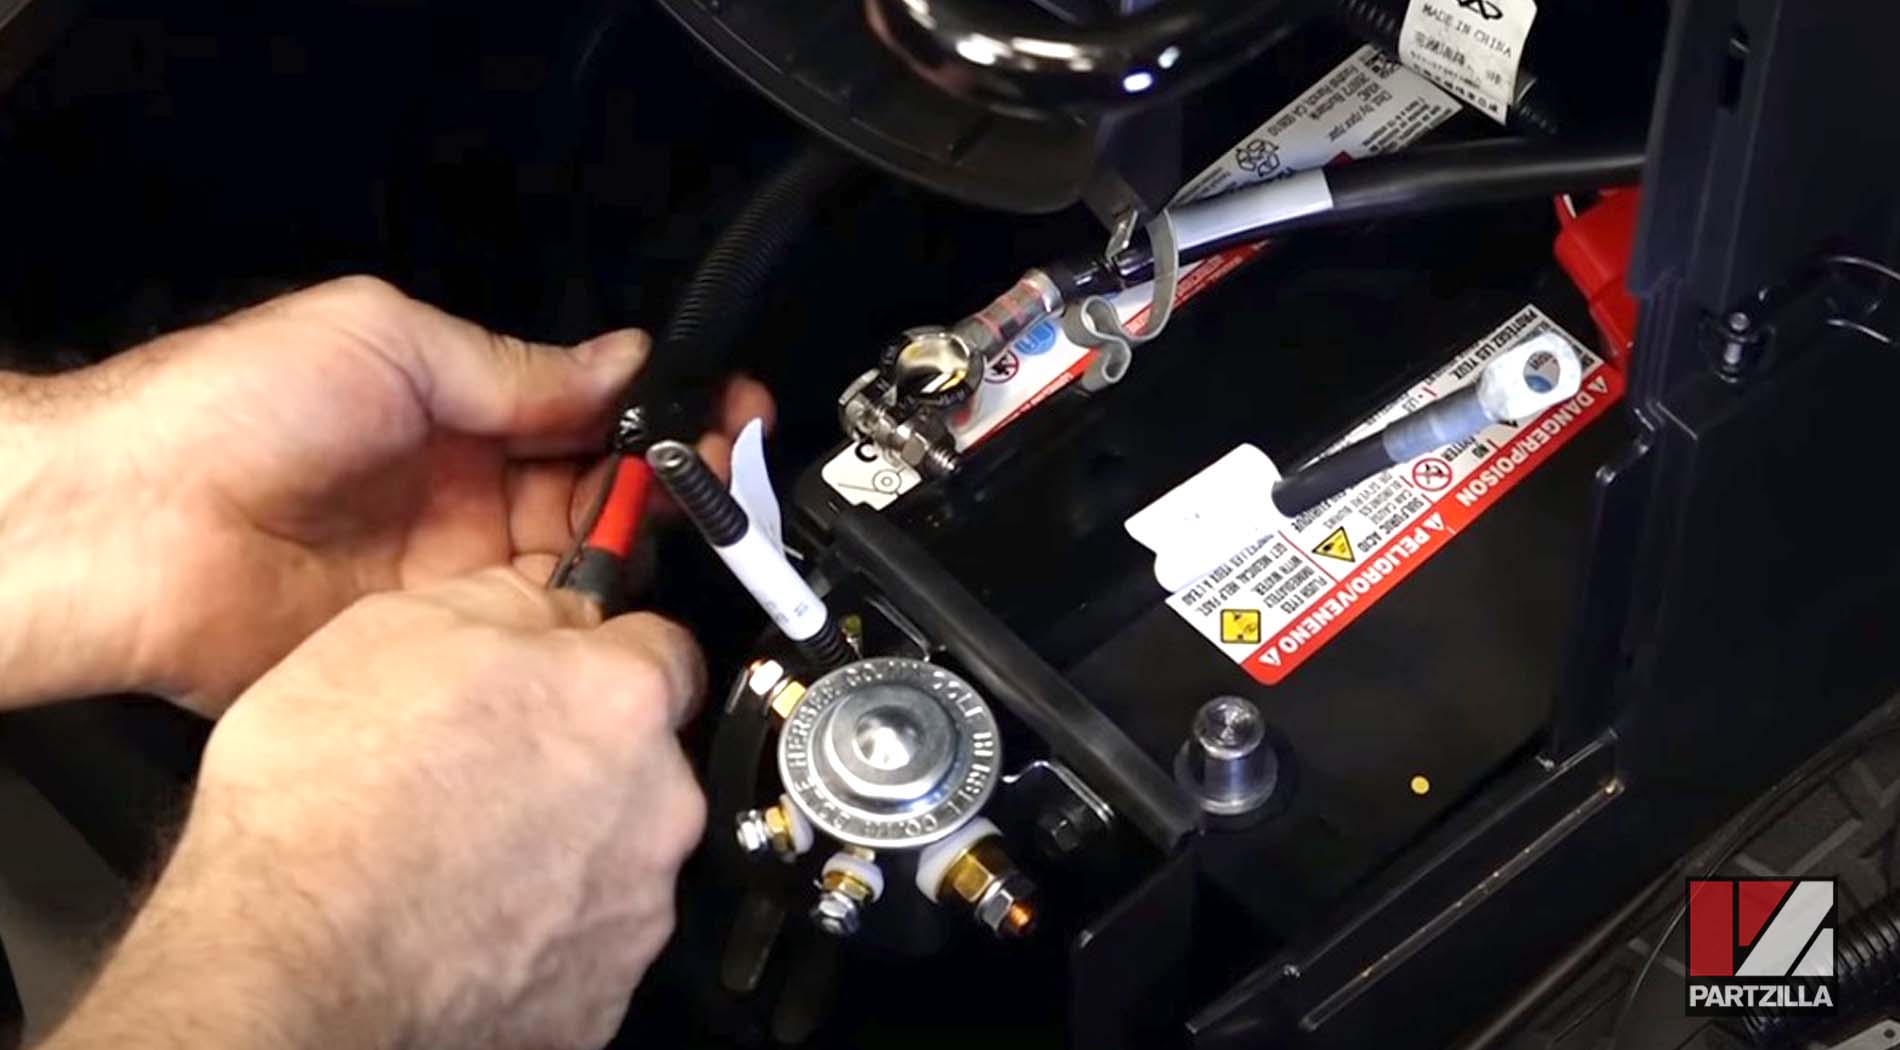
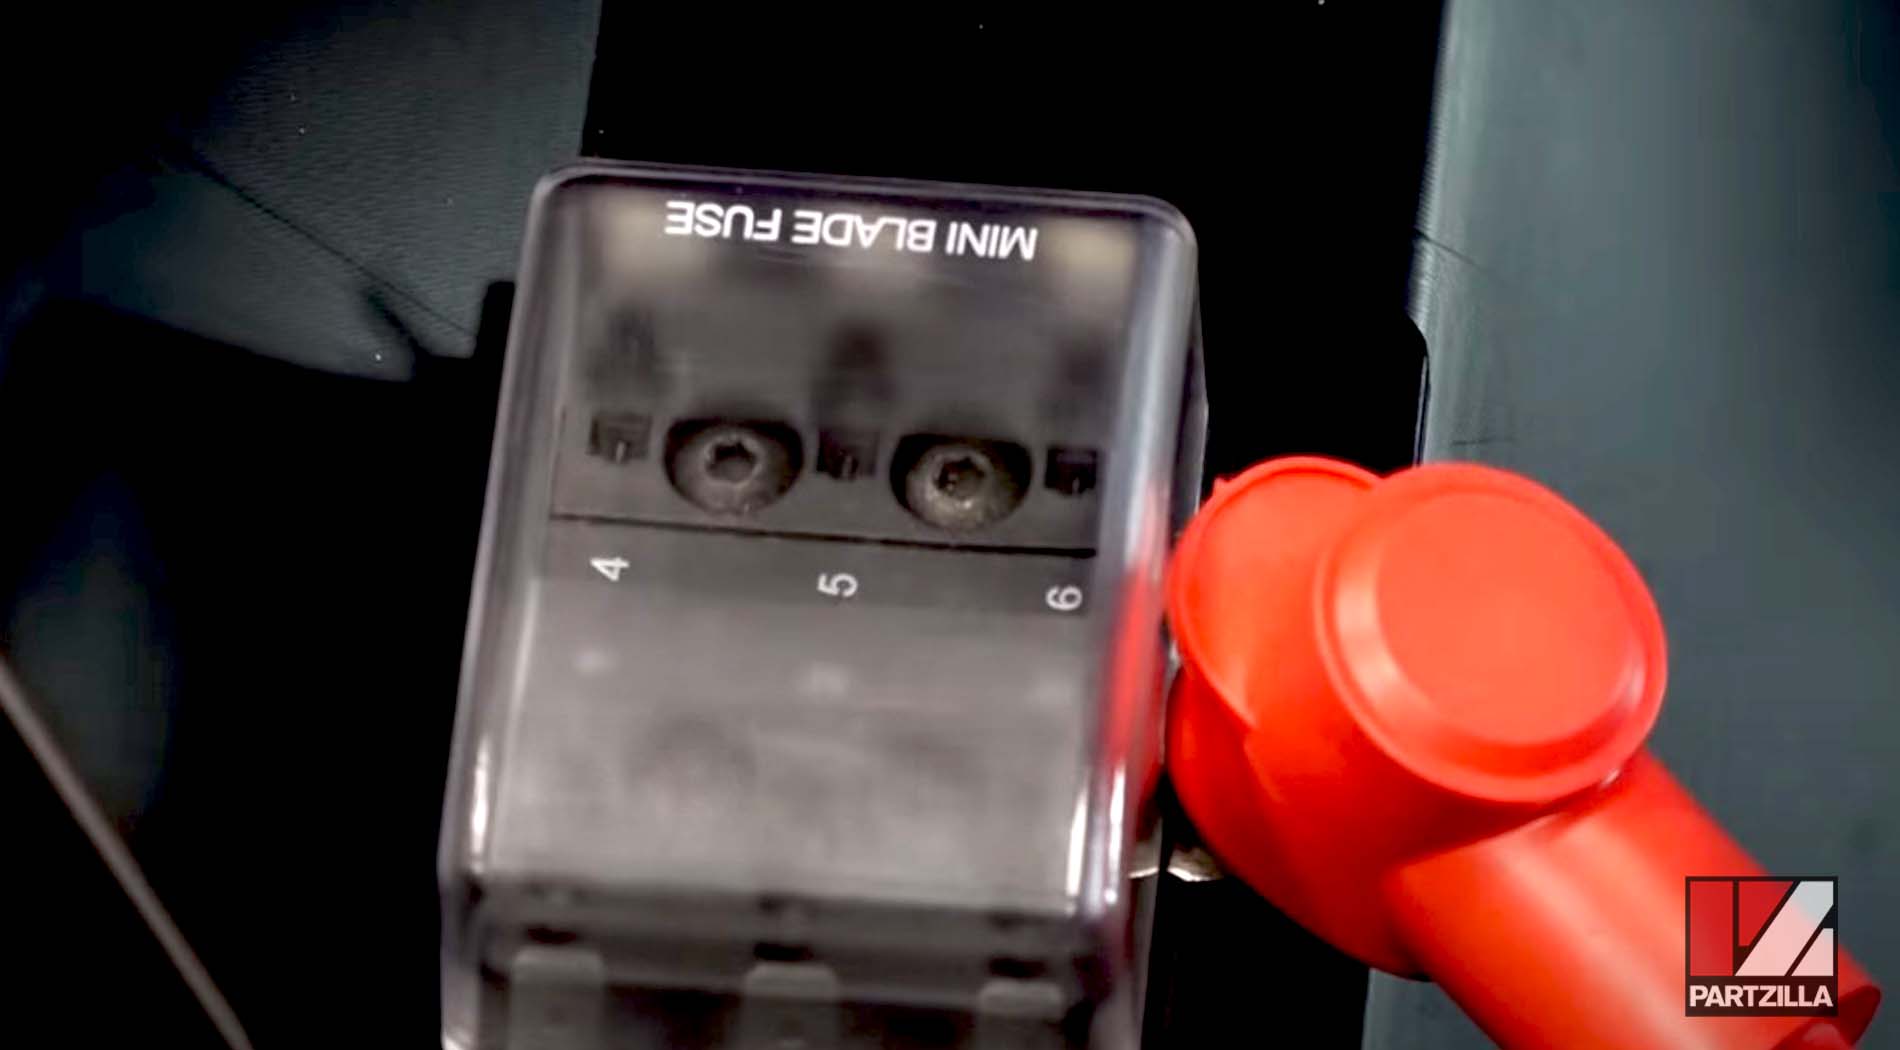
Step 6. Connect the main cable to the right side terminal on the accessory fuse box relay.
Step 7. Connect the smaller brown wire that's attached to the main cable to the center-left terminal on the accessory fuse box relay.
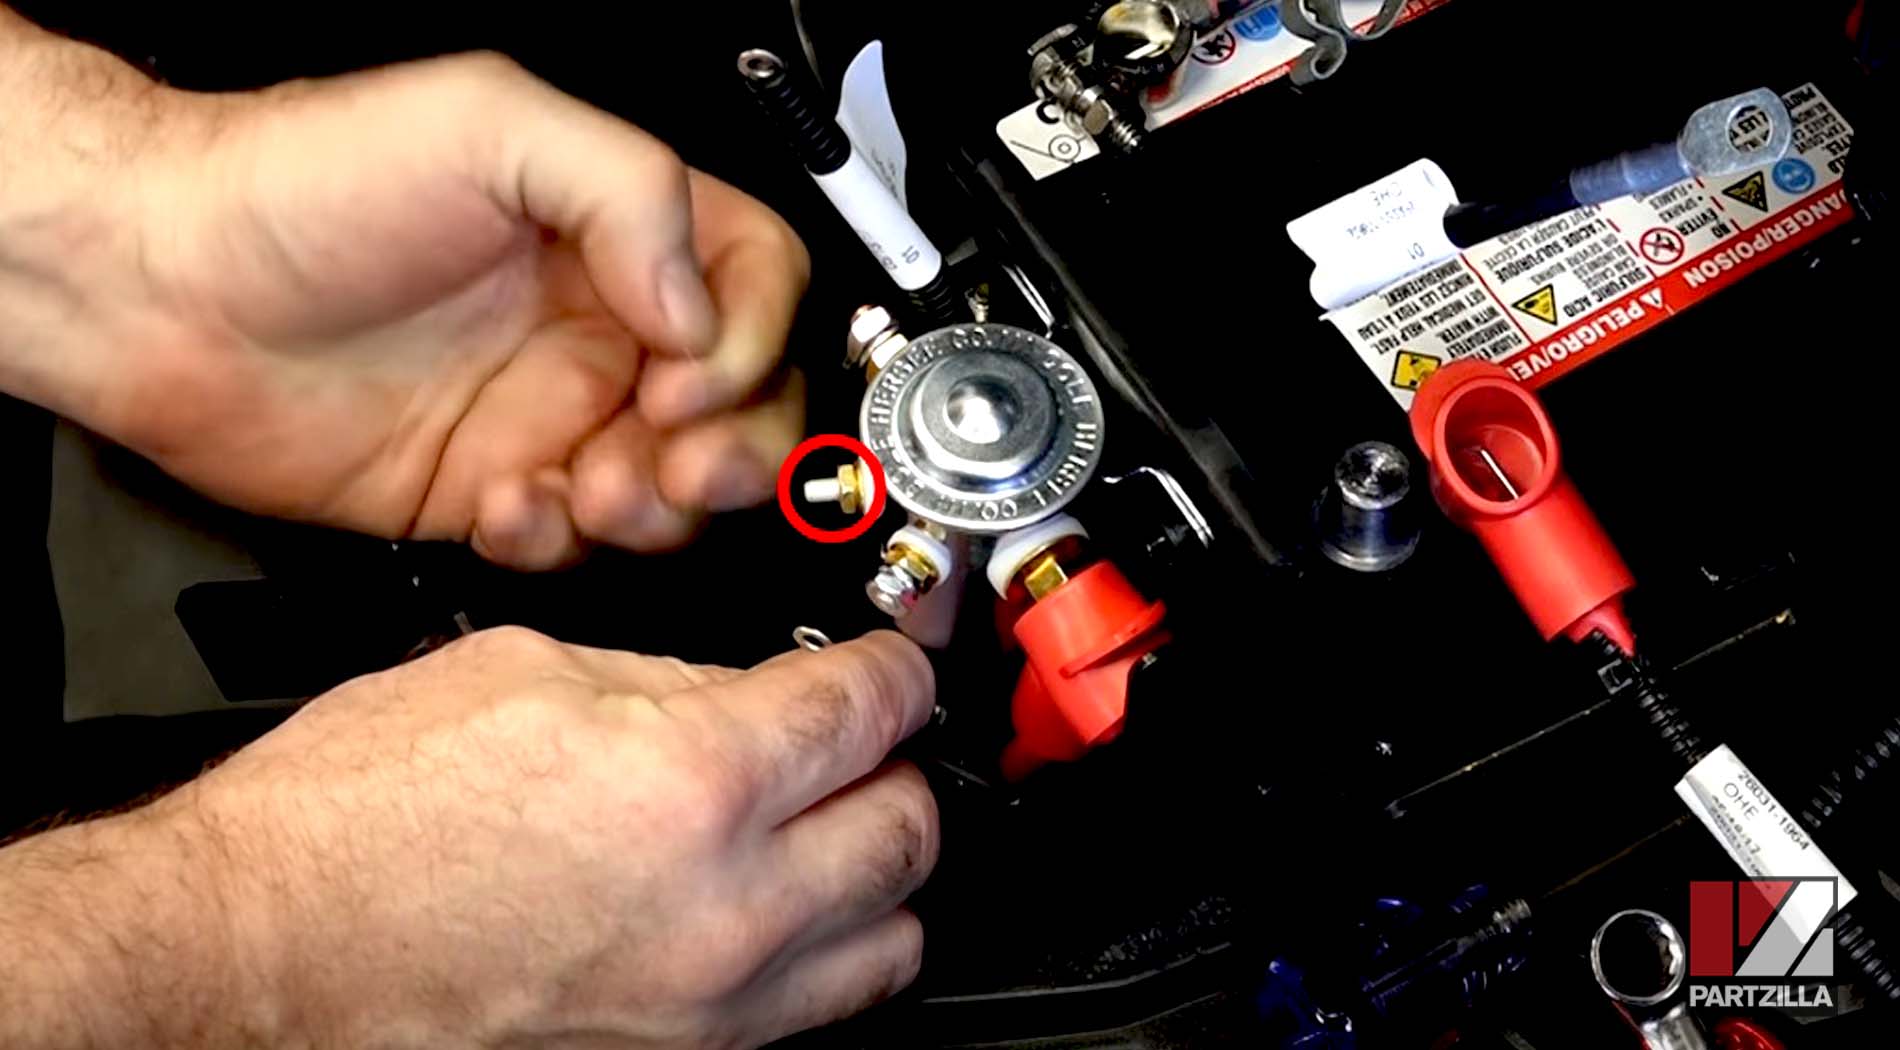
Step 8. Connect the other end of the 6-inch ground cable you've already attached to the front of the relay panel to the center-right terminal on the accessory fuse box relay.
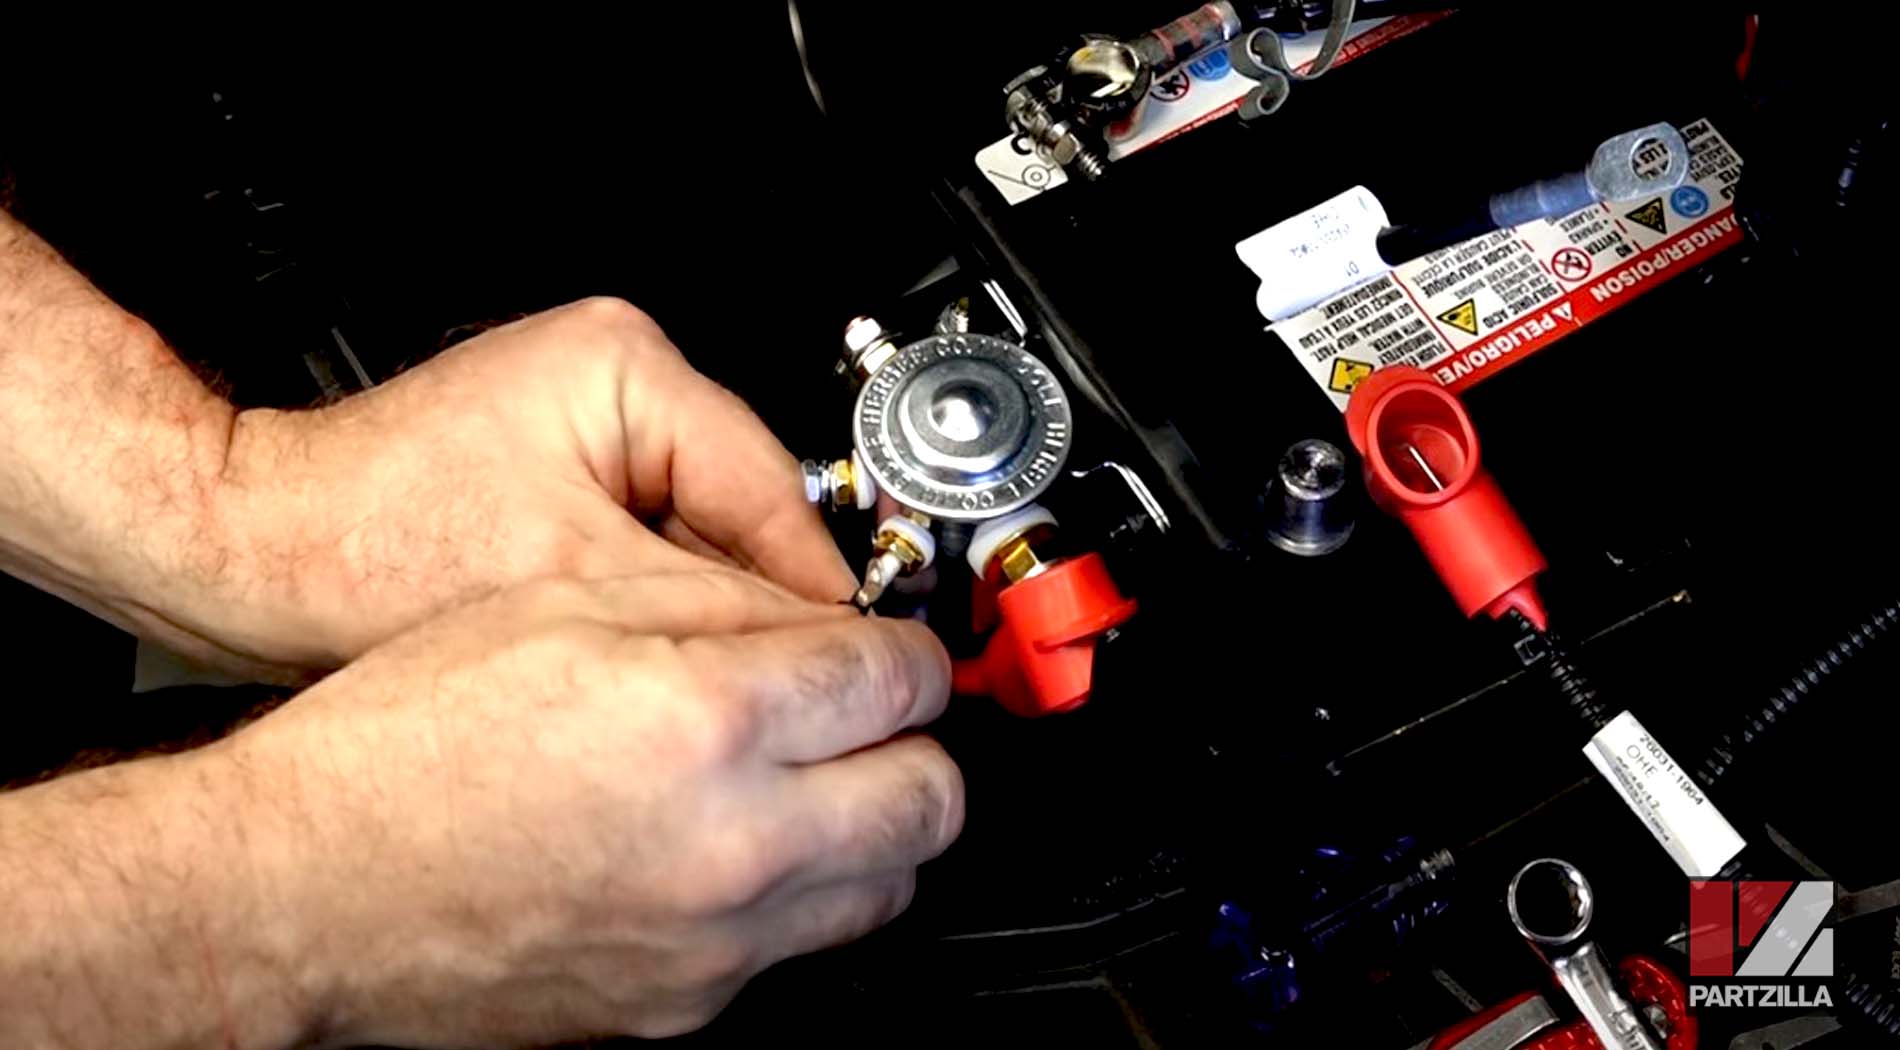
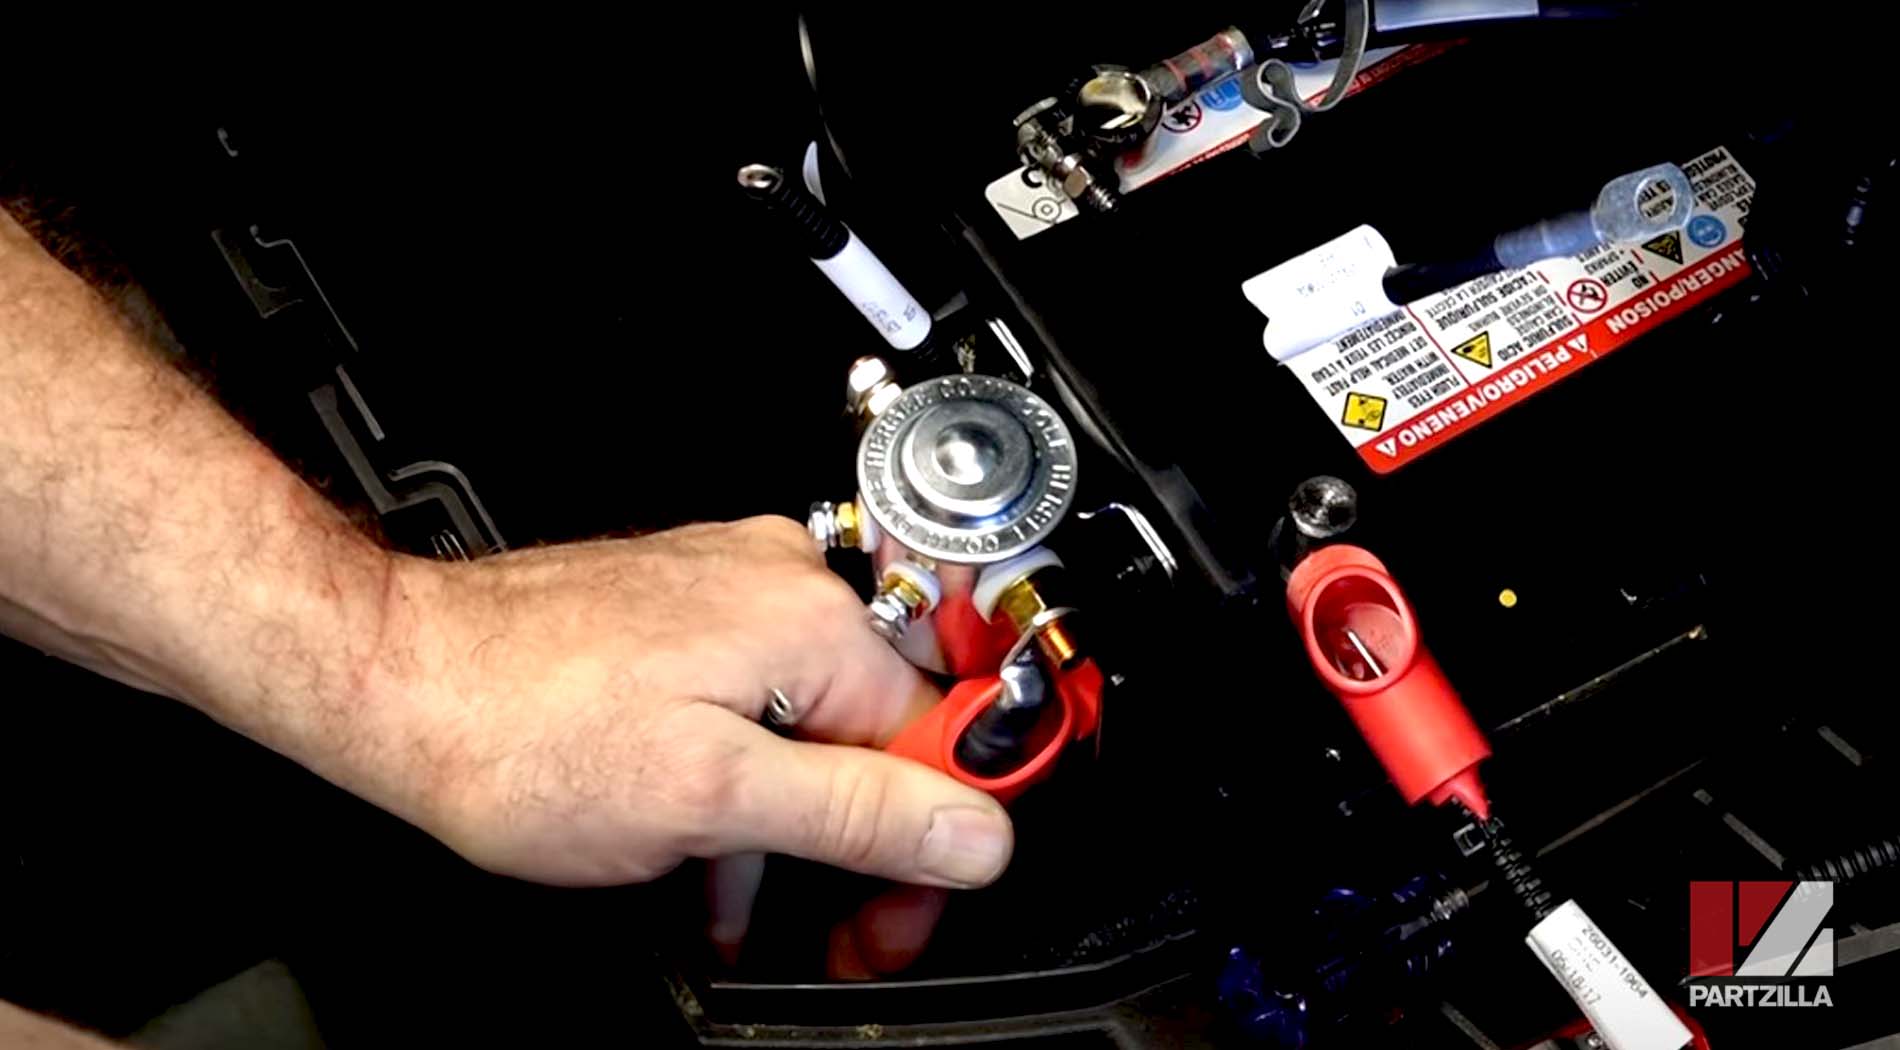
Step 9. Connect the end of the positive relay battery cable with the rubber end cap to the left side terminal on the accessory fuse box relay.
Installing Kawasaki Mule PRO-FXT Accessory Fuse Box
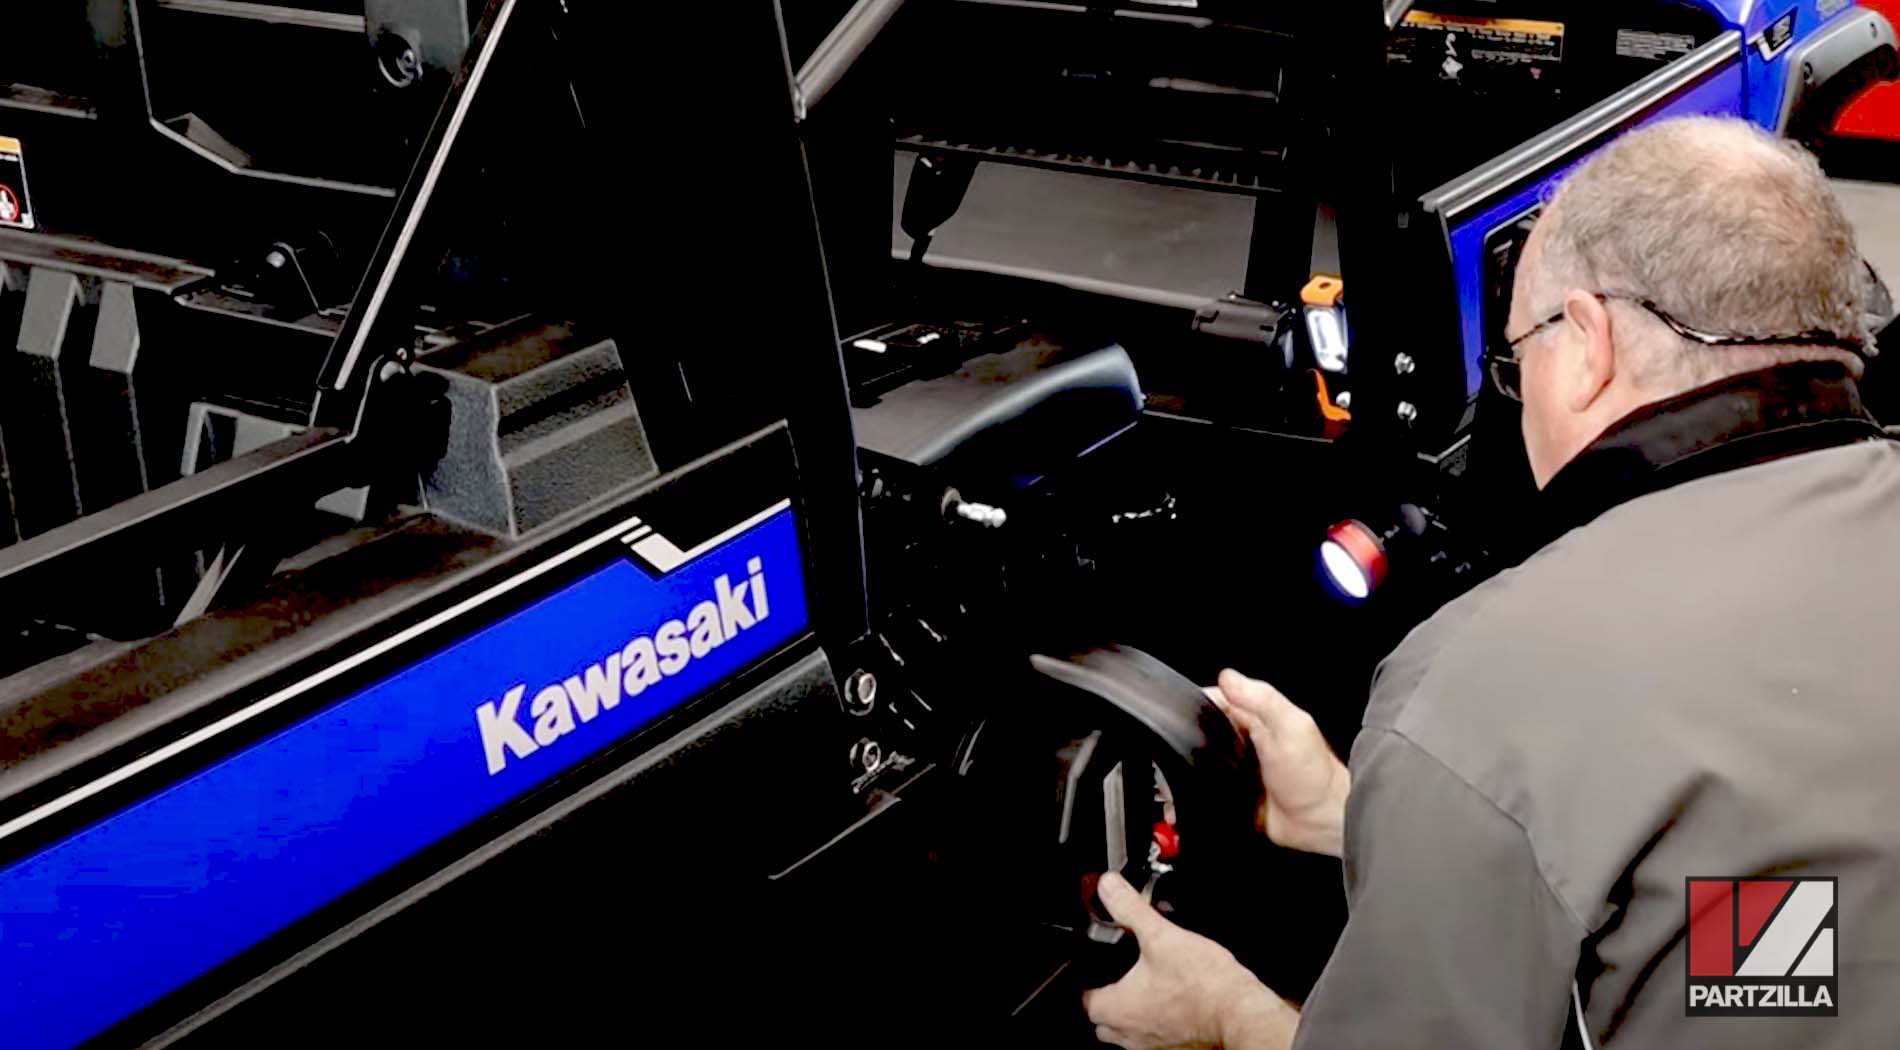
Step 1. Position the accessory fuse box to the right on the shroud covering the radiator in the front compartment. Use a punch tool to mark drill points through the bolt holes in the fuse box.
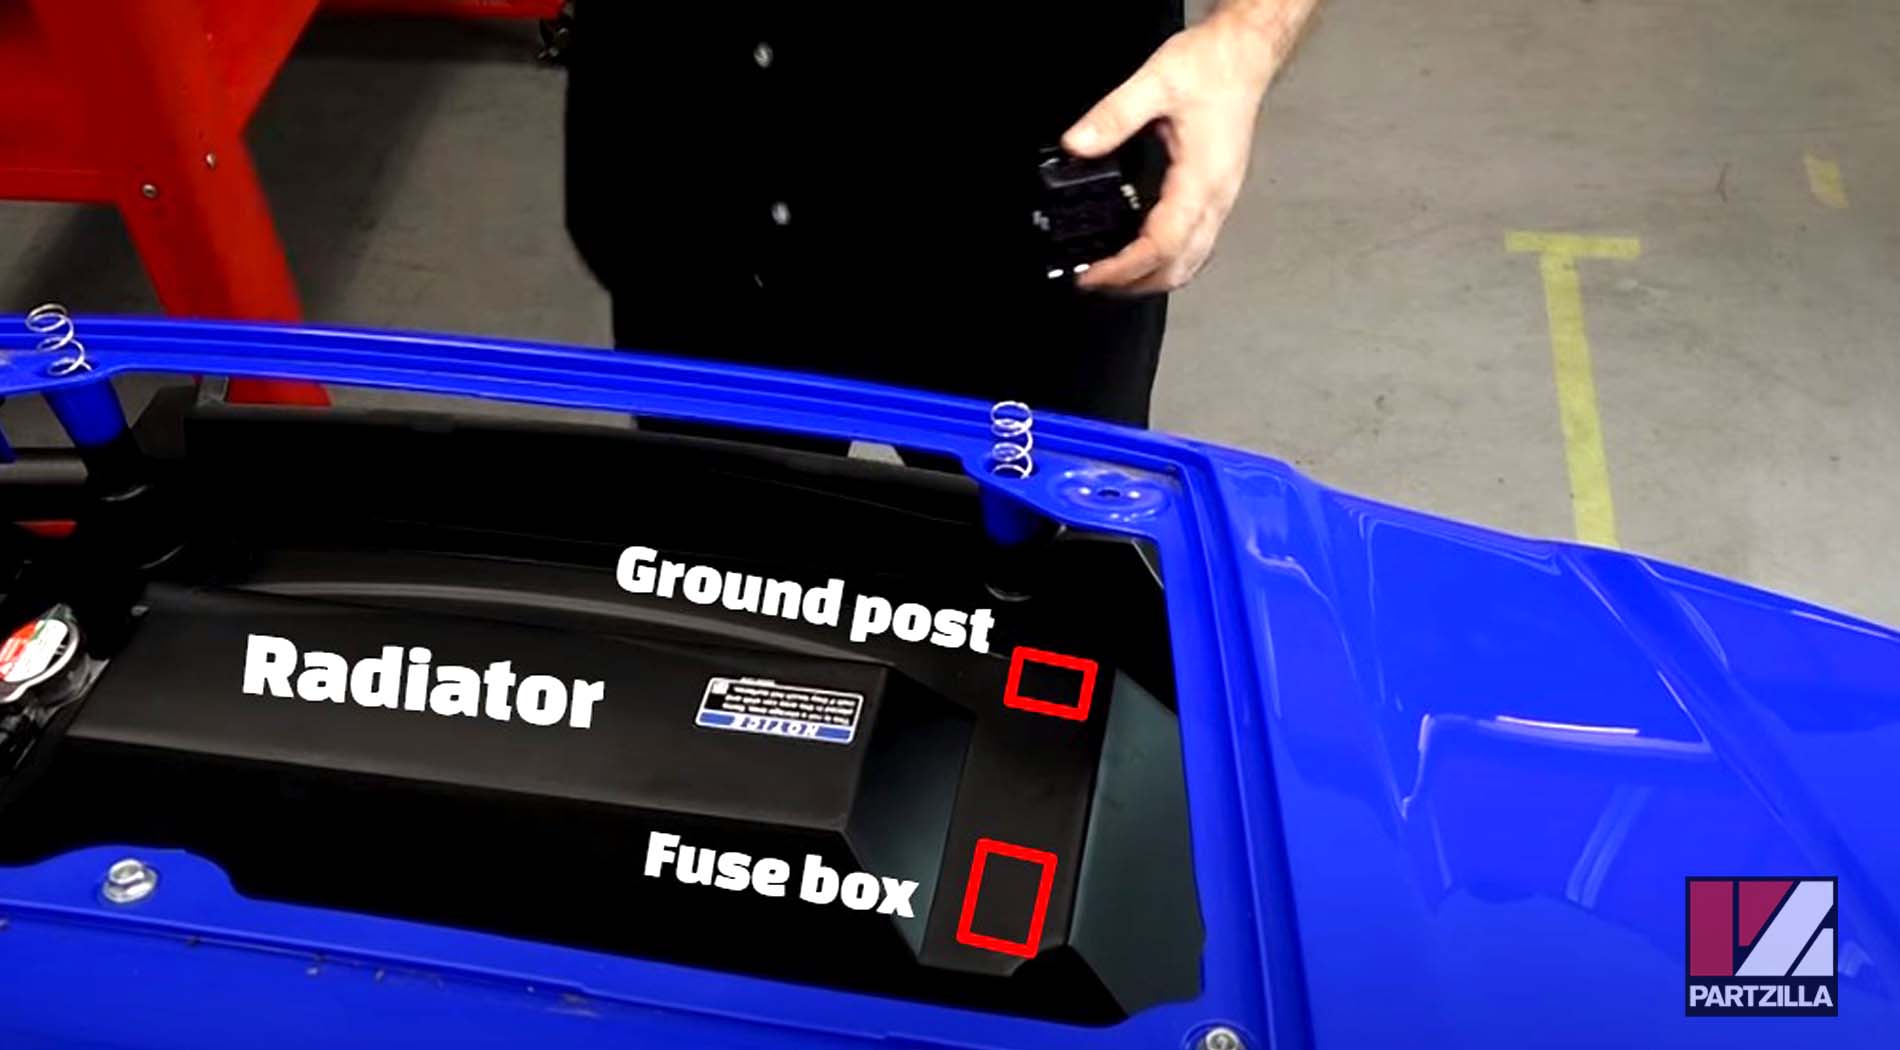
NOTE: Position the fuse box as far to the right side as possible to avoid the radiator, which is located below the shroud.
Step 2. Drill through the drill points using a 15/64 drill bit, and mount the accessory fuse box with 3mm Allen bolts and locknuts.
Step 3. Position the ground post to the right on the shroud covering the radiator in the front compartment. Use a punch tool to mark drill points through the bolt holes in the ground post.
NOTE: Position the ground post as far to the right side as possible to avoid the radiator, which is located below the shroud.
Step 4. Drill through the drill points using a 15/64 drill bit, and mount the ground post box with 3mm Allen bolts and locknuts.
Step 5. Connect the main accessory fuse box cable to the fuse box terminal, then replace the fuse box lid and pull the cable's end cap over the terminal.
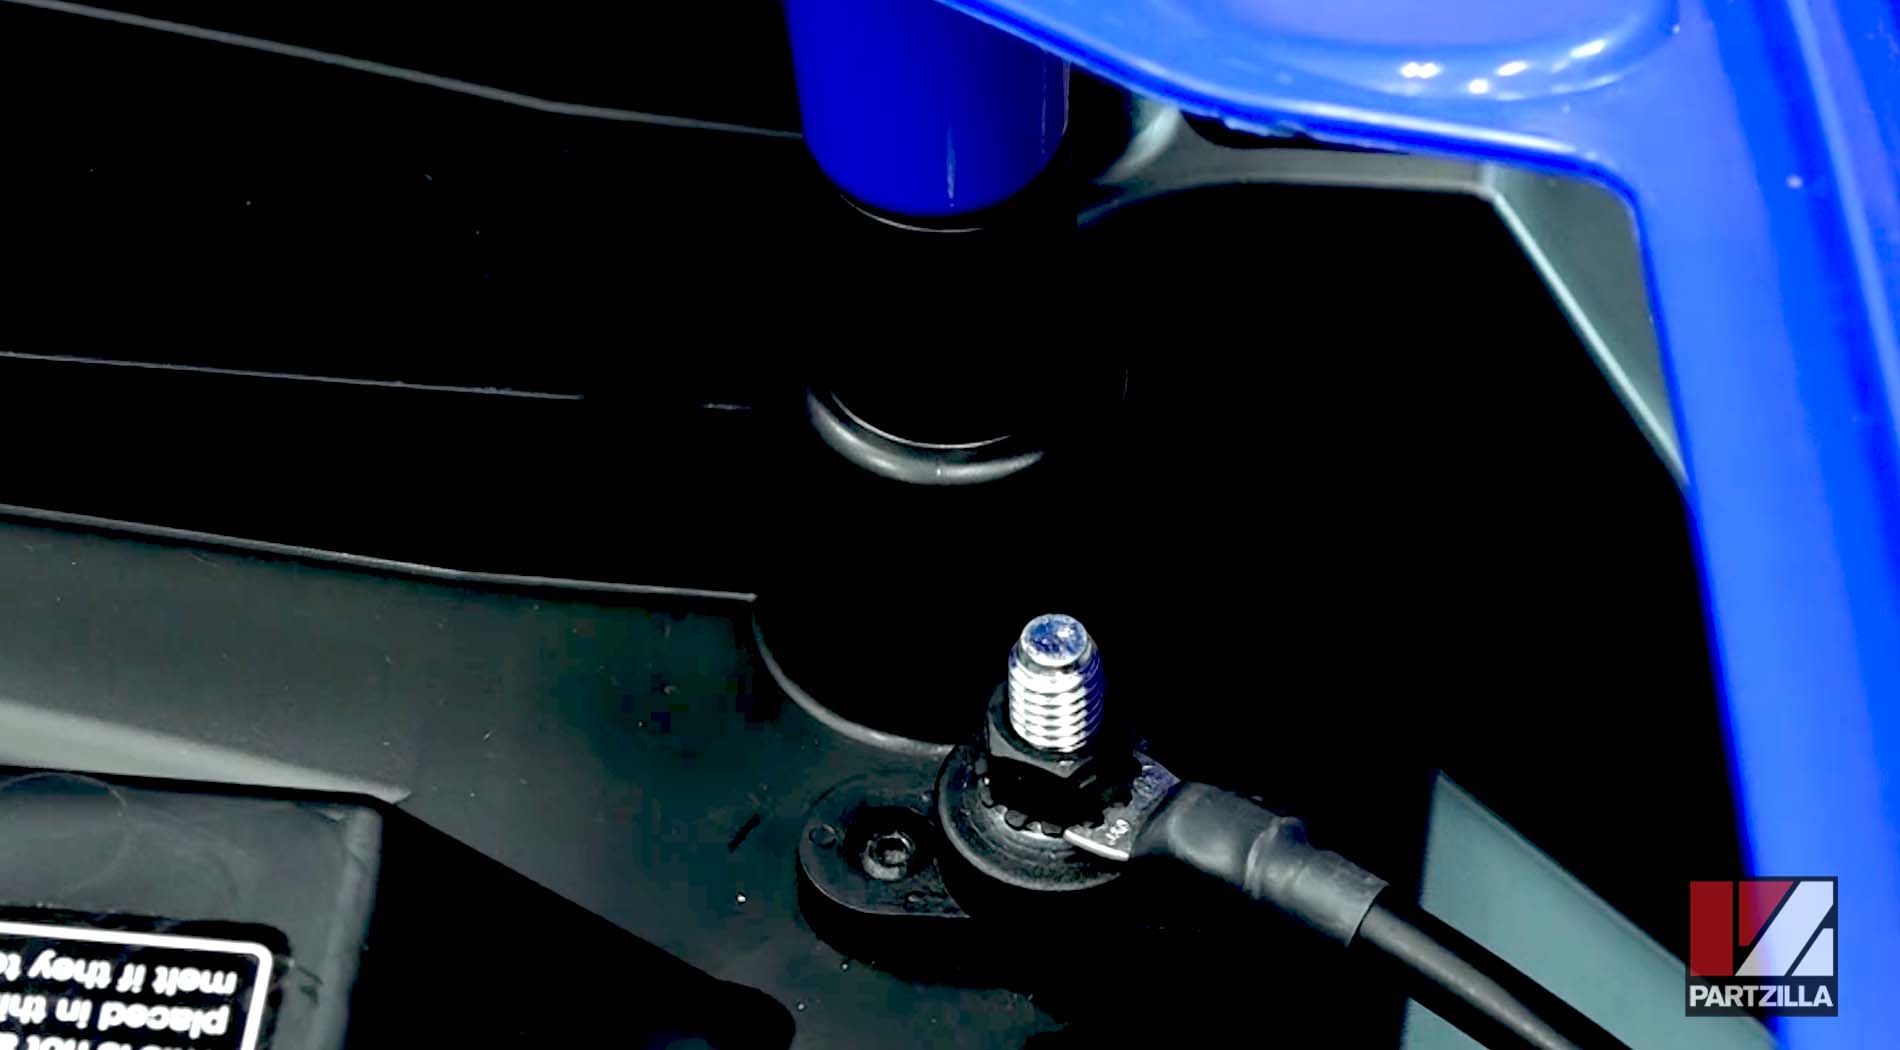
Step 6. Attach one end of the 13-inch ground cable (from the kit) to the ground post.
Installing Kawasaki Mule PRO-FXT Fuse Box Ground
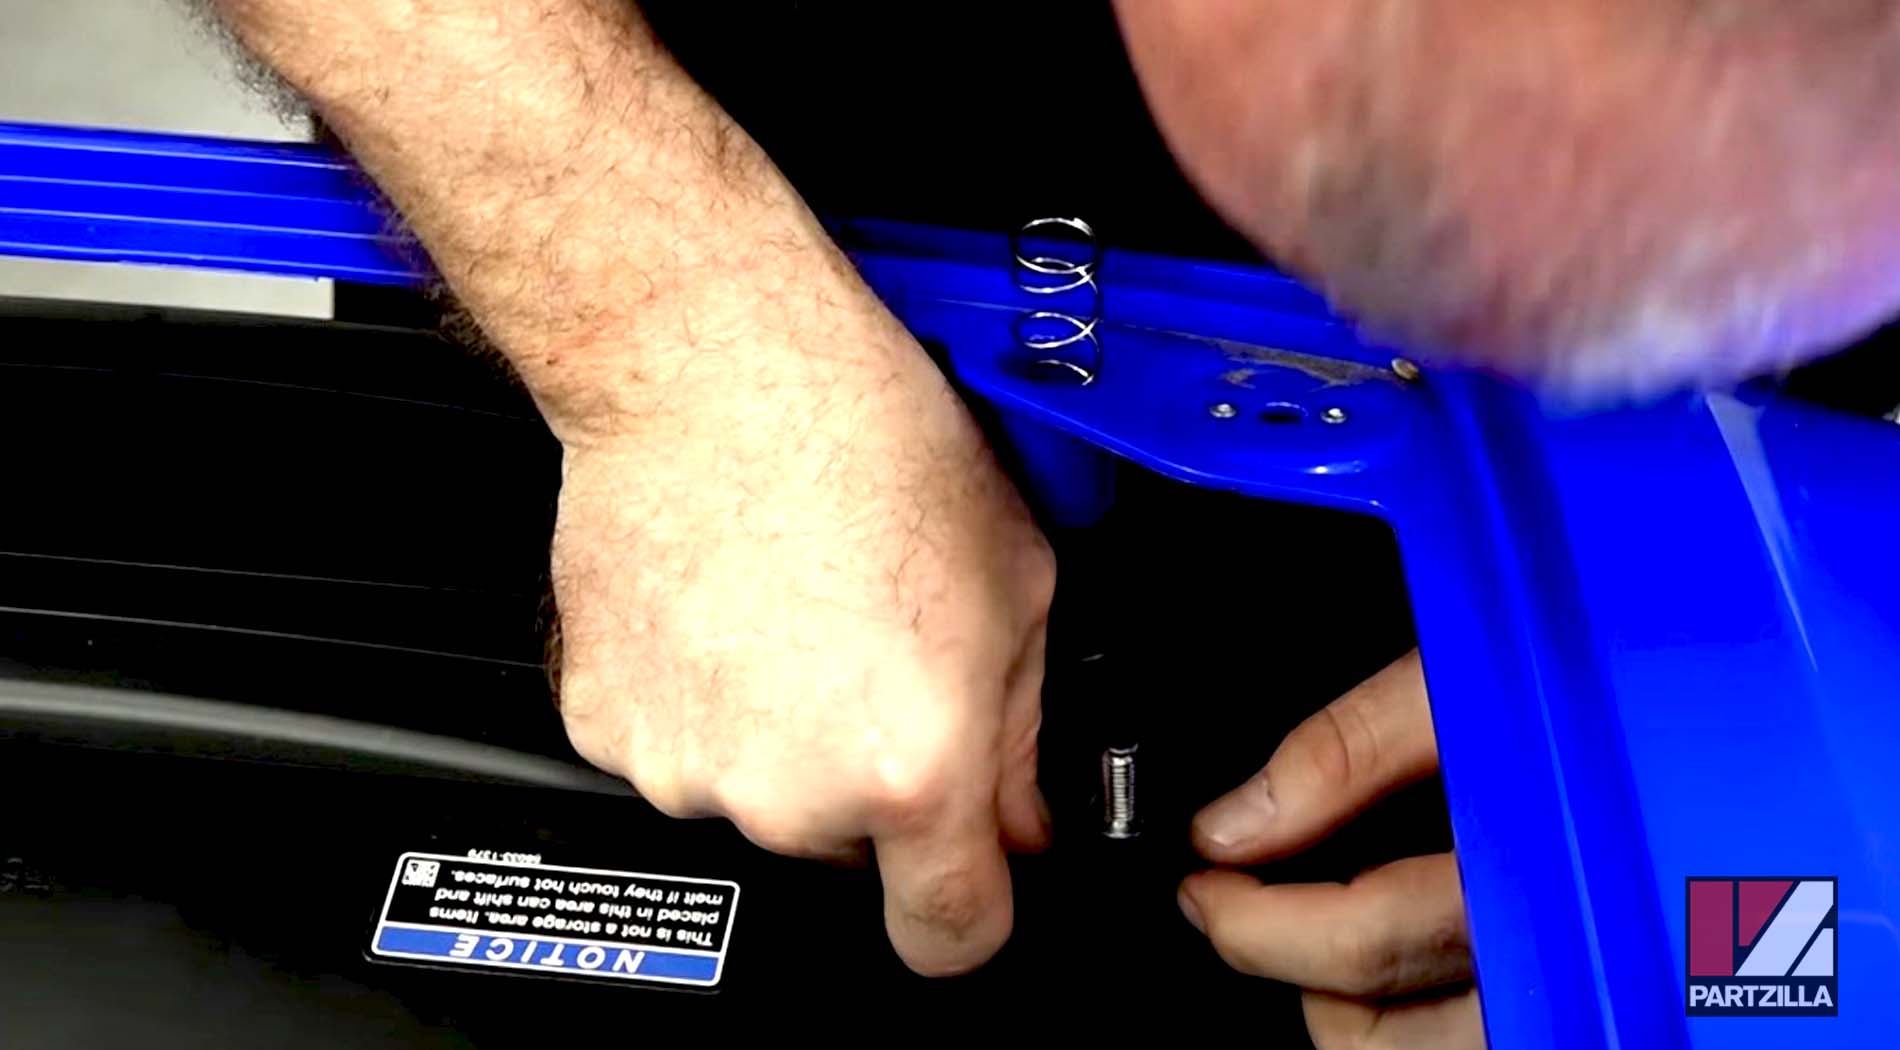
Step 1. Remove the five plastic push pin rivets from around the dashboard. Use push pin pliers to avoid damaging the push pin rivets, and pull the dashboard out of the way.
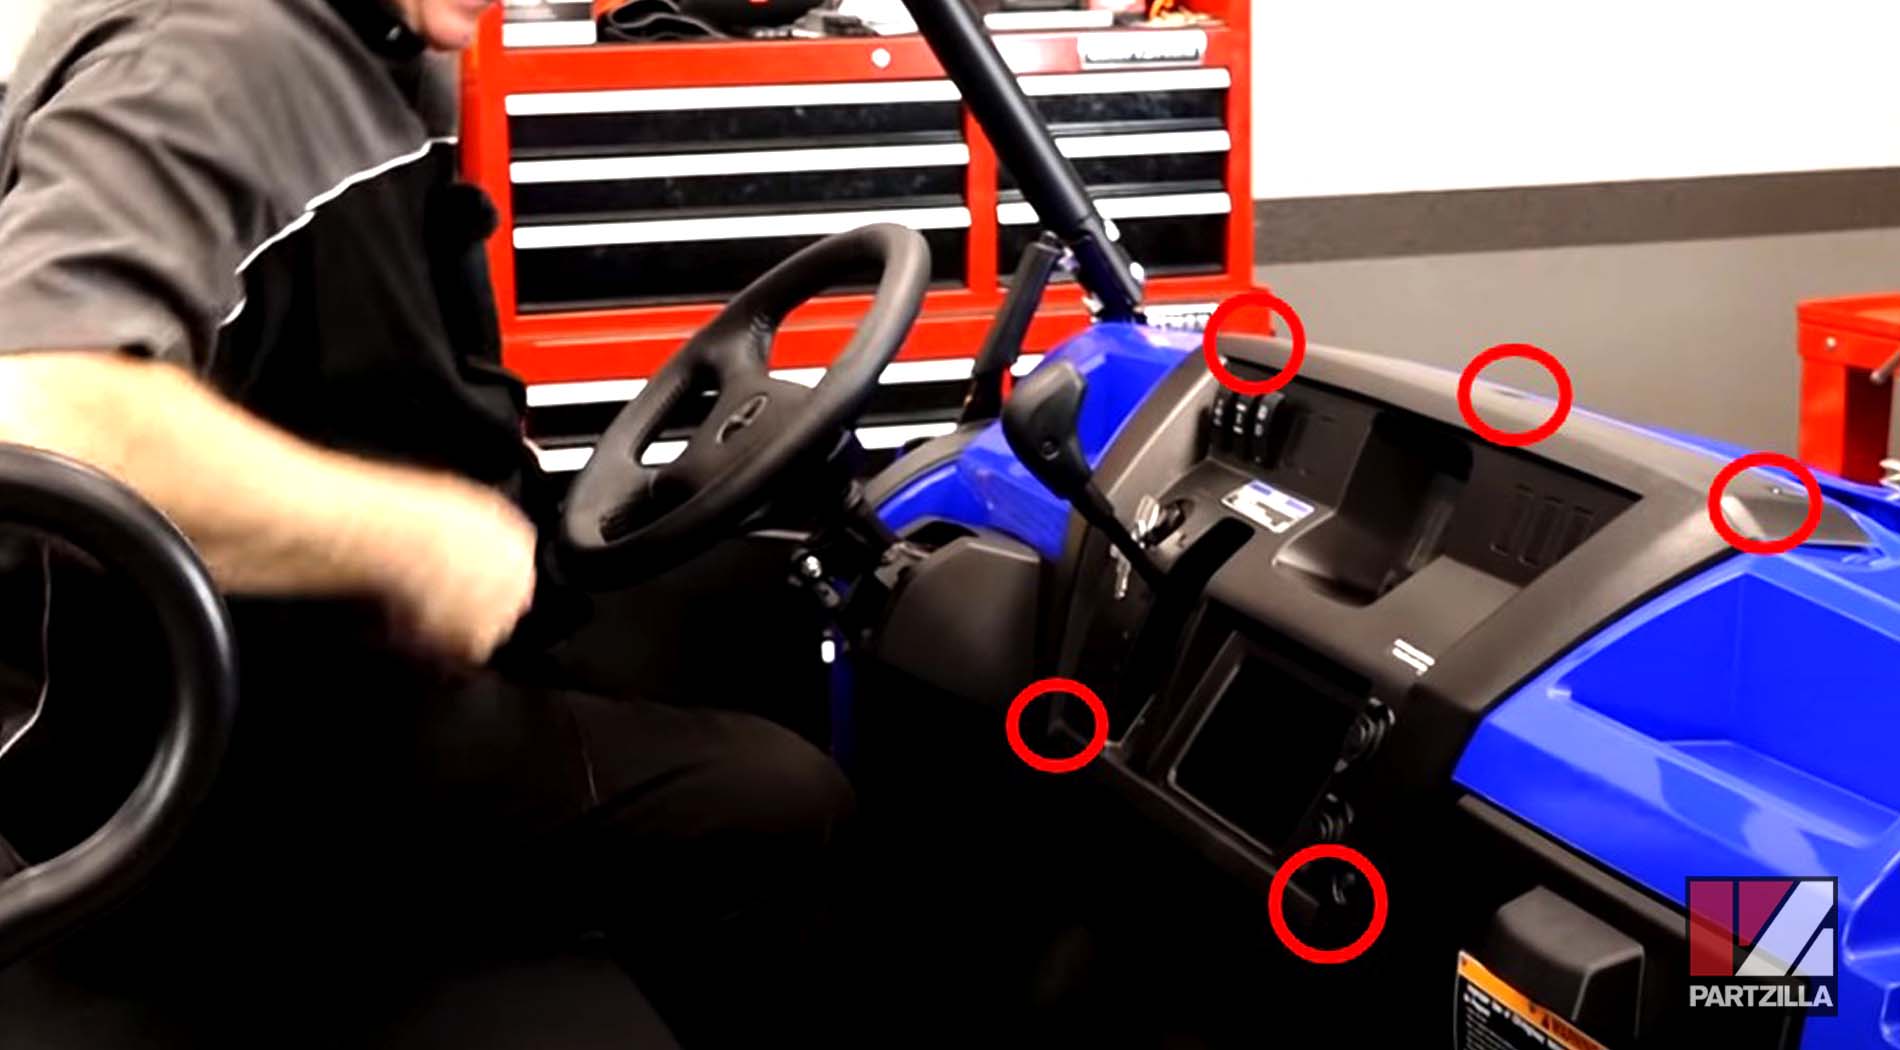
Step 2. Run the smaller brown wire with the bullet connector from the main accessory fuse box cable from the front compartment to behind the dashboard, and connect it to the brown wire with red stripe behind the dashboard. Reinstall the dashboard and push pin rivets.
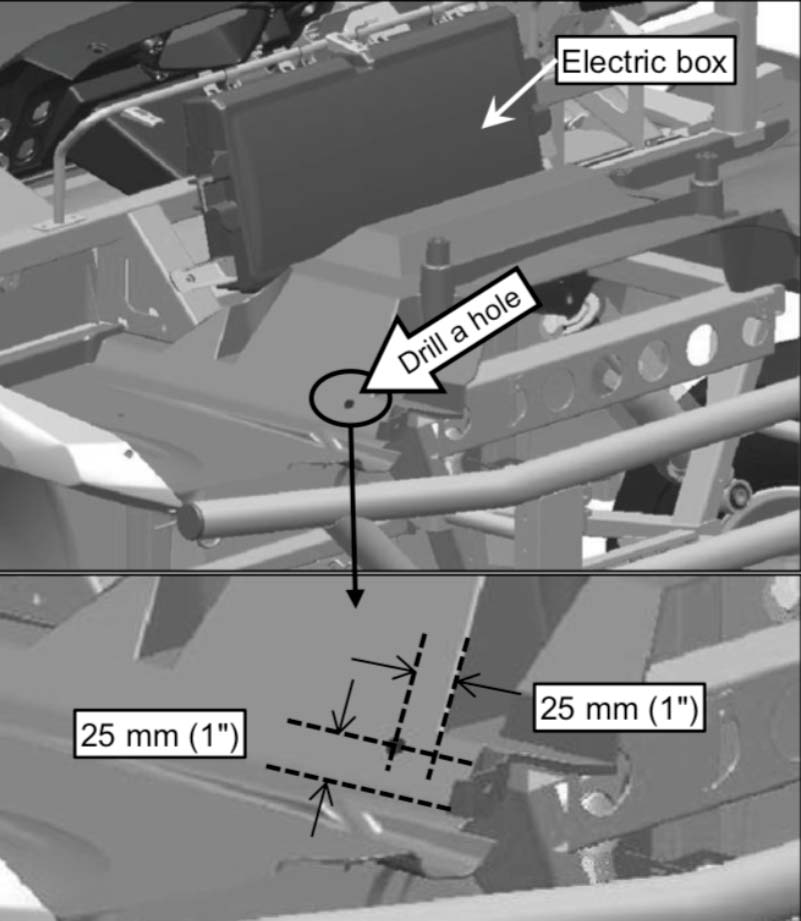
Step 3. Measure a point one inch from the front and one inch from the bottom in the side of the radiator shroud and drill a hole with a 1/2 inch drill bit.
Watch the clip below to see this step in action.
Step 4. Move under the Mule and locate the unused bolt hole in the frame near the 1/2 inch hole you just drilled to the right of the radiator.
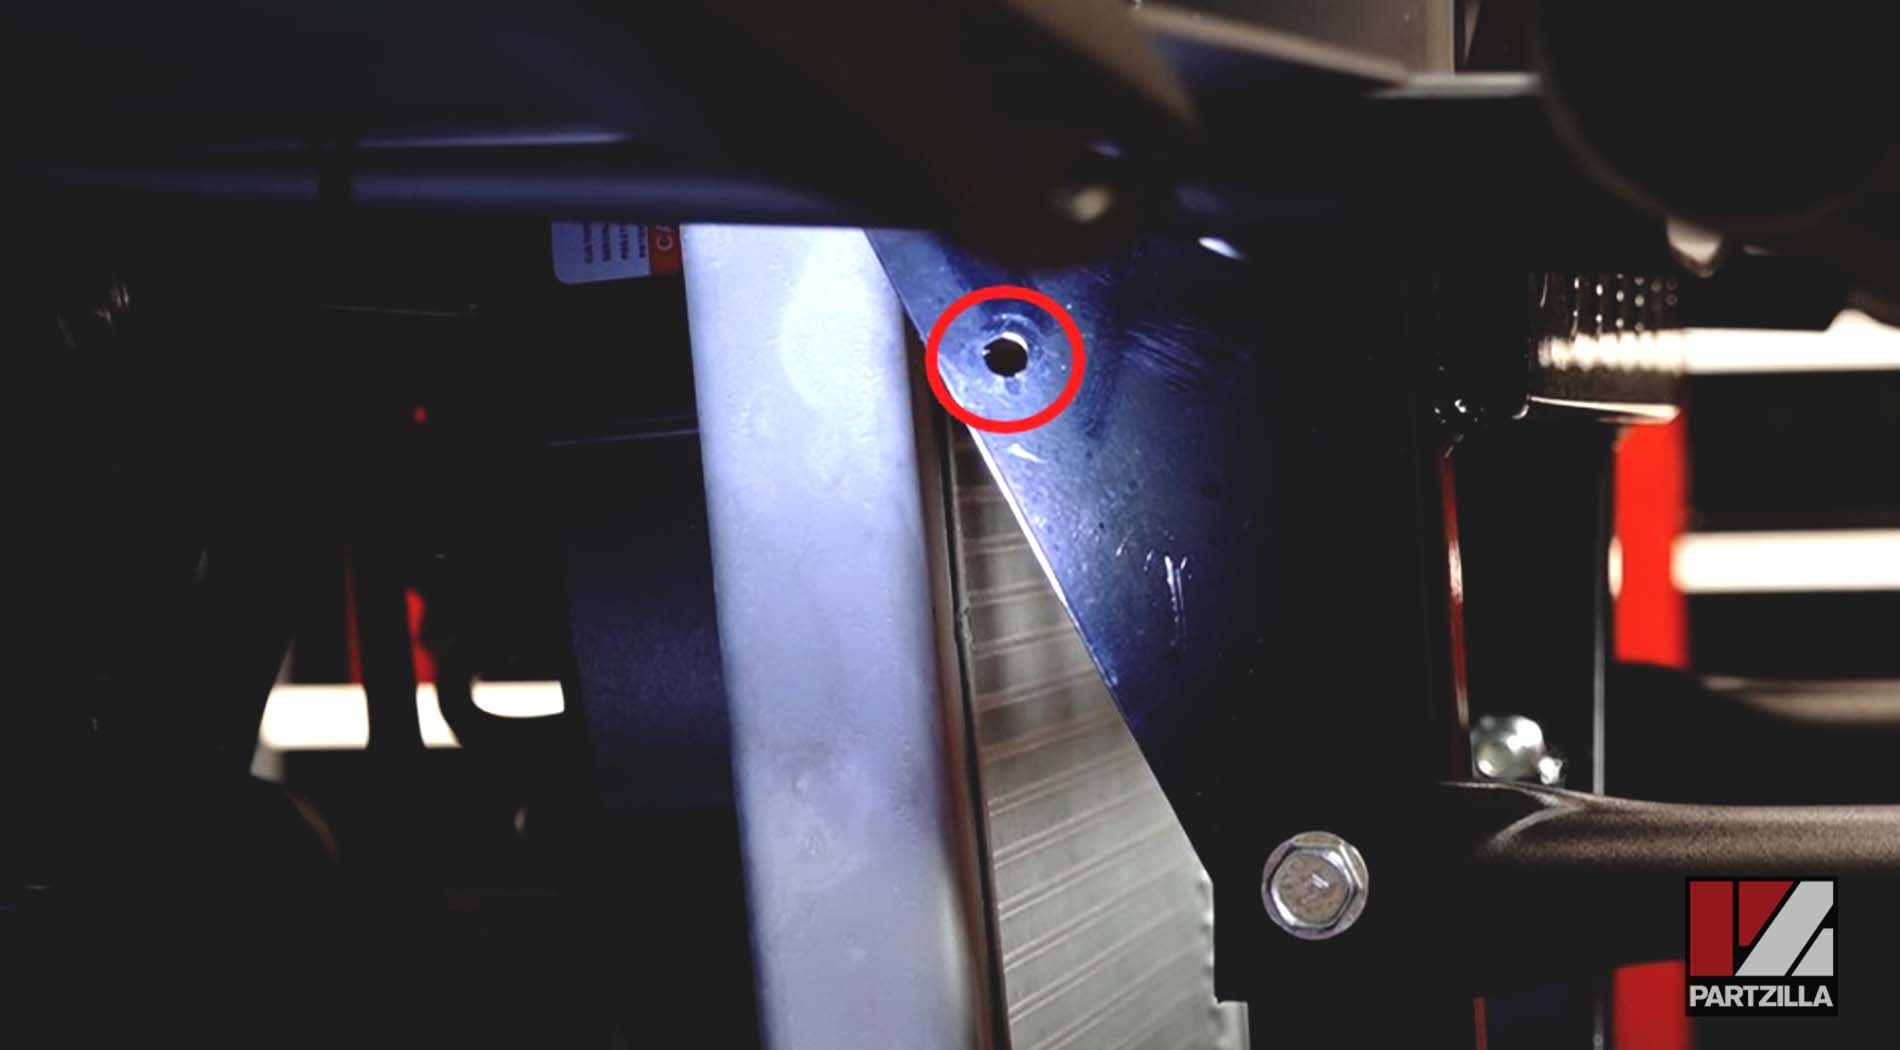
Step 5. Remove the paint around the hole so you can use it as a ground point.
PRO TIP: Use sandpaper or a wire brush on a drill to remove the paint.
Step 6. Feed the 13-inch ground cable from the ground post down through the hole you drilled and bolt it to the hole in the frame.
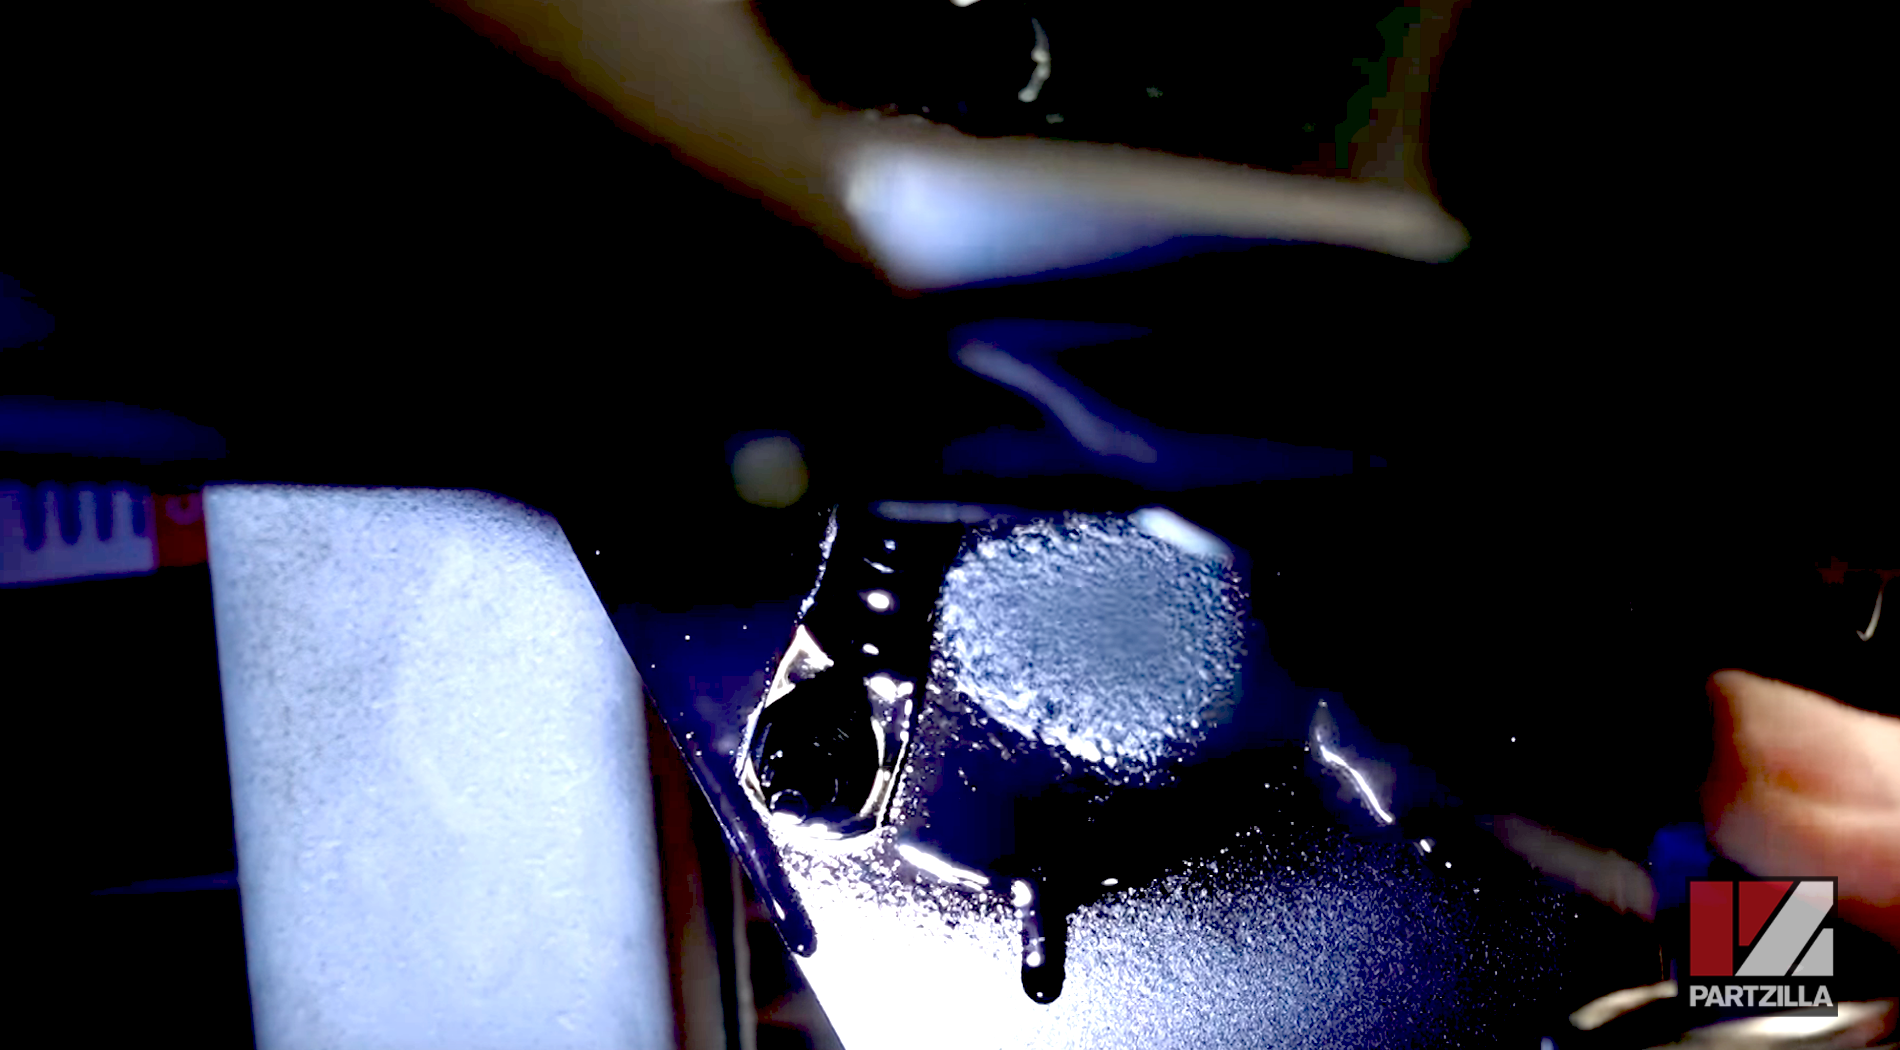
Step 7. Spray the area of the frame you removed paint from with an epoxy paint to protect it from rusting.
Completing Kawasaki Mule PRO-FXT Fuse Box Relay
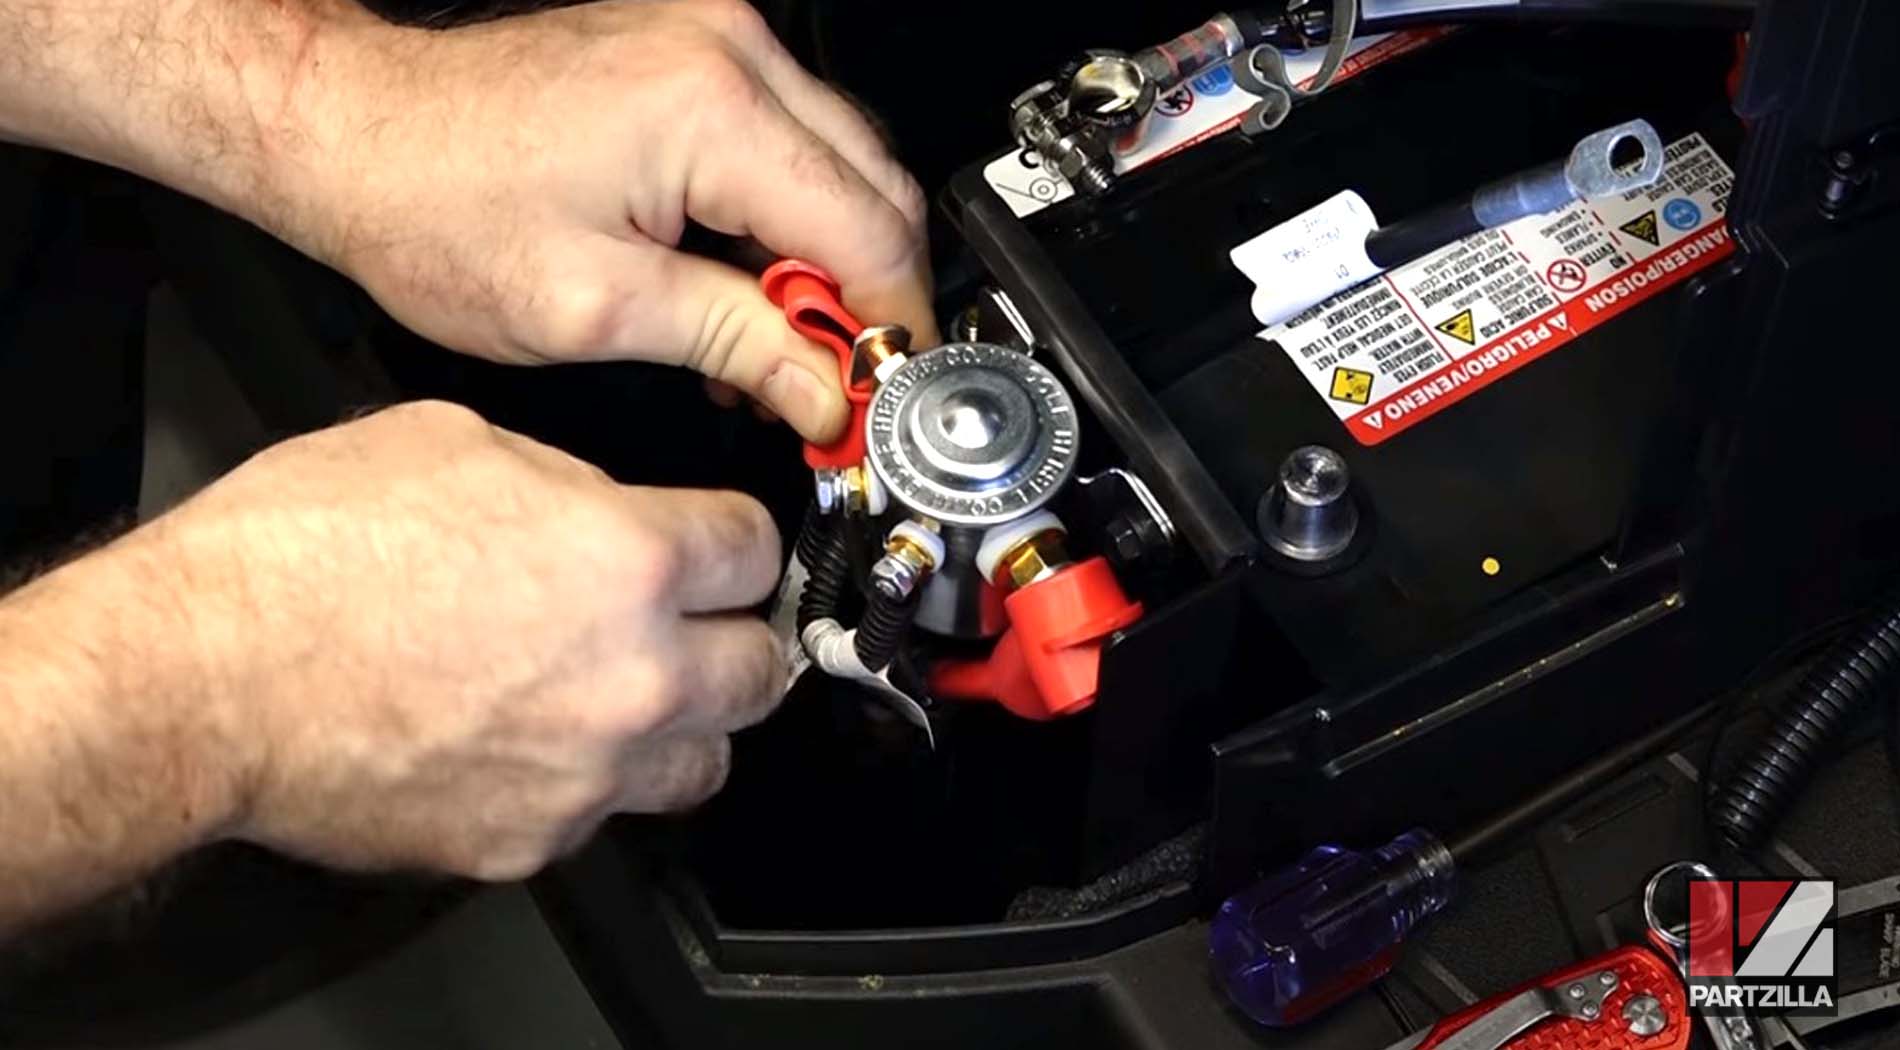
Step 1. Take the positive relay battery cable and connect it to the positive terminal of the battery. Run the cable through the end cap that's already on the battery's positive terminal.
Step 2. Reconnect the ground cable to the negative battery terminal and connect the 8-inch ground cable you've already attached to the back of the relay panel to the negative battery terminal.
Step 3. Reinstall the air filter, airbox cover and battery cover.
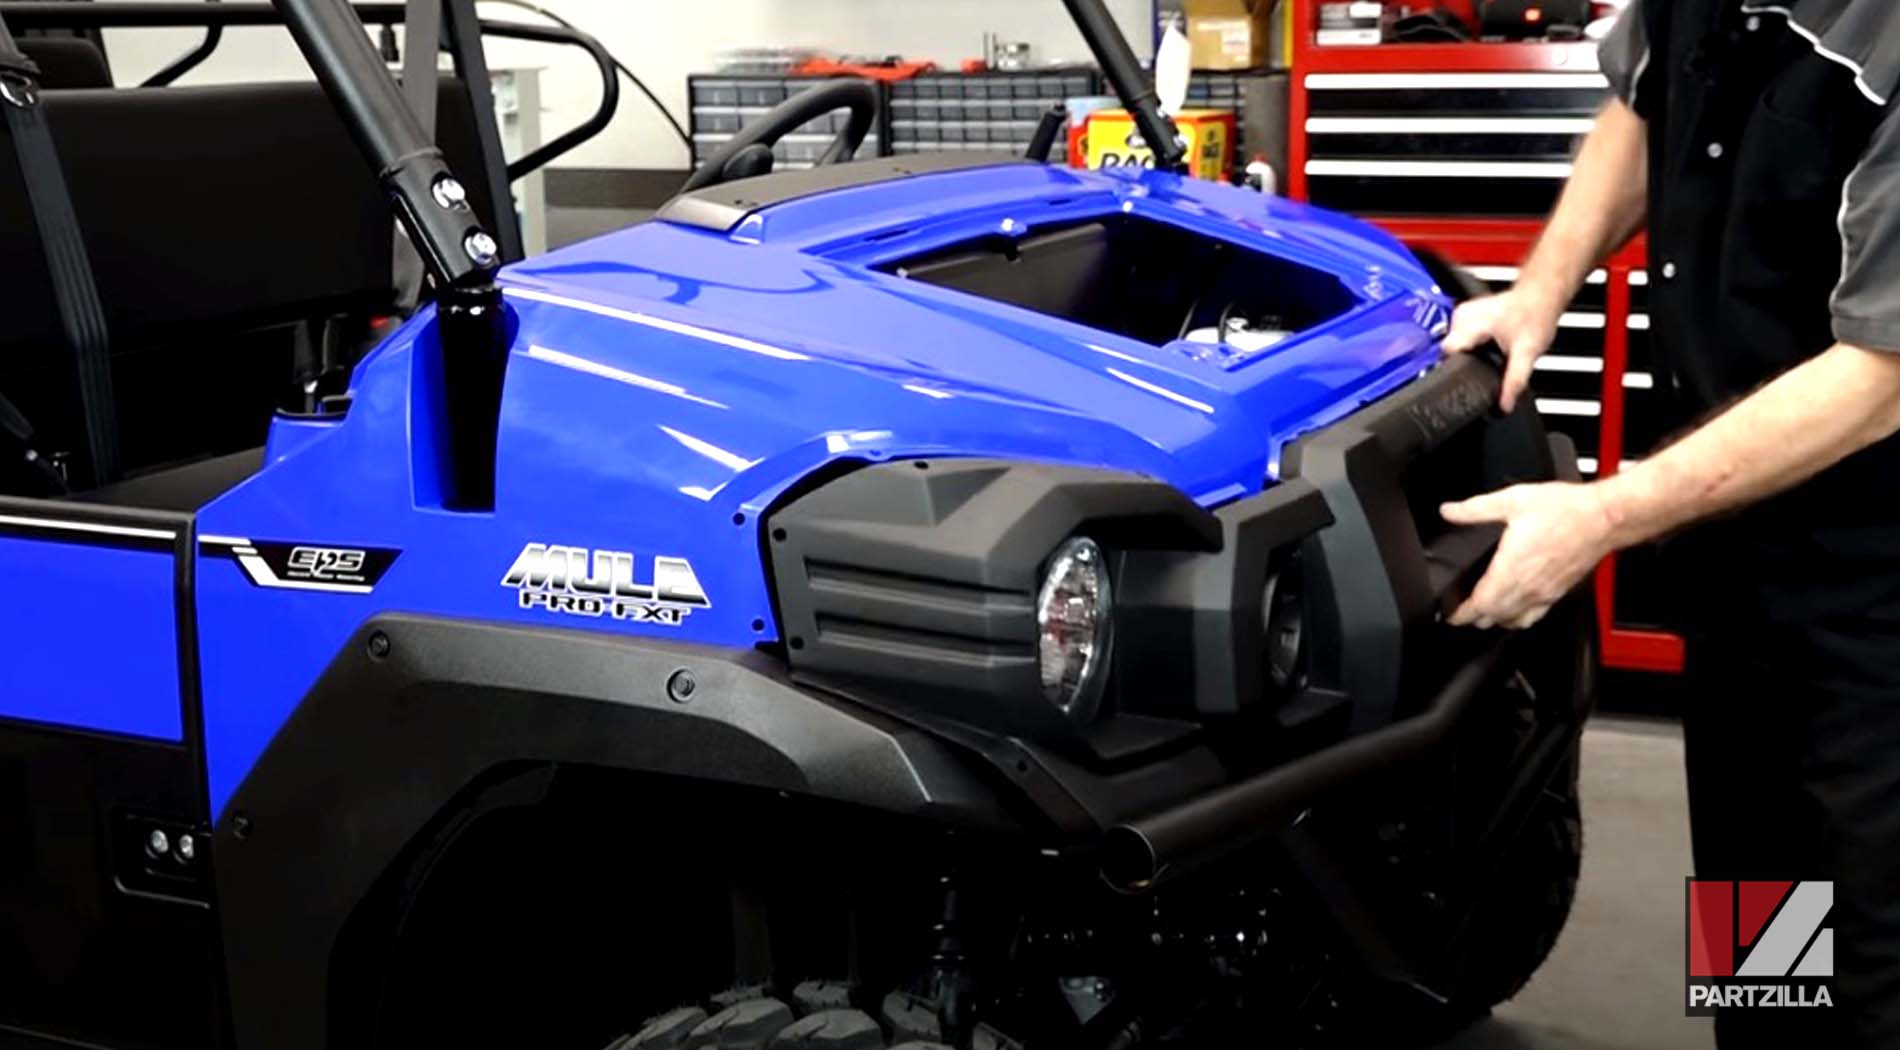
Step 4. Reinstall the front compartment cover, reconnect the headlights and reinstall the headlight grill.
If you made it this far and have the accessory fuse box installed, the next step is to fit an additional battery to the Mule. Watch the Kawasaki Mule PRO FXT dual battery kit installation video below to get that done.