How to Change Honda Rancher 420 Diff Fluid
Changing the final drive and front diff oil in a Honda ATV is an often overlooked maintenance task. A Honda Rancher 420 takes the same type of fluid on both ends, and you should change those fluids once every two years, regardless of mileage.
Watch the video above and follow the steps below to change the final drive and differential oils in a Honda Rancher TRX420.
Tools and Supplies – Honda TRX 420 Rancher Oil Change
- 3/8th ratchet
- 10mm, 12mm,17mm sockets
- Torque wrench
- Contact cleaner
- Honda shaft drive oil

NOTE: Two bottles of Honda drive shaft oil are needed to change both the front differential and final drive fluid.
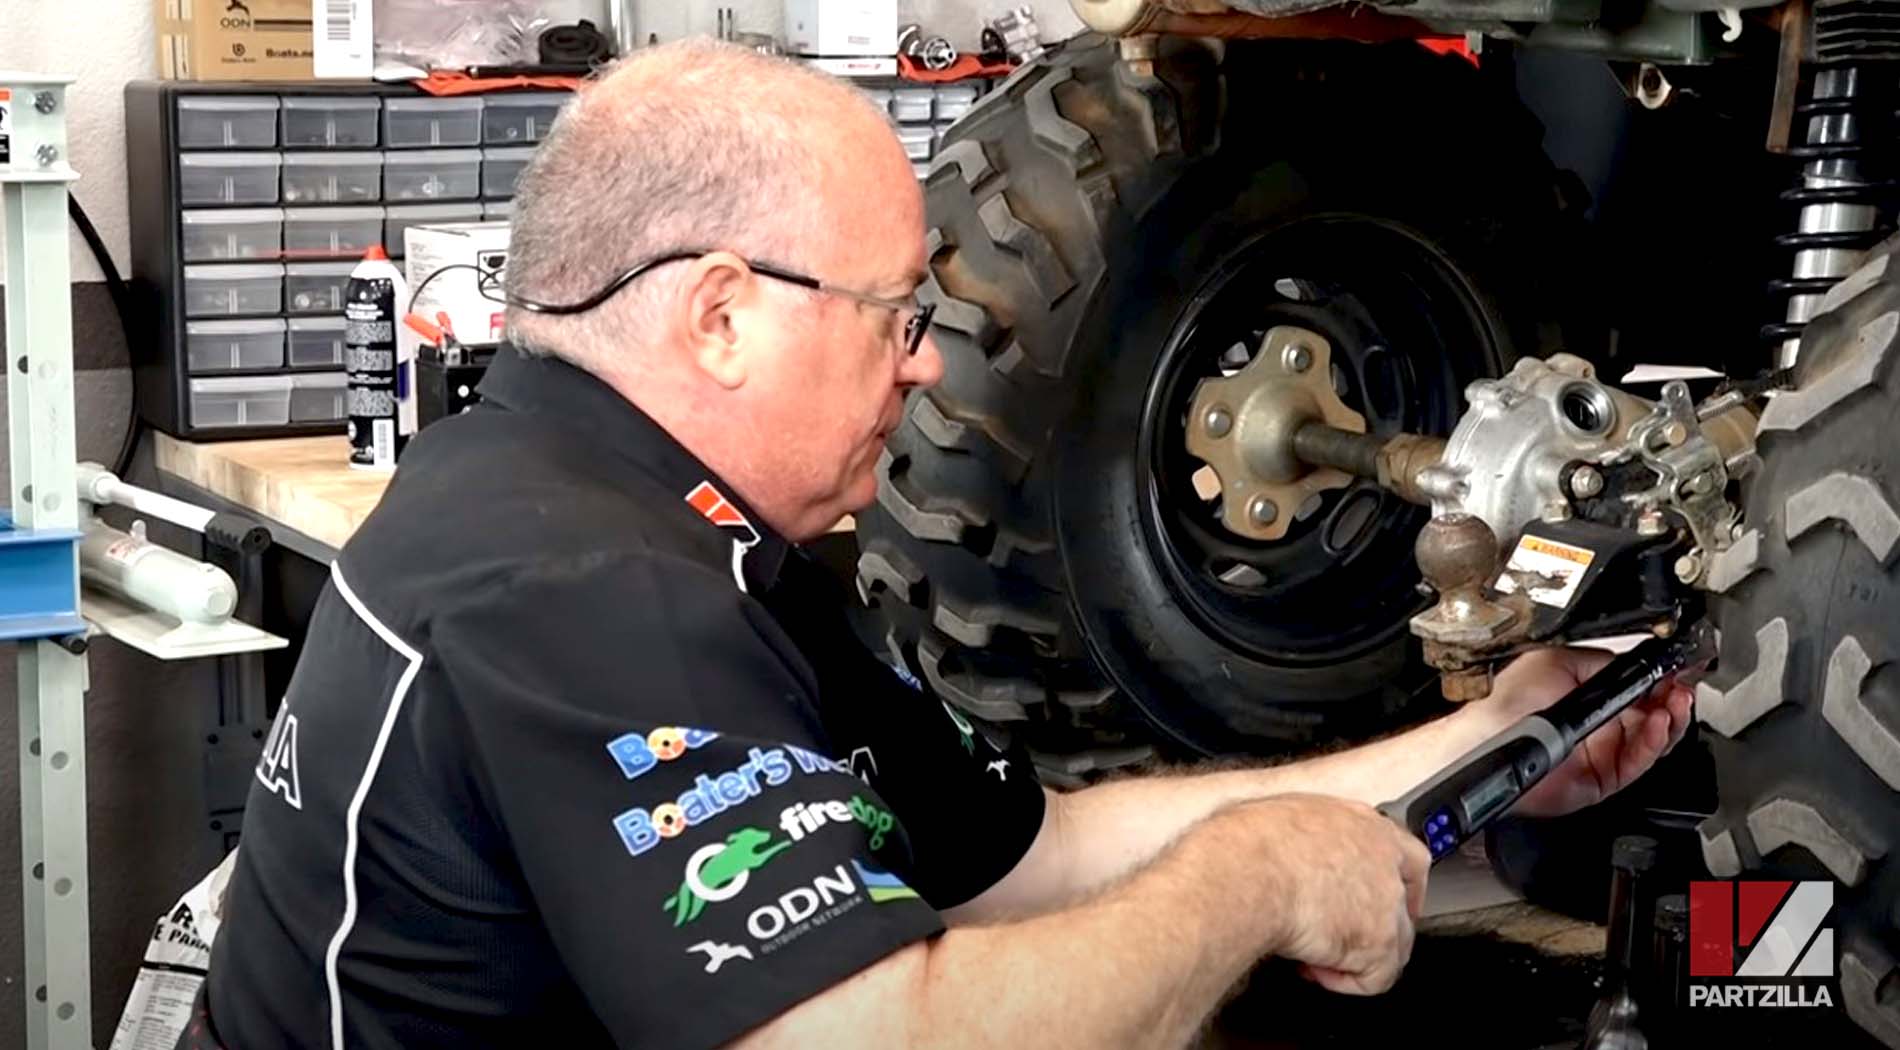
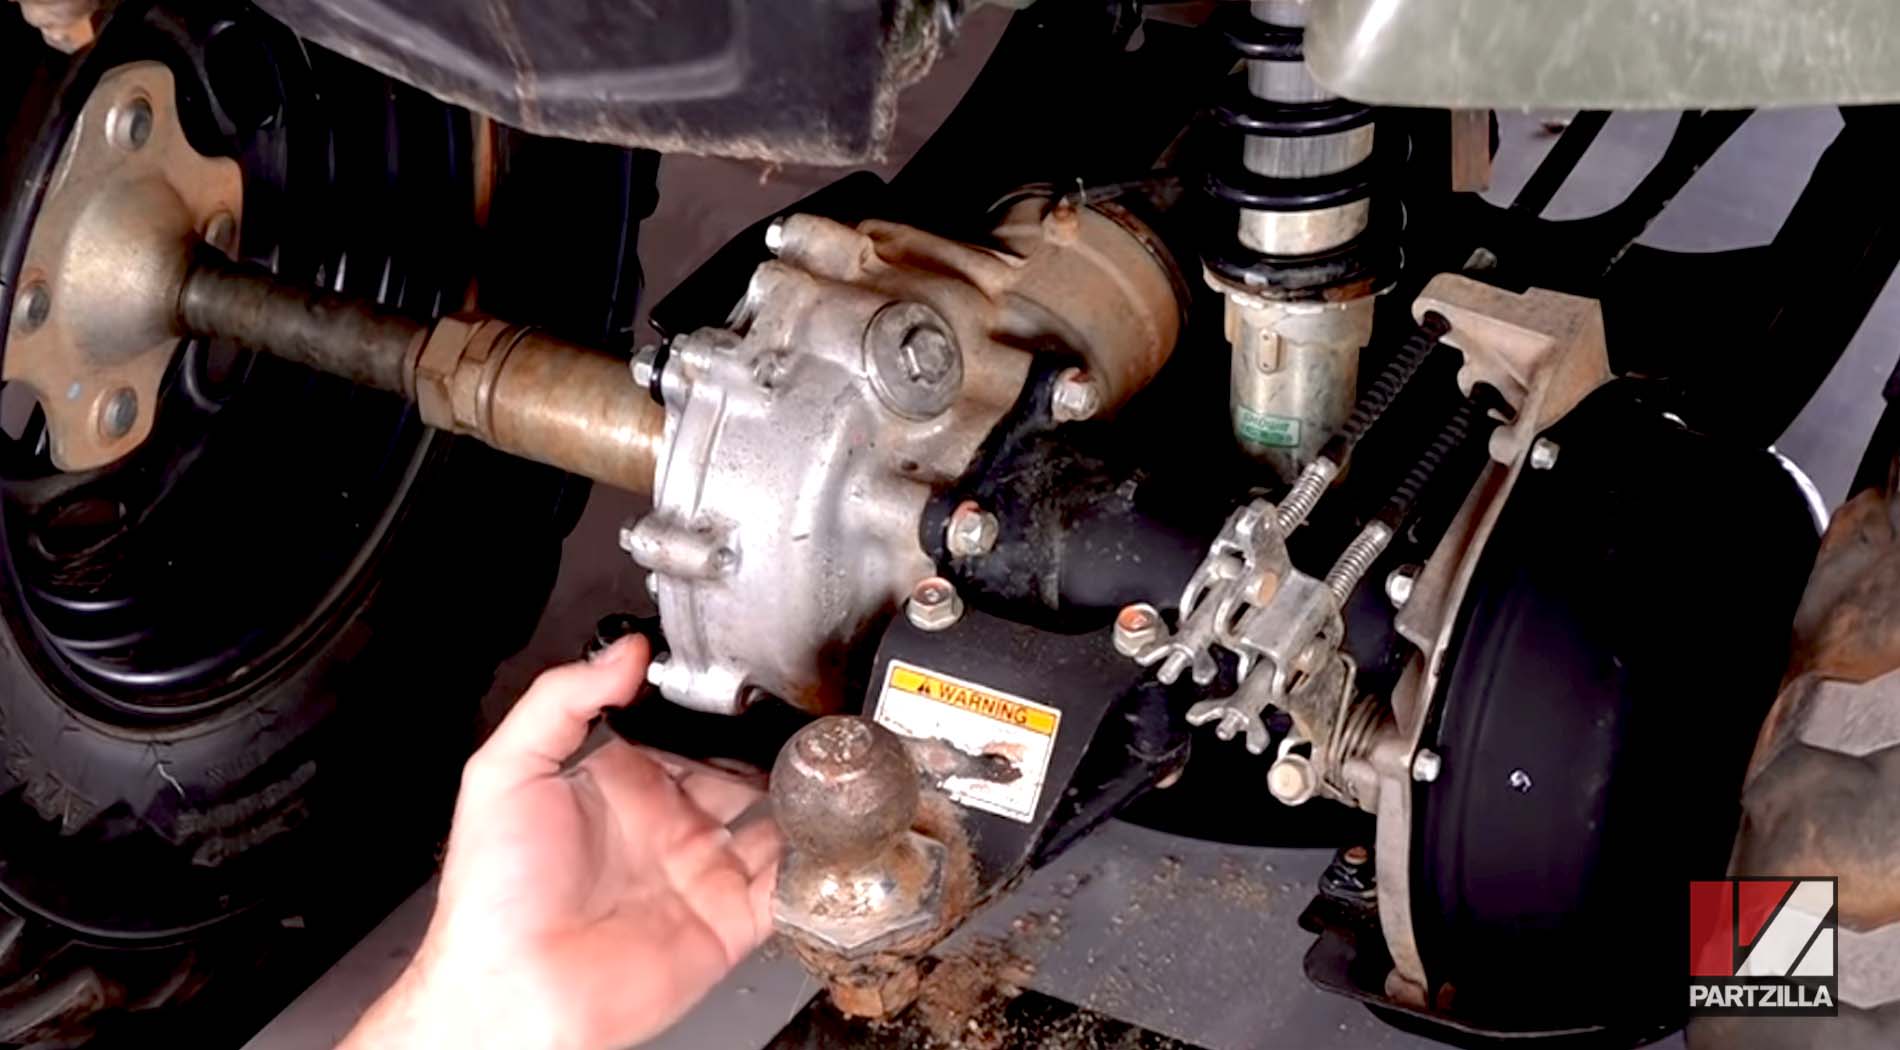
Honda Rancher Front Differential Fluid Change
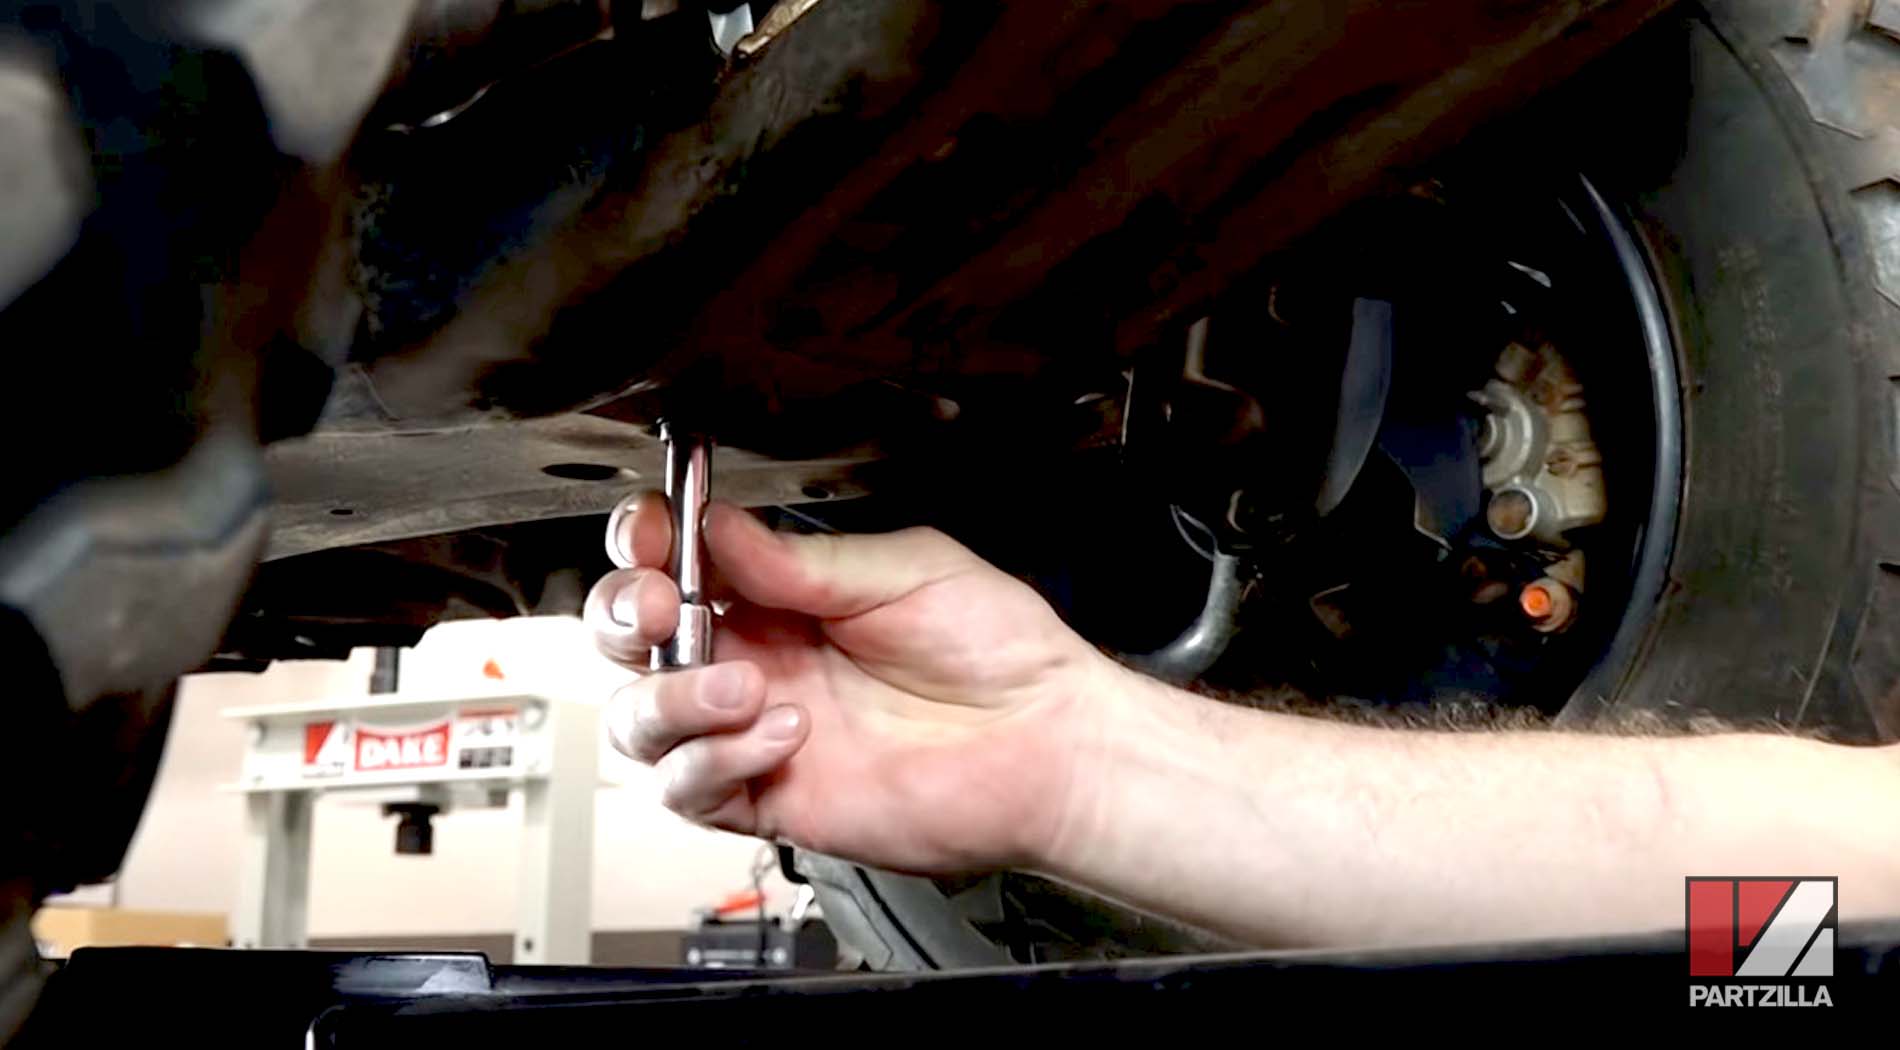
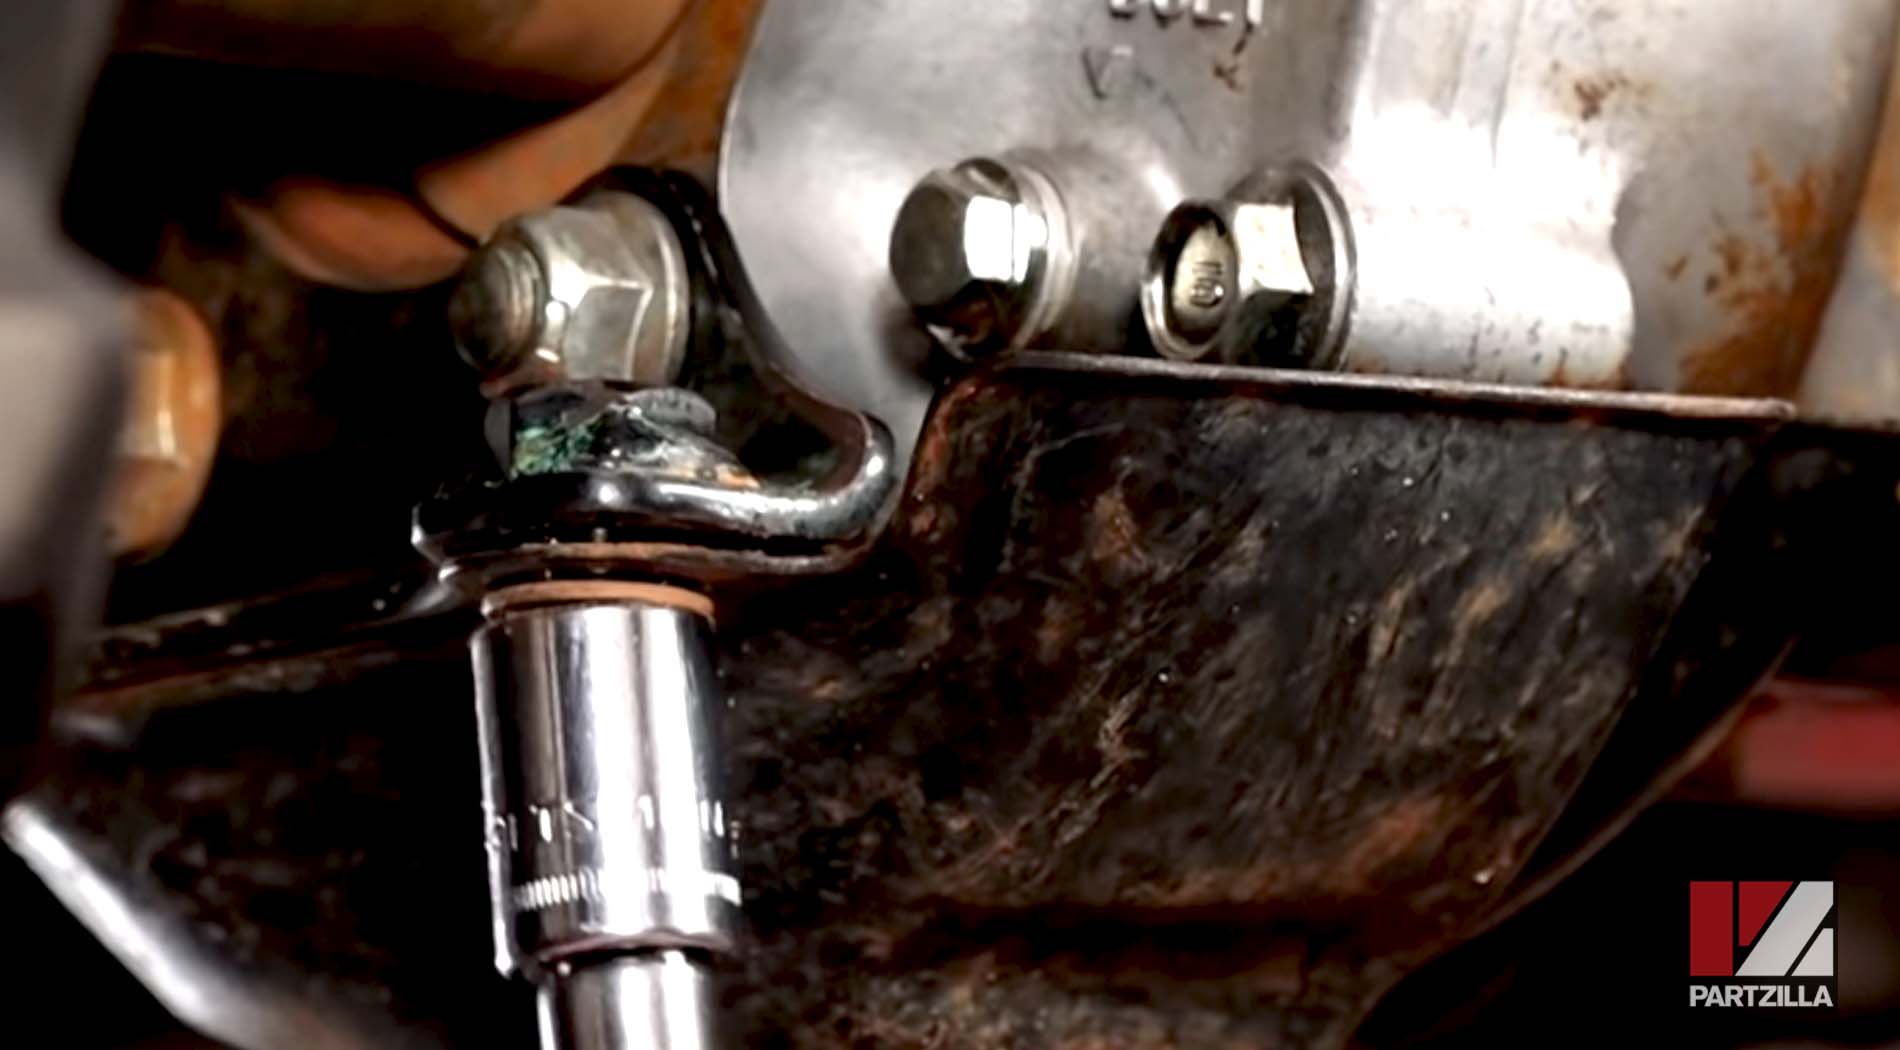
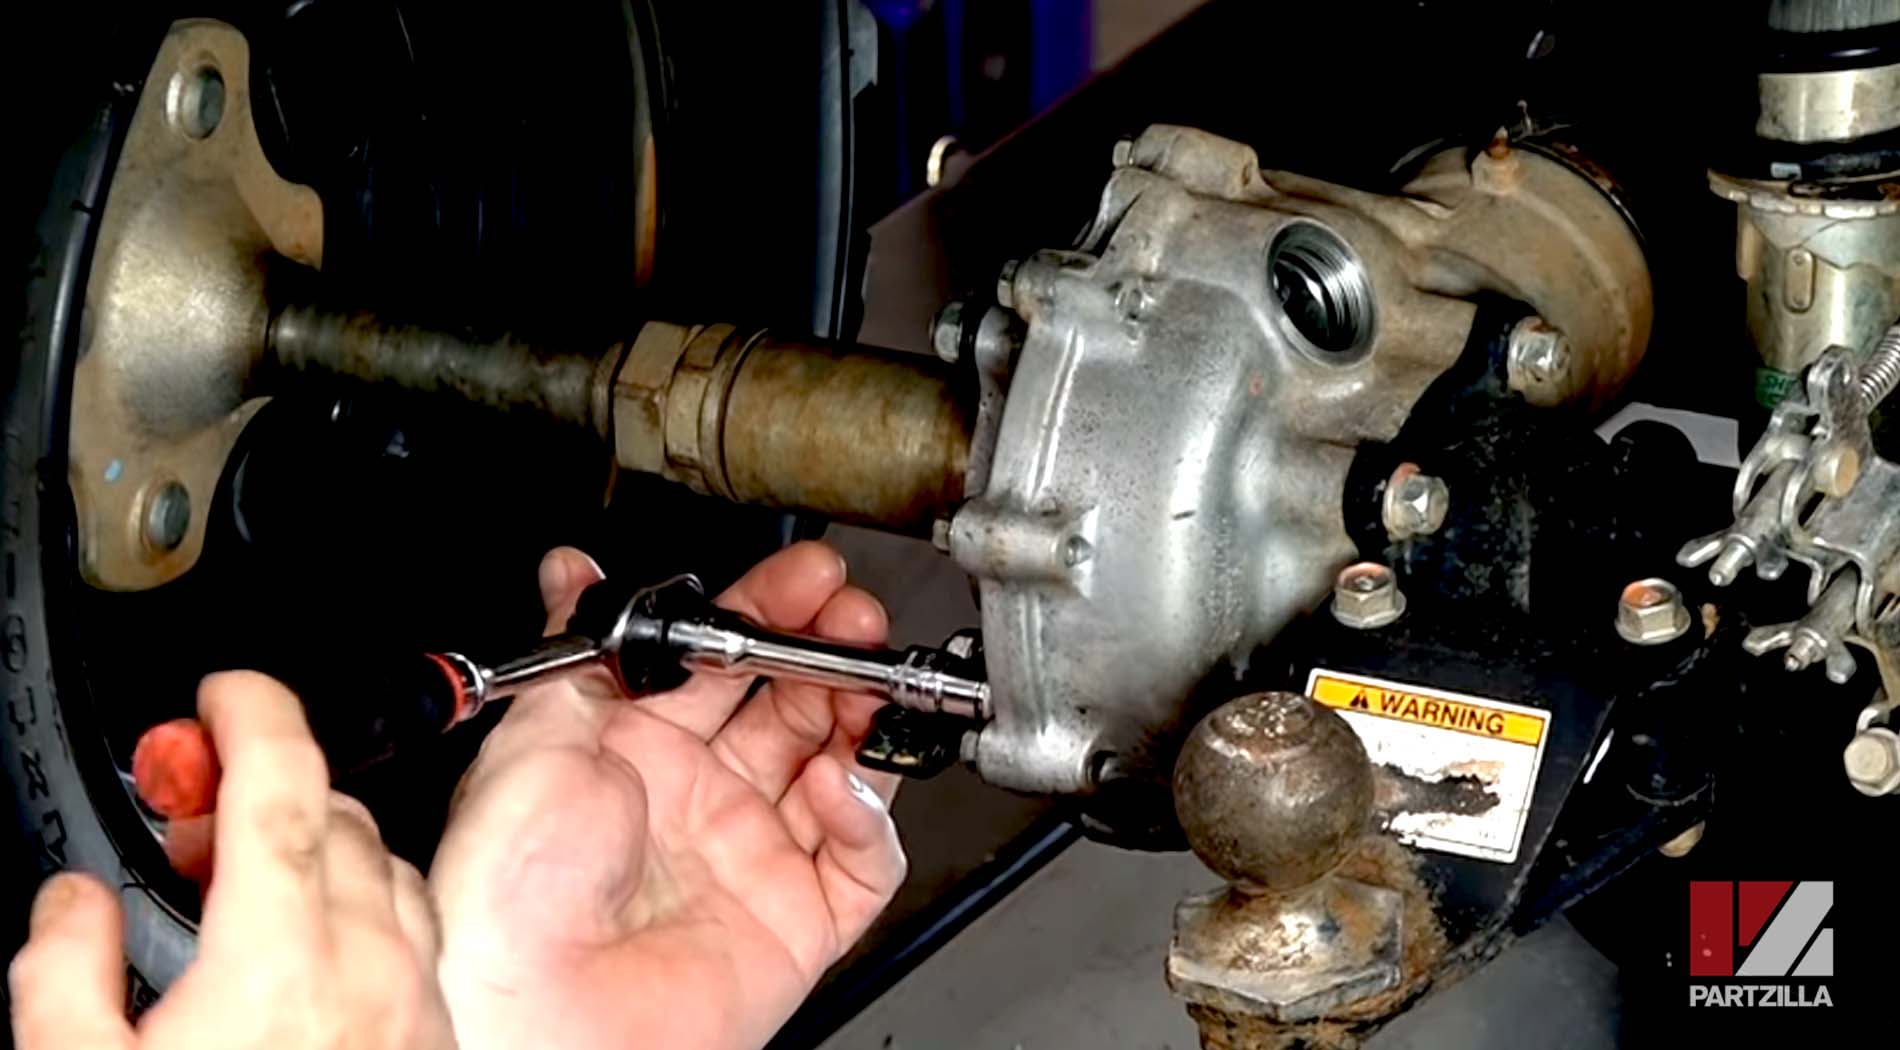
Step 1. Remove the top fill bolt (located on the right-hand side of the differential as you’re facing the ATV) with a 17mm socket.
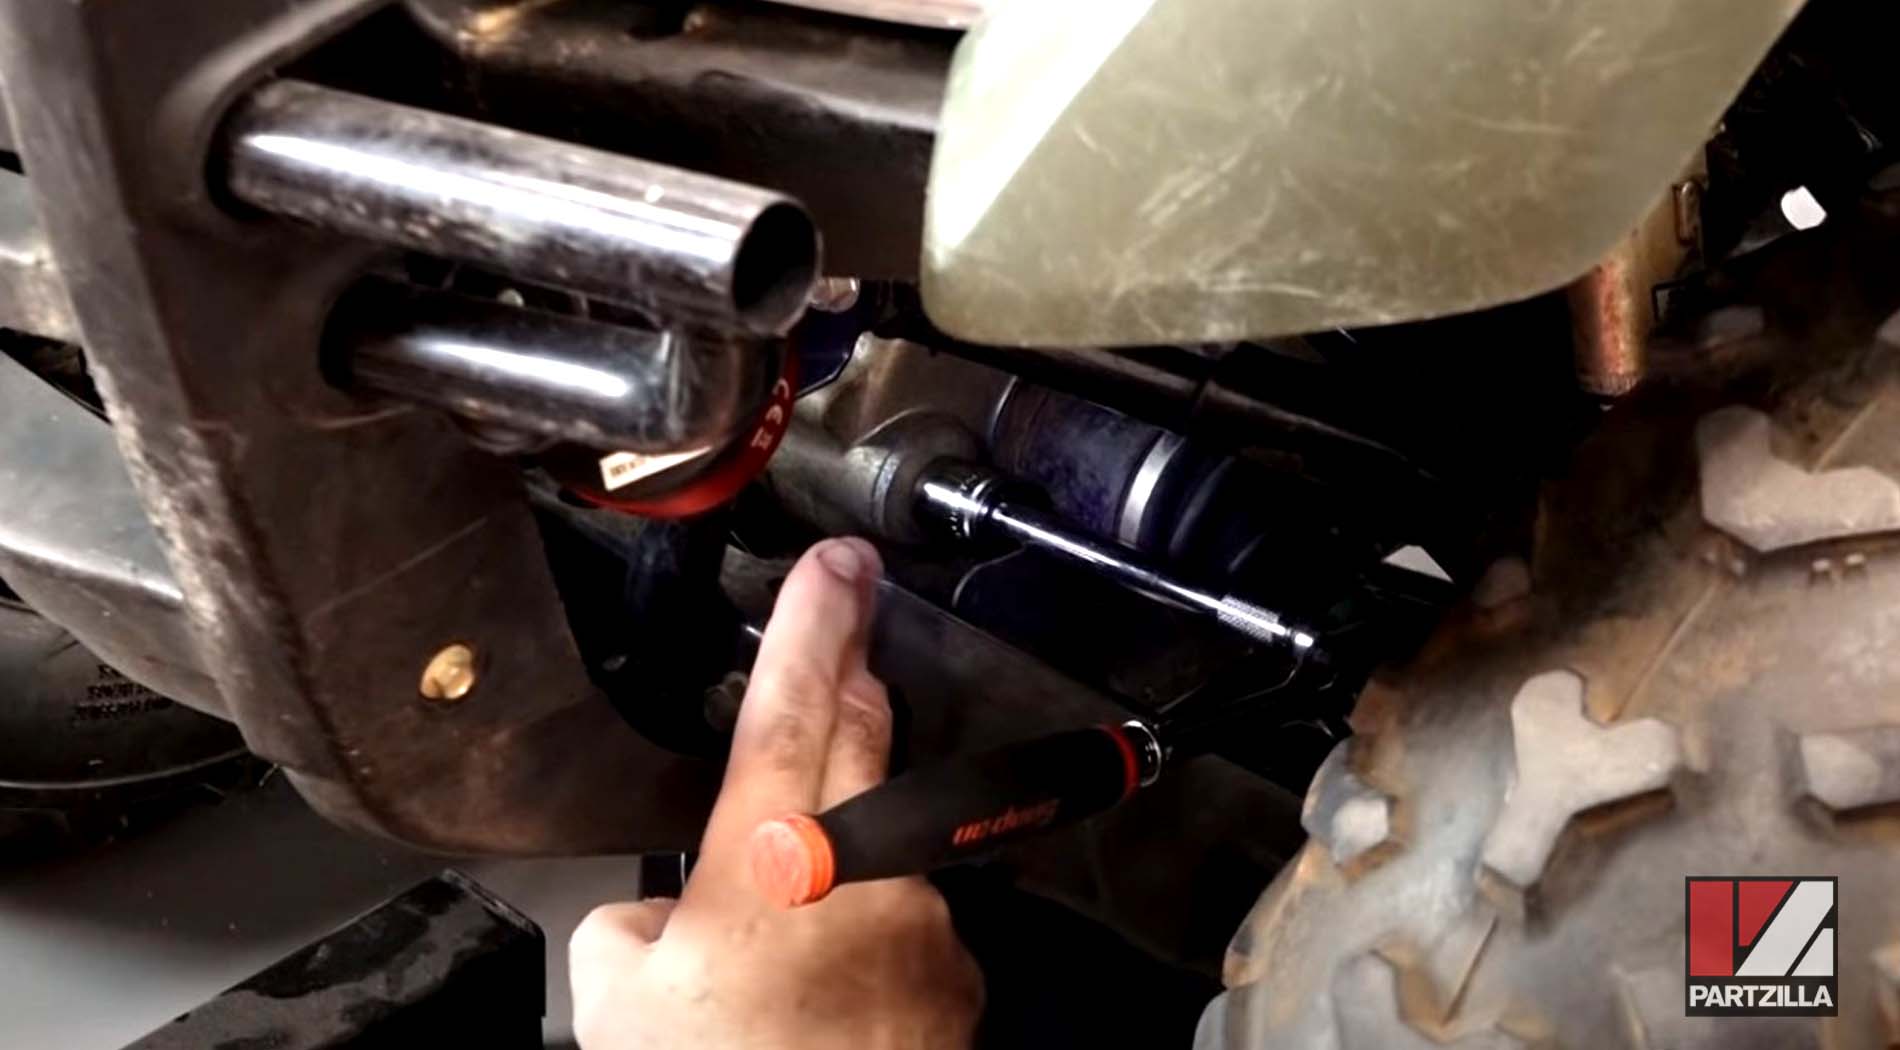
Step 2. Get a drain pan to catch the fluid, and remove the 10mm drain bolt located underneath the front differential.
Step 3. Replace the drain bolt once the fluid has completely drained, and tighten it to 9 foot-pounds.
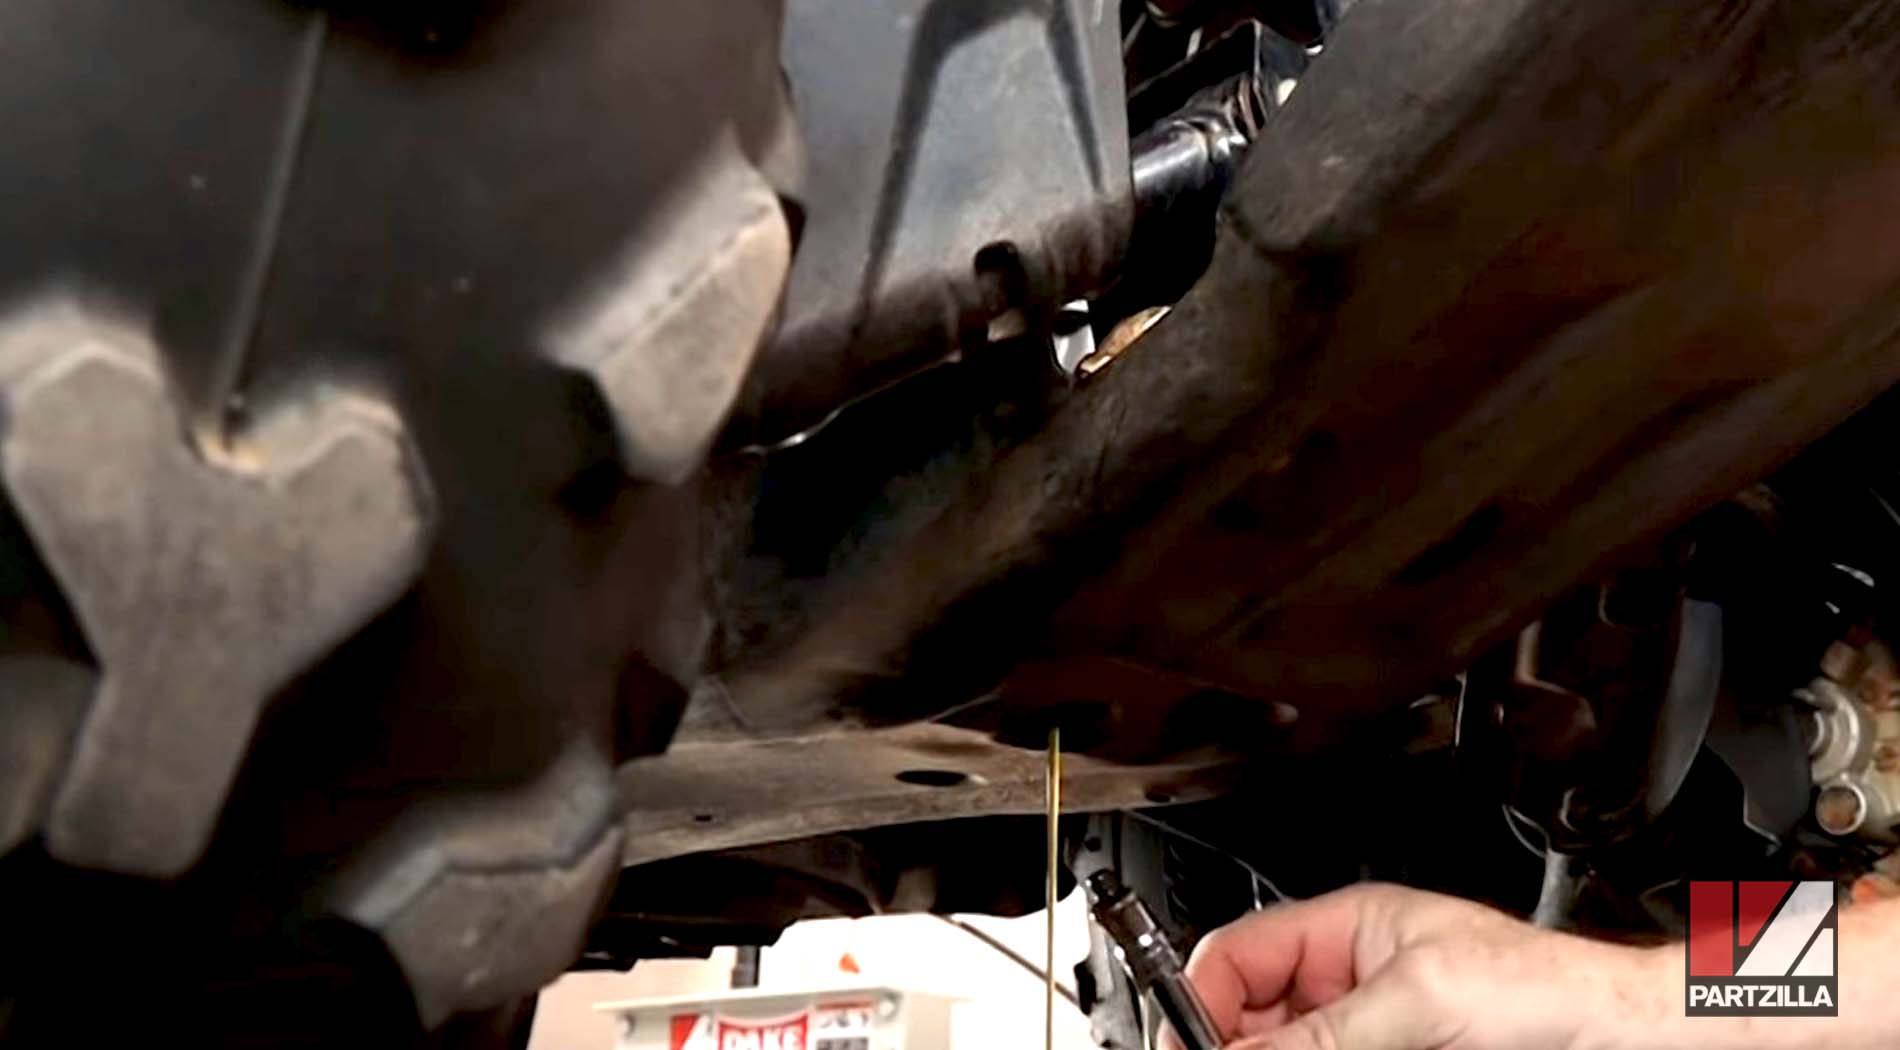
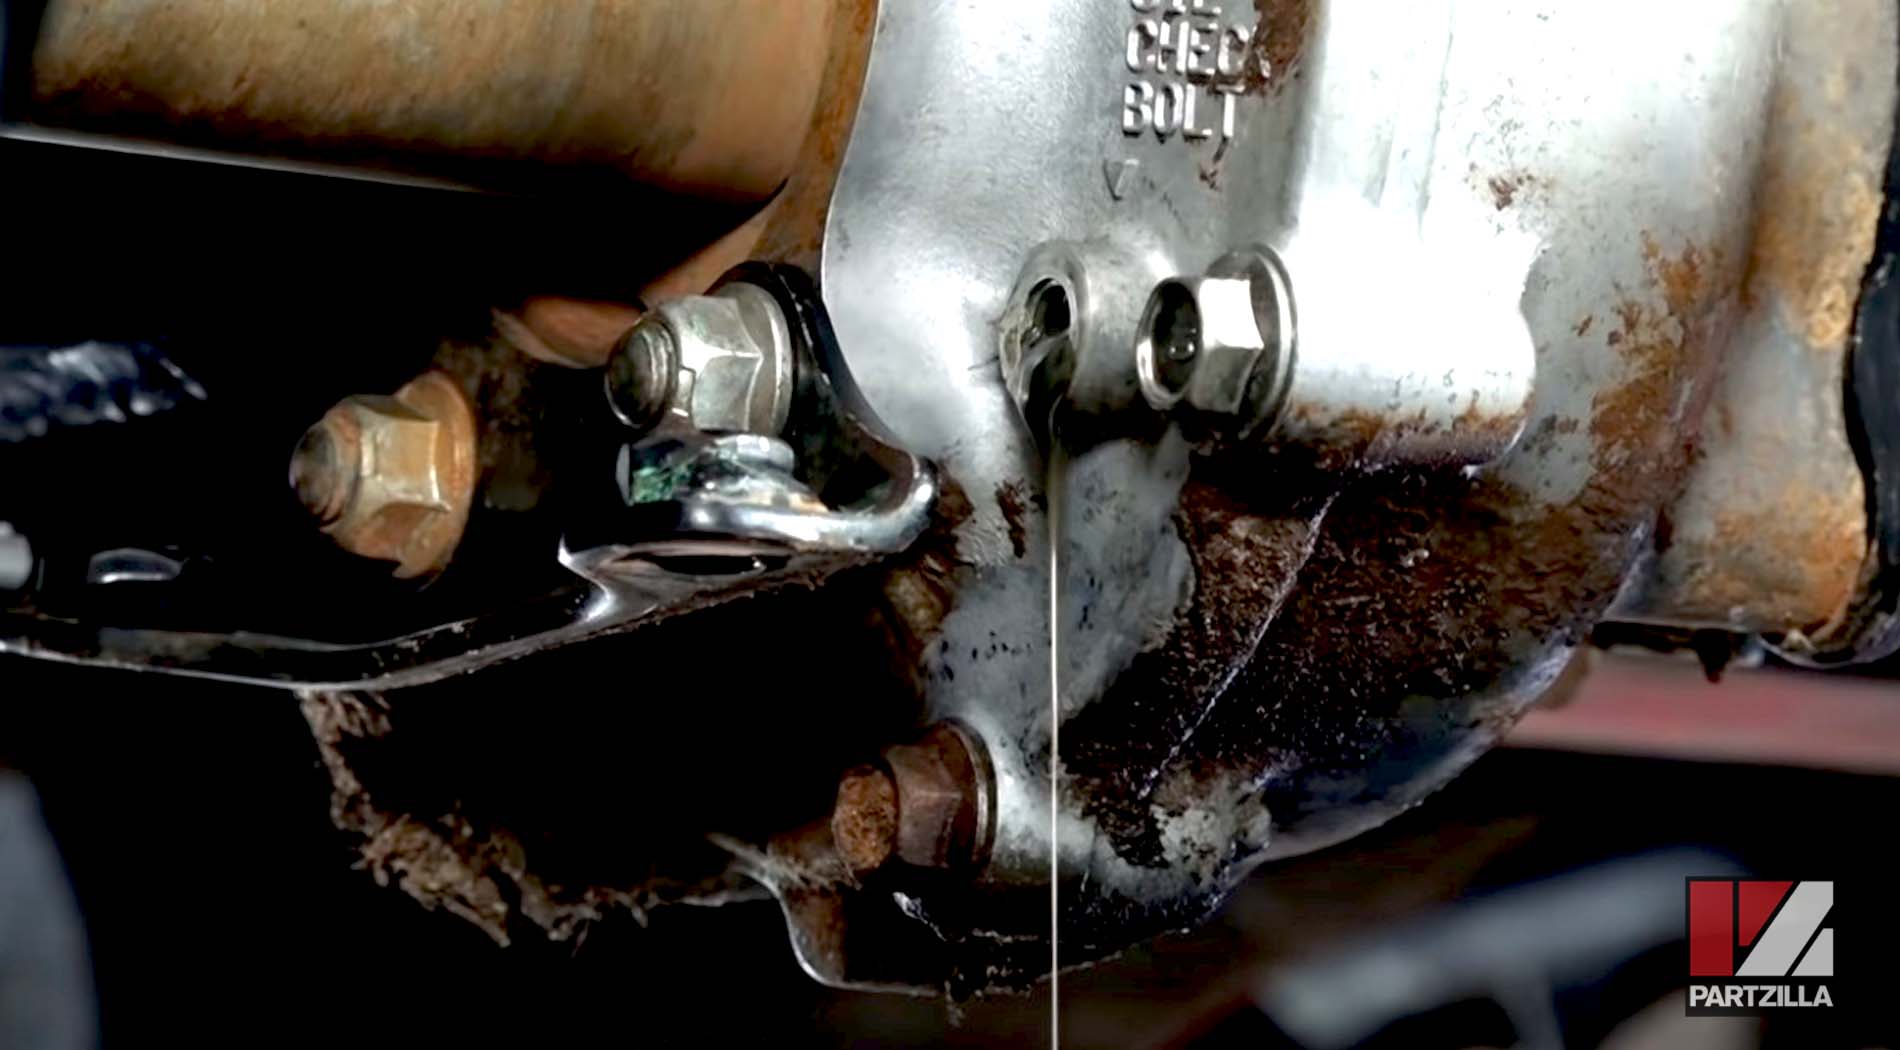
Step 4. Pour Honda shaft drive fluid into the fill bolt opening from Step 1. It should take between 7.5 and 8 oz. of fluid, but you’ll know it's full when the fluid starts to run out of the opening.
Step 5. Replace the fill bolt, and tighten it with a 17mm socket.
NOTE: Don’t overtighten it. If you have a little excess fluid around the bolt when you’re done, clean it up with some contact cleaner.
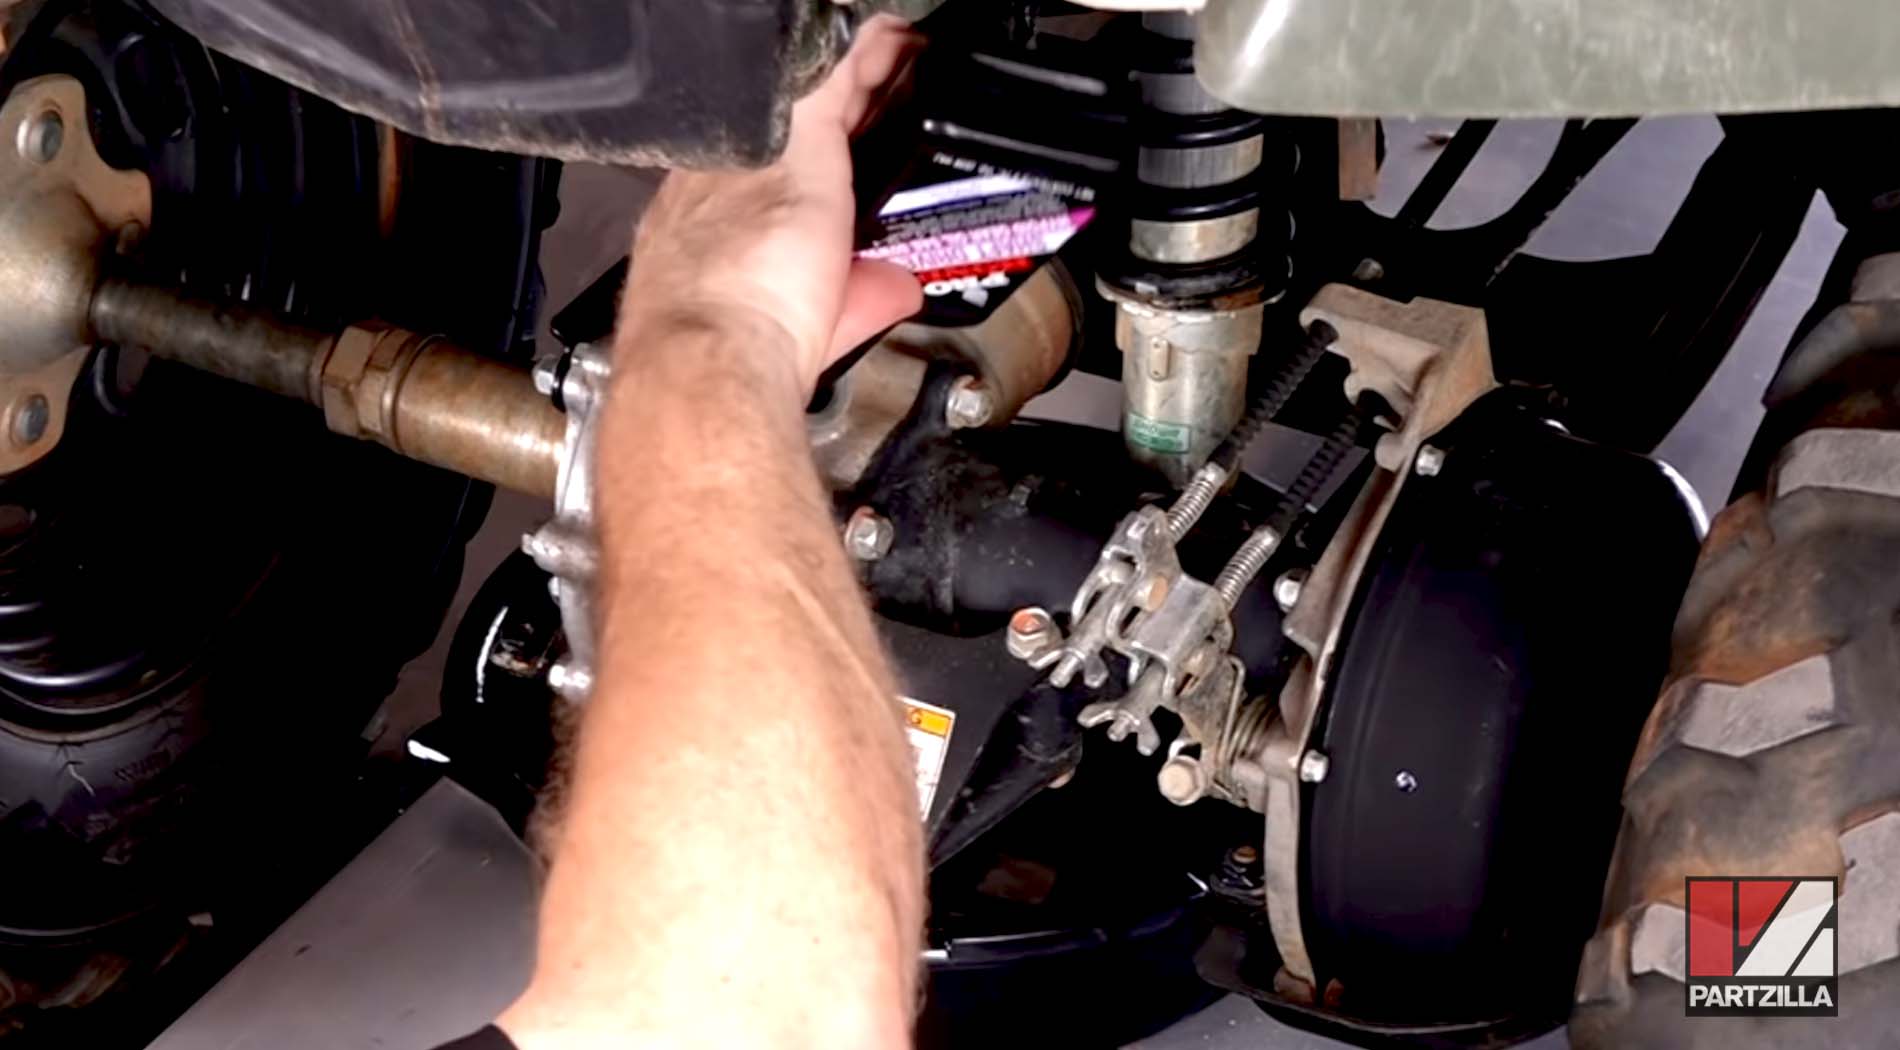
Honda Rancher Final Drive Fluid Change
Step 1. Remove the three 12mm bolts (one at the front and two at the back) underneath the drive housing that hold the skid plate in place, followed by the skid plate itself.
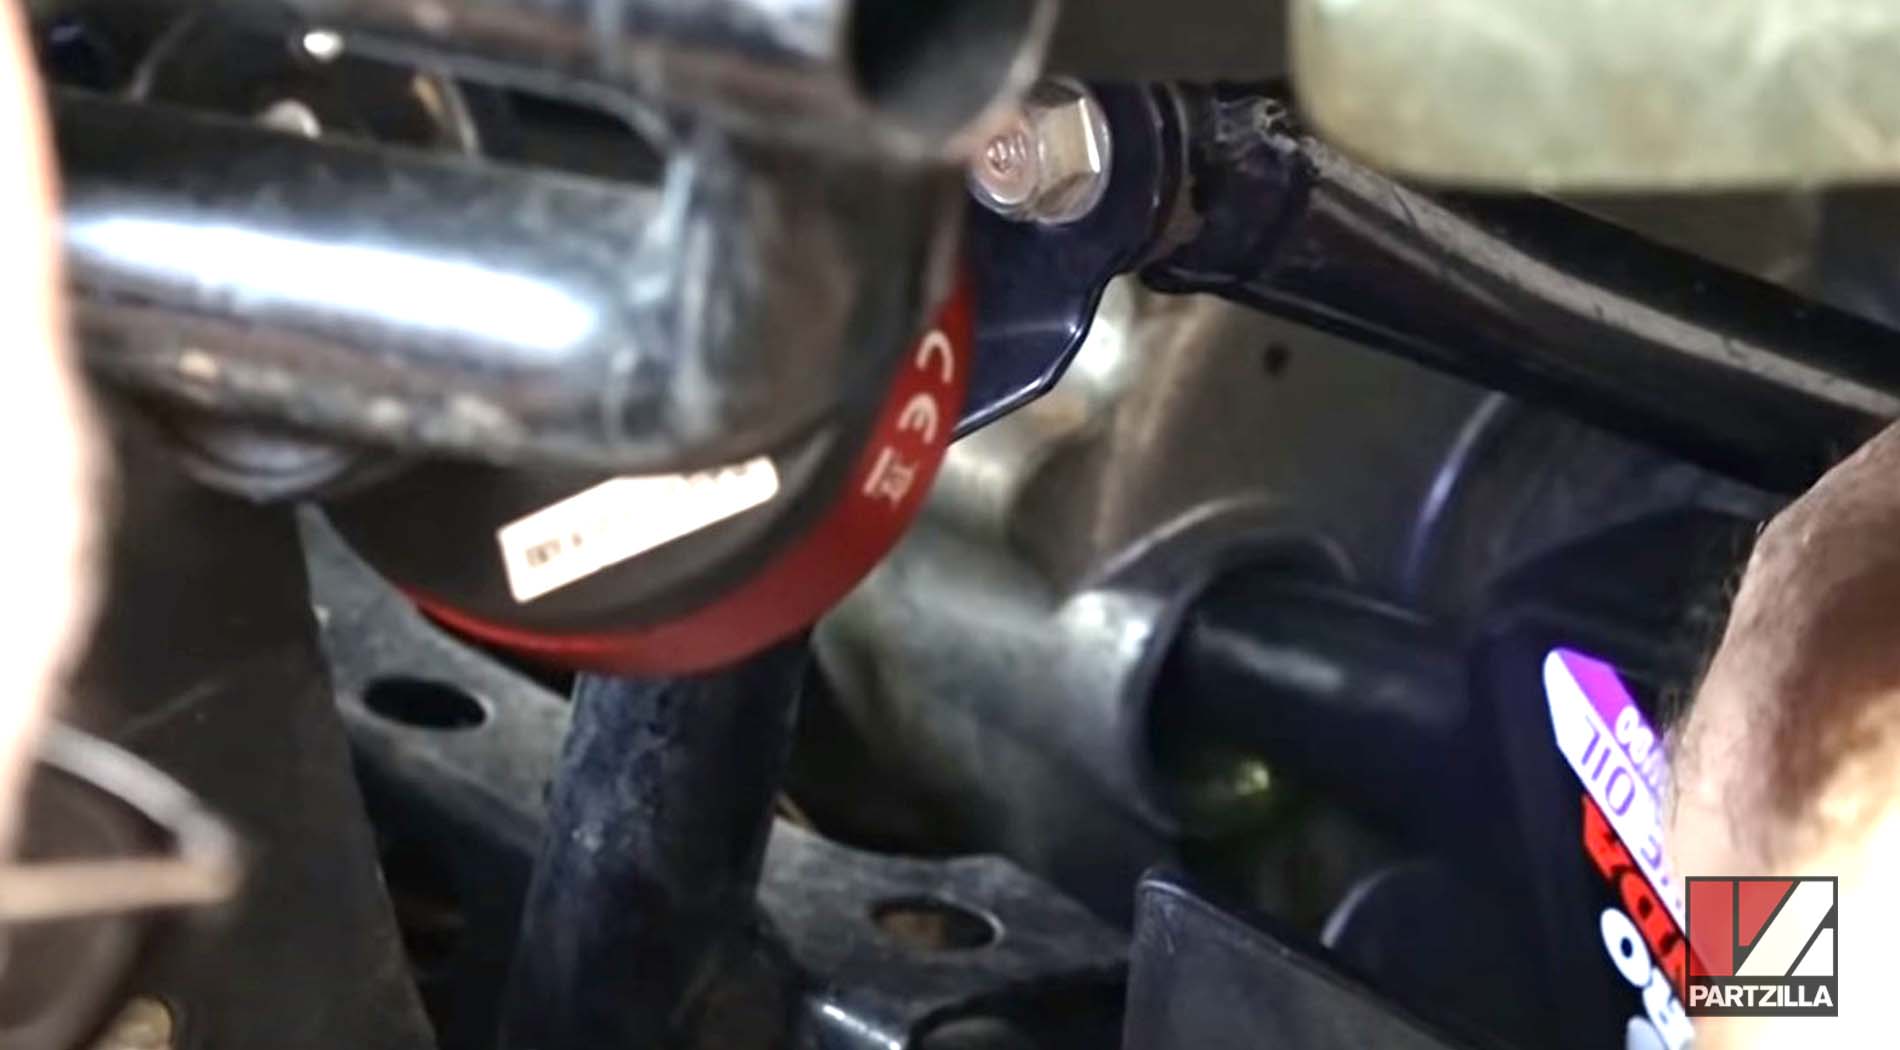
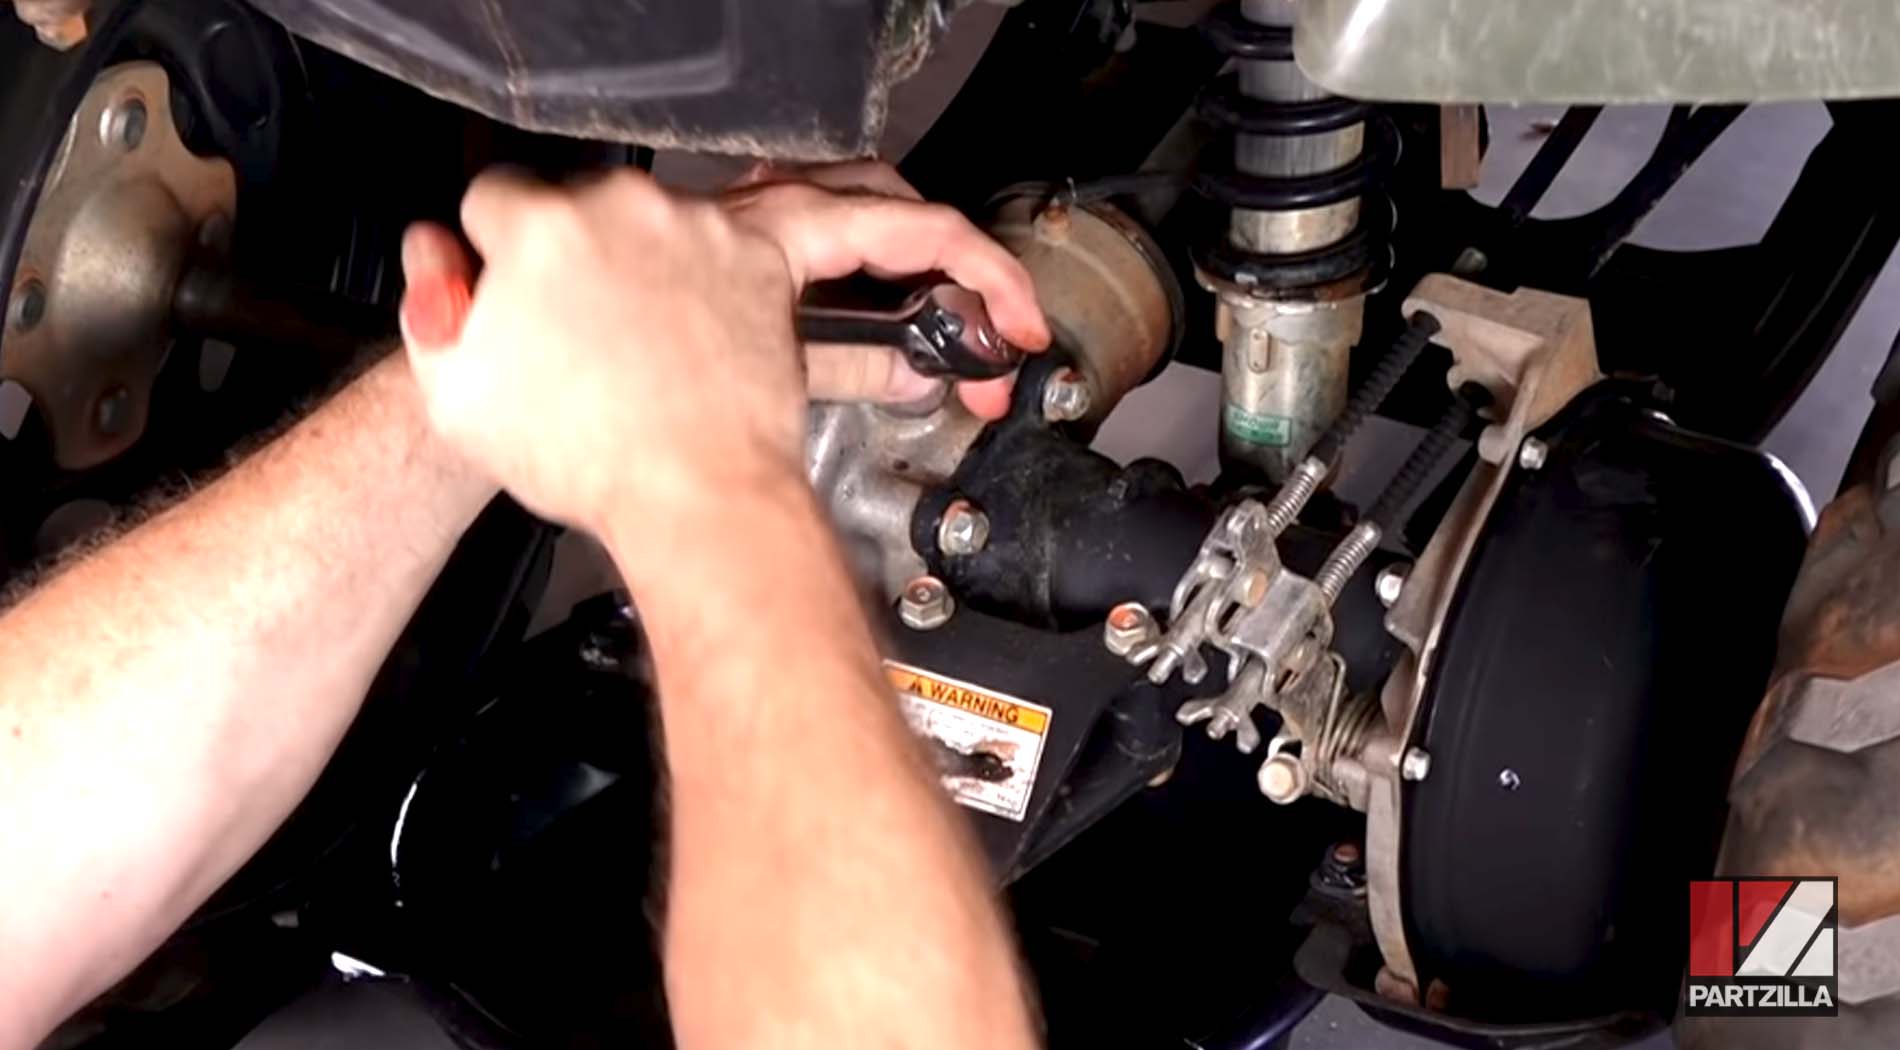
Step 2. Remove the rear 17mm fill bolt on top of the housing.

Step 3. Get a drain pan underneath, and remove the check bolt using a 10mm socket. The check bolt is low on the left-hand side, facing the rear of the unit.

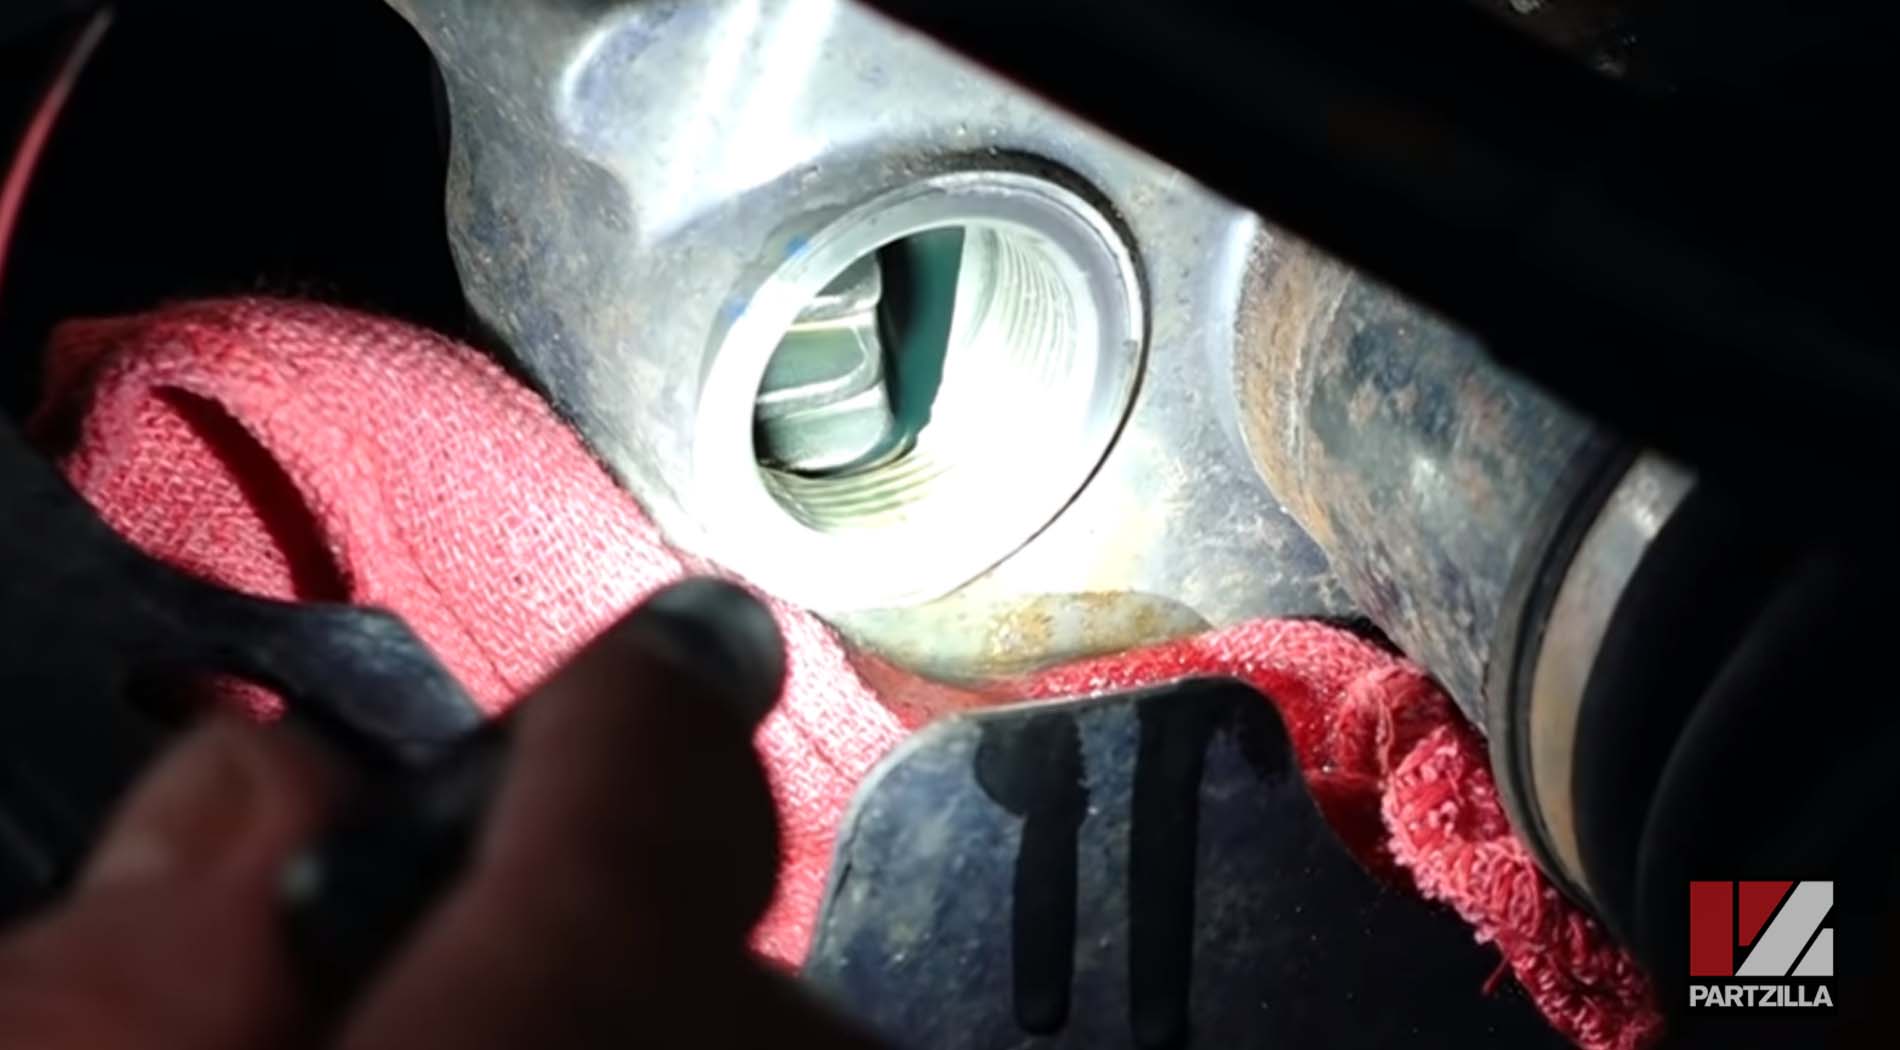
Step 4. Clean around the drain bolt to remove any dirt or mud caked around it, and remove the drain bolt with a 10mm socket. The drain bolt is low and on the right-hand side.
Step 5. Replace the drain bolt once the fluid is finished draining, and use a torque wrench to tighten it to 9 foot-pounds.
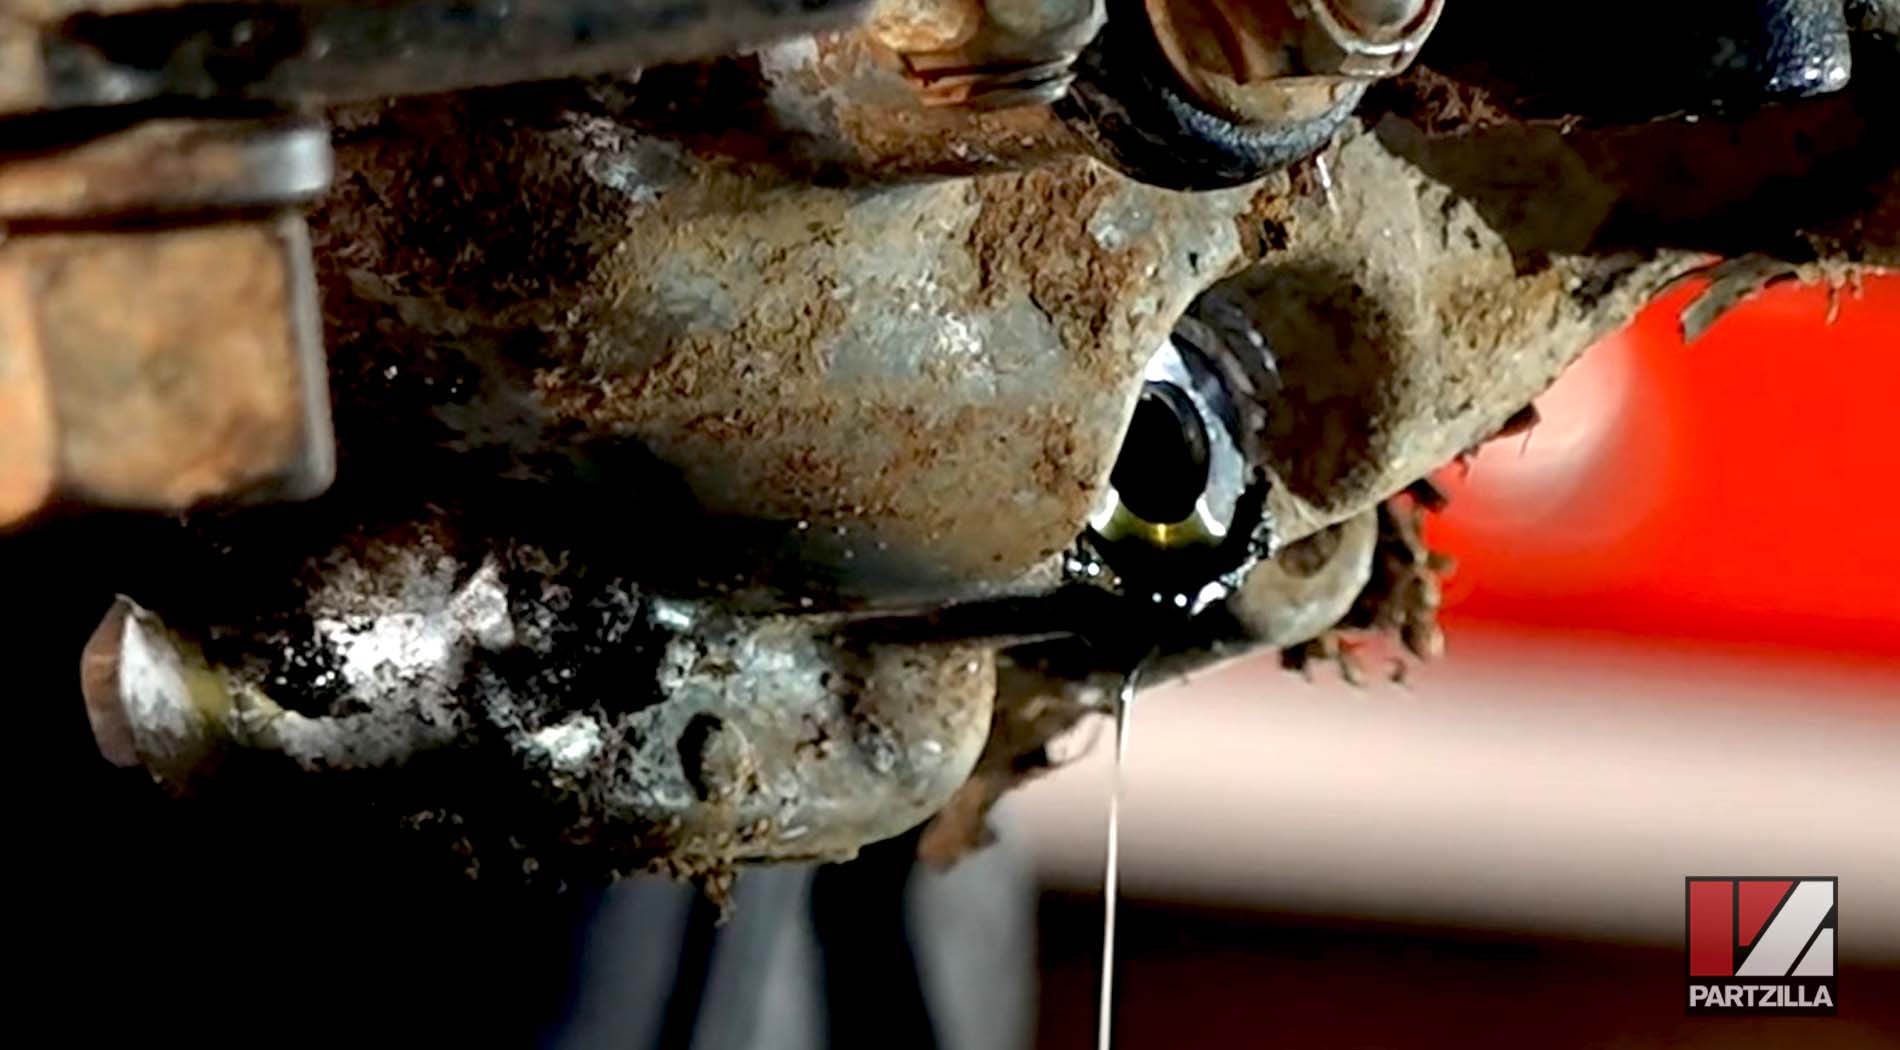
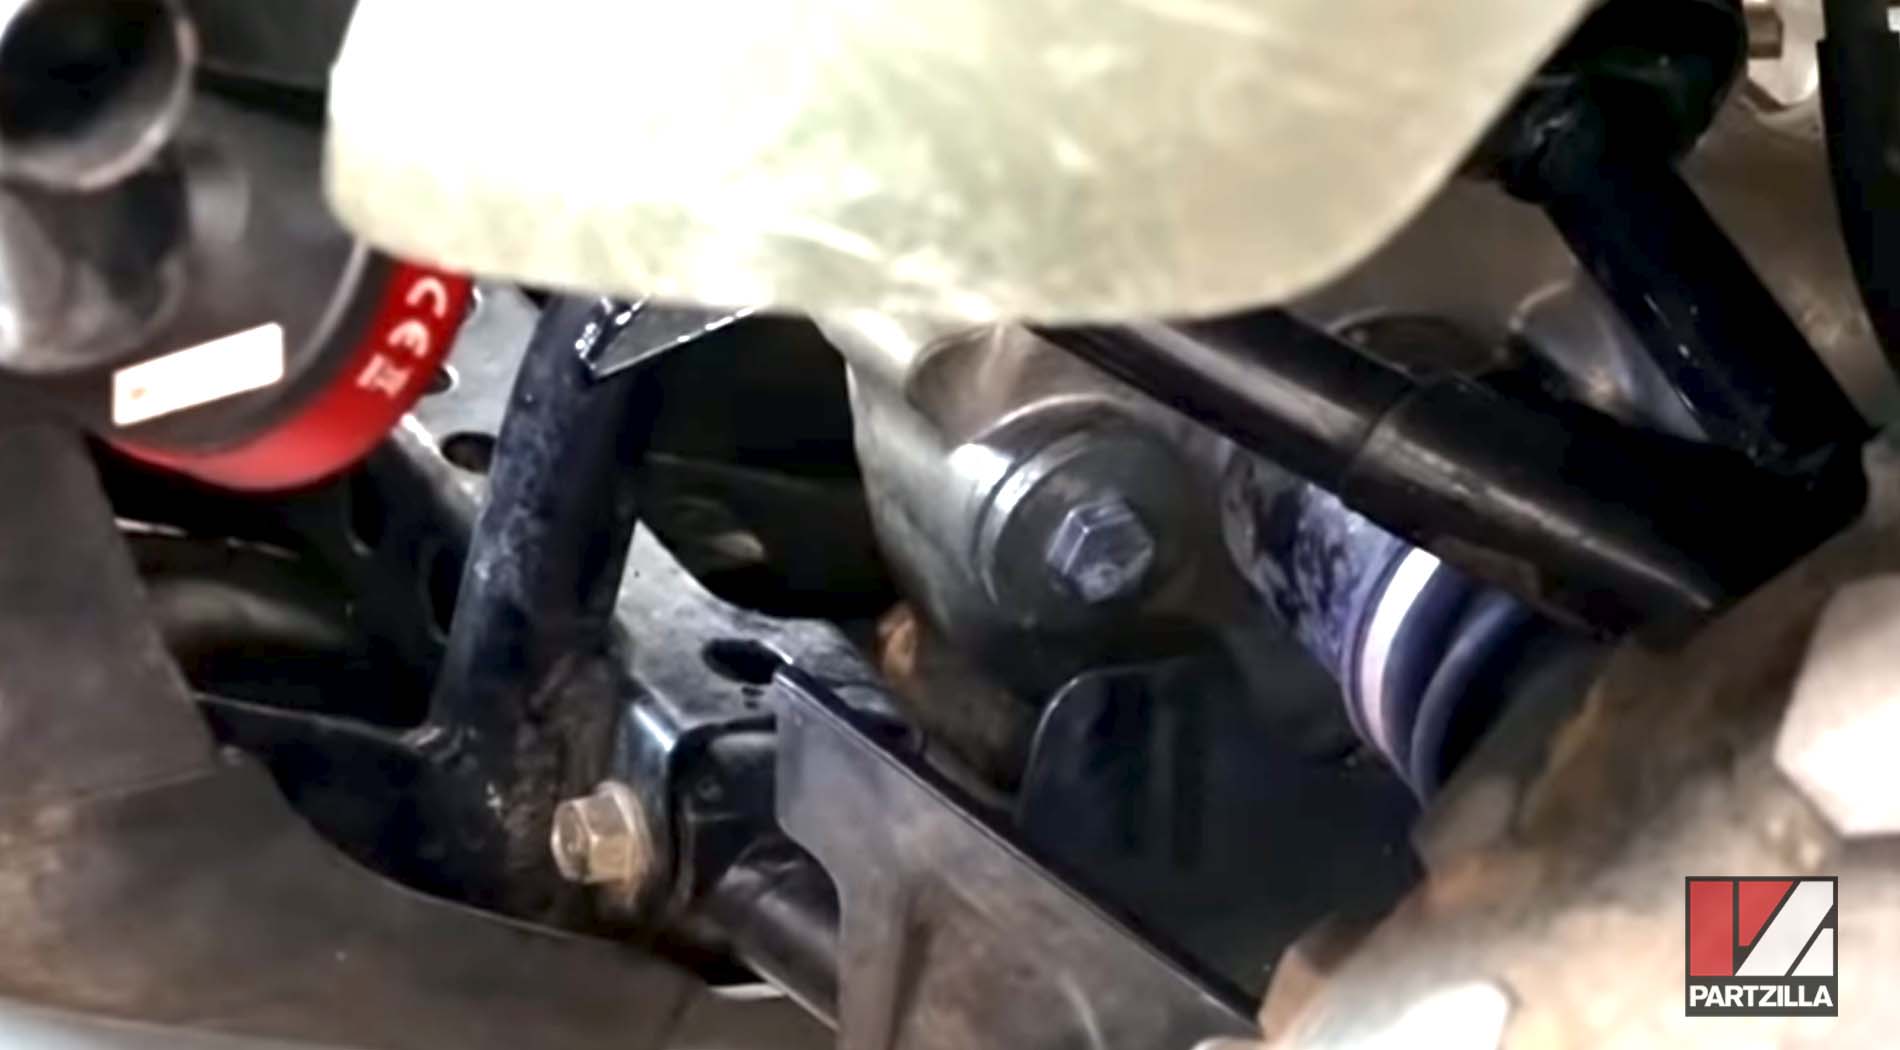
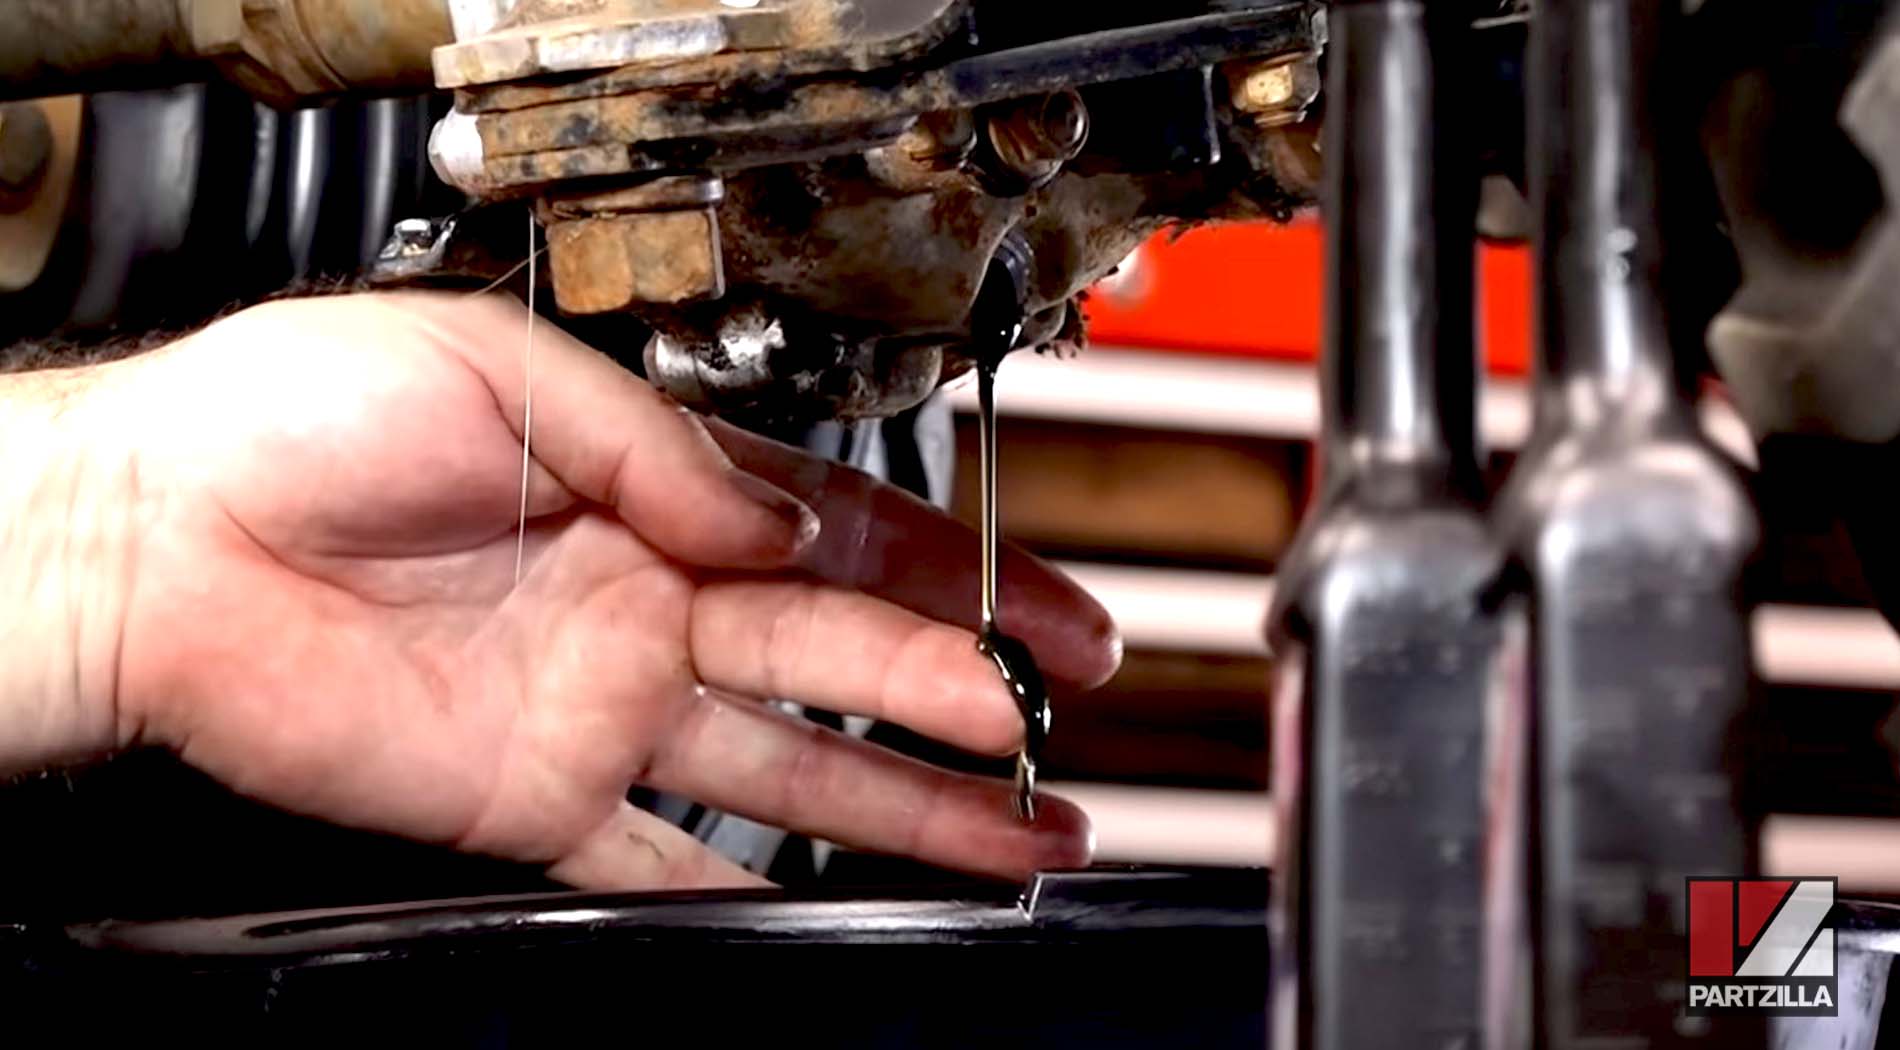
Step 6. Fill the rear drive with Honda drive shaft oil. It'll only take about 2.5 oz., but you’ll know it’s full when fluid begins to run out of the check bolt opening on the bottom left of the housing.

Step 7. Replace the check bolt, and torque it to 9 foot-pounds.
Step 8. Replace the fill cap, and tighten it just enough.
Step 9. Reattach the skid plate, tighten the three 12mm bolts that hold it in place and you’re done.
The steps to change the differential fluids on a Honda Rancher are the same or similar across the board for all models. However, if you want to see a slightly different take for another model, watch the video below to see how to change the rear differential oil on a Honda Rancher TRX 350.