Honda TRX 350 Front Brake Cylinders Change
When an ATV doesn't stop as quickly as it should, a good place to check for problems is the front brake cylinders. ATVs encounter dirt often, so the front brake cylinders top the list of parts that wear out quickly.
Watch the video above and follow the steps below to replace the front brake cylinders on a Honda Rancher 350.
Tools and Parts - Honda Rancher 350 Front Brake Cylinder Replacement
- Ratchet and extensions
- 8mm, 10mm, 17mm, 27mm sockets
- 10mm, 12mm wrenches
- 10mm brake line wrench
- Screwdriver
- Pliers
- Wire brush
- Torque wrench

NOTE: Brake fluid is poisonous and highly damaging to paintwork. When working on a Honda ATV braking system, keep brake fluid away from children or pets, and don't let it spill on plastics. Also, because the right and left side TRX350 front brake cylinders are slightly different from one another, you'll have to buy all four brake cylinders listed above.
Replacing Honda Rancher 350 Front Brake Cylinders
Step 1. Remove the front wheel, the central cotter pin and castle nut.
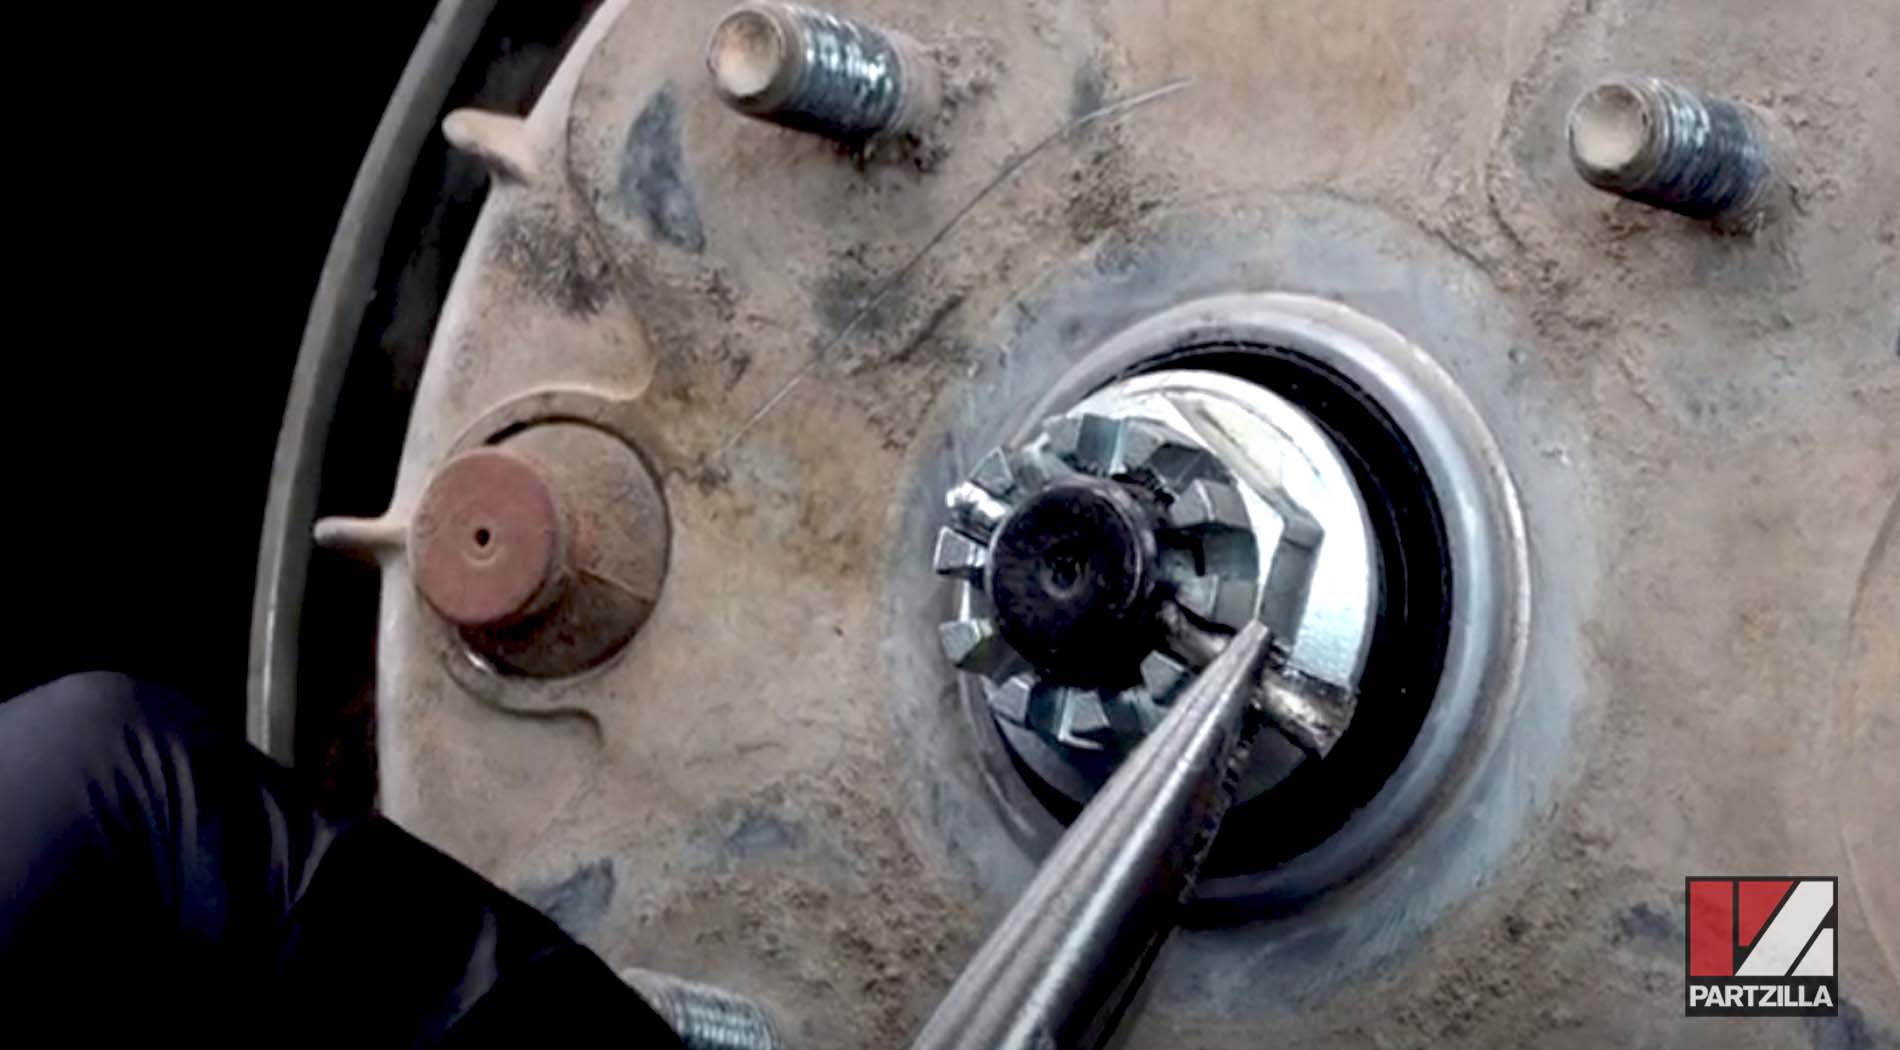
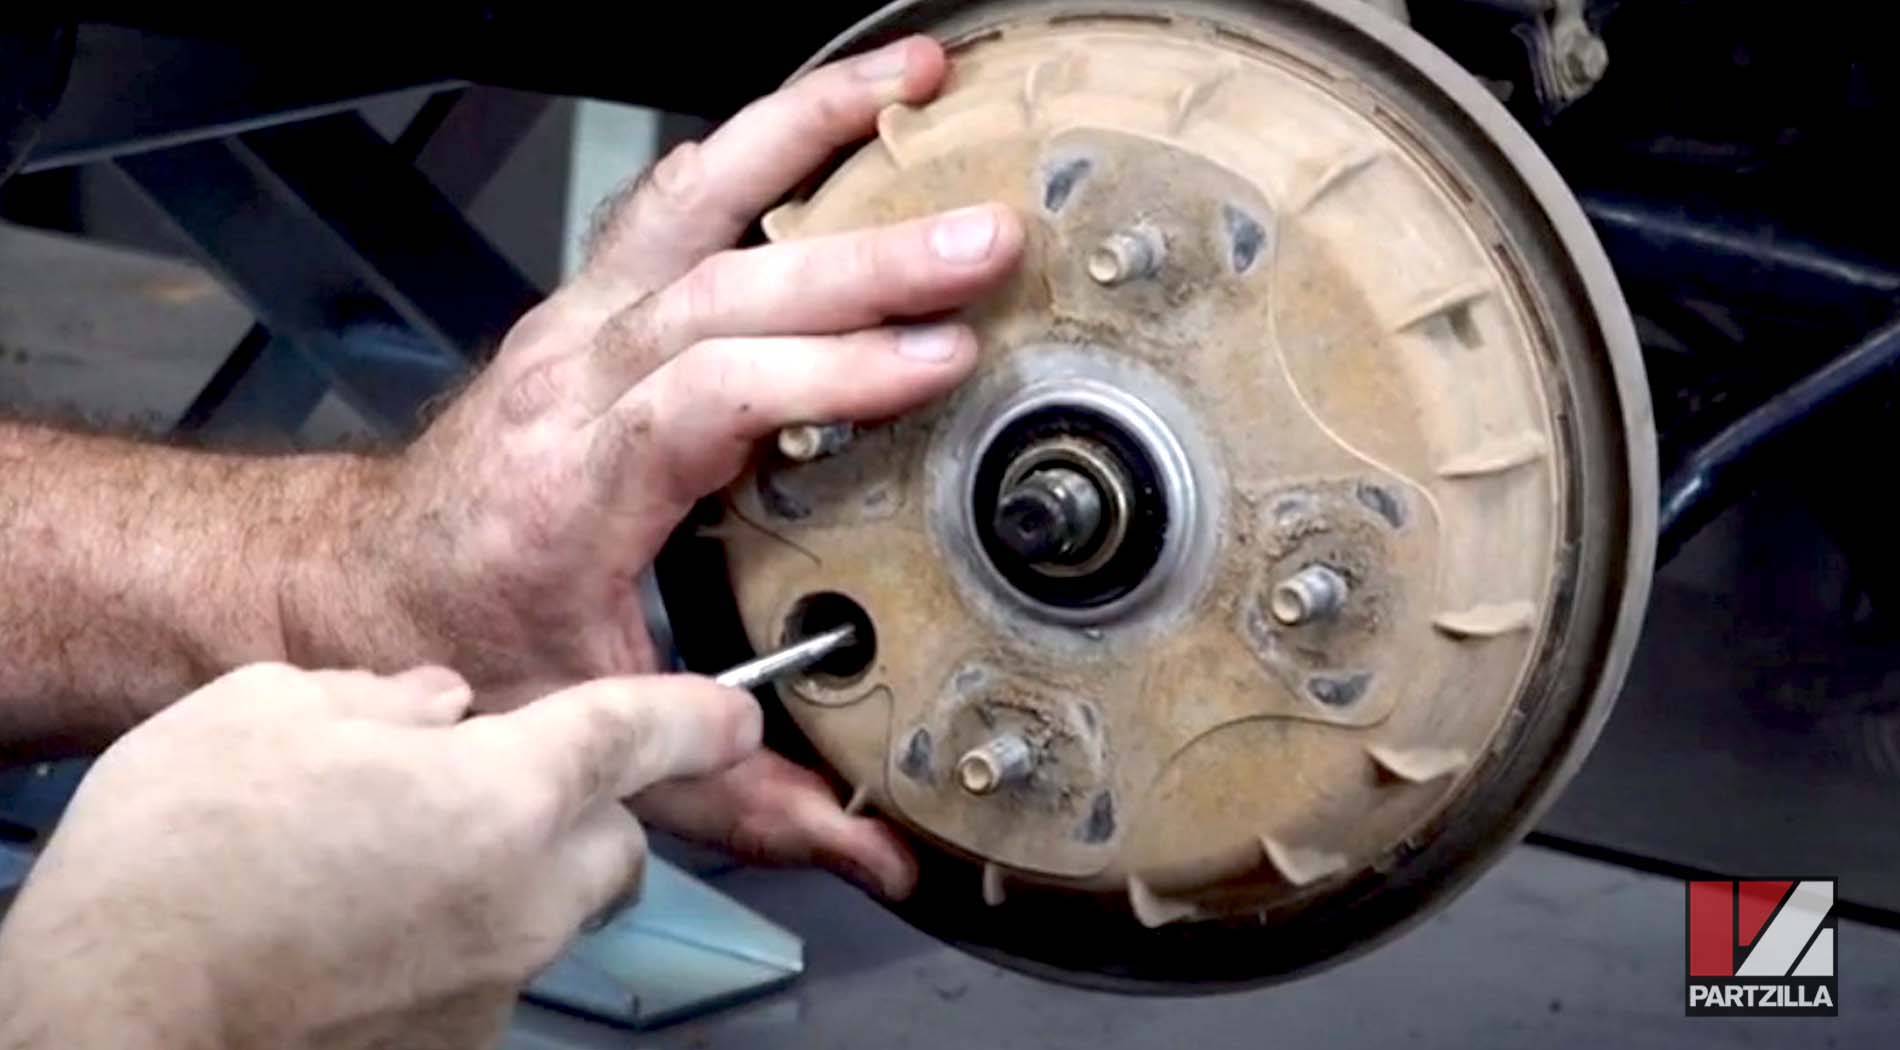
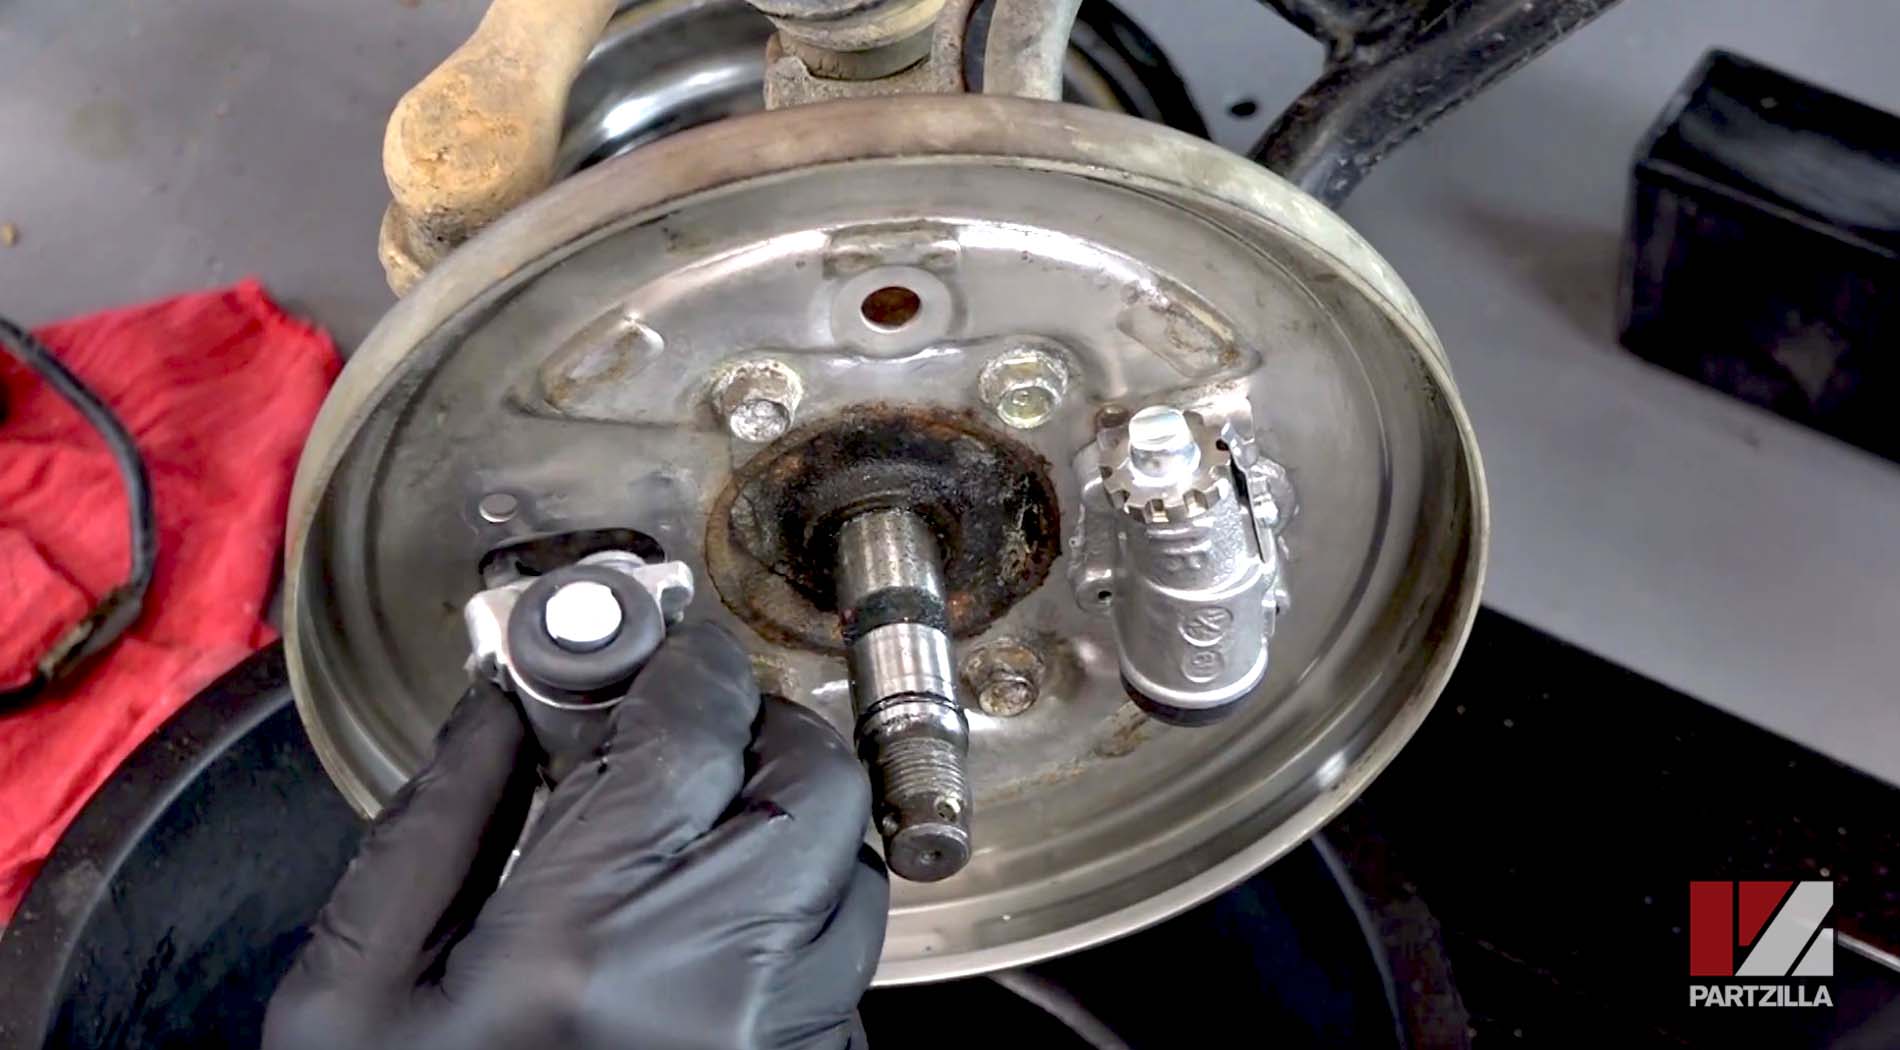
Step 2. Remove the plug from the brake drum, then rotate the drum so it's over the brake cylinders, and use a screwdriver to turn the notched wheels that retract the brake pistons. This releases the pressure of the brake shoes against the brake drum, and enables the drum to be removed. Having removed the drum, reinstall the plug so you don't lose it.
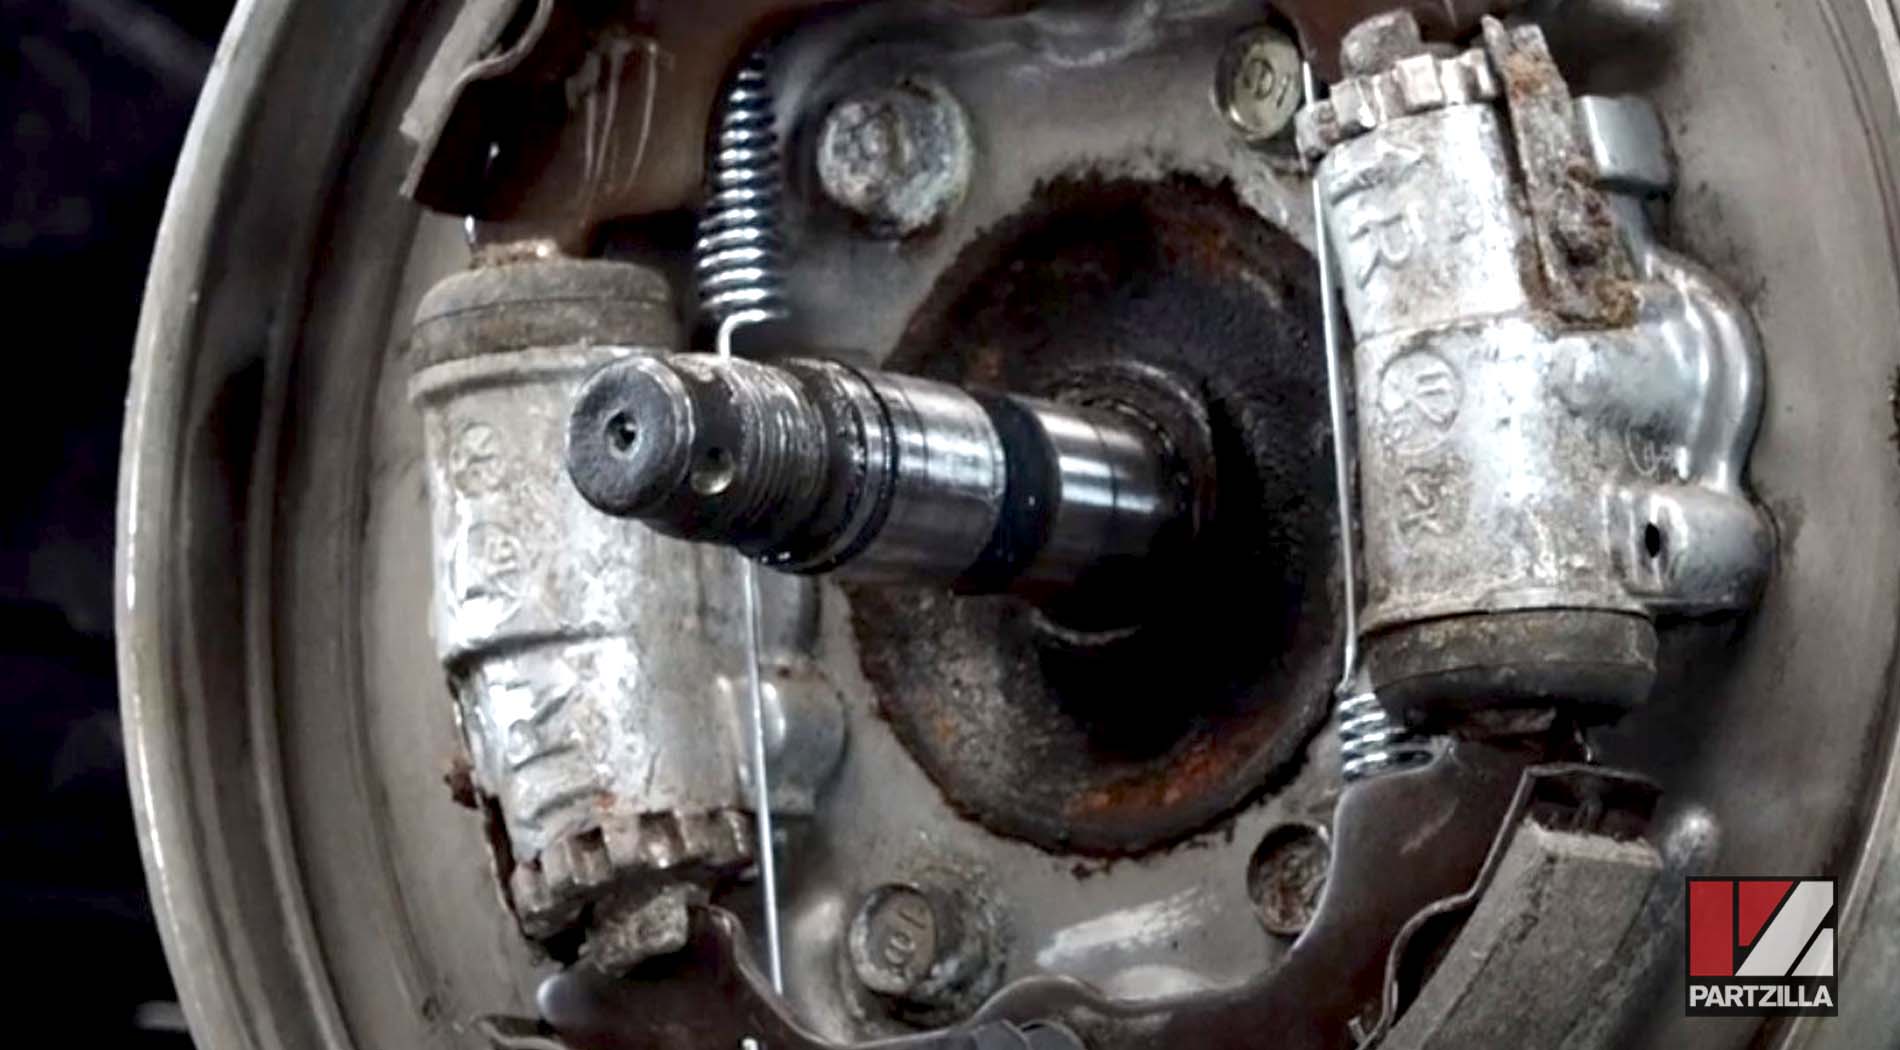
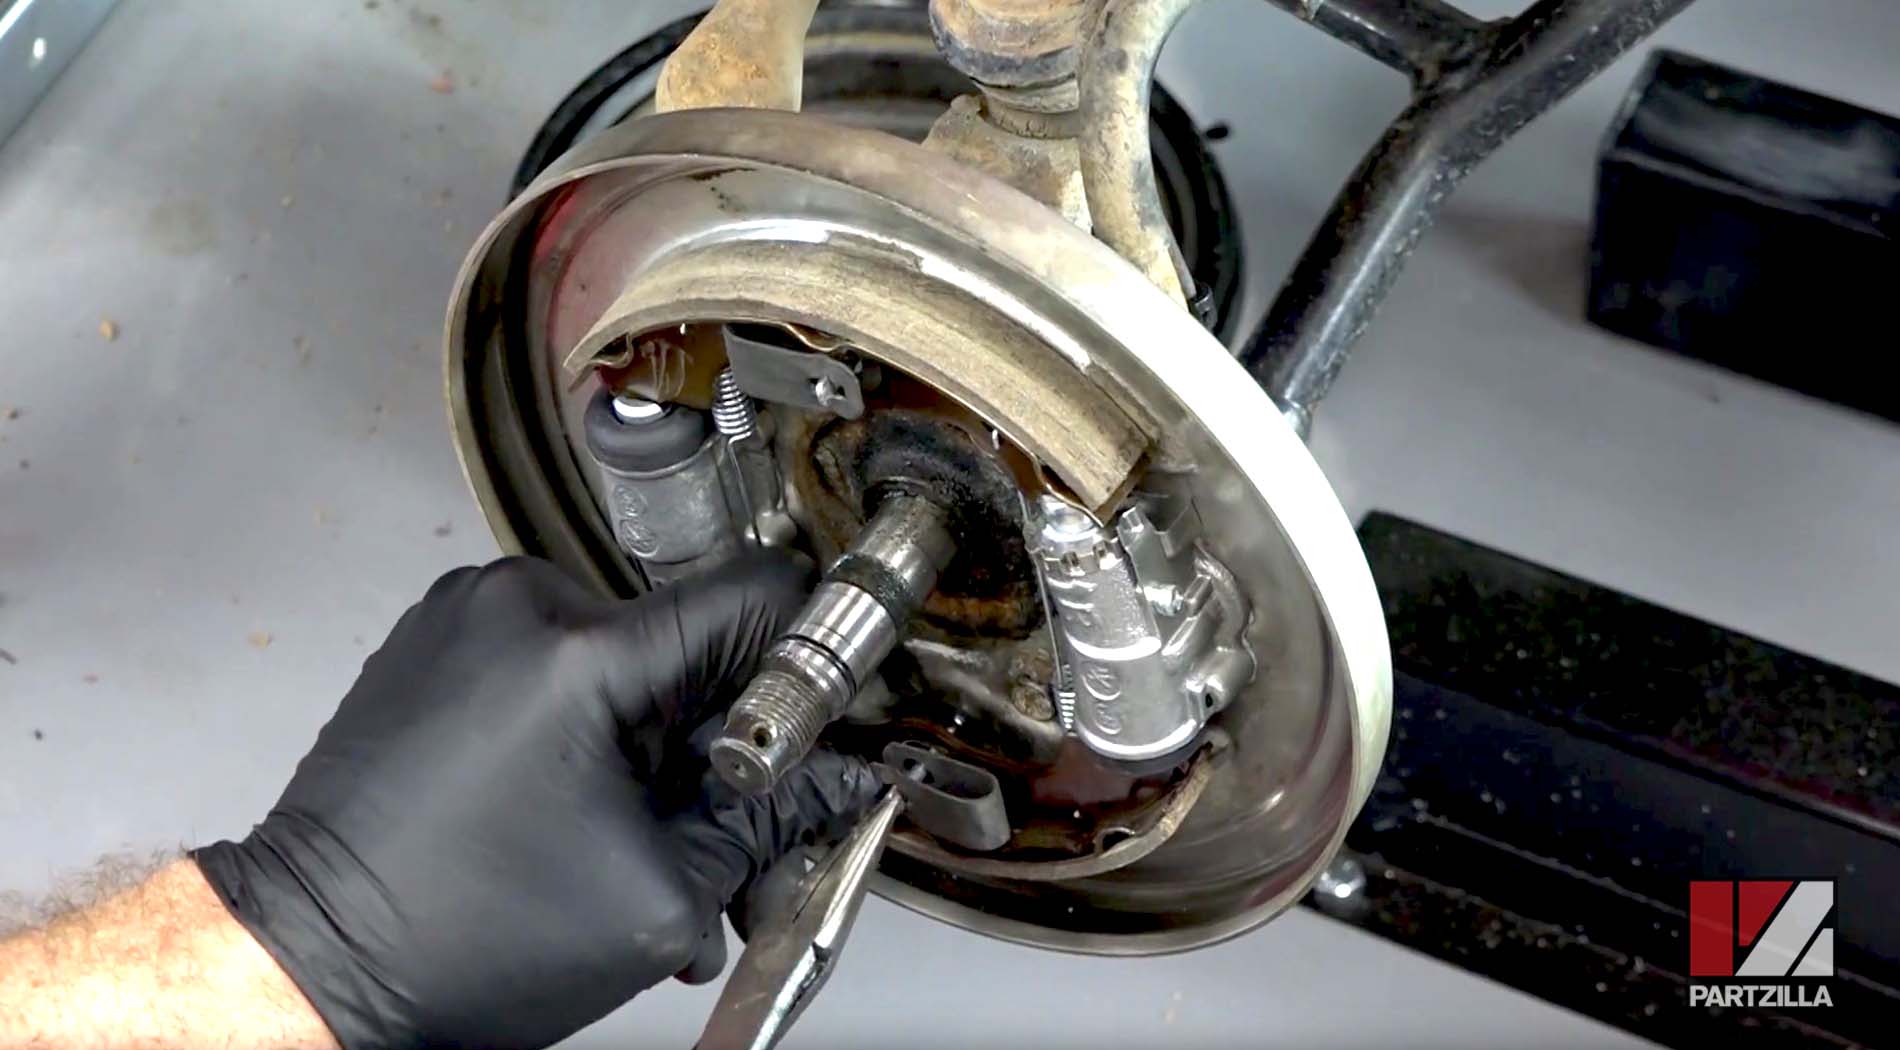
Step 3. Remove the two retention pins and spring shoes holding the brake shoes in place.

Step 4. Remove the brake shoes by lifting the upper brake shoe up and off its slots in the brake cylinders, then dropping the lower brake shoe down and out of its slots. Note how the two springs attach to the brake shoes, so you can reinstall them in the correct position later.
PRO TIP: If the brake shoes are worn, now is the perfect time to discard them and fit a new set.
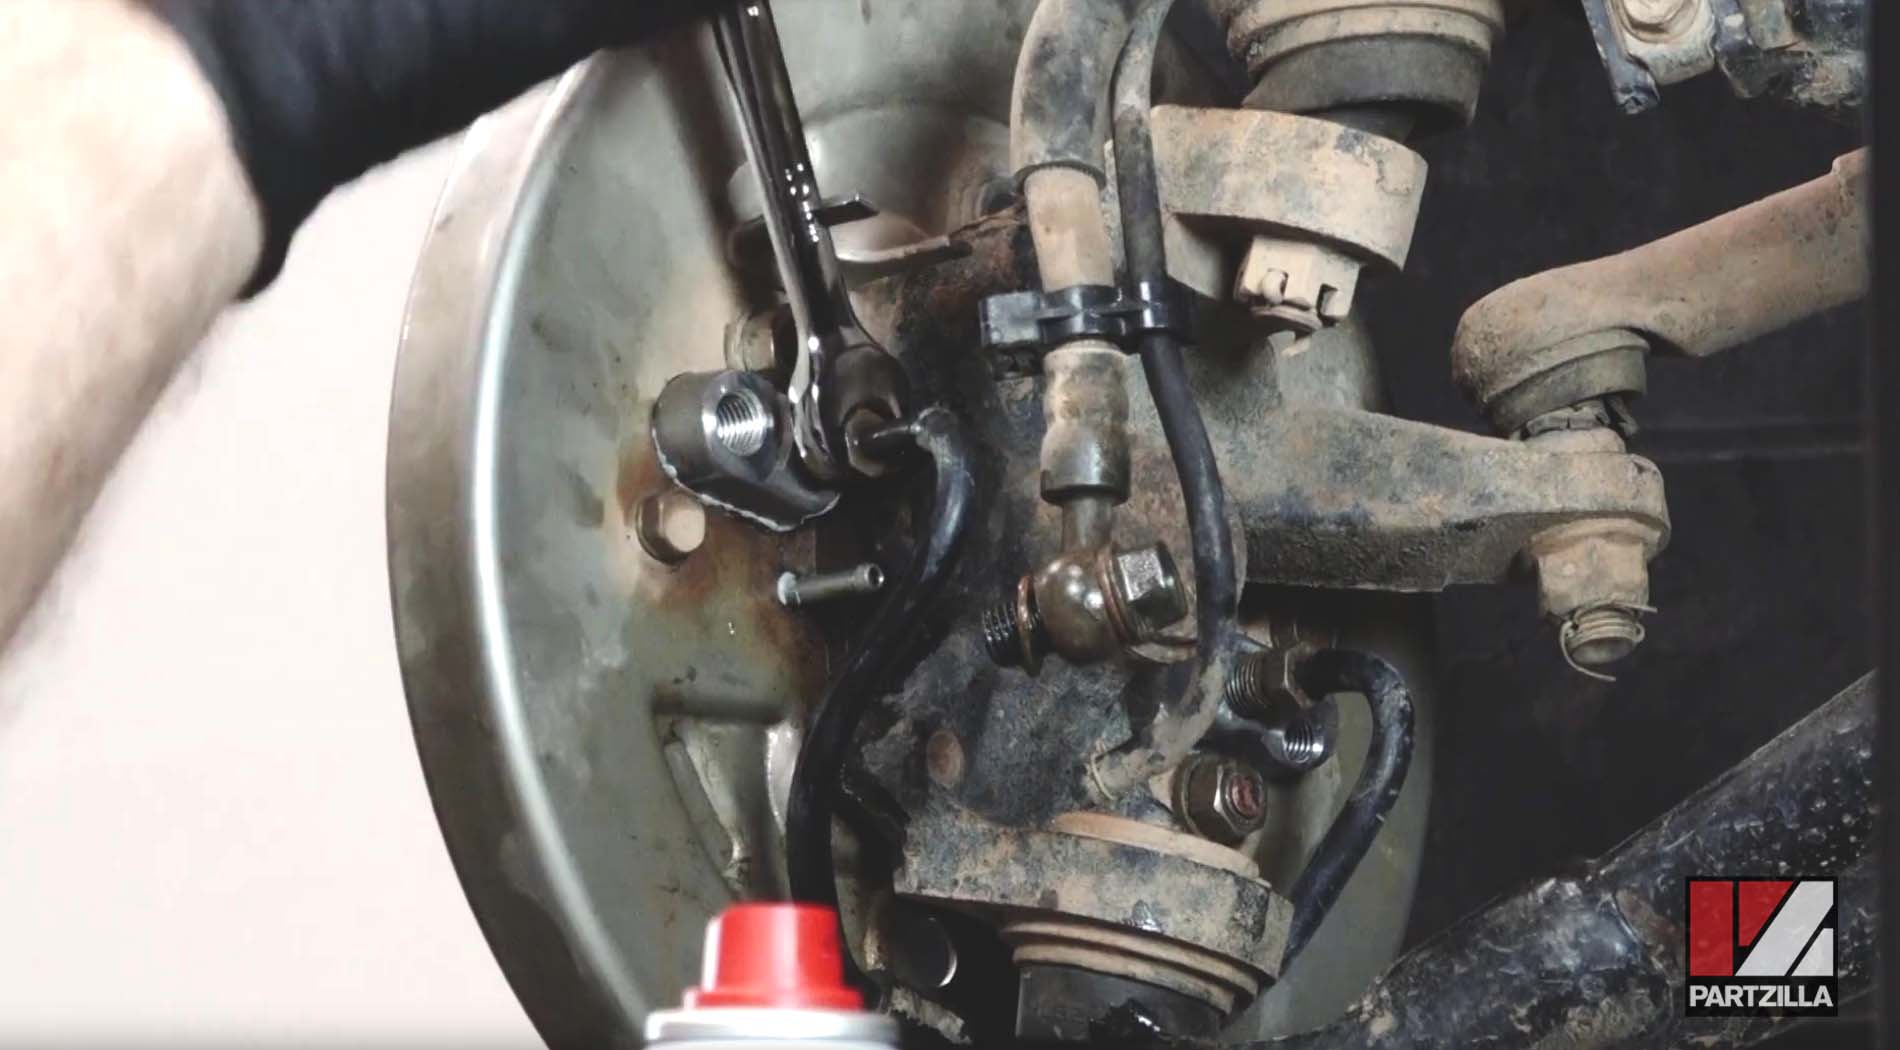
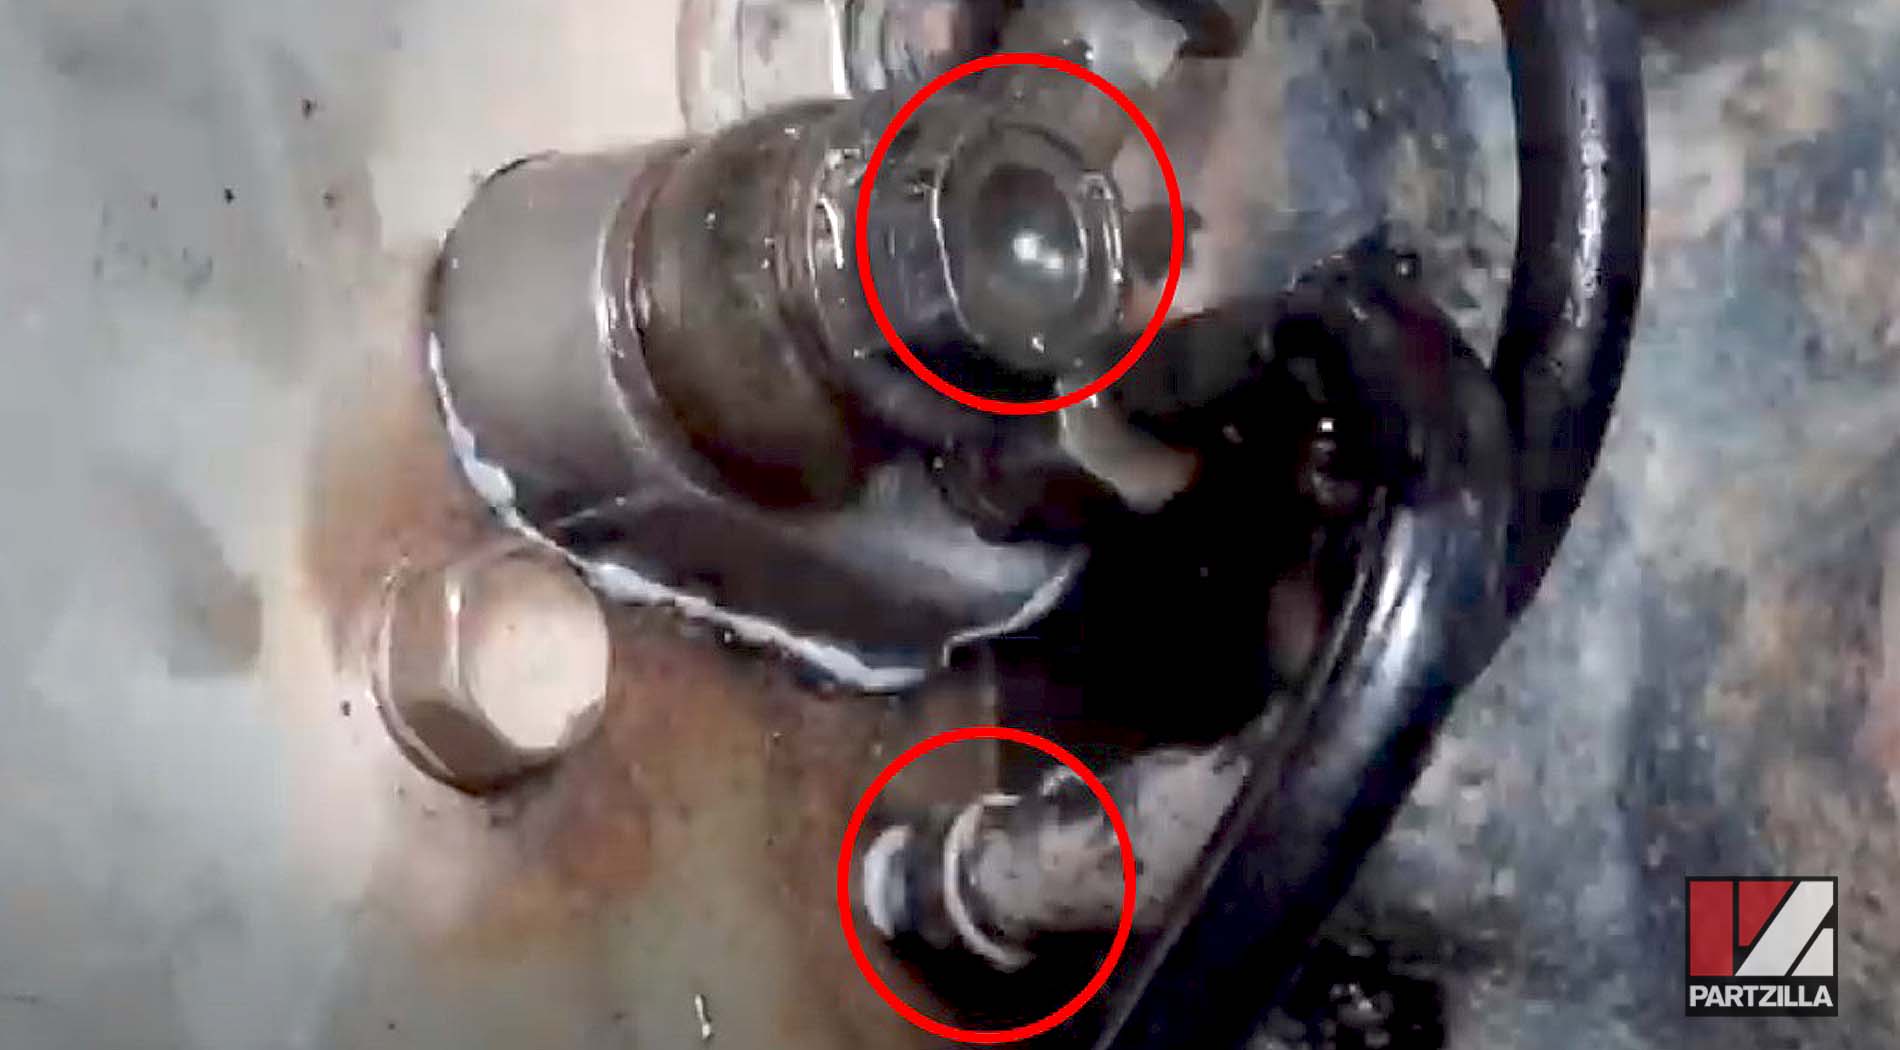
Step 5. Remove the banjo bolt holding the main brake fluid line and the breather hose next to it from the forward brake cylinder behind the brake assembly back plate. Have a pan ready to catch the brake fluid that will spill out of the line, and don't lose the two banjo bolt washers.
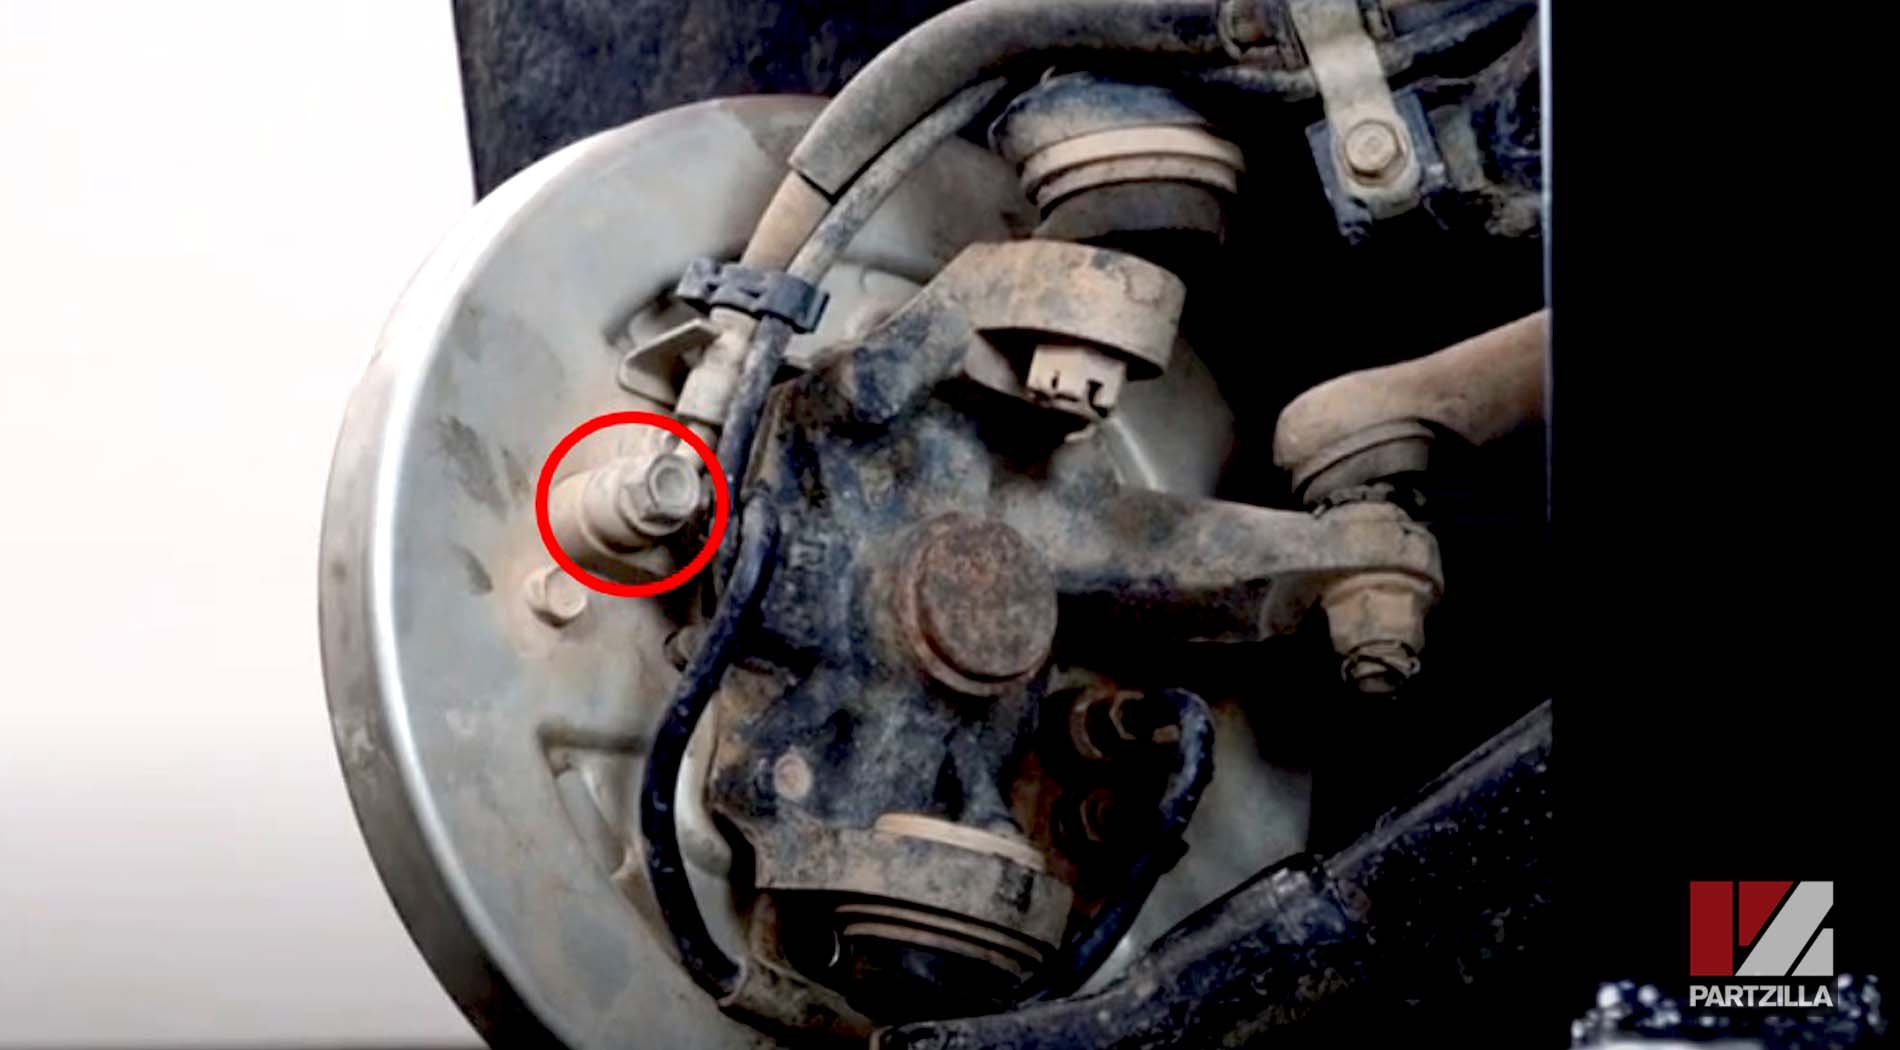
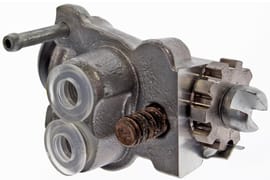
Step 6. Remove the brake line that connects the two brake cylinders from behind the brake assembly back plate. You'll have to remove the bleeder valve from the rearward brake cylinder to access the brake line next to it.
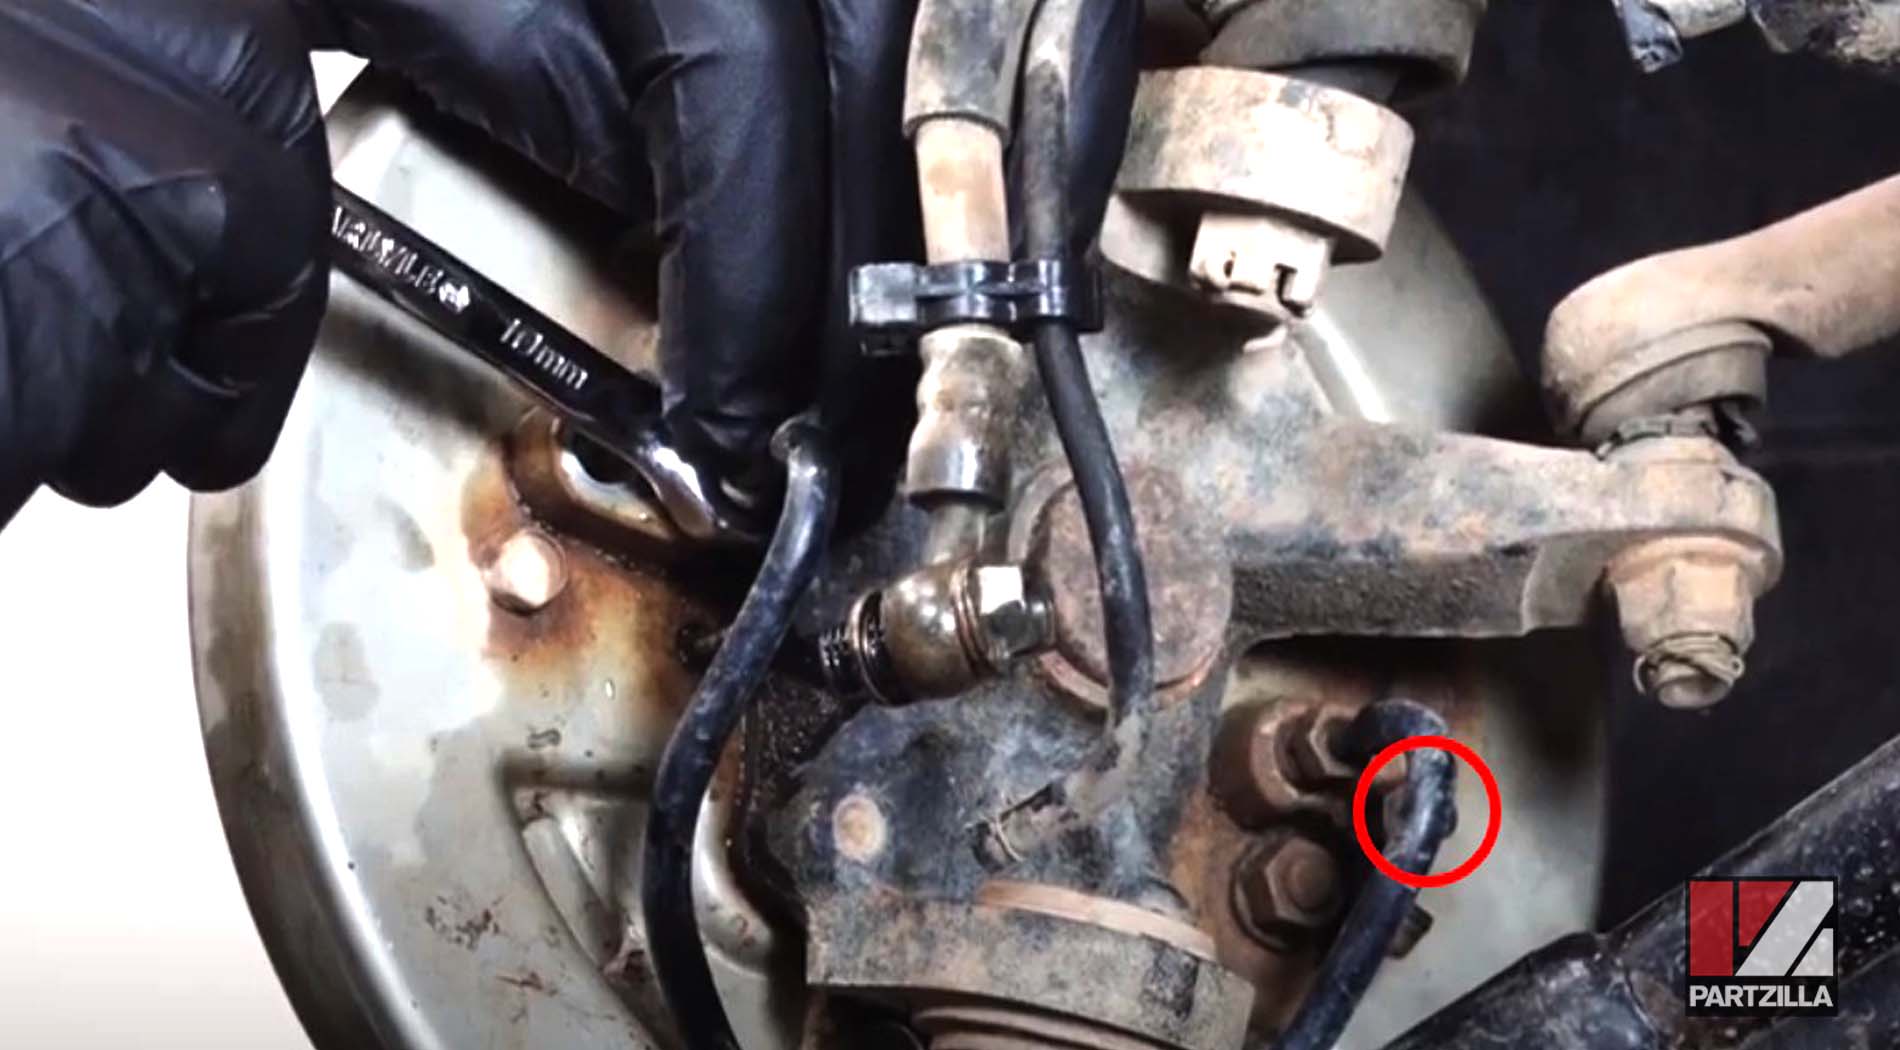
PRO TIP: Using a brake line wrench to disconnect the brake line will reduce the chances of stripping the brake line's heads.
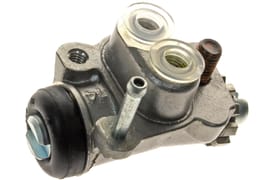
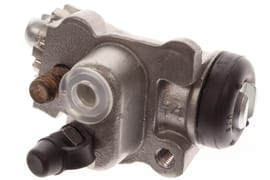
Step 7. Remove the brake cylinders by unbolting them from the brake assembly back plate and tapping them through the front side of the plate.
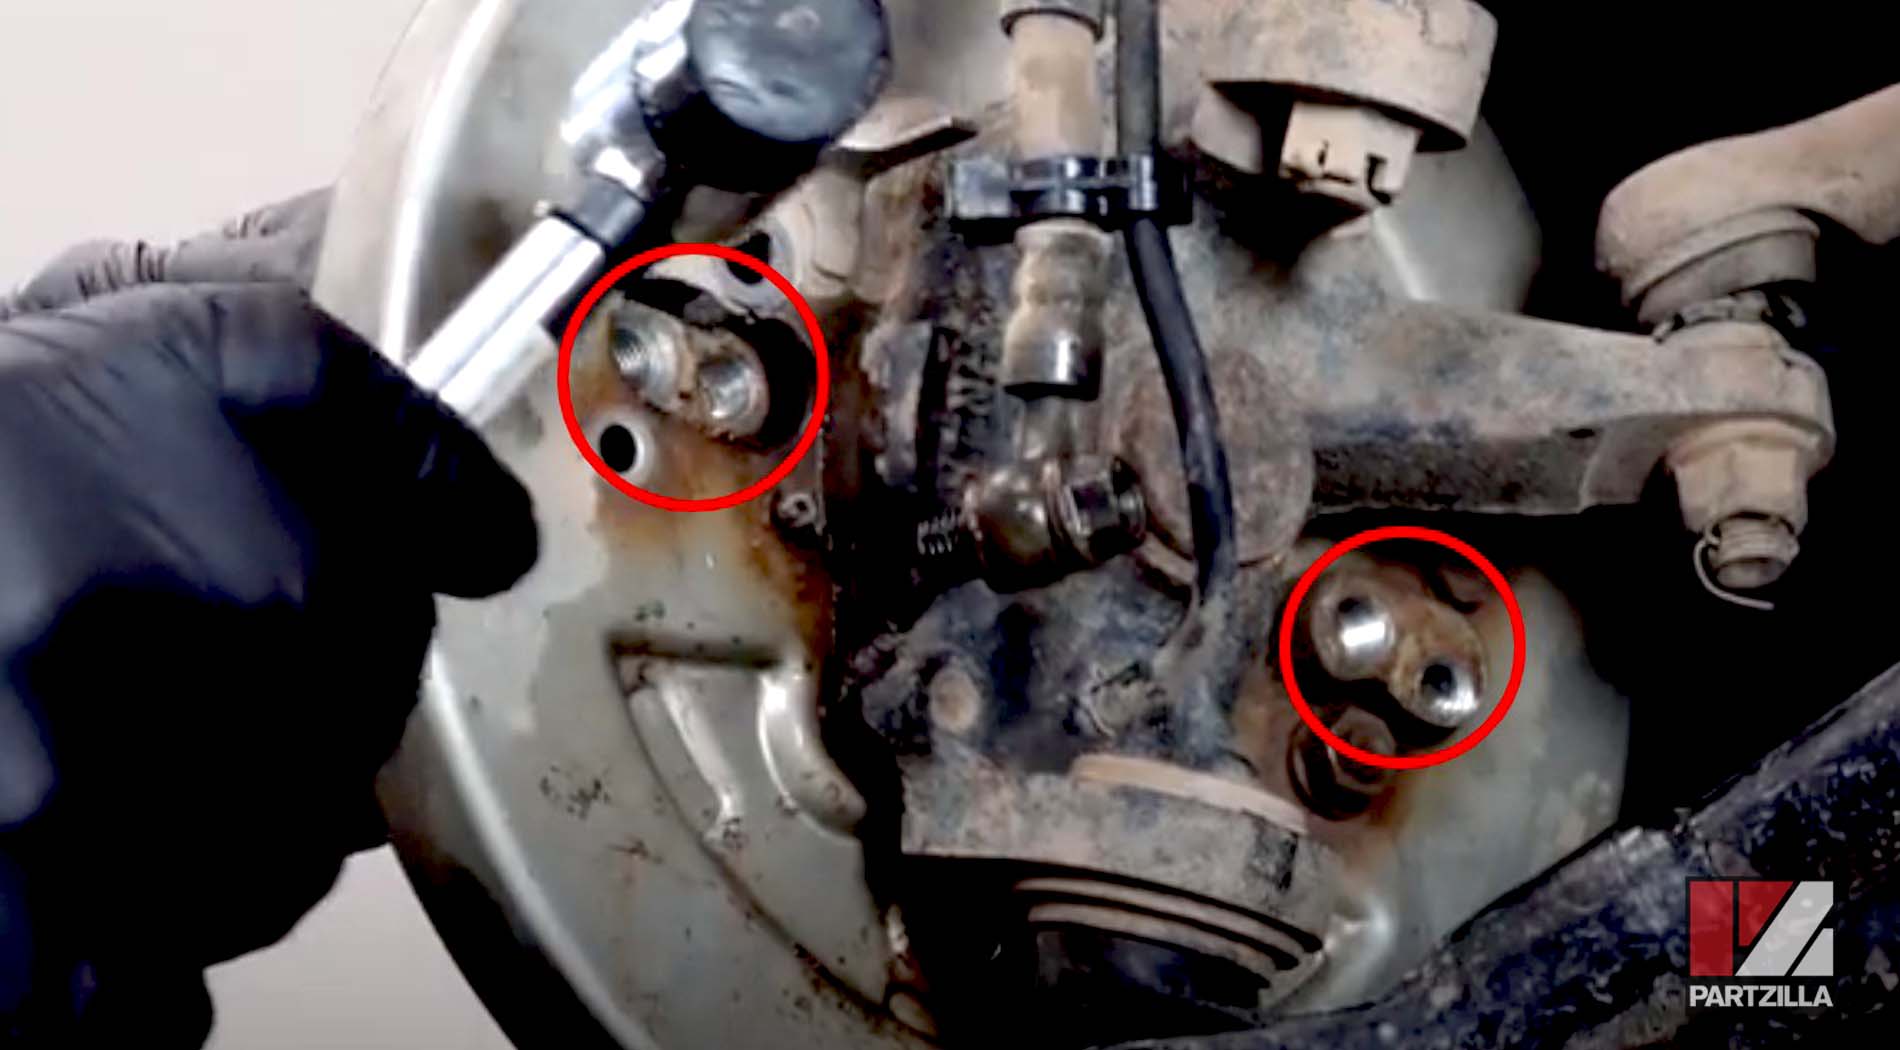
Step 8. Thoroughly clean both sides of the brake assembly back plate and all the other brake parts with contact/brake cleaner. Use a wire brush too, if necessary.
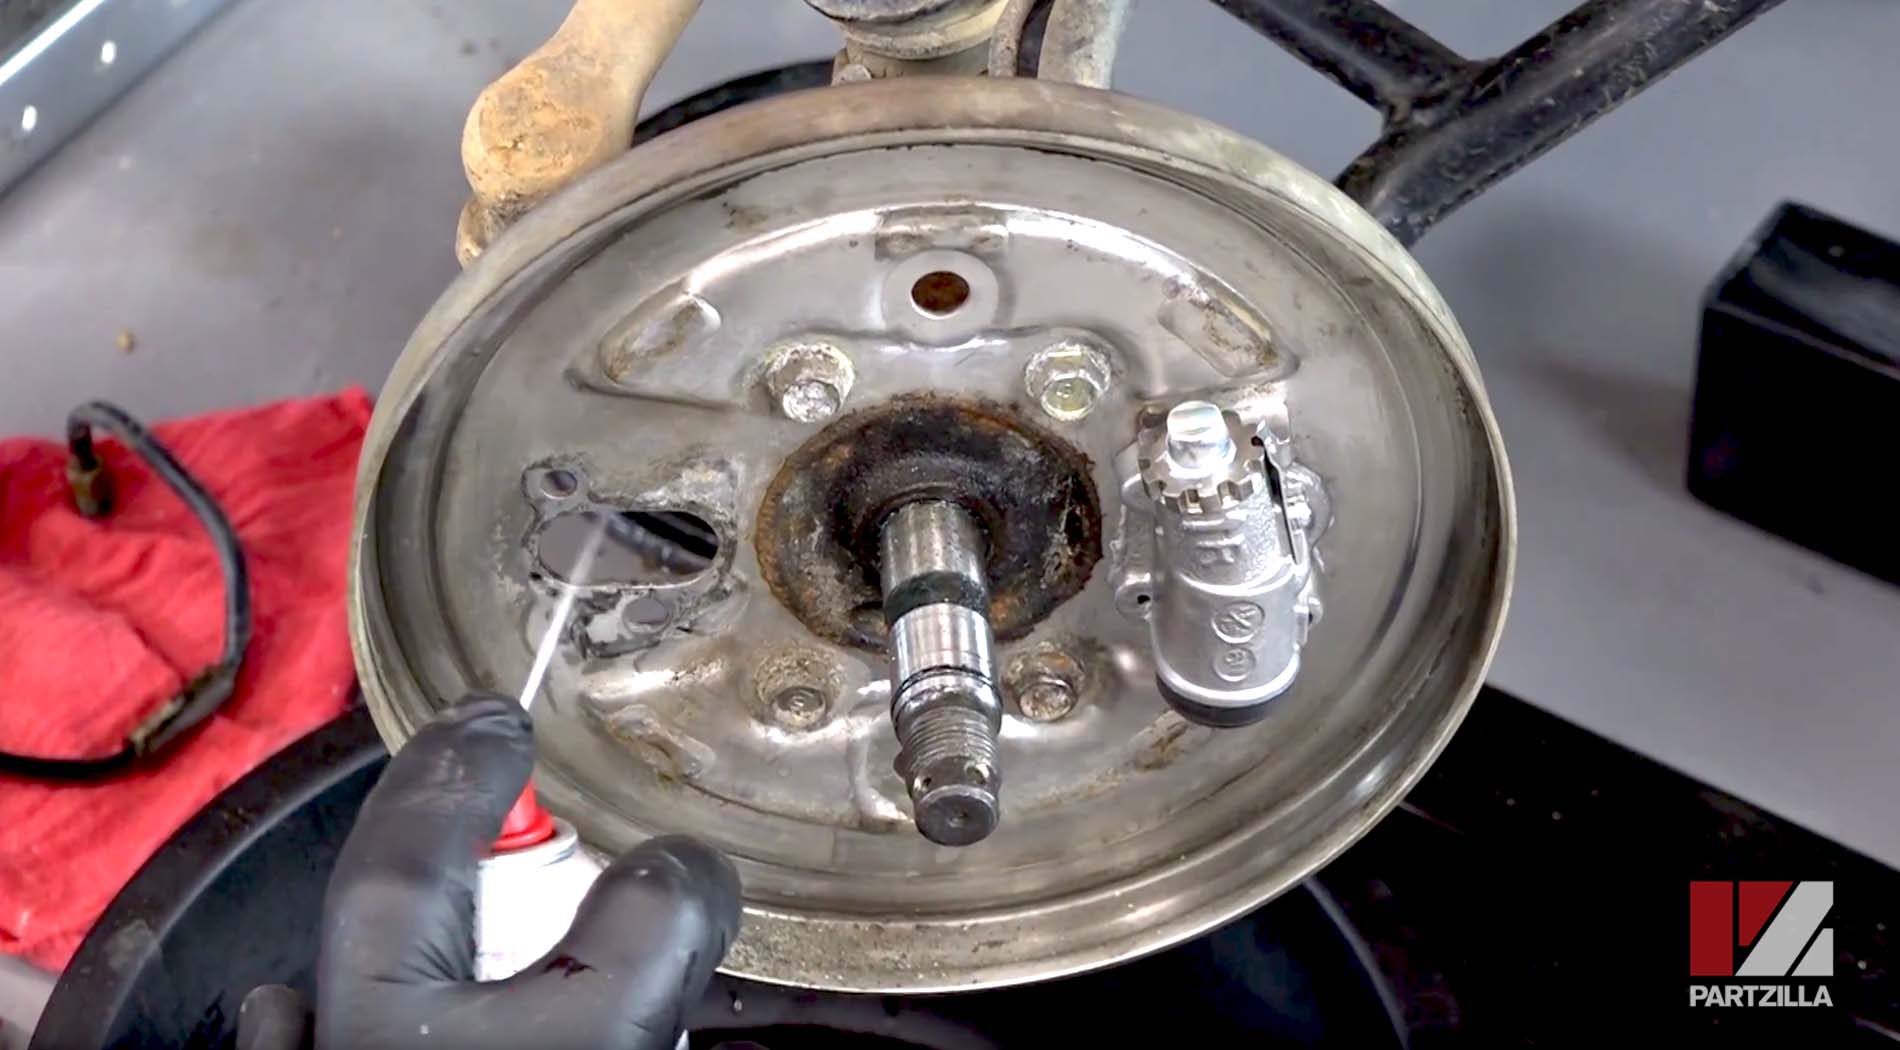
Step 9. Install the new brake cylinders. Remember that the cylinder with the bleeder valve goes at the rear of the brake assembly back plate.
PRO TIP: Don't remove the rubber plugs from the new brake cylinders until you're ready to reconnect the brake lines. This will prevent any dirt from getting into the brake fluid system.
Step 10. Reinstall the brake line that connects the two brake cylinders. Once again, you'll have to remove the bleed valve from the rearwards cylinder to access the brake line next to it. Once the brake line is reconnected, reinstall the bleed valve.
Step 11. Reinstall the main brake fluid line banjo bolt and the breather hose to the forward brake cylinder.
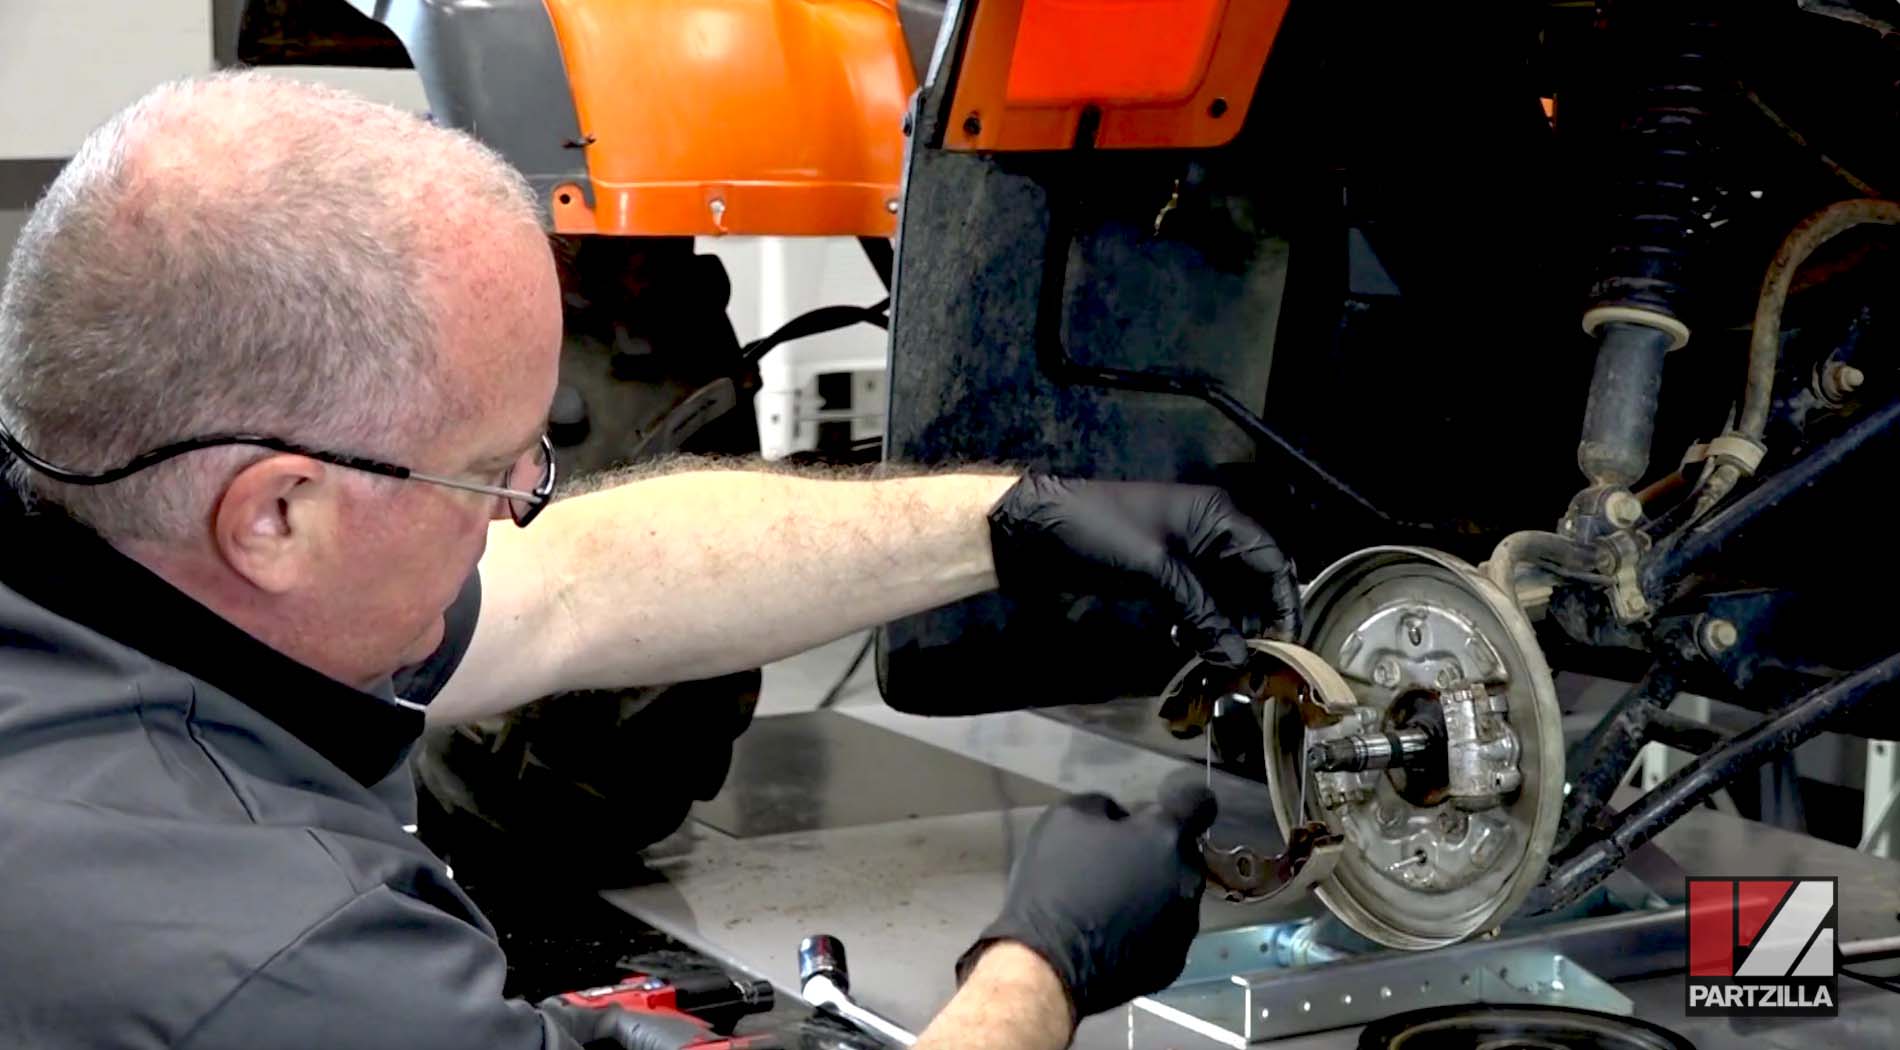
Step 12. Reinstall the brake shoes into their slots in the new brake cylinders. You should be able to install the shoes and springs as one unit by slotting the upper shoe into place, and then levering the lower shoe down and into its slots.
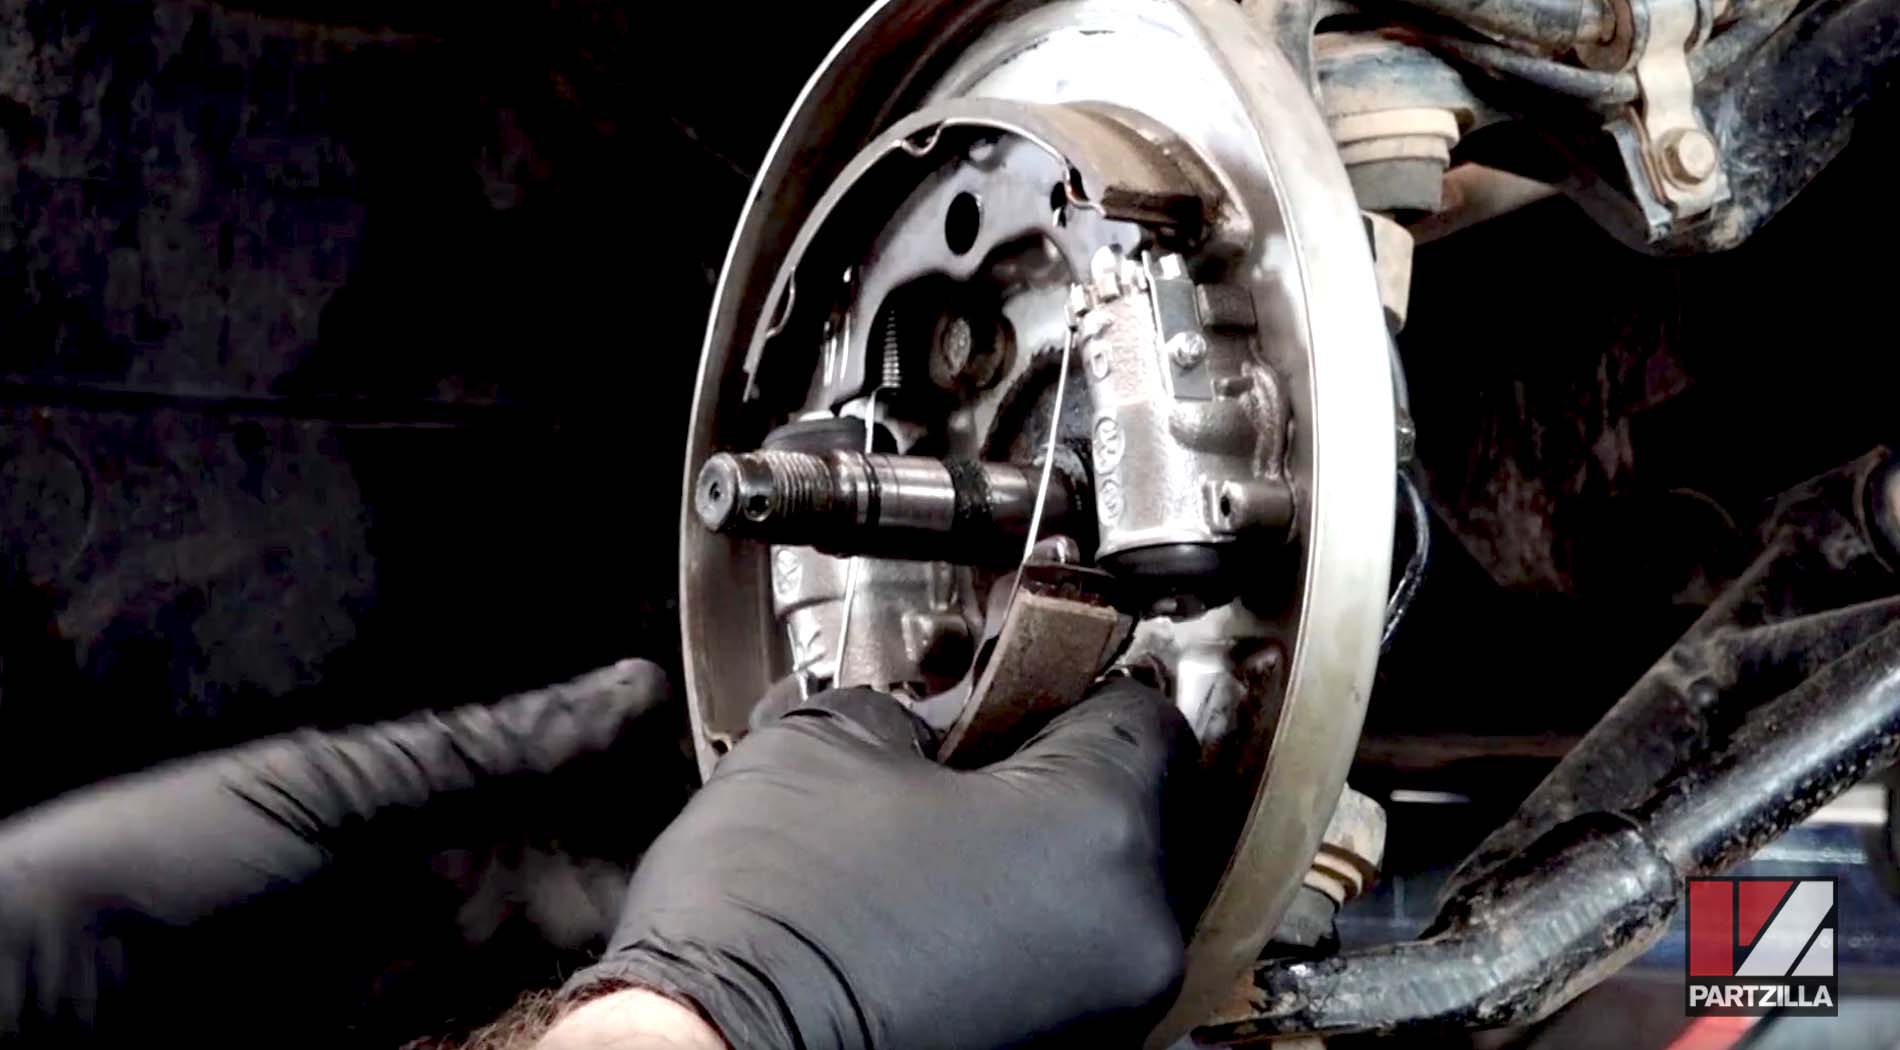
Step 13. Reinstall the two retention pins and spring shoes that hold the brake shoes in place.
Step 14. Make sure the front brake drum dust seal is well greased, and also use this opportunity to grease the stub axle. Reinstall the brake drum over the brake shoes.

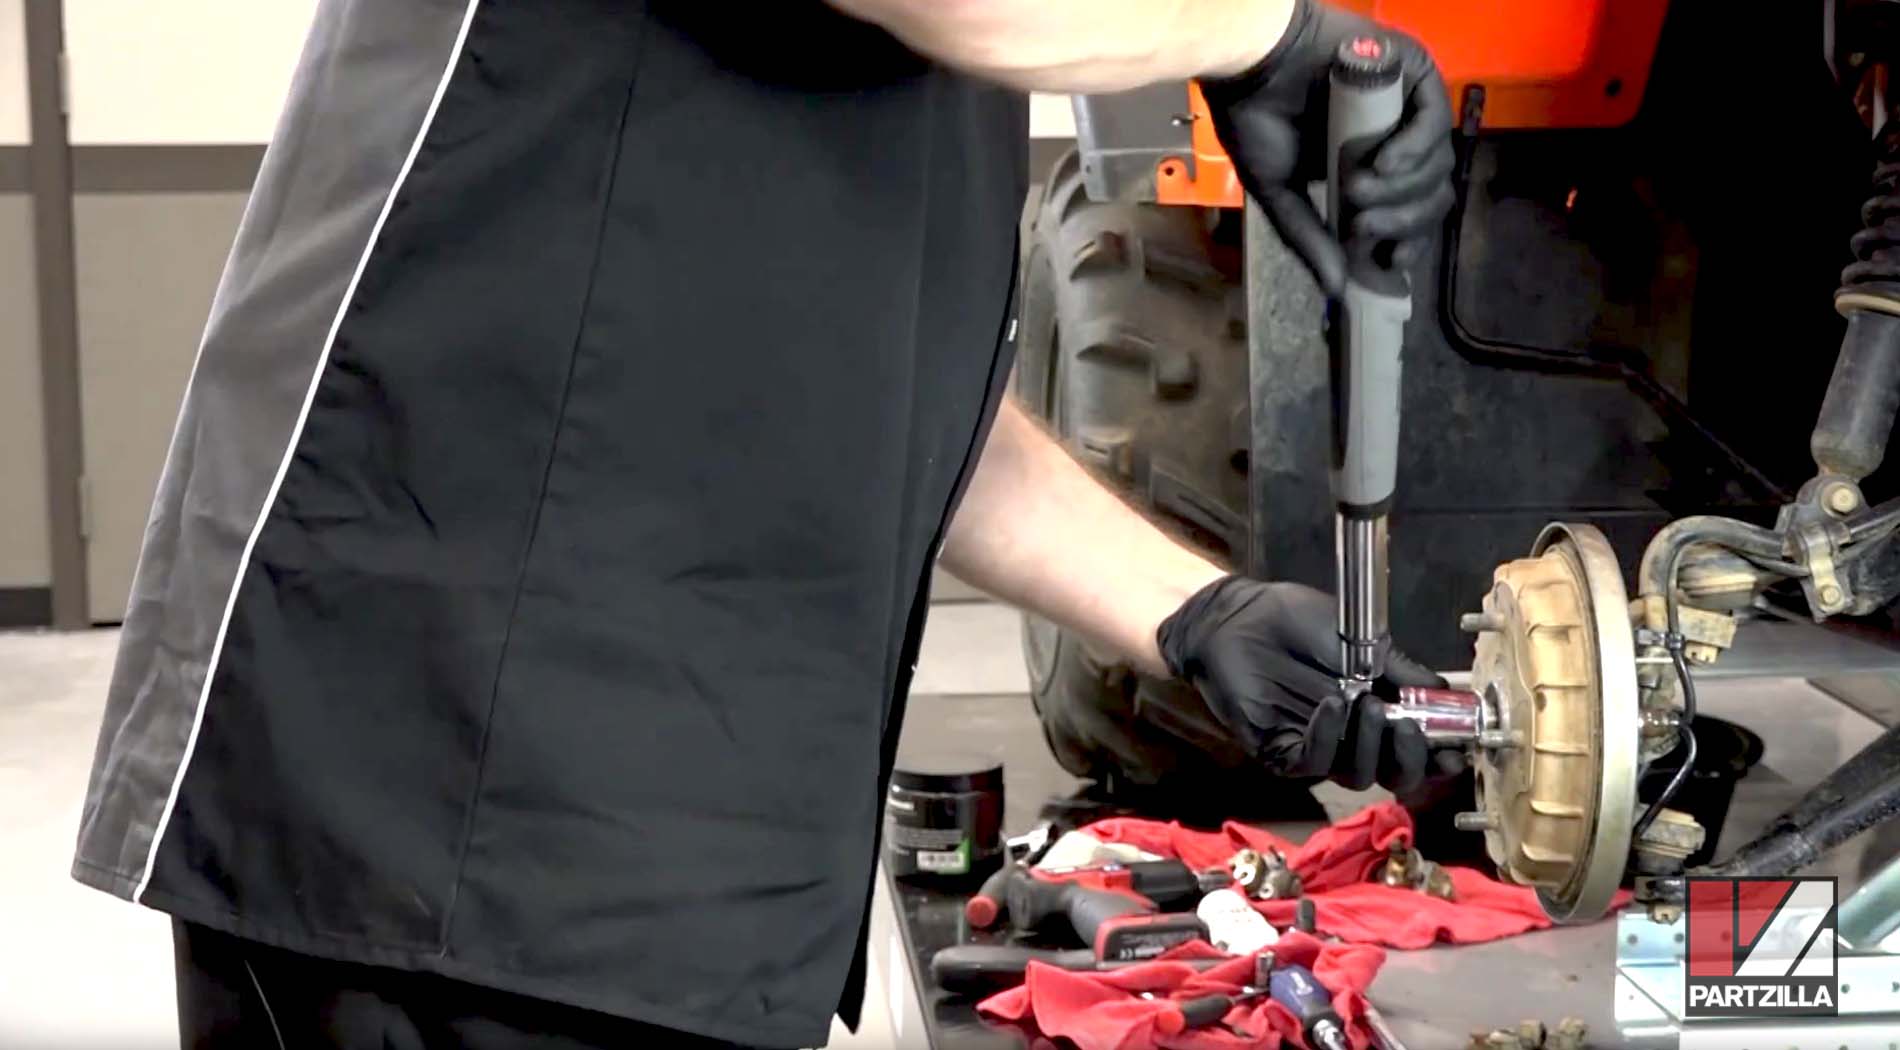
Step 15. Reinstall the castle nut, then torque it to 58 foot-pounds and reinstall the cotter pin. Lastly, reinstall the front wheel and torque the lug nuts to the measurement specified in your Honda Rancher owner's manual.
Ready to bleed the brakes on your ATV? Watch the Honda TRX 350 Rancher front brake bleed video below to see how it's done.