How to Change Honda 420 Rancher Front Wheel Bearings: Part 2
Welcome to the second part of our Honda Rancher 420 front wheel bearings replacement project, in which we pick up from removing the steering knuckle in part 1.
Replacing the front wheel bearings on a TRX420 is a long process, which is why we broke the steps down into two parts. Watch the video above to see the full job and follow the steps below to complete the second part of replacing the wheel bearings on a Honda Rancher TRX420.
Tools and Parts - Honda Rancher 420 Front Wheel Bearing Change
- 3/8th ratchet
- Torque wrench
- 10mm, 12mm, 17mm sockets
- 5mm Allen
- Driver set
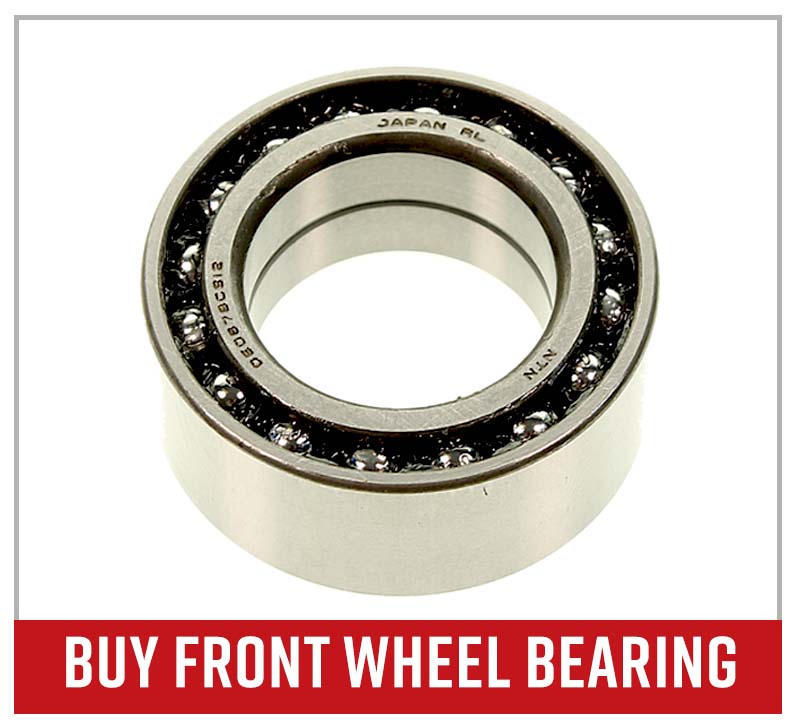
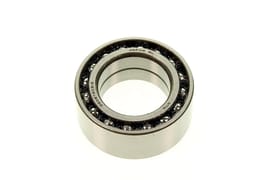
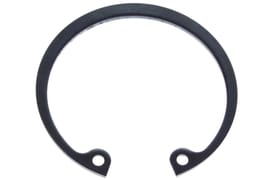
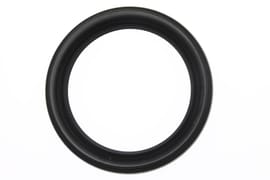
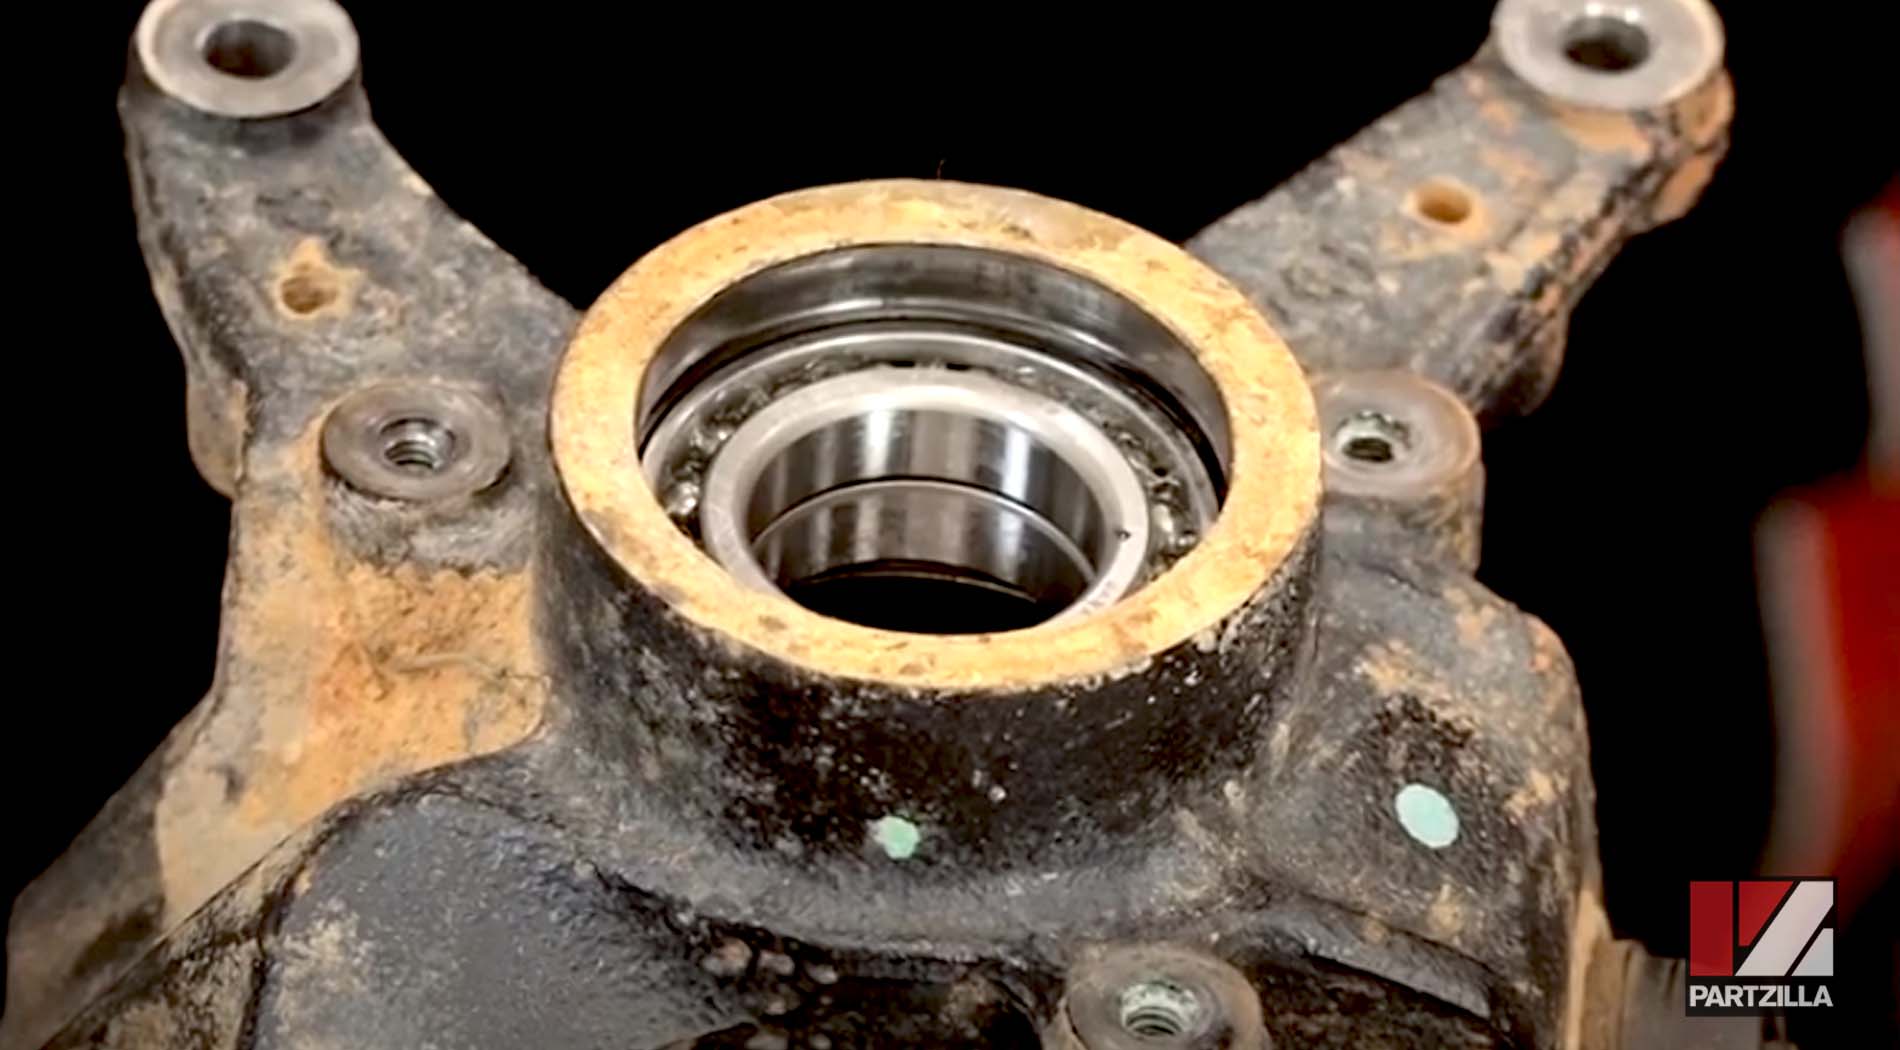
NOTE: These are the parts needed to replace the wheel bearings on one side. Unless you’re replacing just one damaged bearing, both sides tend to wear at about the same rate, so you should replace both bearings at the same time if one is worn. Use our Honda Rancher TRX420 front knuckle parts diagram to see the wheel bearing (#22), dust seals, (#23 and #24), and circlip (#27) locations.
Honda Rancher TRX420 Wheel Bearing Replacement Part 2
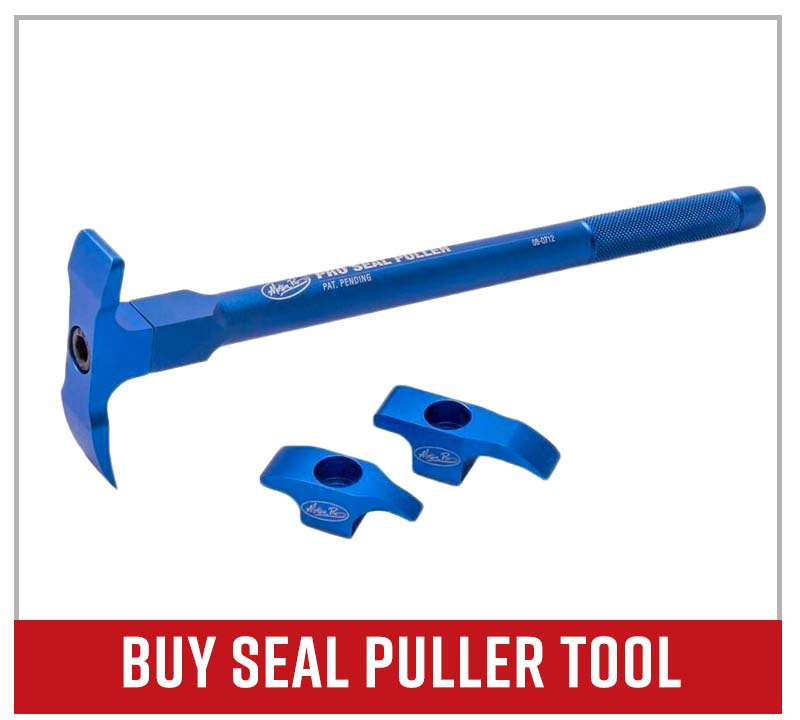
Step 1. Remove the outer seal from the steering knuckle.
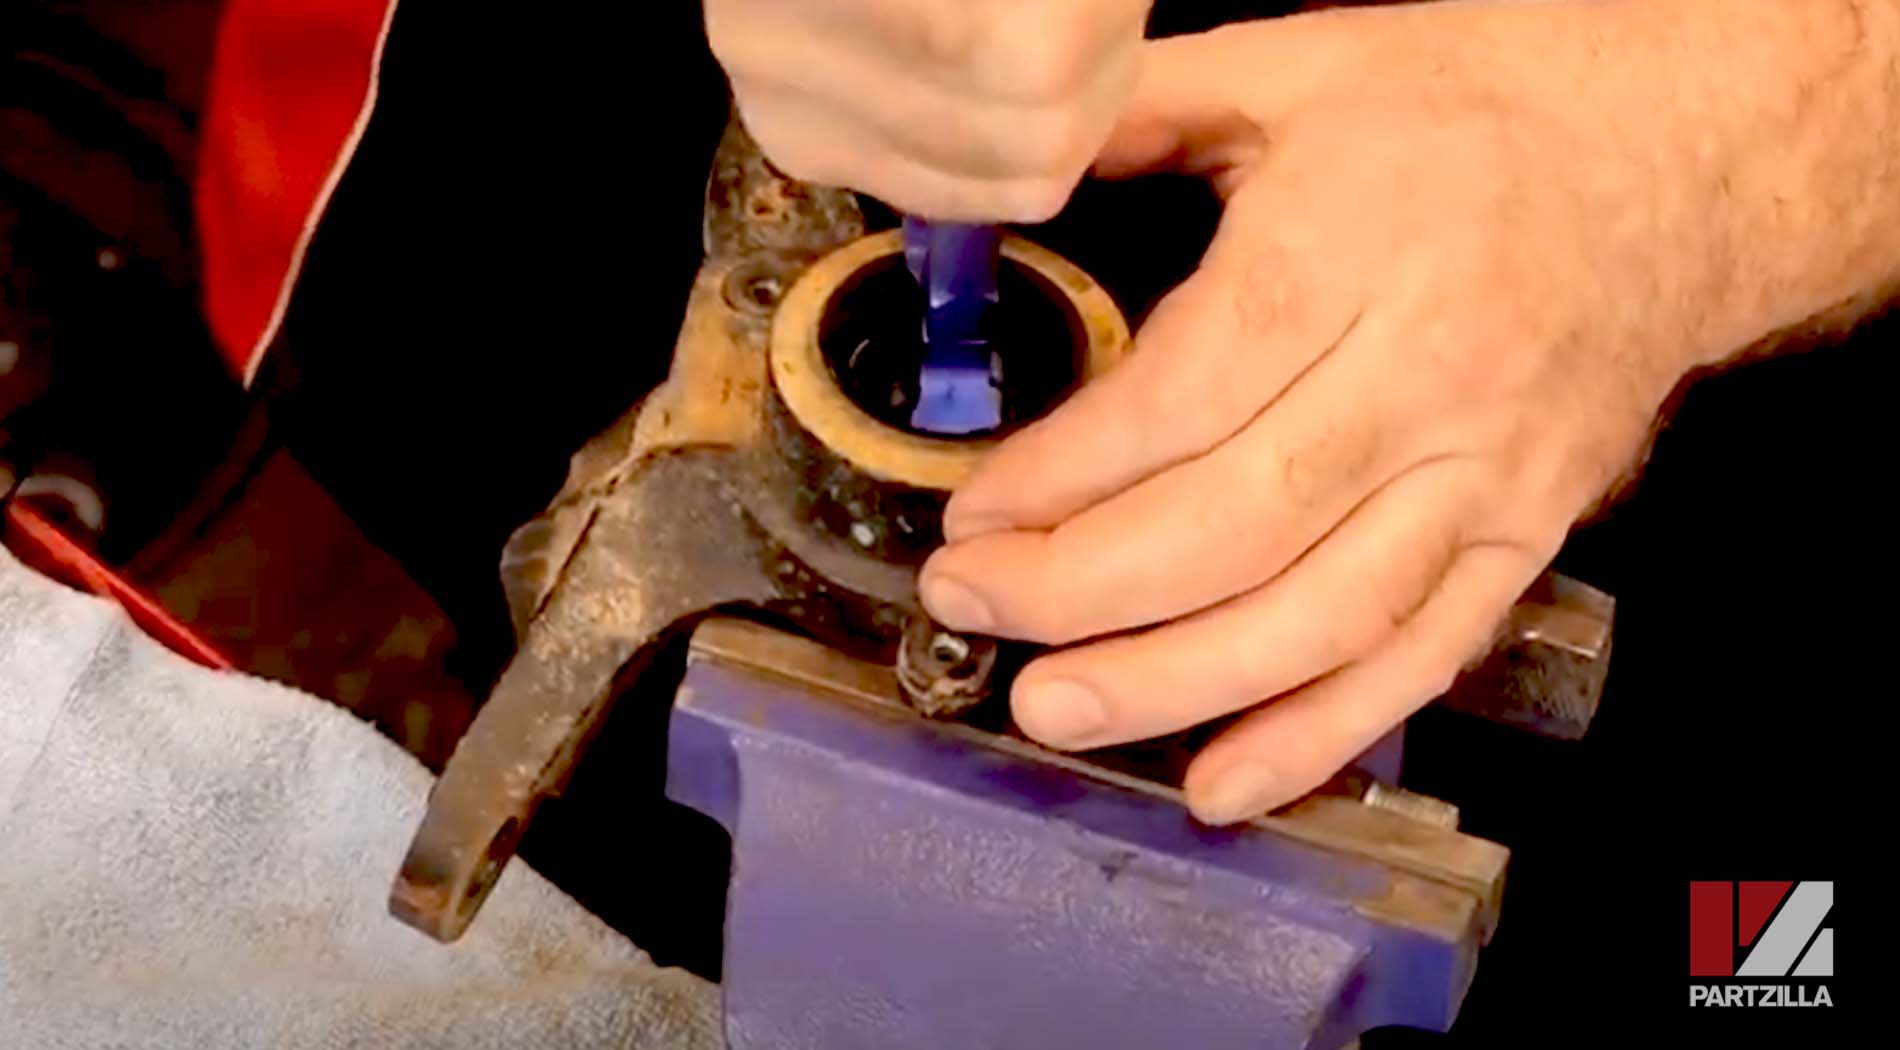
NOTE: We used a seal puller set, but you can use a screwdriver to pry the seal out.
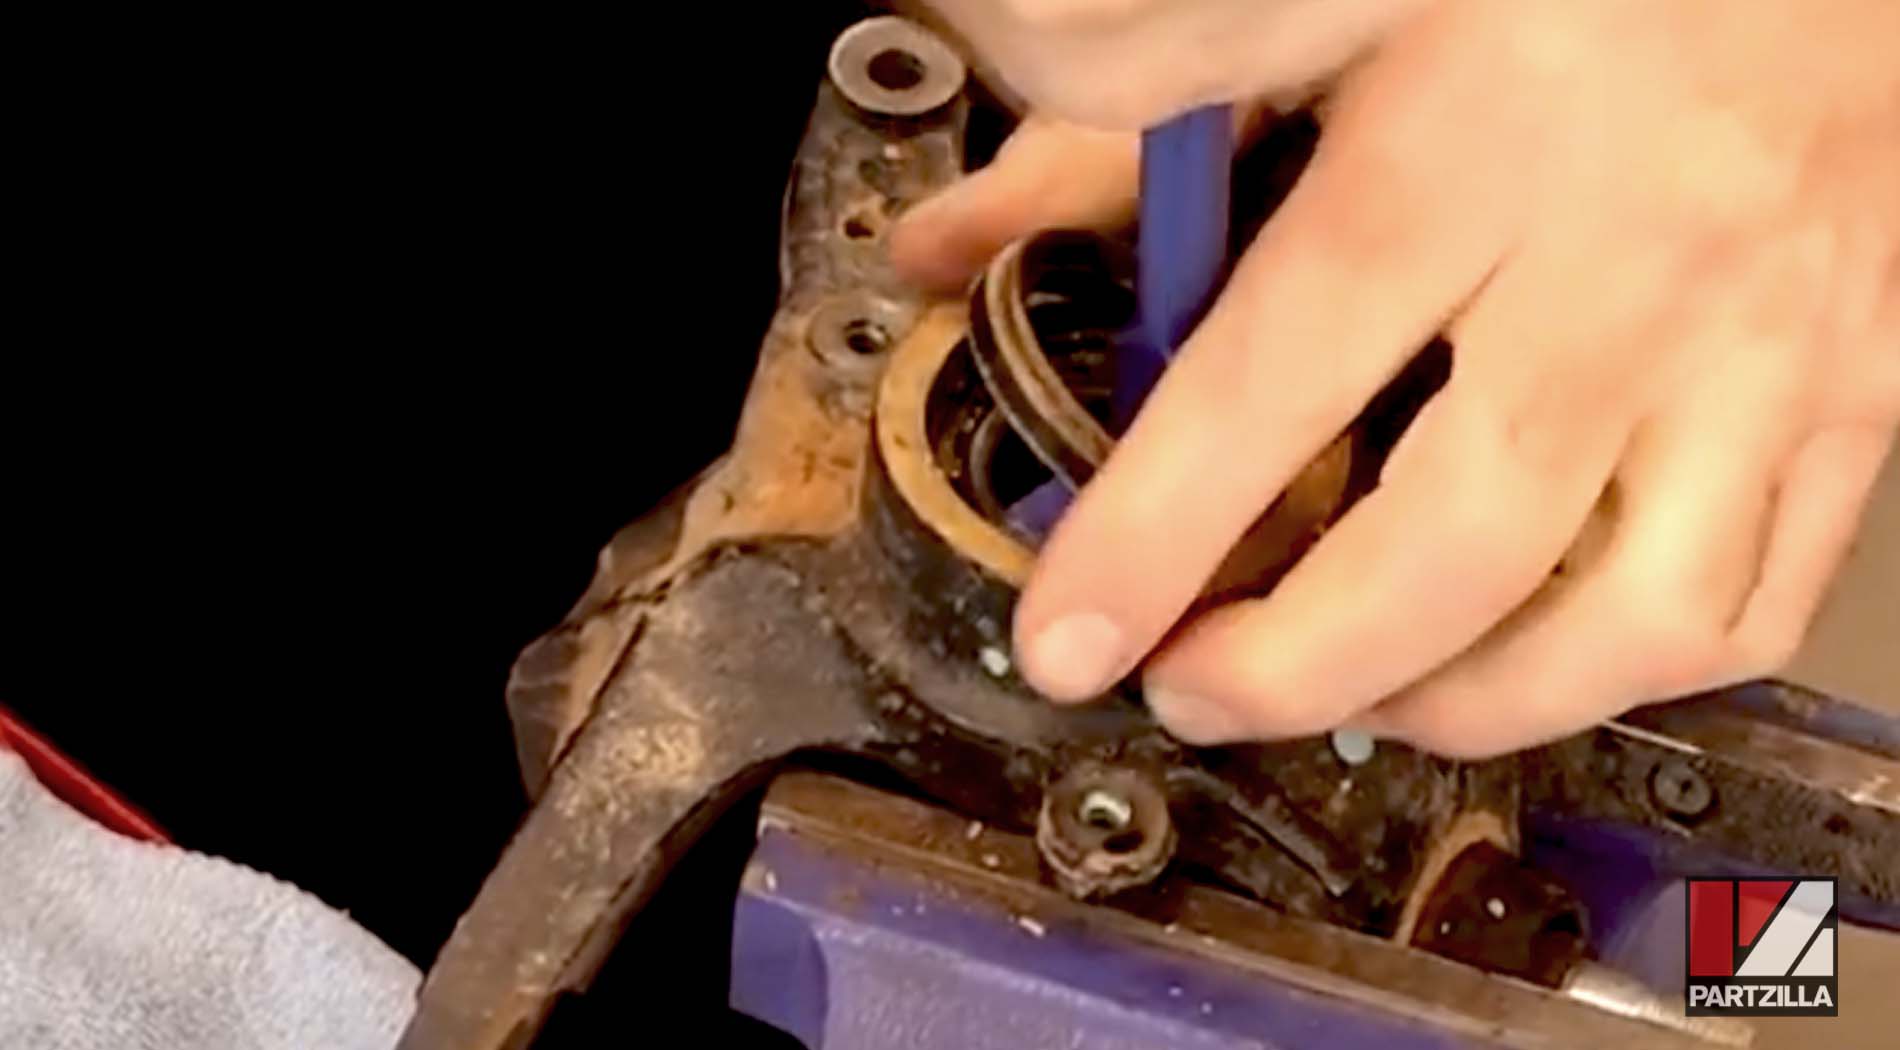
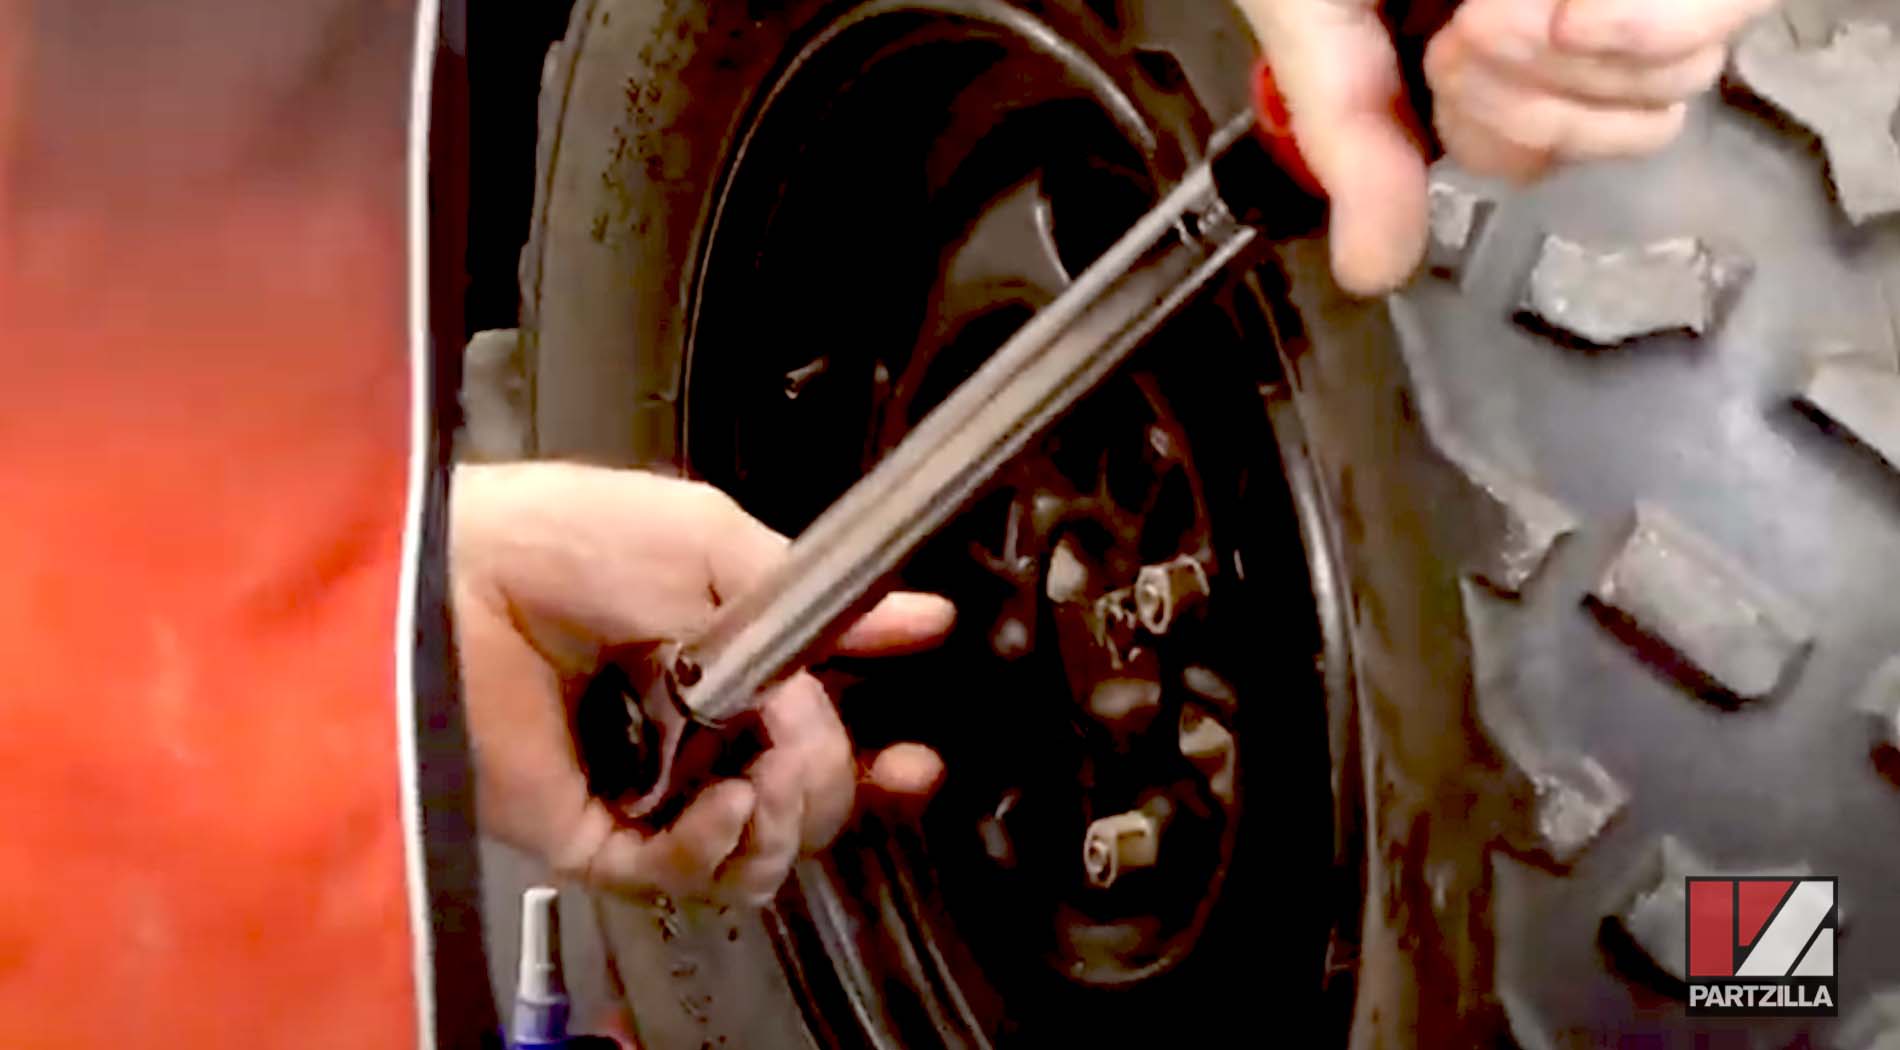
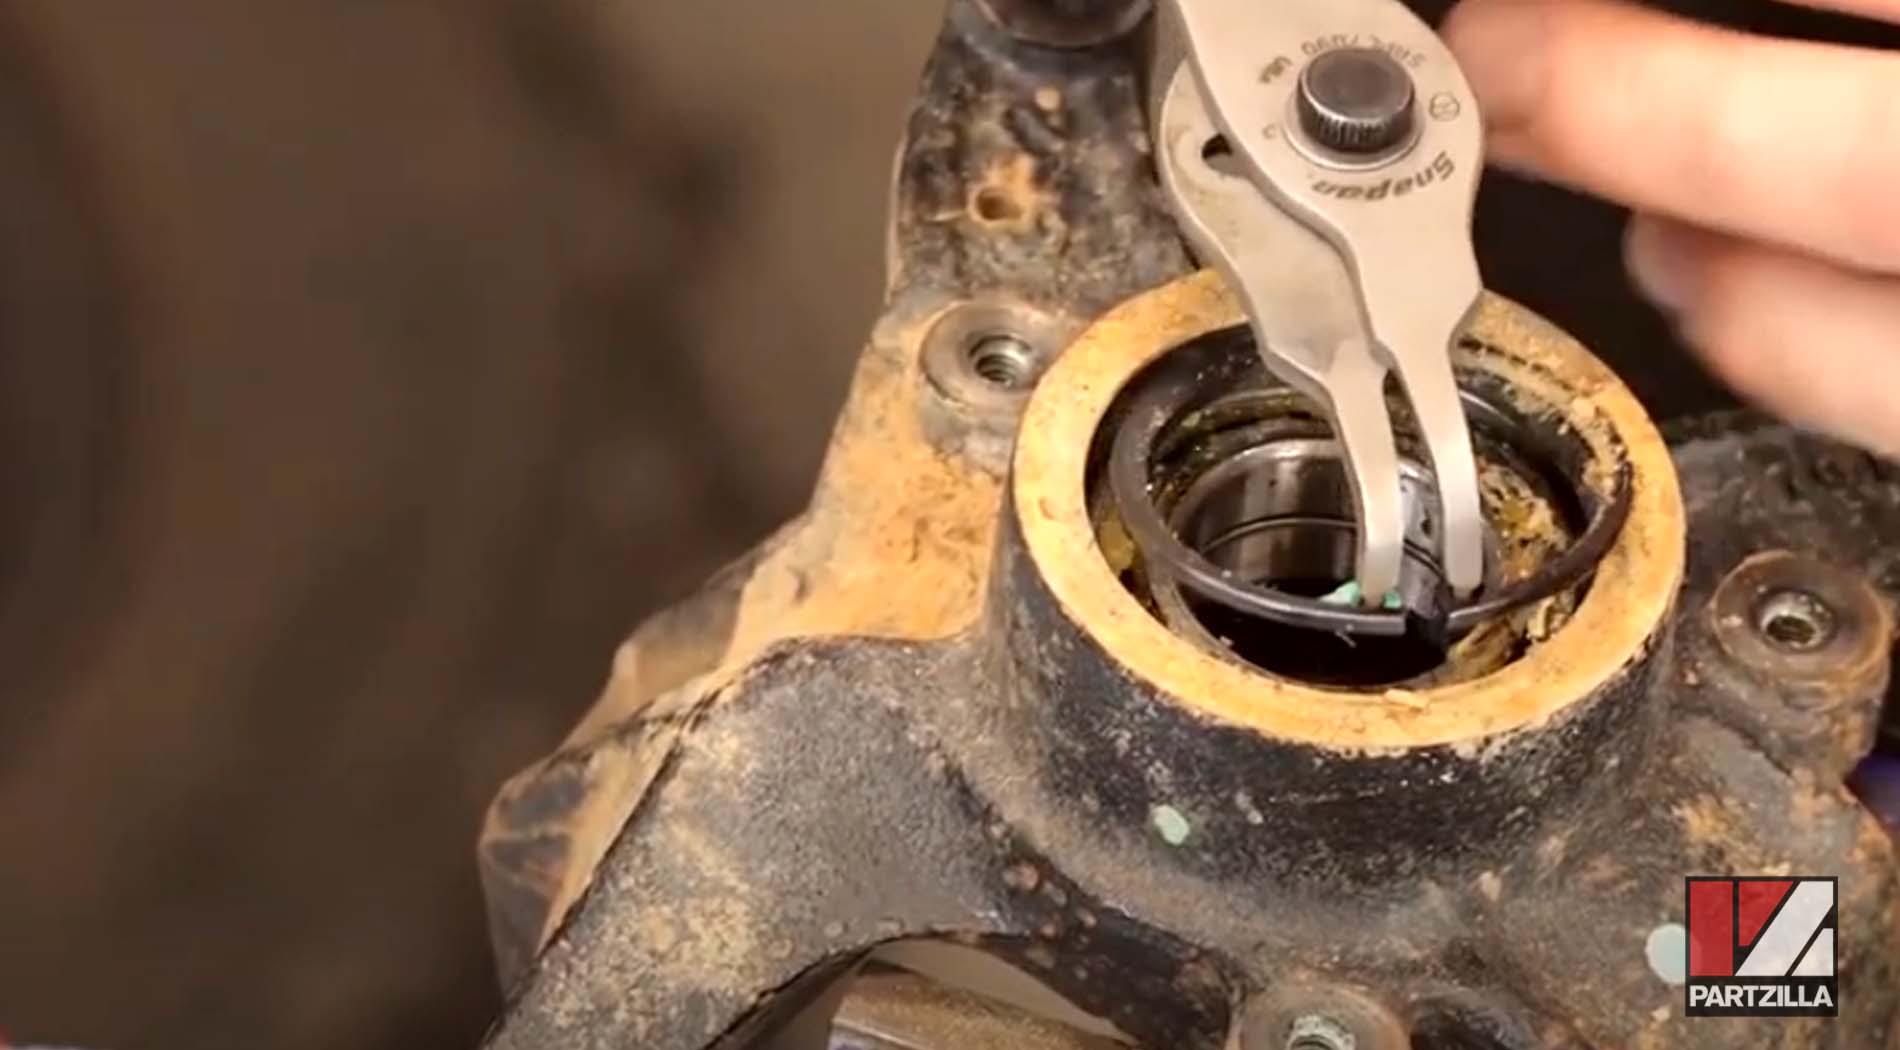
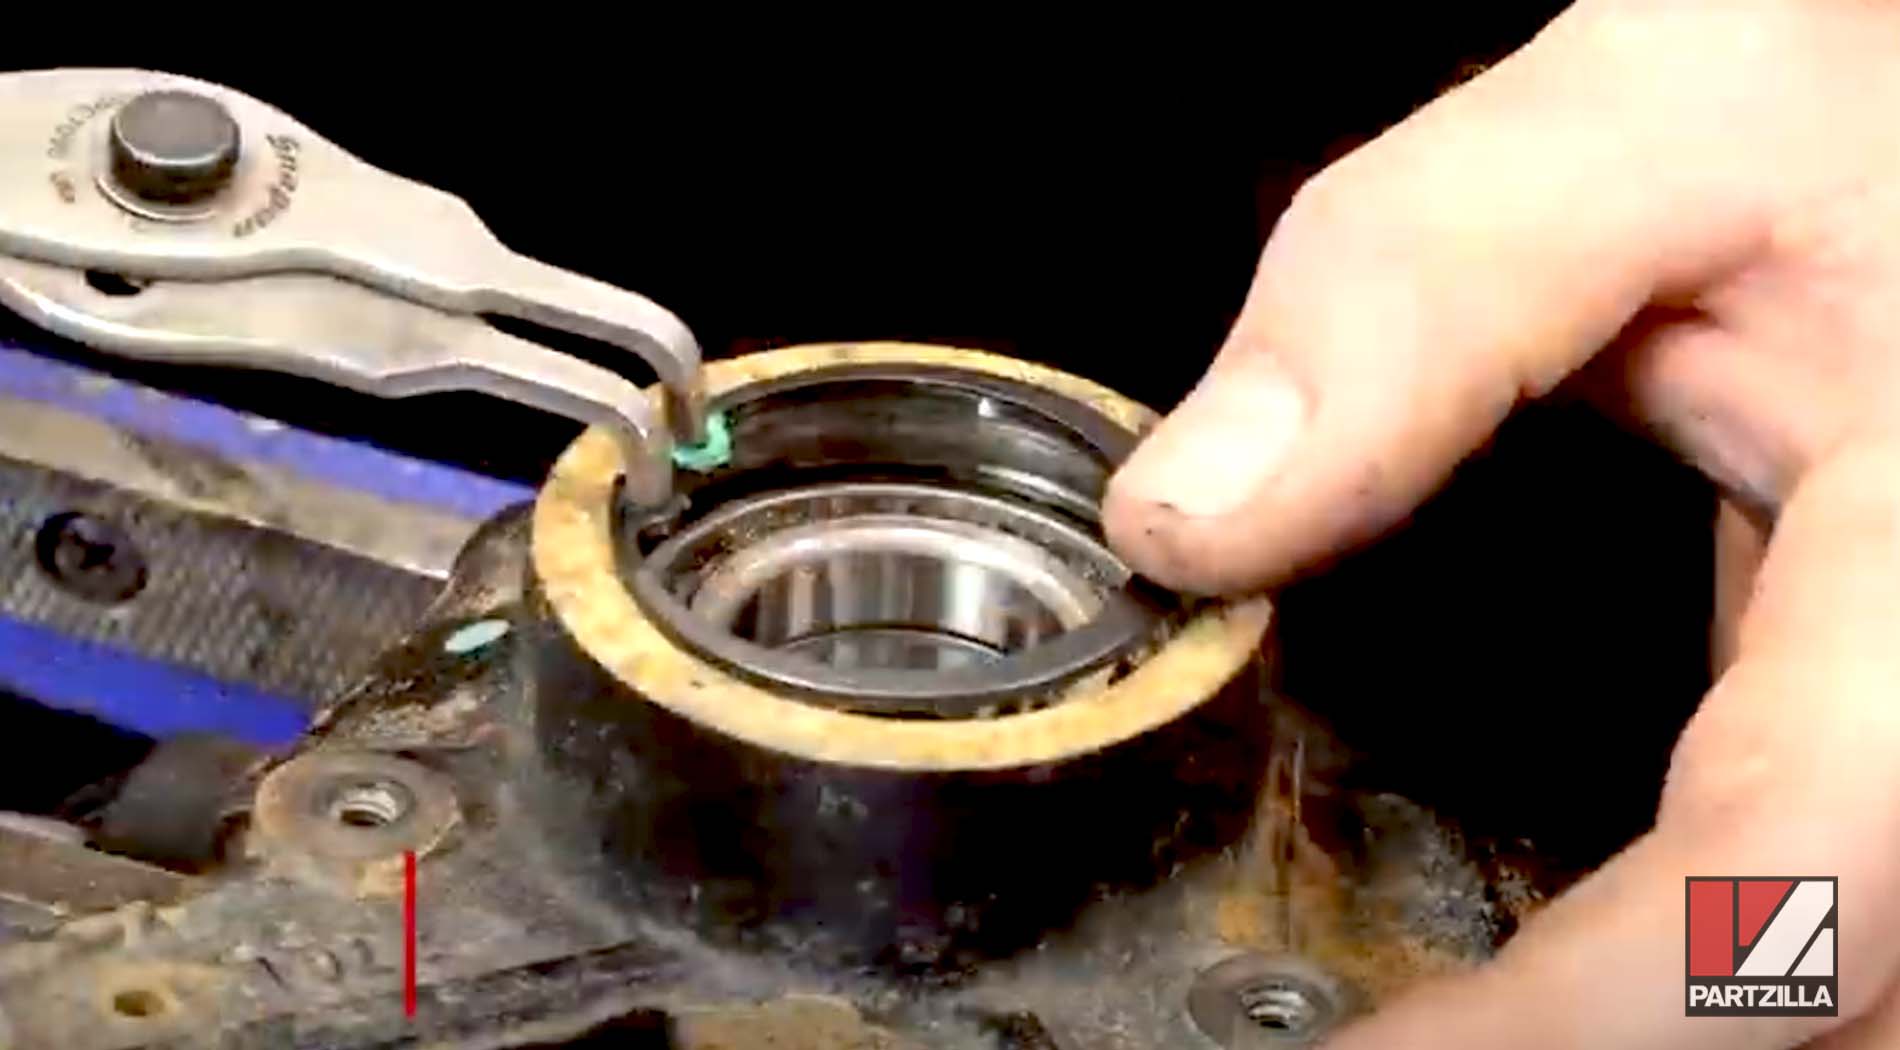
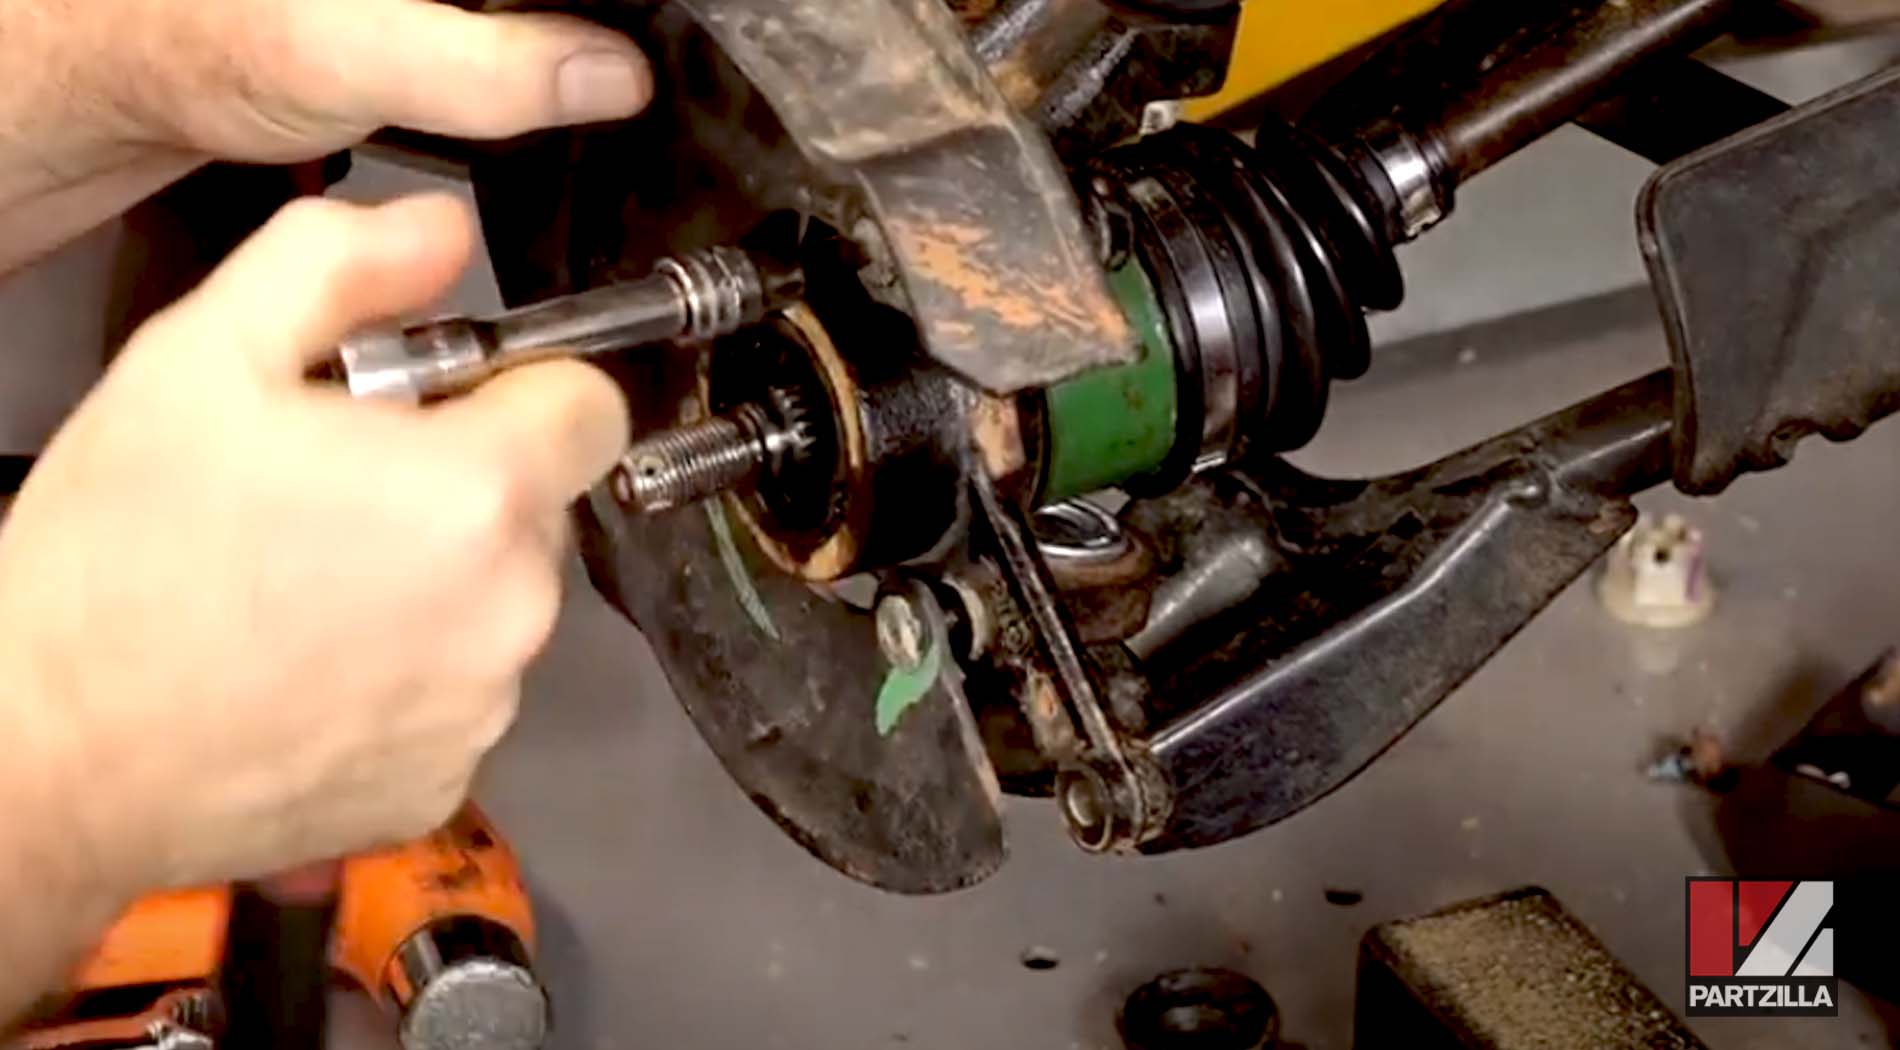
Step 2. Use a set of circlip pliers to remove the circlip holding the wheel bearing in place.
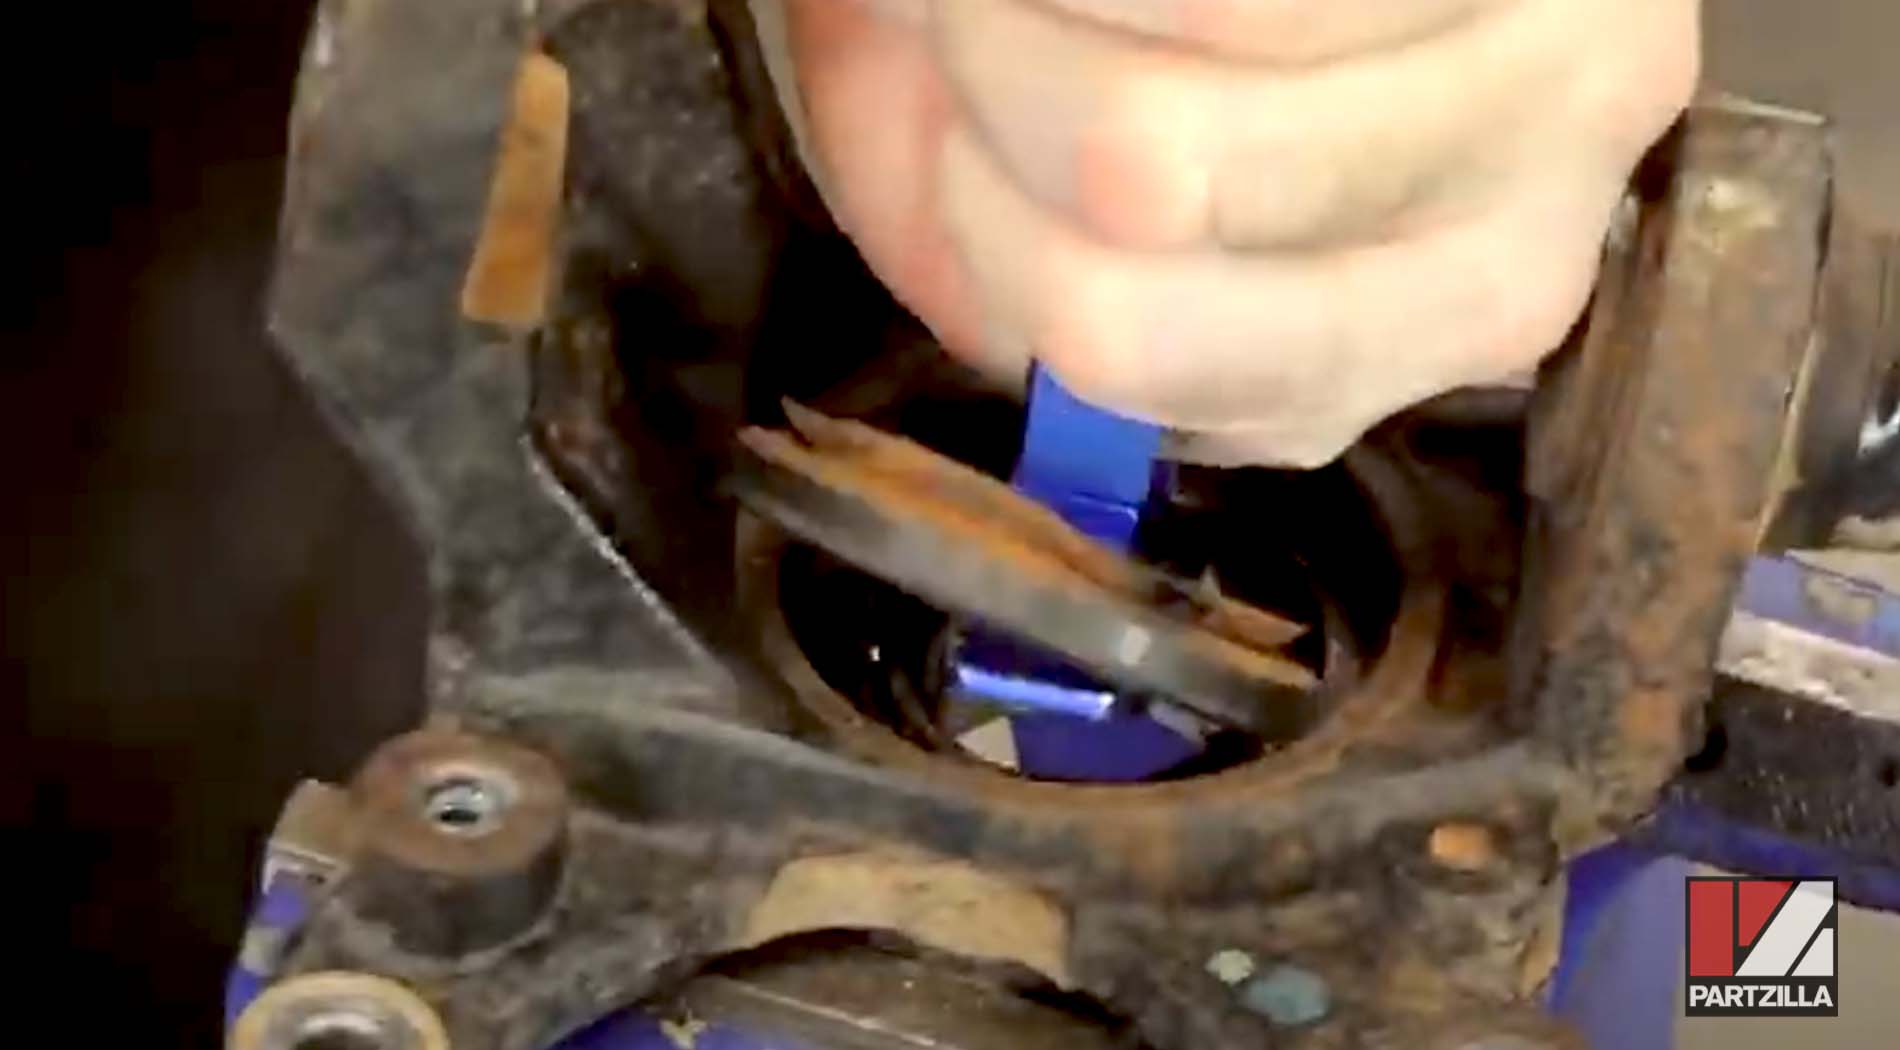
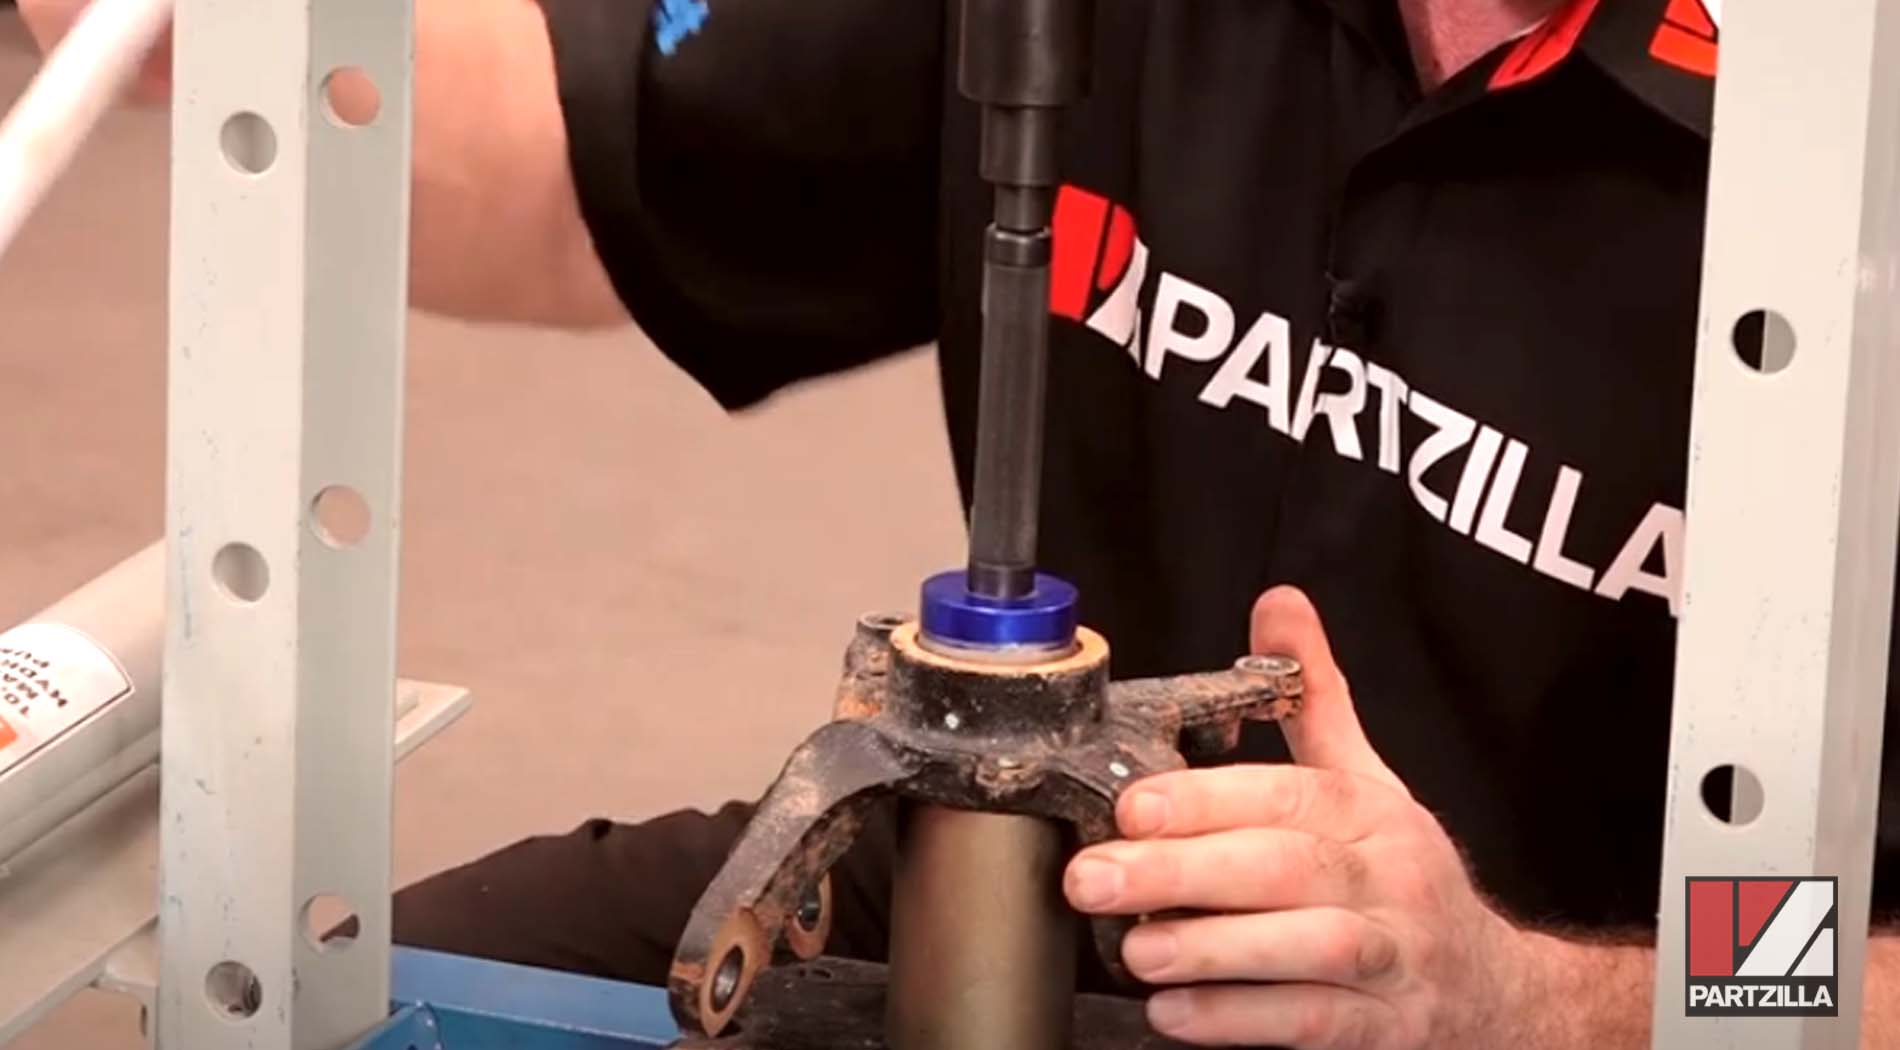
Step 3. Flip the steering knuckle over, then lock it down in a vise and pry out the inner seal.
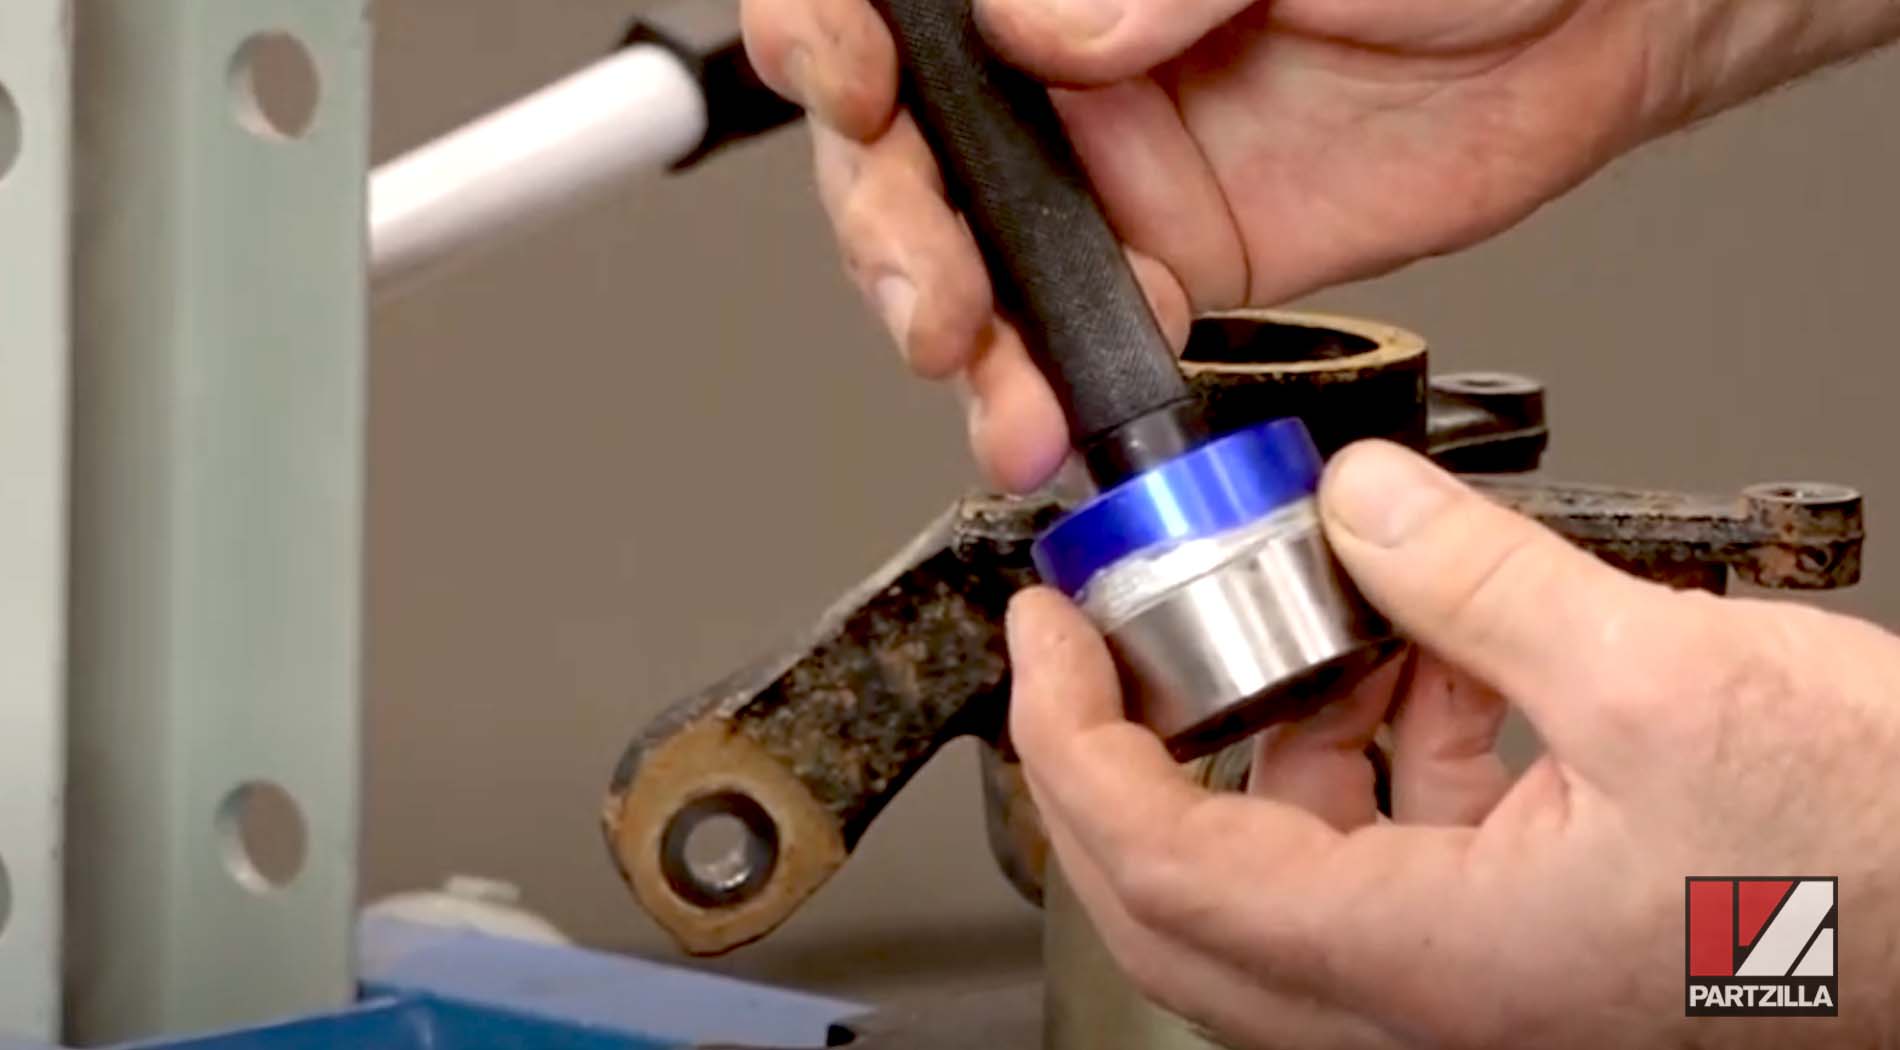
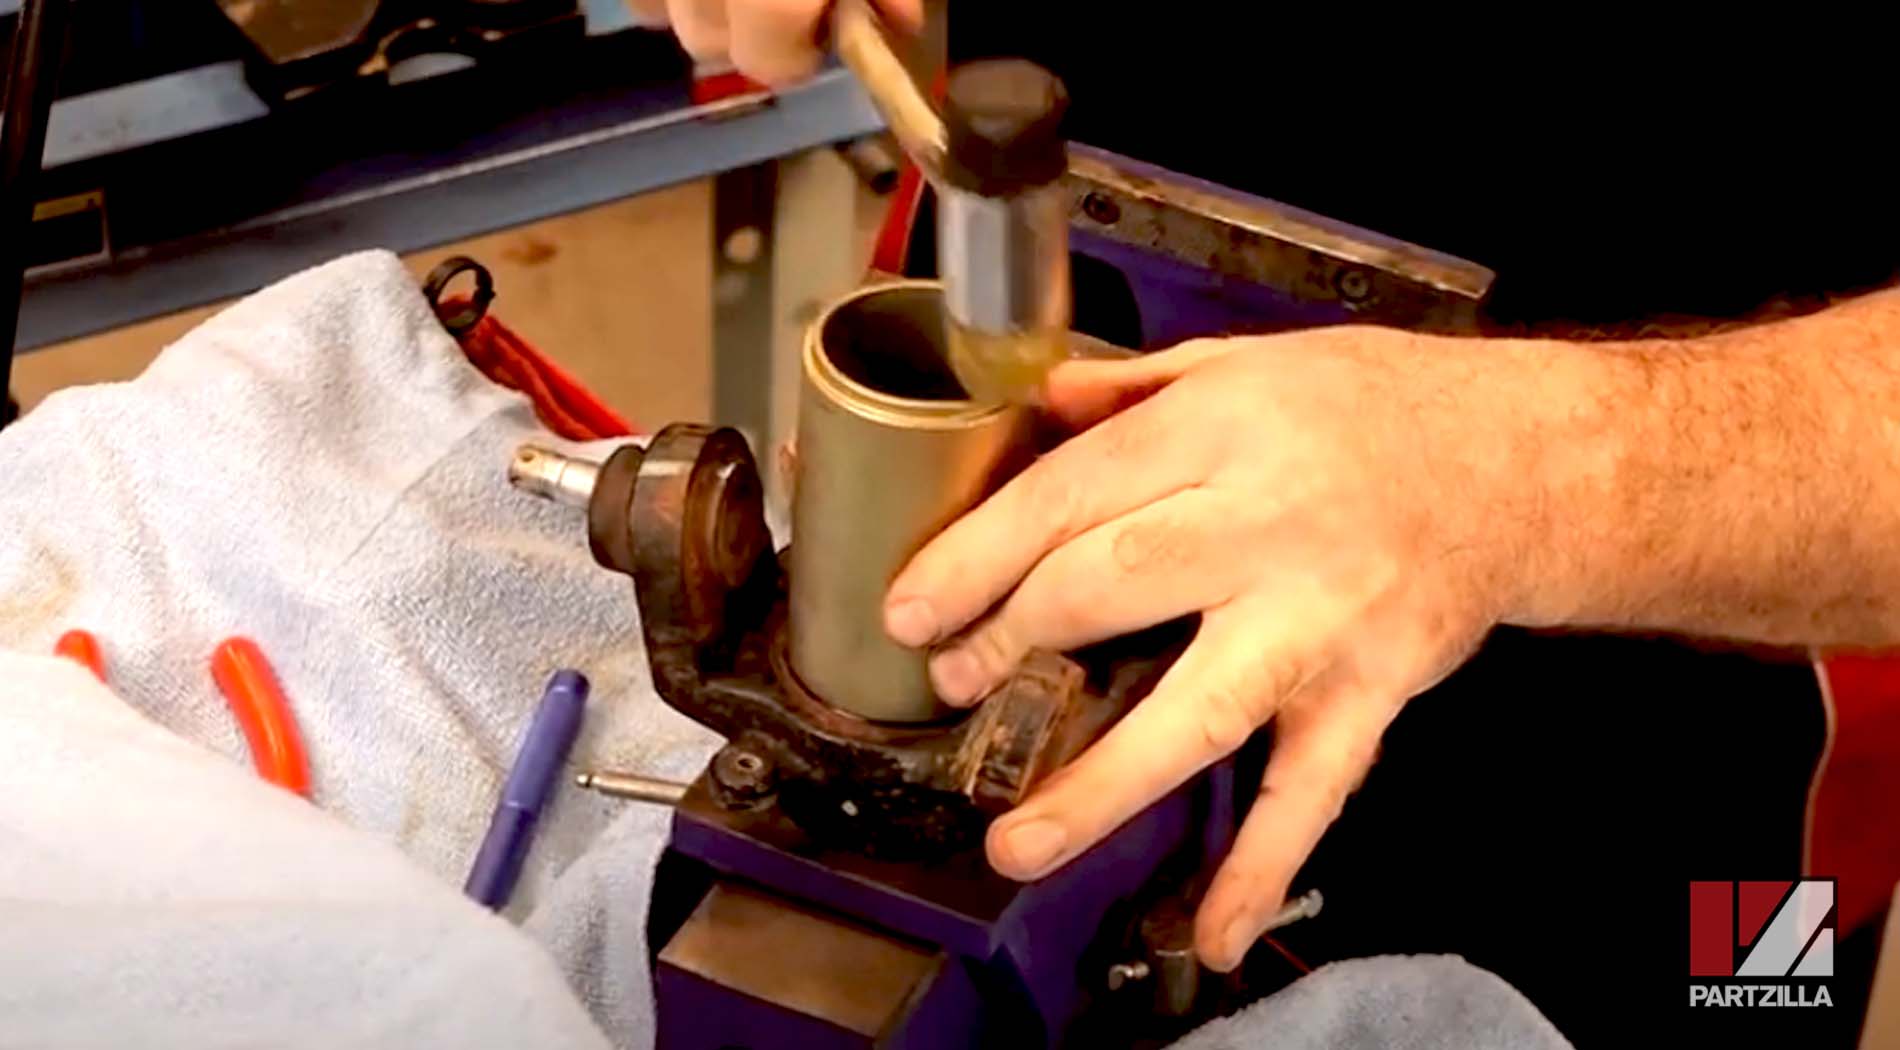
Step 4. Press out the wheel bearing from the back (inside) of the knuckle. Use a bearing press set that covers as much of the bearing as possible, but not so big that it catches on the knuckle itself, since the press is going to move through the knuckle as it forces out the bearing.
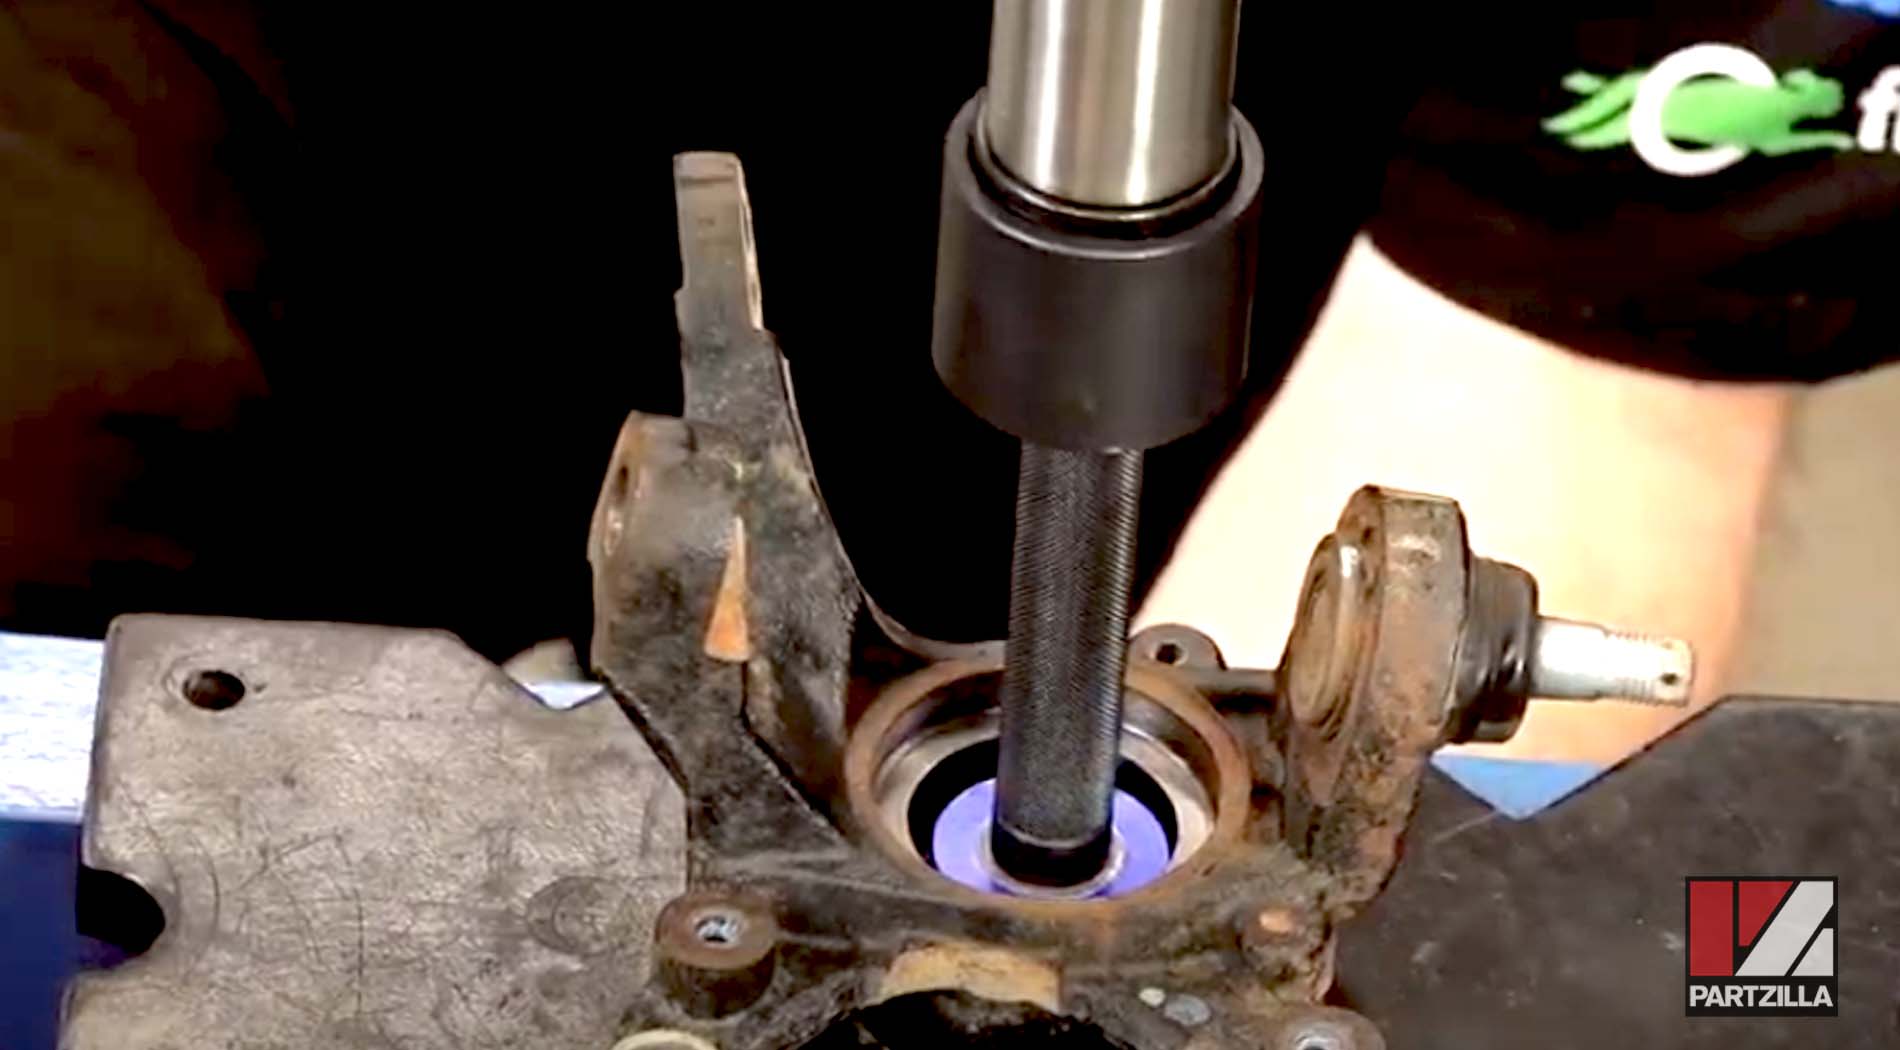
Step 5. Use a driver to press the new bearing into place, one that covers the outer race of the bearing.
NOTE: We used a 47mm driver. Use a driver that’s almost identical in size to the outer race of the bearing, otherwise you could end up damaging the bearing.
Step 6. Press in the bearing from the front (the outside) carefully until you feel it bottom out.
PRO TIP: The steering knuckle has an awkward shape, so to get the bearing opening to face straight up and enable the press to drive the bearing in, use a big socket underneath the knuckle to hold it up.
Step 7. Put the knuckle back in the vise, lock the knuckle down facing up, and then install the new circlip.
Step 8. Get the outer seal into place using a soft-blow hammer to drive it down flush with the circlip.
Step 9. Flip the steering knuckle over in the vise, then drive in the inner seal. Use a cup to drive the seal into place and a soft-blow hammer to push the cup.
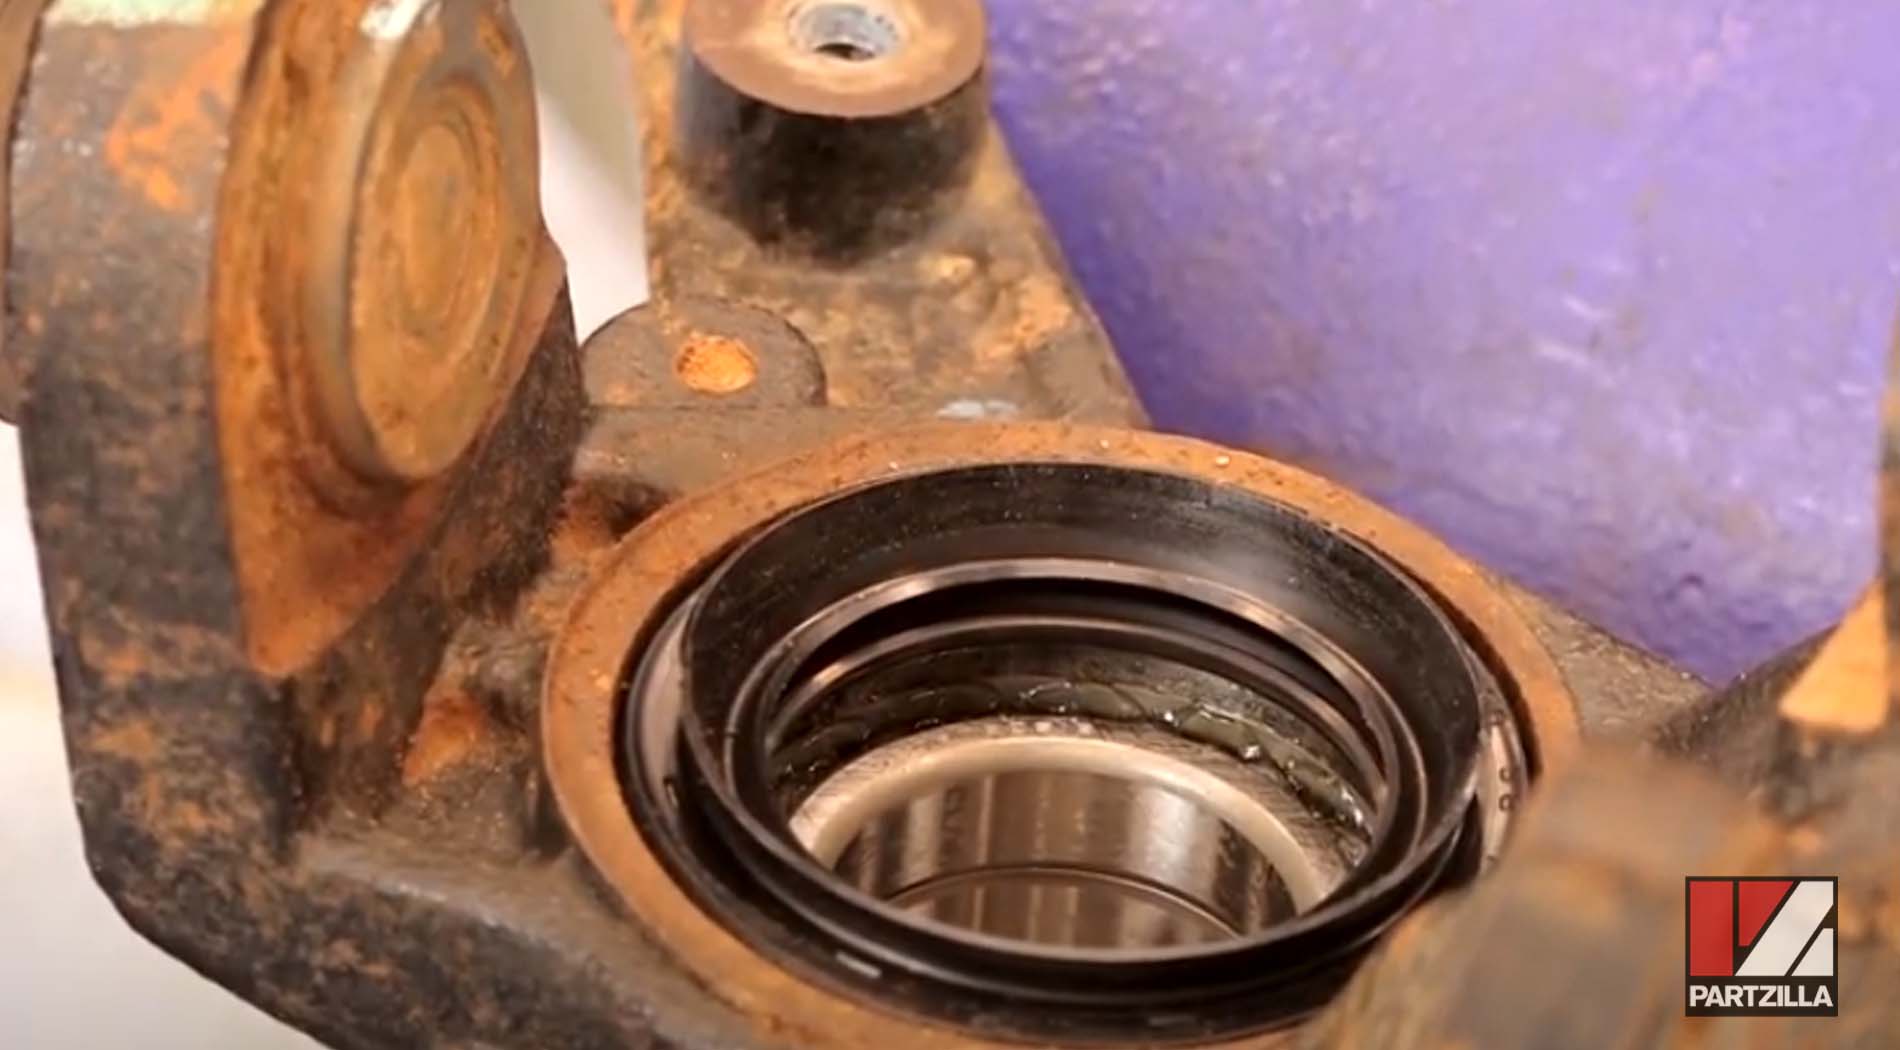
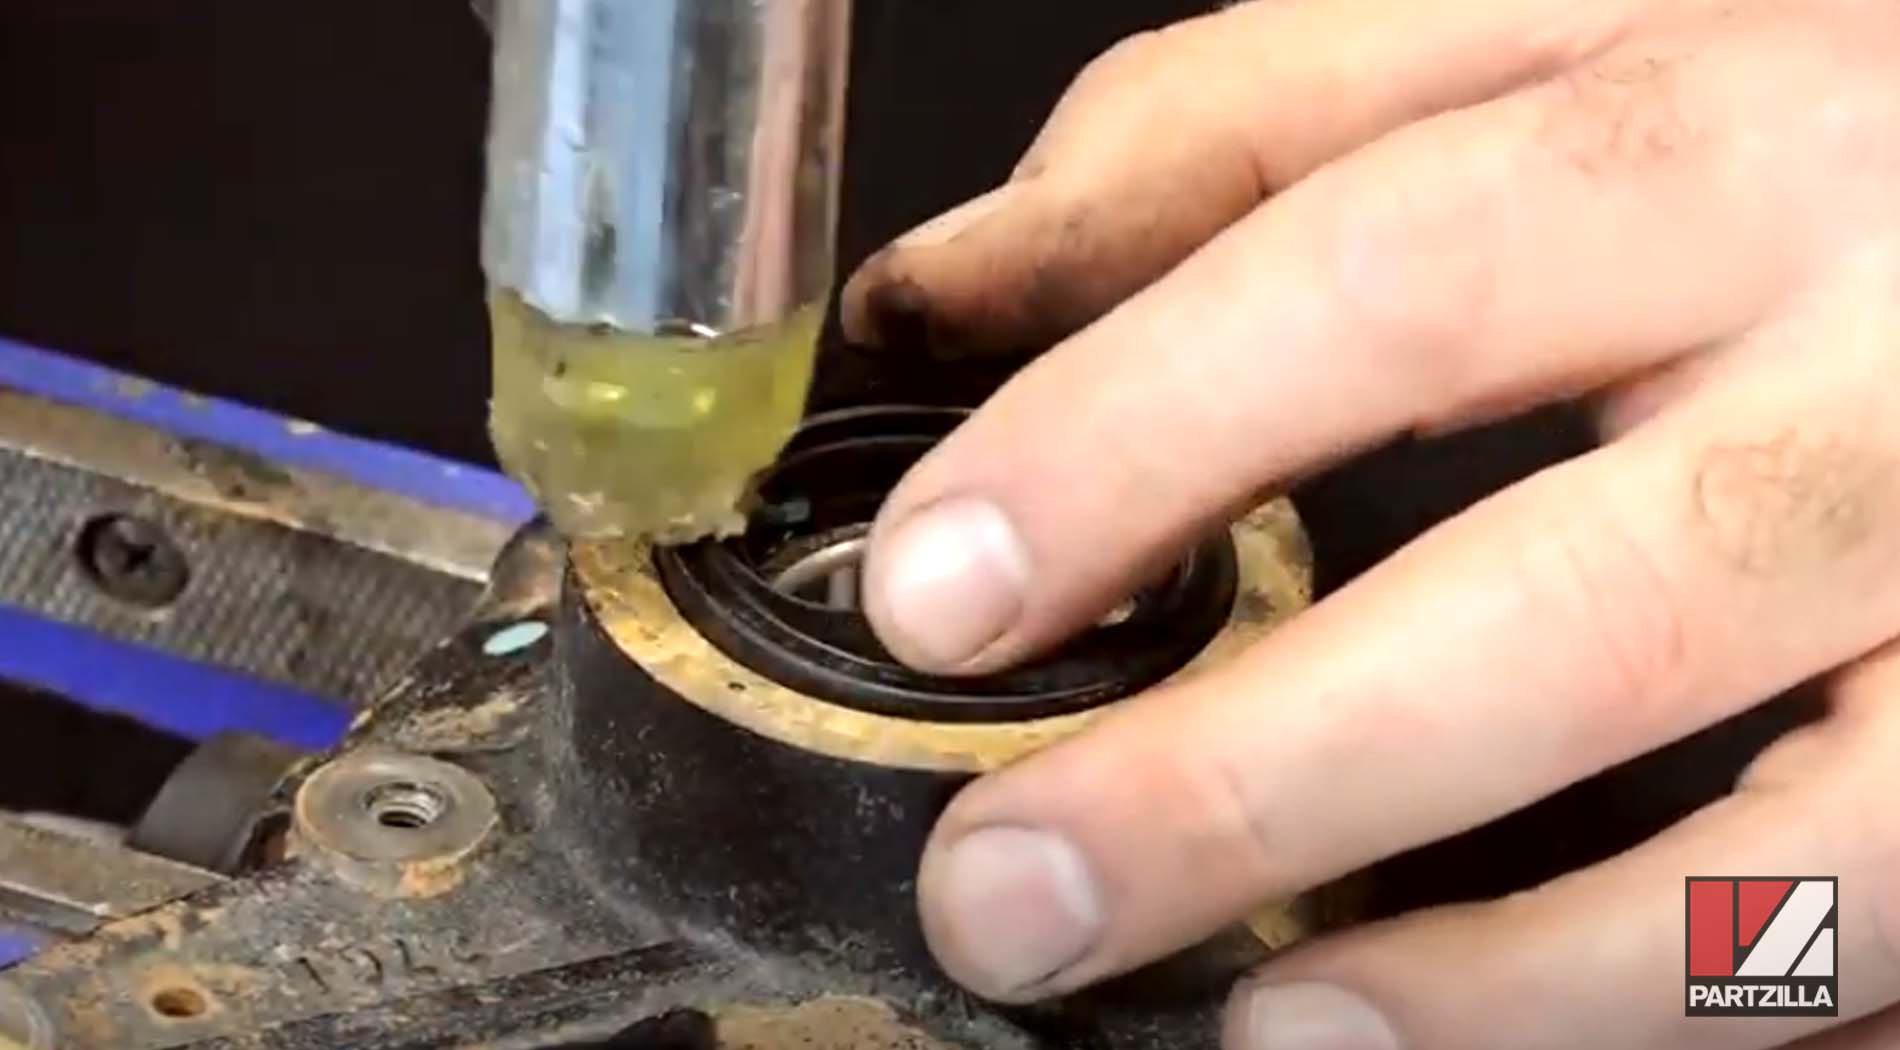
Step 10. Pack a little grease around both the inner and outer seals.
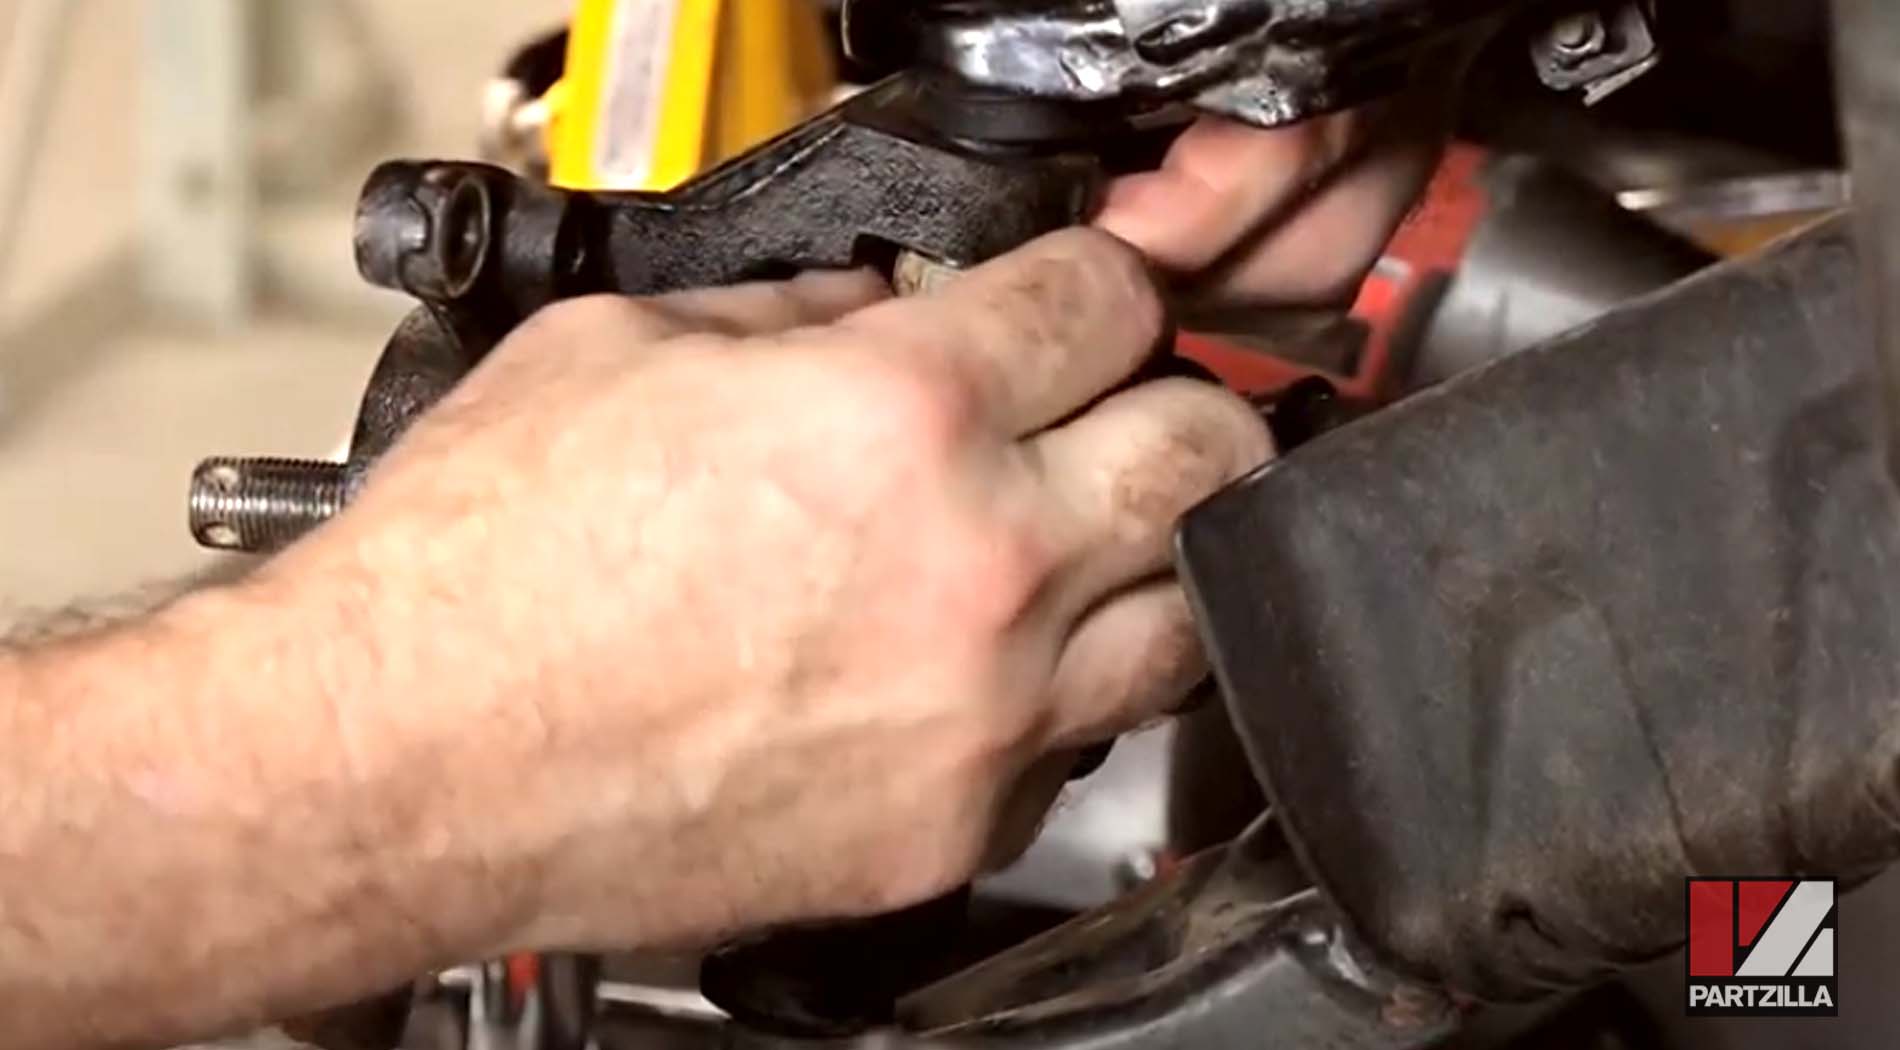
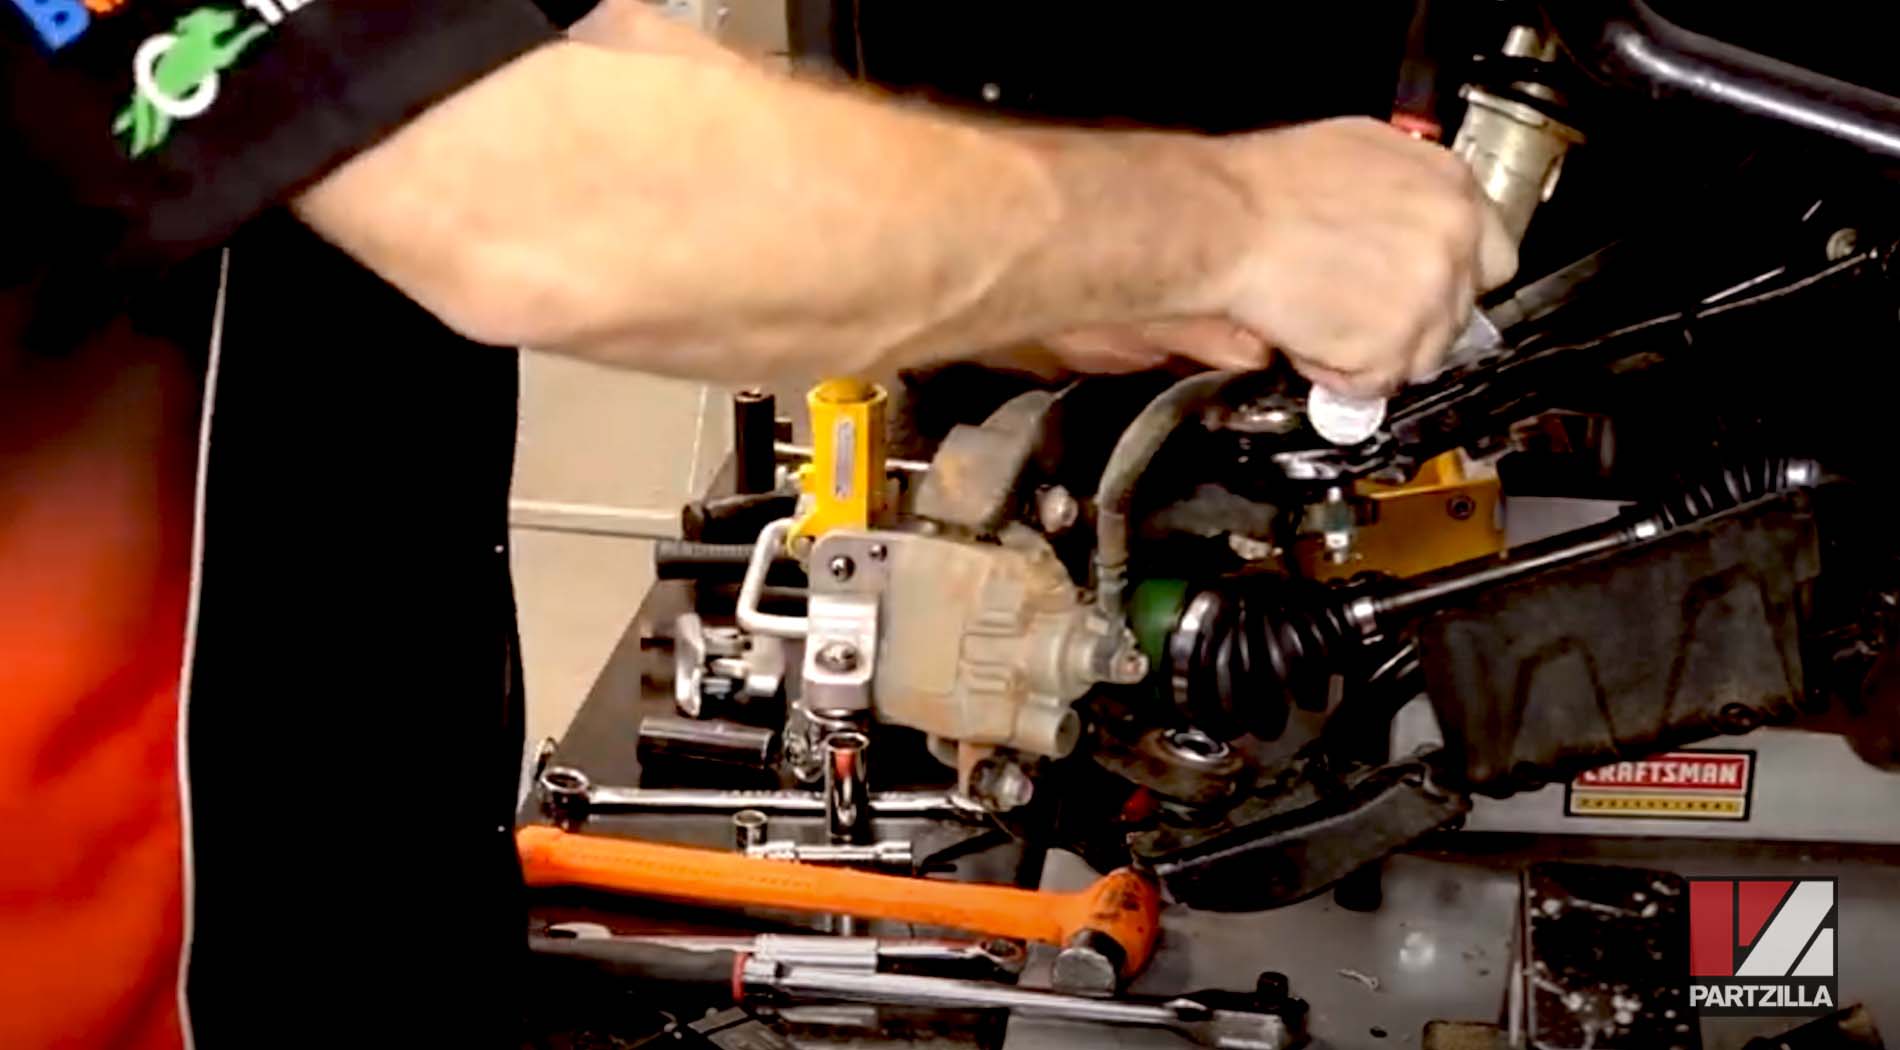
Step 11. Put the tie rod back in and tighten it to hold everything steady.
Step 12. Get the lower ball joint through the steering knuckle and thread the castle nut onto the lower ball joint.
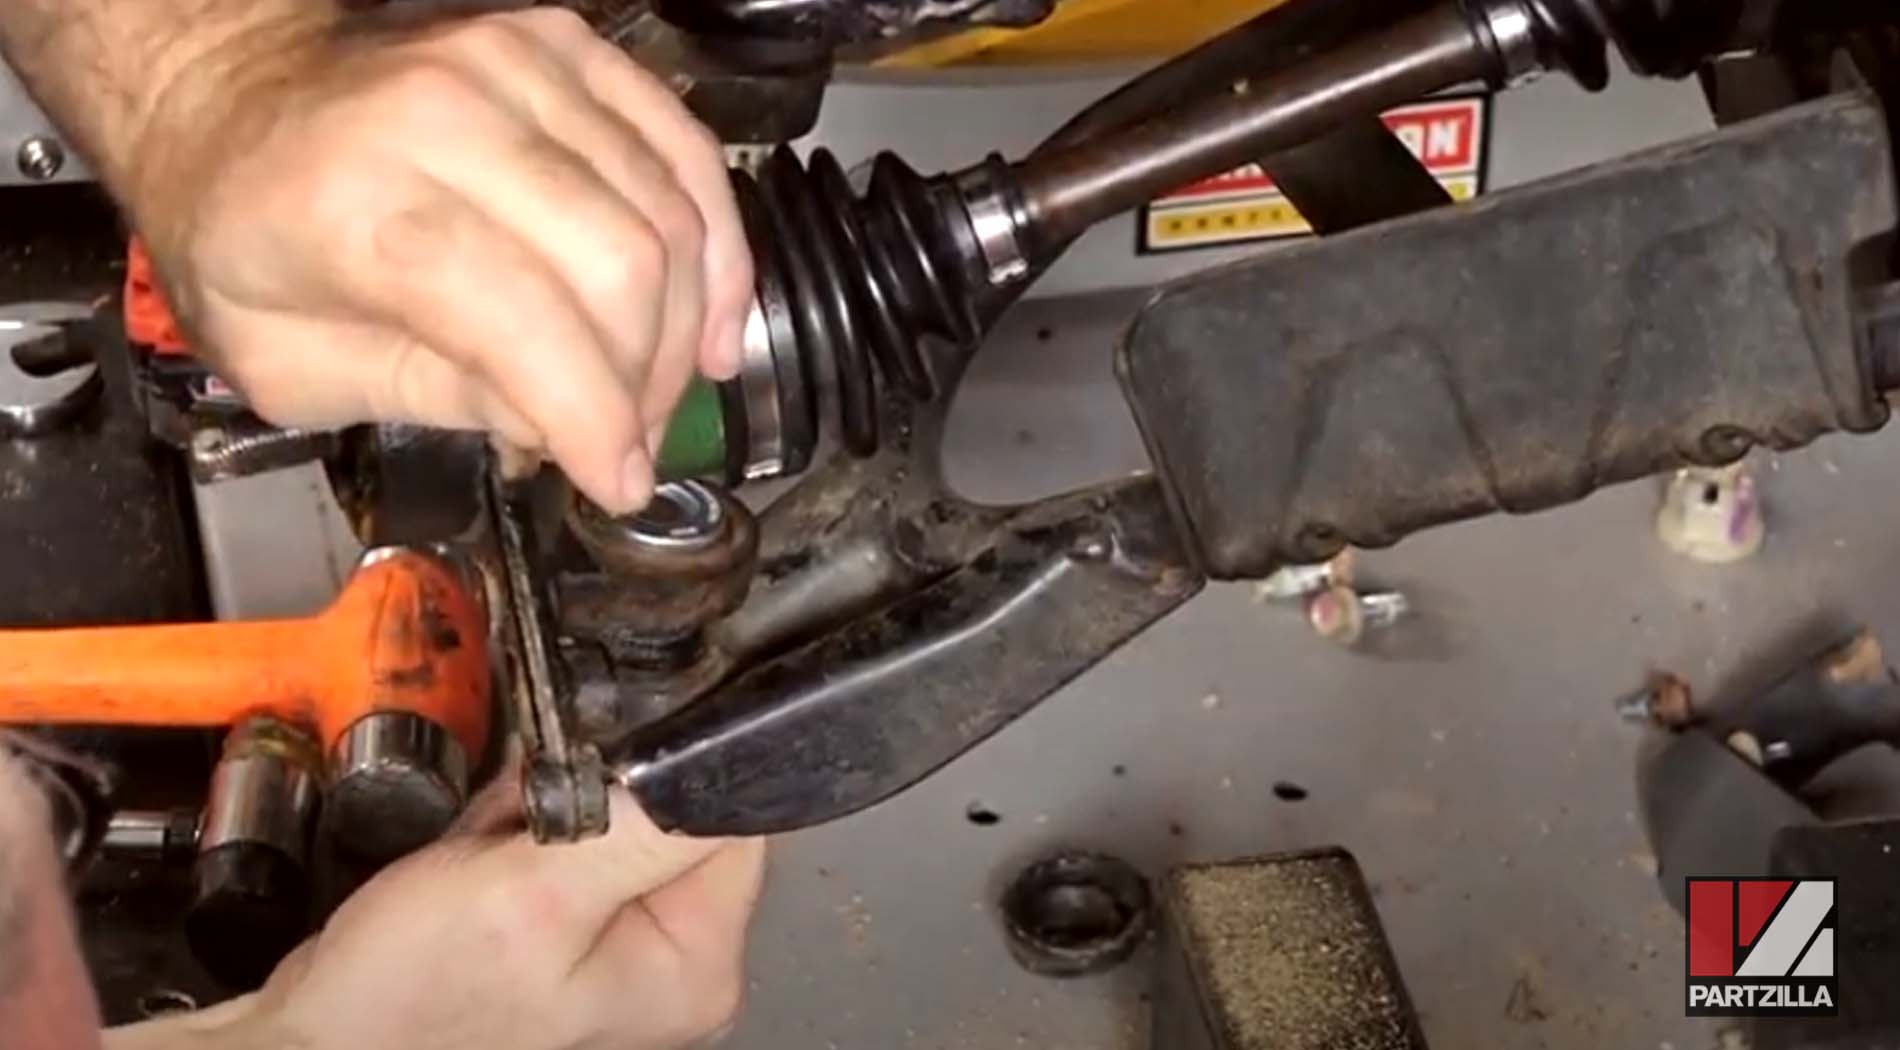
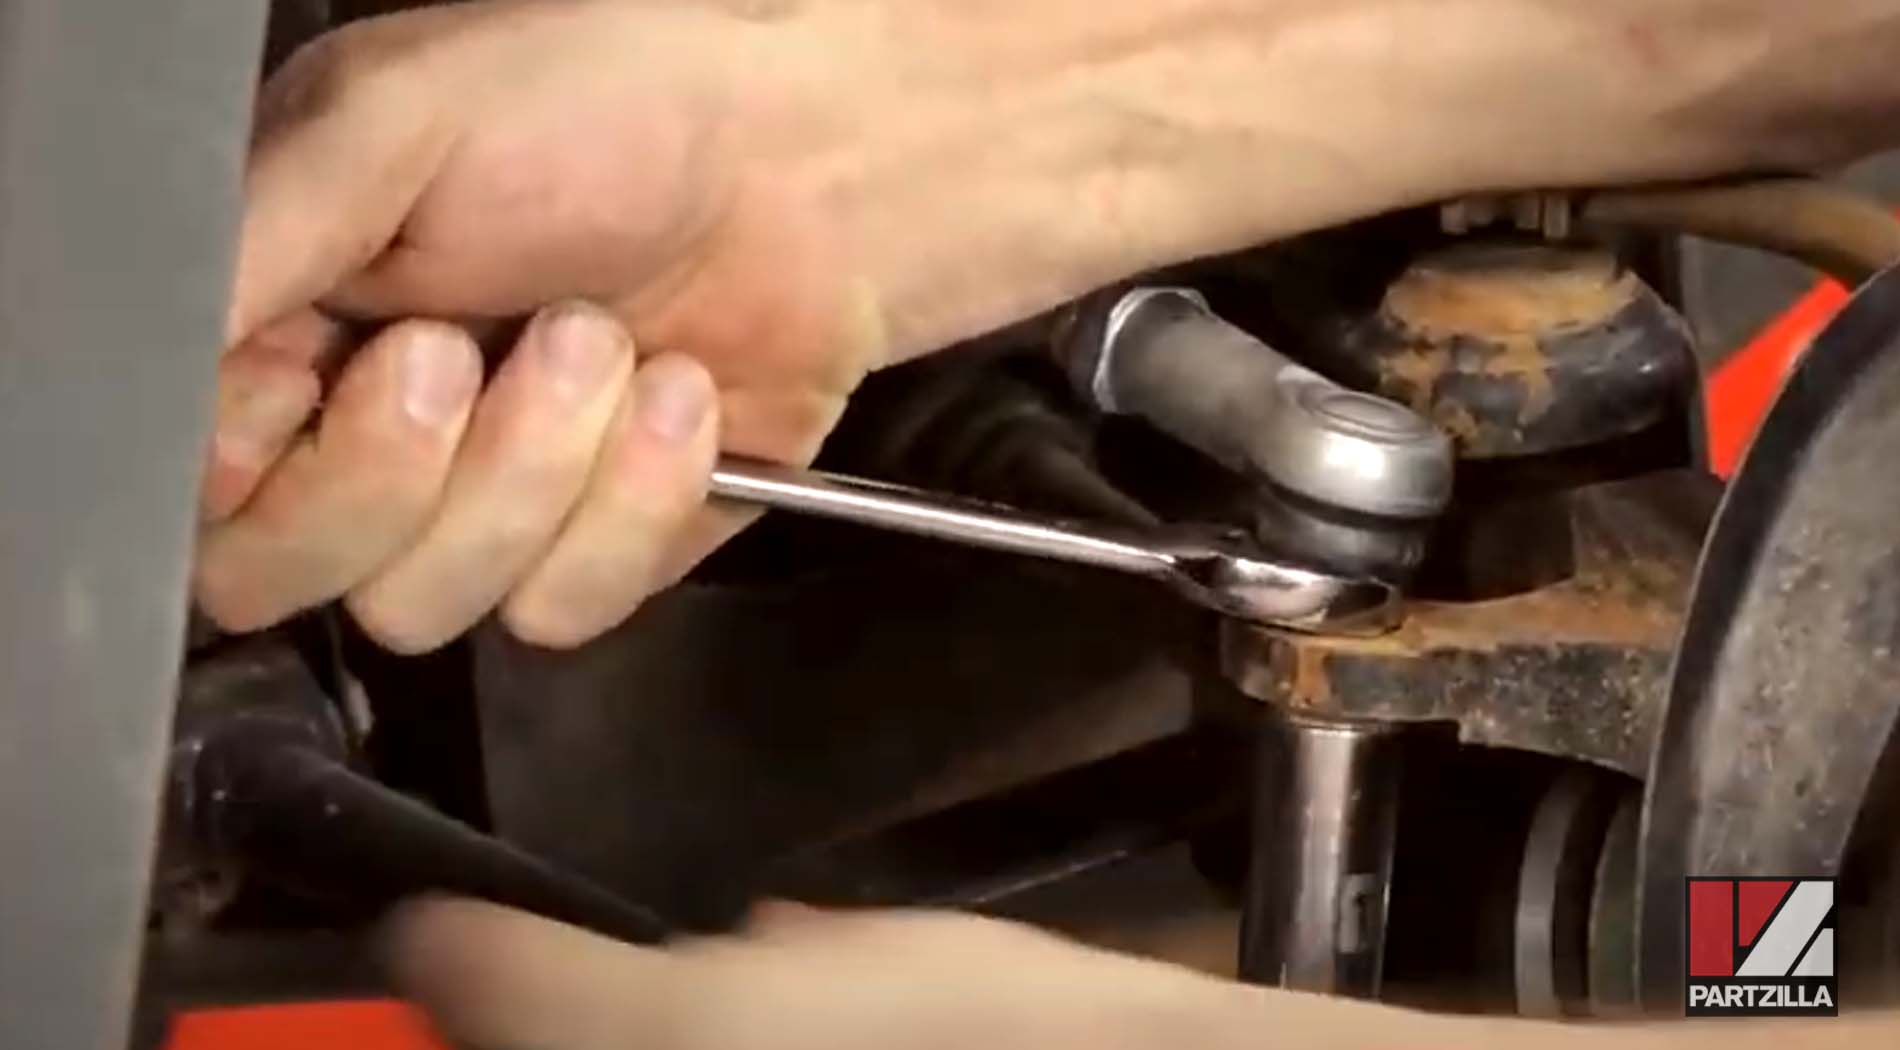
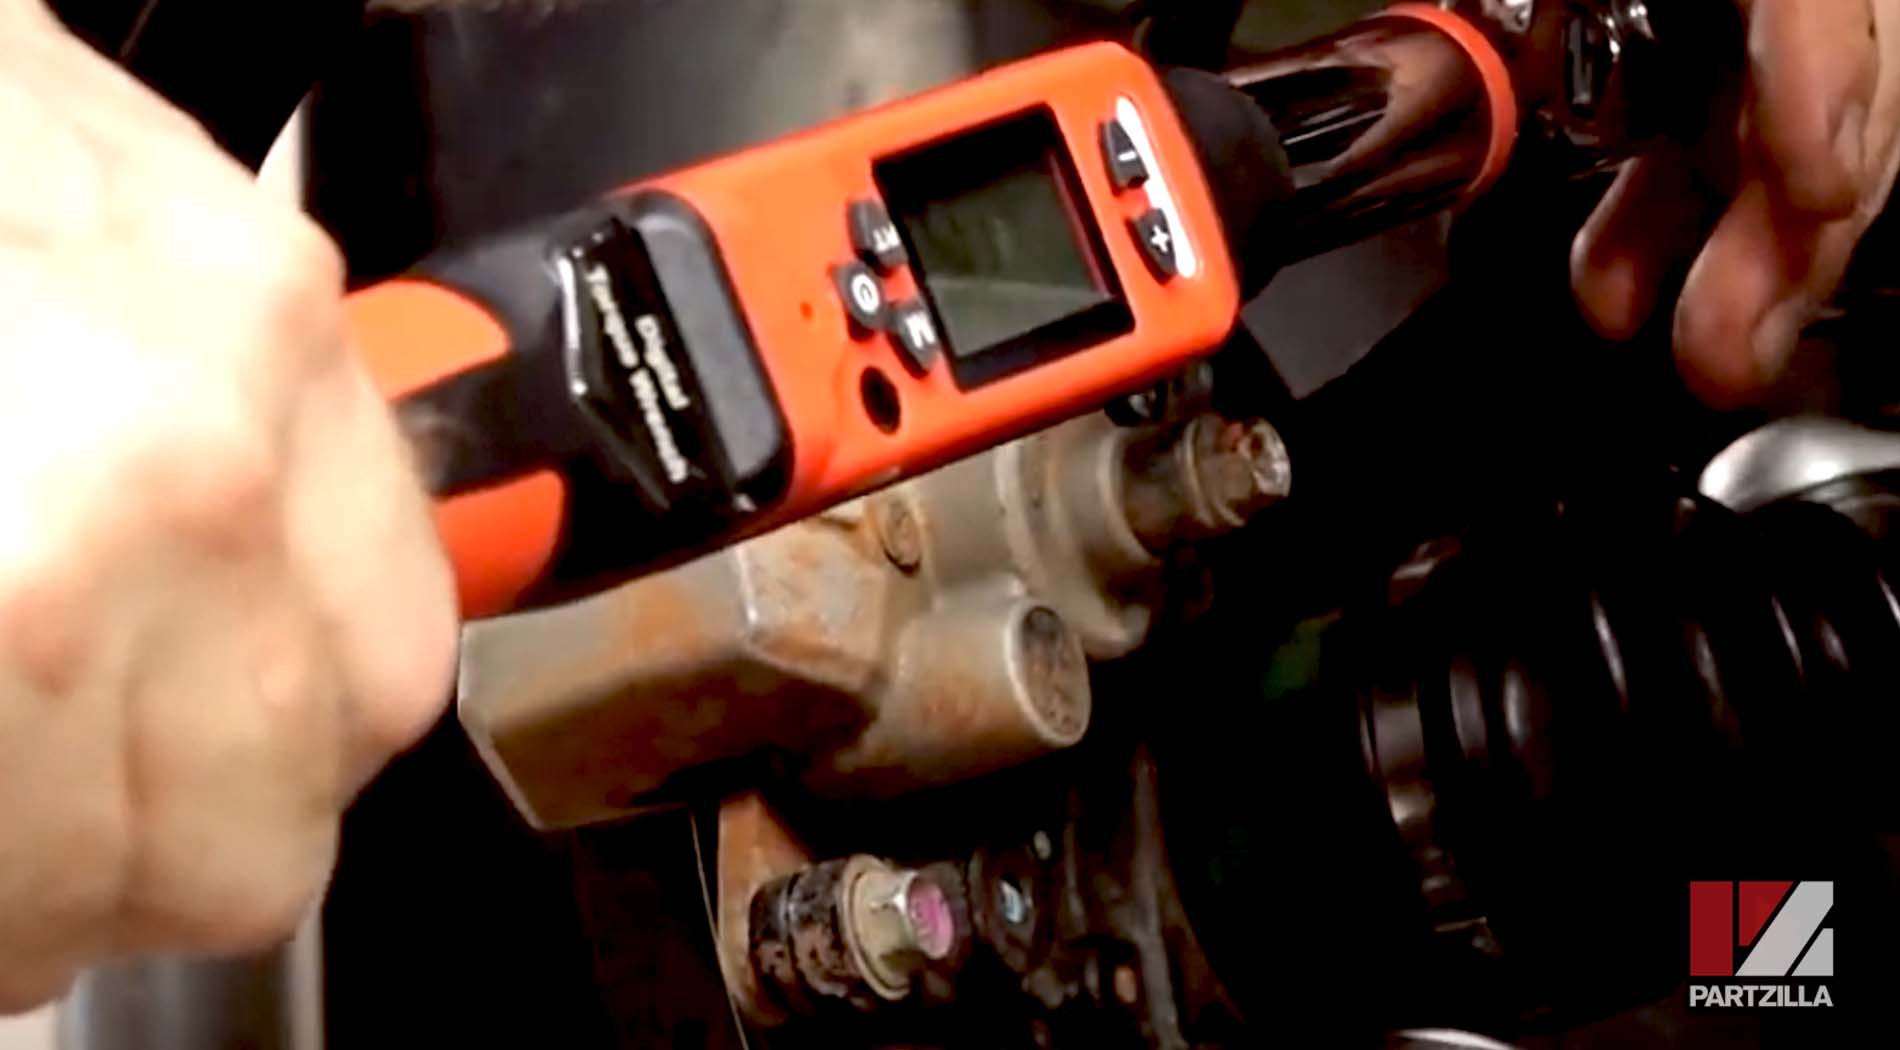
Step 13. Torque the upper and lower ball joint castle nuts. They’re both 17mm and require 21 foot-pounds of torque.
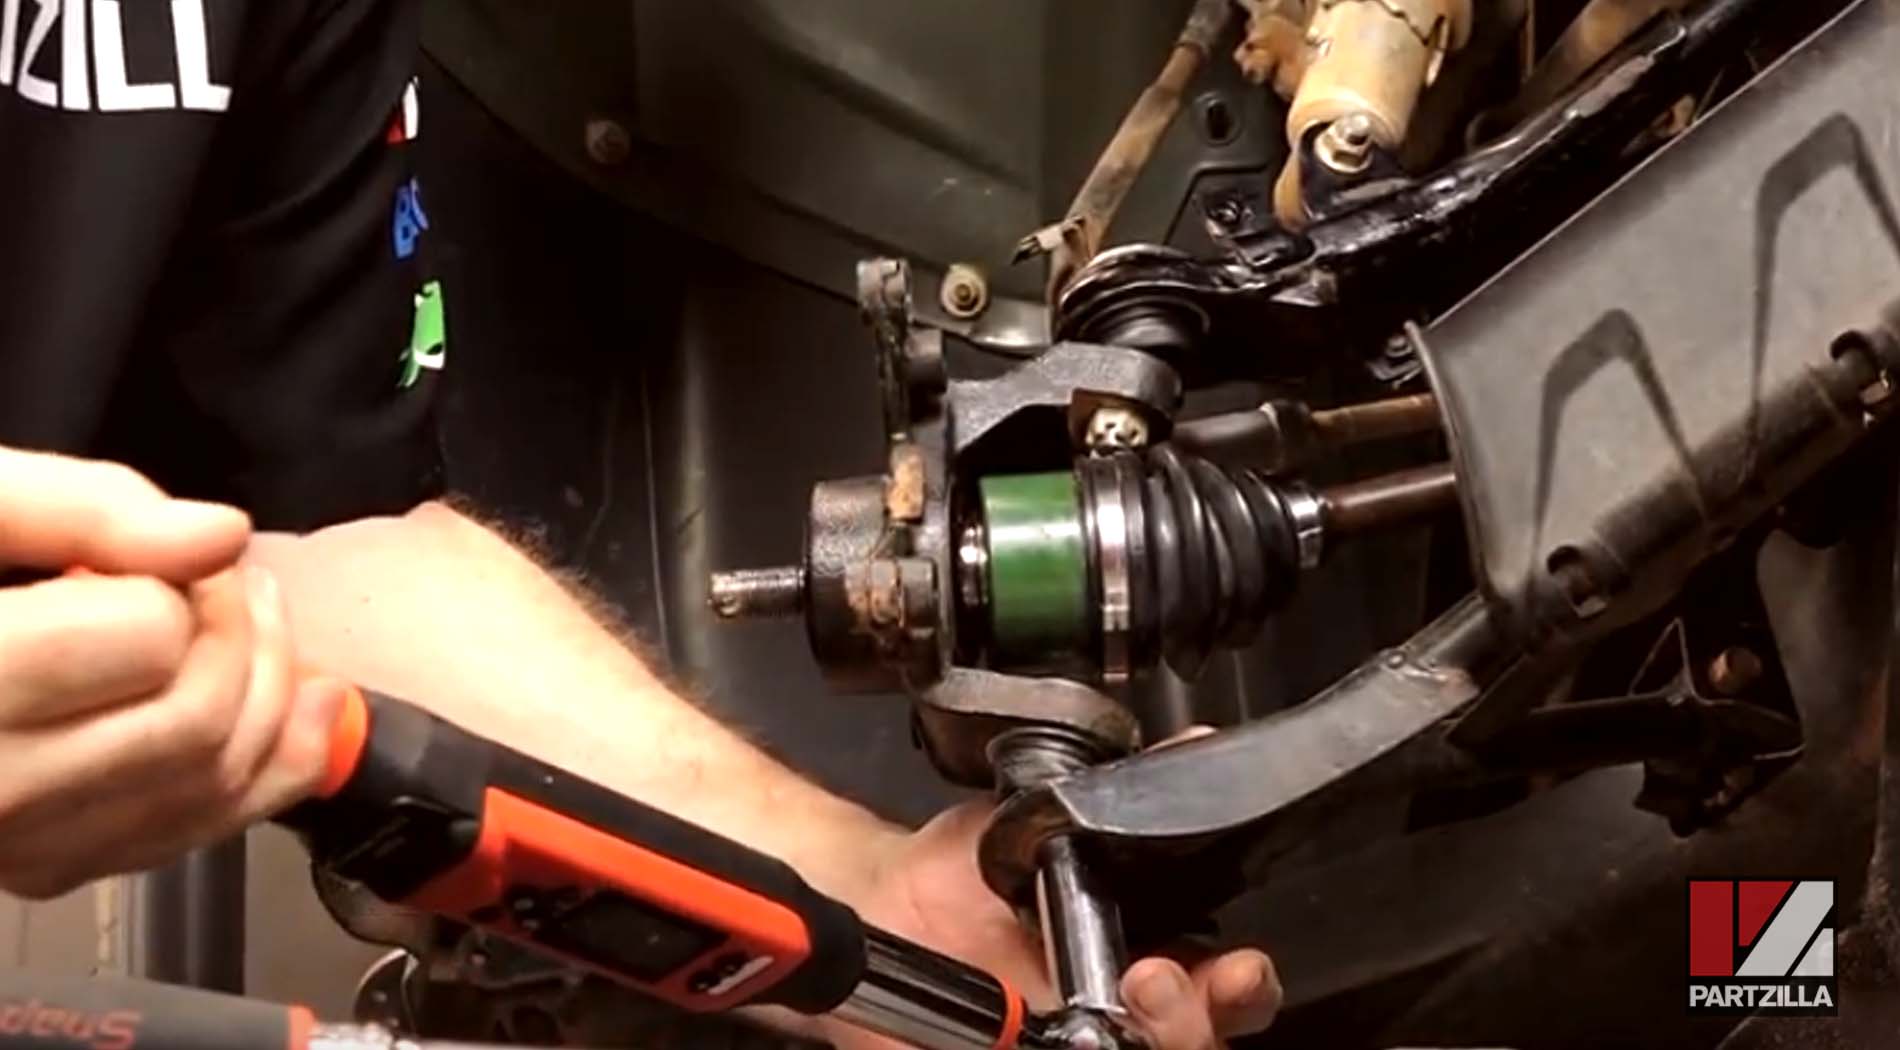
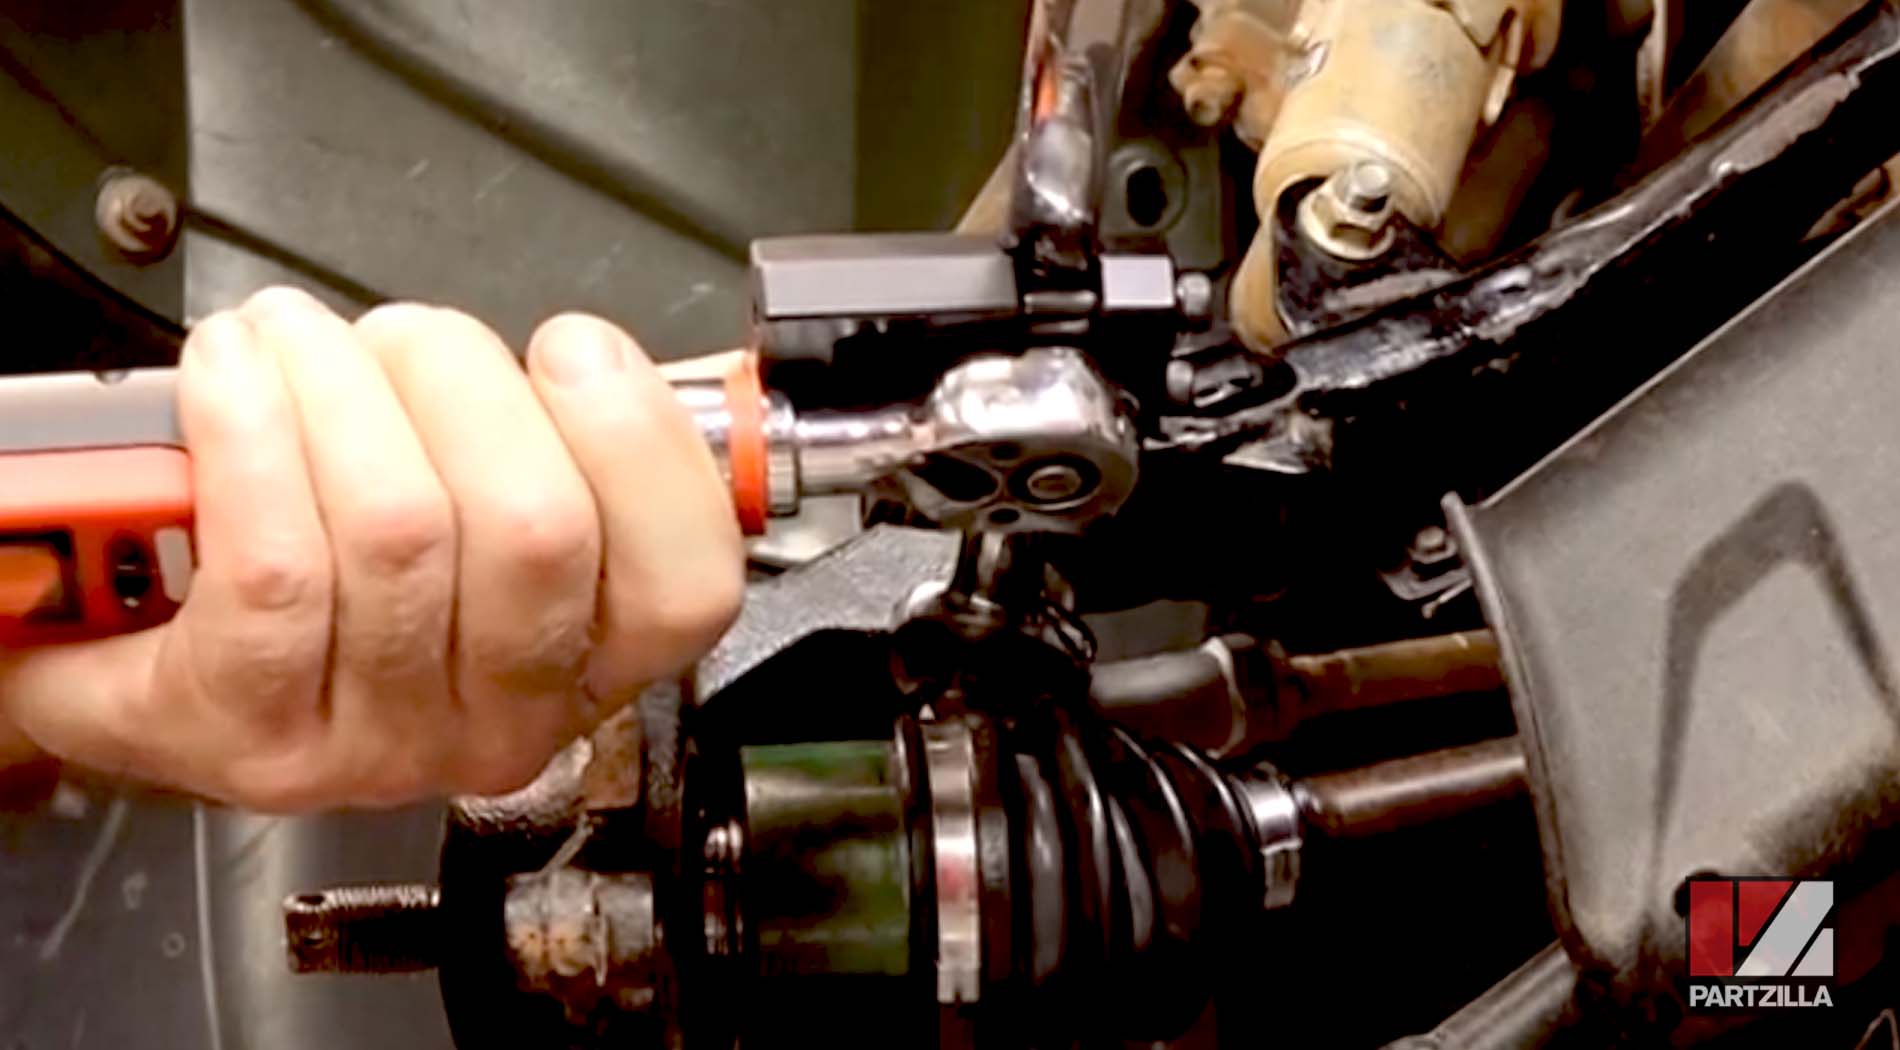
NOTE: For the upper ball joint castle nut, our torque wrench didn’t fit in between the nut and the CV boot, so we used an adjustable torque wrench adapter that allows you to use a box-end wrench to reach in there and tighten the nut to the correct spec.
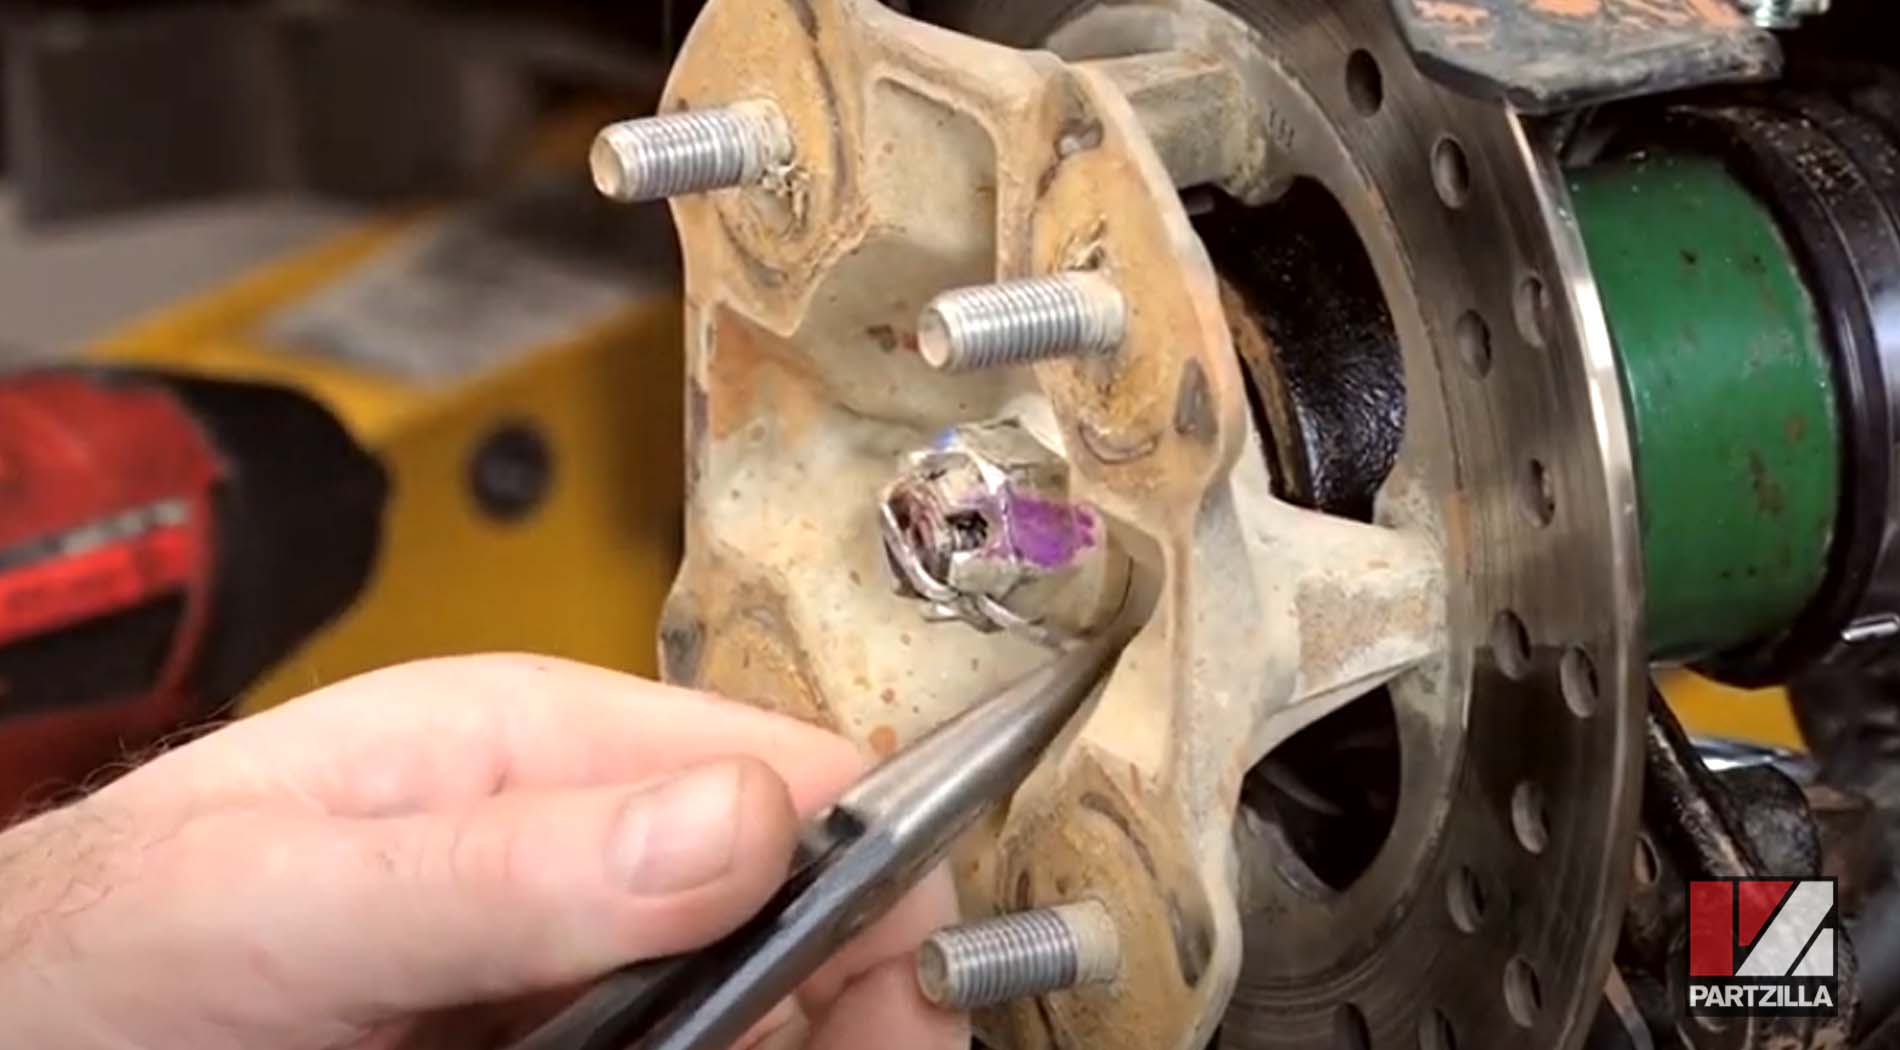
Step 14. Install the cotter pins in the upper and lower ball joint castle nuts, then bend the tips of the pins with a screwdriver and hammer to keep them from backing out.
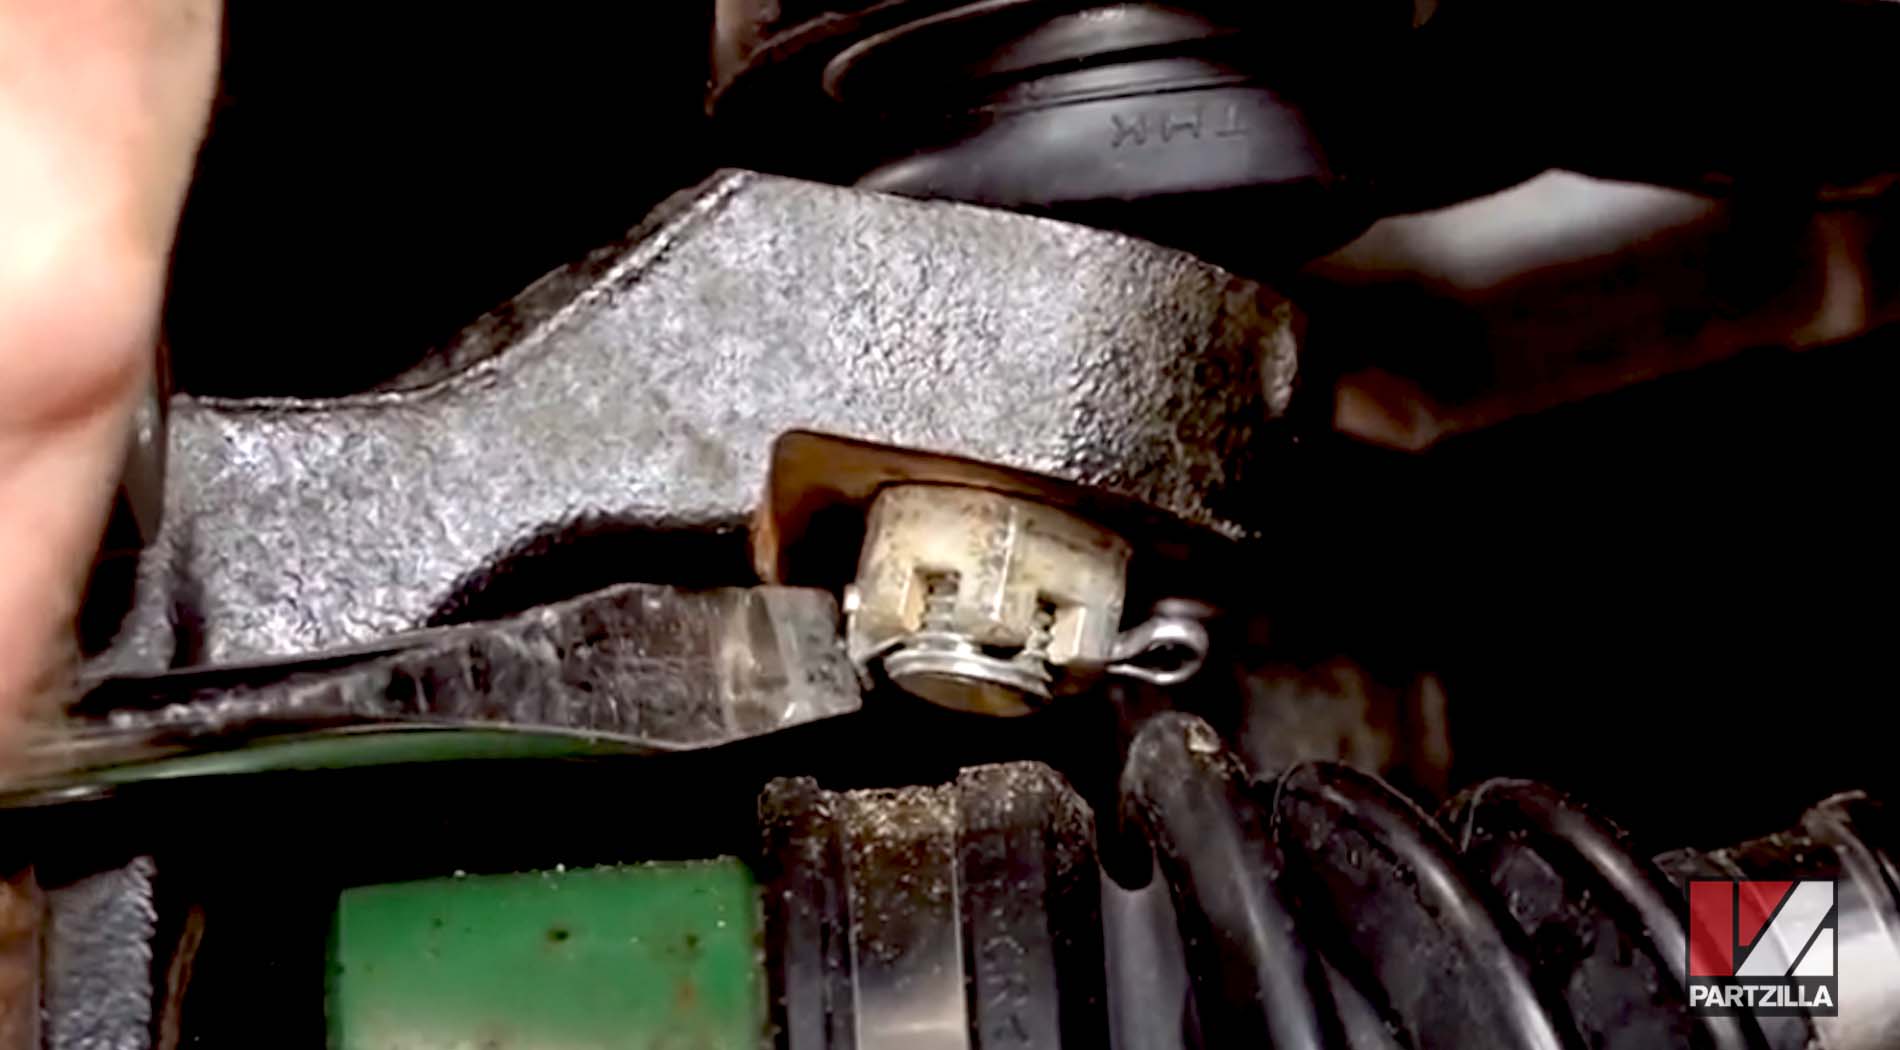
PRO TIP: If the holes for the cotter pins on the bolt don’t line up with the nut, add a little more torque to them.
Step 15. Tighten the nut on the tie rod end to 40 foot-pounds, and get its cotter pin into place.

Step 16. Replace the splash guard that goes behind where the brake disc will be. It’s held in place by three 5mm Allen bolts.
Step 17. Get the hub into place by first adding some grease to the center of the hub and the splines on the drive shaft, then pushing the hub into place.

Step 18. Tighten the castle nut holding the hub in place. To keep the hub from spinning, thread back on a couple of the lug nuts to protect the threads on the studs, then use a prybar leveraged against the ground. Torque it to 58 foot-pounds.

Step 19. Replace the cotter pin on the hub castle nut.
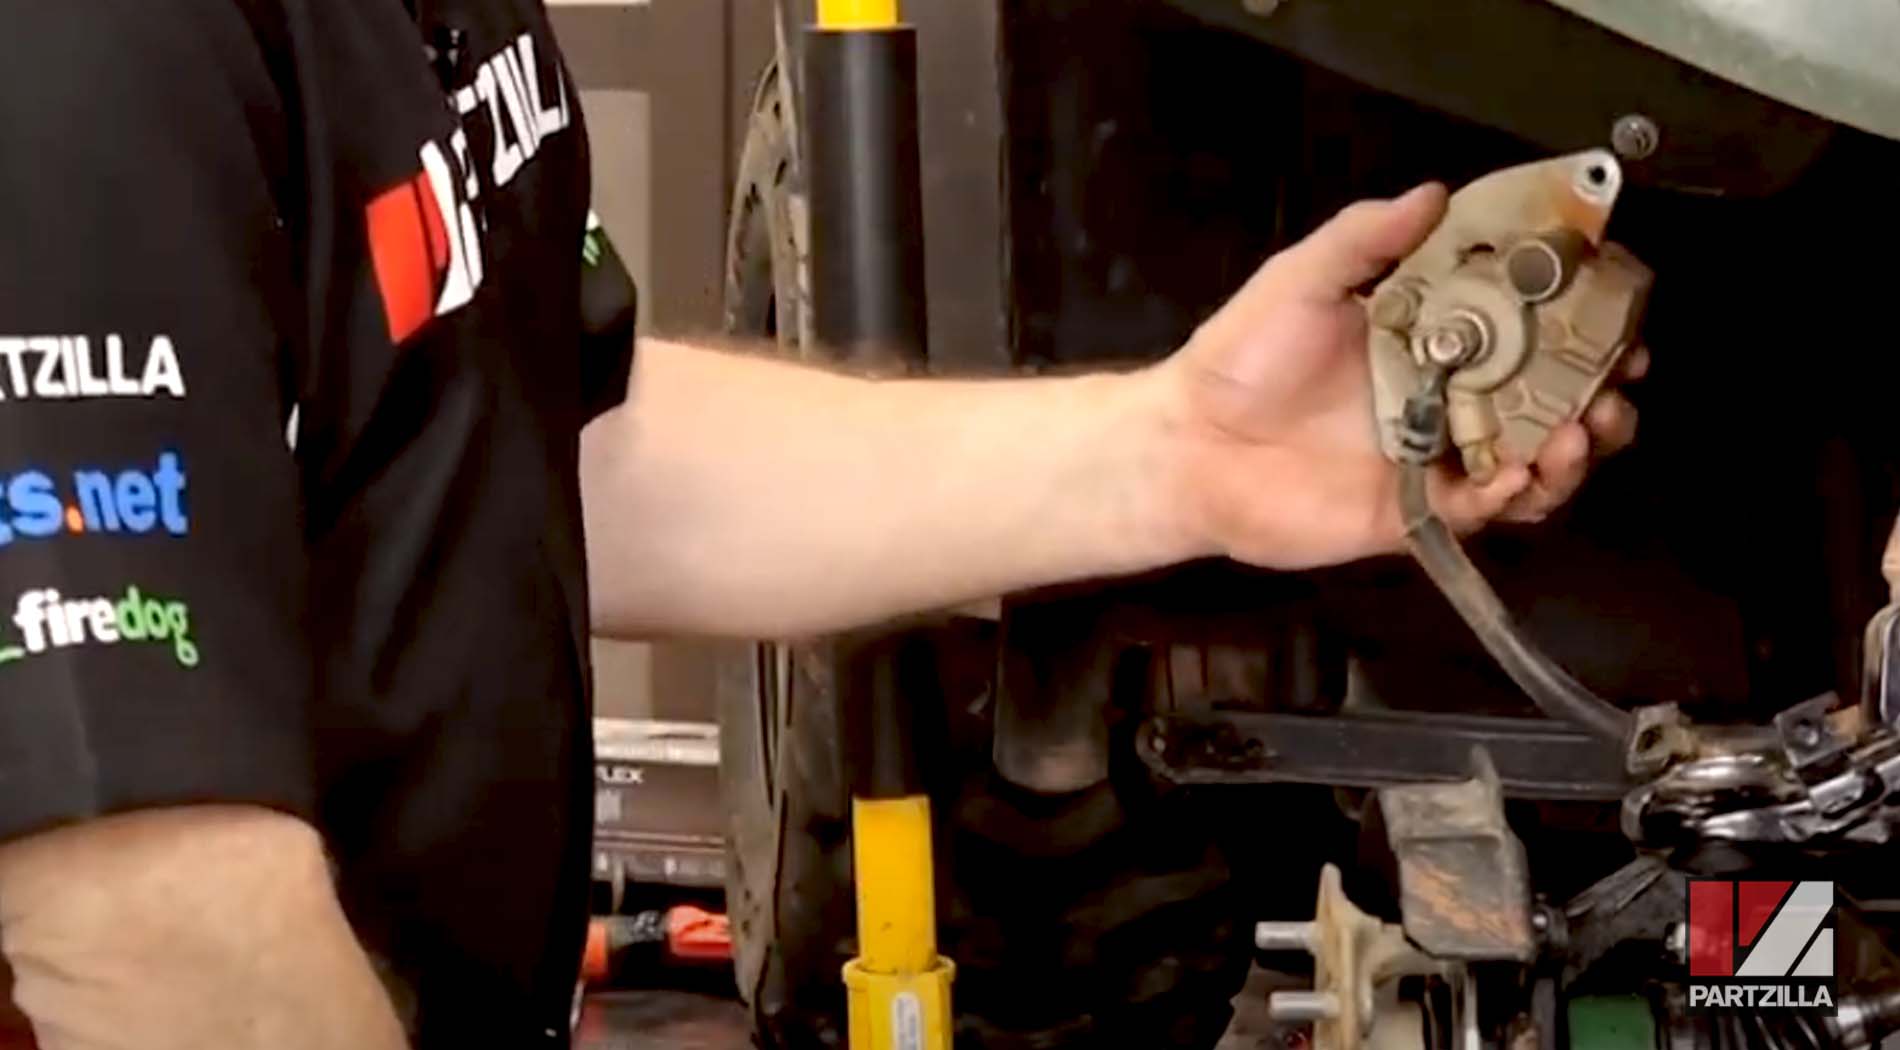
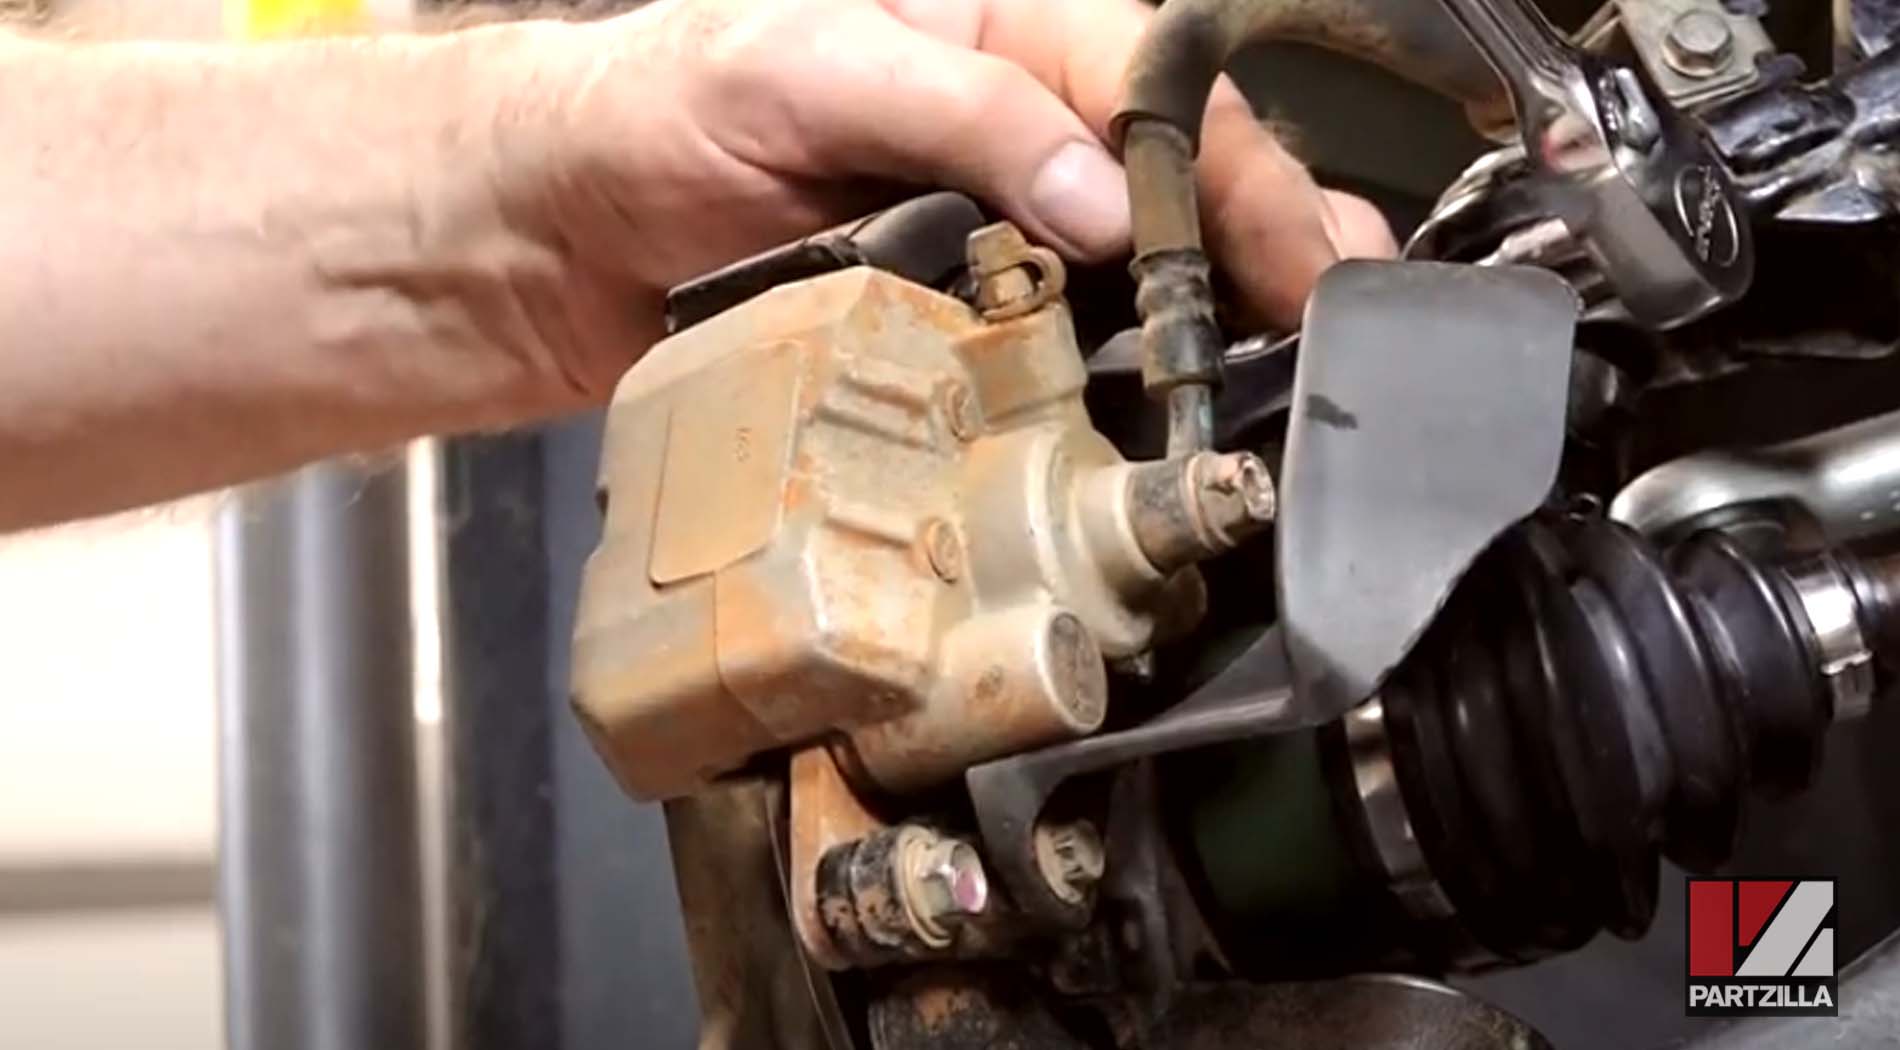
Step 20. Cut the brake caliper loose from its zip tie and bolt it back into place with its two 12mm bolts, then torque them to 22 foot-pounds.
Step 21. Bolt the brake hose clamp back into position on the upper arm.
Step 22. Replace the guard behind the caliper, and add a little blue threadlocker to the two 10mm bolts to keep them in place.
Step 23. Replace the wheel, then thread the lugs into place and tighten them. Next, lower the unit to the ground, add 47-foot-pounds of torque and you’re done.