Honda Goldwing Fork Seals Replacement Part 1
To preserve the legendary smooth ride of your GL 1800 Honda motorcycle, you need to change the fork seals and the fork oil every couple of years.
The process to replace the fork seals on a Honda Goldwing GL 1800 is a lengthy one, so we broke it up into two parts. This part covers the removal, disassembly and reassembly of the left fork. Part 2 covers the same for the right fork, plus the reinstallation of both forks.
Follow the steps below and watch our Honda GL1800 Goldwing fork seal replacement video above to get the job done.
Tools and Parts Needed – Honda Goldwing GL1800 Fork Seals Replacement
Tools
- Ratchet and extensions
- 8mm - 22mm socket set
- Metric Allen set
- 6mm extended Allen
- T-40 Torx
- 8mm - 17mm wrench set
- Screwdrivers
- Pliers
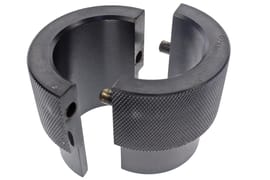
- 45mm seal driver
- Torque wrench
Parts
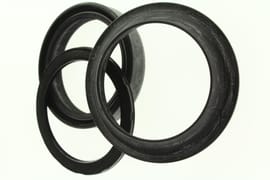
- Left fork seal set
- Right fork seal set
- Fork oil
- Electrical tape
- Blue threadlocker
NOTE: The GL1800’s left and right forks differ slightly, so the disassembly and reassembly process will be different for each.
PRO TIP: To keep track of everything, store the various bolts, screws and fasteners with their corresponding parts as you disassemble everything.
Removing the Forks
Step 1. Support the motorcycle with a lift jack and tie down all four corners to prevent it from falling.
Step 2. Remove the forward half of the front fender and the side fender panels.
Step 3: Remove the right-side brake caliper by taking off the two 12mm caliper mounting bolts.
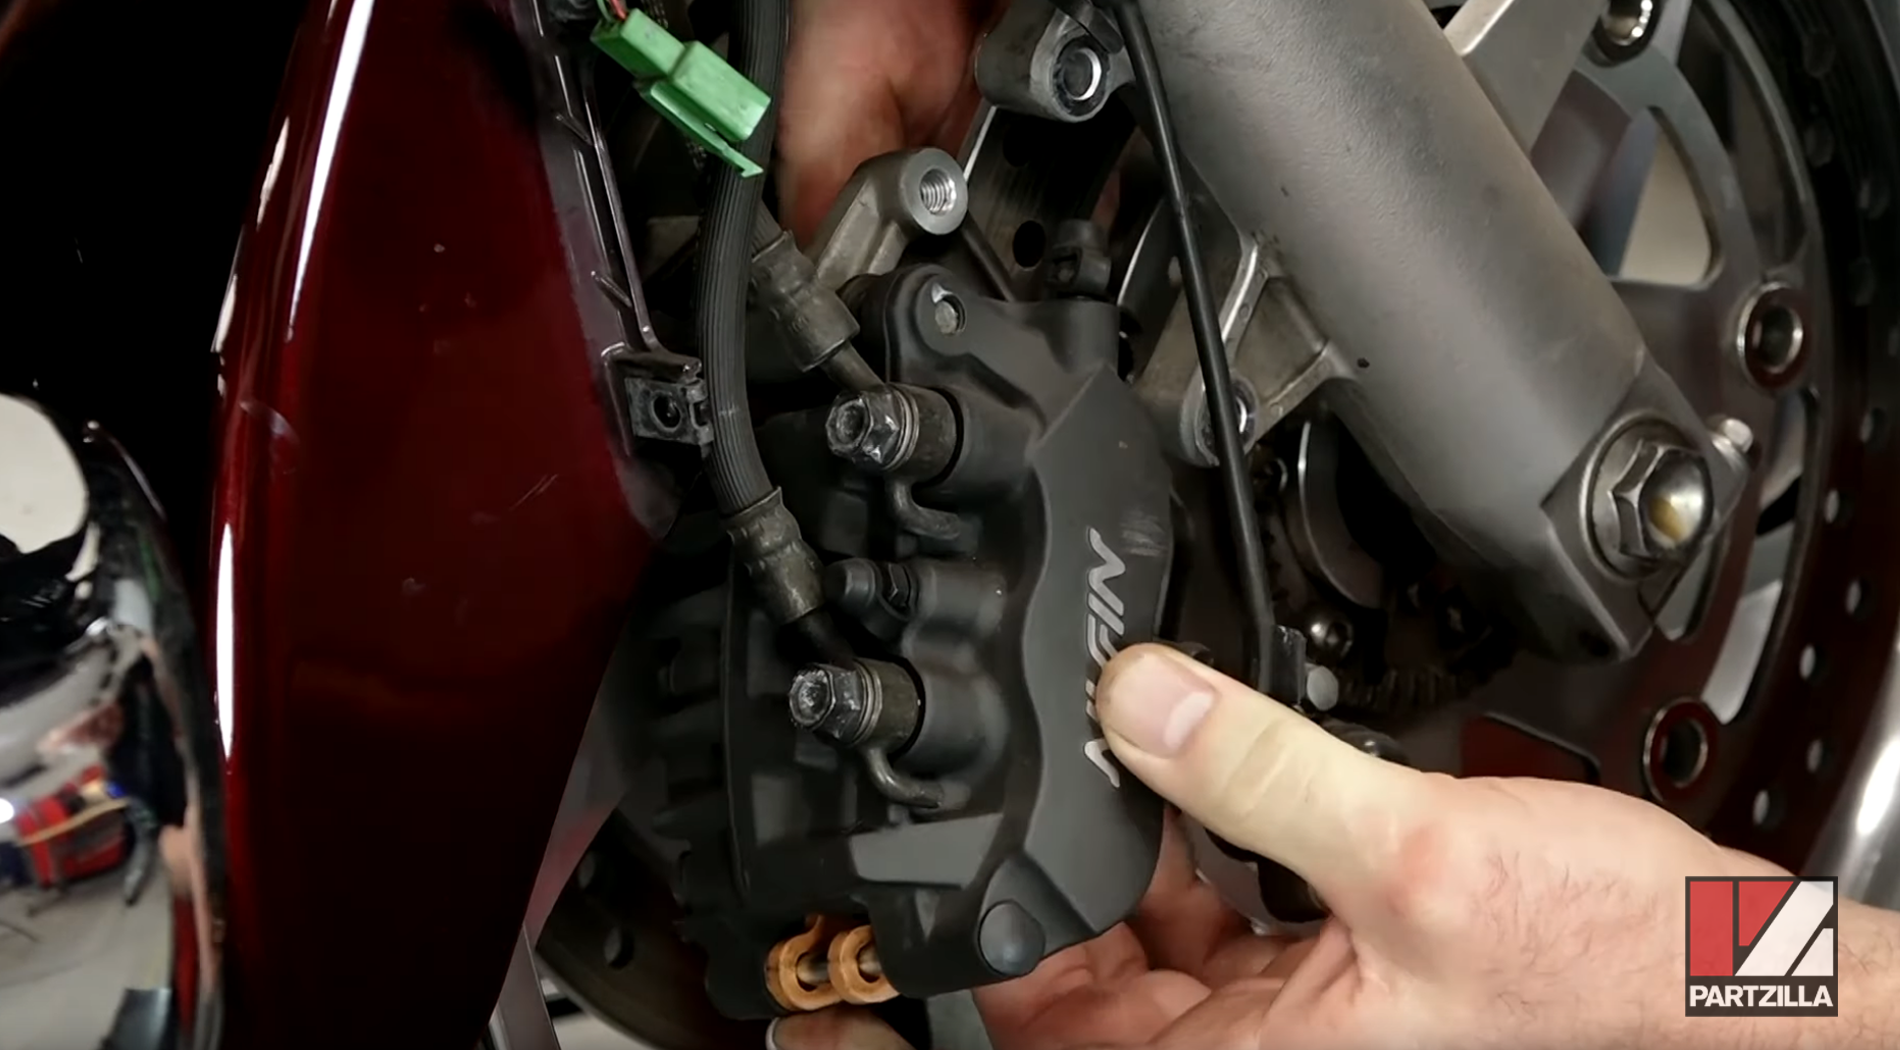
Step 4: Remove the left-side brake caliper by taking off the plastic cover and 5mm Allen brake pad pin beneath it. Drop the brake pads down and out of the caliper, then remove the 6mm Allen bolt from the caliper mounting bracket and the T40 Torx bolt at the top of the caliper.
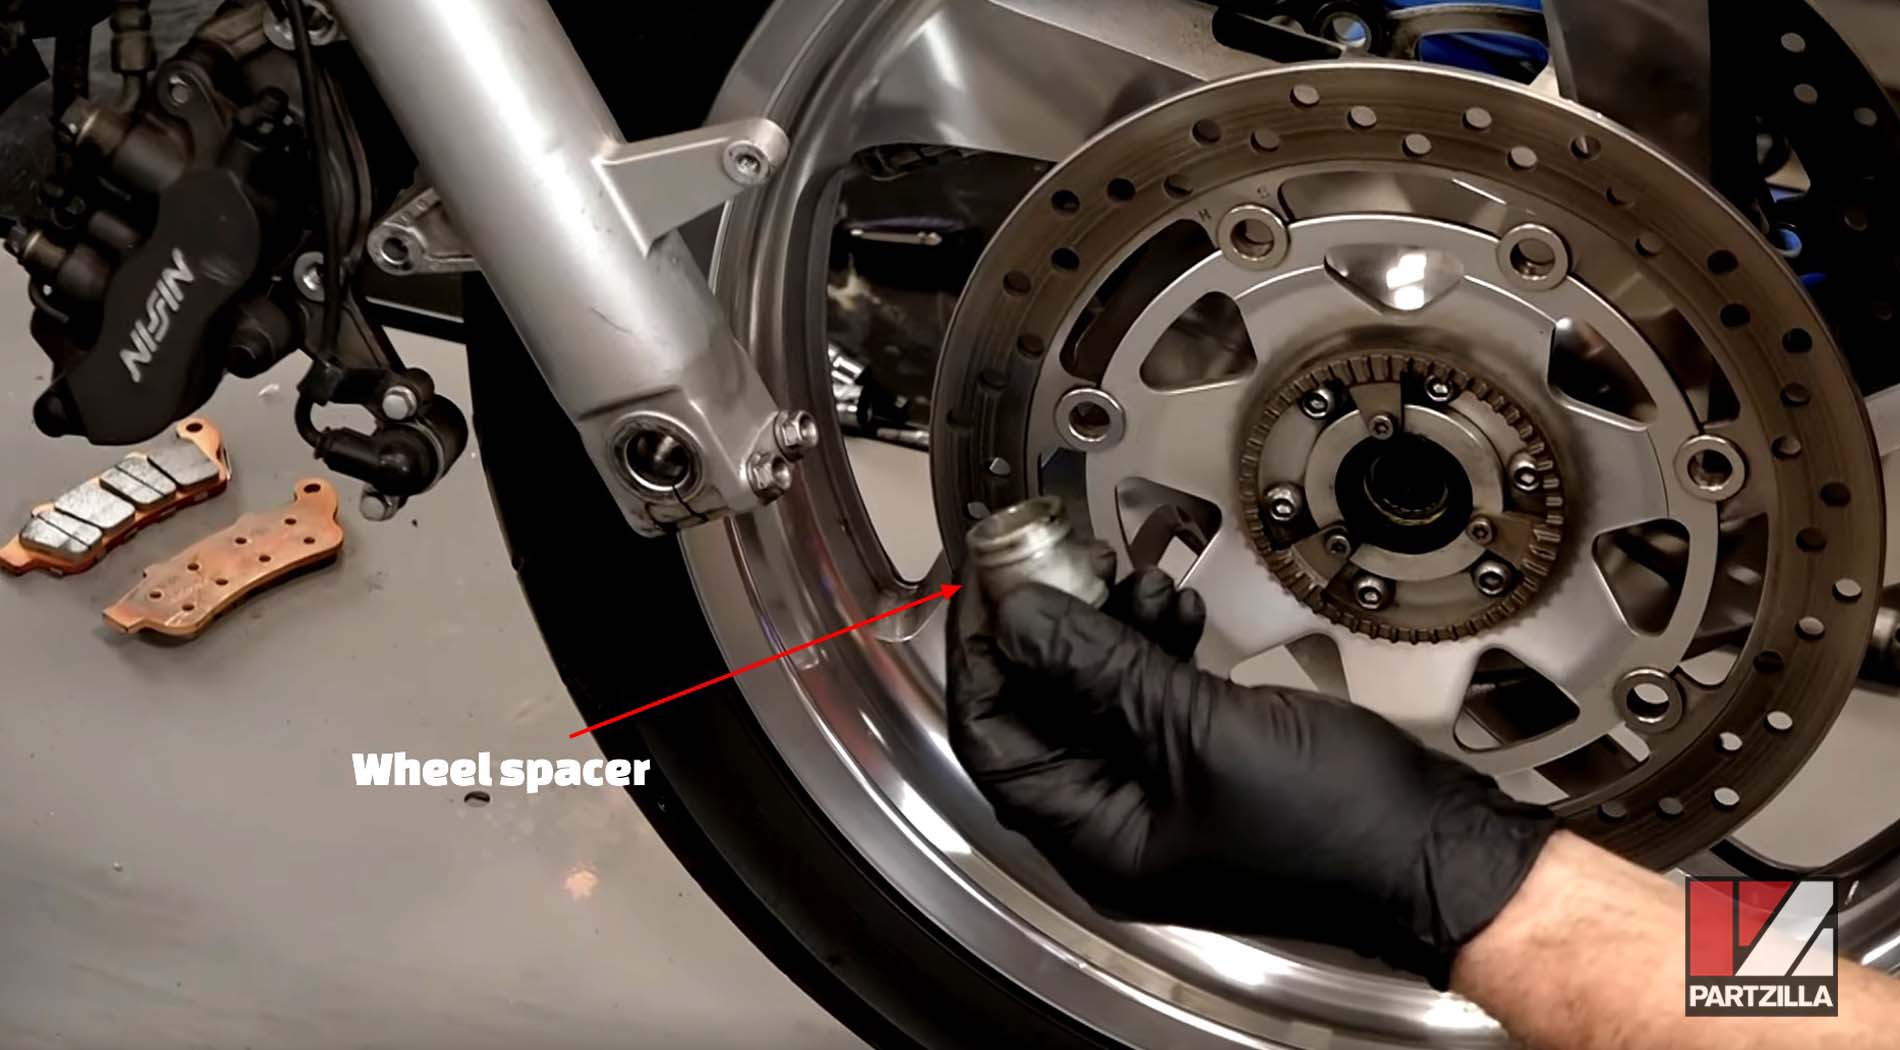
Step 5. Remove the 22mm axle nut, loosen the 12mm axle pinch bolts on both forks, and support the front wheel. Next, remove the axle and the front wheel. Remove the spacers/collars from each side of the wheel and note which spacer goes on which side of the wheel.
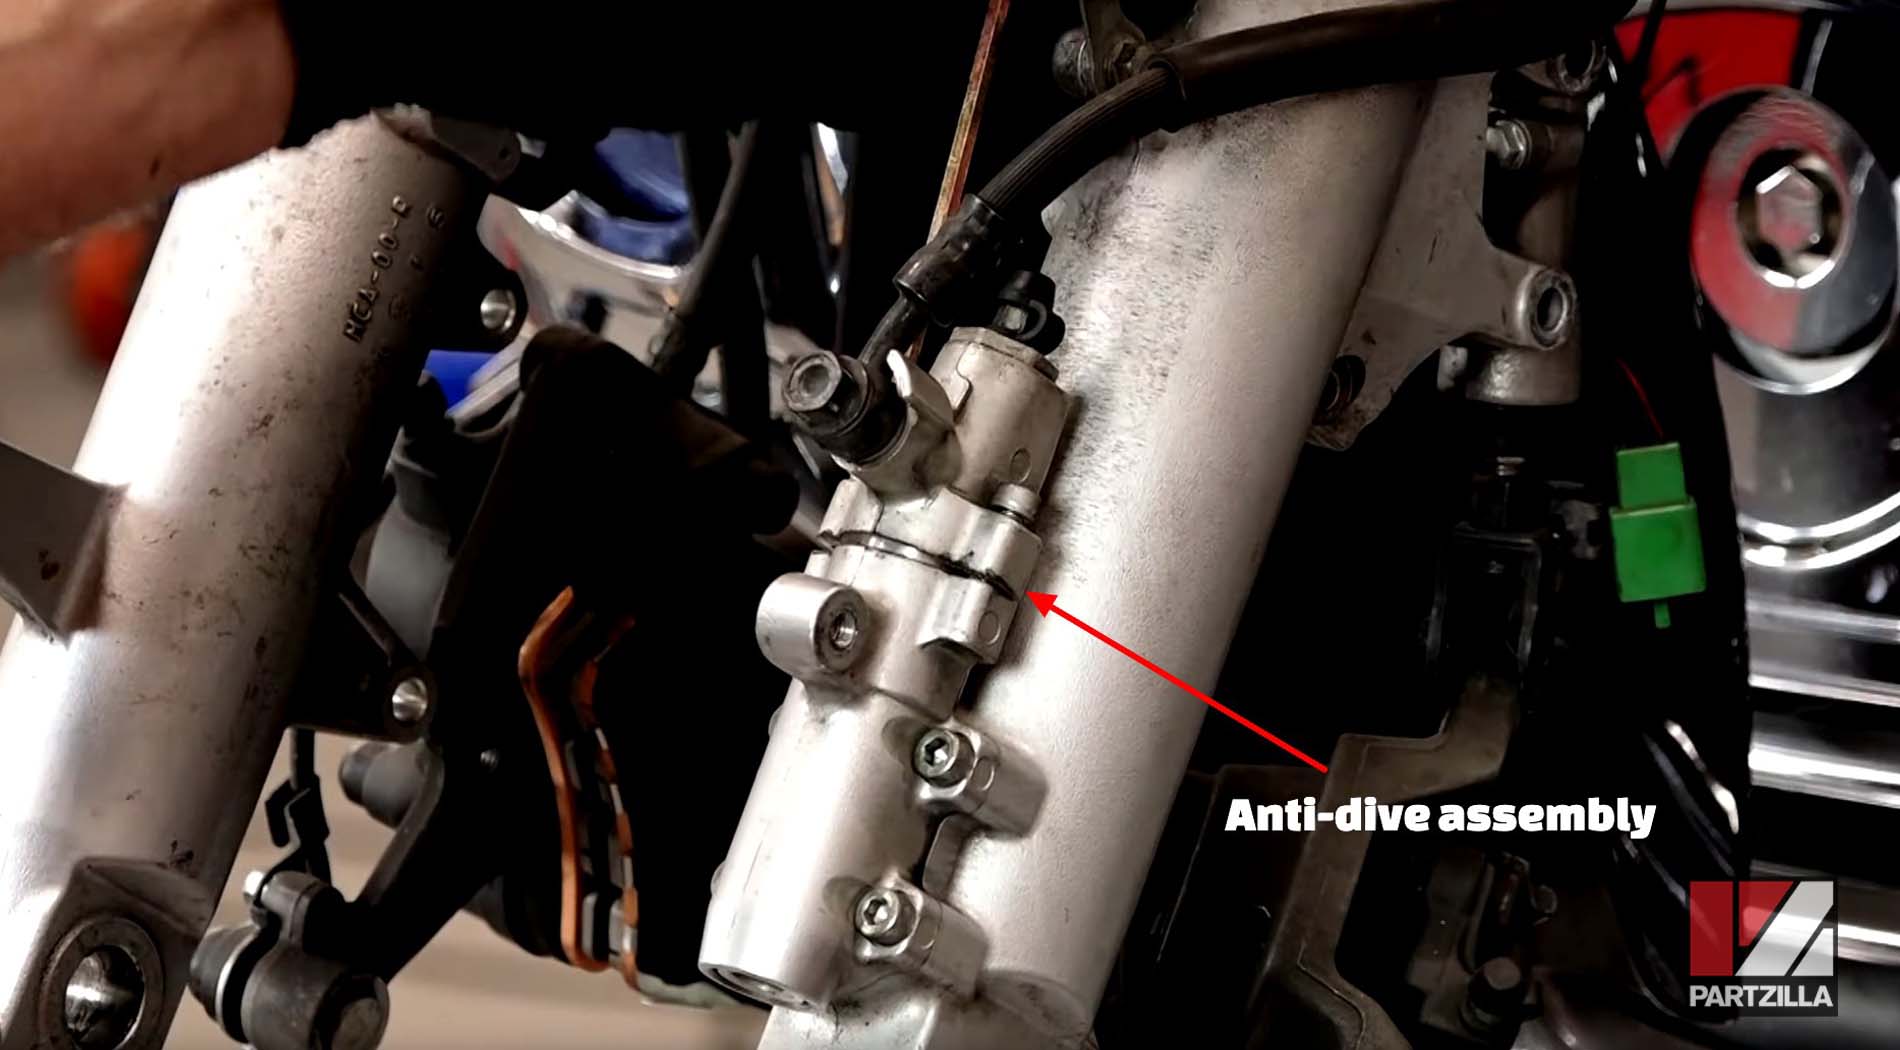
Step 6: Remove the two 4mm Allen bolts from the top of the anti-dive assembly on the left fork, disconnect the top of the assembly, and then remove the rearward half of the front fender and the mounting brackets from the forks.
Step 7: Remove the meter panel by carefully pulling it upward until it’s loose, reaching behind the speaker covers and disconnecting the speaker cables, then removing the panel.
Step 8: Remove the four 8mm bolts holding the meter assembly (dials and display screen), then slightly lift the assembly and reach beneath it to disconnect the three wiring connectors. Next, remove the meter assembly.
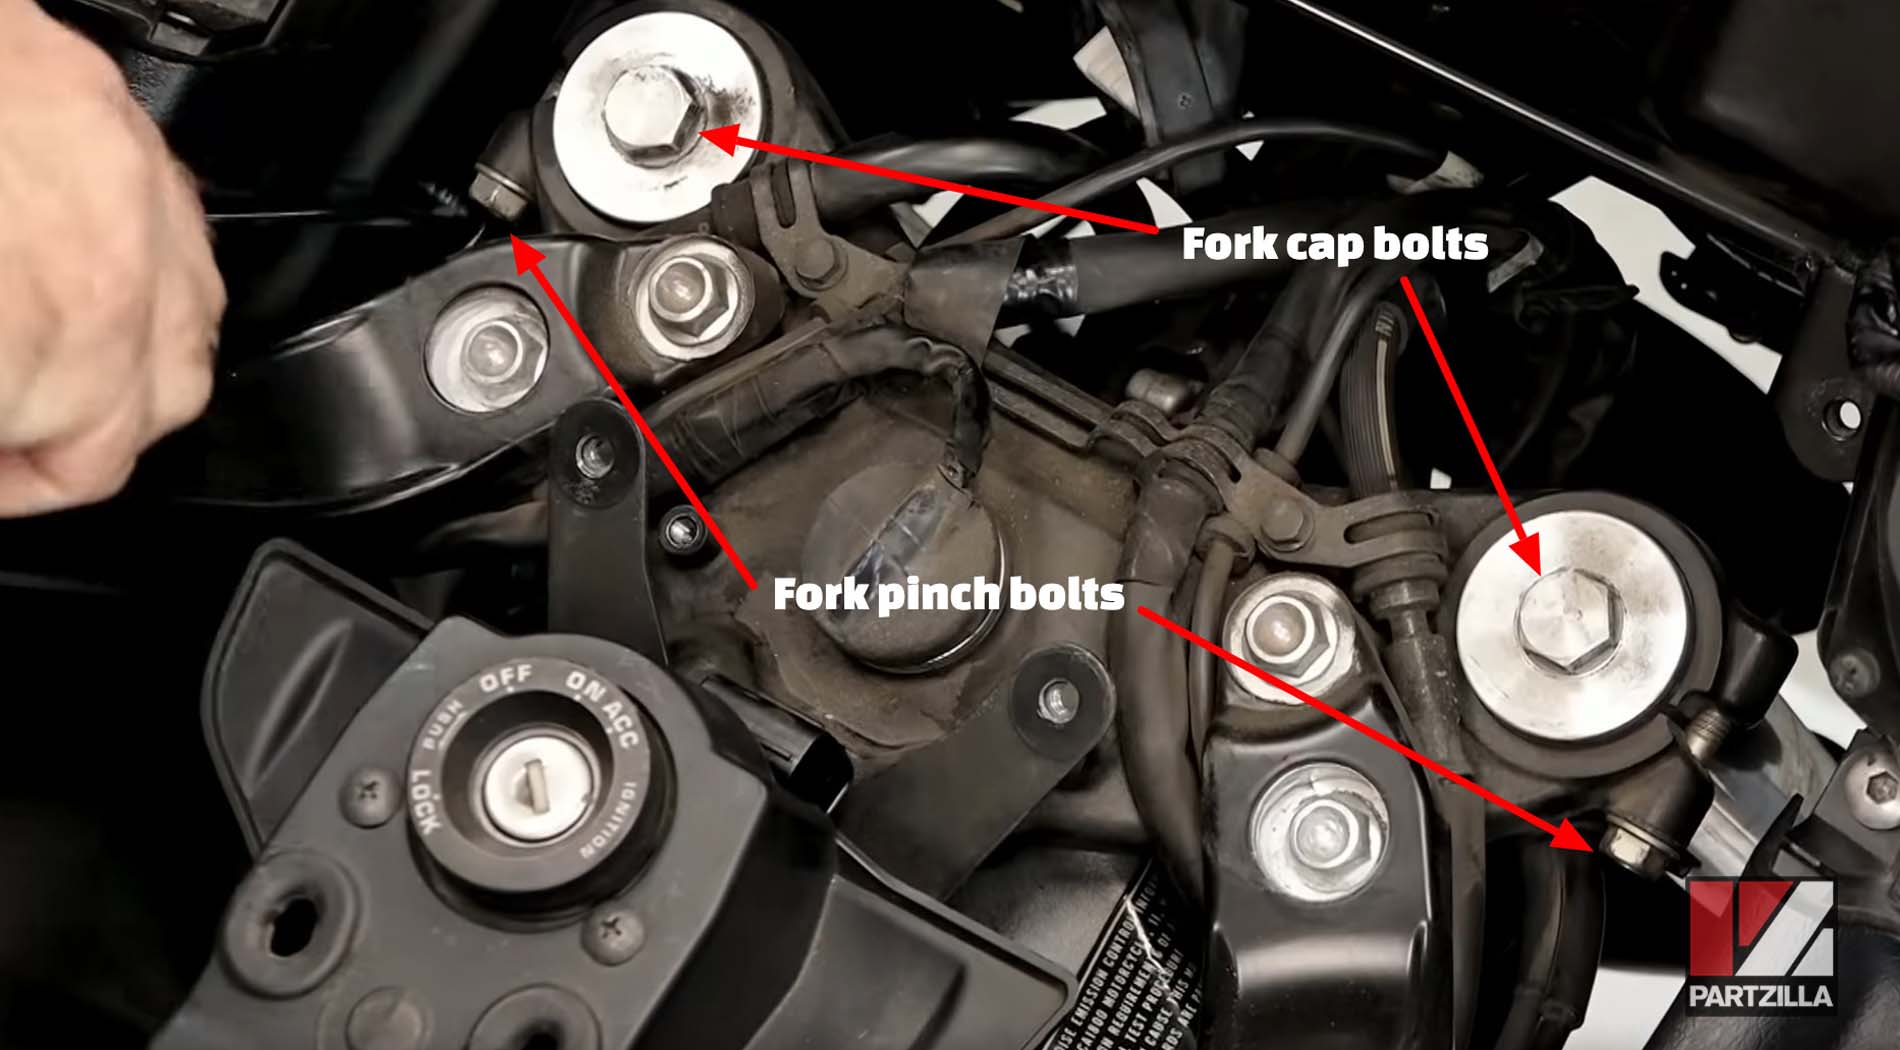
Step 9: Remove the top cover from the handlebar top bridge, then loosen the two 17mm fork cap bolts, the two fork pinch bolts from the top bridge and the four fork pinch bolts from the steering stem. Slide the forks out from the top bridge and steering stem.
Watch the clip below to see the component removal segment of our Honda GL1800 fork seal video.
NOTE: The left and right forks differ slightly, so the disassembly and reassembly process will be different for each.
Disassembling the Left Fork
Step 10. Remove the 17mm fork cap bolt, the spring collar, the spring seat washer and the spring from the fork assembly. Drain the old fork oil from the fork assembly.
Step 11. Remove the 6mm Allen bolt and washer from the bottom of the fork. Have a container ready to catch the remaining fork oil that drains out once the bolt is removed.

Step 12. Remove the dust seal from the top of the fork case and pry out the oil seal stopper ring from the top of the fork case, being careful not to scratch the fork tube. Pull the fork tube out from the fork case.
Step 13. Thoroughly clean the spring, spring collar, fork tube and fork case. Inspect the bushing guide and bushing slider for wear and replace them if necessary.
Watch the clip below to see the left fork disassembly segment of our Honda GL1800 fork seal video.
Reassembling the Left Fork
Step 14. Lightly lube the fork tube with fork oil, then reinstall the fork tube into the fork case. Apply a drop of blue threadlocker onto the 6mm bolt, then reinstall the bolt and washer into the bottom of the fork and torque it to 15 foot-pounds.
PRO TIP: You may have to temporarily reinstall the spring and spring collar into the fork tube and hold them down so you can tighten the bolt. Remove the spring and collar once the bolt is torqued.
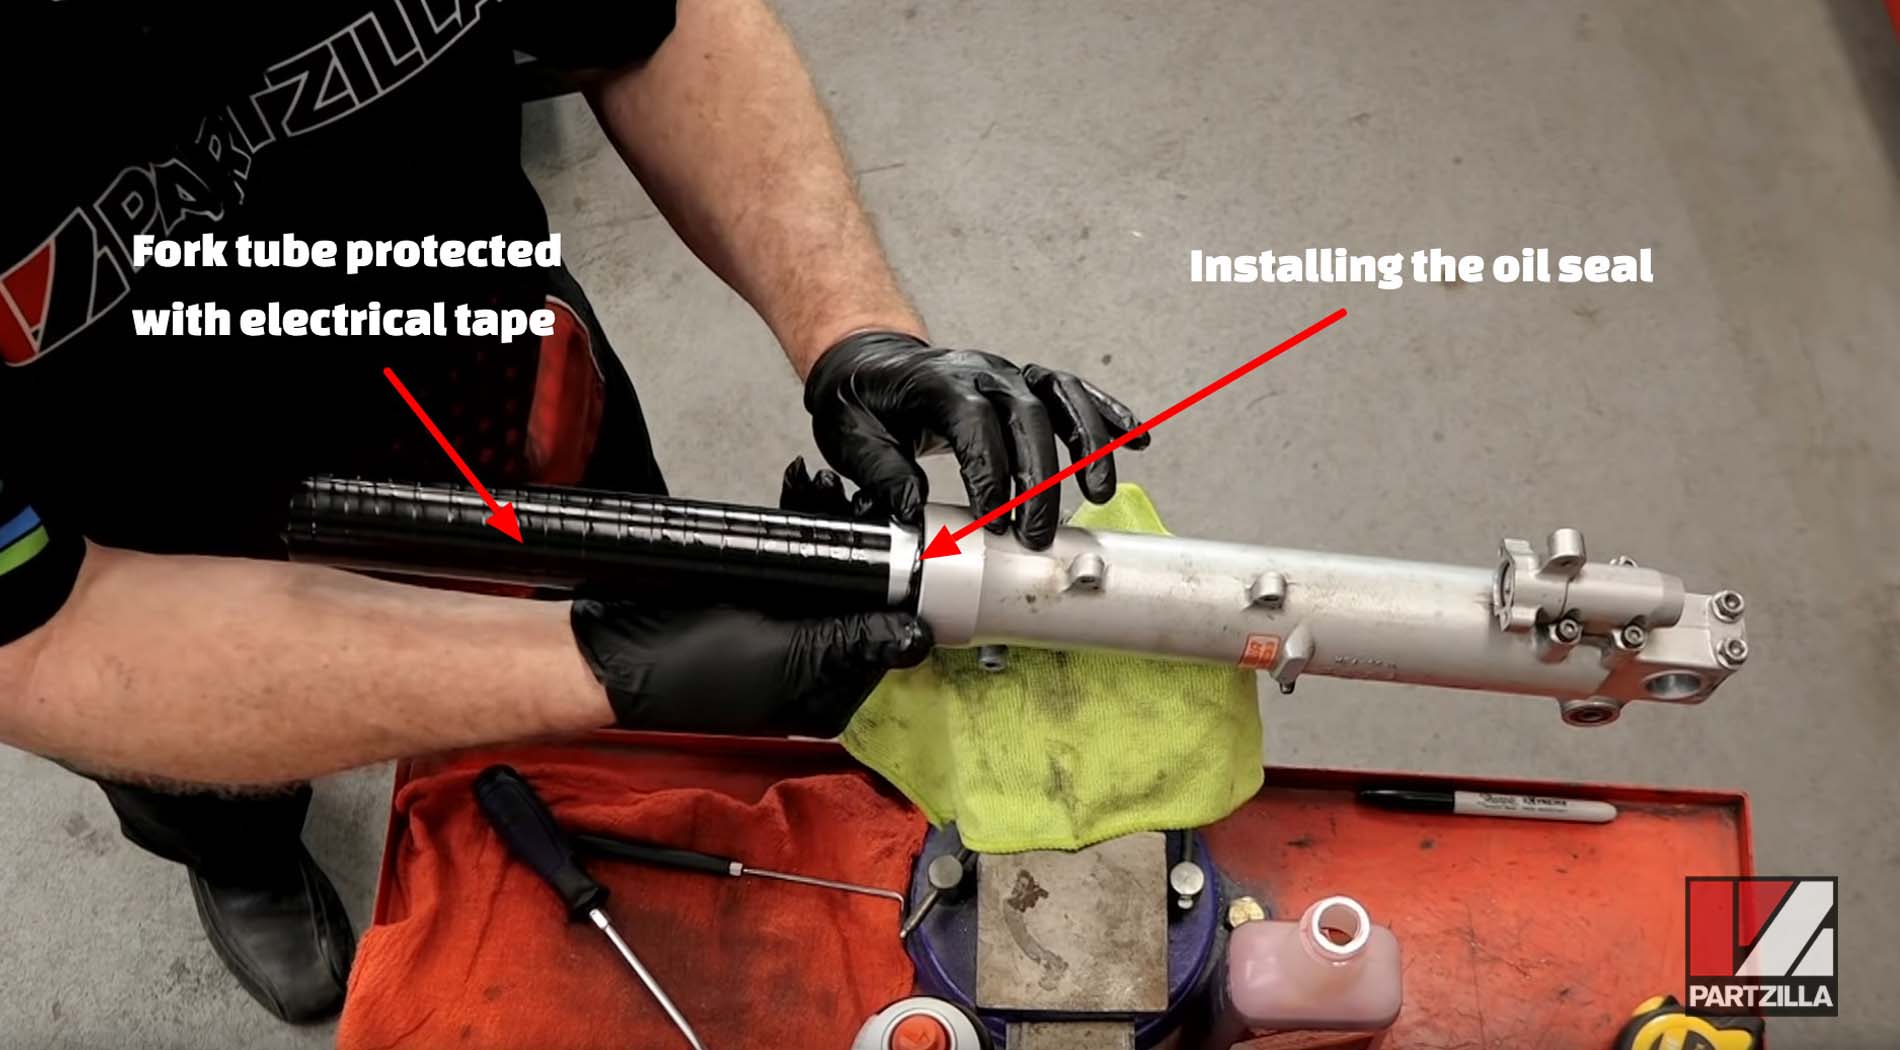
Step 15. Push the fork tube into the fork case, then cover the exposed portion of the tube with electrical tape to protect it. Lightly lube the fork tube and tape with fork oil.
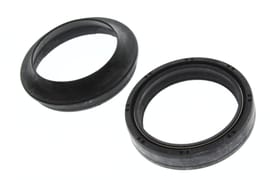
Step 16. Reinstall the bushing guide and the lower metal backup ring, then install the new lower fork seal “packing ring” (included in the left fork seal set) and reinstall the upper metal backup ring over the fork tube. Seat them all in place using a 45mm seal driver.
Step 17. Lightly lube the new main oil seal (included in the left fork seal set) and install it with its cut edge facing upward over the fork tube. Seat it in place using the 45mm seal driver.
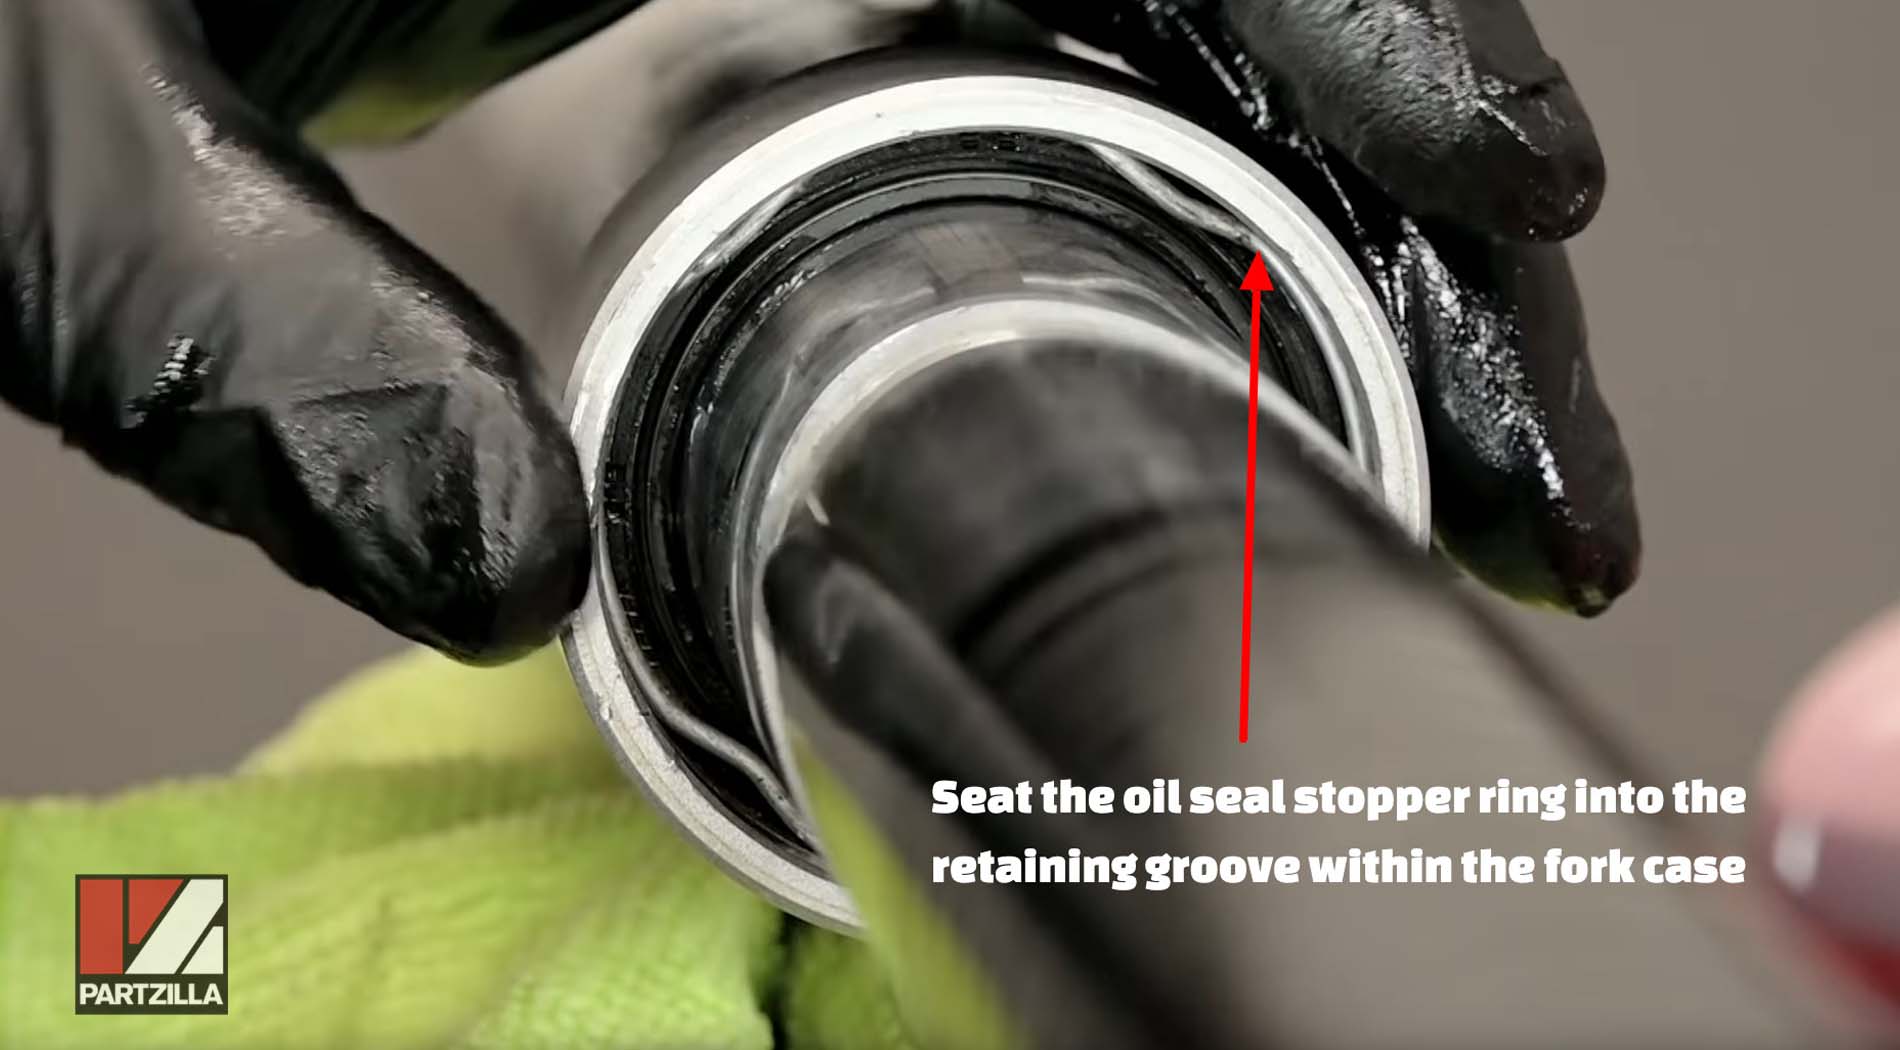
Step 18. Reinstall the oil seal stopper ring into its retaining groove within the top of the fork case, being careful not to scratch the fork tube.
Step 19. Install the new dust seal (included in the left fork seal set) into the top of the fork case and remove the electrical tape from the fork tube.
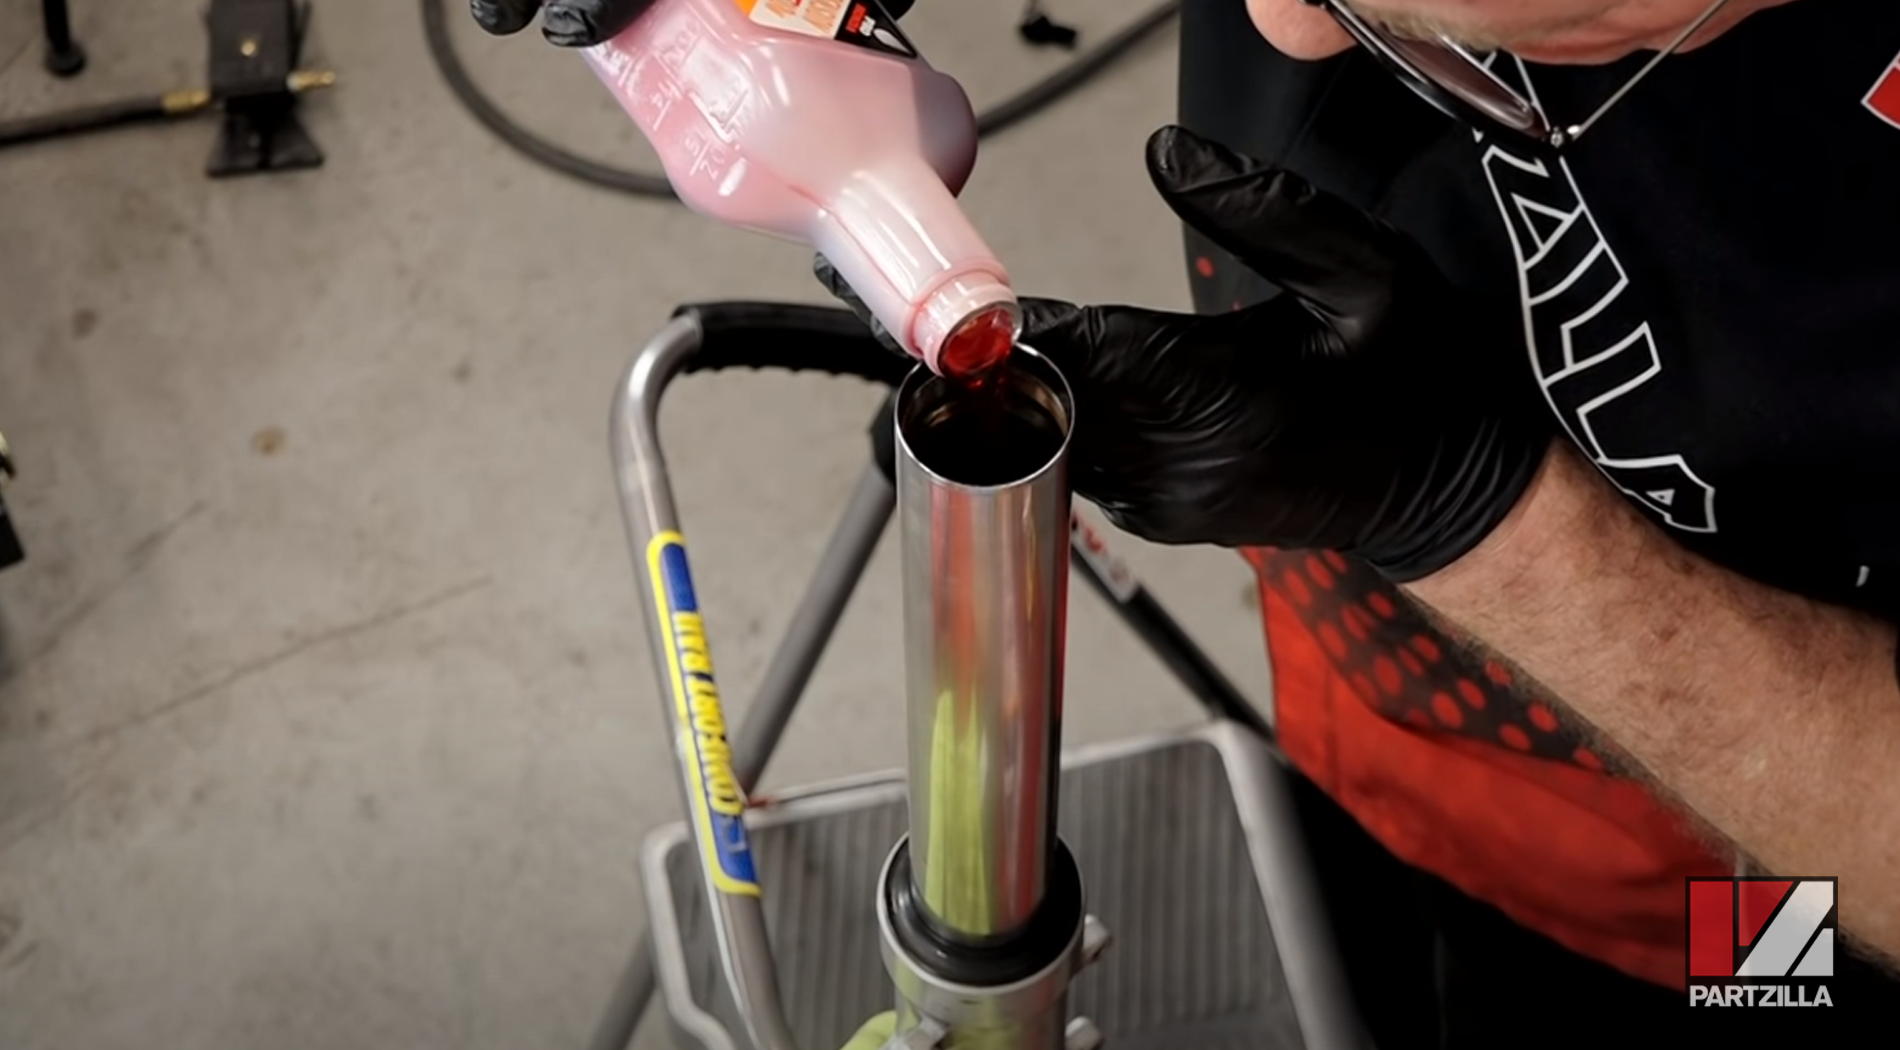
Step 20. Refill the fork assembly with 17.9 fl oz. of fork oil. Pump the fork tube up and down a few times to remove any air from within the fork assembly. The oil level should be 5 inches below the top of the fork tube. Top off the fork oil if necessary.
Step 21. Reinstall the spring (with the tighter-wound end of the spring facing downward), the spring seat washer and the spring collar into the fork tube.
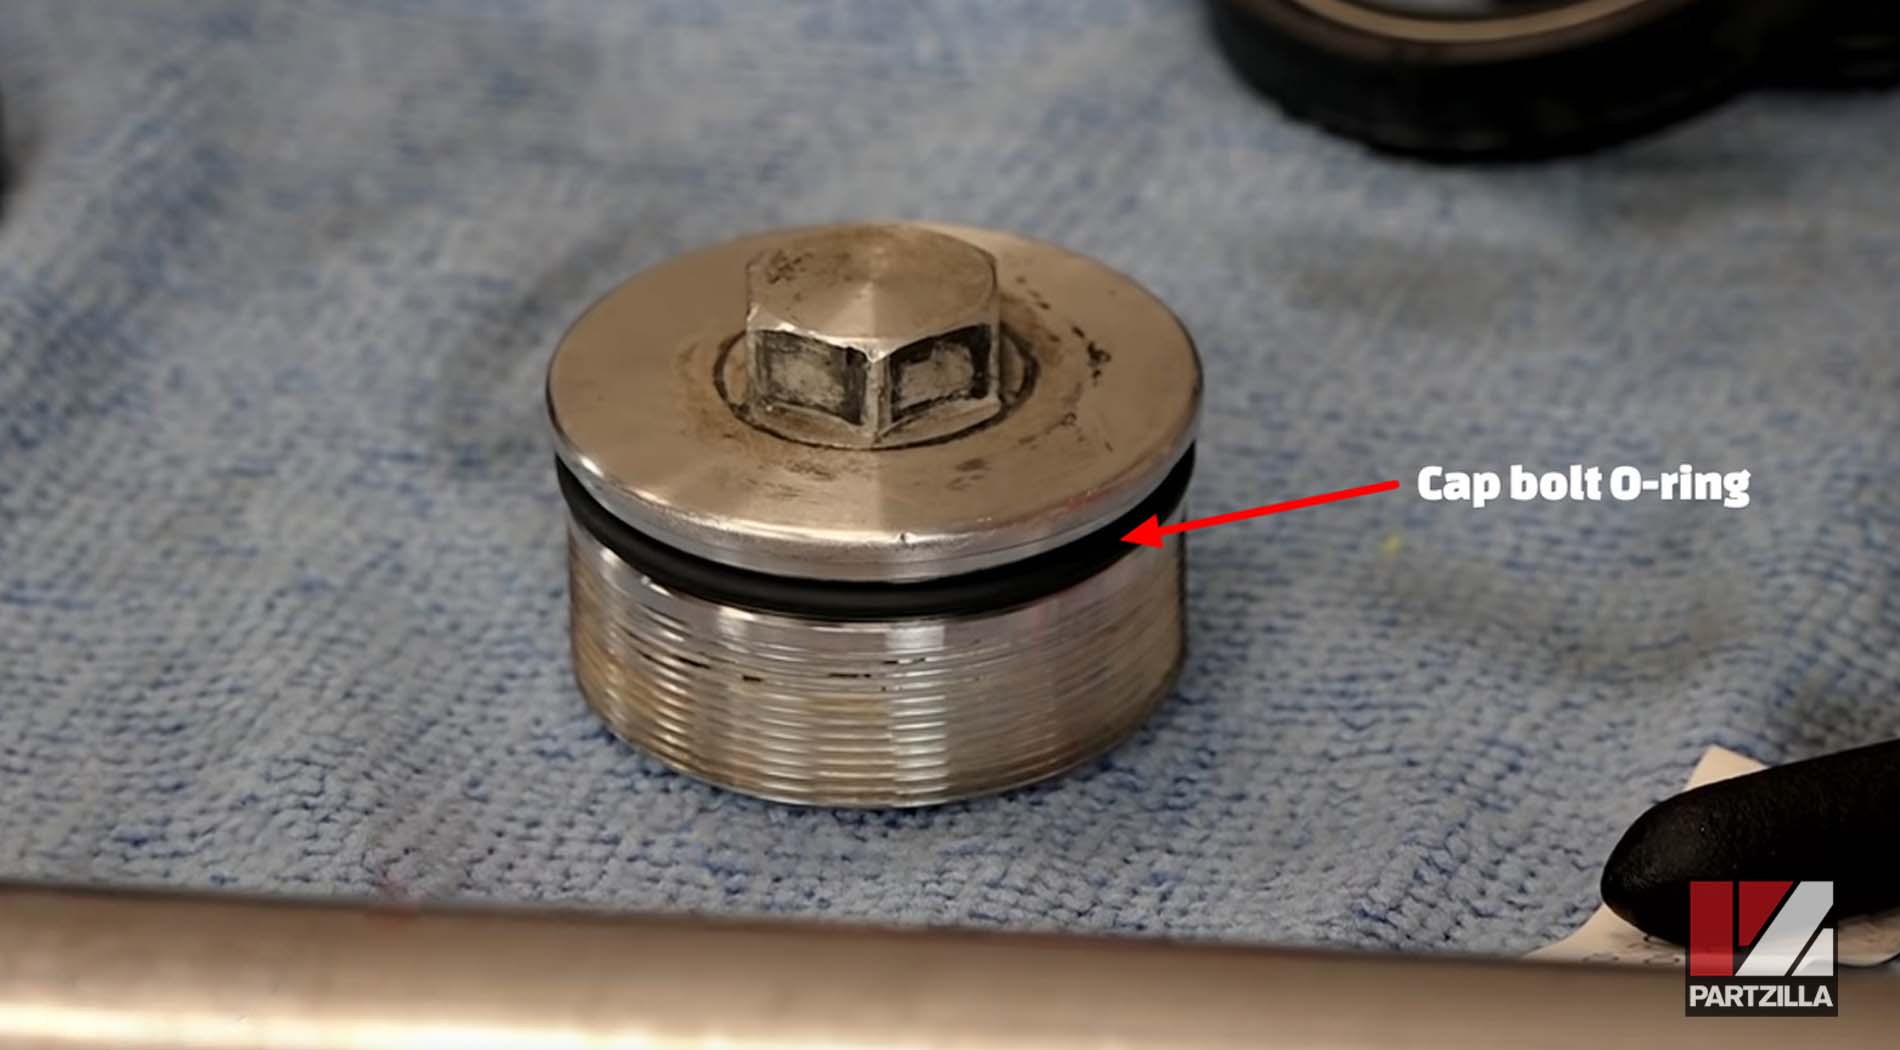
Step 22. Inspect the O-ring on the 17mm fork cap bolt and replace it if necessary. Reinstall the fork cap bolt into the fork tube.
Watch the clip below to see the left fork reassembly segment of our Honda GL1800 fork seal video.
In Part 2 of our Honda Goldwing GL1800 fork seal replacement, we repeat the same process for the right fork and then install both forks.