Honda CRF450R Fork Rebuild
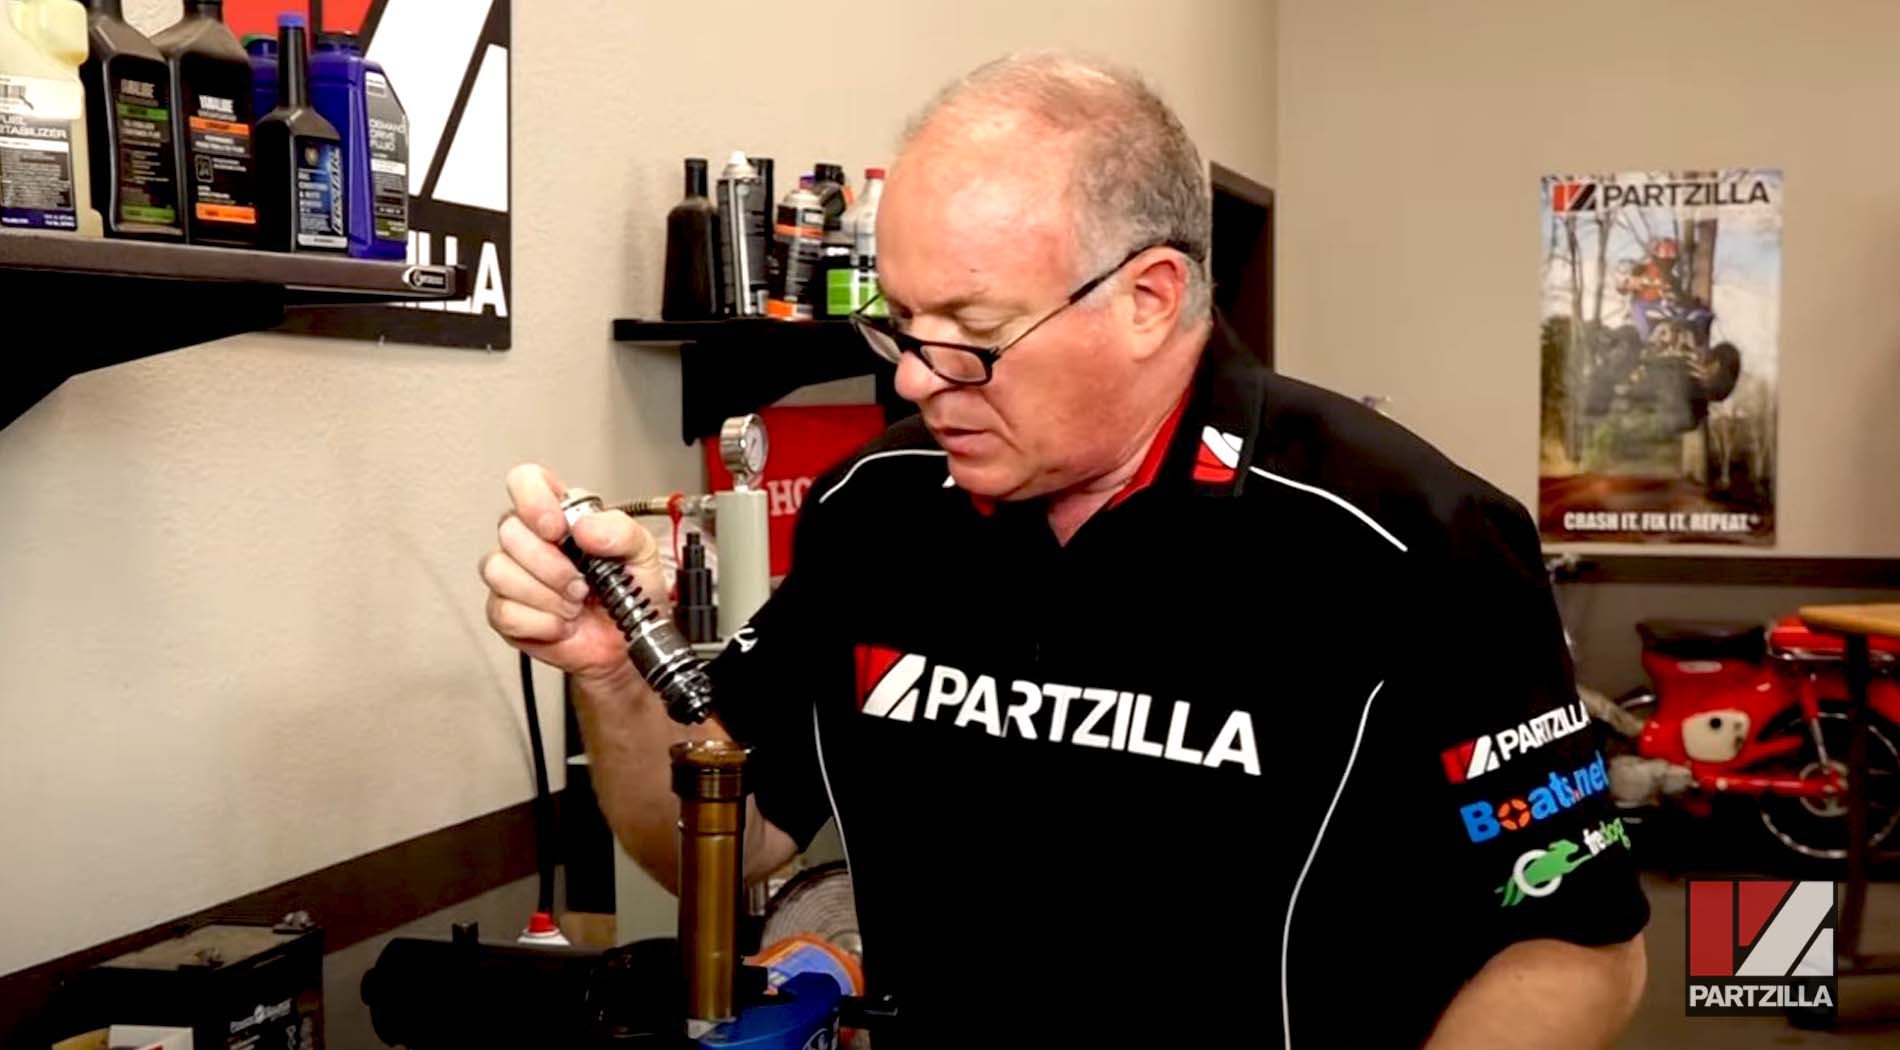
As part of our complete 2005 Honda CRF450R motorcycle rebuild, getting the front forks rebuilt was the next big custom project on the list to refurbish this dirt bike.
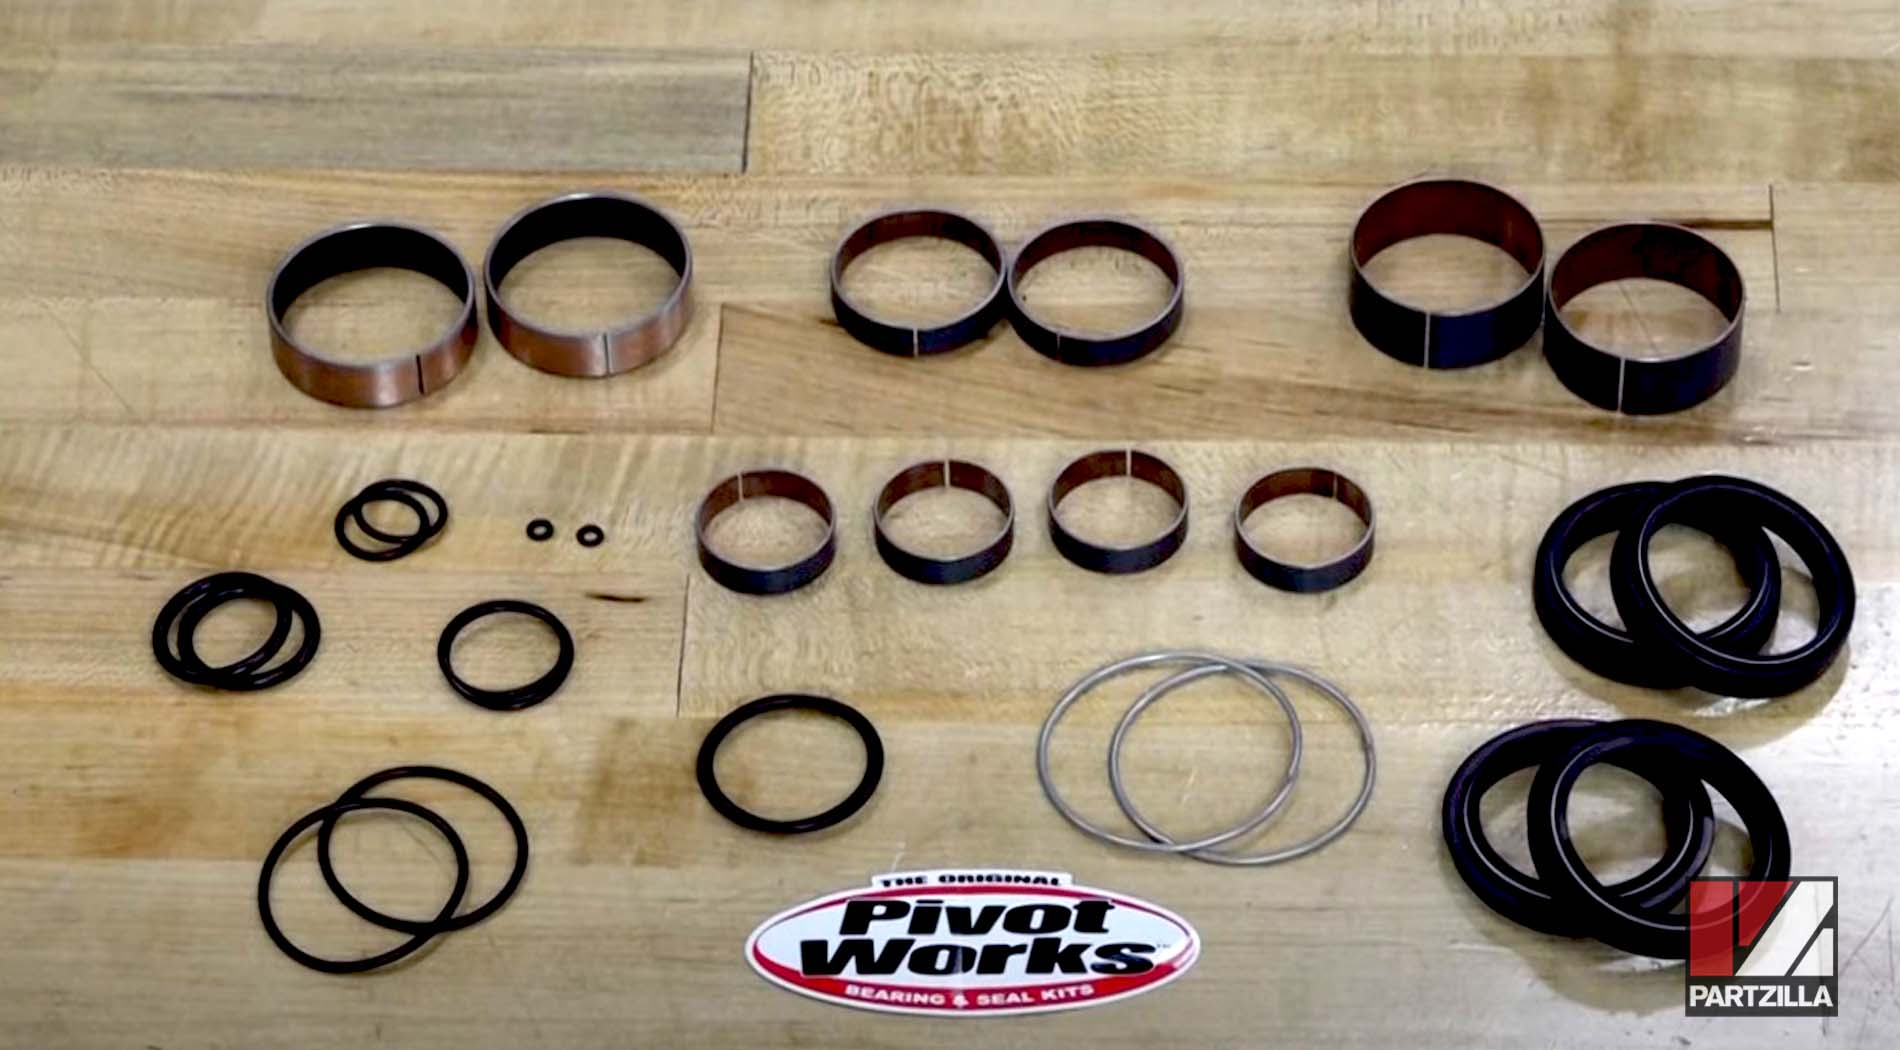
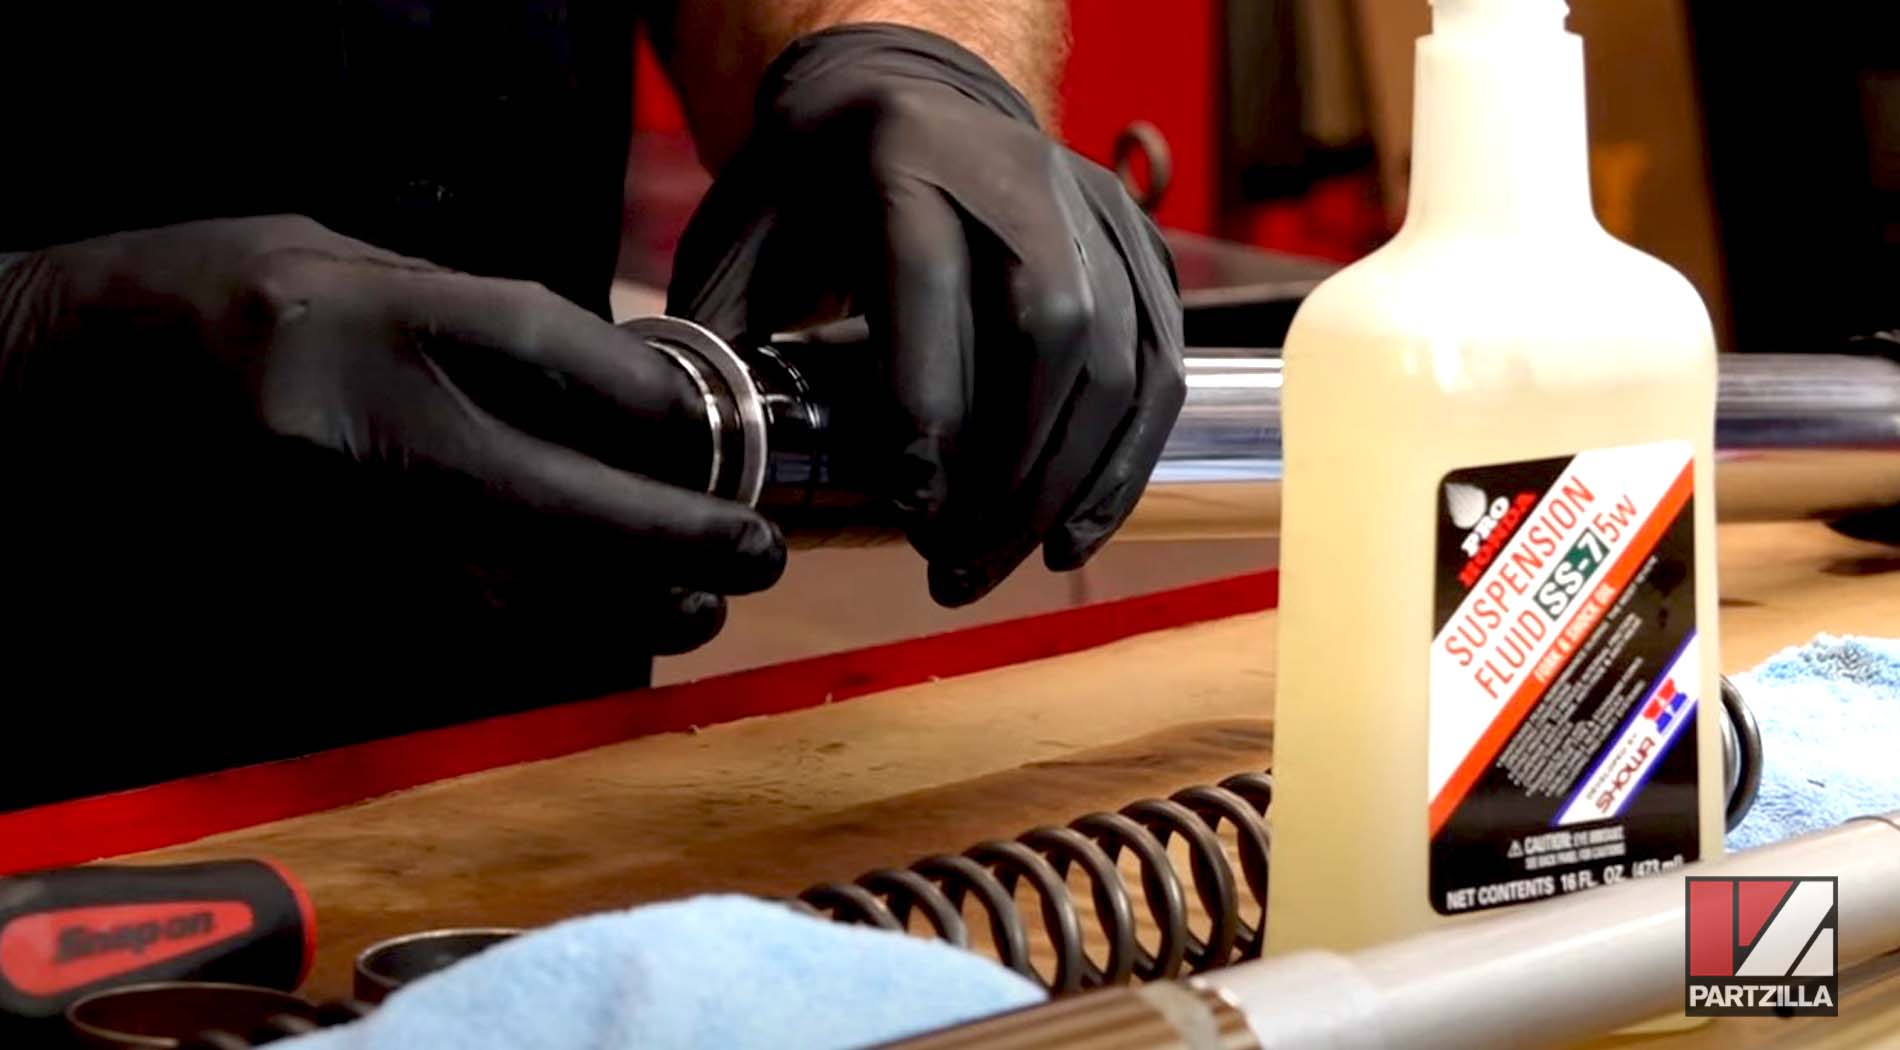
The fork seals on our CRF450 were worn and in need of replacement. We chose a comprehensive fork rebuild kit from Pivot Works that comes with all the different bushings, O-rings, seals and everything else needed to rebuild the CRF450 forks.
Watch the video above and follow the steps below to do a fork rebuild for a Honda CRF450R motorcycle.
Tools and Supplies - Honda CRF450 Fork Rebuild
Aside from the standard tools like wrenches, screwdrivers, a torque wrench, ratchets and extensions, you’ll also need the following tools and supplies:
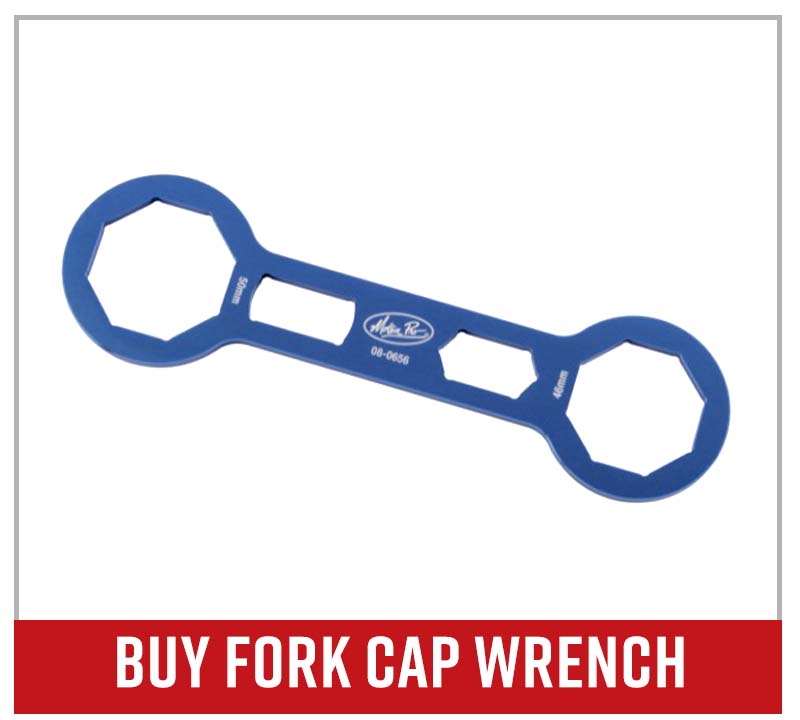
- Fork cap wrench
- Fork seal driver
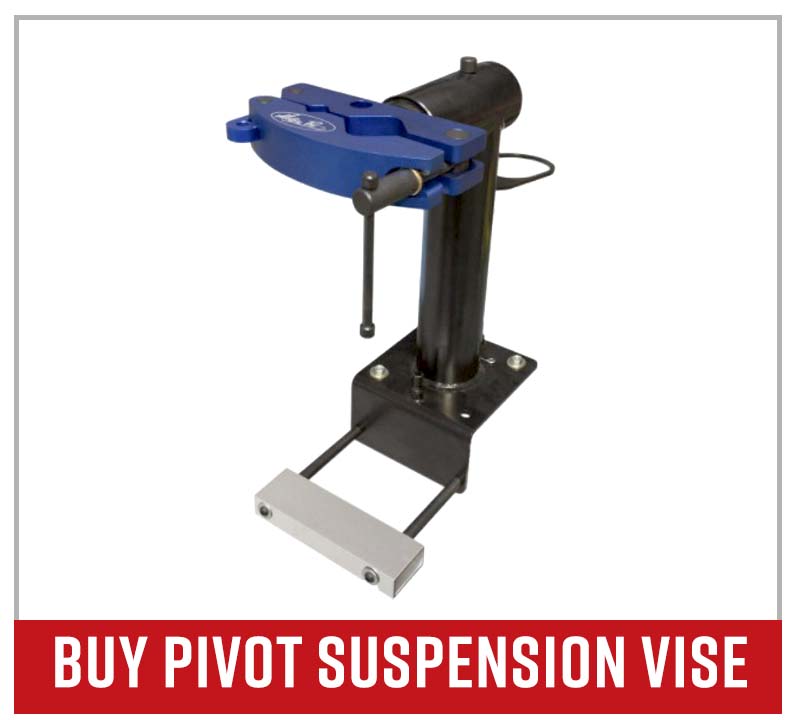
- Pivot suspension vise
- Damper rod holder (shaft holding tool)
- Contact cleaner
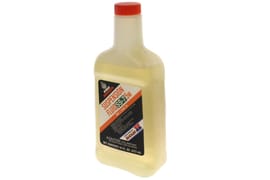
- Suspension fluid
PRO TIP: If you don't have a damper rod holder, you can use a wrench (13mm). However, if you're going to do this type of job on a regular basis, invest in a damper rod holder with multiple diameters that you can use on different machines.
Honda CRF450 Fork Rebuild Steps
Step 1. Clean the bottom of the fork tube with some contact cleaner and a brush, then wipe it dry.
Step 2. Adjust the compression in the rebound dampers all the way back, counting how many turns you have to come out if it’s already been tuned.
PRO TIP: Count the number of clicks along with the turns to get you in the ballpark for when it comes time to retune it.
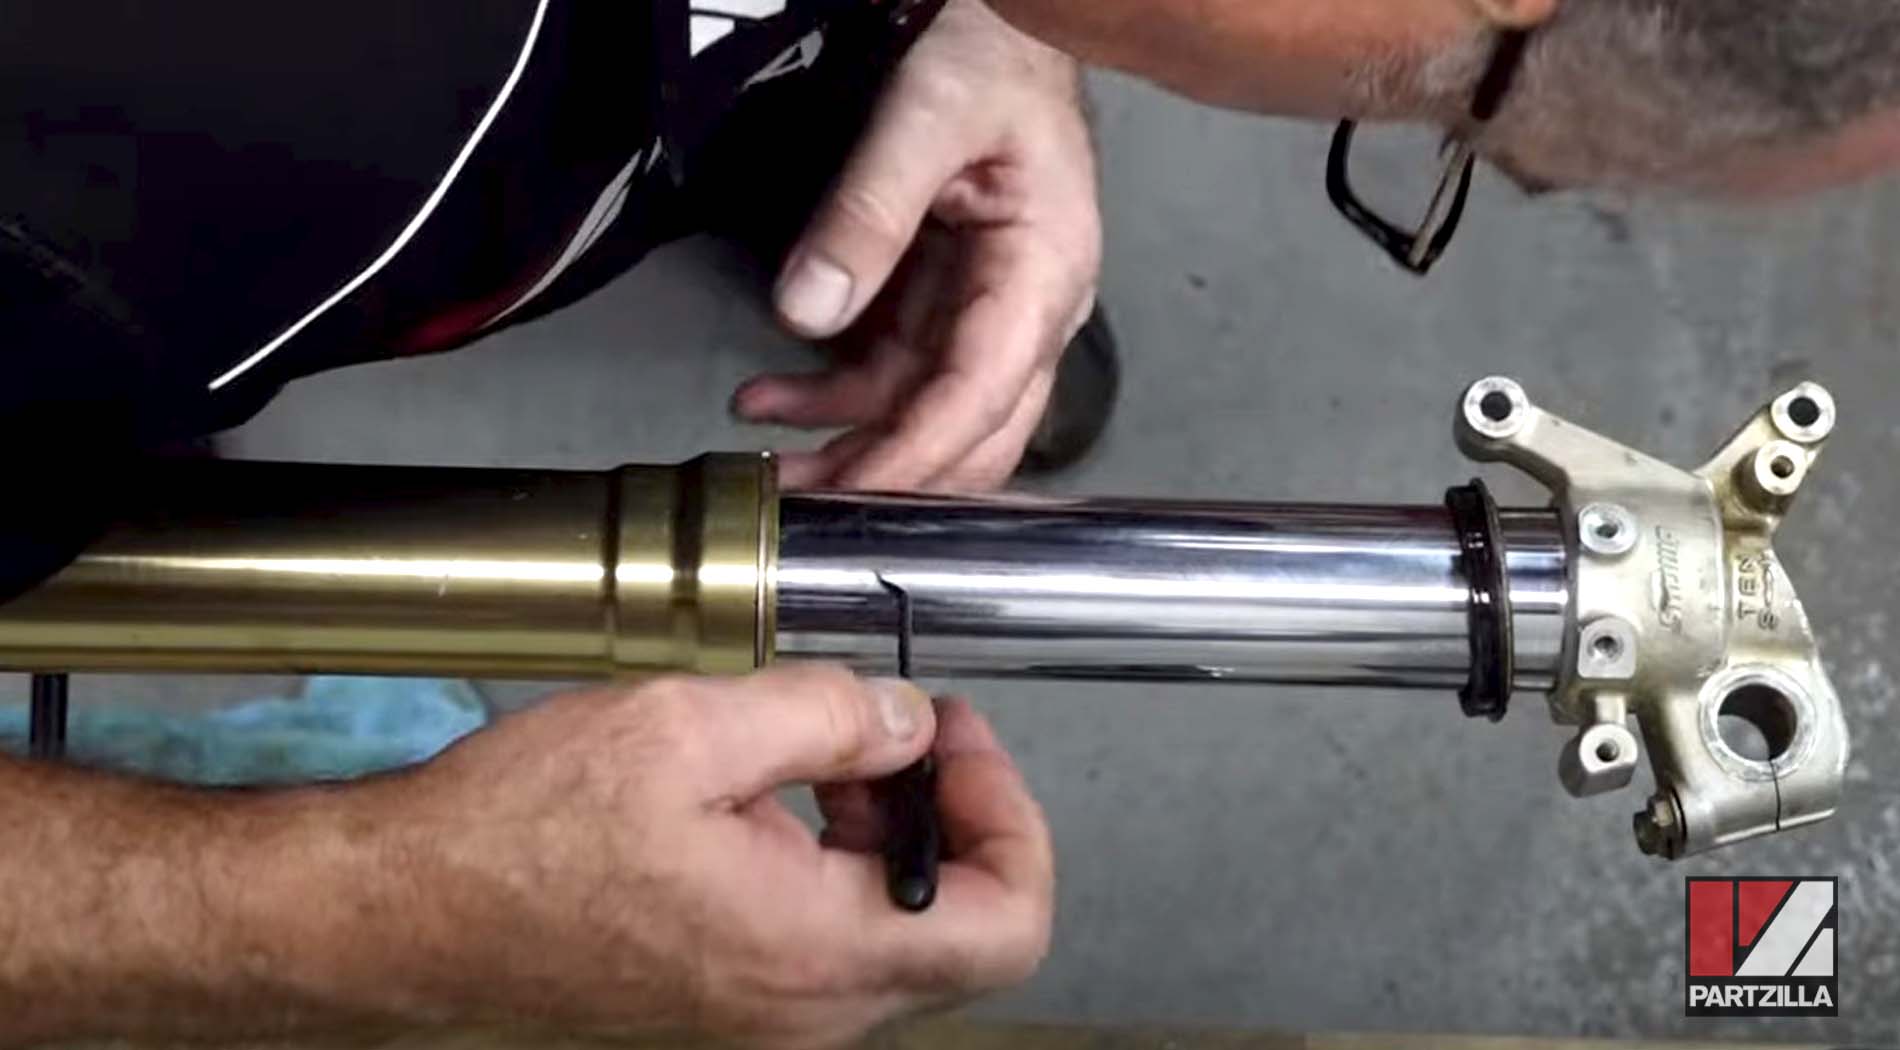
Step 3. Position the fork tube in the vise clamp where it would be on the lower part of the fork clamps on the bike, then use the fork cap wrench to break loose the top cap.
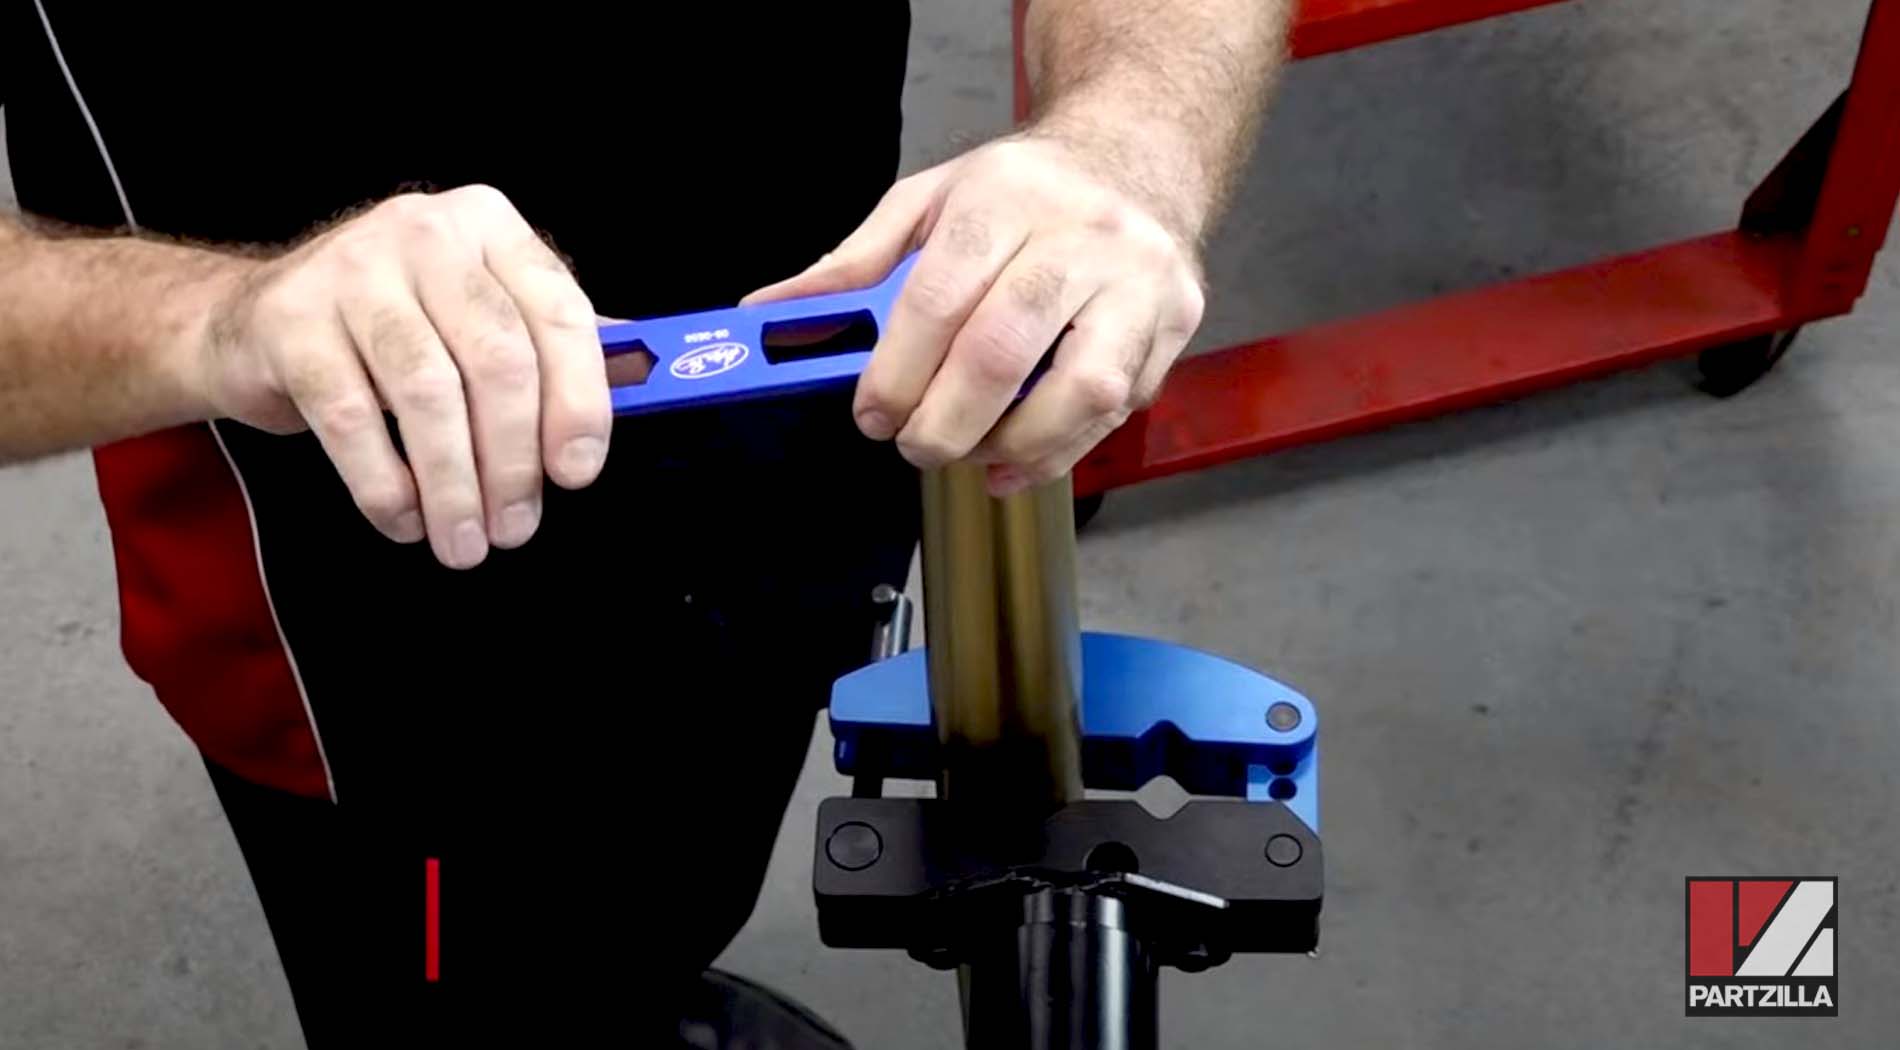
Step 4. Tighten the top fork cap down to the seal, then flip the fork tube around, pull the damper out and drain the fluid out of the tube.
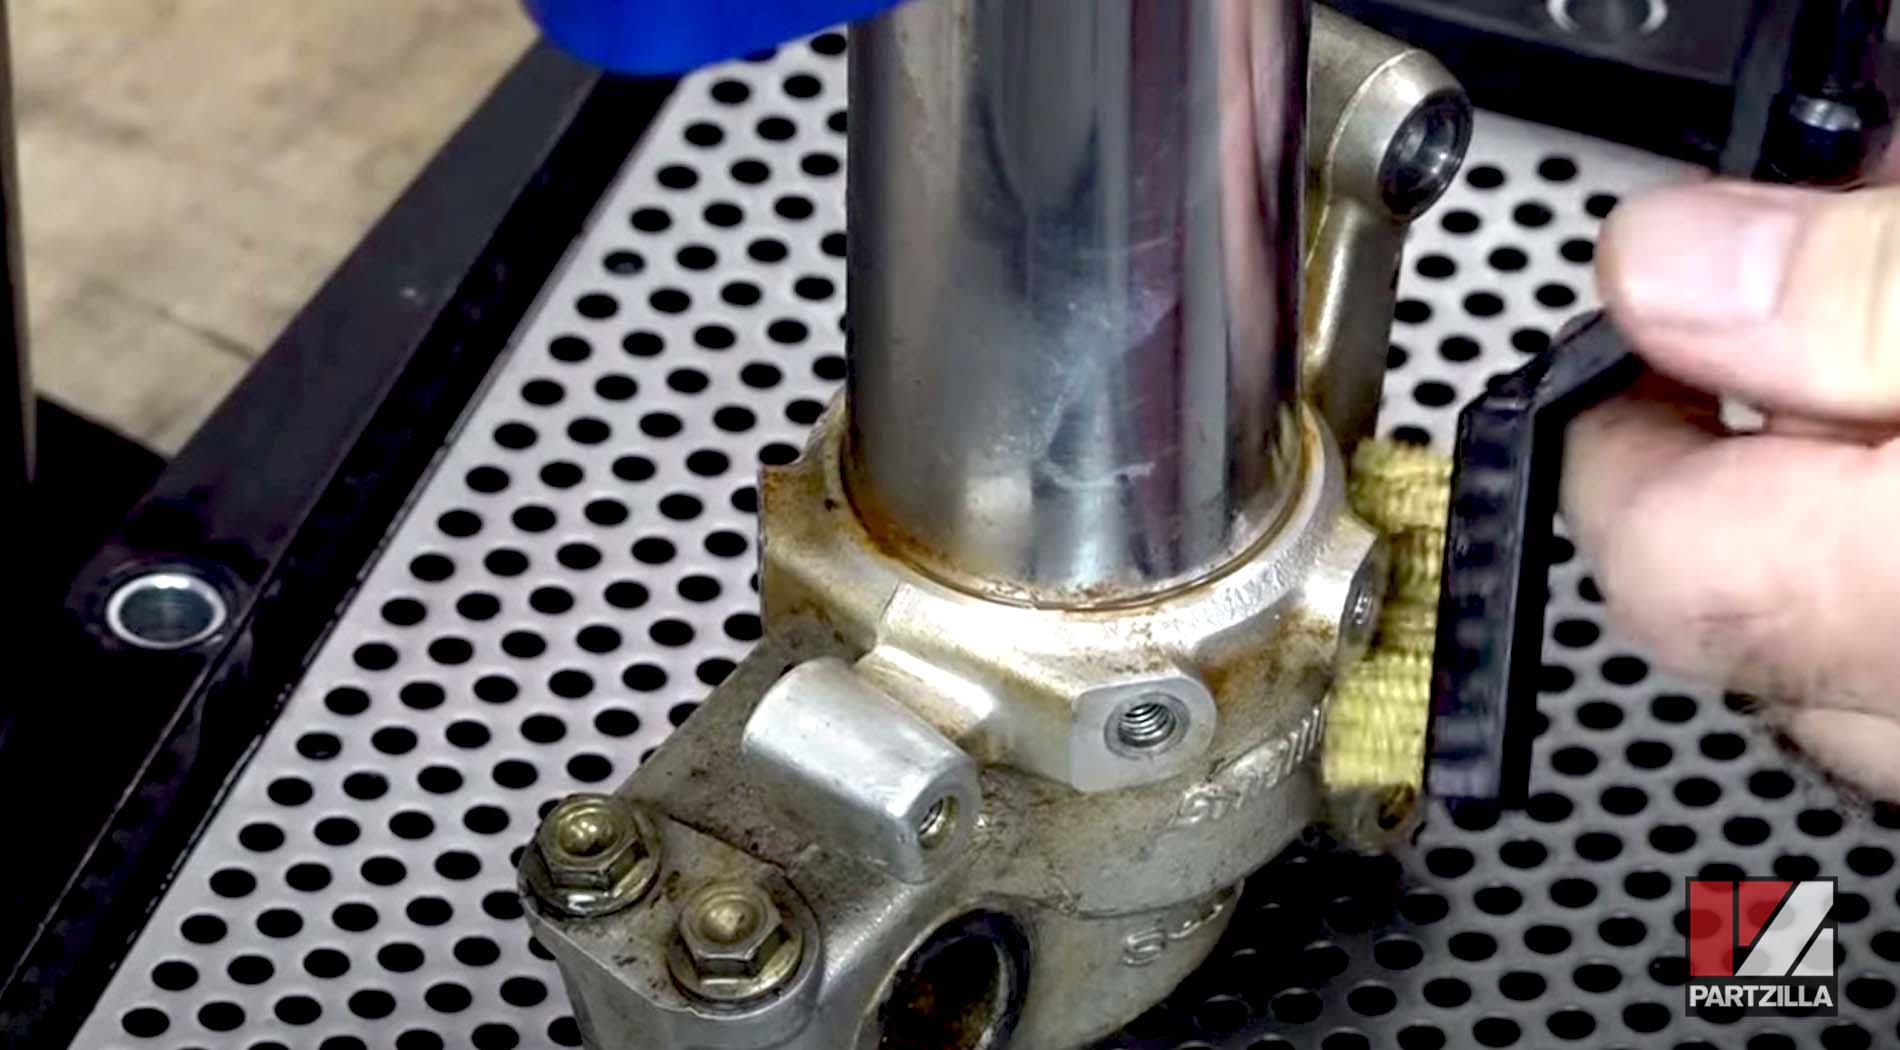
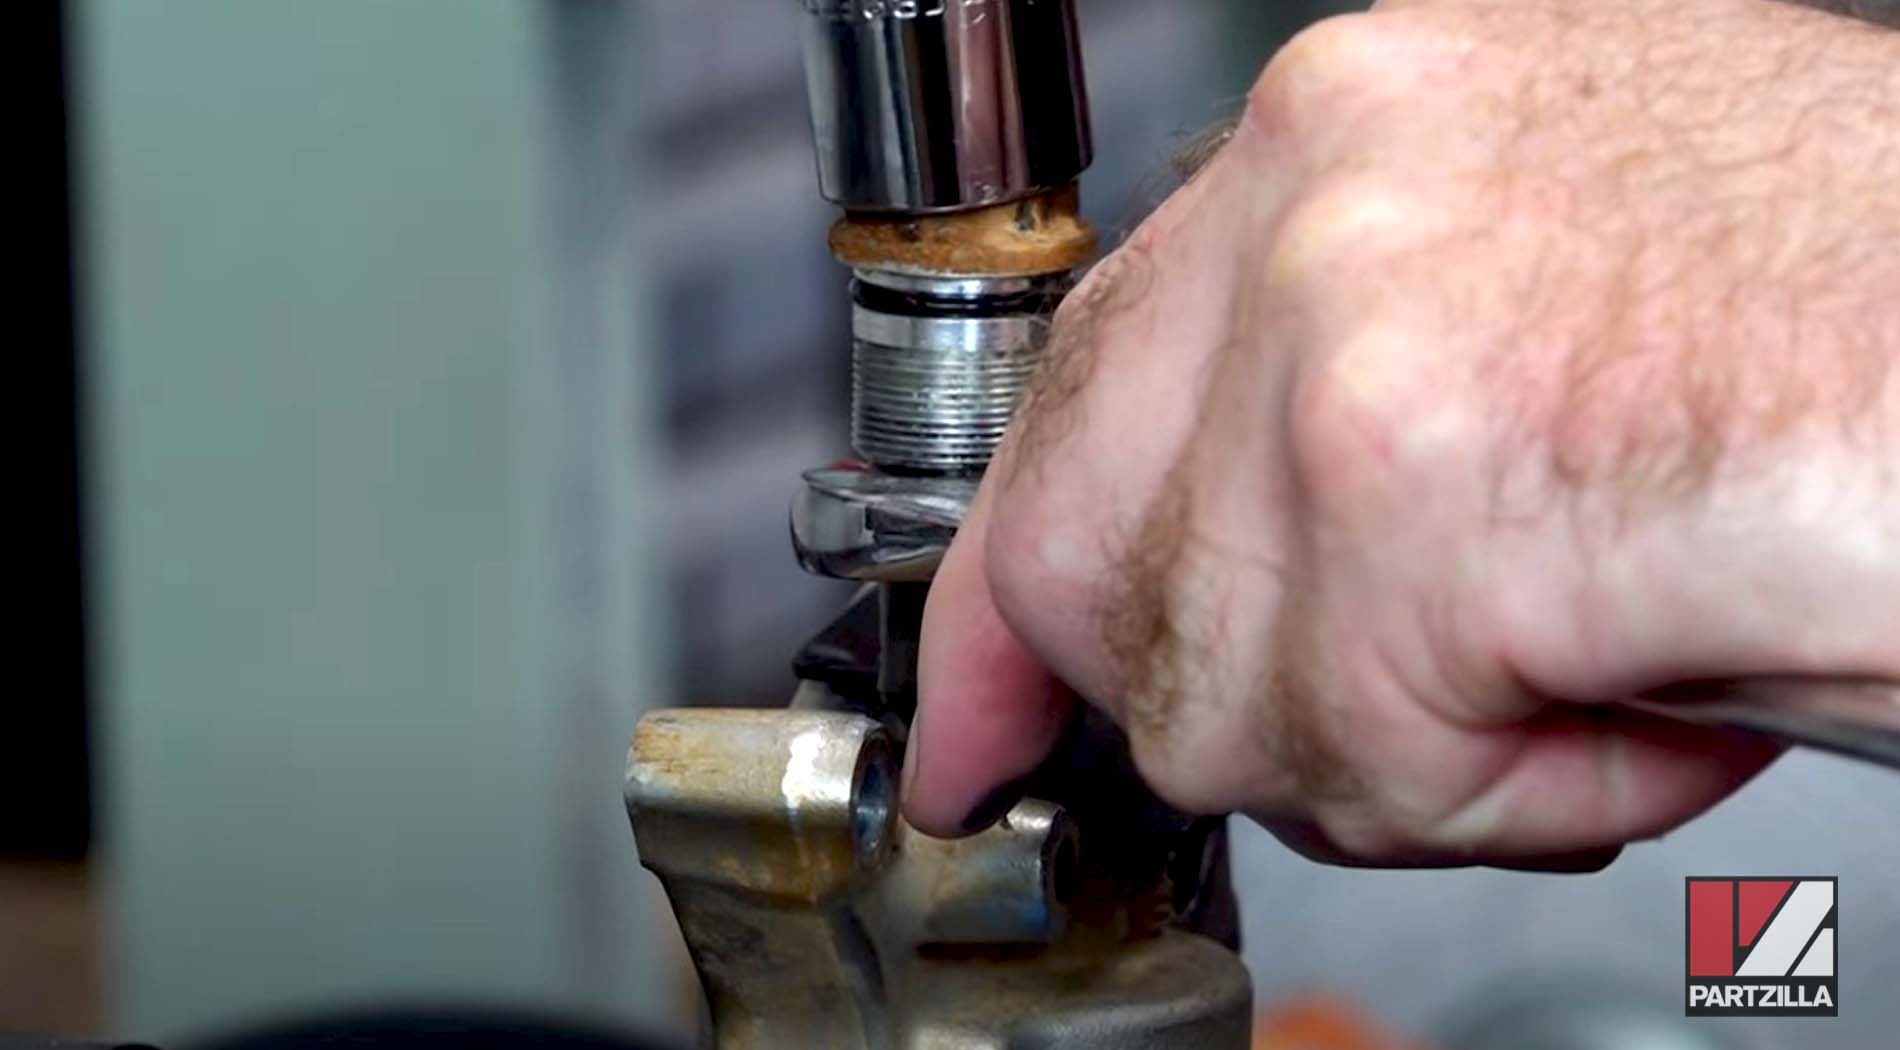
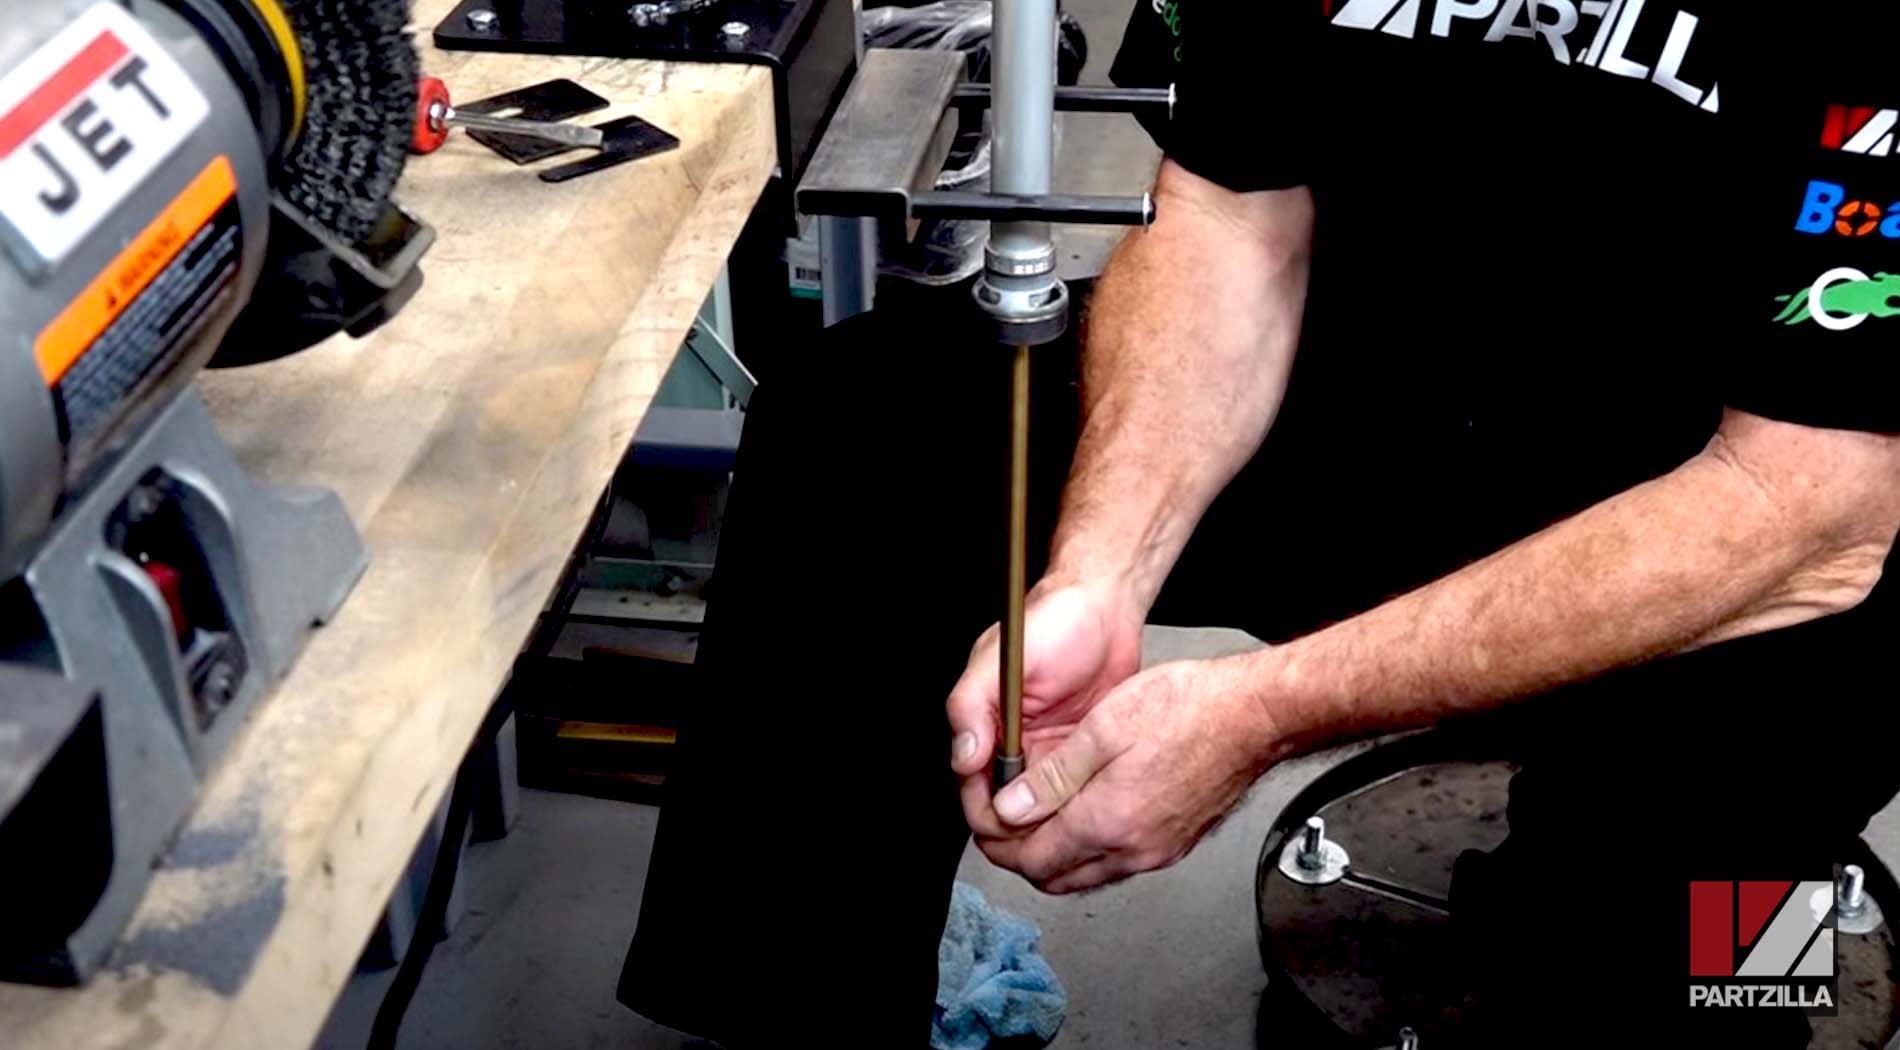
Step 5. Push the damper back in, then get the bottom end of the fork upright on the clamp, loosen it, and get the 21mm damper rod bolt off.
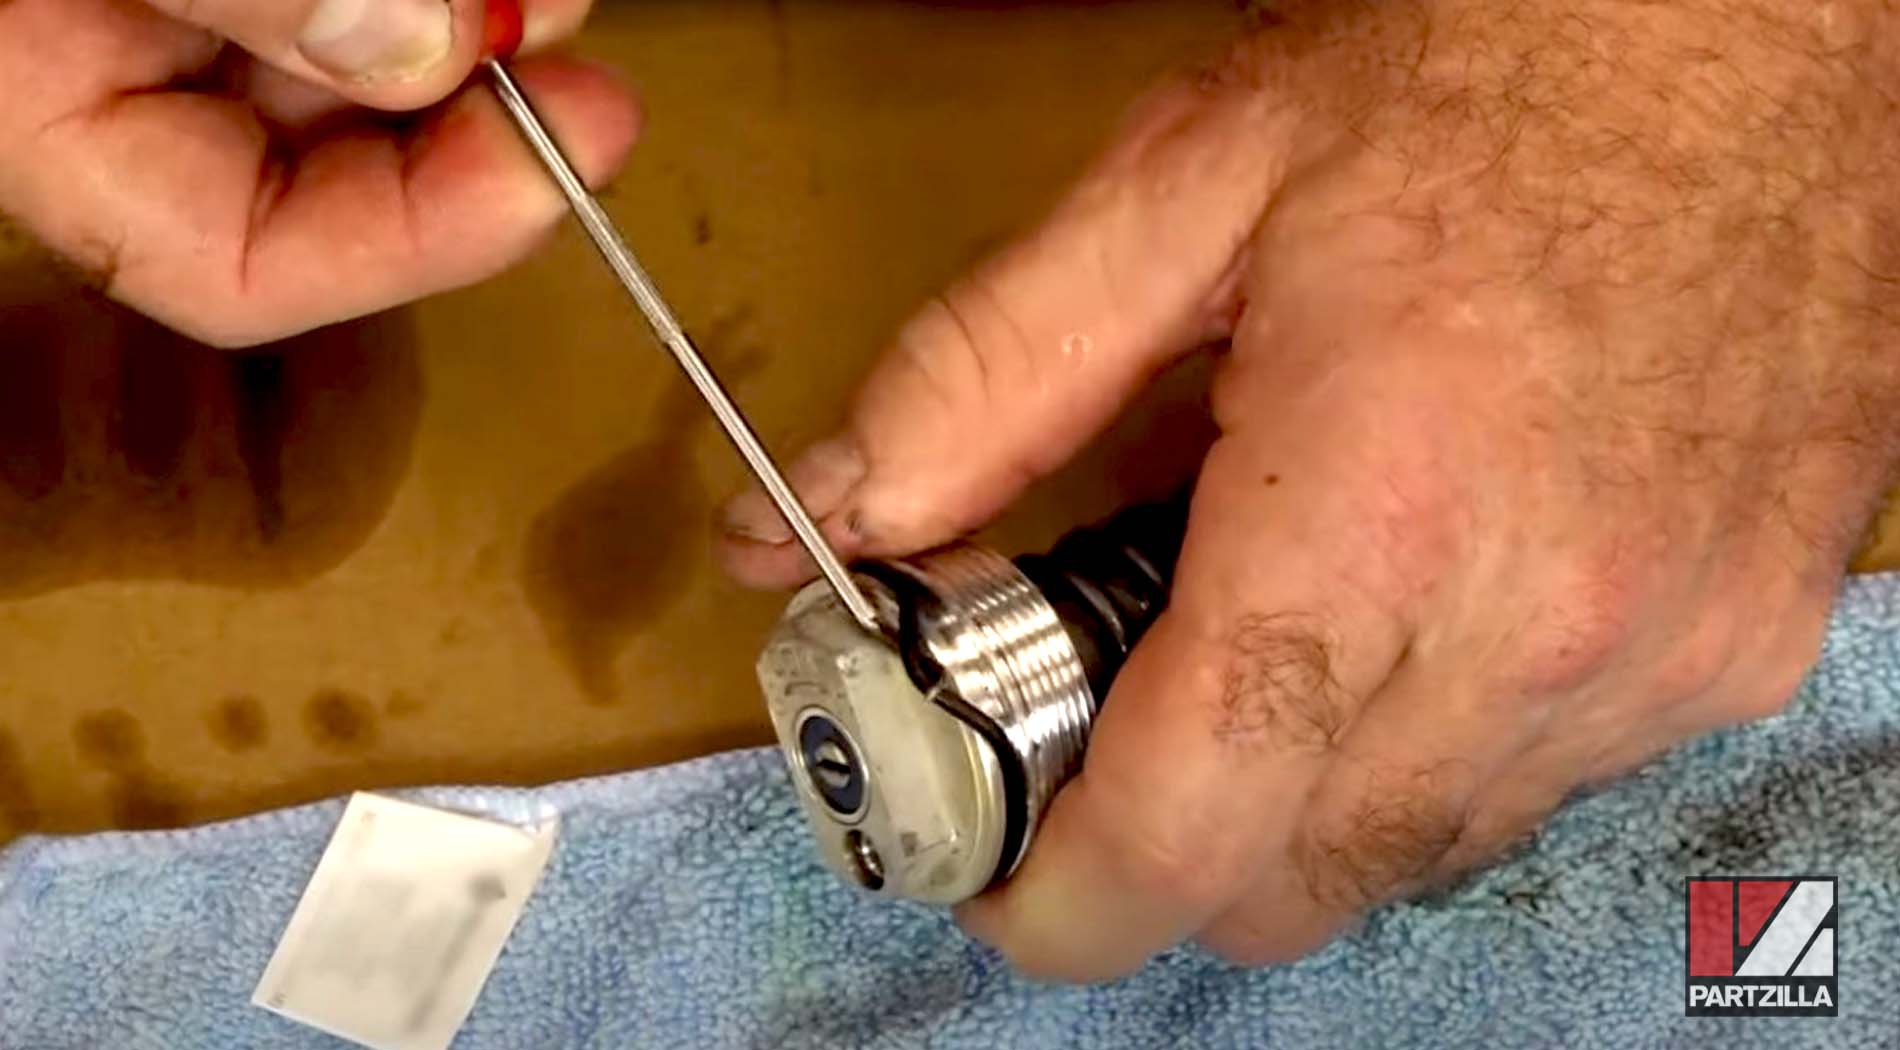
Step 6. Push up the damper rod and place the shaft holding tool on it to hold it in place, then break loose the 17mm lock nut at the 21mm lock nut at the top.
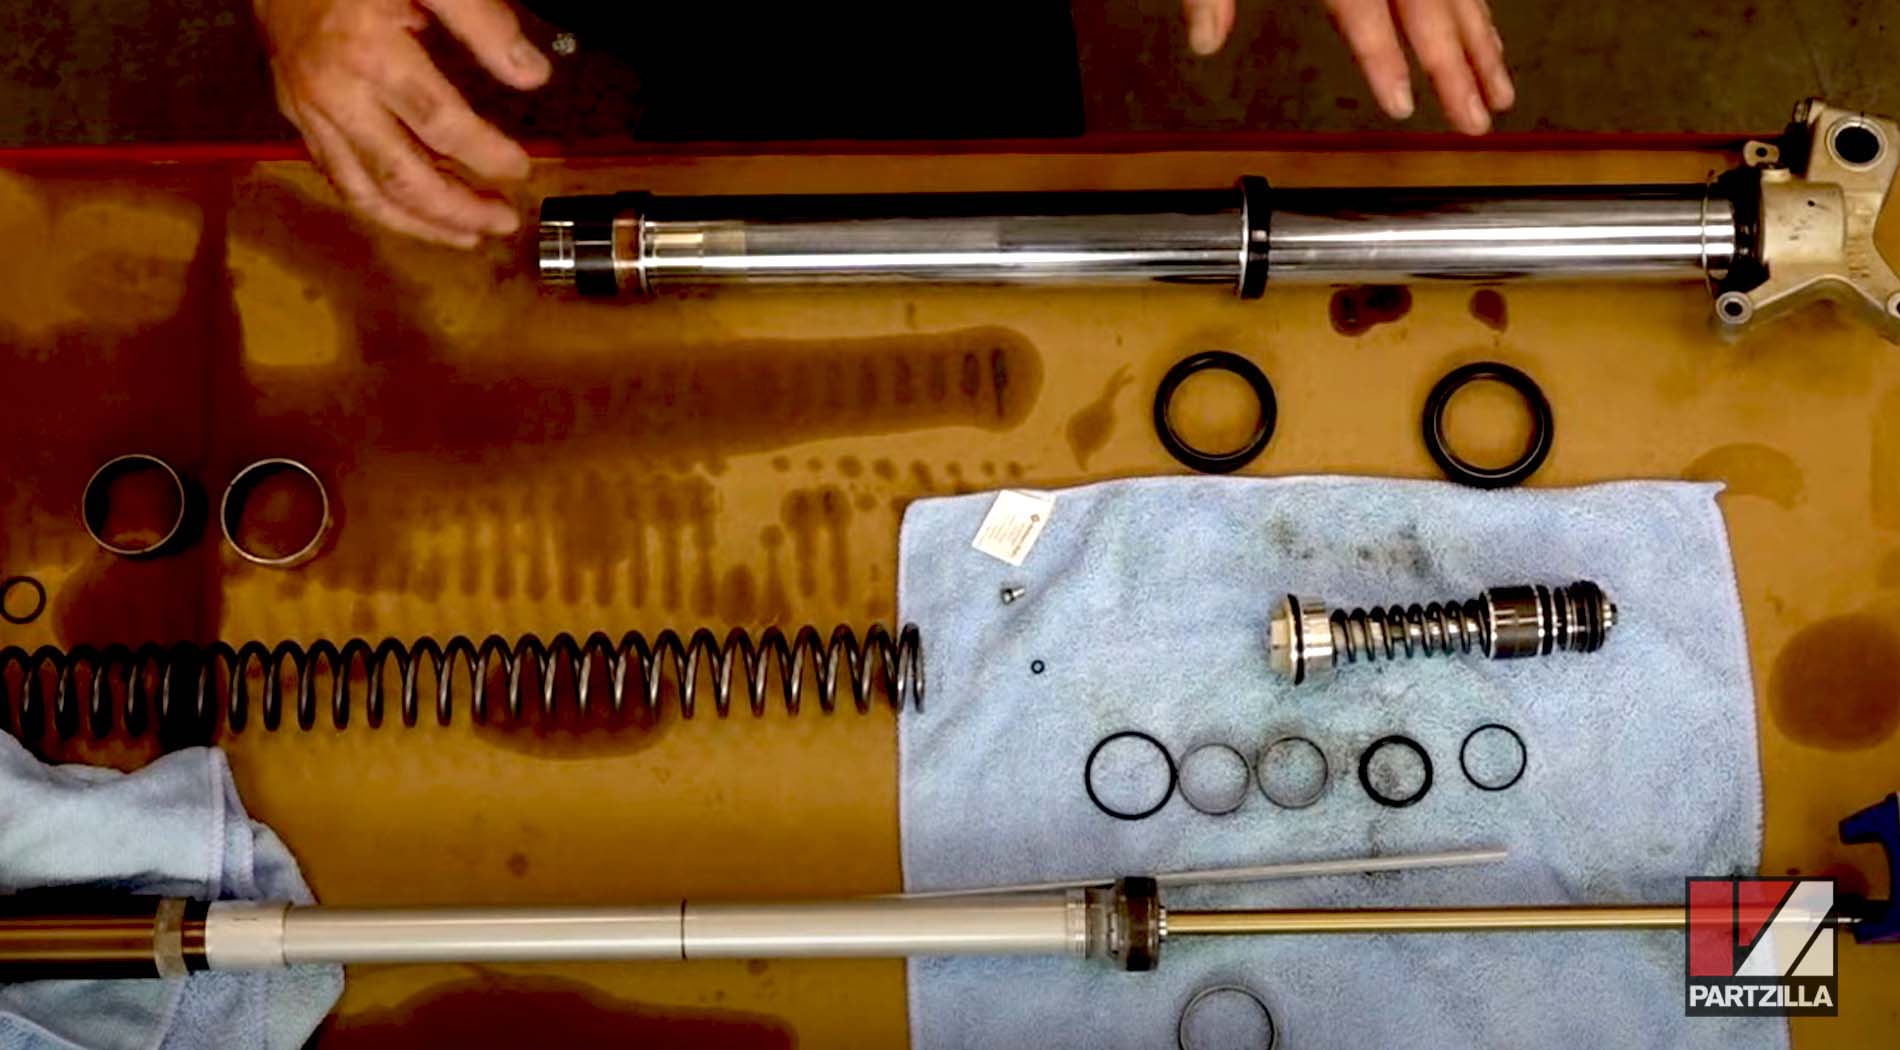
PRO TIP: As you're pulling things apart, lay everything down in order so you'll have a clear picture of how it all goes back together. Use our exploded parts diagram for additional reference.
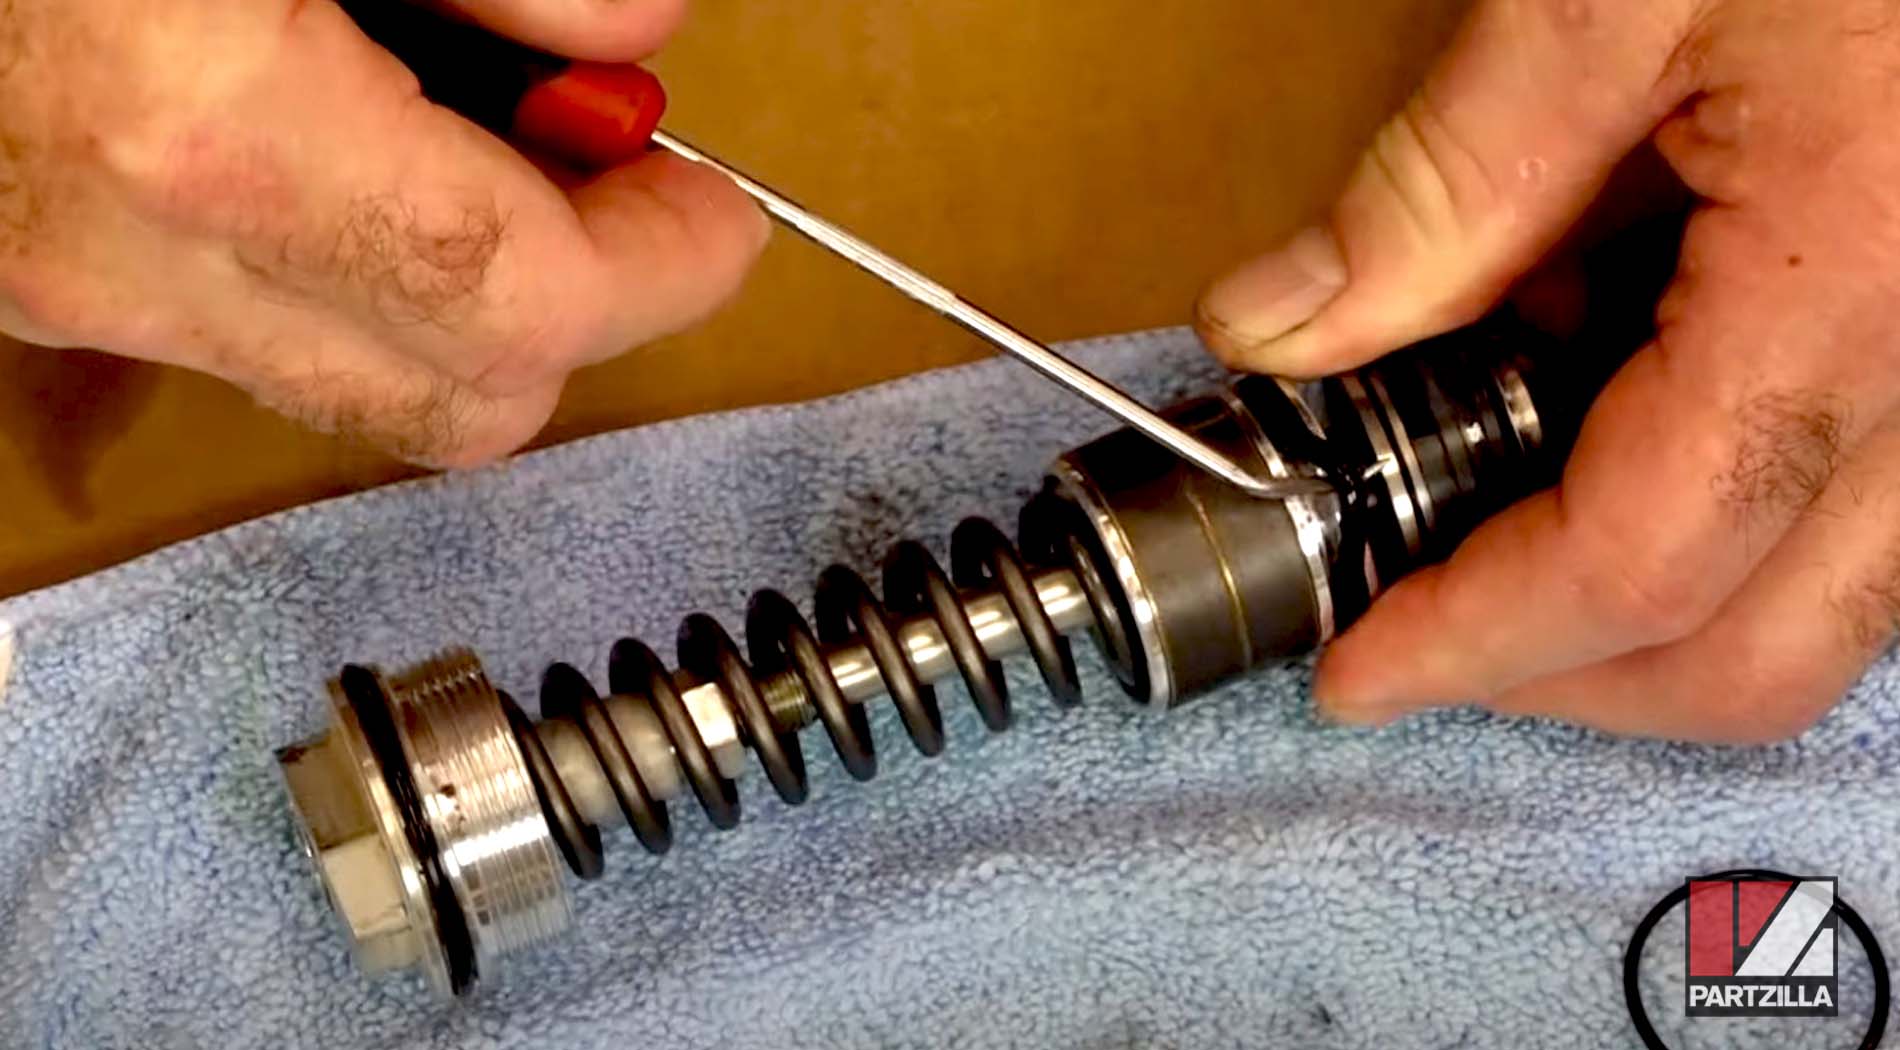
Step 7. Use pliers to carefully remove the push rod, then release the shaft holding tool.
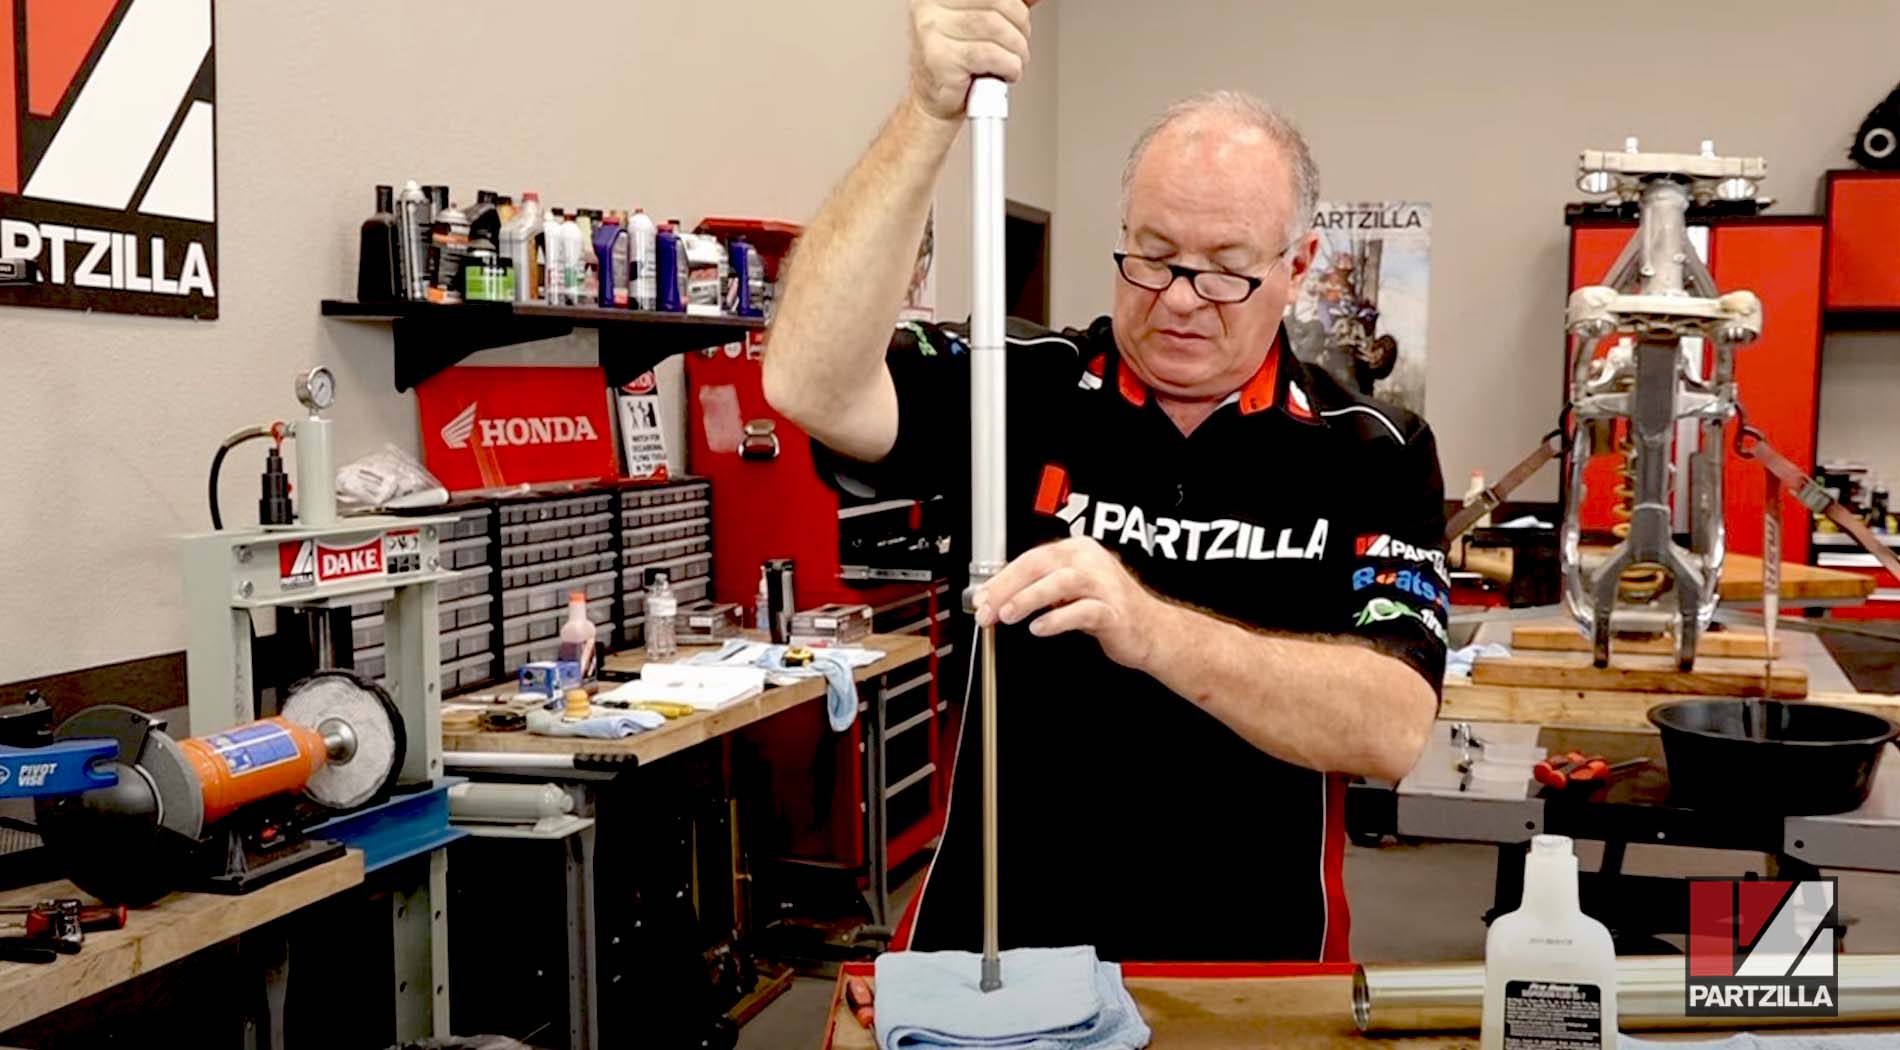
Step 8. Spin the tube around and remove the top fork tube cap, then pull out the damper assembly.
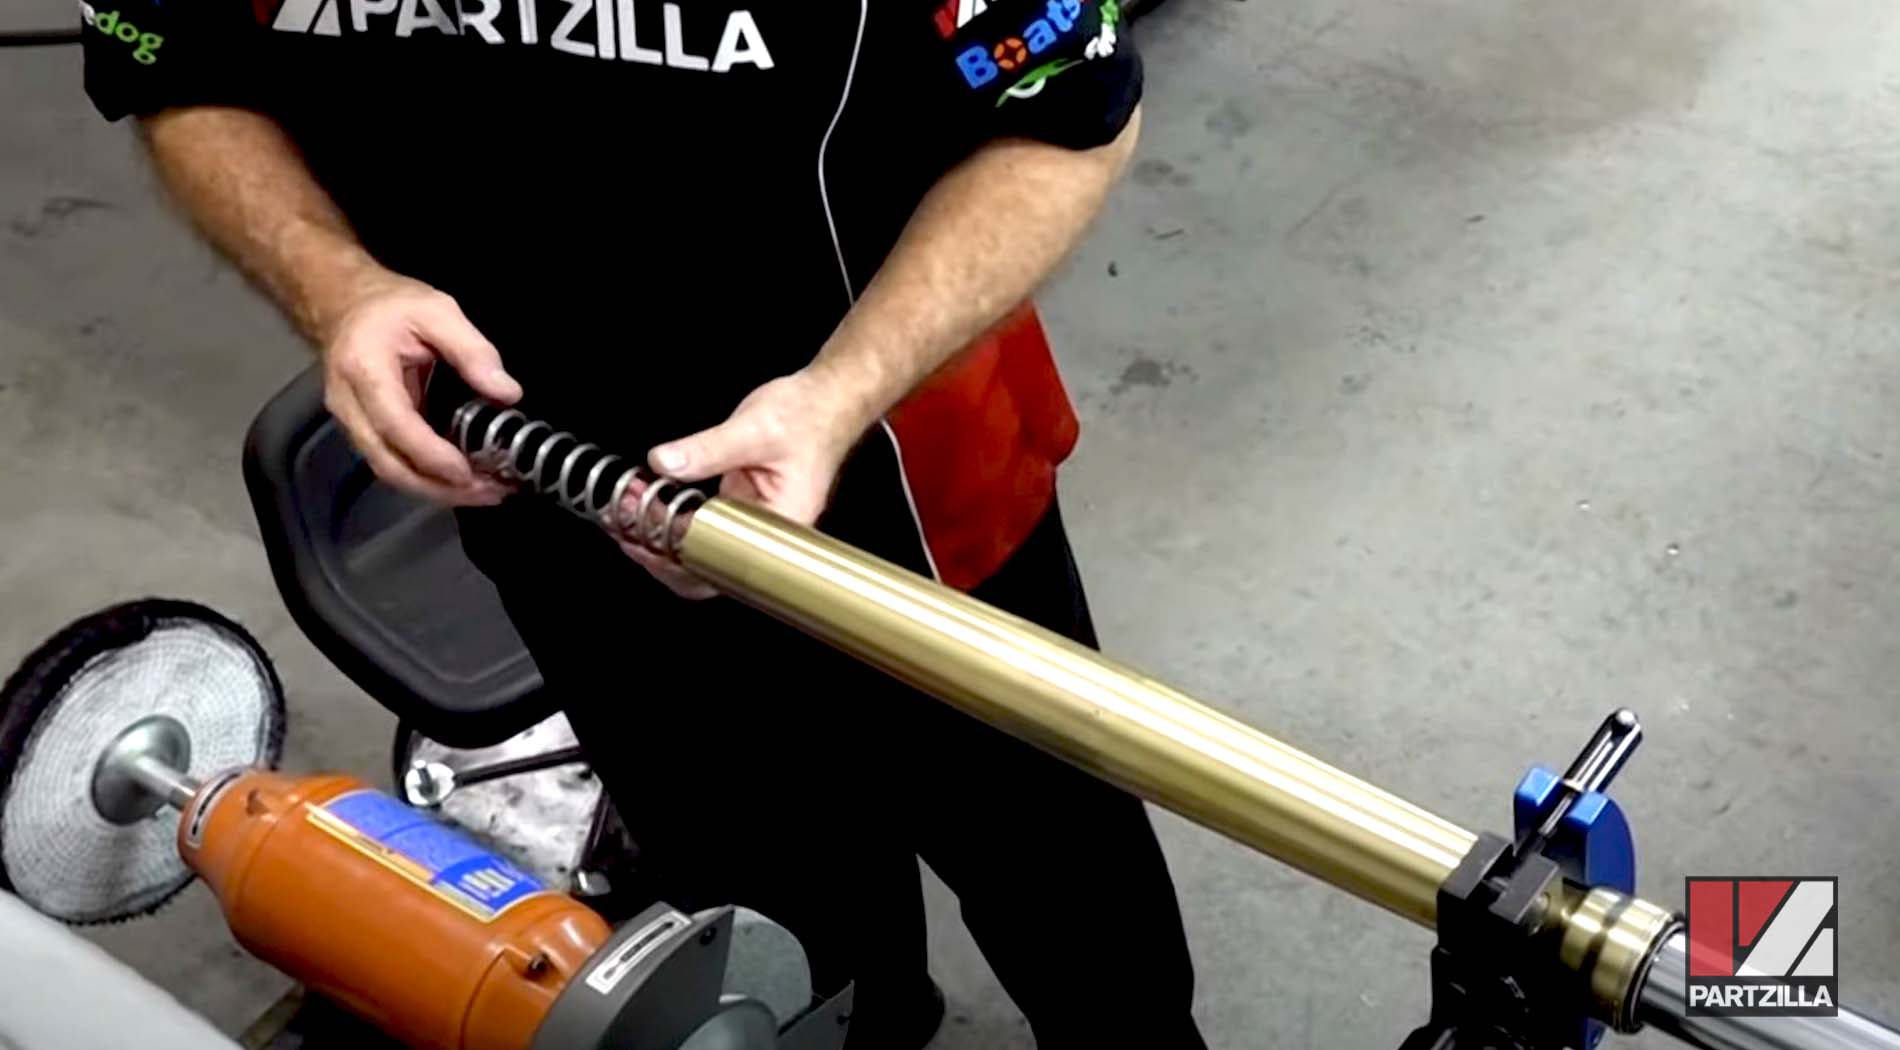
Step 9. Spin the tube around again and remove the fork spring.
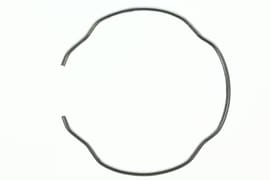
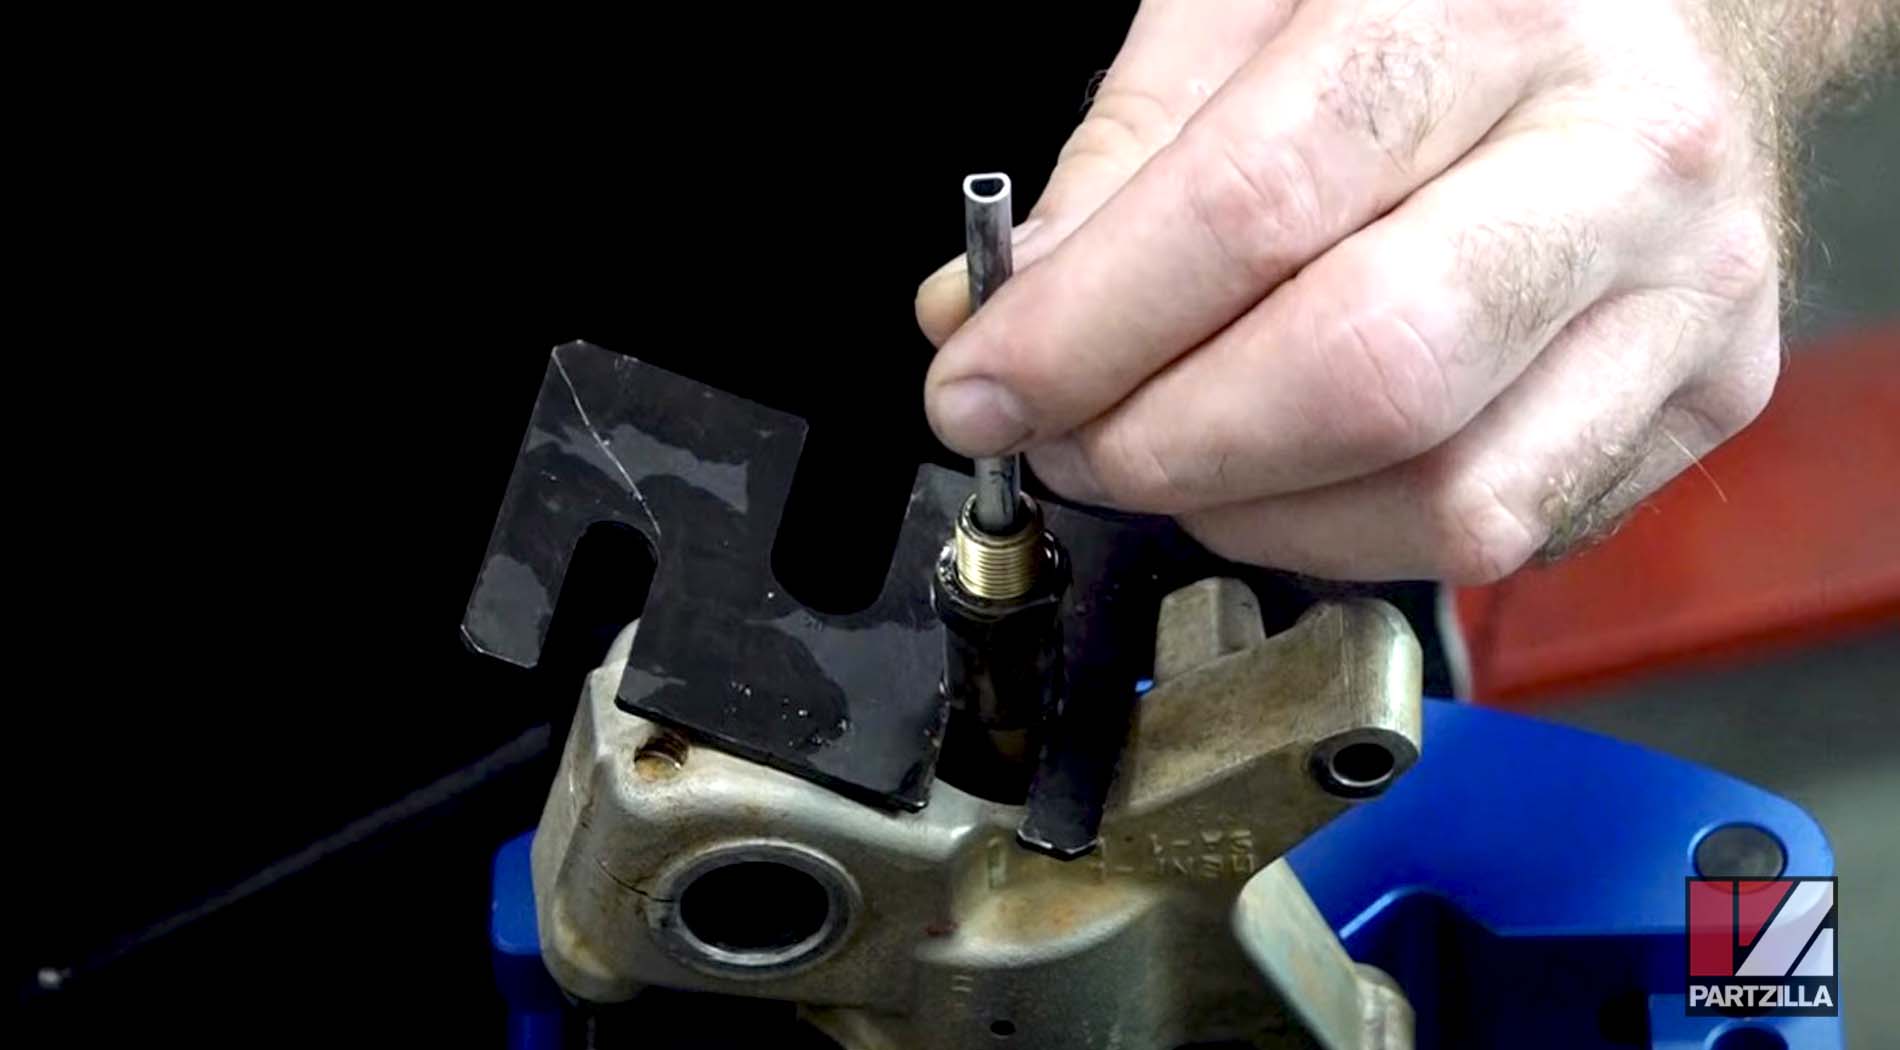
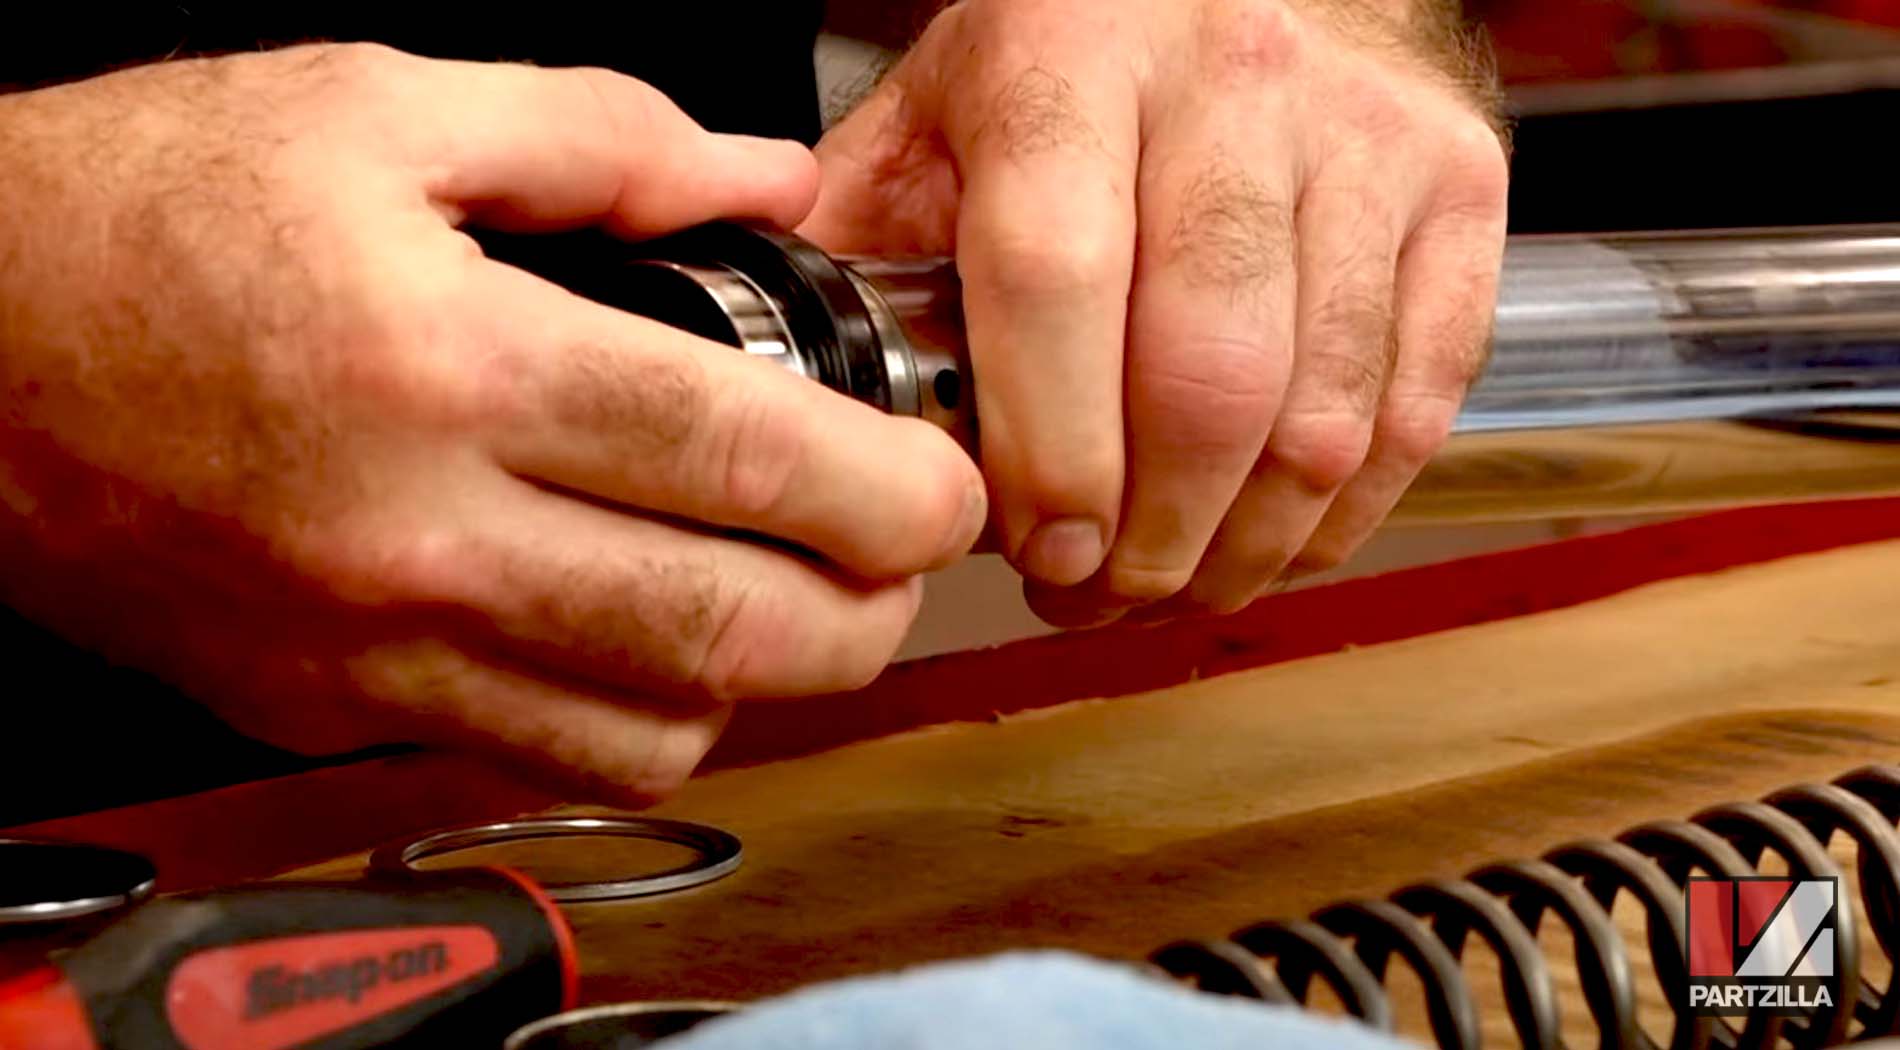
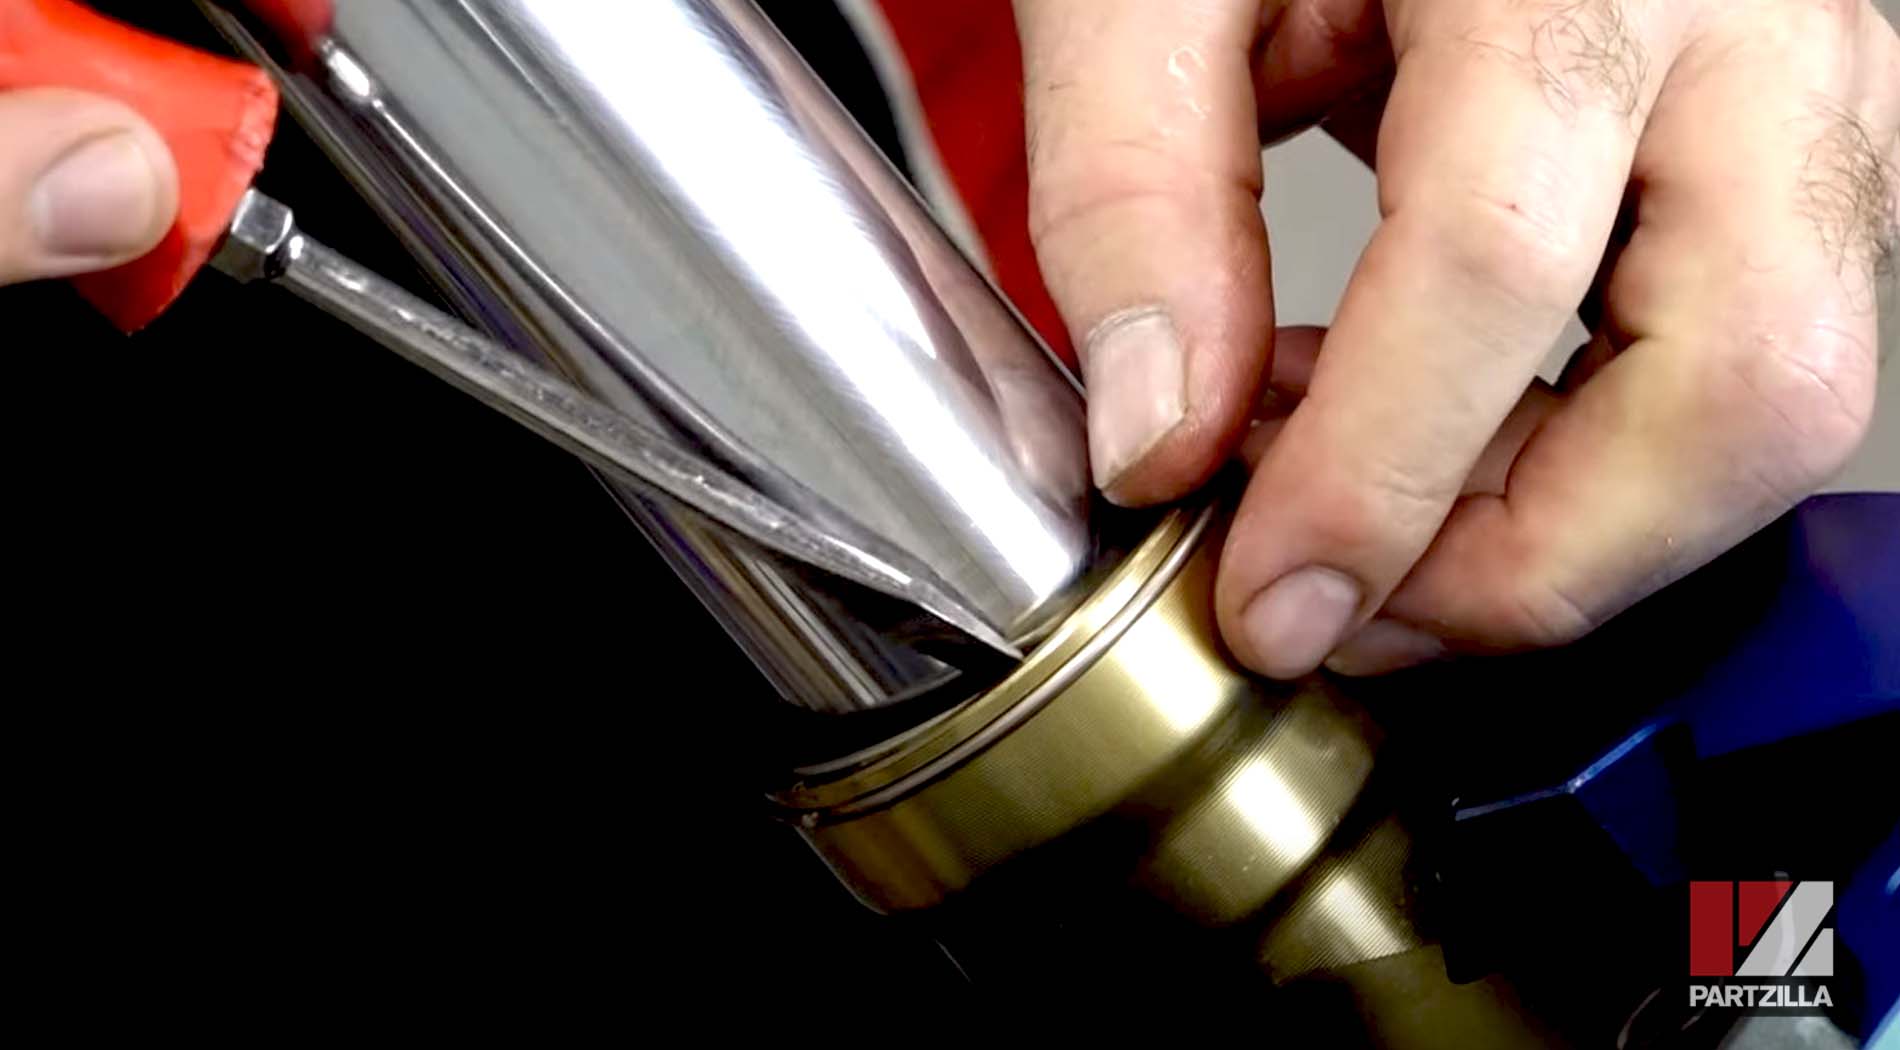
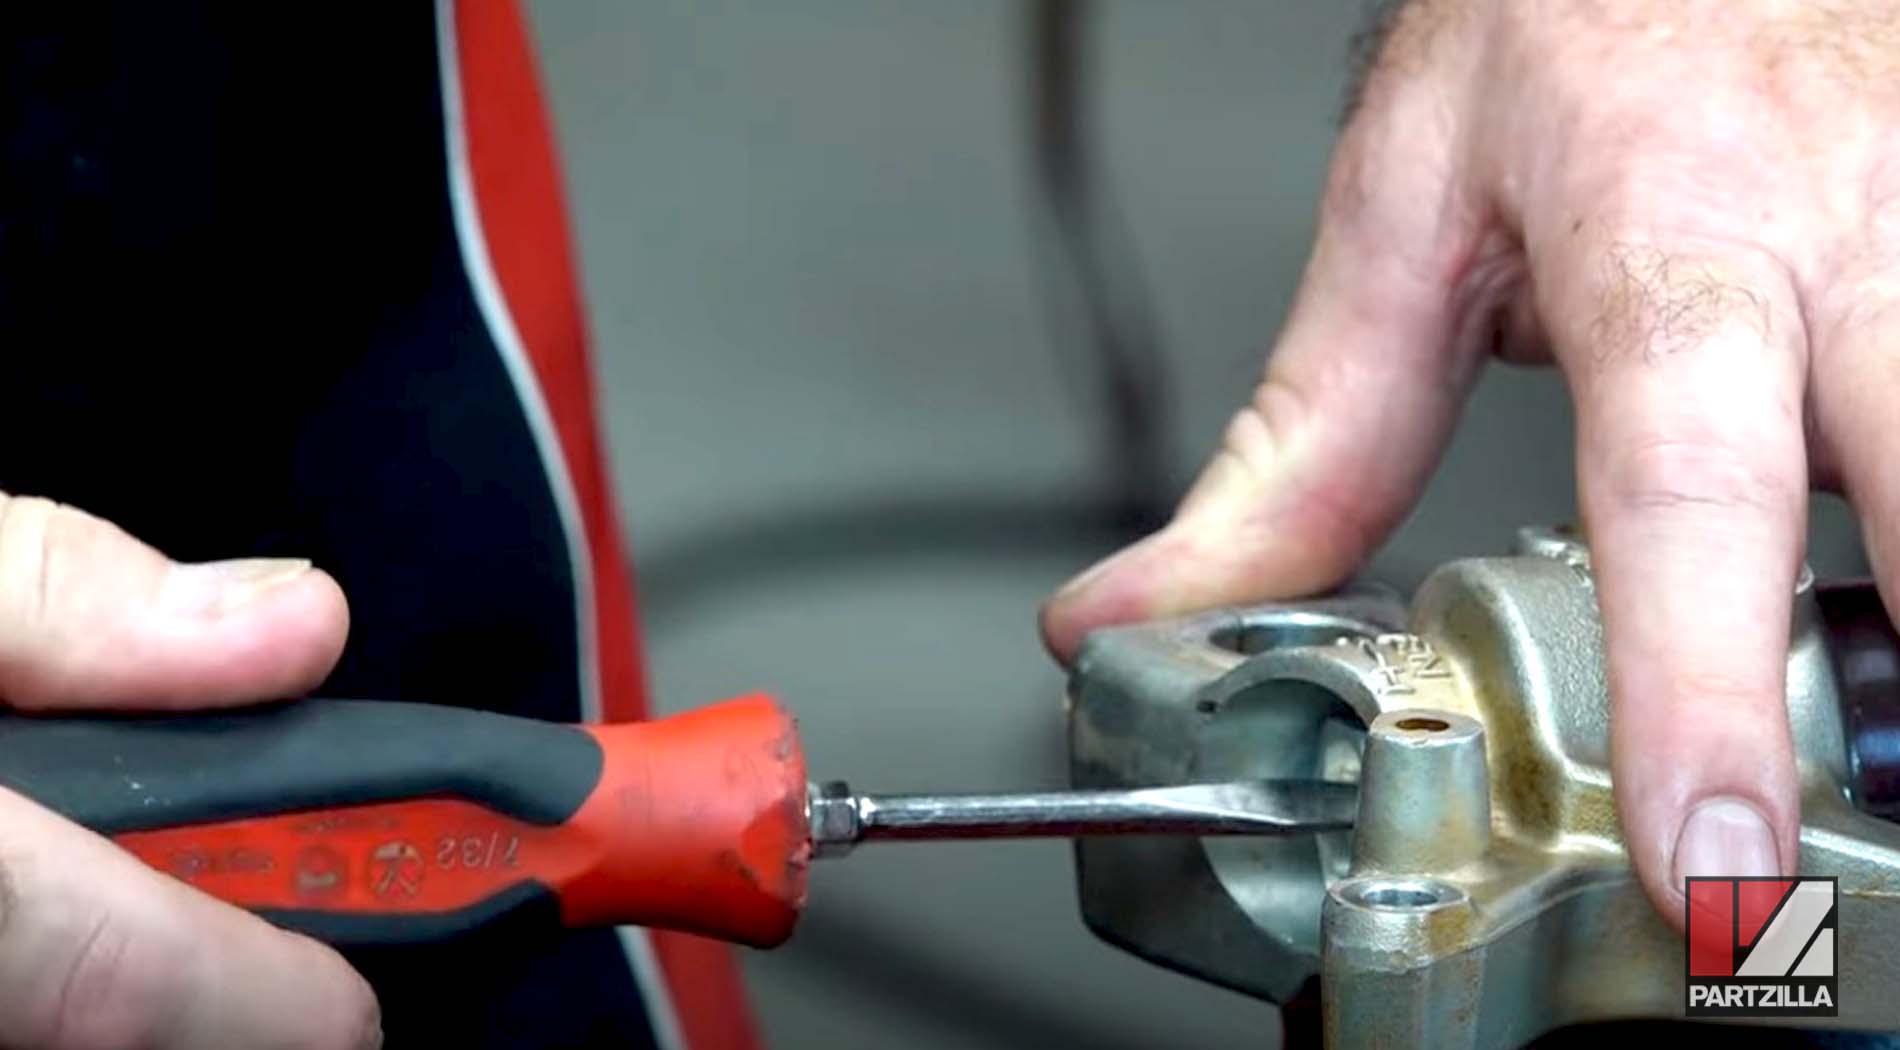
Step 10. Place the fork tube in the vise clamp, then remove the dust ring with a flathead screwdriver and the inner stopper ring with a pick tool.
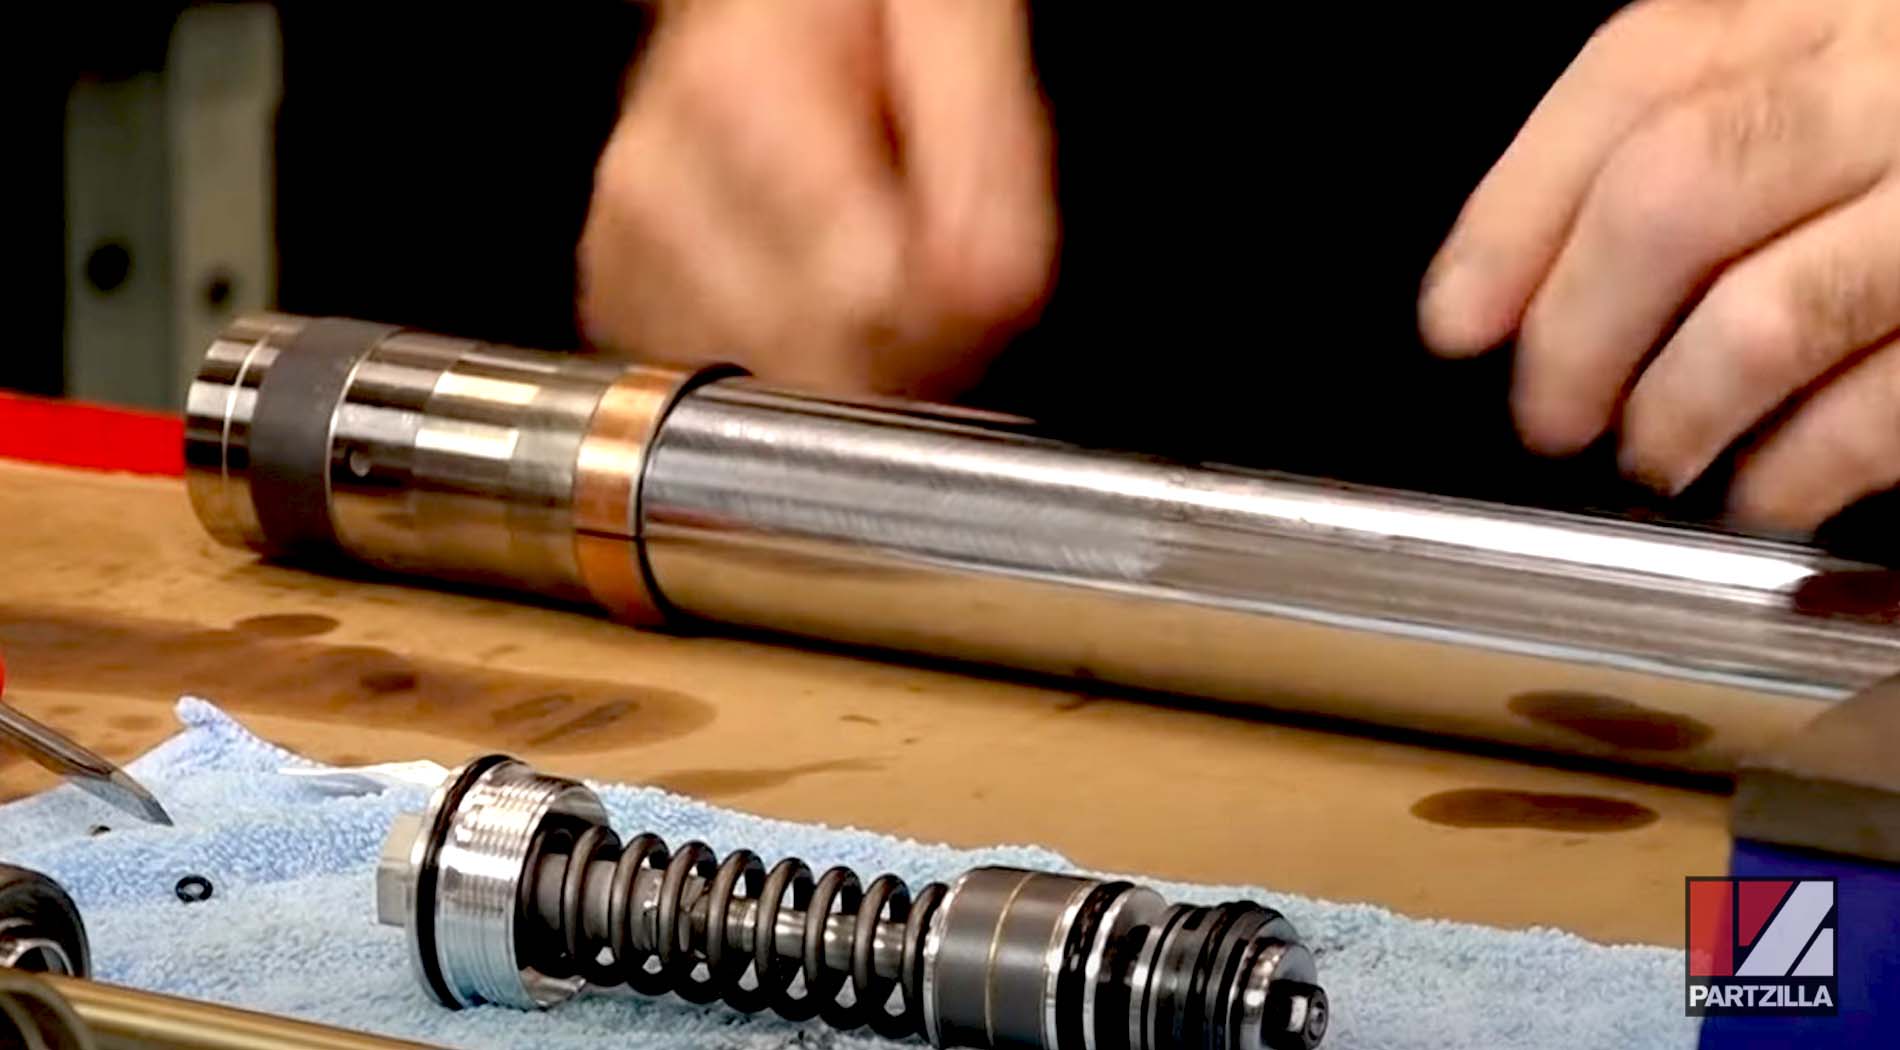
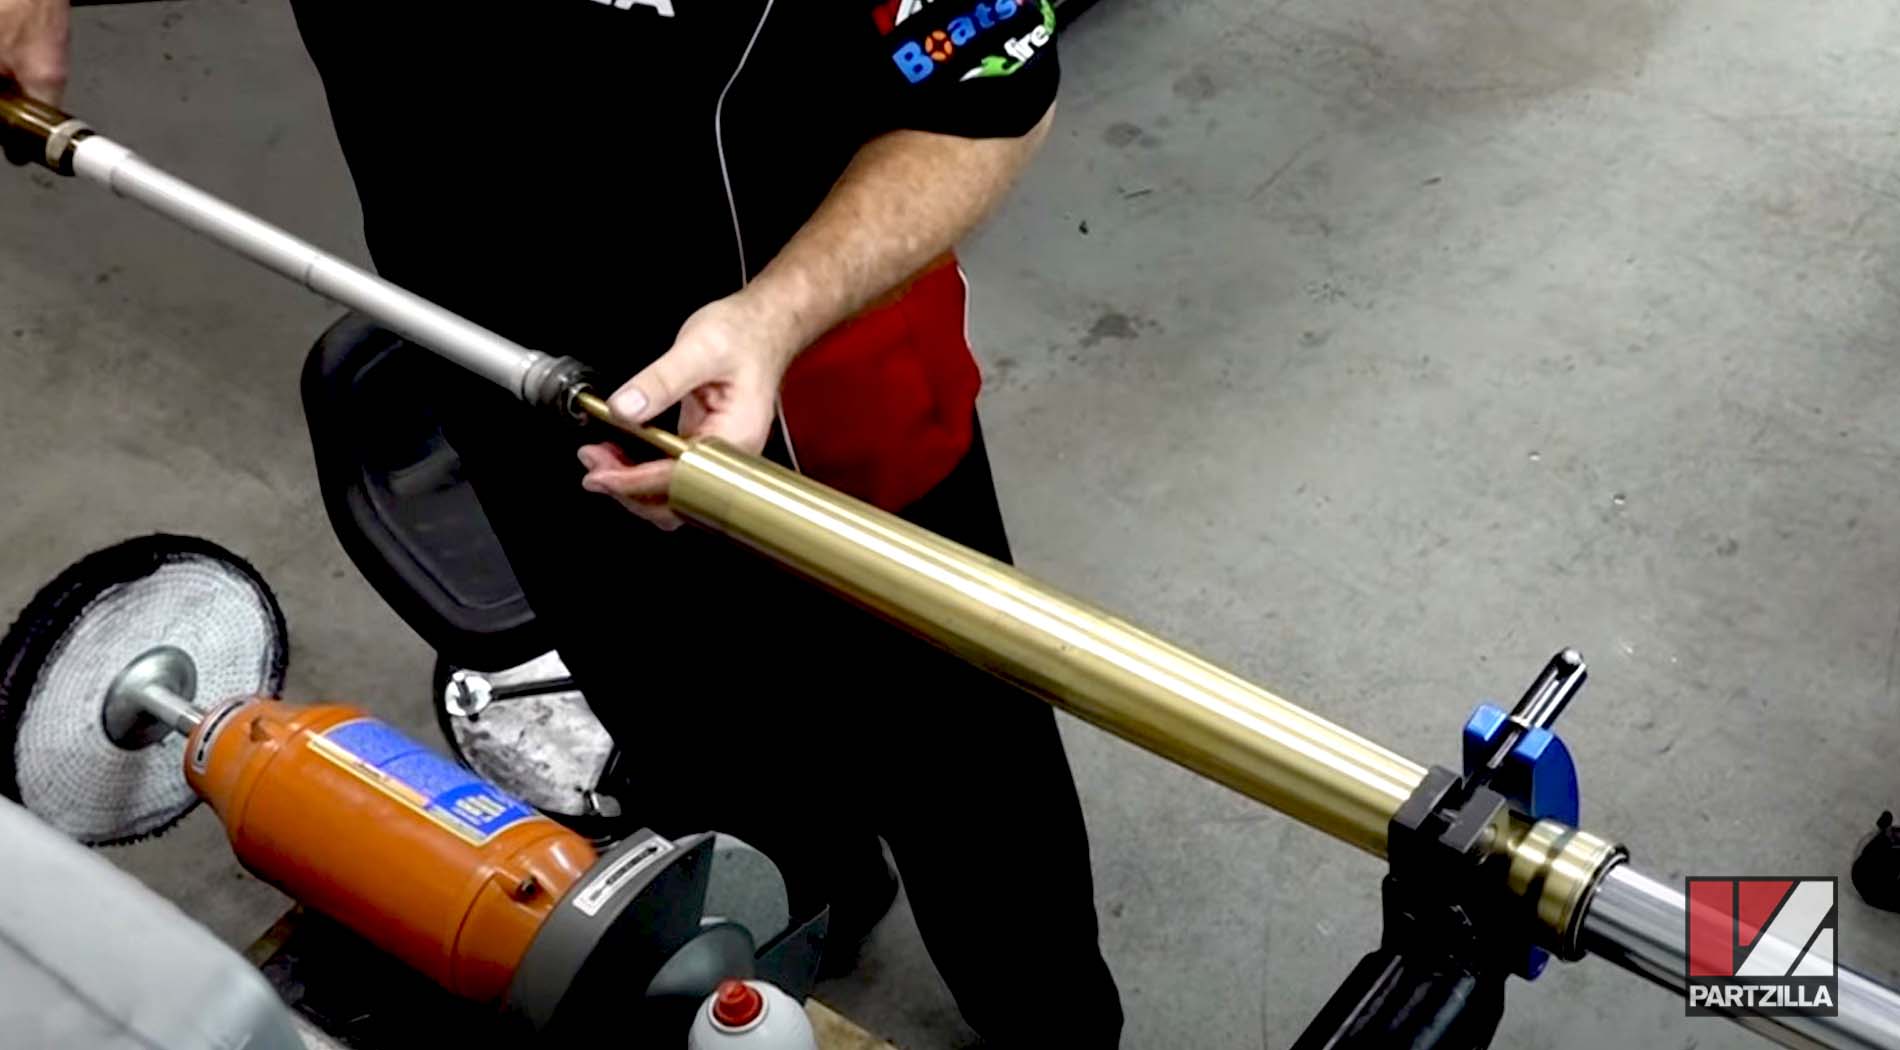
Step 11. Pull the outer fork tube and the inner tube apart.
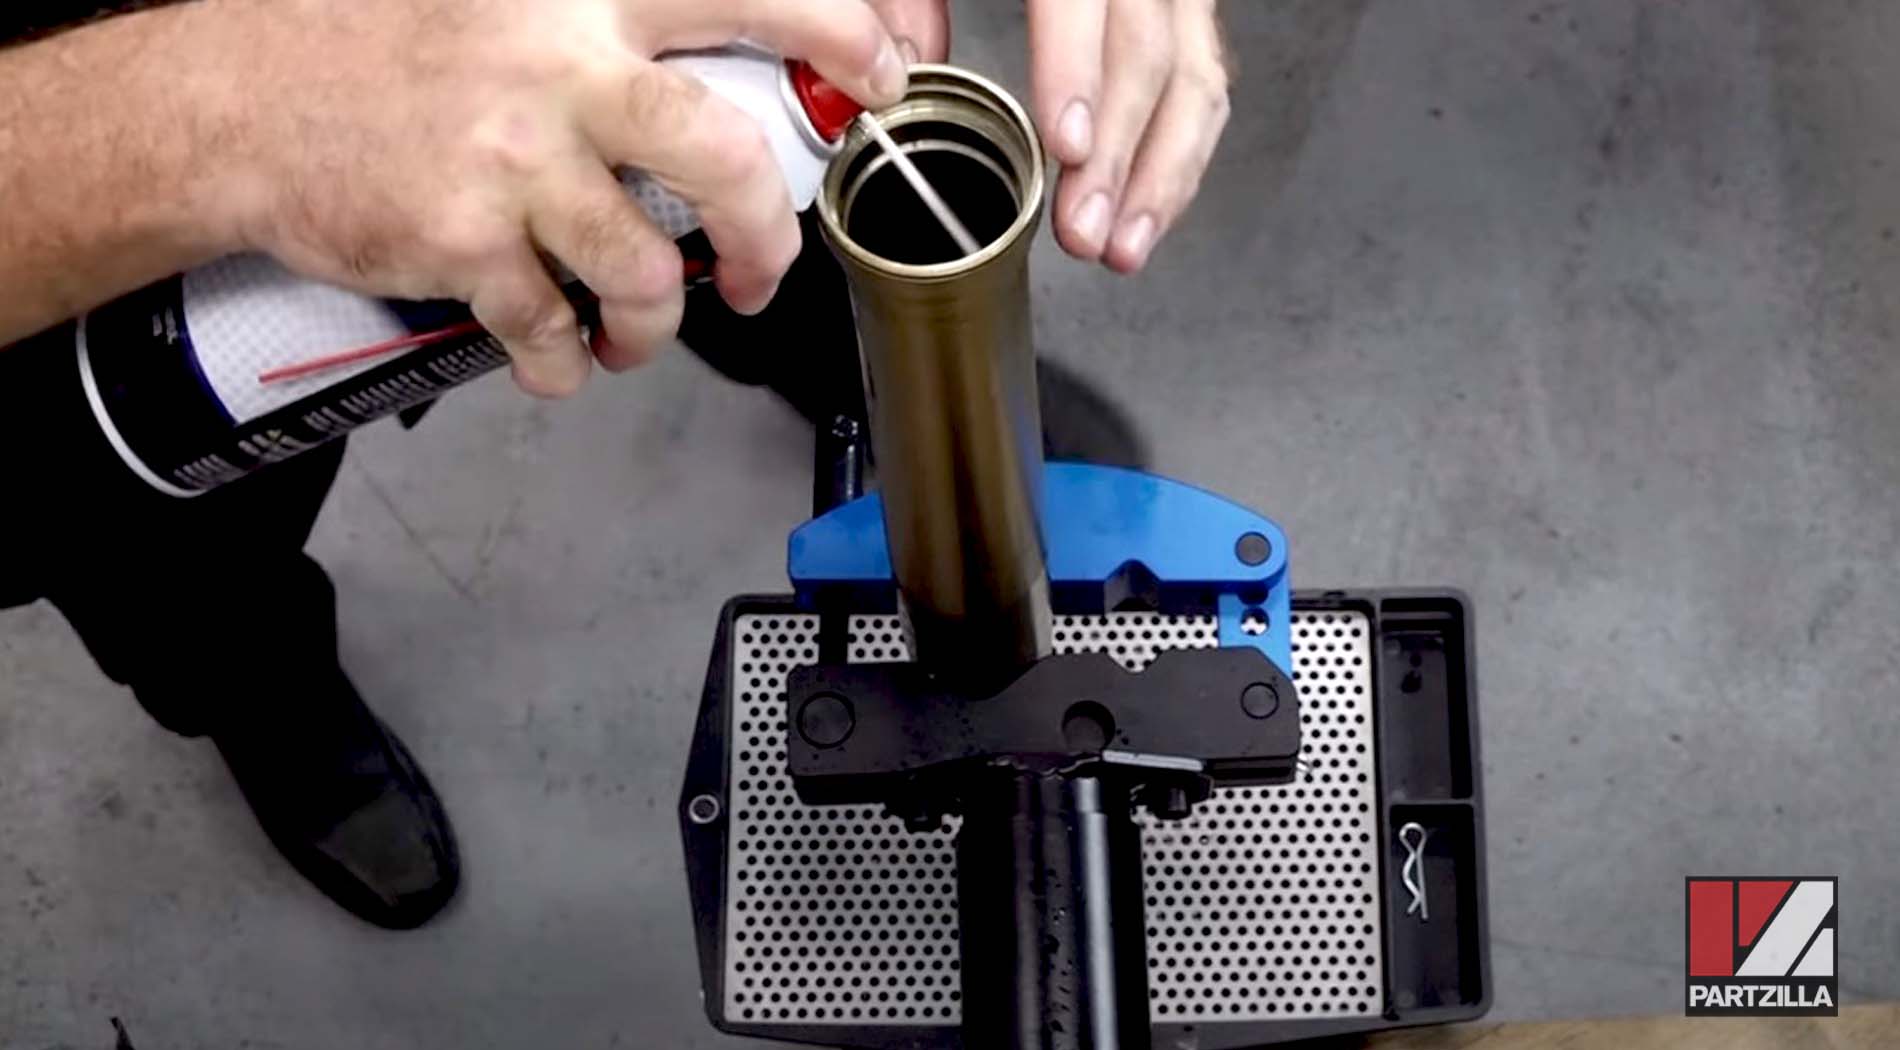
Step 12. Spray the inside of the fork tube with contact cleaner before removing it from the vise clamp.
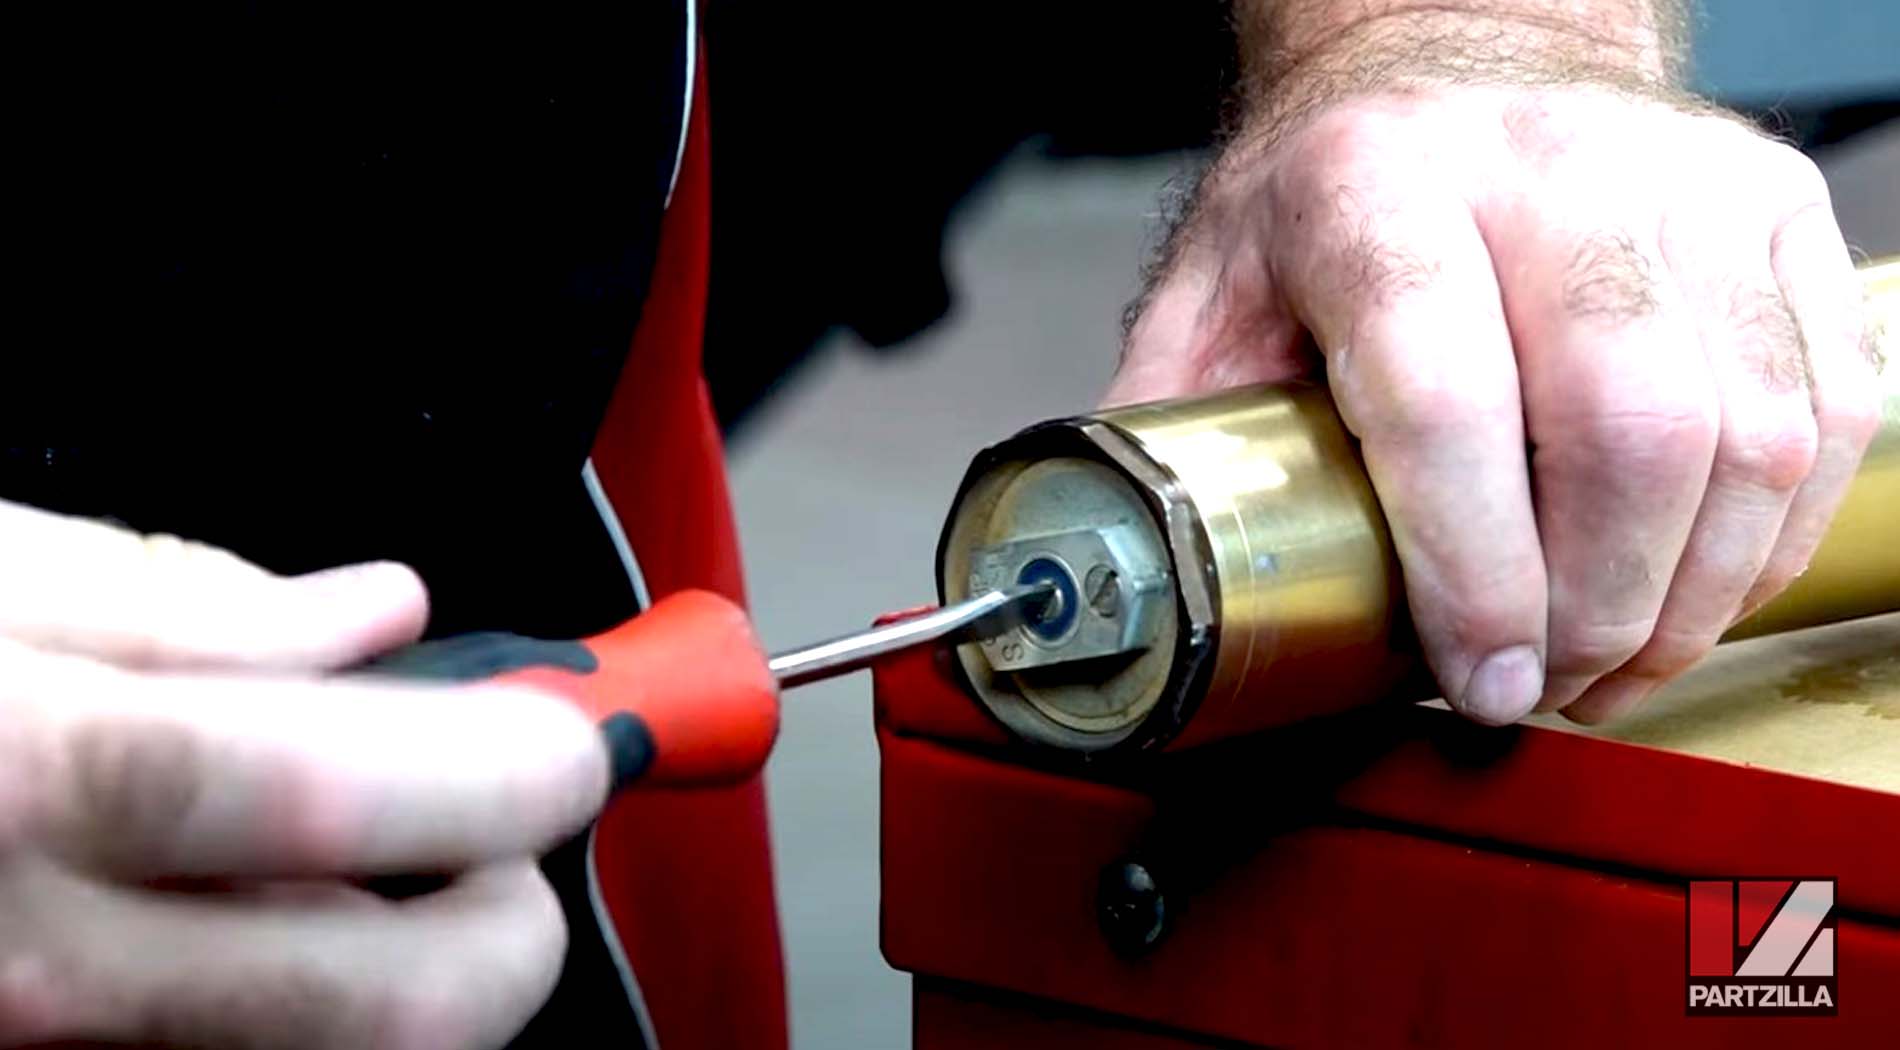
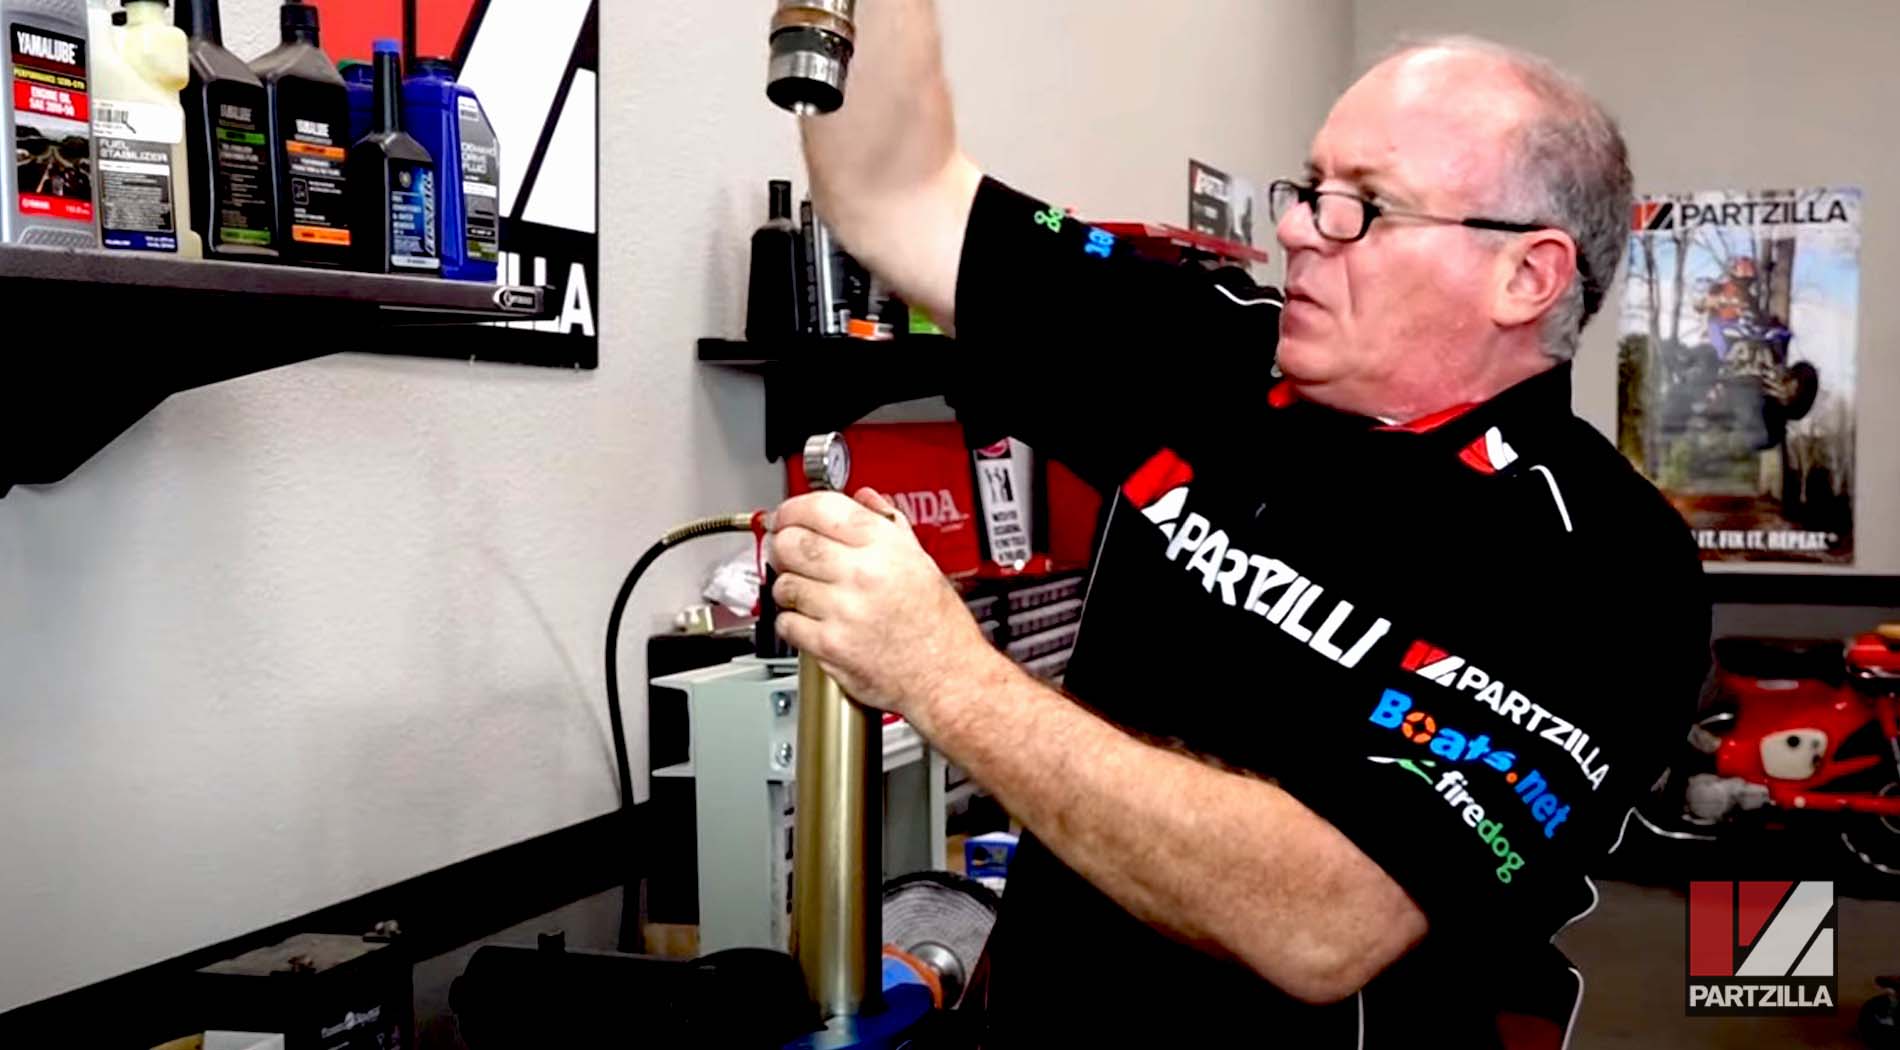
Step 13. Place the fork damper rod in the vise, then use the middle opening of the fork cap wrench to break loose the top cap, and carefully remove the damper from the outer tube.
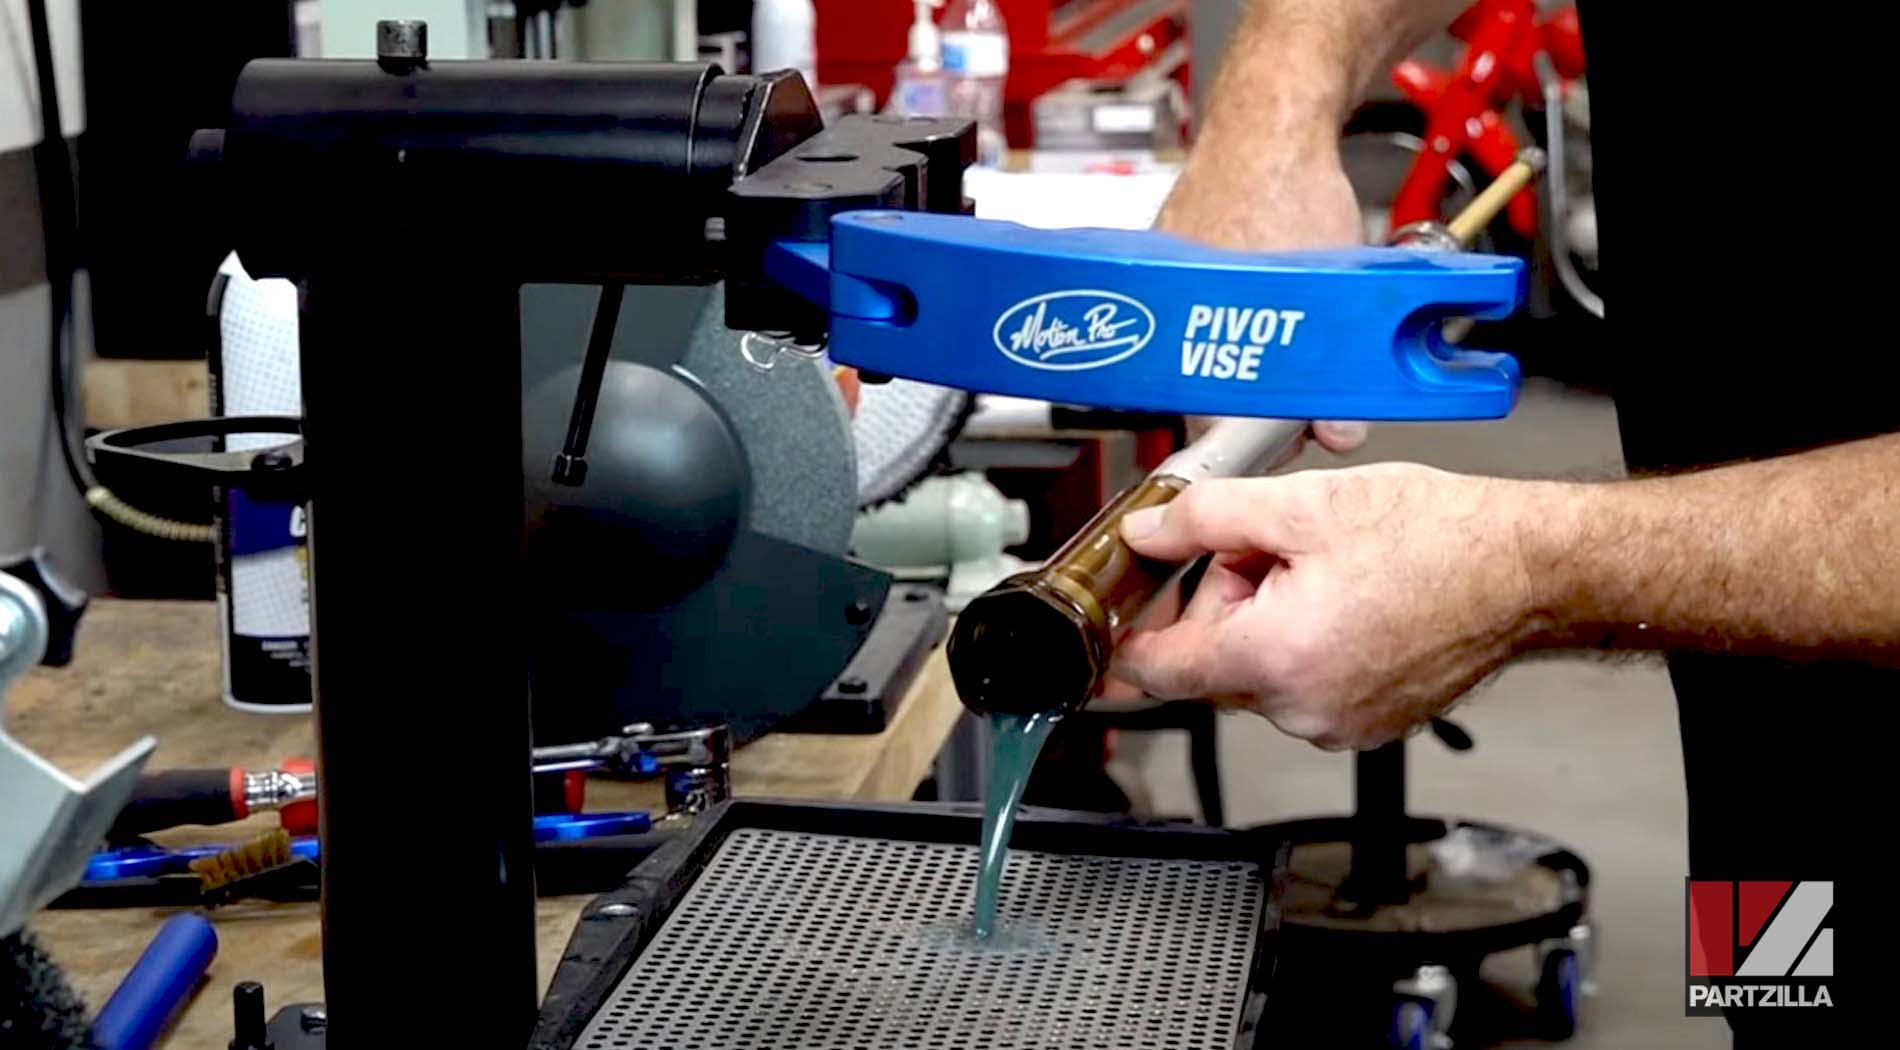
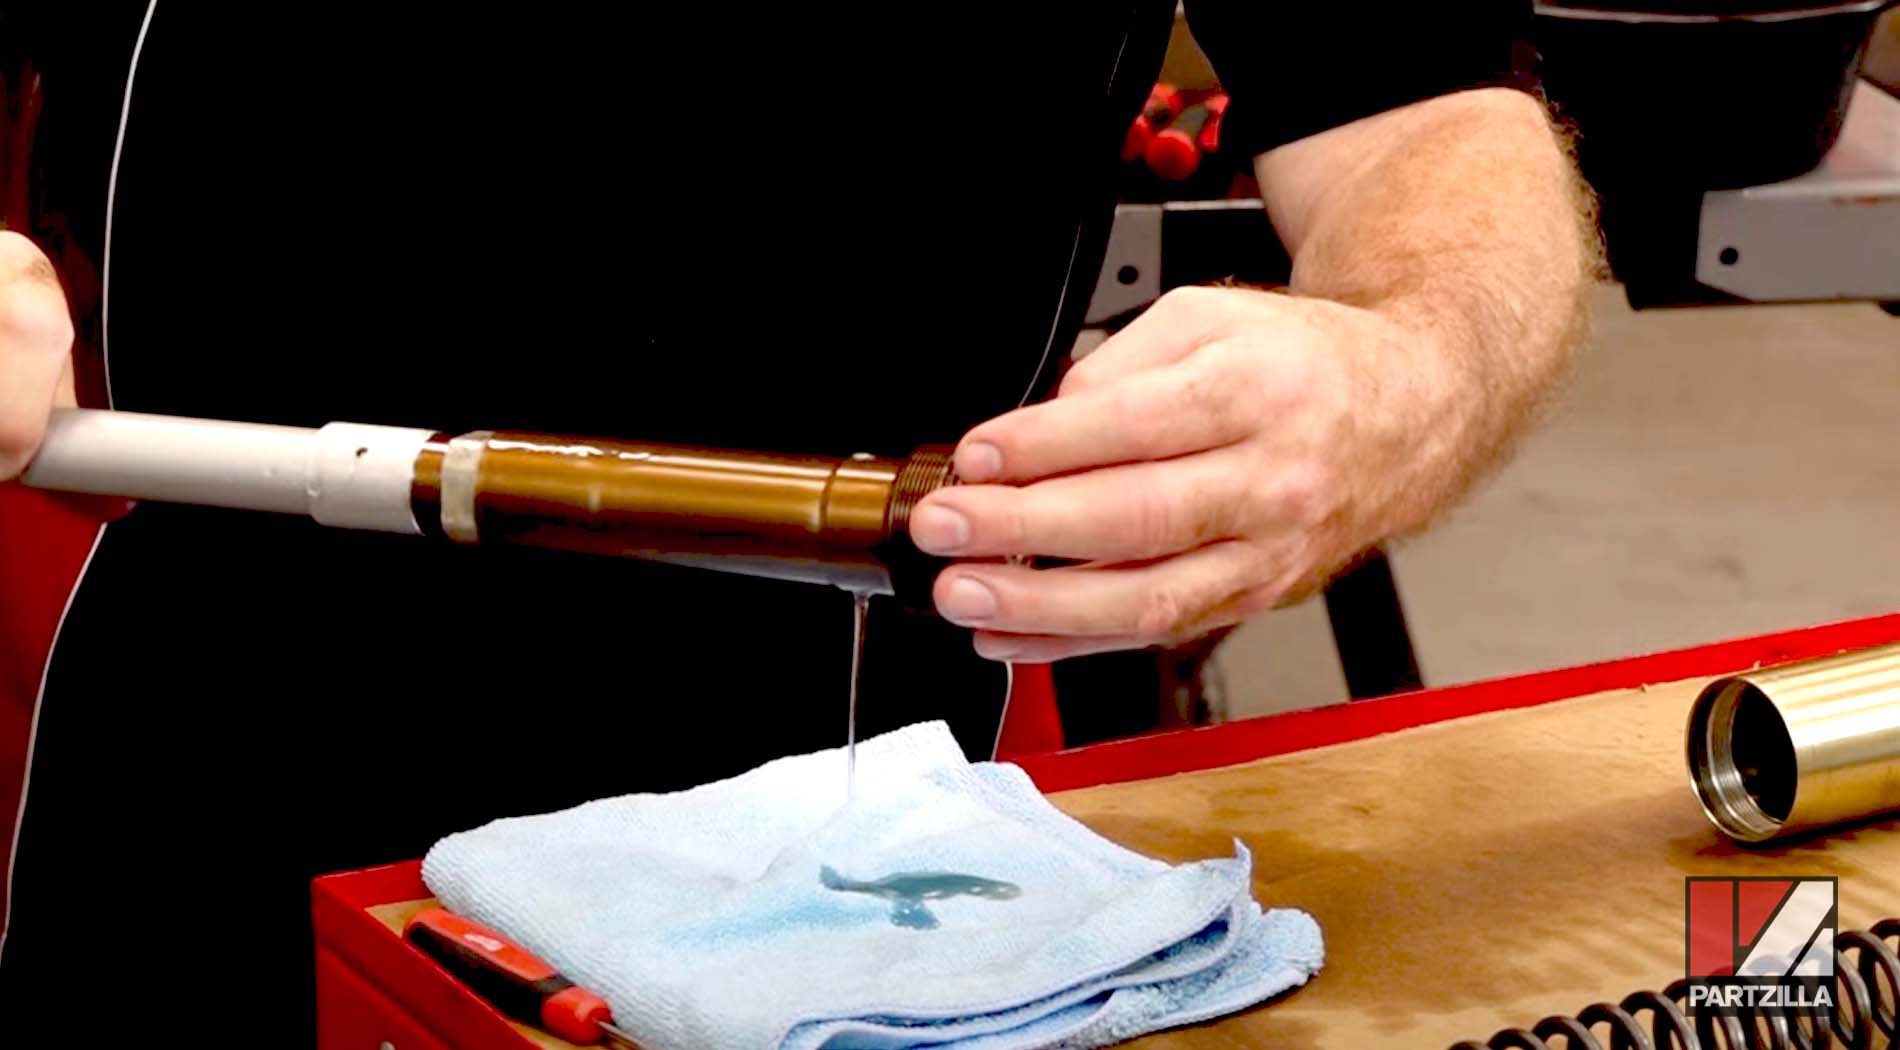
Step 14. Remove the rod from the vise and empty out the fork oil.
PRO TIP: Get everything laid out in order and cleaned up, then start at the bottom and work your way up when installing the new parts.
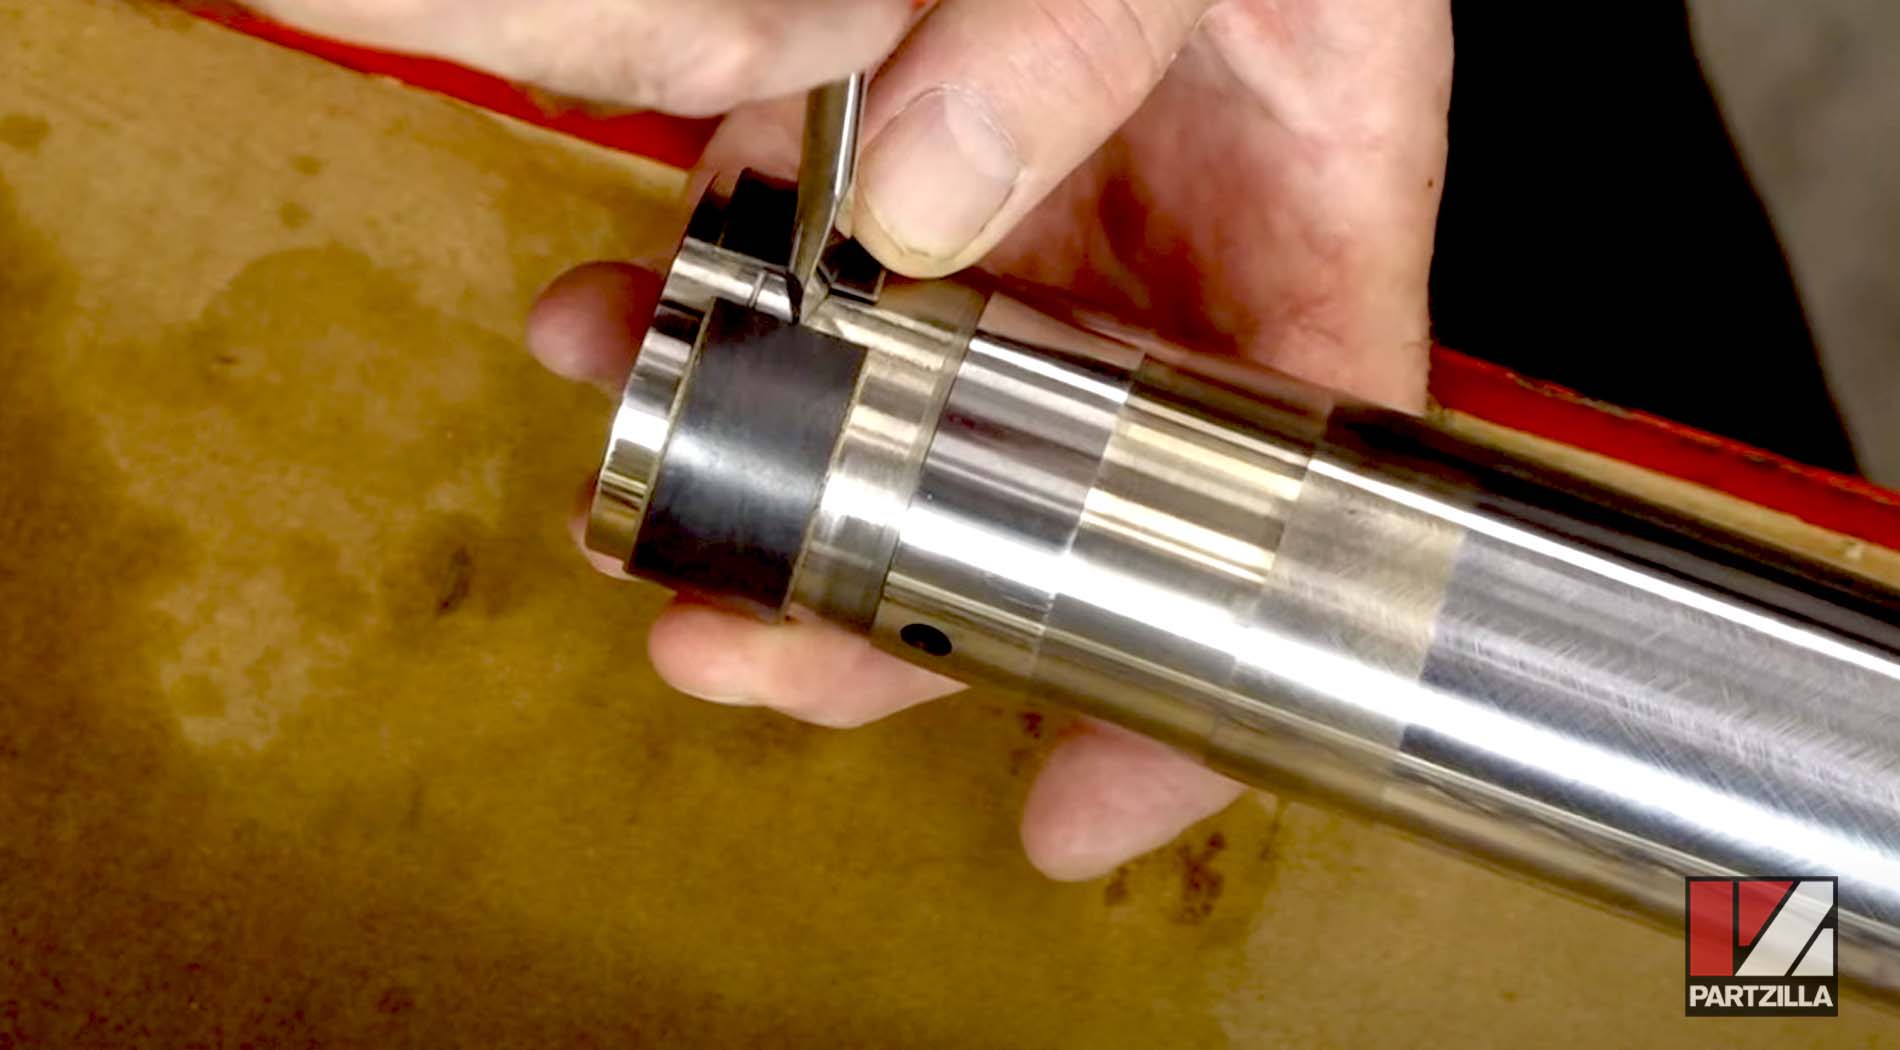
Step 15. Remove the bushings from the fork tube. Use a flathead screwdriver to remove the upper bushing by turning the screwdriver and opening up the bushing, being careful not to scratch the fork tube.
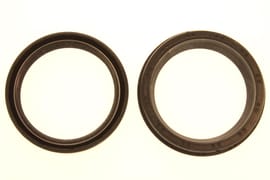
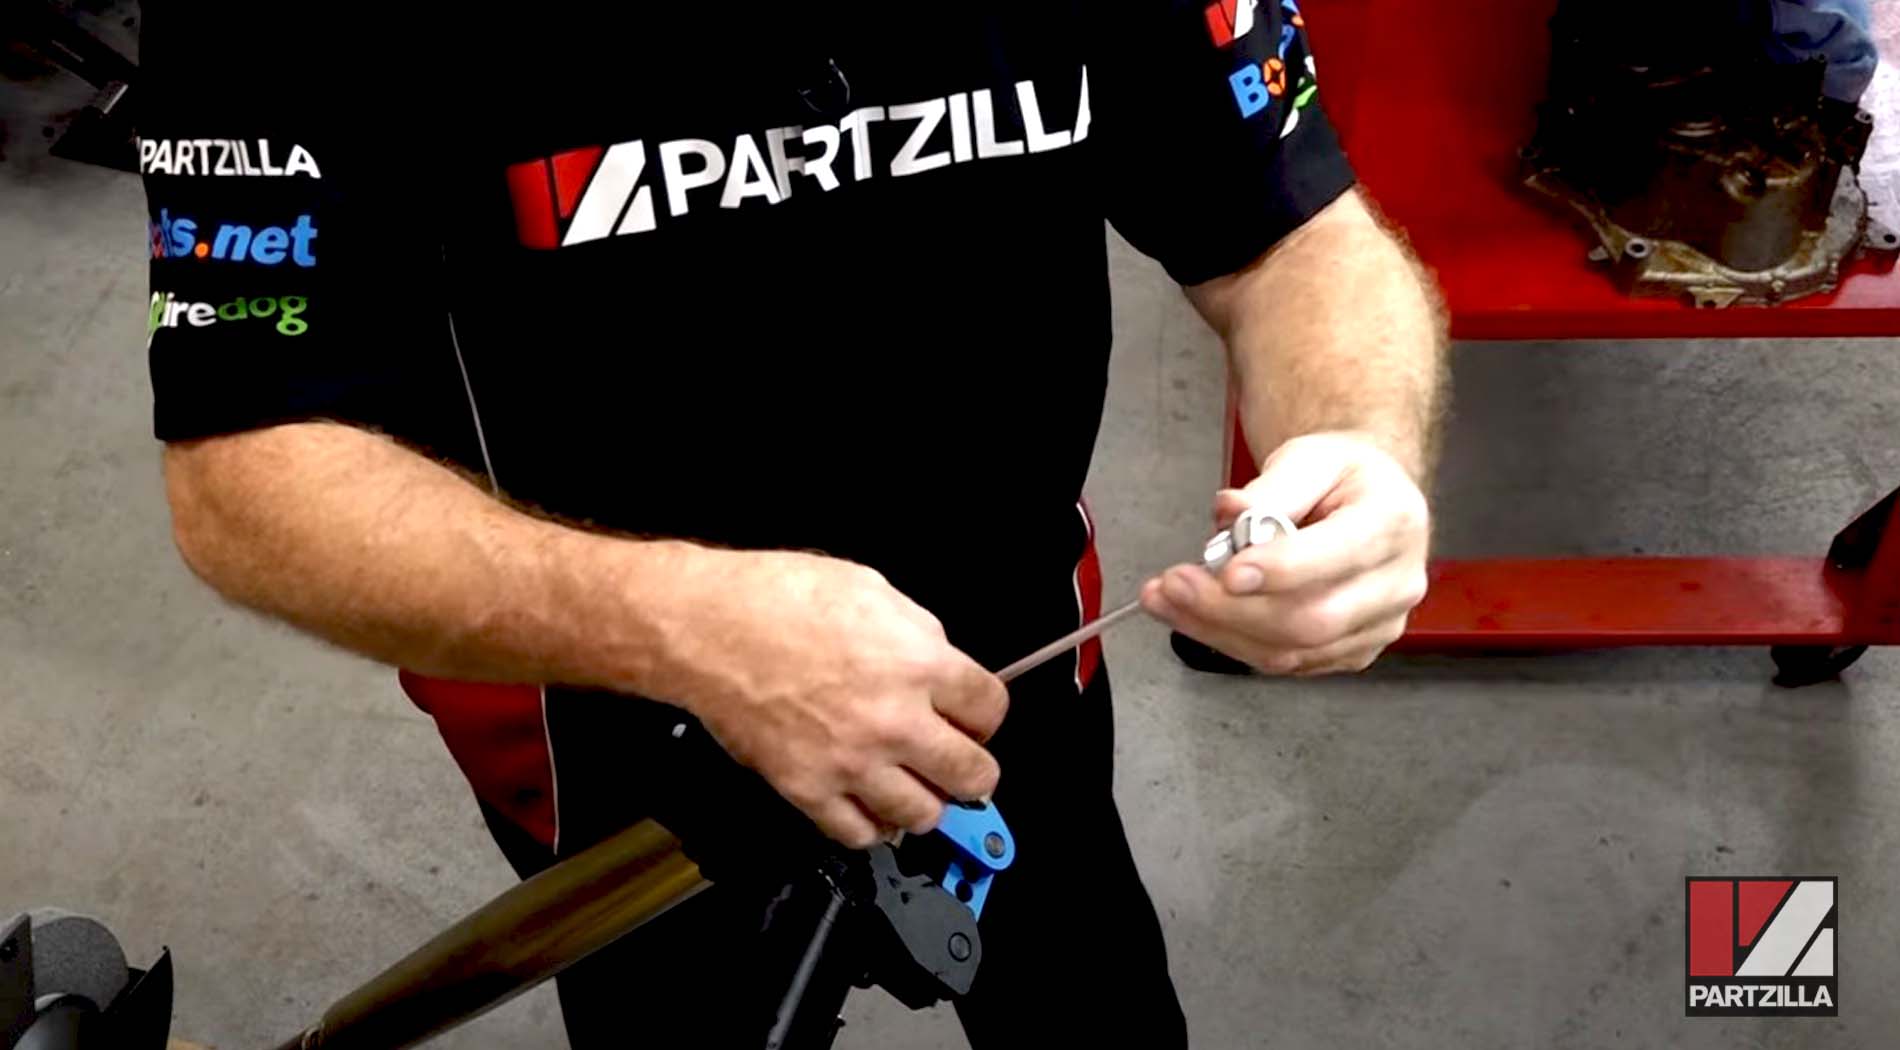
Step 16. Remove the washer (backup ring), the main seal, the locking clip and the dust seal from the fork tube.
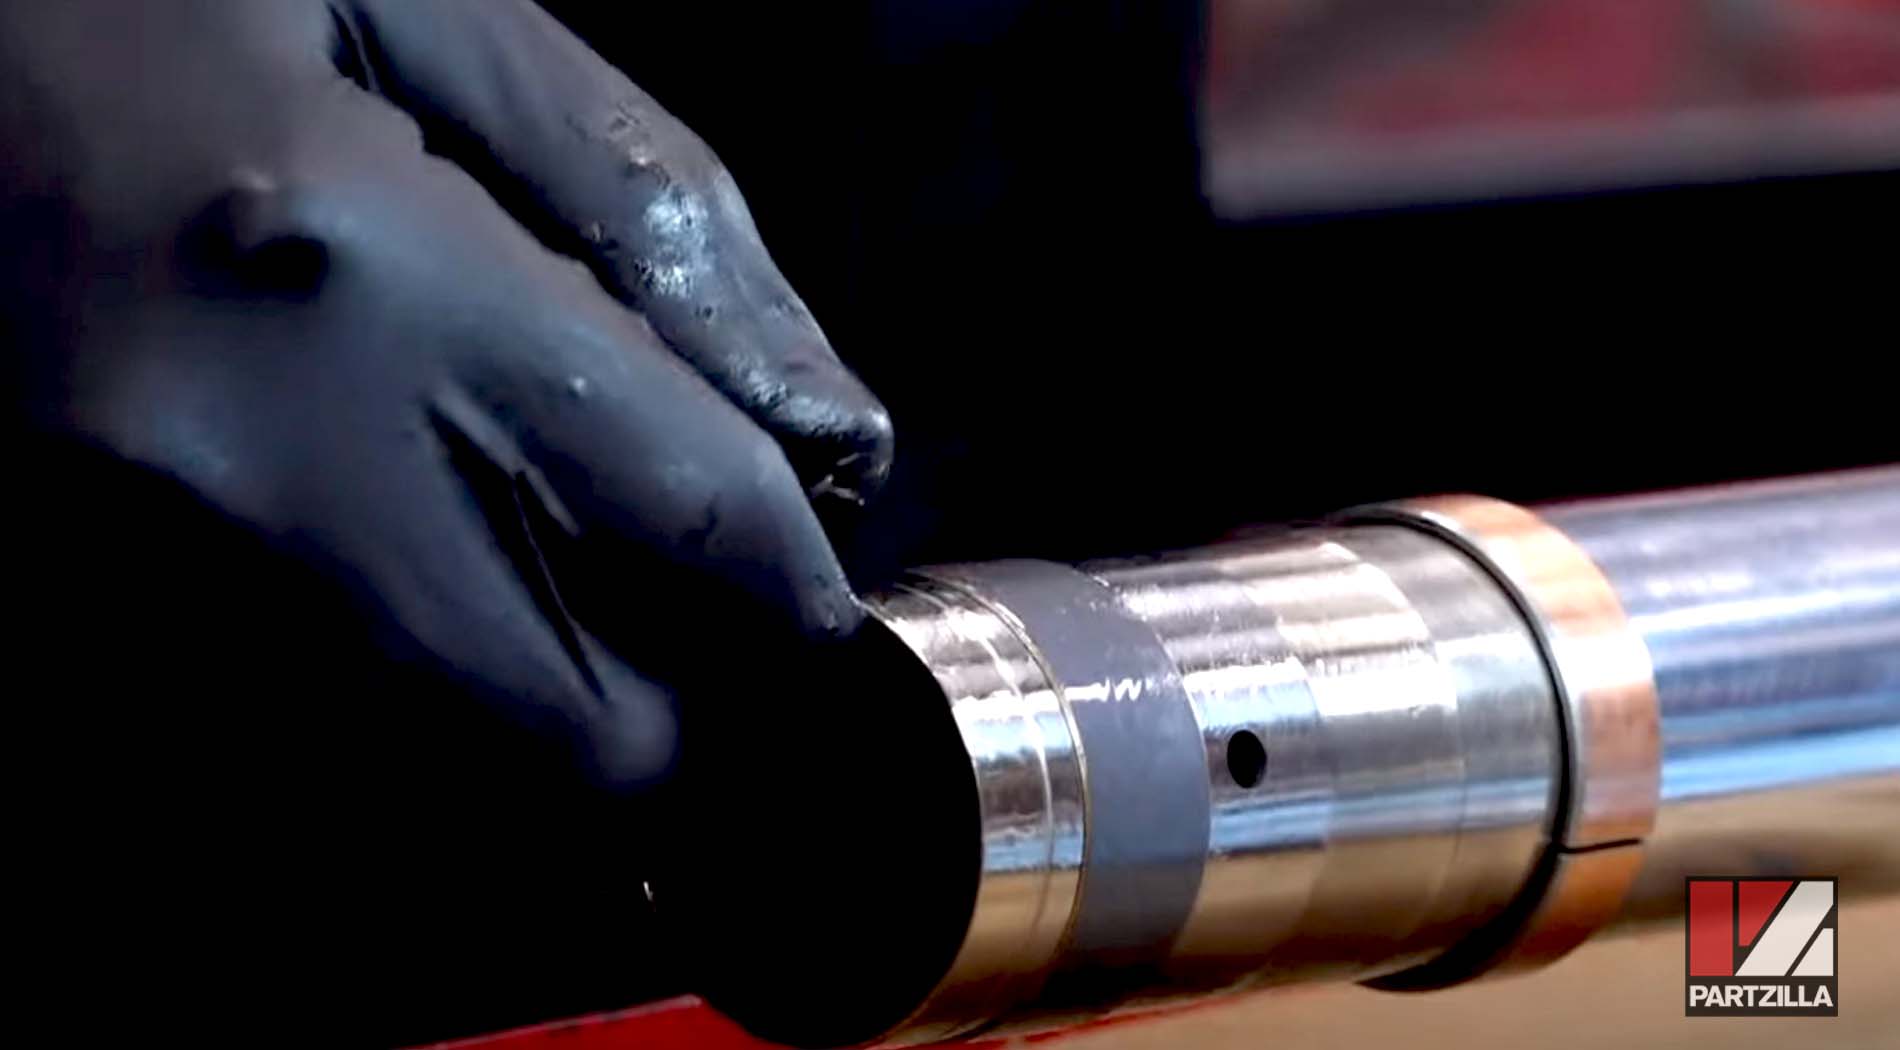
Step 17. Clean the inner fork tube one more time at the top, then wrap the top up with electrical tape to protect the main seal and the dust seal from the edges. Make sure to inspect the tube for damage or grooves that could prematurely wear out the seals.
Step 18. Put a light coat of suspension fluid on the tube to make everything easier to install. Next, put a little bit of fluid on the inside lip of the dust seal and then wiggle it onto the tube, followed by the locking clip and the main seal.
Step 19. Install the backup ring, then remove the electrical tape and oil up the tube again to prepare for the installation of the bushings.
Step 20. Install the lower bushing first, then open up the upper bushing with a flathead screwdriver enough to clear the fork and walk it on, being careful not to scratch it. Listen for a click so that you know the bushing is seated properly.
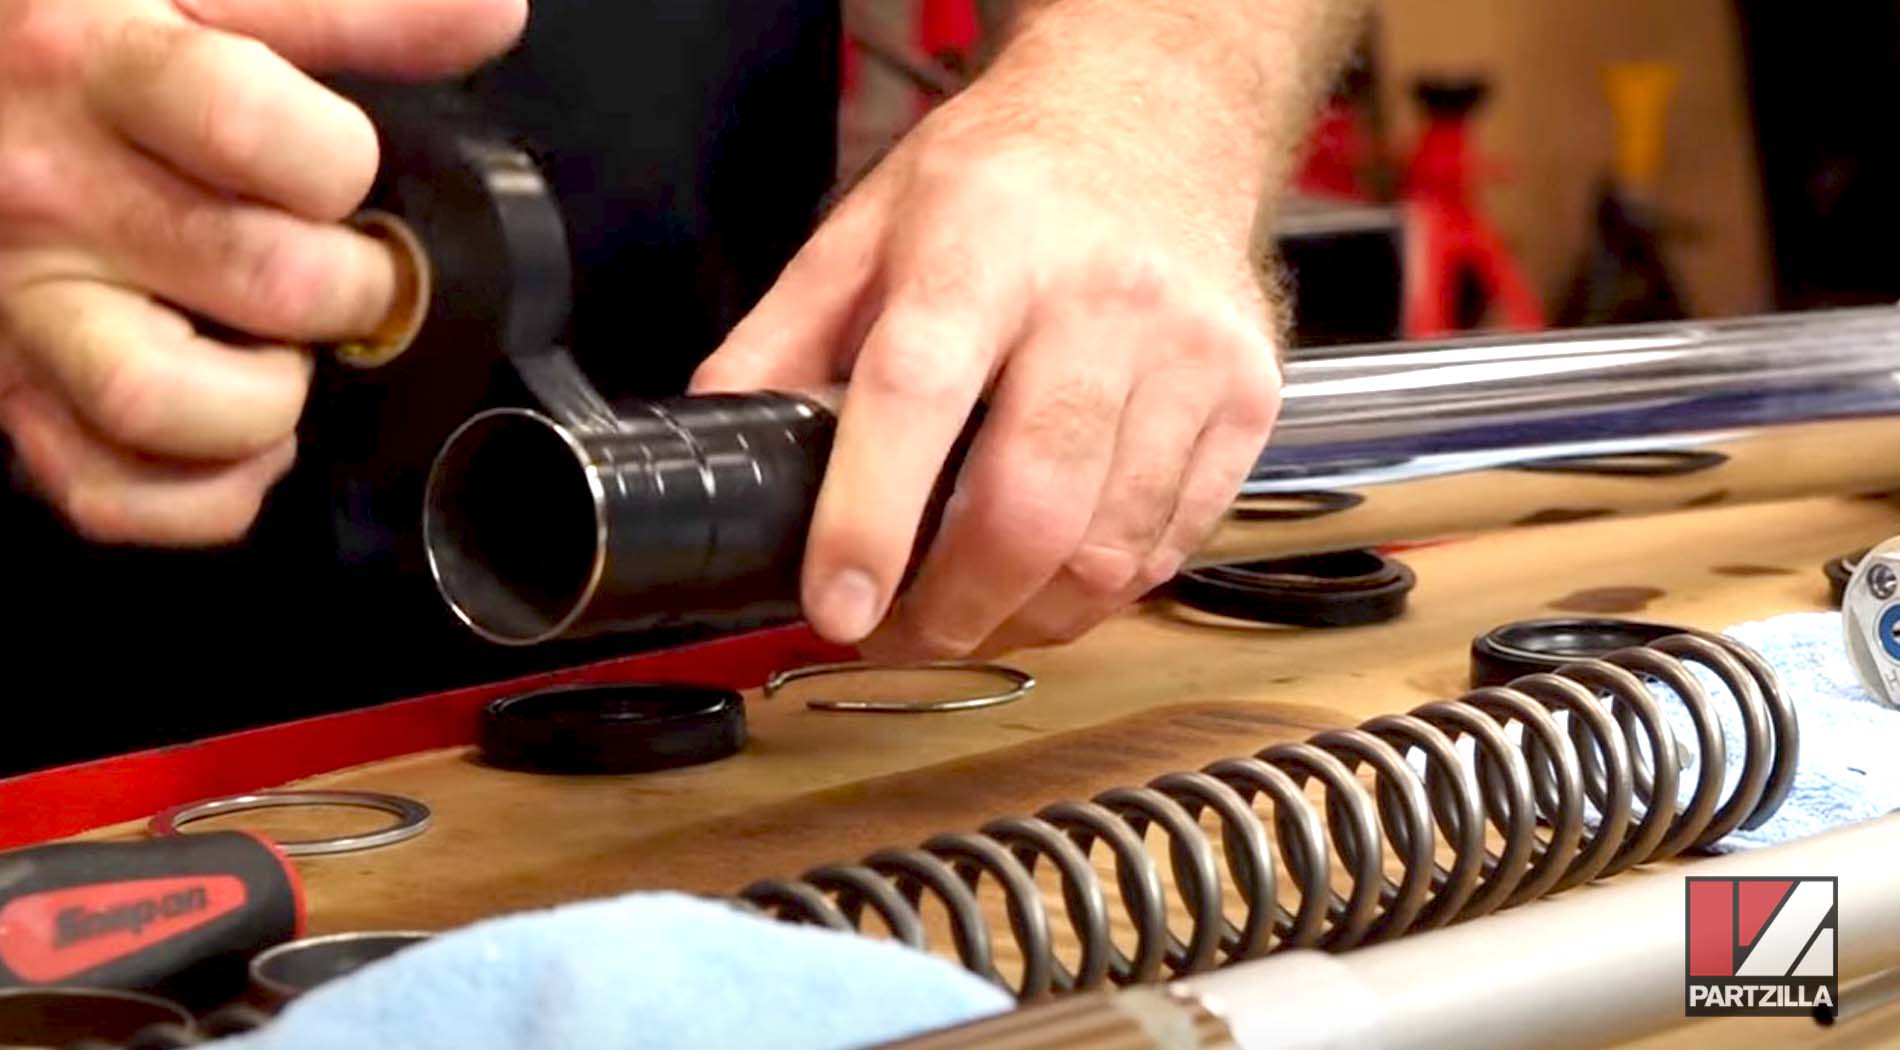
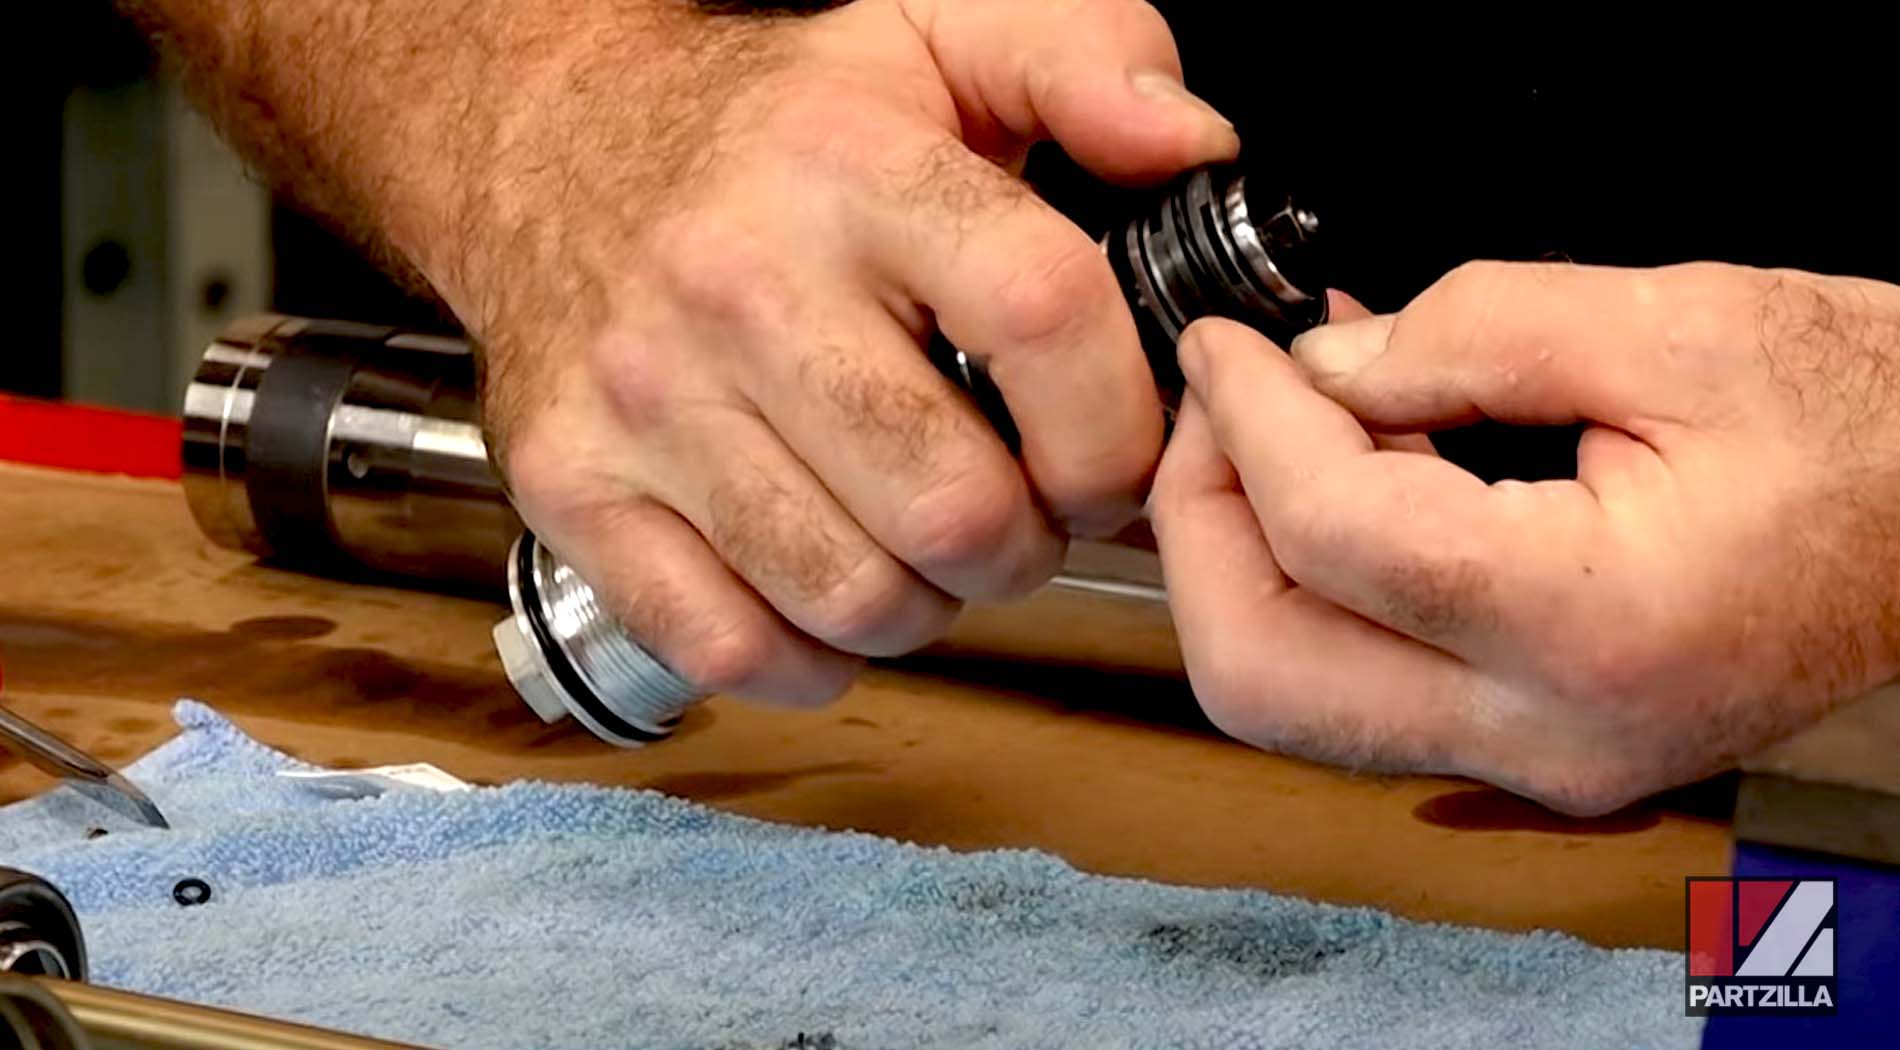
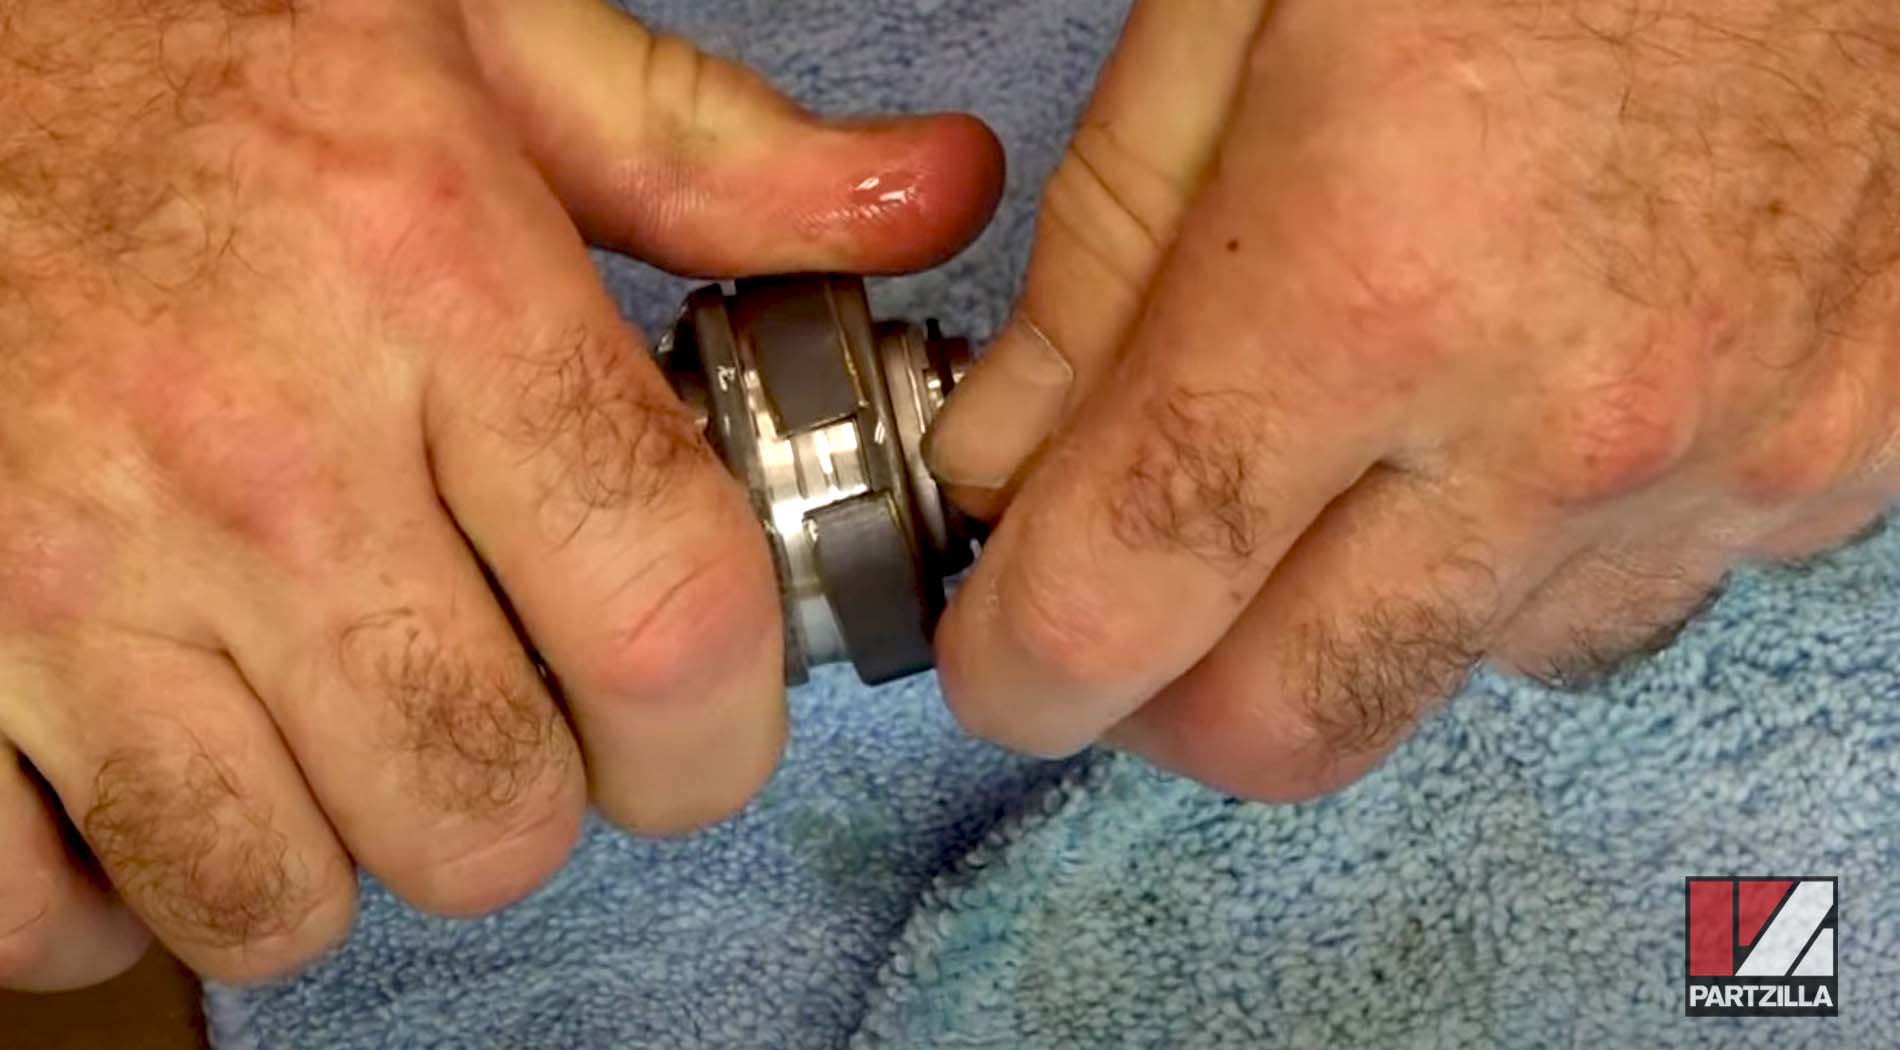
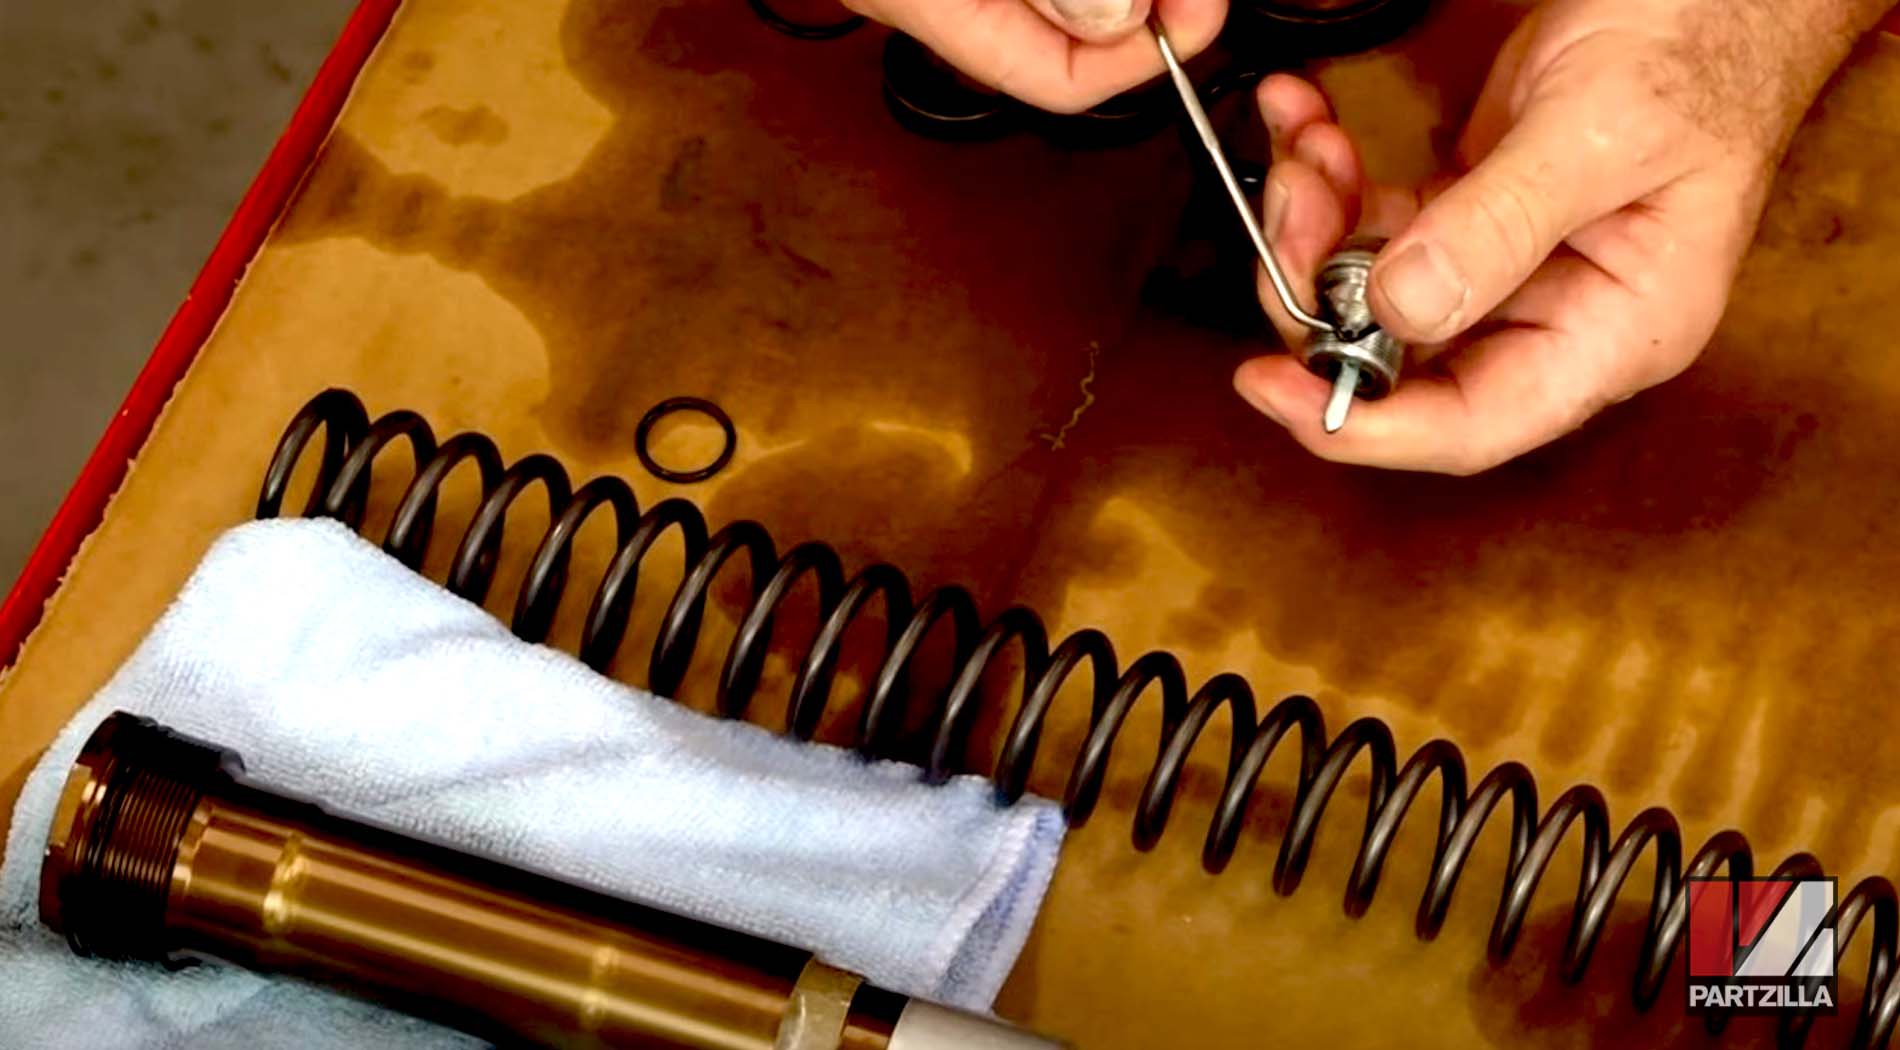
Step 21. Remove the O-rings from the damper with a pick tool, and the bushings with a flathead screwdriver. Next, clean up the damper with contact cleaner.
NOTE: If you’re using contact cleaner, make sure it doesn't come into contact with any of the O-rings because it’ll make them swell up and not fit correctly.
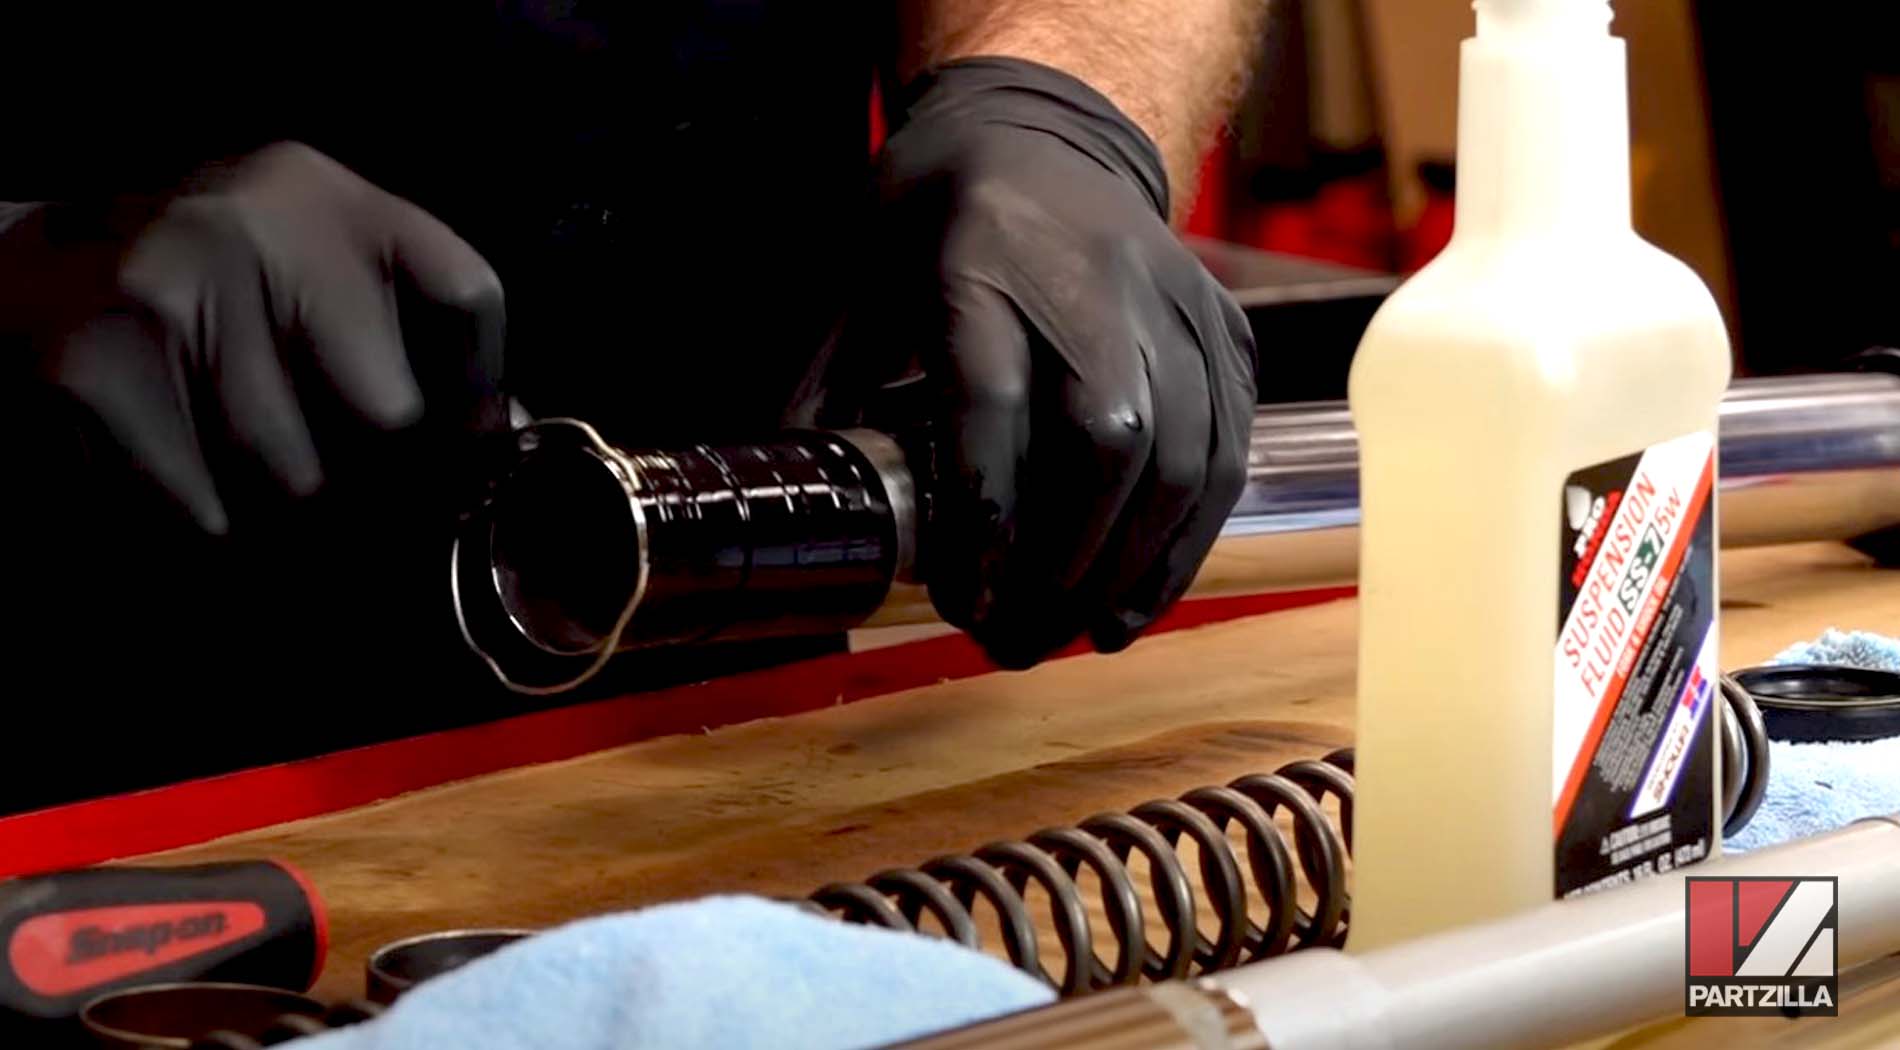
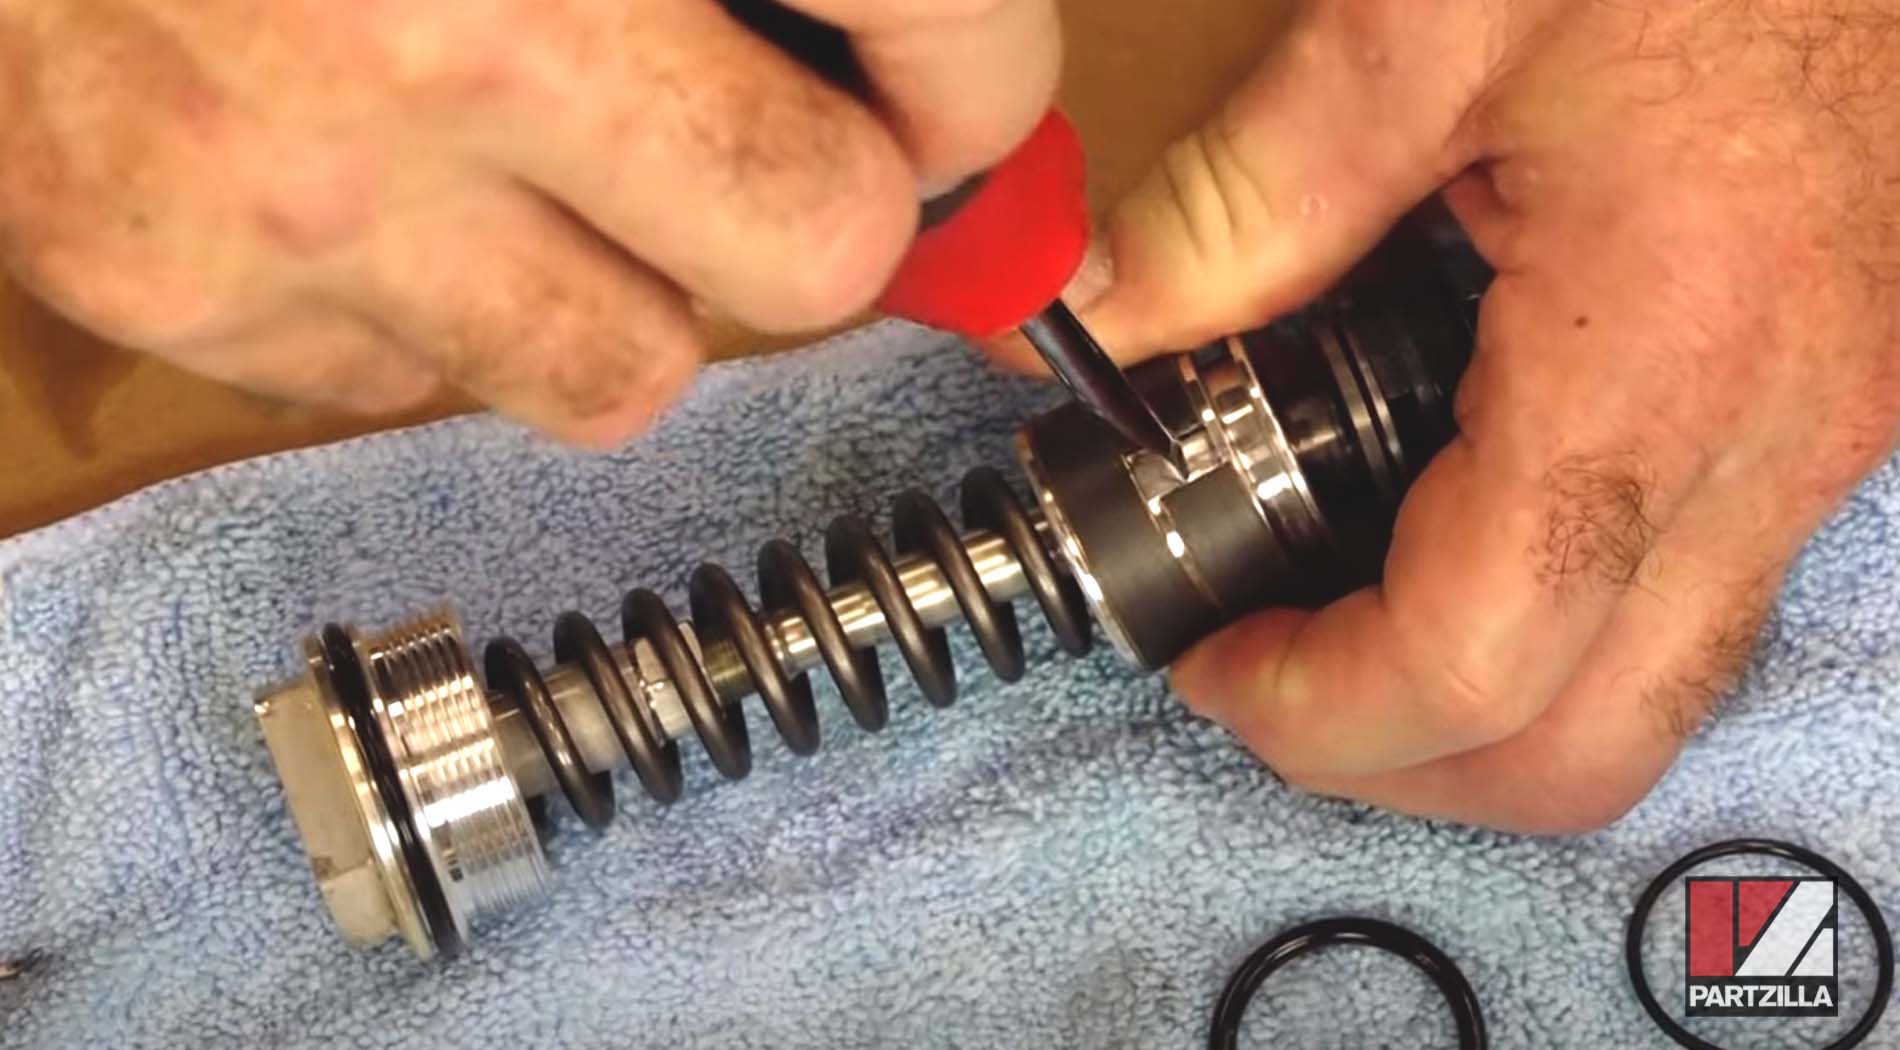
Step 22. Install the new O-rings onto the damper, followed by the new bushings, keeping the ends of the bushings 180 degrees apart.
Step 23. Replace the O-ring on the bleed screw, then reinstall the screw onto the damper. Next, apply fork oil to the bushings and all three of the O-rings.
Step 24. Replace the bushing on the damper tube, then to put a little bit of fork oil on it. Next, replace the O-ring up at the top and the O-ring on the lower cap.
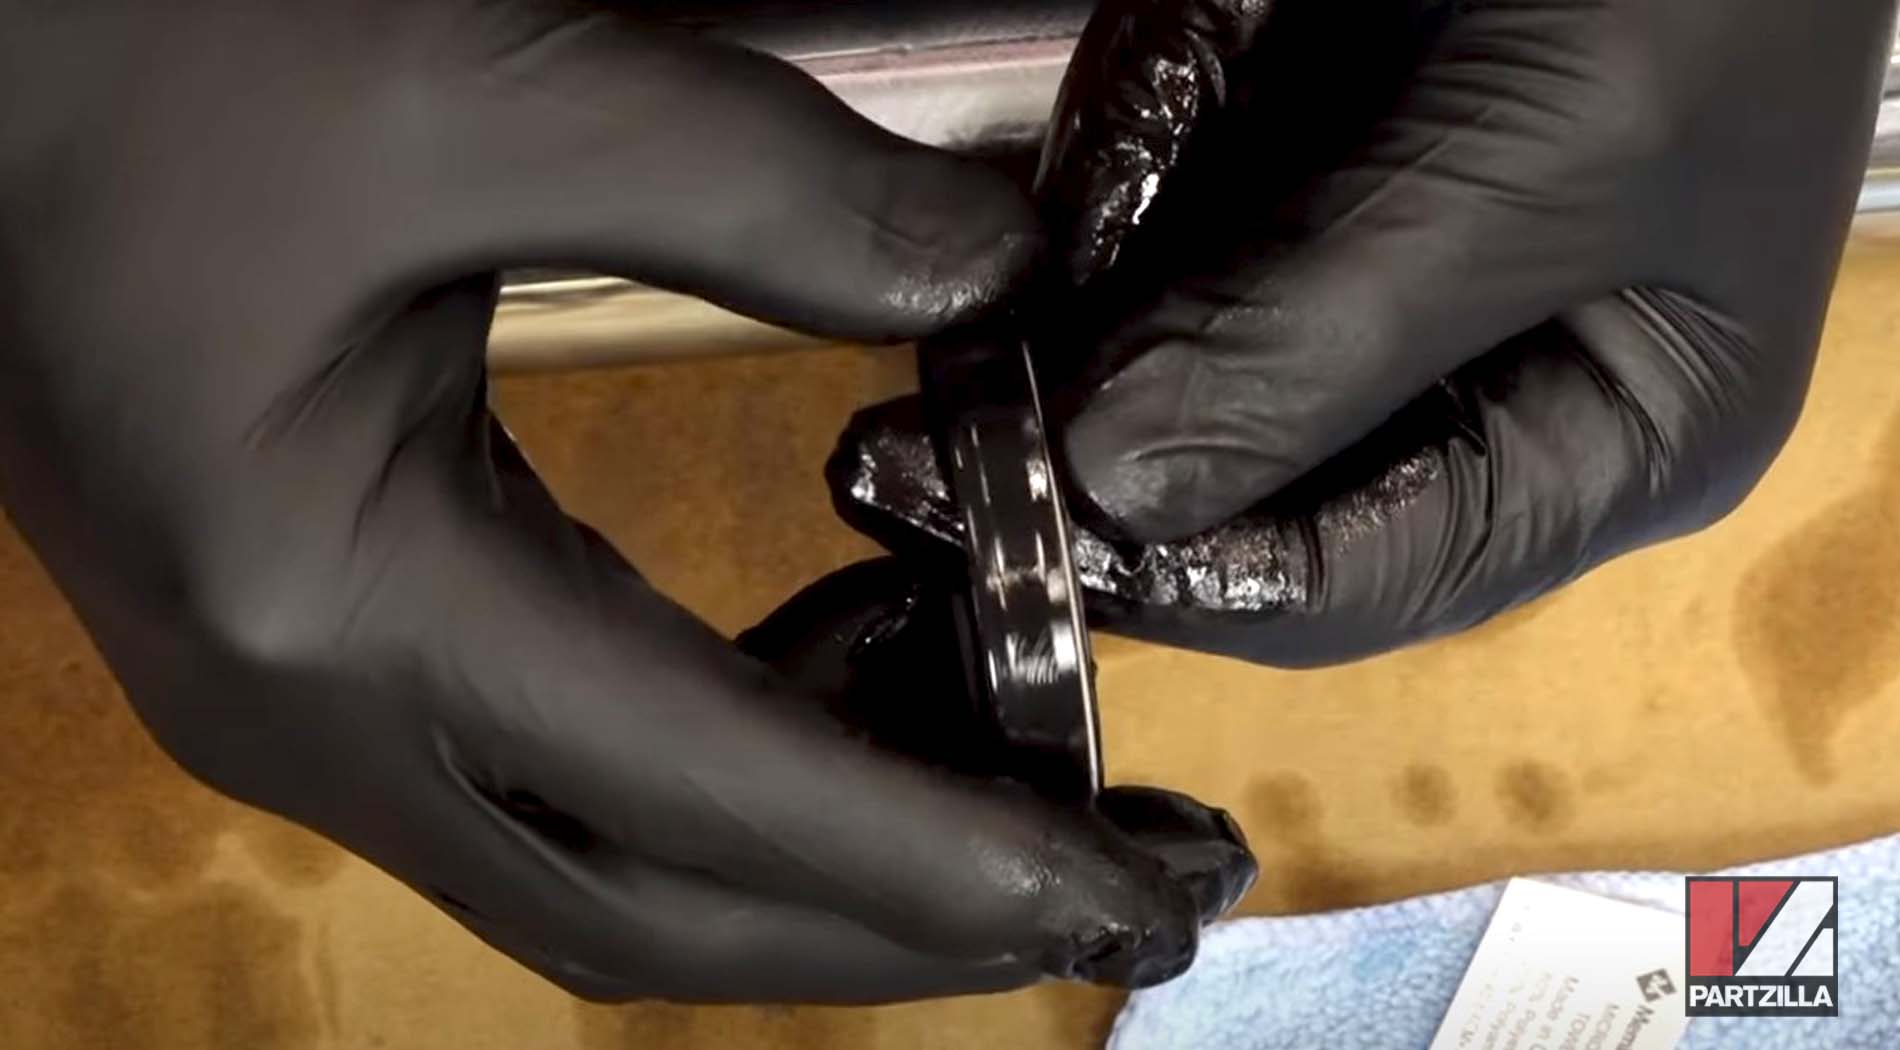
Step 25. Install the wear ring on the outer edge of the fork tube.
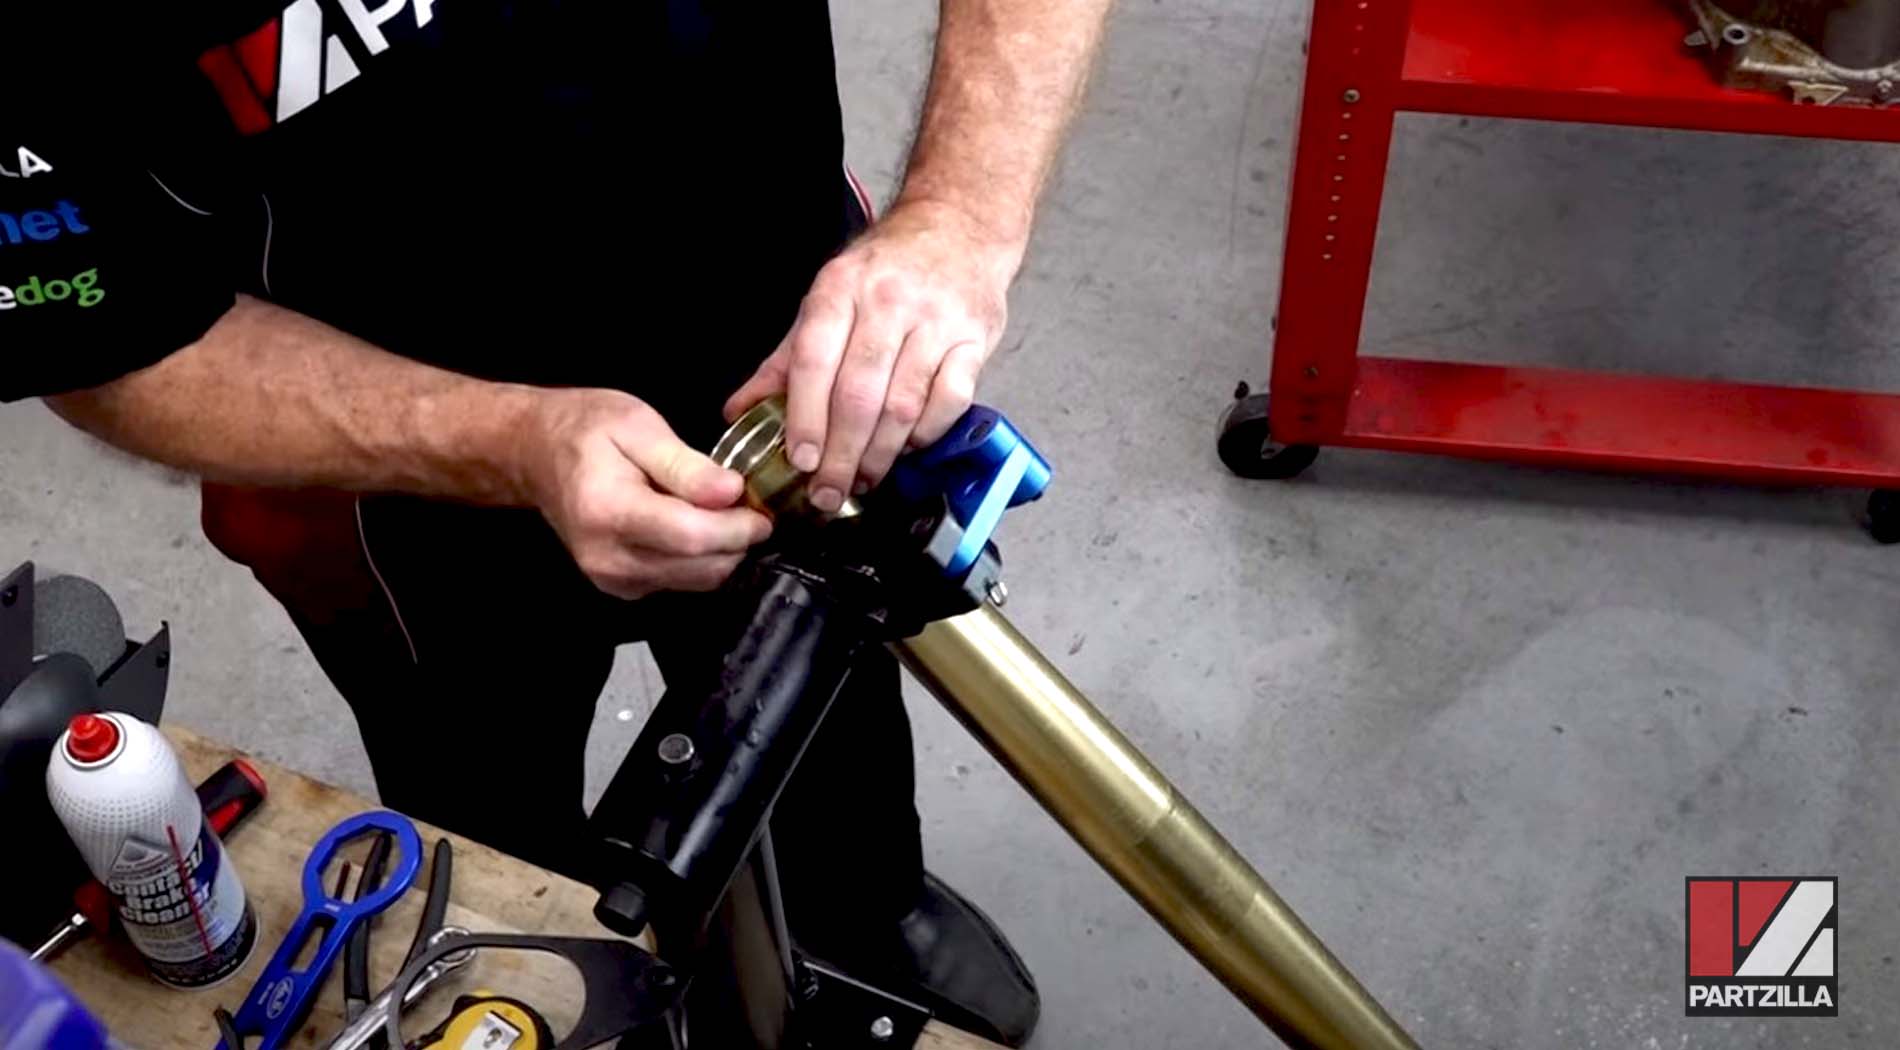
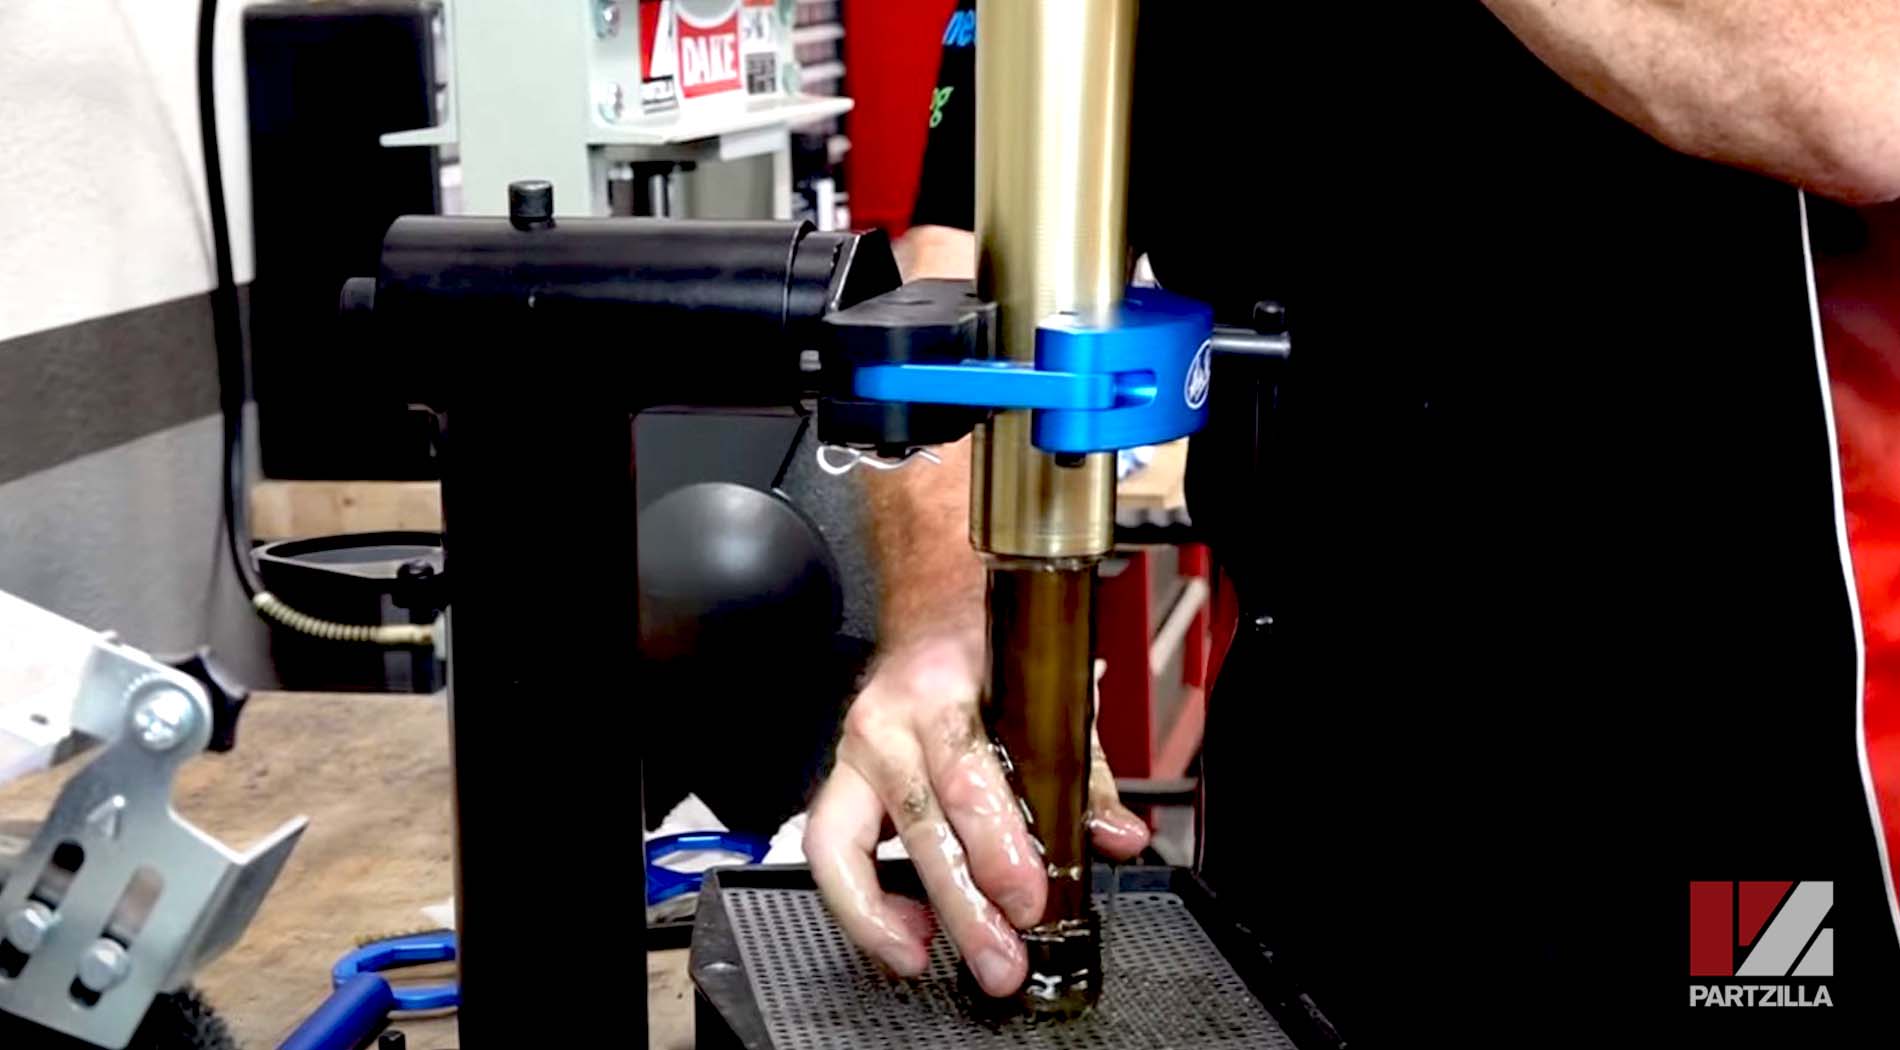
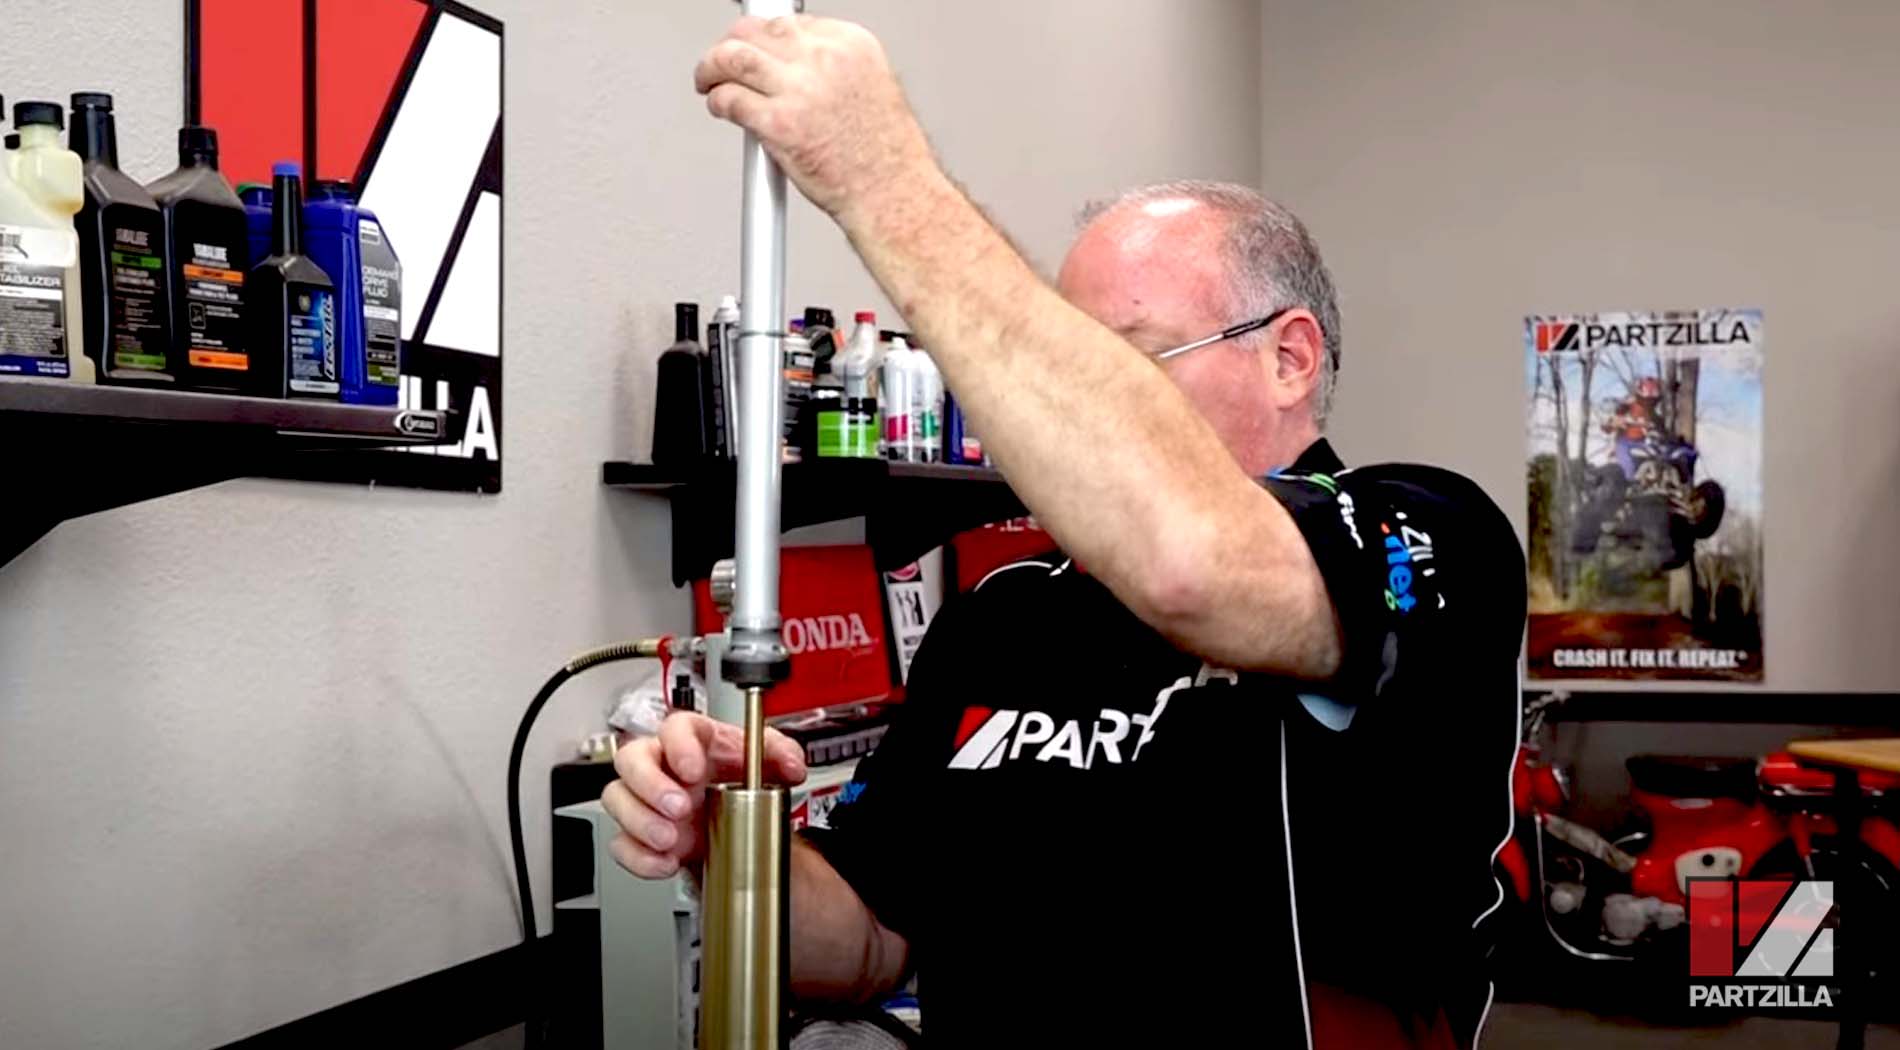
Step 26. Oil the inner tube before installing it back onto the outer tube. Next, use the fork seal driver to drive in the fork seals until they bottom out.
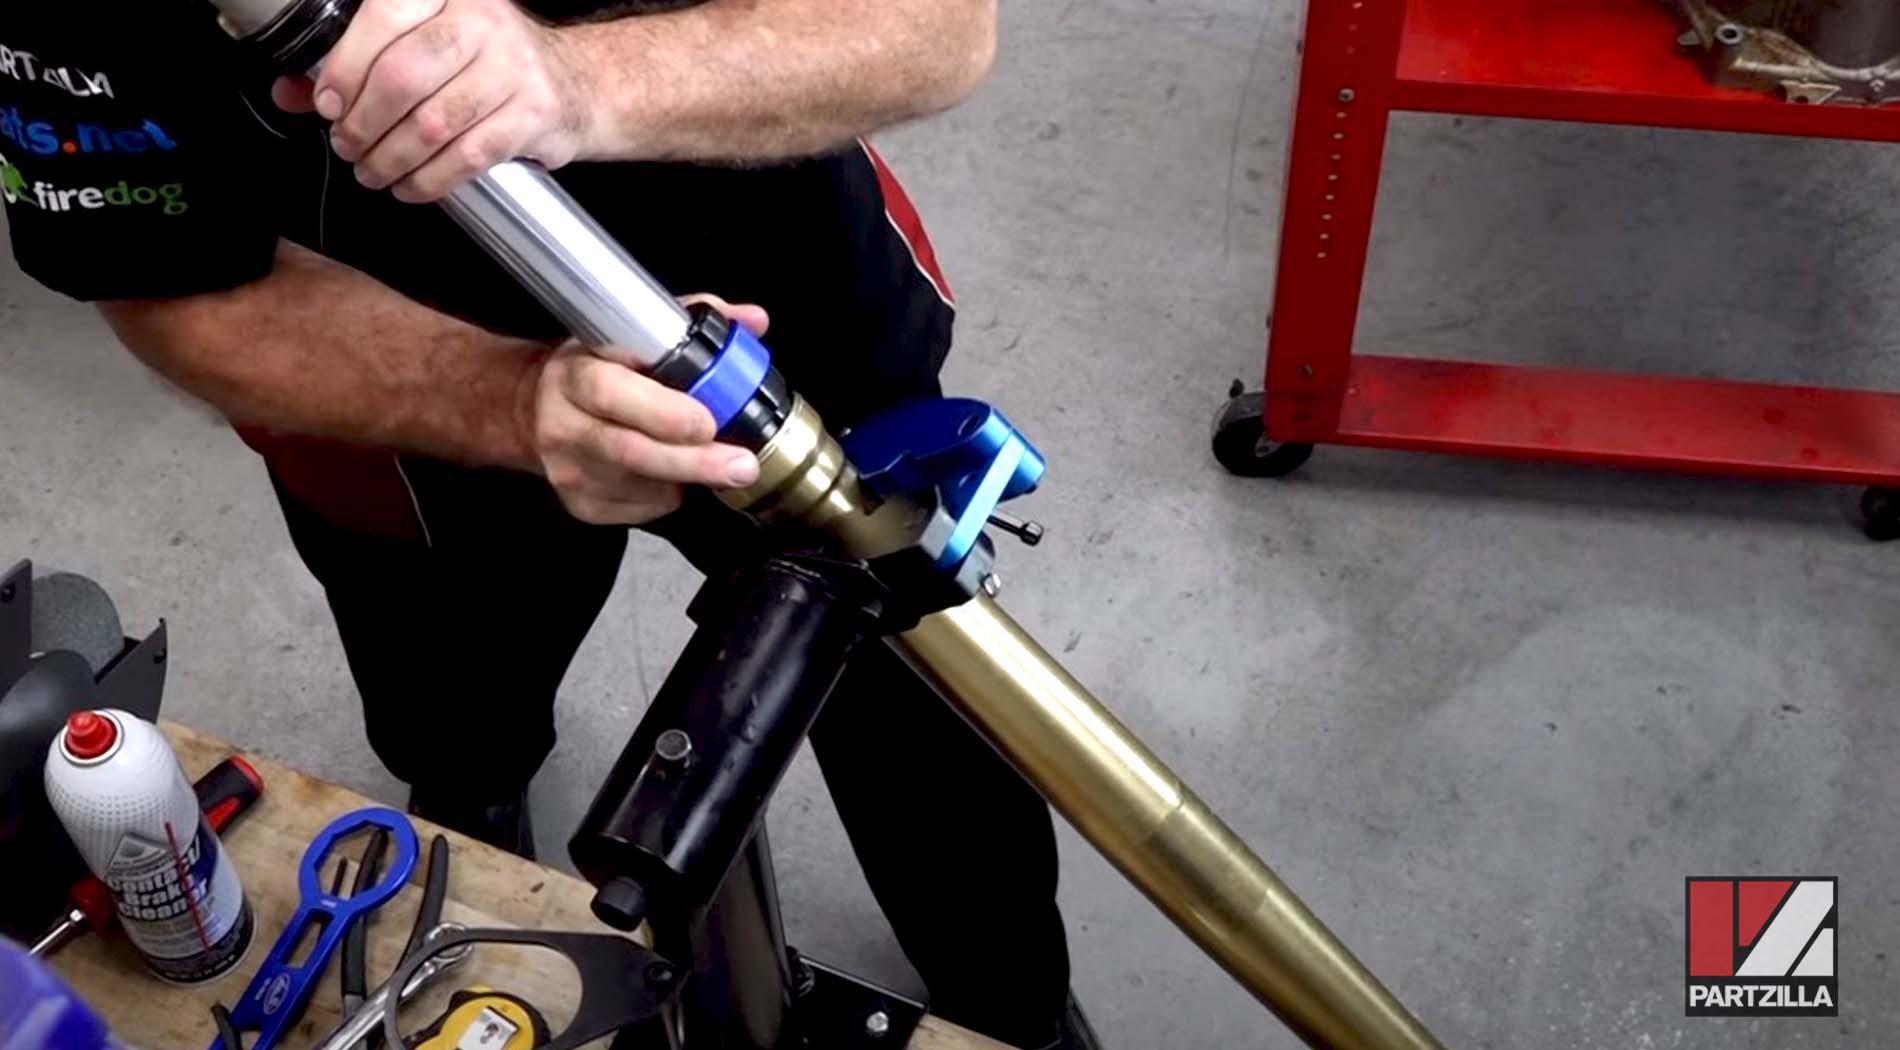
Step 27. Install the main seal and use the fork seal driver again to drive it in. Next, walk the walk snap ring in over it, push the ring in gently with a screwdriver and listen for a click, which lets you know when it’s seated properly. Install the dust seal, which you can push in with your fingers.

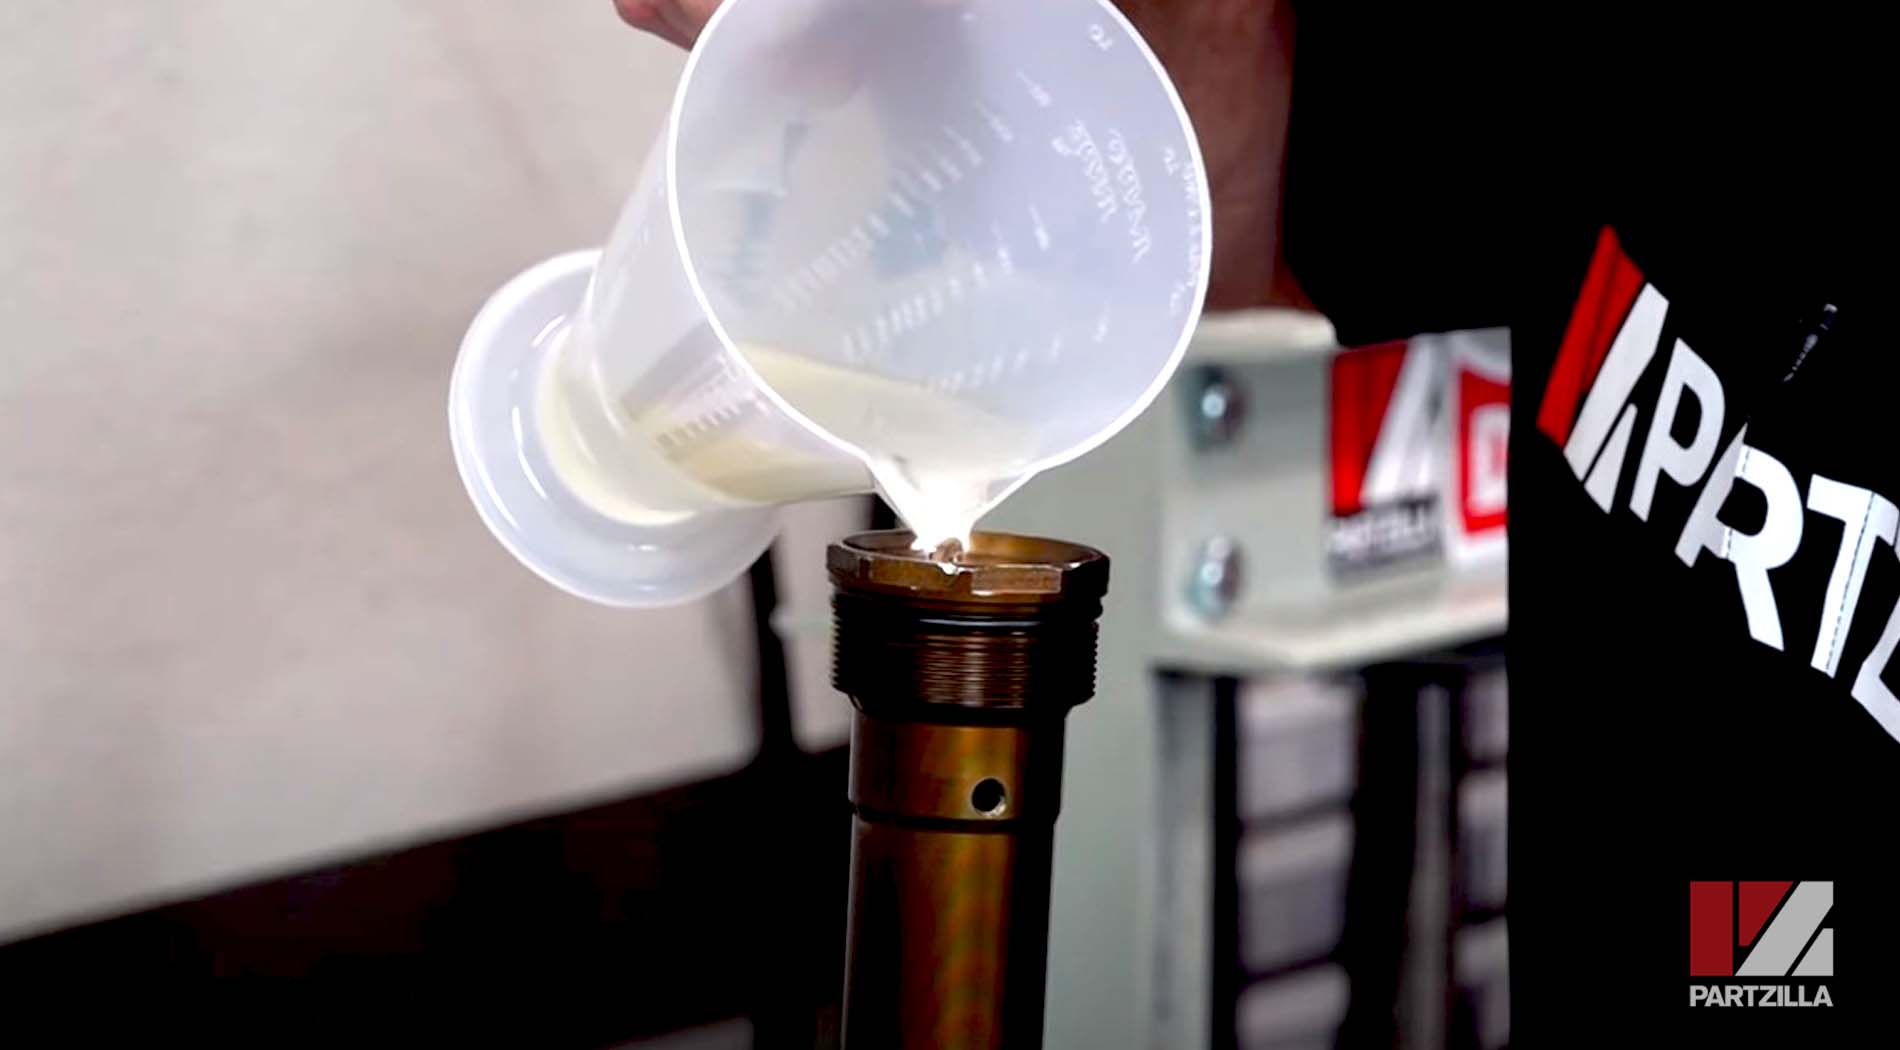
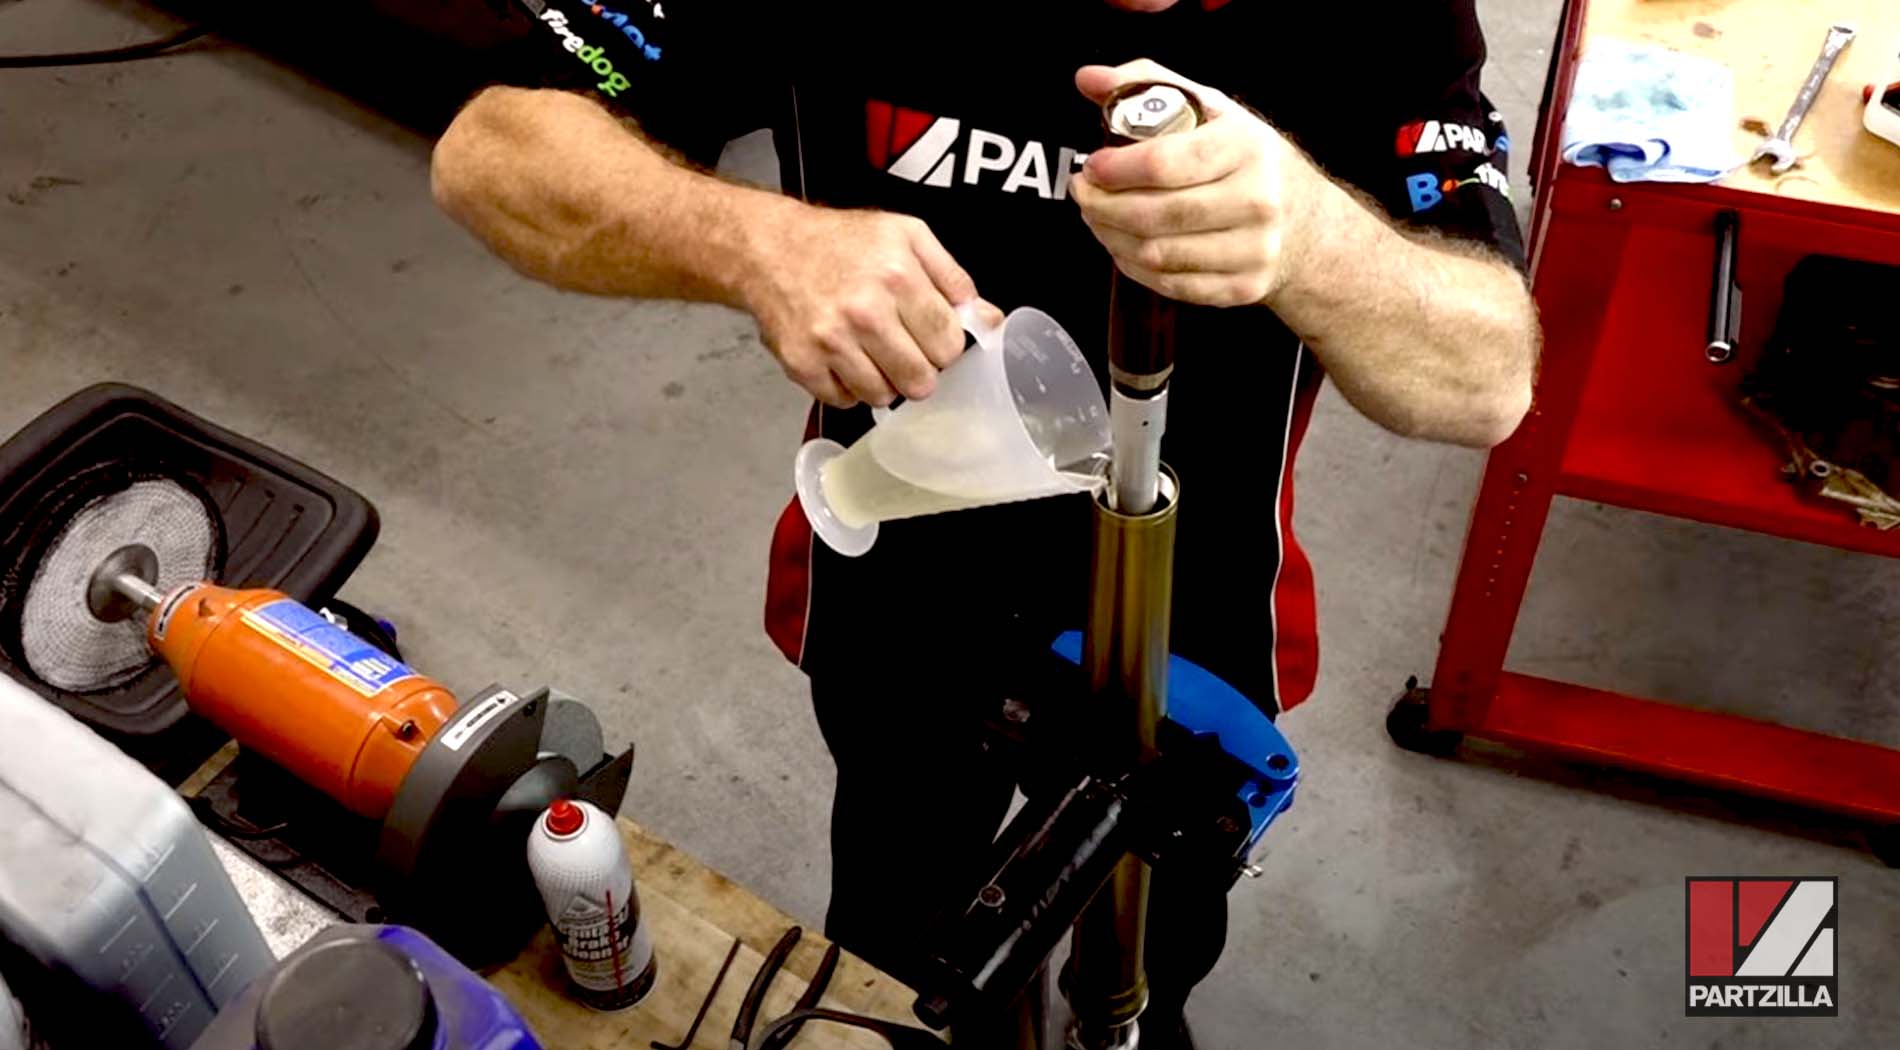
Step 28. Fill up the inner damper with 195cm cubed or milliliters of fork oil.
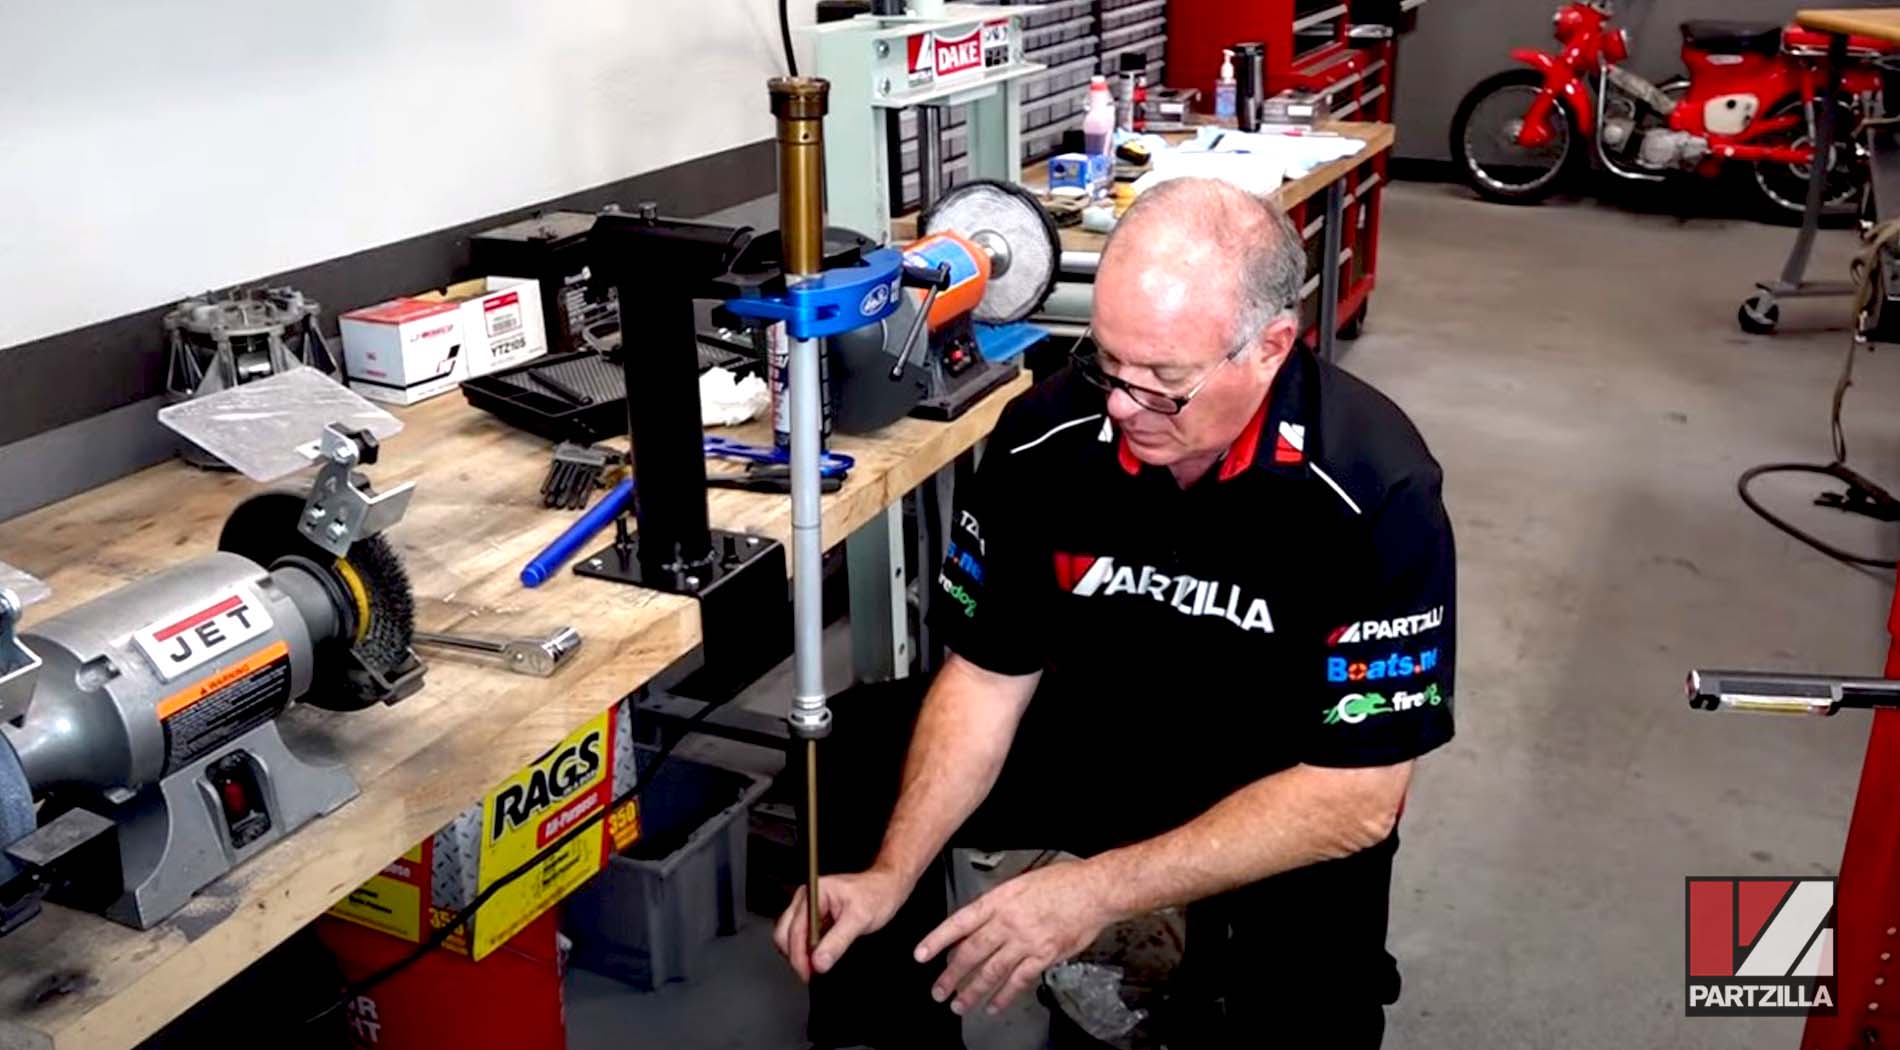
Step 29. Bring the damper rod through its stroke a couple of times and listen for it it to draw in and push out the air. When you don't hear the sound anymore, the air has been pushed out.
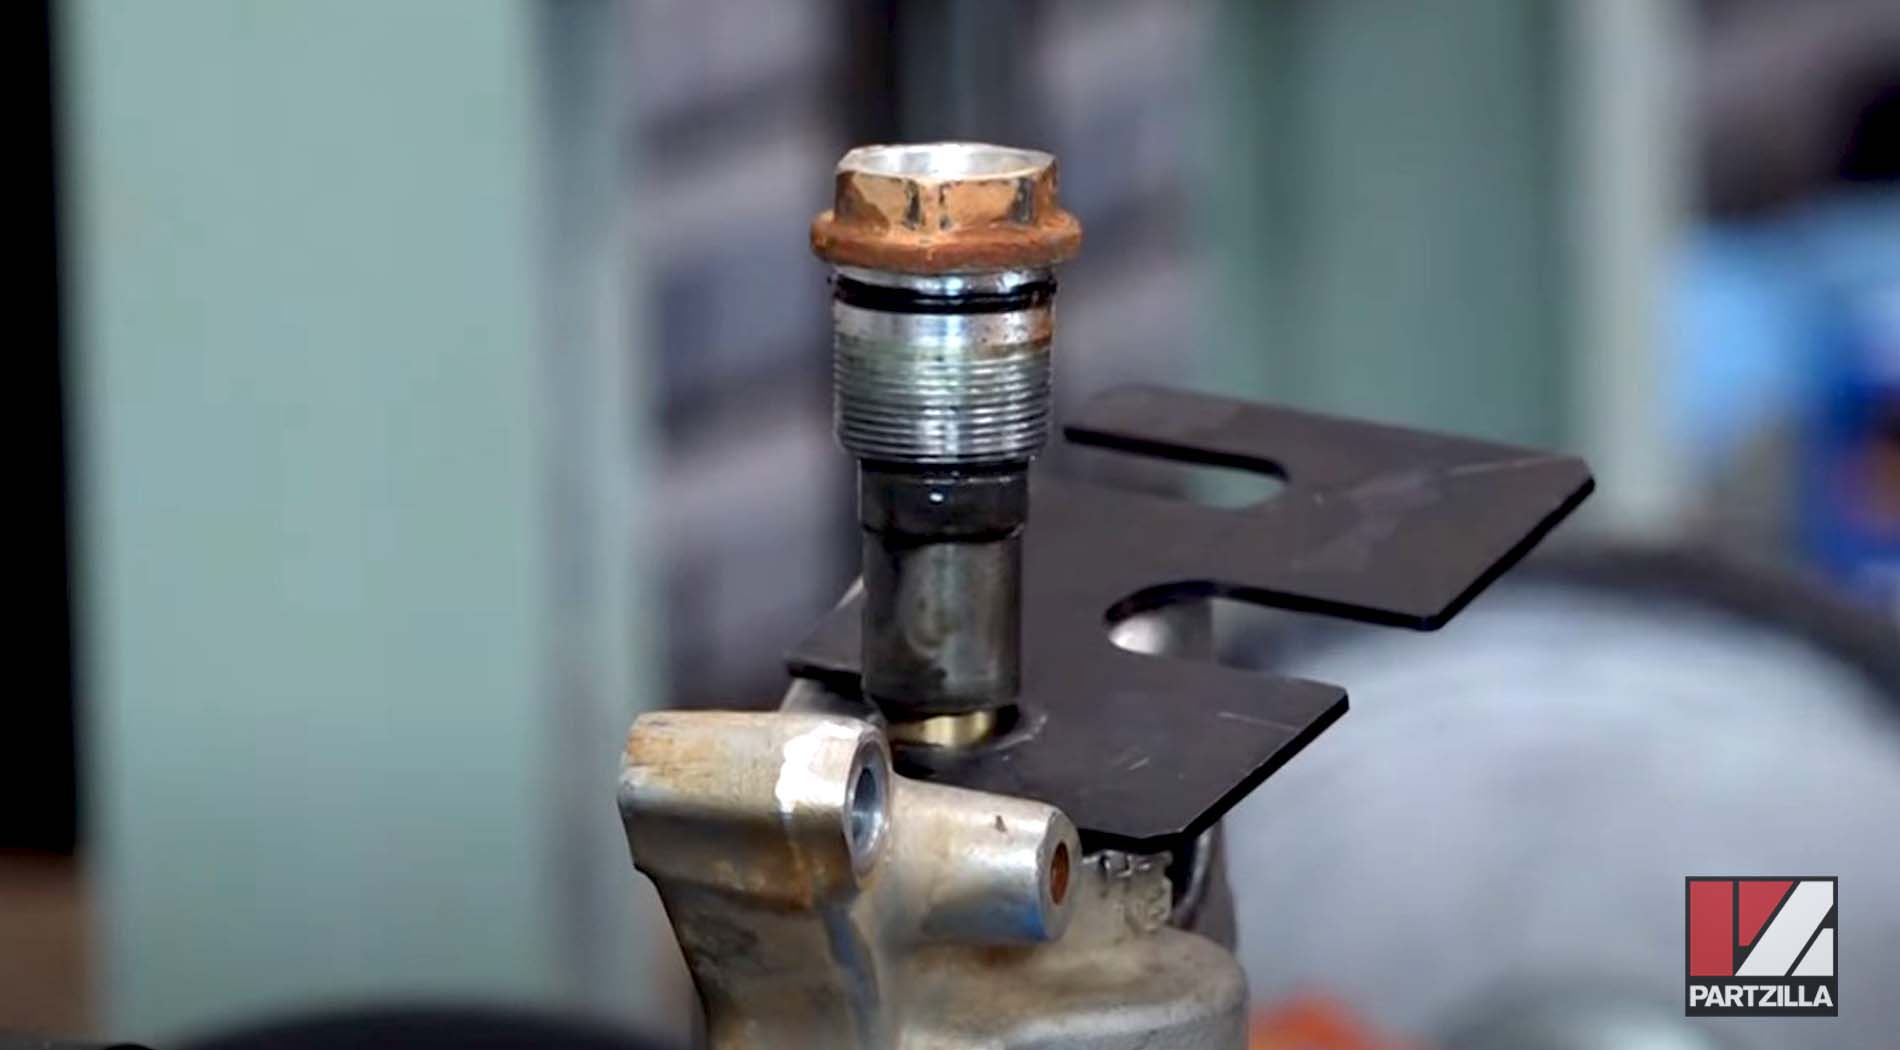
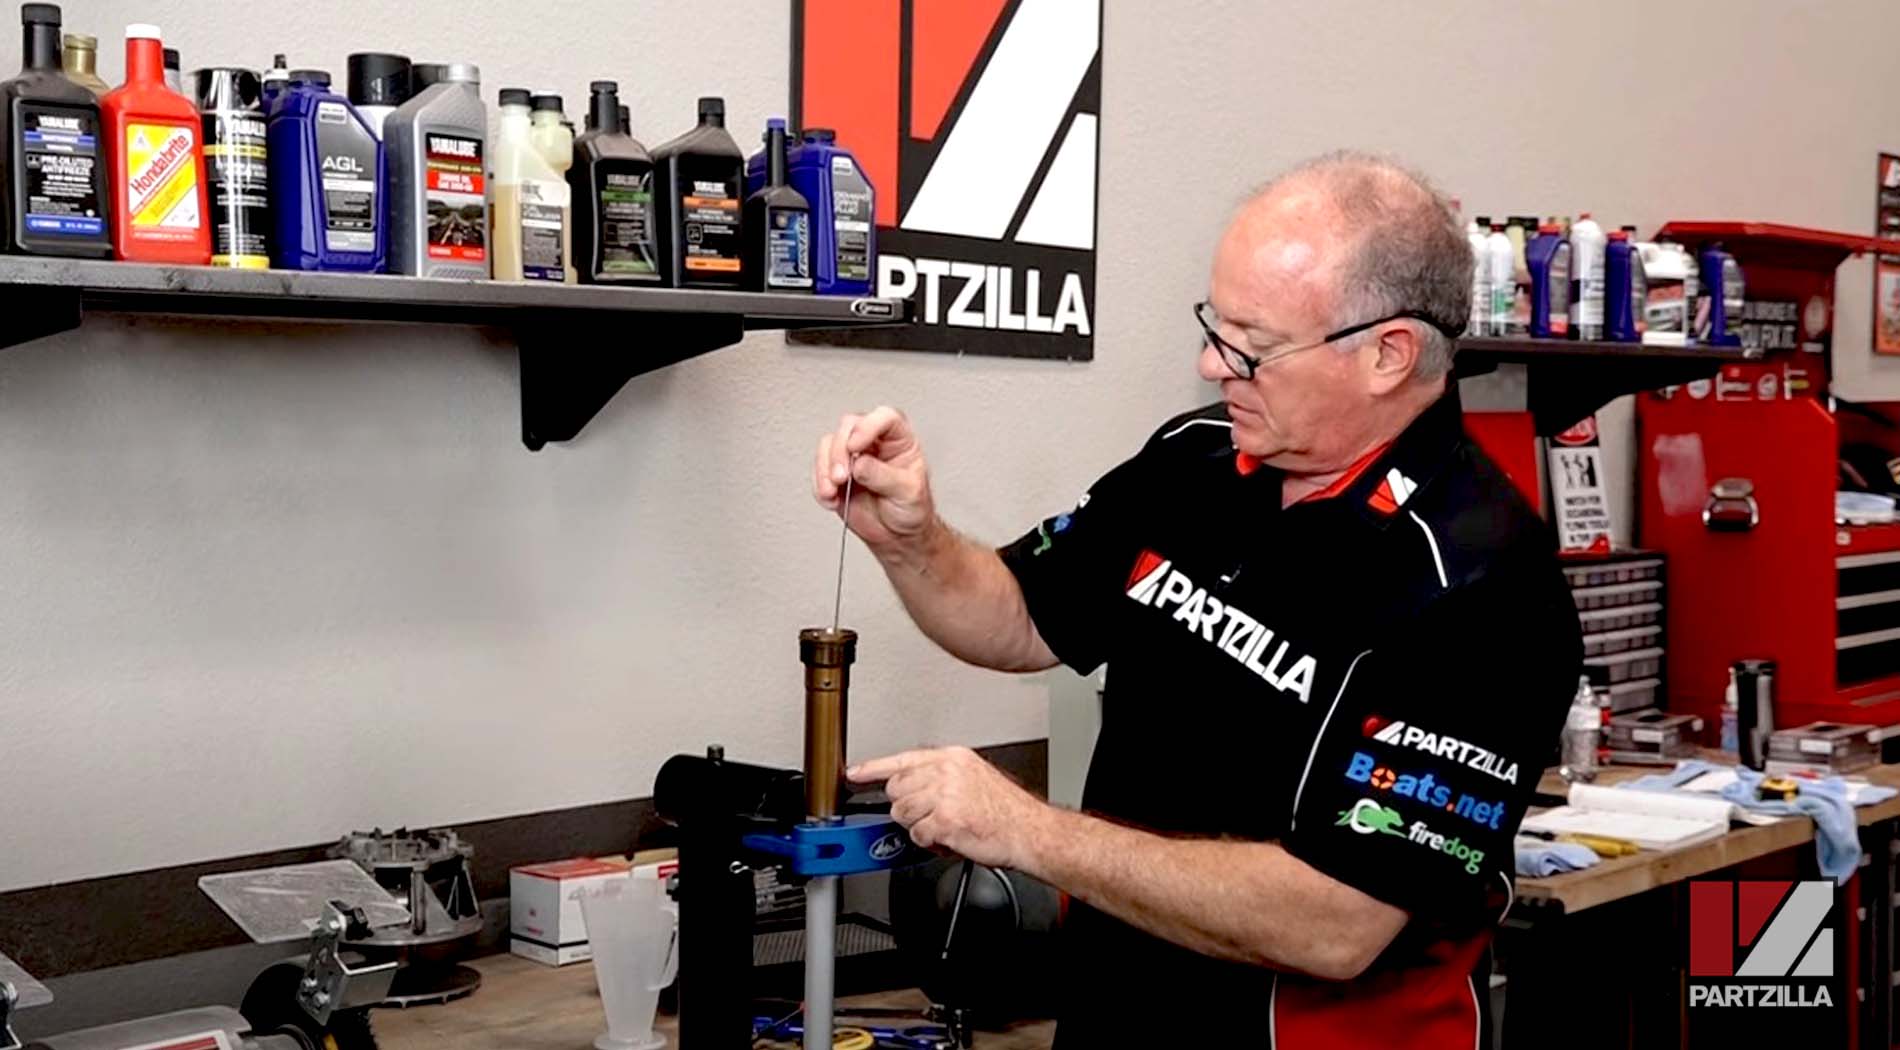
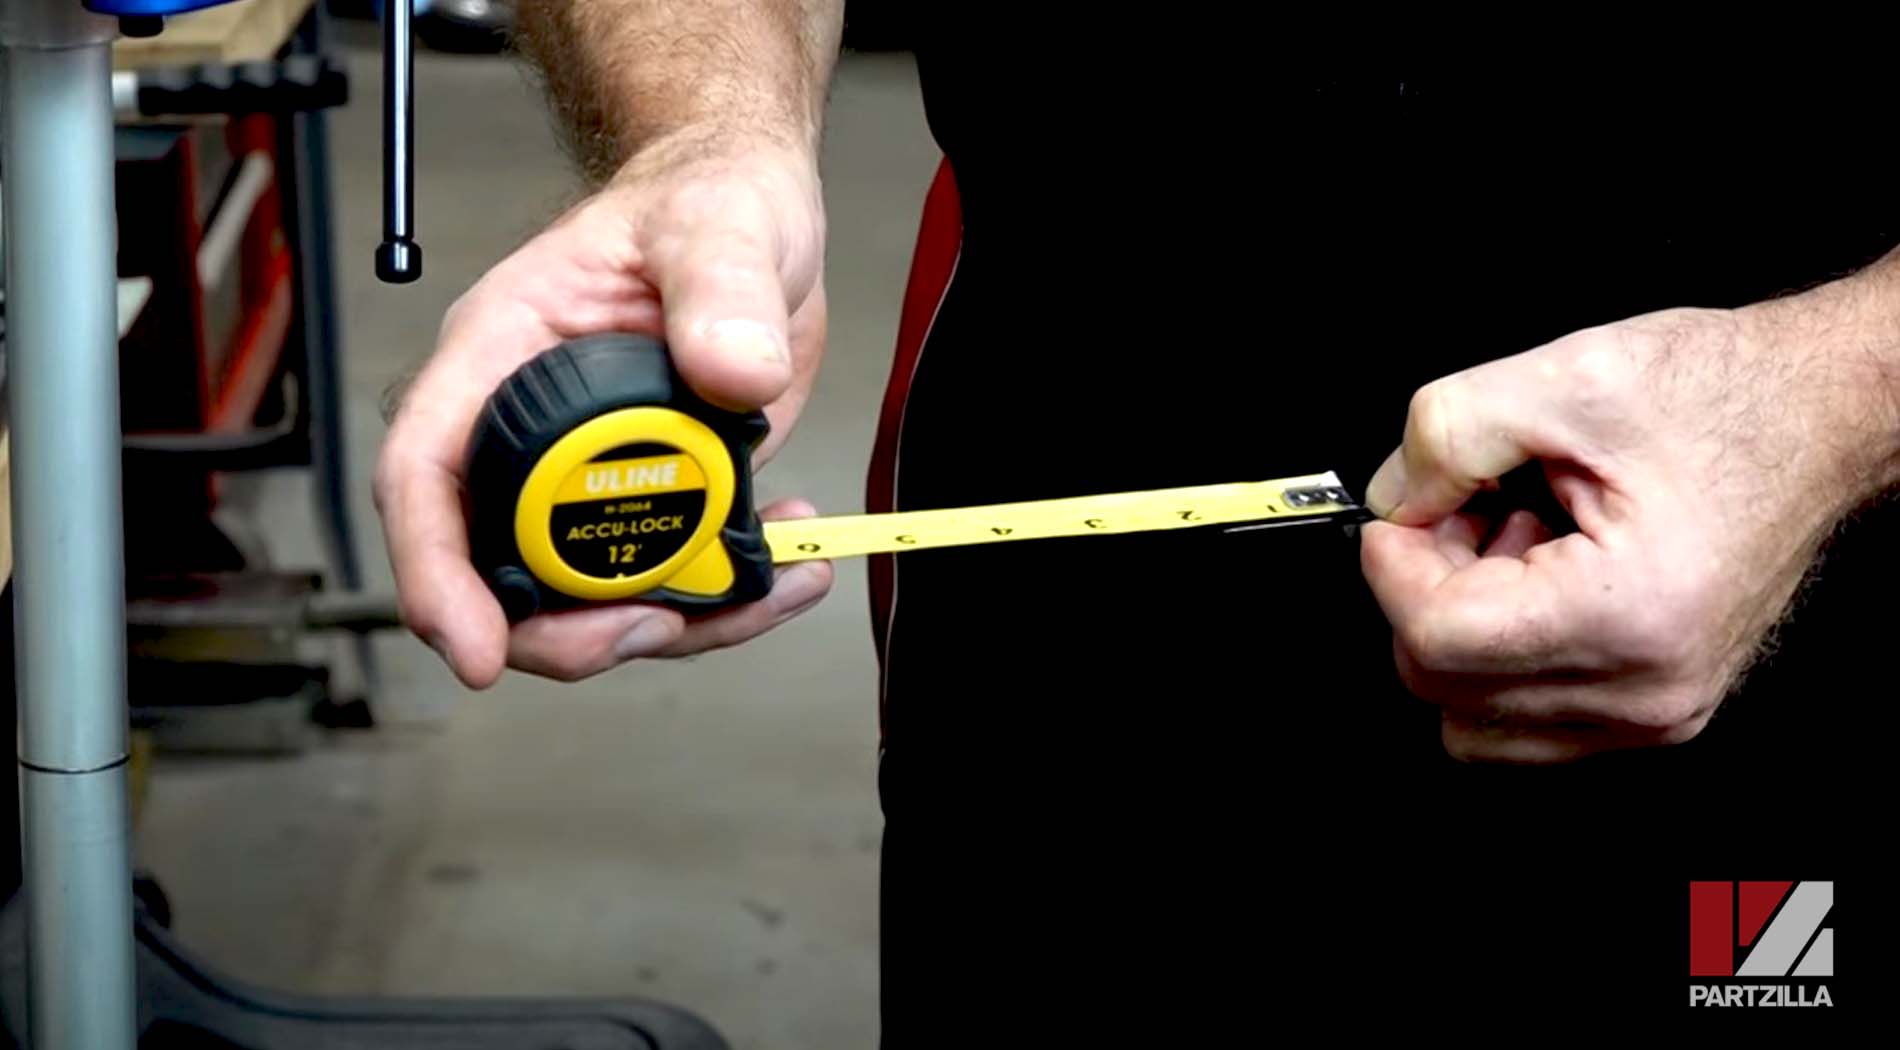
Step 30. Dip a zip tie into the damper rod to measure the fork oil level from the bottom of the outer shelf (see finger point in the picture below) up to wherever the level is. Pop out the zip tie and measure the mark. The level in this case should be somewhere between 1.65 and 1.85 inches.
Step 31. Oil up the damper assembly, then wiggle it slowly into position inside the damper rod.
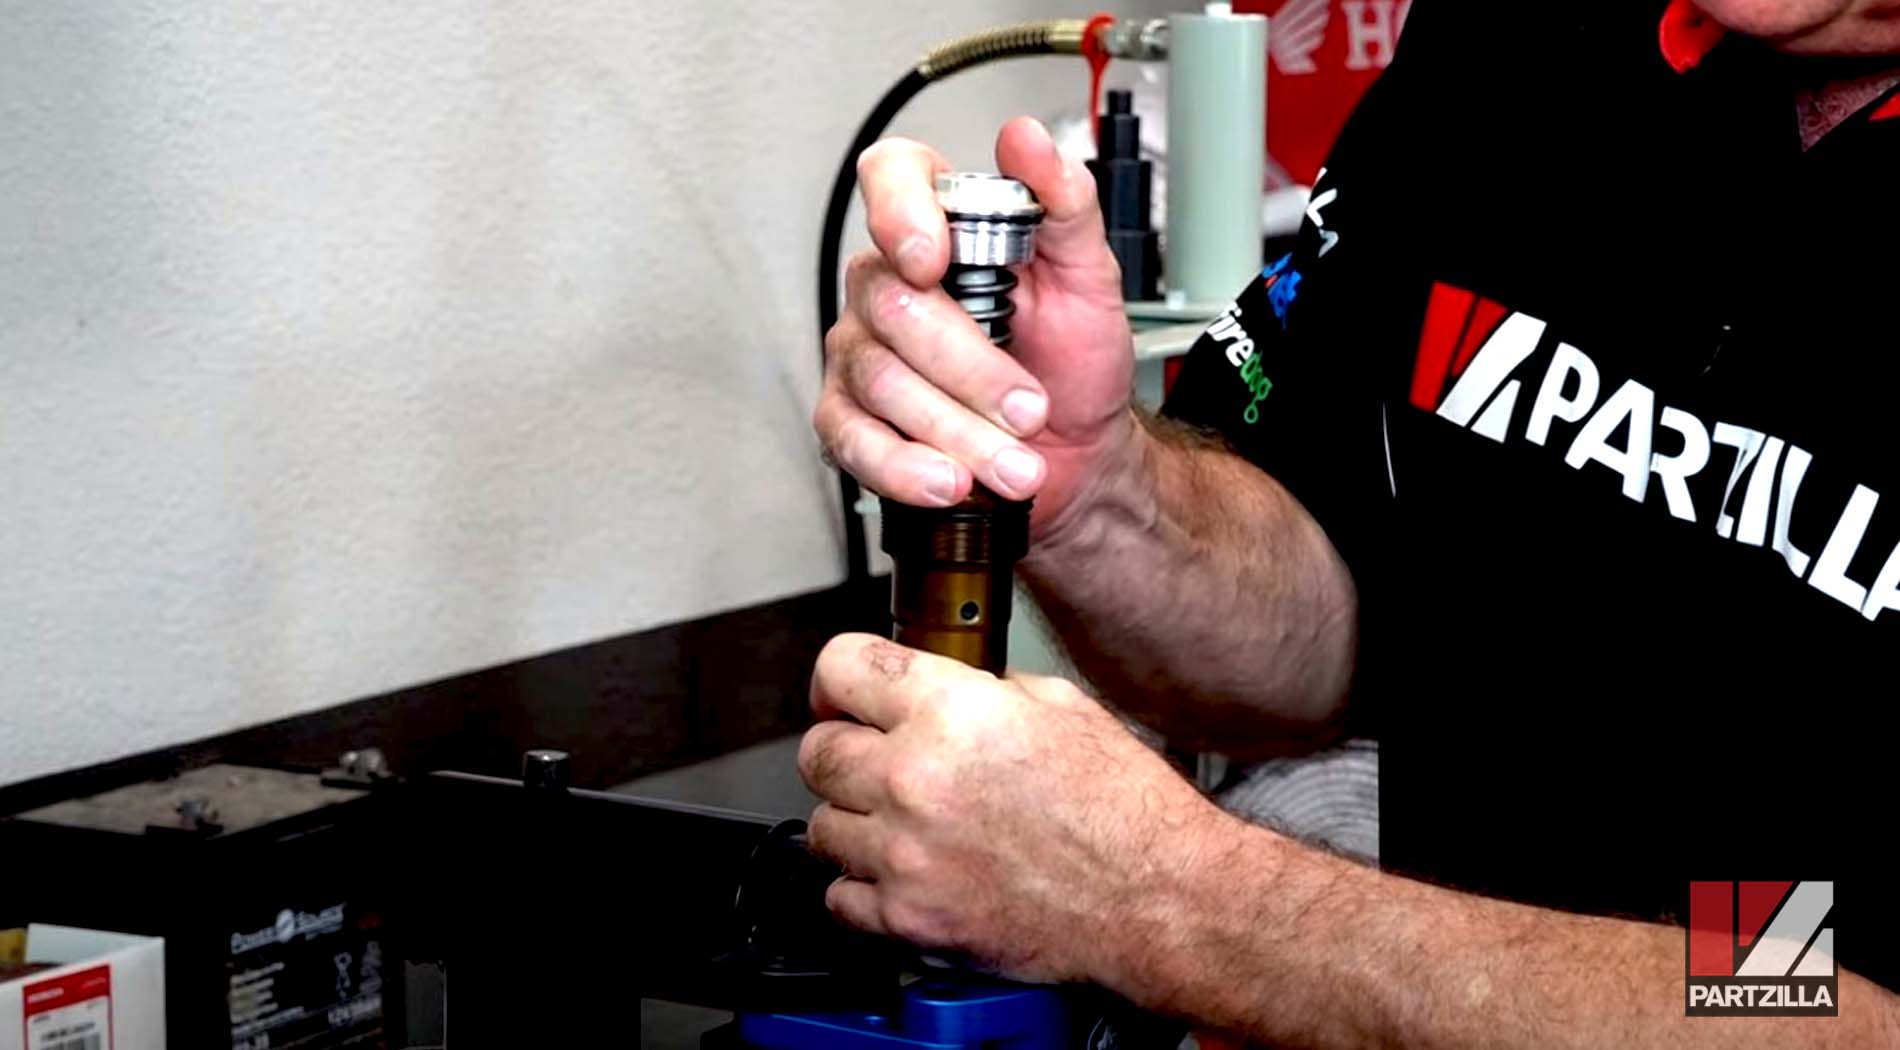
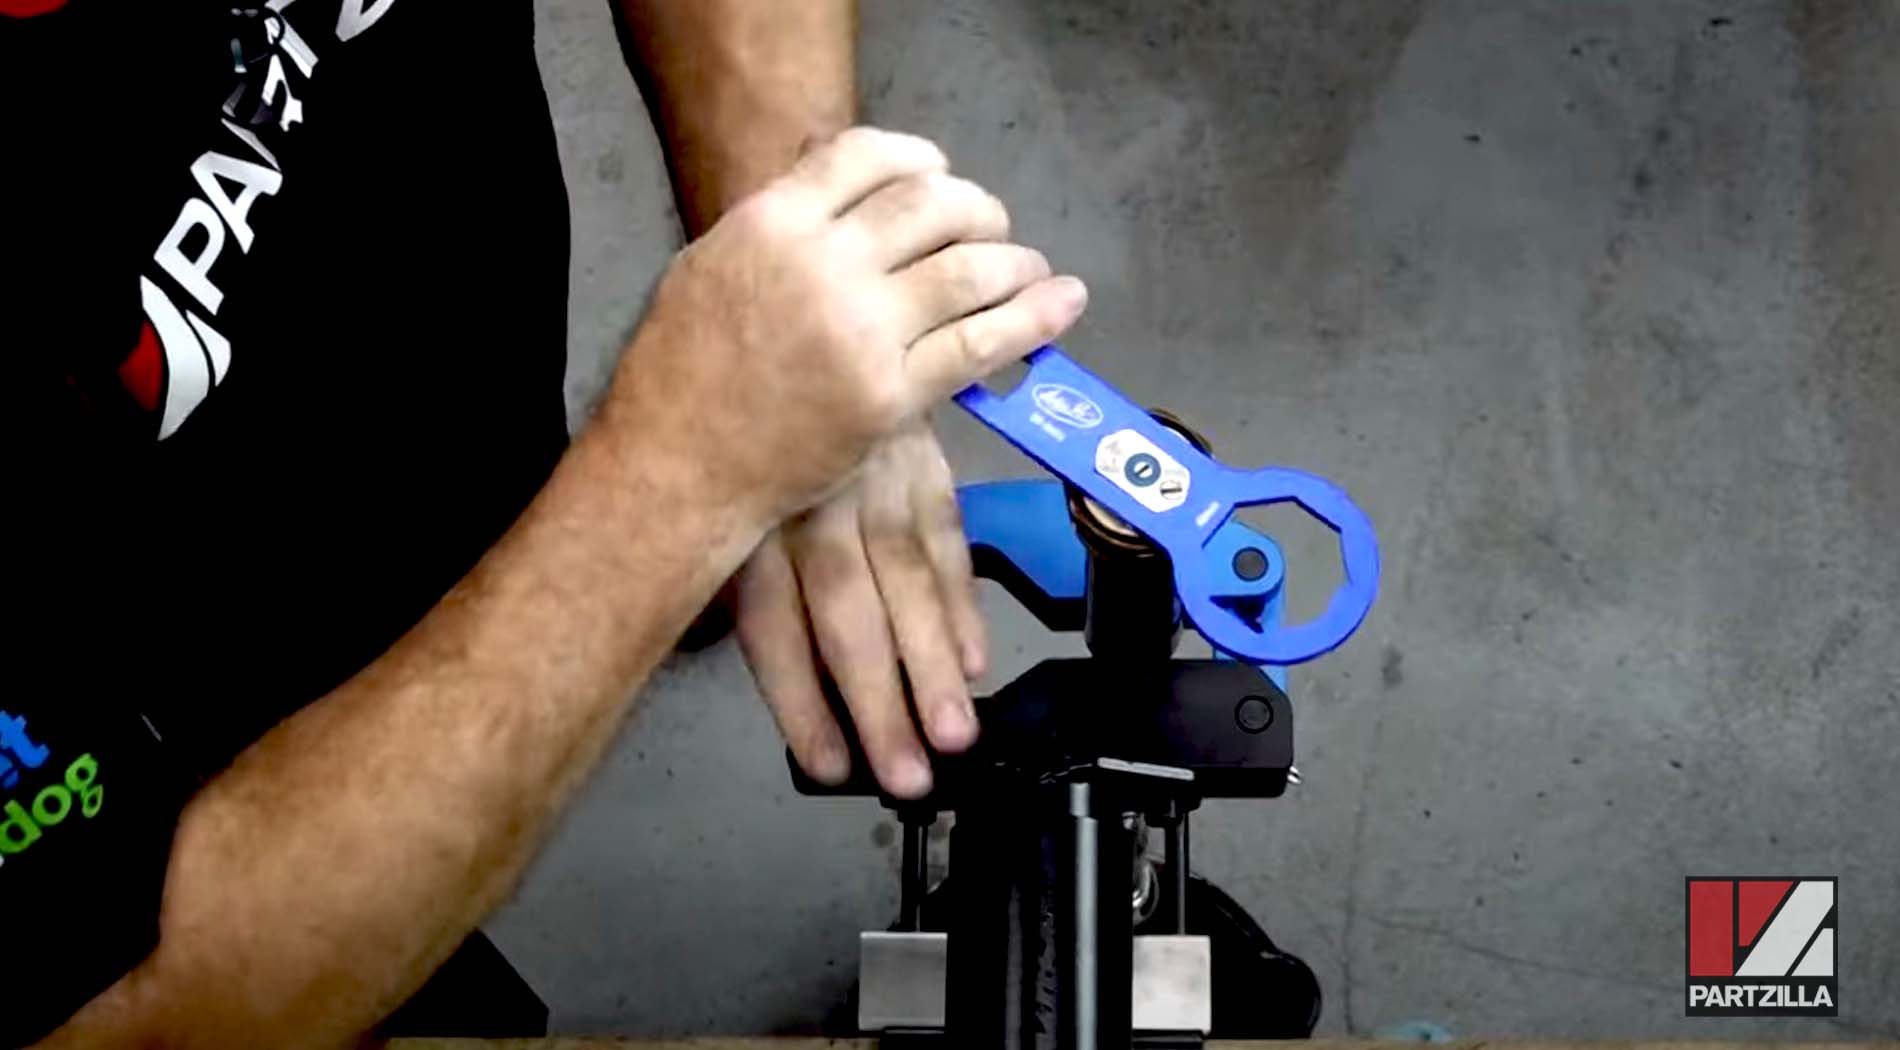
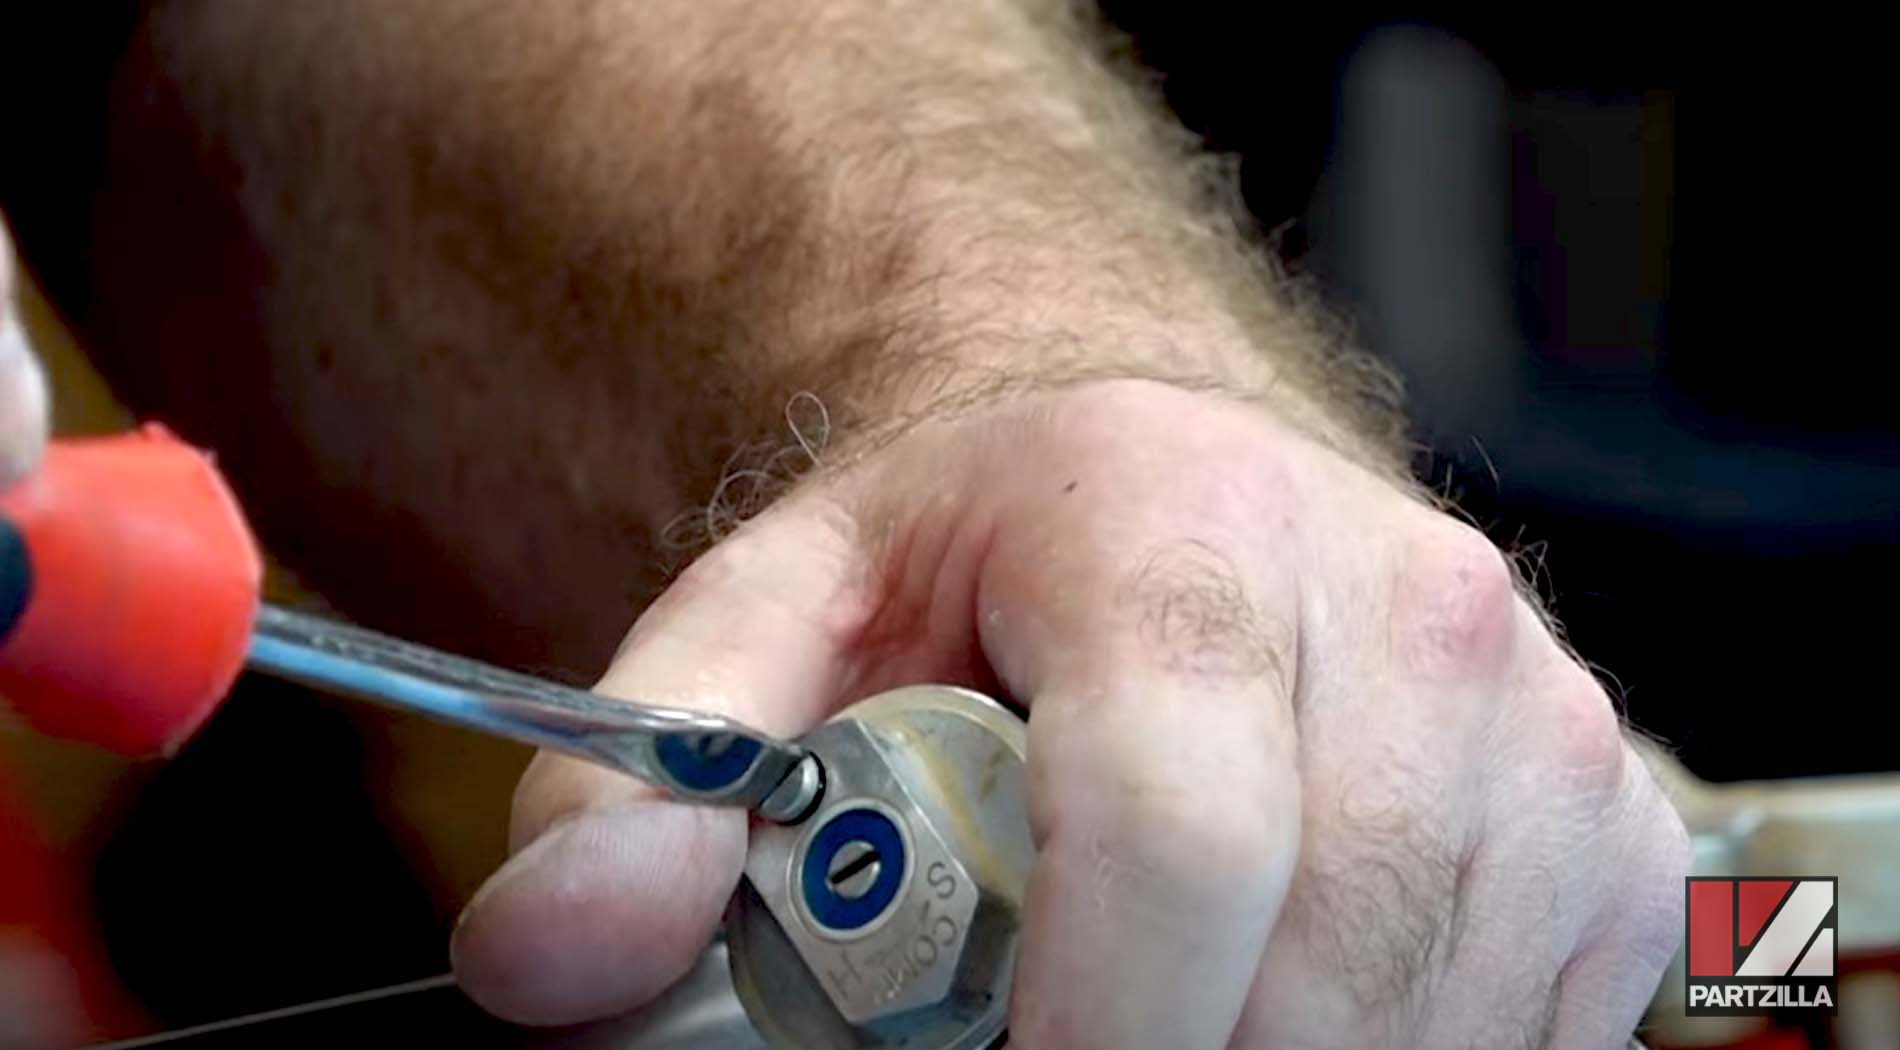
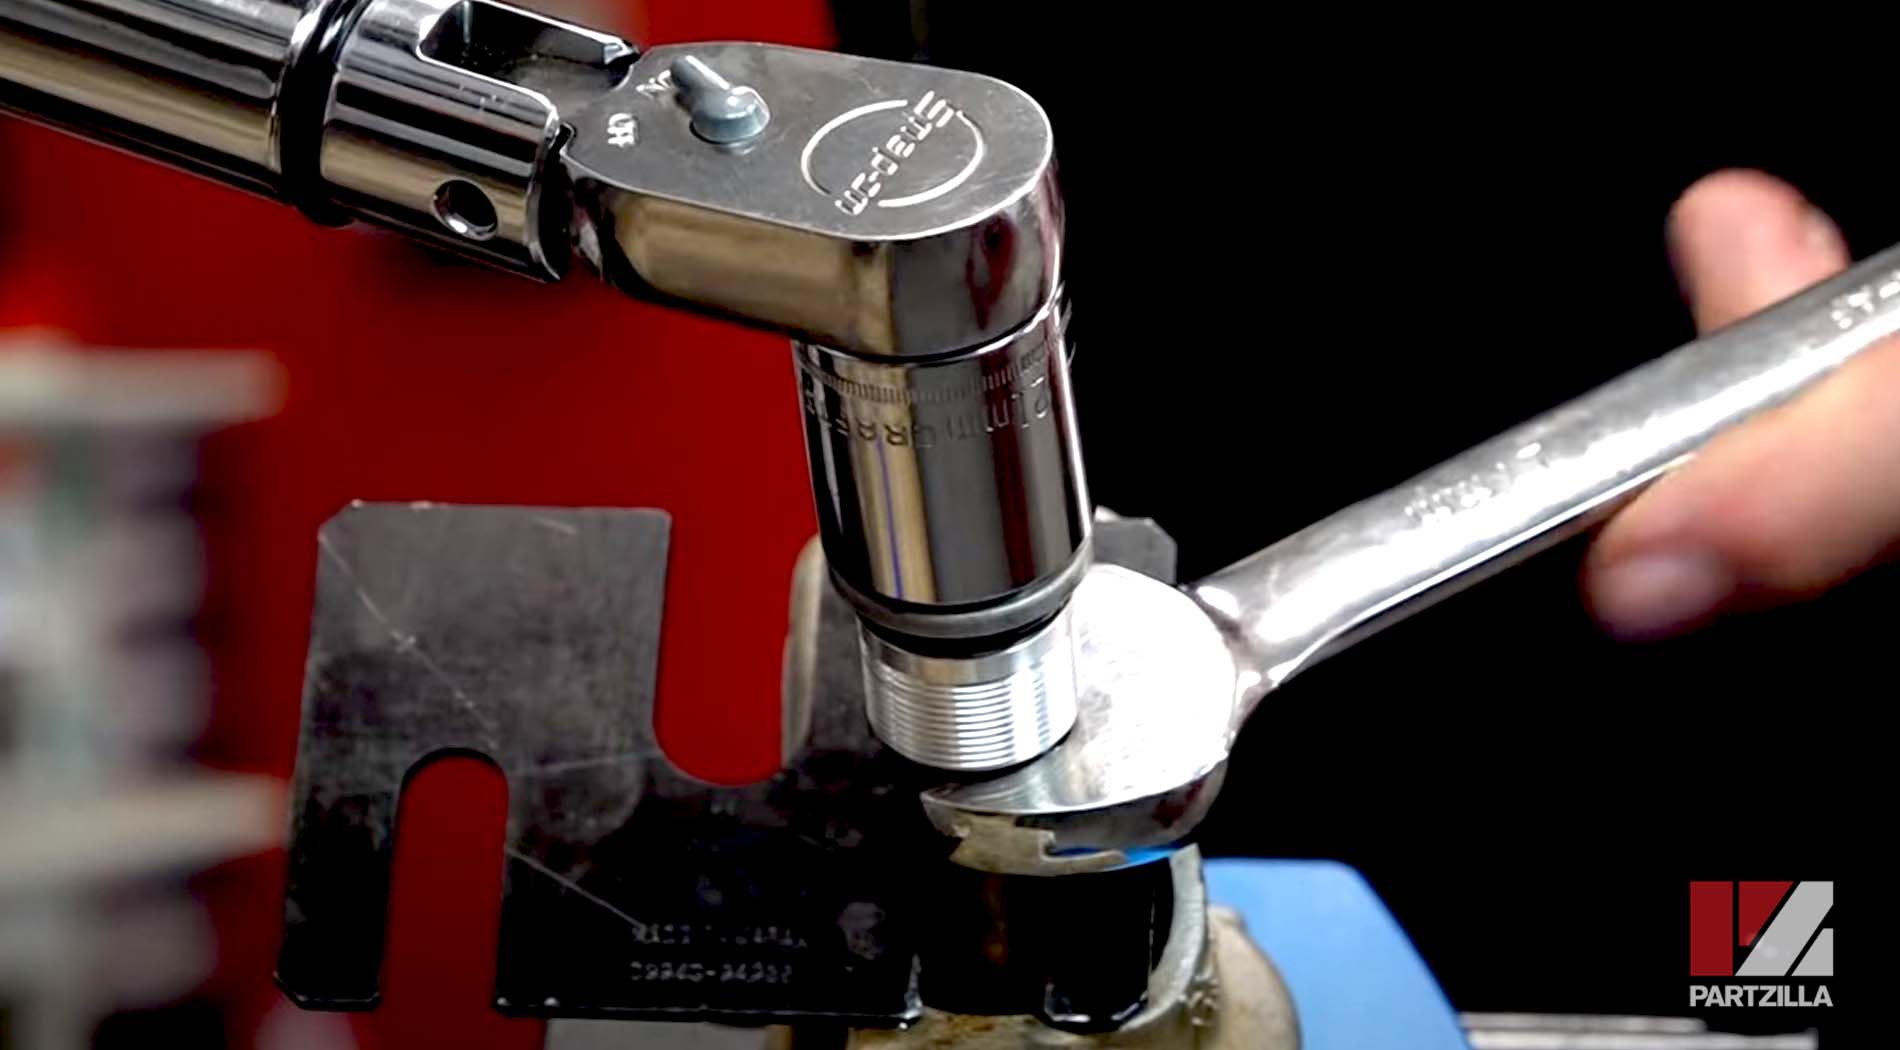
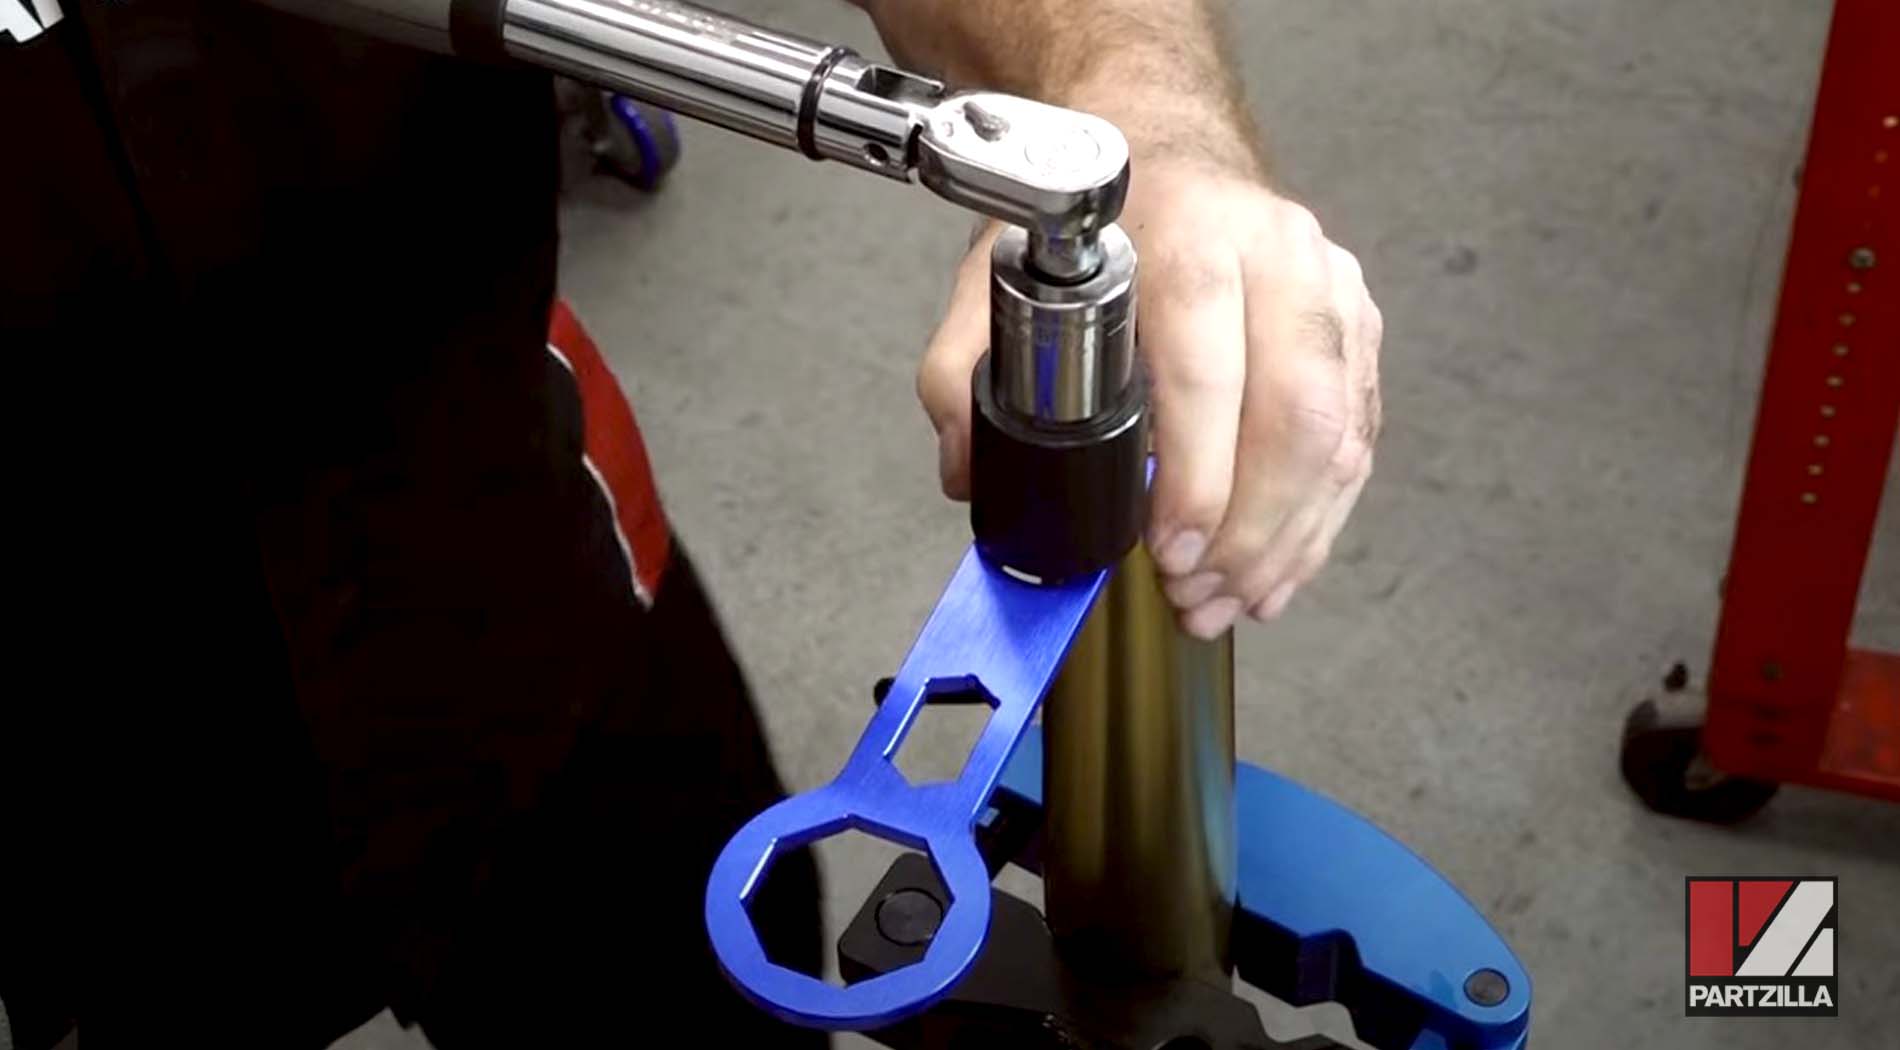
Step 32. Use the fork cap wrench to tighten down the damper a little bit, which compresses the springs.
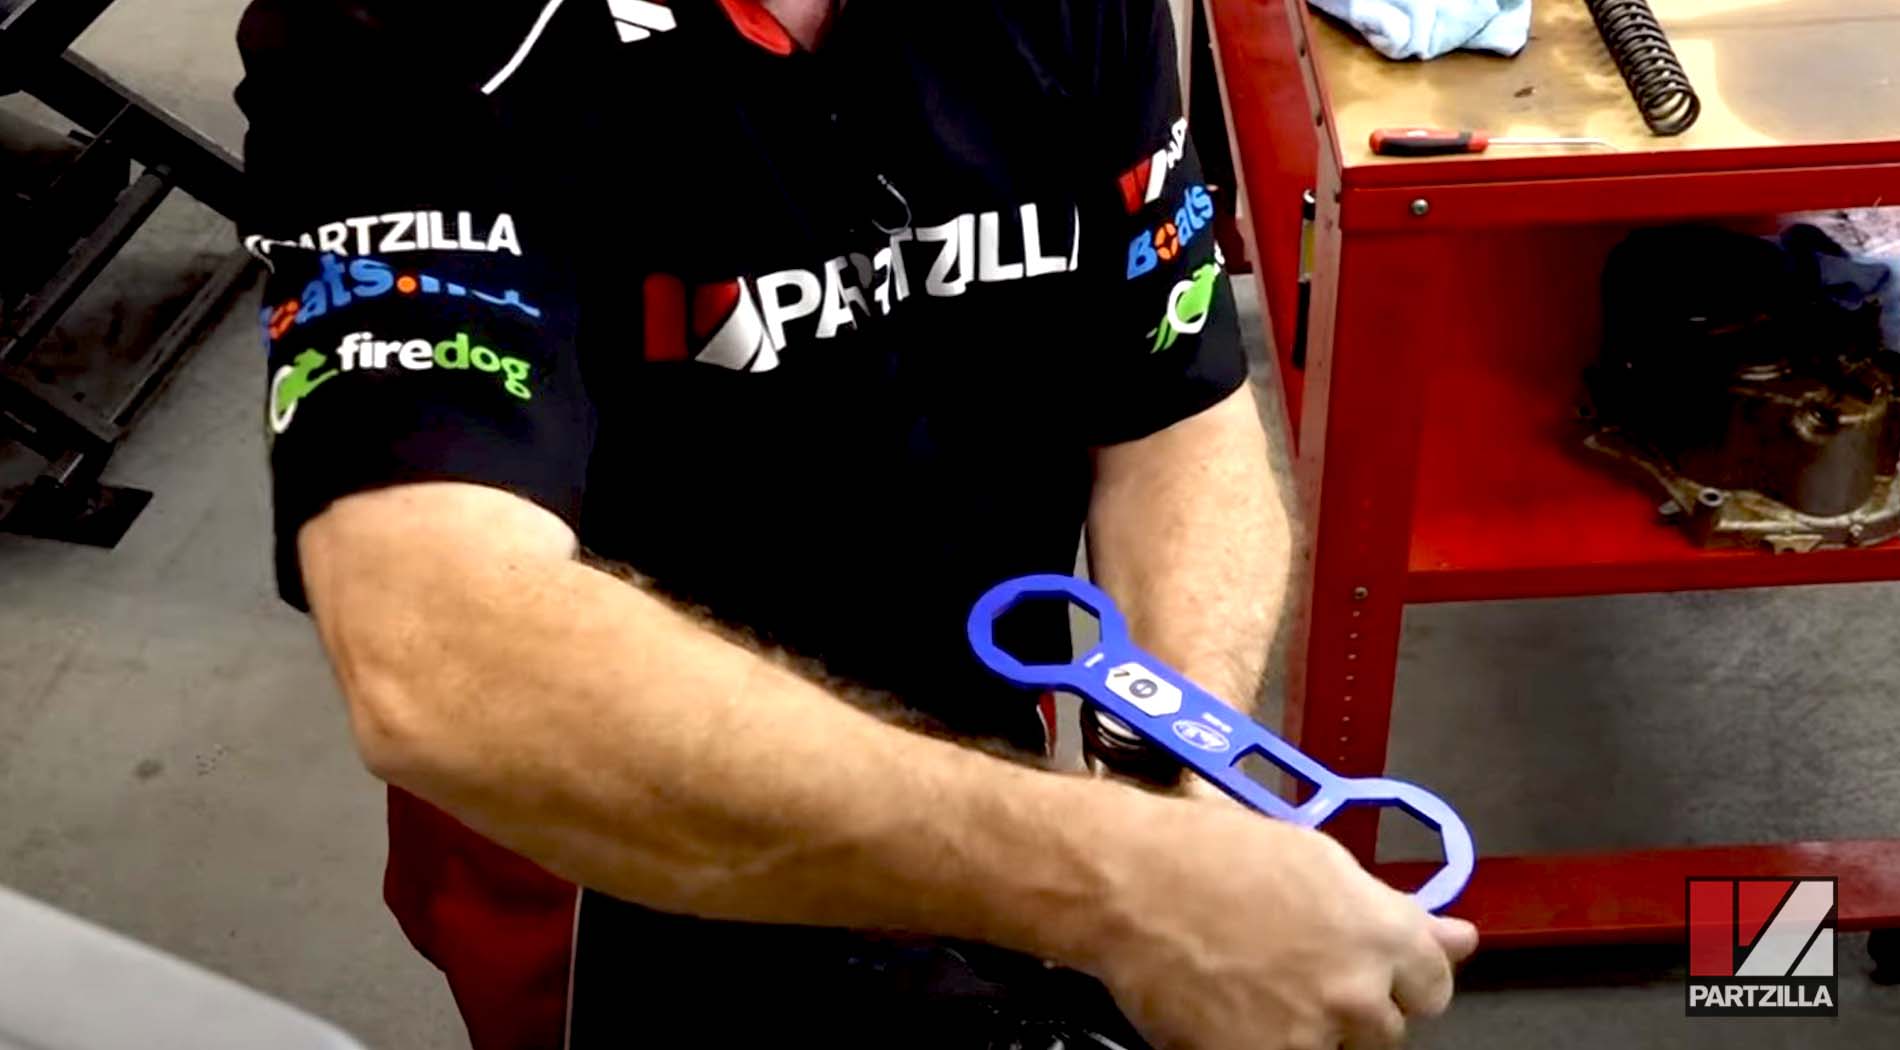
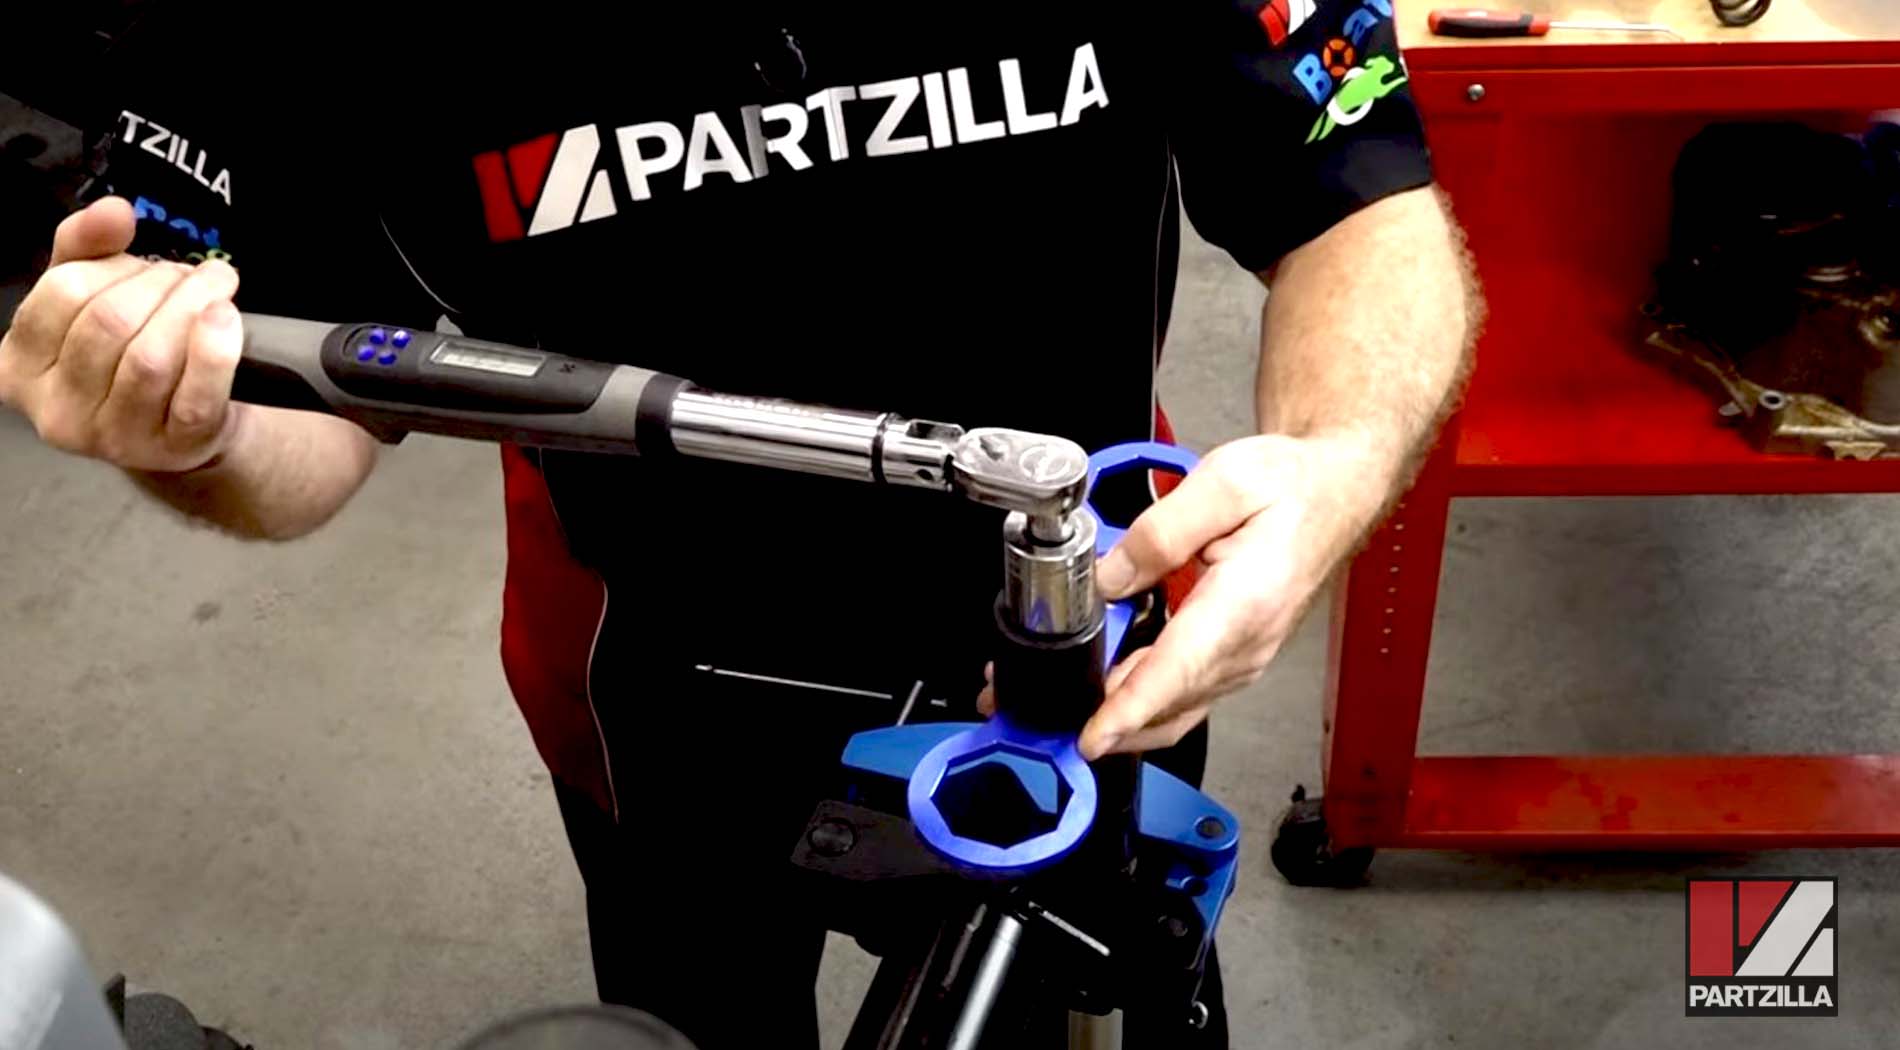
Step 33. Torque the damper to 22 foot-pounds using the fork cap wrench and a torque wrench to get a 90-degree angle.
Step 34. Continue the bleeding procedure by extending the damper rod out all the way, then slowly stroking it up and down 4 inches, then releasing it and repeating this several times. This purges the rest of the air out and prevents it from getting it into the valves of the damper.
Step 35. Adjust the bleed screw all the way to the soft setting, then take the damper rod out of the clamp and over to a soft surface. Next, run it through its full stroke a couple of times to force out some of the excess fluid, roughly 15-18 milliliters or centimeters cubed to complete the bleeding procedure.
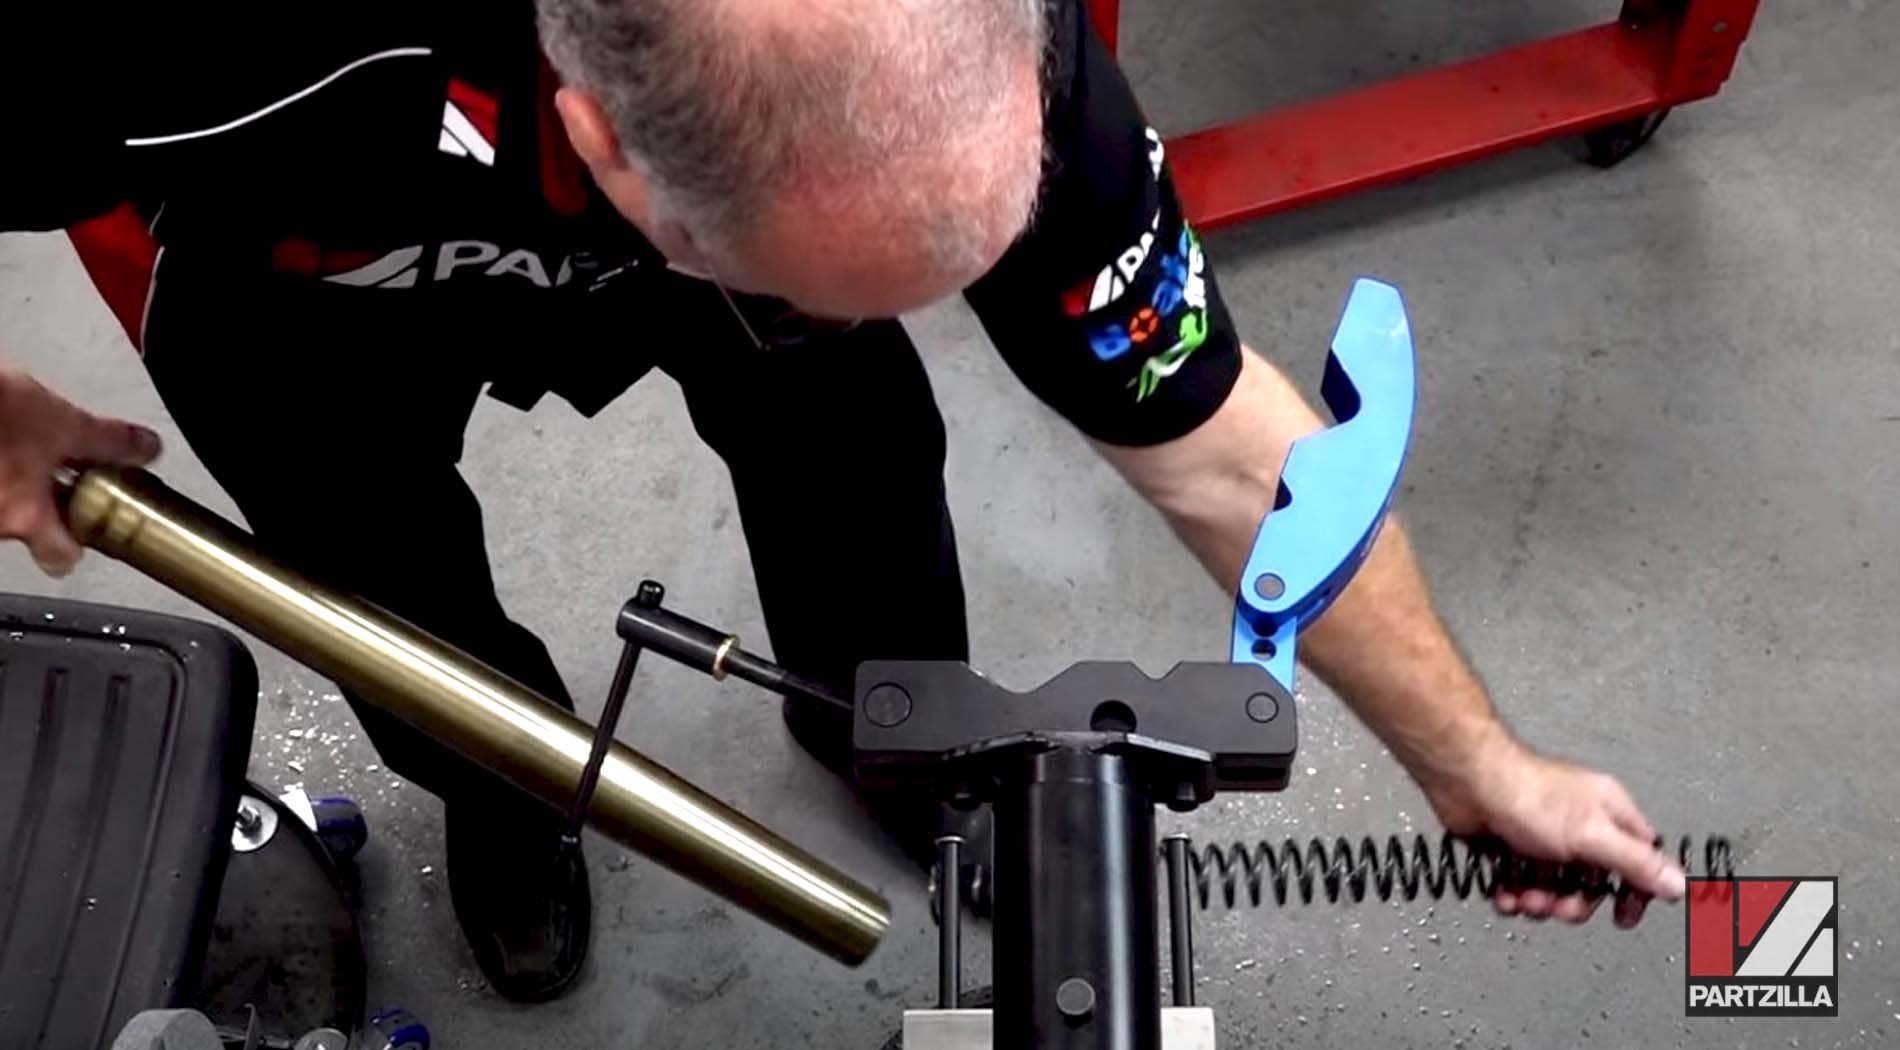
Step 36. Bring the fork tube back into the clamp and install the fork spring.
Step 37. Push the damper rod back through without forcing it, making sure the locking nut is backed up all the way first.
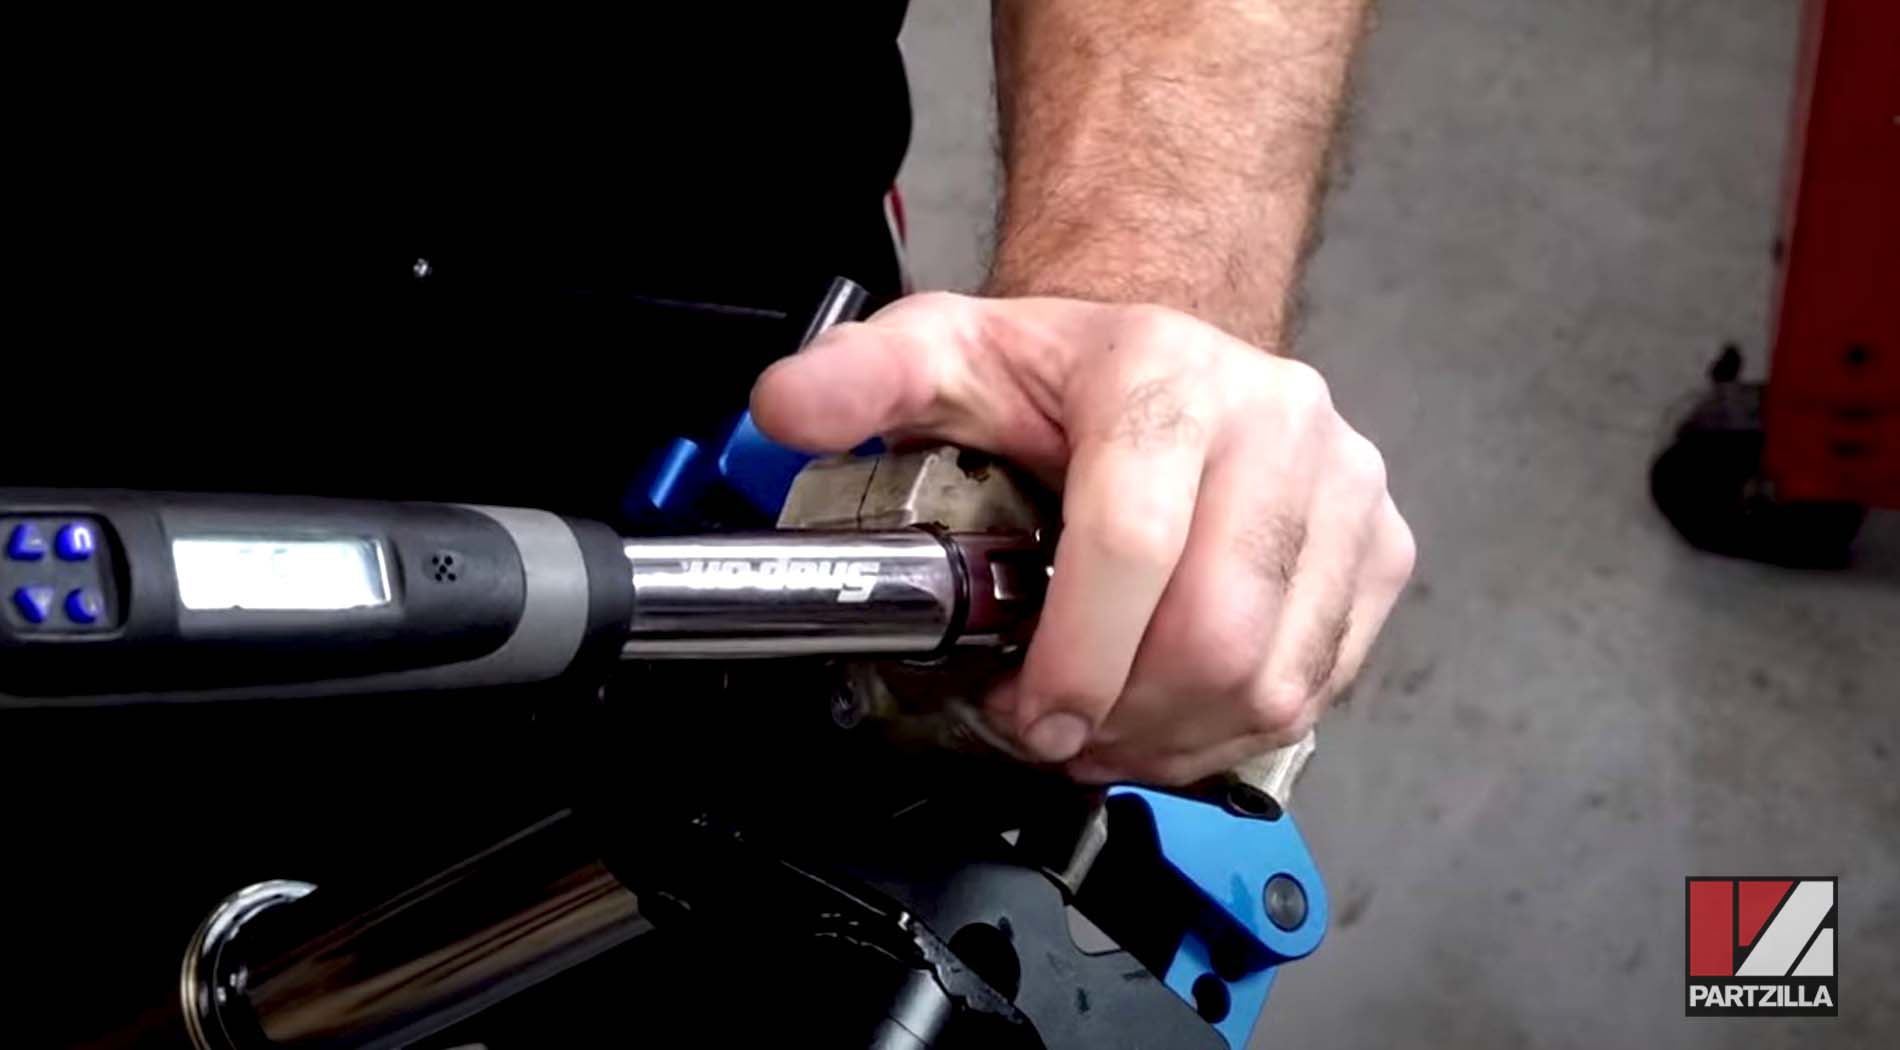
Step 38. Use the damper rod holder and the vise clamp to hold the tube in place and install the push rod until it bottoms out.
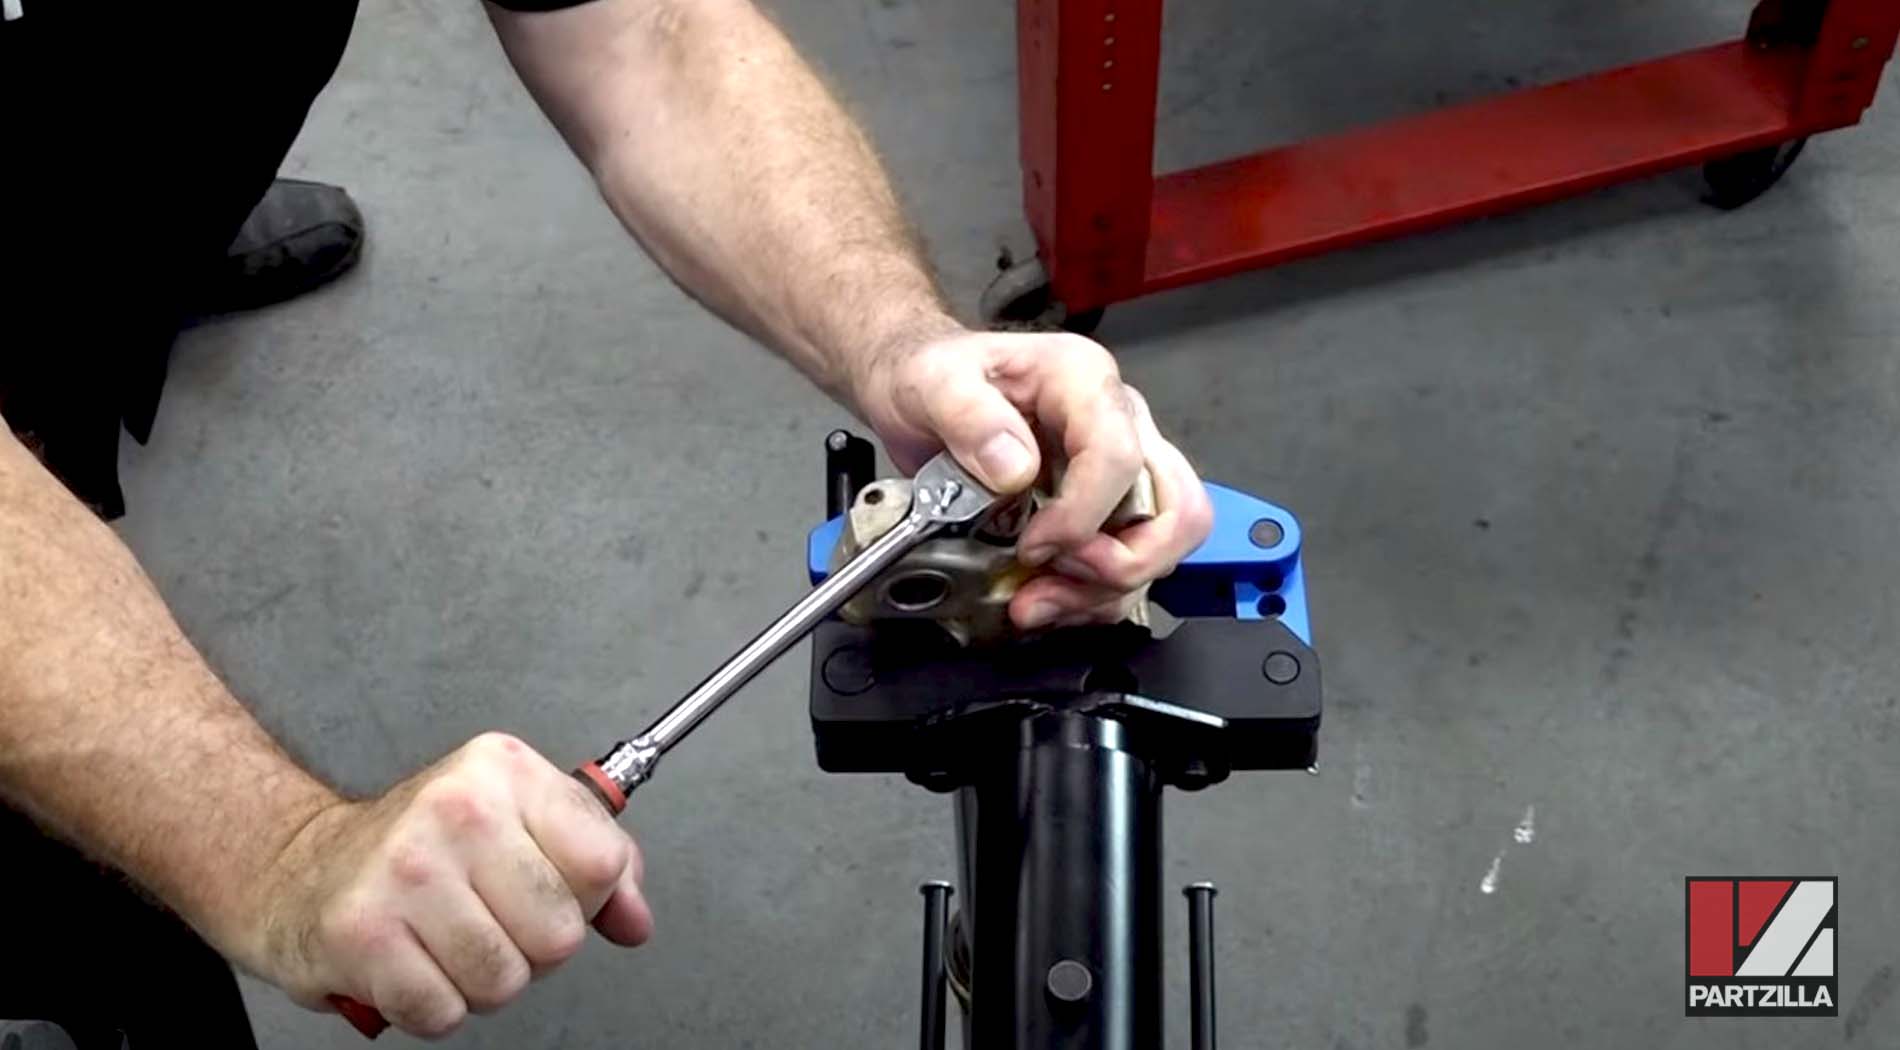
Step 39. Bring up the lock nut to engage the center bolt, then torque it to16 foot-pounds. Hold the top center bolt still and turn the wrench at the bottom to get the torque right.
Step 40. Bottom out the center nut and torque it to 51 foot-pounds.
Step 41. Fill the fork tube with fork oil back to the factory spec level (in this case 385) or higher or lower, depending on how you want your setup.
Step 42. Replace the damper rod back into the tube and torque it to 25 foot-pounds using a torque wrench and the fork clamp wrench.
Step 43. Get the compression setting back to where you started with the turn and click count in Step 2.
Repeat the entire procedure for the other fork tube and you’re done.