Honda CRF450R Clutch Replacement Upgrade
As part of our complete Honda motorcycle rebuild, we replaced the clutch on our 2005 Honda CRF450R with an aftermarket clutch rebuild kit from Wiseco.
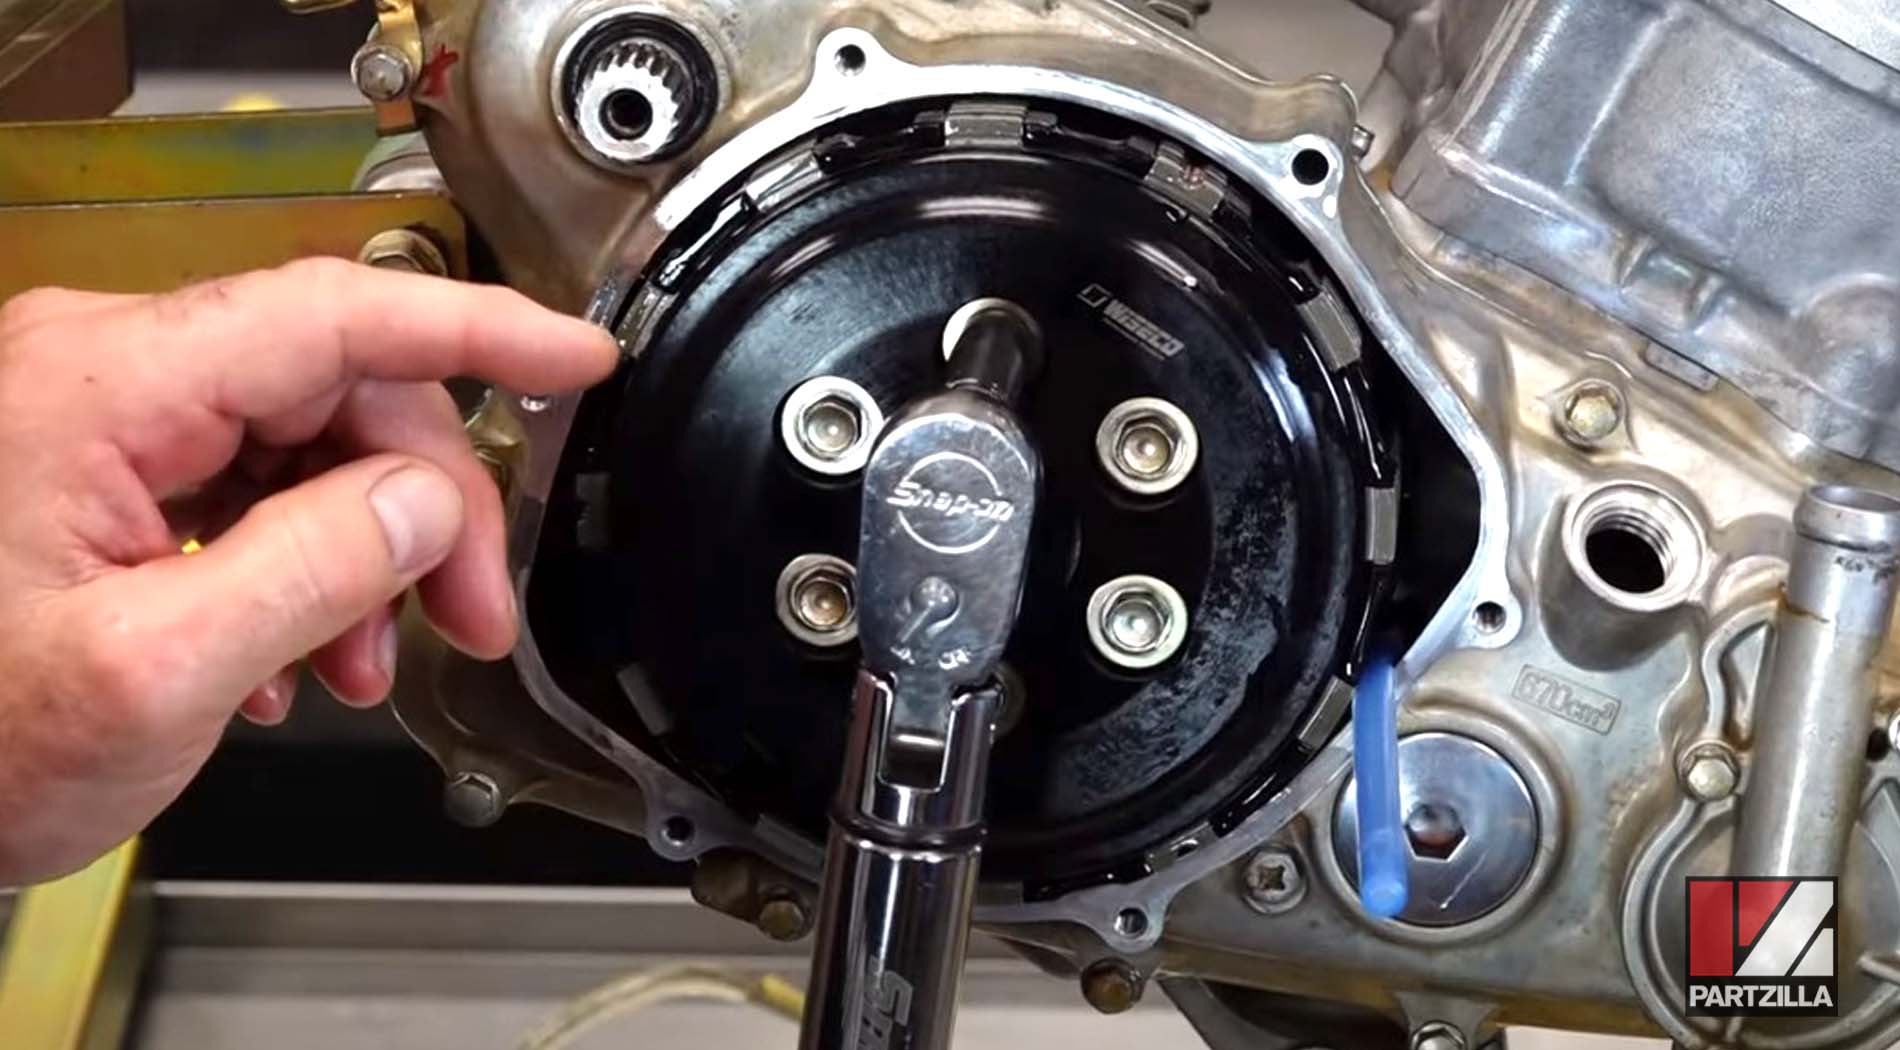
Watch the video above and follow the steps below to do a clutch replacement on a Honda CRF450.
NOTE: The engine on our Honda CRF450 was removed as part of a larger complete motorcycle rebuild, but you don't have to remove it to replace the clutch. Also, we chose an aftermarket clutch rebuild kit from Wiseco, which has a lighter and stronger clutch basket than the OEM, but you can use OEM Honda motorcycle parts if you prefer, and we transferred some OEM CRF450 clutch parts over to the new assembly.
Tools and Parts - Honda CRF450 Clutch Replacement
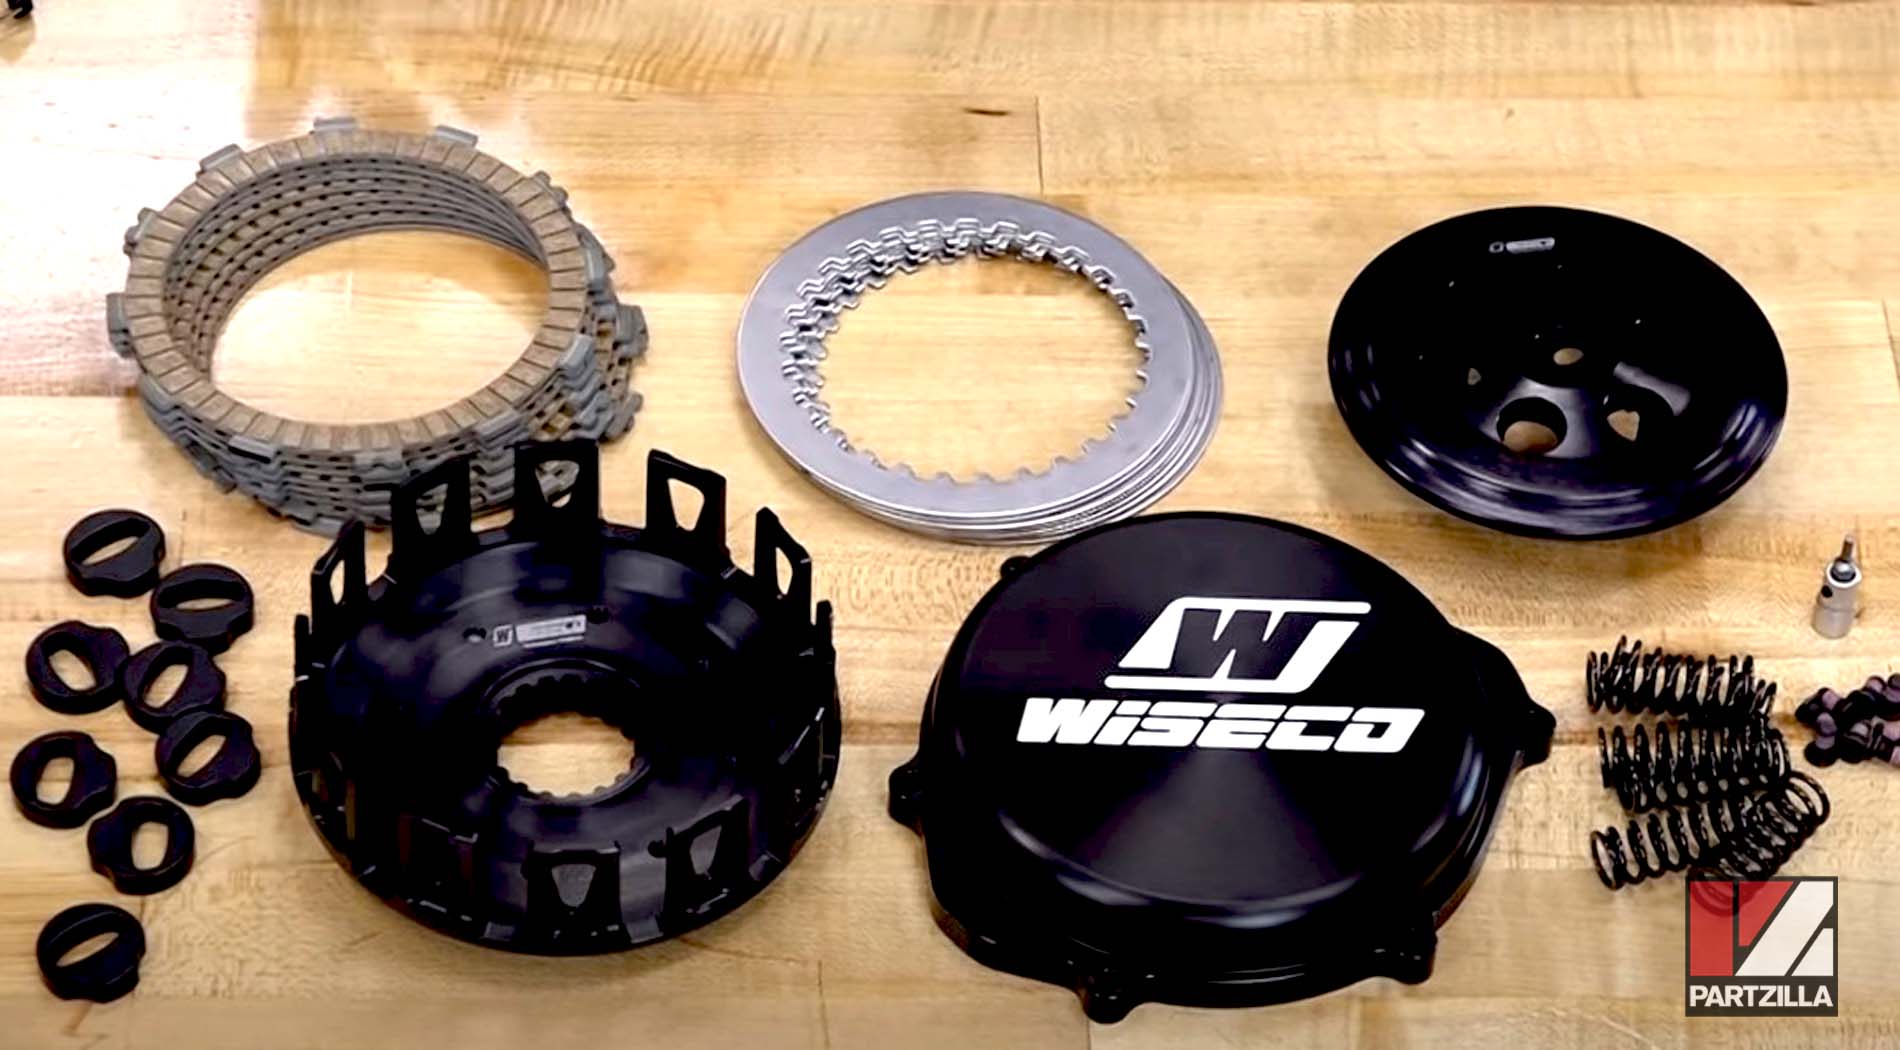
- Clutch rebuild kit
- Clutch holder tool
- Transmission fluid
- Drill press (or side grinder)
- Torque wrench
- Soft-blow hammer
Honda CRF450 Clutch Upgrade Steps
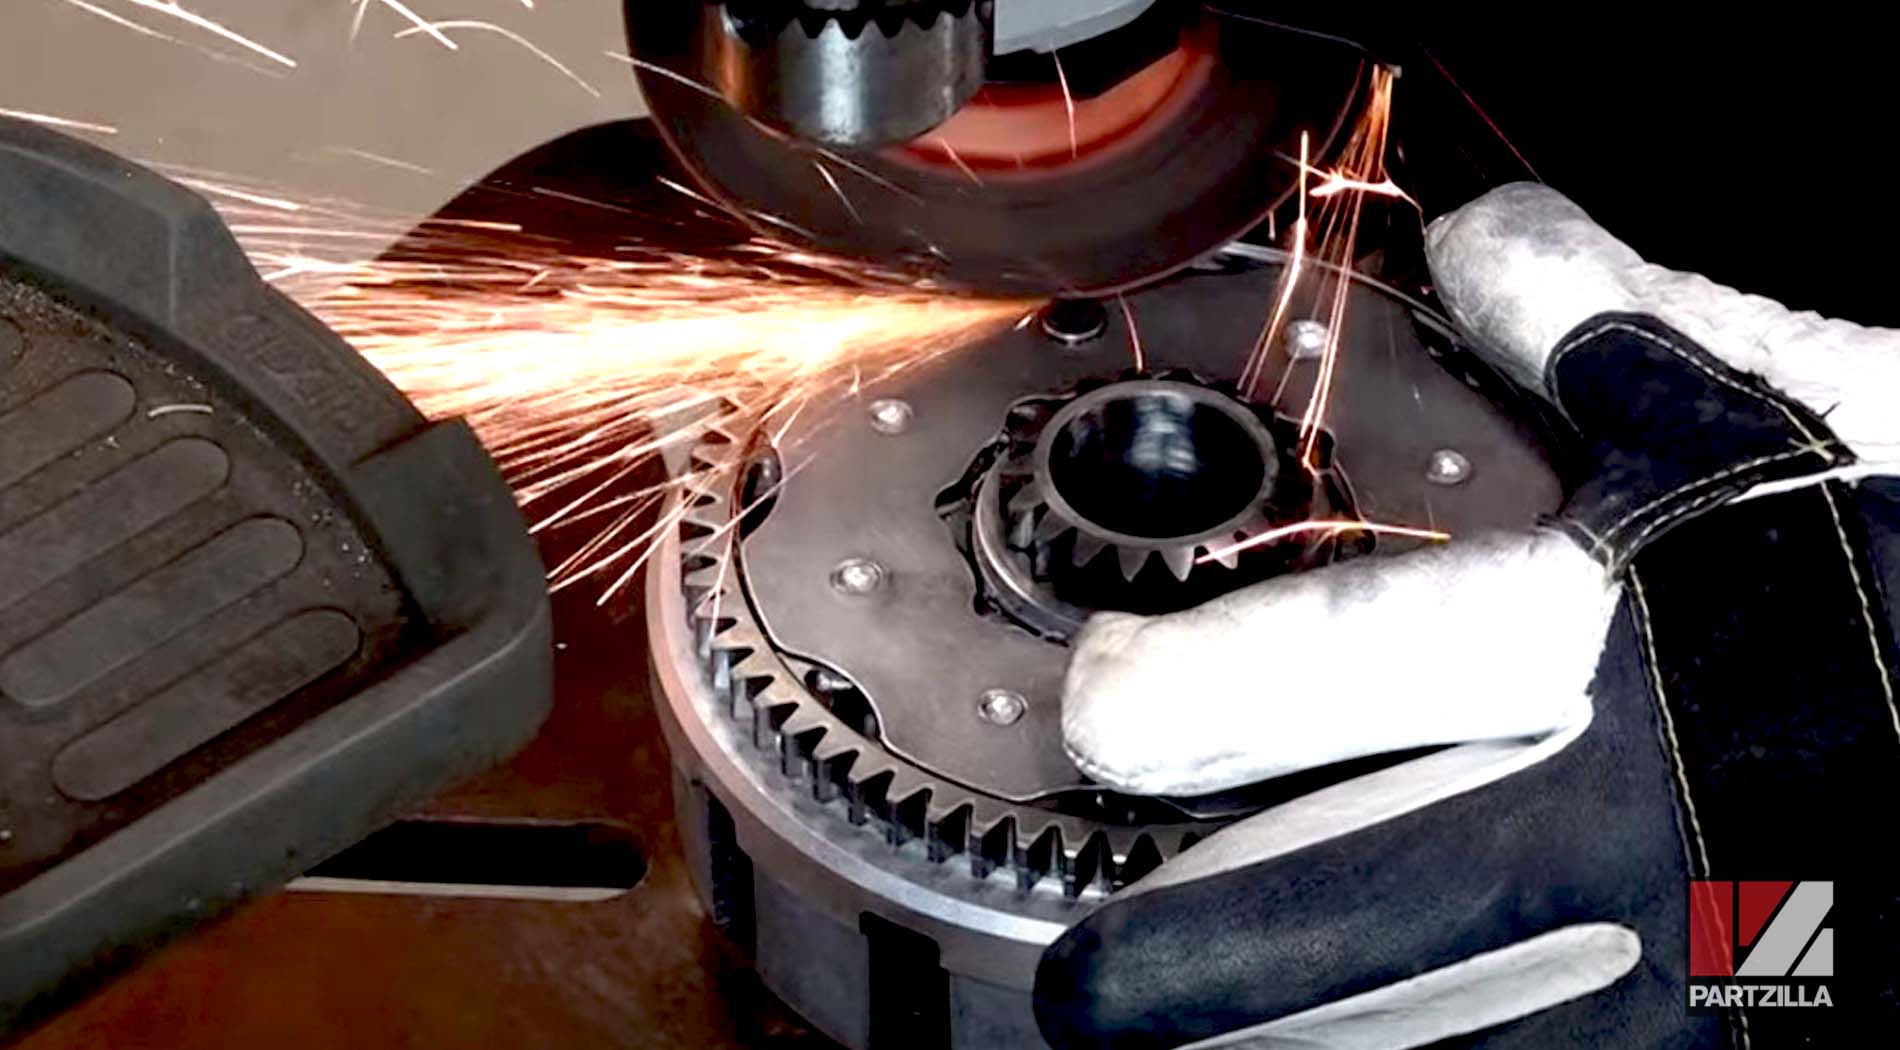
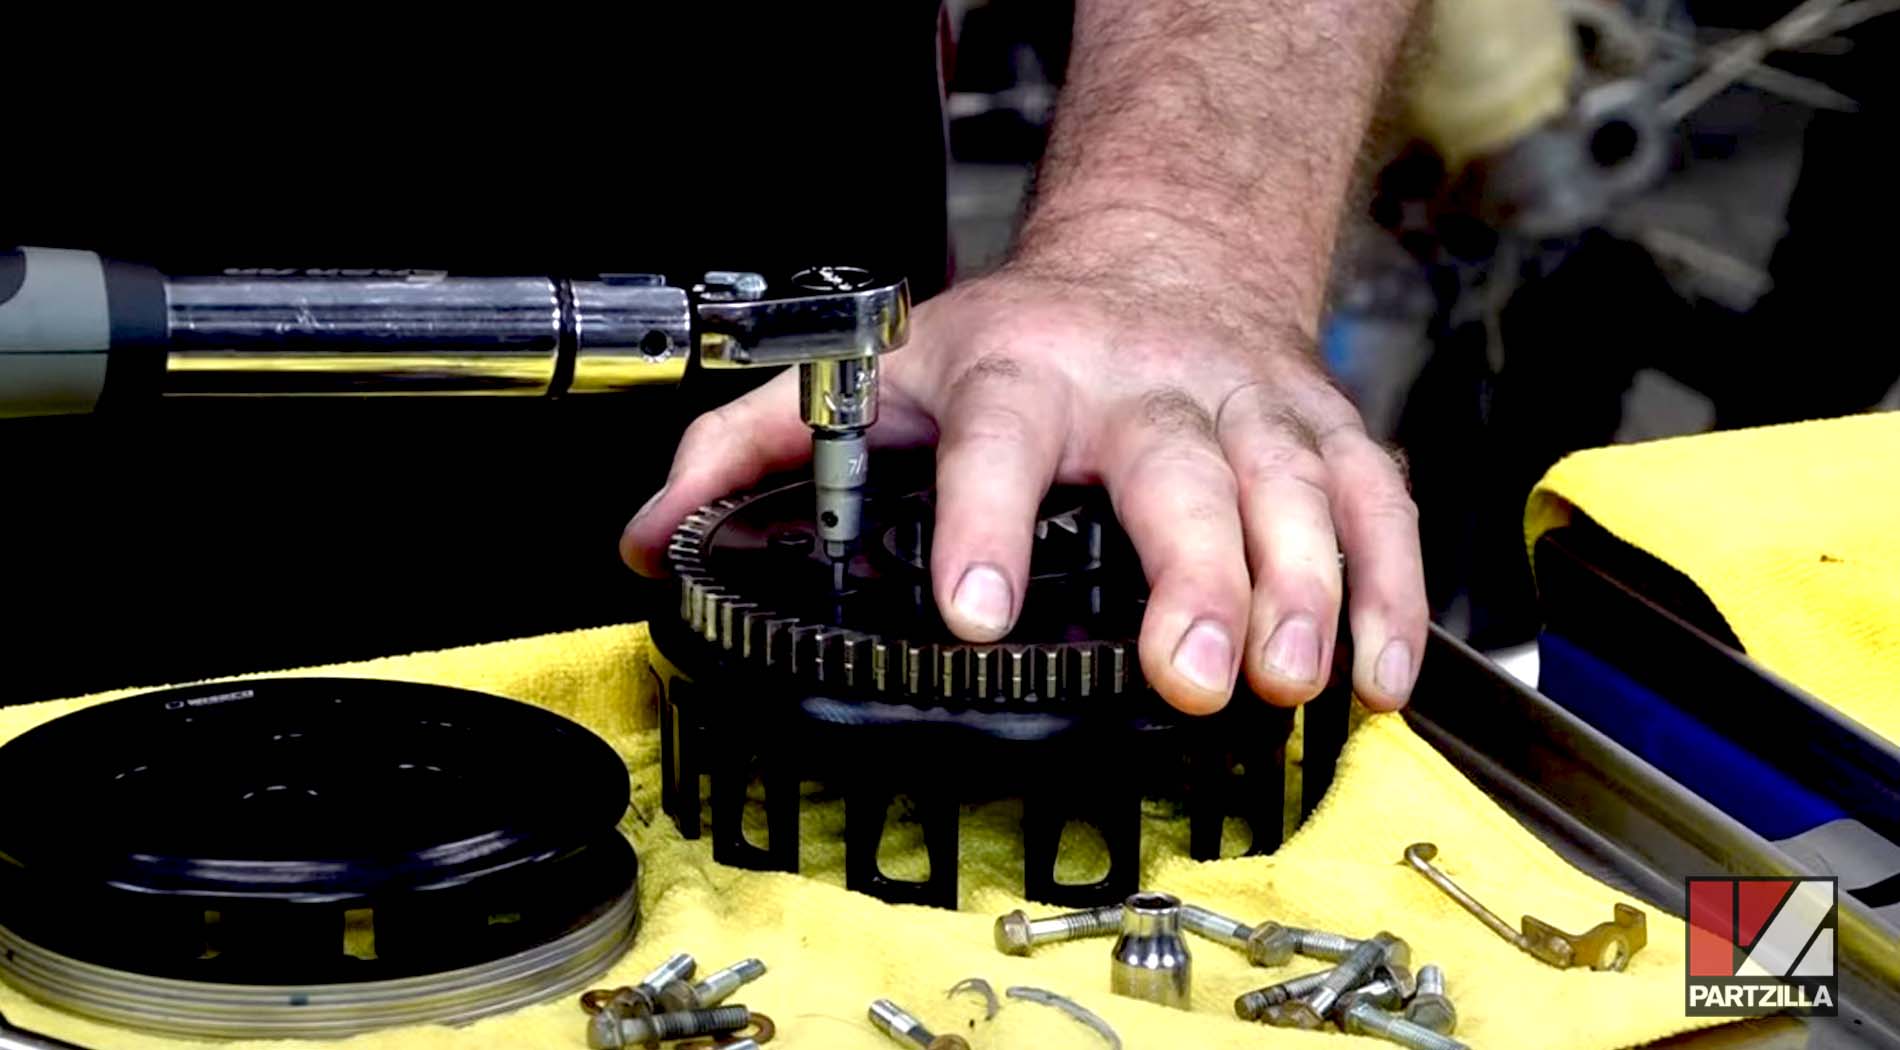
Step 1. Remove the retaining plate that holds the outer gear in place from the old clutch basket by taking off the rivets that hold it in place. You can do this by either grinding, drilling or pressing off the rivets to release the plate. The best way to do it is to drill the rivets out with a drill press and a 5/16th drill to get them out.
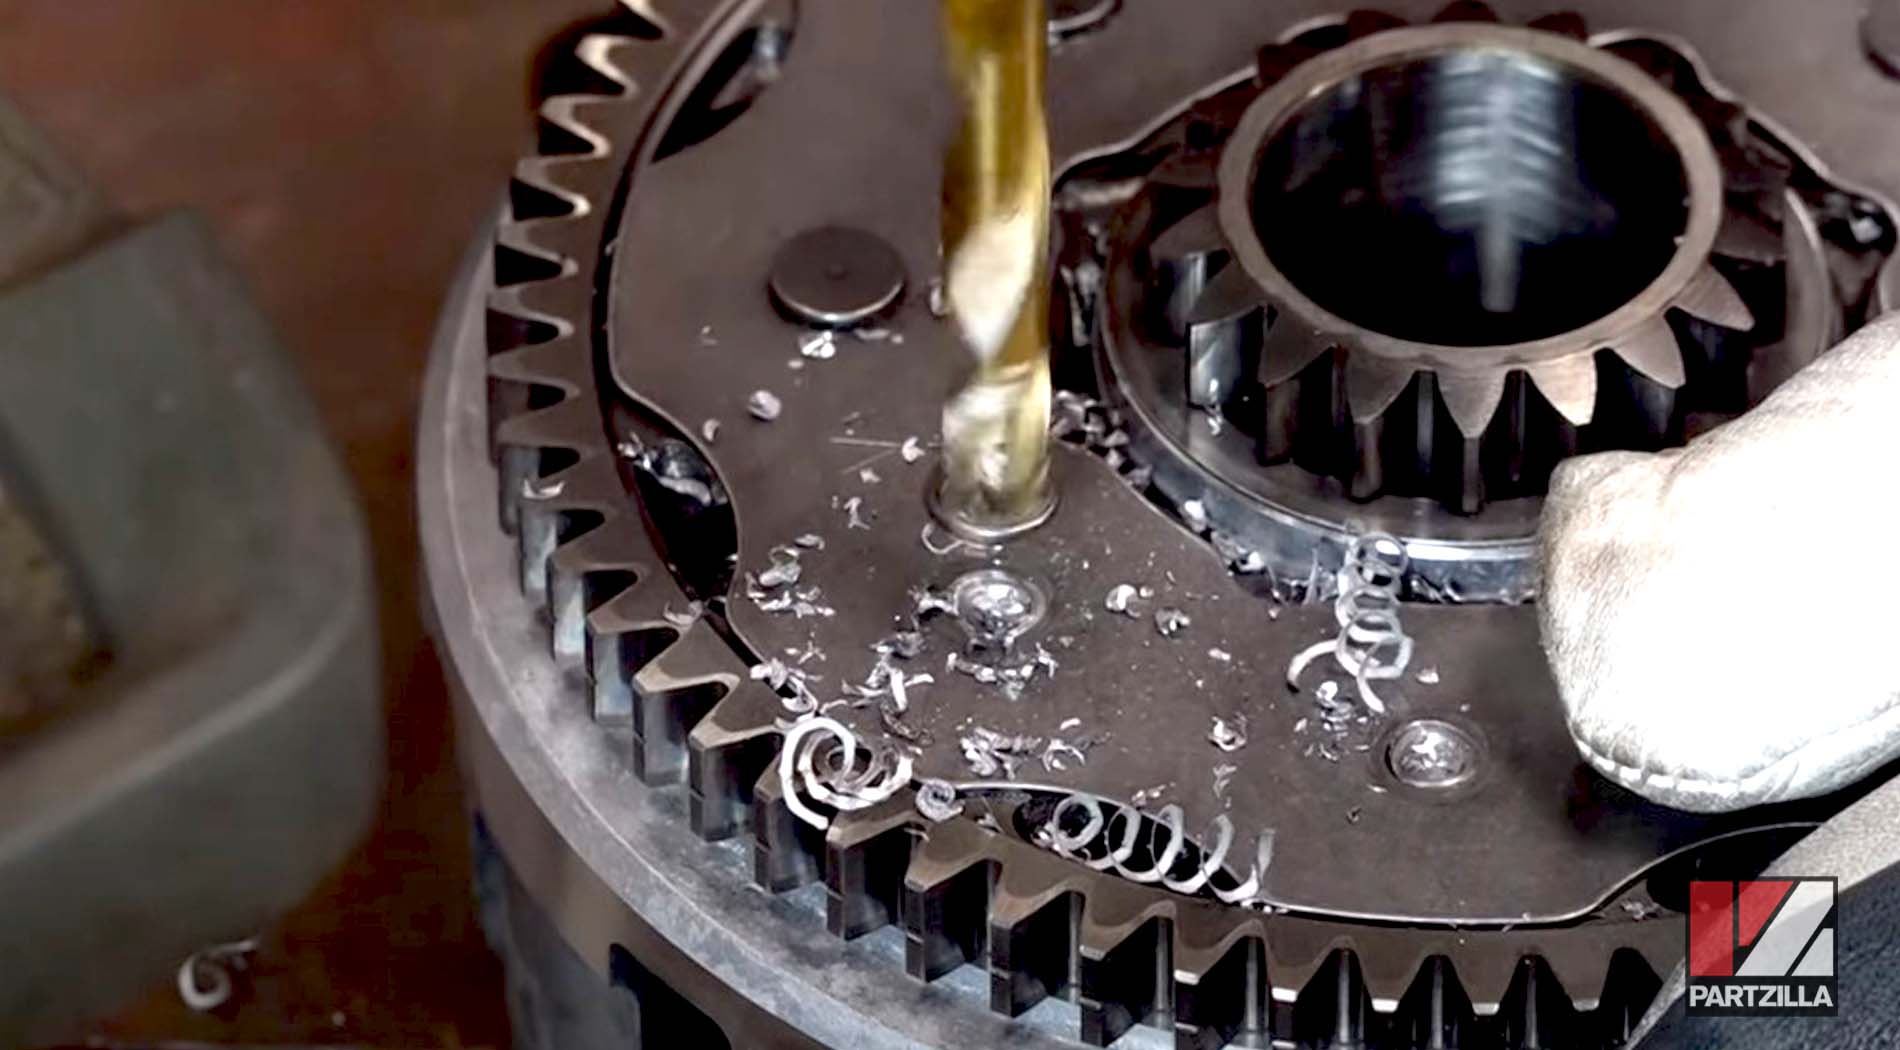
You can also use a side grinder to take the rivets off and pop off the plate underneath it if you don’t have access to a drill press.
NOTE: The Wiseco manual says you can push the rivets out of the plate, but we attempted that method and it didn’t work for our clutch basket.
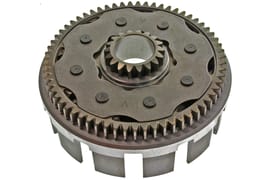
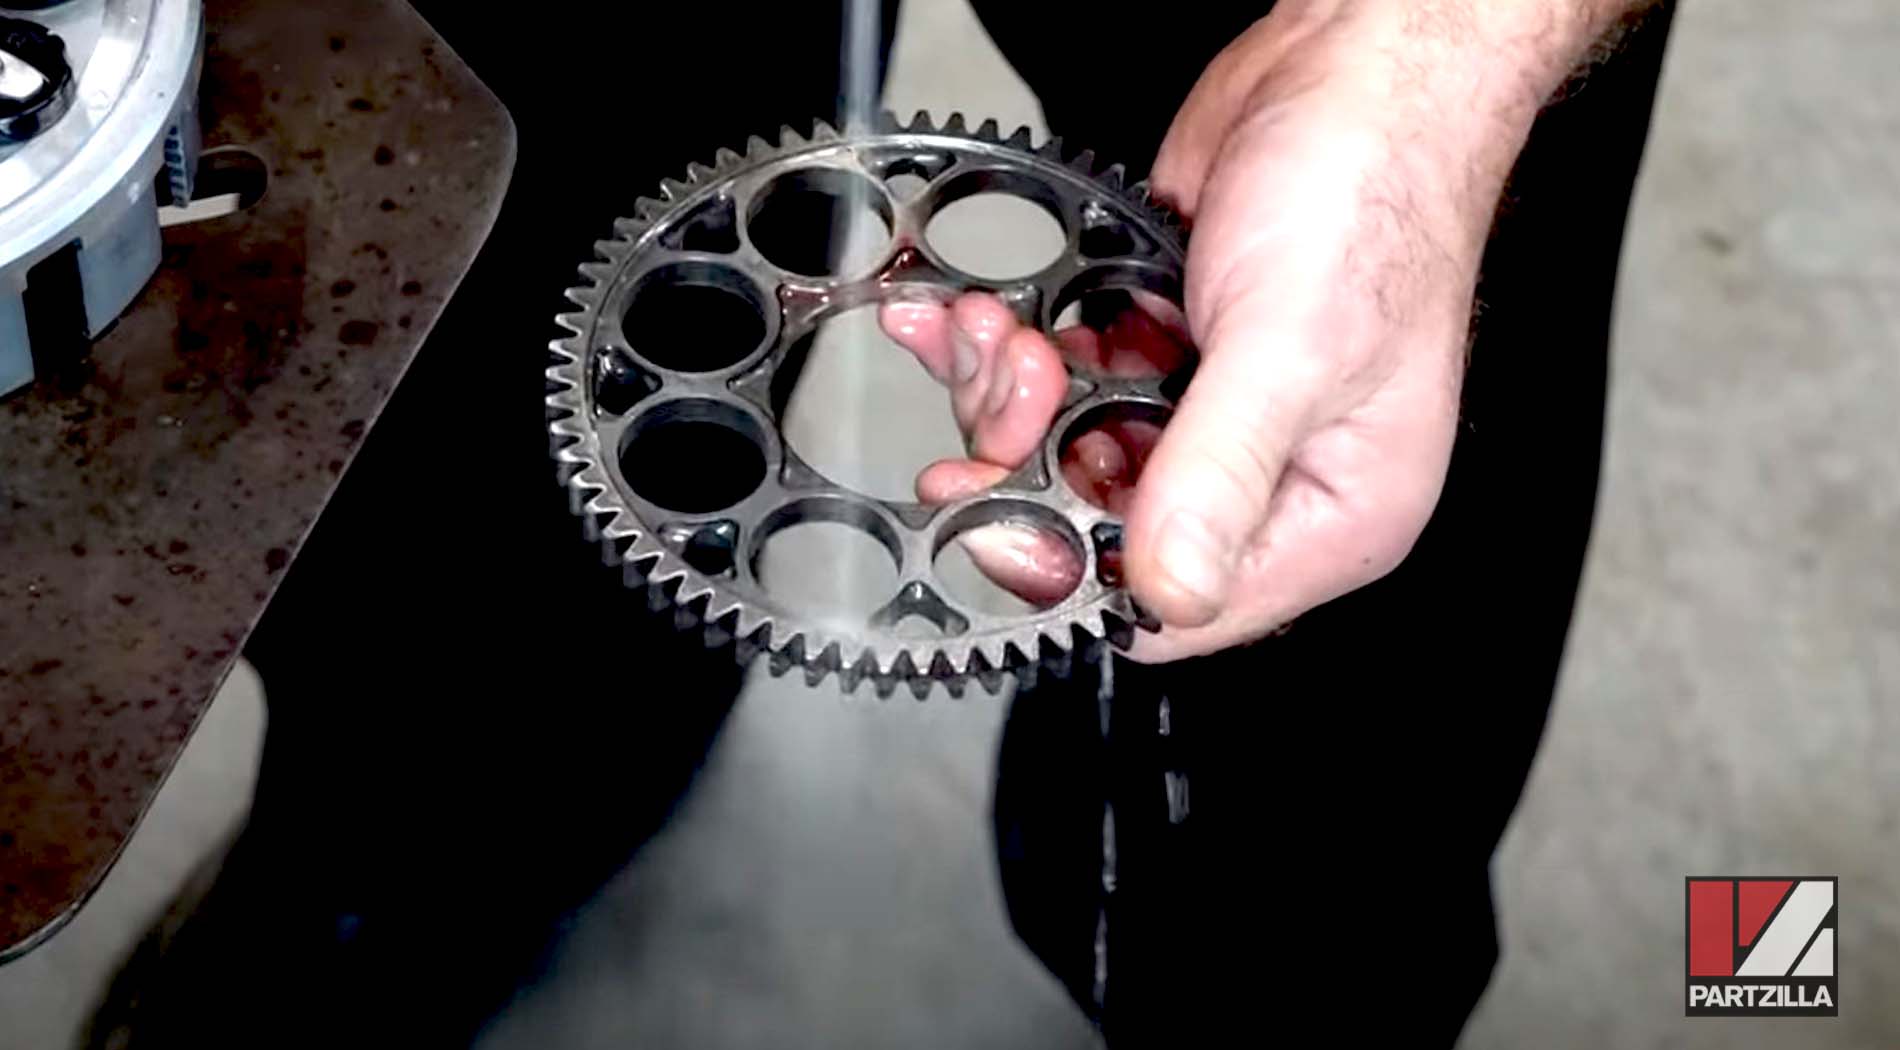
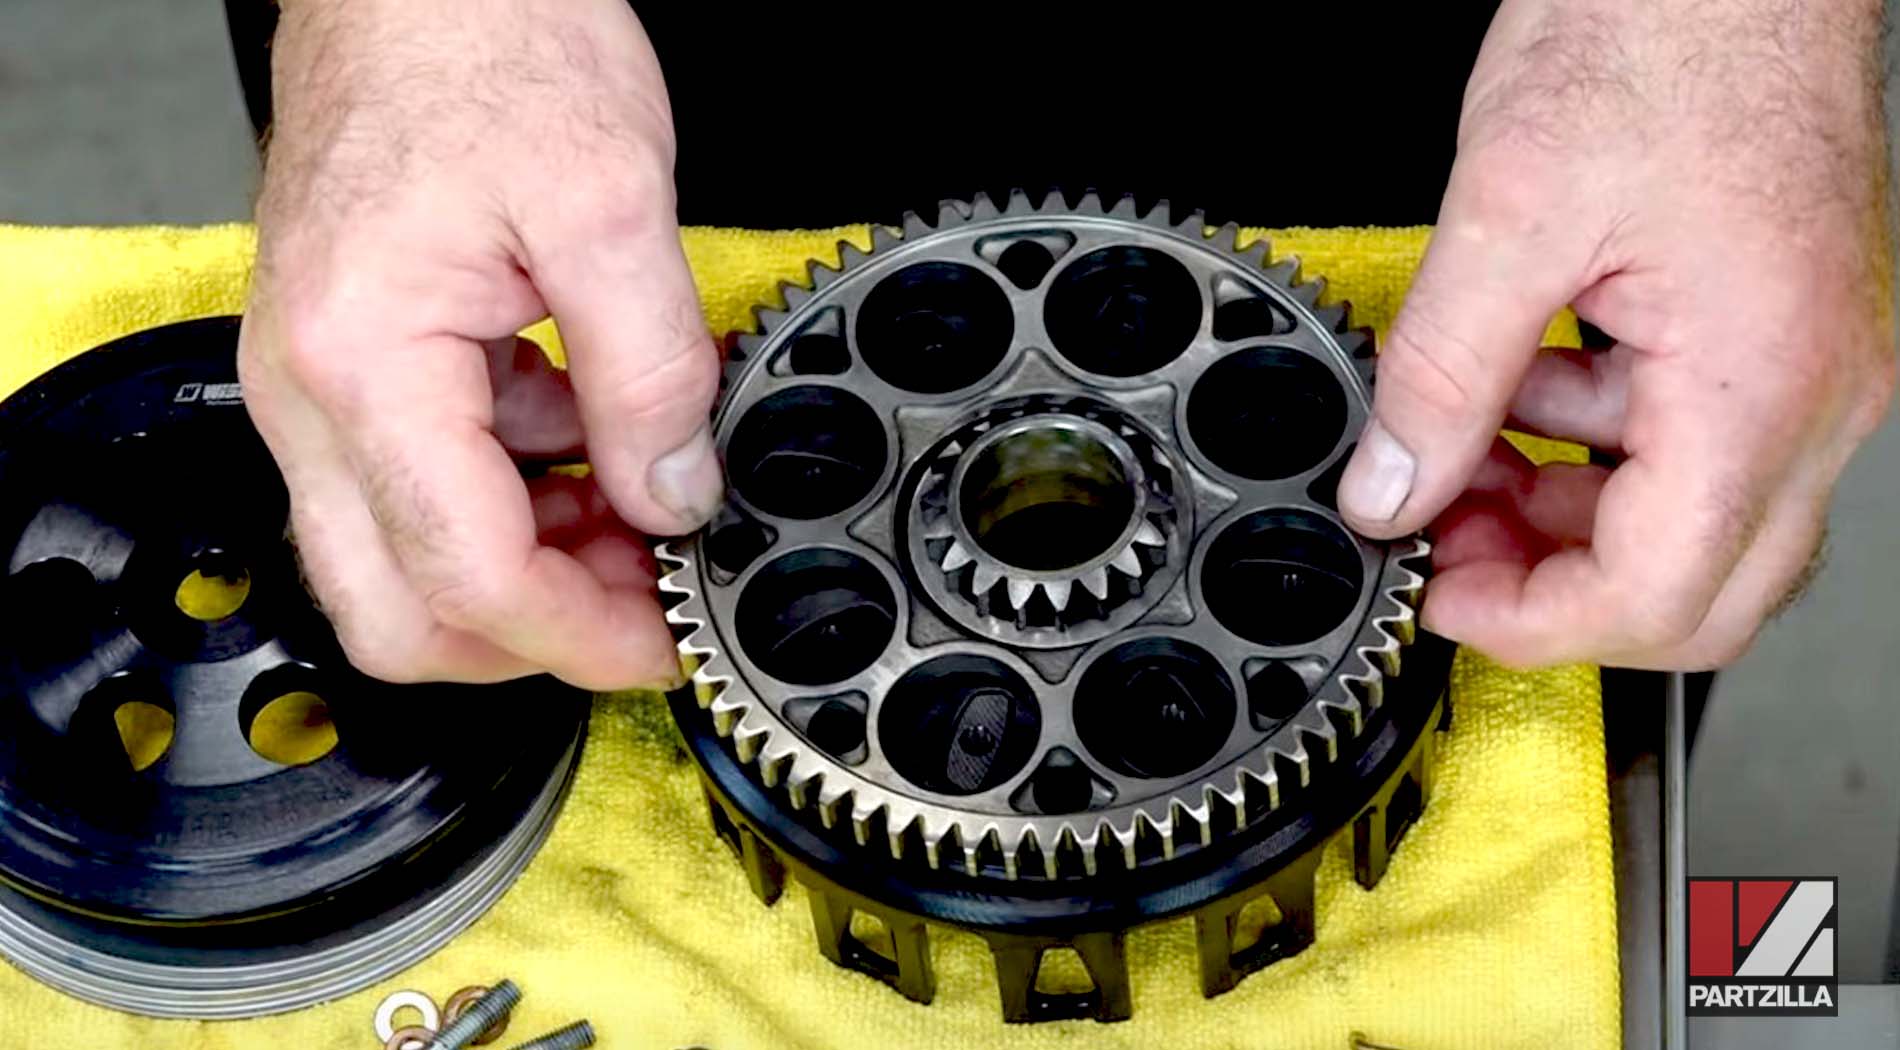
Step 2. Remove the outer gear from the clutch basket, then clean it with some contact cleaner to ensure it’s clear of any metal shavings.
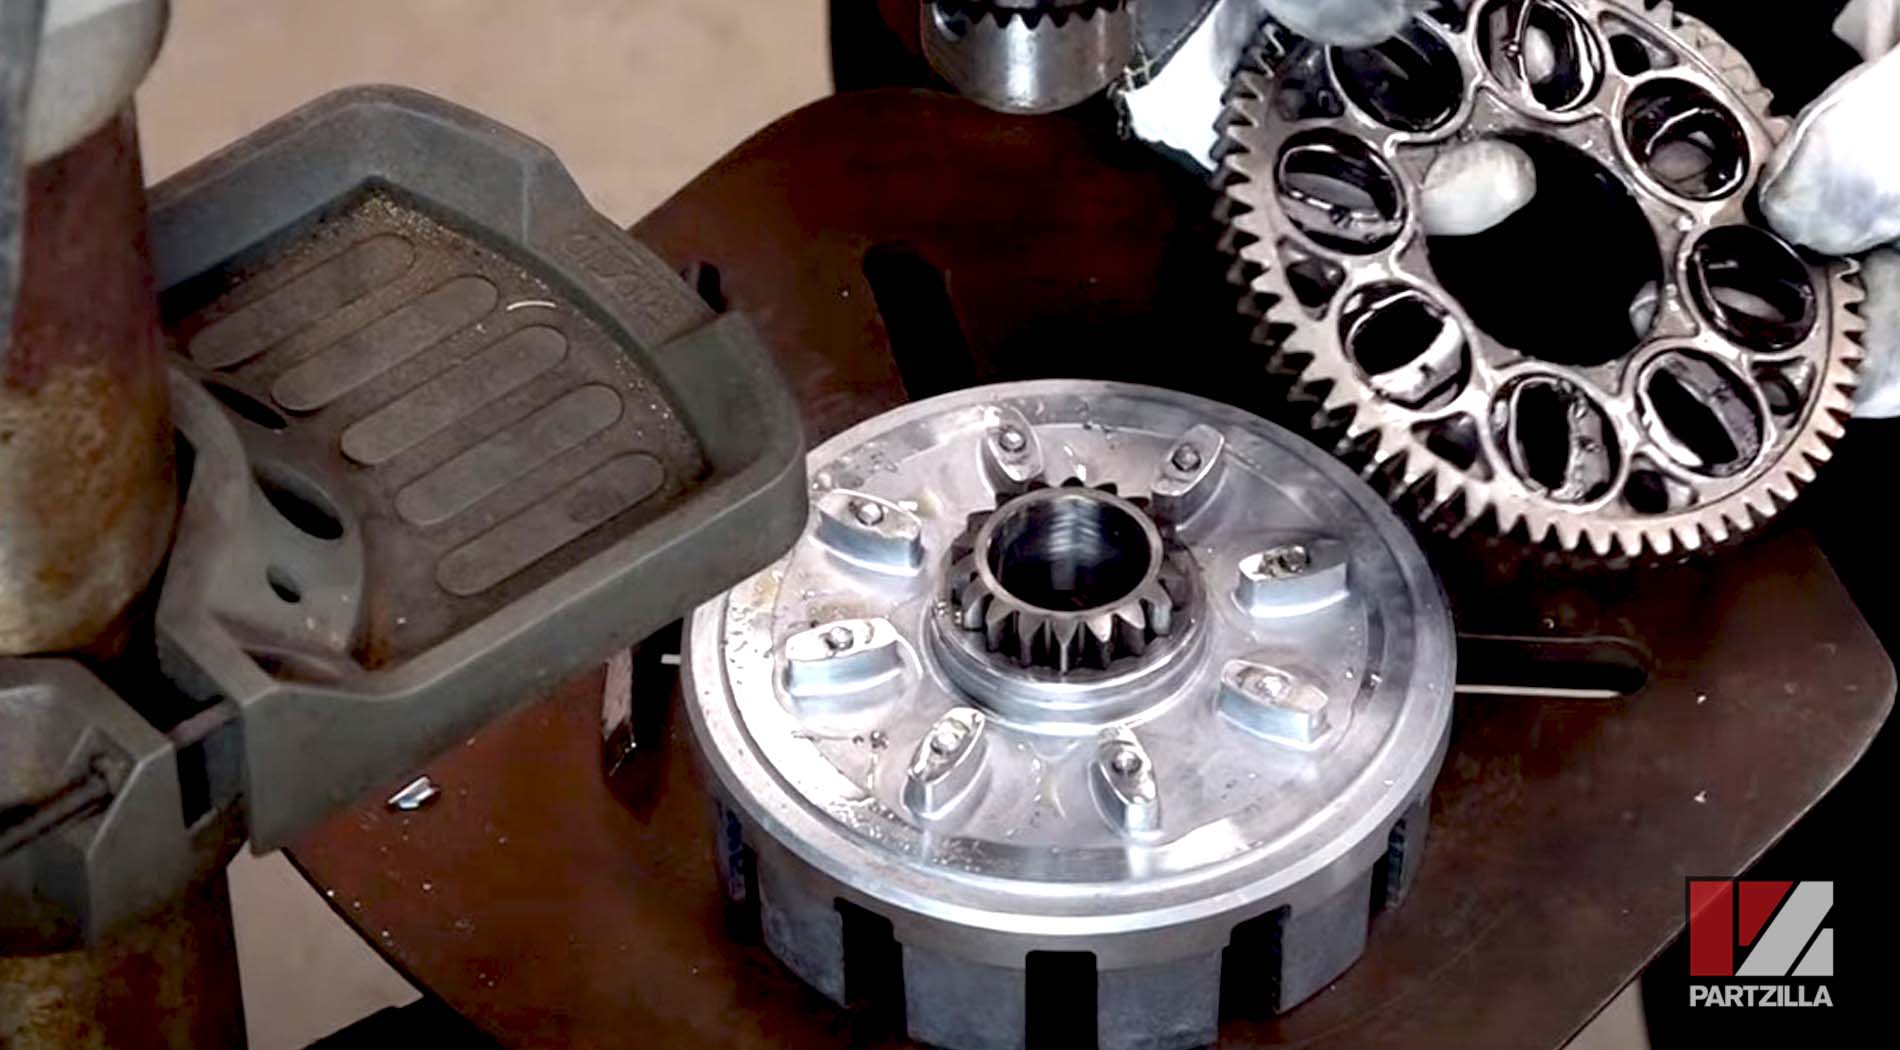
PRO TIP: Leave everything in the same orientation from where it came apart to make sure you transfer it over correctly to the new clutch basket. Use a marker to label the side that faces into the engine.
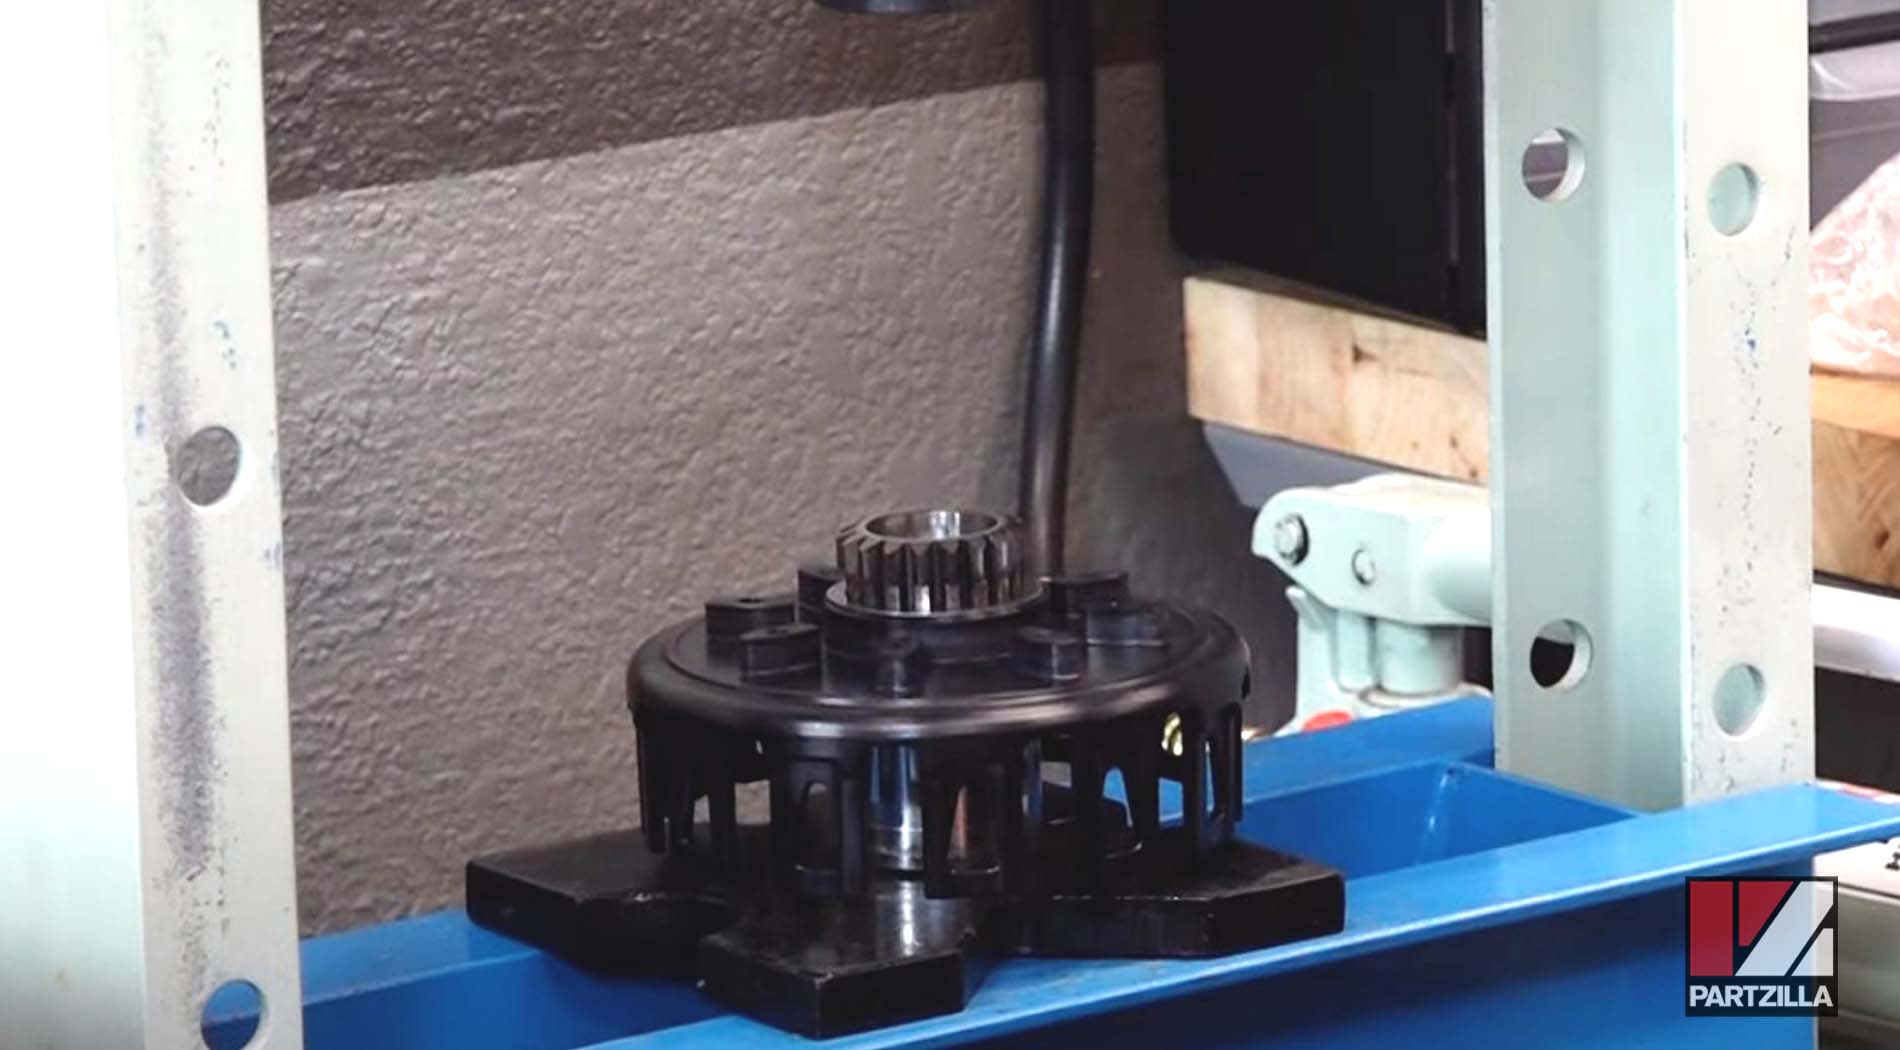
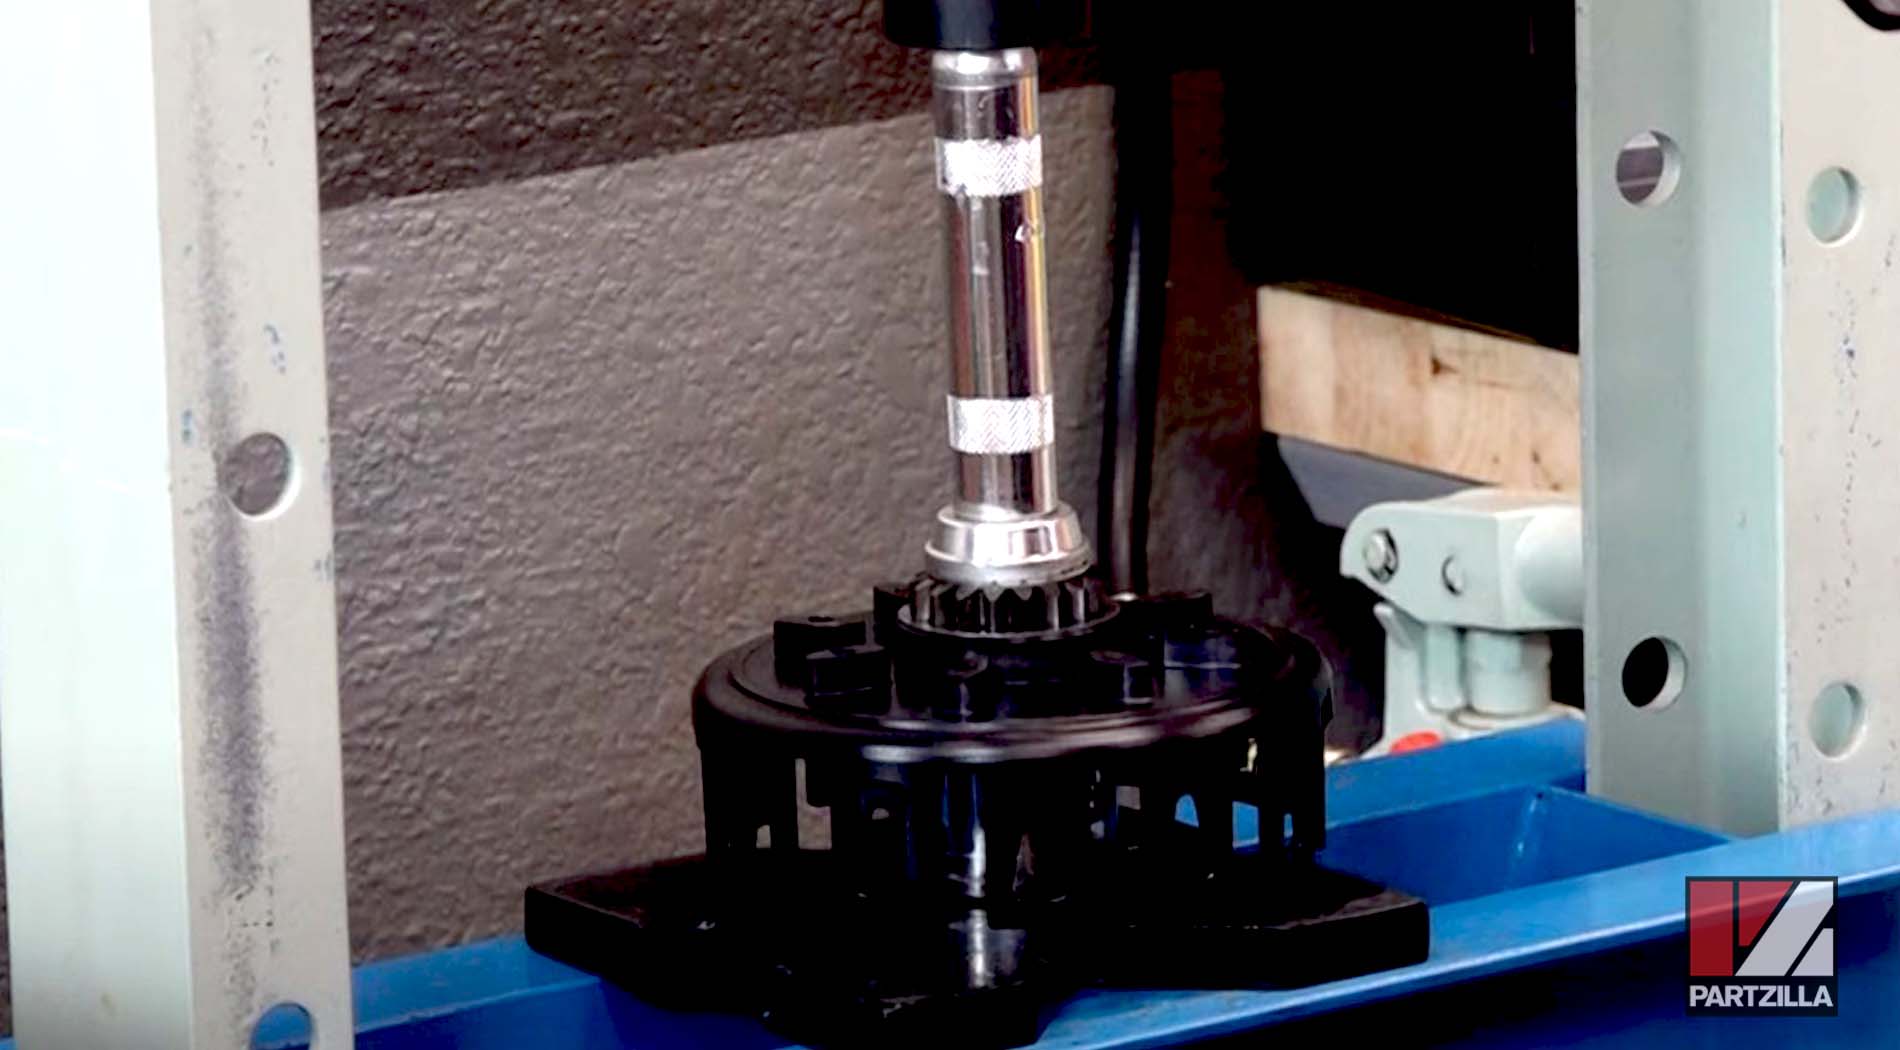
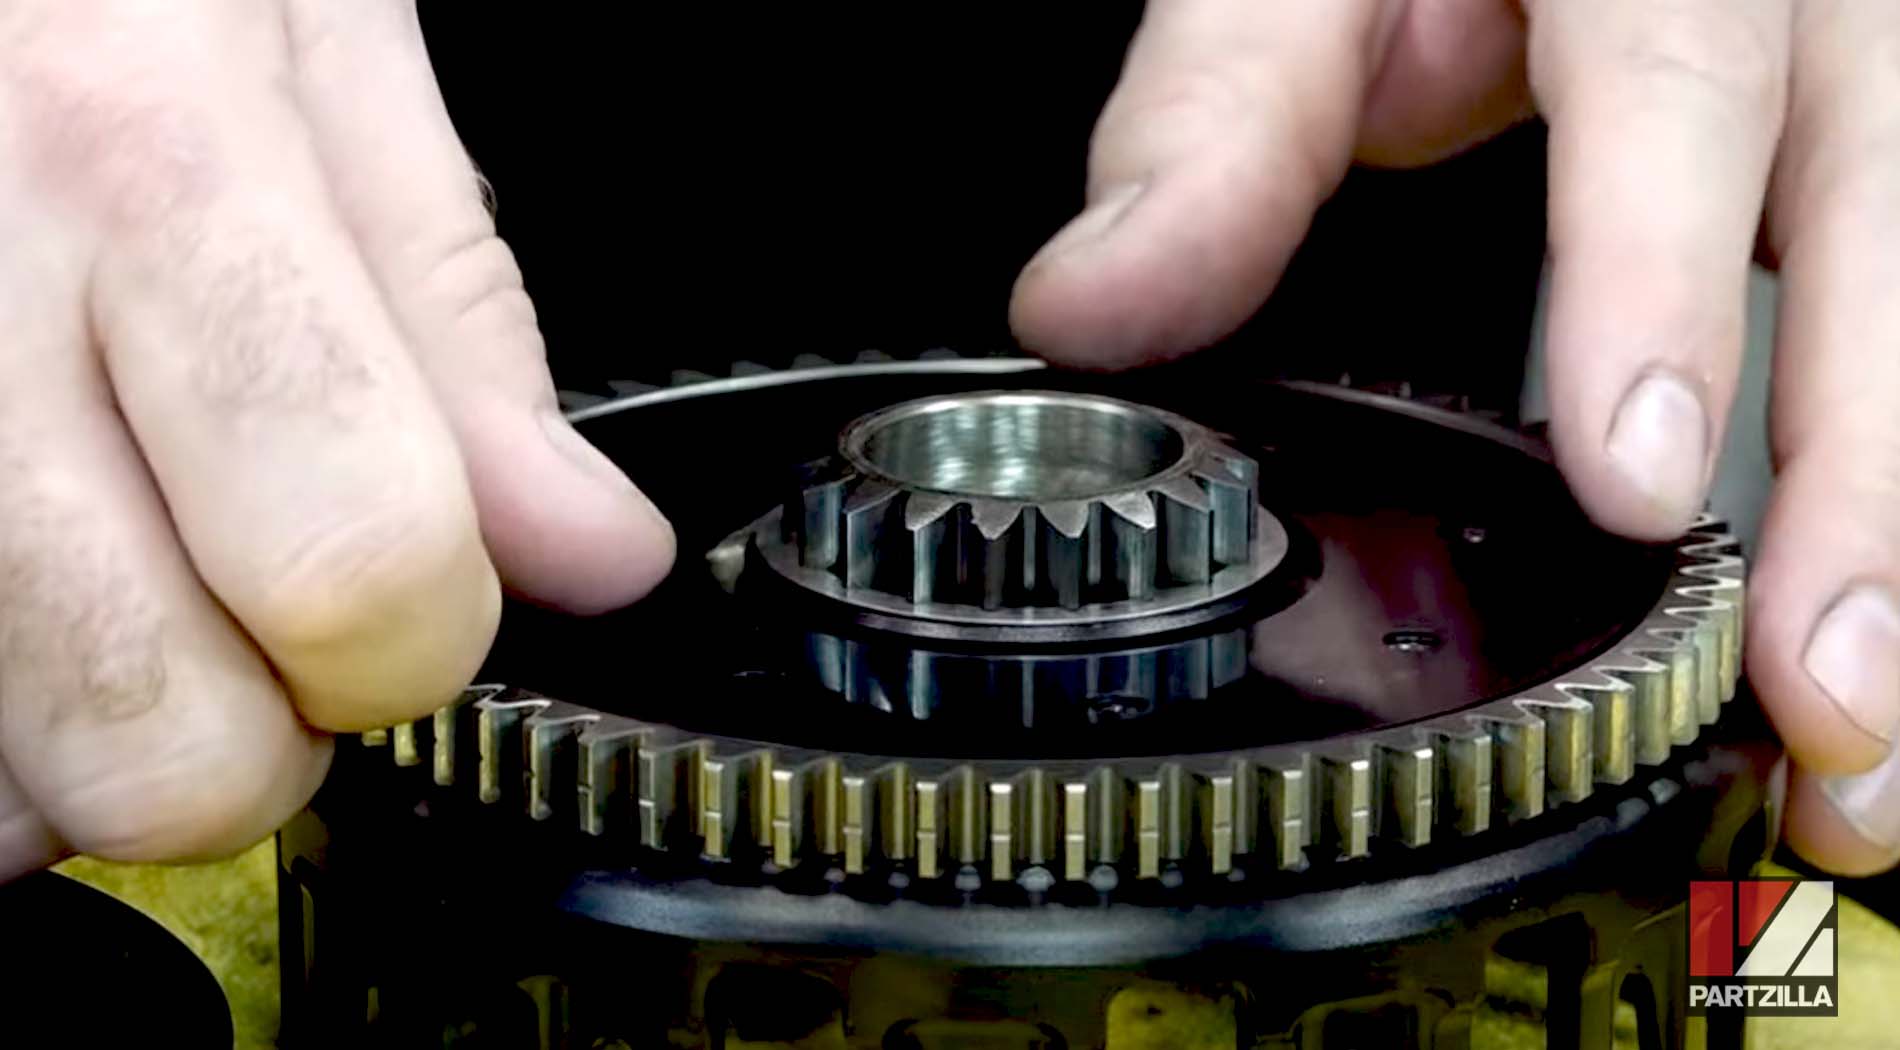
Step 3. Press the inner gear and its washer out of the clutch basket by making sure the driver fits to the inside of the gear’s teeth.
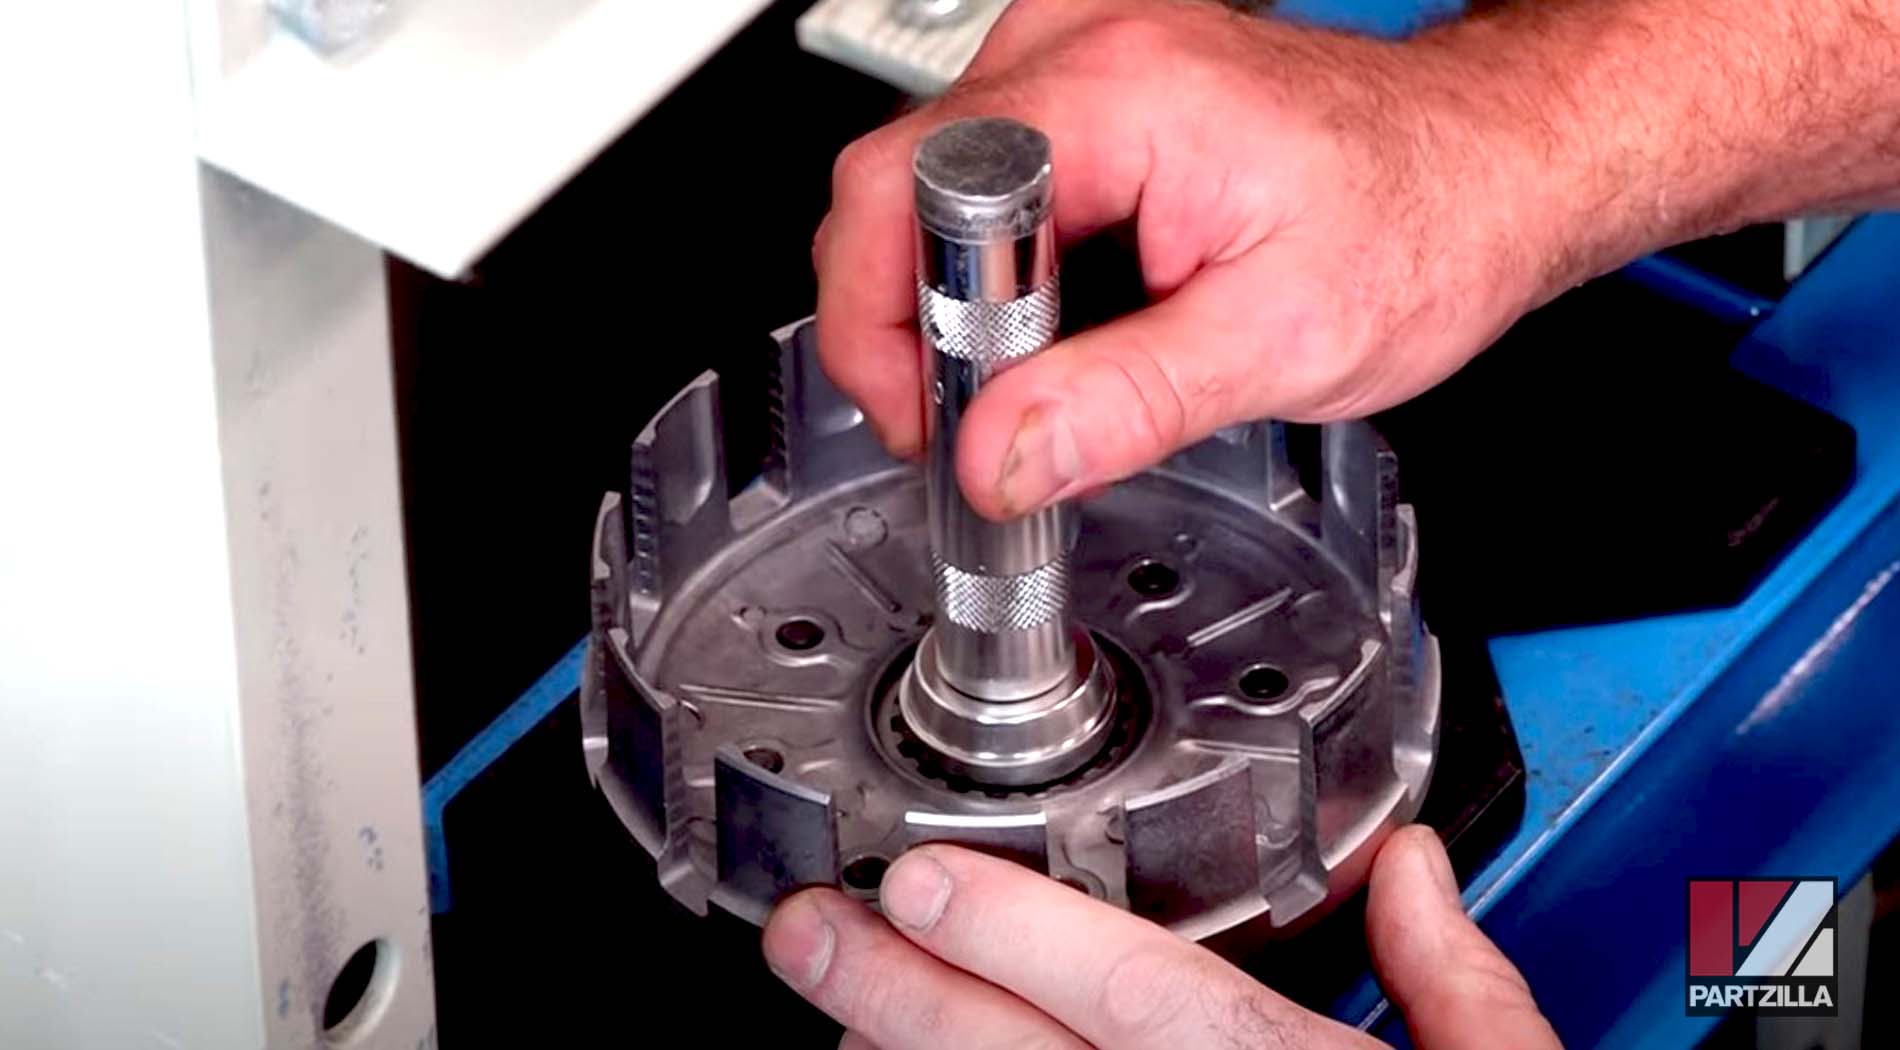
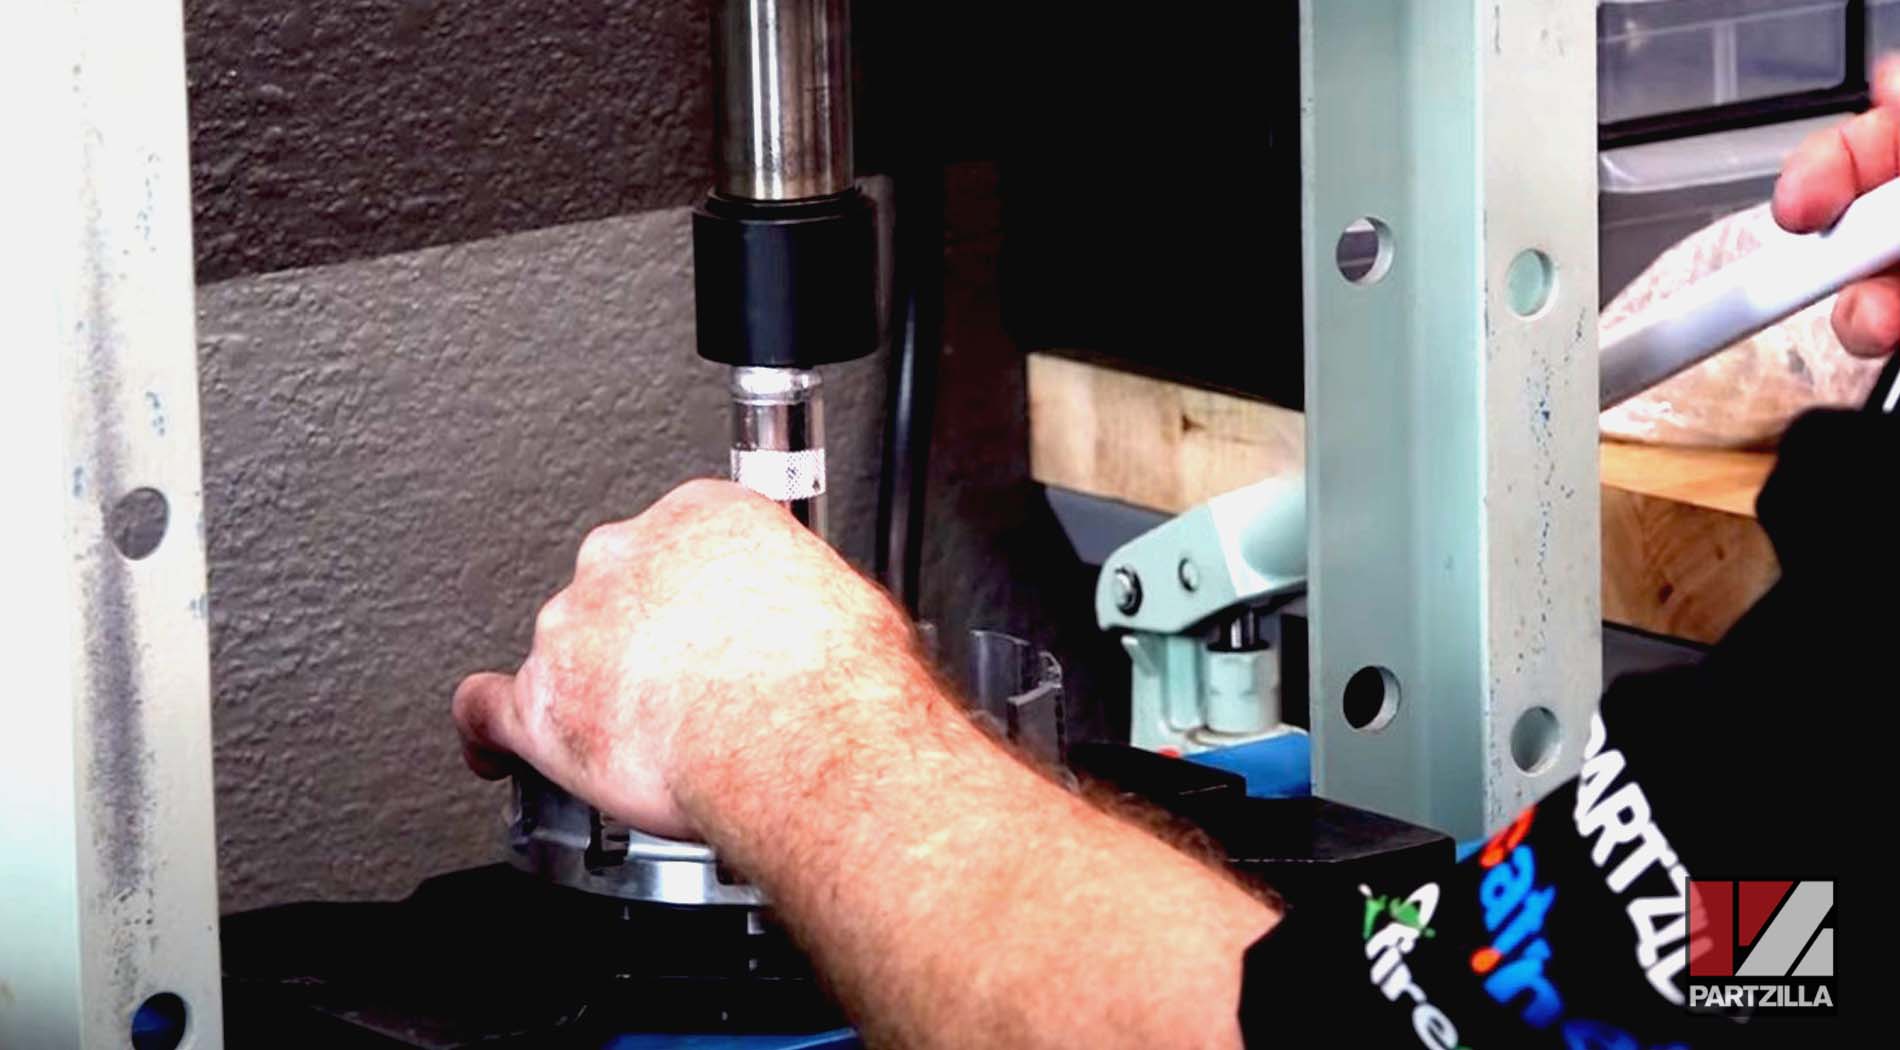
Step 4. Press the inner gear and its washer into the new clutch basket until it’s seated, being careful not to damage the basket.
Step 5. Soak the clutch plates in transmission fluid for about an hour to prep them for installation.
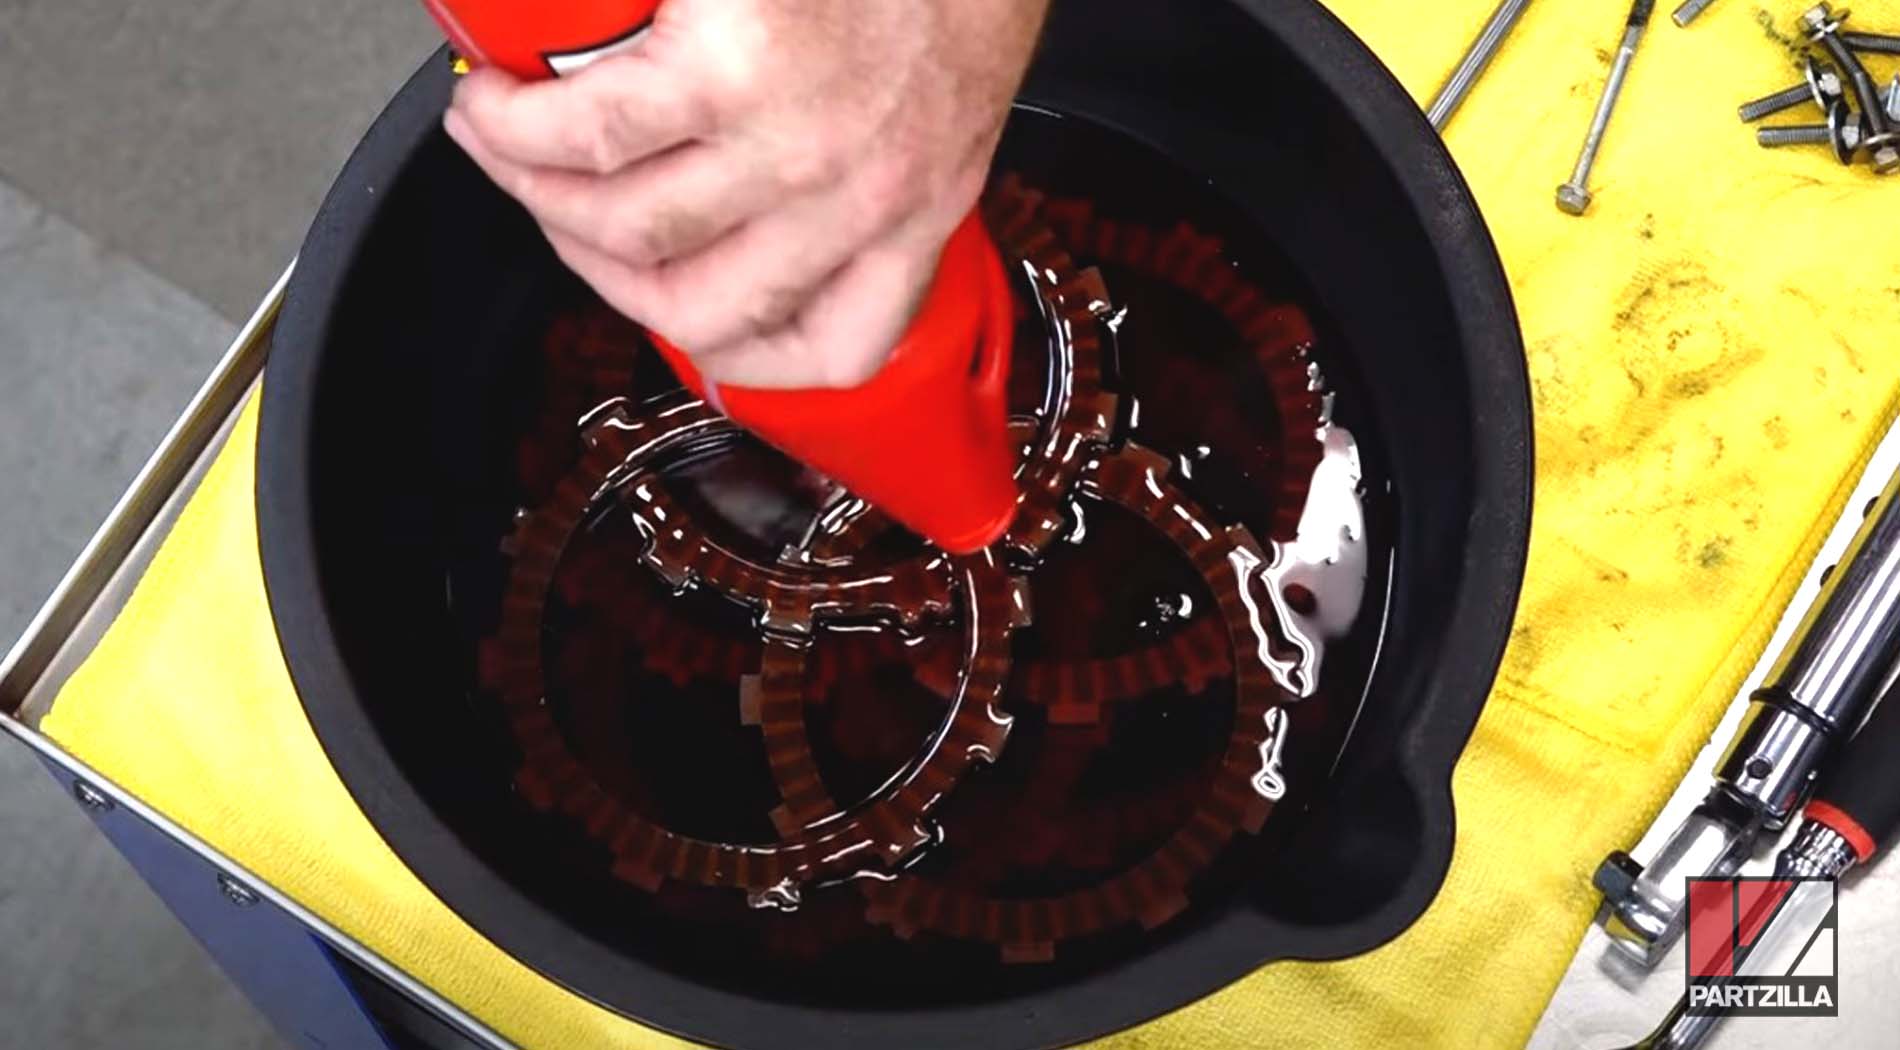
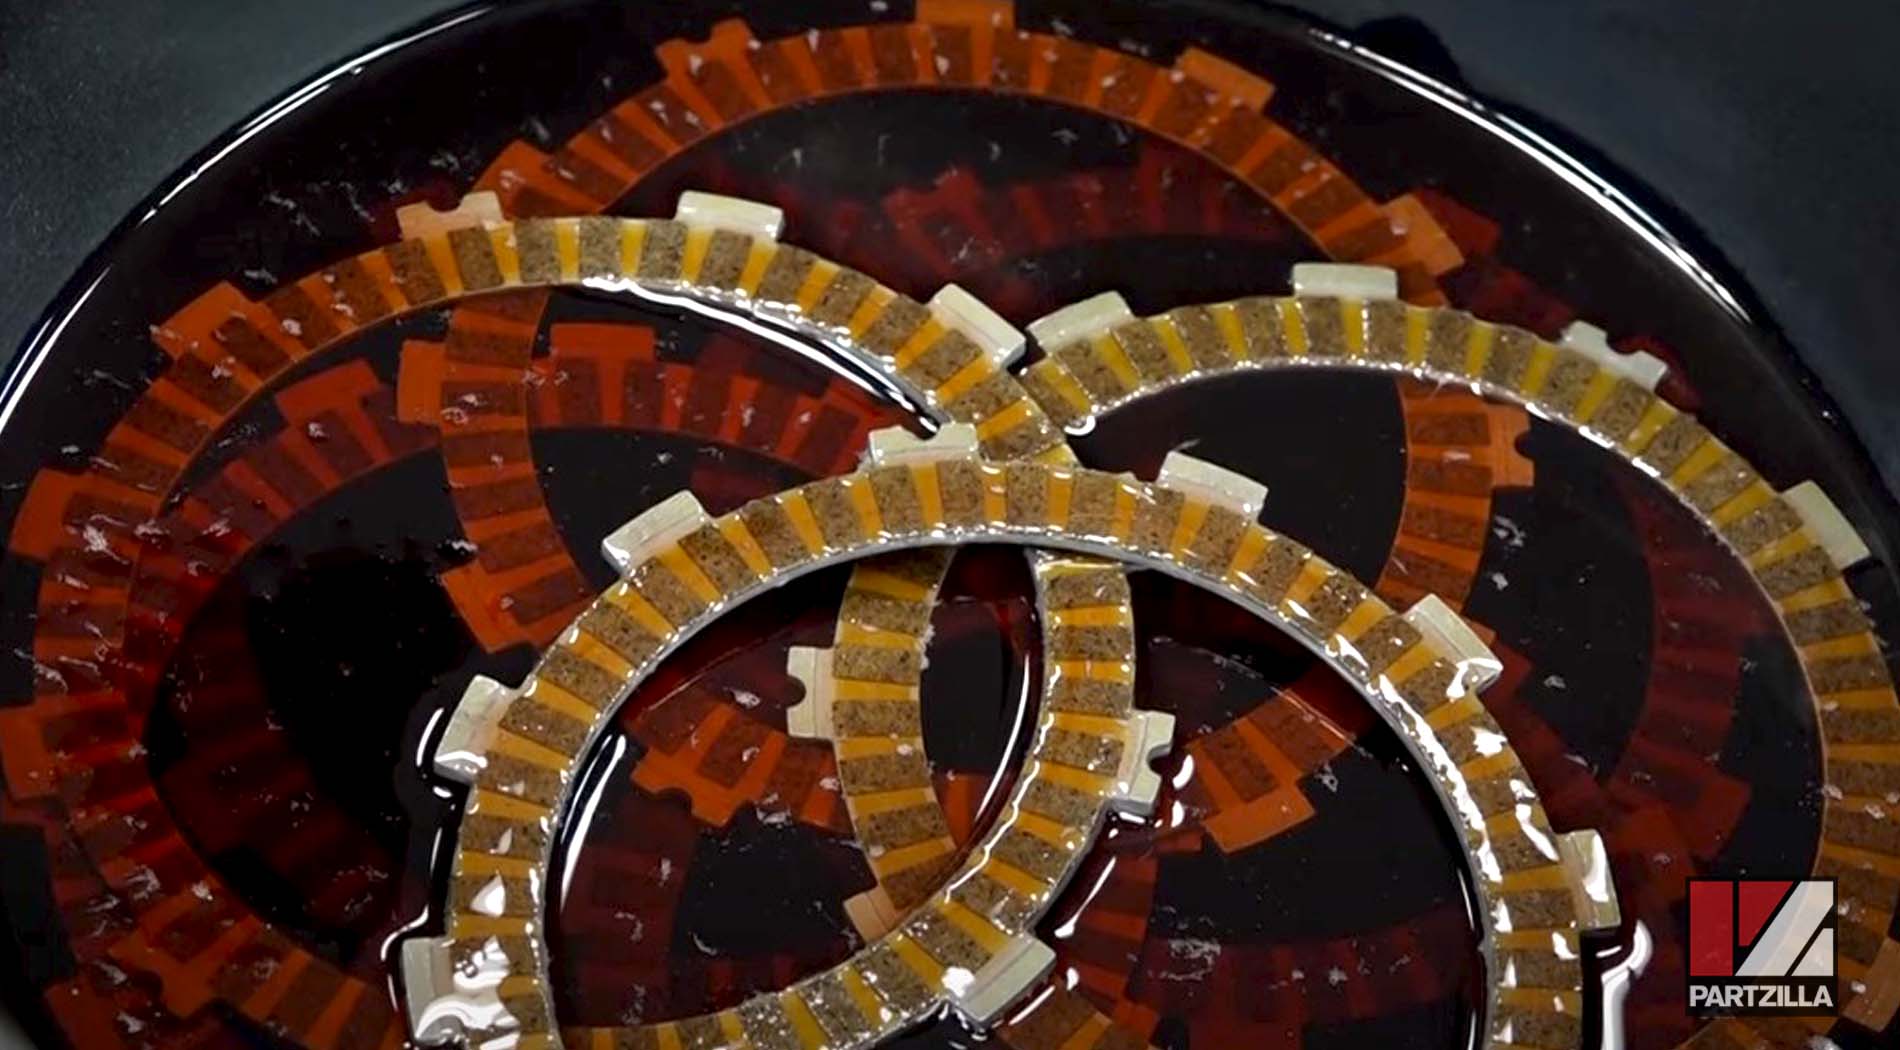
NOTE: We used HP transmission fluid from Honda, but you can use whatever lubricant you think is best.
Step 6. Place the clutch basket cushions (included in the Wiseco kit) in by hand. They only go in one way, so if you have to force it, you're doing it wrong.

Step 7. Place the outer gear (removed in step 2) onto the new clutch basket.
Step 8. Put on the new retaining plate and Torx head screws (included in the Wiseco kit along with the correct size Torx bit to replace the rivets), then torque them to 5 foot-pounds.
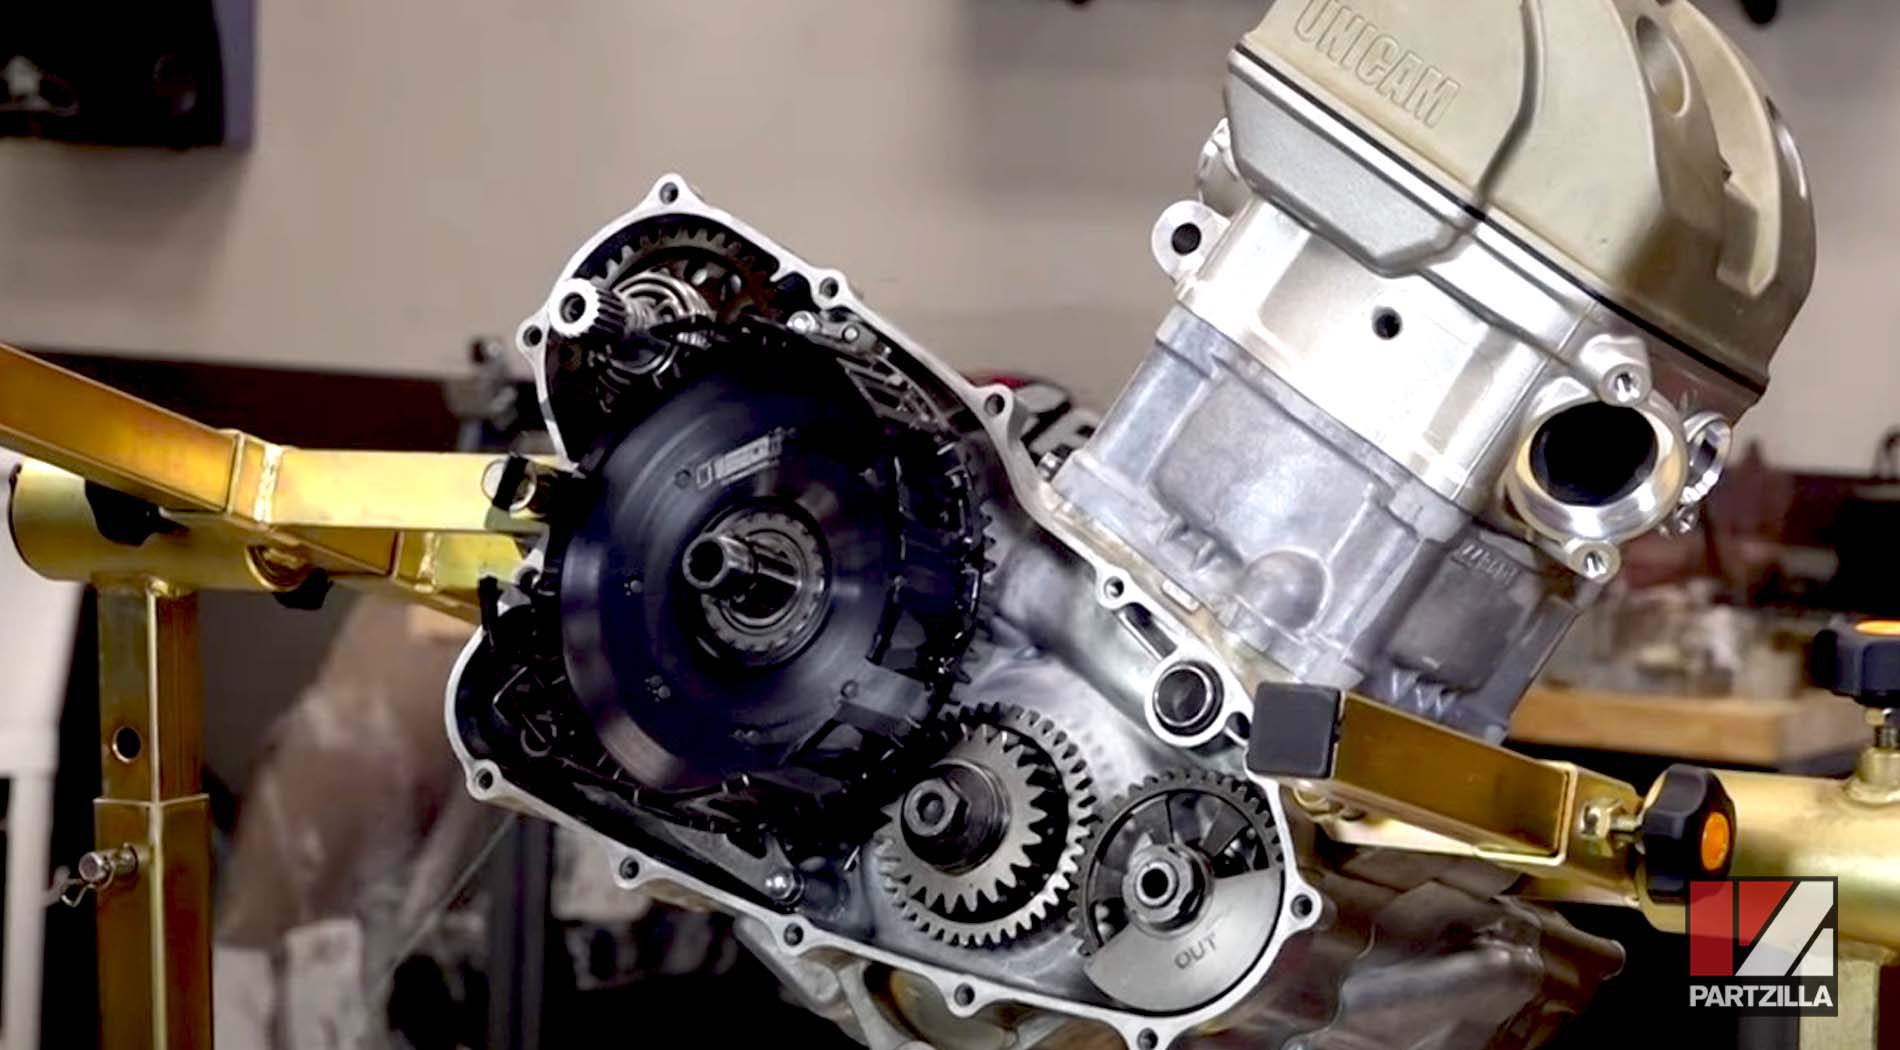
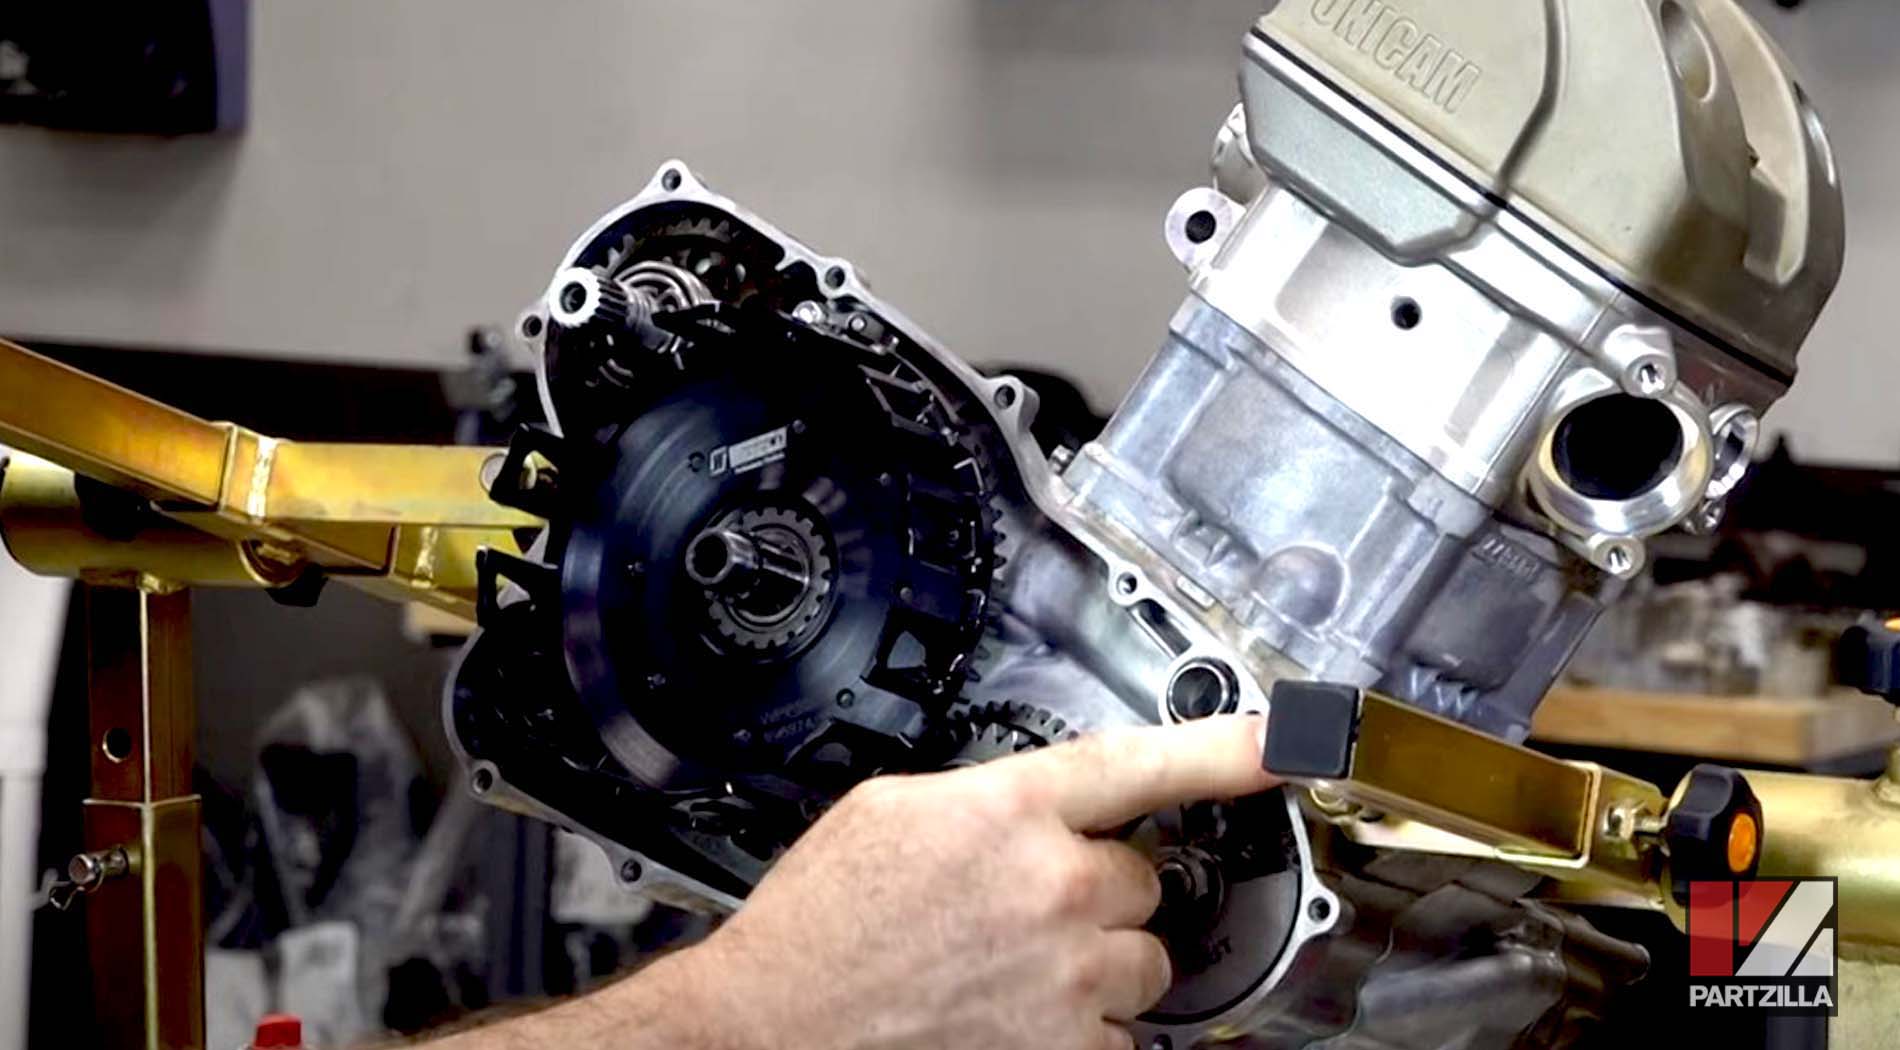
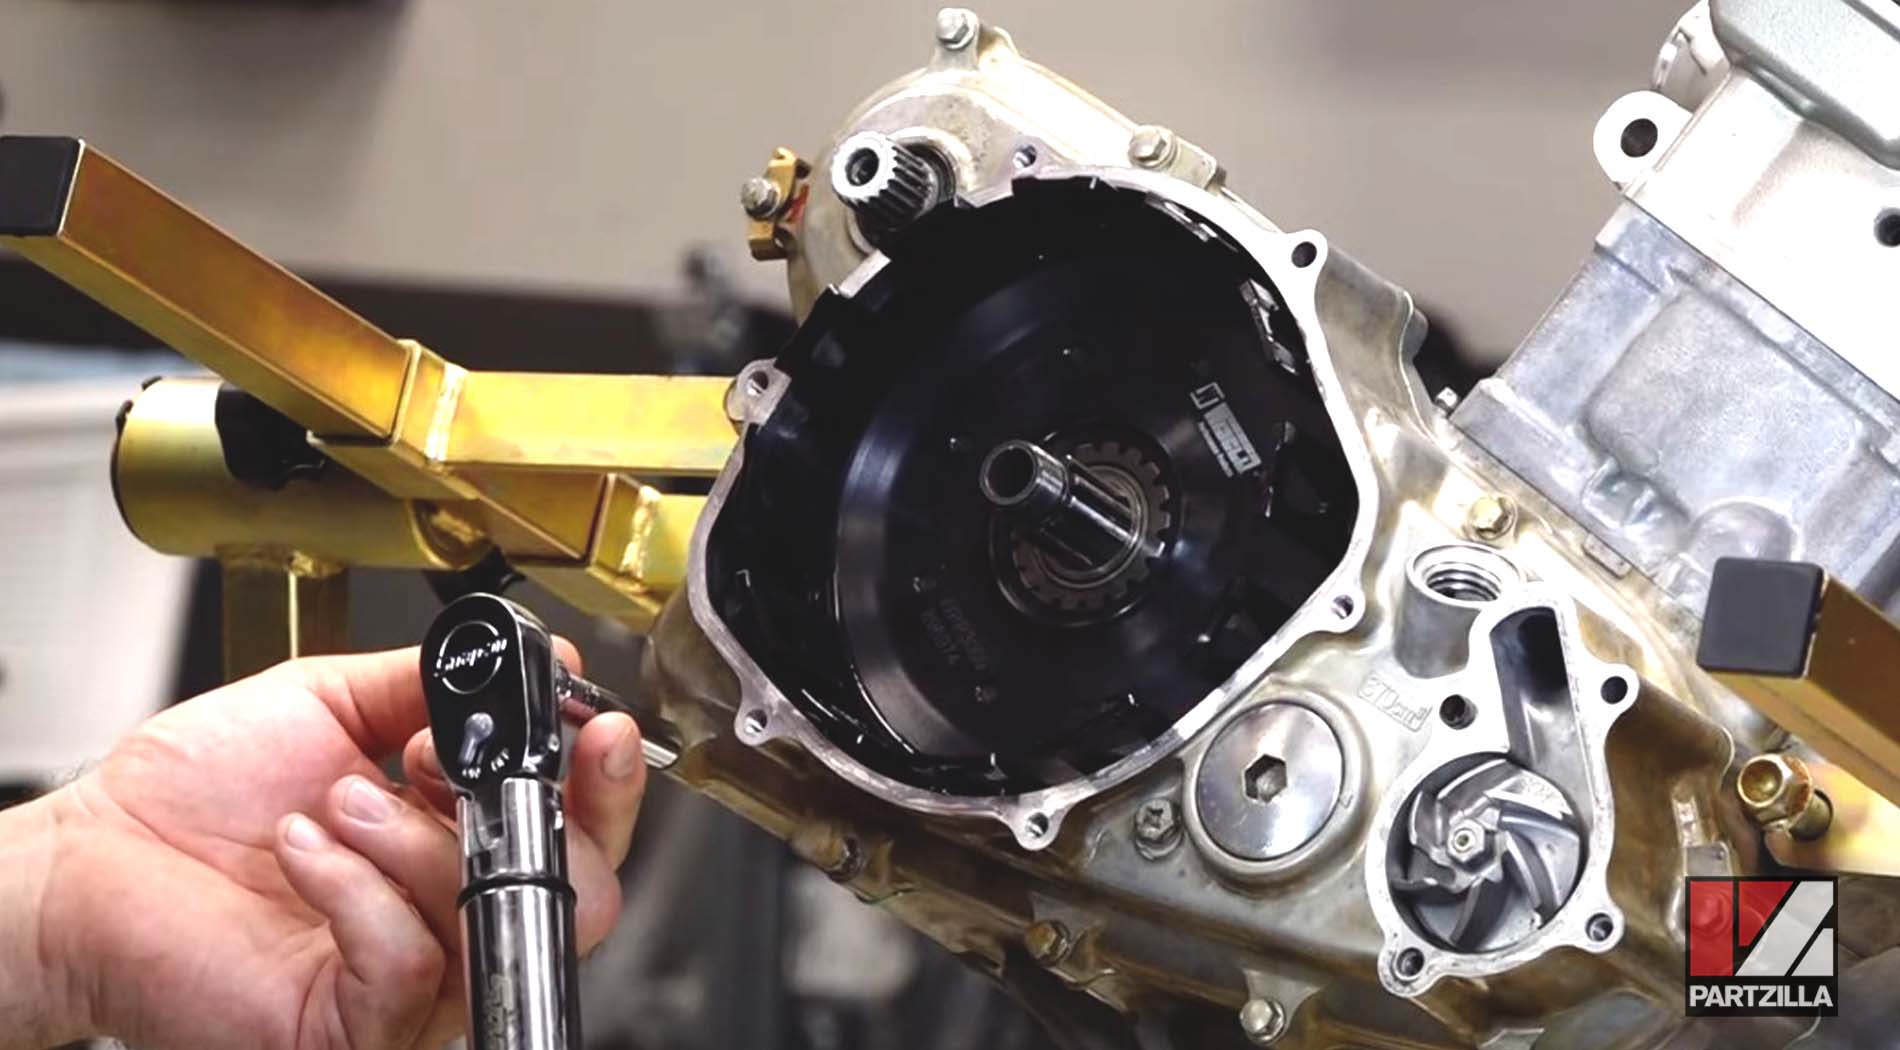
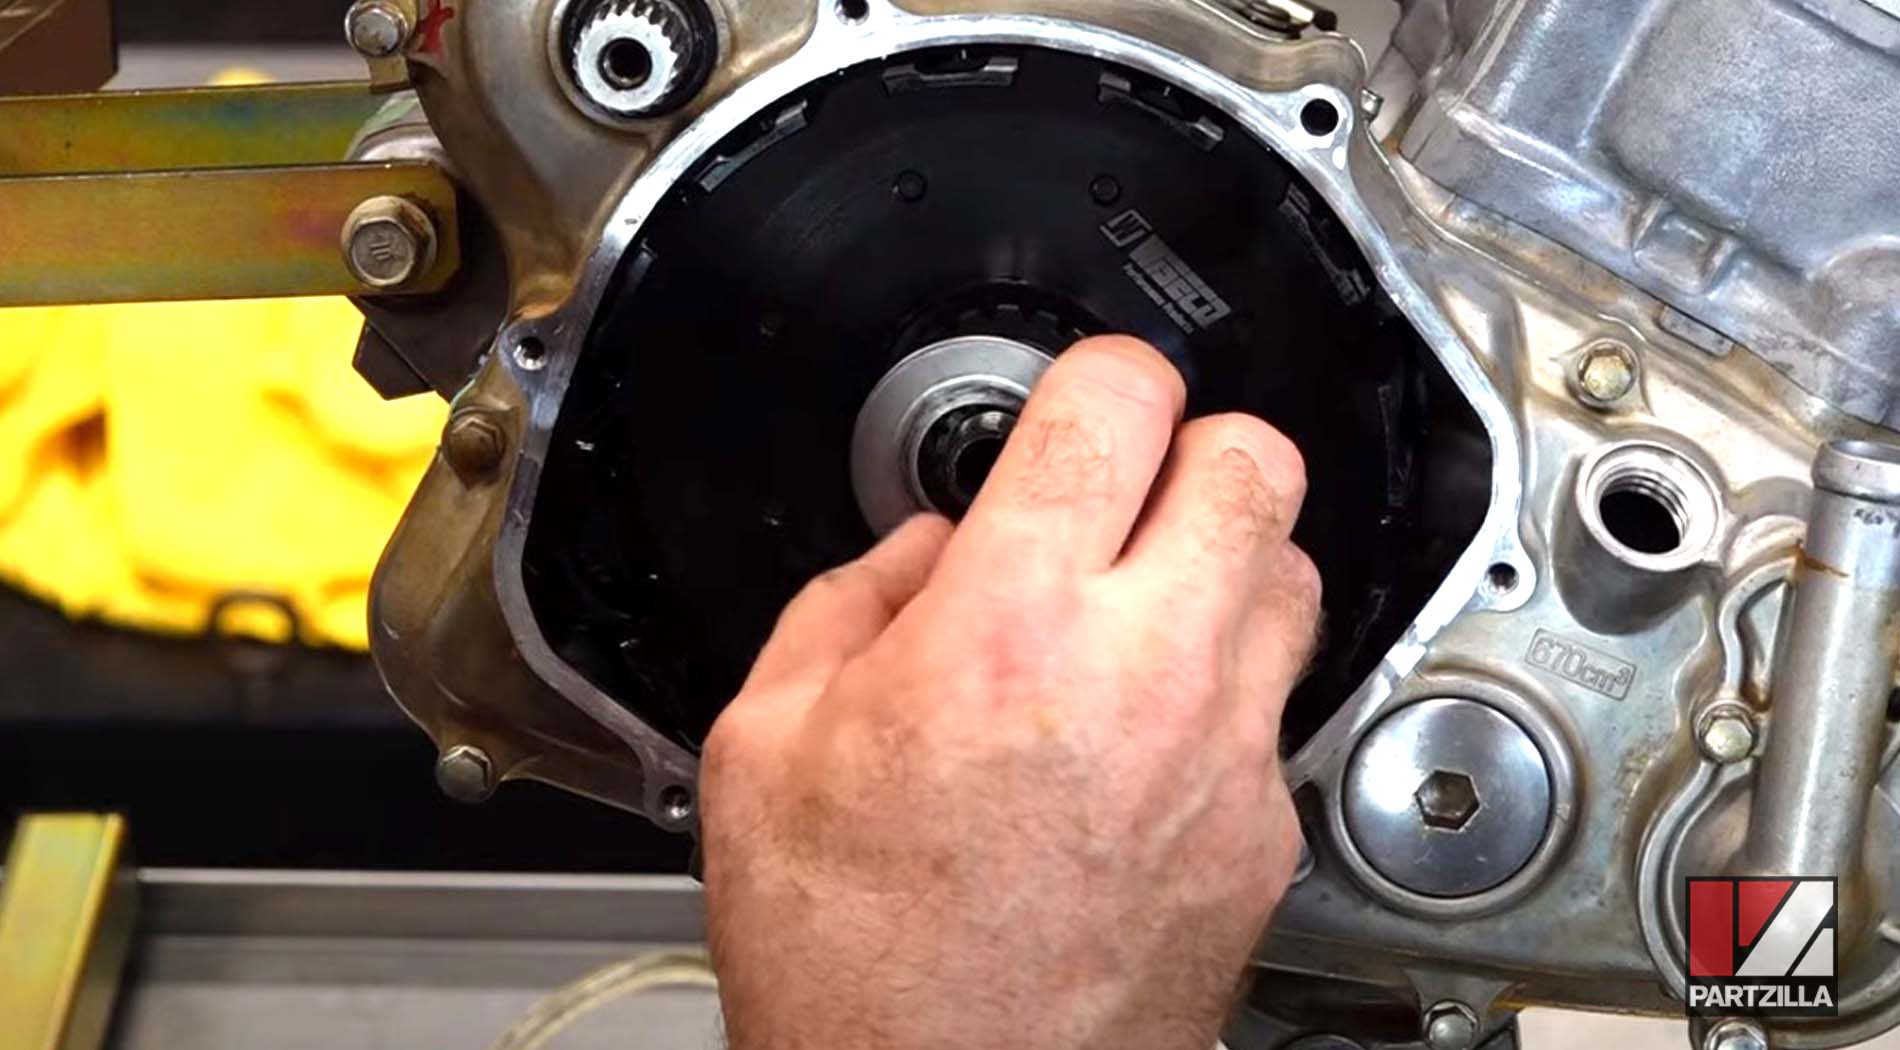
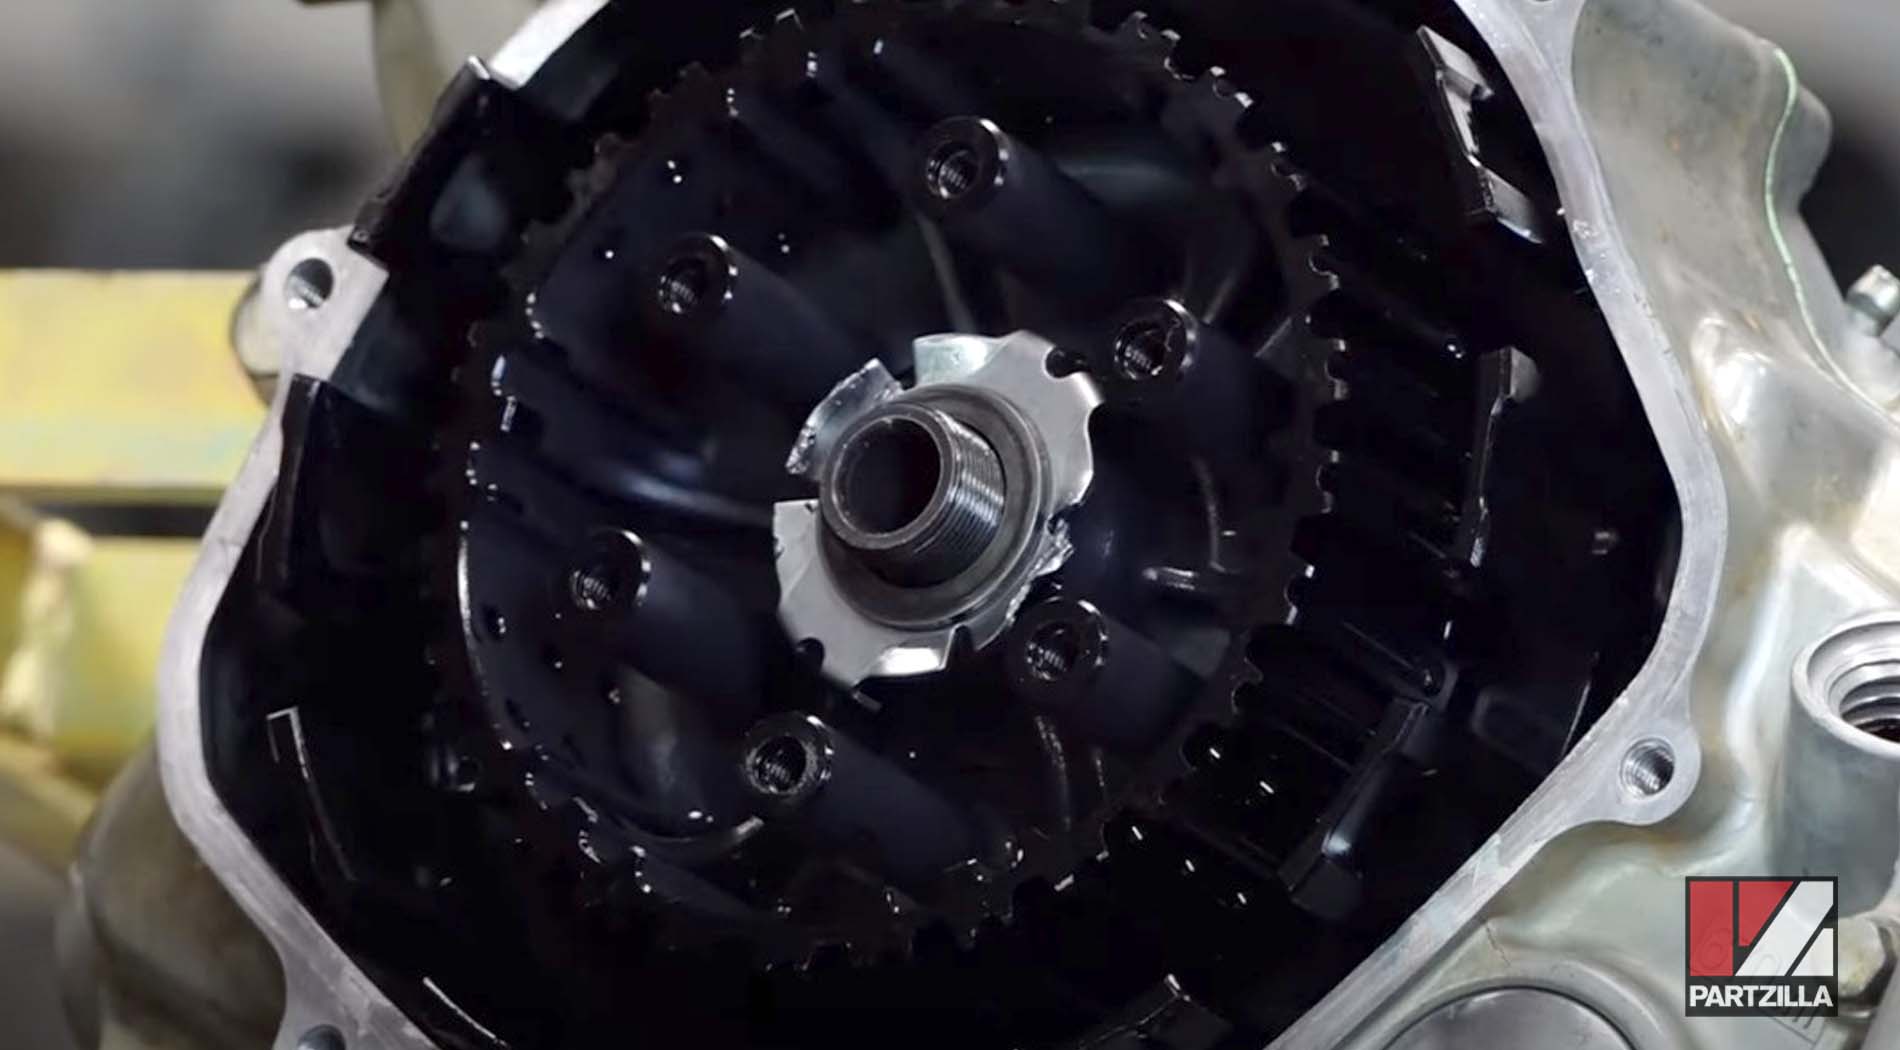
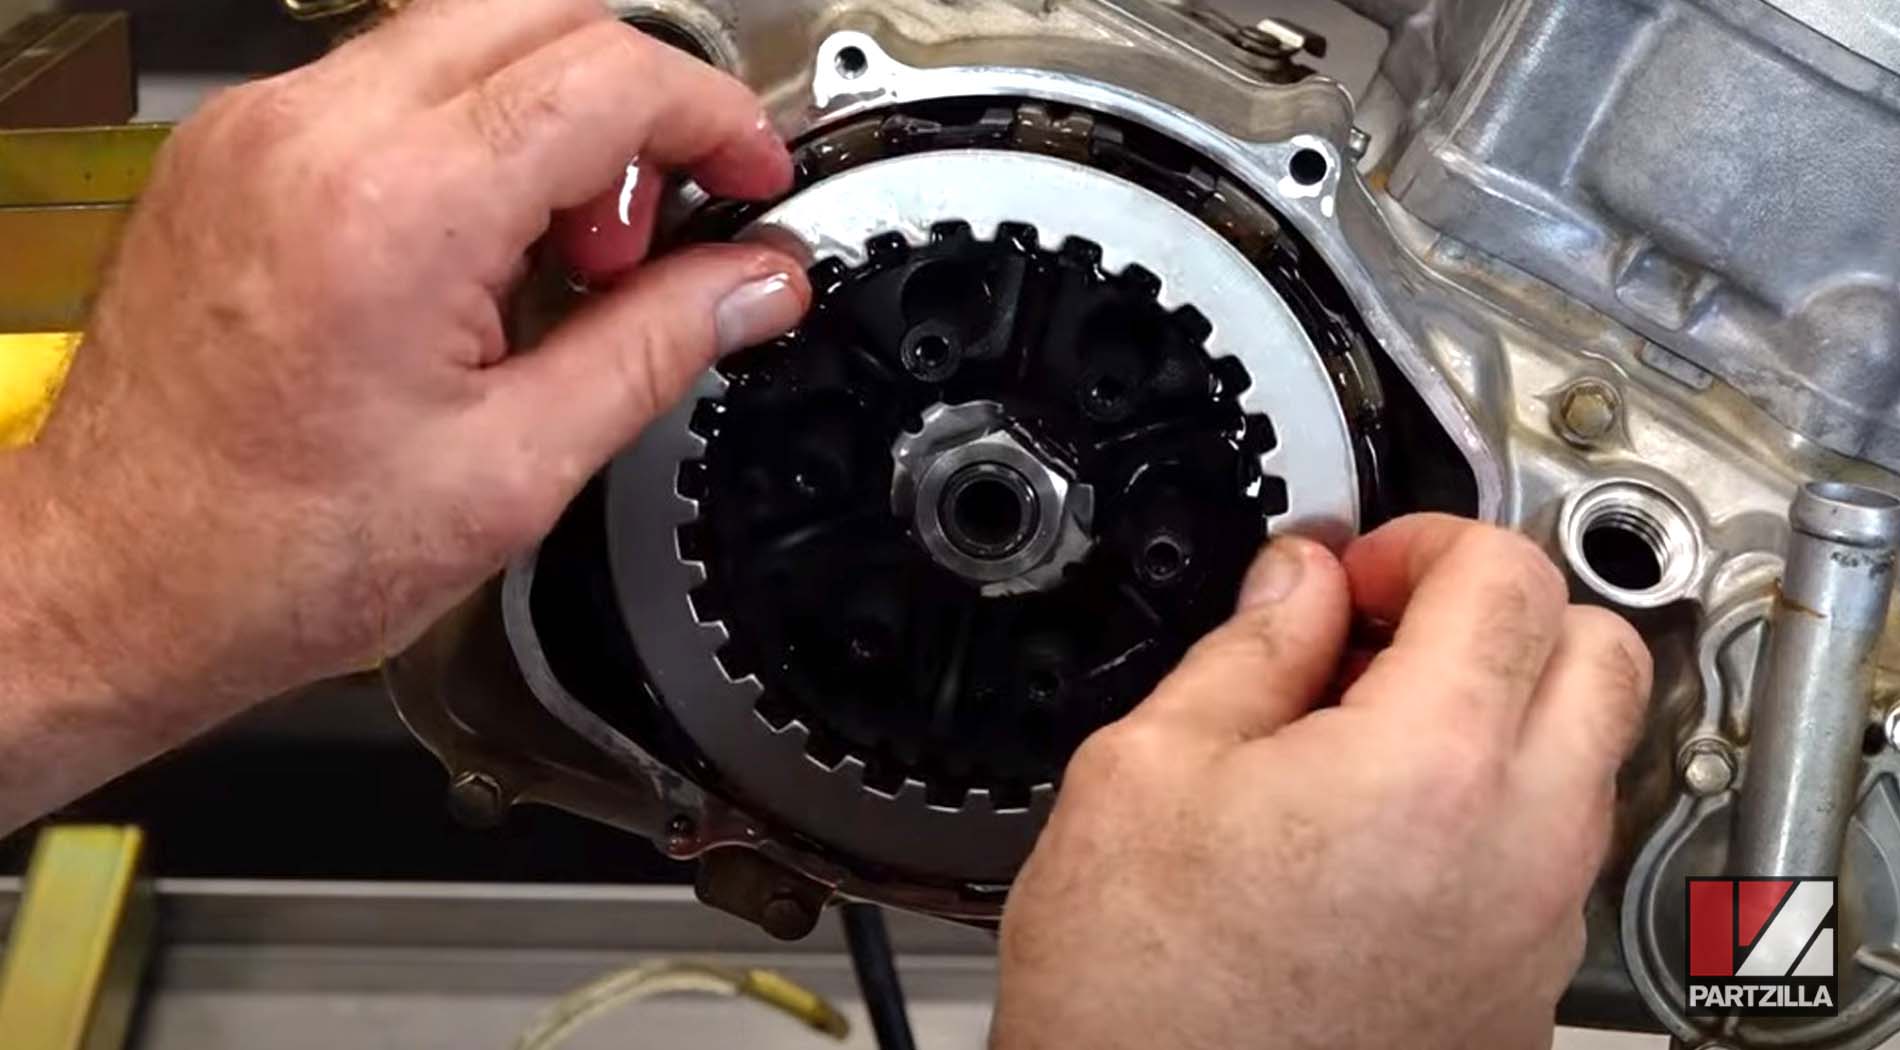
Step 9. Install the back bushing and the needle bearing for the clutch basket, then install the clutch basket itself onto the engine.
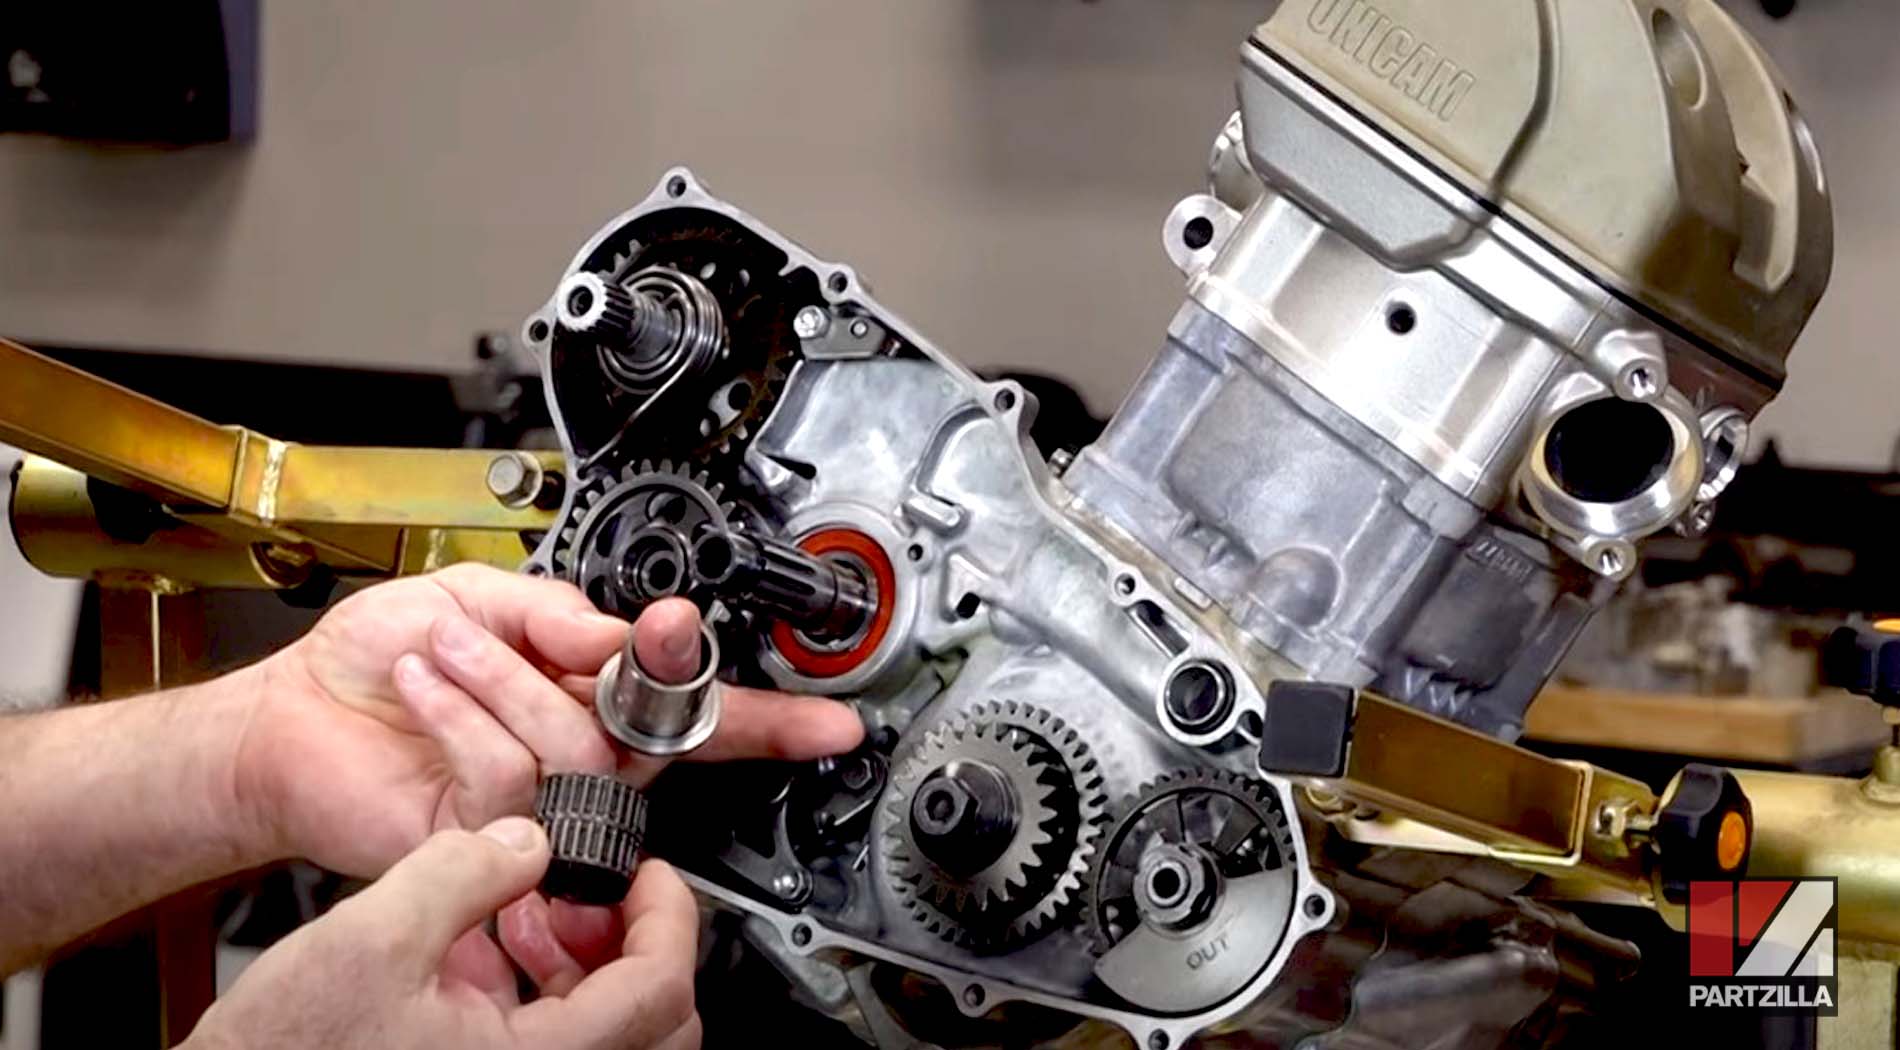
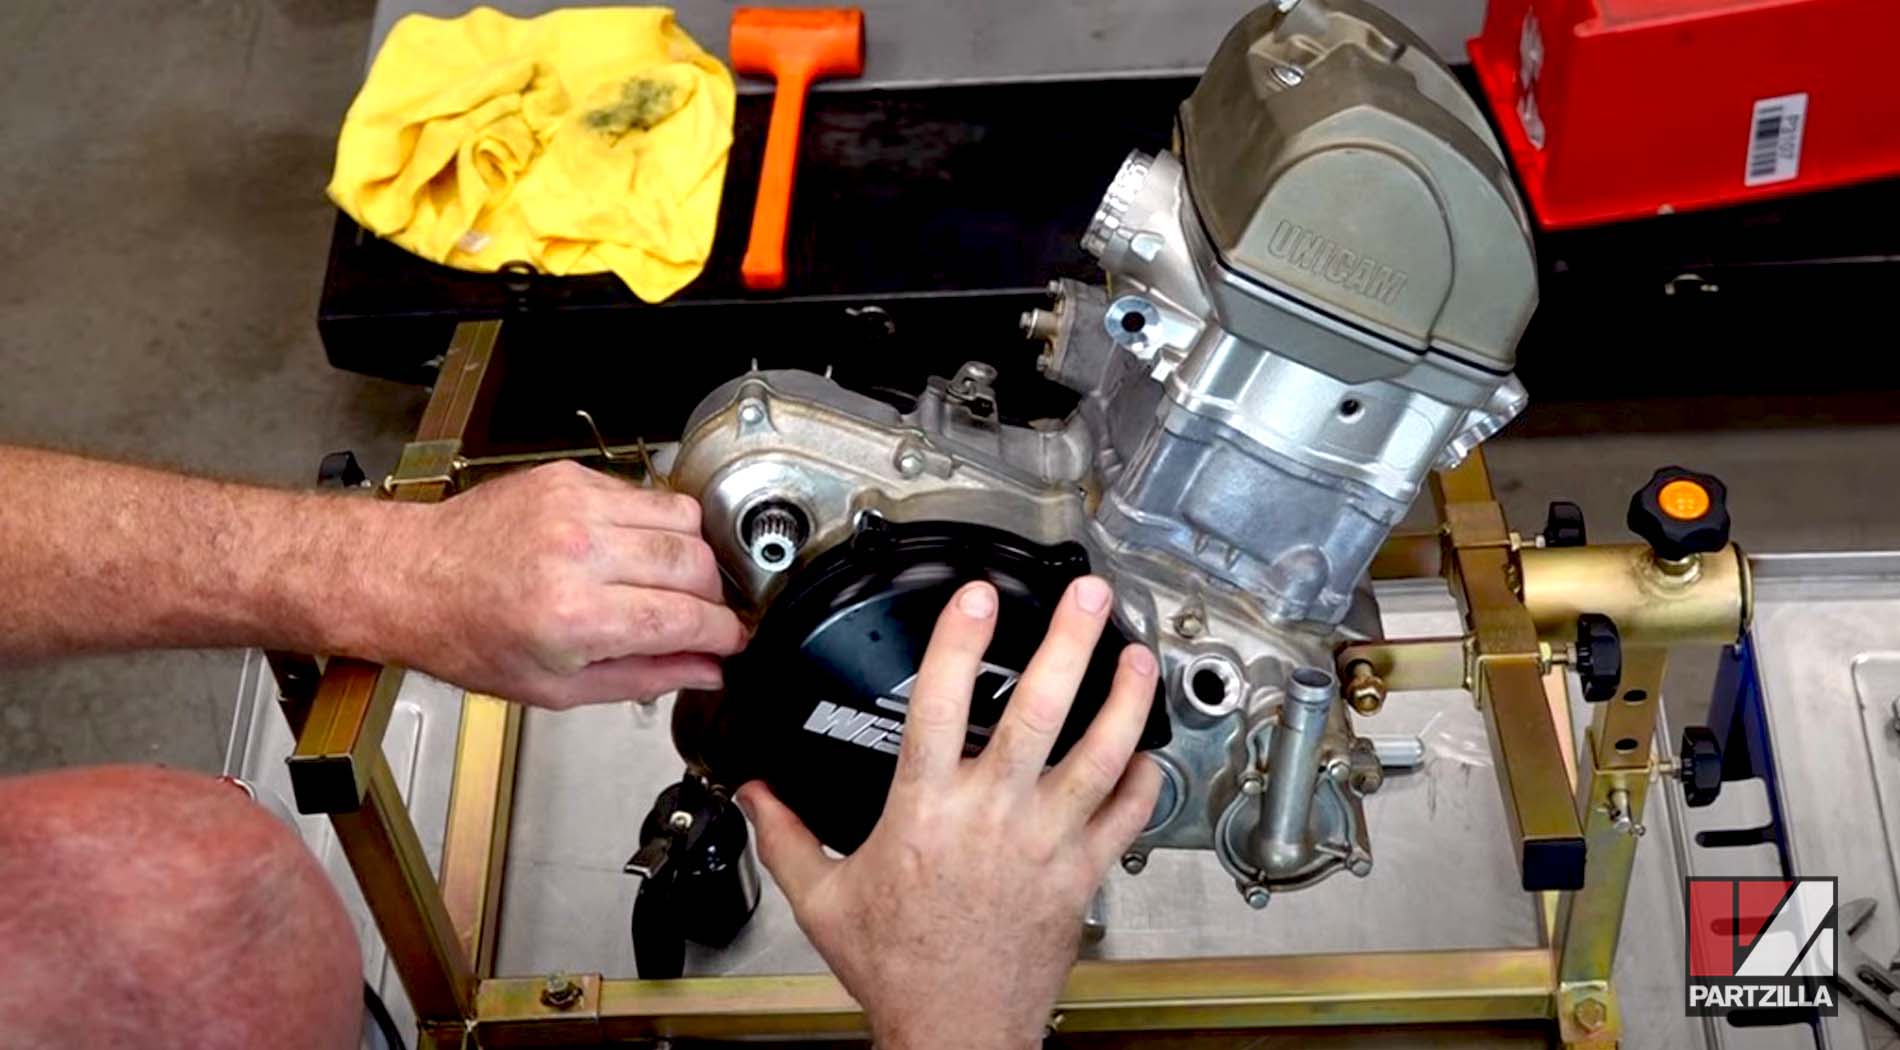
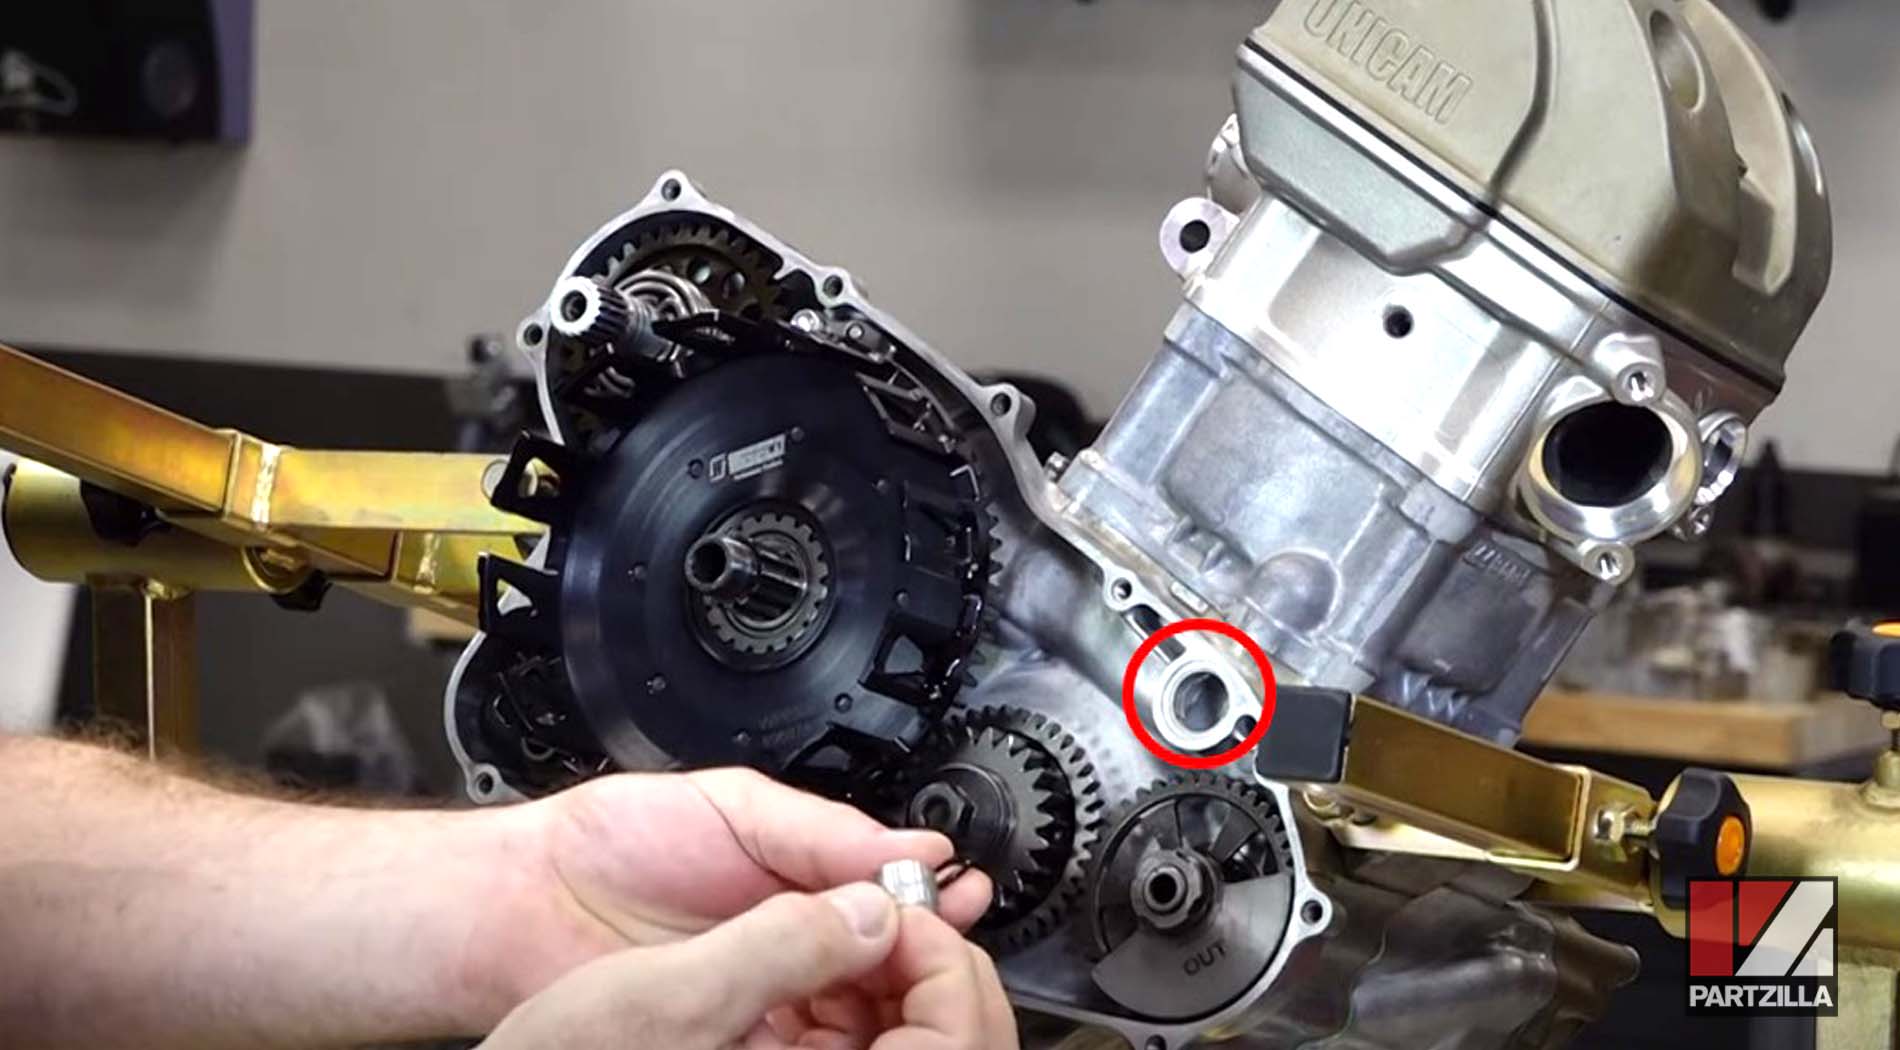
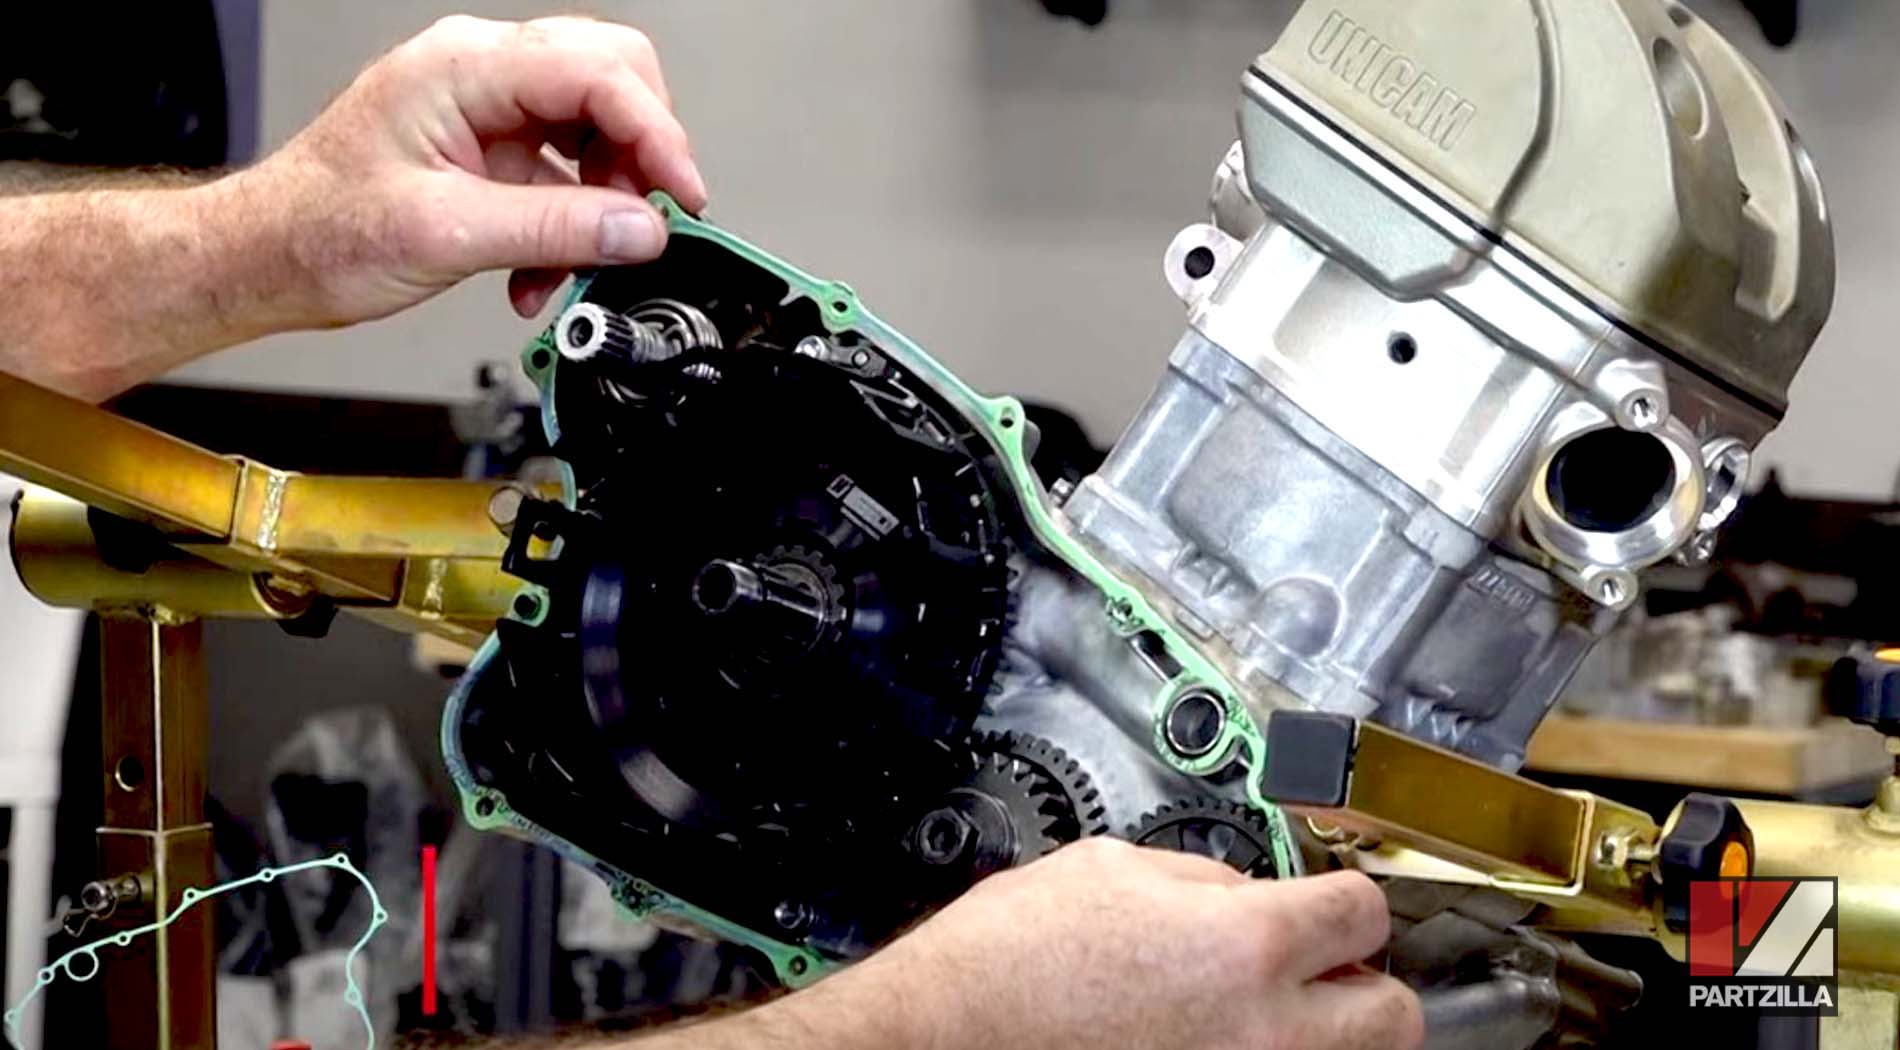
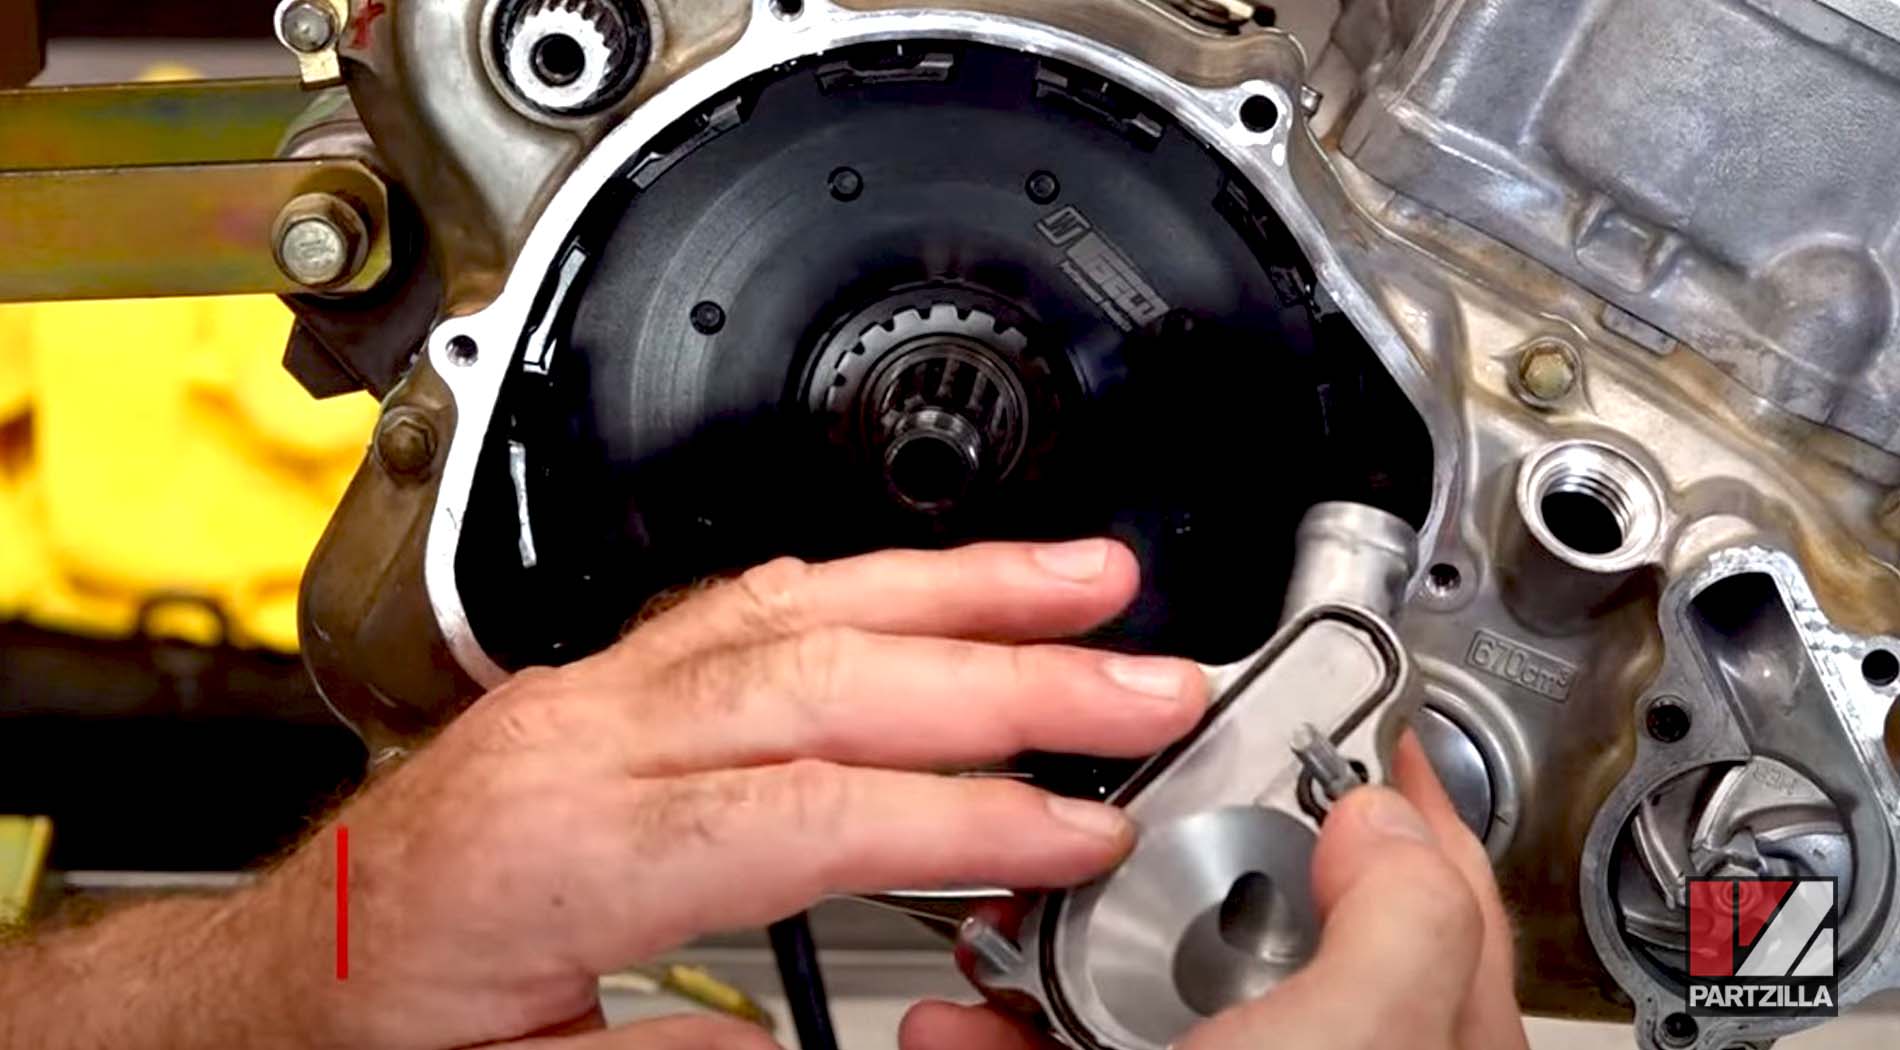
Step 10. Make sure the crankcase is clean and free of oil, then install the pass-through with the O-ring and the two dowels that help hold the crankcase cover gasket in place.
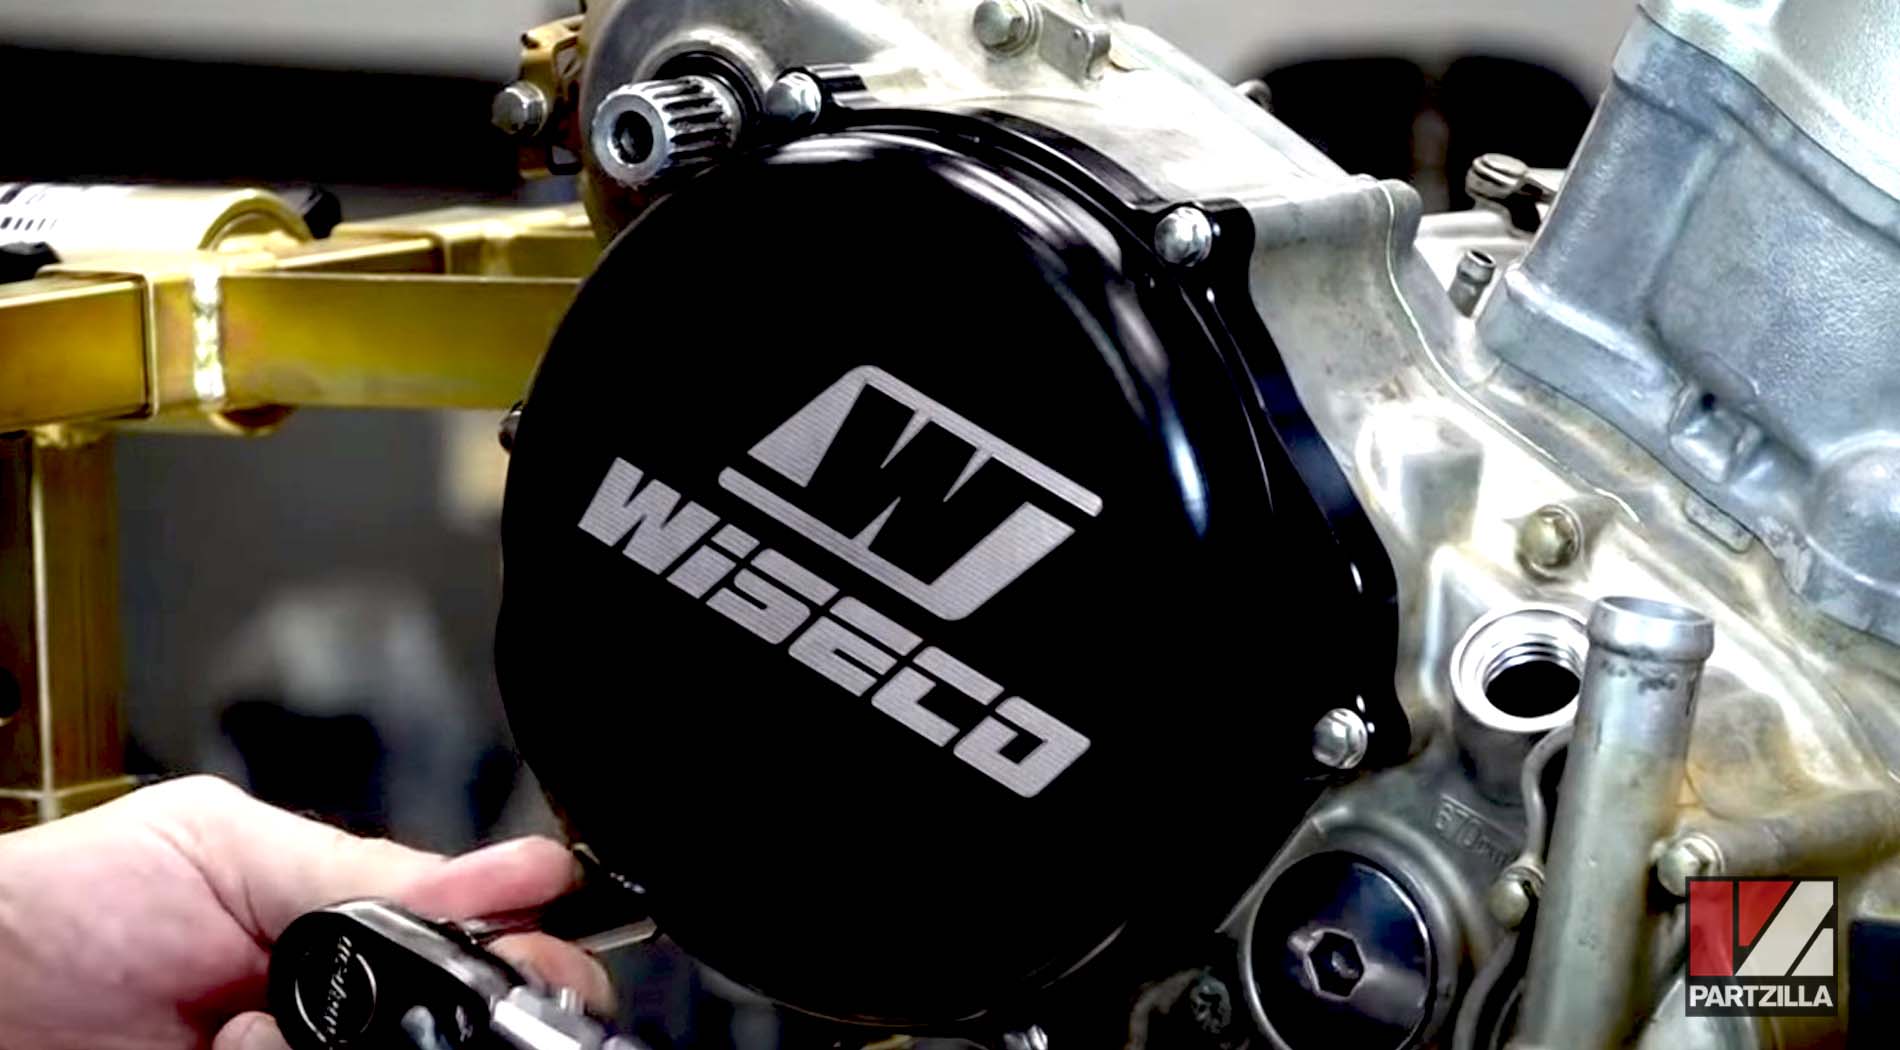
Step 11. Install the crankcase cover gasket, followed the crankcase cover itself. Use a soft-blow hammer to tap the crankcase cover and get it seated.
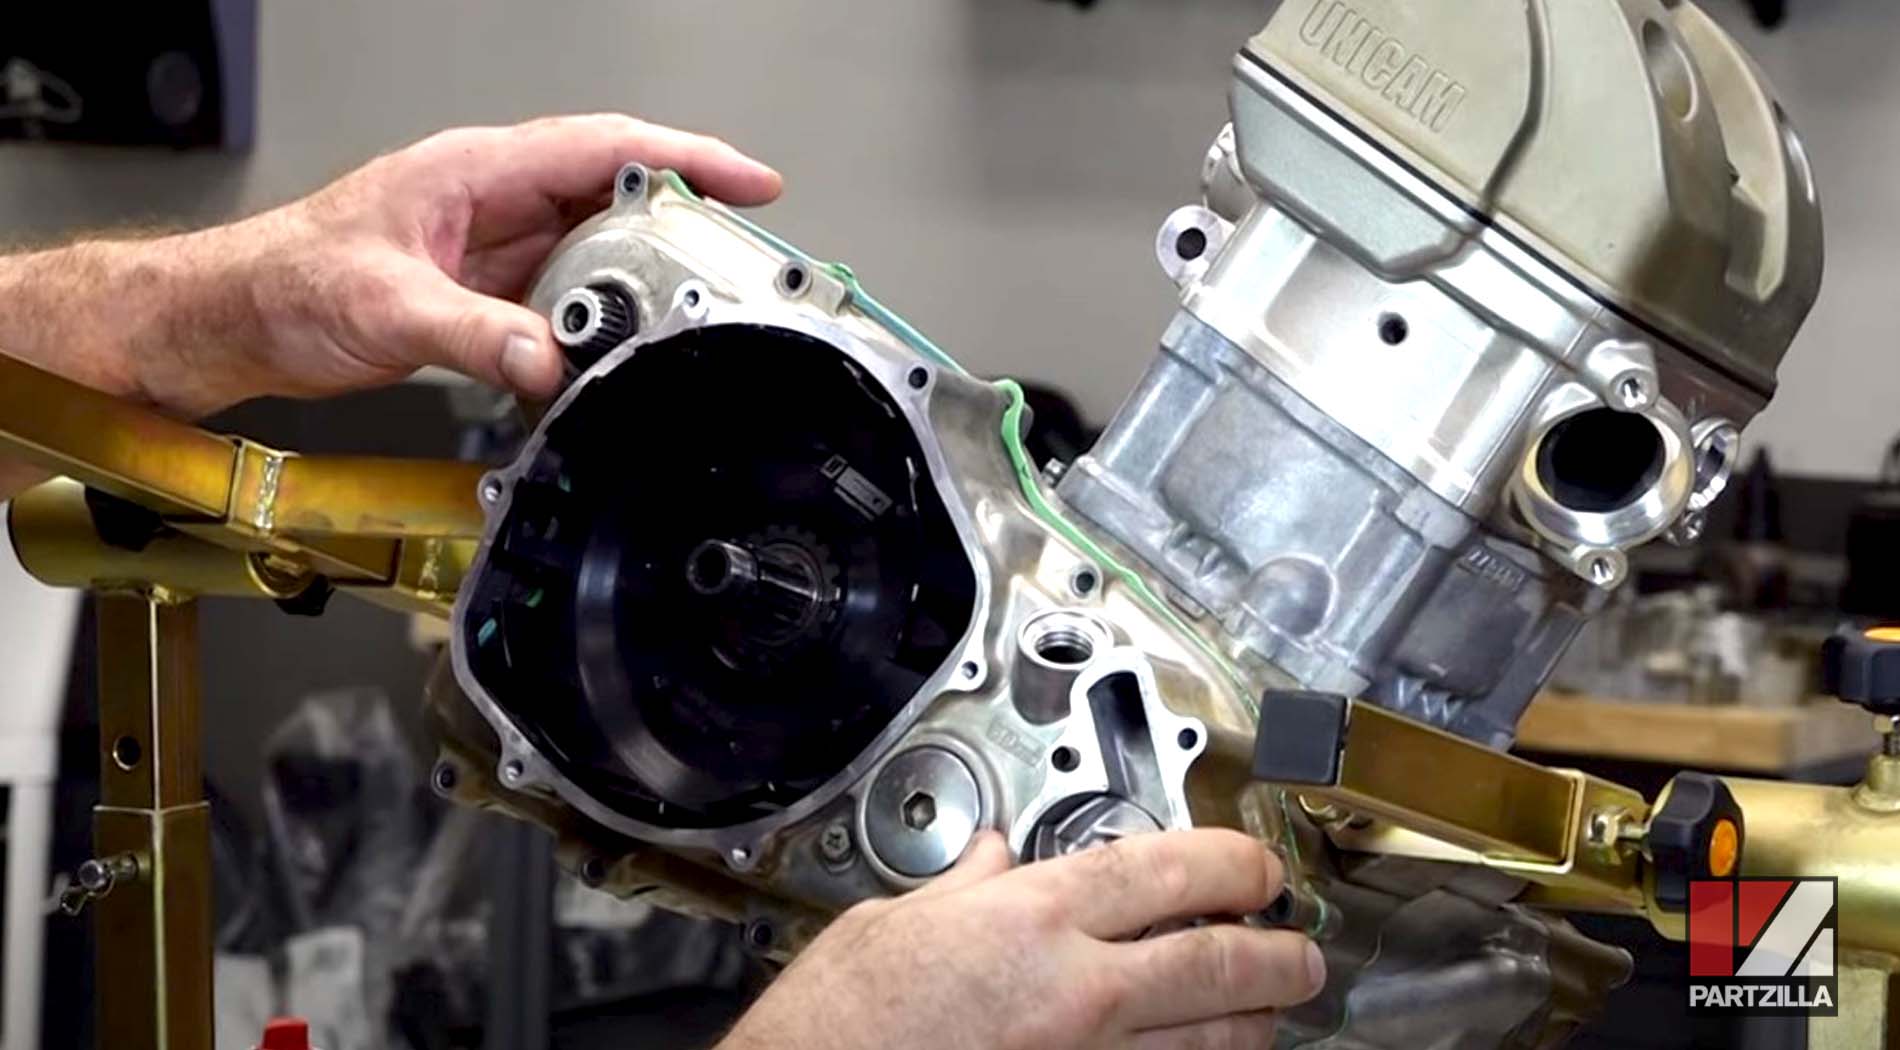
Step 12. Install the crankcase cover bolts, starting with the bolt that has the little guide on it. Get the bolts seated first, then torque them down to 7 foot-pounds.
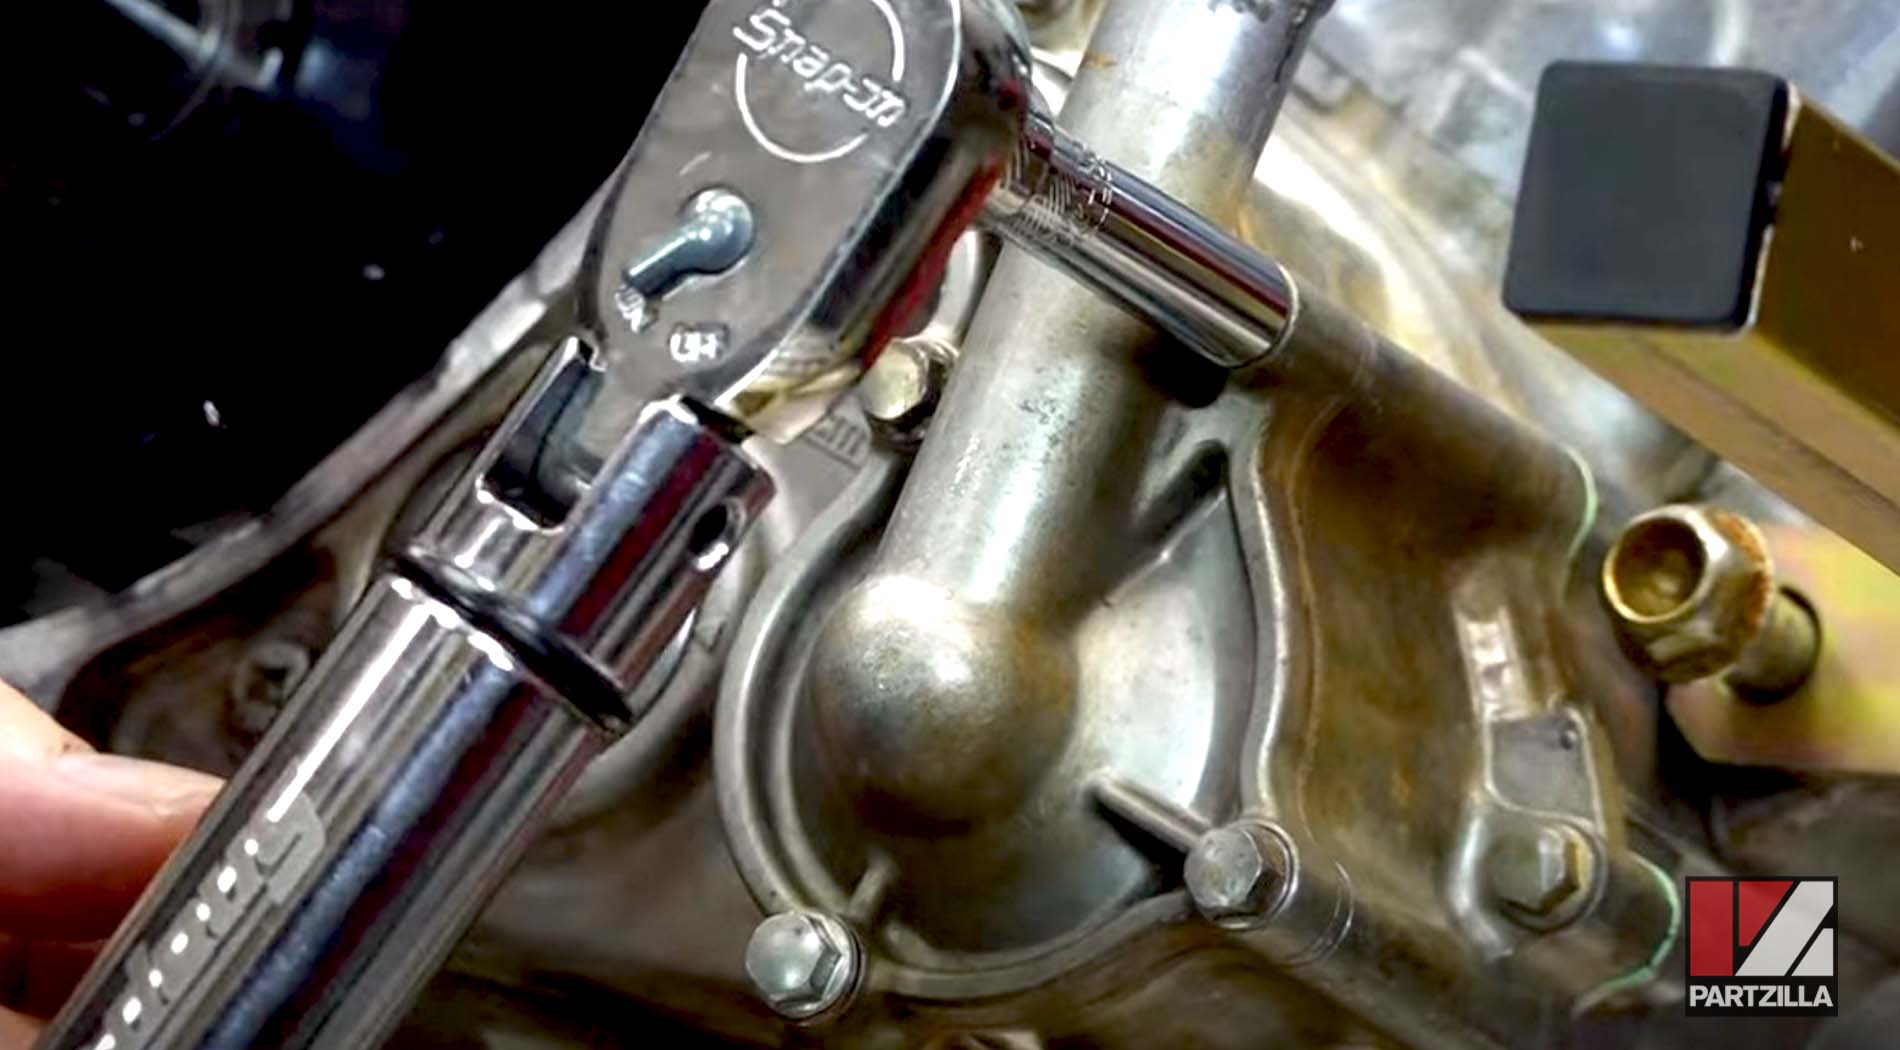
Step 13. Reinstall the water pump housing and its gasket, the dowel, and the bolts that hold it in place. Make sure the bolt at the very bottom has its copper crush washer in place to prevent leaks. Torque the bolts to 7 foot-pounds.
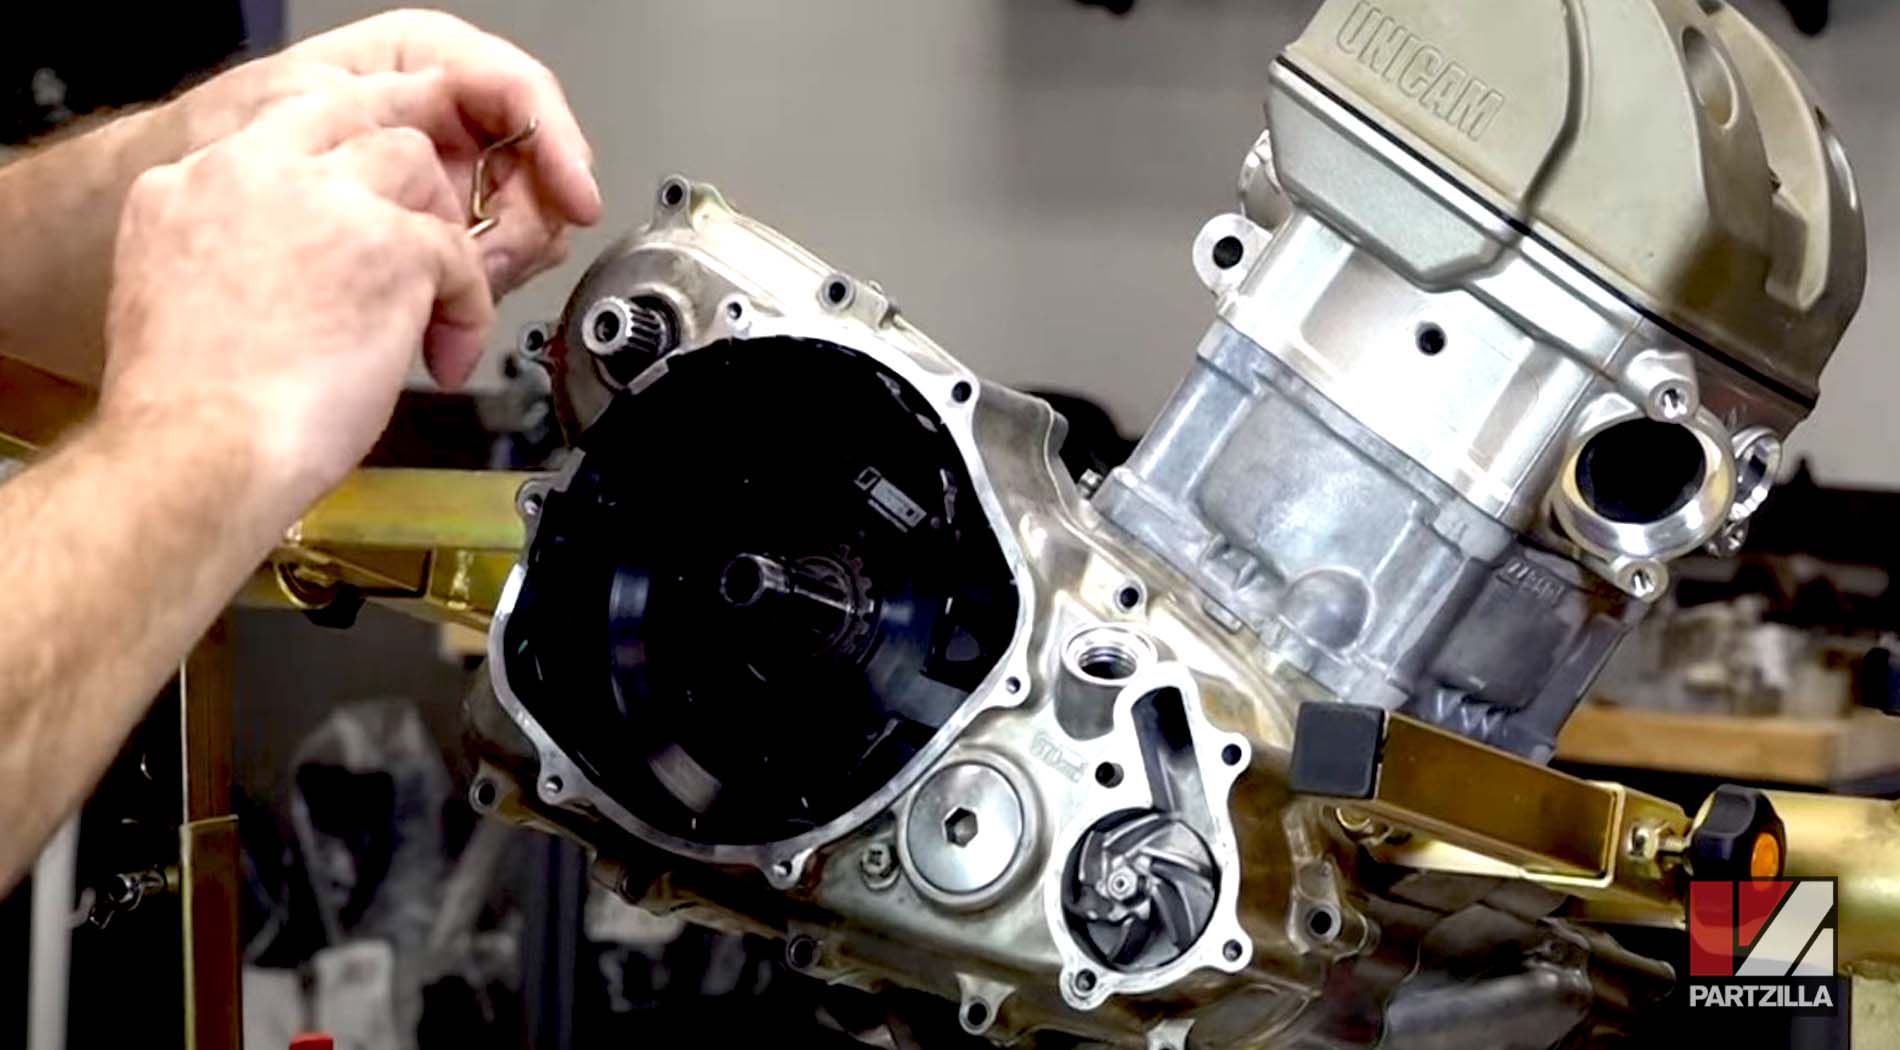
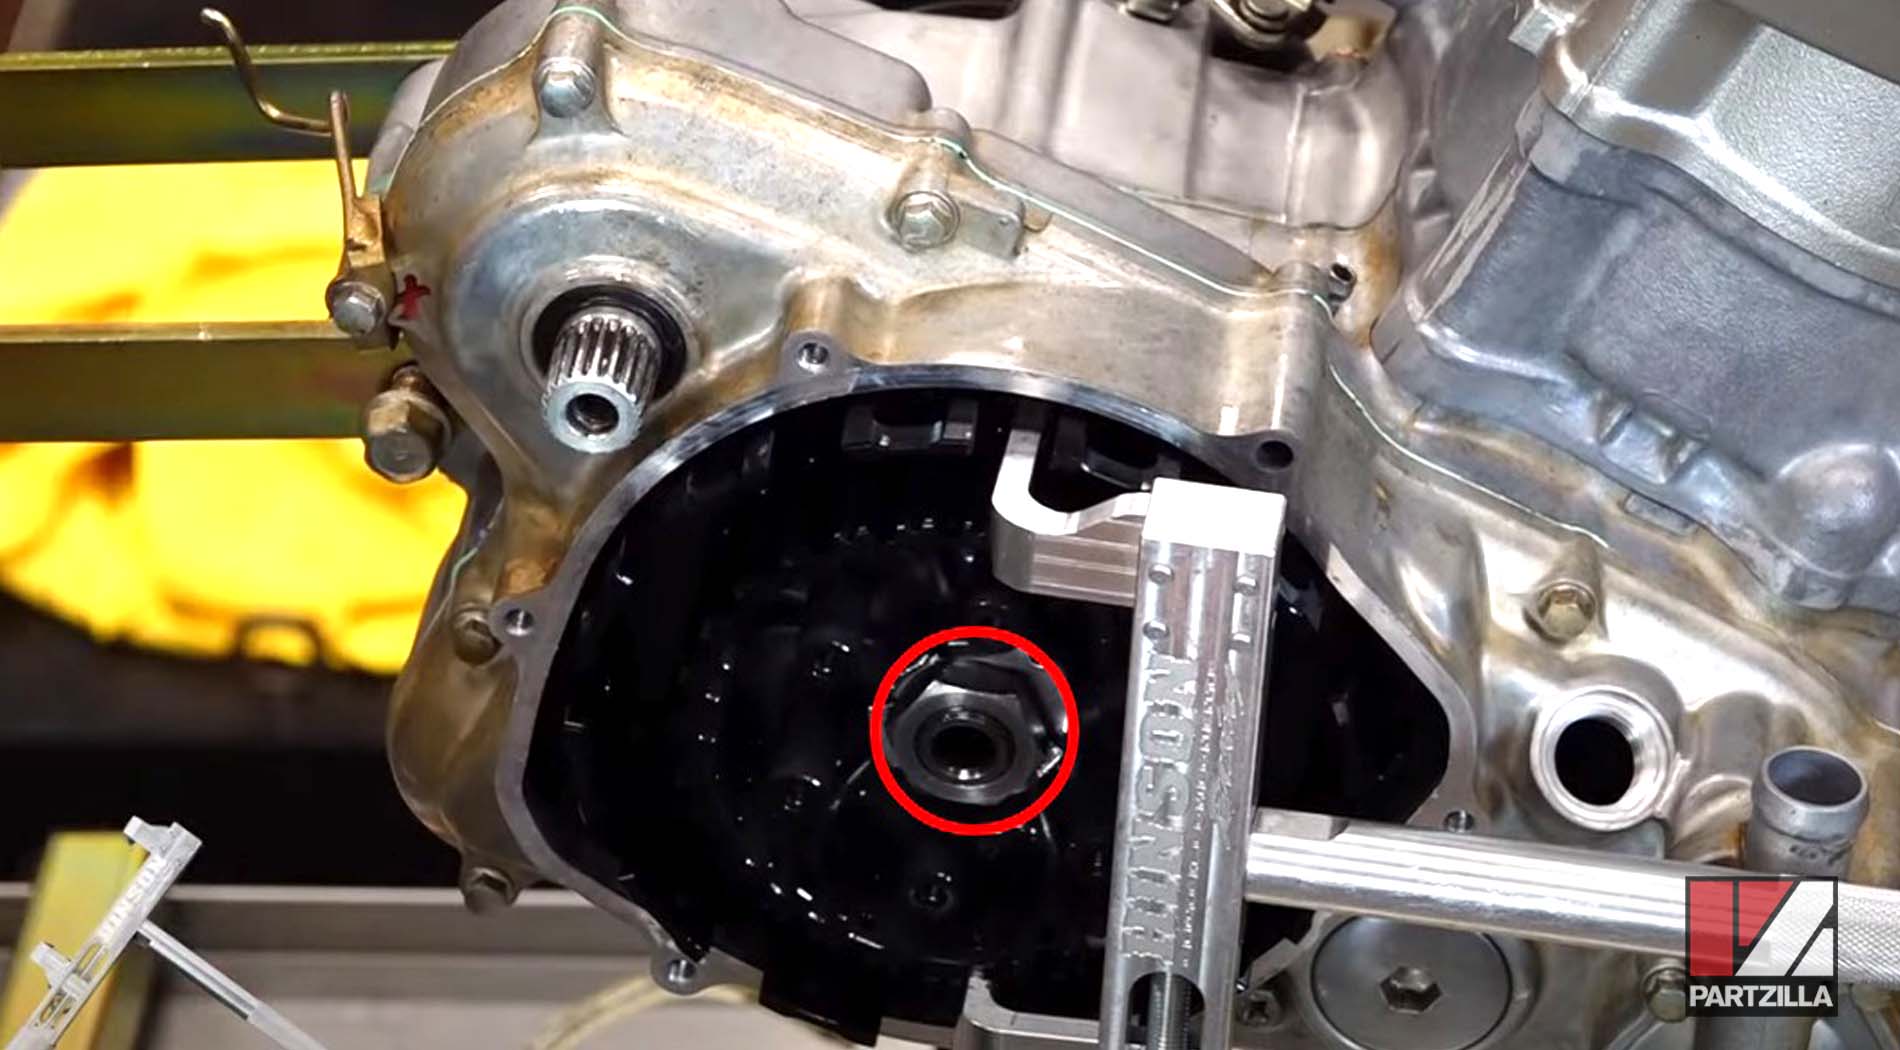
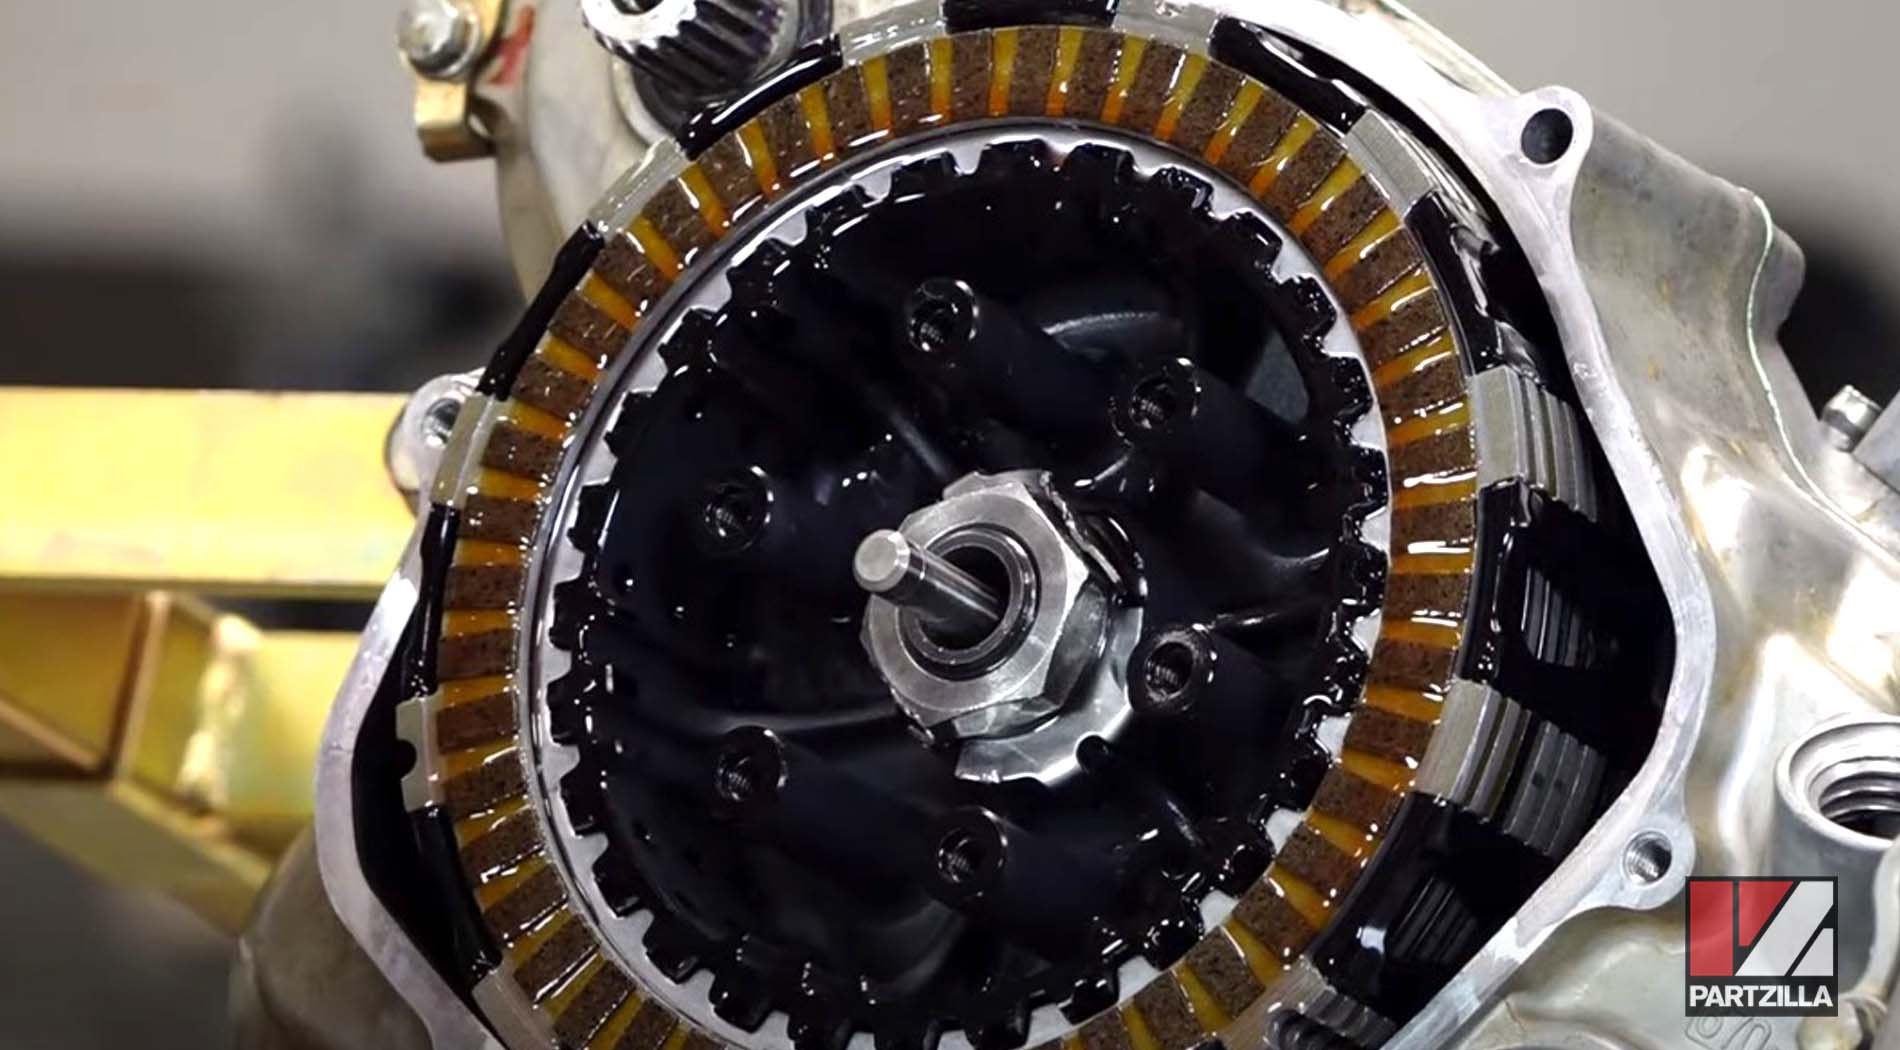
Step 14. Install the lower thrust washer, followed by the inner clutch hub, the lock washer and the upper thrust washer.
Step 15. Install the 27mm central nut, then use a clutch holder tool to keep the clutch in place and torque the nut to 59 foot-pounds.
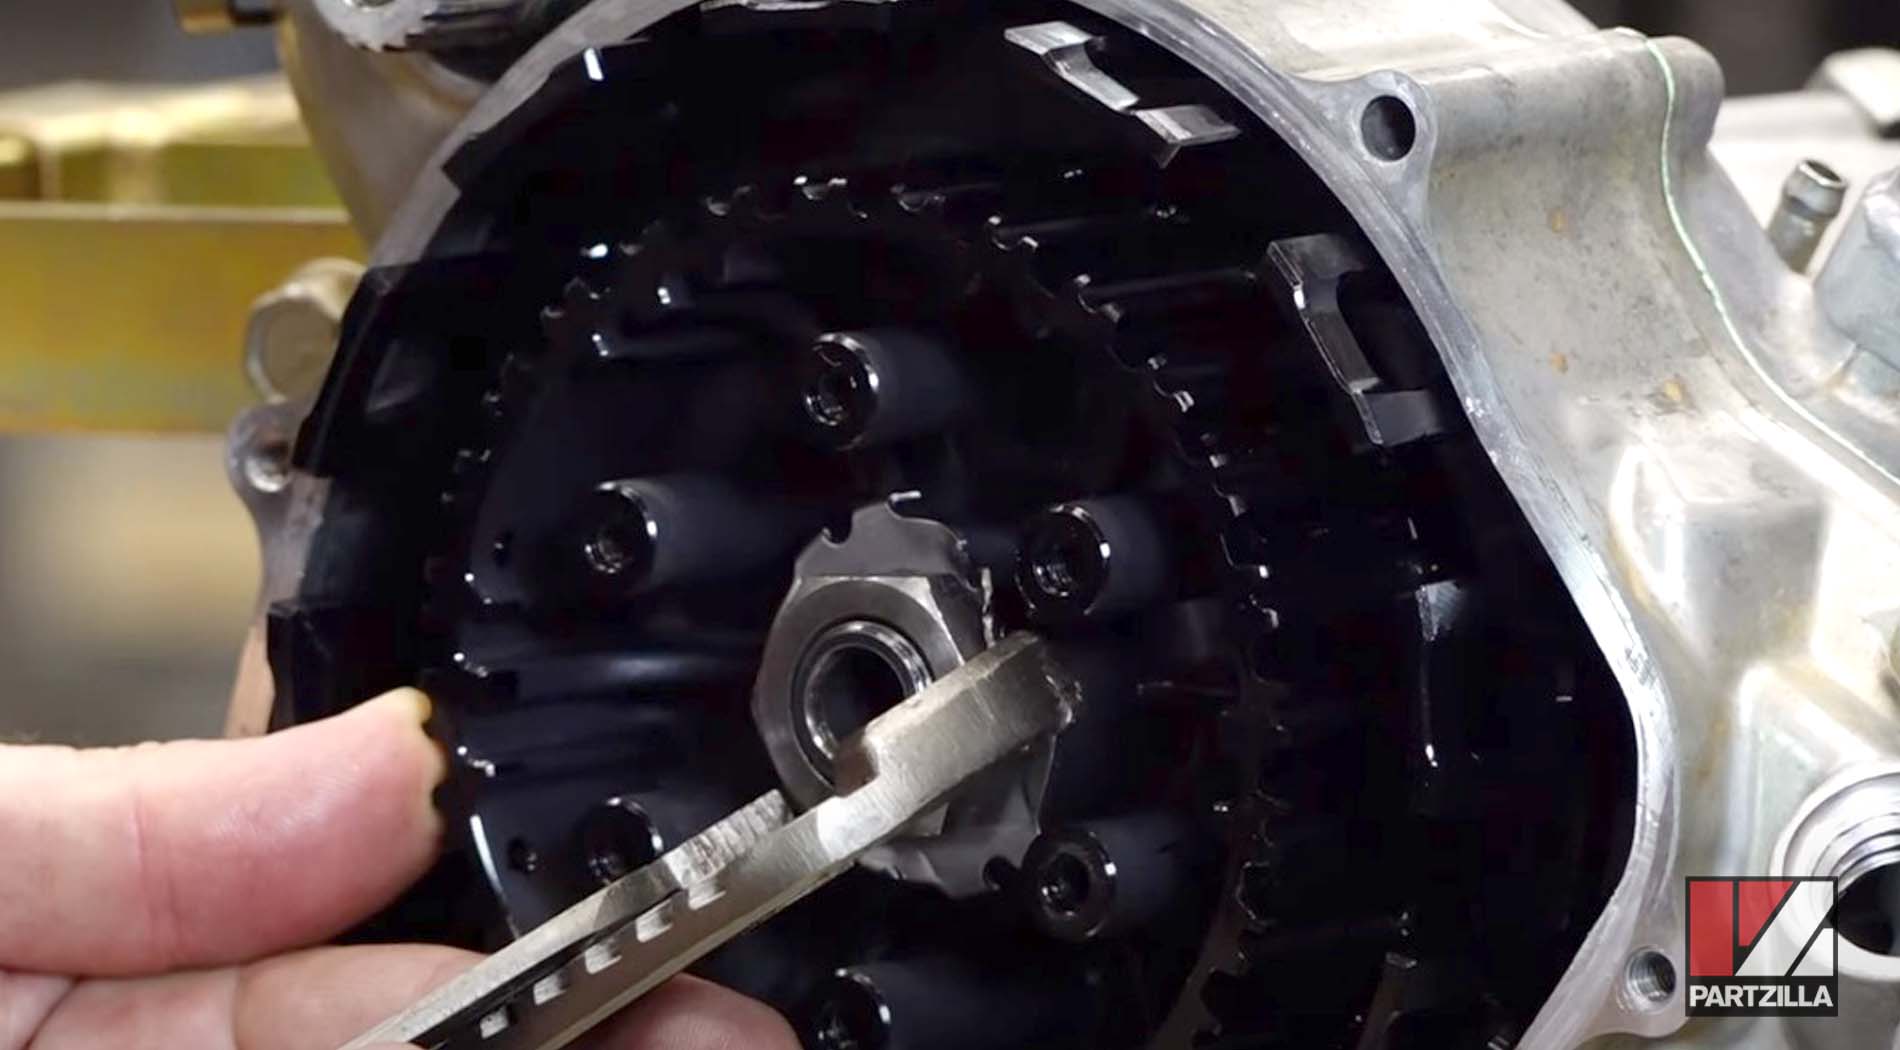
Step 16. Bend the tabs on the lock washer to lock the central nut in place.
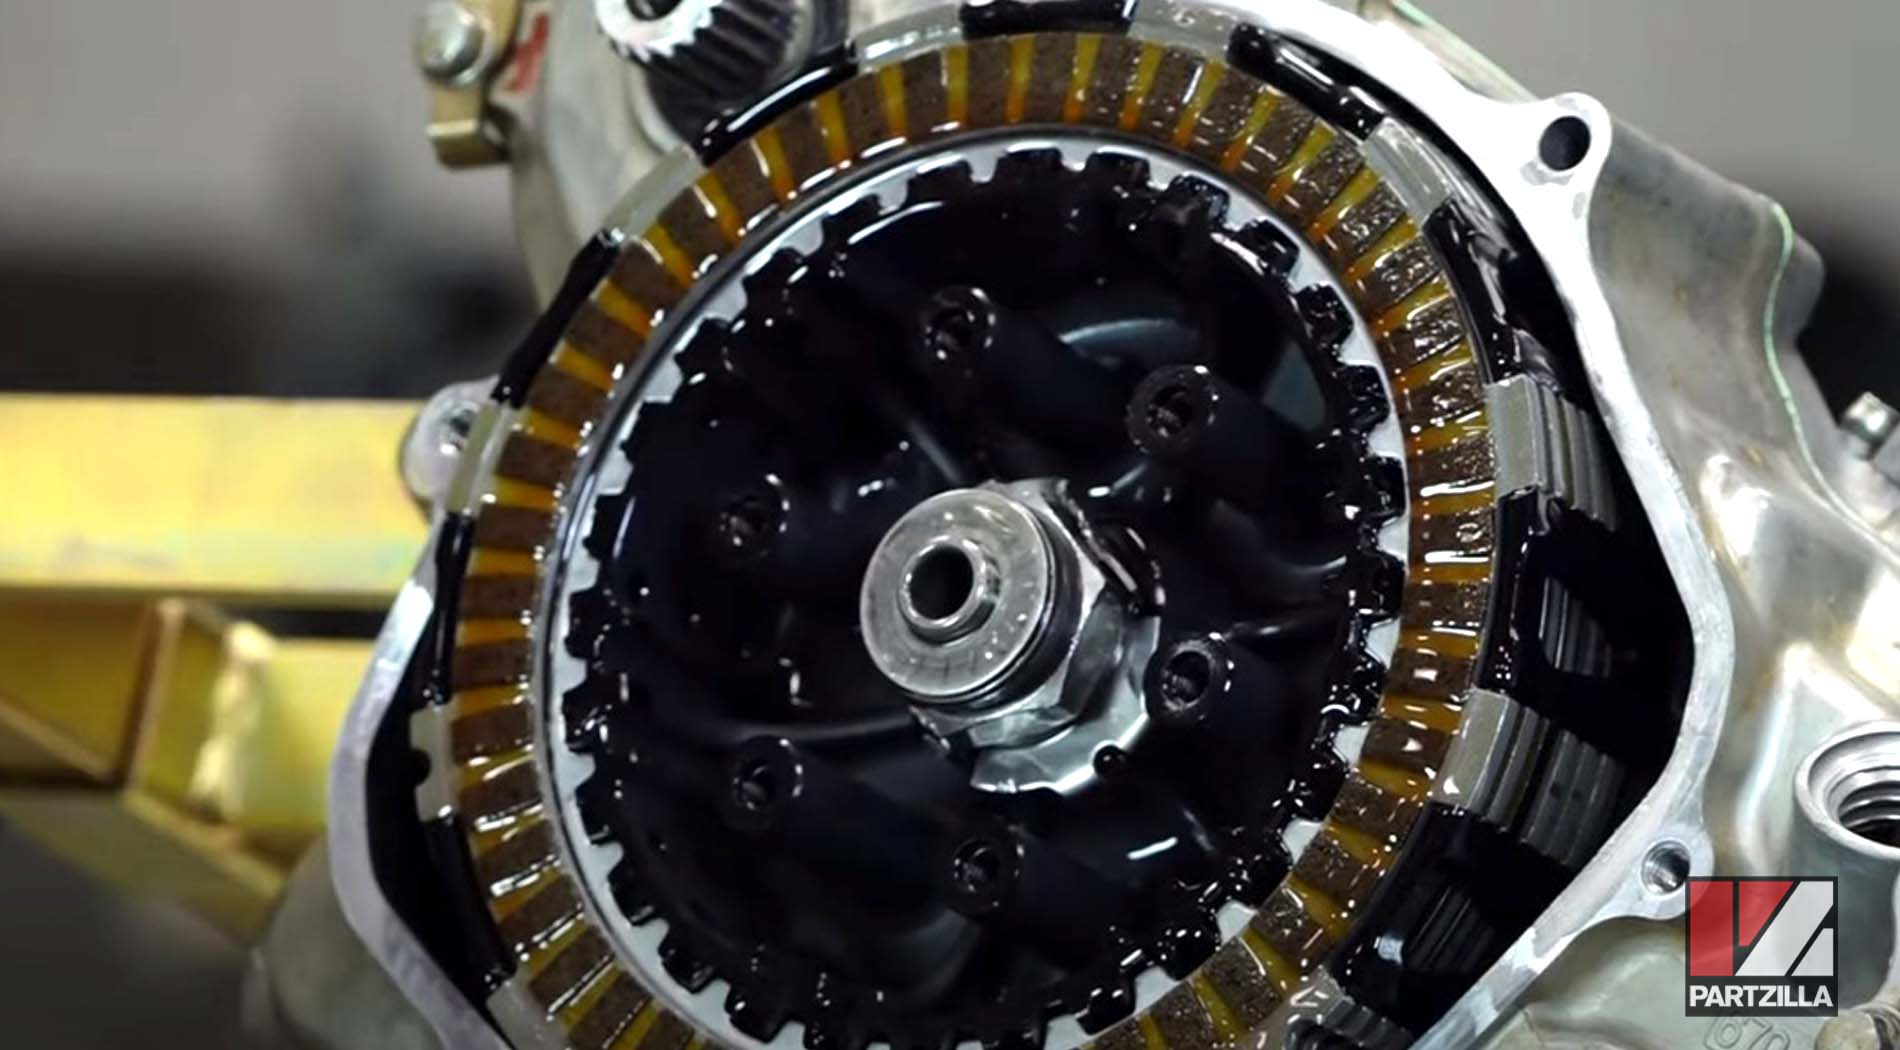
Step 17. Install the clutch plates, which are non-directional but need to be installed in the correct order.
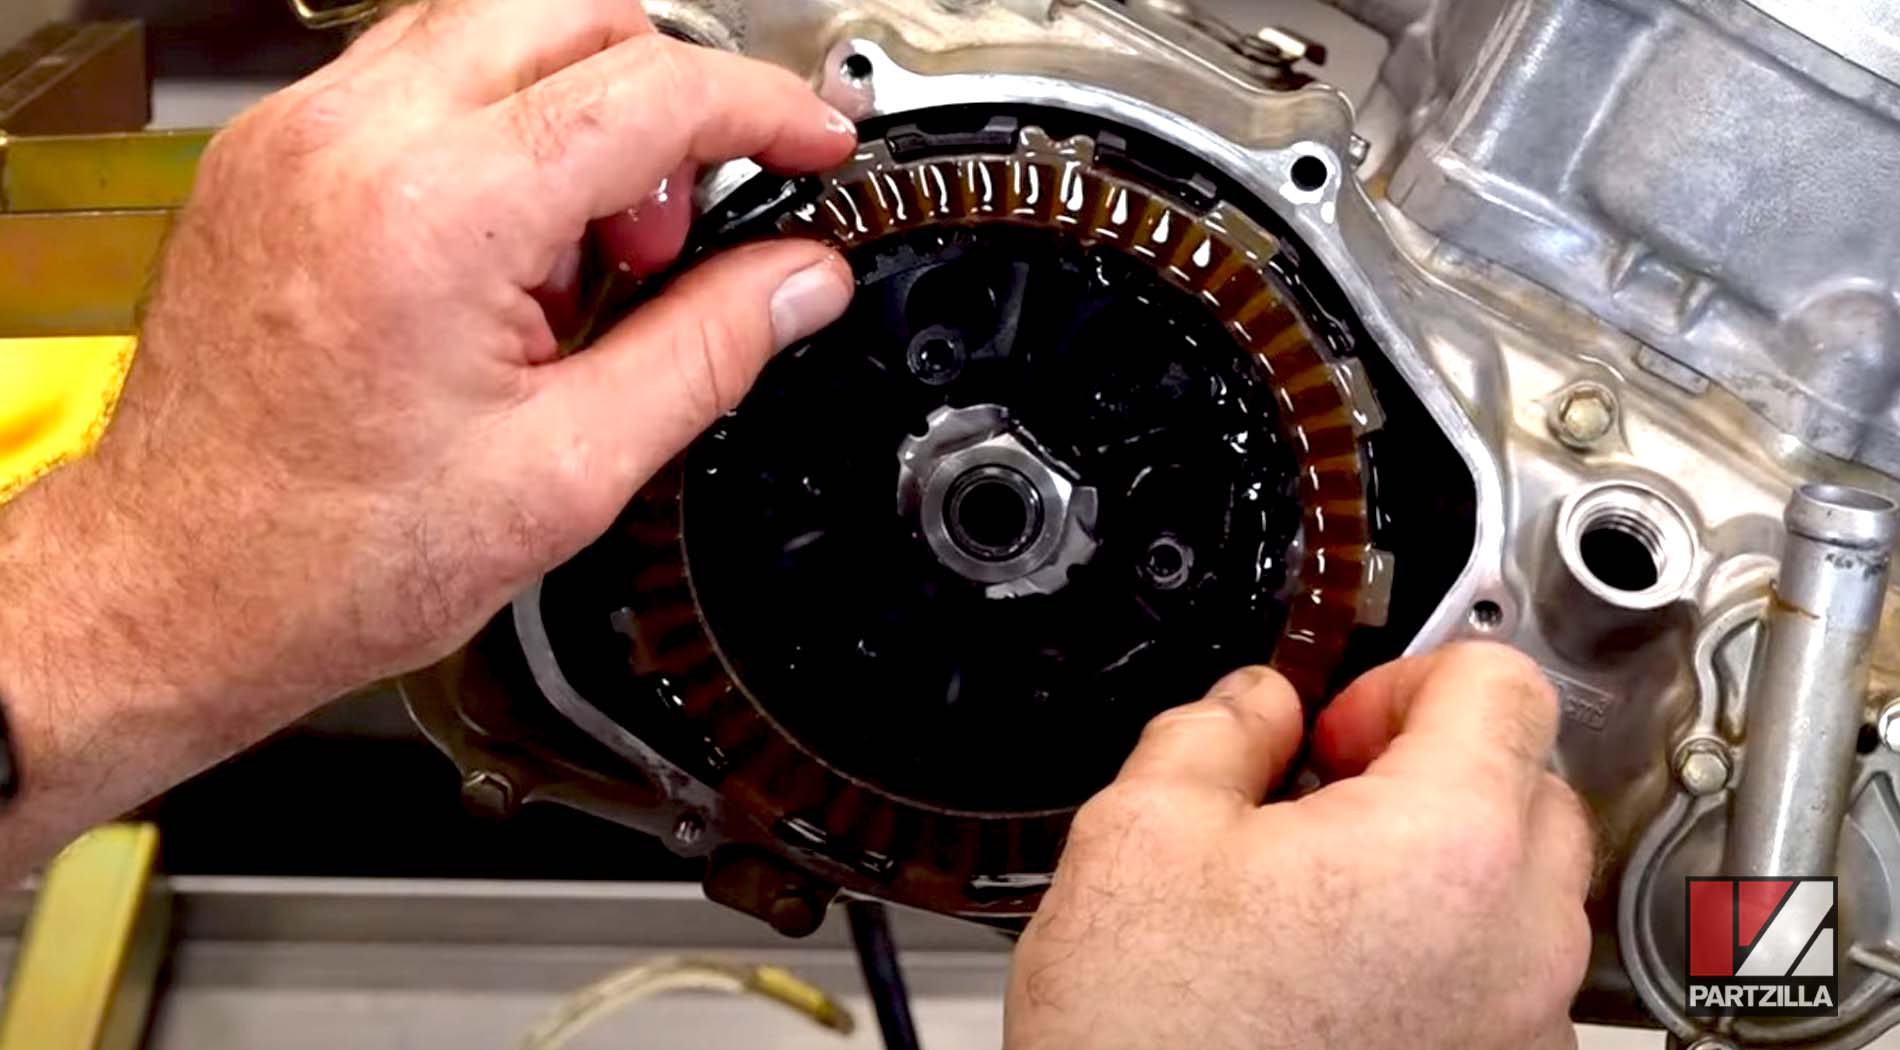
NOTE: If you’re using OEM Honda clutch plates, watch our Honda CRF450 clutch pack replacement video below or use our CRF450 clutch parts diagram for reference on the correct order in which the clutch plates are installed.
Step 18. Install the lift rod, the collar, the bearing and the washer that goes outside of it.
NOTE: Make sure the bearing is oiled up before installing it.
Step 19. Install the clutch pressure plate and its springs, which are non-directional and can go in either way. Next, install the bolts that hold the springs in place, then tighten them down in a criss-cross pattern and finally torque them to 9 foot-pounds.
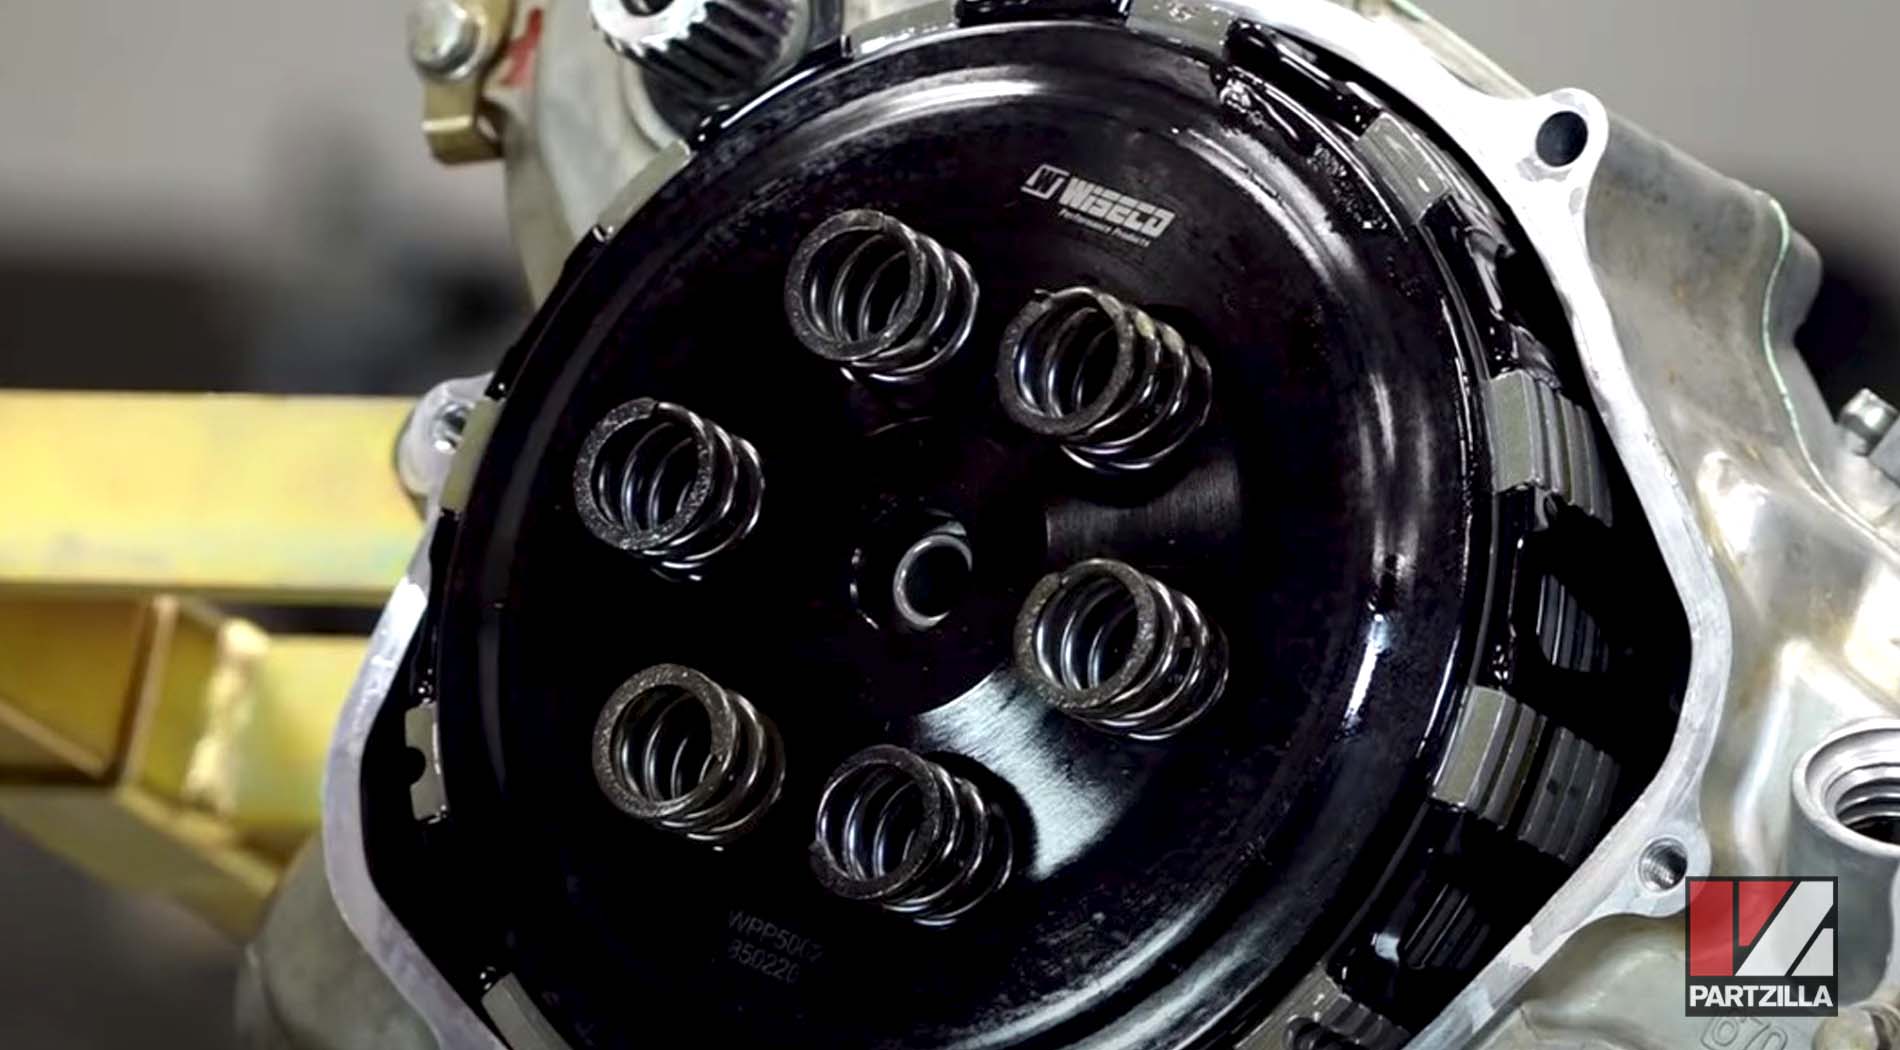
PRO TIP: You can use a soft plastic pen casing to hold the clutch in place while you torque down the clutch spring bolts.
Step 20. Install the gasket onto the clutch cover, then install the clutch cover itself and the bolts that hold it in place onto the crankcase. Next, torque the bolts to 7 foot-pounds and you’re done.