Honda CRF450R Head Installation and Valve Adjustment
Welcome to the head installation and valve adjustment portion of our Honda CRF450R engine rebuild project, picking up after the piston and cylinder installation.
For this Honda motorcycle engine rebuild project, we used OEM parts, as well as parts from a Wiseco rebuild kit called a Garage Buddy. The Garage Buddy includes parts that go all the way down to the crankshaft, as well as all the necessary gaskets, seals, O-rings, pistons, rings, etc. necessary for completing the rebuild.
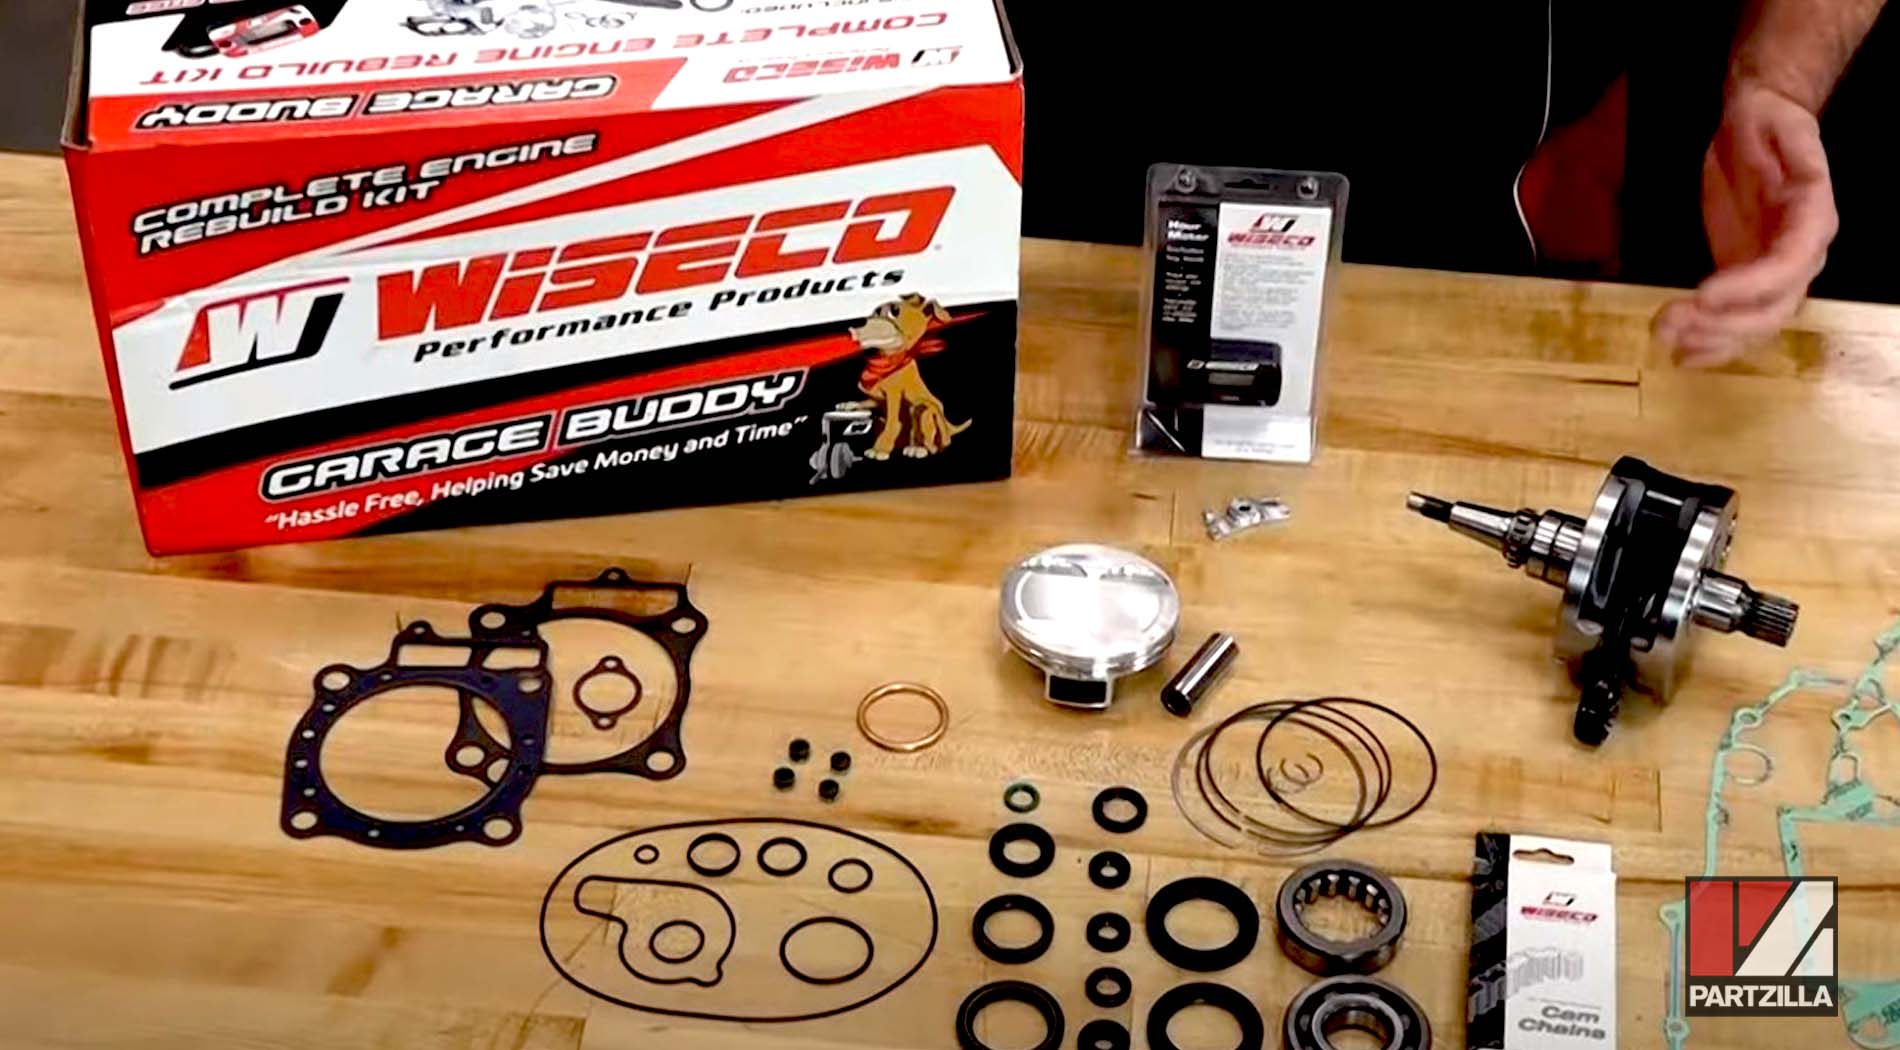
Another kit needed for this part of the project is a shim kit, which has all the different shim variations, sizes and thicknesses to get the motor into spec.

Tools and Parts - Honda CRF450 Head Installation and Valve Adjustment
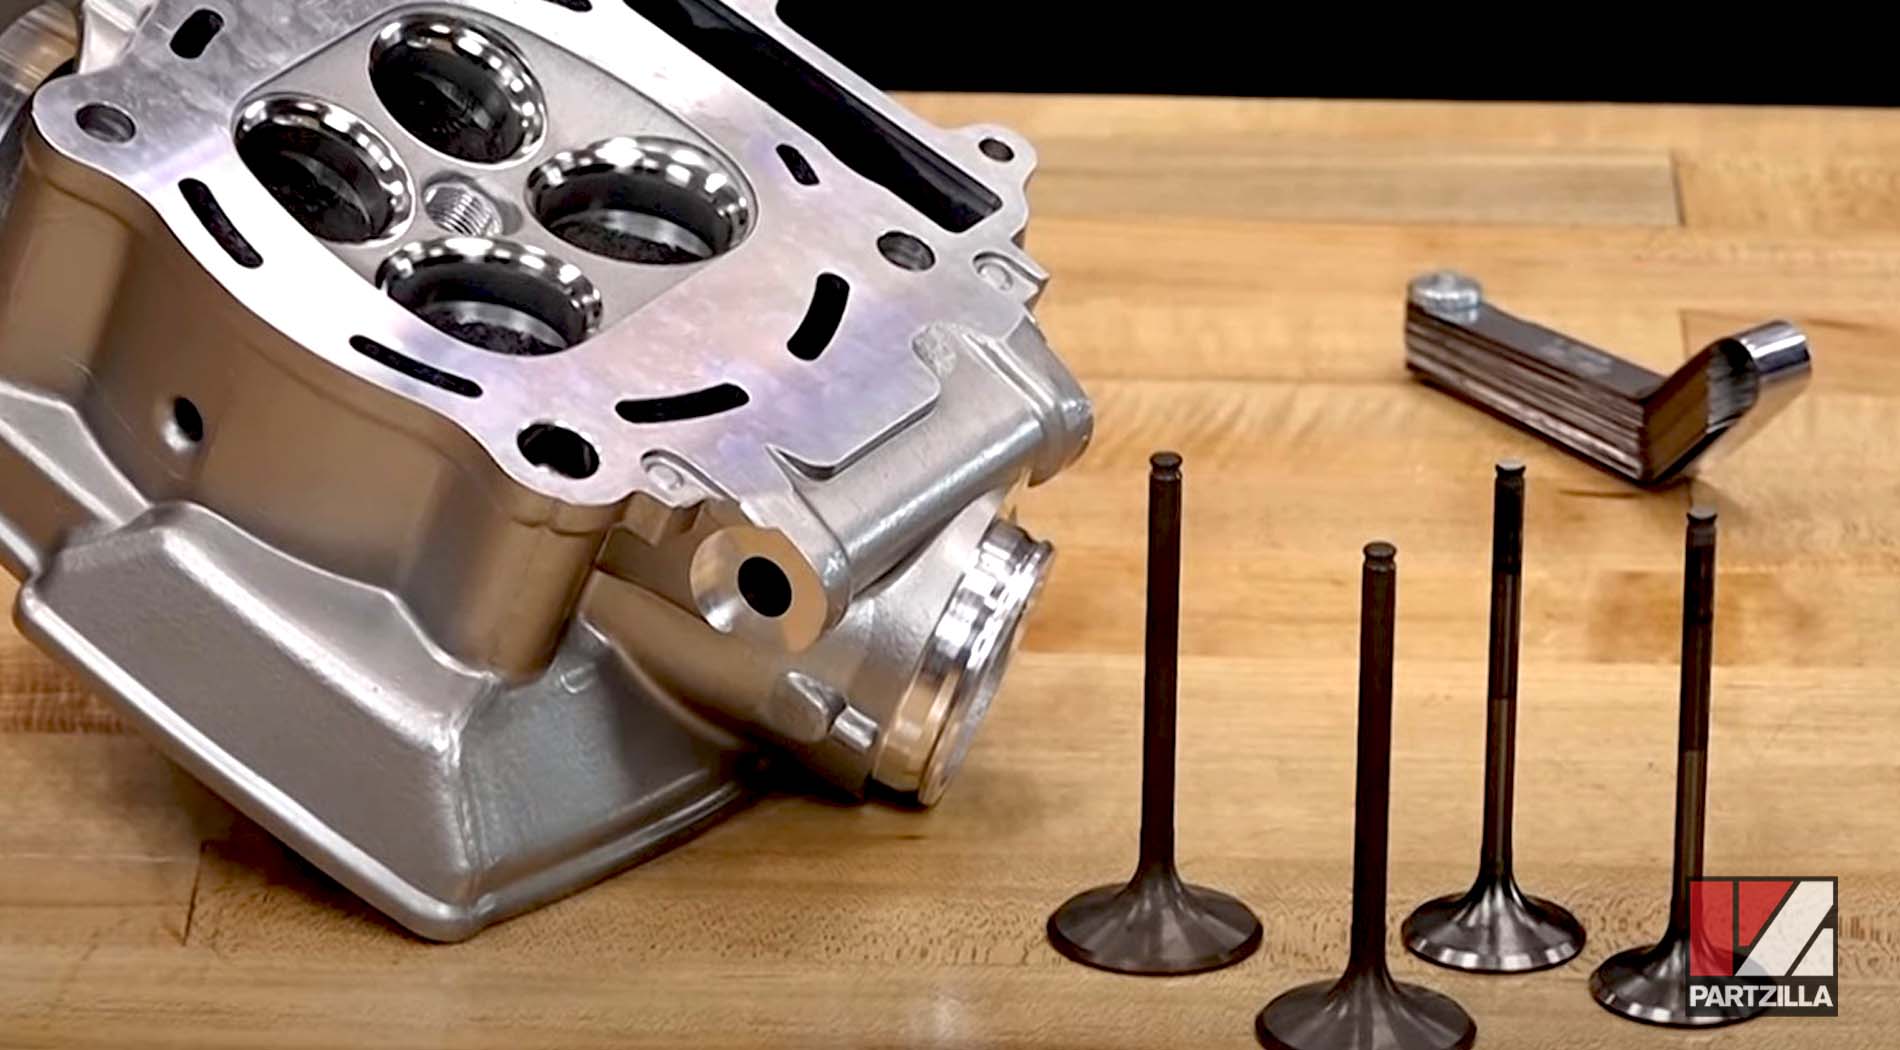
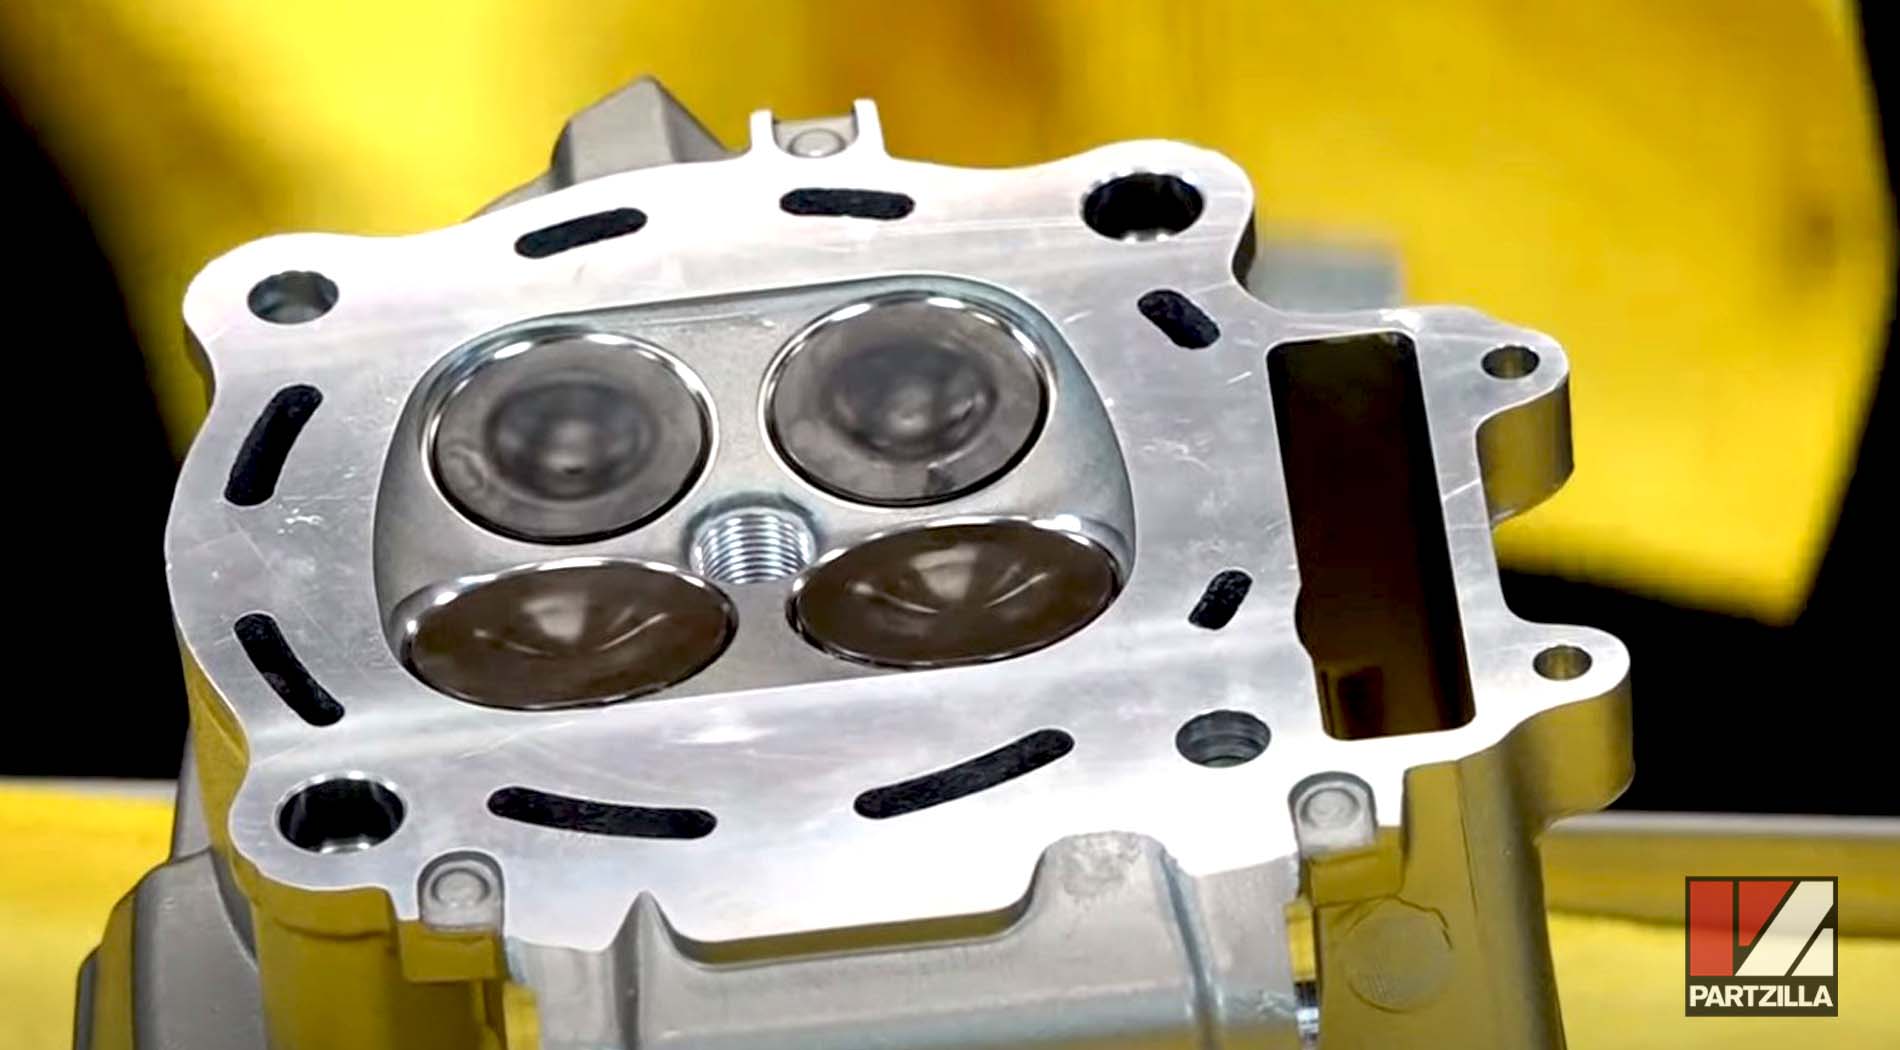
NOTE: We used several OEM parts, including titanium intake valves that don’t need to be lapped, as well as a brand new cylinder head. Valve lapping isn’t necessarily required, but we check it anyway throughout the process.
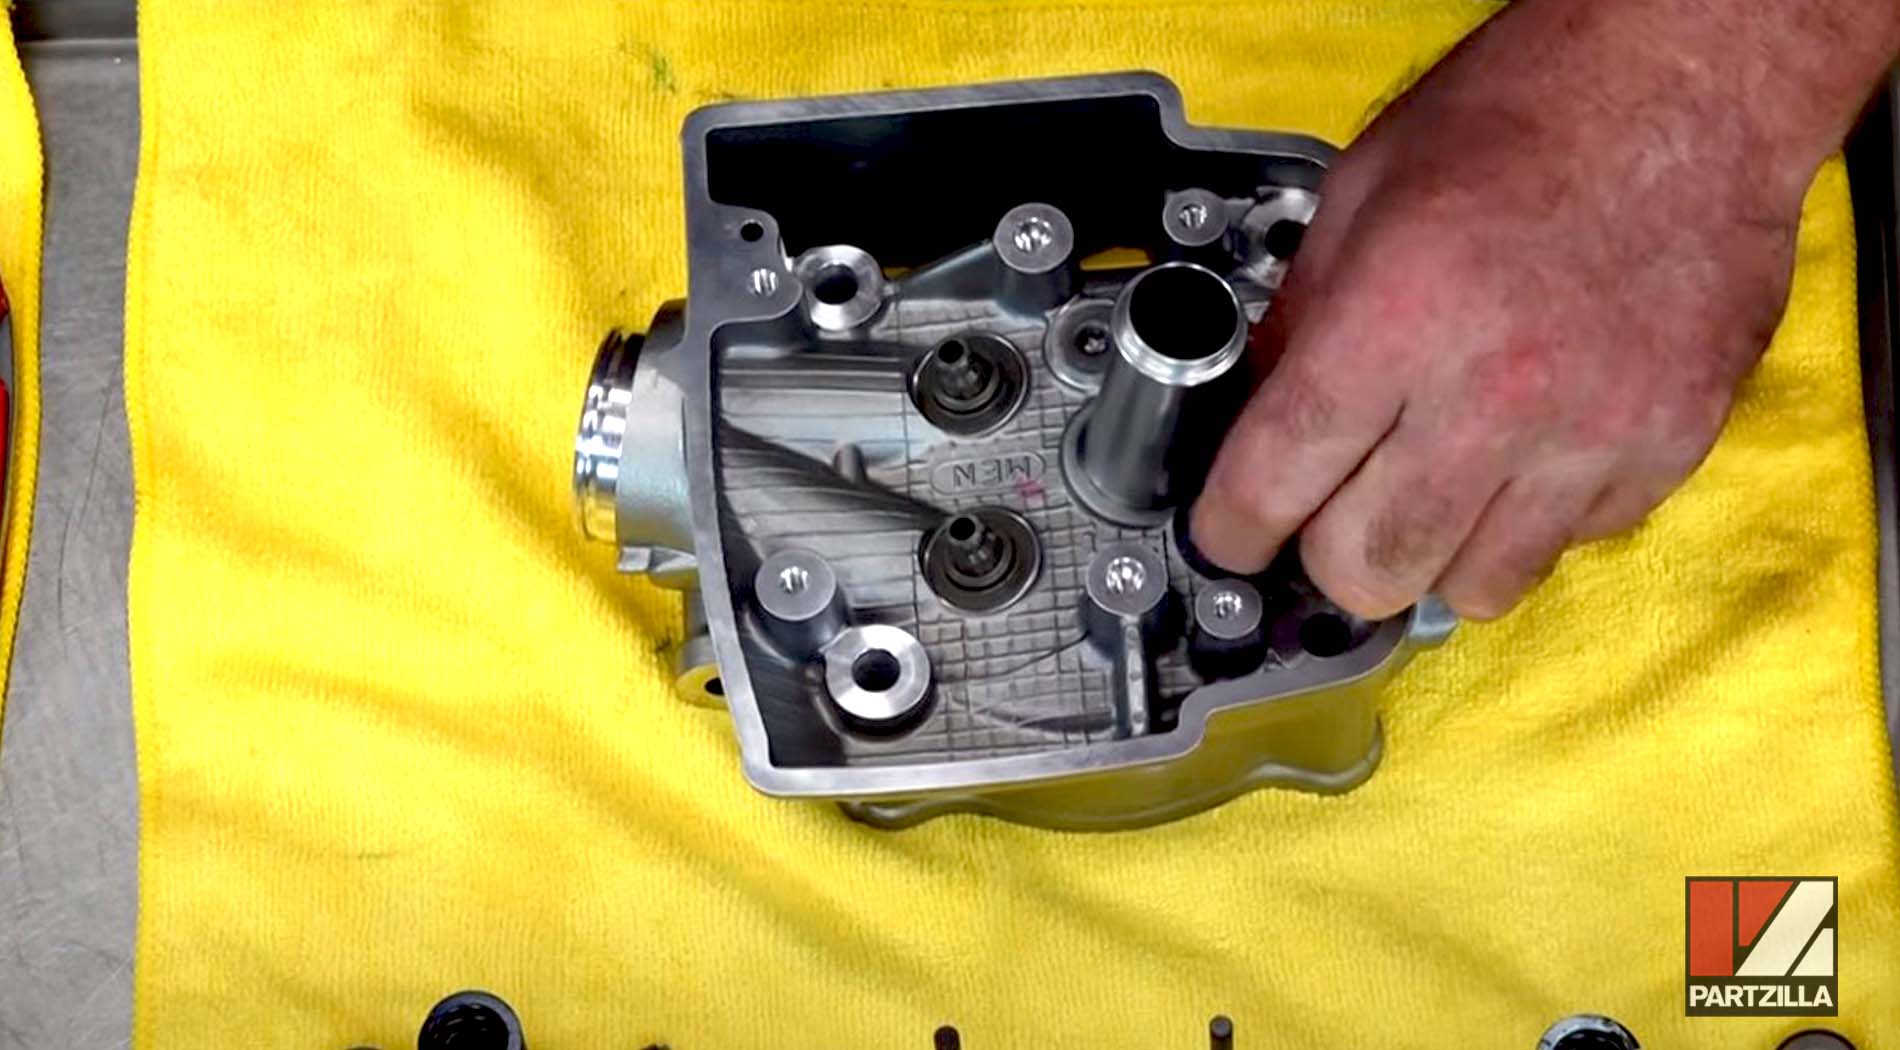
Honda CRF450 Engine Rebuild - Valve and Spring Removal
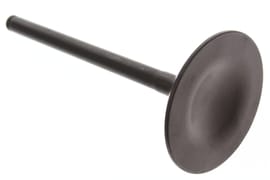
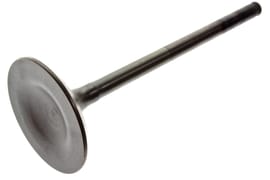
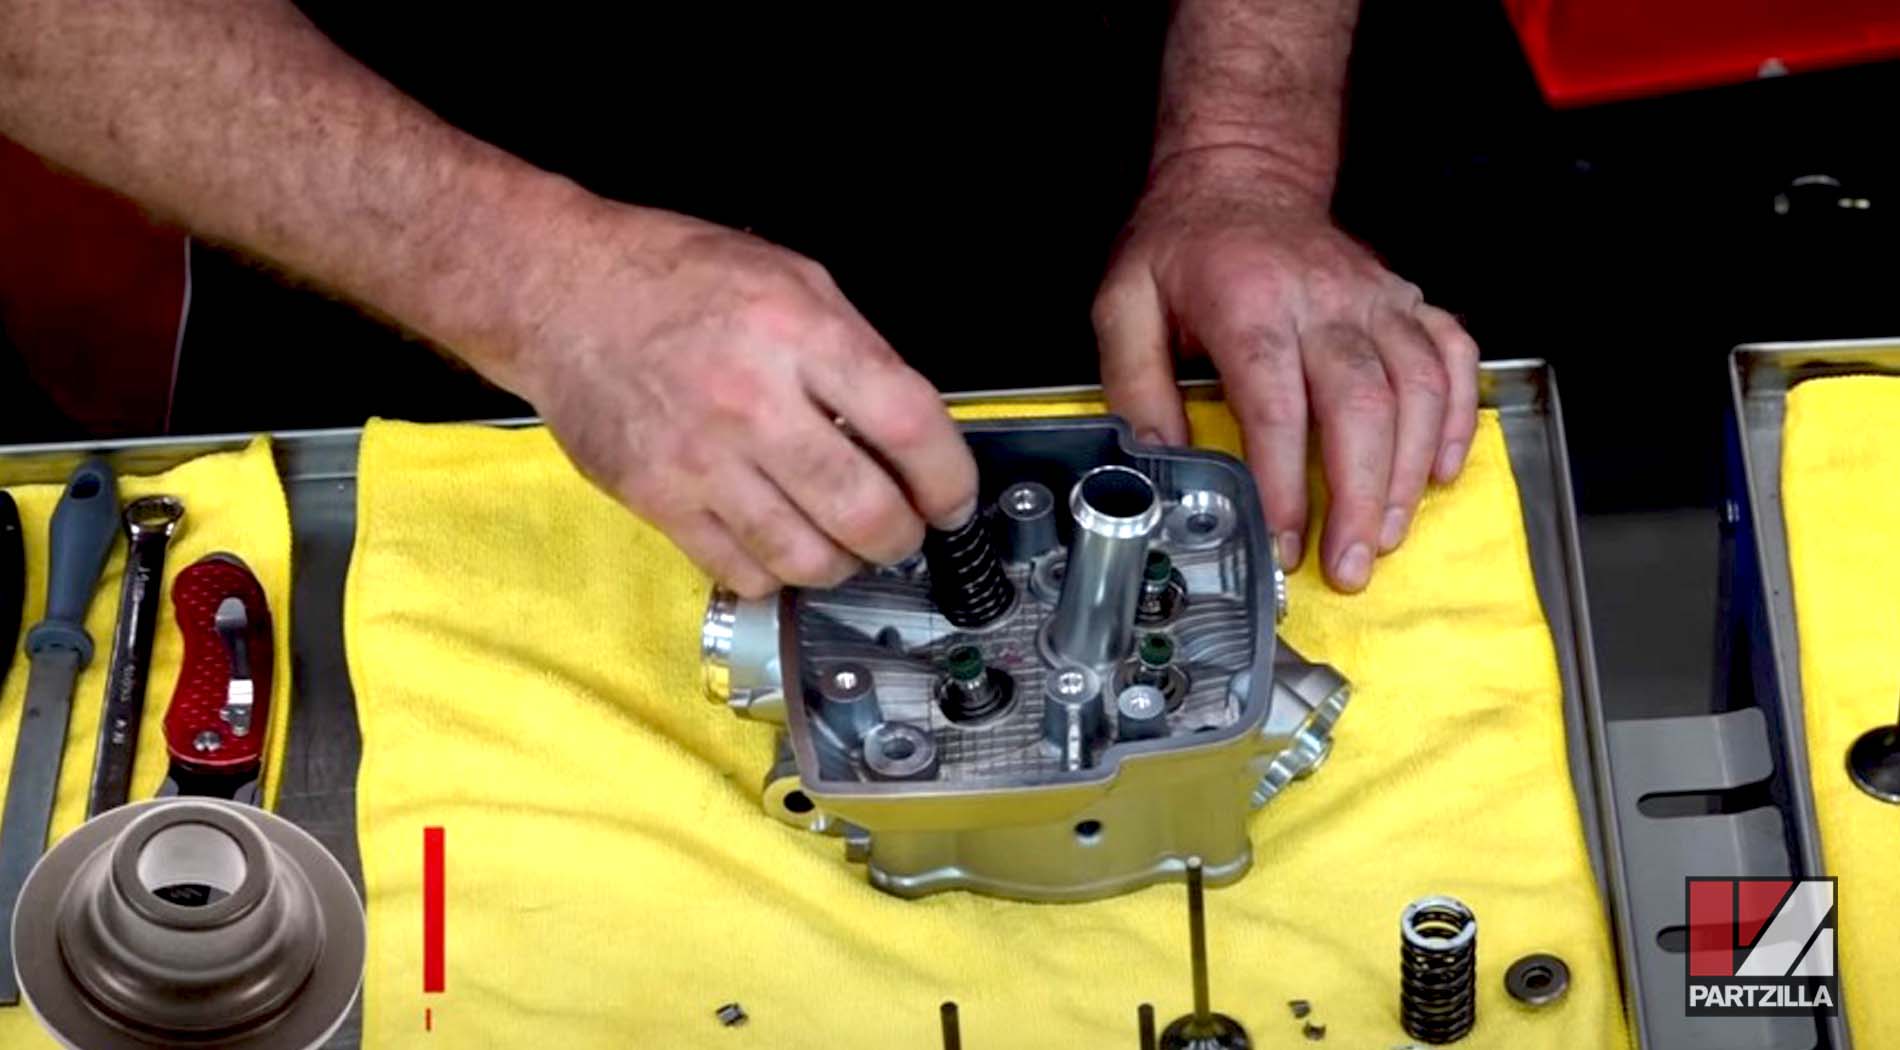
Step 1. Clamp a valve spring compressor in a vise, then compress the valve springs and remove the springs, the keepers, the valves and everything else you need to transfer over to the new head.
NOTE: On our CRF450 engine’s head, we discovered a dual spring setup from an unfamiliar manufacturer, so we stopped pulling the old head apart and decided to go with new OEM Honda parts. Watch the video below to see how to use a valve spring compressor if you’re going to reuse the valves and springs from the old head.
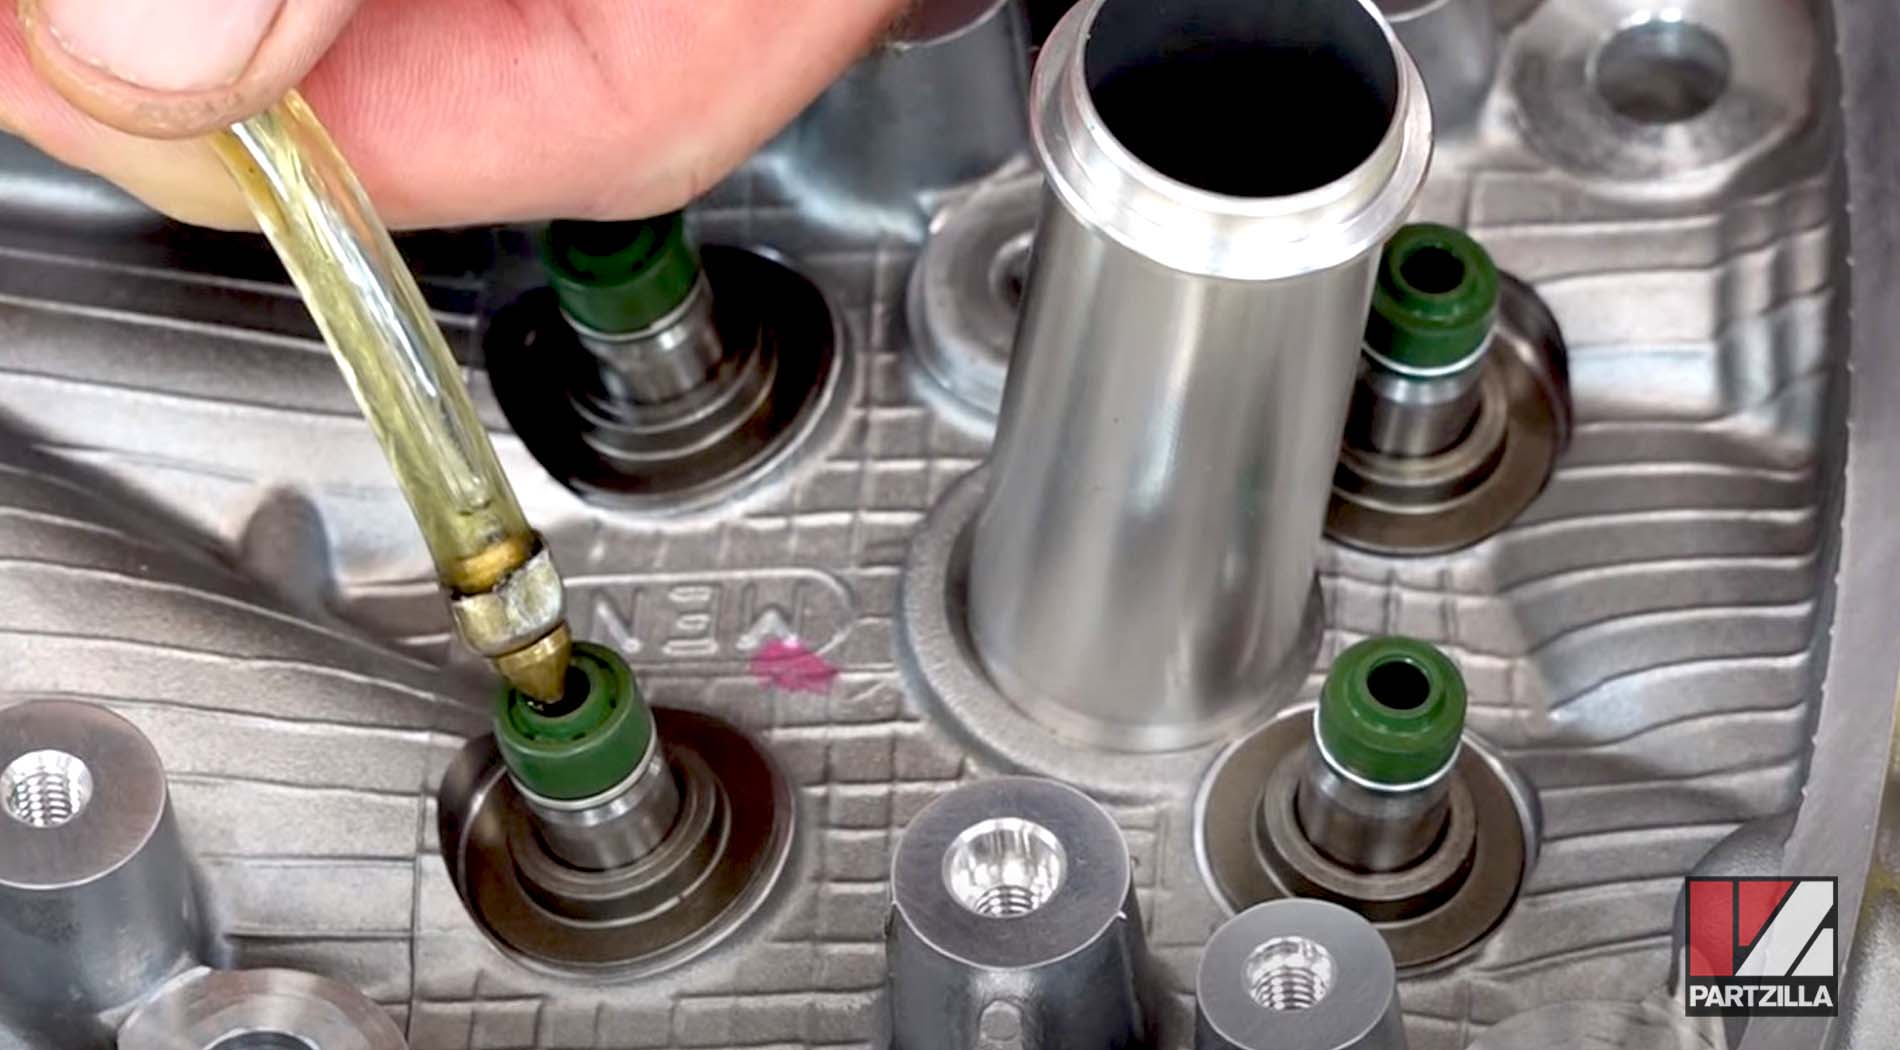
Honda CRF450 Engine Rebuild - Checking Valve Seals
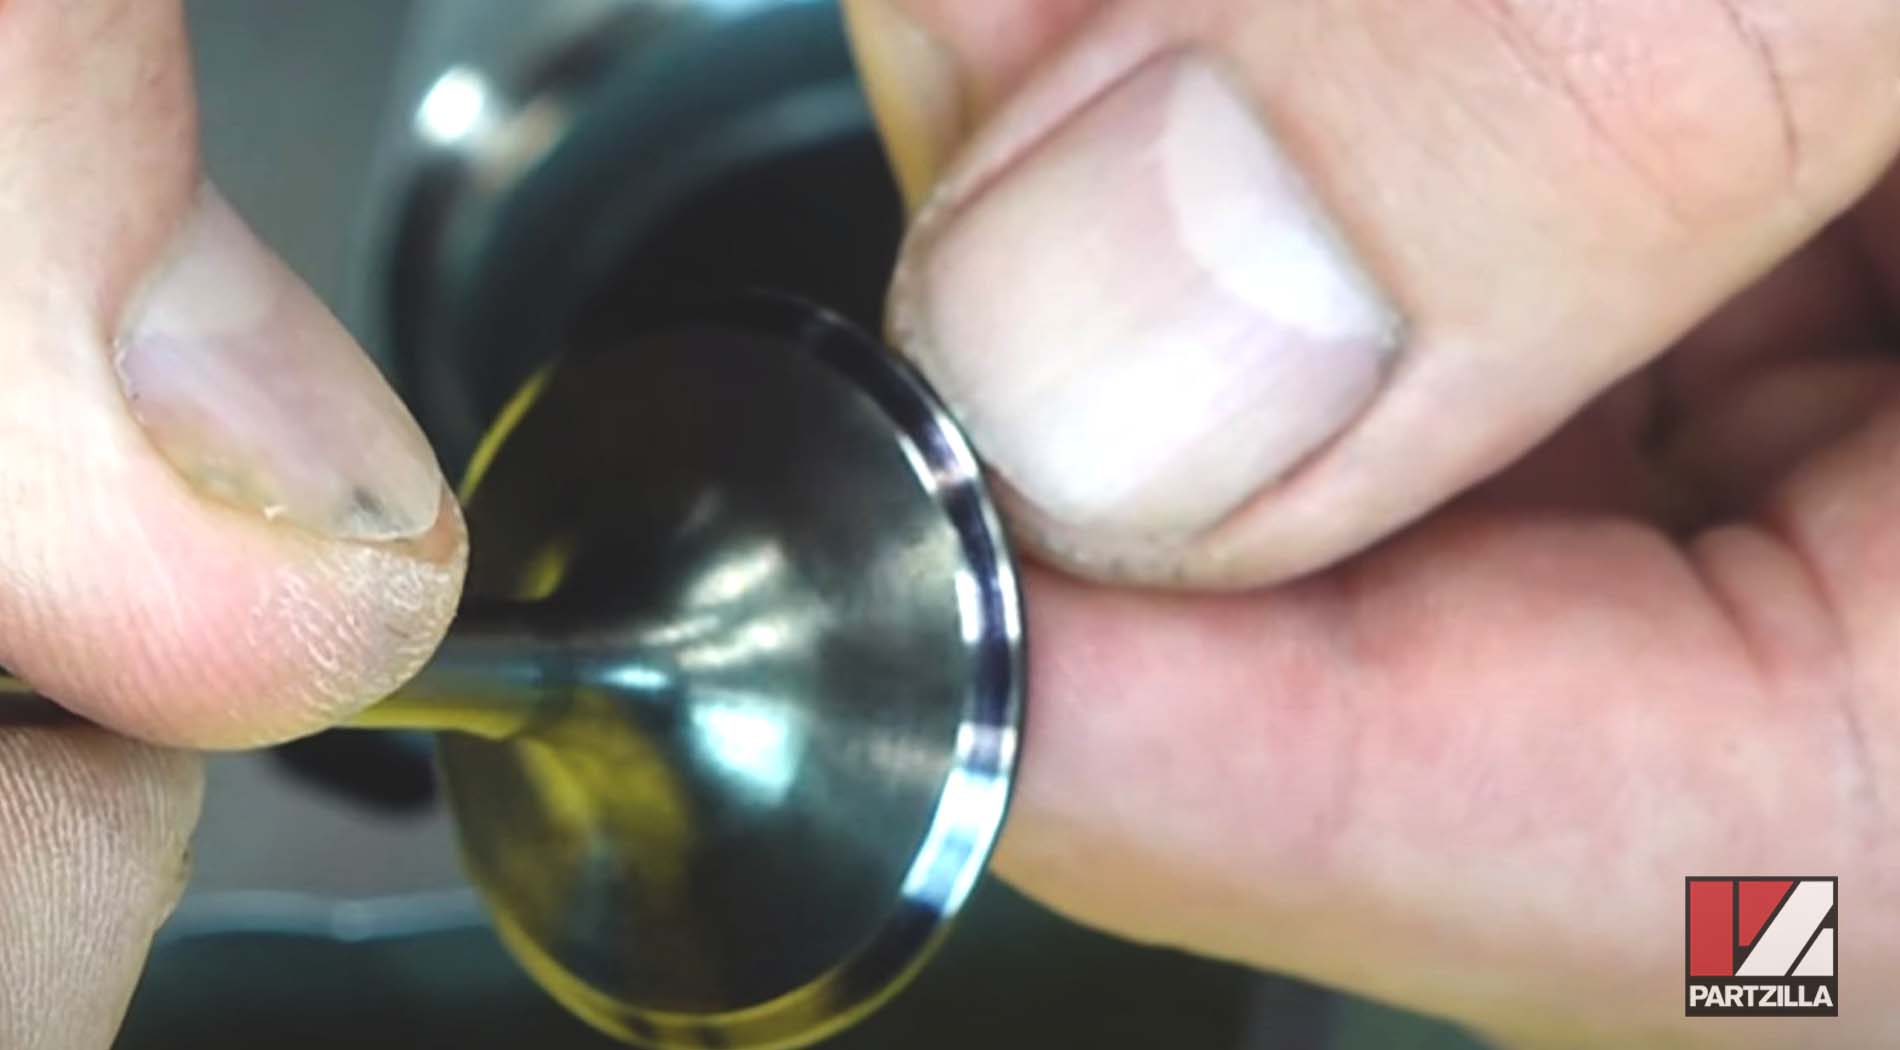
Step 2. Put a little valve marking compound on the three angle cut surface of each valve seat, then pop each valve a couple of times to see the contact area the marking compound makes with the valve face.
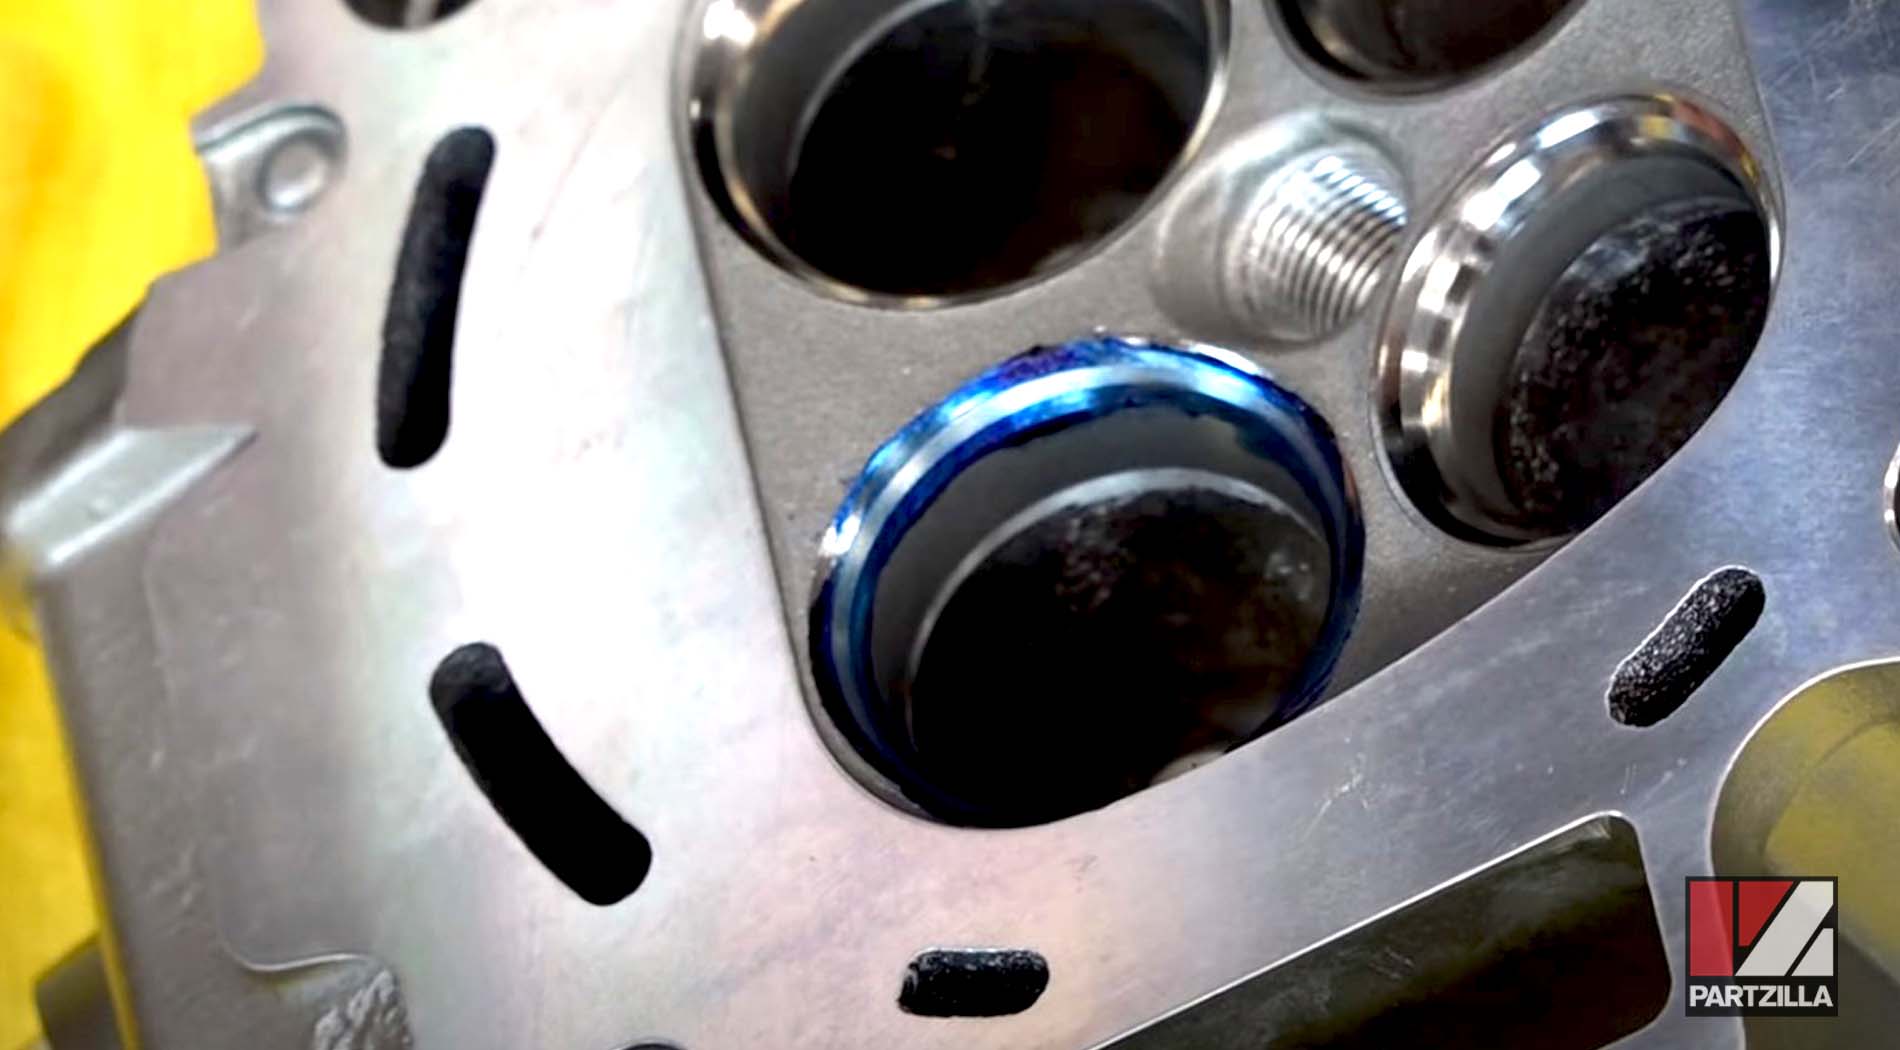

As mentioned, the valves don’t need to be lapped, but you’re looking for a nice, wide, even band all the way around that covers the entire valve face, which tells you they’re going to seal up properly.
PRO TIP: If you don't have any valve marking compound such as Prussian Blue, use a marker pen, but do it quickly before the ink has a chance to dry.
Watch the clip below to see the valve seal inspection segment of our Honda CRF450 head installation and valve adjustment video.
Honda CRF450 Engine Rebuild - Valves and Springs Installation
Step 3. Install the four valve spring seats, which are all the same for the intake valves and the exhaust valves.
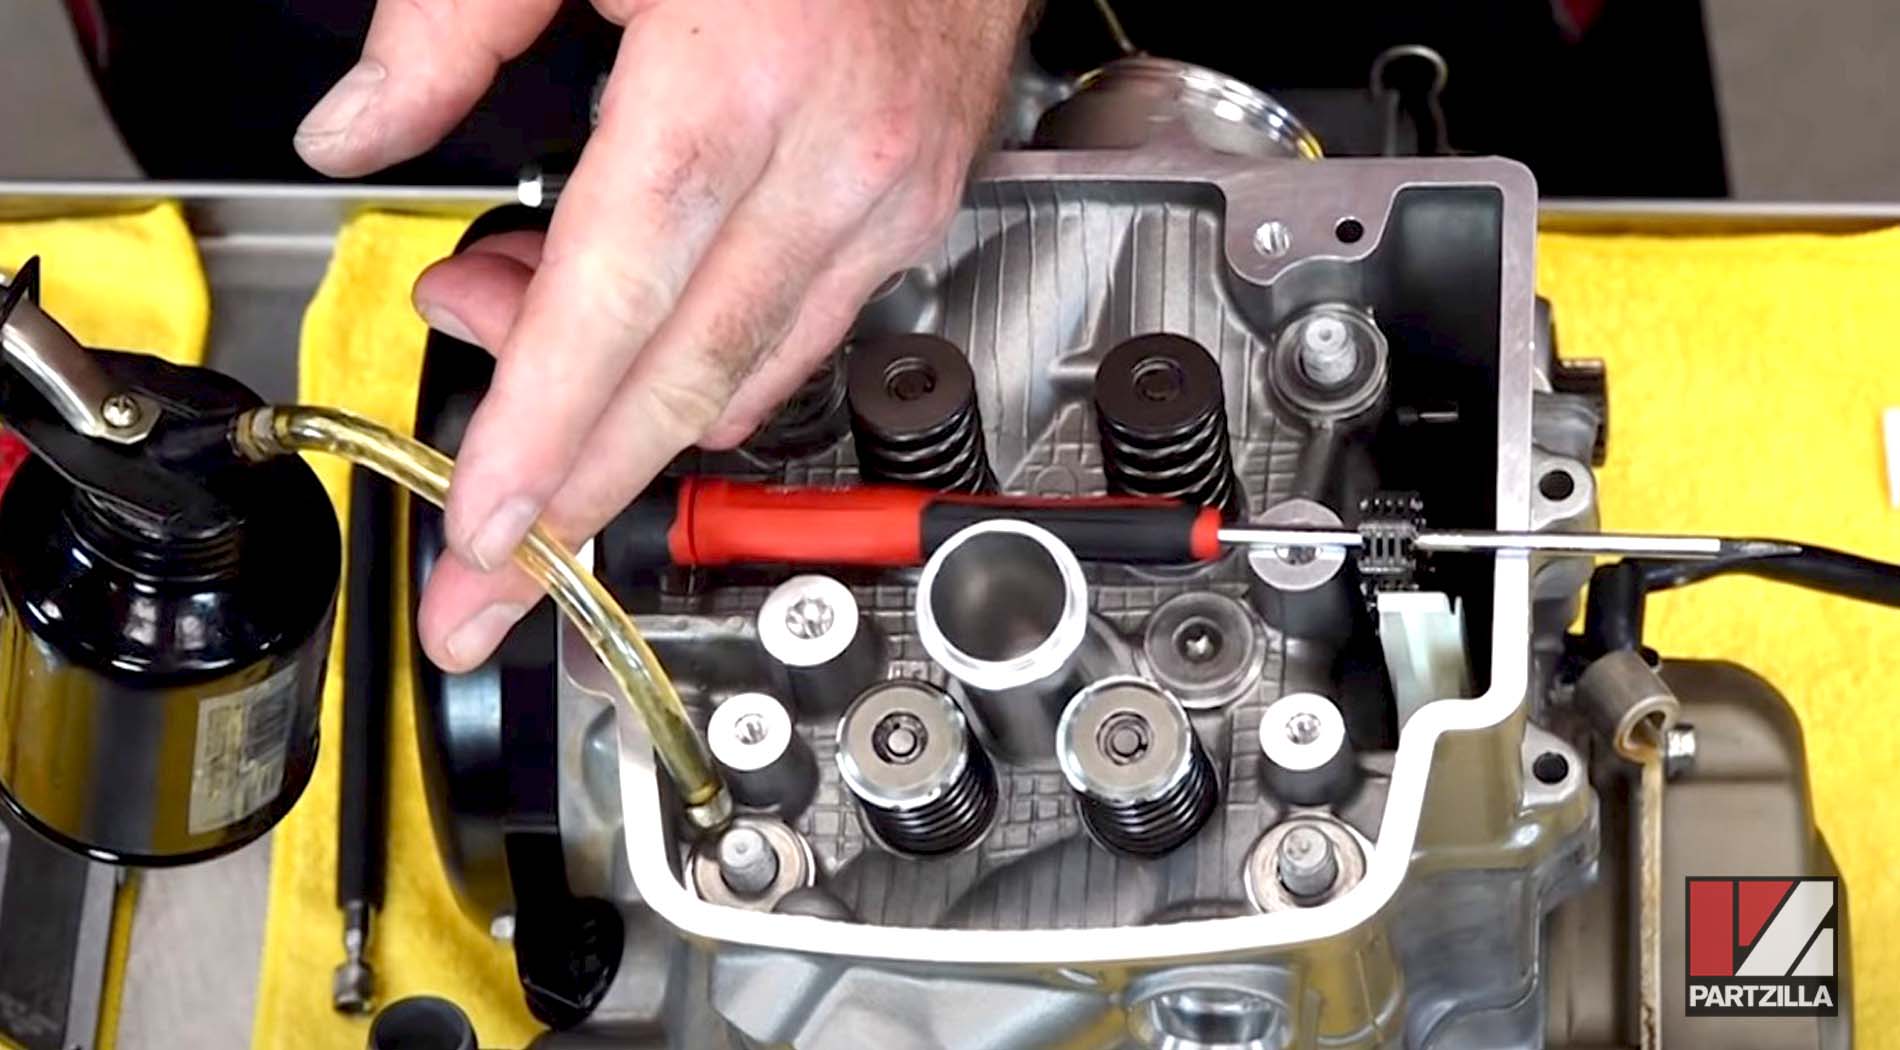
Step 4. Install the valve stem seals (which are different for the intake and the exhaust) with your finger. Add a little bit of oil in each seal and let it go down into the guide, then wipe off any excess.
NOTE: Use our CRF450 camshaft/valve parts diagram for reference. The exhaust valve stem seals are #1 on the diagram, and the intake valve stem seals are #2 on the diagram.
Step 5. Match the valve springs to their respective valves. The springs should have paint on the top of them but if yours don’t, the winding is a little tighter at the bottom than at the top, and that side goes down. There's a big difference between the intake and the exhaust both in height and in diameter, so match the springs accordingly.
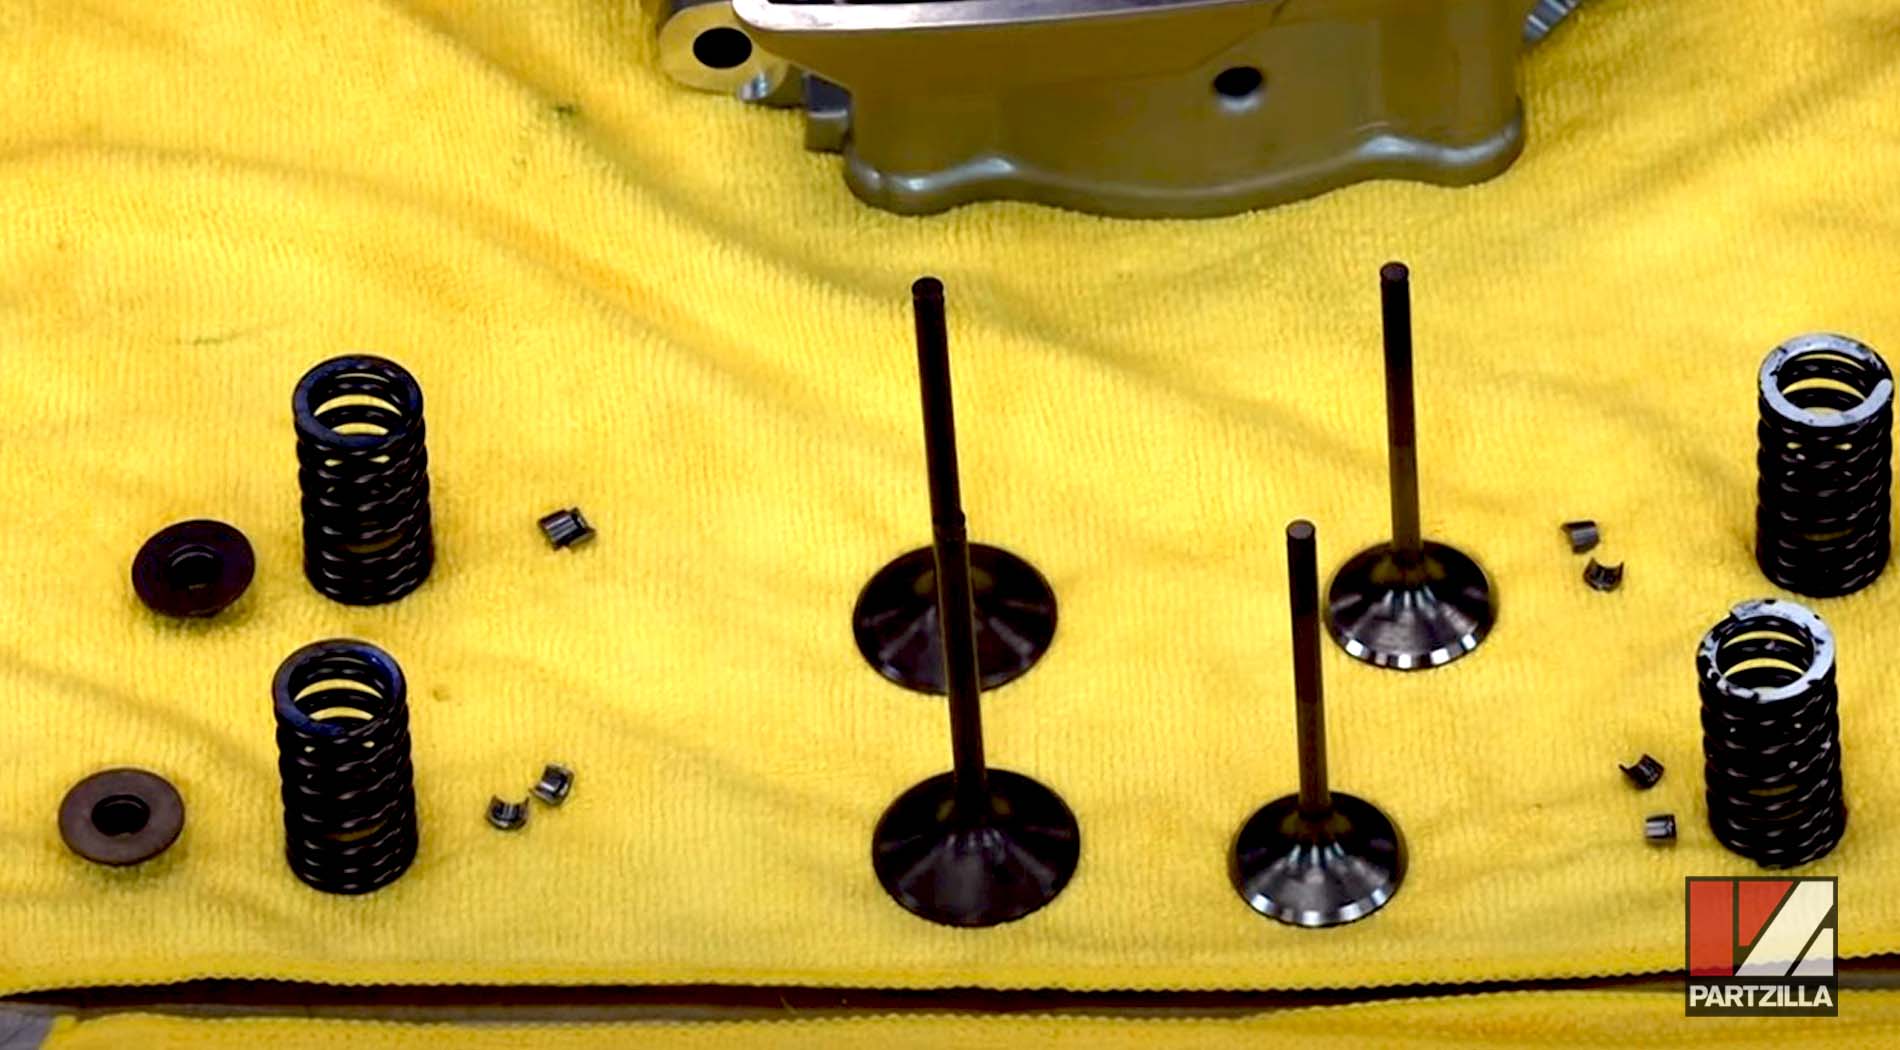
NOTE: Use our CRF450 camshaft/valve parts diagram for reference. The intake valve spring is #14 on the diagram and its retainer is #16, and the exhaust valve spring is #15 on the diagram and its retainer is #17.
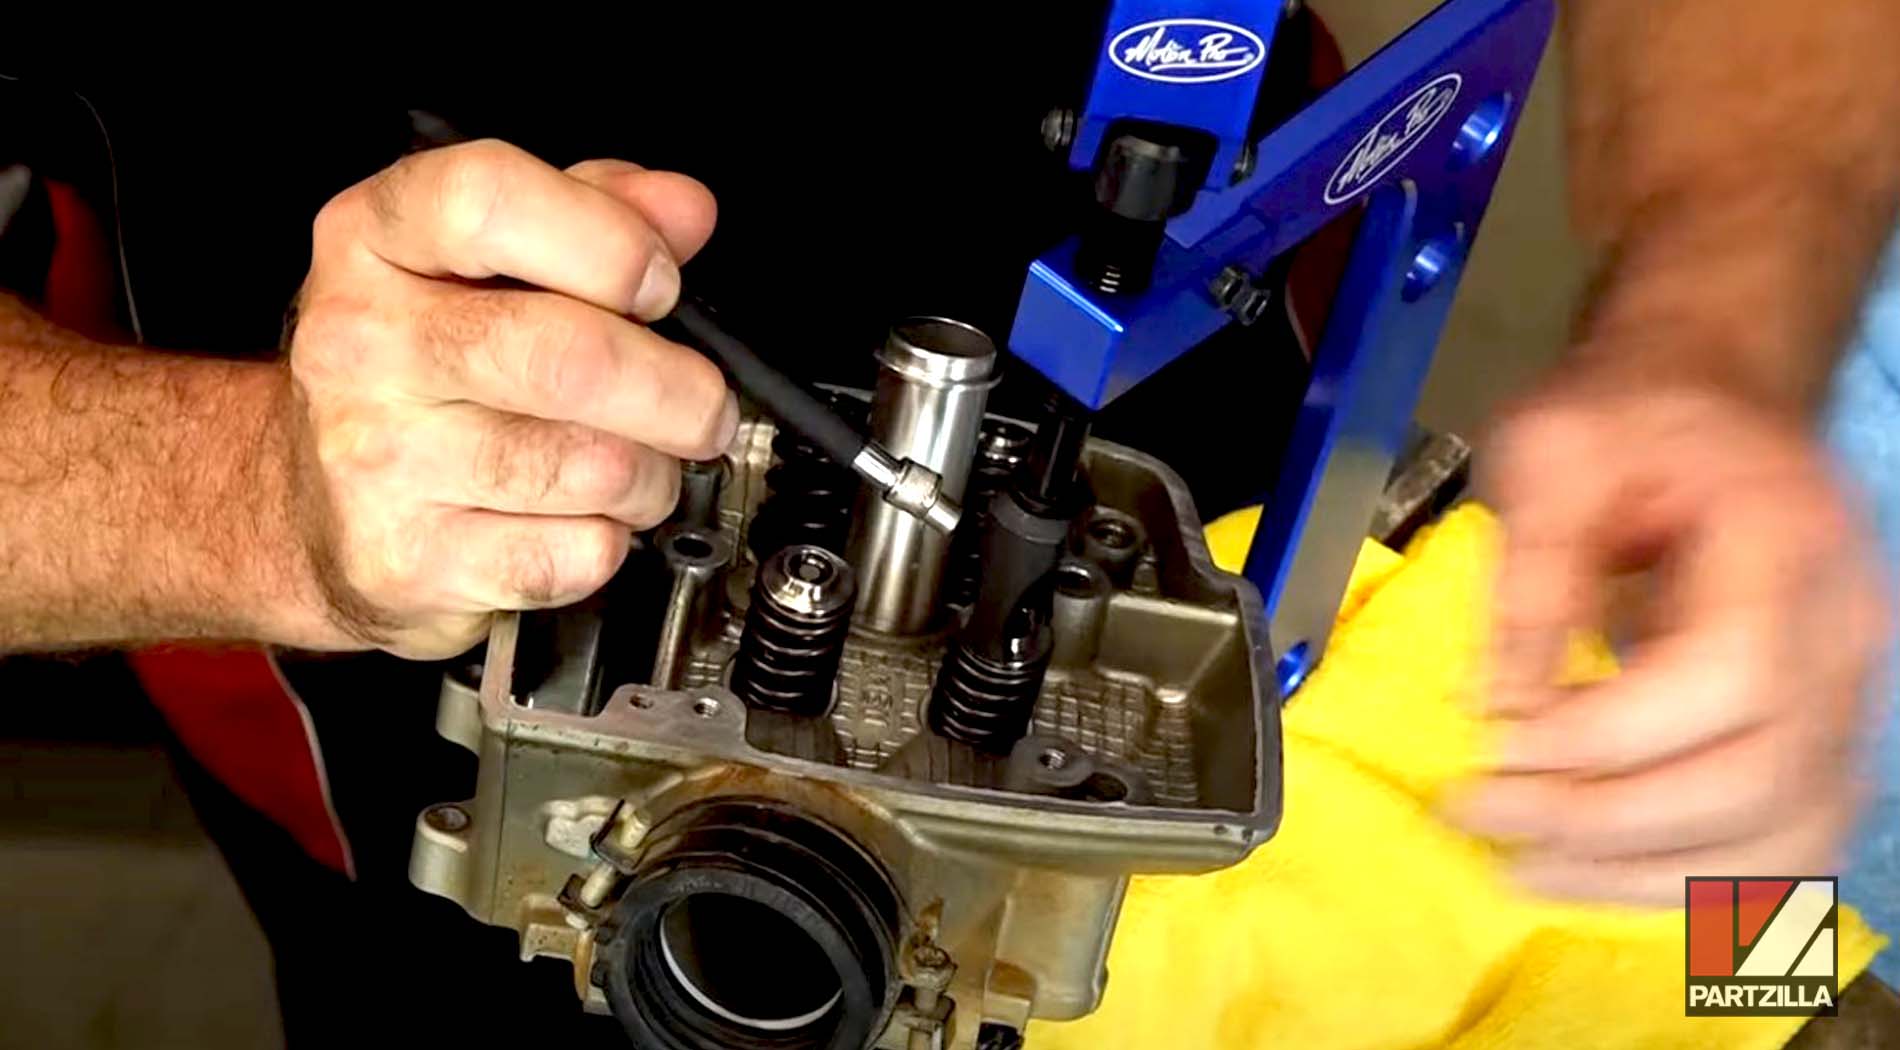
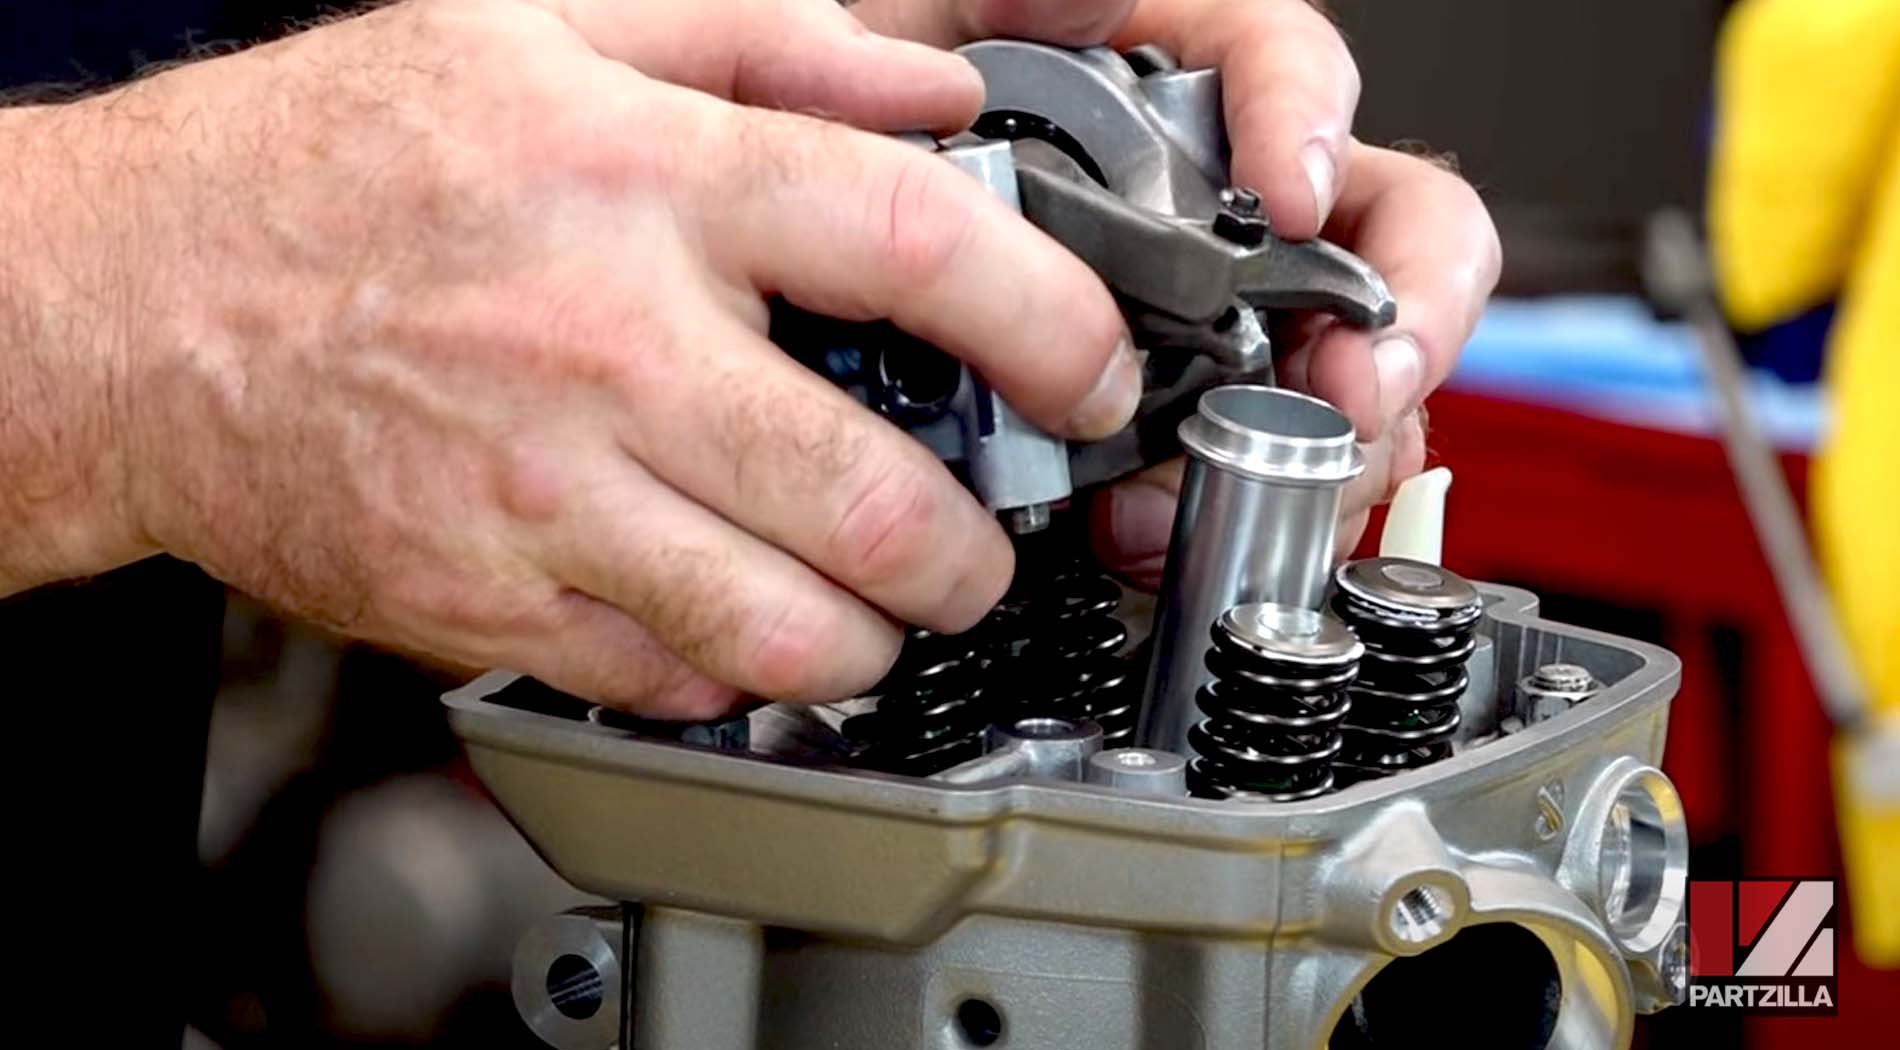
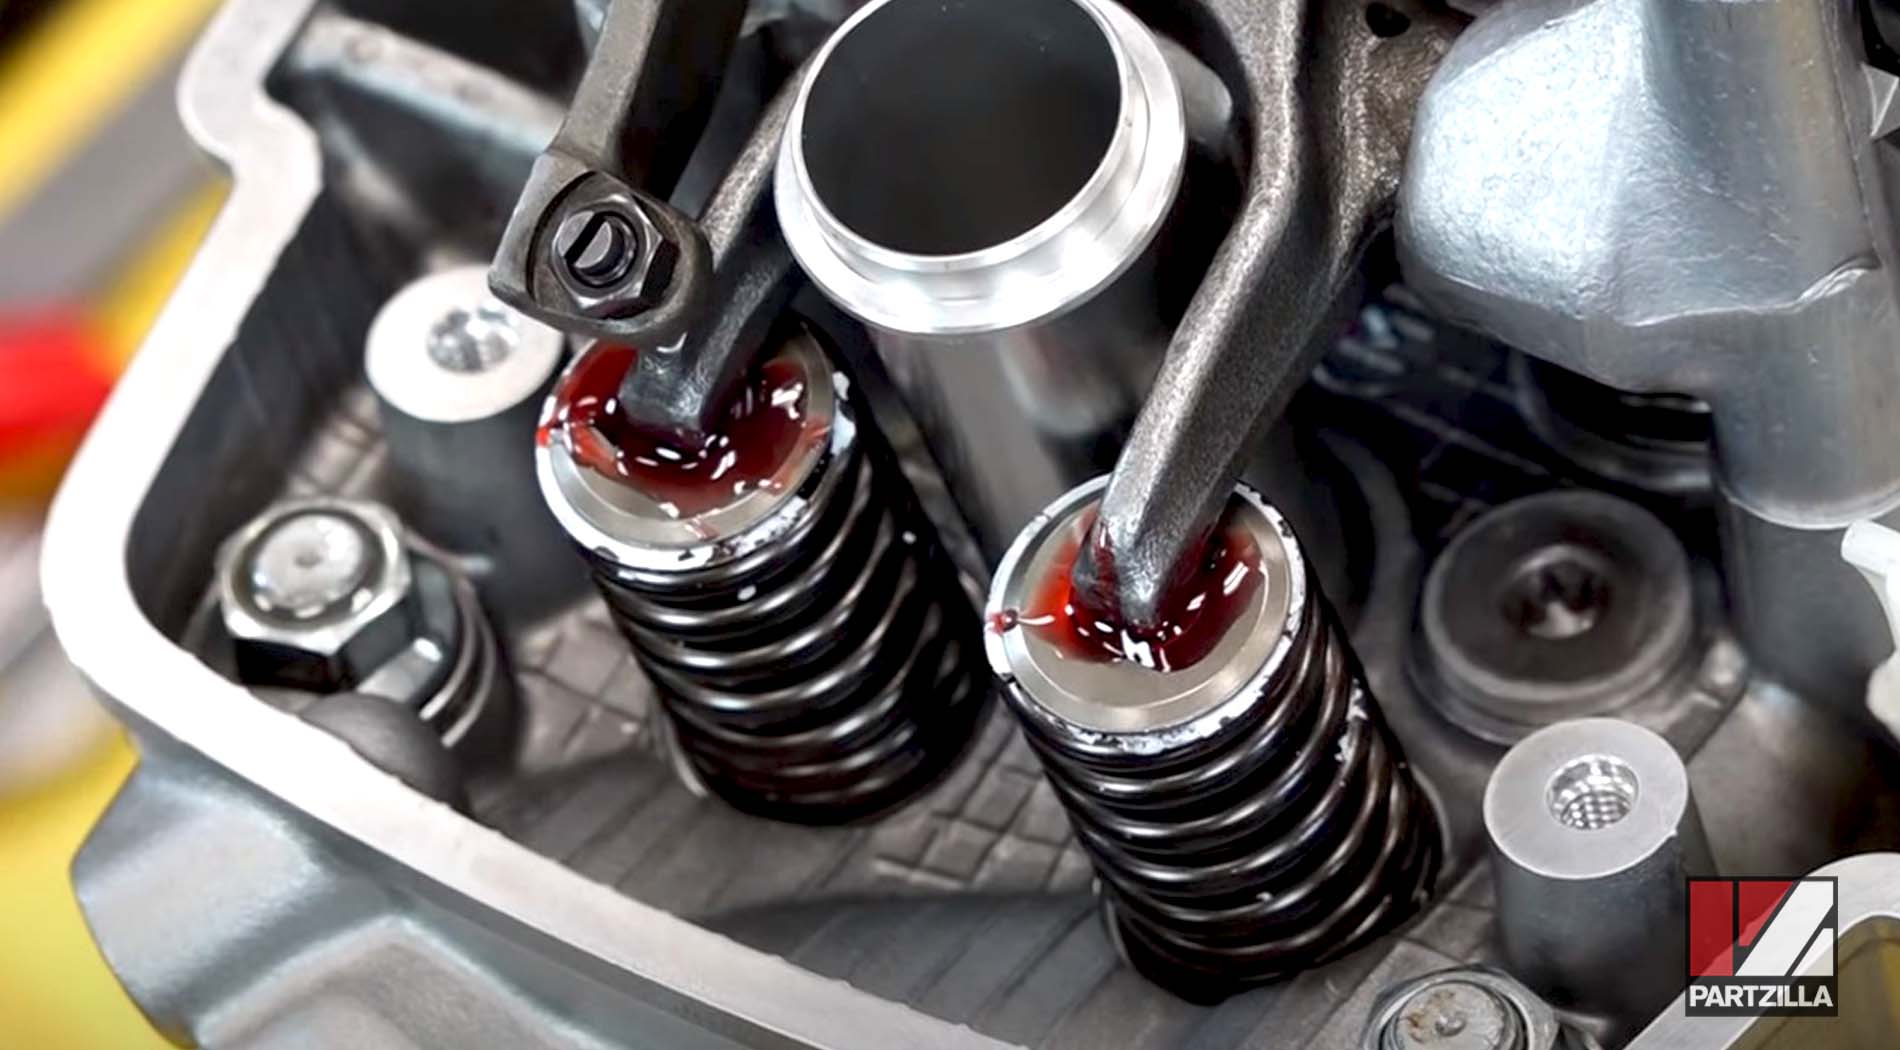
Step 6. Install each valve individually, turning it a little bit as you're pushing it through the seal so it doesn't damage it, then install the valve’s spring and retainer up top.
Step 7. Compress each spring with the valve spring compressor, then put a little bit of grease on the tip of the keeper (valve cotter) to allow it to stay attached to your screwdriver or magnet so you can get it in position.
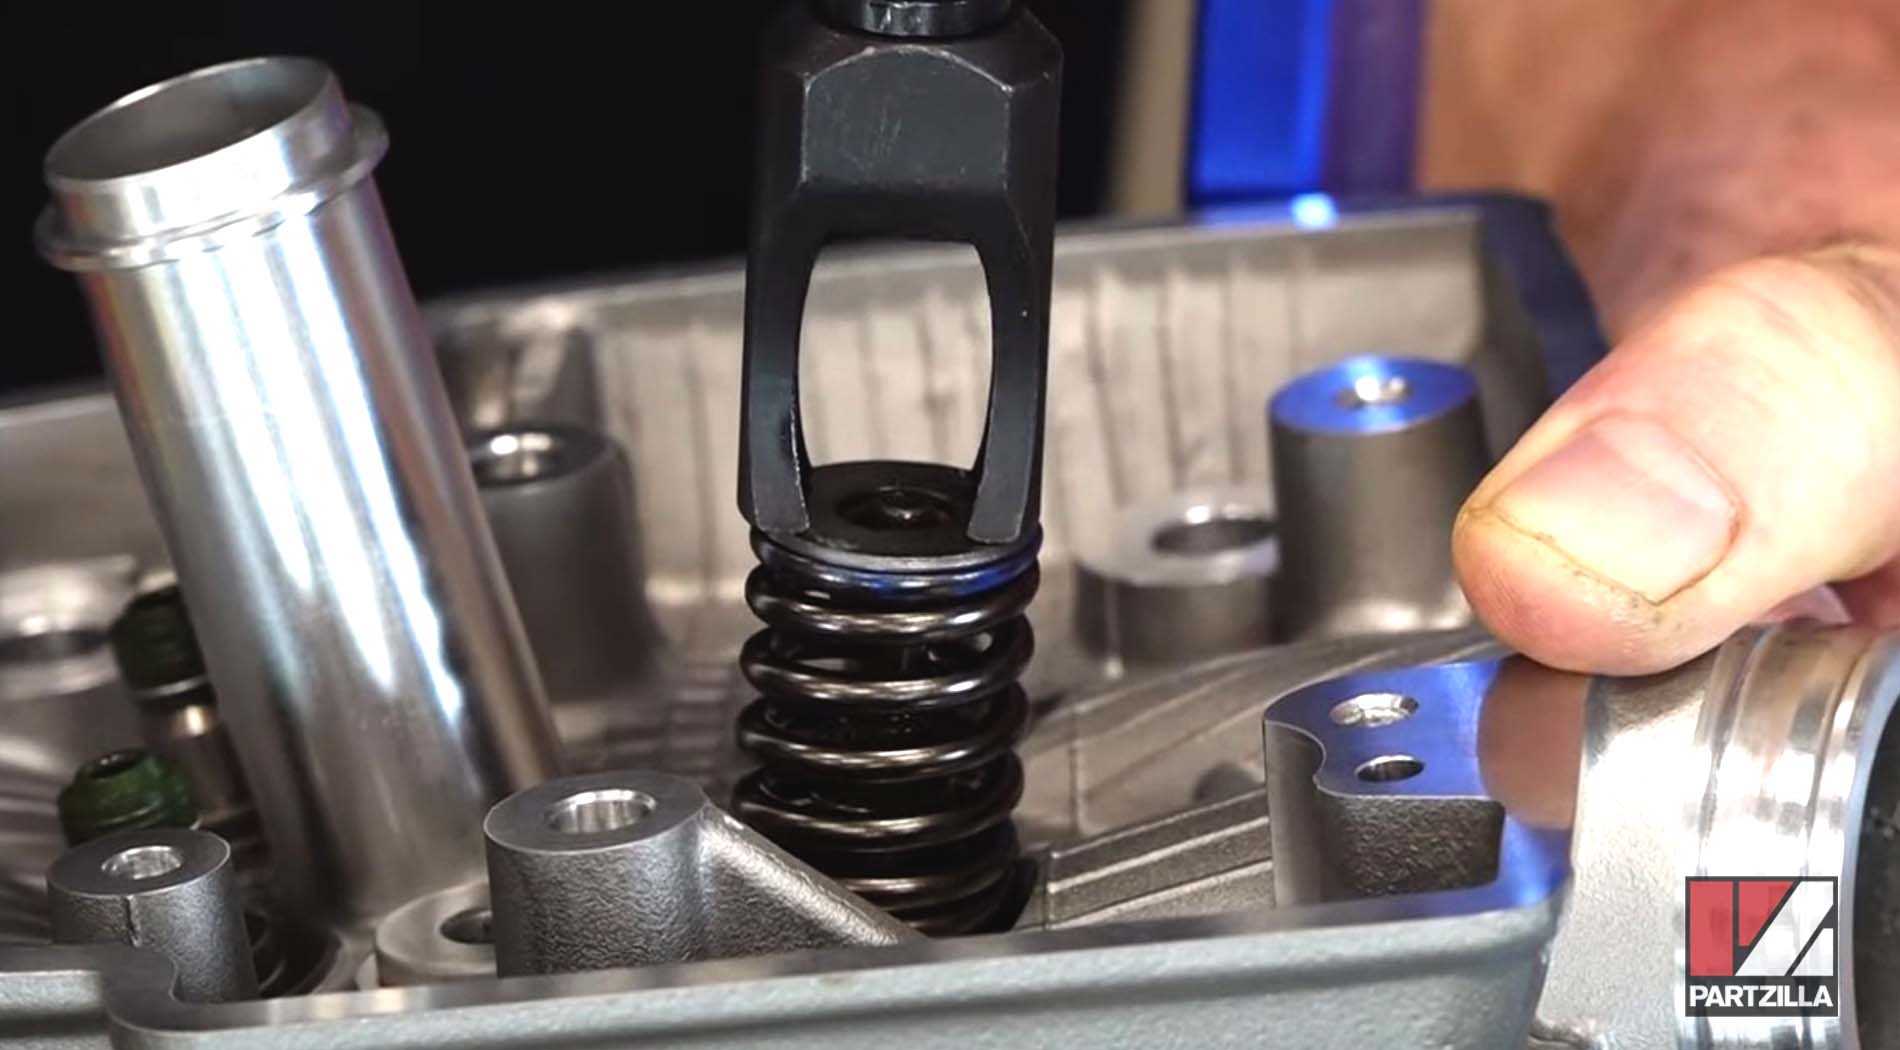
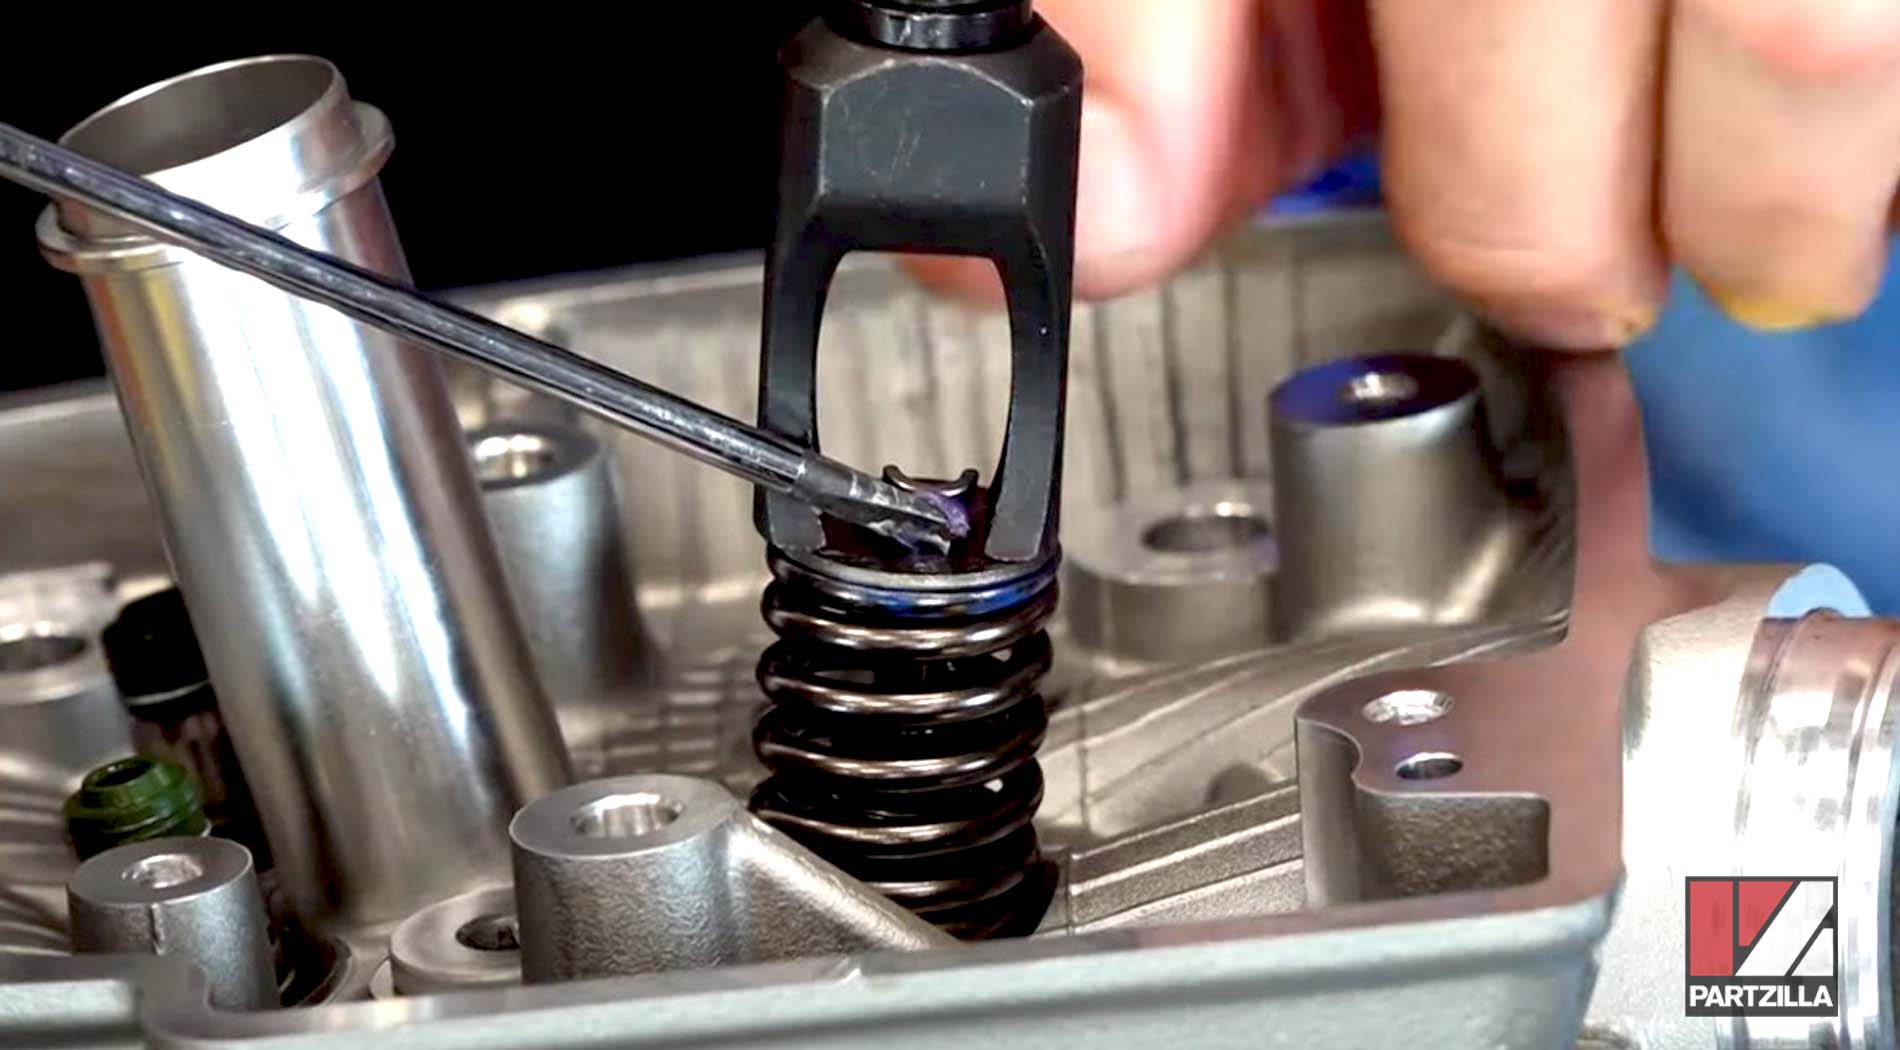
NOTE: Use our CRF450 camshaft/valve parts diagram for reference. The intake valve cotter is #20 on the diagram and the exhaust valve cotter is #19.
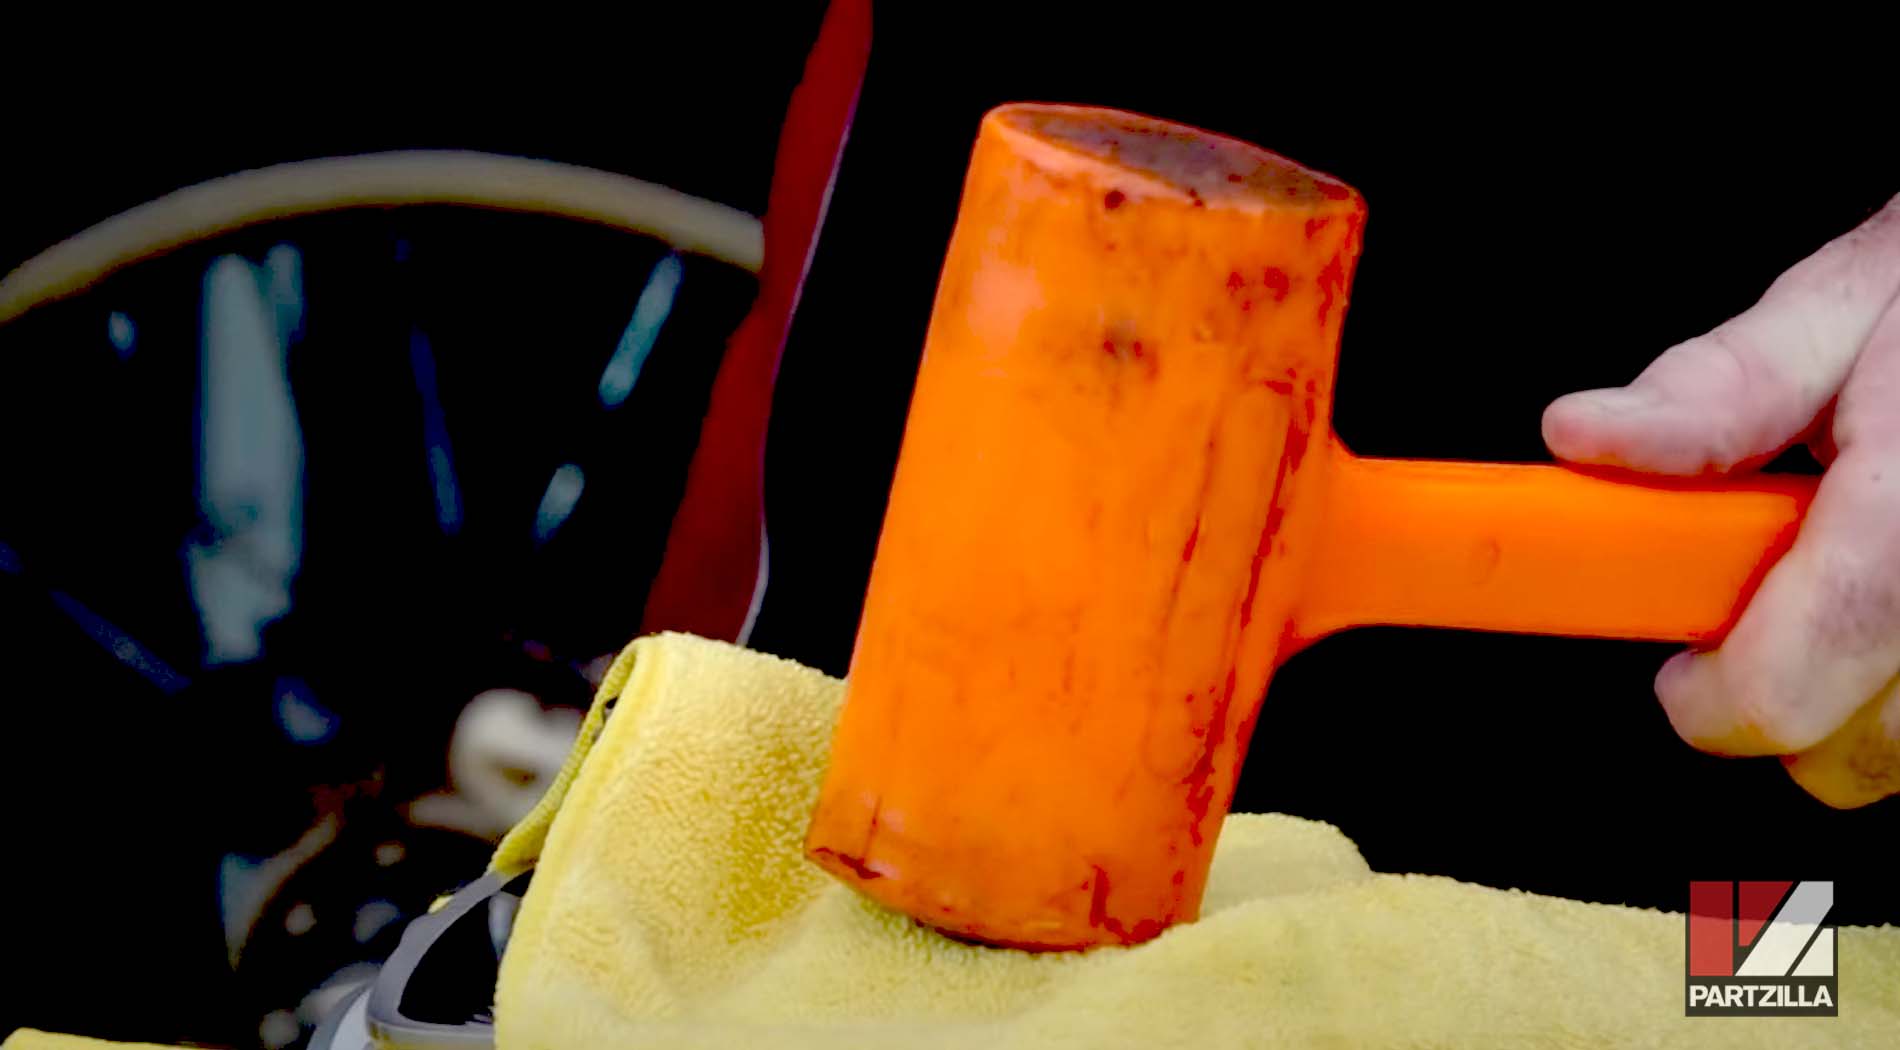
Step 9. Cover each spring with a shop towel and give it a light pop with a soft-blow hammer to get everything to seat.
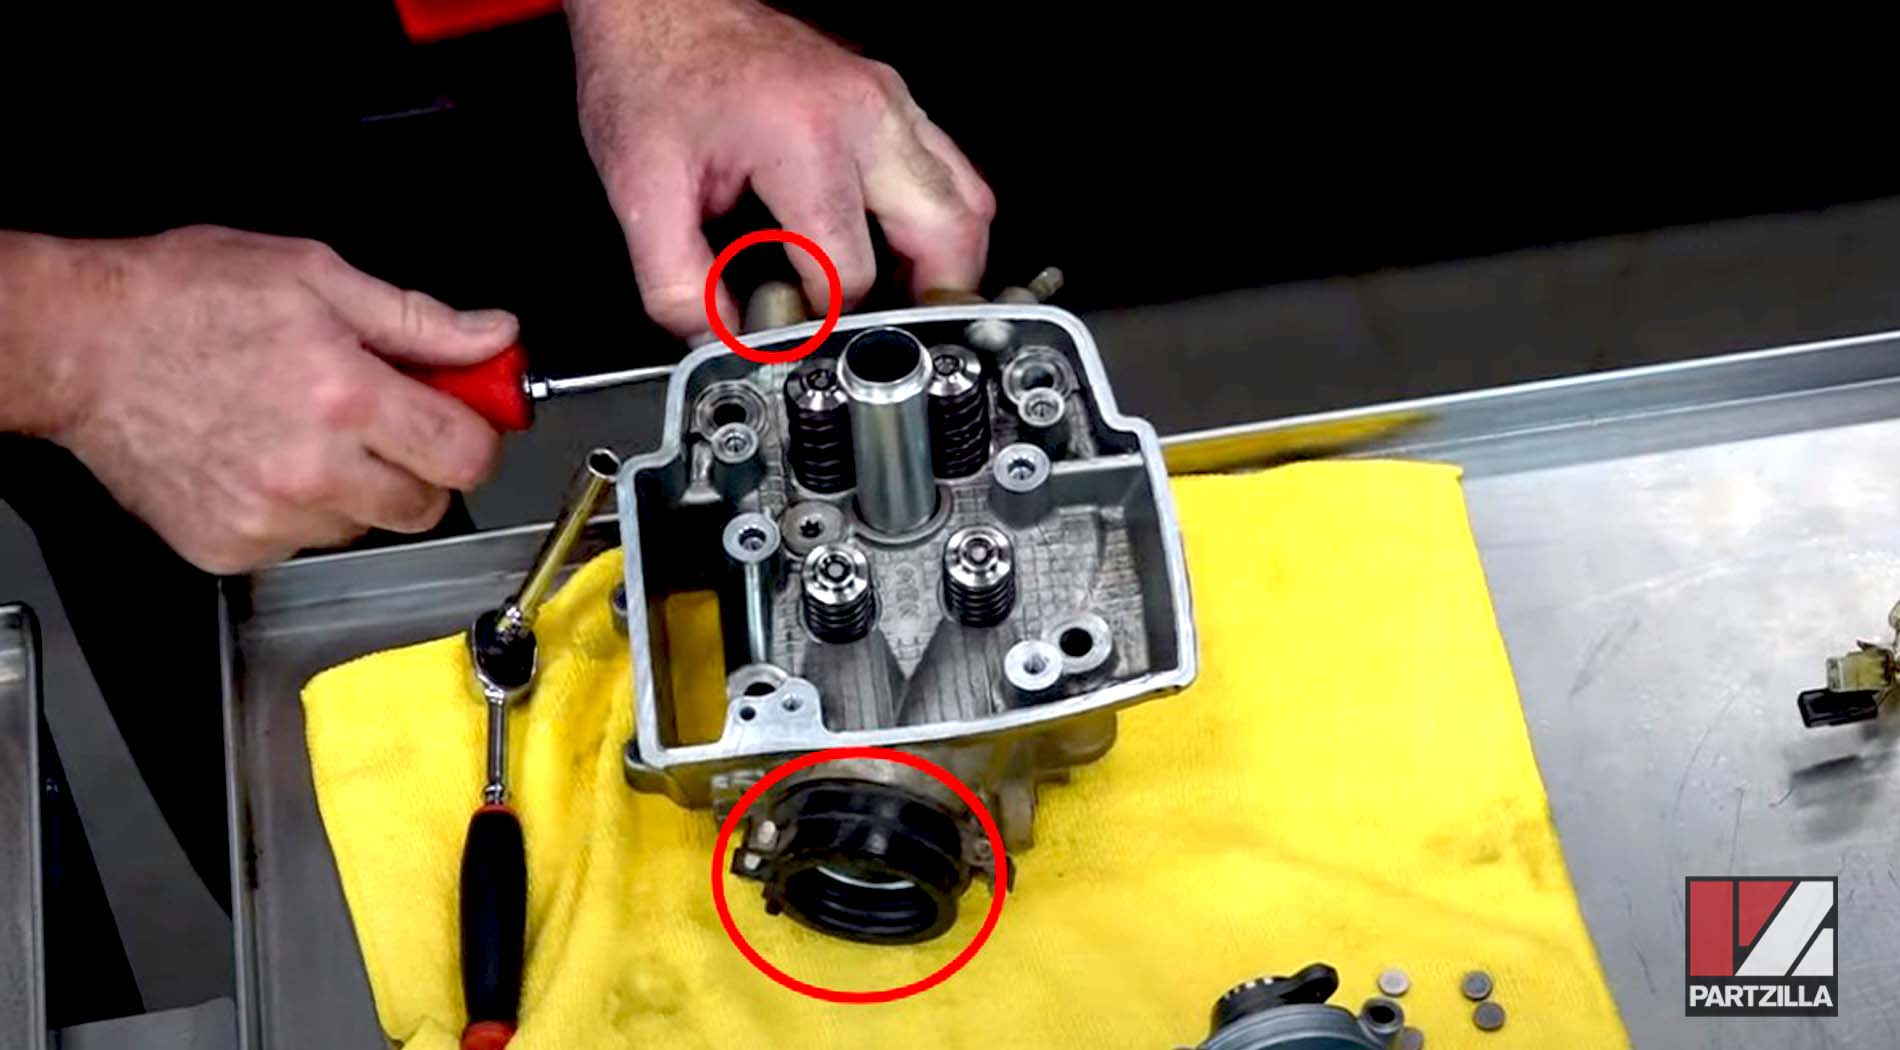
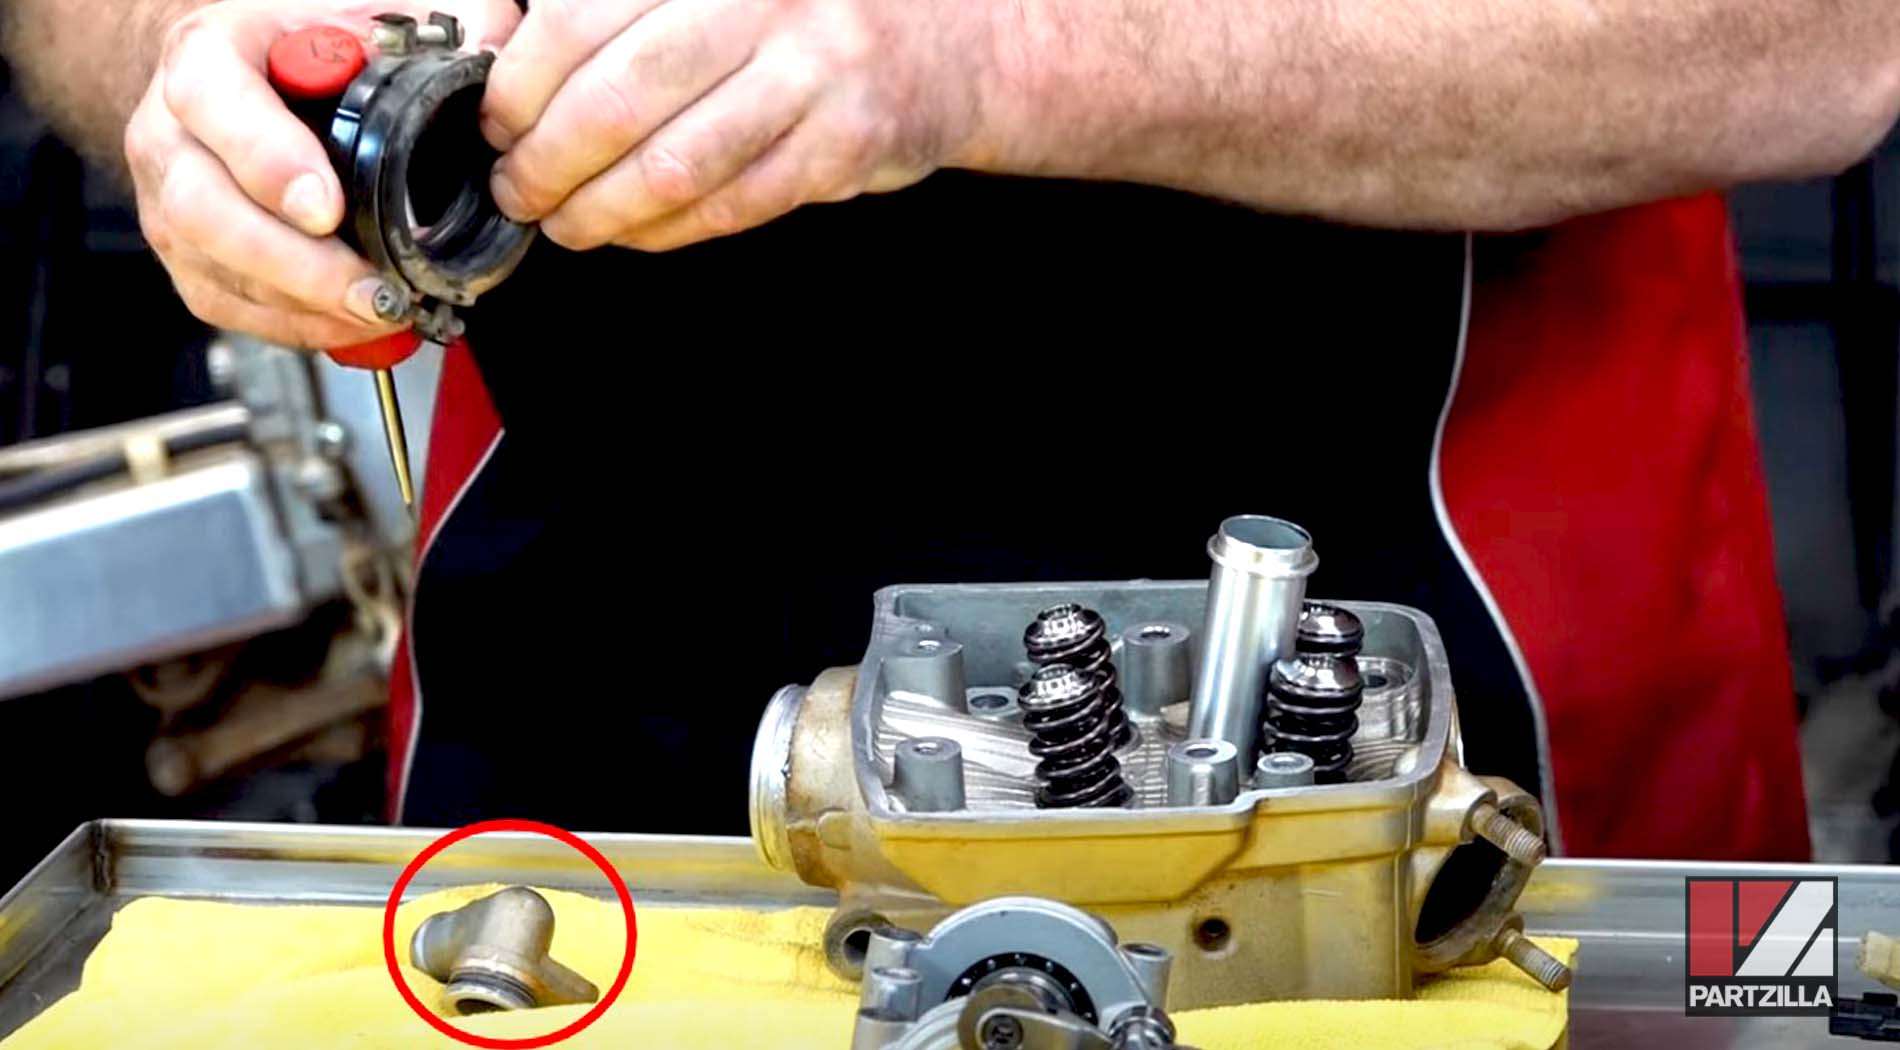
Step 10. Remove the water tube on the side, followed by the intake boot. If the rubber carburetor insulator of the intake boot is hardened, it needs to be replaced.
Watch the clip below to see the valve and valve springs installation segment of our Honda CRF450 head installation and valve adjustment video.
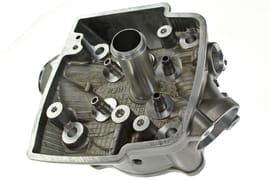
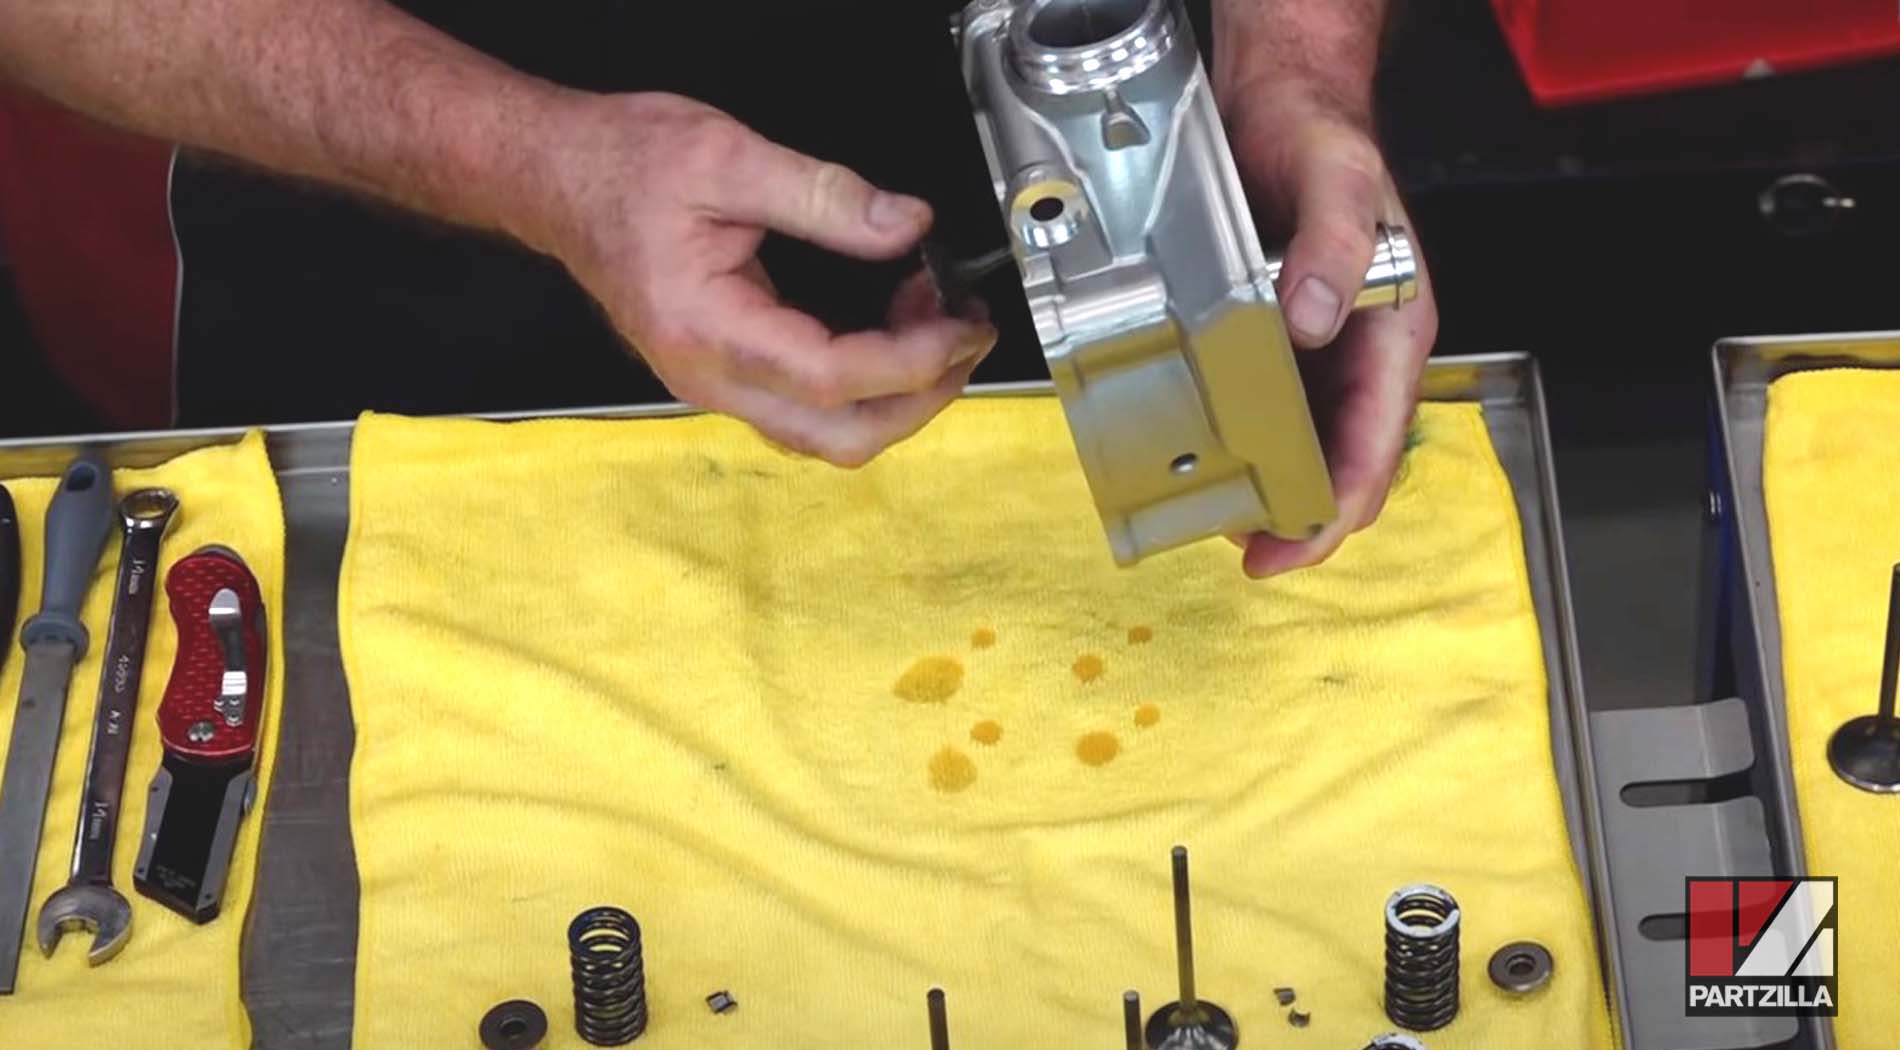
Honda CRF450 Engine Rebuild - Cylinder Head Installation
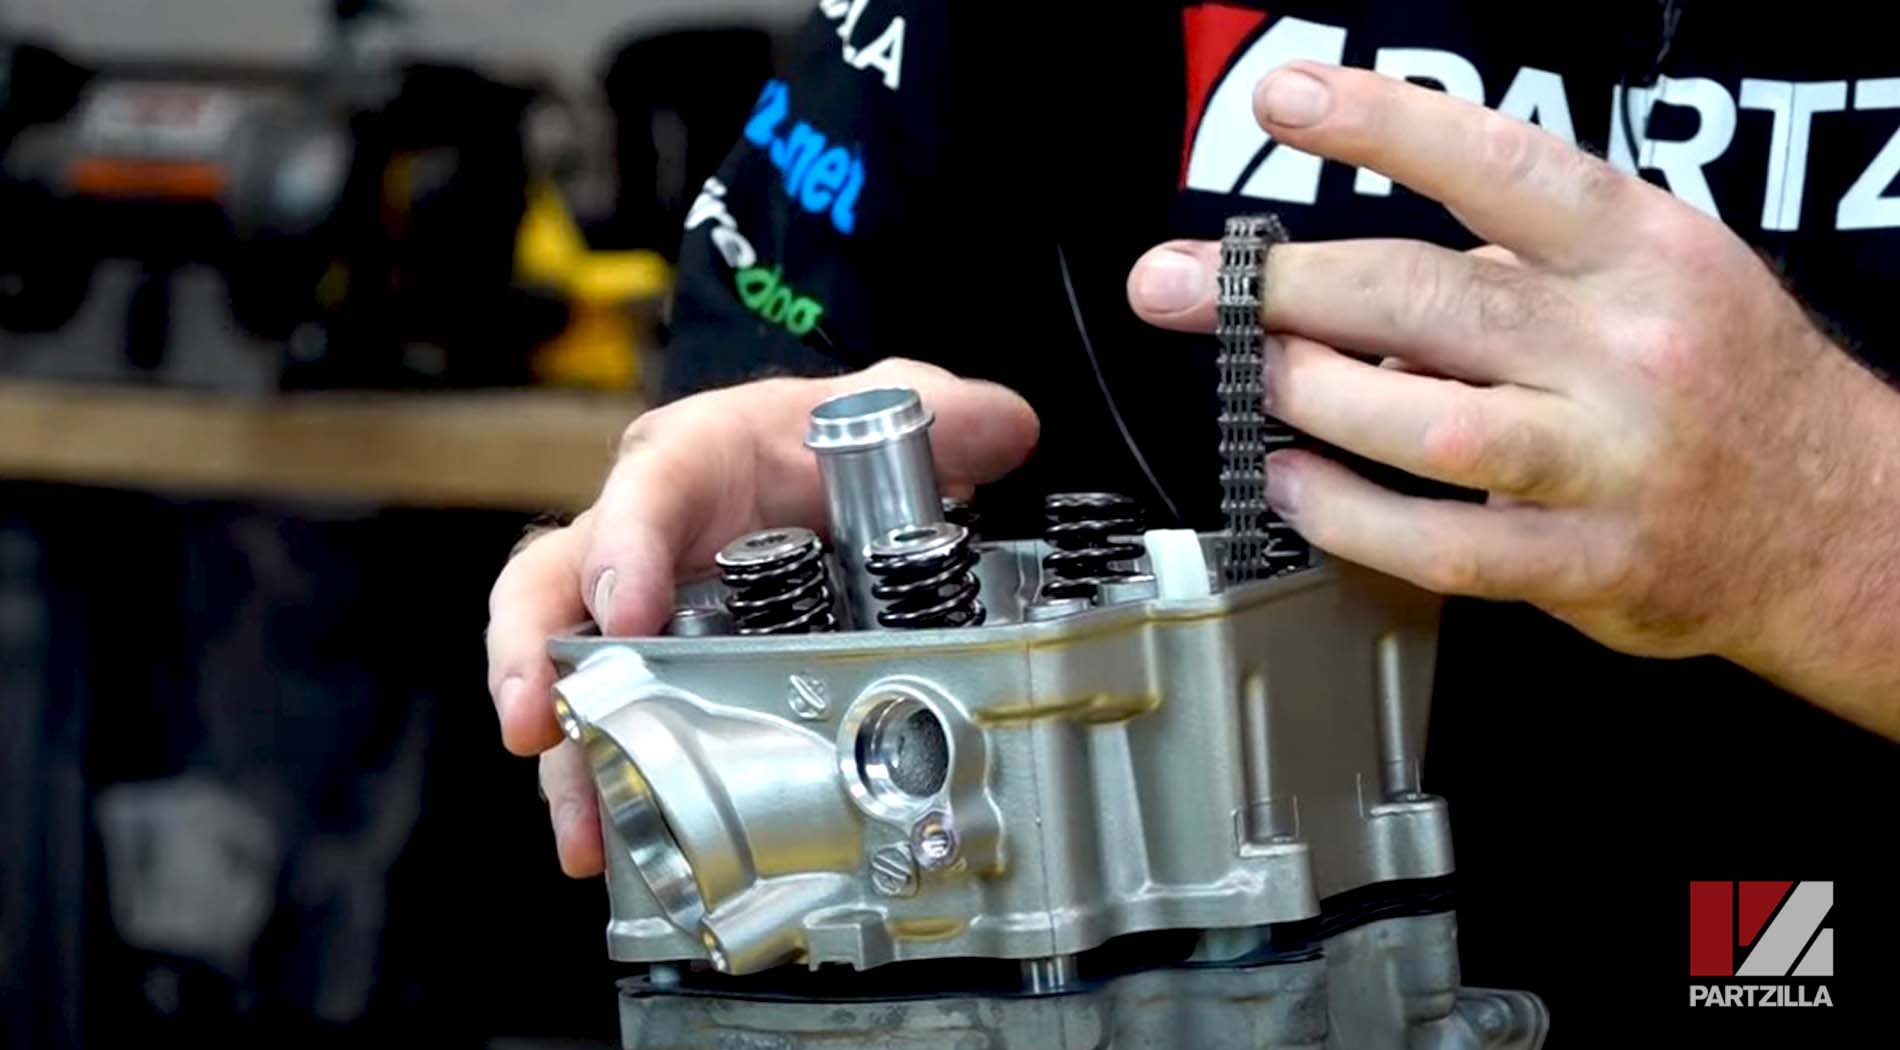
Step 11. Install the cam chain guide into the groove where it belongs.

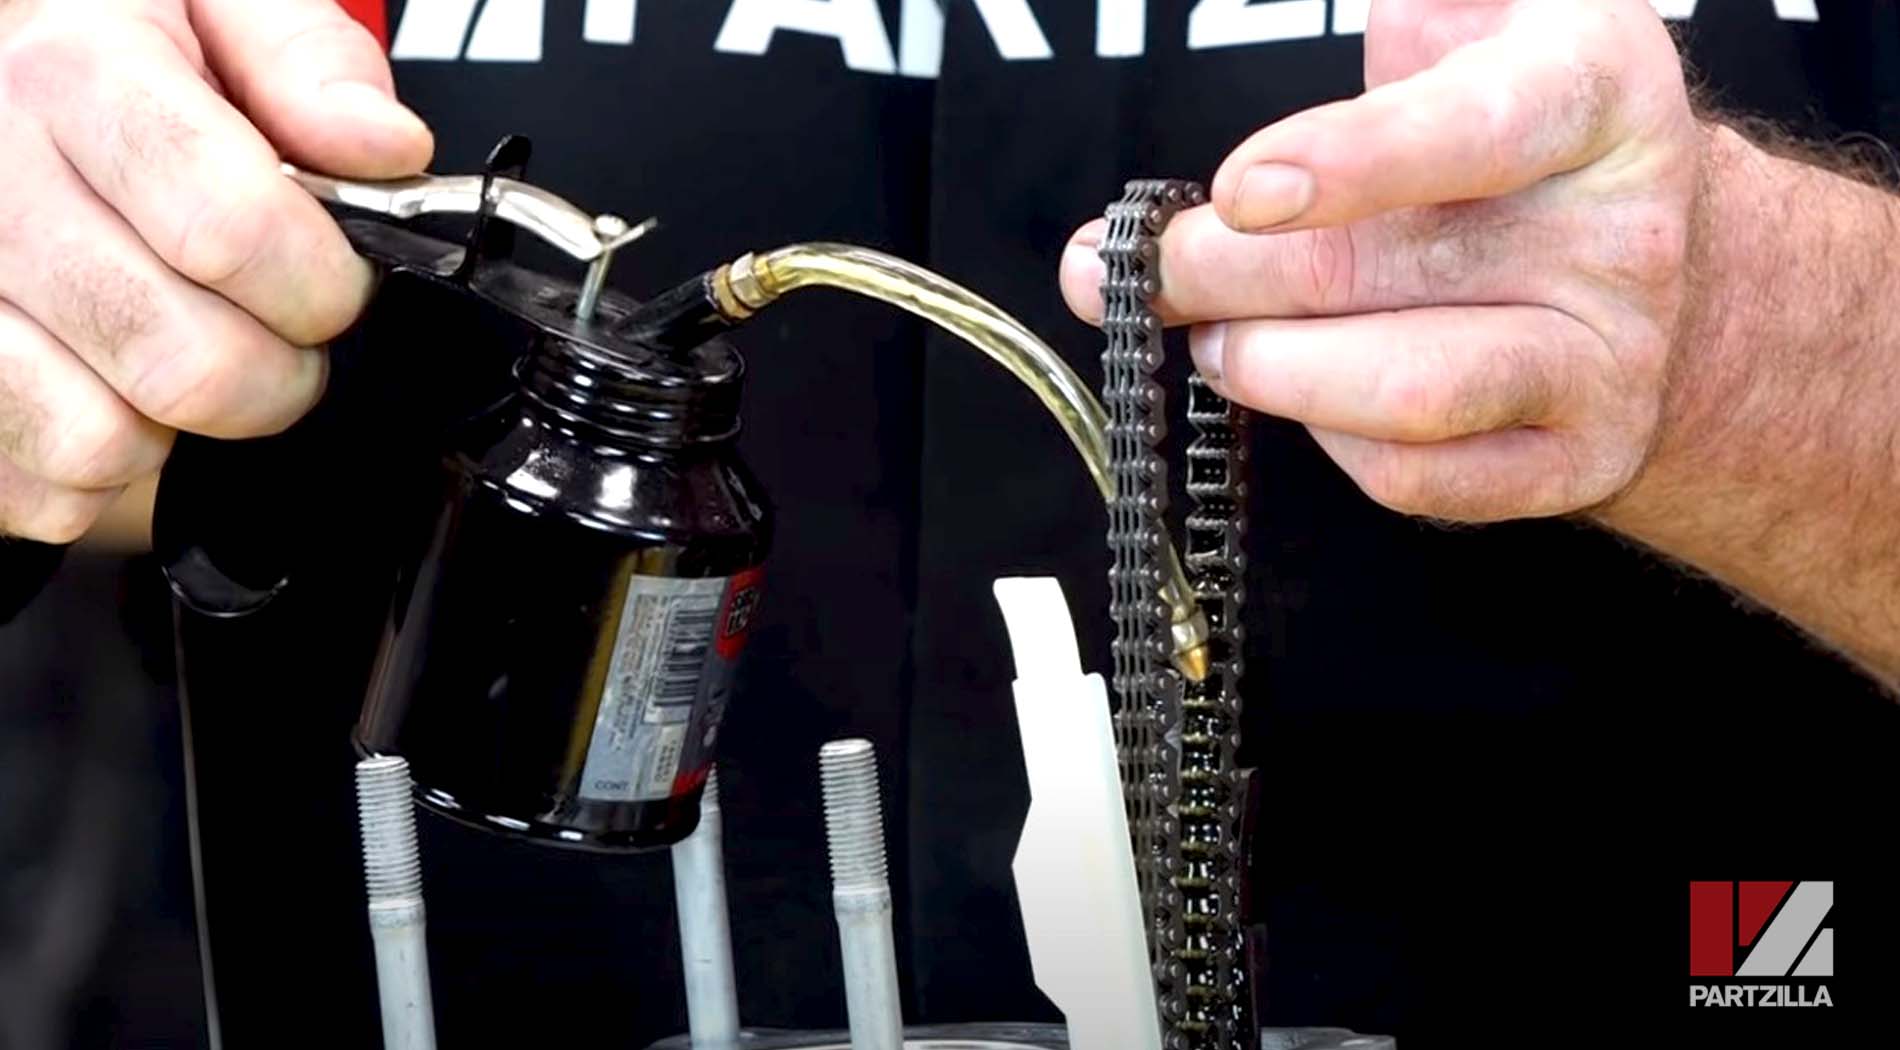
Step 12. Oil up the cam chain, especially if you’re installing a new one, and clean off any excess oil.
Step 13. Install the cylinder head dowels, followed by the head gasket.
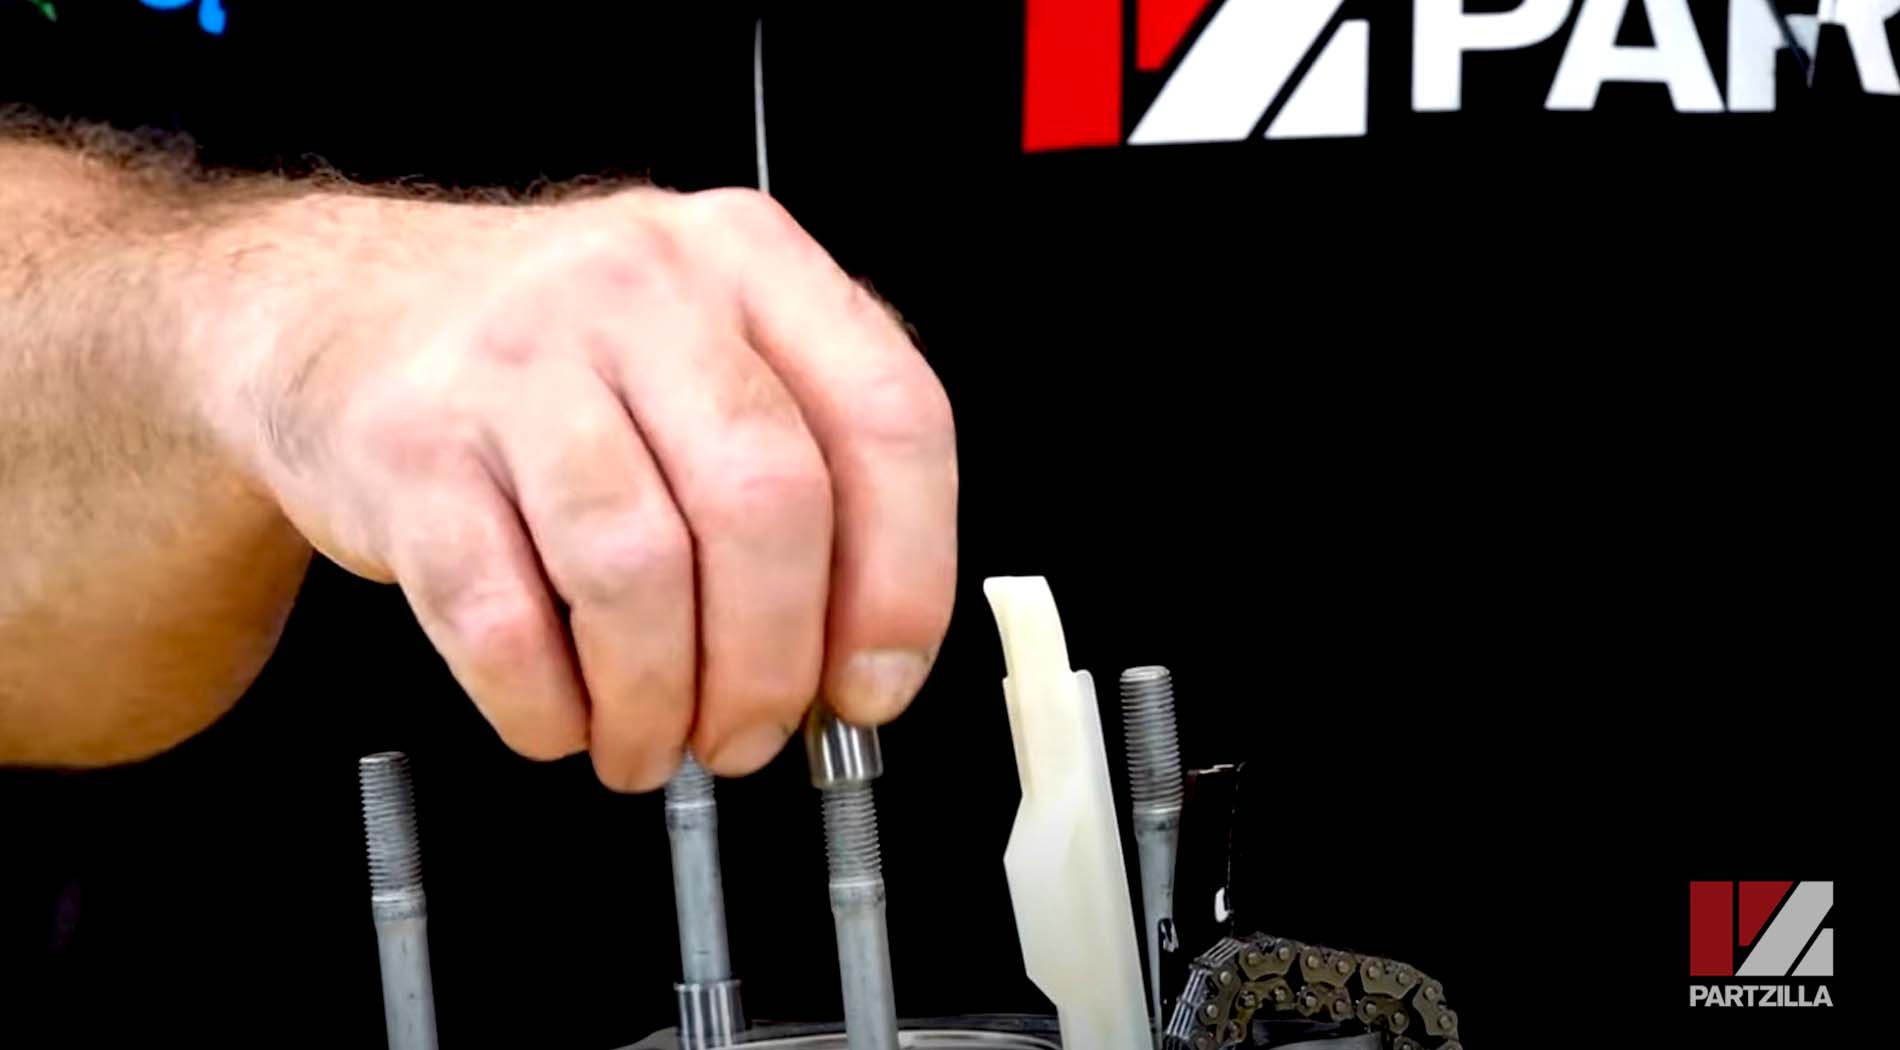
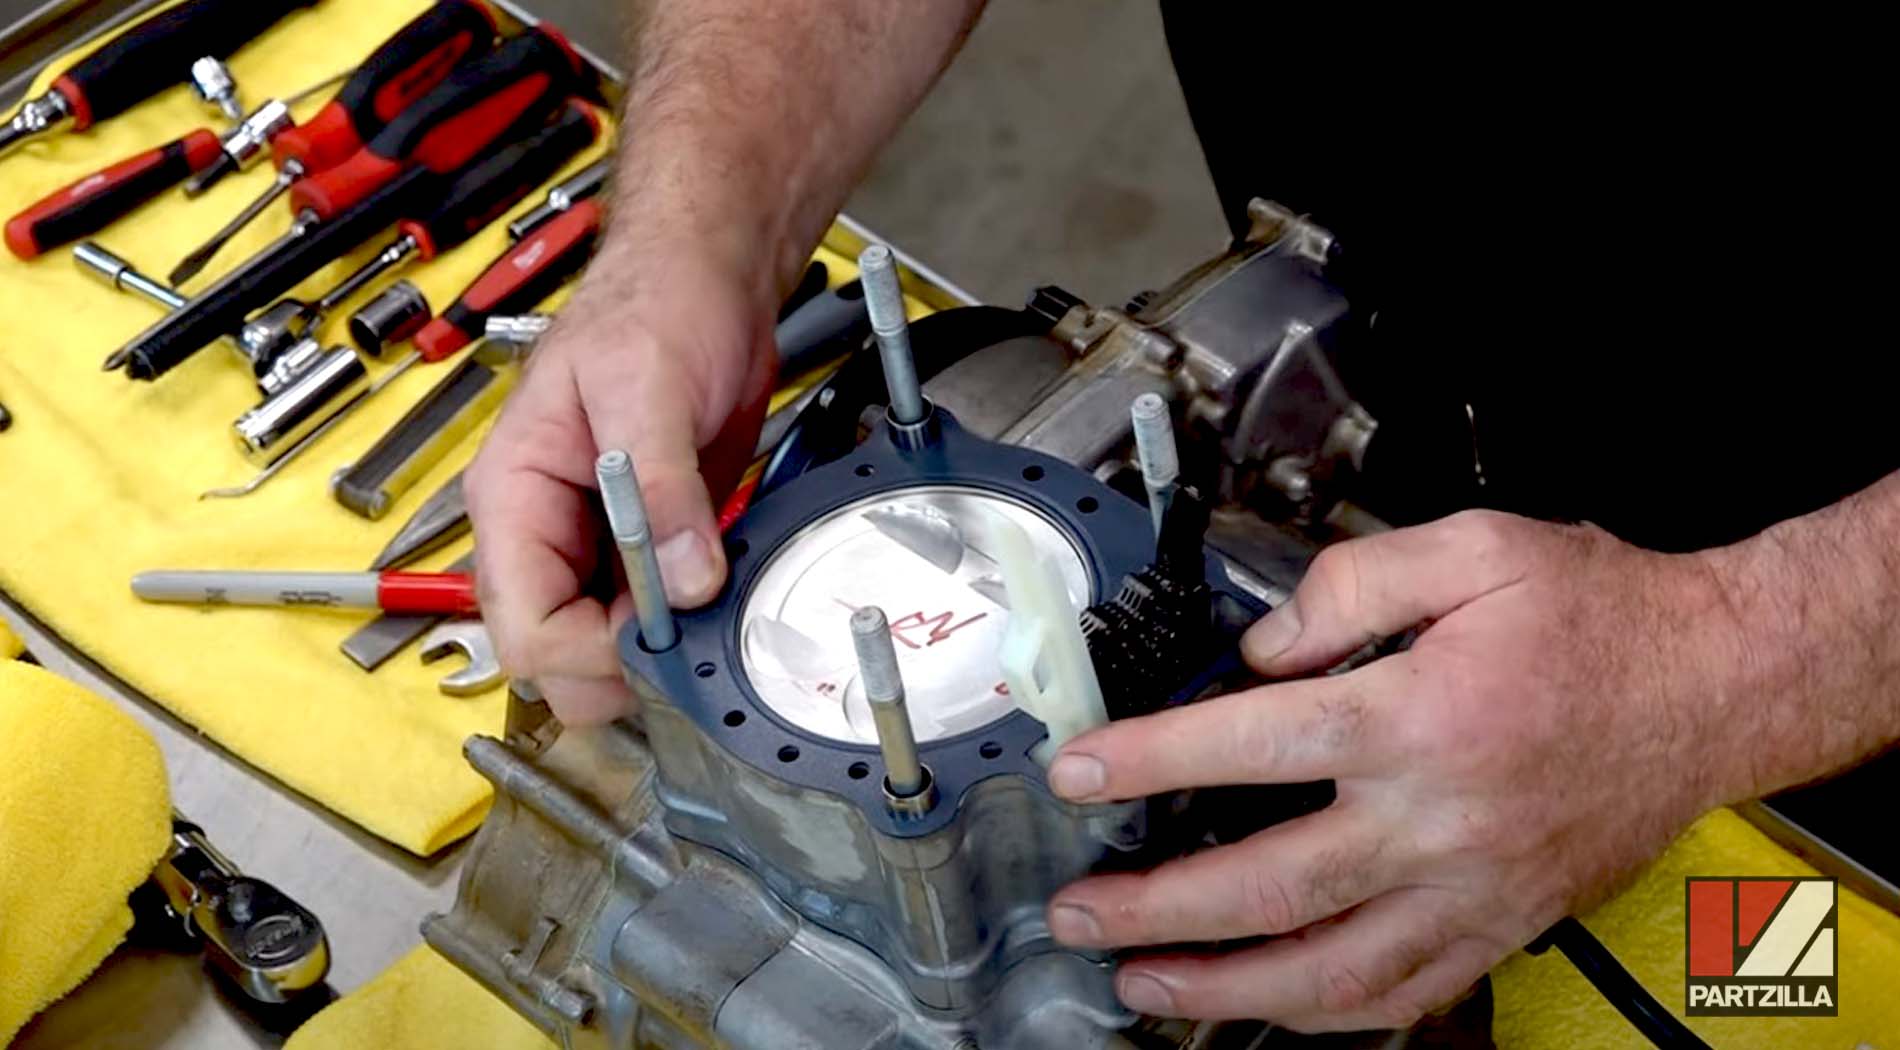
Step 14. Pull the chain up so the guides can move a little and then bring the head down. Wiggle the head just a bit to get it to line up on the dowels.
Step 15. Clean up the main bolt washers, then install them and lube them up so there isn’t any friction throwing off the torque. Next, install the nuts that go on top of the washers and torque them to 44 foot-pounds, starting off with 10 foot-pounds and then going back and forth in a criss-cross pattern to add the remaining torque.
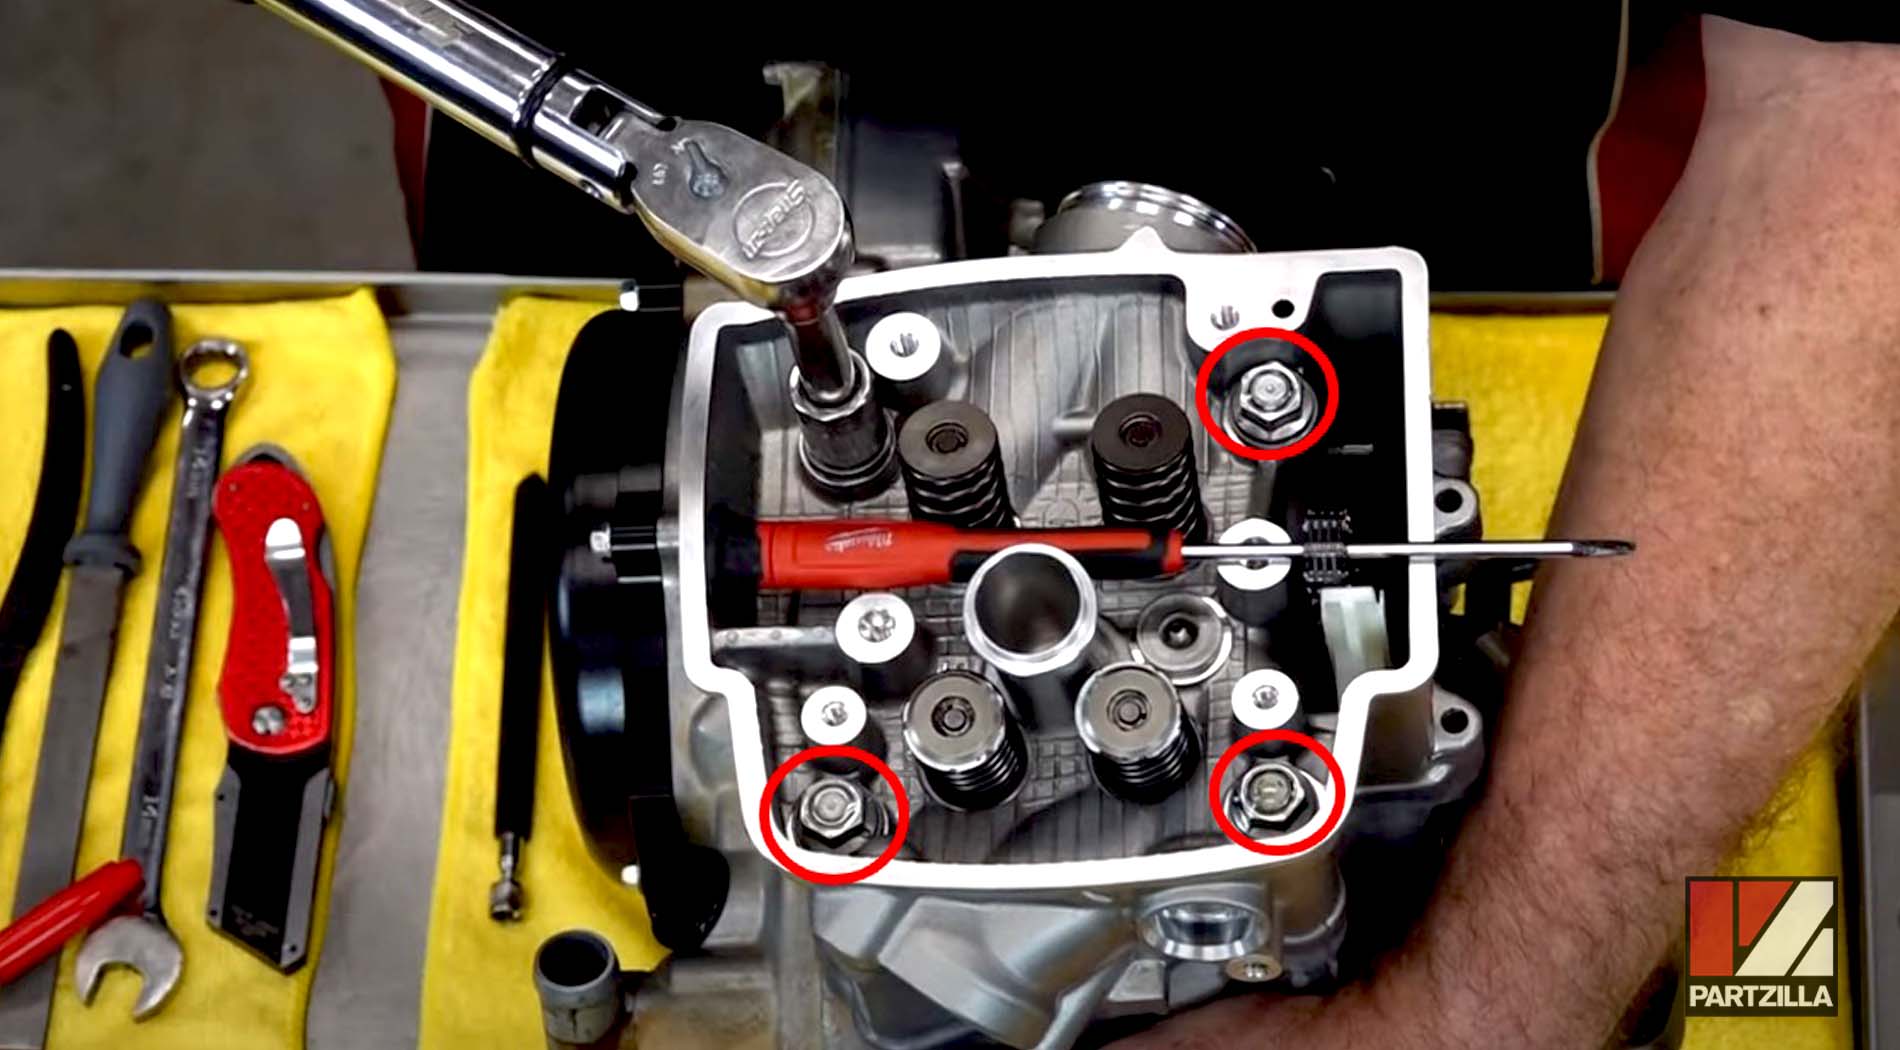
Step 16. Install the remaining 8mm bolts and torque them down to 7 foot-pounds.
Watch the clip below to see the cylinder head installation segment of our Honda CRF450 head installation and valve adjustment video.
Honda CRF450 Engine Rebuild - Cam Installation
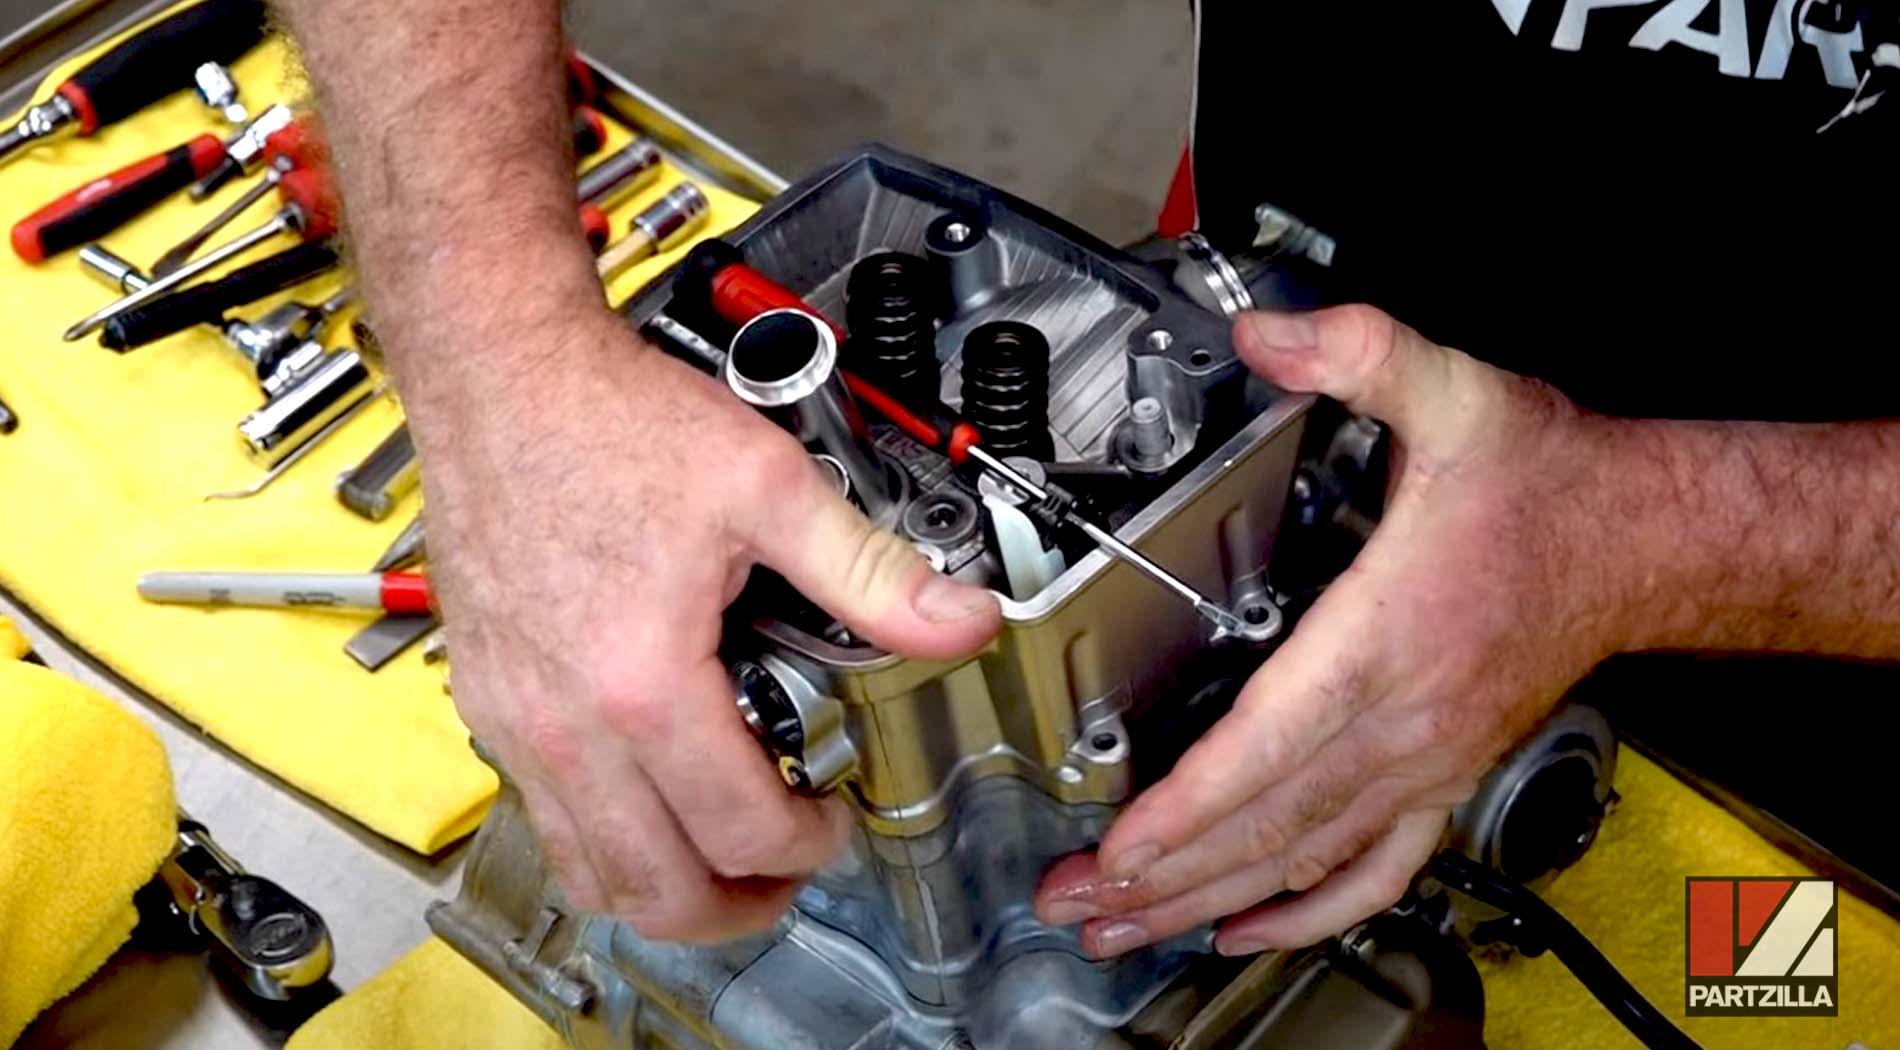
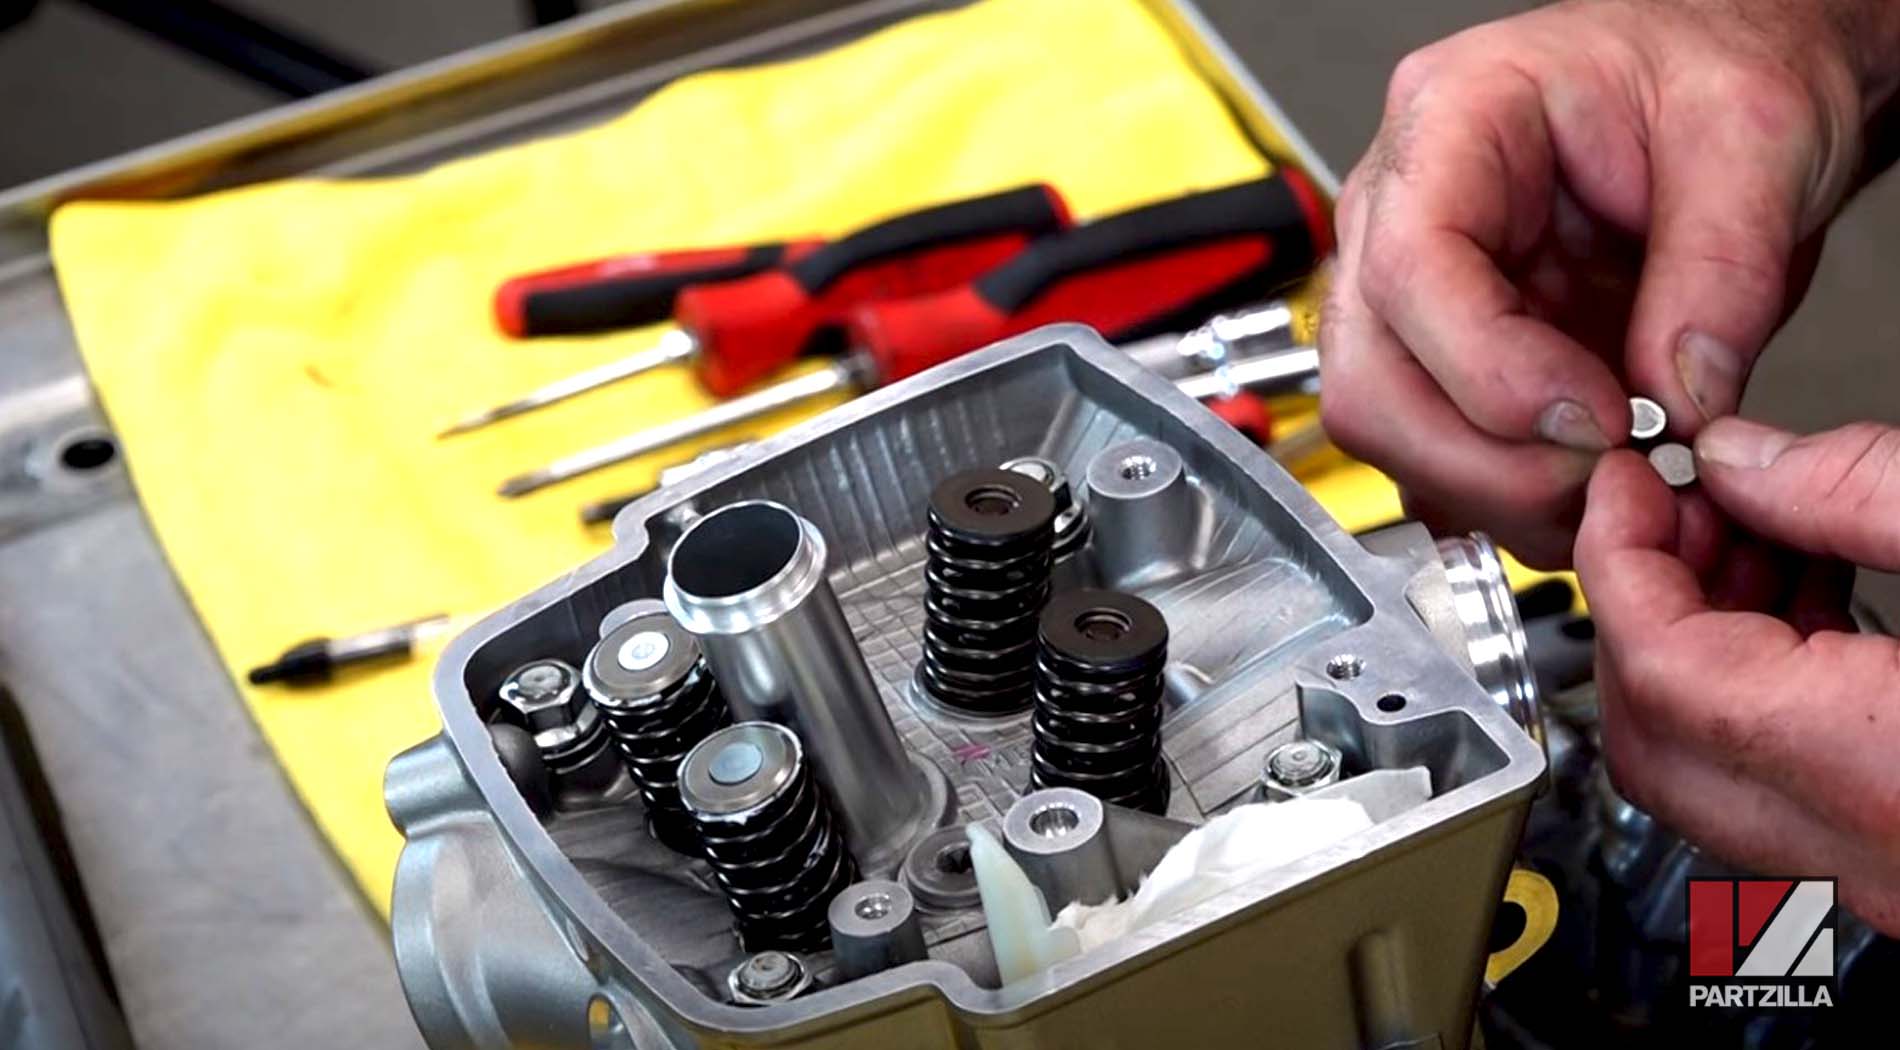
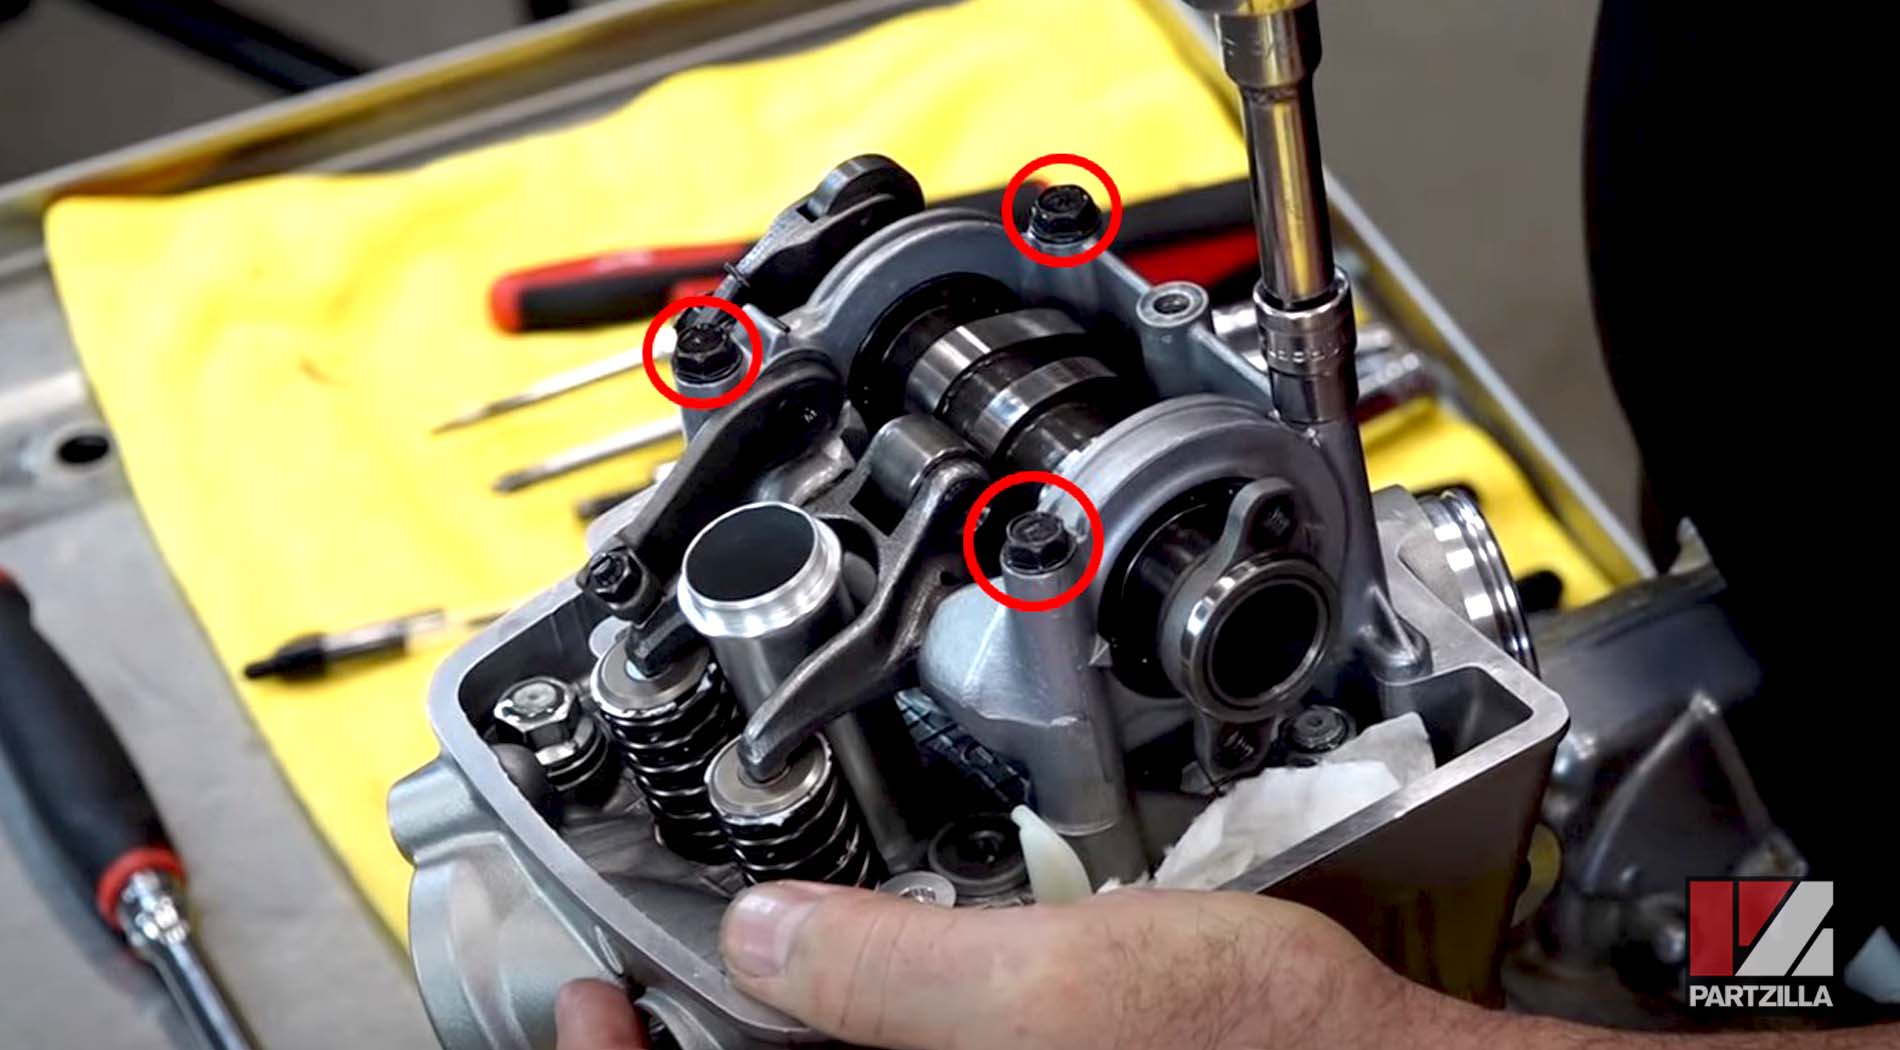
Step 17. Check that the engine is at top dead center, then install the correct size shims on top of the intake and exhaust valves, followed by the cam housing with the lobes facing up.

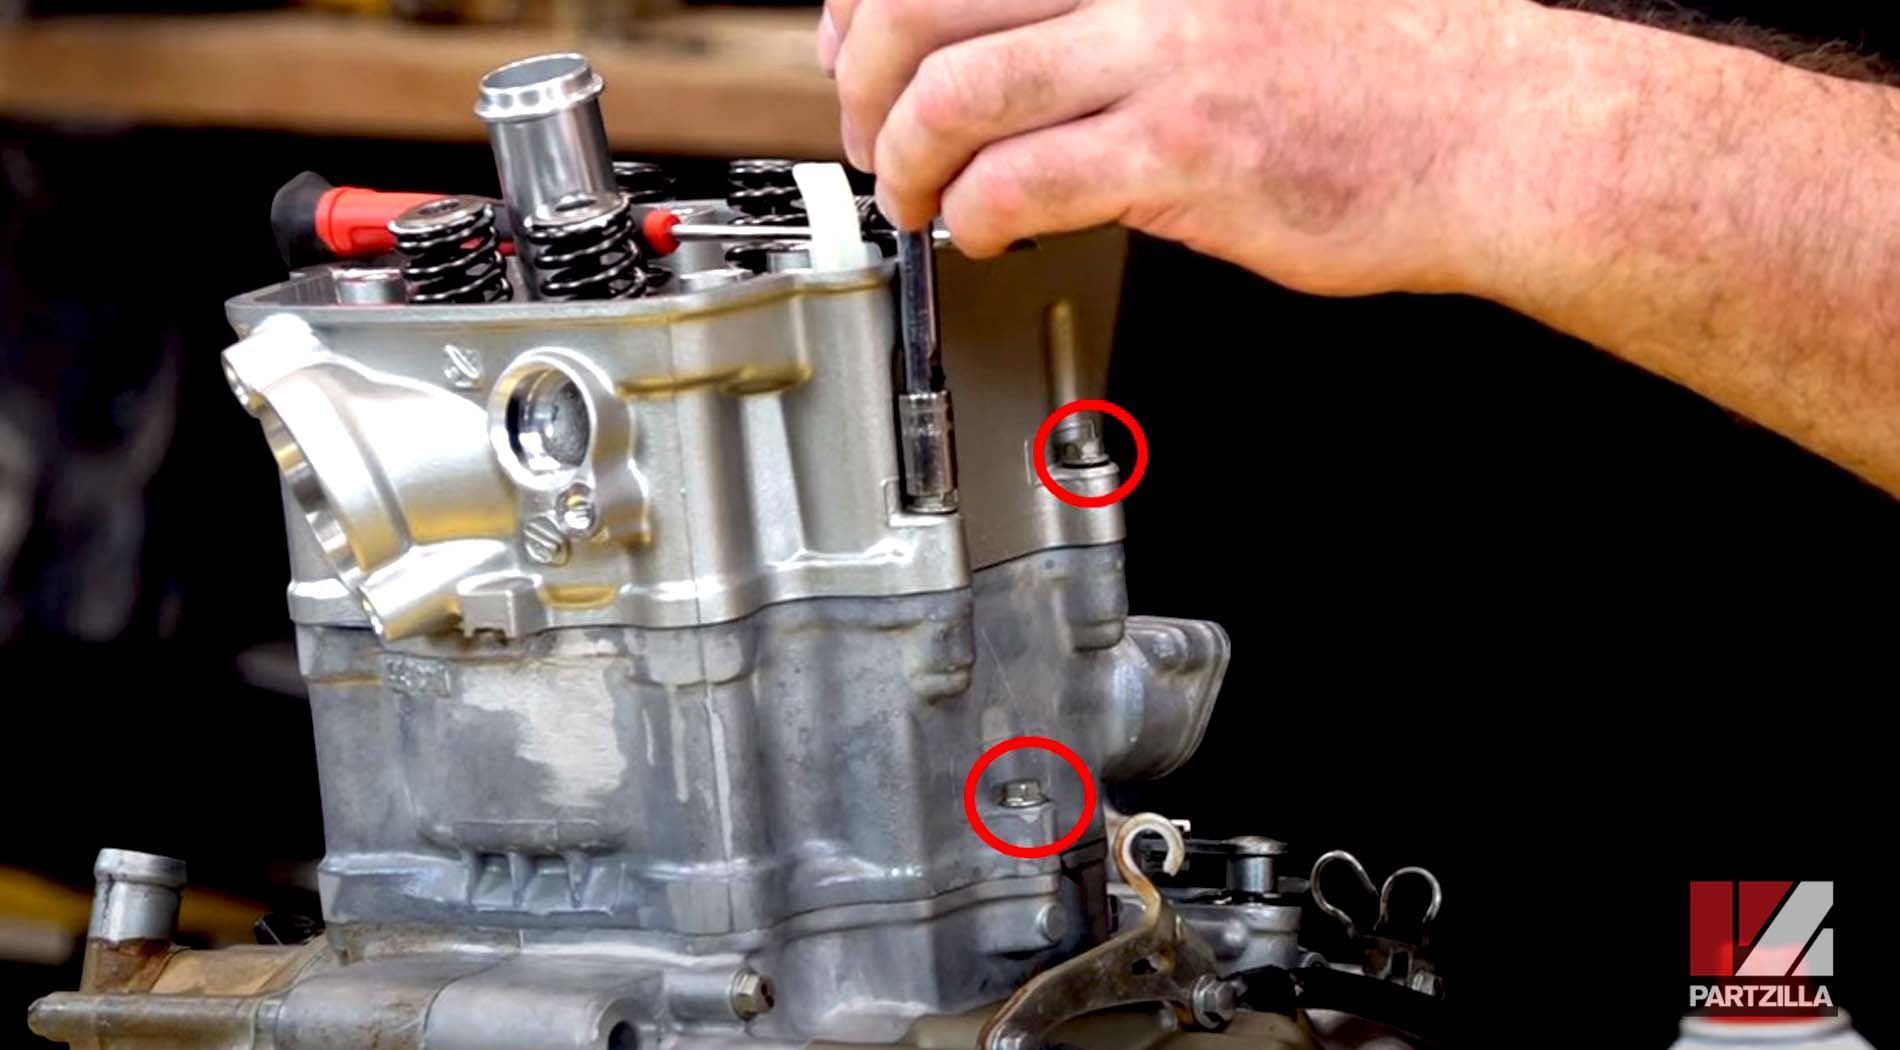
Step 18. Oil up and then install the cam housing bolts, with the long ones in the front and the short ones in the back, then torque the bolts to 10 foot-pounds.
Watch the clip below to see the cam installation segment of our Honda CRF450 head installation and valve adjustment video.
Honda CRF450 Engine Rebuild - Valve Clearance Measurement
Step 19. Use a feeler gauge to measure the valve clearance for each valve. On this engine, we’re looking for six thousandths of an inch on the intake valve and 11 on the exhaust.
Step 20. Add assembly lube to the moving parts, especially on the lobes.
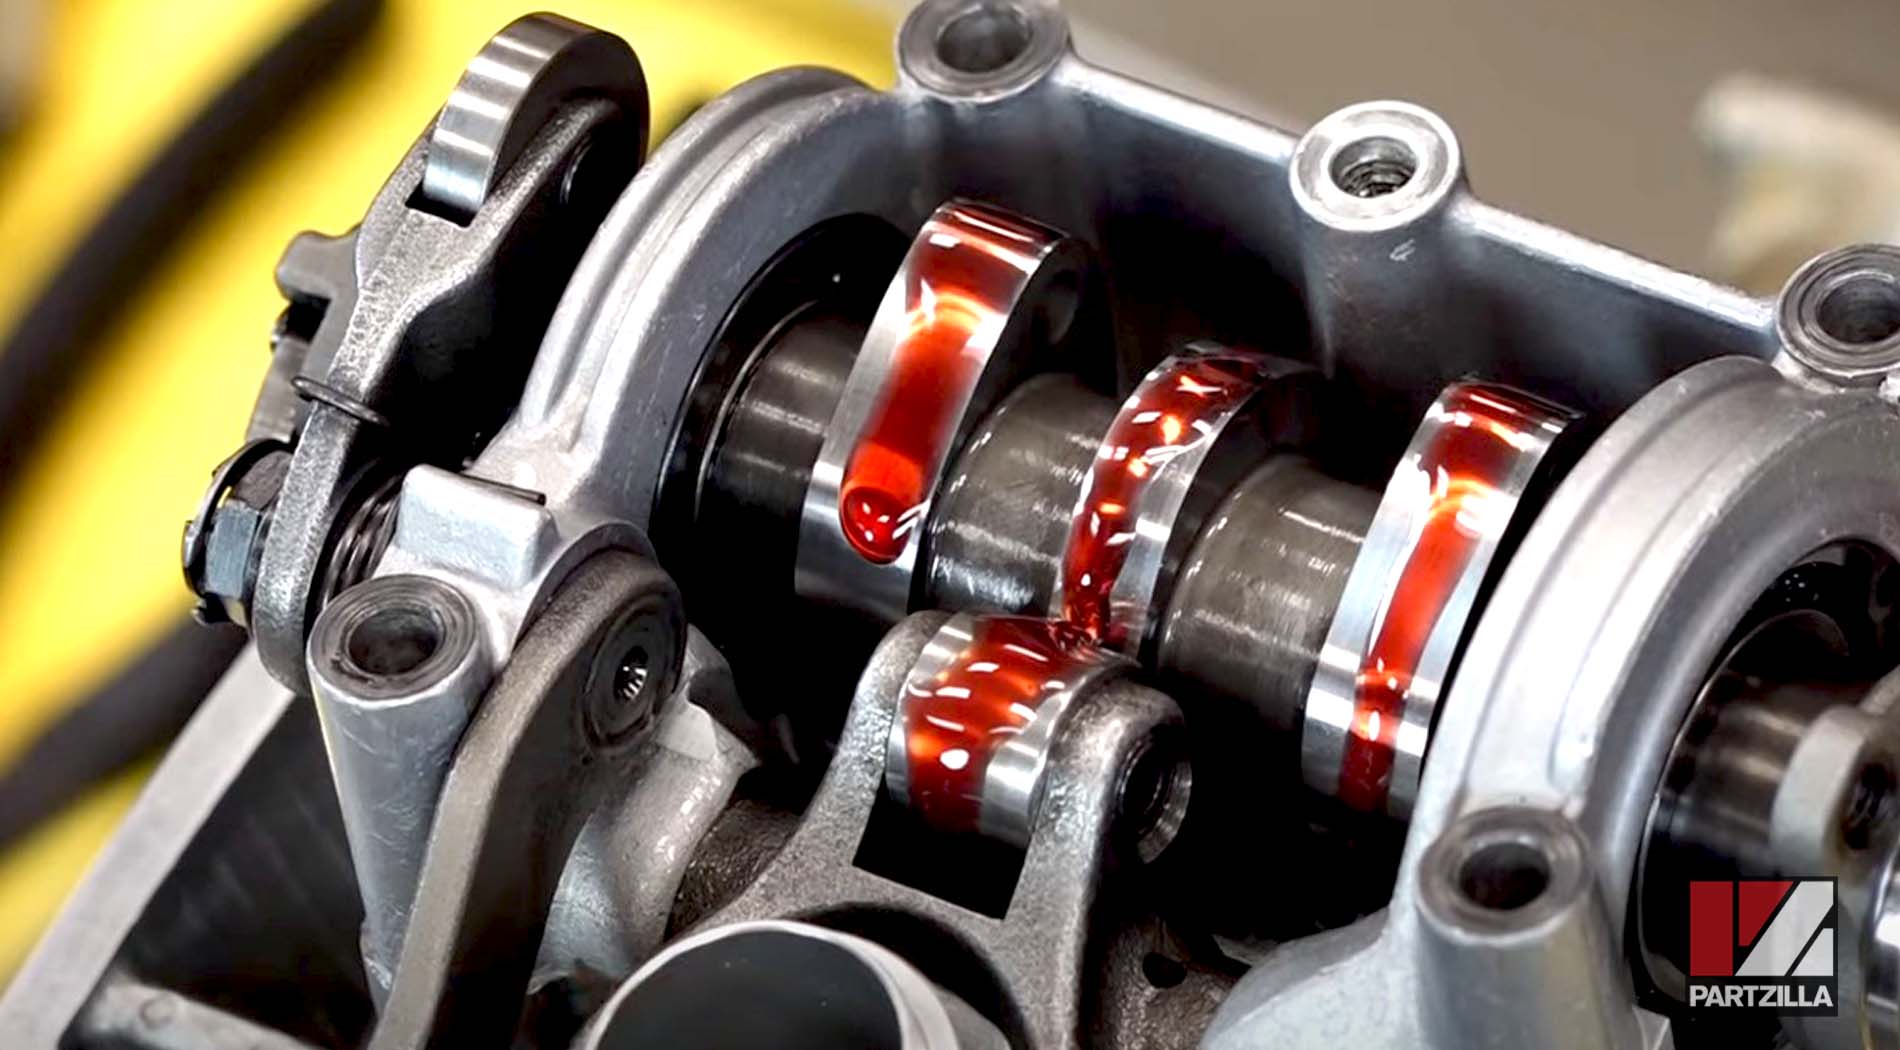
PRO TIP: If you’re putting the engine together, installing it in the machine and starting it up in a day or two, you could use regular oil. But since it's going to be a while before we do a first start, we use assembly lube because its consistency is like honey and it's going to stay on the parts longer.
Watch the clip below to see the valve clearance measurement segment of our Honda CRF450 head installation and valve adjustment video.
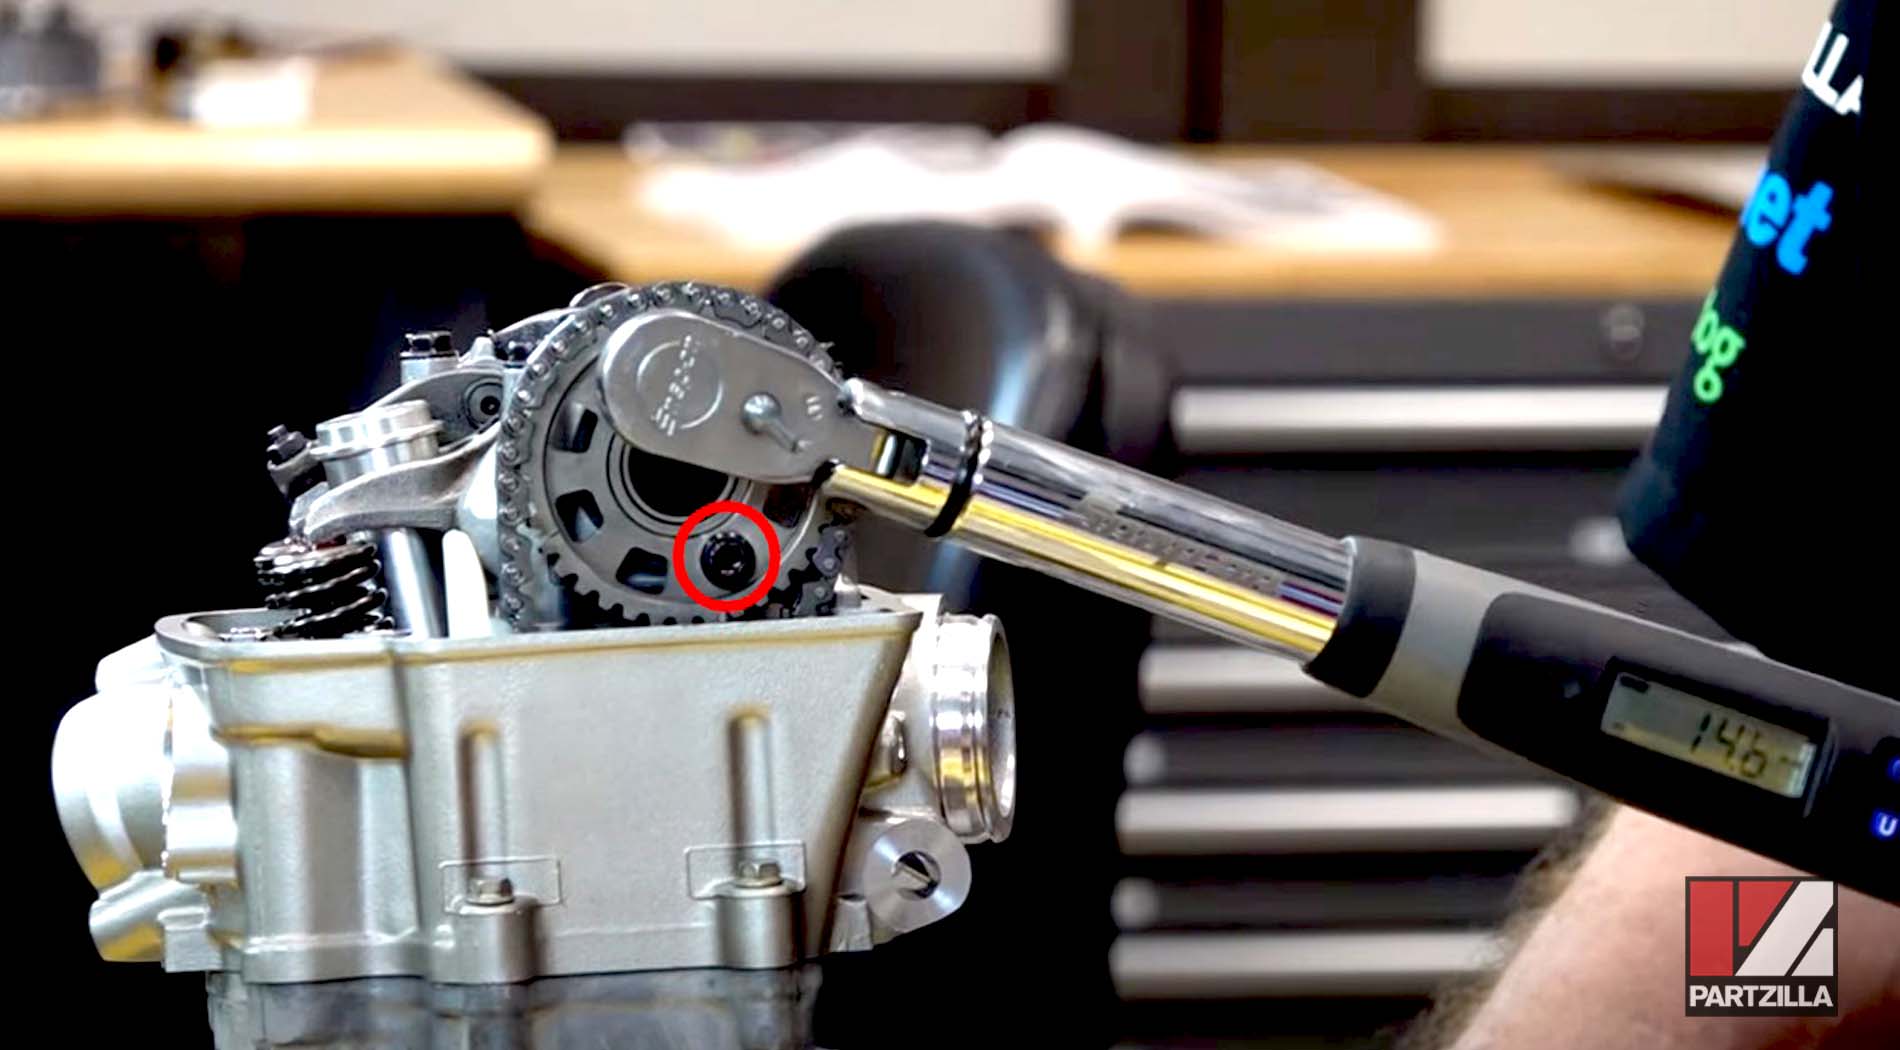
Honda CRF450 Engine Rebuild - Setting the Timing
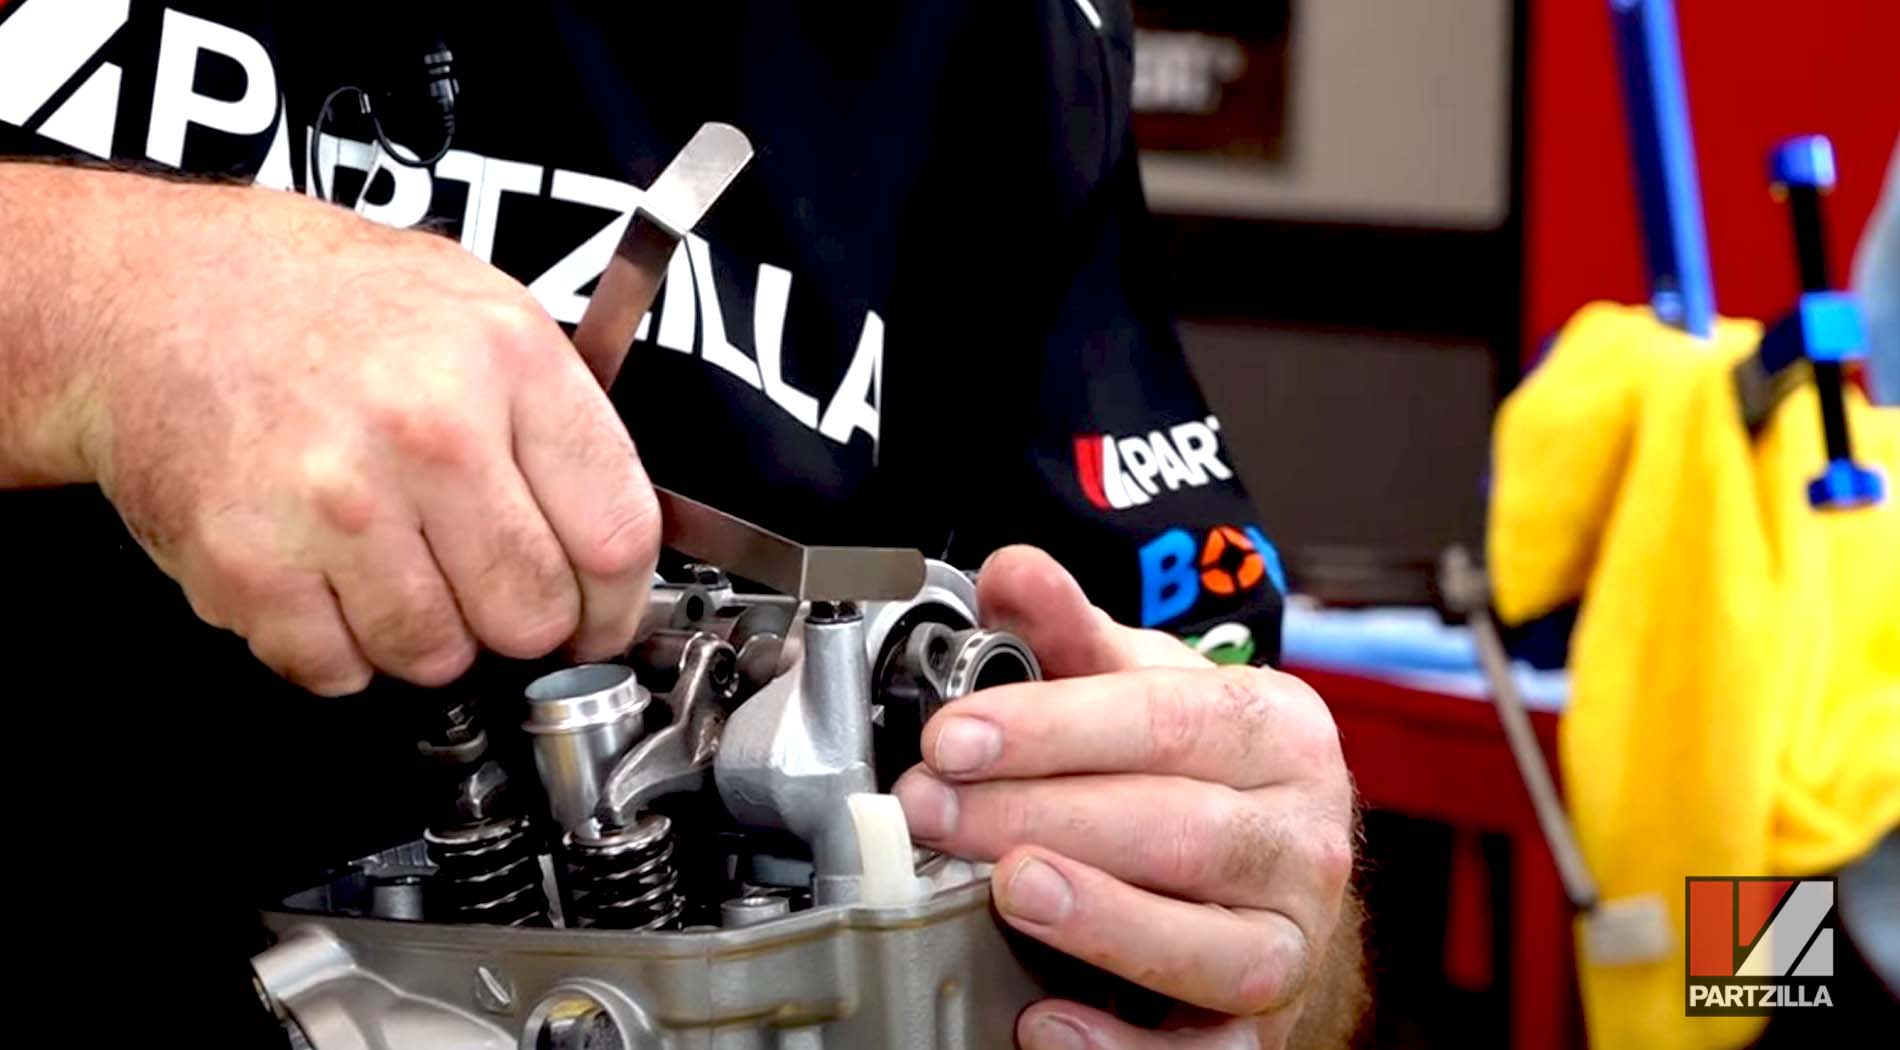
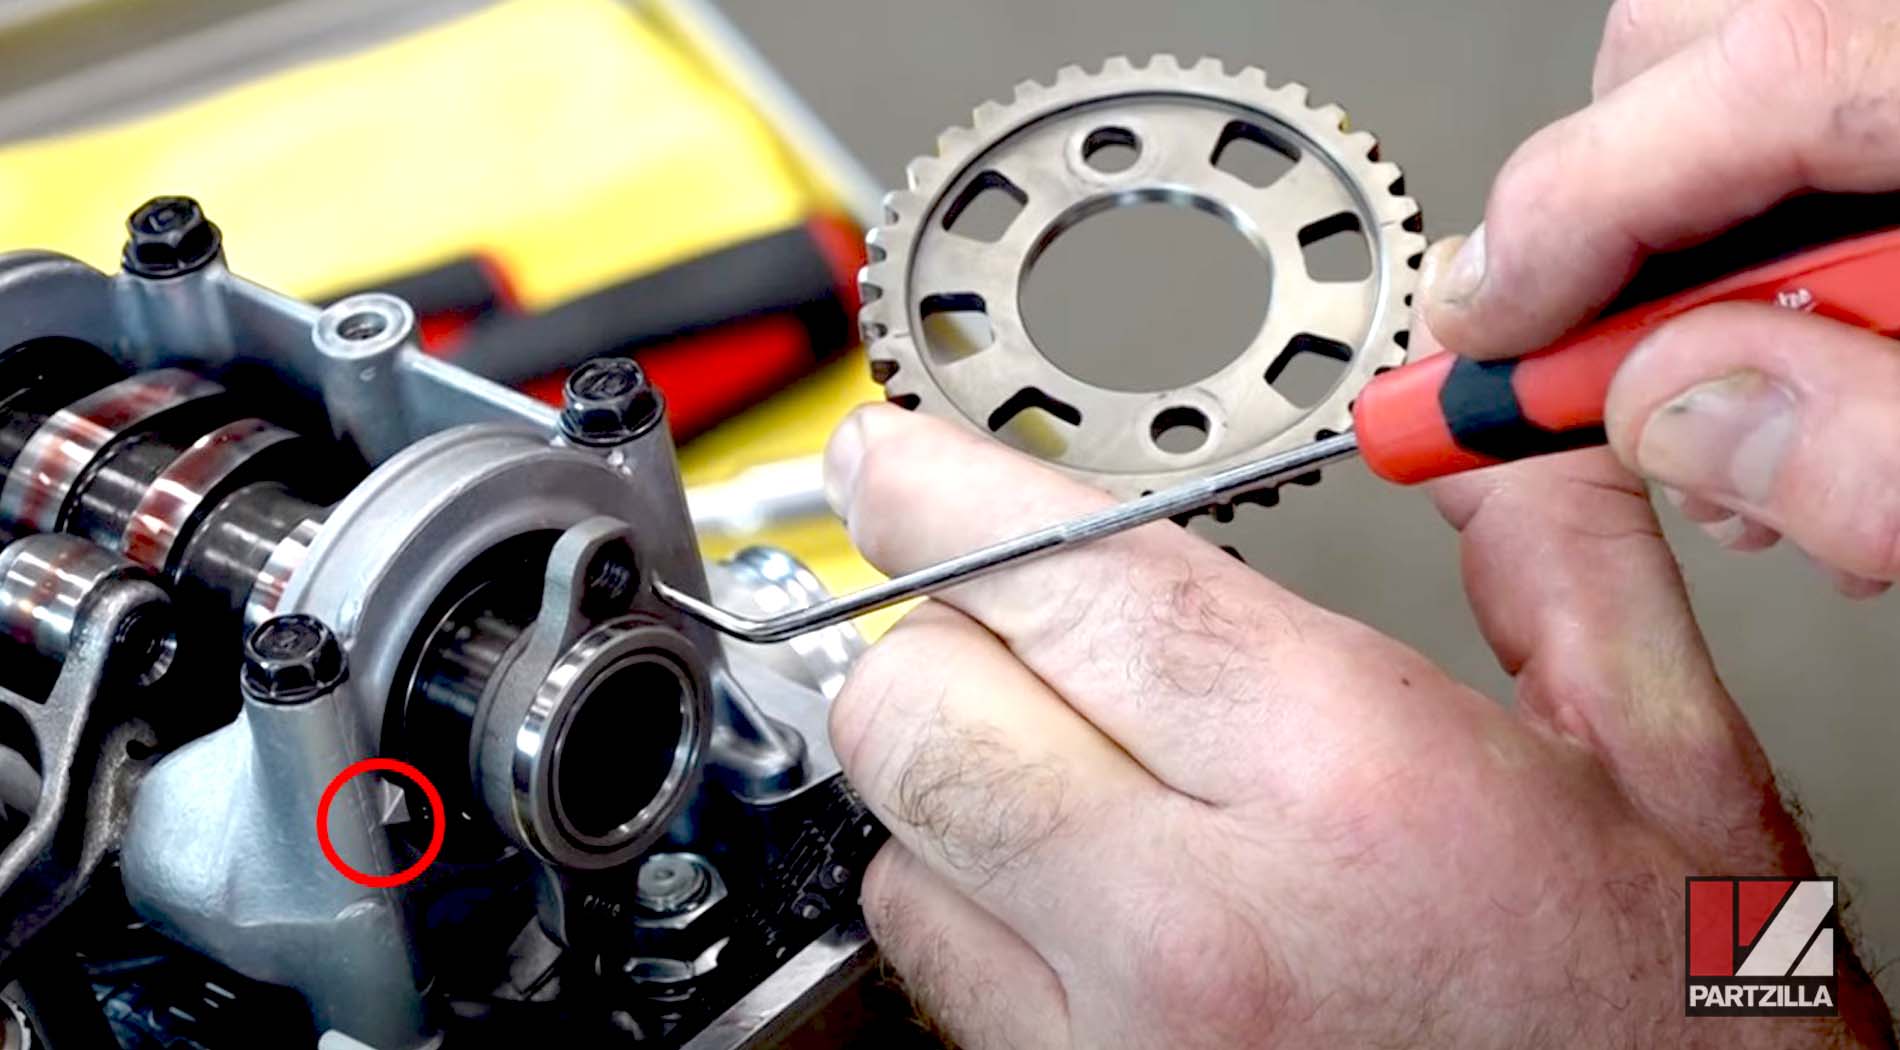
Step 20. Install the timing gear by first making sure the engine is at top dead center and bringing the cam chain back up. Next, clean the gear with contact cleaner, then walk the gear around the cam chain and line up the two timing marks on the gear with the two arrows on the cam housing.
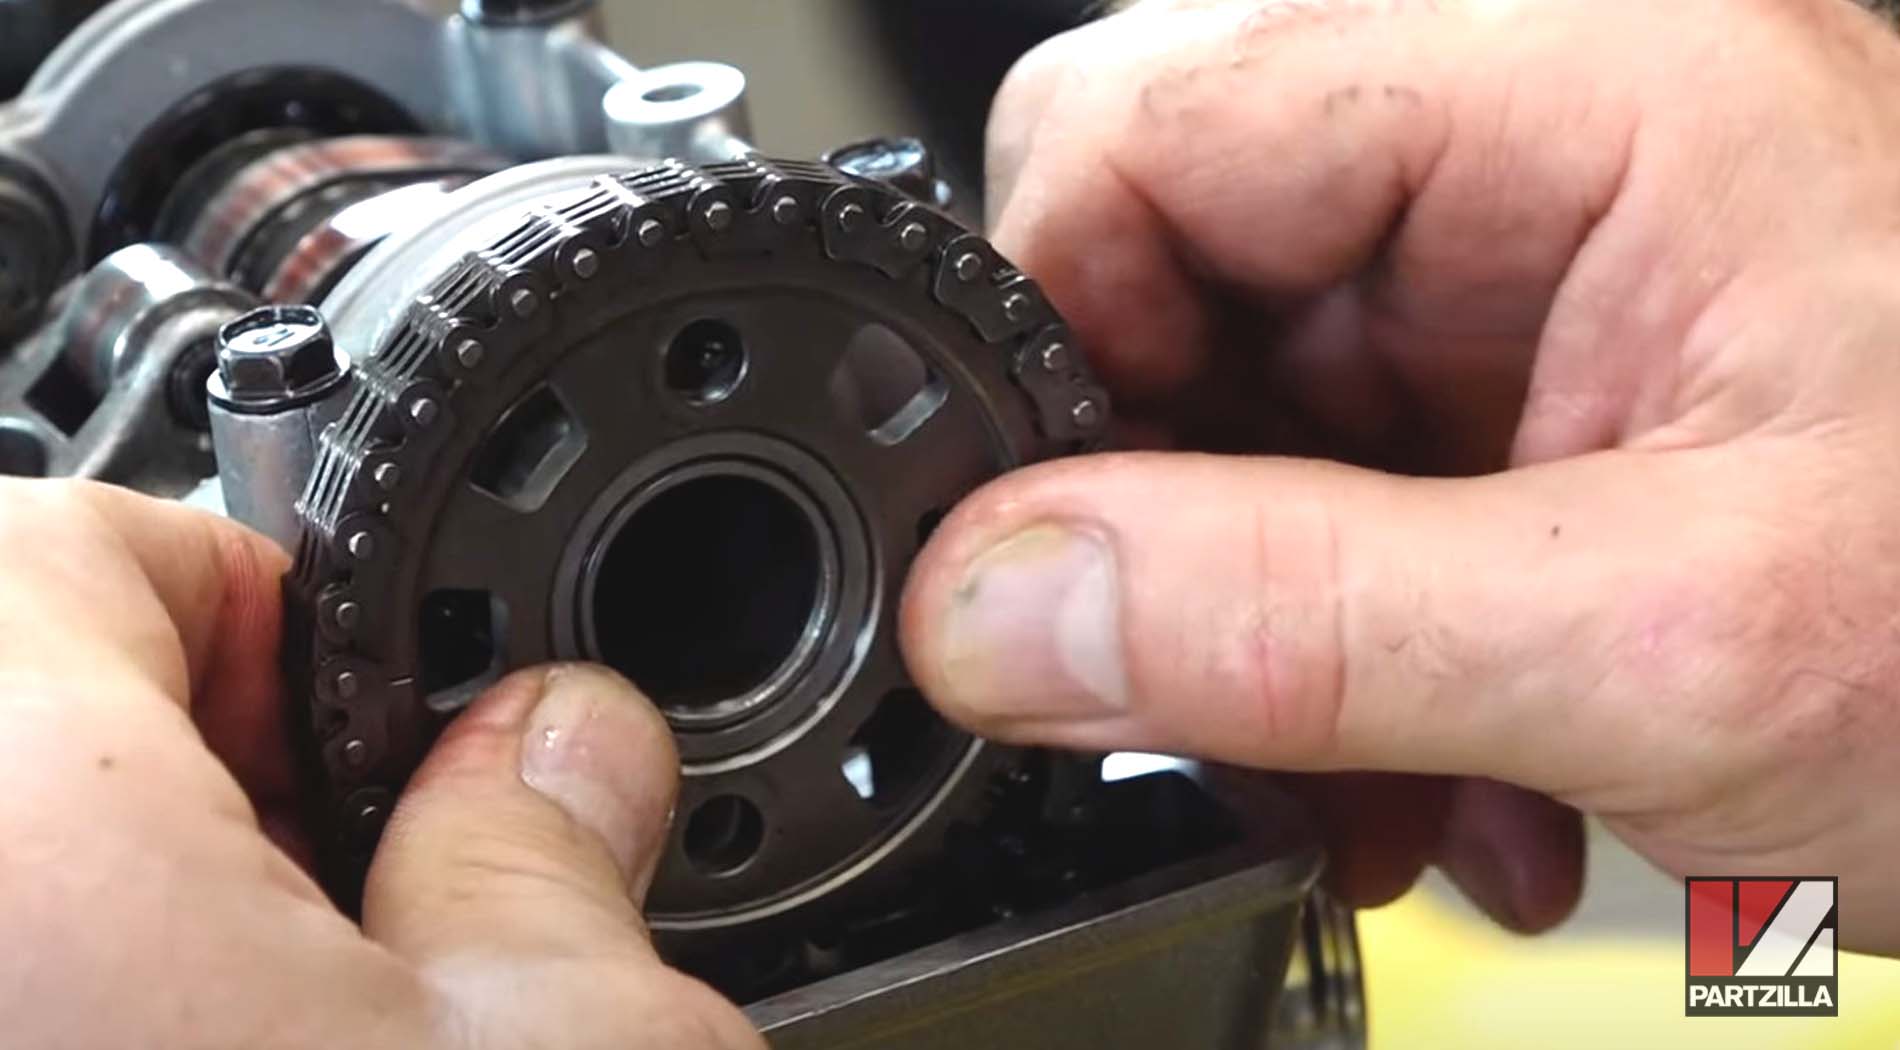
Step 21. Add some blue threadlocker to the bolts that hold the timing gear in place, then hand-tighten them without torqueing them down. Make sure any old threadlocker is cleaned off first.

Watch the clip below to see the timing setting segment of our Honda CRF450 head installation and valve adjustment video.
Honda CRF450 Engine Rebuild - Cam Chain Tensioner Installation
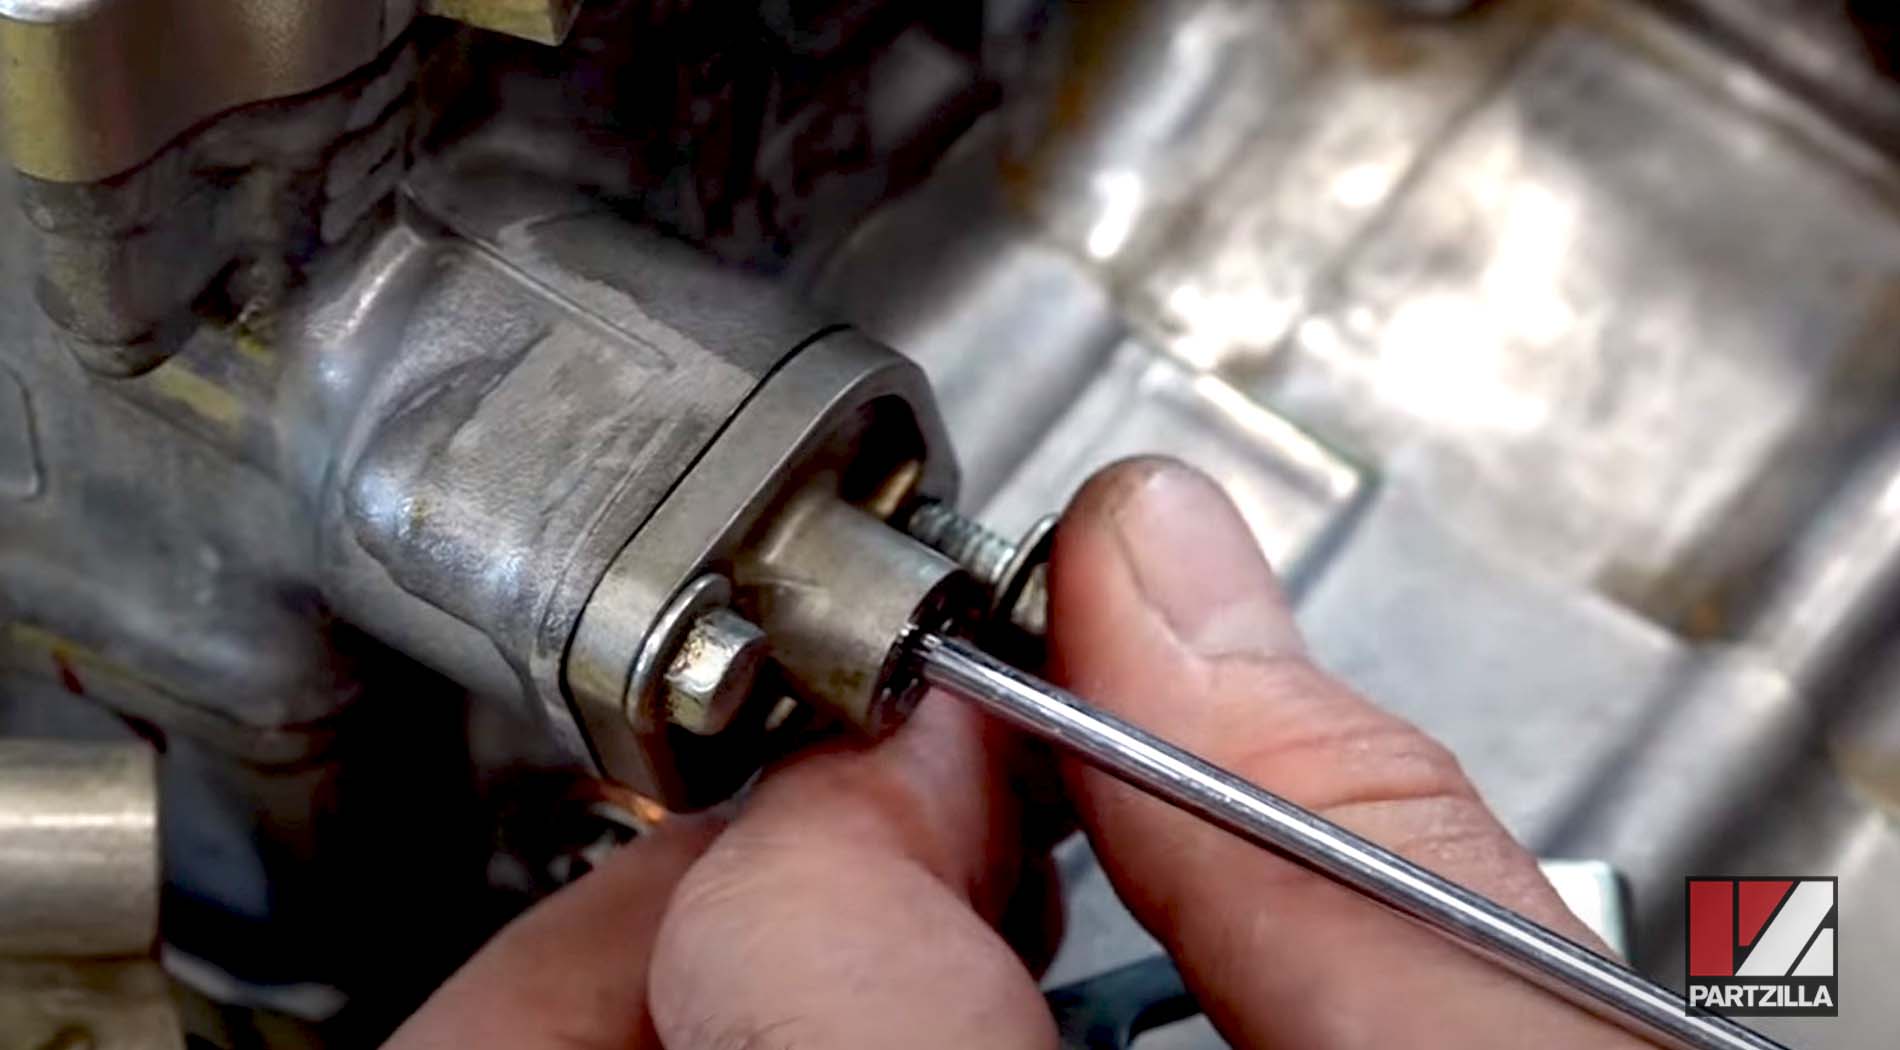
Step 22. Install the cam chain tensioner by removing the end bolt to pull the tension back with a flat-blade screwdriver. Wind the tensioner in and hold it there until you get it fully installed, then release it. Torque the tensioner bolts to 7 foot-pounds each.
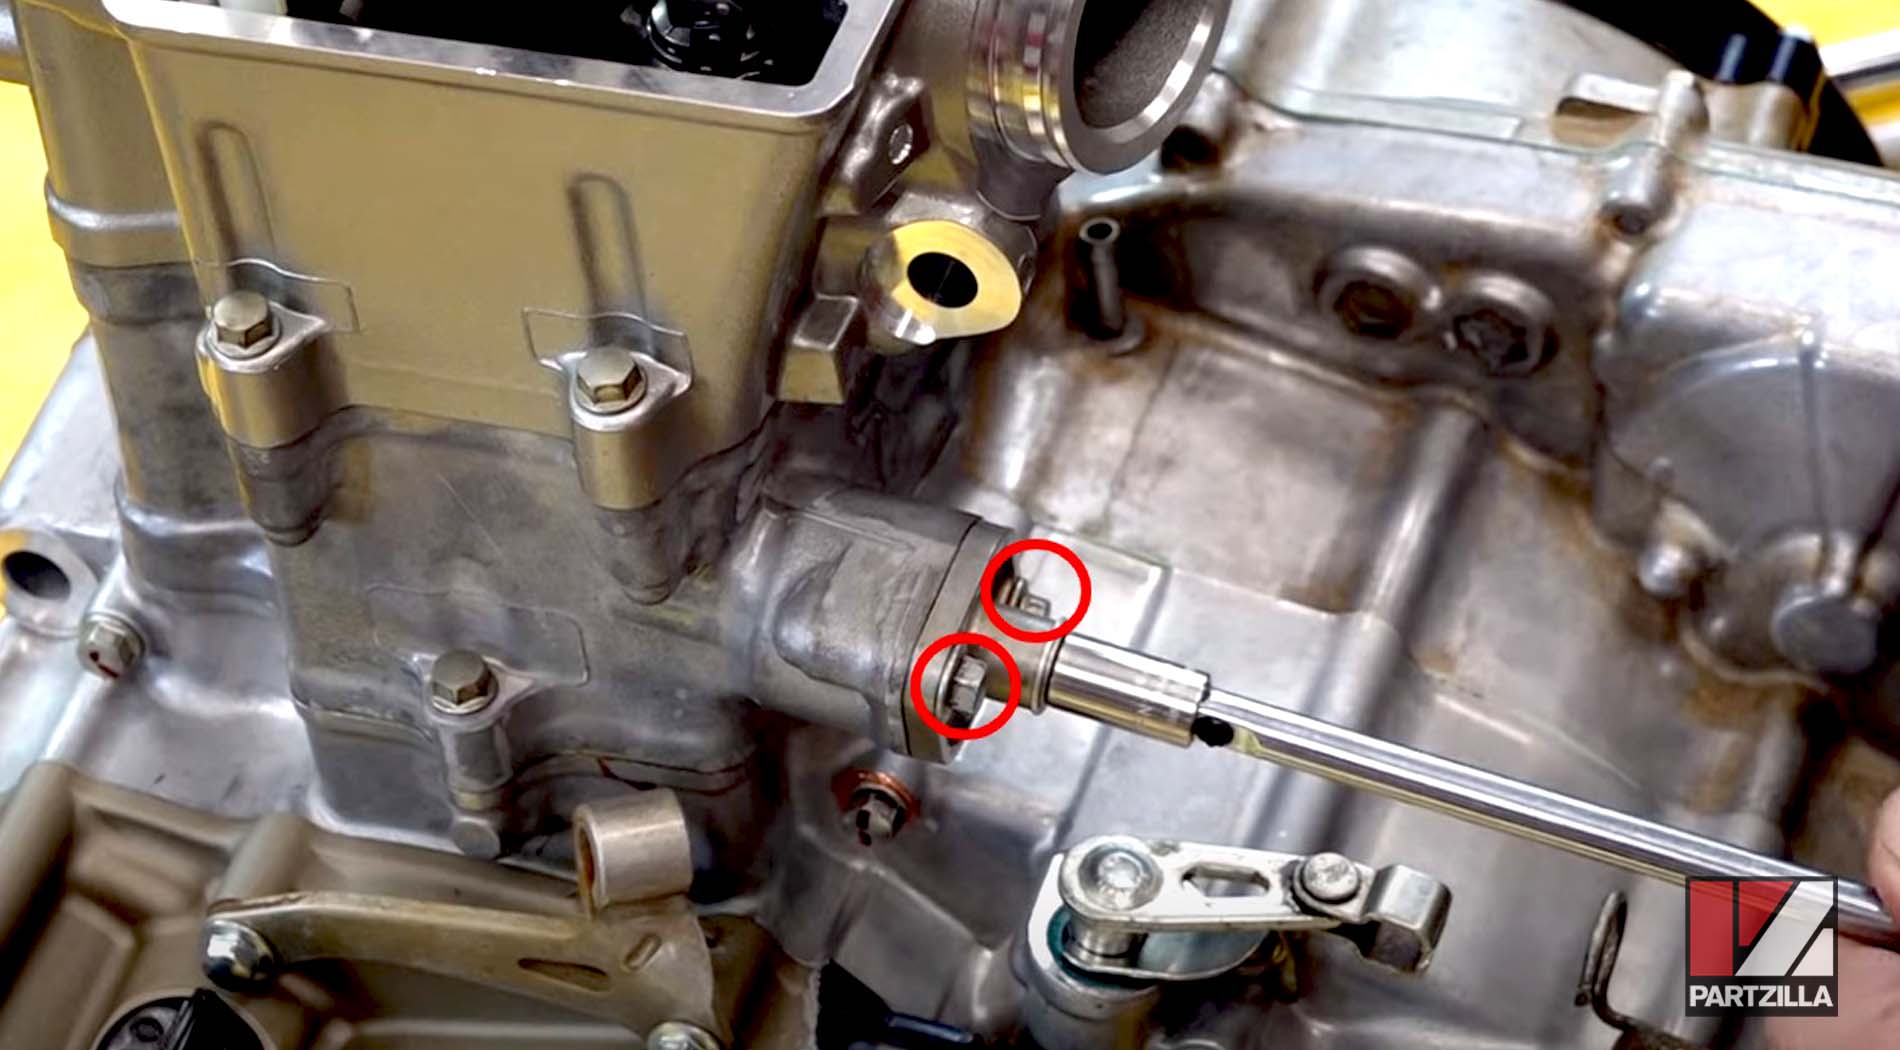
Step 23. Torque the timing gear bolts to 15 foot-pounds.
Watch the clip below to see the cam chain tensioner installation segment of our Honda CRF450 head installation and valve adjustment video.
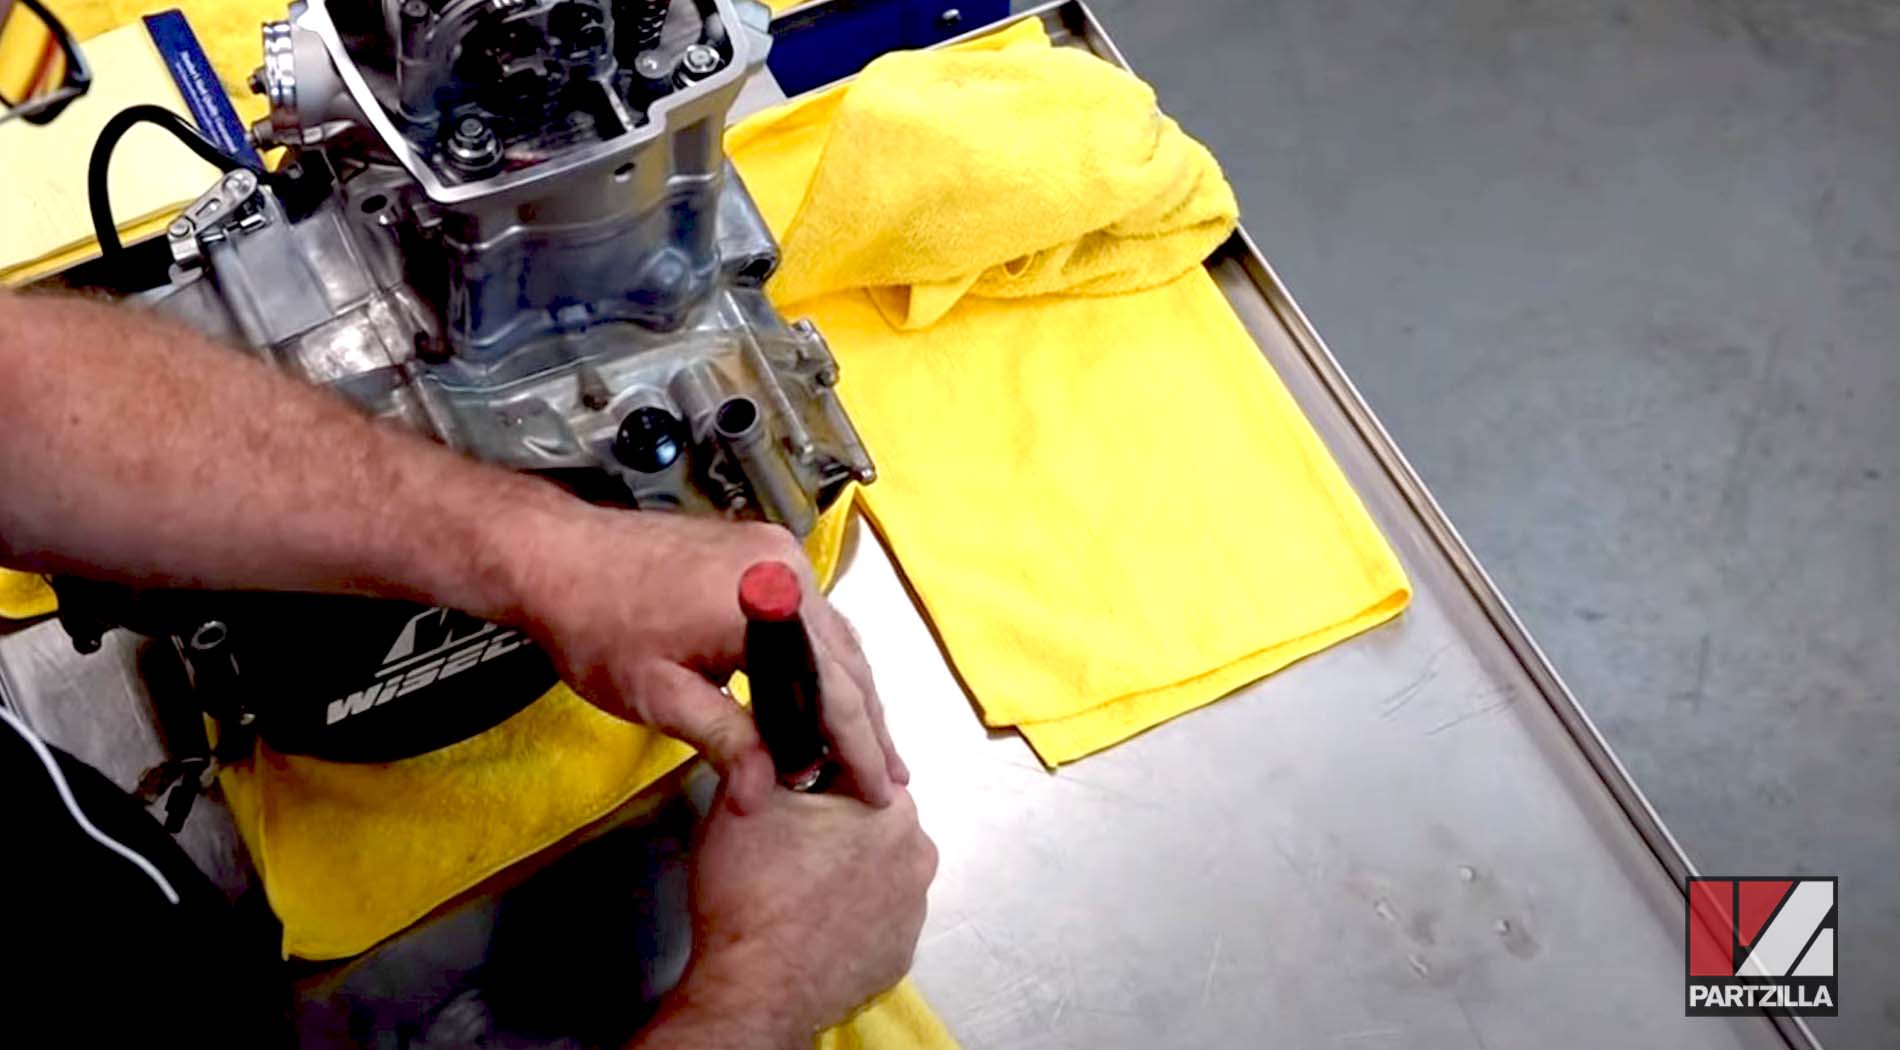
Honda CRF450 Engine Rebuild - Head Cover Installation
Step 24. Reinstall the inspection plugs.
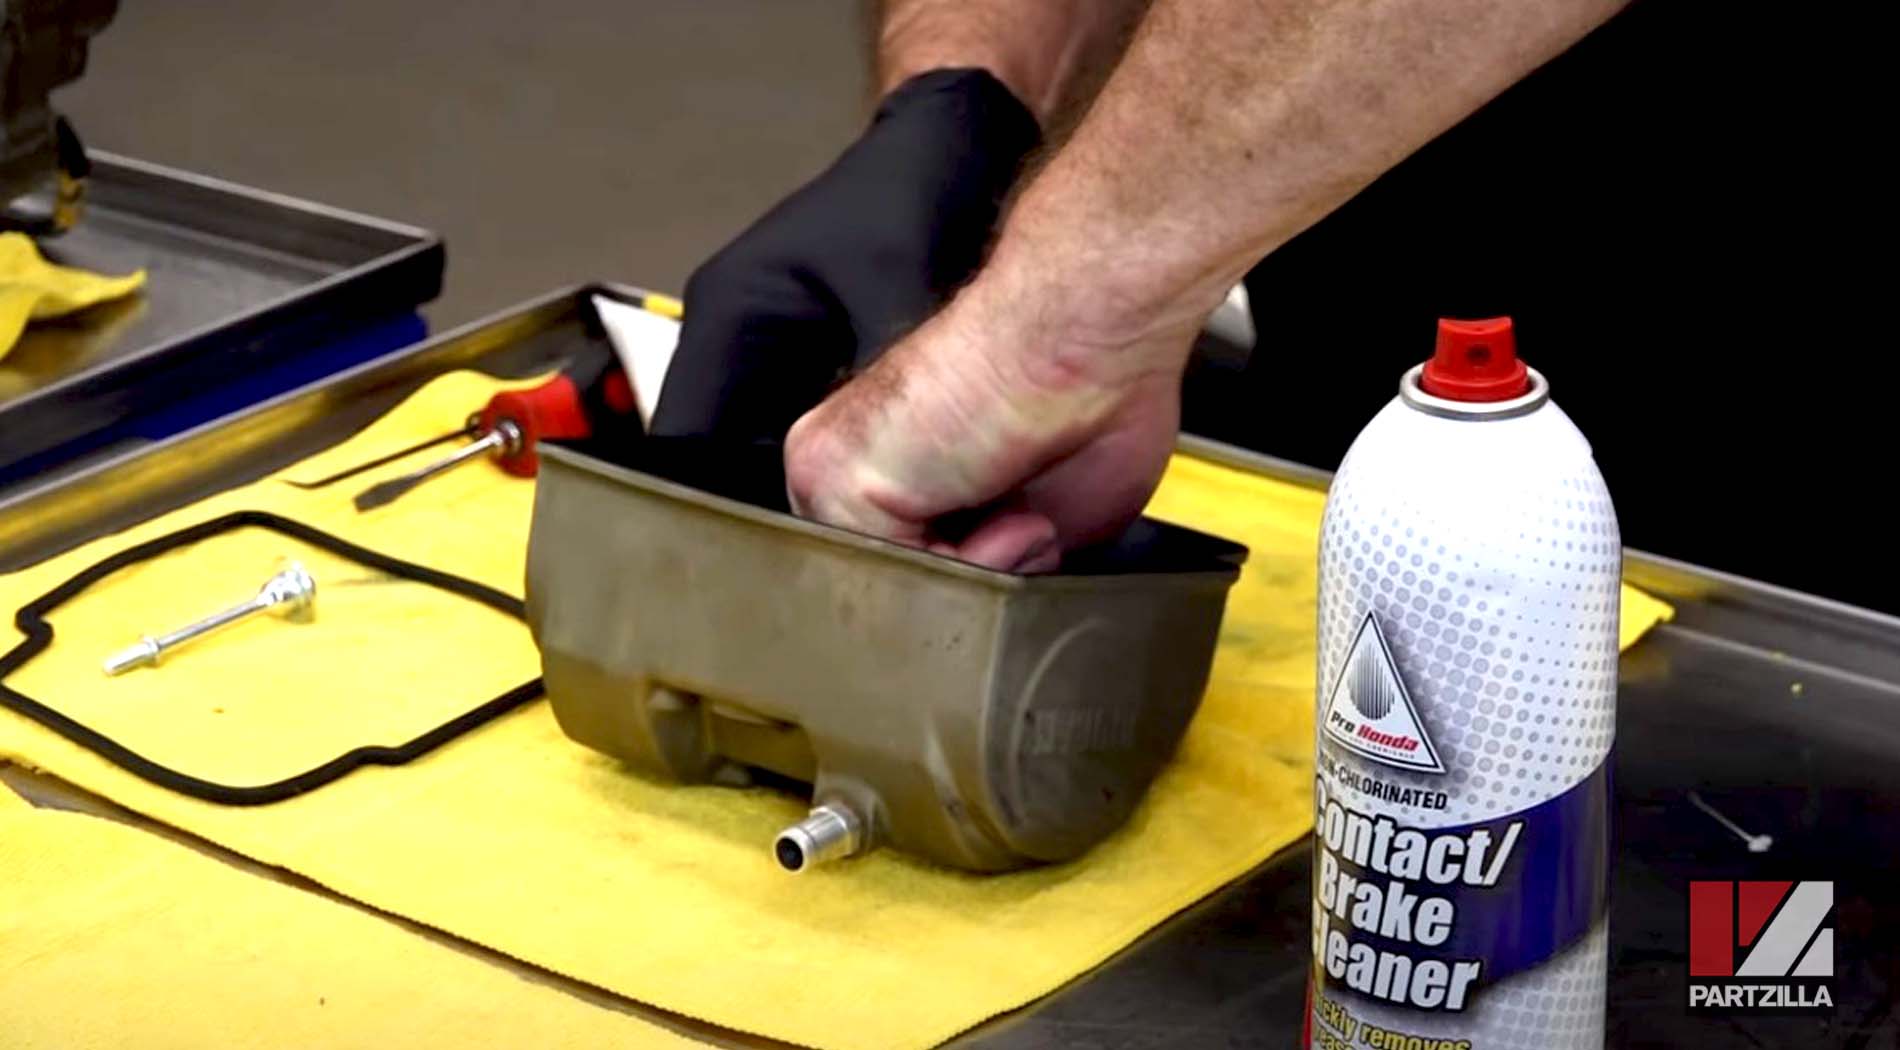
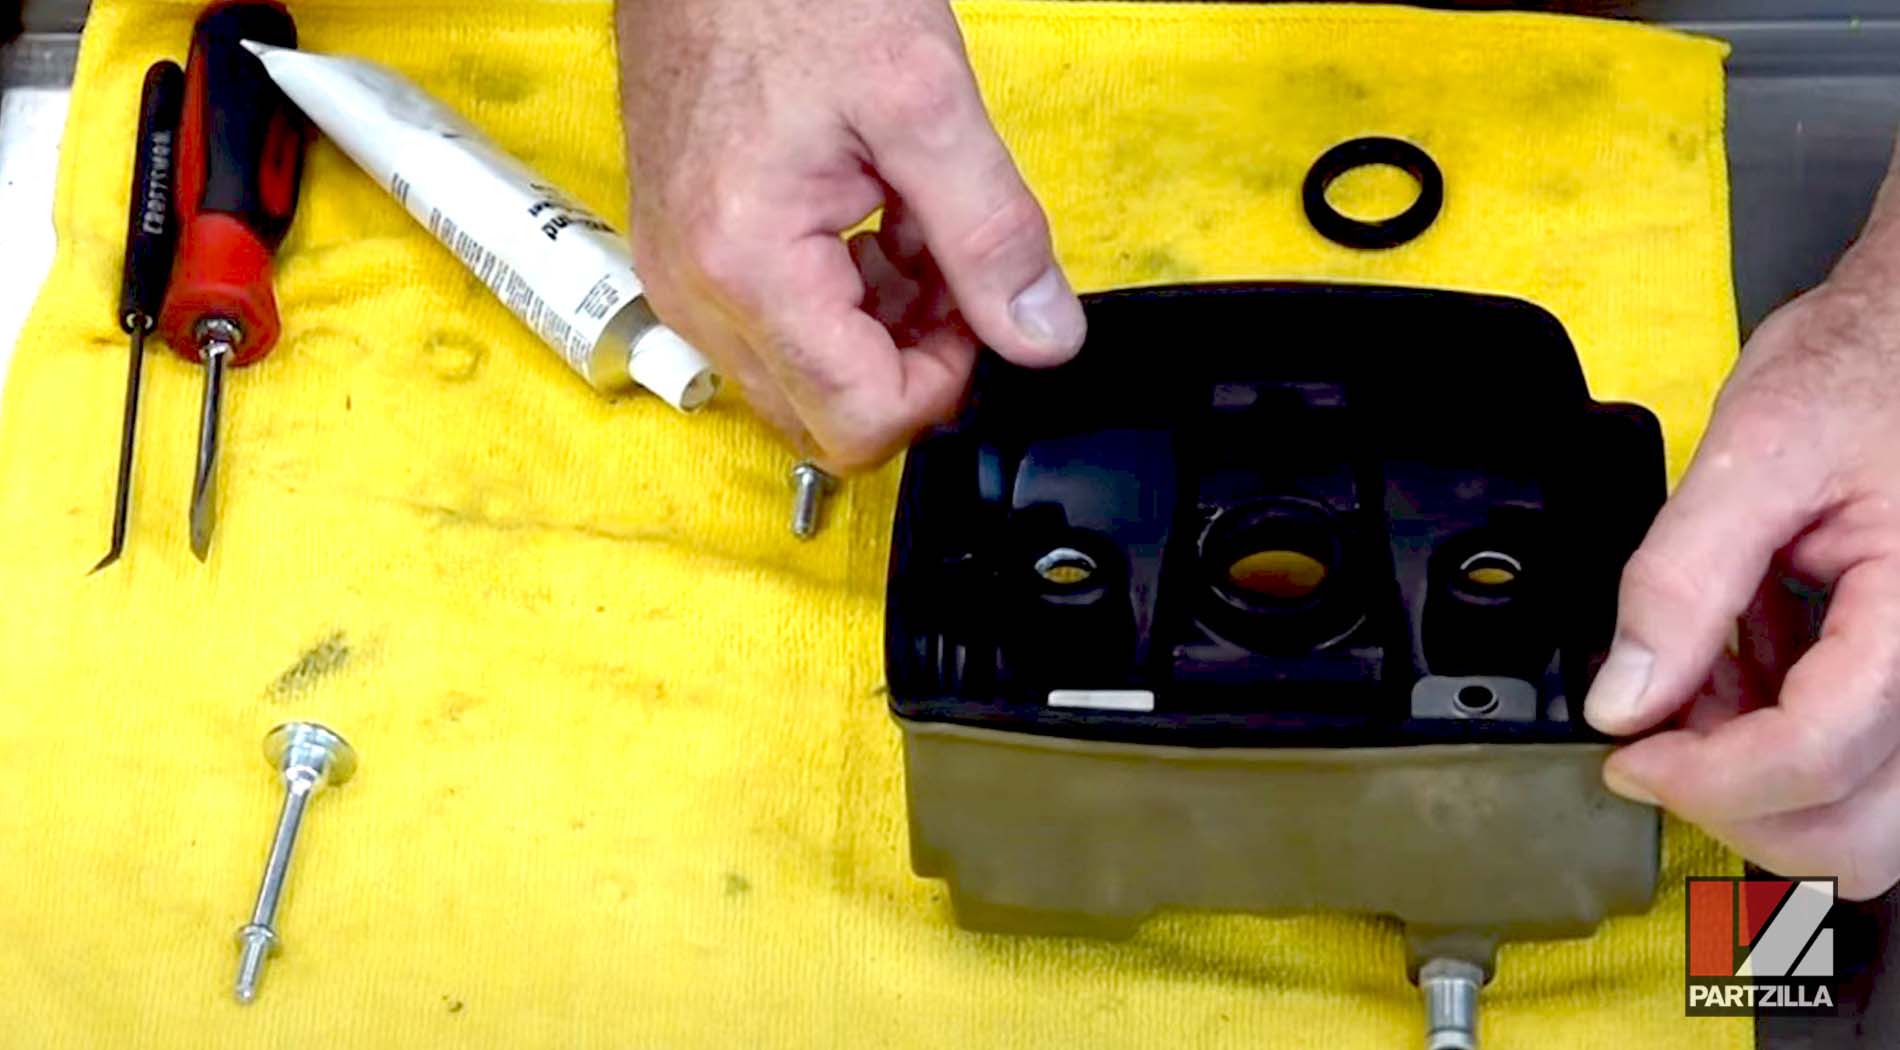
Step 25. Clean the cylinder head, then replace the main head cover gasket and the seals up top that the bolts go through. Add a little bit of Hondabond down into the channel, then press the seals in.
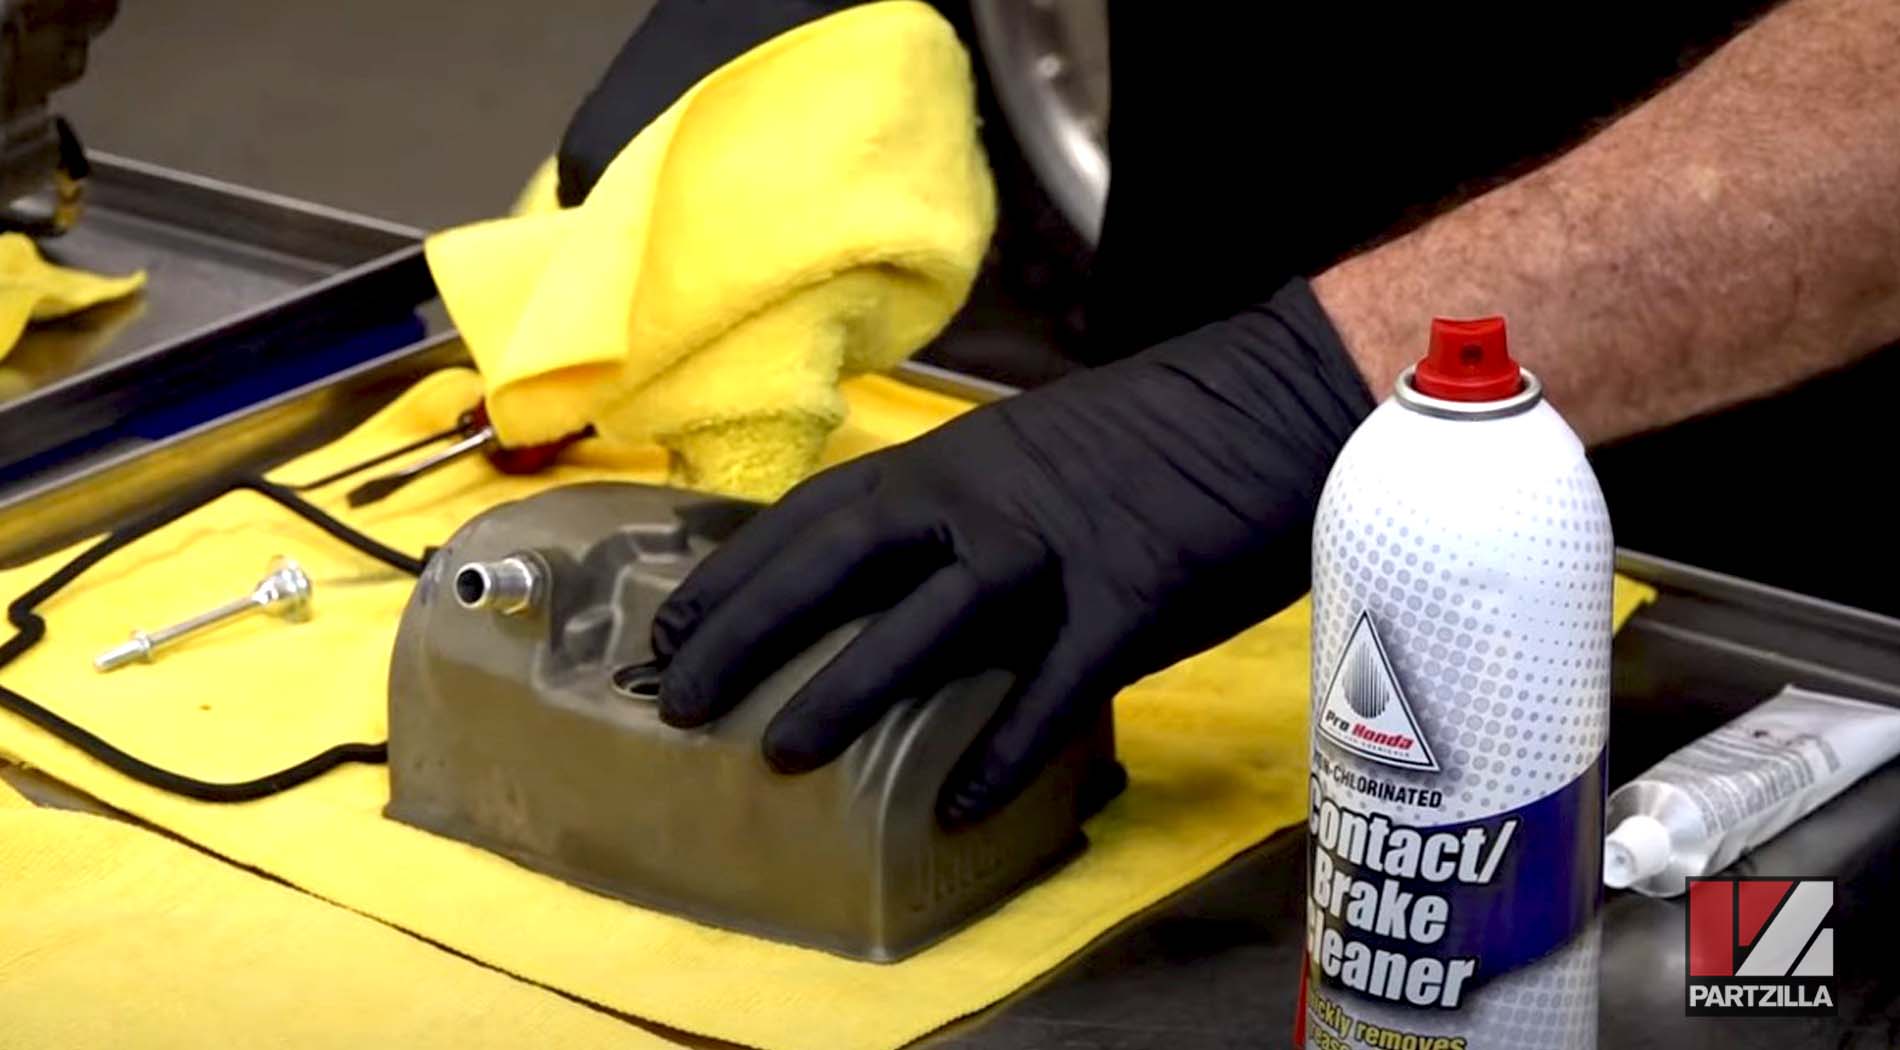
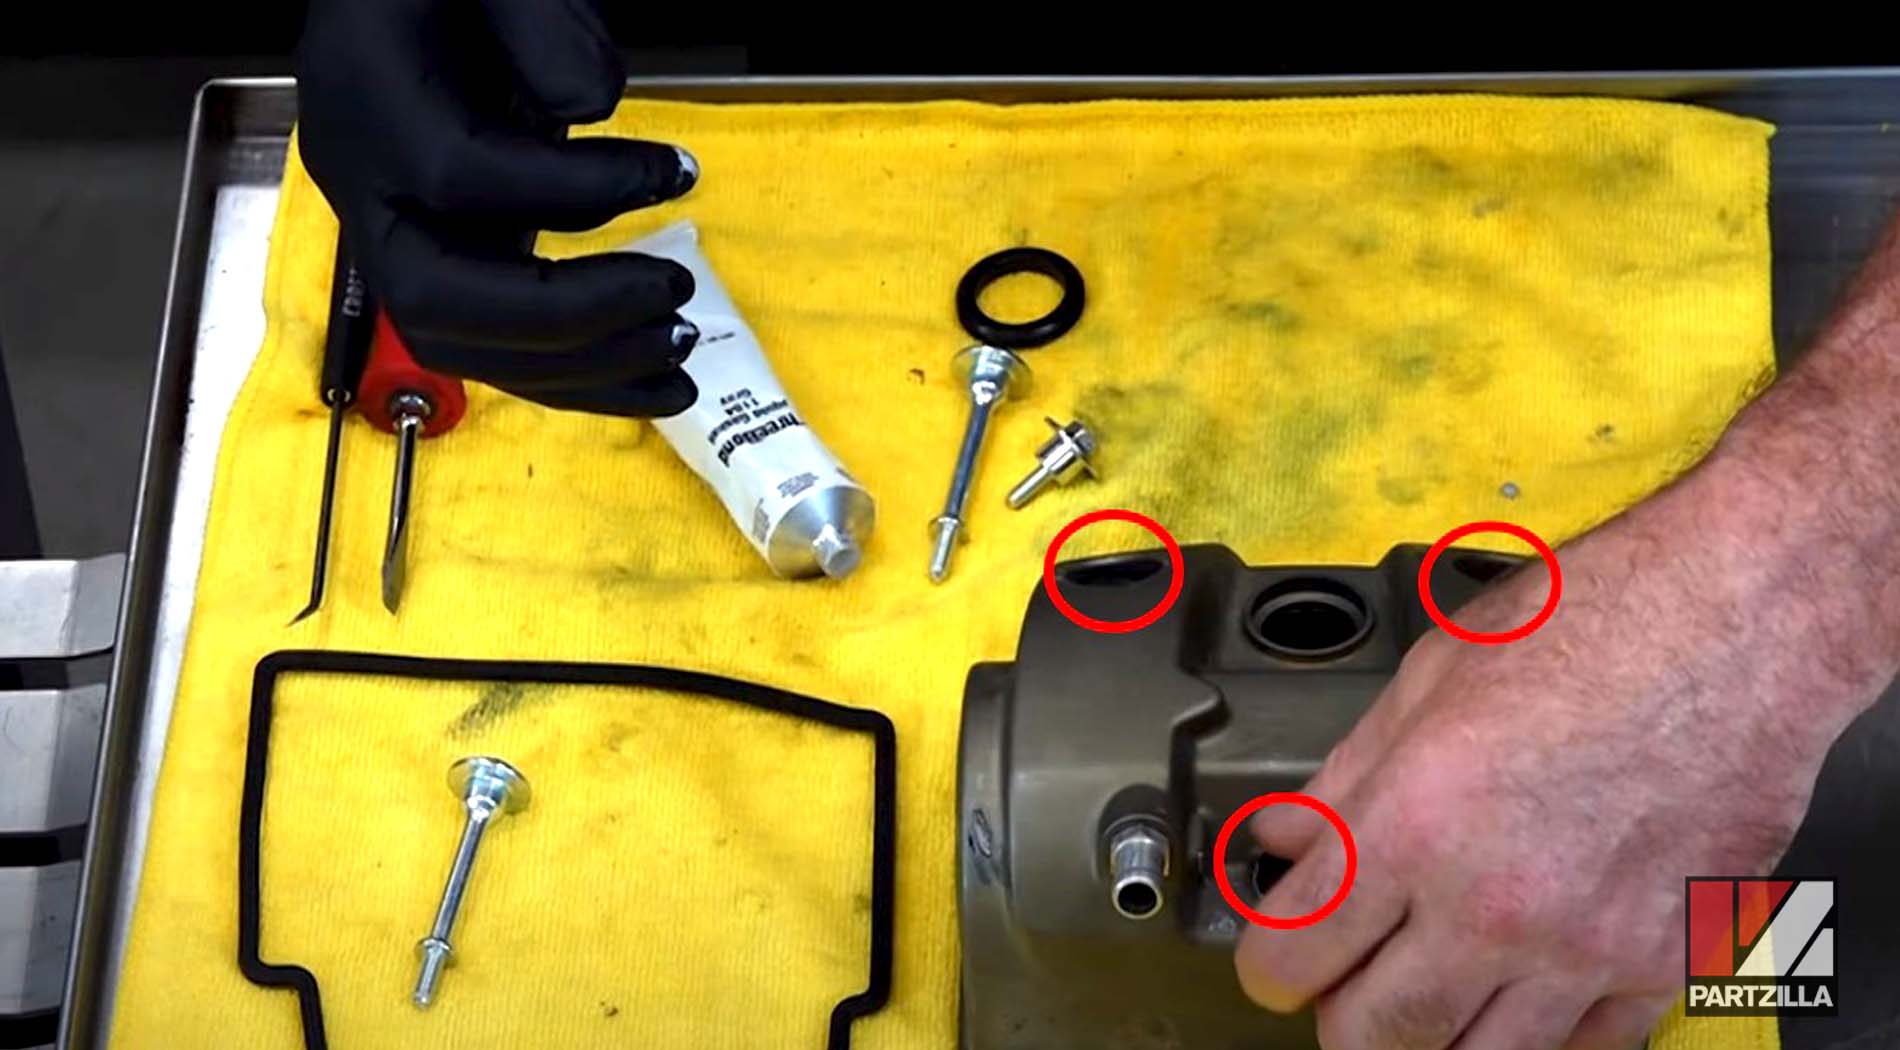
NOTE: Make sure there's no debris so the new seals have a clean place to adhere to. Wear gloves while you’re applying the Hondabond (or similar bonding agent).
Step 26. Add Hondabond to the ring seal that goes around the channel where the spark plug tube is before installing it.
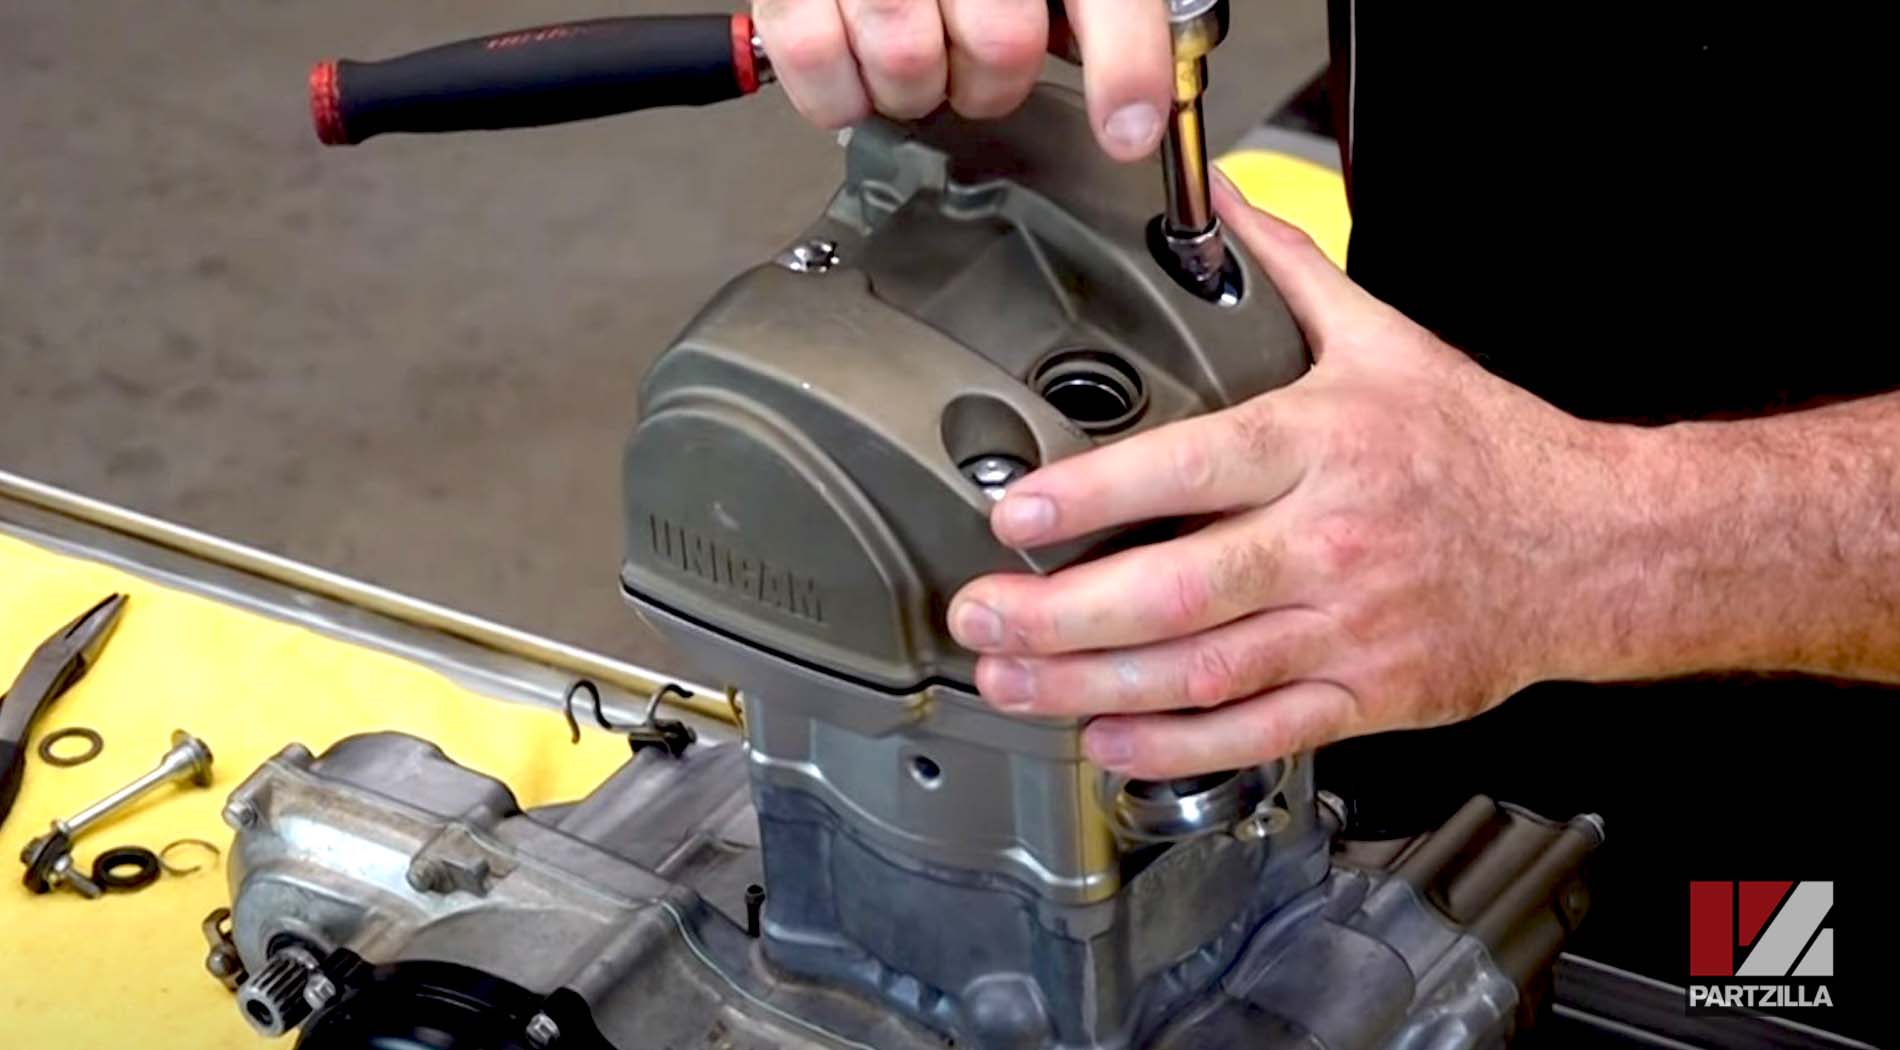
Step 27. Get the new main cylinder head gasket in place.
Step 28. Line up the cylinder head cover with the cylinder head gasket, then install and tighten the top bolts.

Watch the clip below to see the head cover installation segment of our Honda CRF450 head installation and valve adjustment video.
Want to see the entire top end rebuild of this CRF450 engine from start to finish? Watch the video below to see how to rebuild the top end of a Honda CRF450R engine.