Honda CRF450 Bottom End Rebuild Part 2
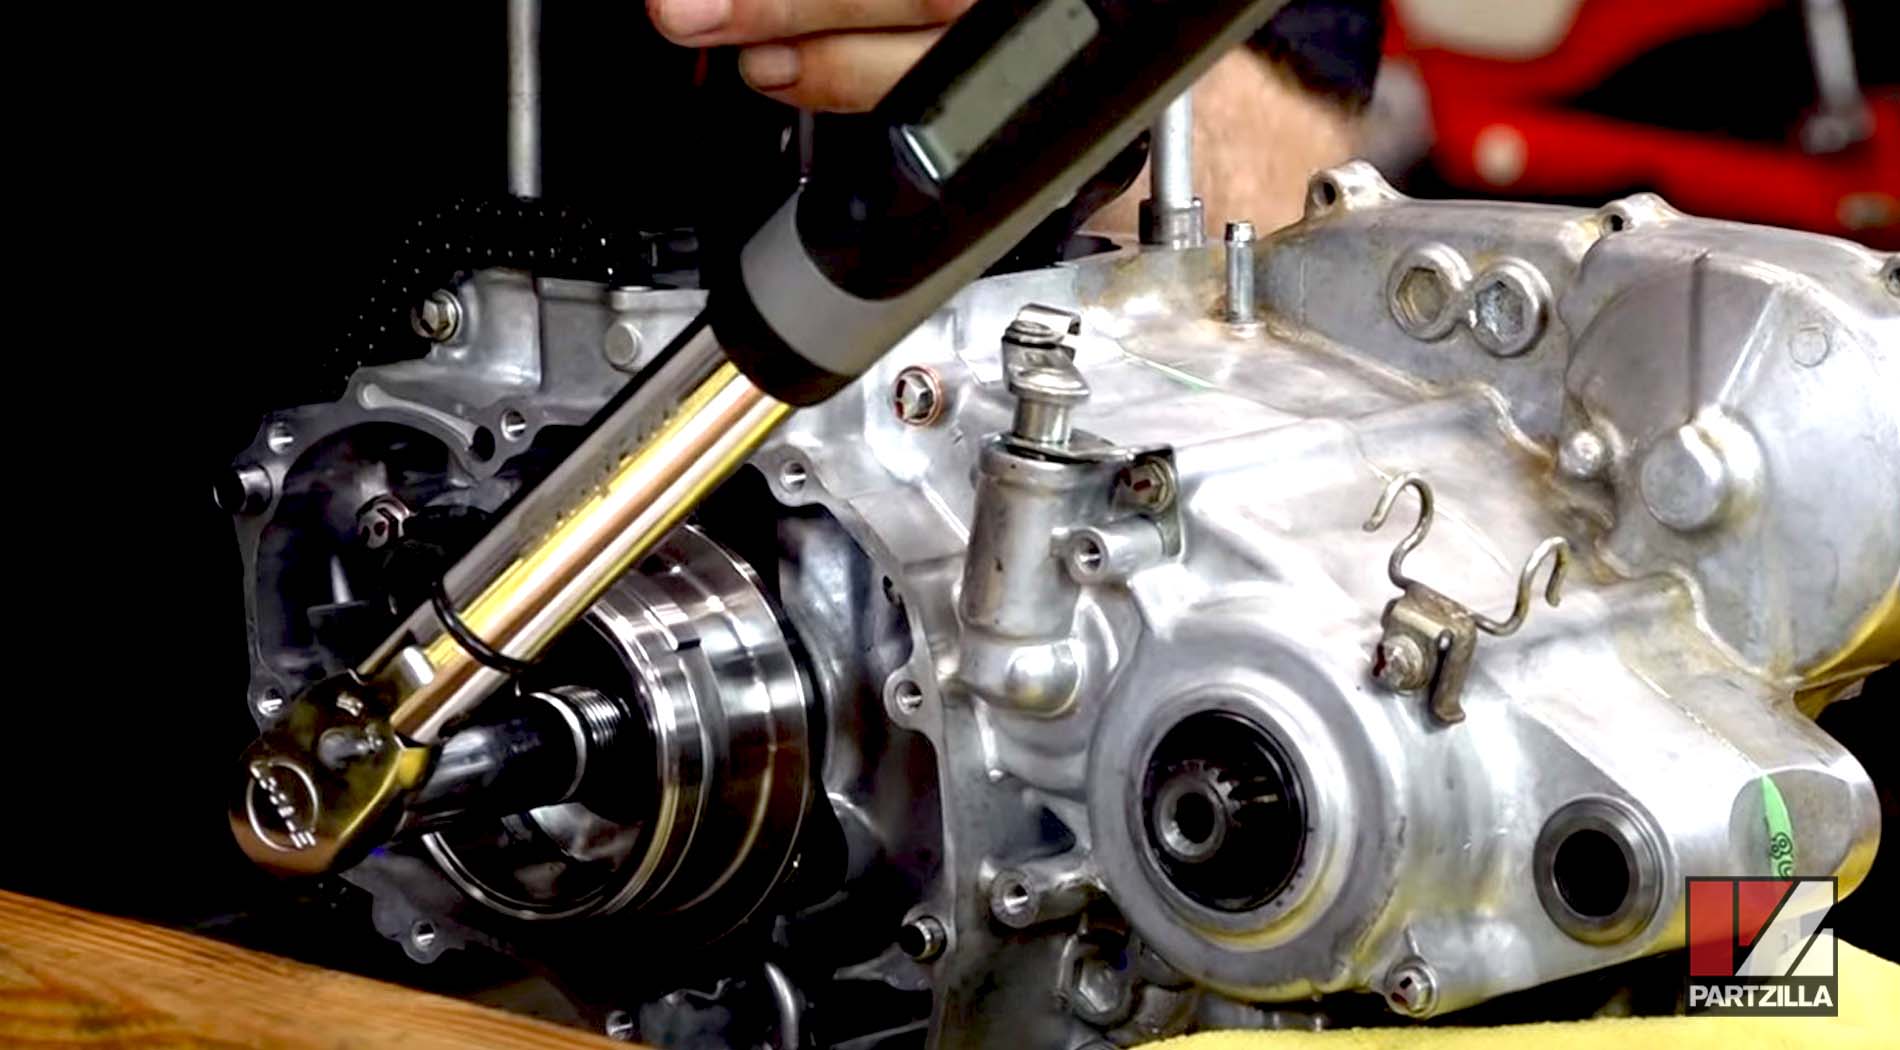
Welcome to the second part of our Honda CRF450R bottom end rebuild, in which we pick up from closing the crankcase halves at the end of part 1.
Using a combination of OEM Honda parts and Wiseco Garage Buddy kit parts, we wrap up the bottom end rebuild portion of our complete Honda CRF450 engine rebuild.
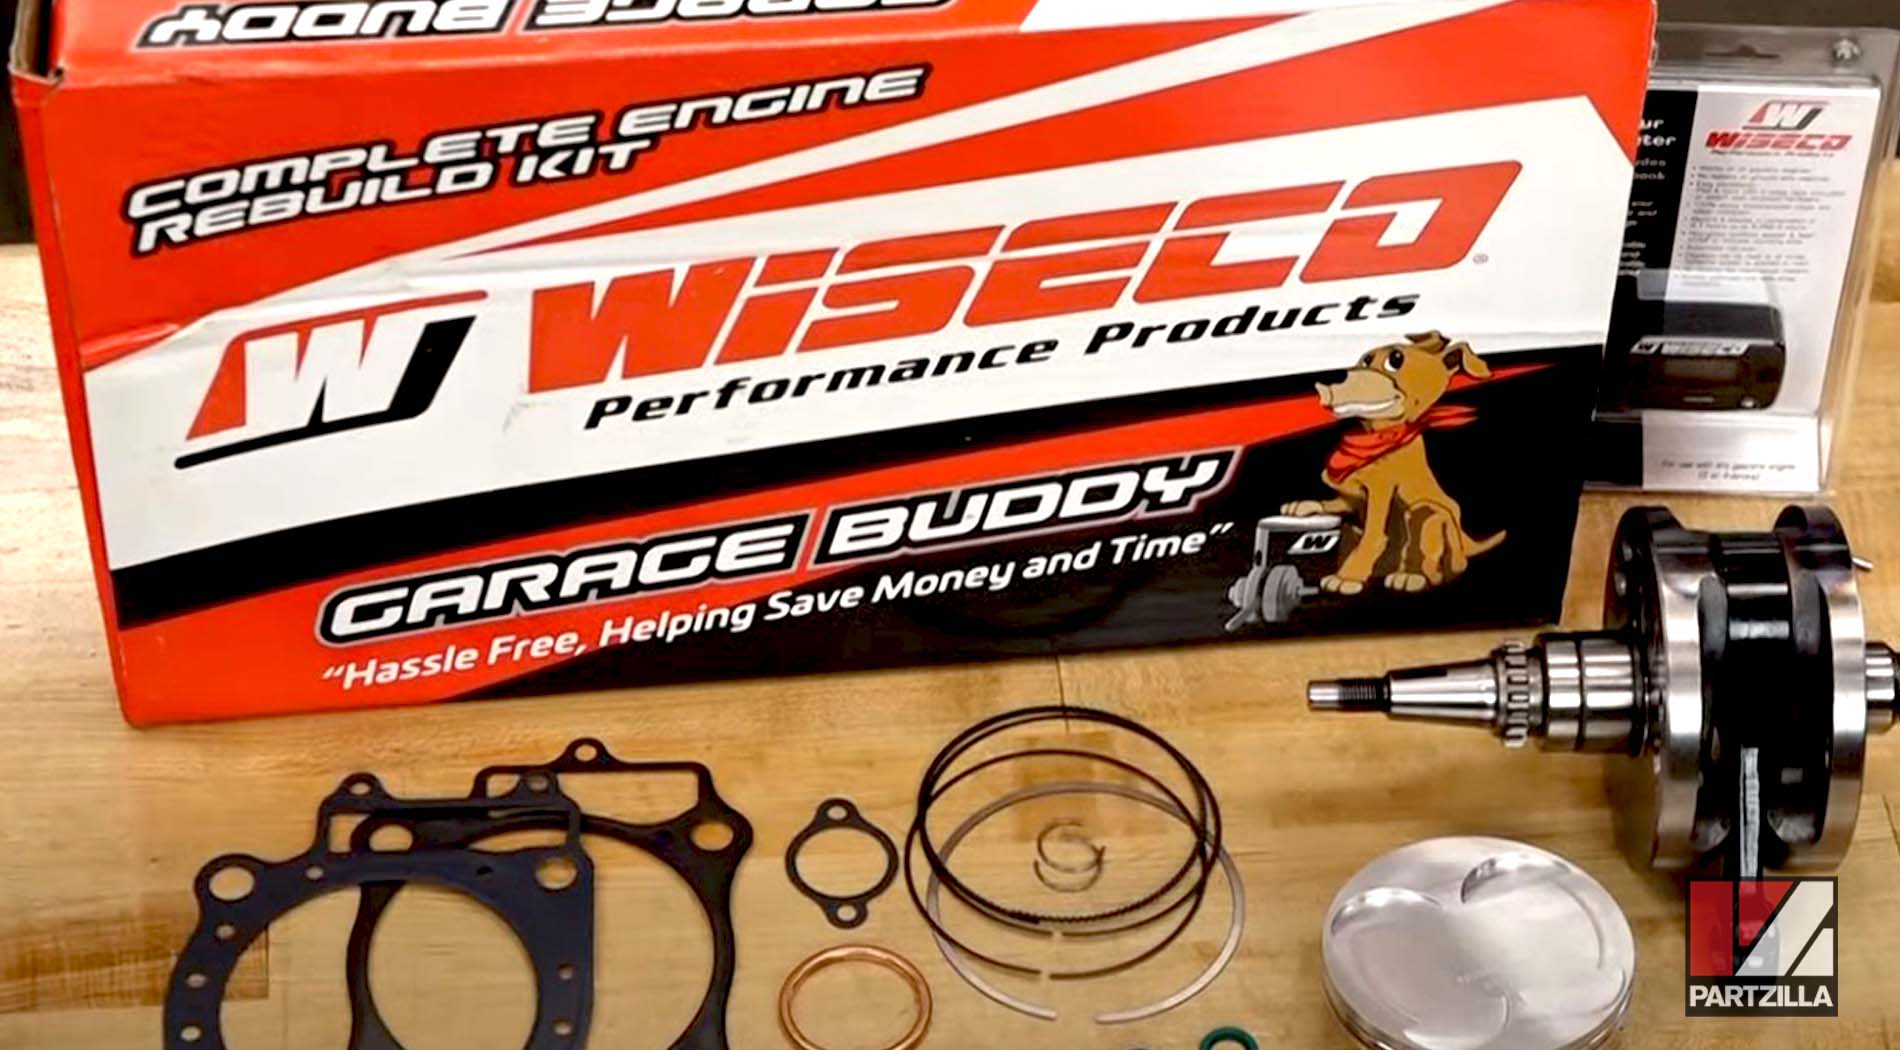
The Wiseco engine rebuild kit includes the parts you need to do the bottom end: crankshaft, seals, bearings, gaskets, O-rings, timing chain, etc. Watch the video above and follow the steps below to complete the bottom end rebuild of a Honda CRF450 engine. Use our Honda CRF450 crankcase parts diagram for additional reference.
NOTE: The steps below are a summarized breakdown of the bottom end rebuild, which we broke up into two parts. Watch the entire video above to see the full bottom end rebuild.
Tools and Supplies Needed - Honda CRF450 Bottom End Engine Rebuild
NOTE: The tools and supplies listed above are special tools required to pull this bottom end rebuild off, in addition to the regular tools found in a standard toolbox.
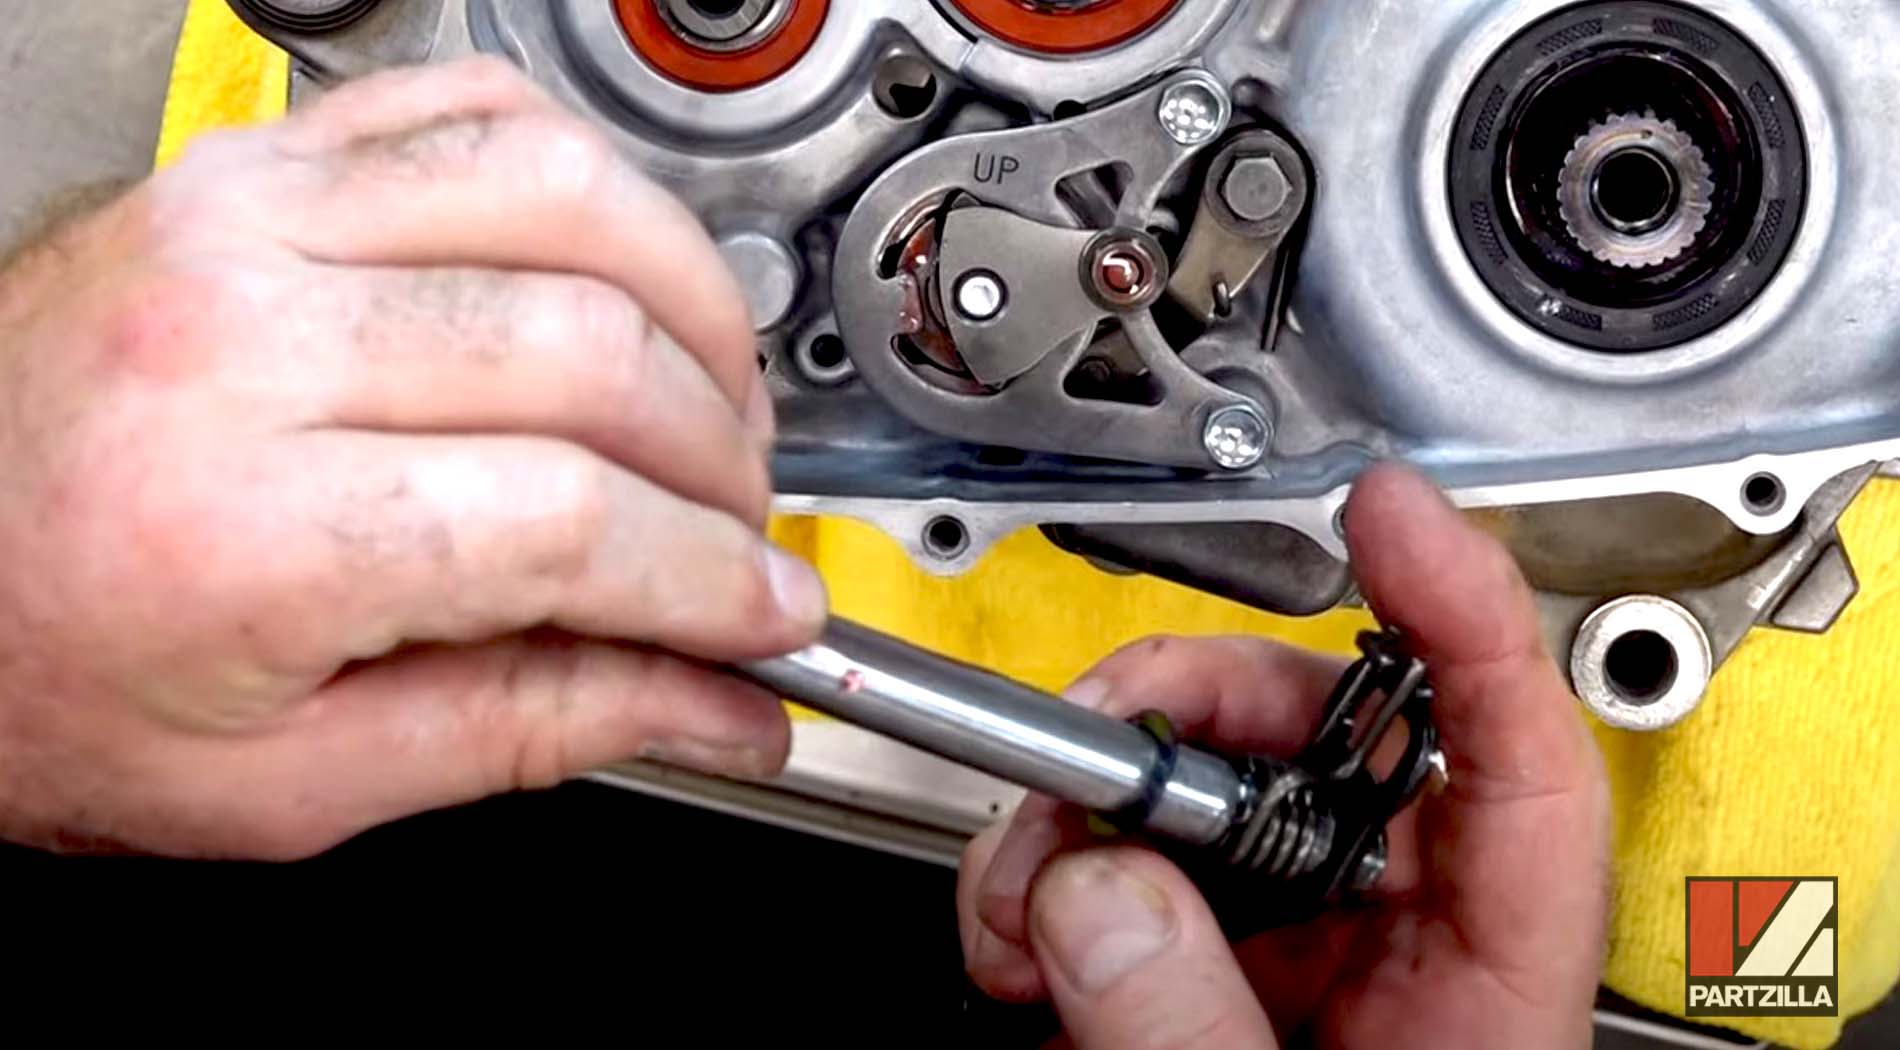
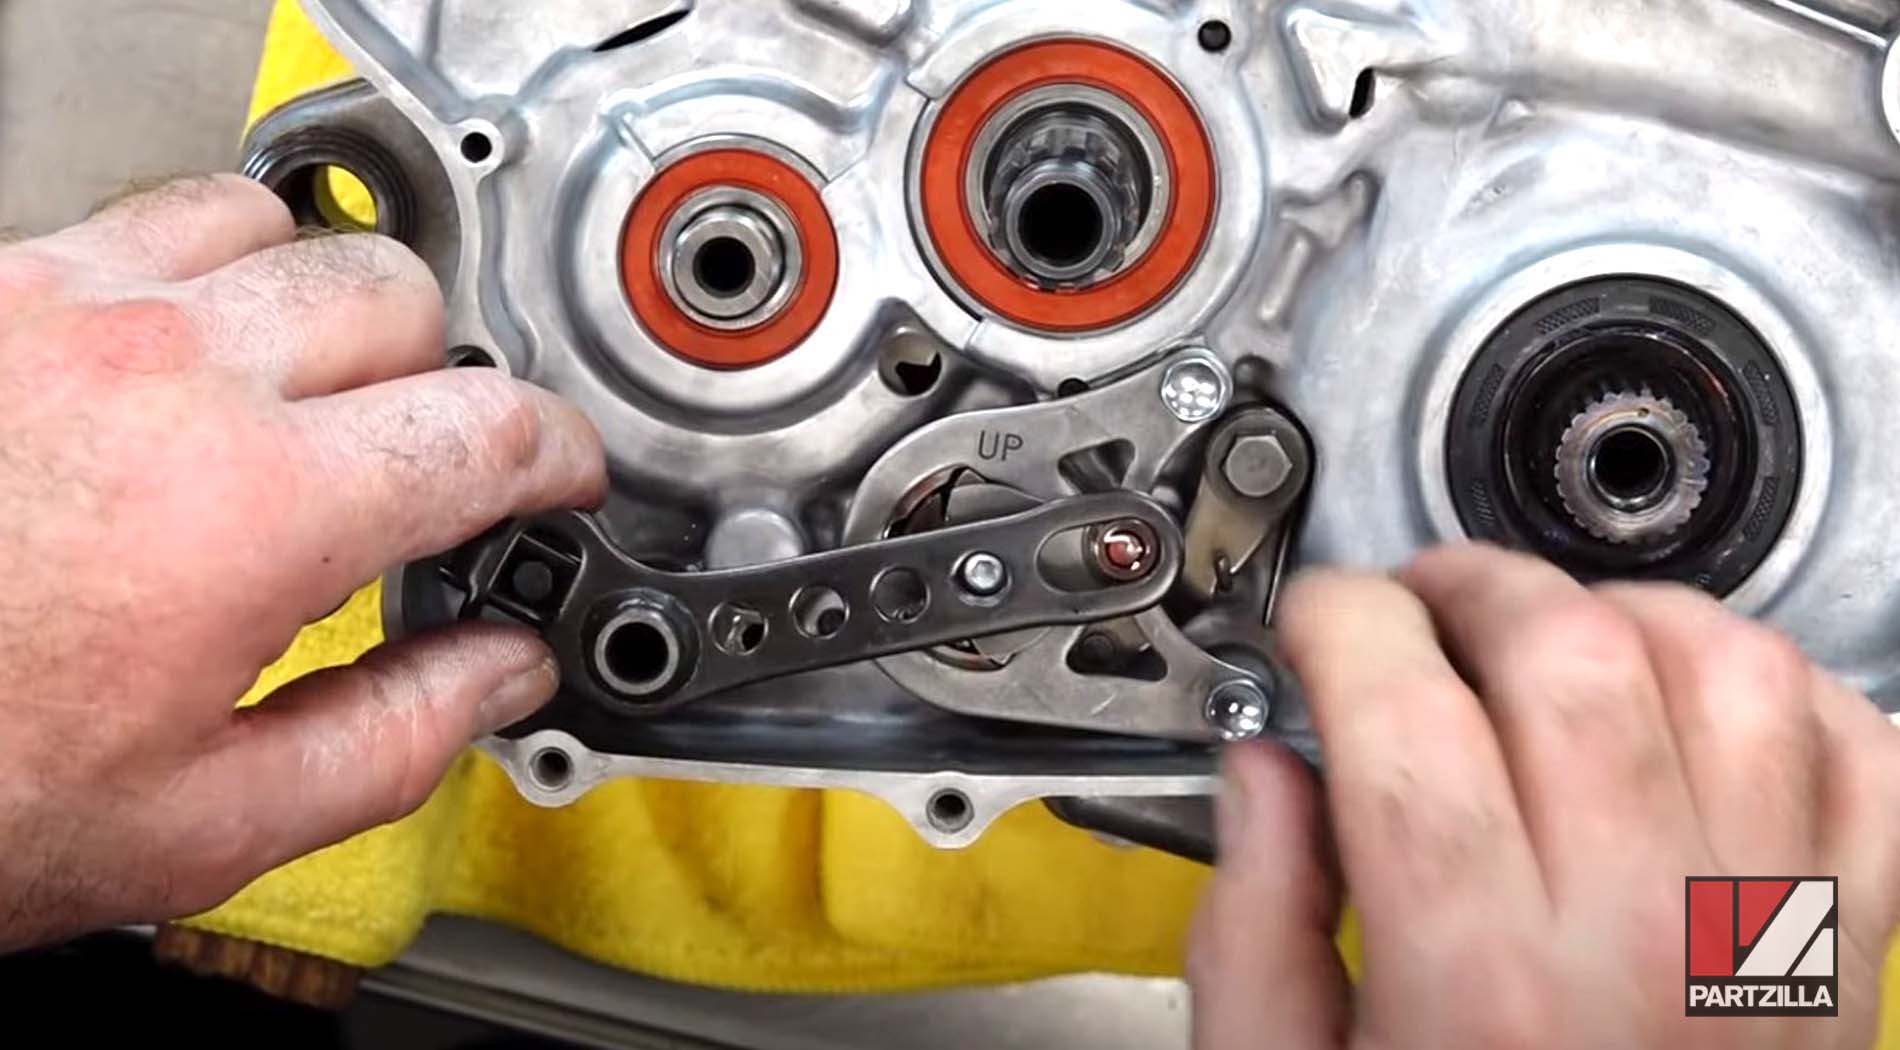
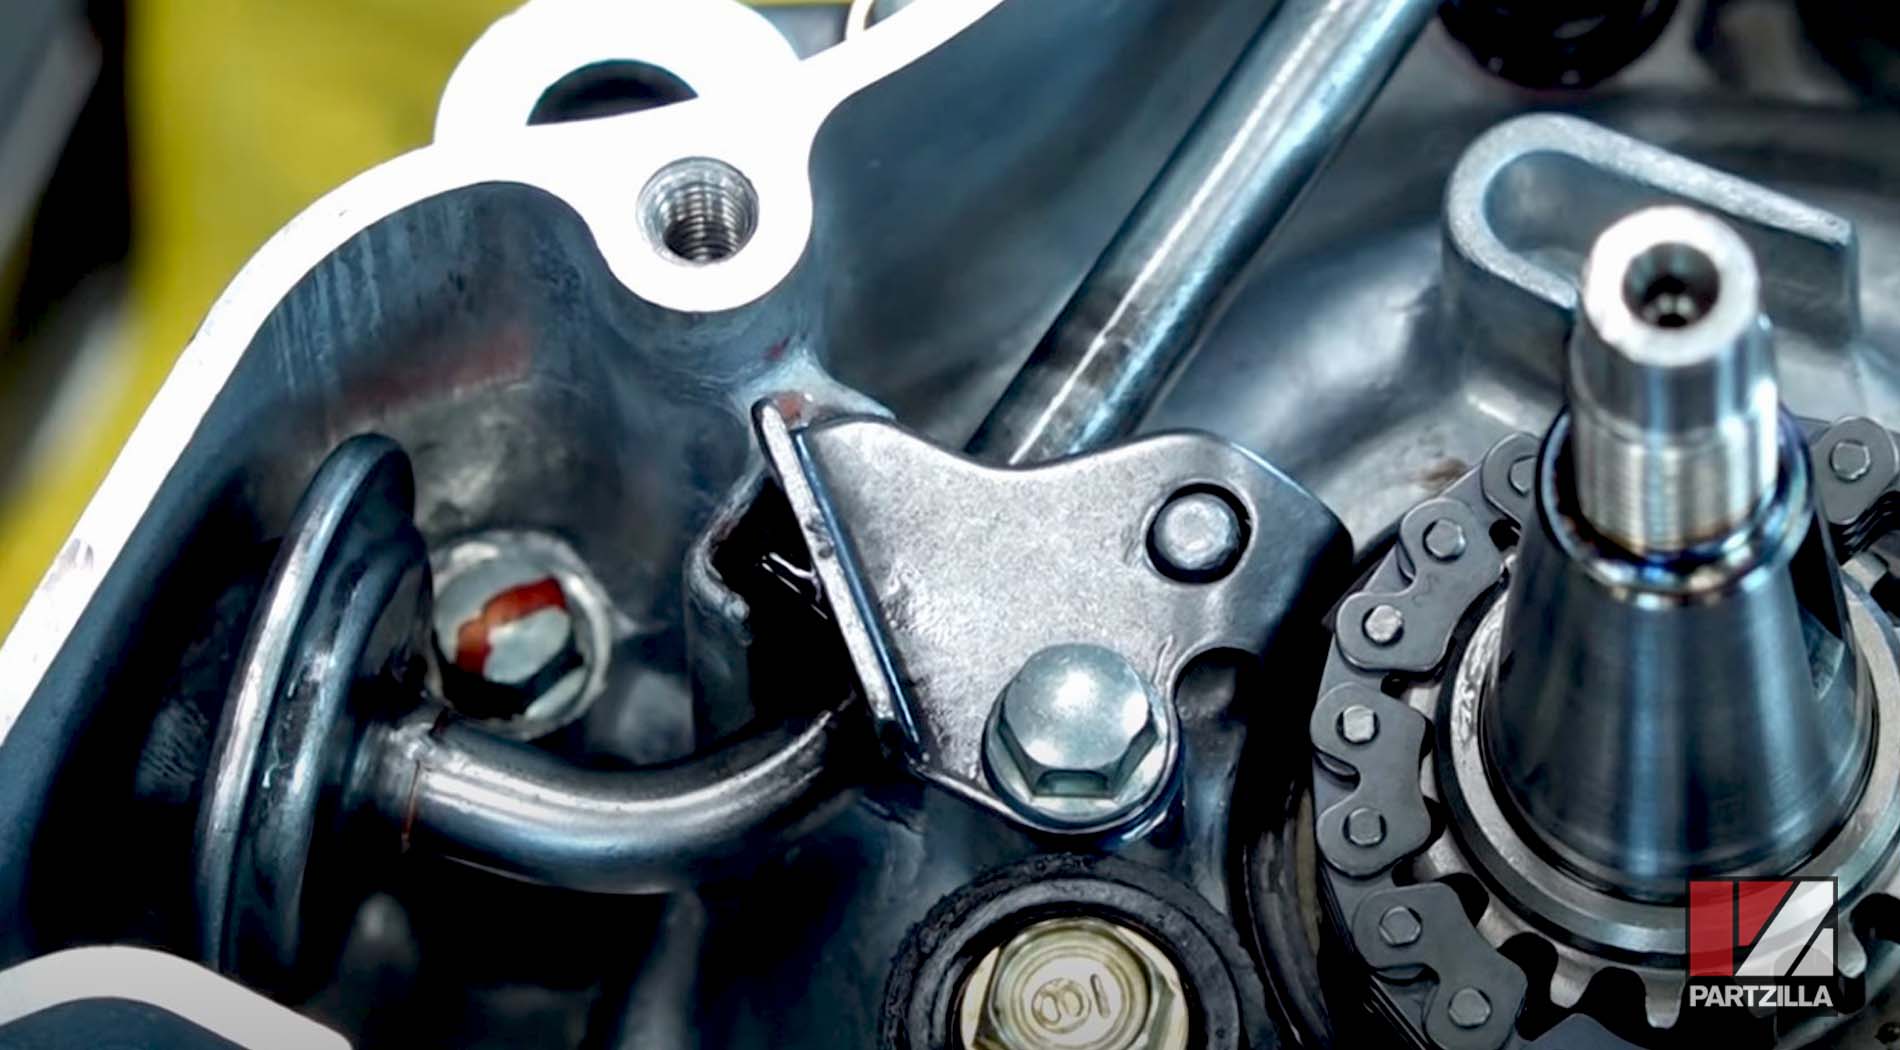
Honda CRF450 Bottom End Rebuild Shifter Installation
Step 1. Assemble the bolt, arm, washer and spring for the shifter, then install it and torque it to 9 foot-pounds.
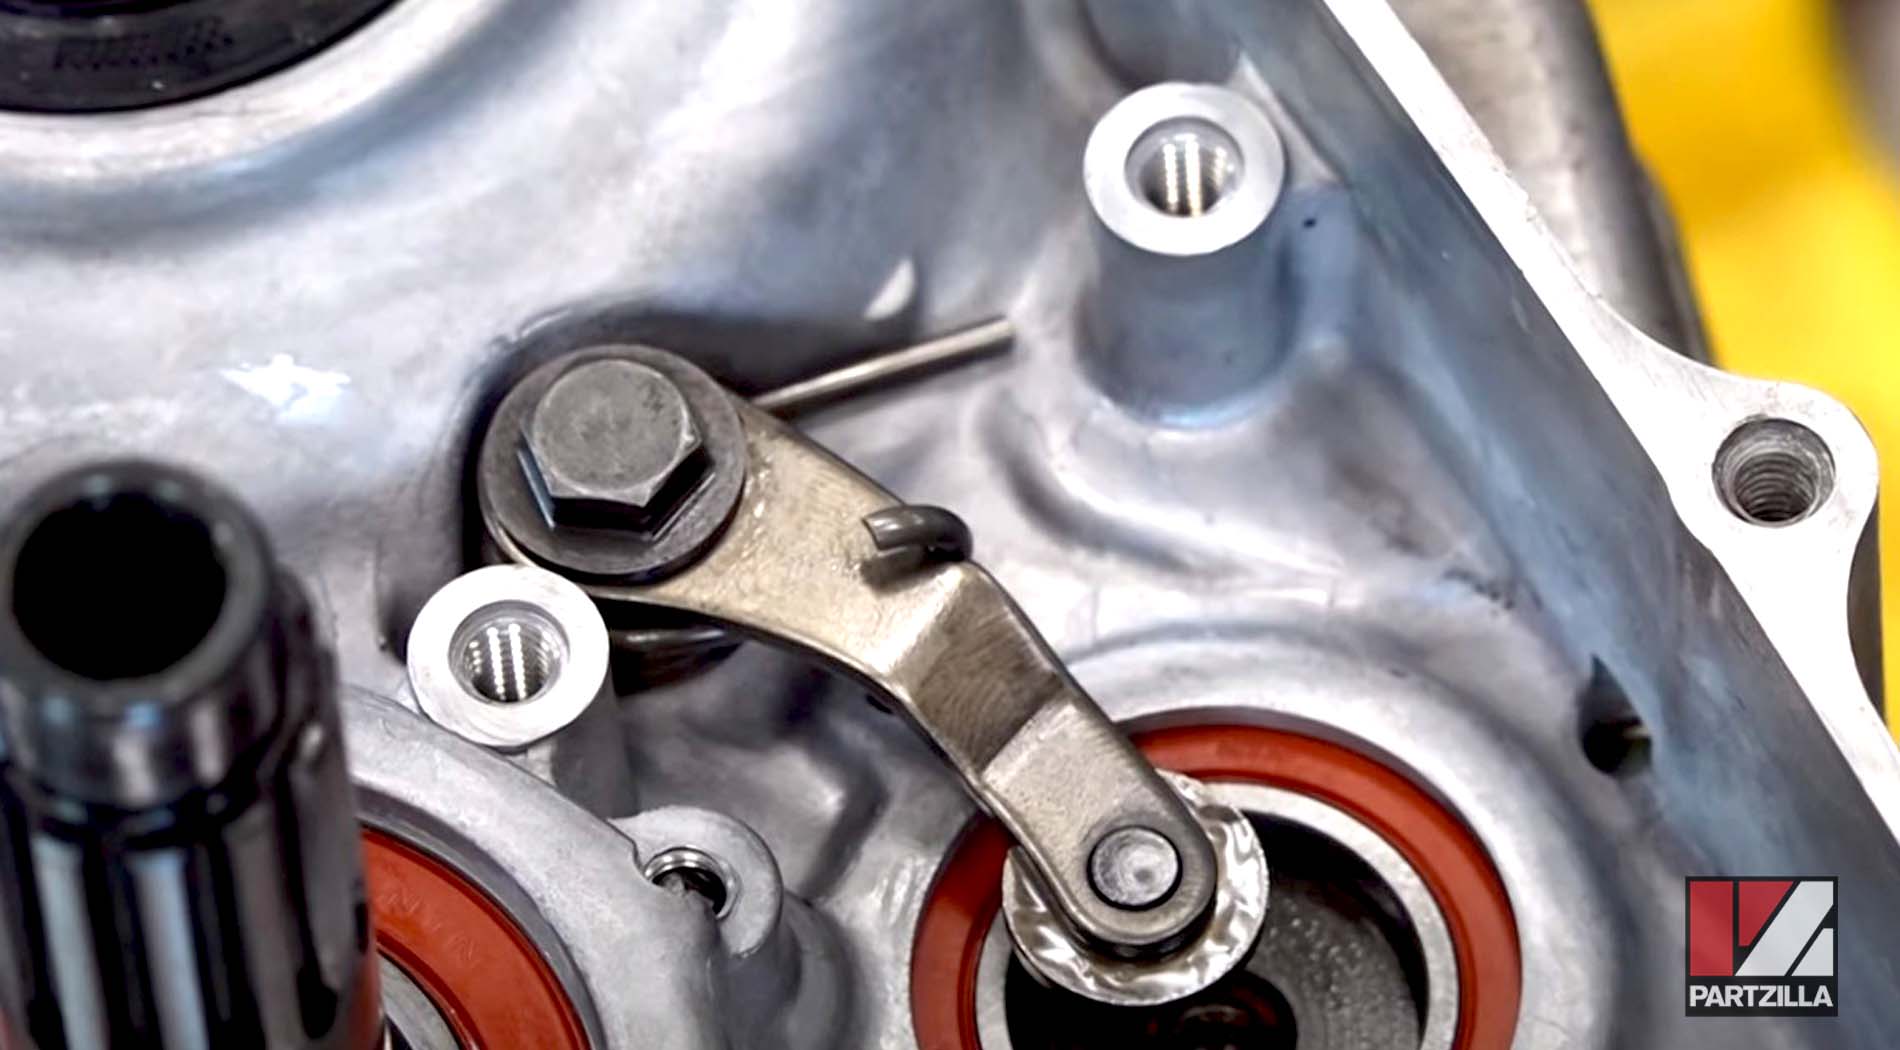
Step 2. Line up the pin with the little notch in the center gearshift drum and install it by first moving the arm out of the way with a screwdriver, then dropping it in and turning it, then installing the 12mm bolt that holds it in place and torqueing it to 16 foot-pounds.
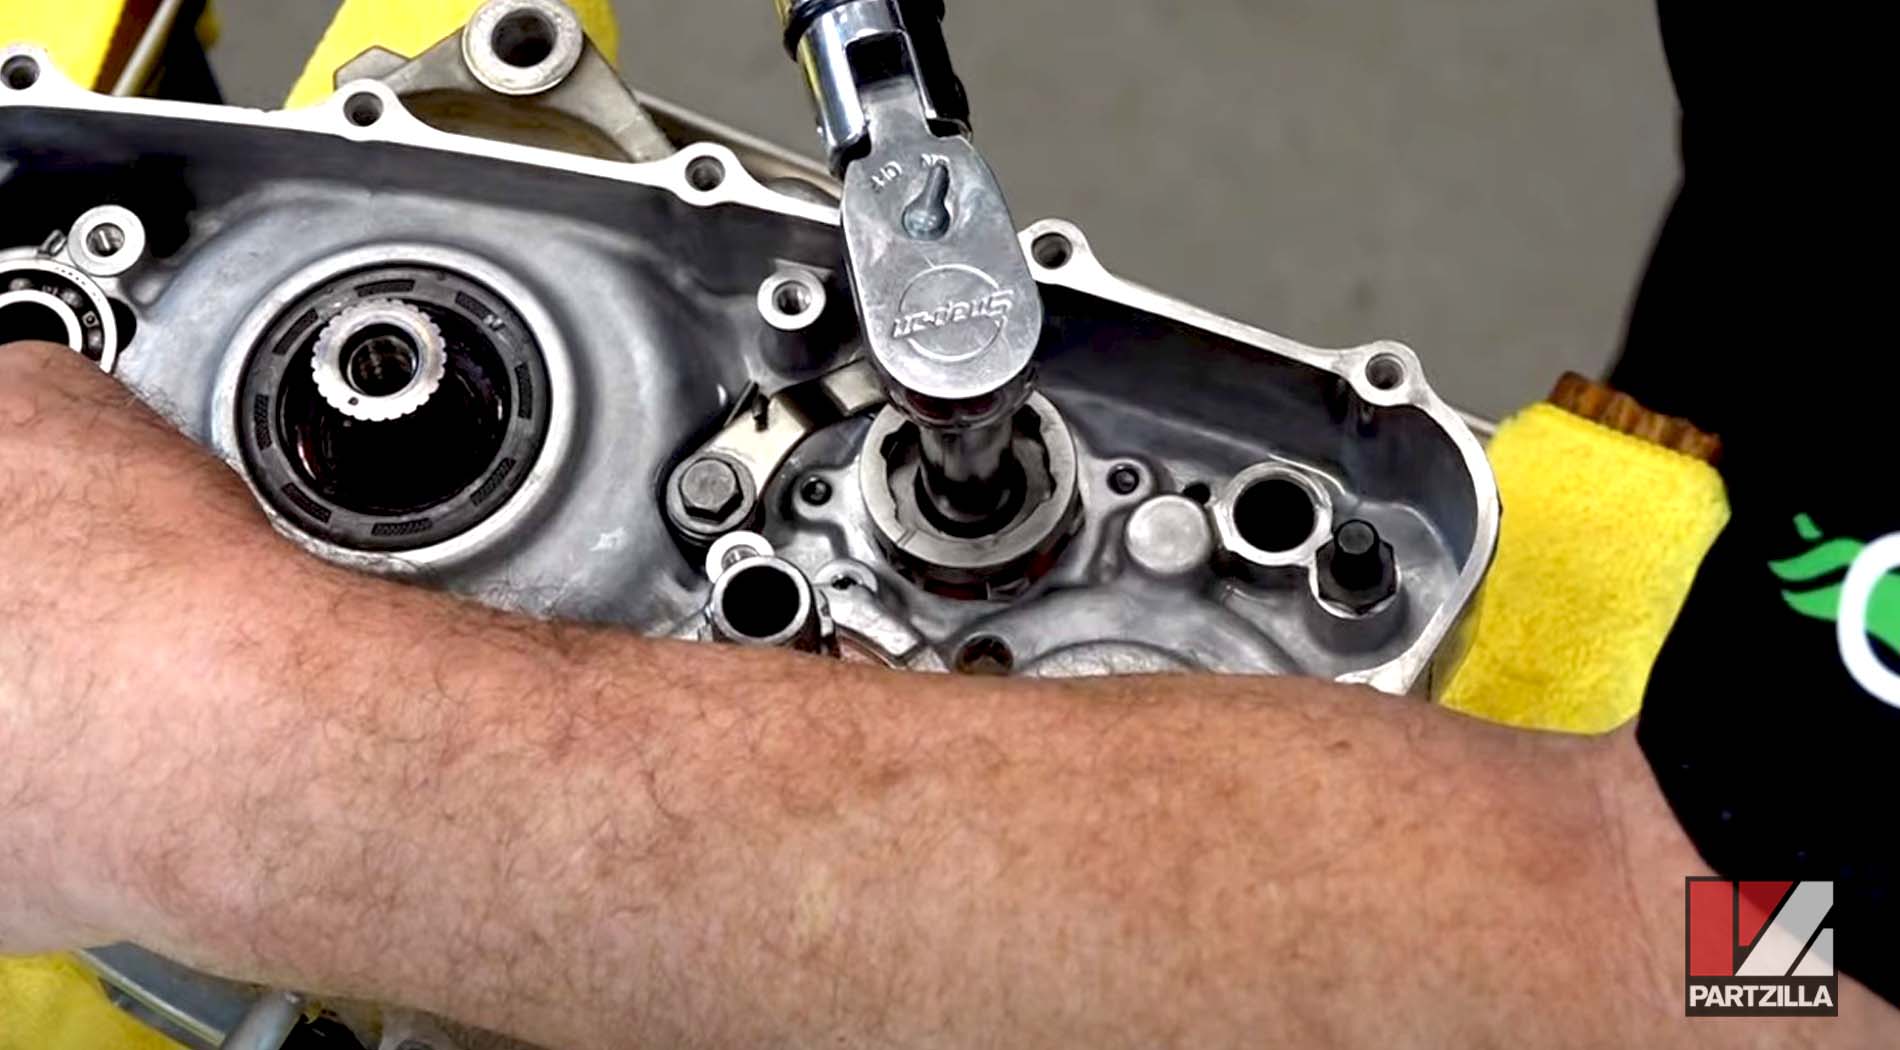
Step 3. Assemble the guide plate and slide it into place, then install the bolts and the collar that hold it and torque them to 7 foot-pounds. Add a little assembly lube to the guide plate and its collar for good measure.
Step 4. Put a little assembly lube on the shift spindle before installing it, making sure the washer that goes along with the snap ring is in place. The two ends of the spring should straddle around the bolt and line up the other end with the collar.
Watch the clip below to see the shifter installation segment of our Honda CRF450 bottom end rebuild.
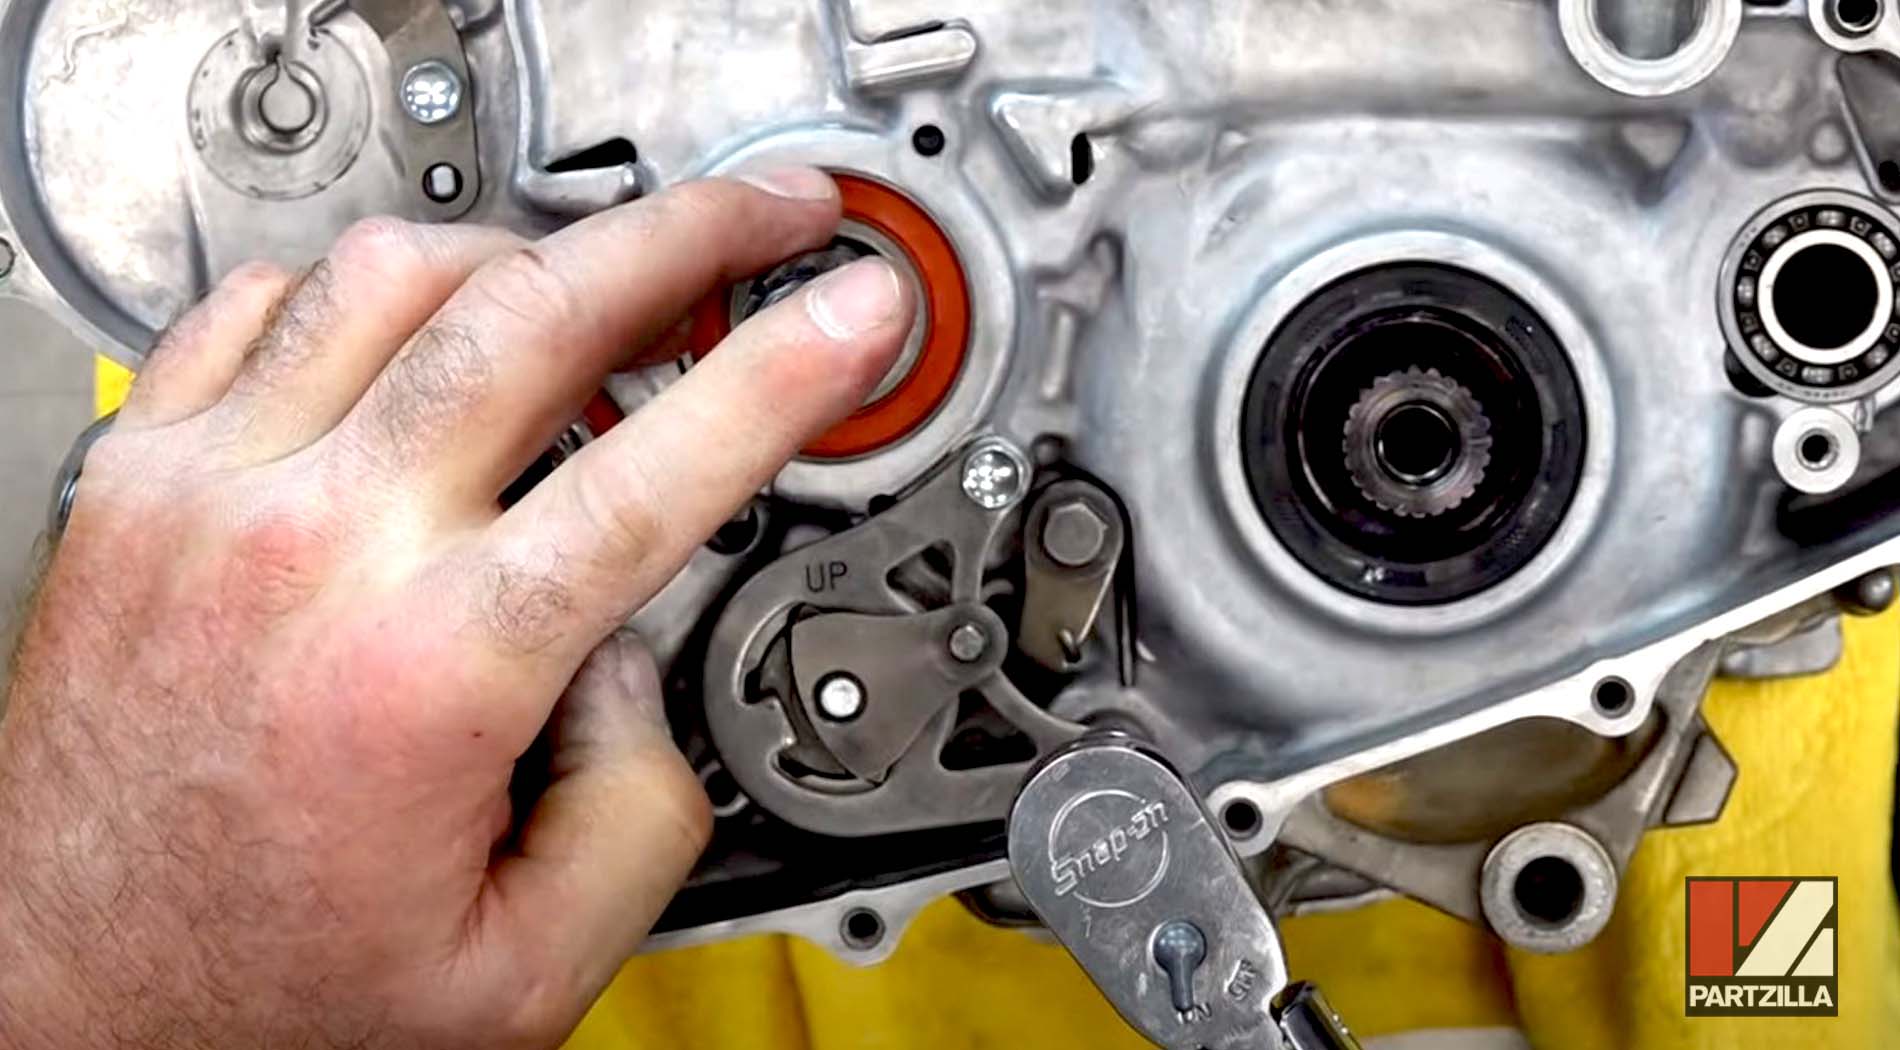
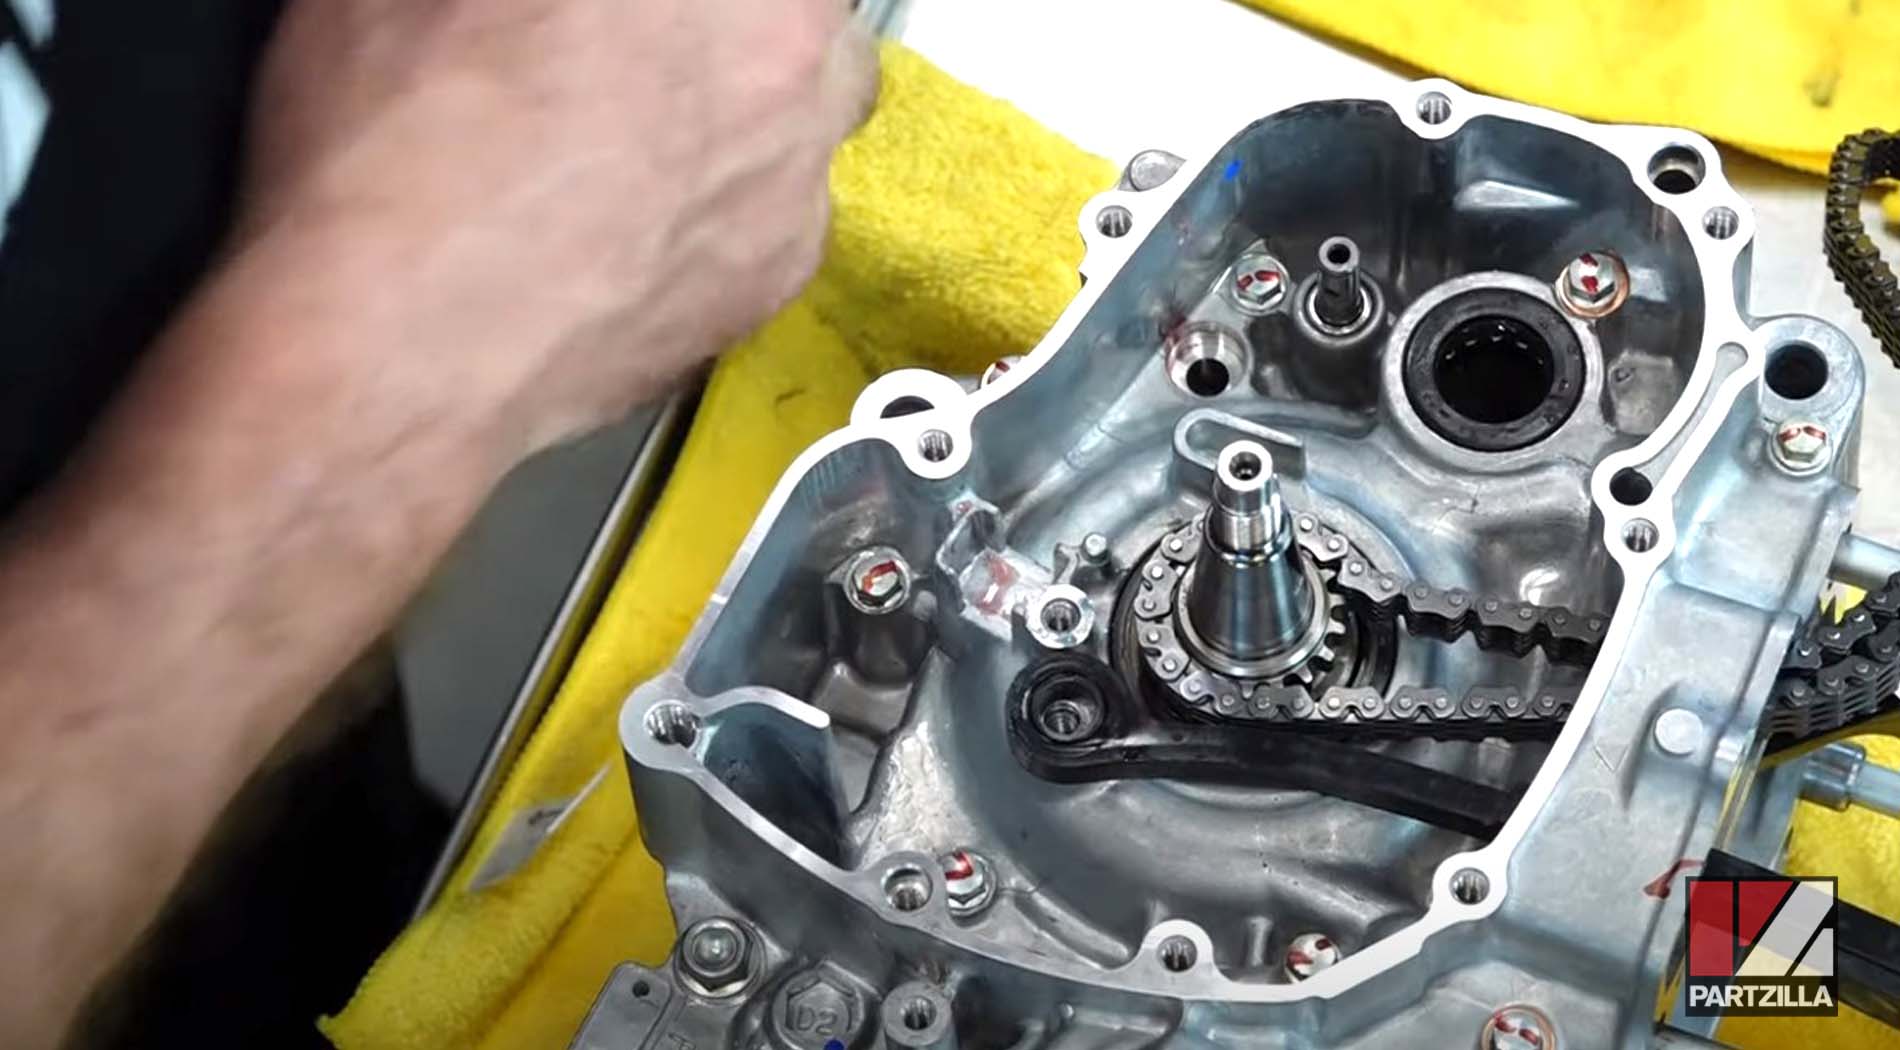
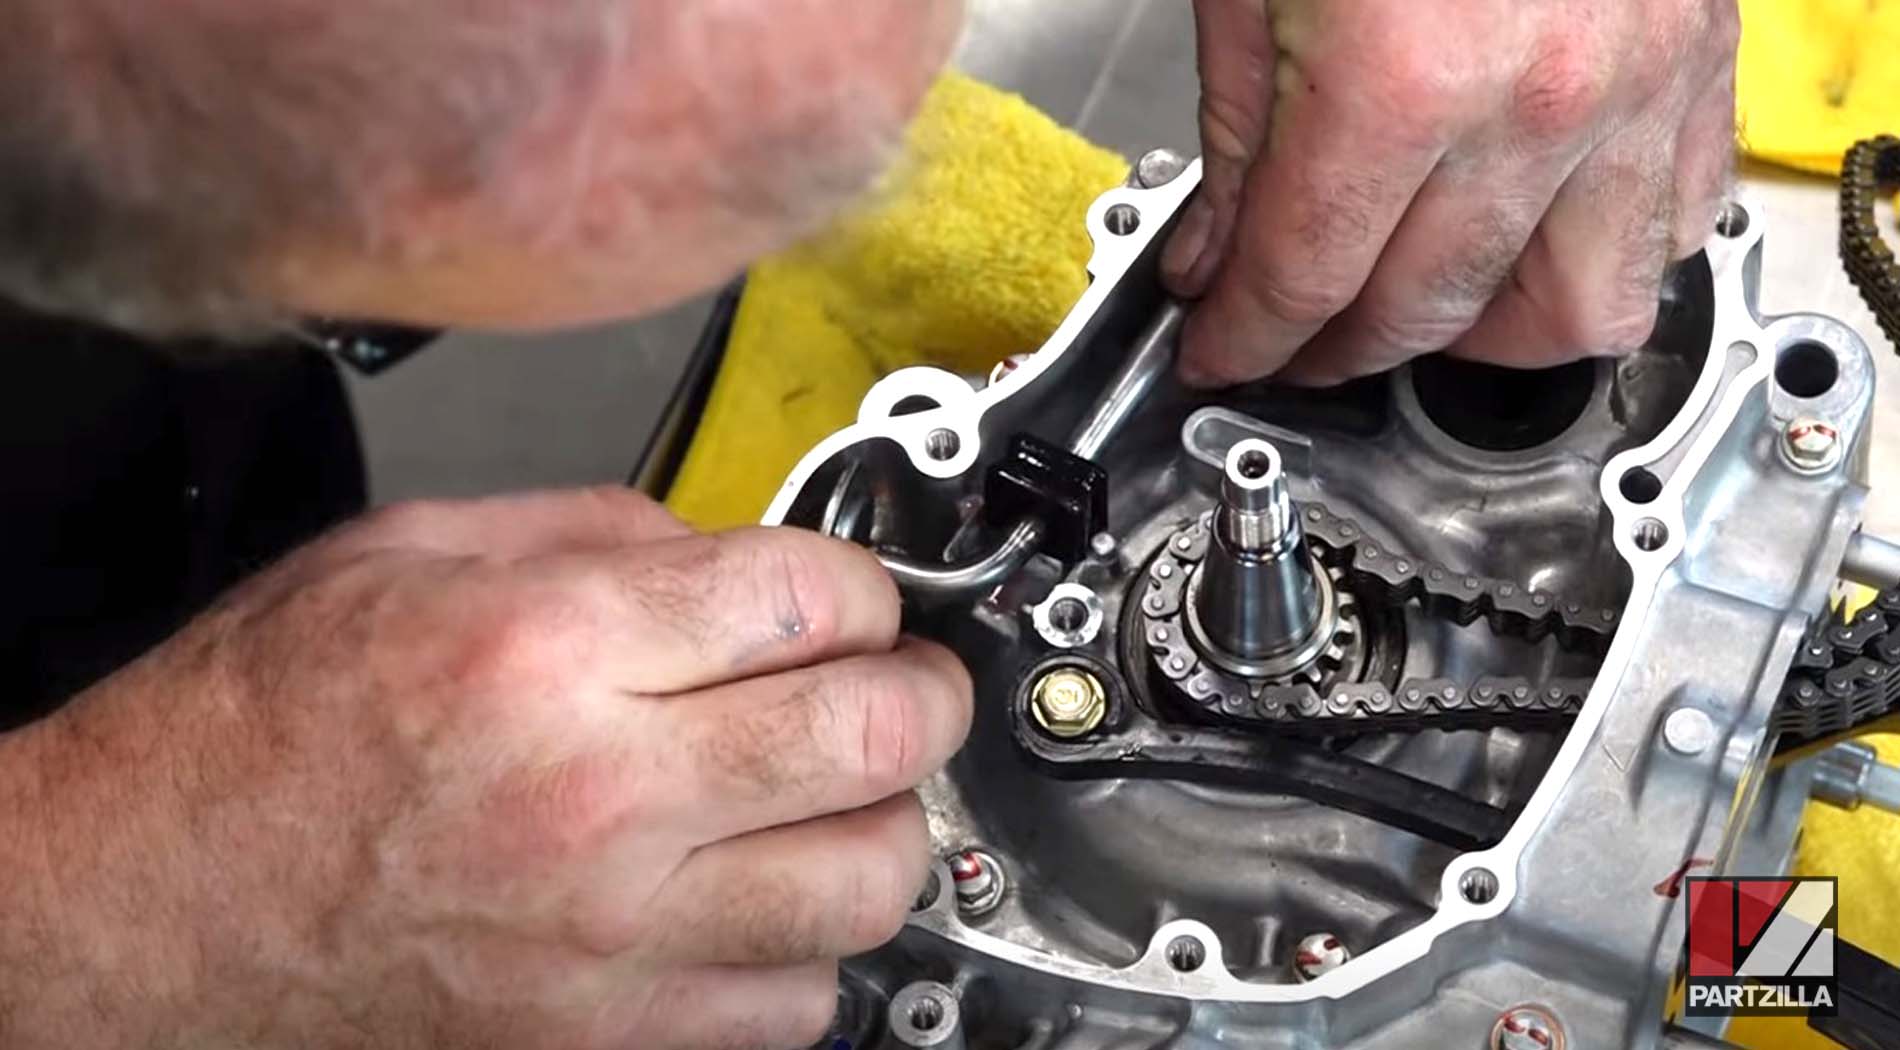
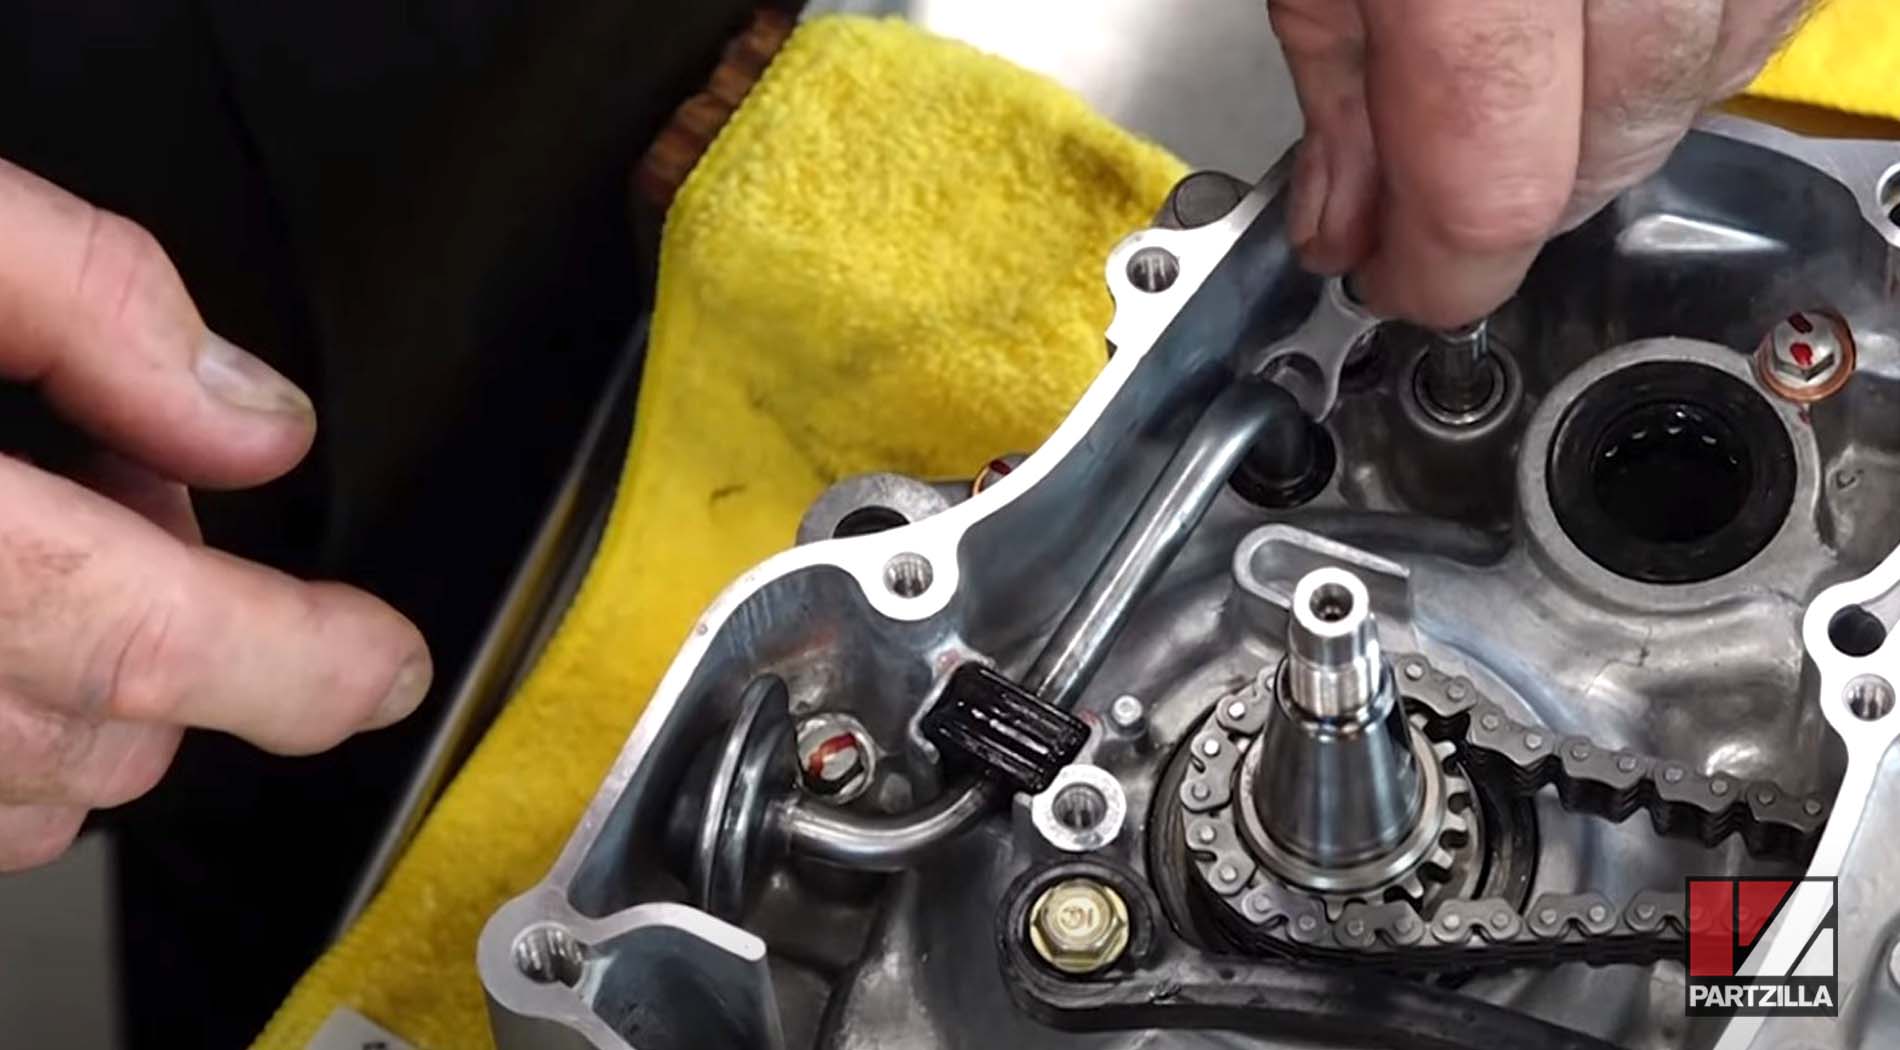
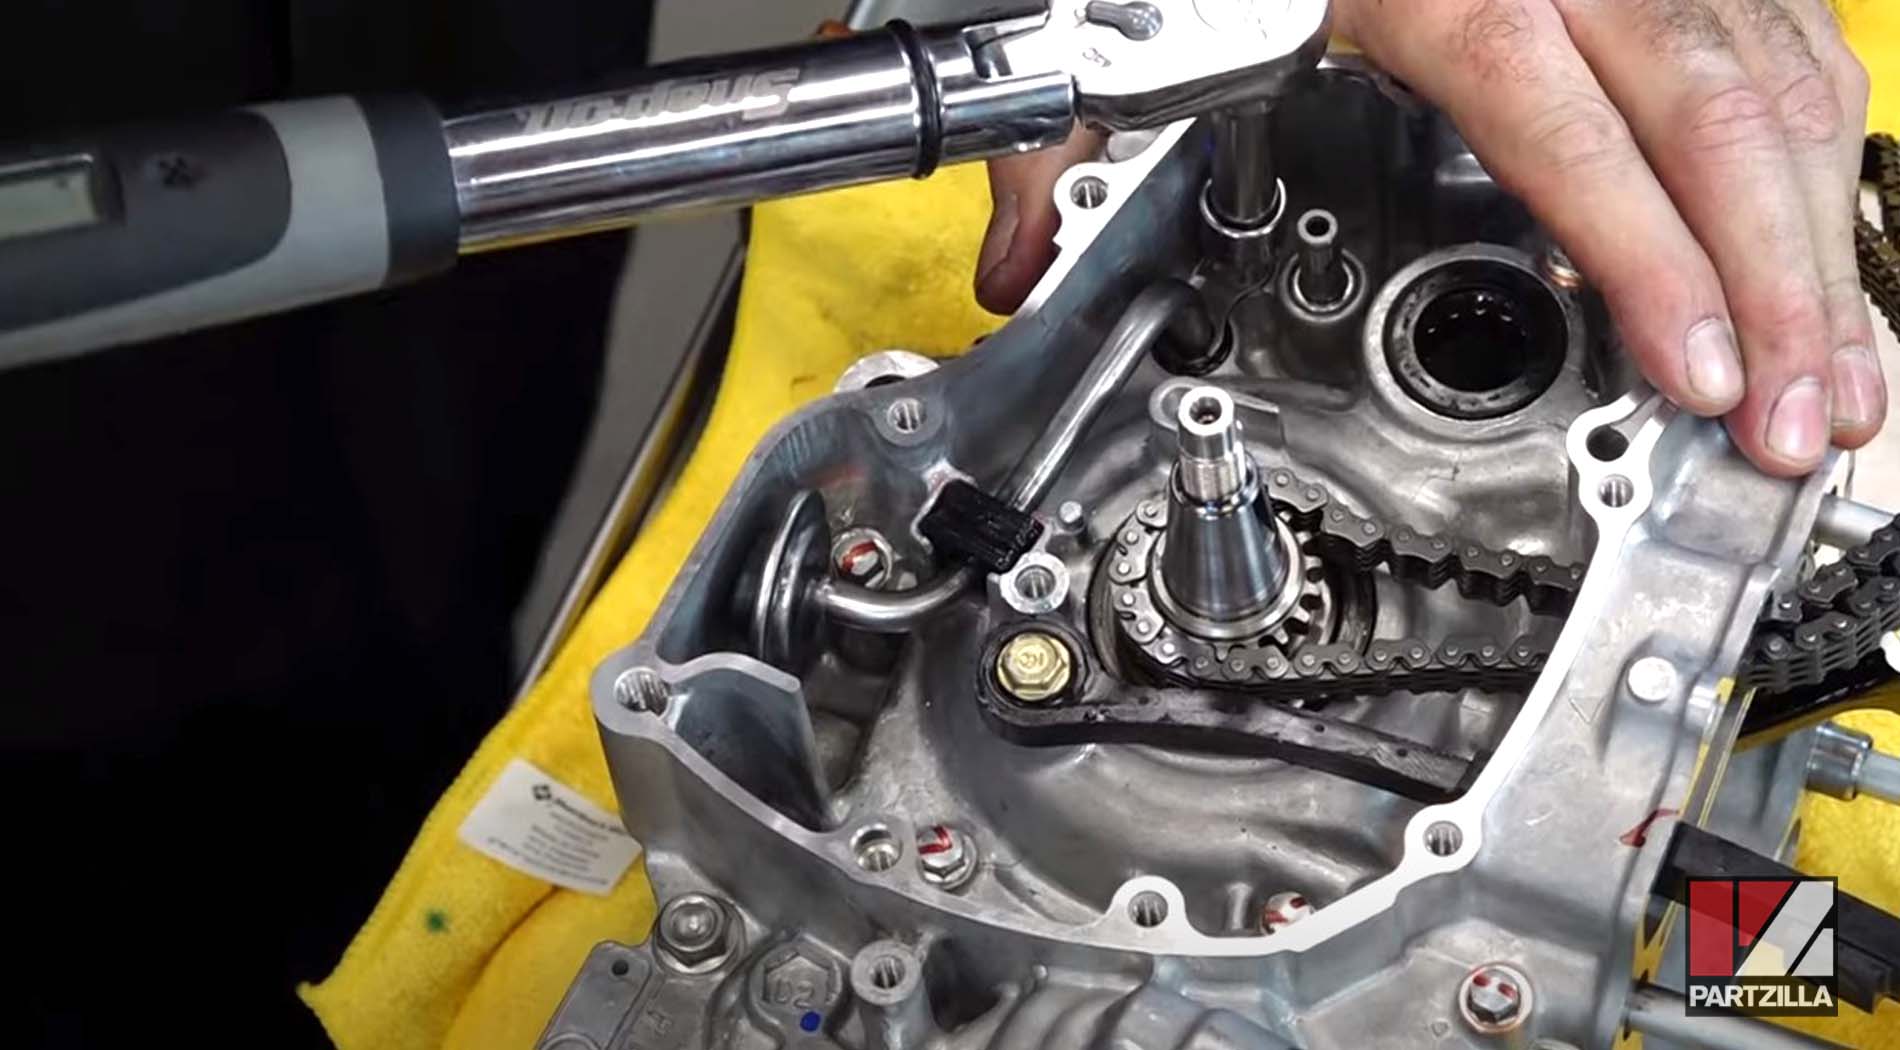
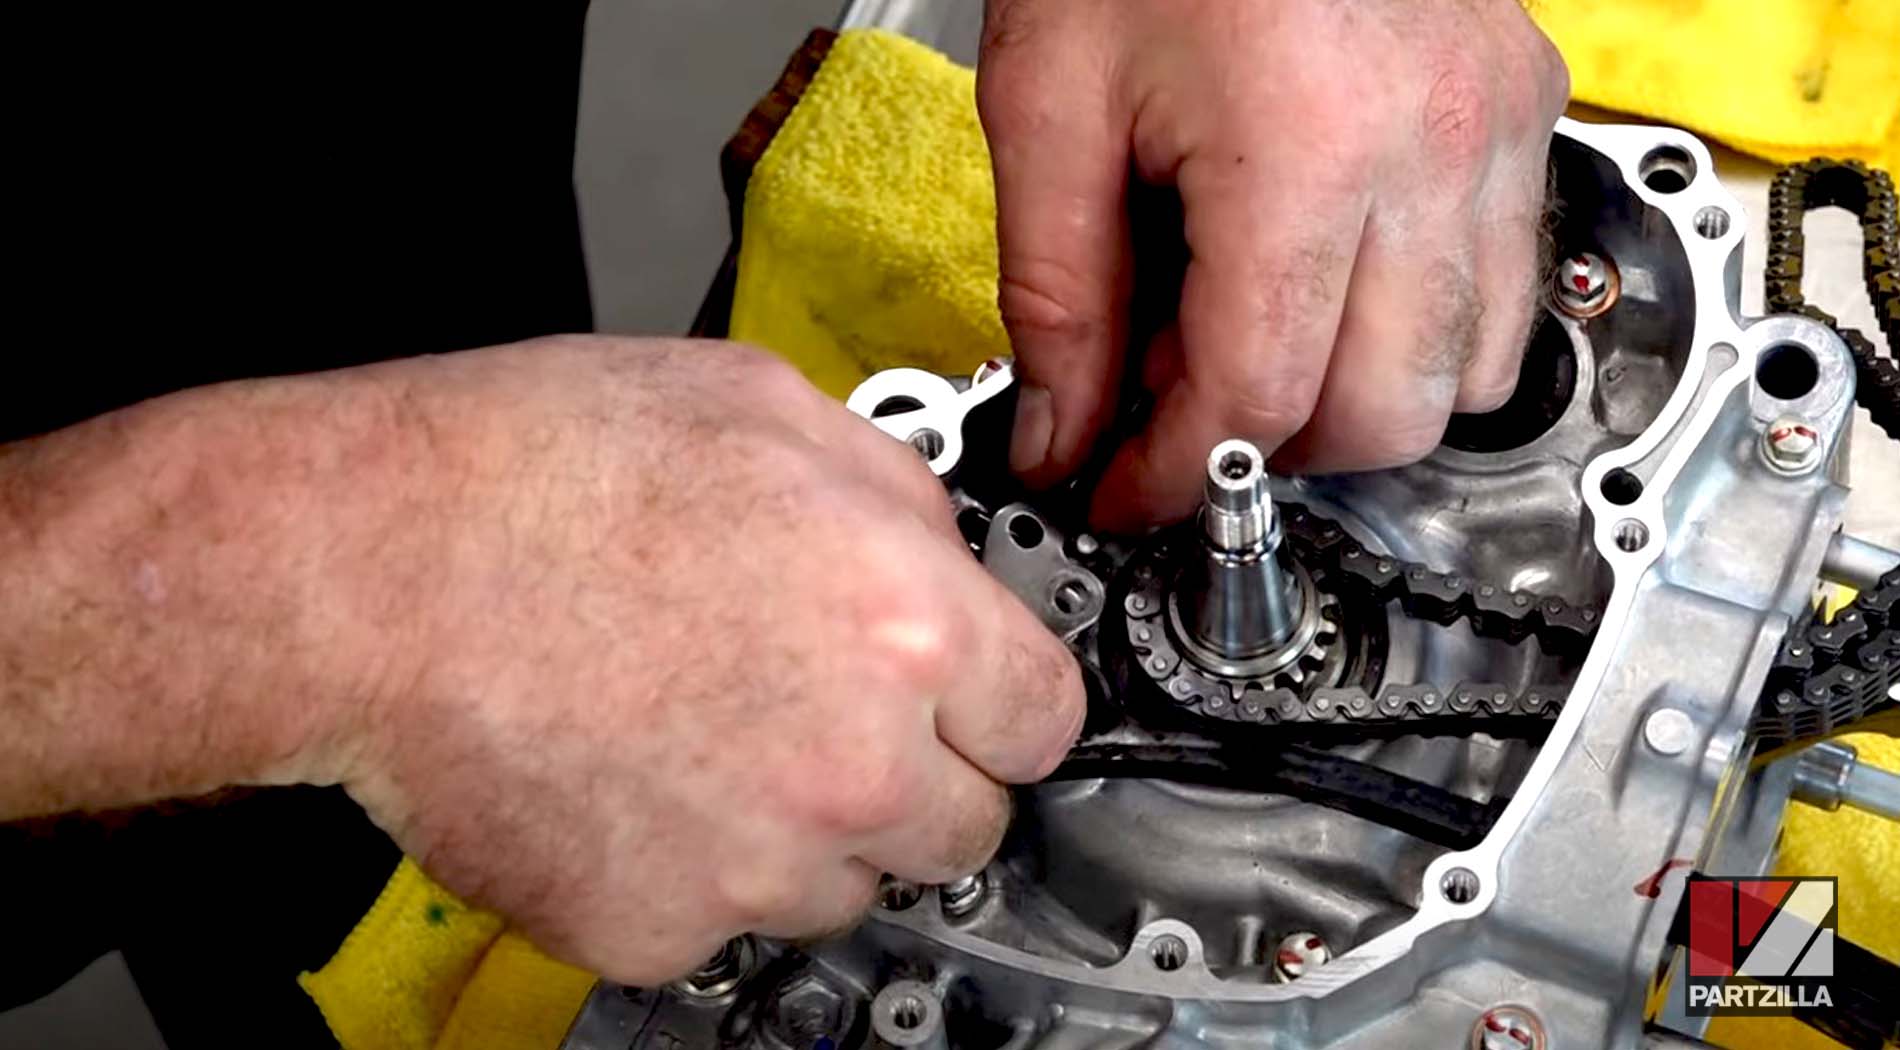
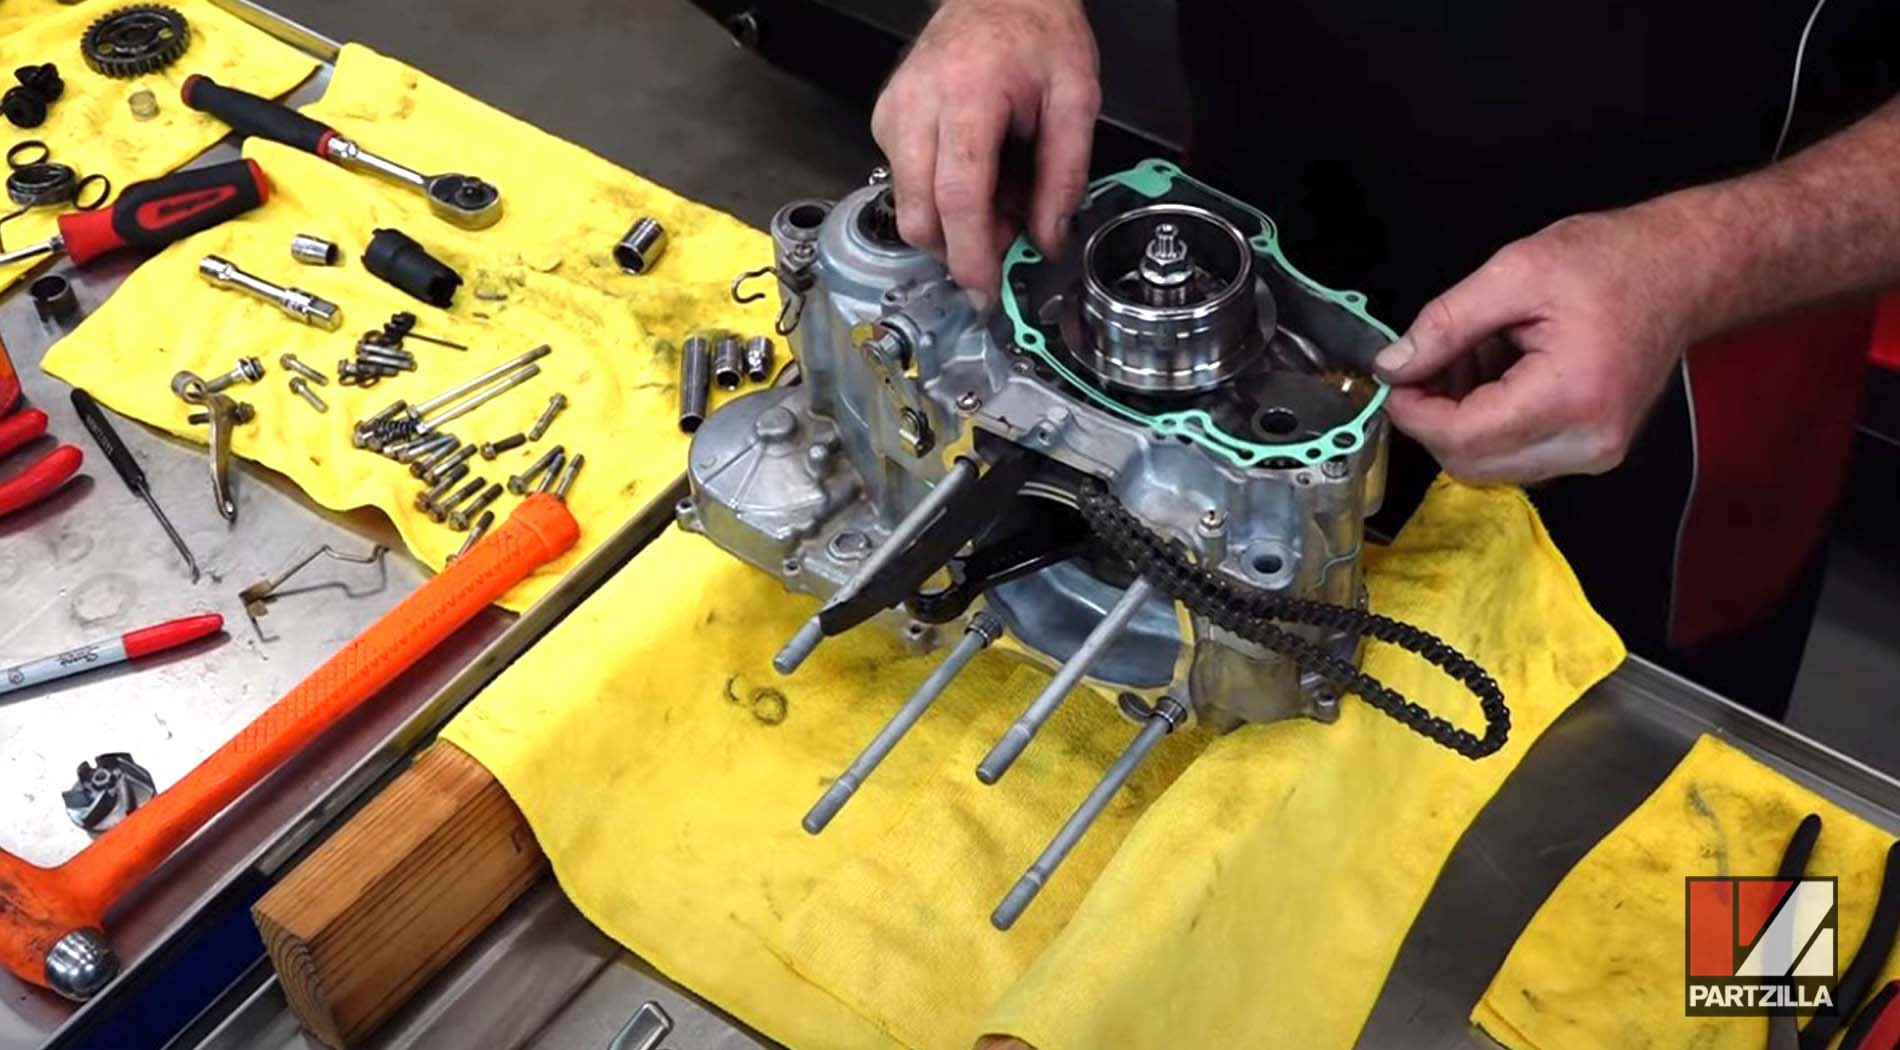
Honda CRF450 Bottom End Rebuild Timing Chain and Guide Installation
Step 5. Put the new timing chain in place, followed by the chain guide, the bolt, washer and collar that hold it in place, then torque the bolt to 9 foot-pounds.
Watch the clip below to see the timing chain and guide installation segment of our Honda CRF450 bottom end rebuild.
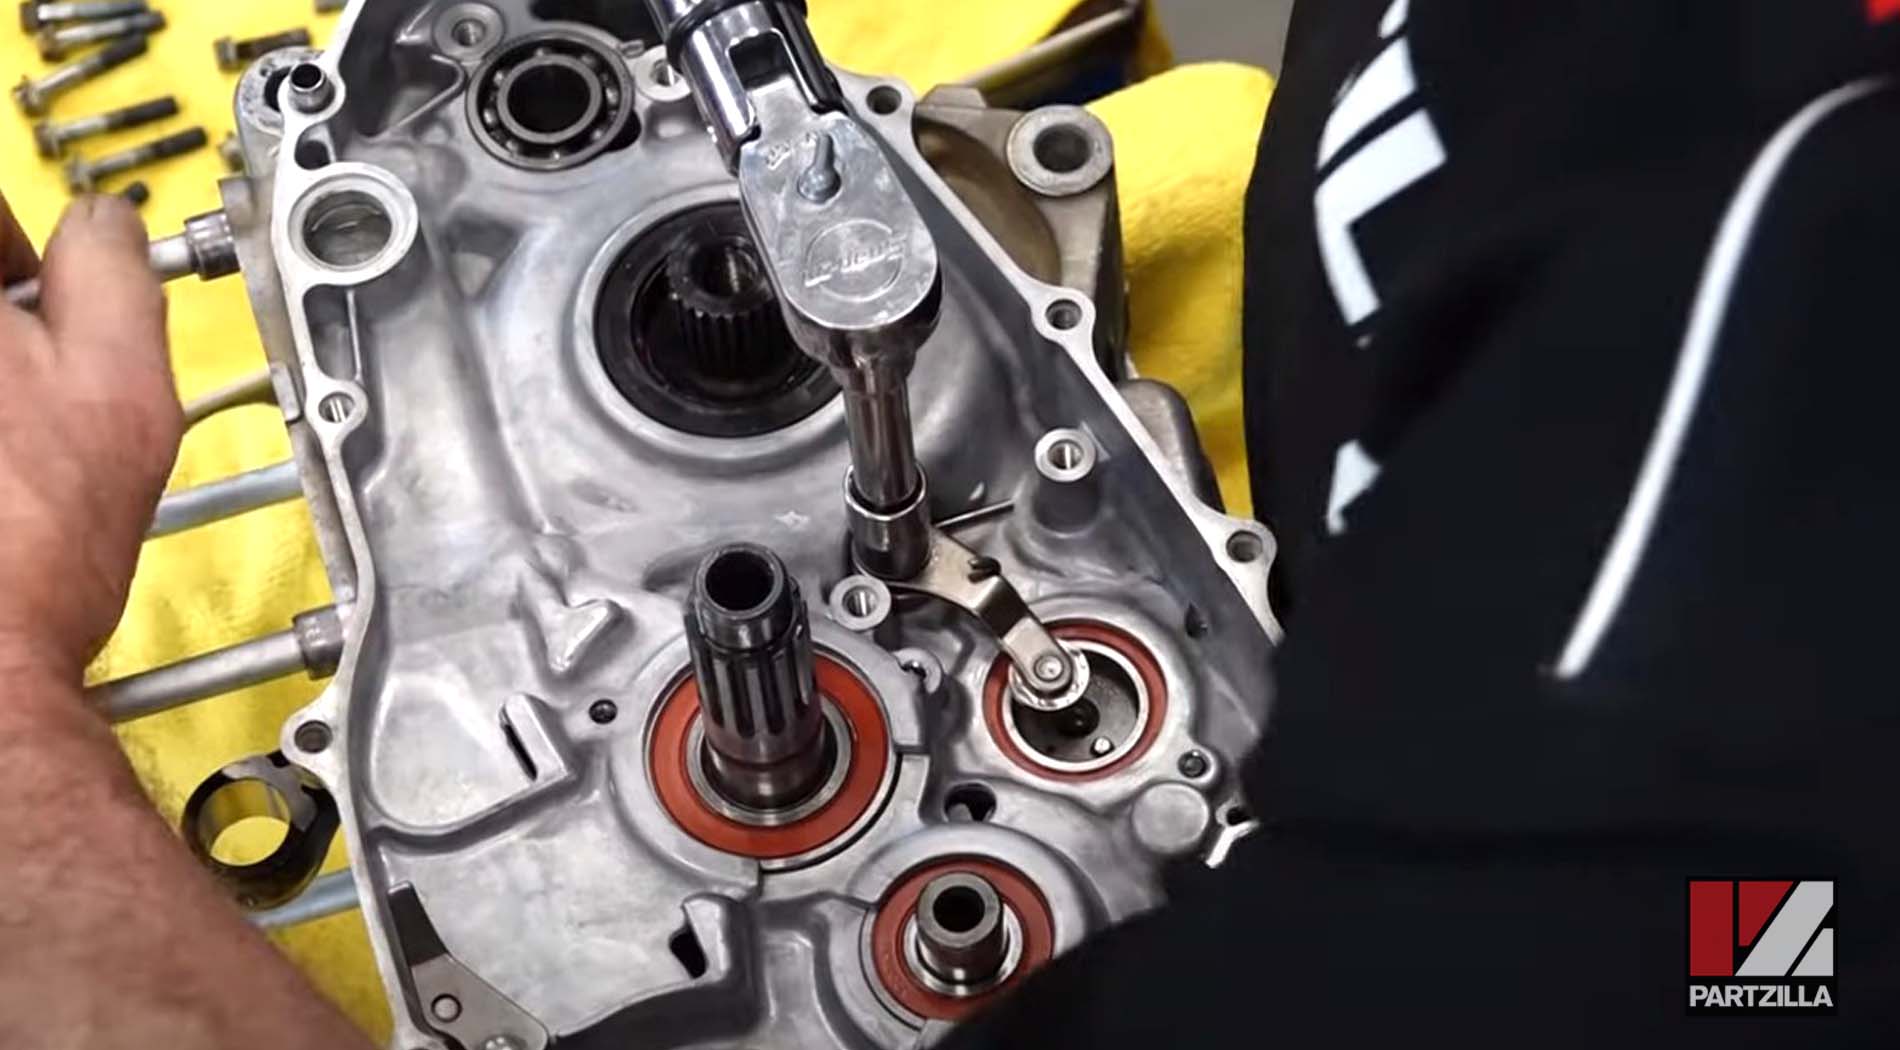
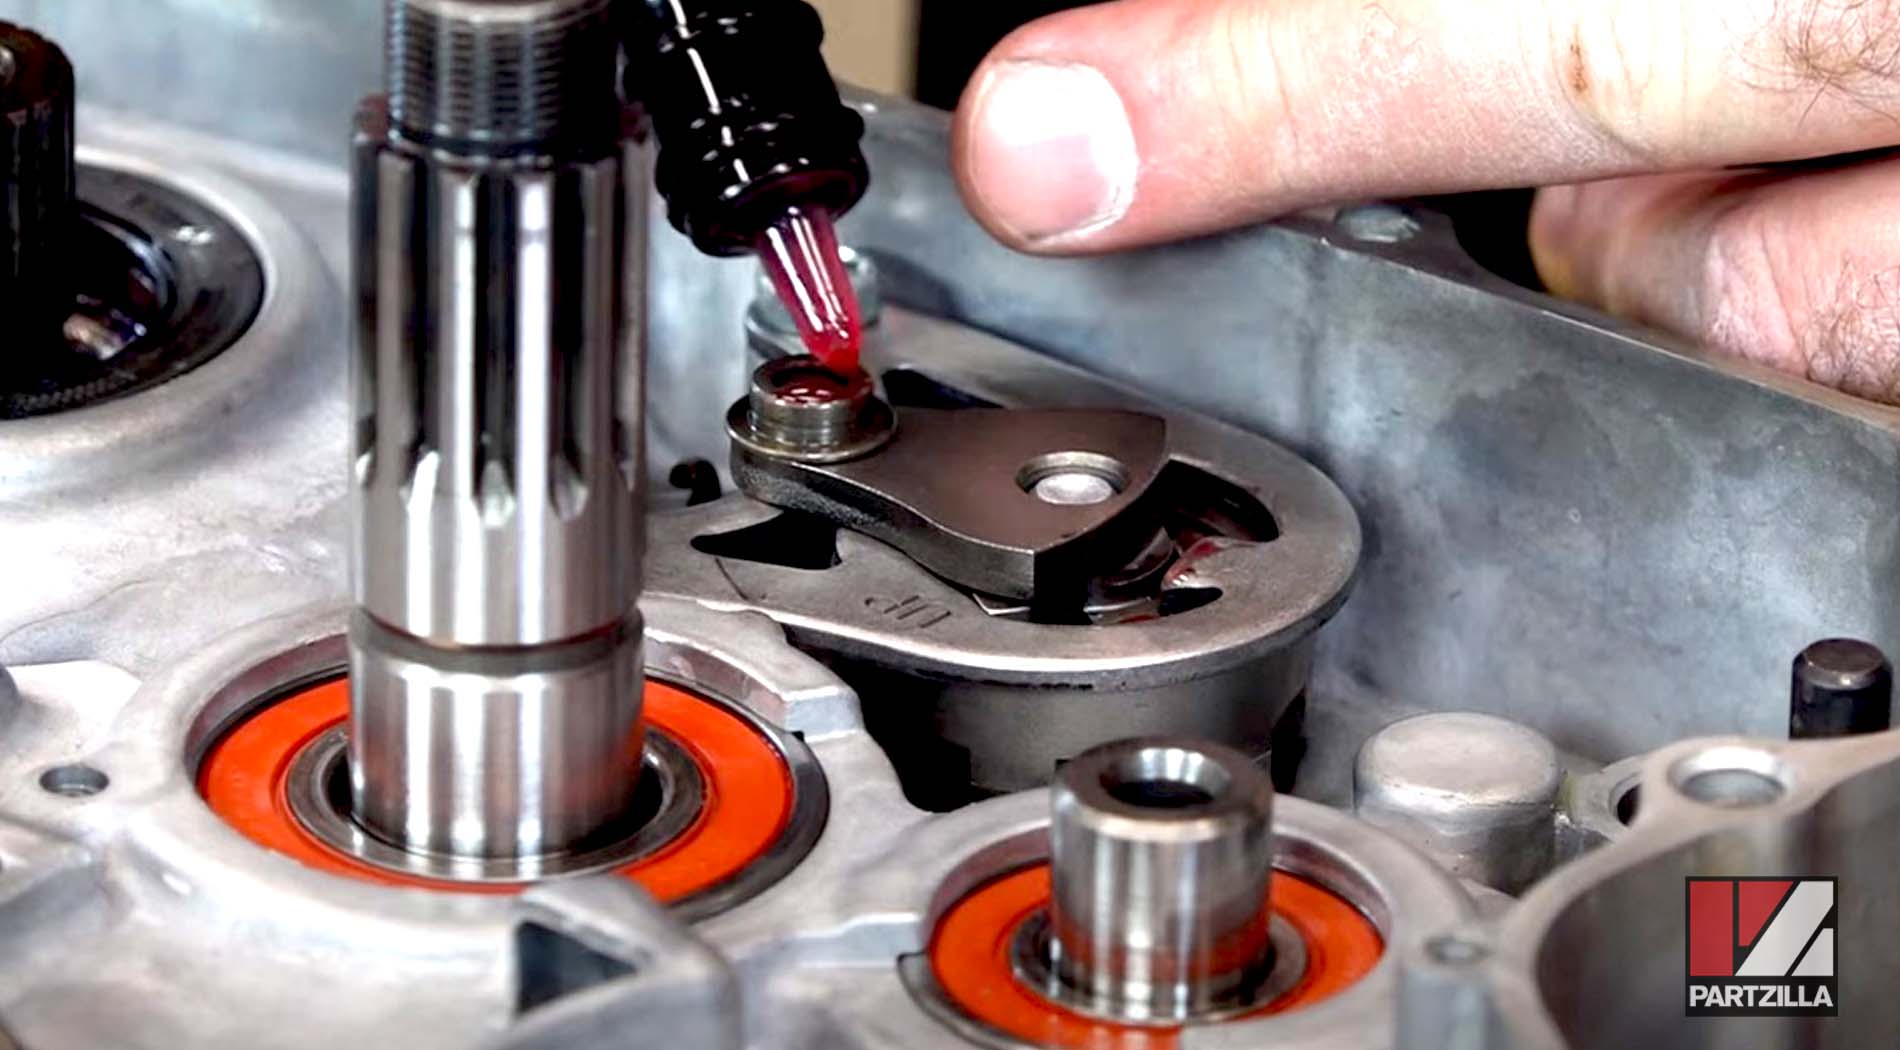
Honda CRF450 Bottom End Rebuild Oil Pump Gear and Counterbalancer Installation
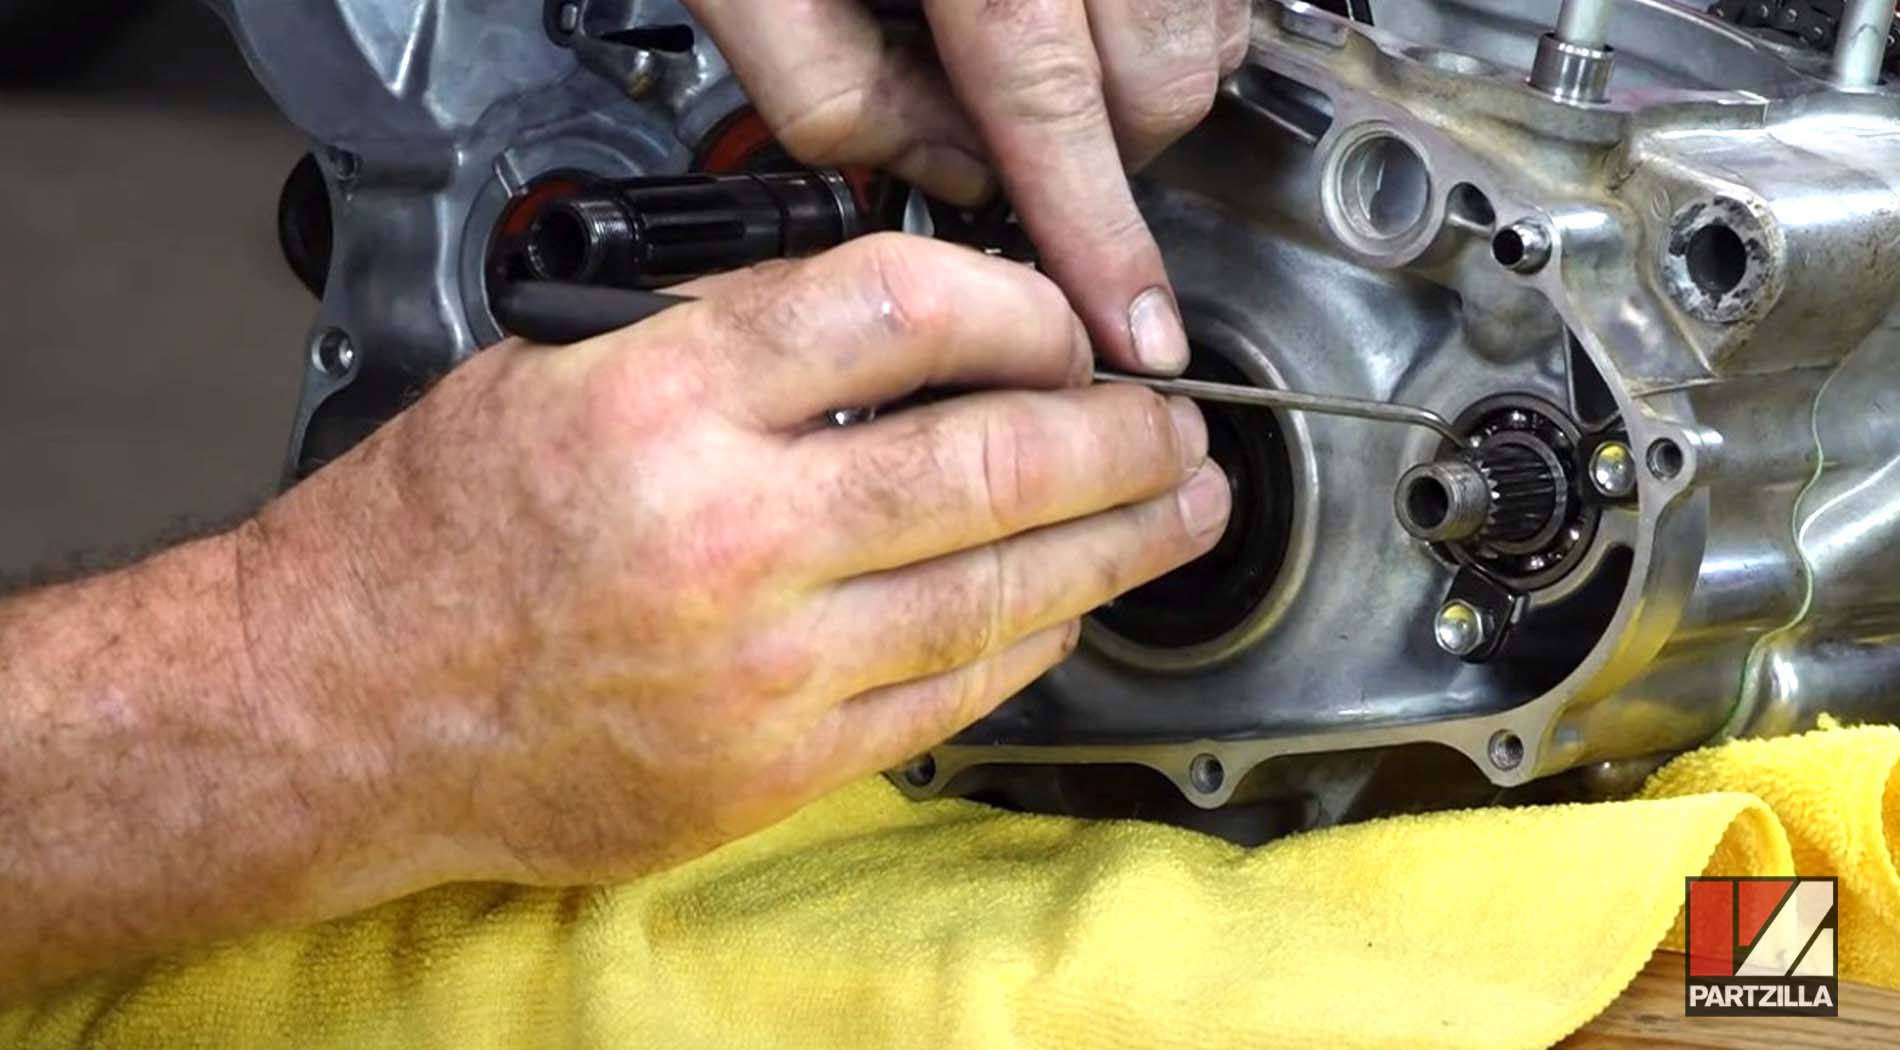
Step 6. Add a little assembly lube to the O-ring and holder up top on the oil pickup tube and install it.
Step 7. Install the plate that holds the pickup tube, and tighten the bolt that holds it in place.
Step 8. Install the upper holder and its 6mm bolts, then torque the bolts to 7 foot-pounds.
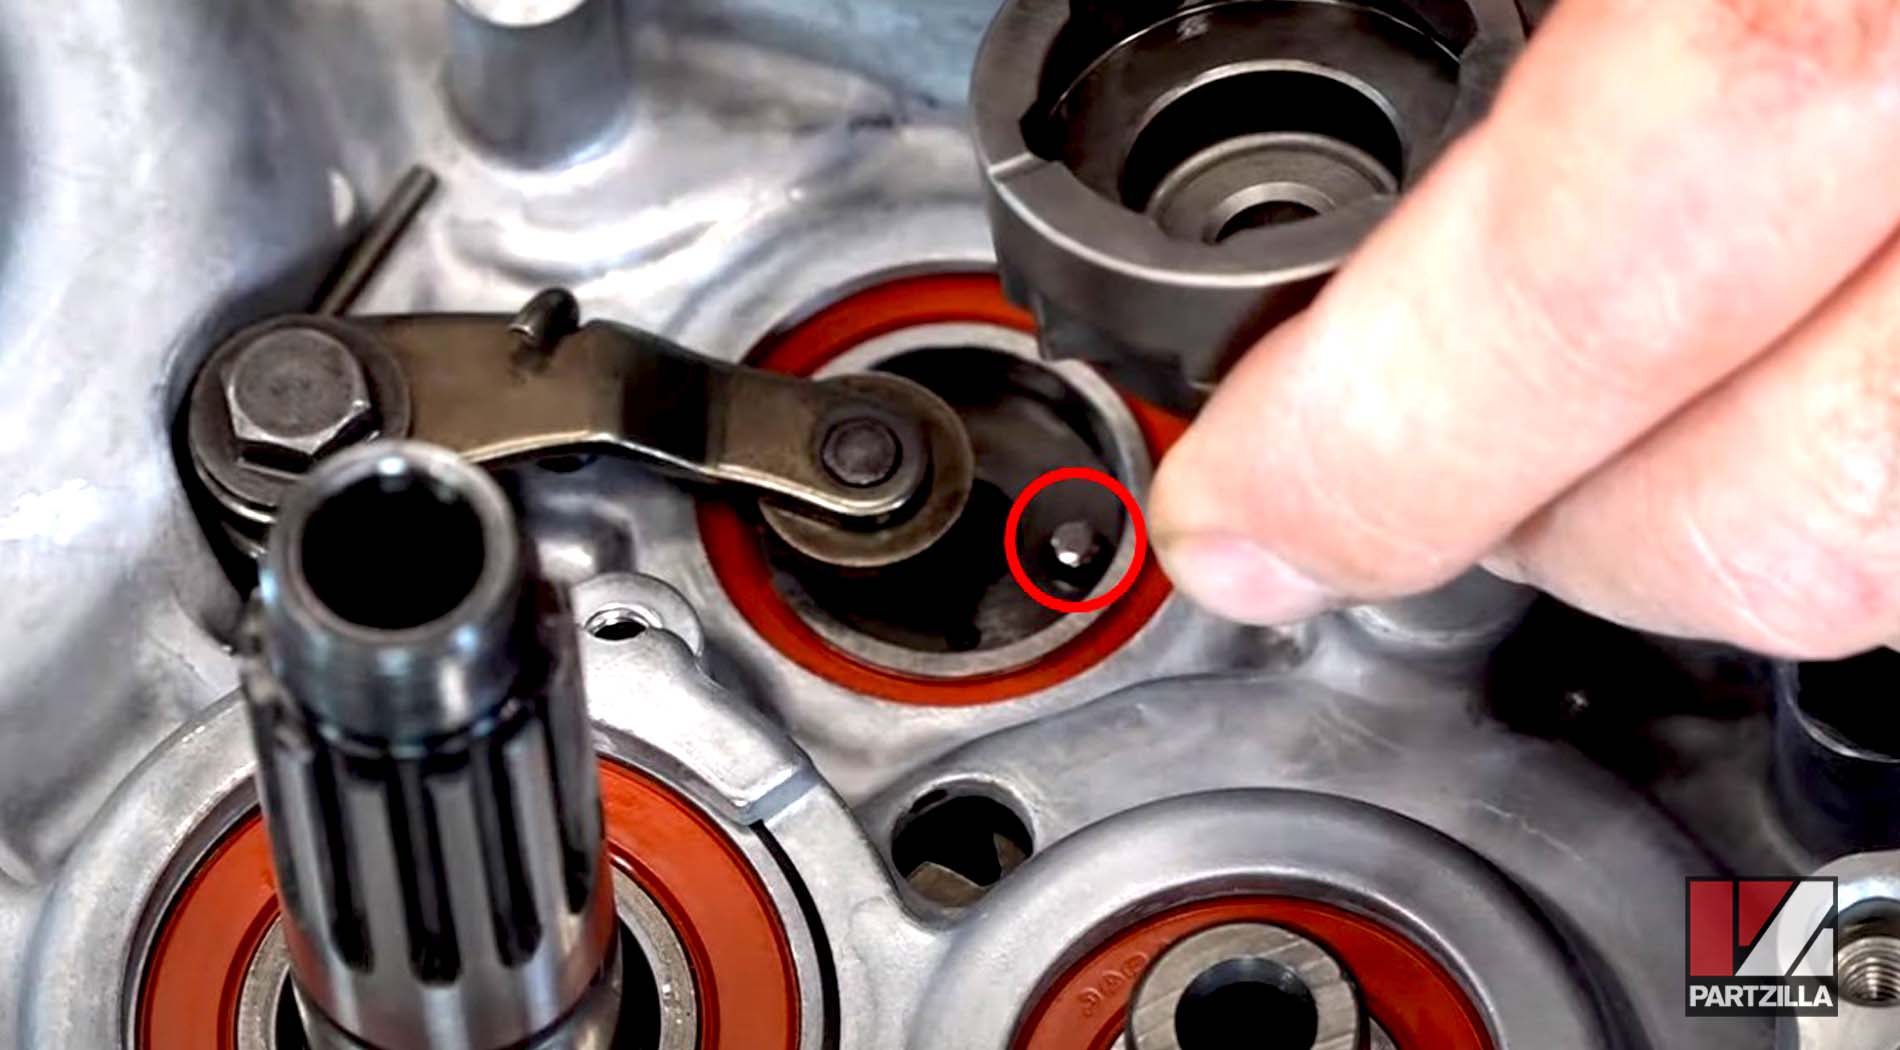
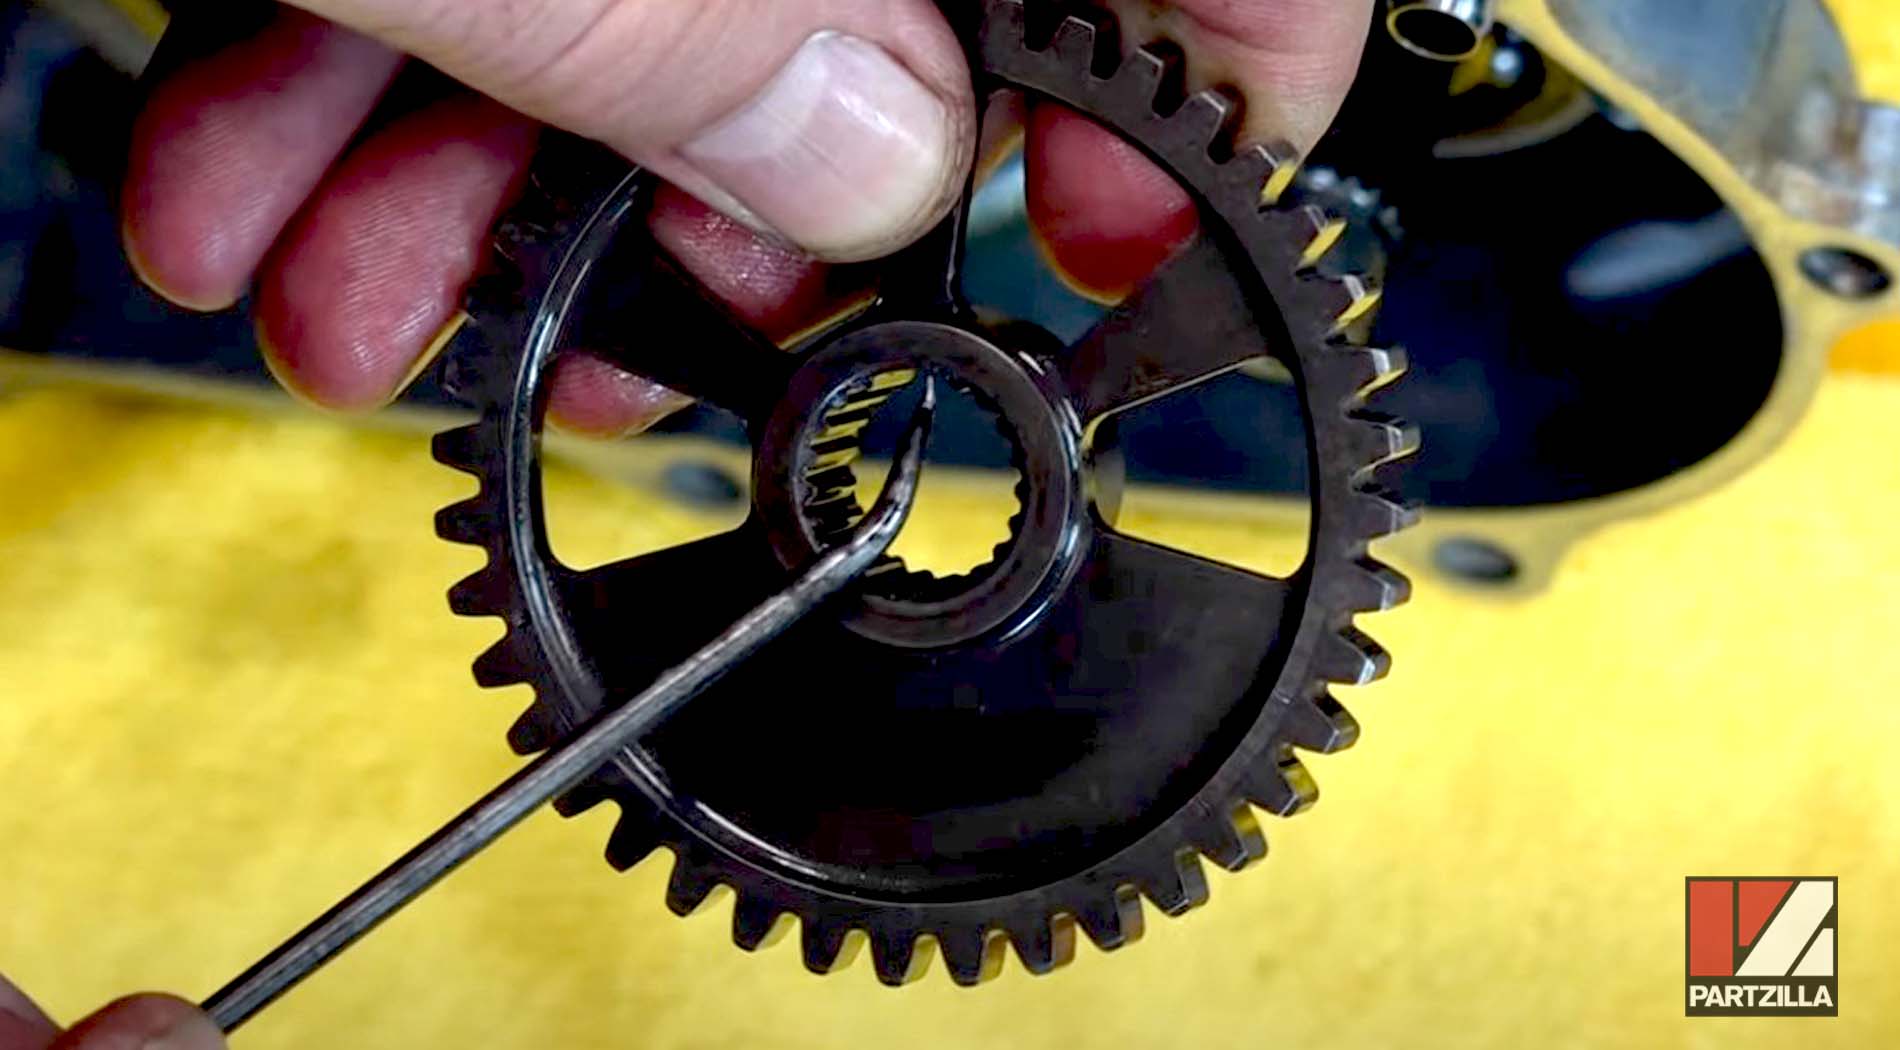
Step 9. Install the pin and clip that hold the oil pump gear in place, followed by the gear itself.
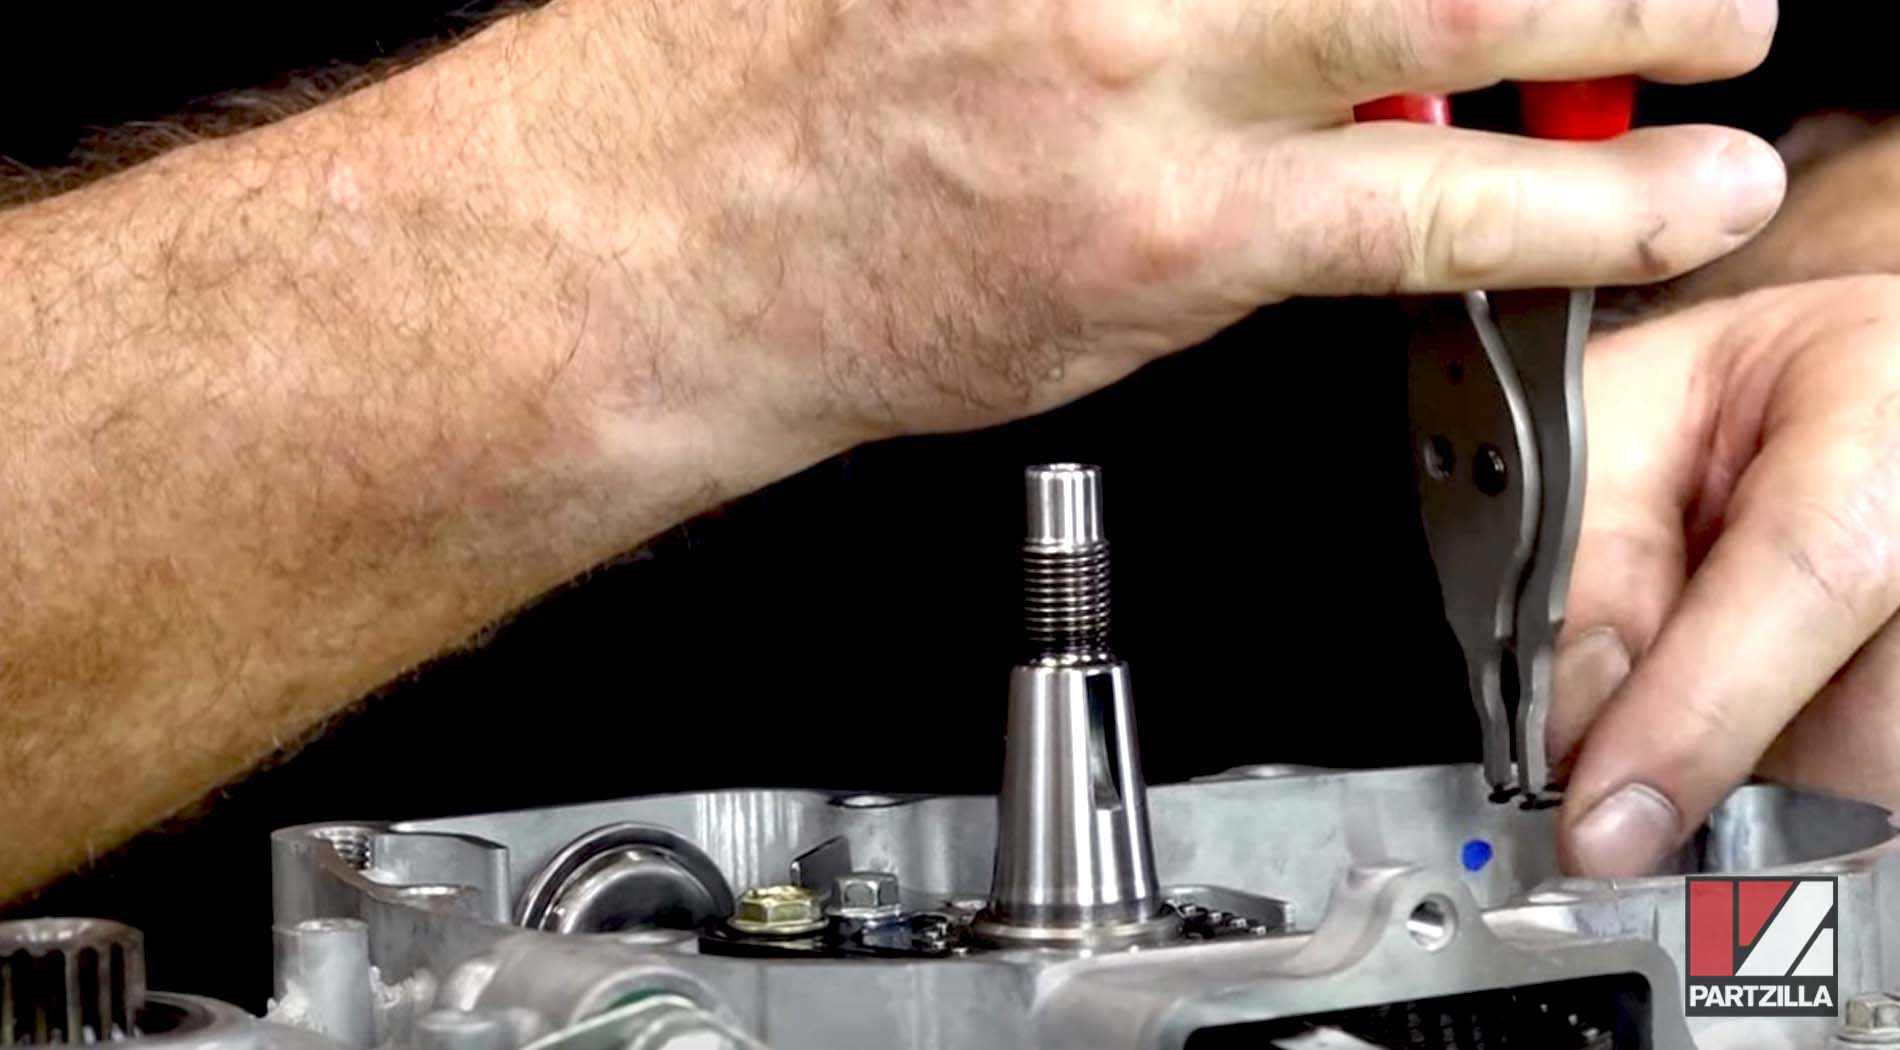
NOTE: When you put the clip on, spread it enough to get over the end of the shaft. Otherwise, if you go too far and bend it, it's no longer usable.
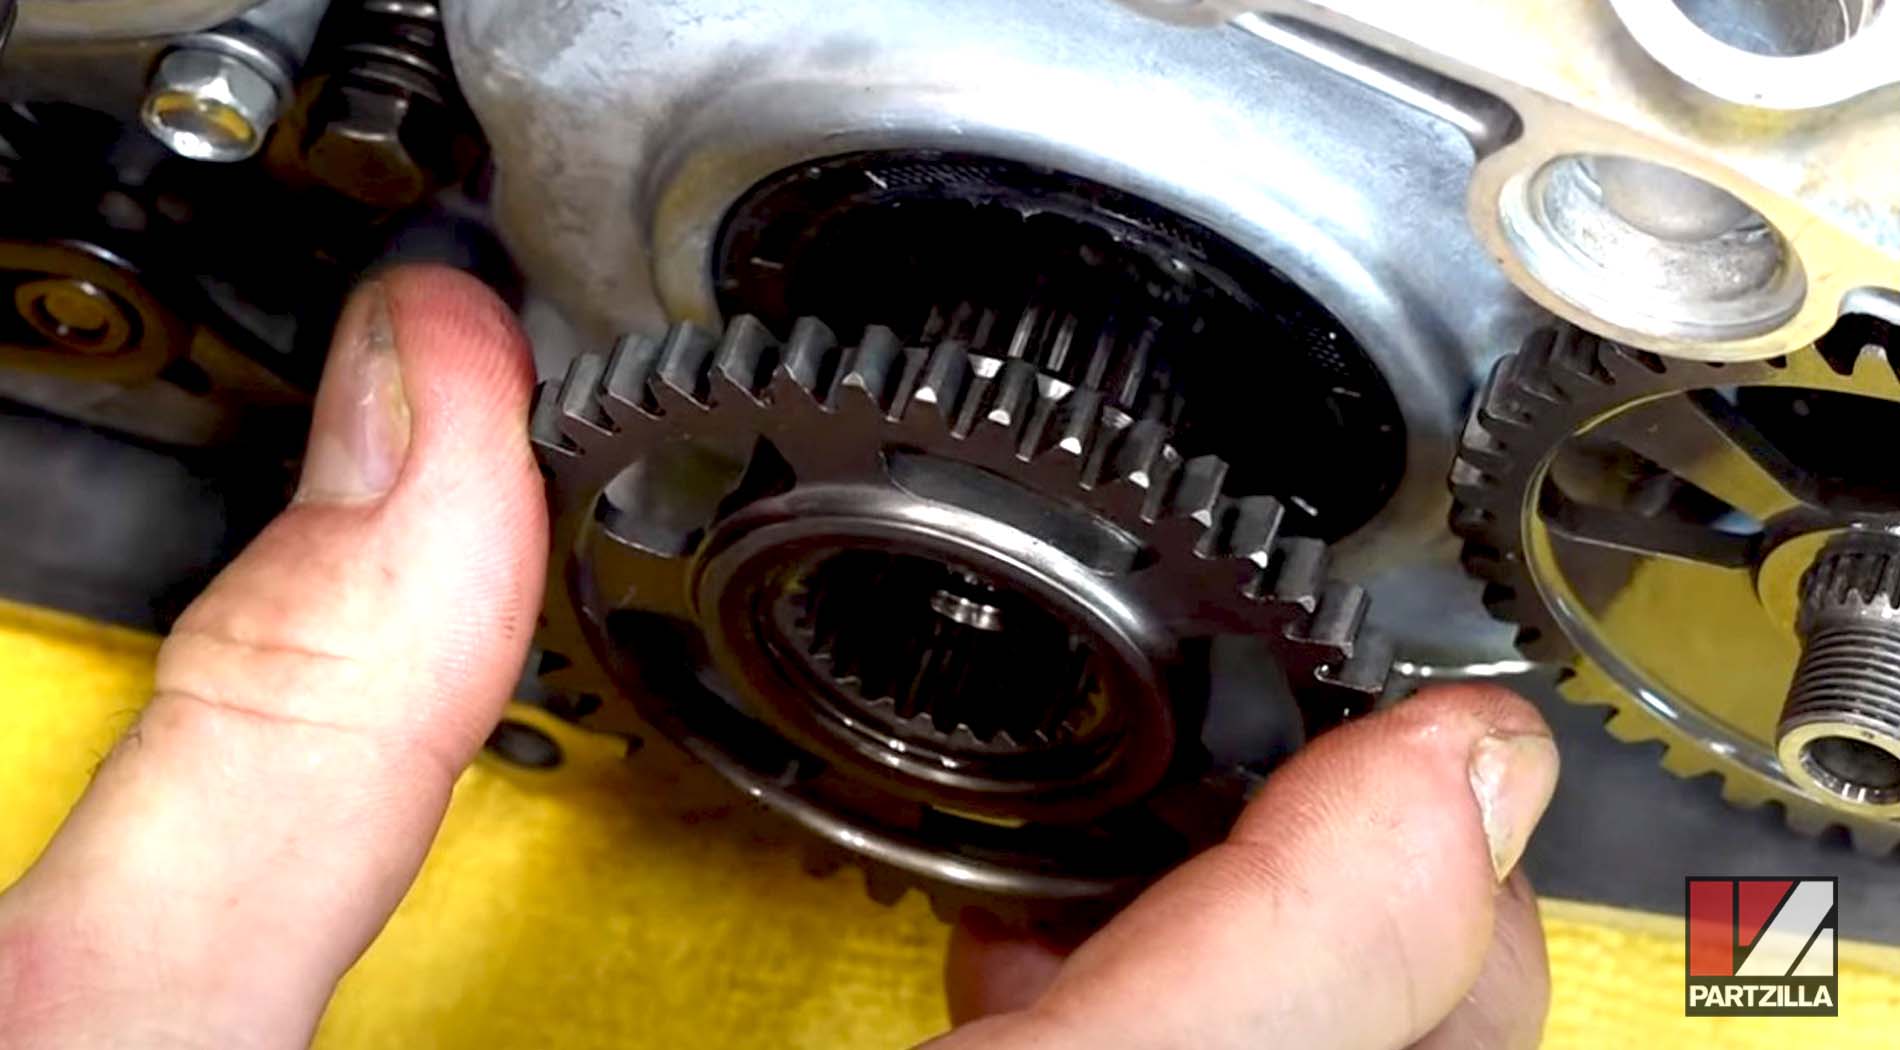
Step 10. Install the counterbalance, being careful not to damage the plastic gear for the oil pump.
Watch the clip below to see the oil pump gear and counterbalancer installation segment of our Honda CRF450 bottom end rebuild.
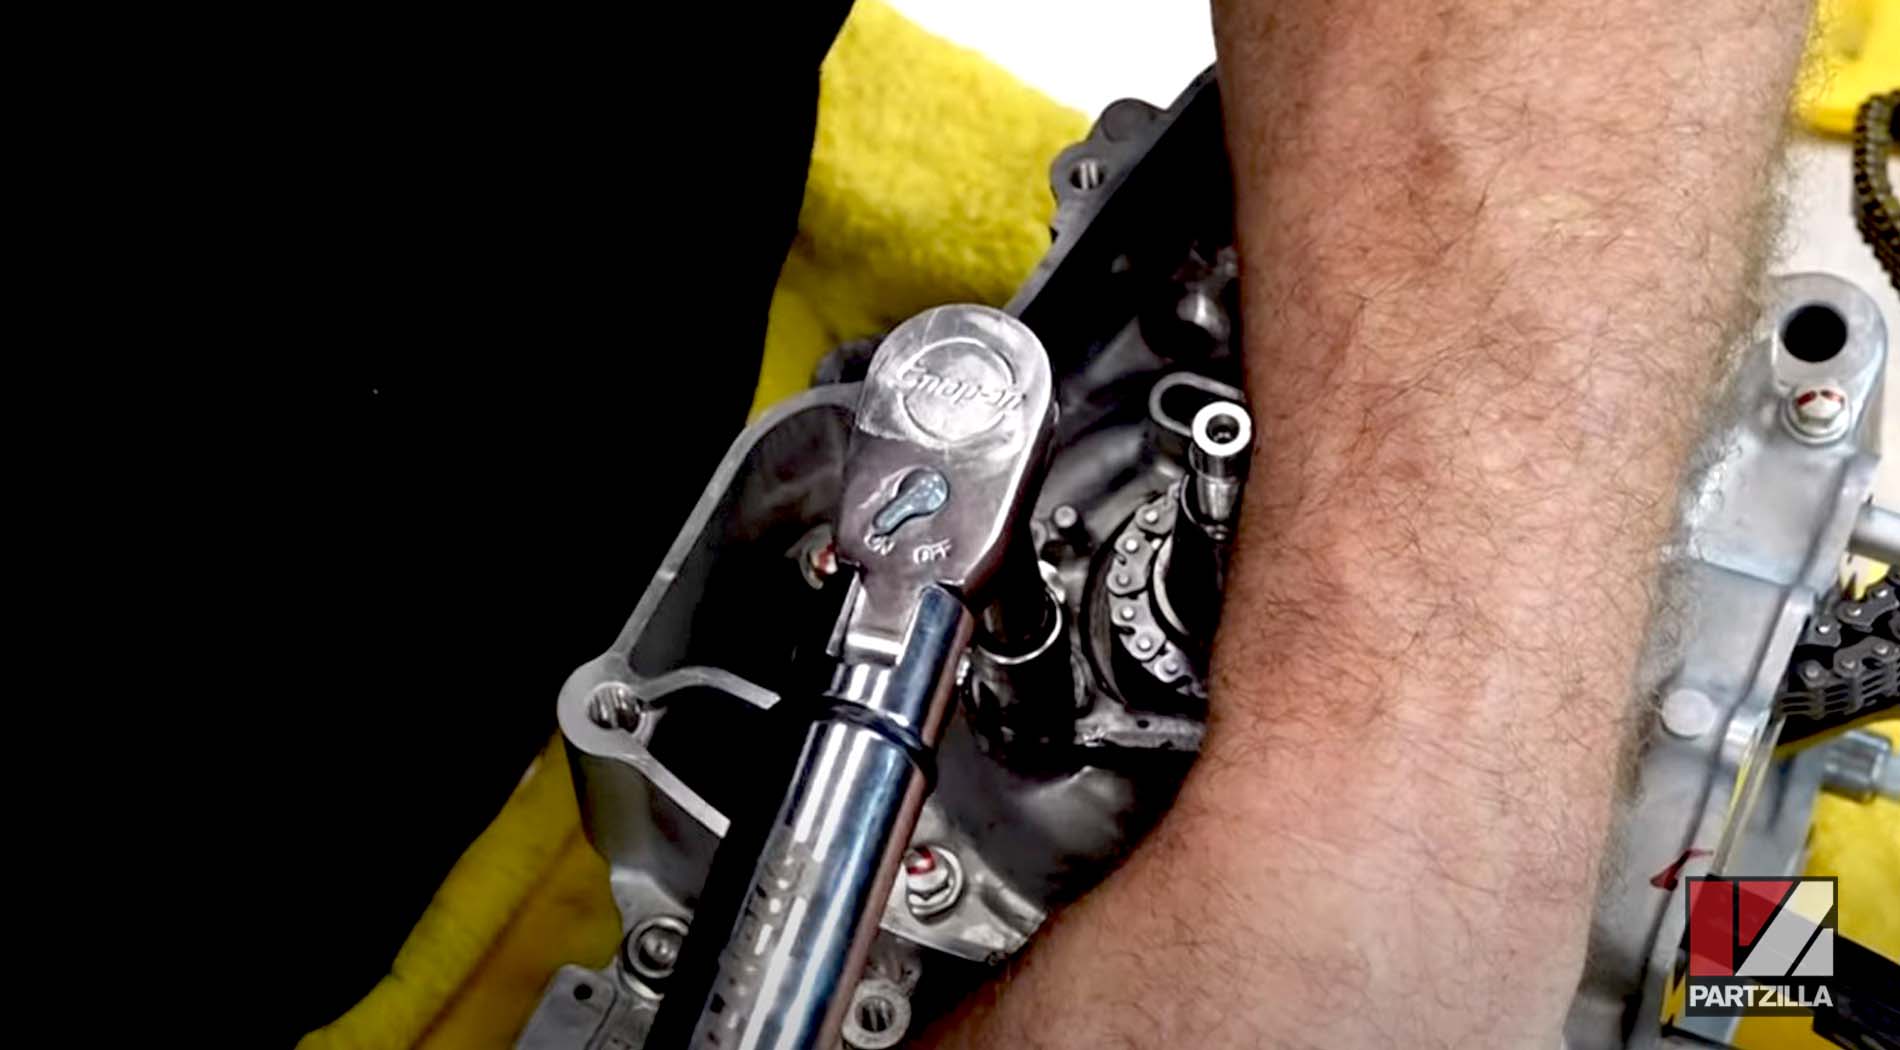
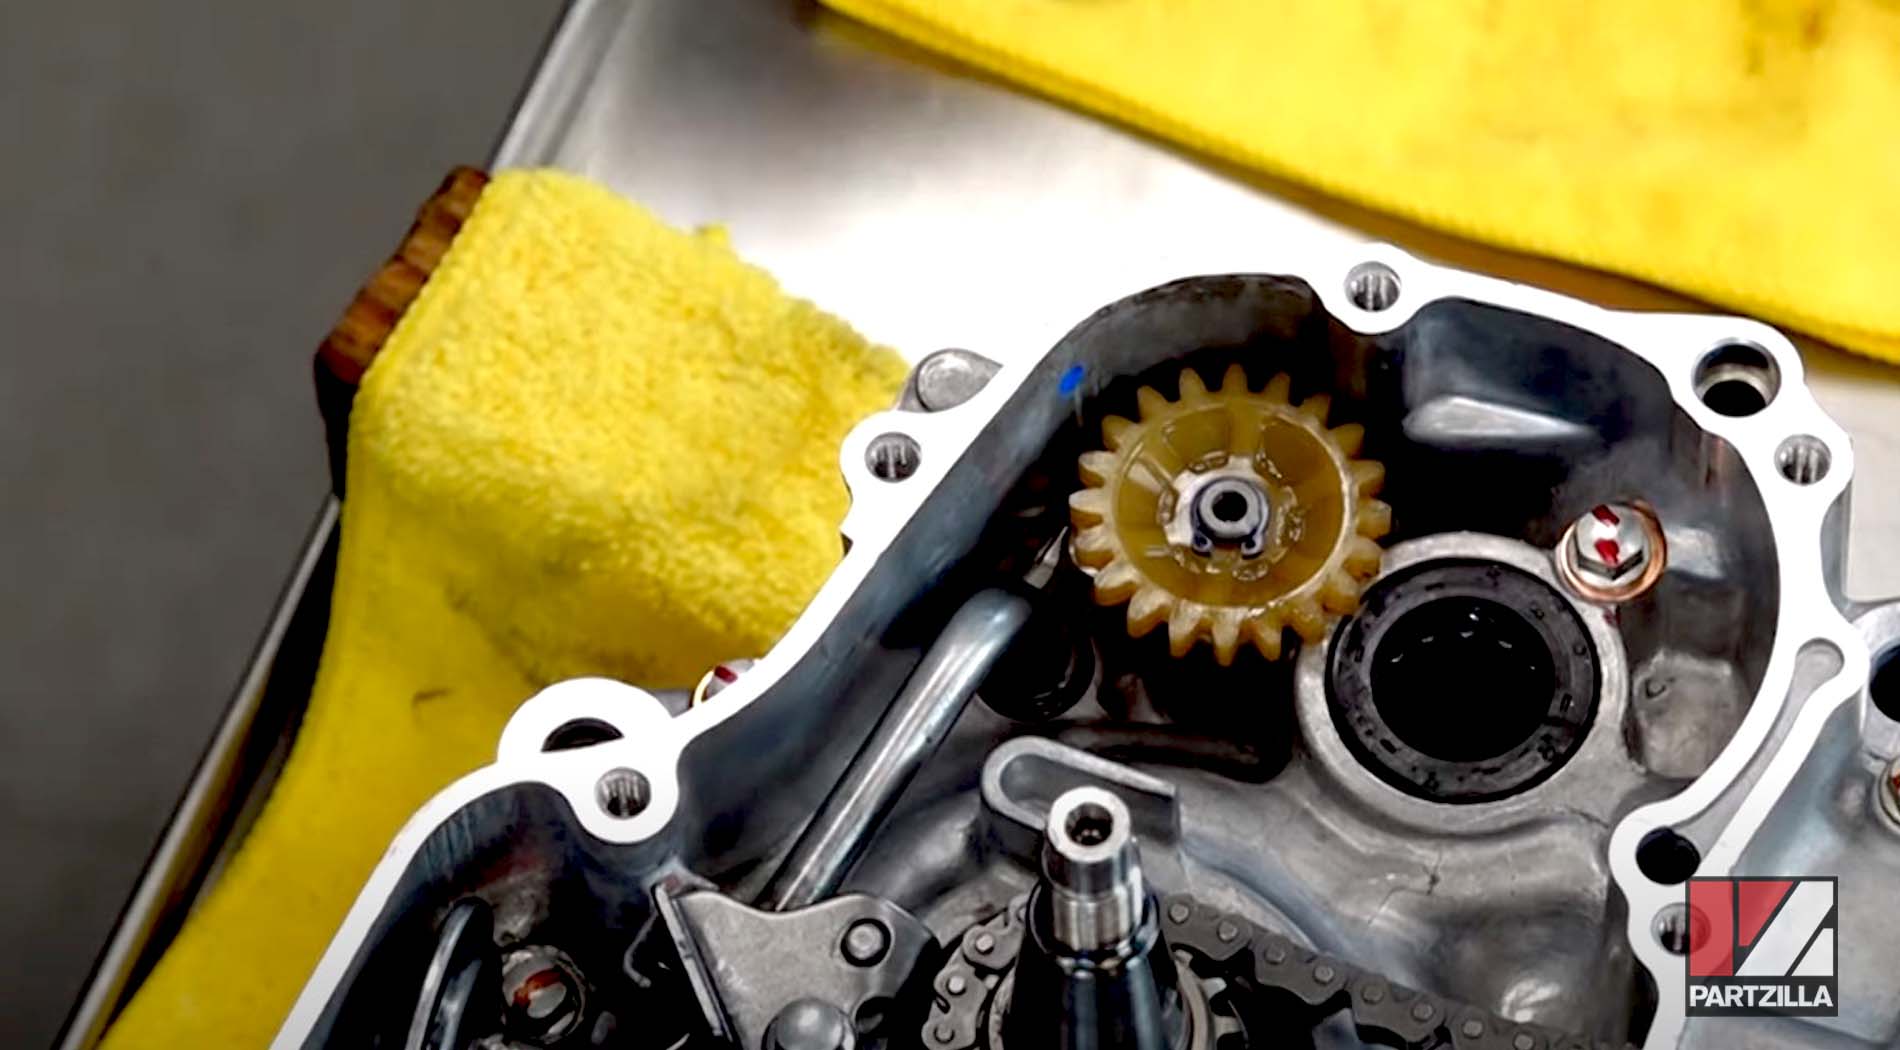
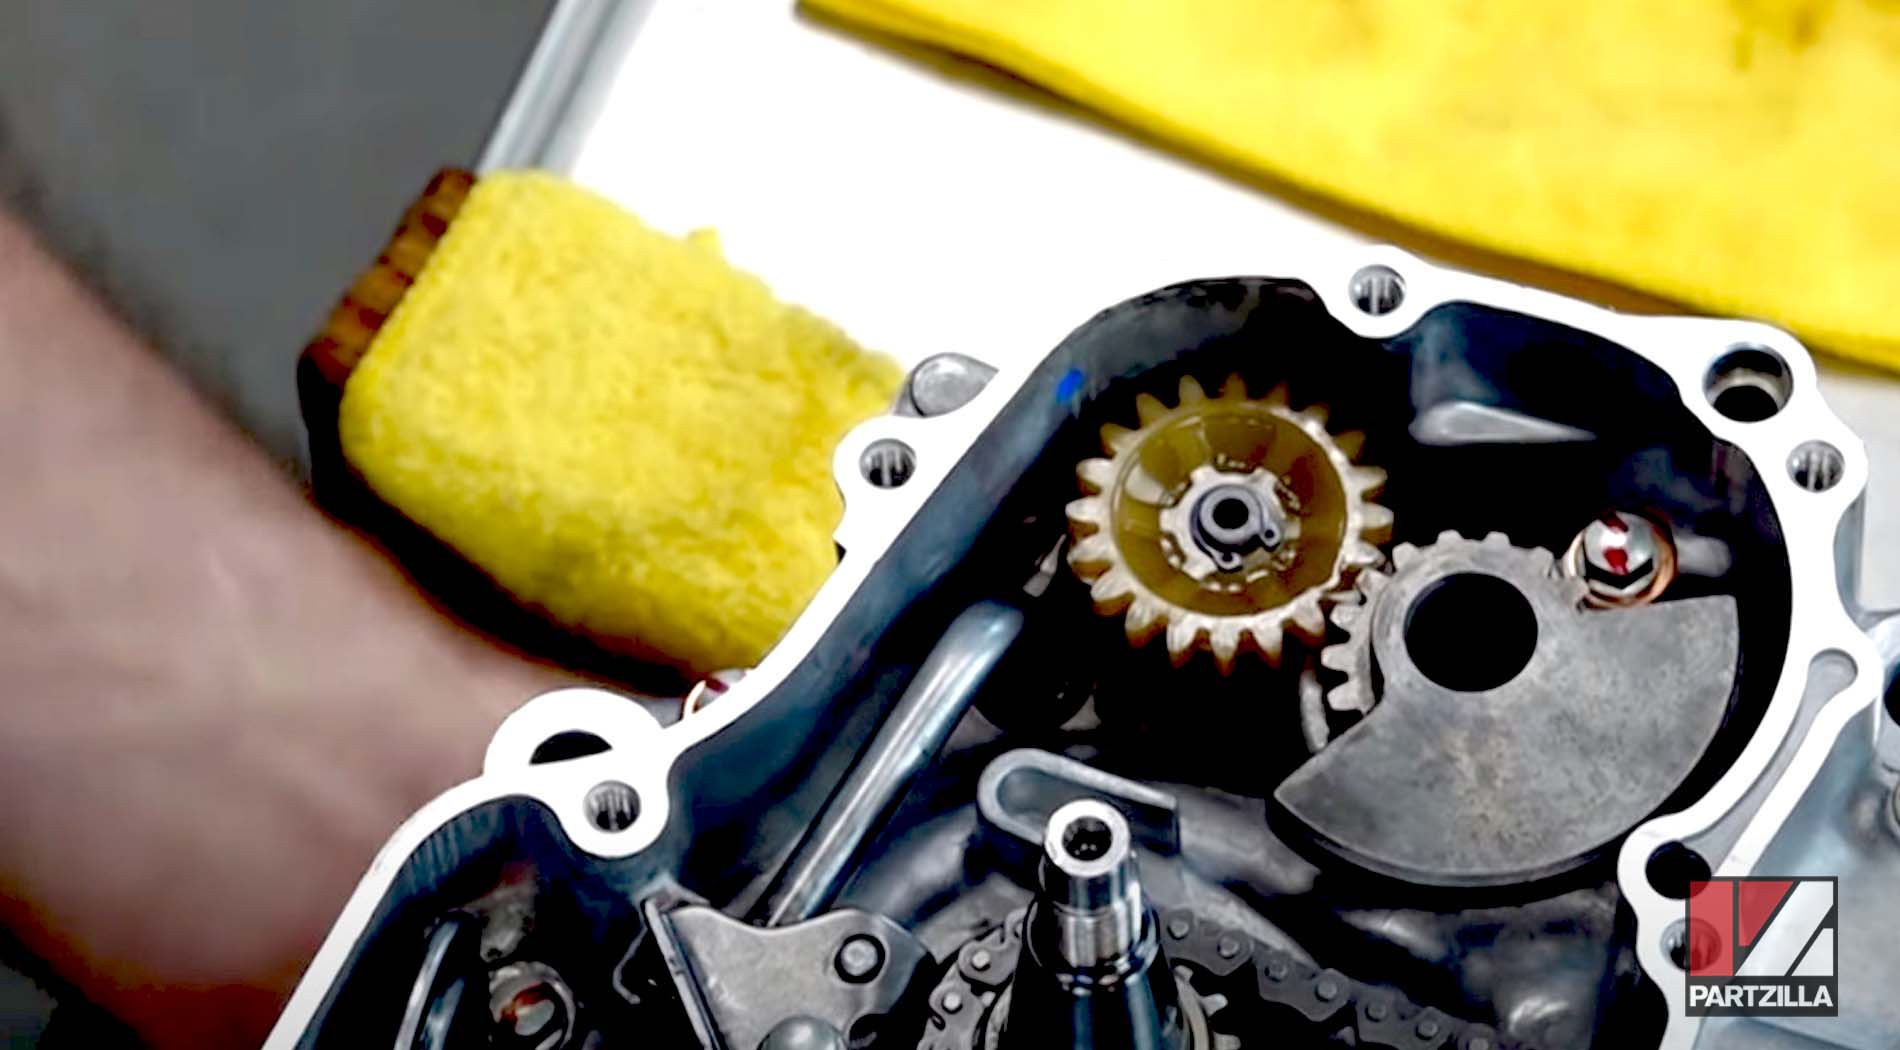
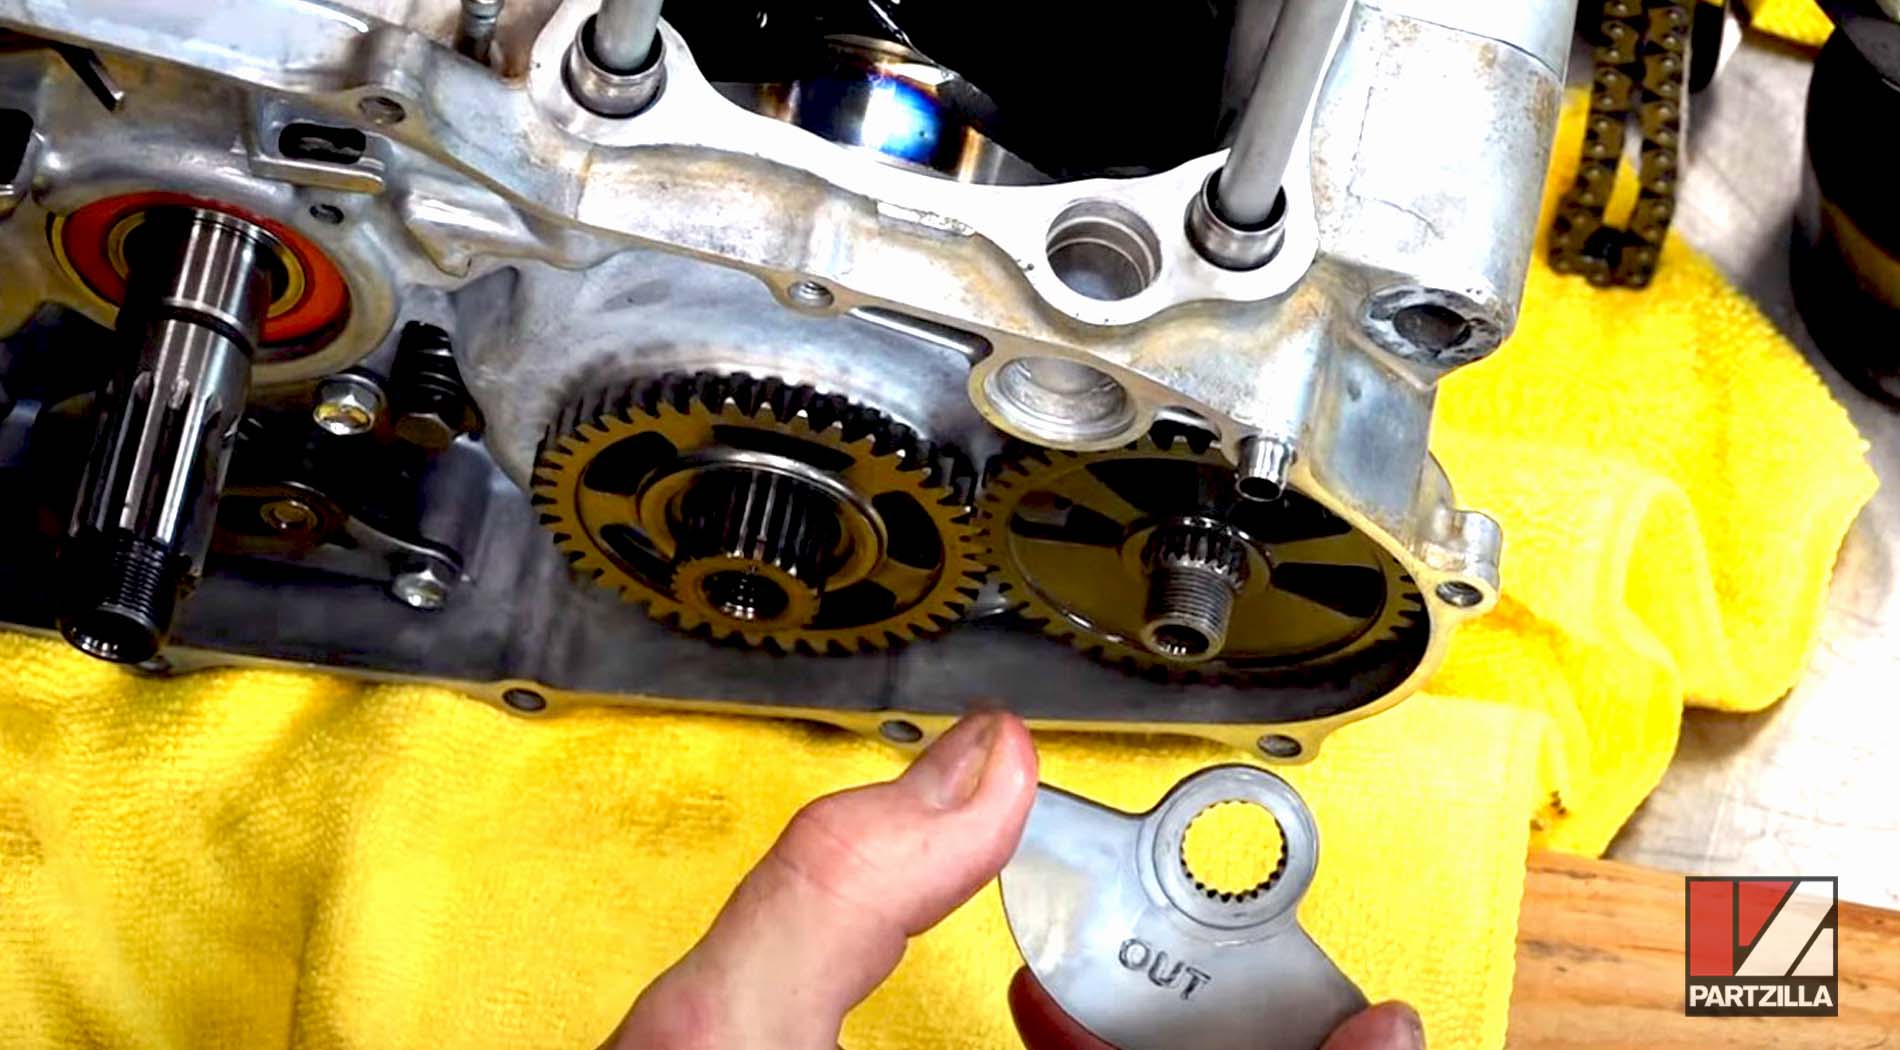
Honda CRF450 Bottom End Rebuild Primary Drive Gear Installation
Step 11. Install the retention bolts for the counterbalance and torque them to 7 foot-pounds.

NOTE: Blue threadlocker is recommended for these and most other bolts installed as part of this bottom end rebuild process.
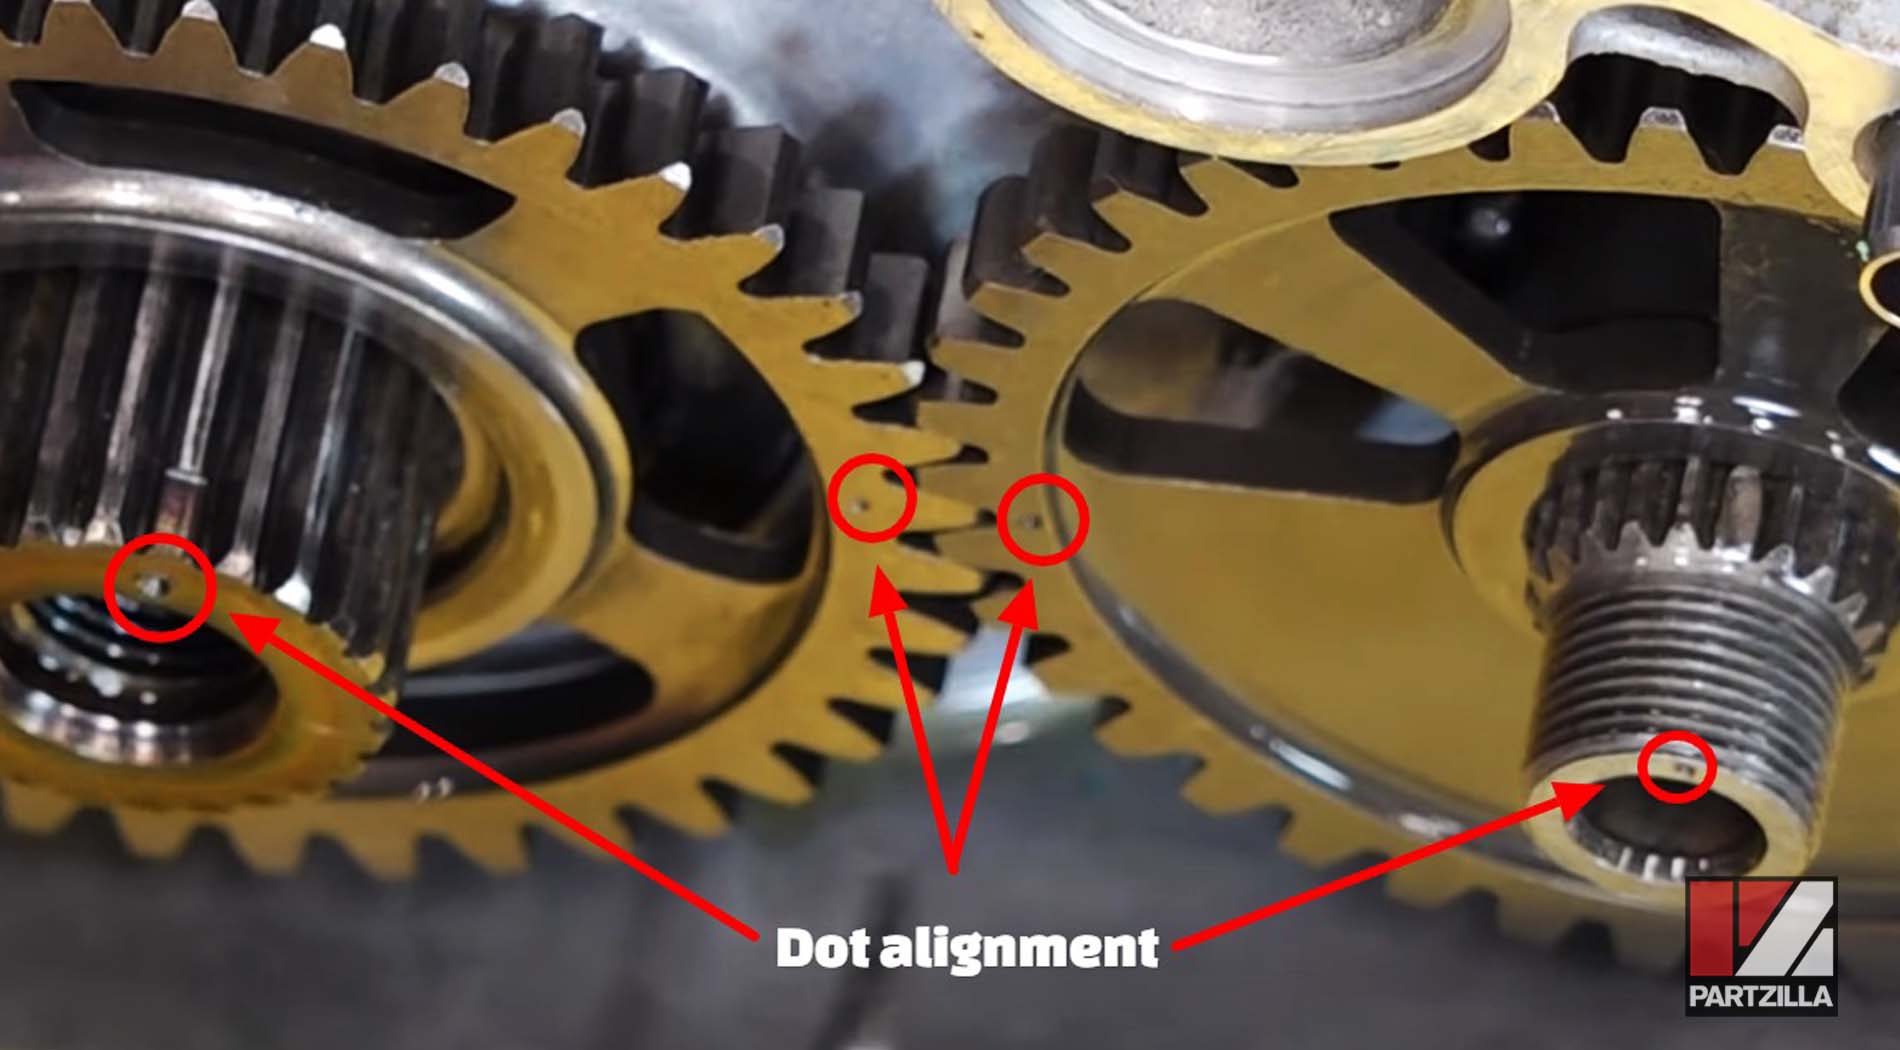
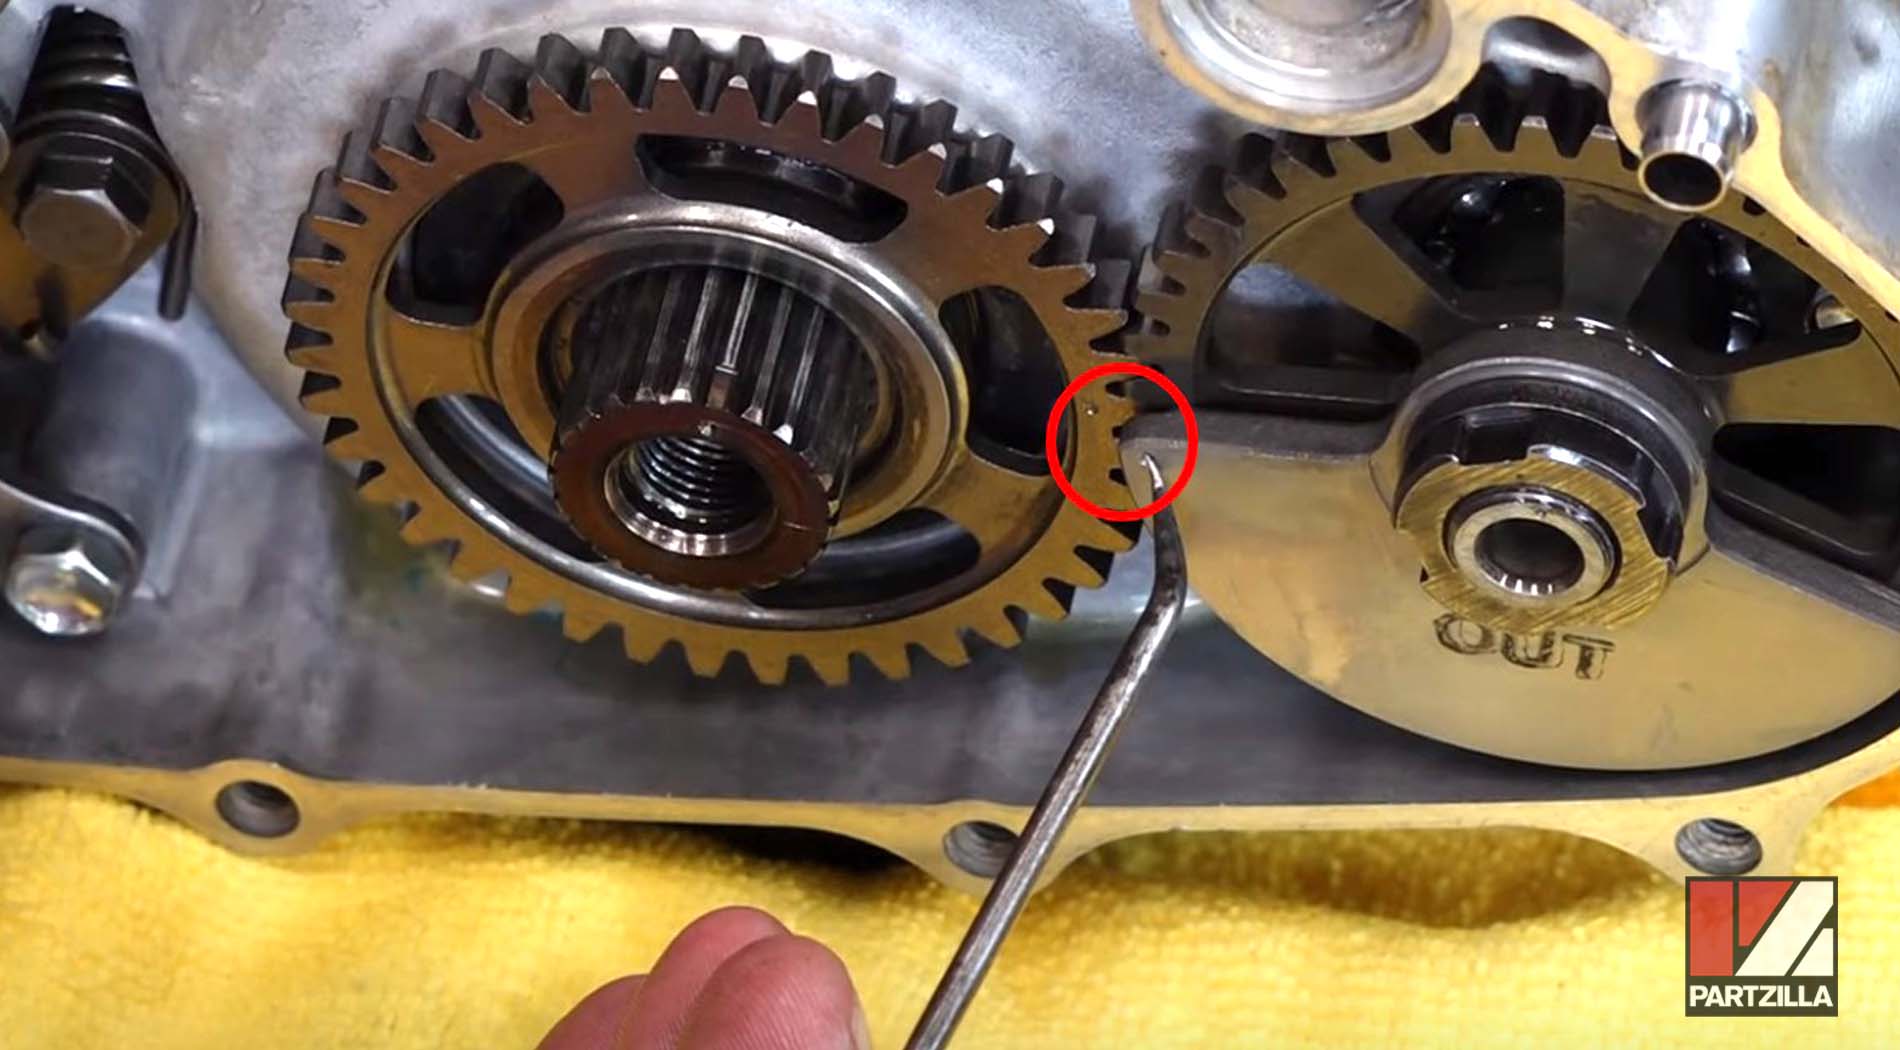
Step 12. Install the driven gear onto the counterbalance by aligning the notch on the gear with the dot on the counterbalance.
NOTE: If you have to force the driven gear on while installing it, then you're doing something wrong.
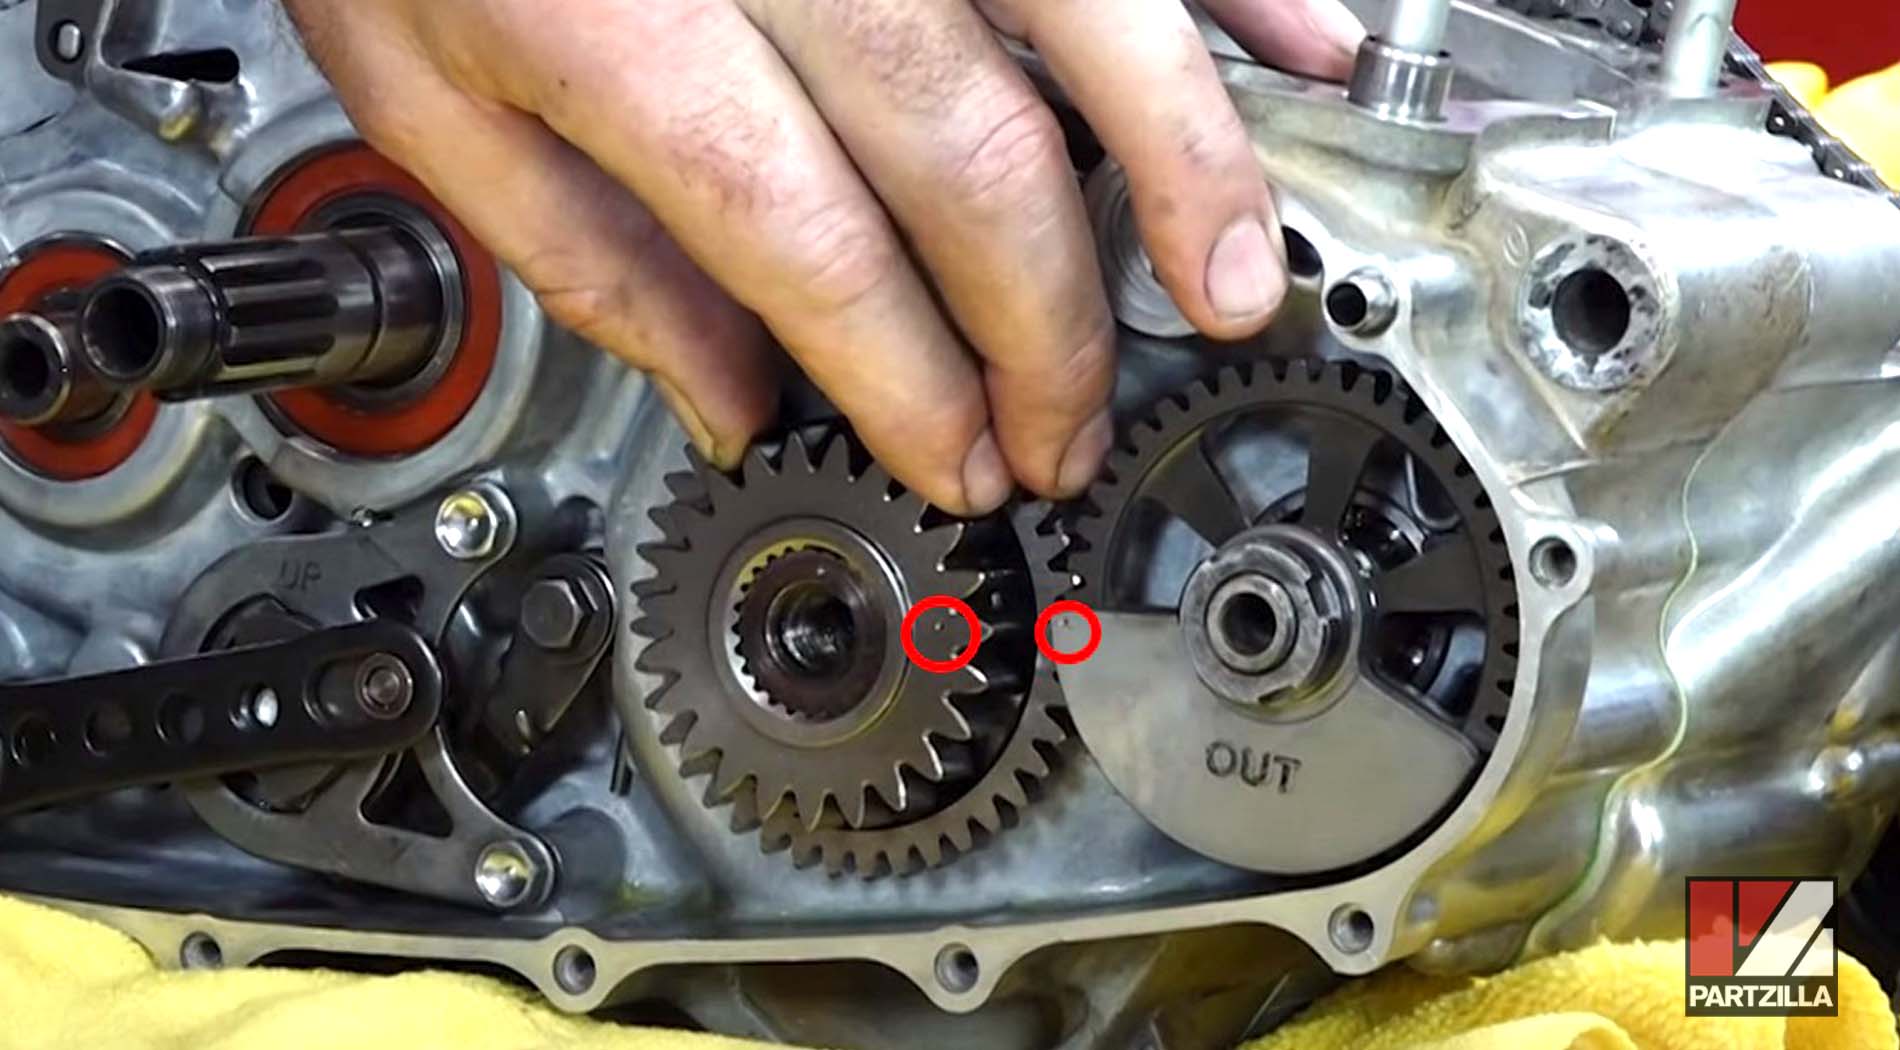
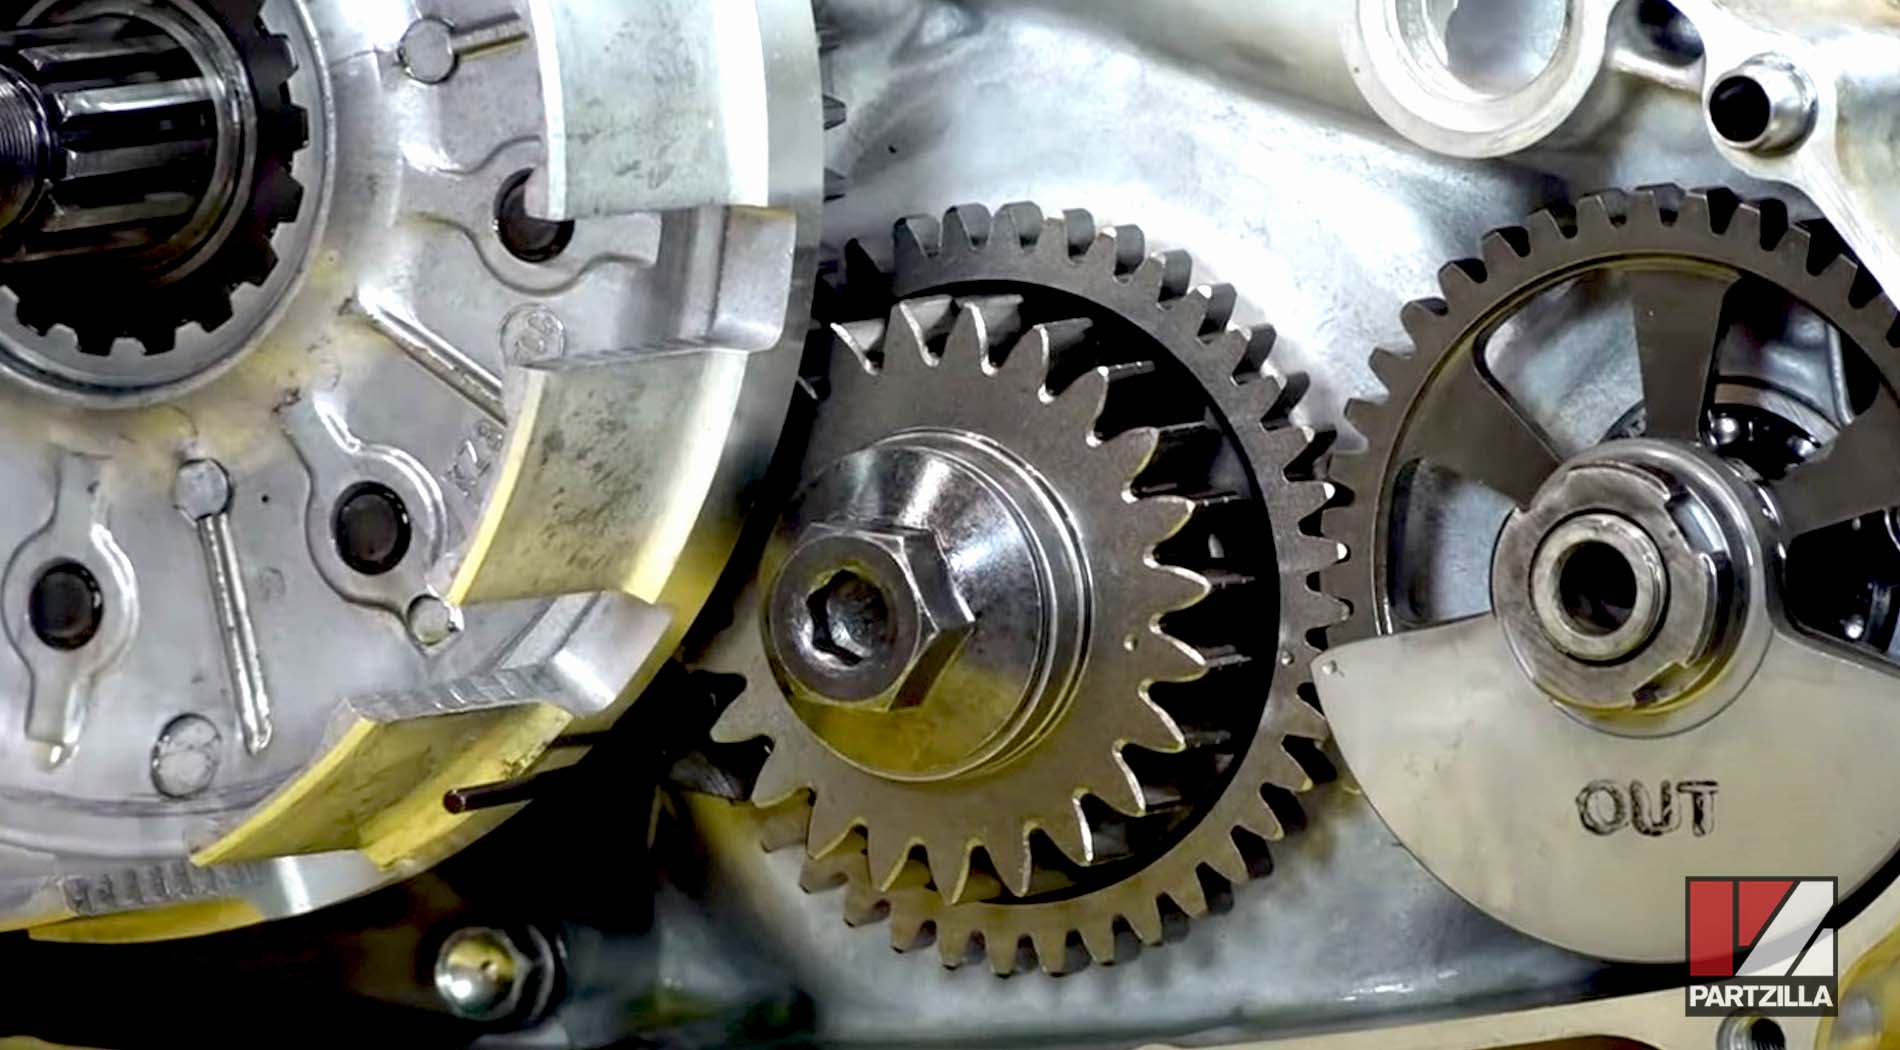
Step 13. Install the secondary drive gear, aligning the dots with the driven gear.
Step 14. Install the weight onto the driven gear, making sure the “out” label is facing out.
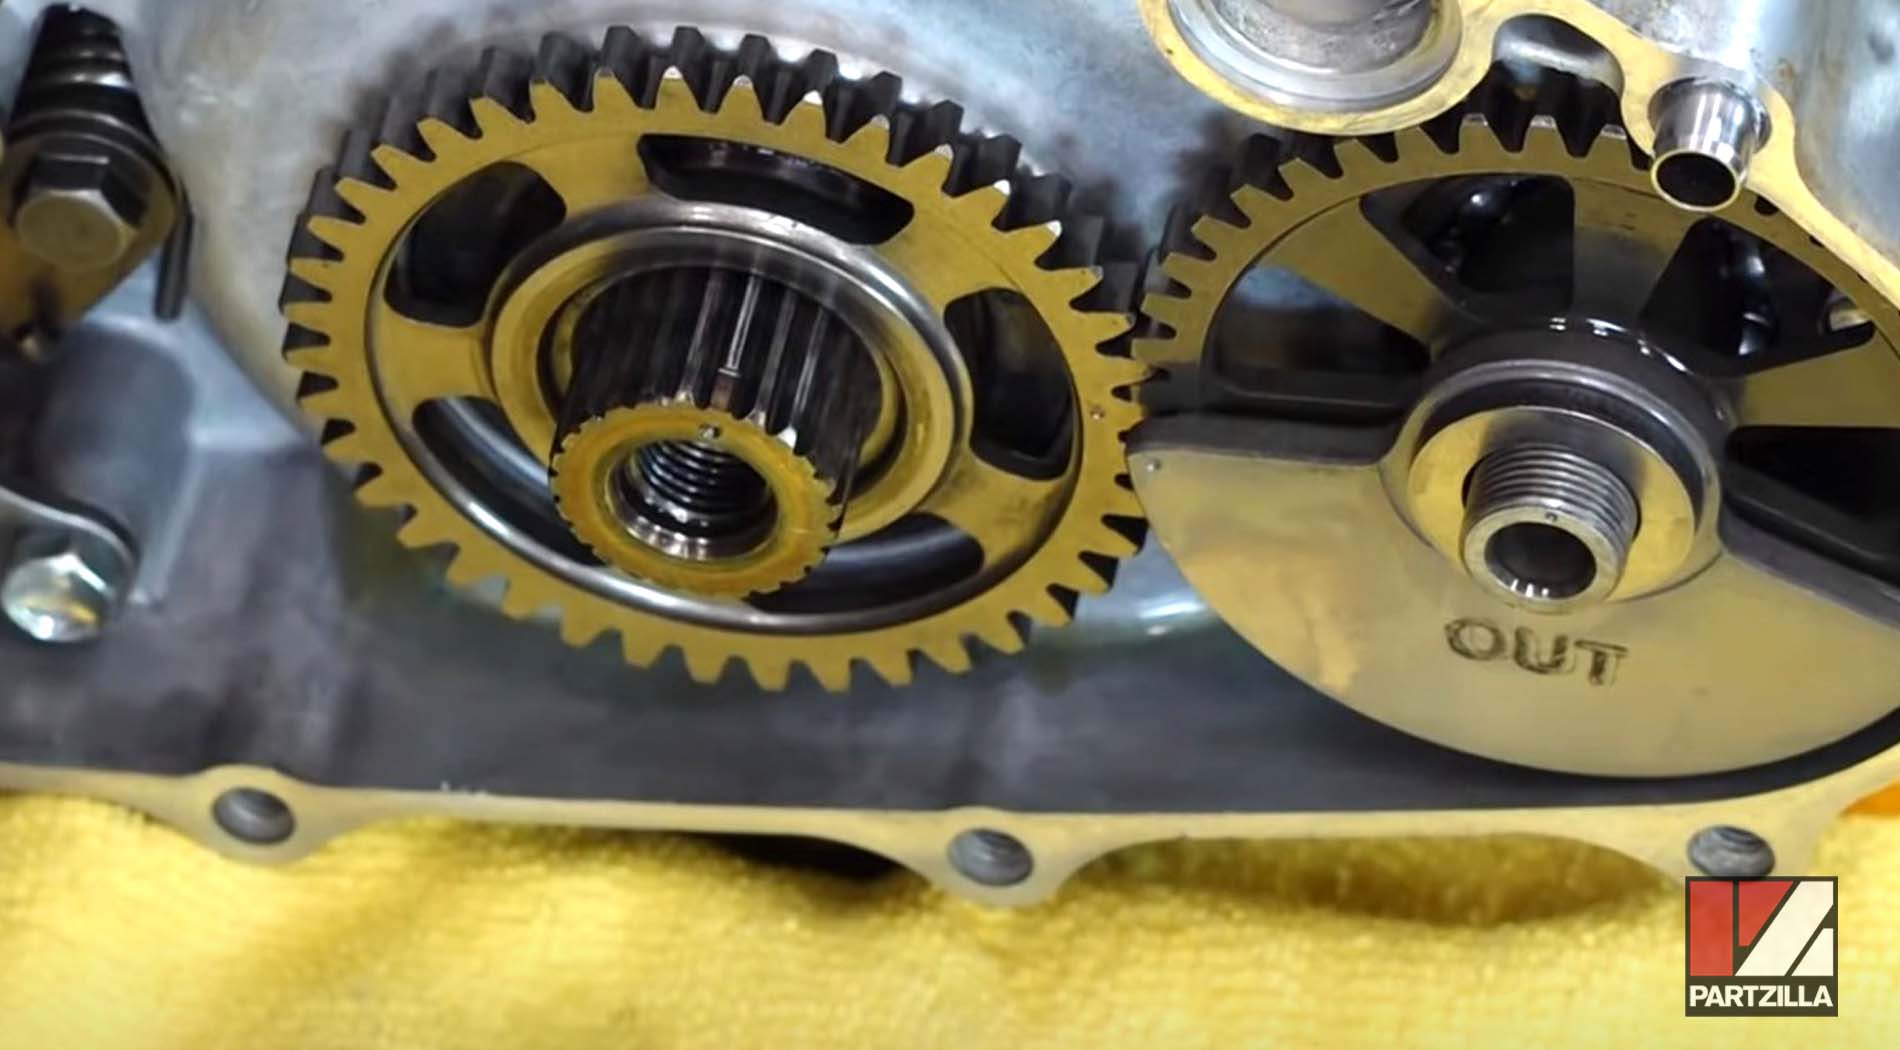
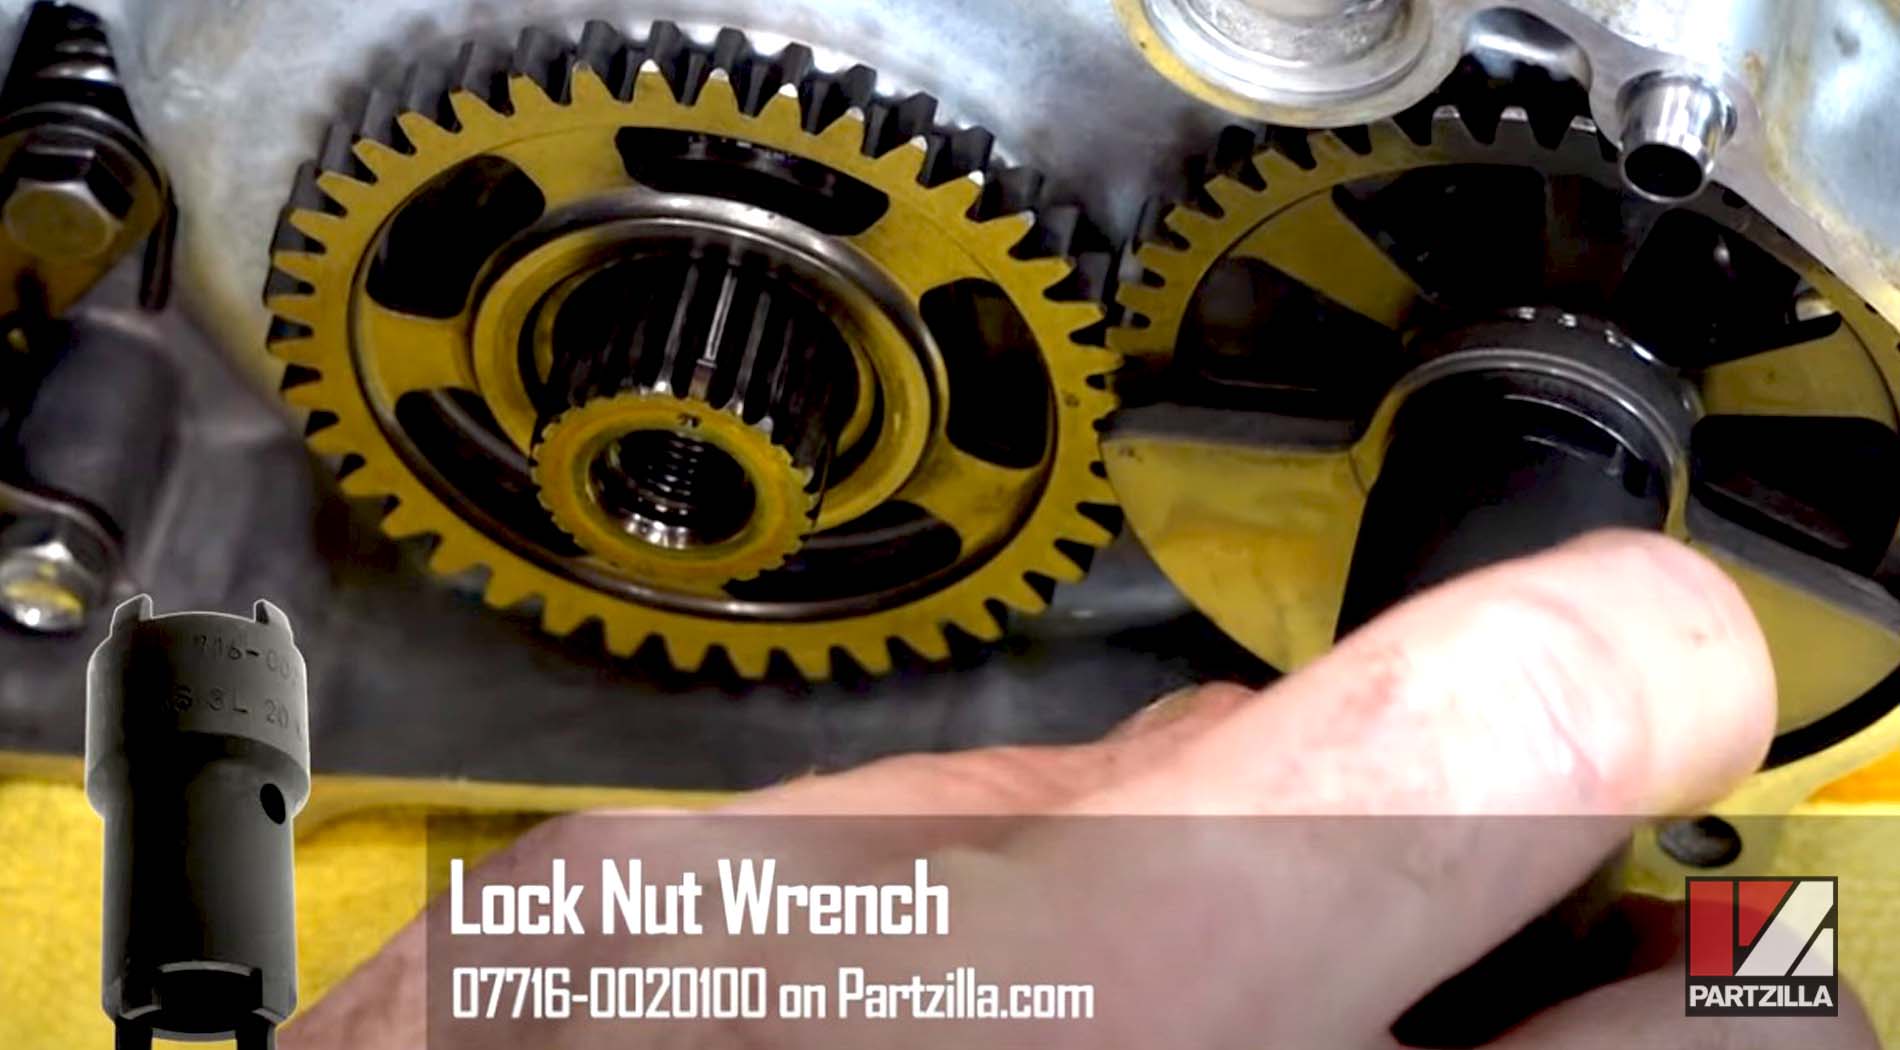
Step 15. Install the thick washer and bolt for the driven gear weight using the lock nut wrench and gear holder special tools to tighten them down, then torque them to 33 foot-pounds. Make sure the dots on the gears are aligned during this step.
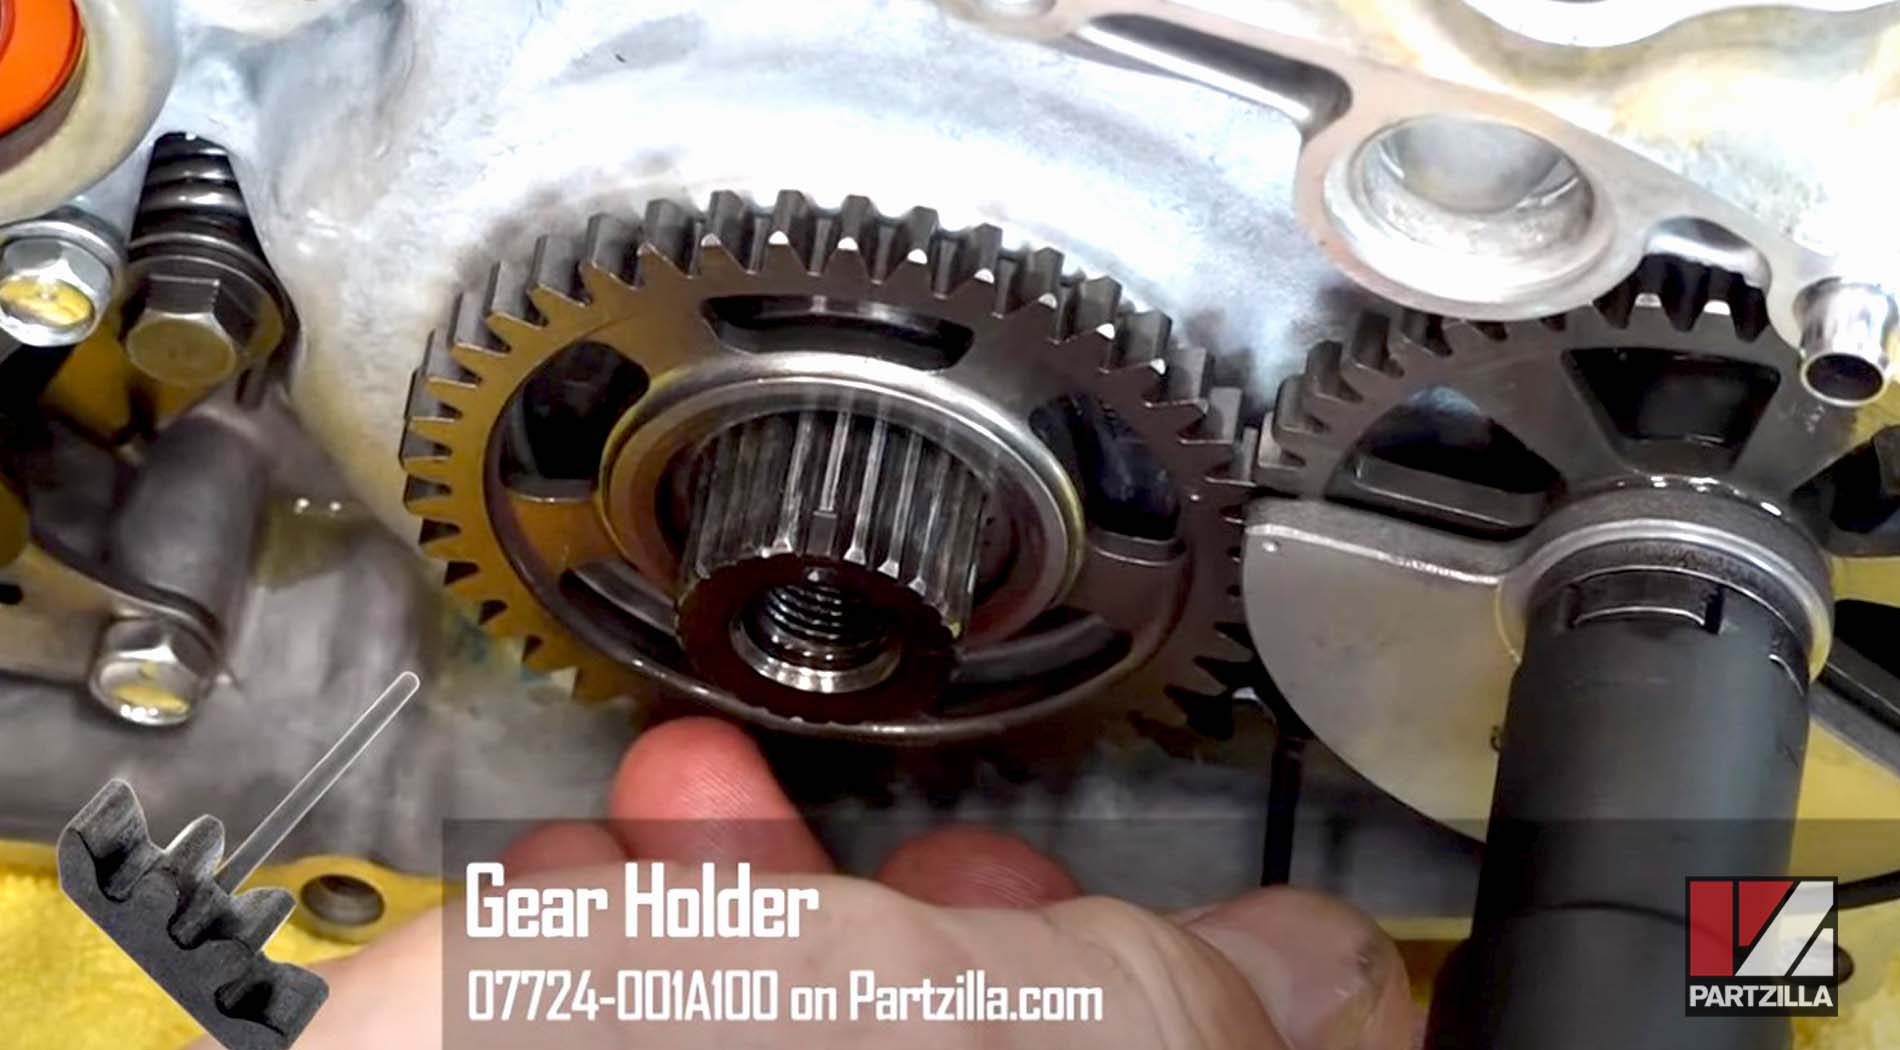
Step 16. Install the primary drive gear and the bolt that holds it in place, again making sure the dots line up with the dots on the driven gear, then torque the bolt to 80 foot-pounds.
PRO TIP: To avoid putting too much stress on and damaging the smaller gears, put the old clutch basket in place temporarily and use the gear holder to keep everything steady while you torque.
Watch the clip below to see the primary drive gear installation segment of our Honda CRF450 bottom end rebuild.
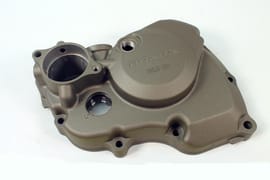
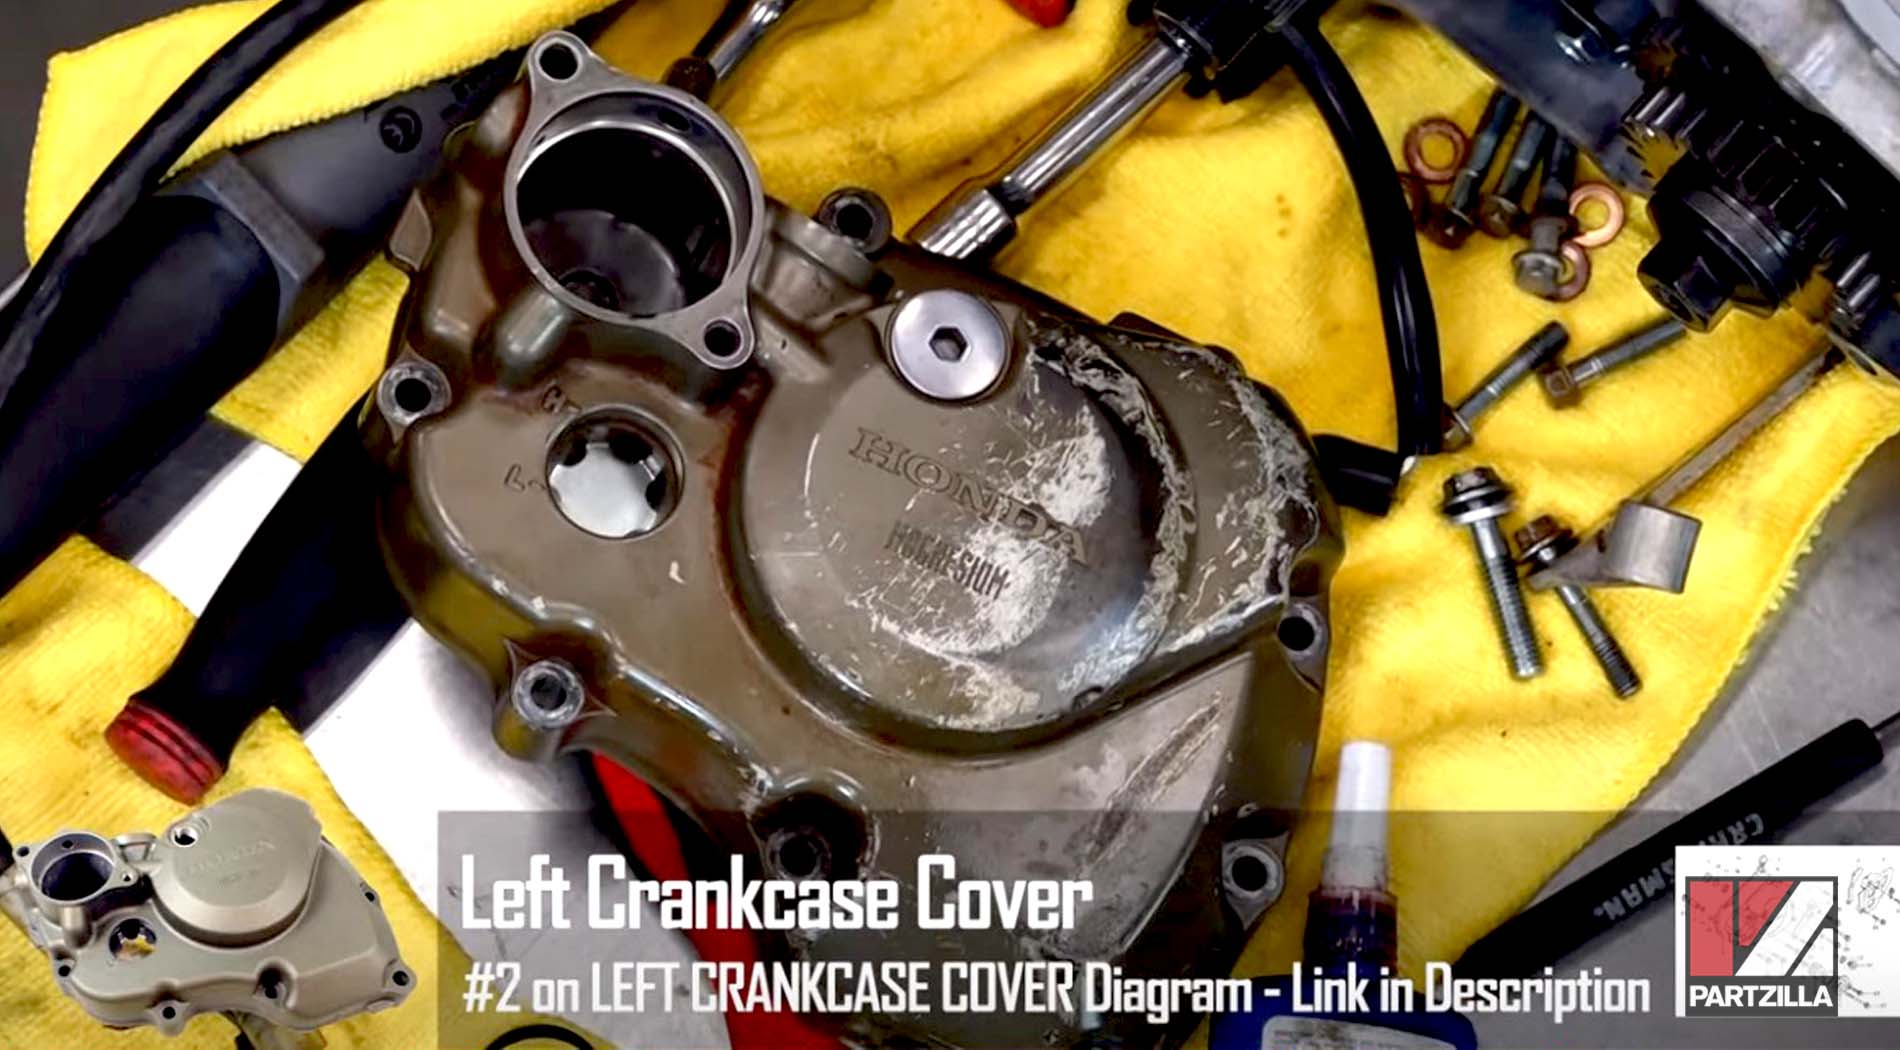
NOTE: The left crankcase cover of our CRF450 engine was in poor shape, so we ordered a new one, and the next steps cover transferring over the stator, the valve and the pickup coil to the new crankcase cover. If you’re not replacing the left crankcase cover for your engine, you can skip ahead to stator cover installation section.
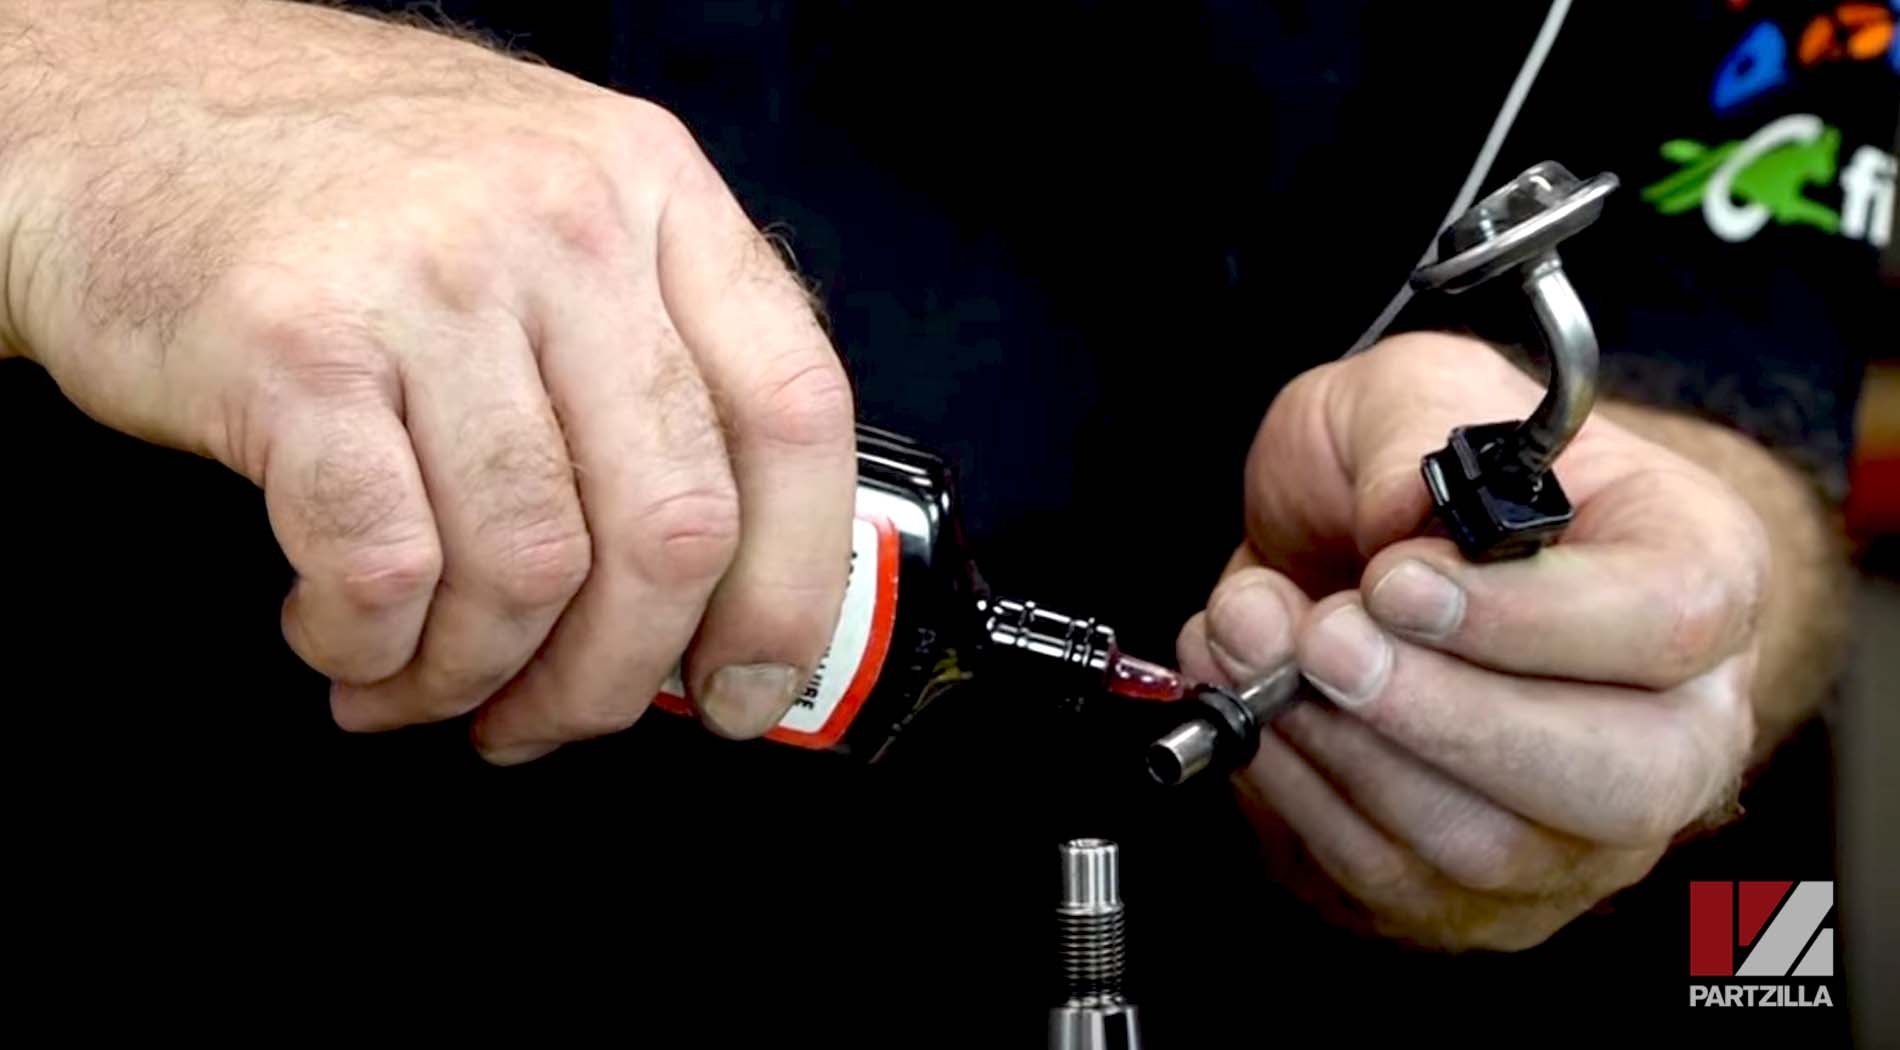
Honda CRF450 Bottom End Rebuild Stator and Rotor Installation
Step 17. Remove the stator and the circlip in the passageway beneath it, as well as the pressure relief valve, its circlip and any remaining washers and seals.
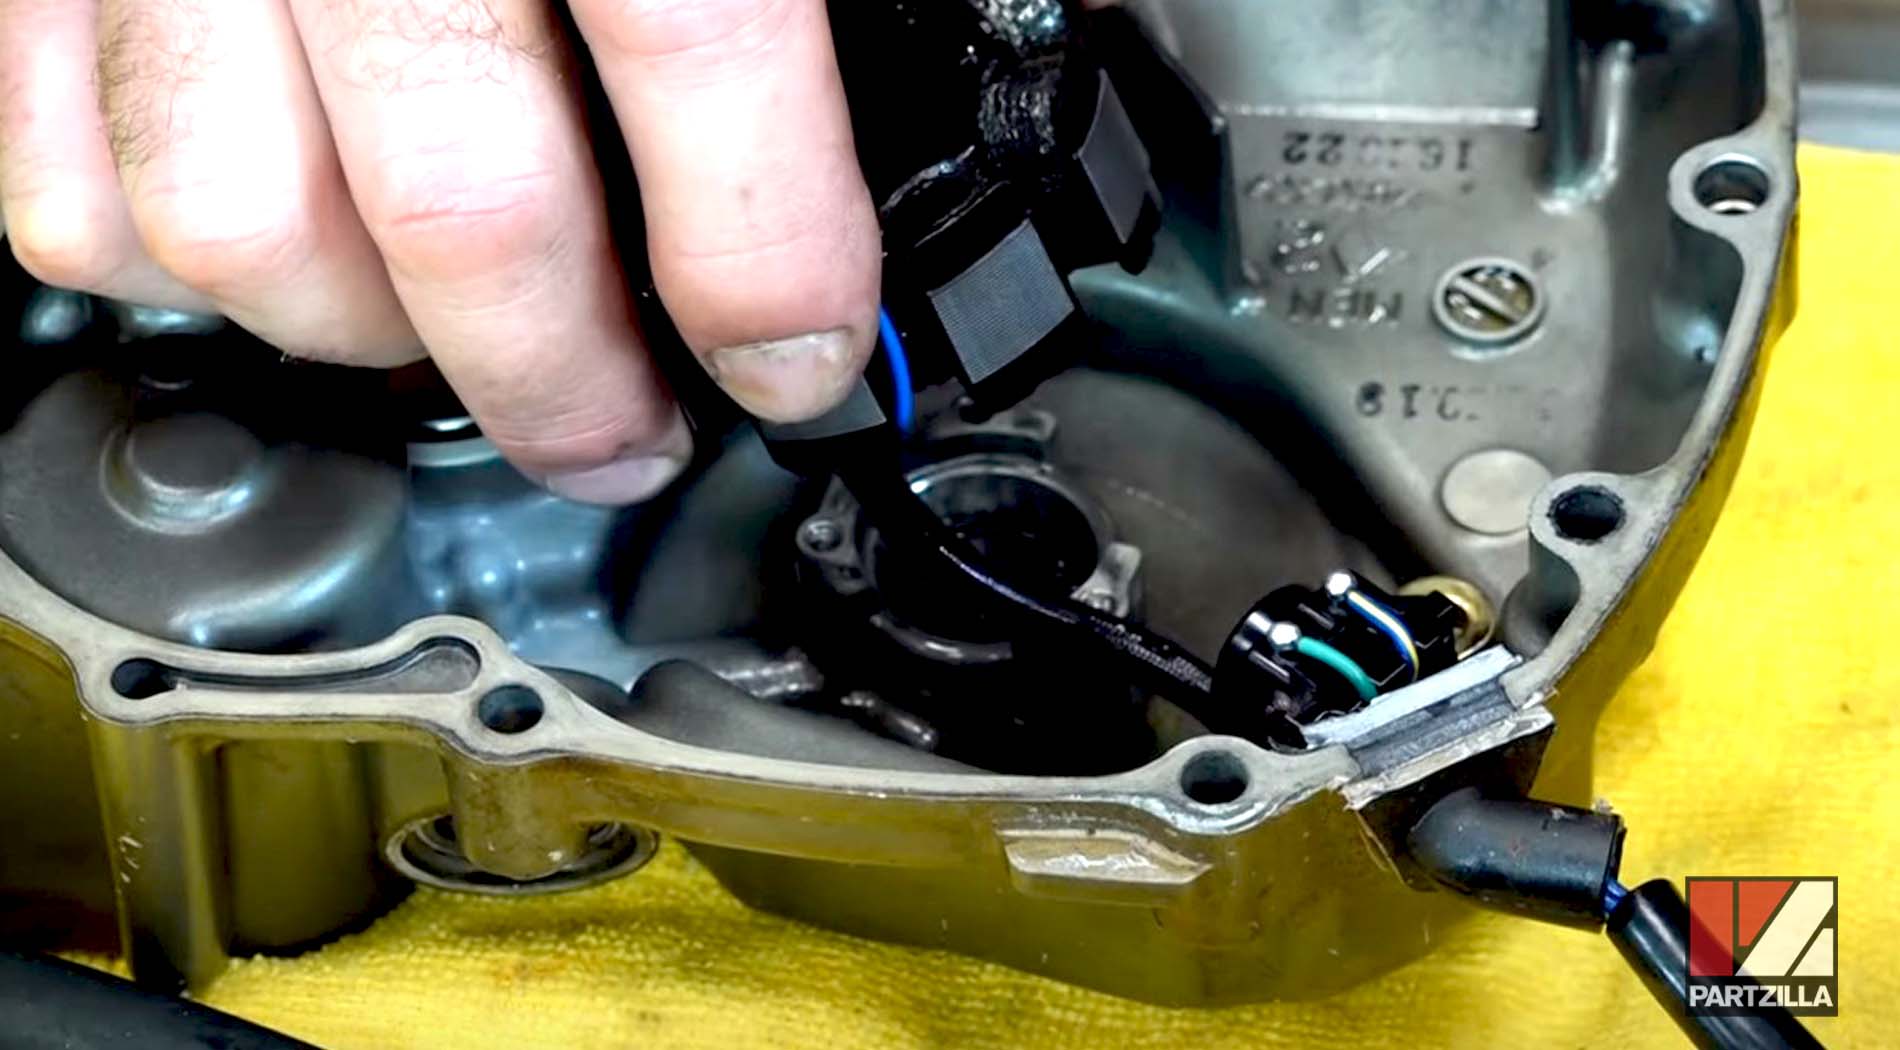
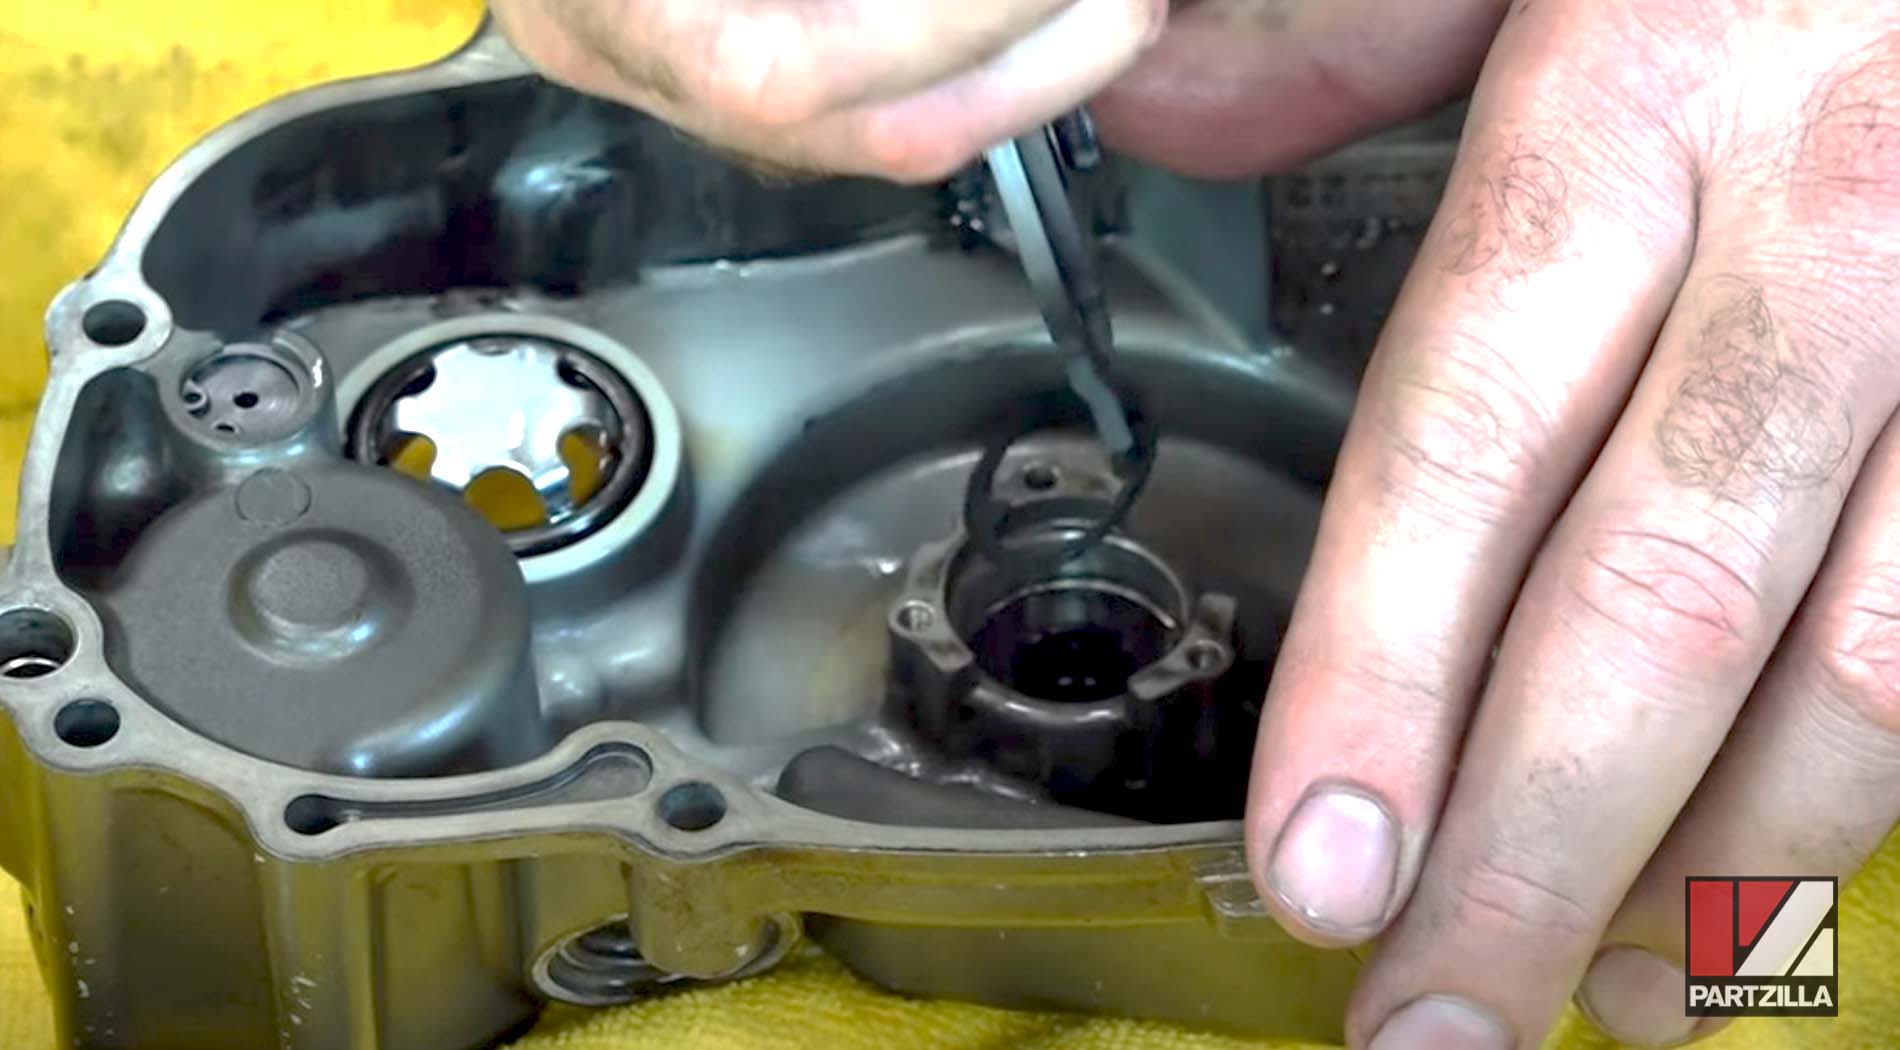
Step 18. Replace any seals, washers or circlips that are damaged or worn. Install the seals, circlips, and washer into the new left crankcase cover in the same order you found them in the old left crankcase cover.
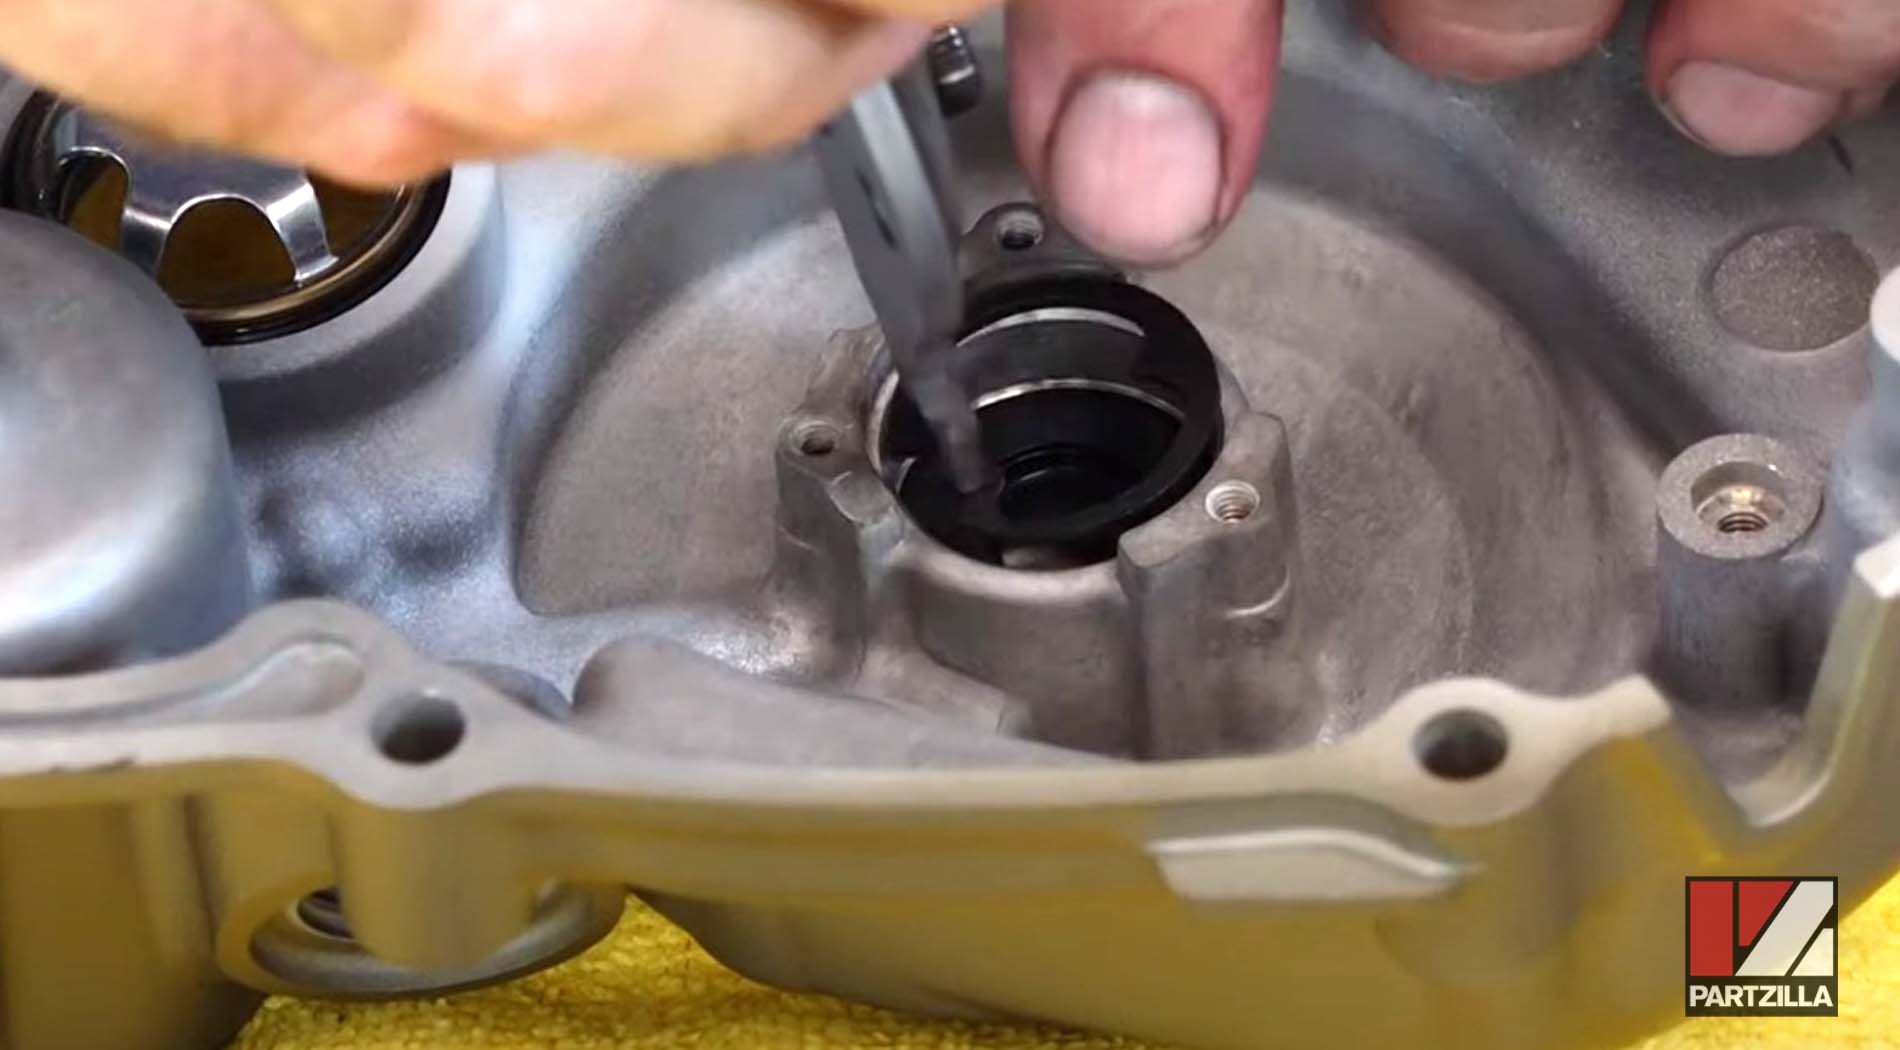
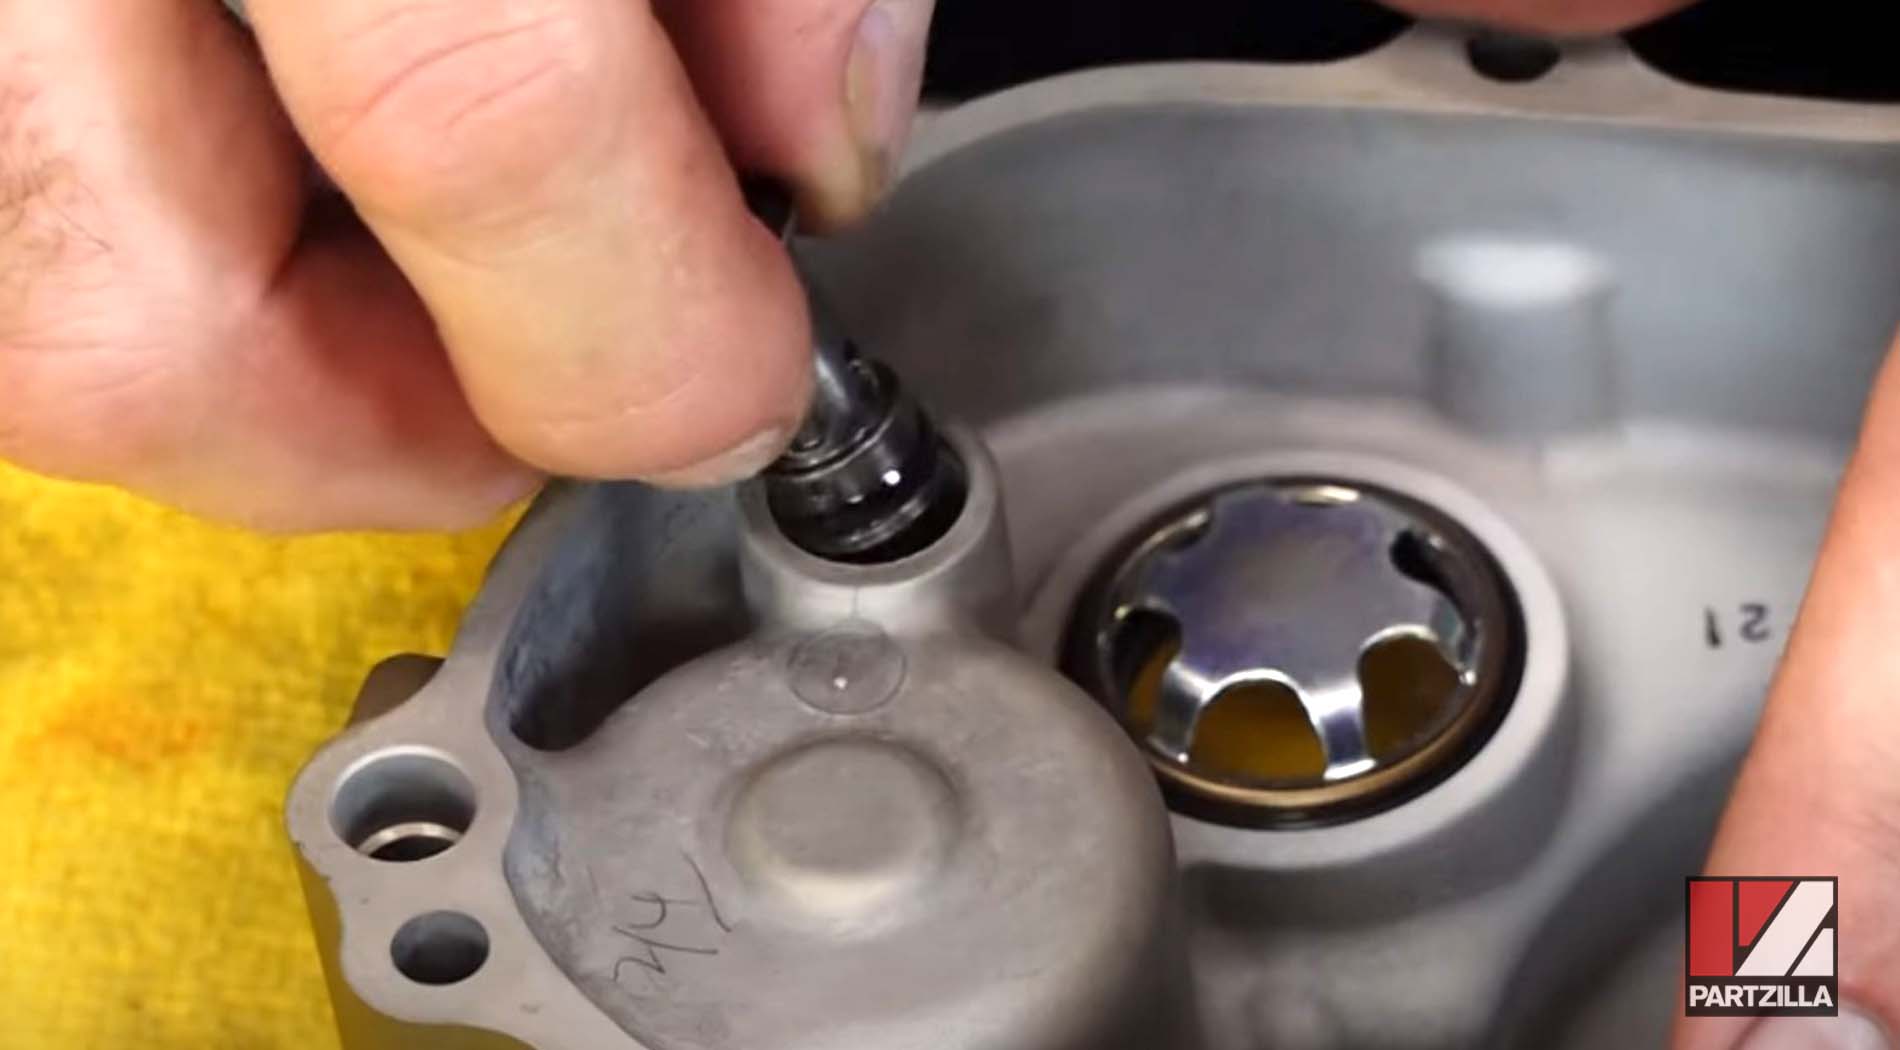
Step 19. Put a little assembly lube on and then install the pressure relief valve and its snap ring.
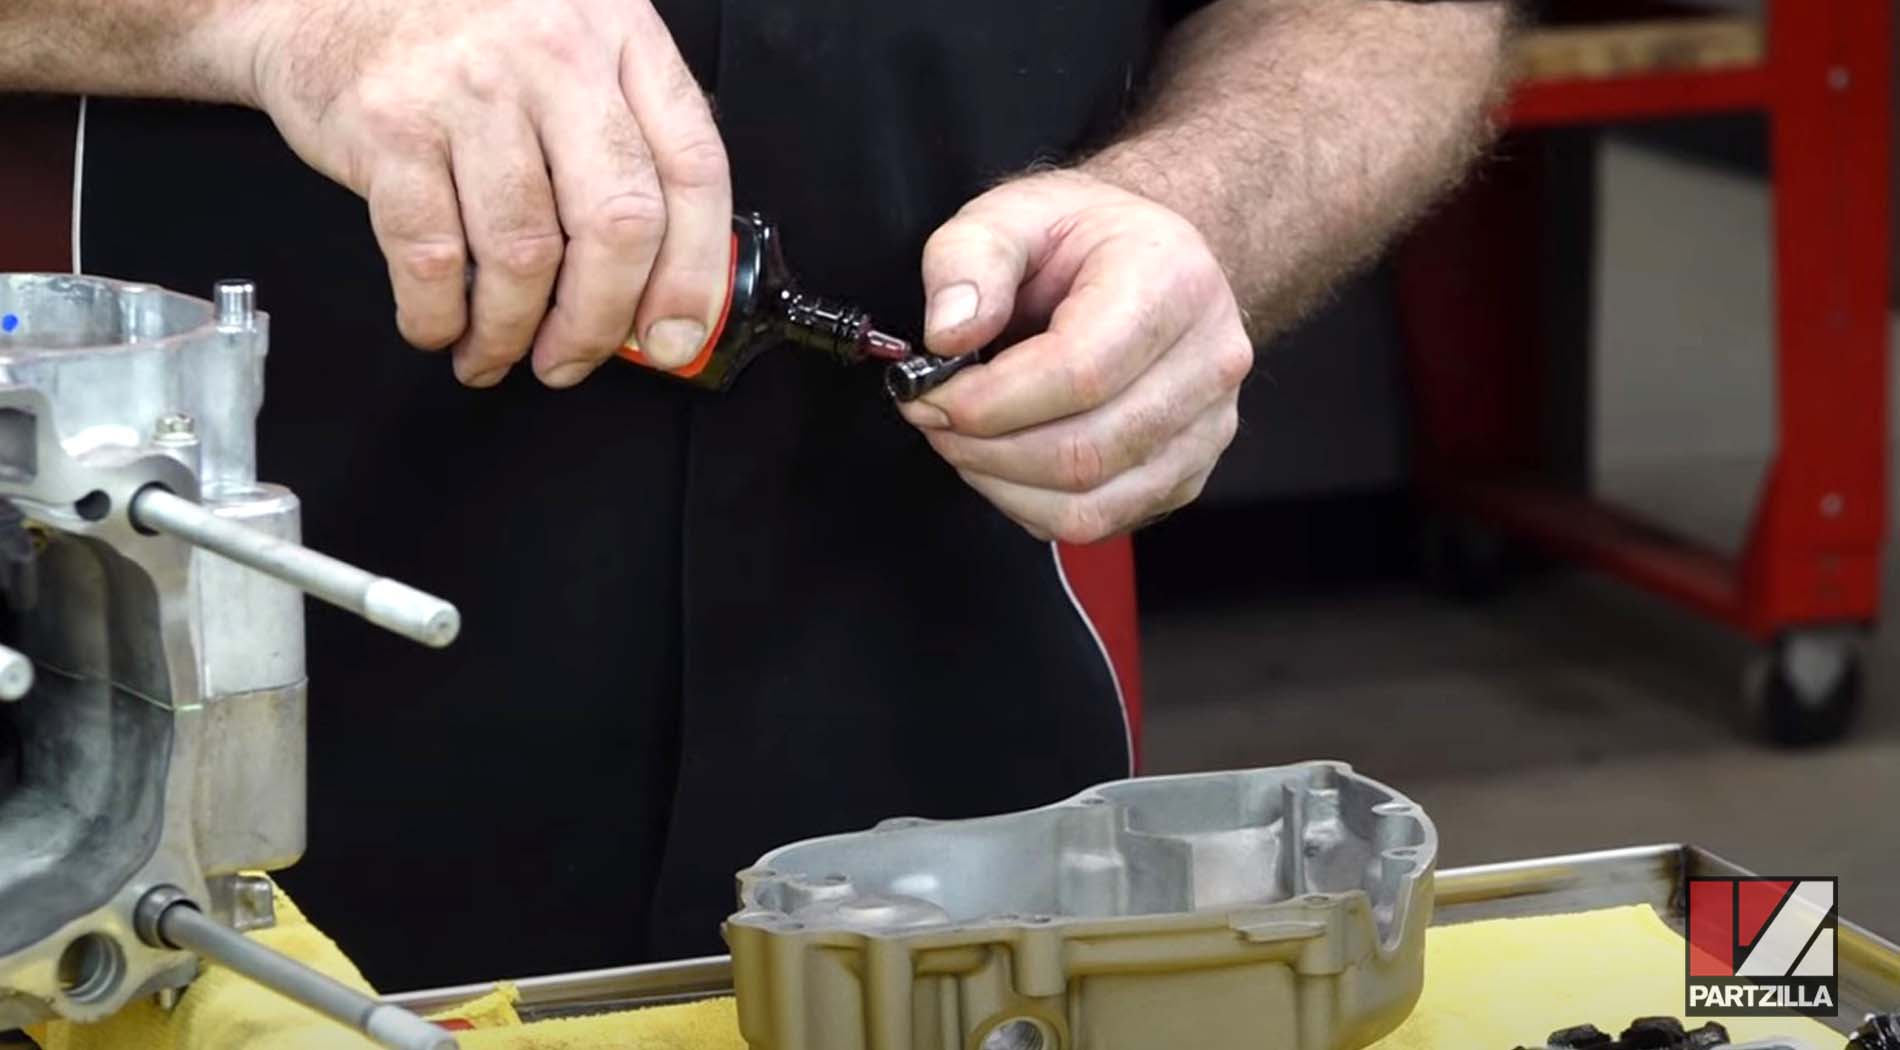
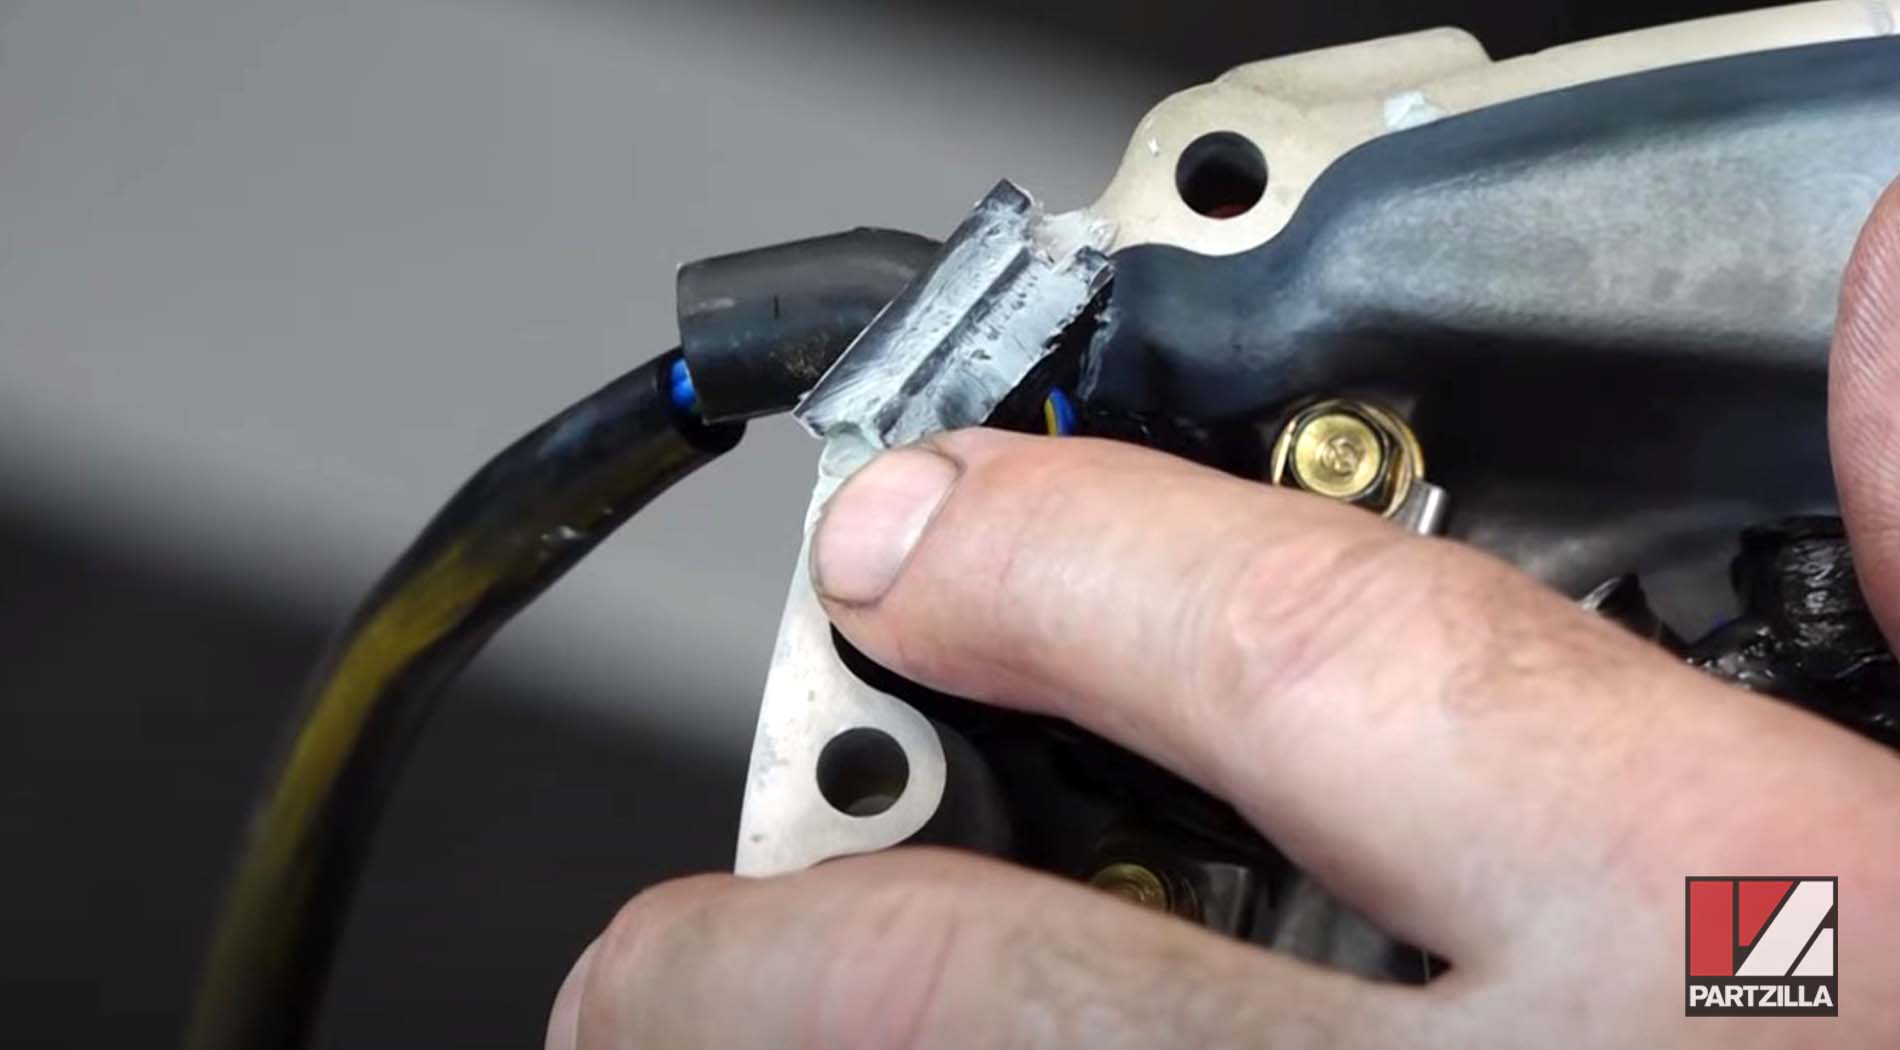
Step 20. Clean the old sealant off of the stator’s wiring harness with some contact cleaner. Next, put some new sealant on and push the stator in, then install and tighten the bolts that hold the stator in place.
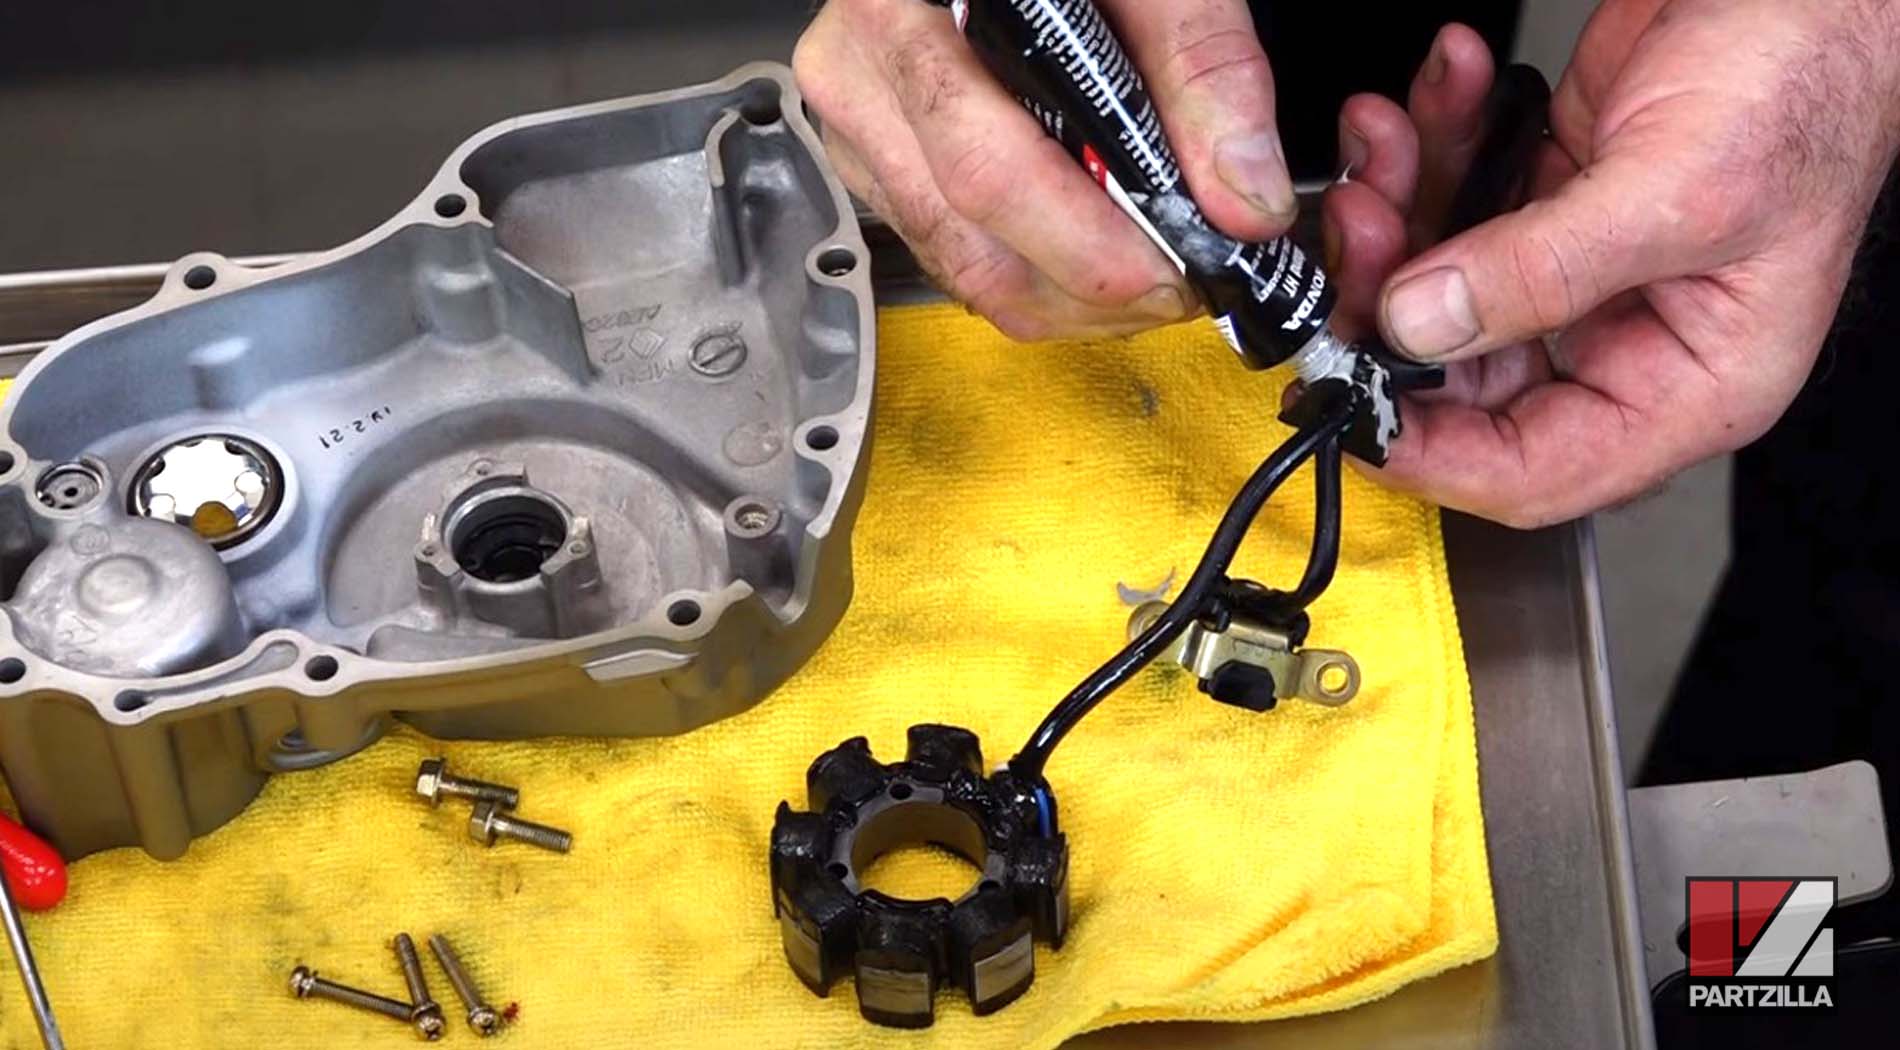
NOTE: Make sure that that stator winding wire goes behind the pickup, and then bring it out dead center. Don't forget the bracket that holds it in place. The stator only goes in one way, so make sure you've got it rotated so the holes line up.
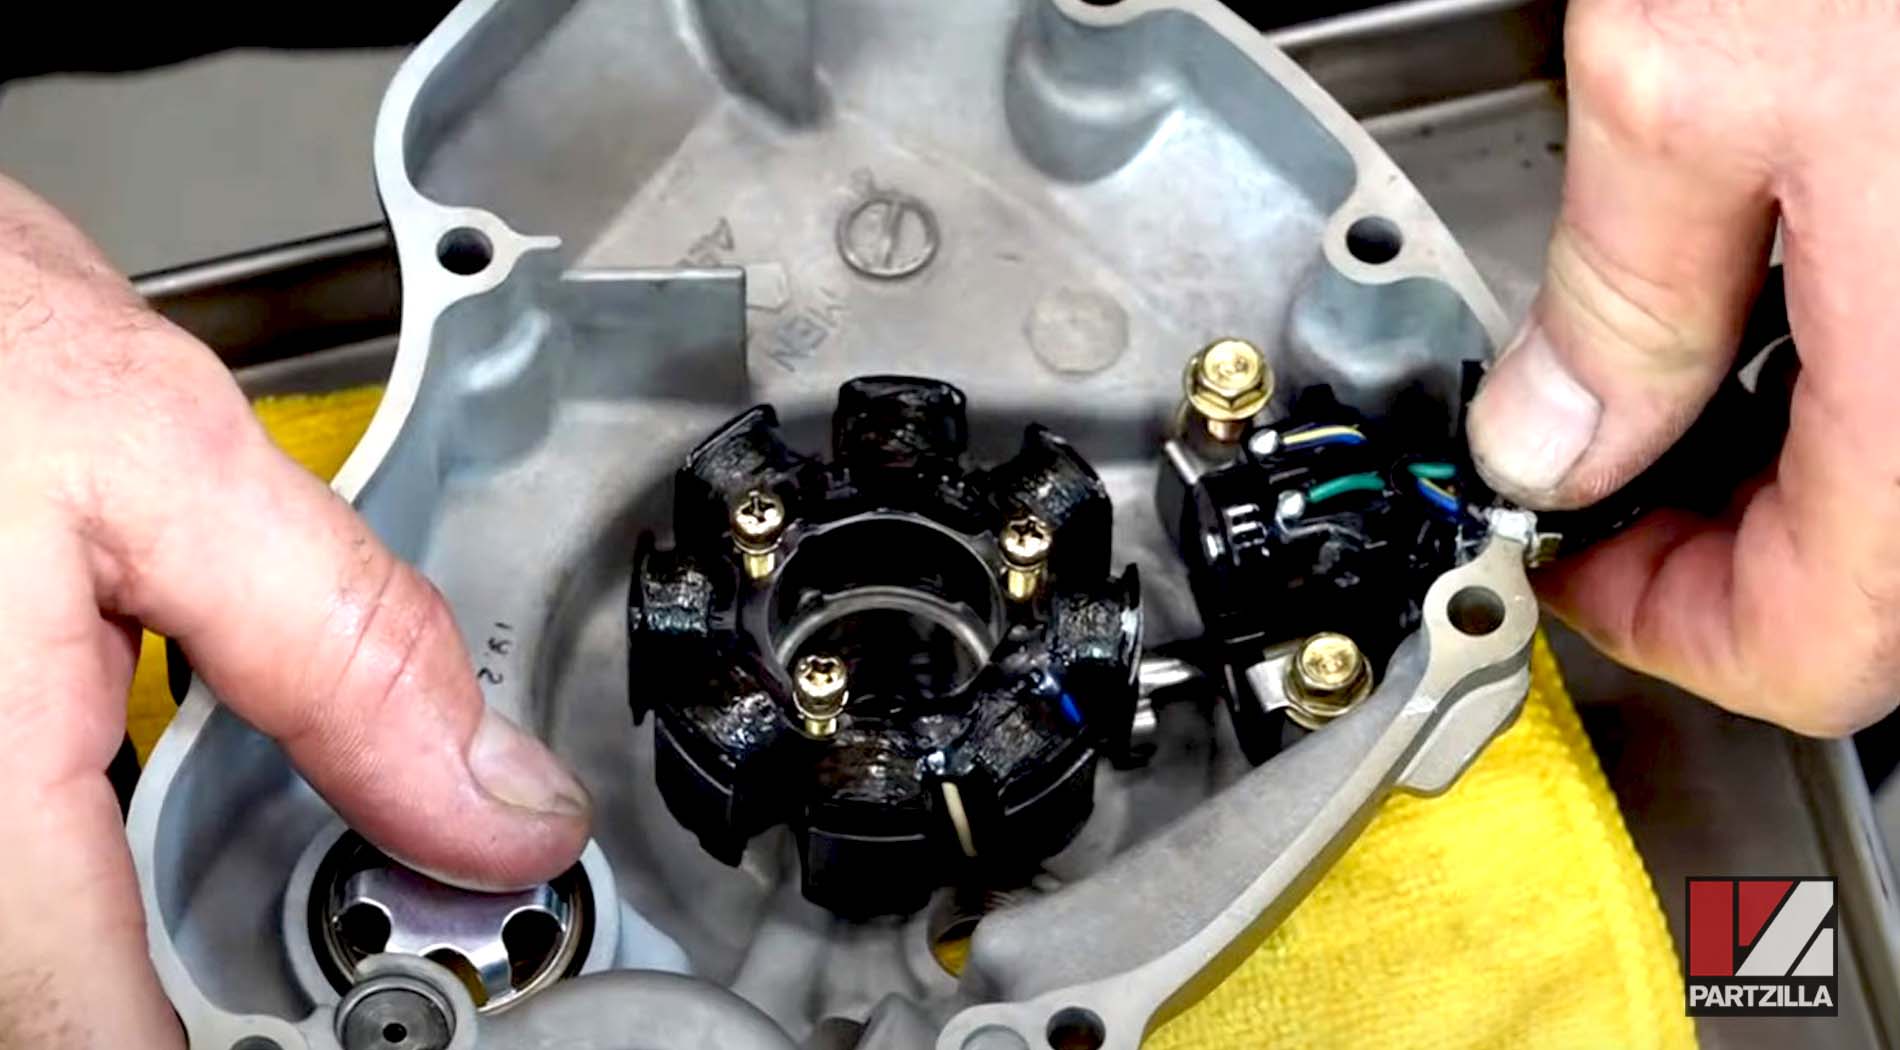
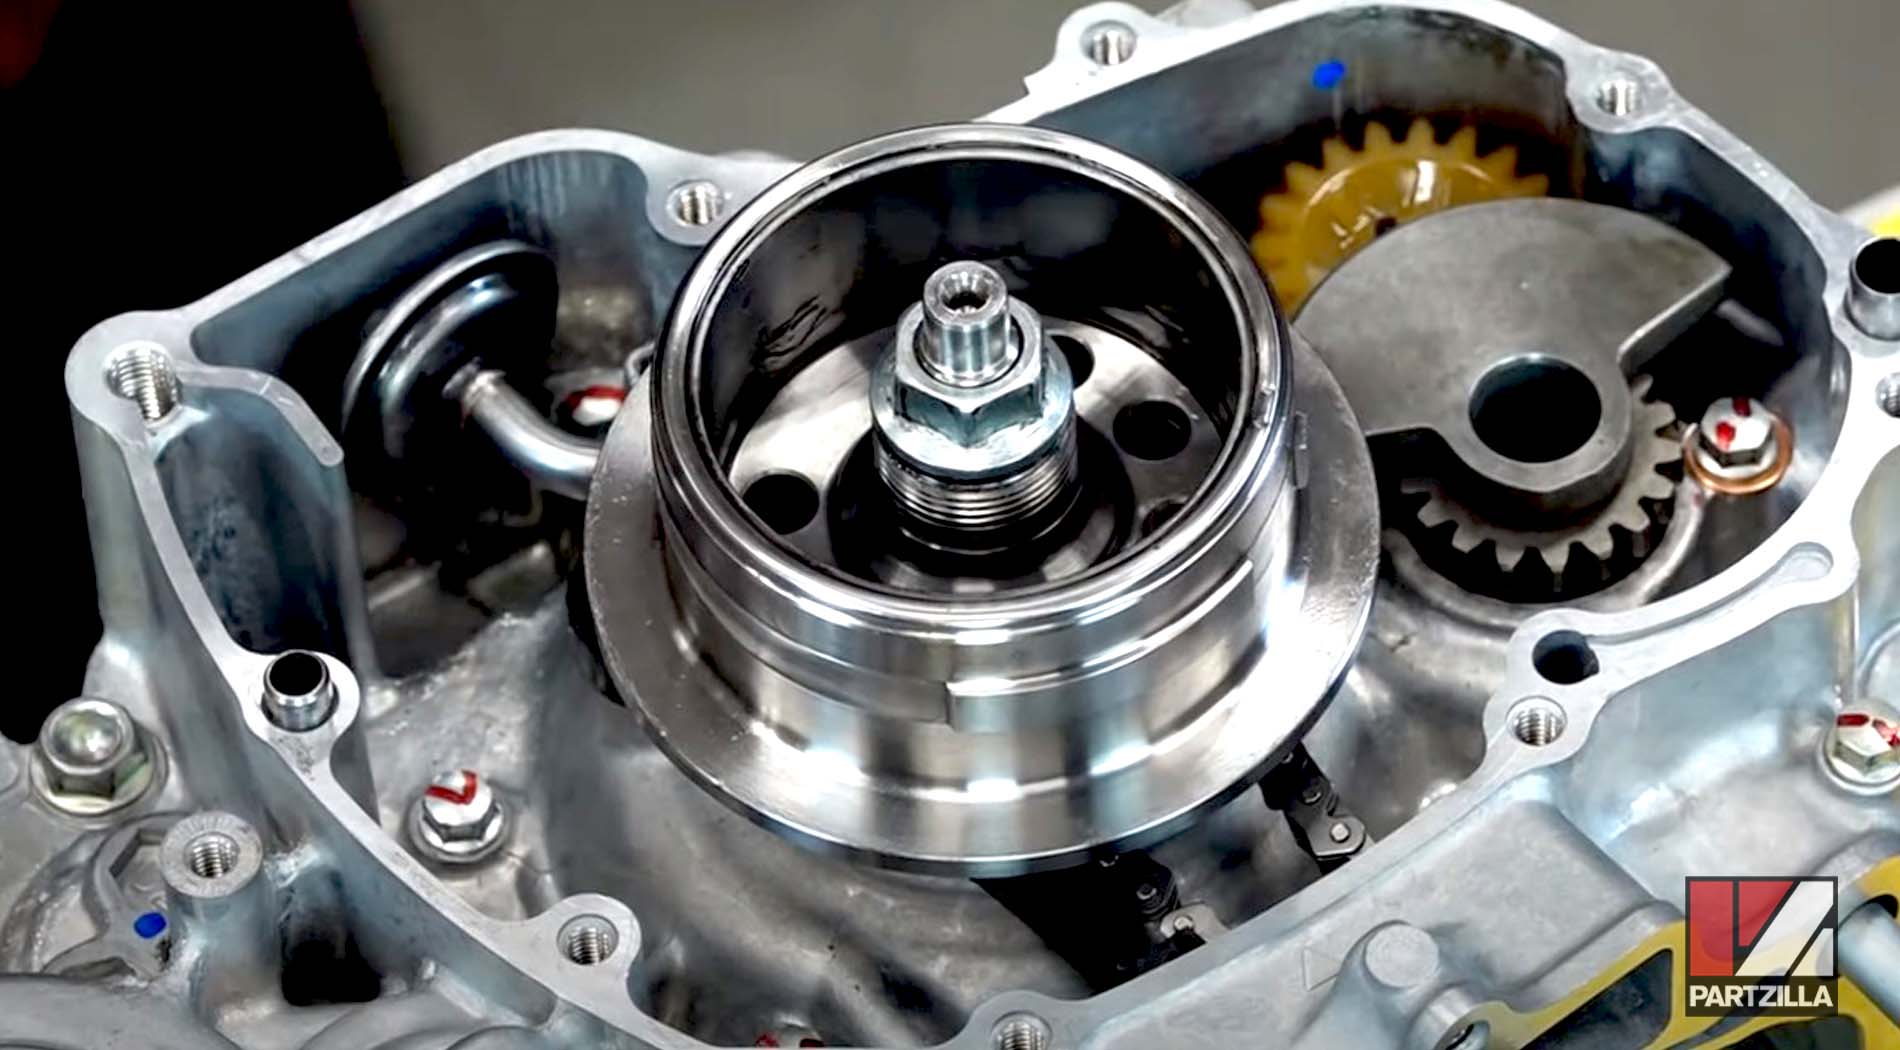
Step 21. Install the crankcase dowels, followed by the stator rotor assembly, then torque the main nut to 47 foot-pounds.
PRO TIP: Use the gear holder and old clutch basket on the other side to hold everything in place, as detailed in step 16, to get the 47 foot-pounds of torque.
Watch the clip below to see the stator and rotor installation segment of our Honda CRF450 bottom end rebuild.
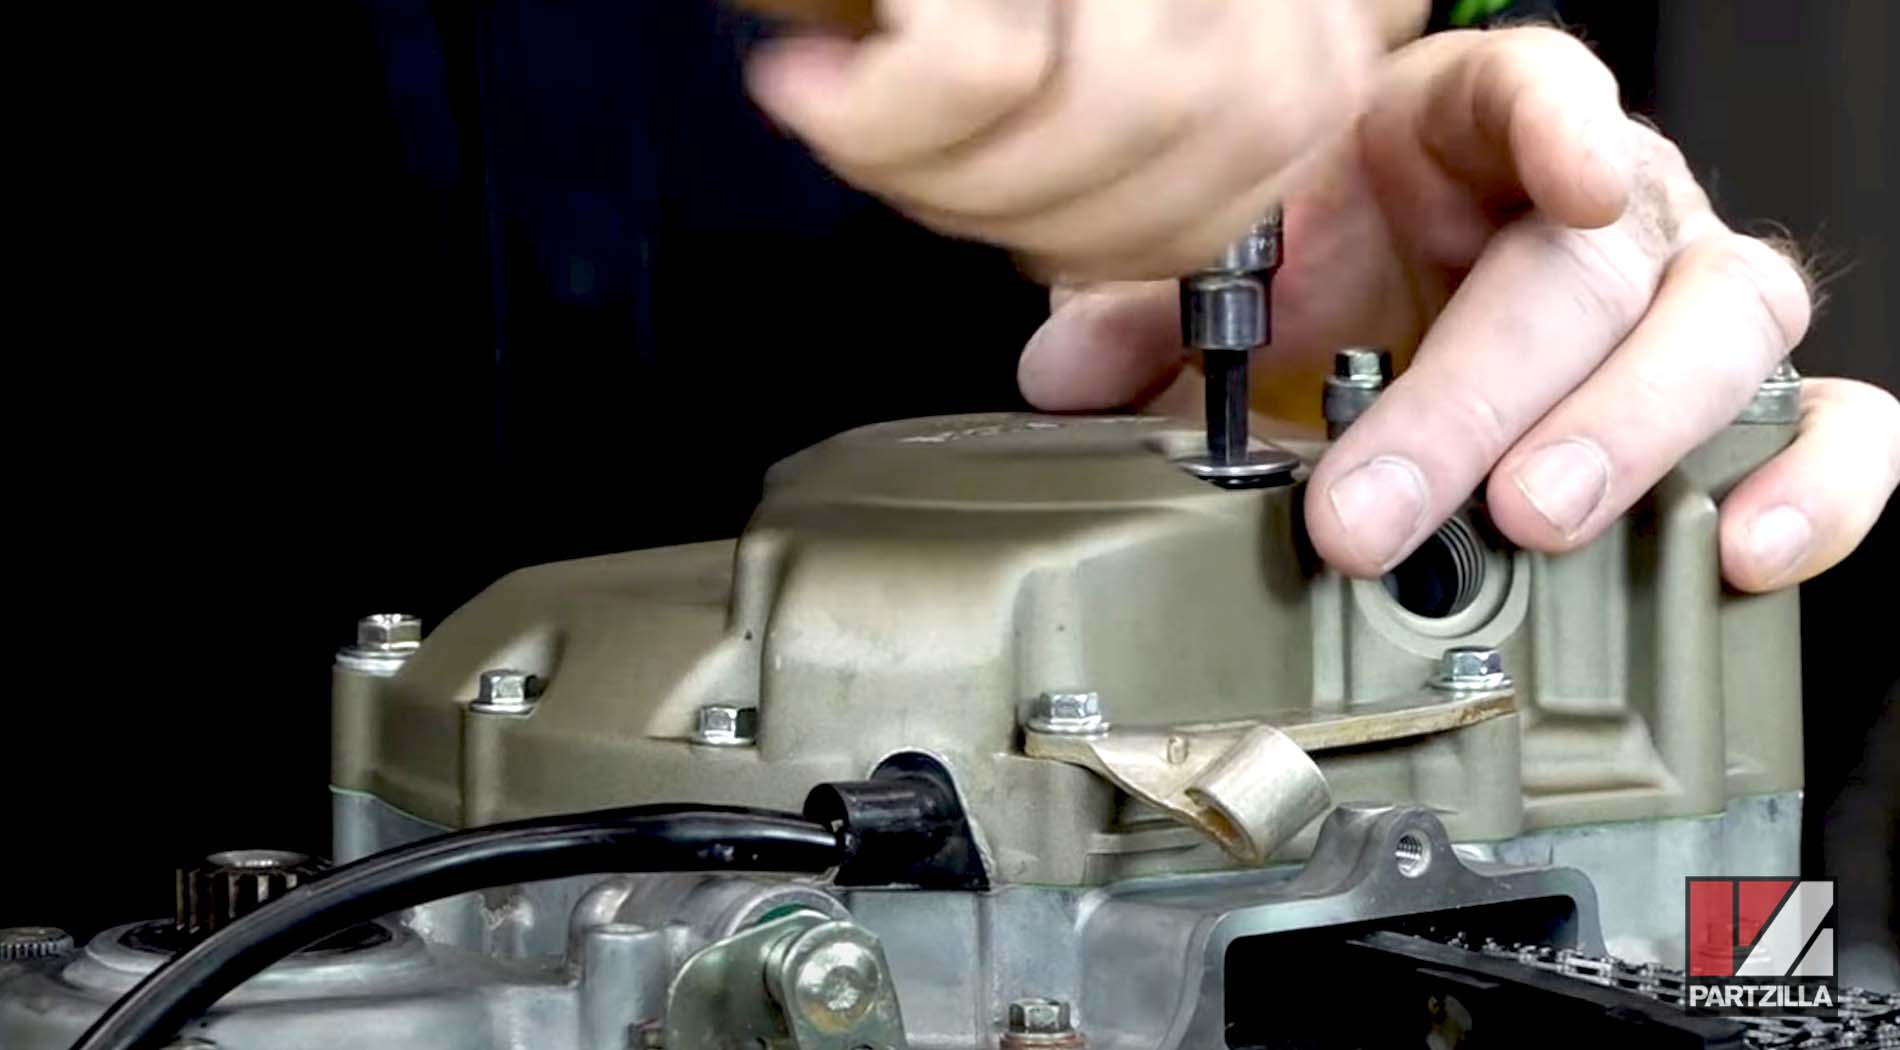
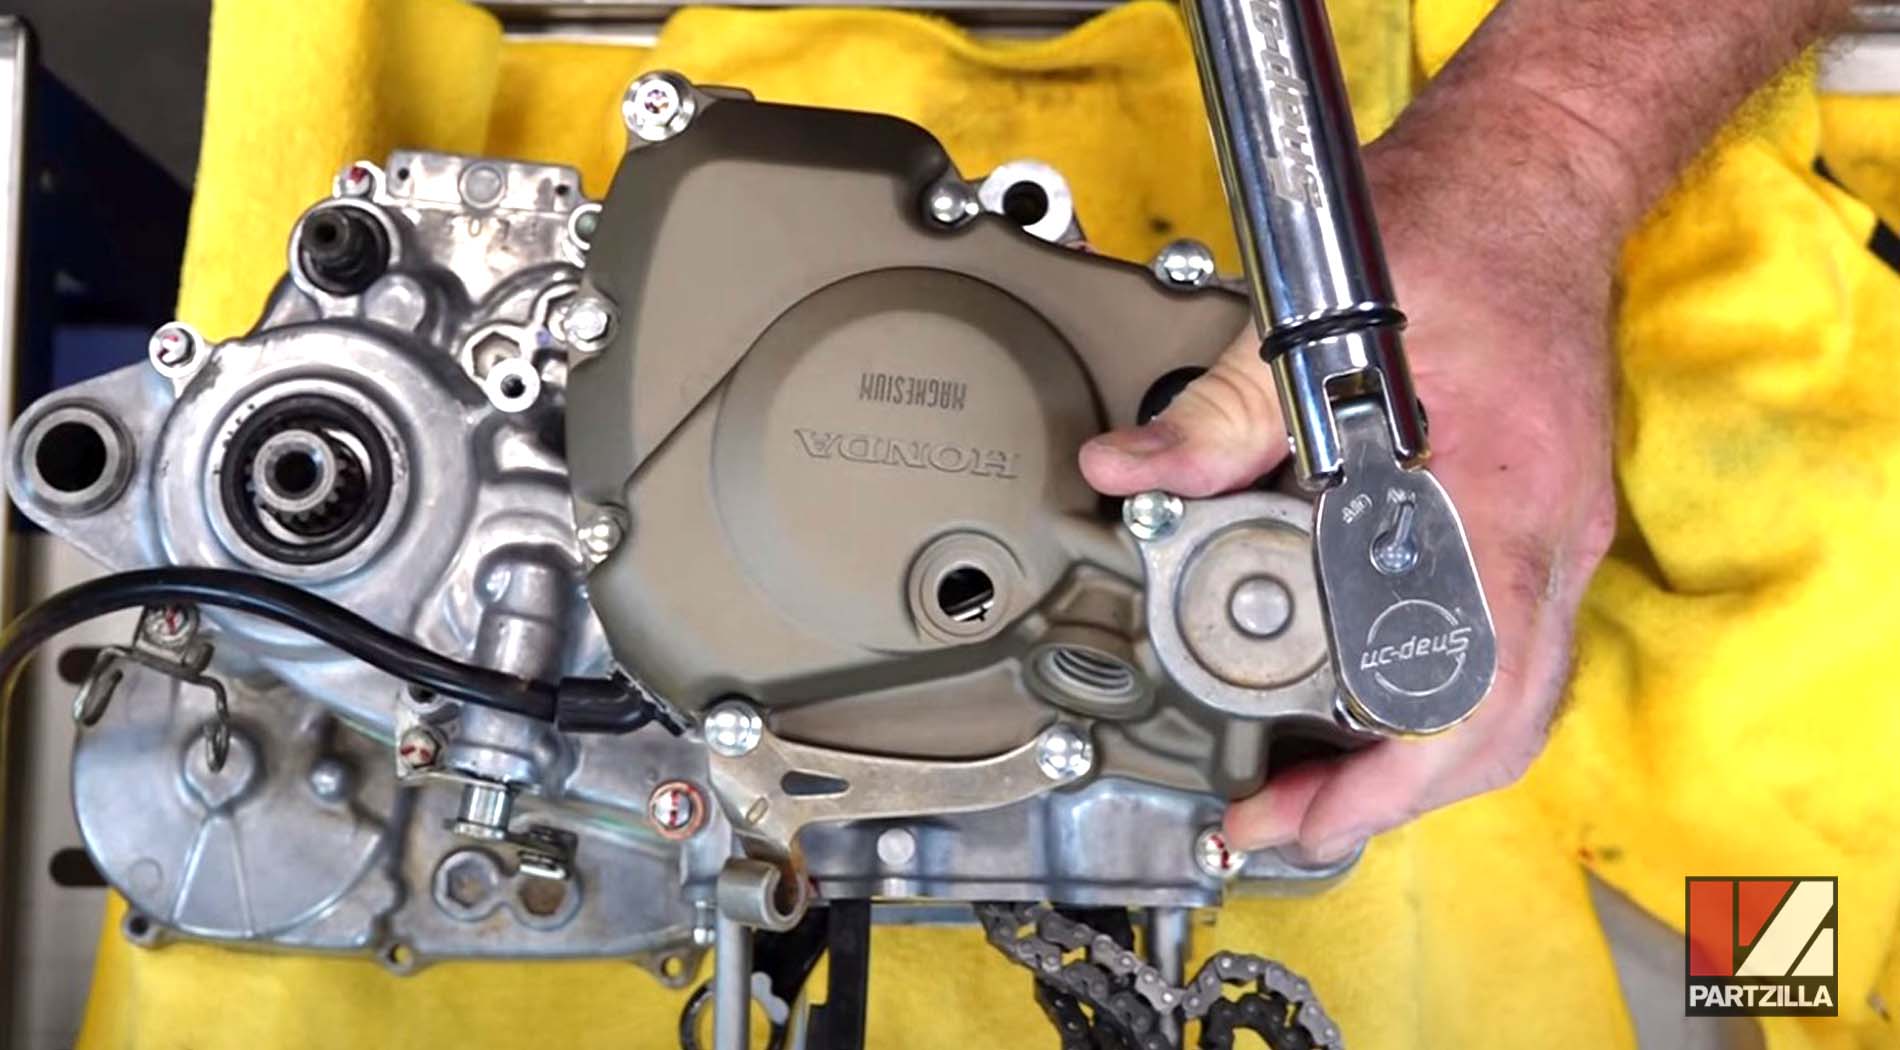
Honda CRF450 Bottom End Rebuild Stator Cover Installation
Step 22. Lay the head gasket over the dowels, then use a little bit of a Hondabond to get a good bonding seal.
Step 23. Install the crankcase cover bolts by seating them, and then going around and torqueing each one to 9 foot-pounds, except the drain plug bolt, which takes 12 foot-pounds.
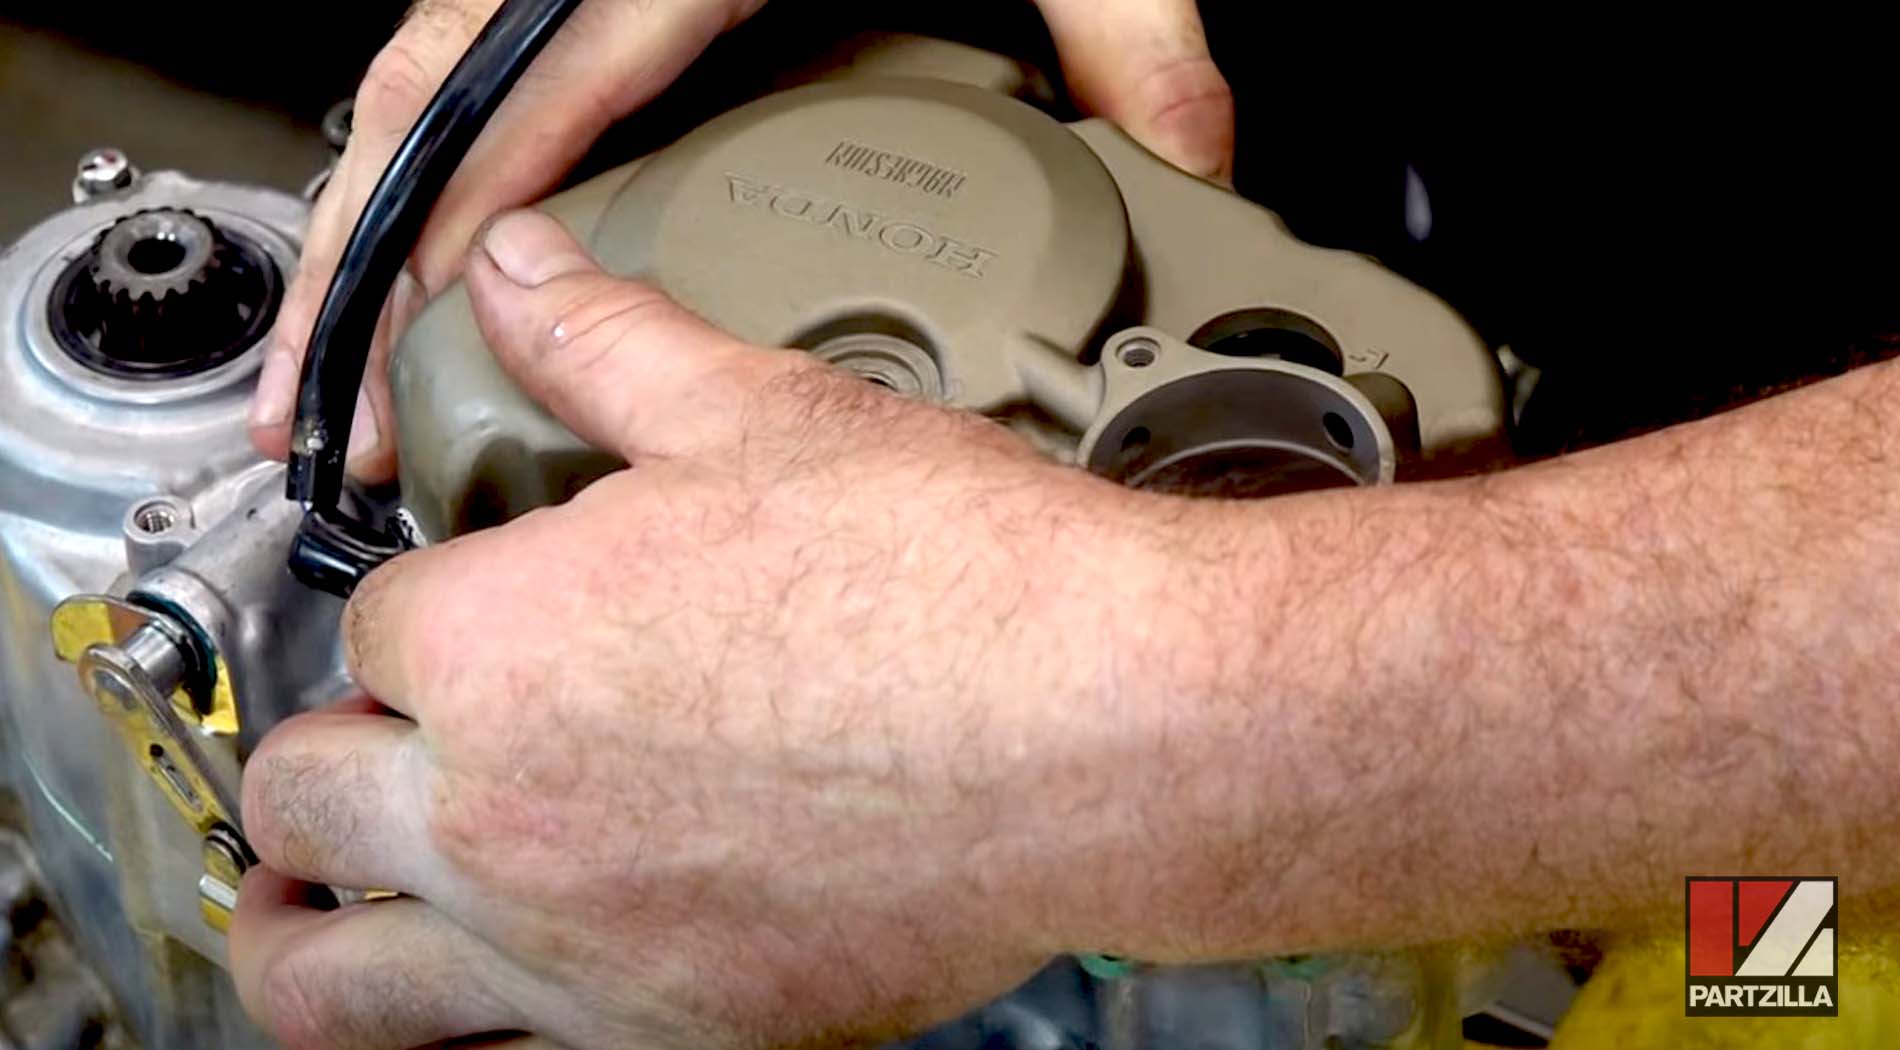
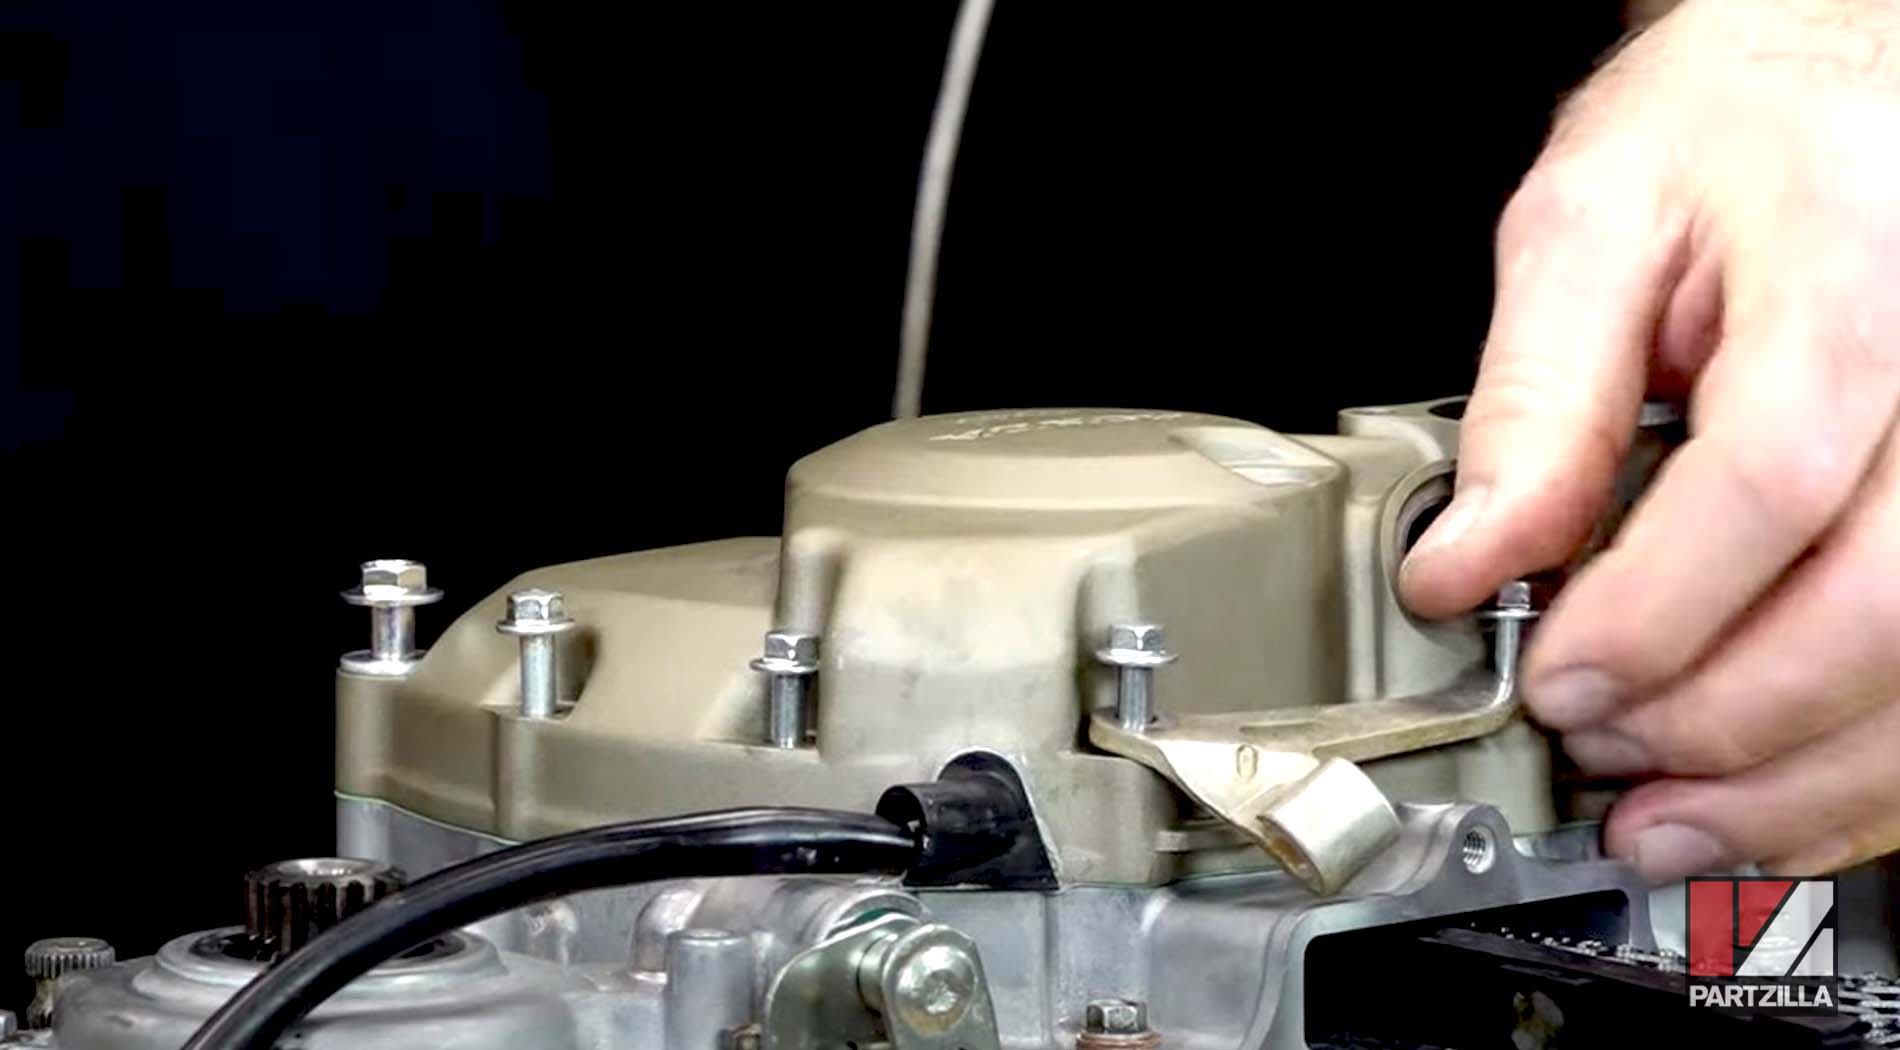
NOTE: There are four different lengths of bolts. Some are obvious as to where they go, but others not so much. Use our CRF450 left crankcase cover parts diagram to make sure everything is in the right place.
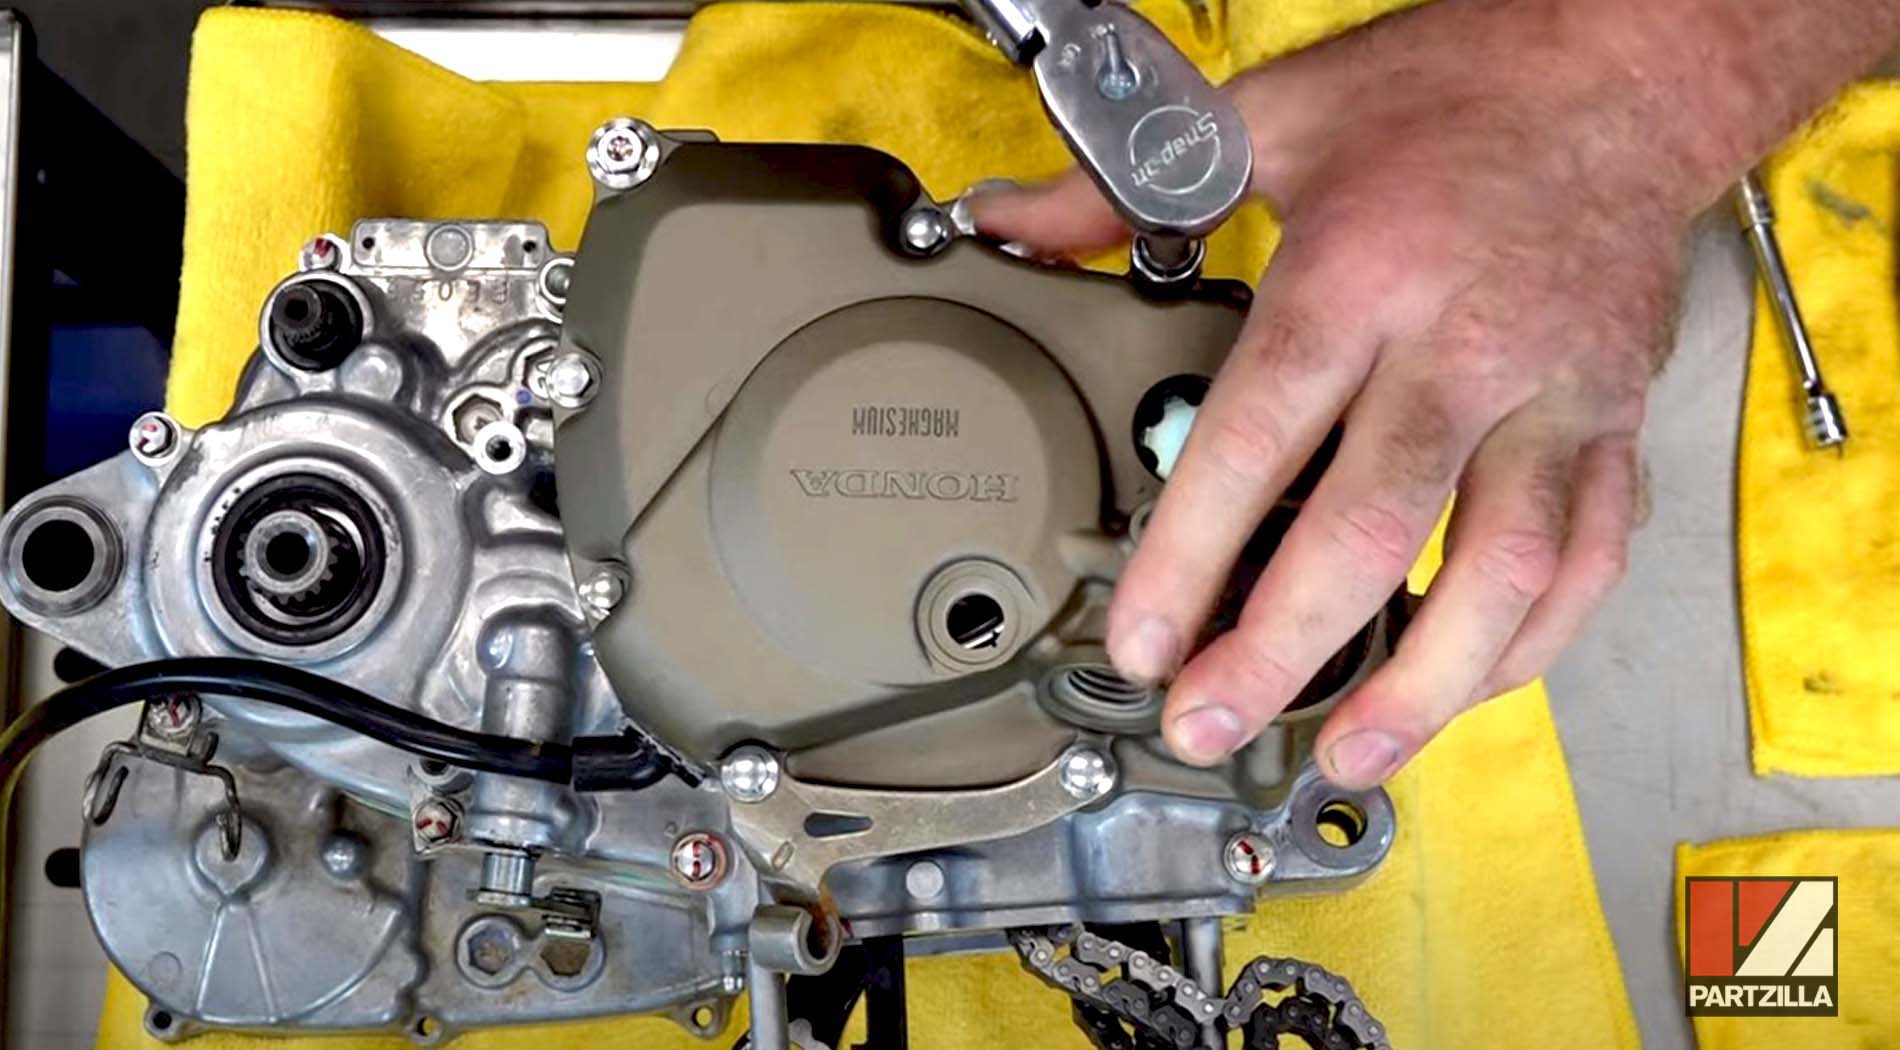
Step 24. Install a new O-ring for the oil filter cover, then put a little bit of lube around it so it'll slide in easily. Next, install a new oil filter with the oil filter spring, the cover and its bolts. Torque the bolts that hold the oil filter cover to 9 foot-pounds.

Step 25. Install the site window and you’re done with the bottom end rebuild.