Honda CRF450 Bottom End Rebuild Part 1
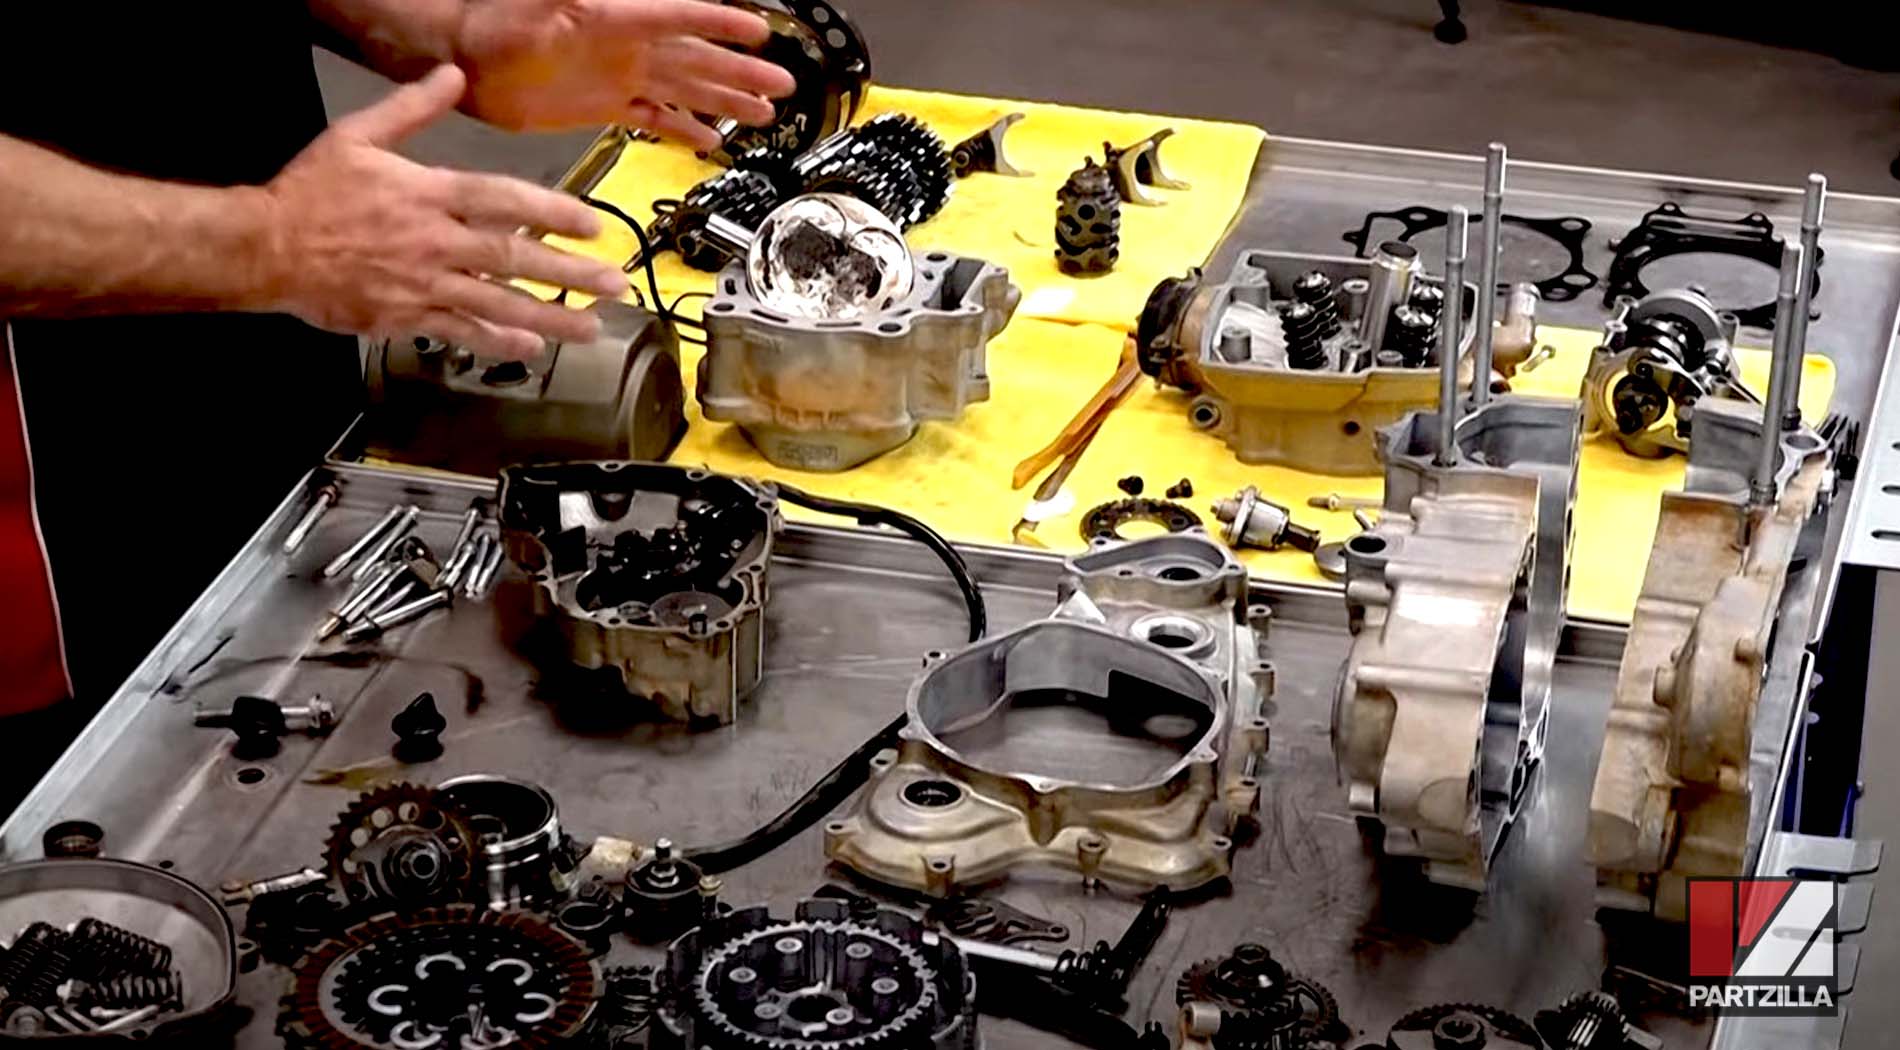
Welcome to the continuation of our Honda CRF450R engine rebuild. After tearing down the bottom end of the bike’s engine, it’s time to rebuild it.
Here we clean up the crankcase halves, put the transmission back together, get all the seals and bearings pressed in, install the crankshaft and close the bottom end back up, all with a combination of OEM Honda parts and Wiseco Garage Buddy kit parts.
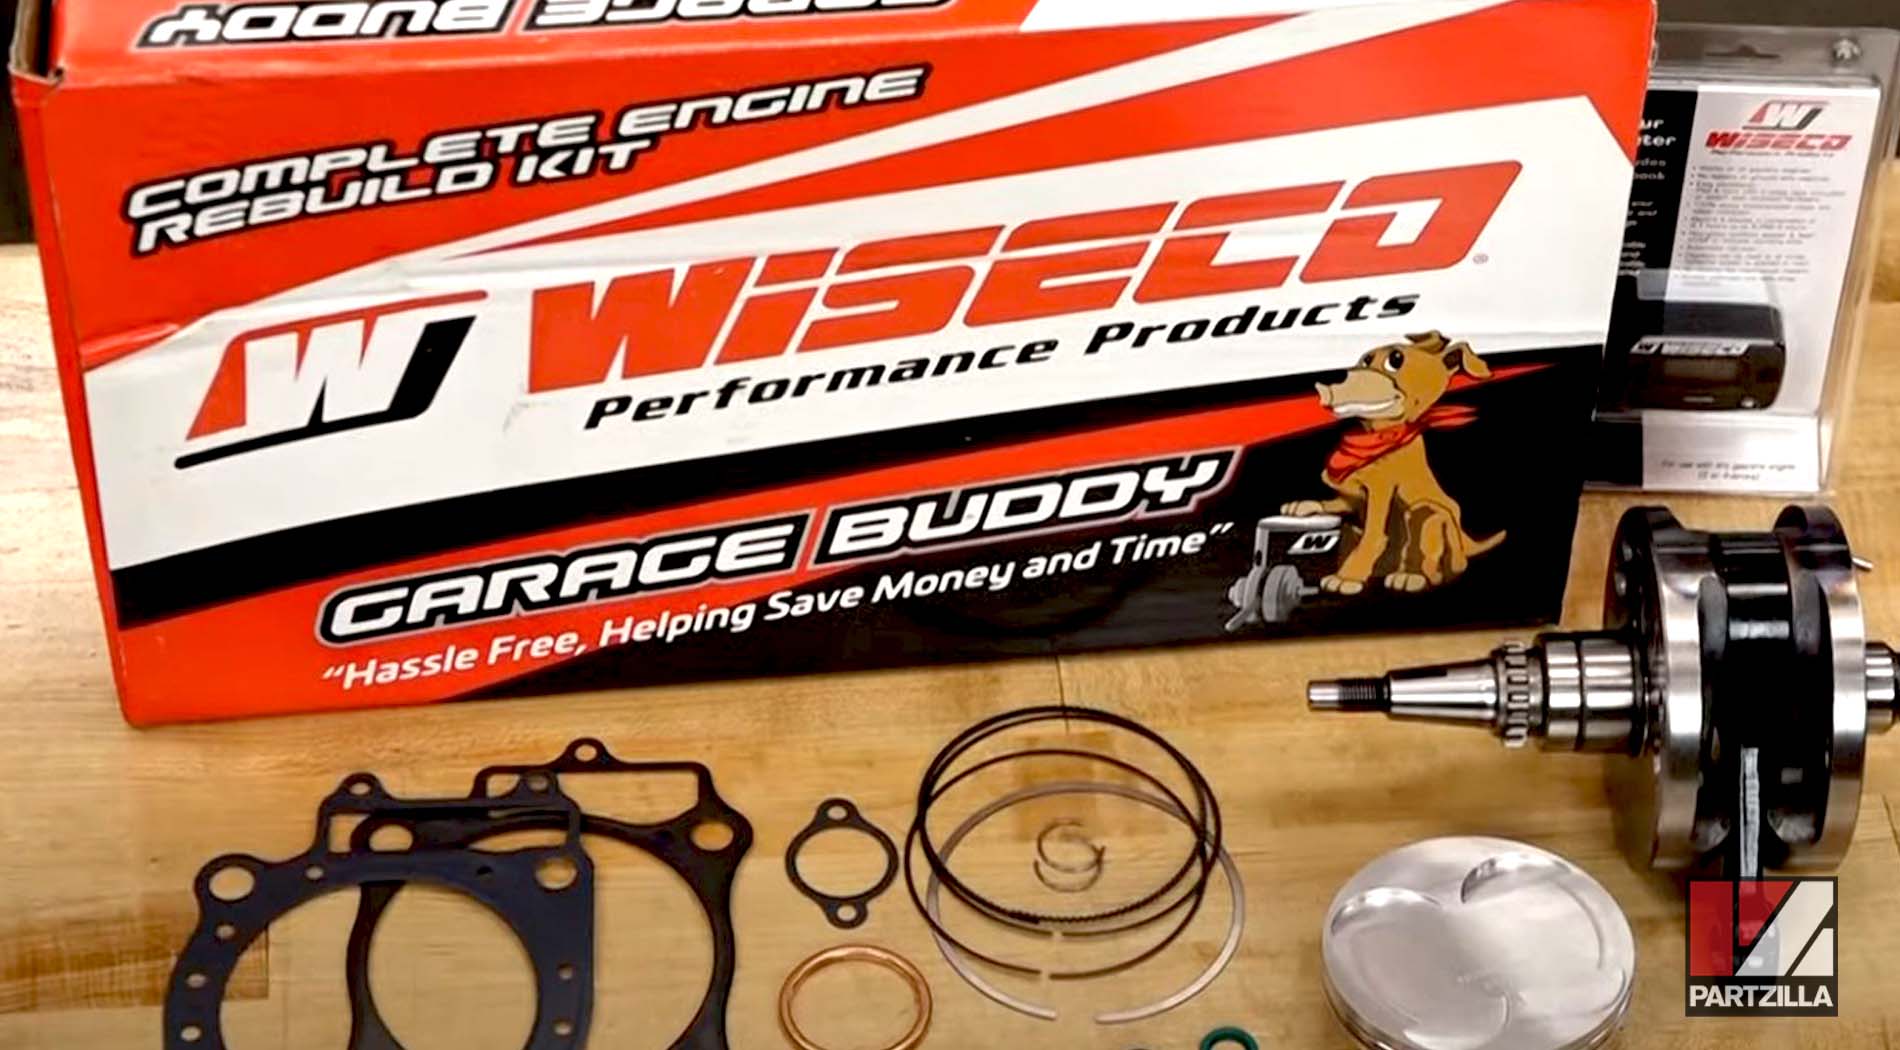
The Wiseco engine rebuild kit includes the parts you need to do the bottom end: crankshaft, seals, bearings, gaskets, O-rings, timing chain, etc. Watch the video above and follow the steps below to do the bottom end rebuild of a CRF450 engine. Use our Honda CRF450 crankcase parts diagram for additional reference.
NOTE: The steps below are a summarized breakdown of the bottom end rebuild, which we broke up into two parts. Watch the entire video above to see the full bottom end rebuild.
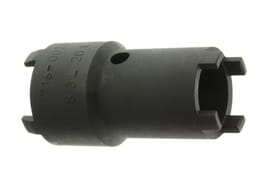
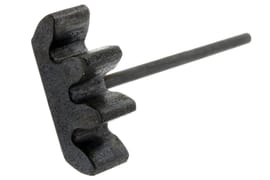
Tools and Supplies Needed - Honda CRF450 Bottom End Engine Rebuild
NOTE: The tools and supplies listed above are special tools required to pull this bottom end rebuild off, in addition to the regular tools found in a standard toolbox.
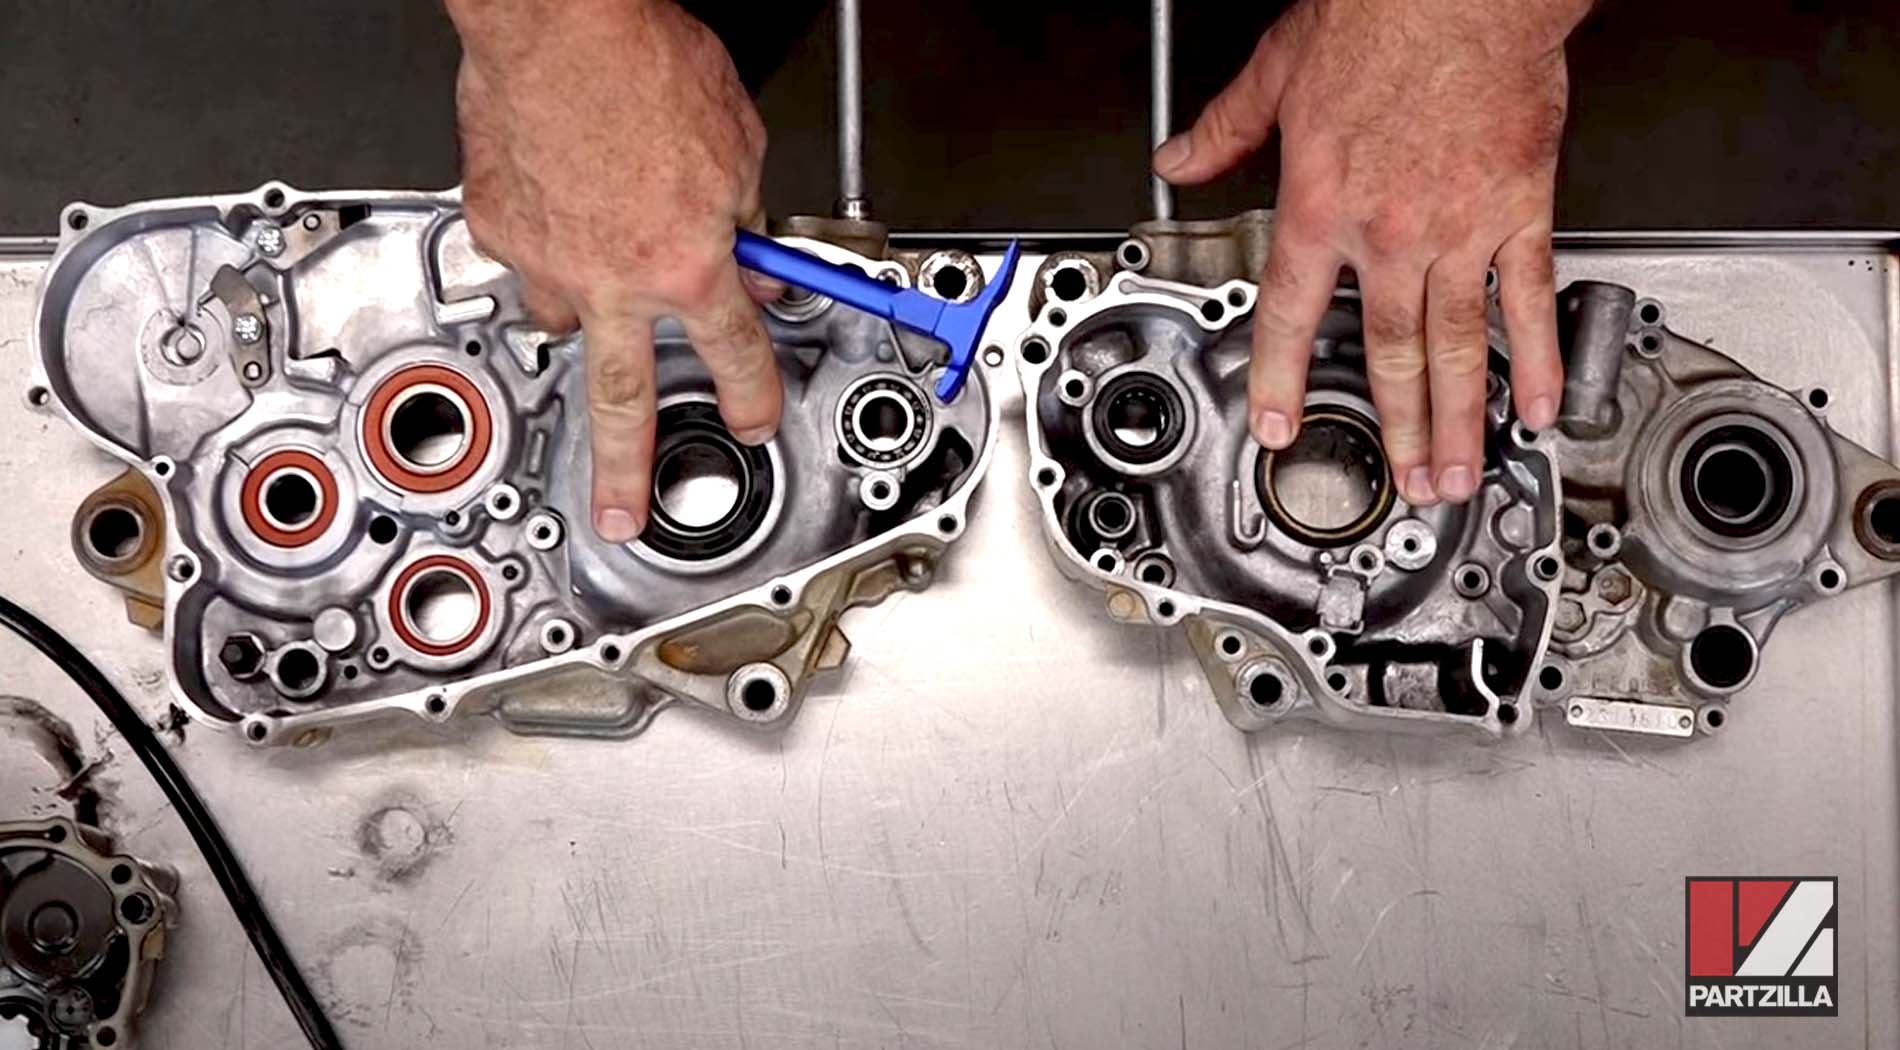
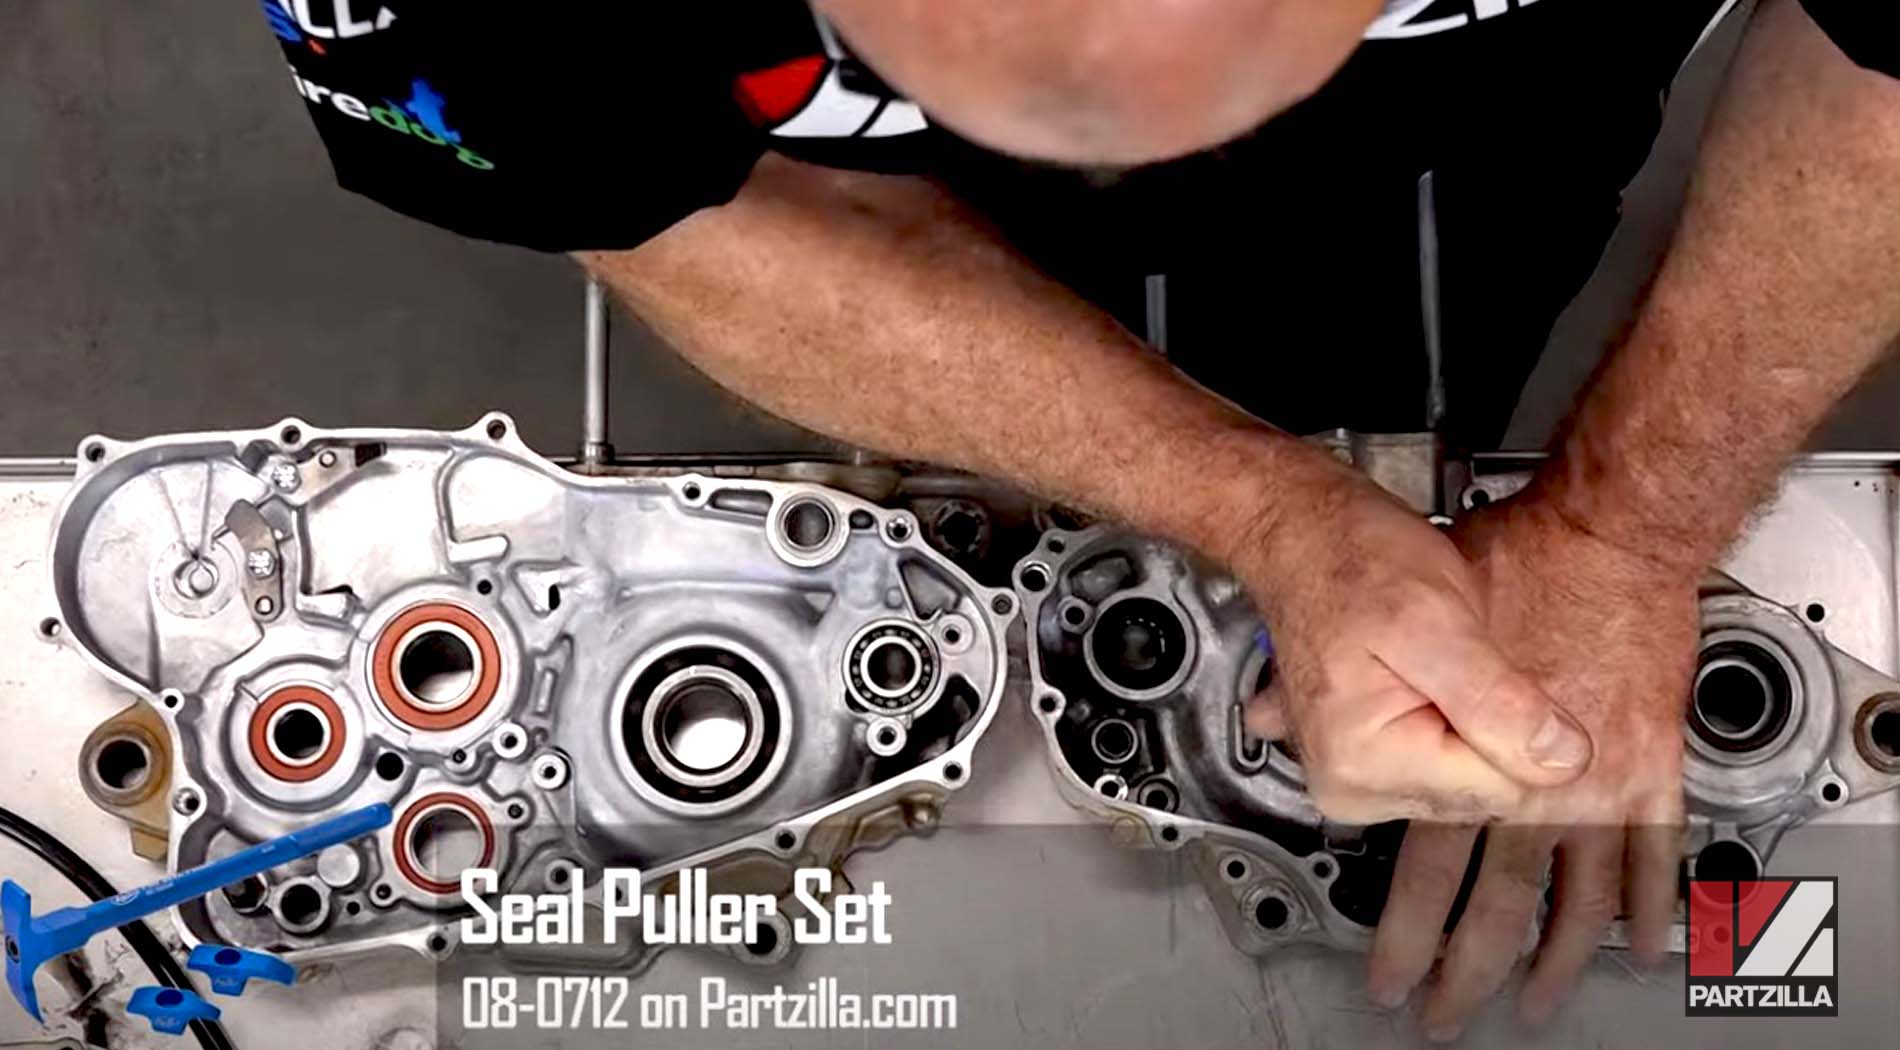
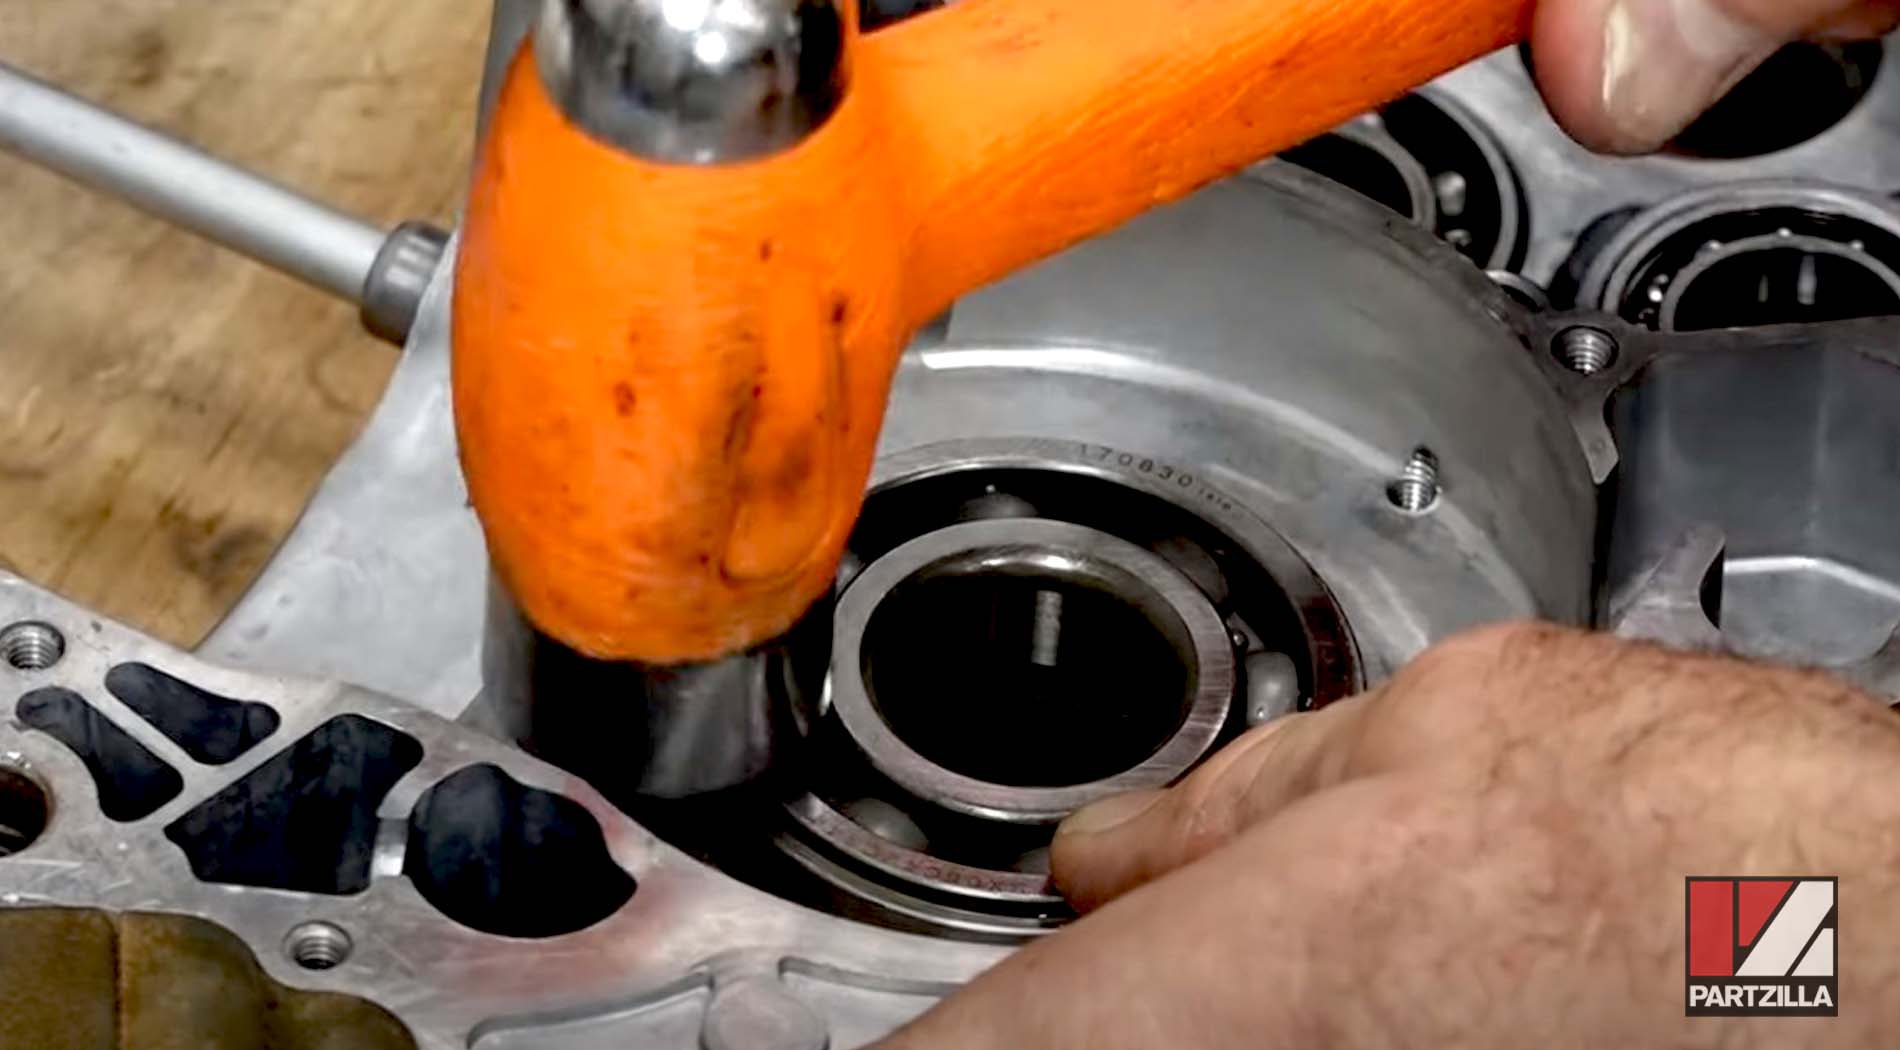
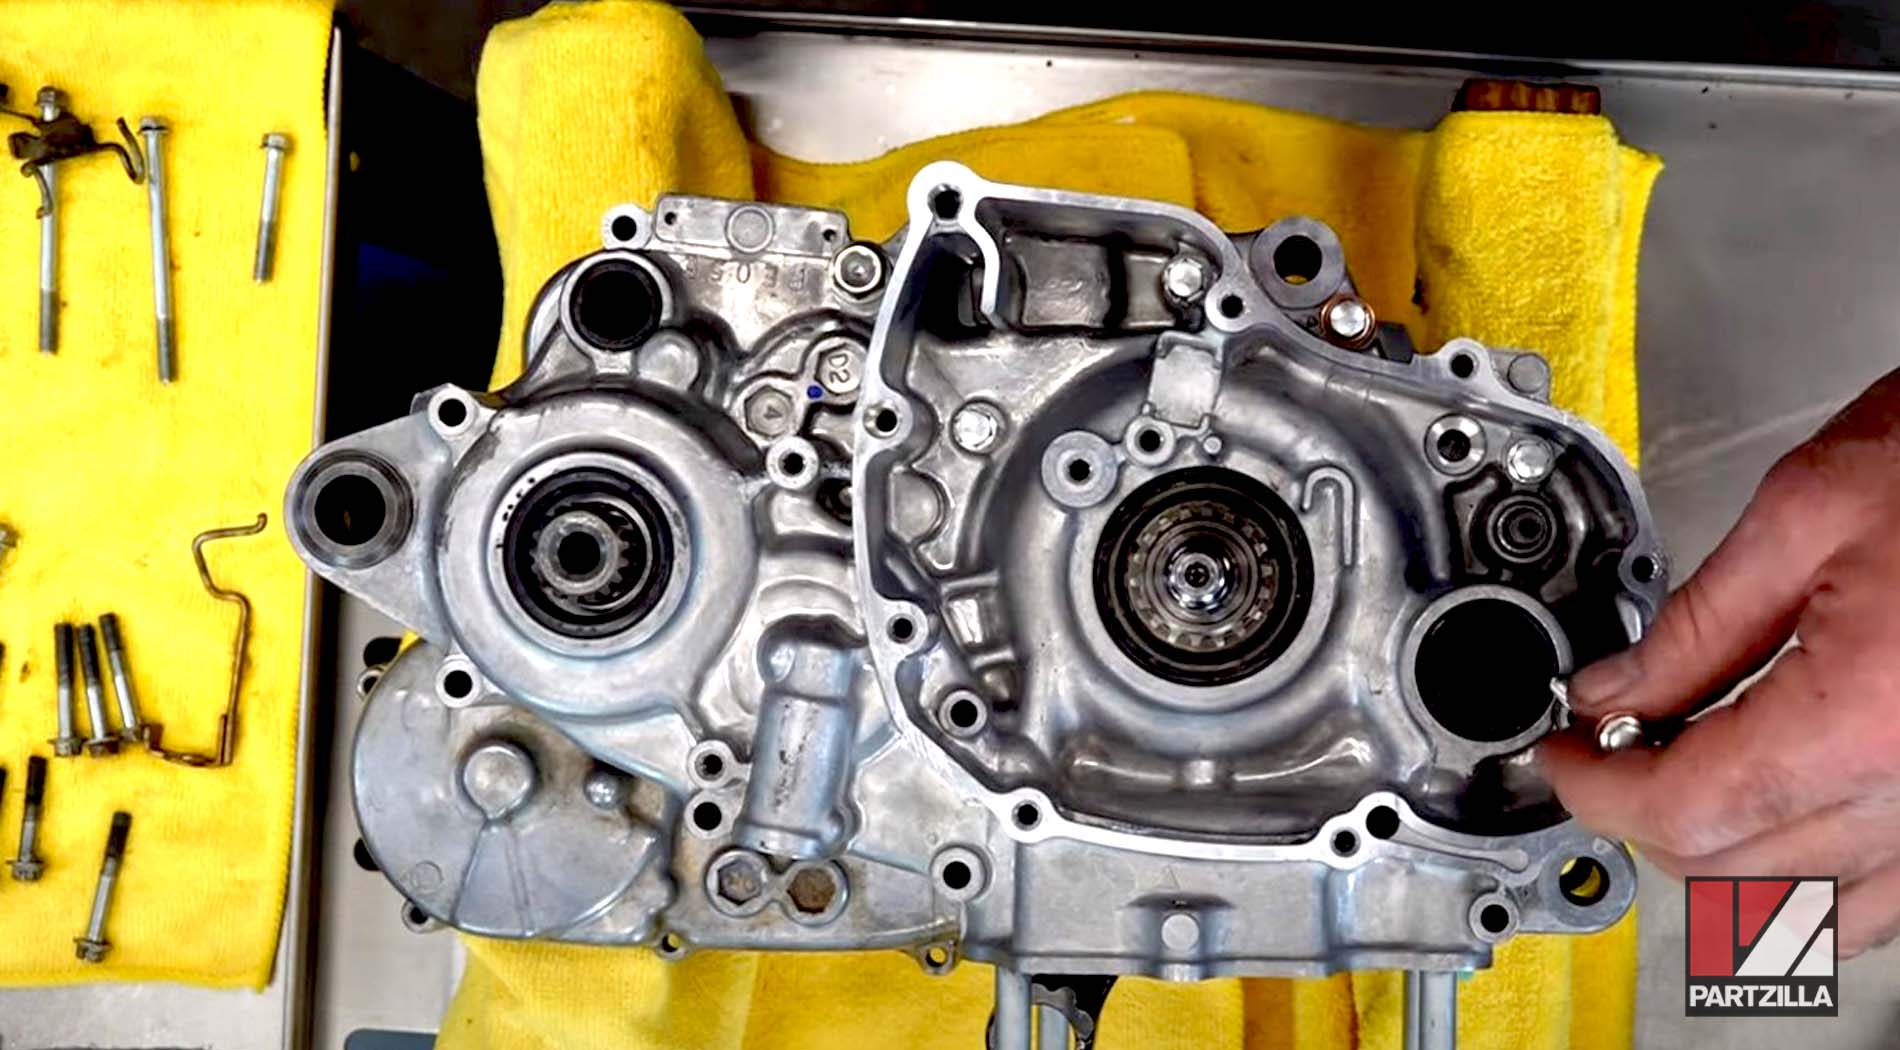
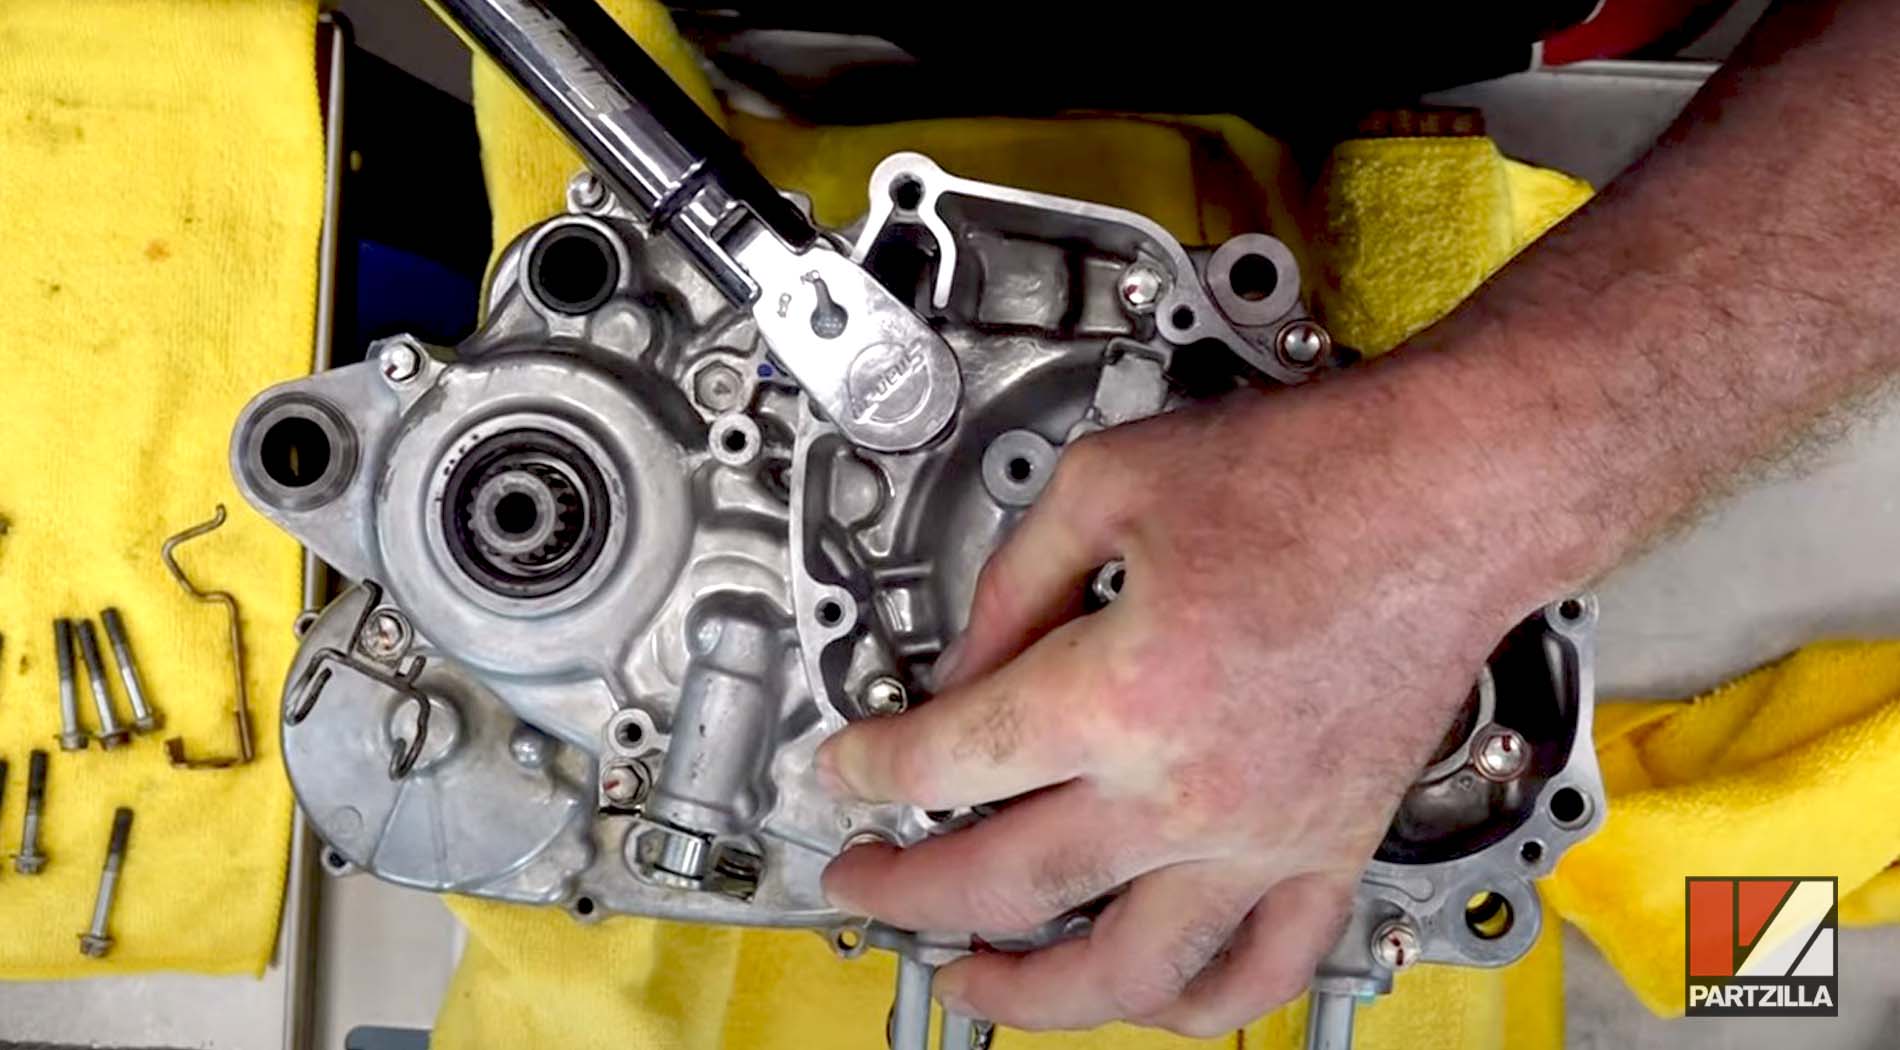
Honda CRF450 Bottom End Rebuild Bearing Removal and Installation
Step 1. Remove the main seals from each crankcase half with a seal puller tool.
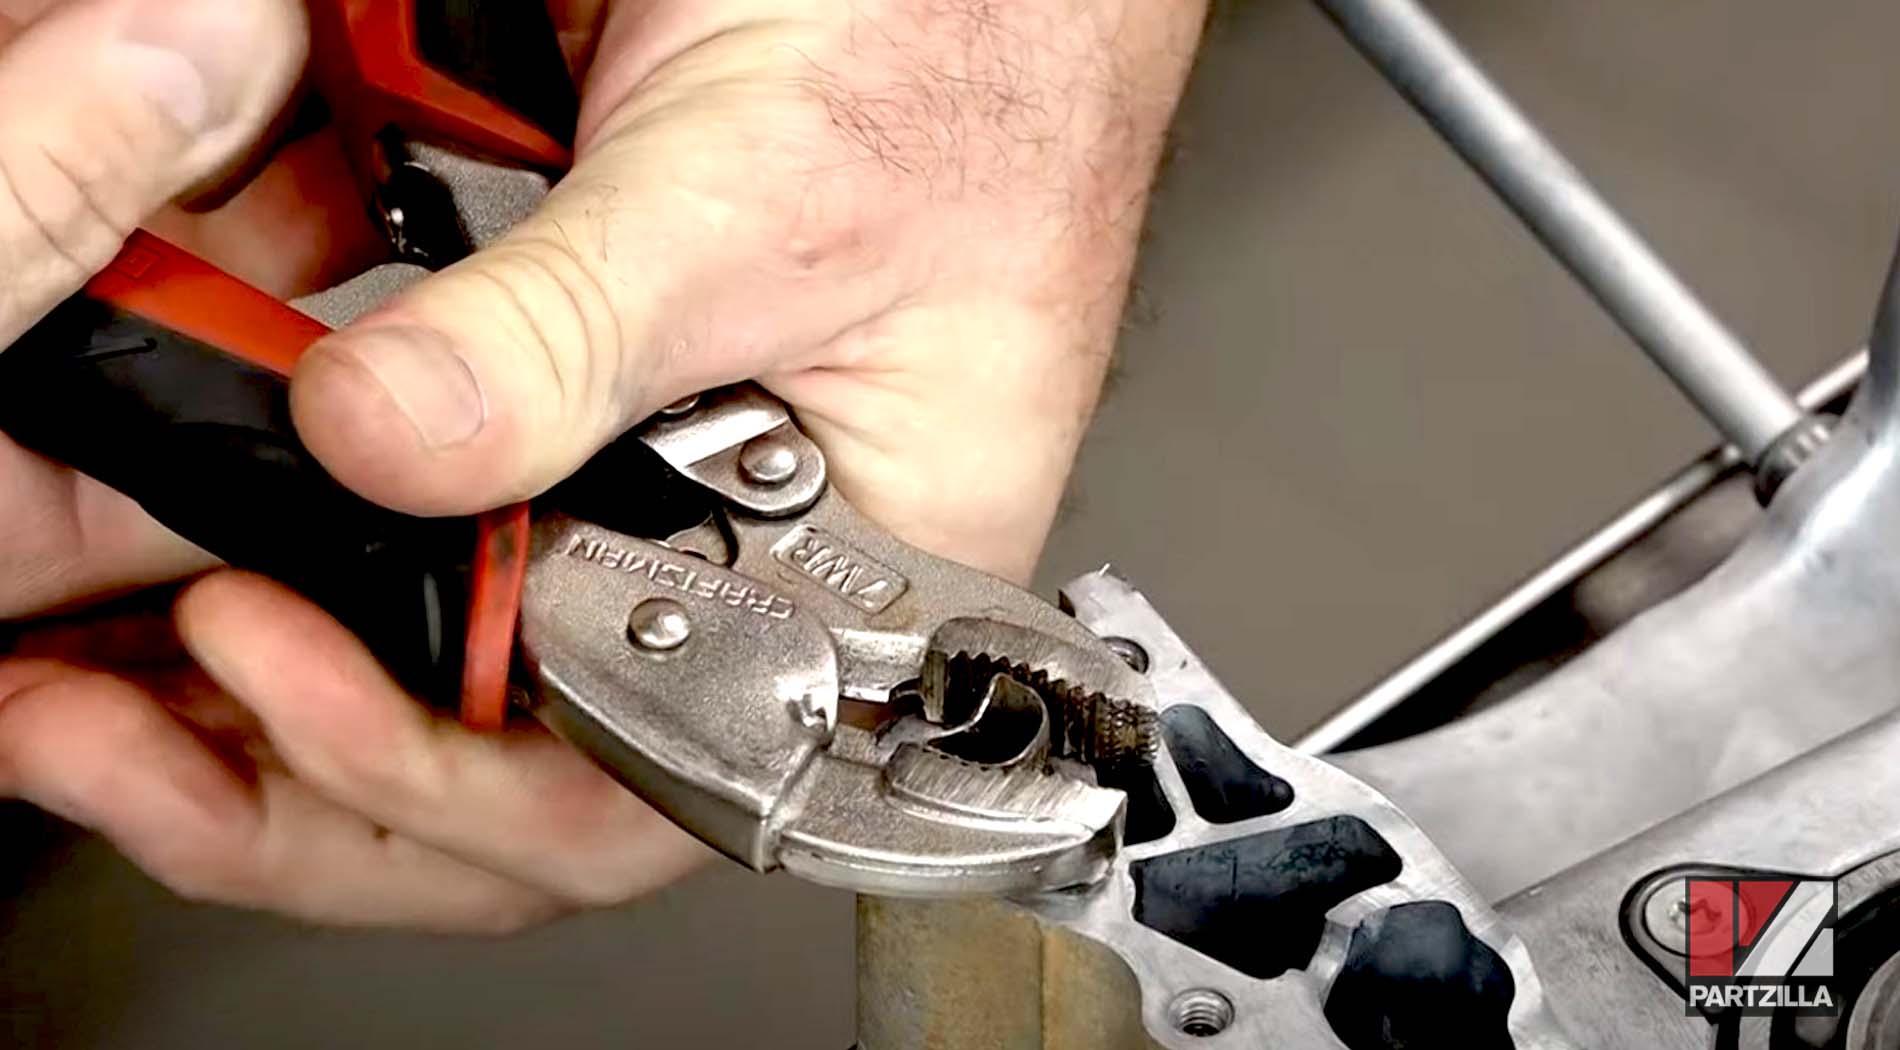
Step 2. Remove all of the dowels that join the crankcase halves with a pair of vice grips.
Step 3. Remove the bolts that hold the bearings in place so you can press each bearing out.

NOTE: Be careful with the sharp edges of the case, which could cut you.
Step 4. Remove each bearing with a bearing driver set.
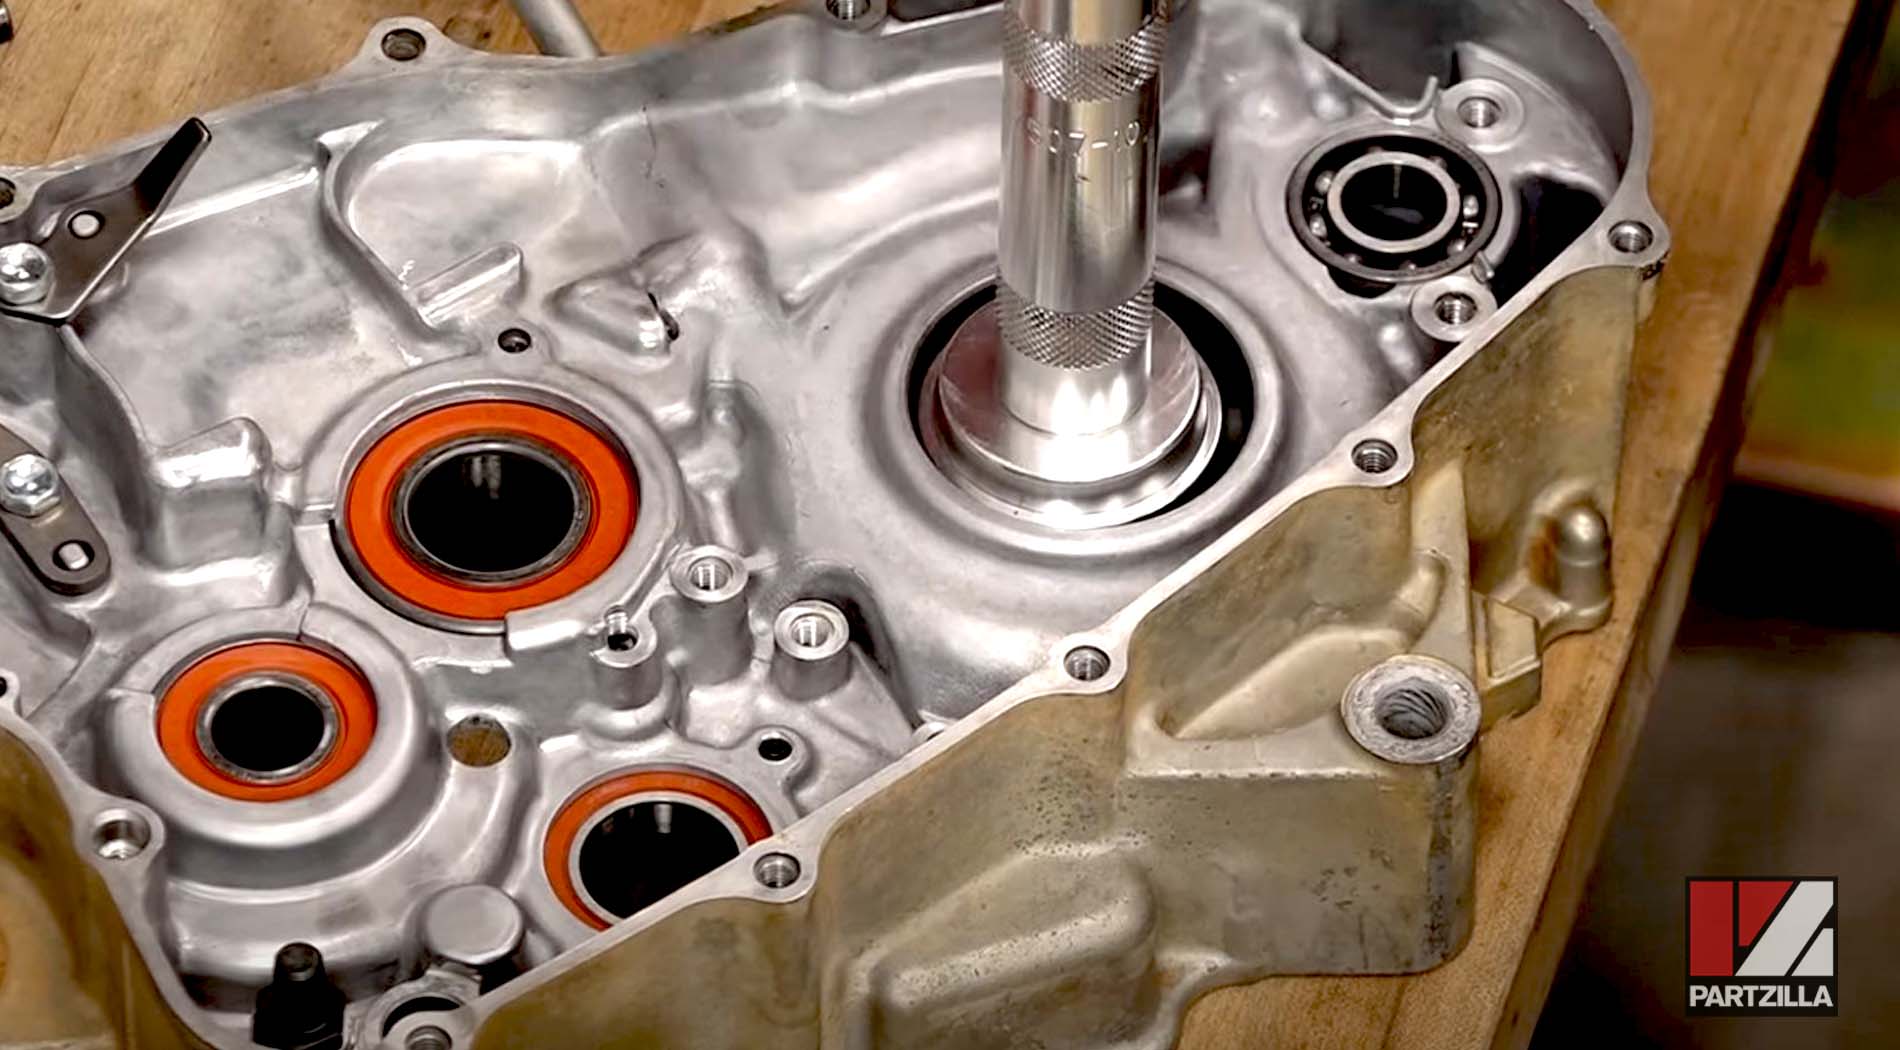
Step 5. Install the new bearings by lining them up with a soft-blow hammer and pressing them in, then reinstalling the bearing’s retaining bolts. Add some blue threadlocker to the bolts before reinstalling them.
PRO TIP: Keep new bearings in a freezer ahead of time and the crankcase heated up to make each bearing easier to install.

Step 6. Grease up the seals and pre-lube all the different bearings on both cases with regular engine oil or assembly lube.
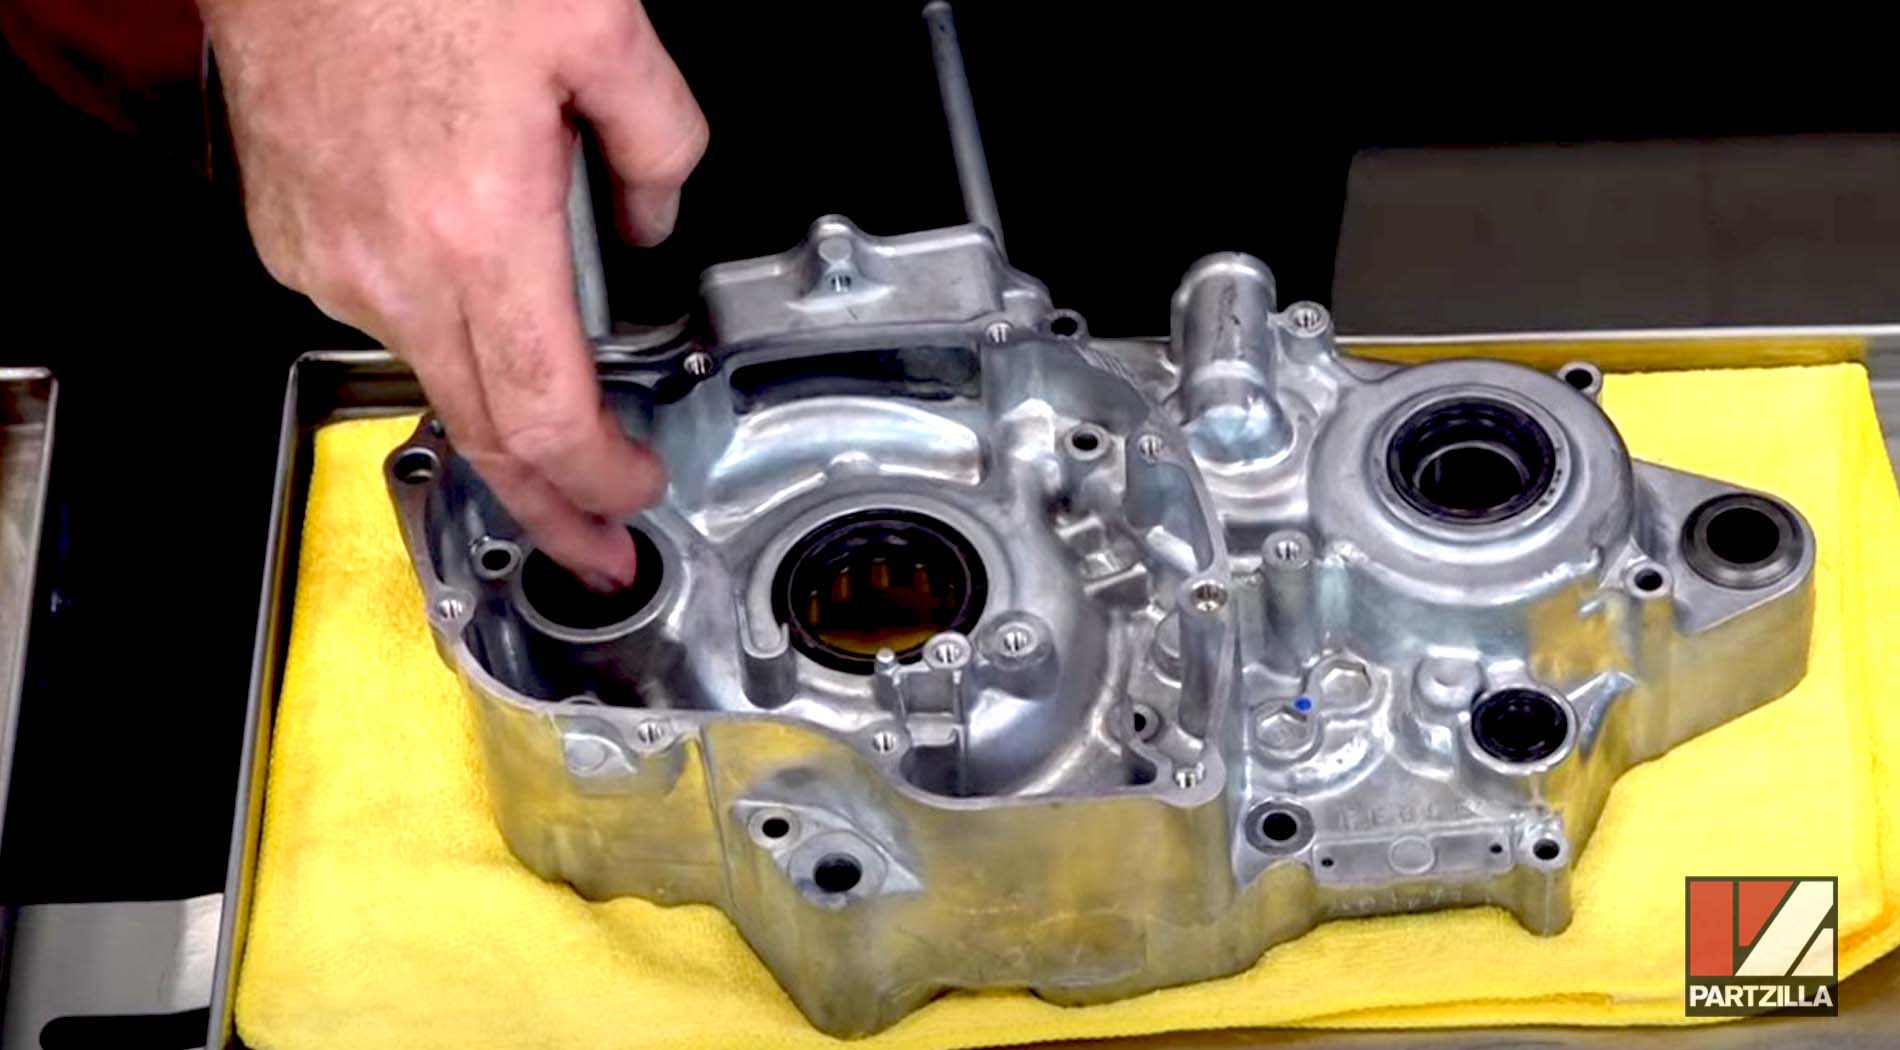
PRO TIP: Use assembly lube on the larger bearings, which is thicker than regular oil and has a better chance of staying on the bearings as you're putting the halves together. You can use regular engine oil for the smaller bearings, but either one will be fine for both.
Watch the clip below to see the bearing removal and installation segment of our Honda CRF450 bottom end rebuild.
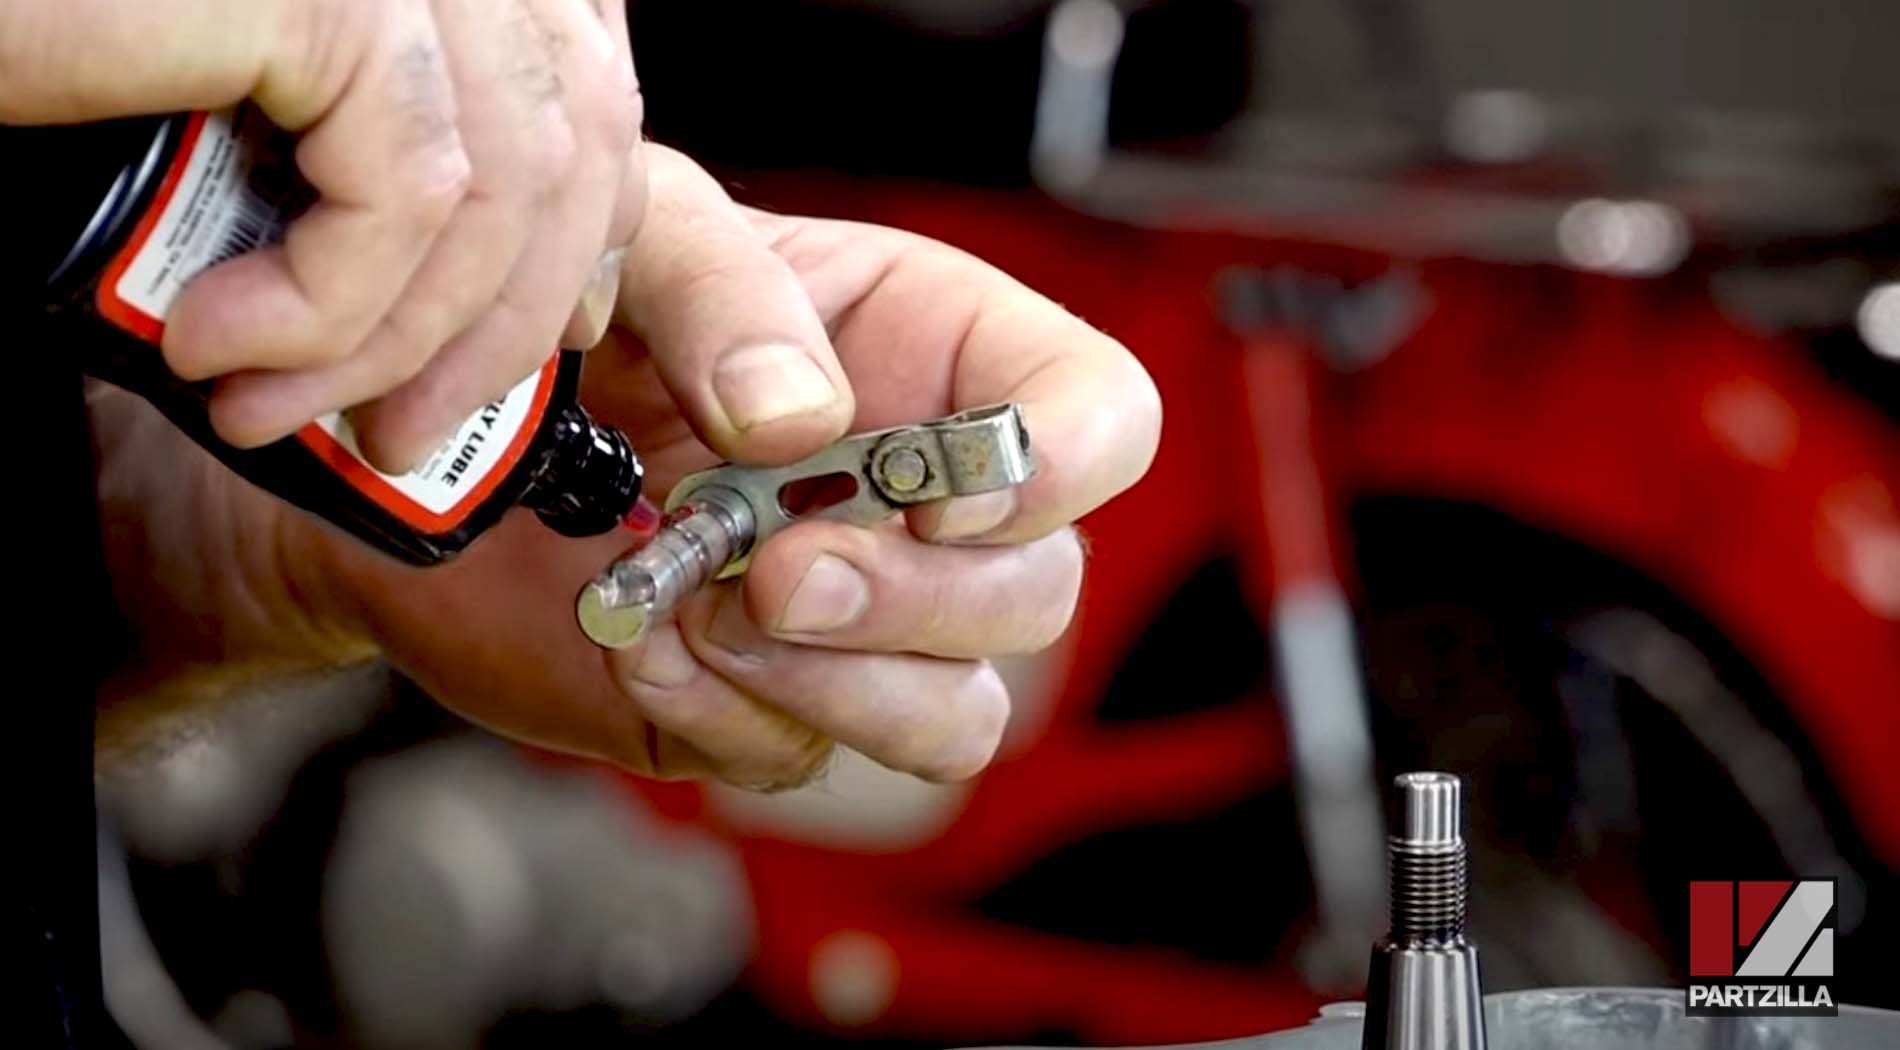
Honda CRF450 Bottom End Rebuild Transmission Installation
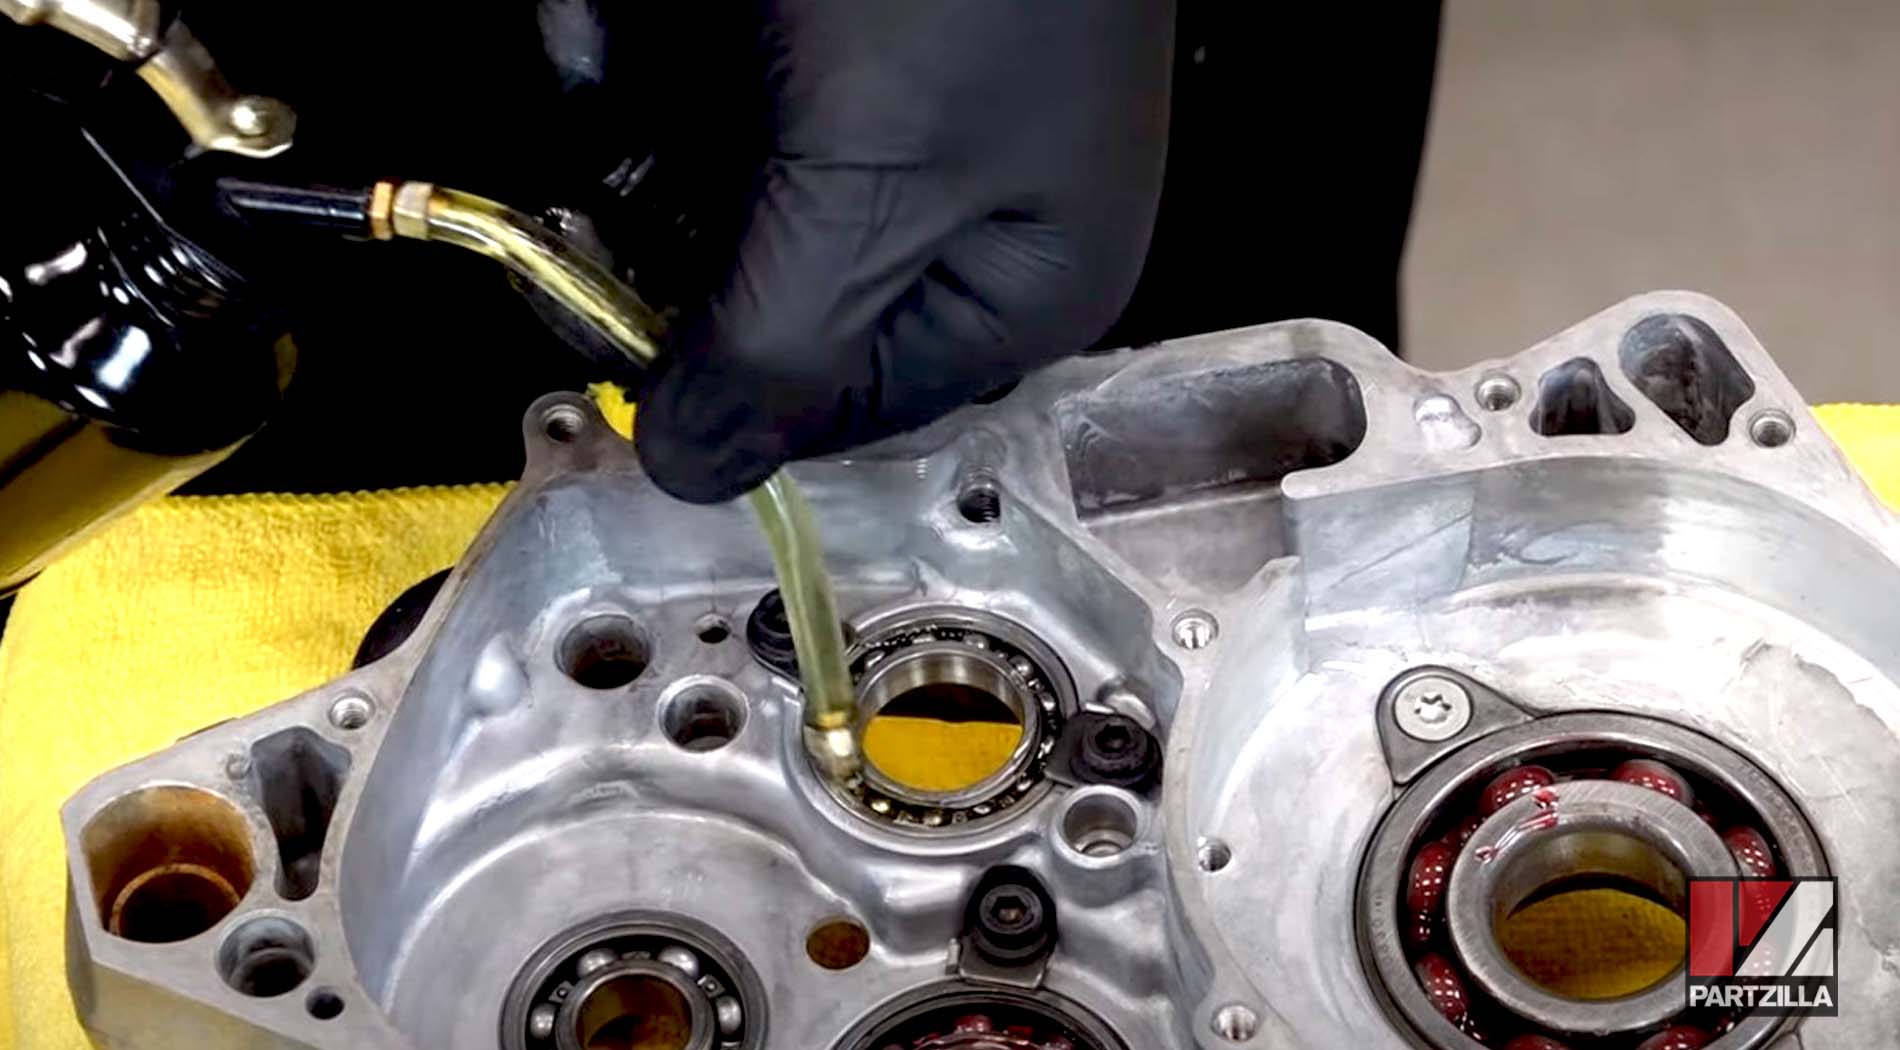
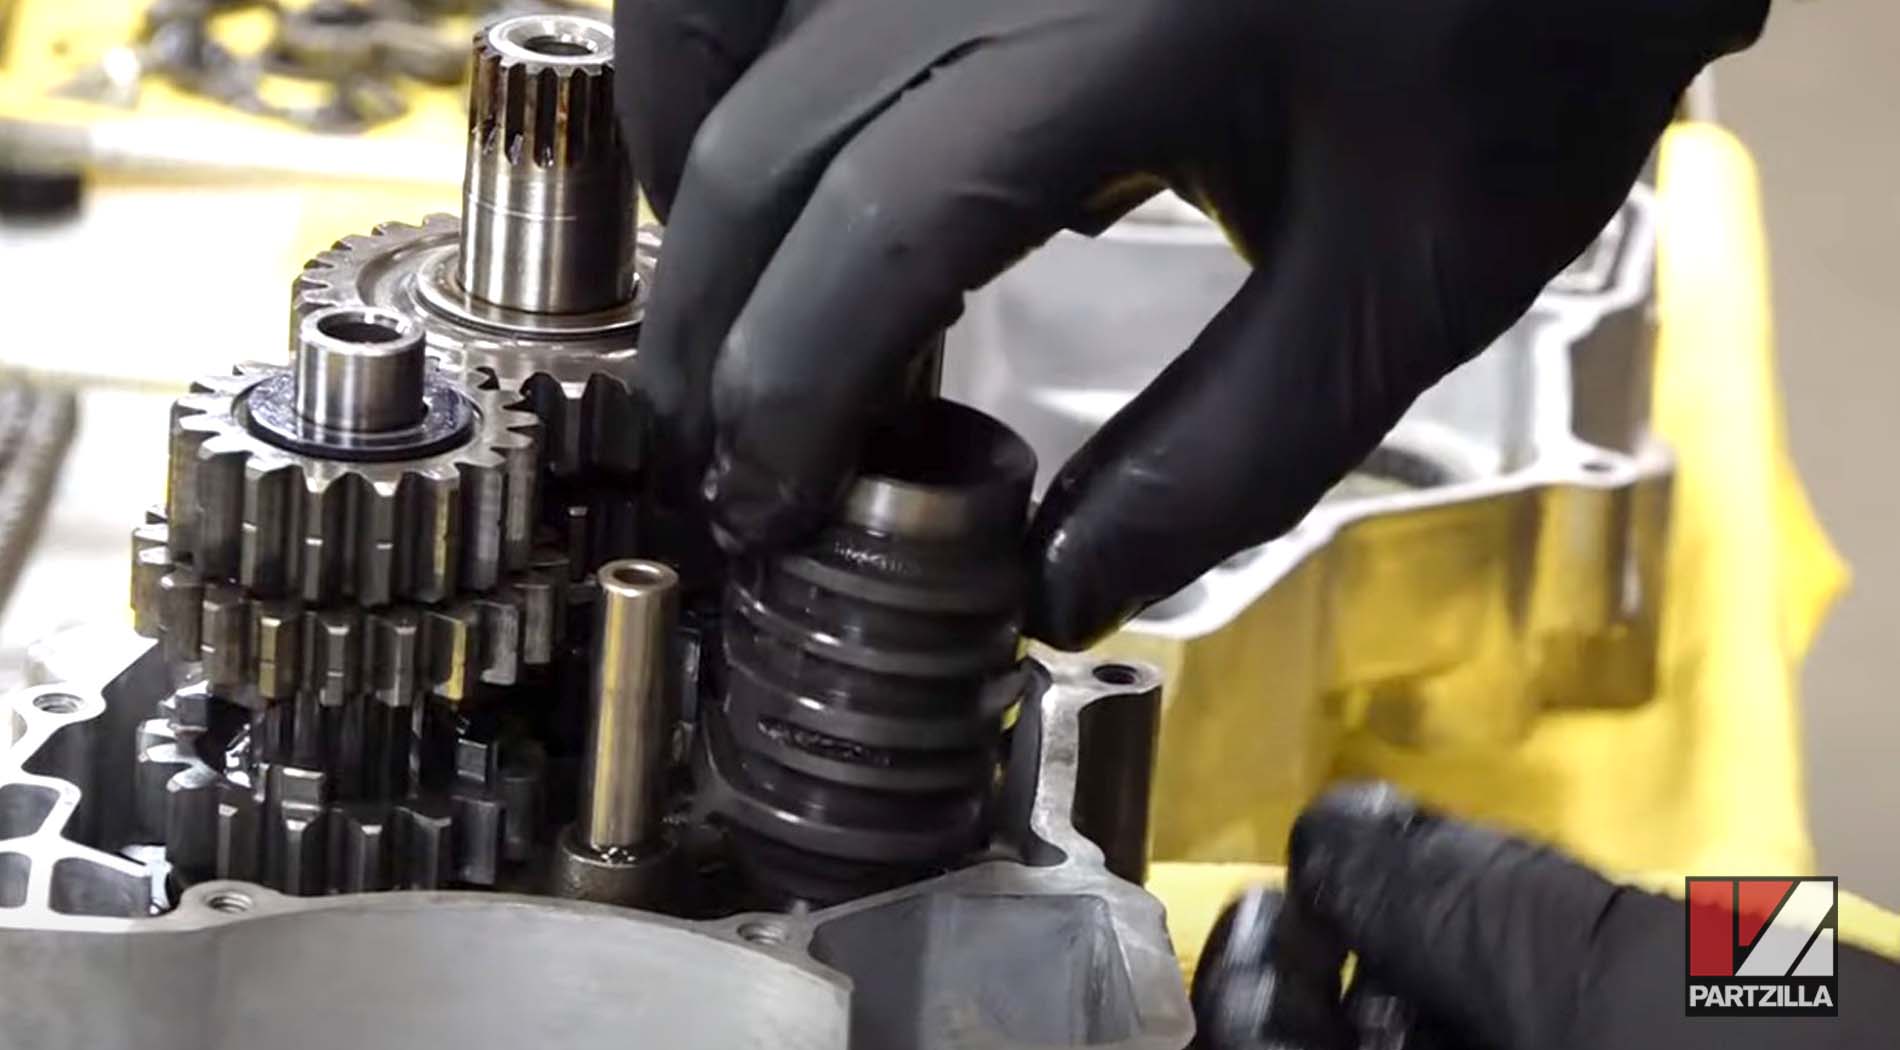
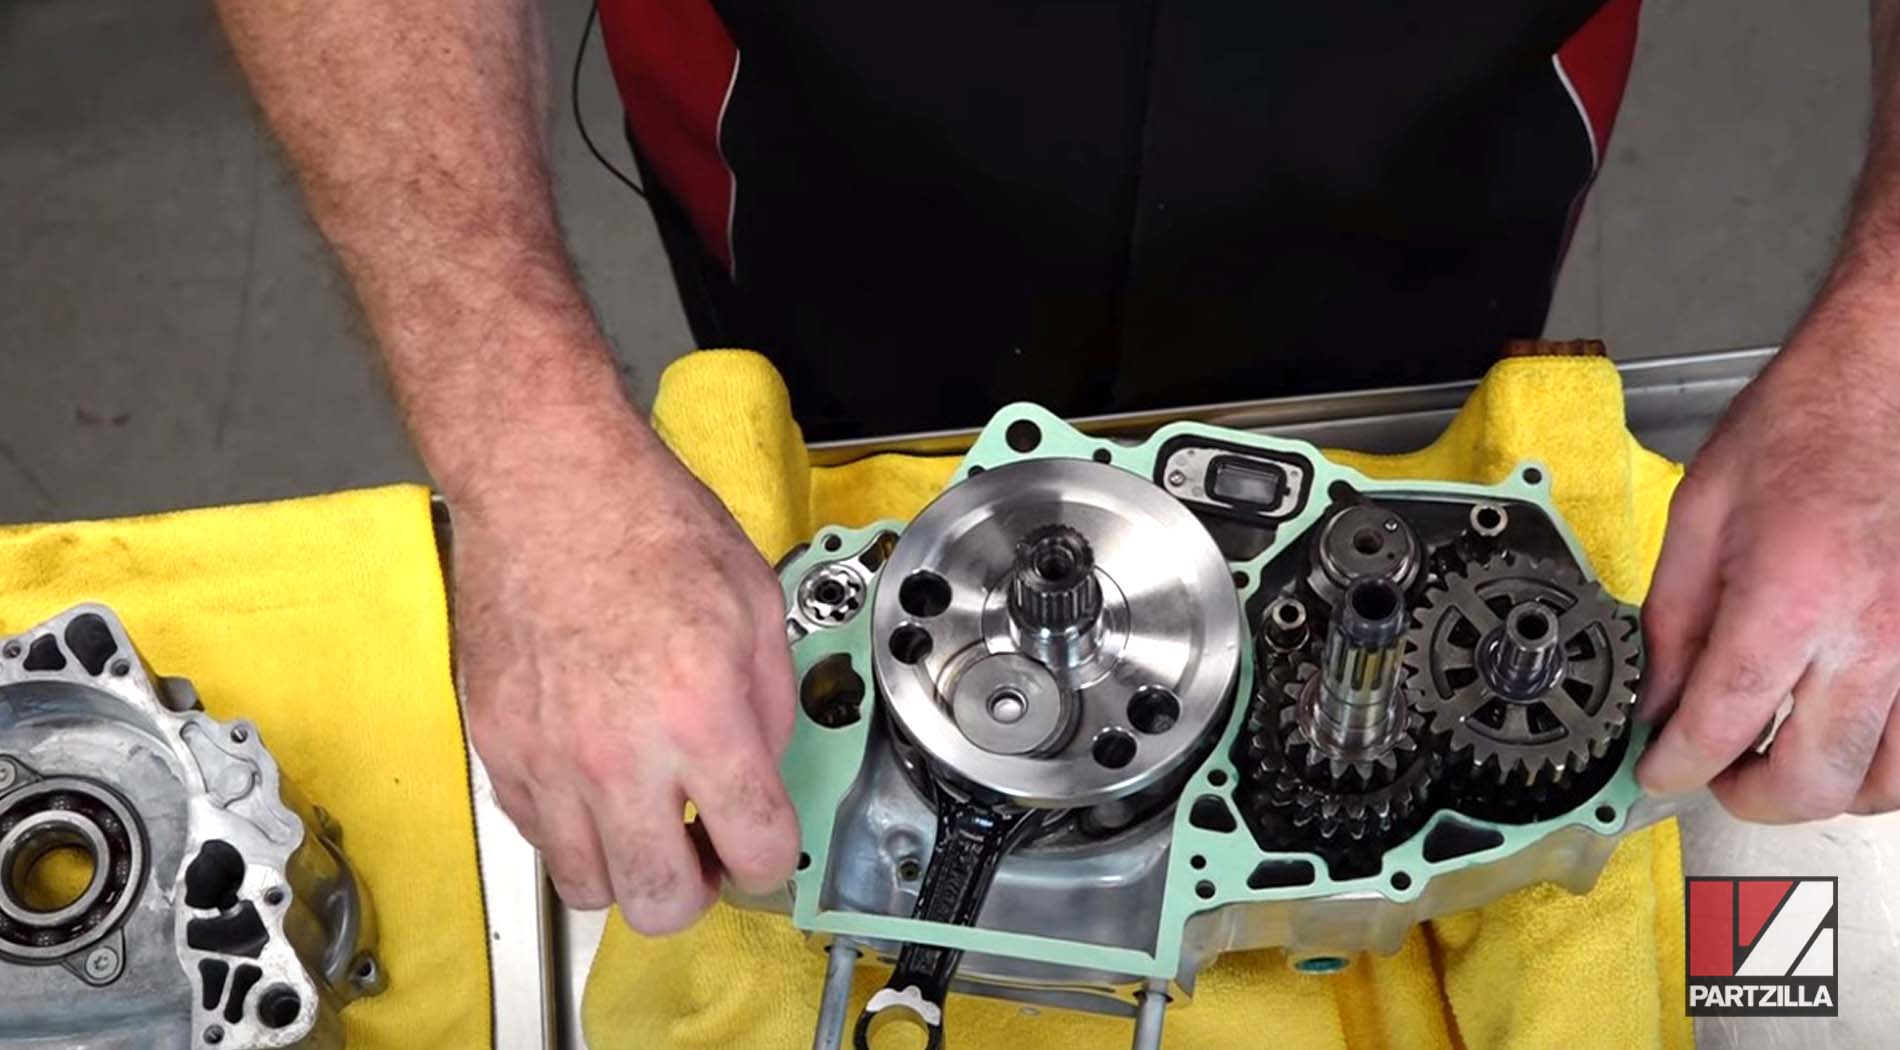
Step 7. Install the transmission clusters into the crankcase halves. Use some oil to lubricate the clusters, especially where the shift forks engage and down on the shaft.
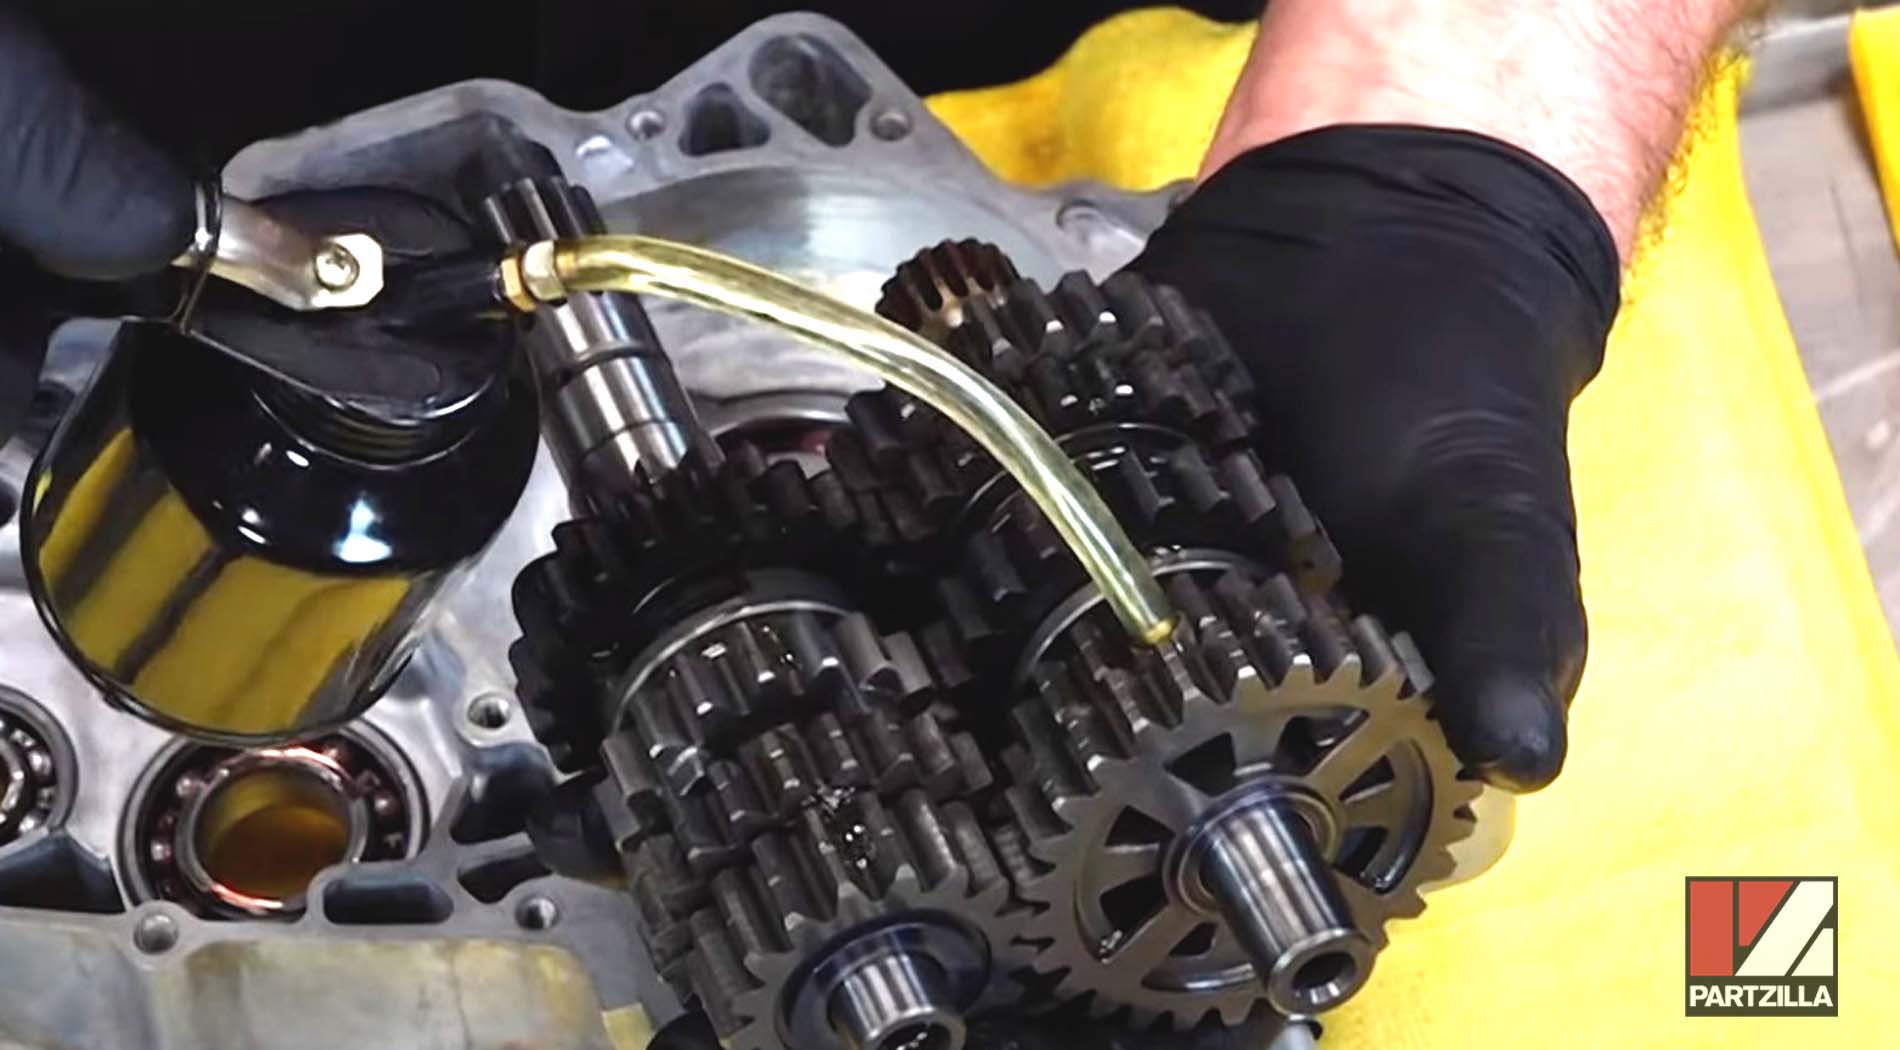
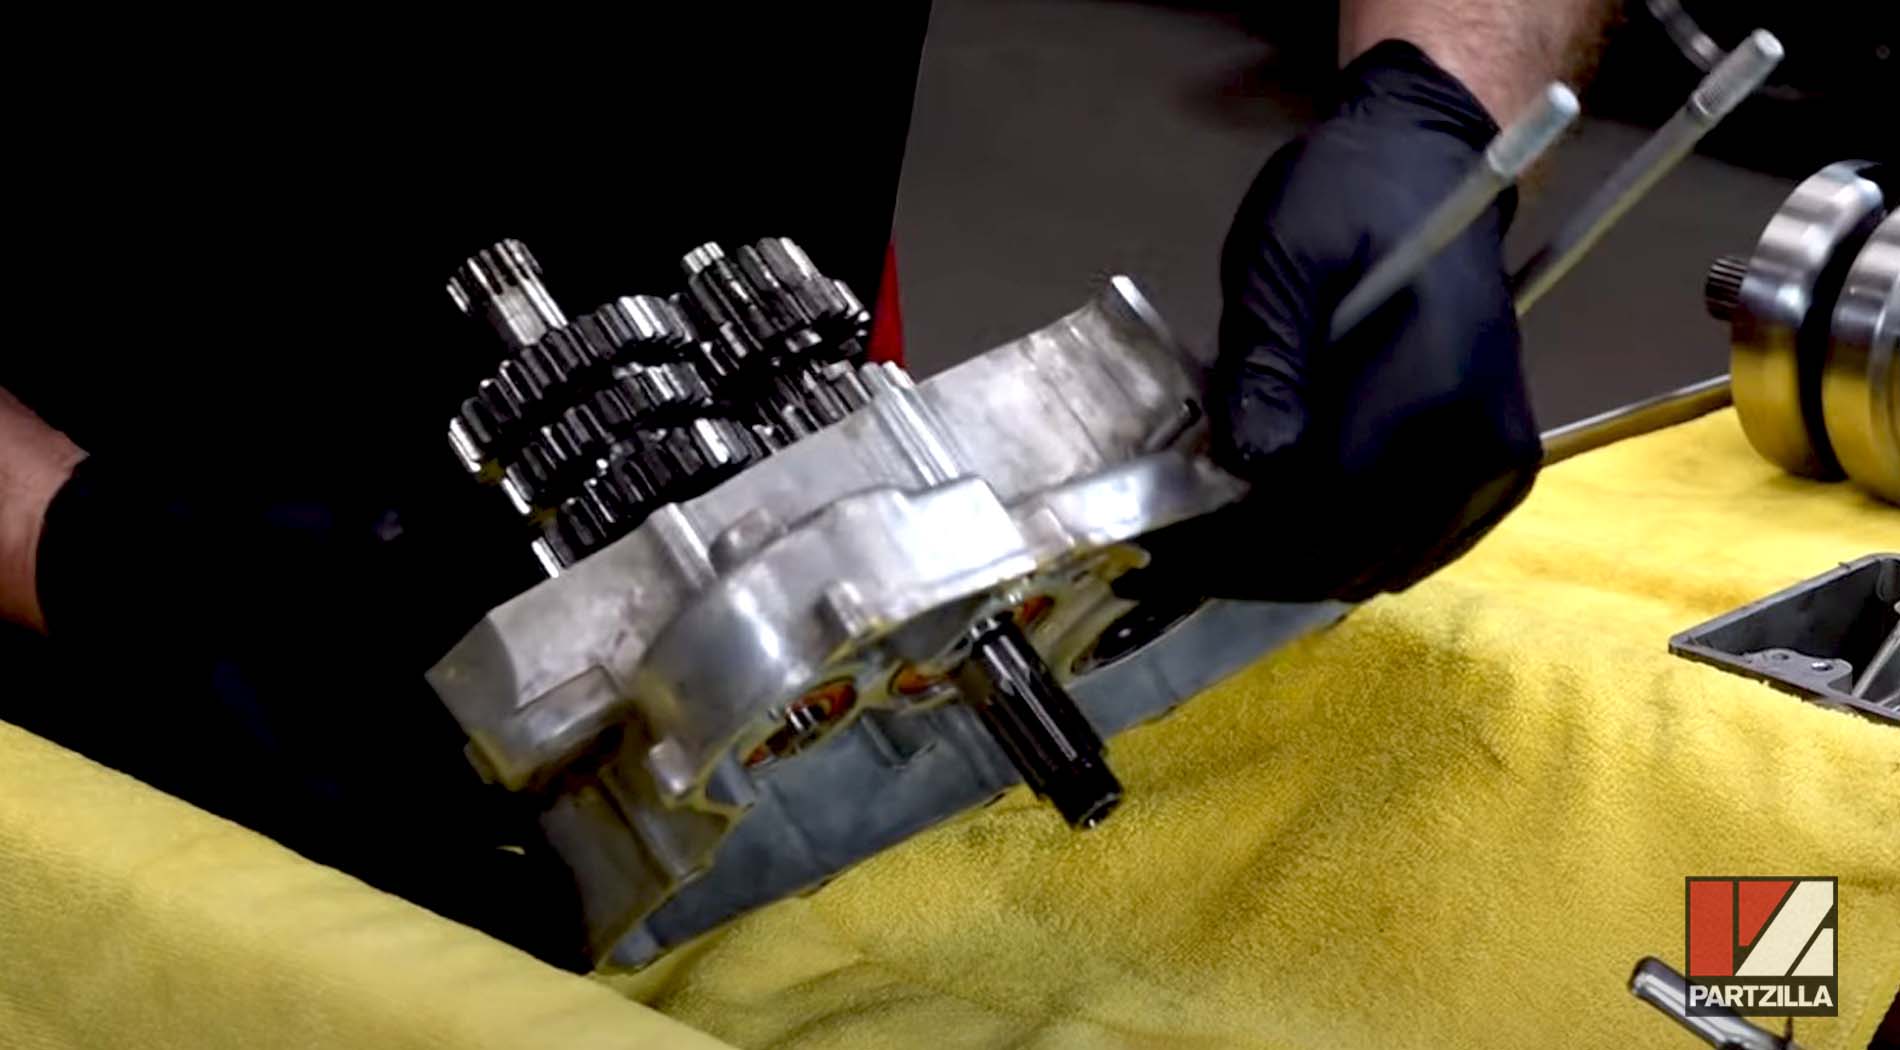
PRO TIP: If you don’t have an engine stand, use two covered 2x4s to hold the engine in place. Use our CRF450 transmission parts diagram to make sure you've got everything in the right order before putting it together, as one missing or misplaced shim or washer won’t make it run correctly.
Step 8. Install the three shift forks, marked 4C, 4R and 4L. The 4R shift fork will be the right side of the crankcase, and it's going to be on the bottom. 4L is going to be on the upper part, and 4C is going to go to the center point.
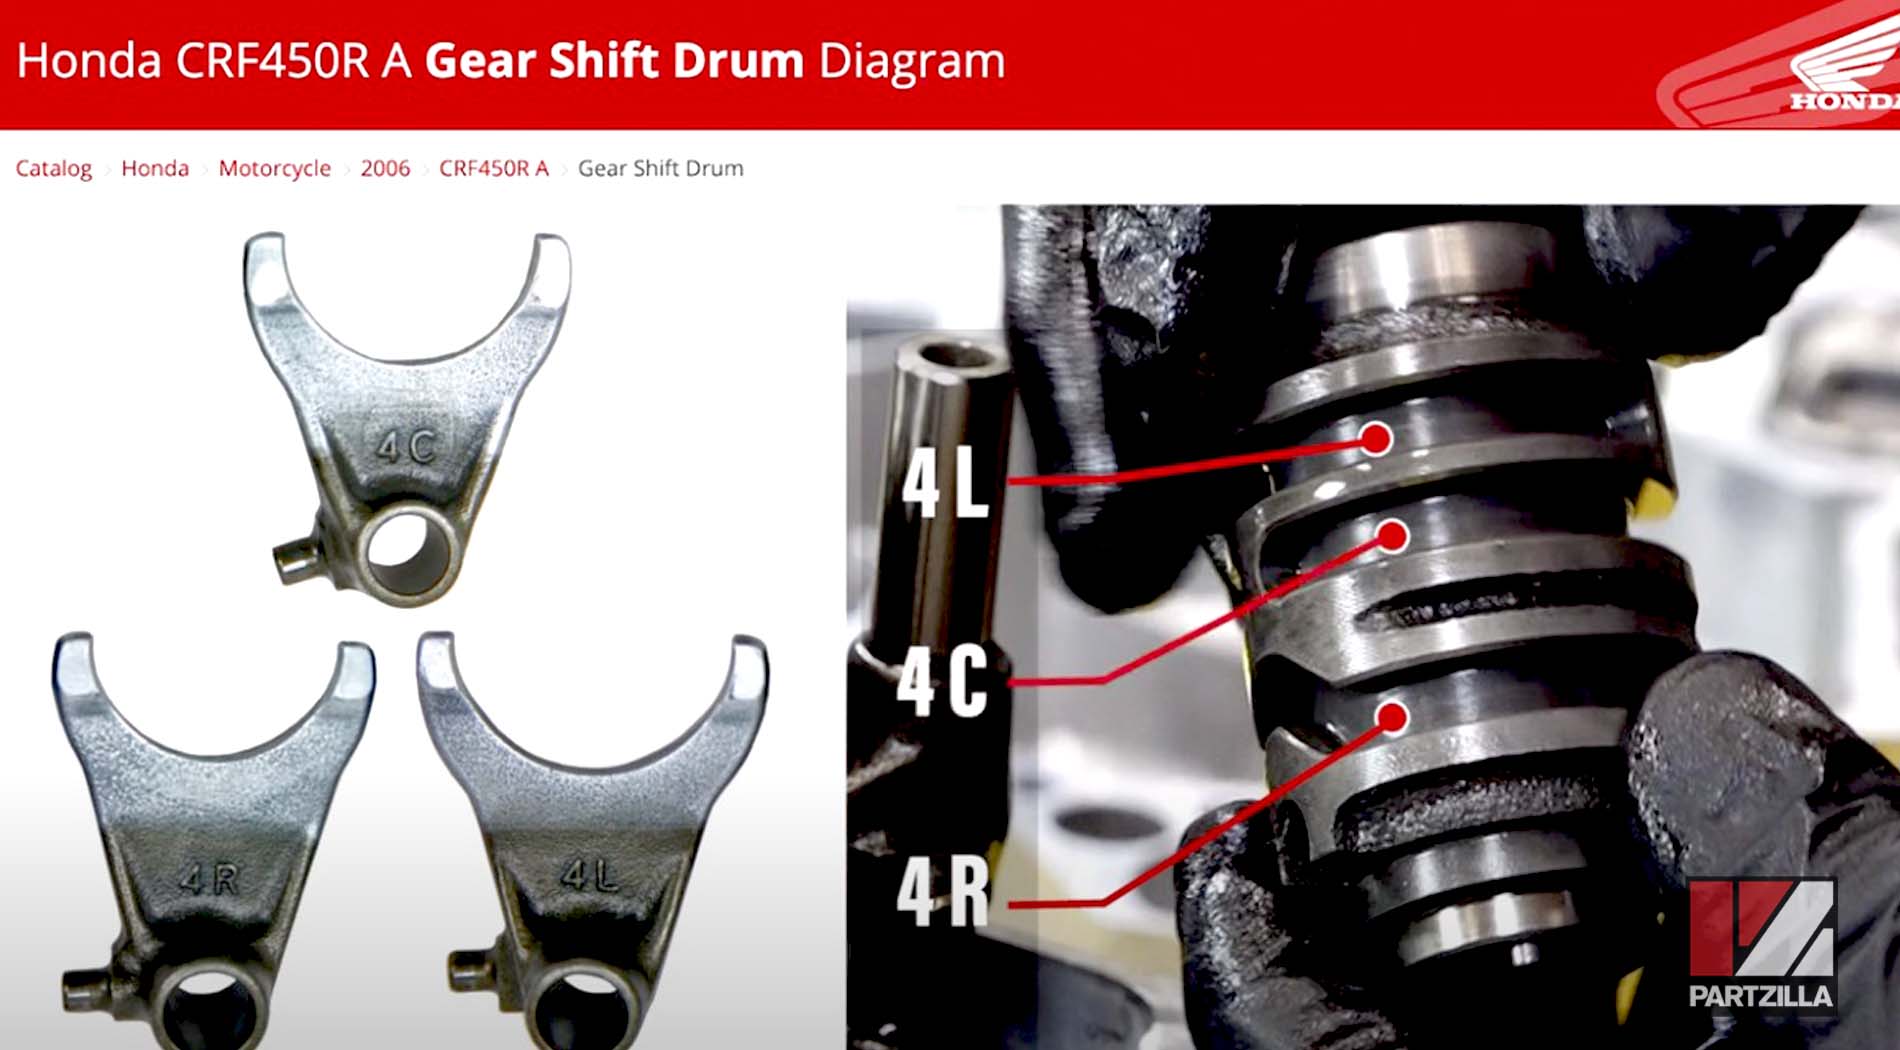
Step 9. Install the gear shift drum.
NOTE: Use our Honda CRF450 gear shift drum diagram for additional reference.
Watch the clip below to see the transmission installation segment of our Honda CRF450 bottom end rebuild.
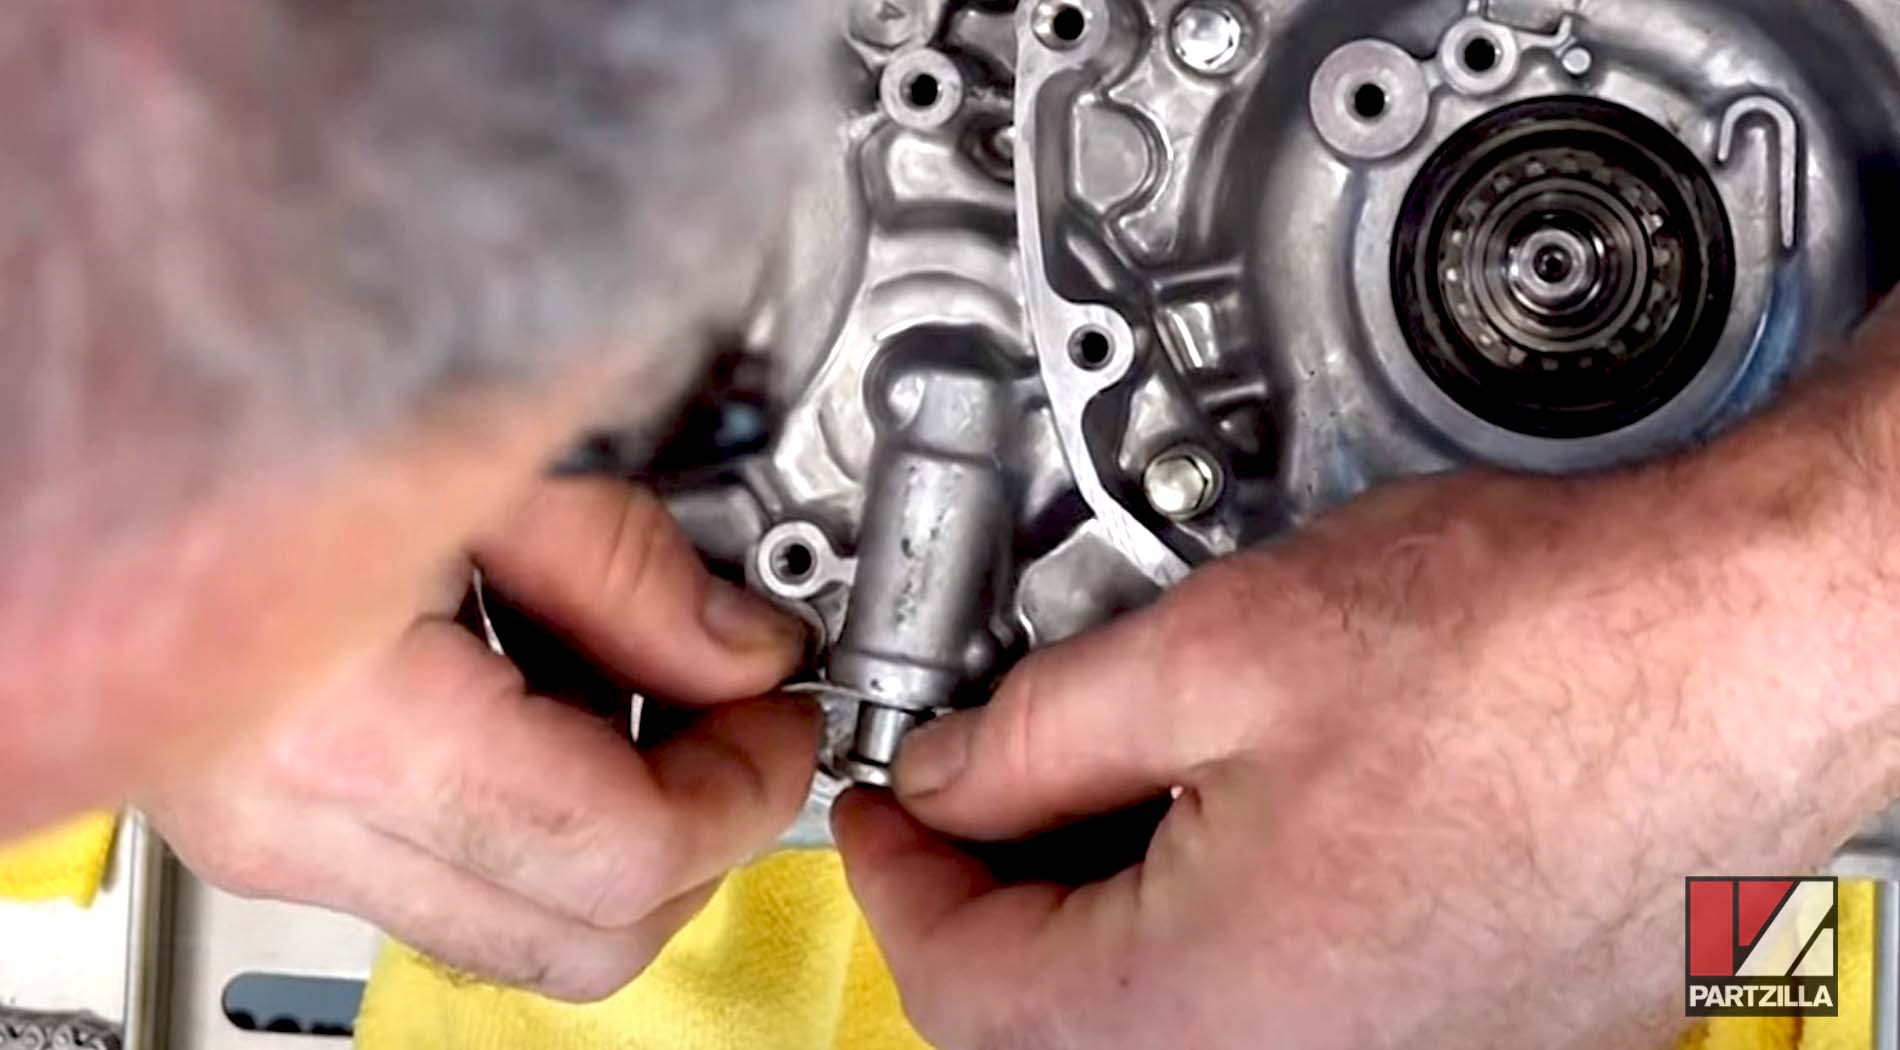
Honda CRF450 Bottom End Rebuild Crankshaft Installation
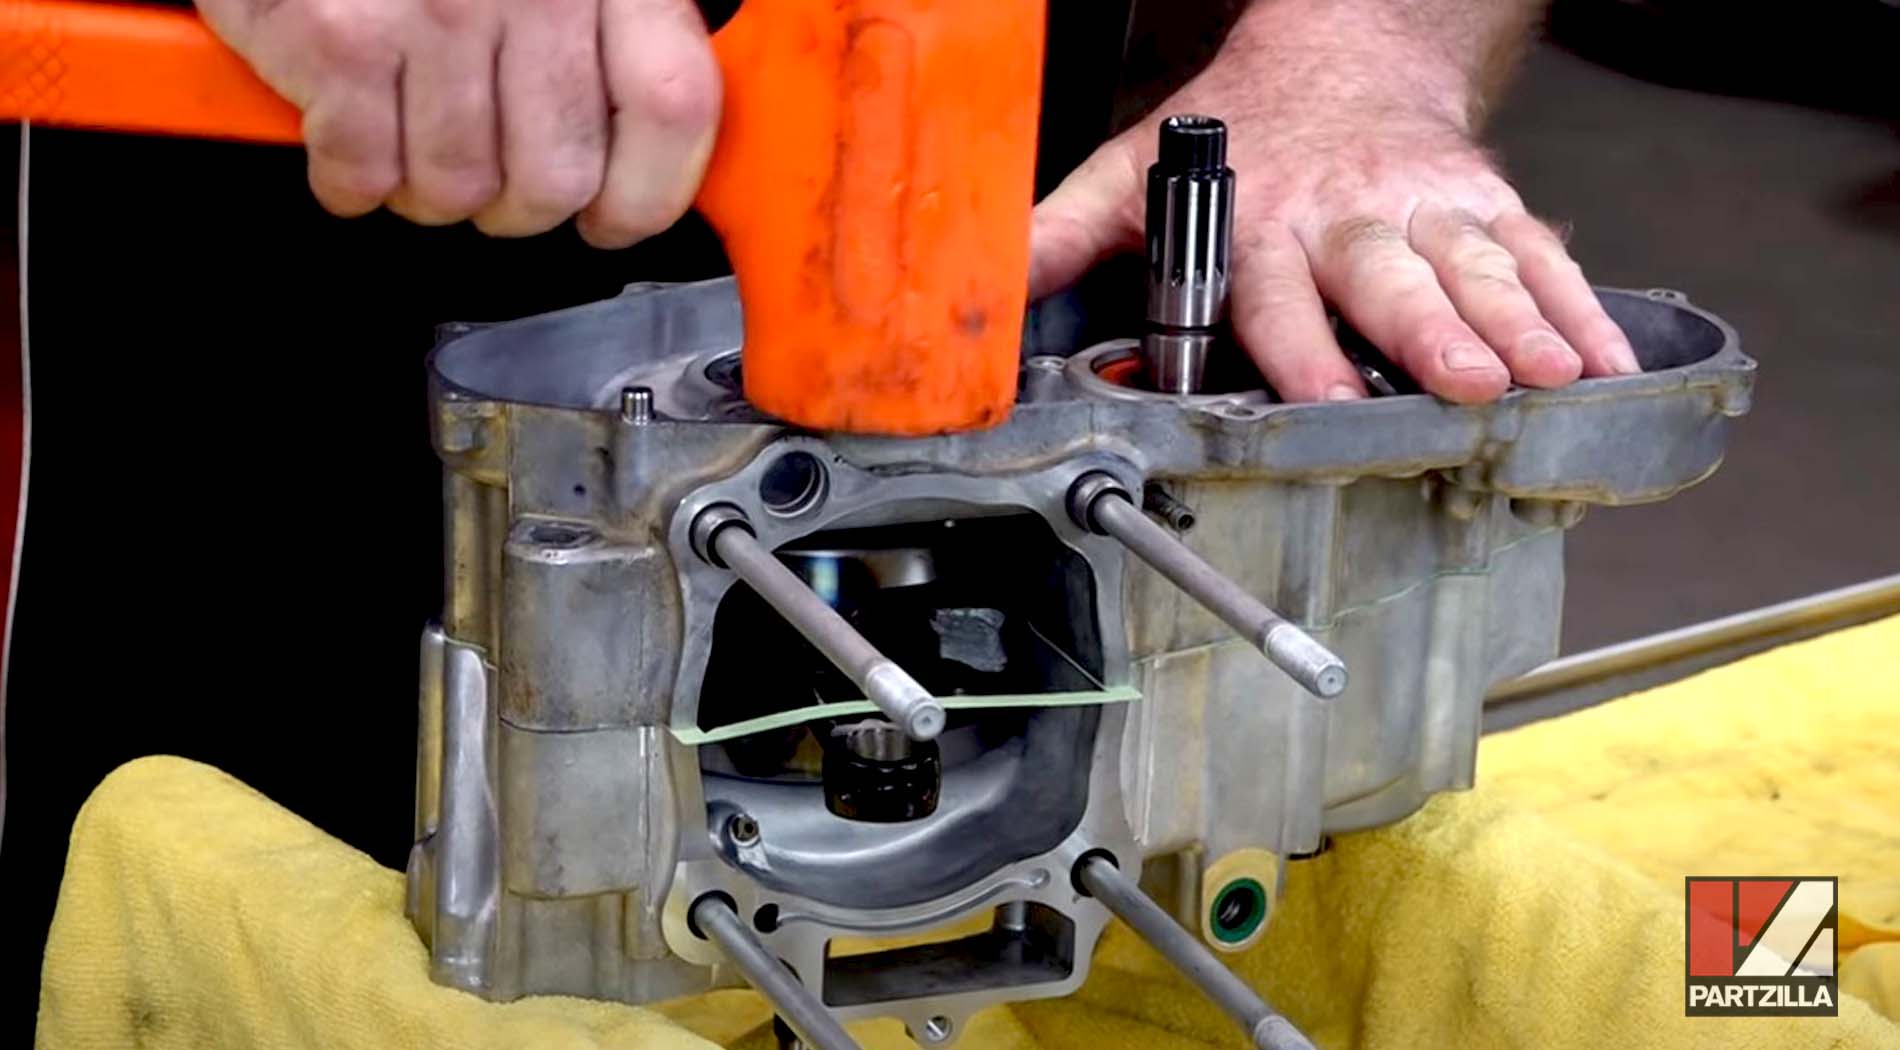
Step 10. Lubricate the crank shaft with oil, then install it.
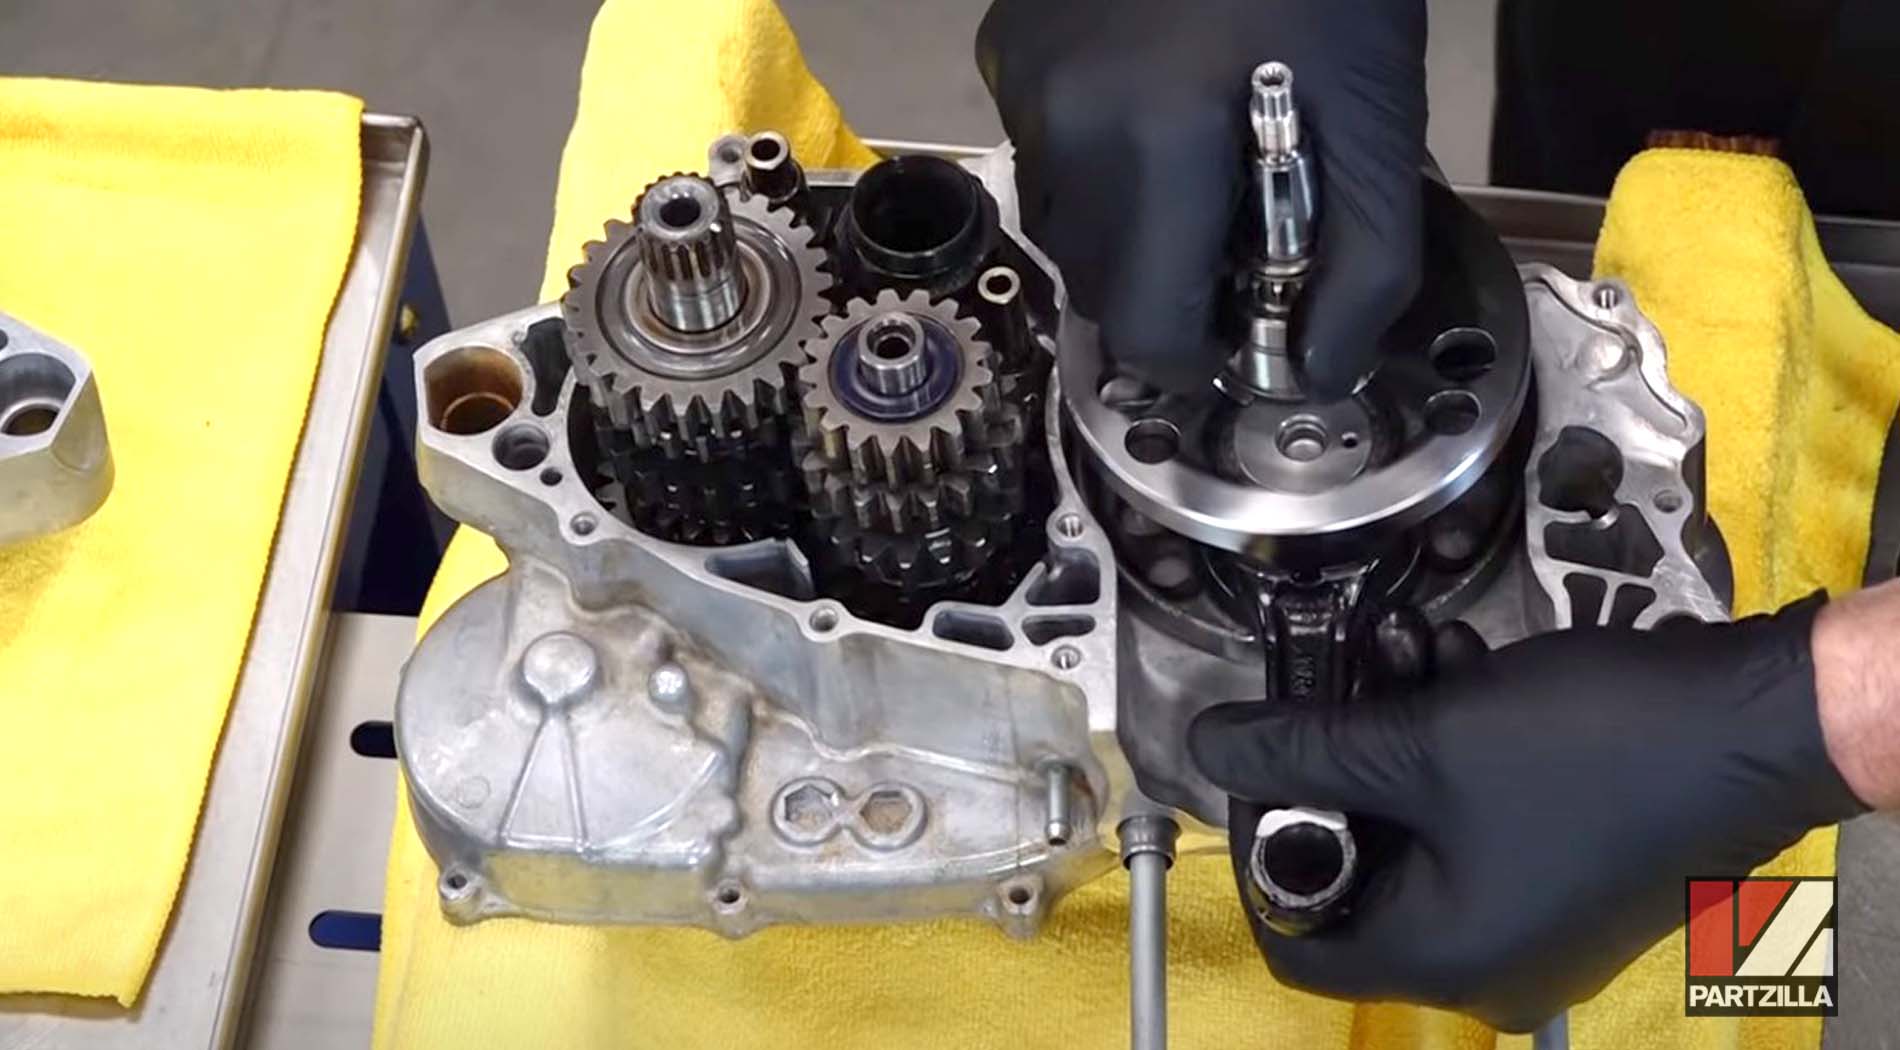
PRO TIP: After installing the crankshaft, attach the other crankcase half temporarily with the dowels out to check for alignment issues, then separate the halves again.
Watch the clip below to see the crankshaft installation segment of our Honda CRF450 bottom end rebuild.
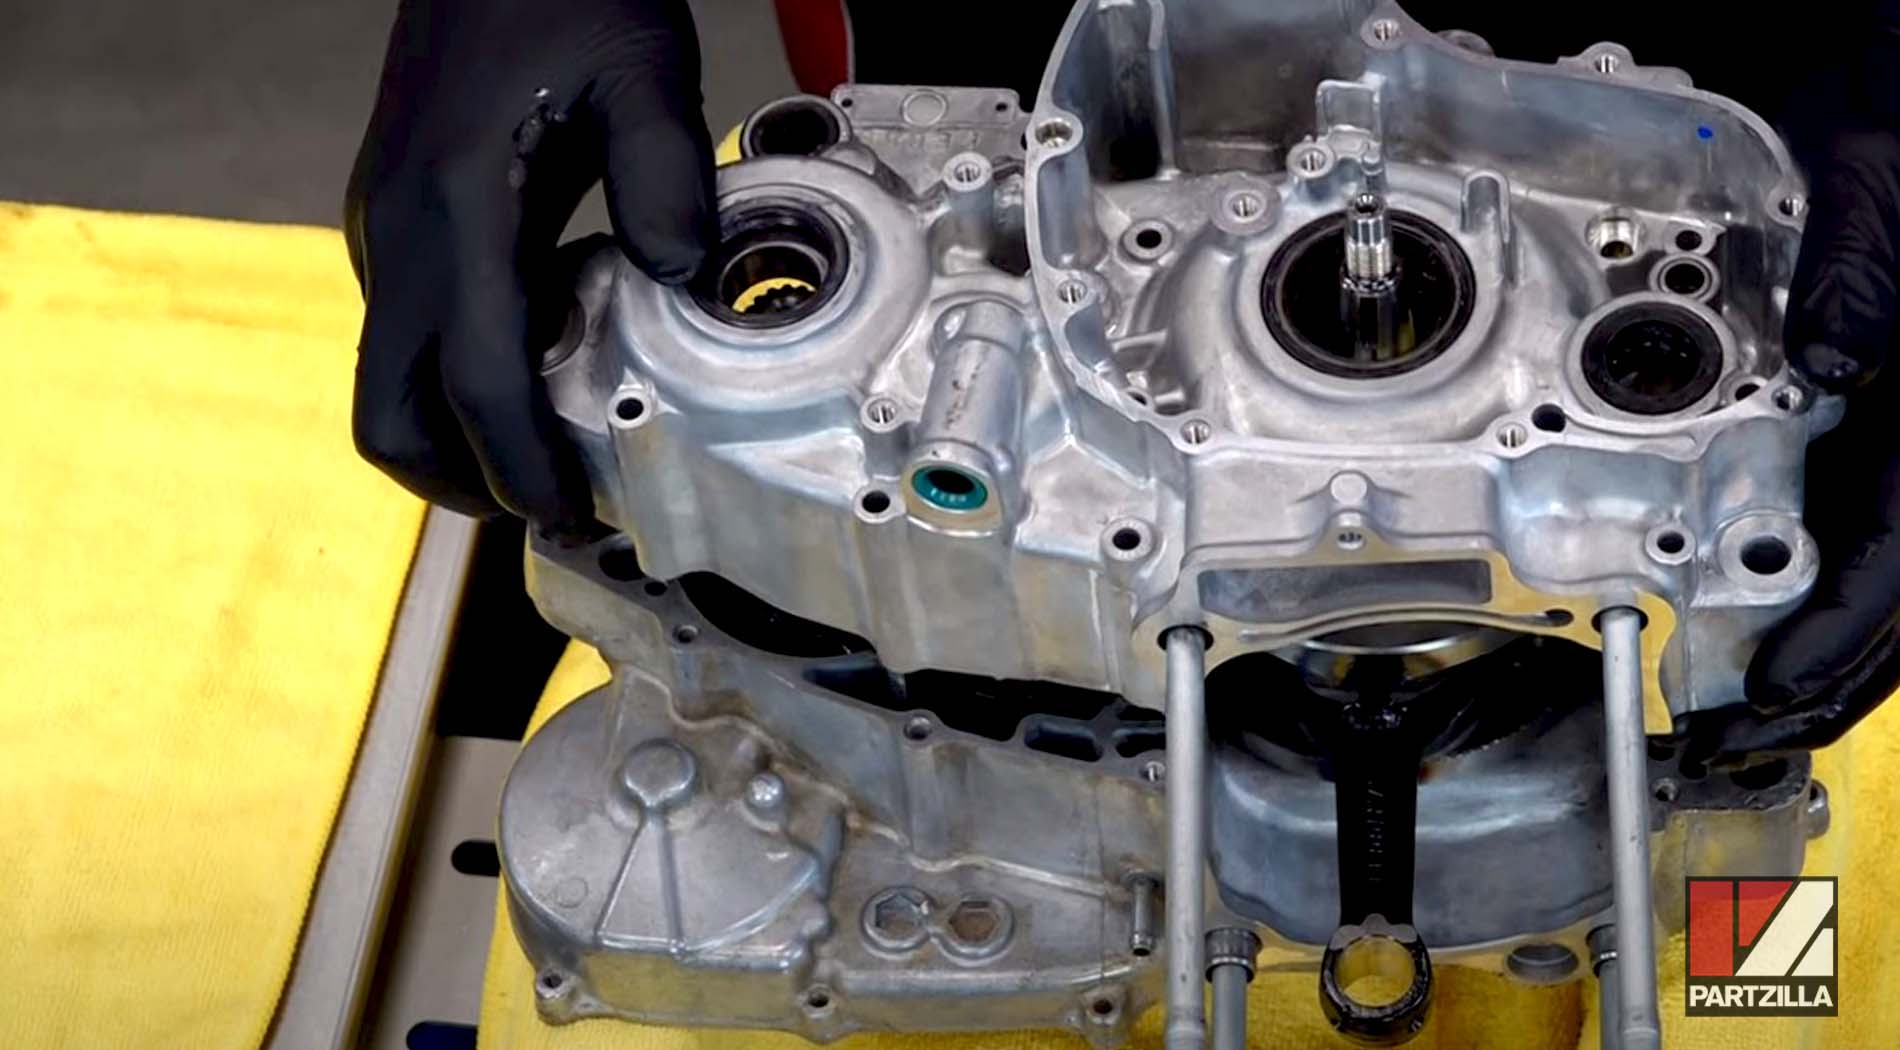
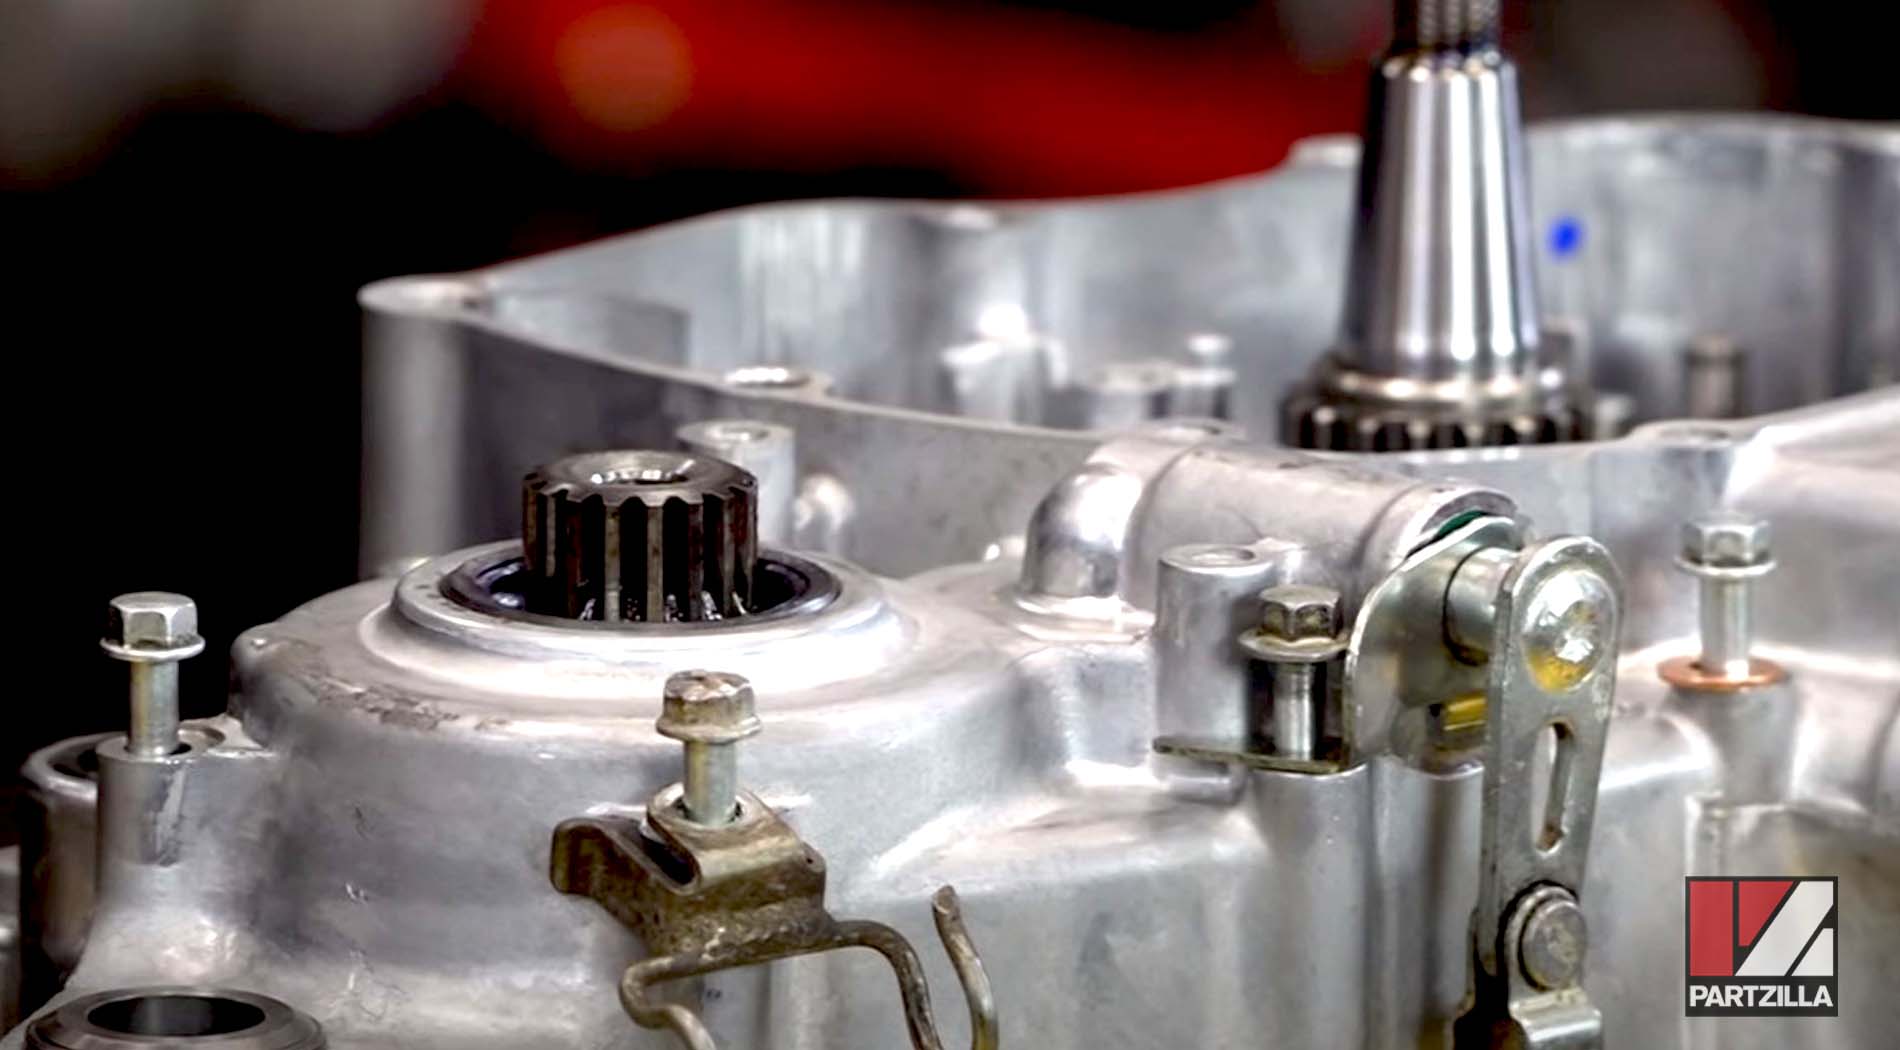
Honda CRF450 Bottom End Rebuild Closing Crankcase Halves
Step 11. Clean both of the crankcase halves' surfaces, making sure there's no oil on them.
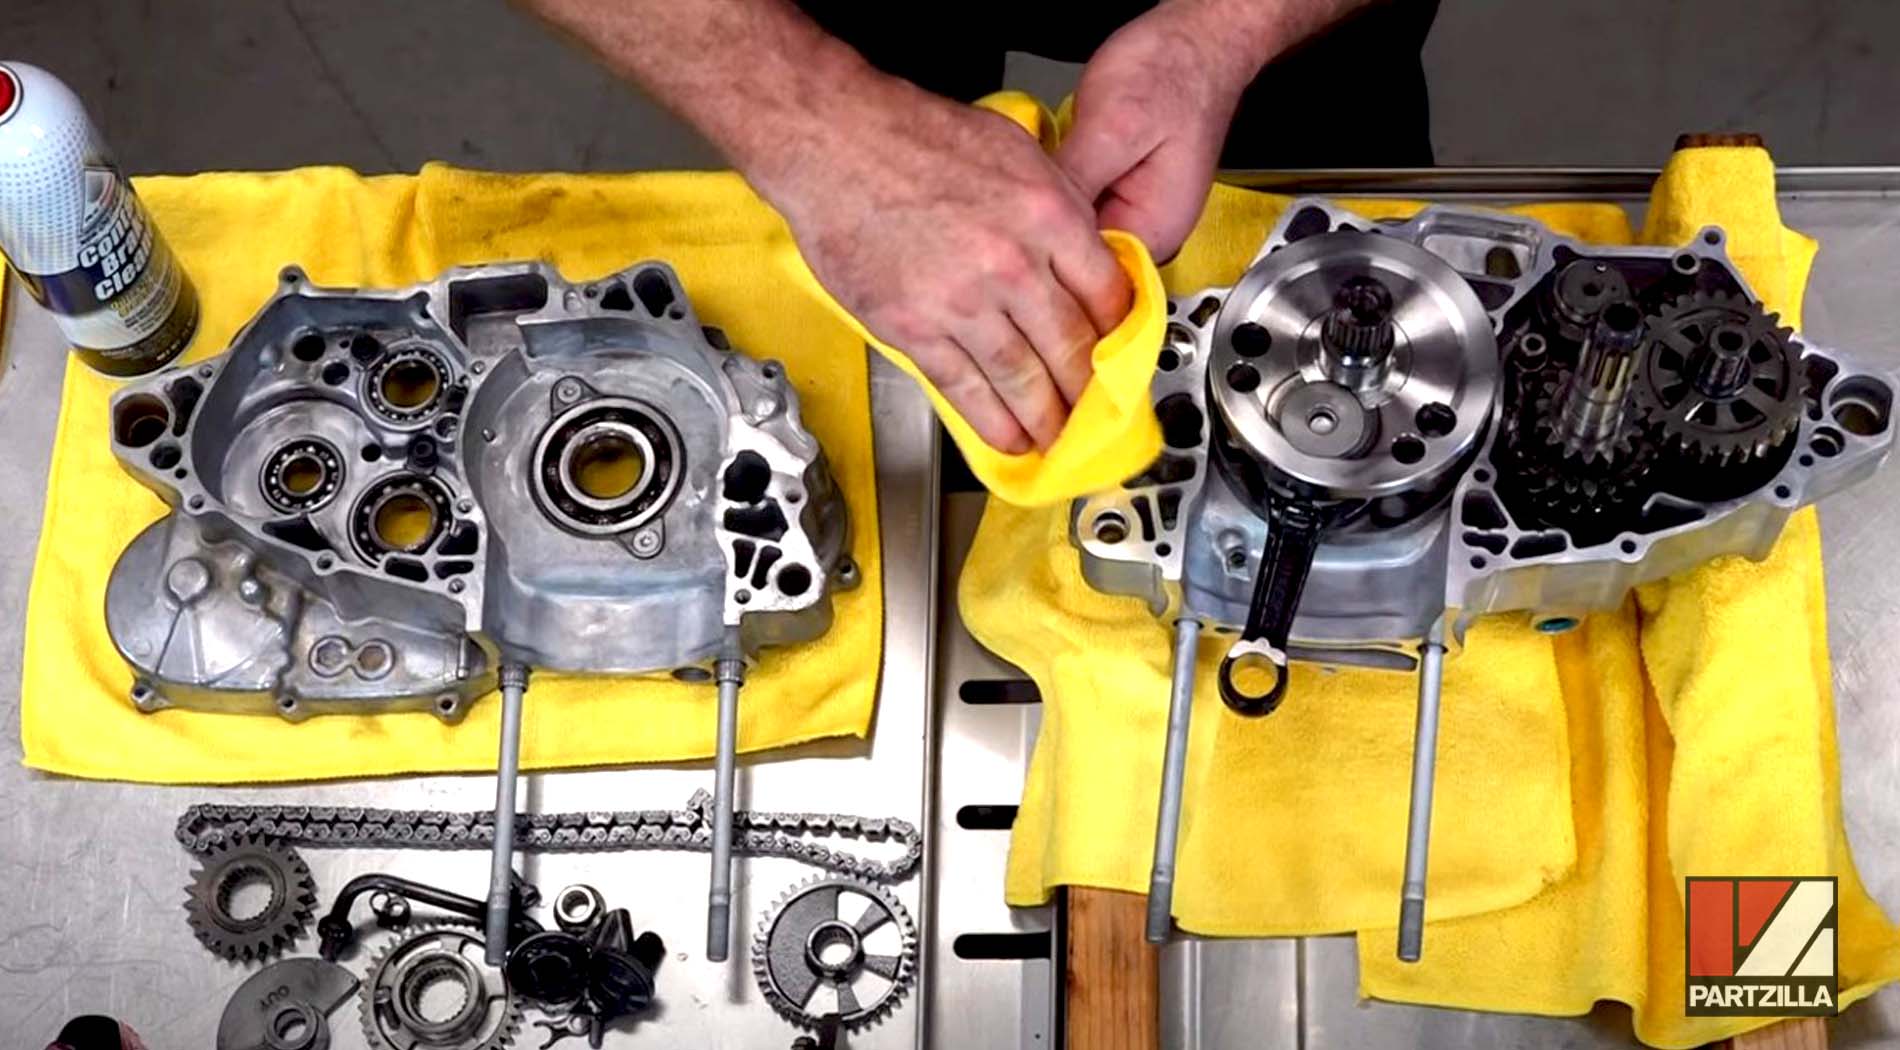
NOTE: To clean the surfaces, apply contact cleaner to a fresh towel and hold it off to the side to prevent contact spray from going inside the cases. During this process, also check for any abnormalities: cuts, grooves, etc. Run your fingers through the surfaces carefully, as the edges are sharp.
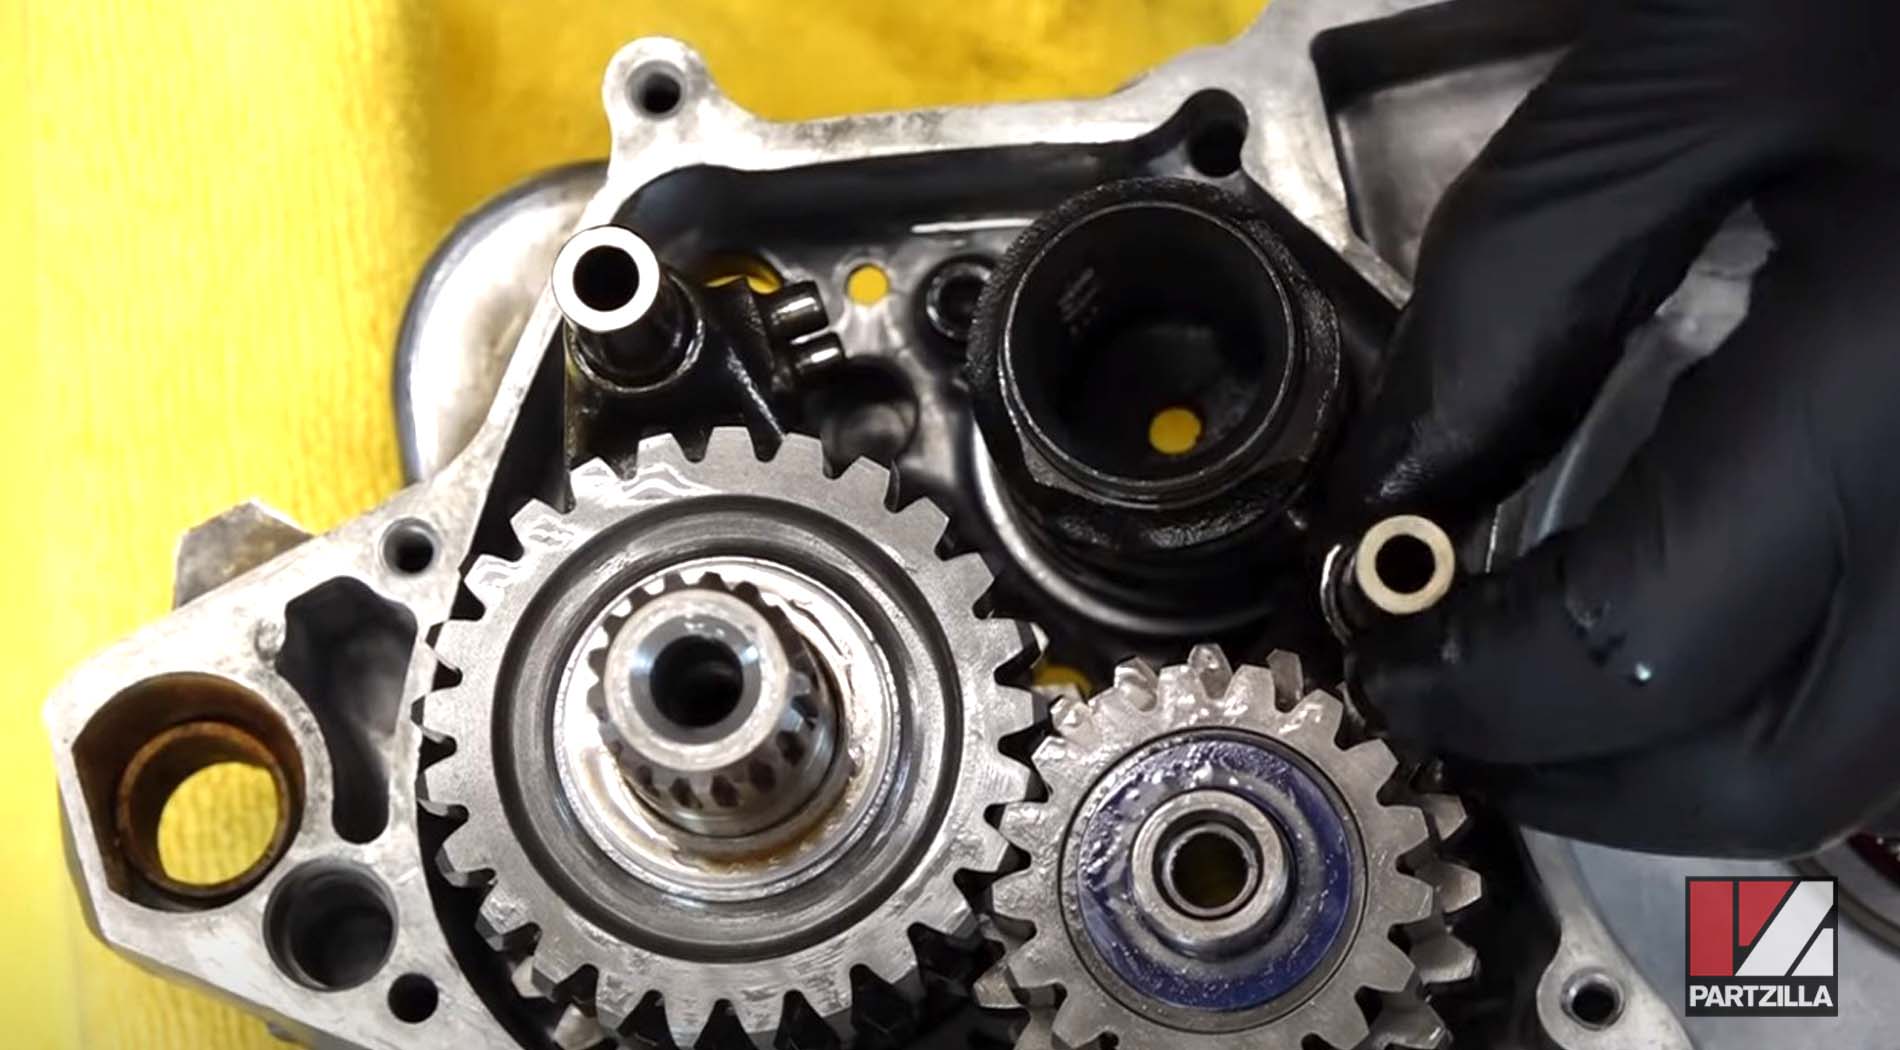
Step 12. Install the dowel pins and the reed valve, making sure the Philips screw is facing up and toward the back.
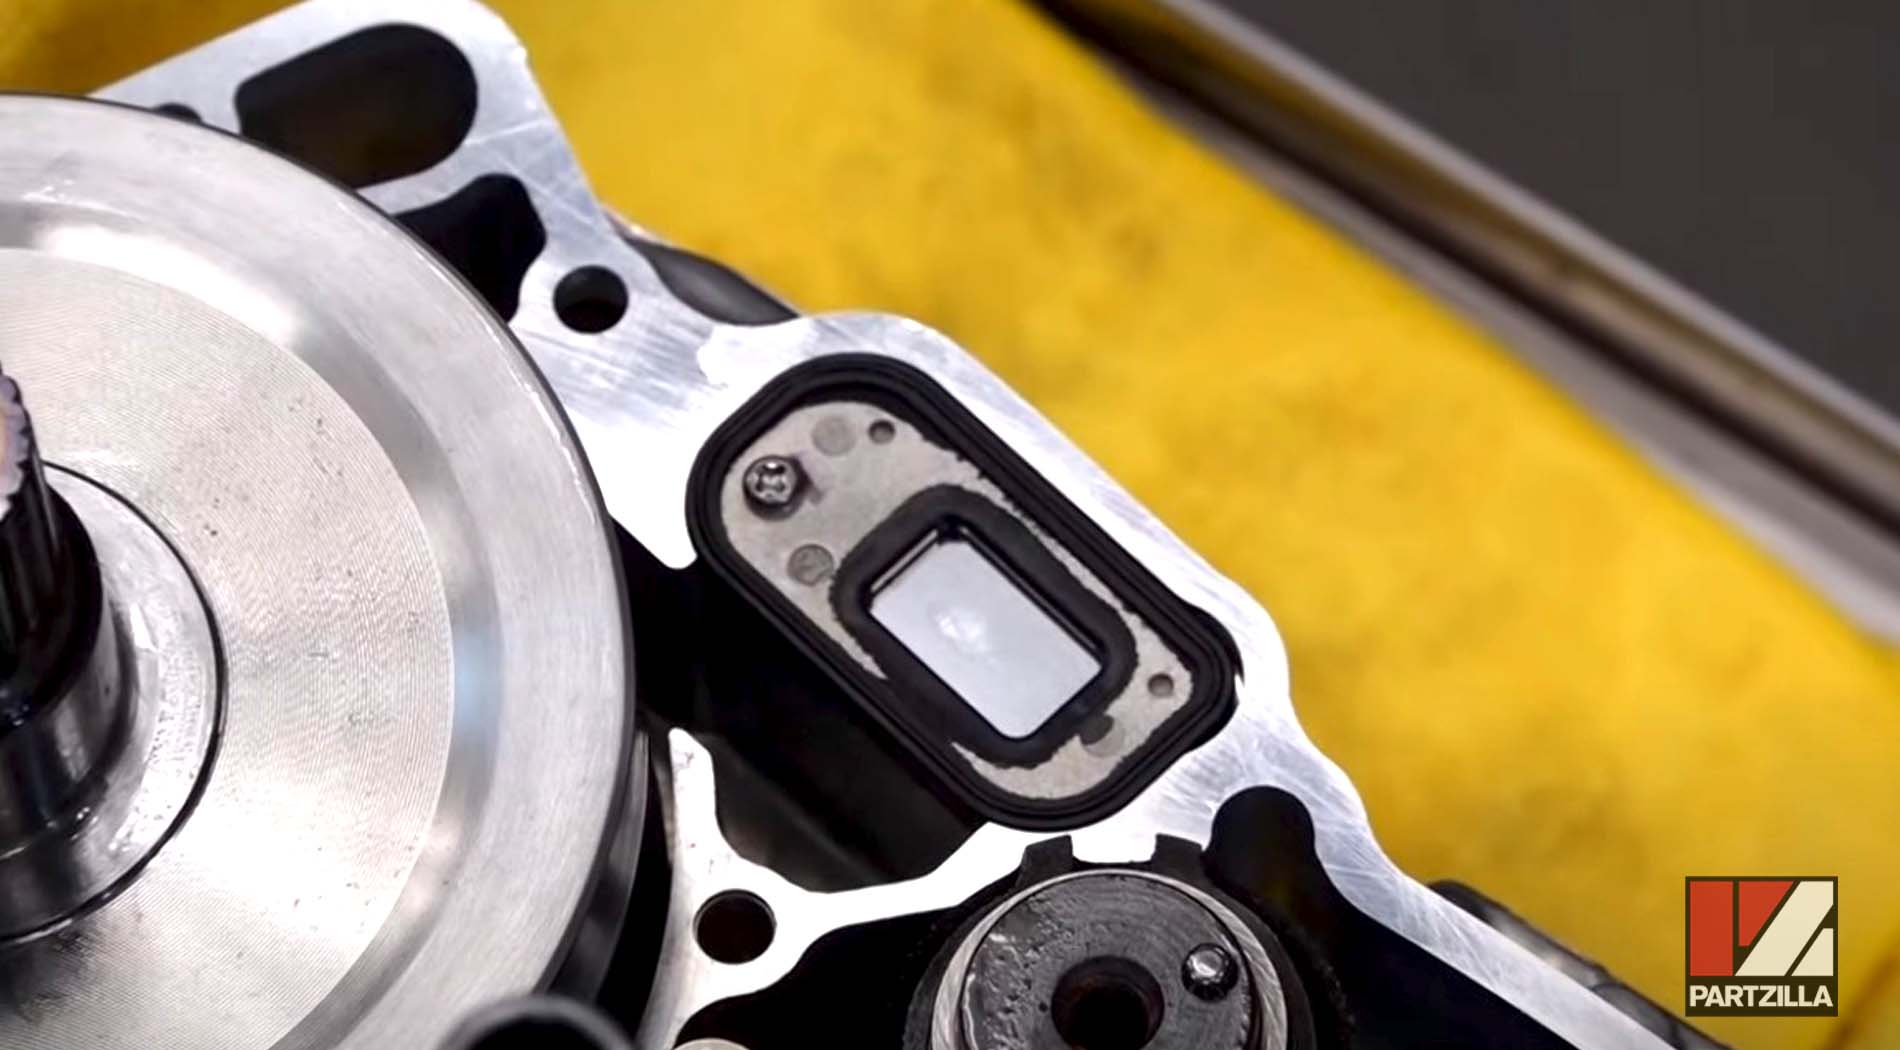
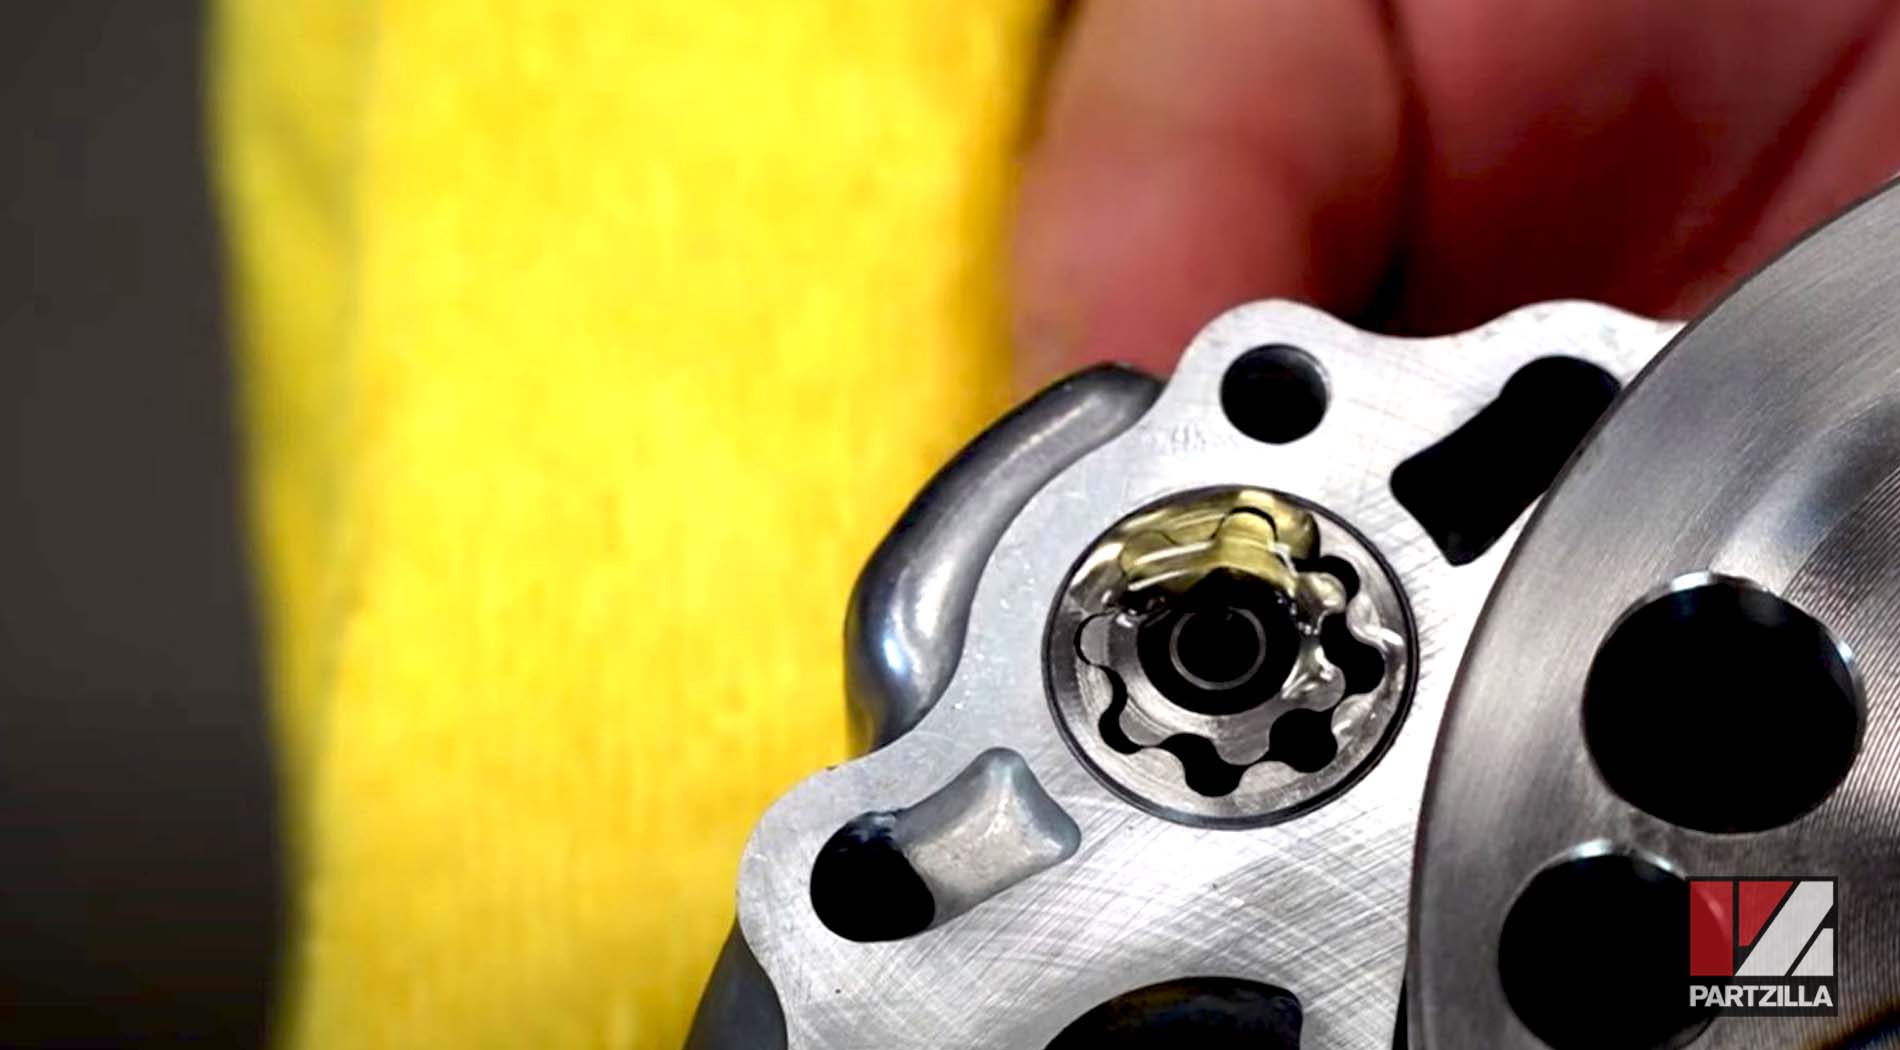
Step 13. Lubricate and install the oil pump shaft, followed by the inner and outer rotor.

Step 14. Install the head gasket, leaving the top section in to hold everything up in place, then join the crankcase halves. Use a soft-blow hammer to lightly tap around the edges to really get it to seat.
Step 15. Start putting the bolts in place clockwise, adding blue threadlocker to all of the bolts that go inside of the crankcase
PRO TIP: If you don’t have an engine stand, use two covered 2x4s to hold the crankcase in place. Lay out all of your bolts clockwise on a towel, starting with the drain bolt, and then transfer them over one at a time. Use our Honda CRF450 crankcase diagram for additional reference.
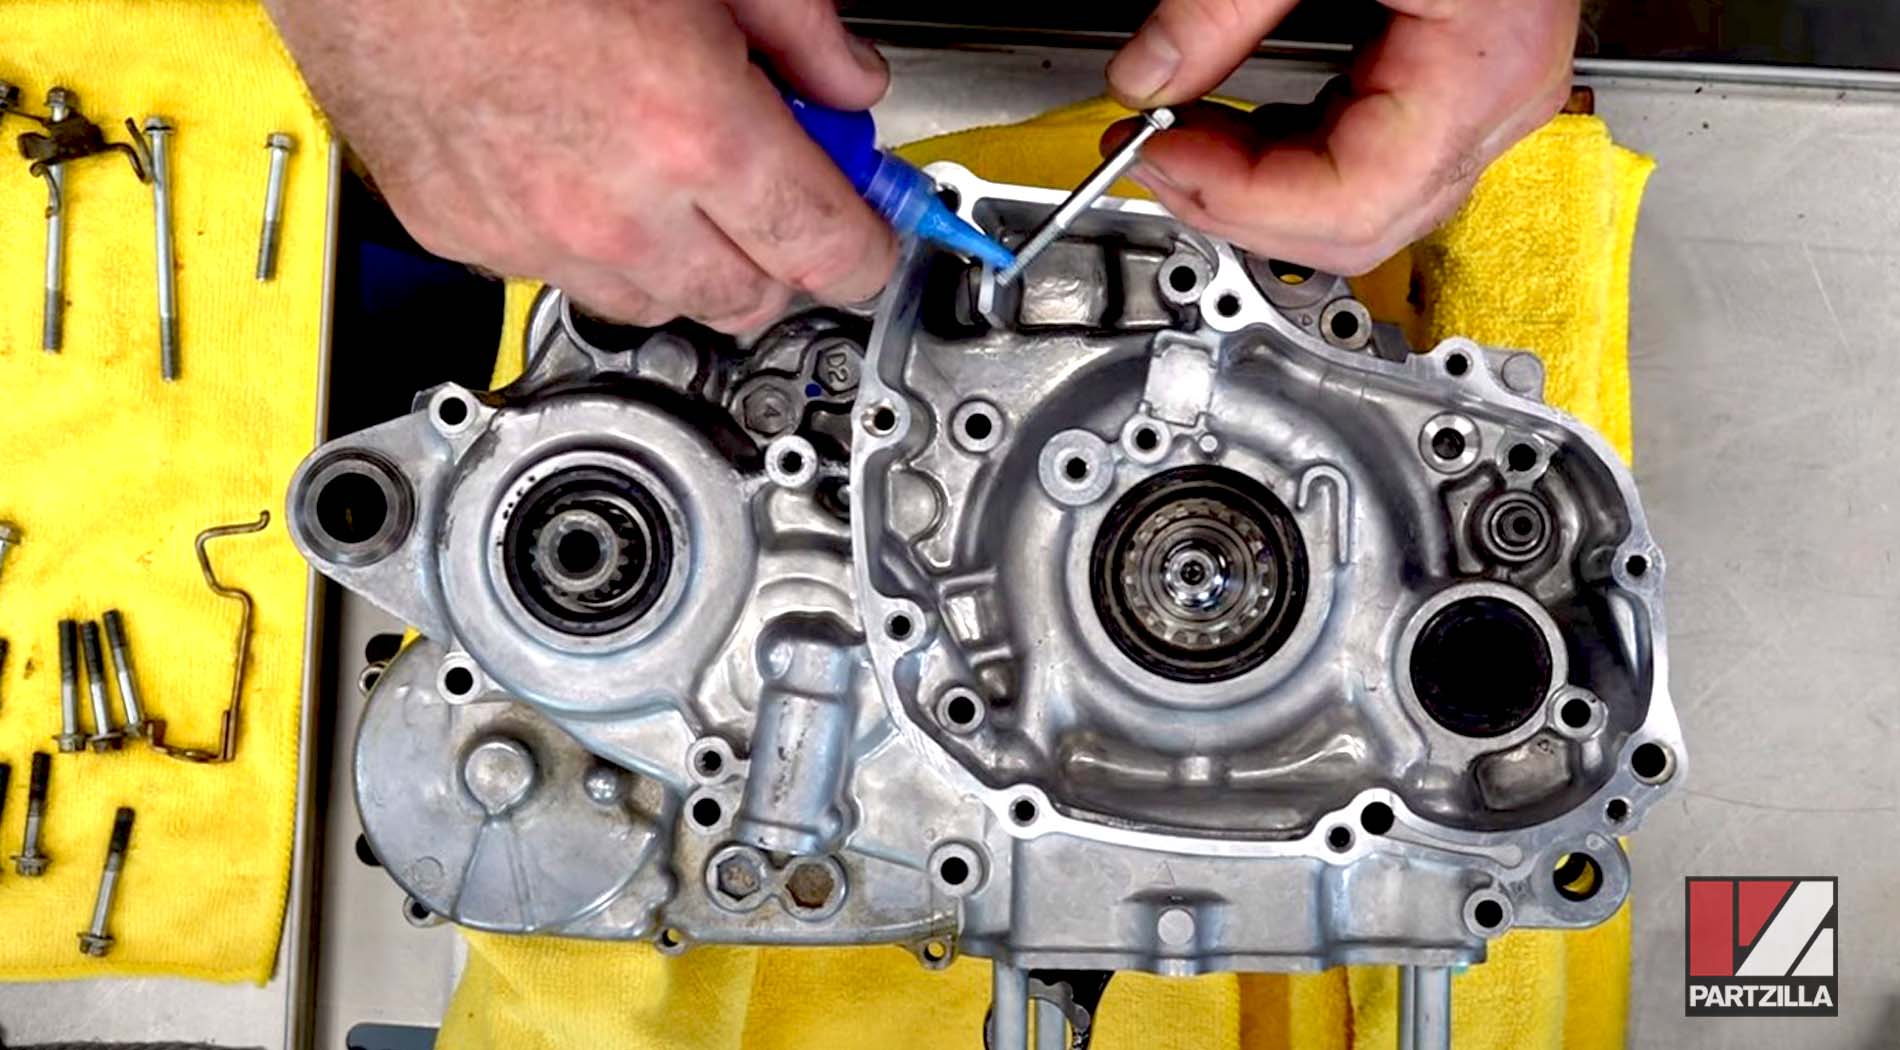
Step 16. Put assembly lube on the clutch arm before installing it.
Step 17. Hand-tighten the bolts in a crisscross pattern and then tighten them to 5 foot-pounds. Next, go around again in another crisscross pattern and tighten them to 7 foot-pounds. Torque the oil drain bolt to 16 foot-pounds.
Watch the clip below to see the crankcase halves closing segment of our Honda CRF450 bottom end rebuild.
As mentioned before, we’re breaking up the steps for this Honda CRF450 engine’s bottom end rebuild into two parts (second part coming soon), picking up from the shifter installation, which you can watch below.