How to Bleed Honda CBR600 Brakes
To keep the braking system on a Honda motorcycle performing at its peak, the brakes should be bled at least once a year. There are two methods of bleeding brakes: manual and vacuum.
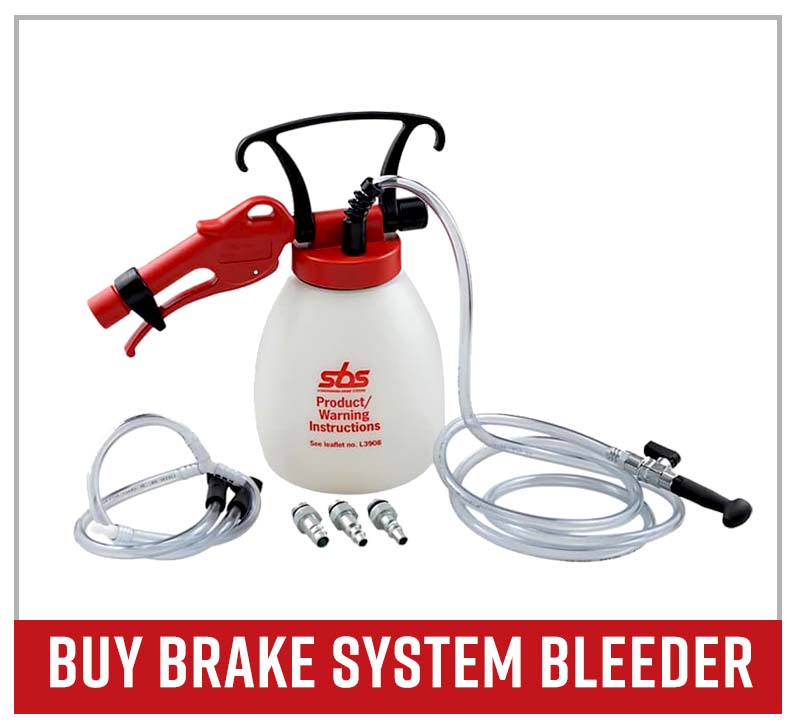
To bleed the brakes manually, you’ll need a length of 3/16” x 5/16” hose. Bleeding the brakes through the vacuum method requires a vacuum brake bleeder. Watch the video above and follow the steps below to learn how to bleed the brakes on a Honda CBR 600RR, both manually and via the vacuum method.
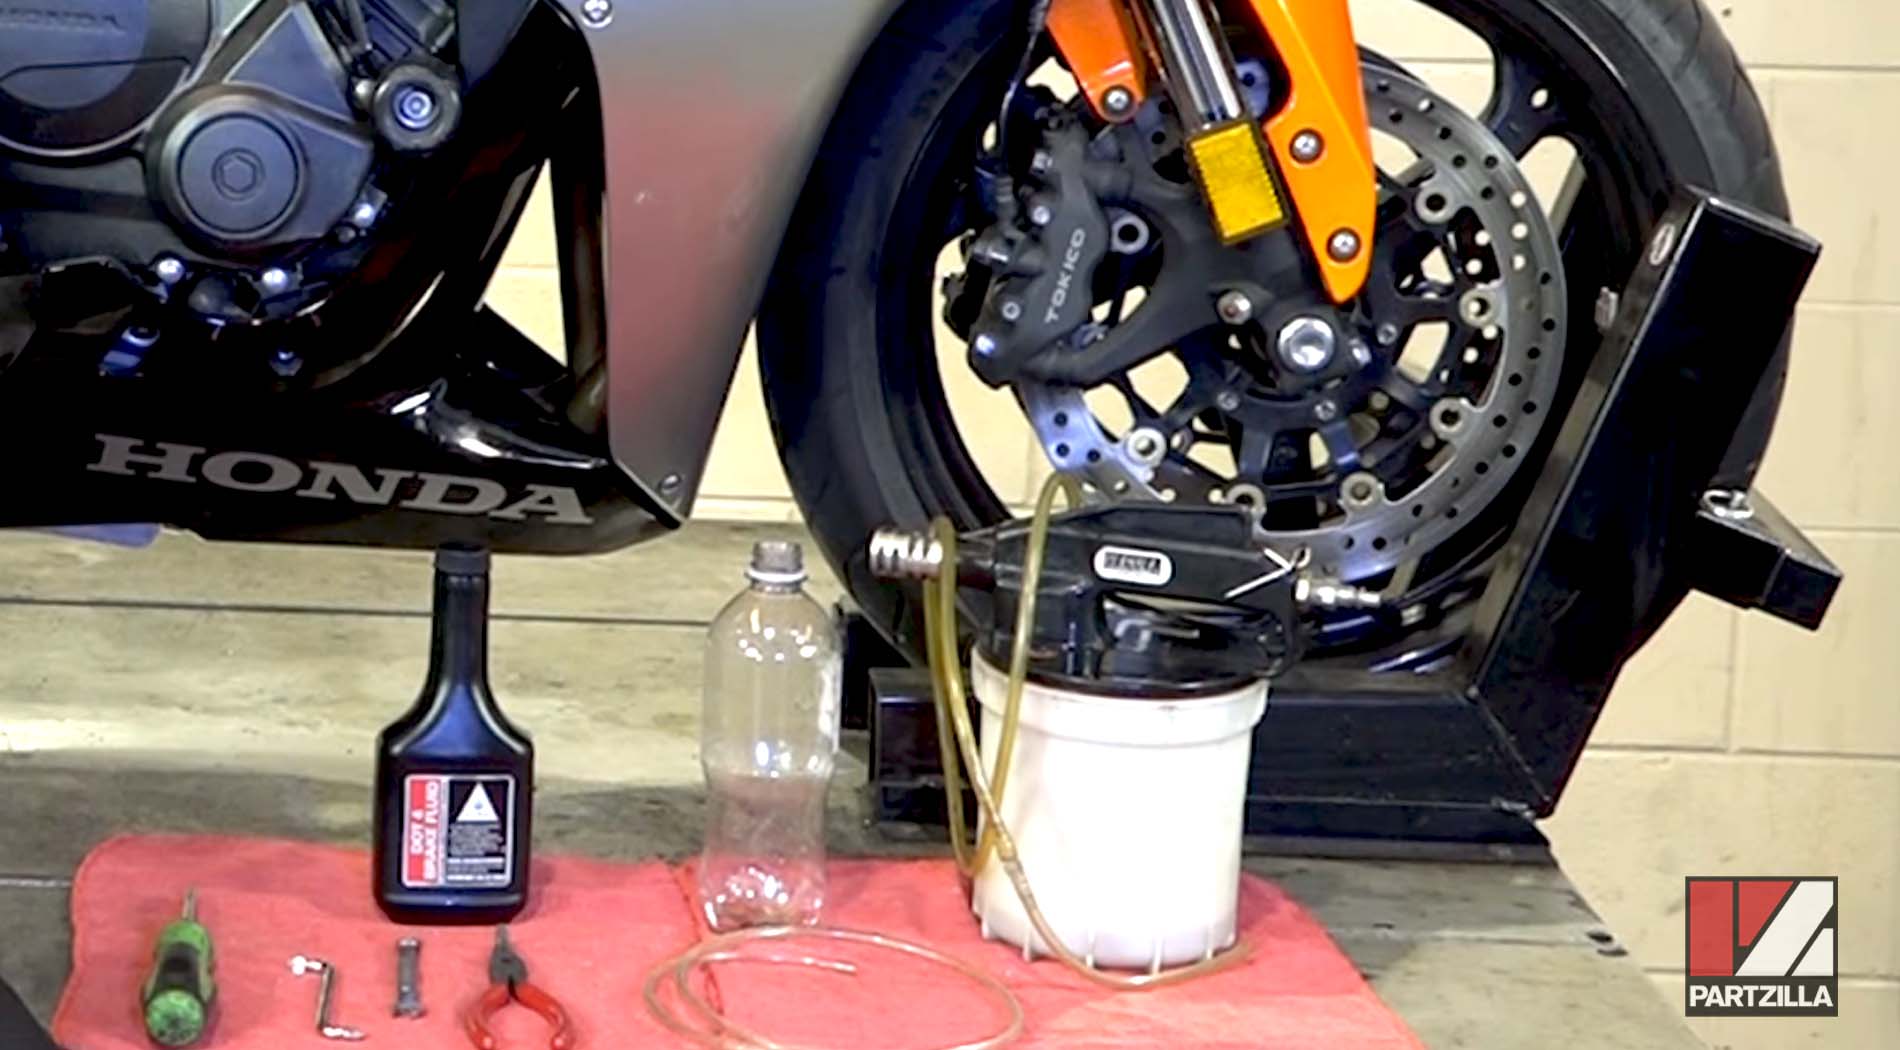
Tools and Supplies – Honda CBR 600RR Brake Bleed
- 8mm wrench
- Philips screwdriver
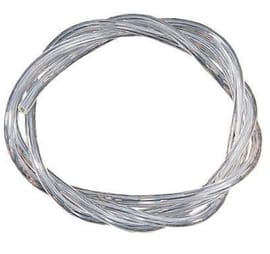
- 3/16” x 5/16” hose
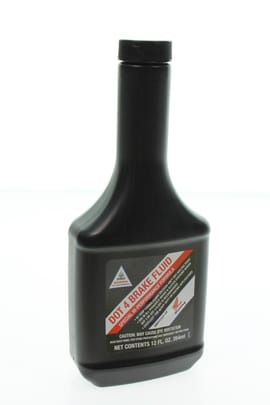
- DOT 4 brake fluid
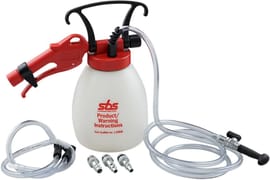
- Brake bleeder

Honda CBR600RR Rear Brake Bleed: Manual Method
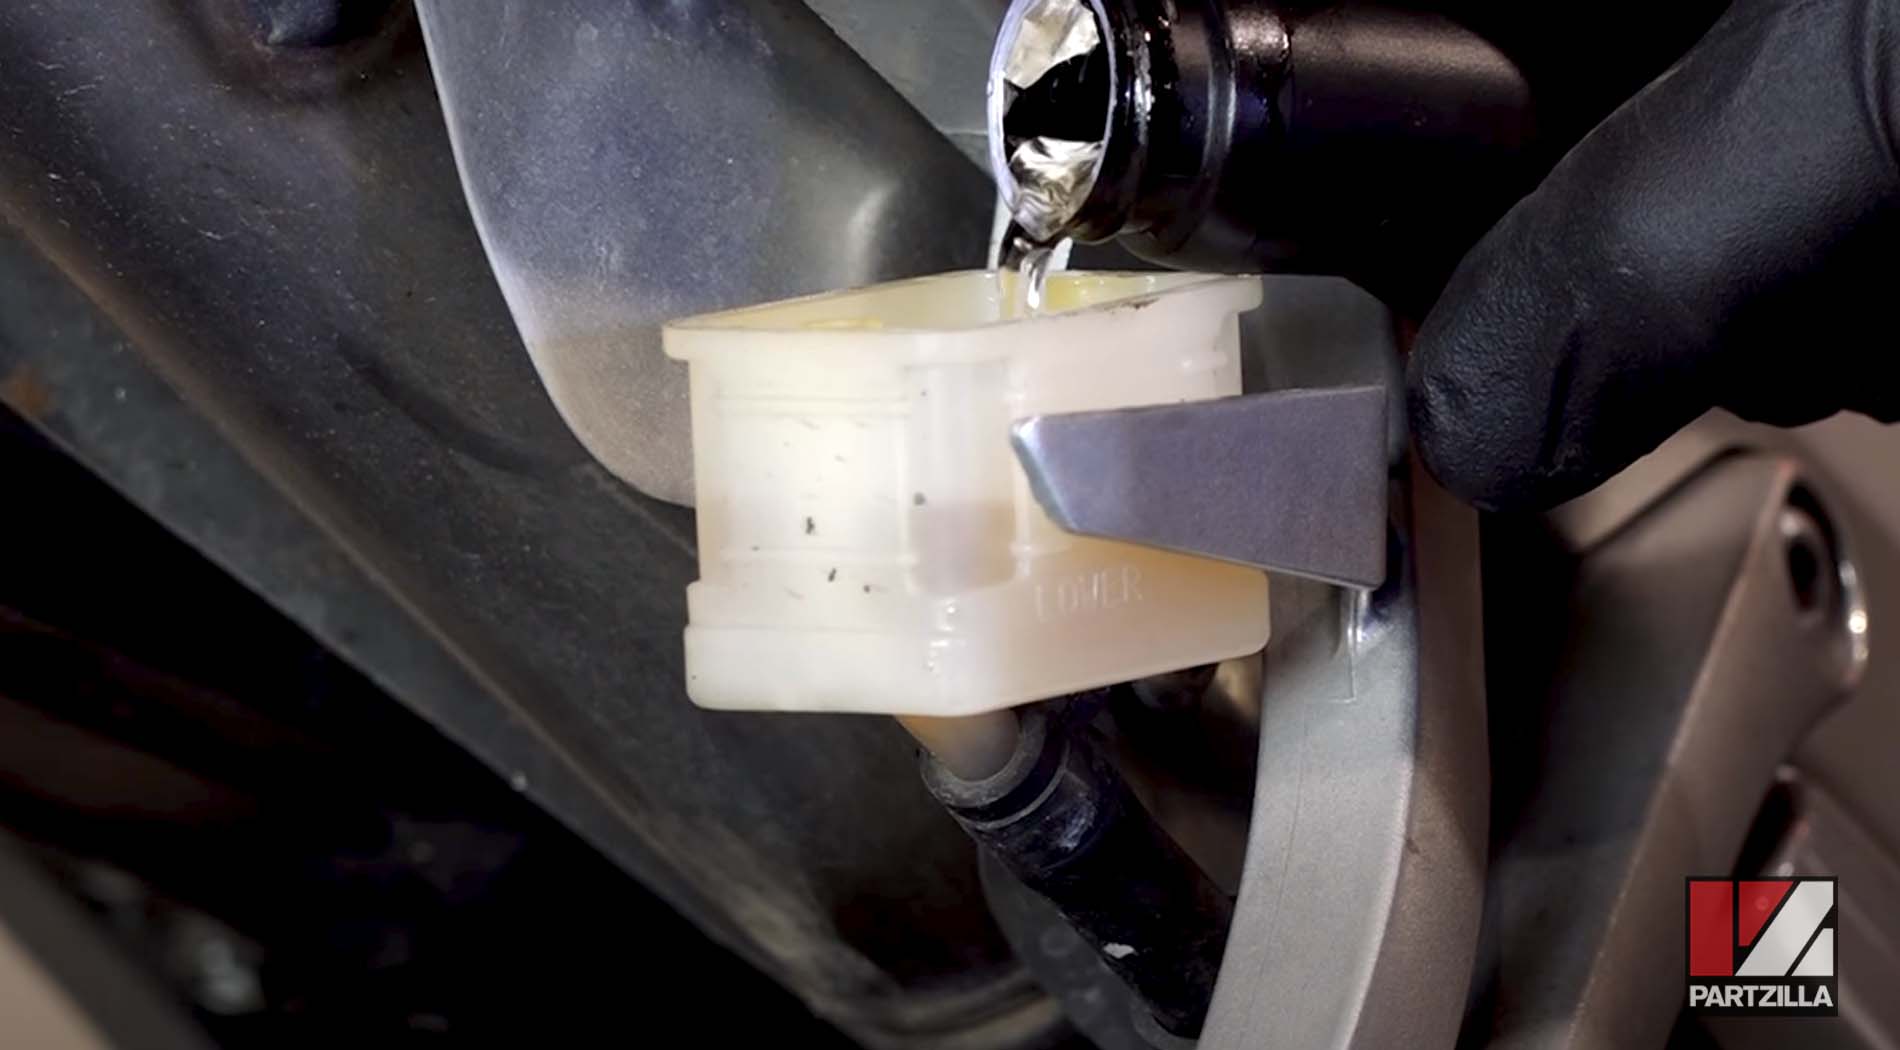
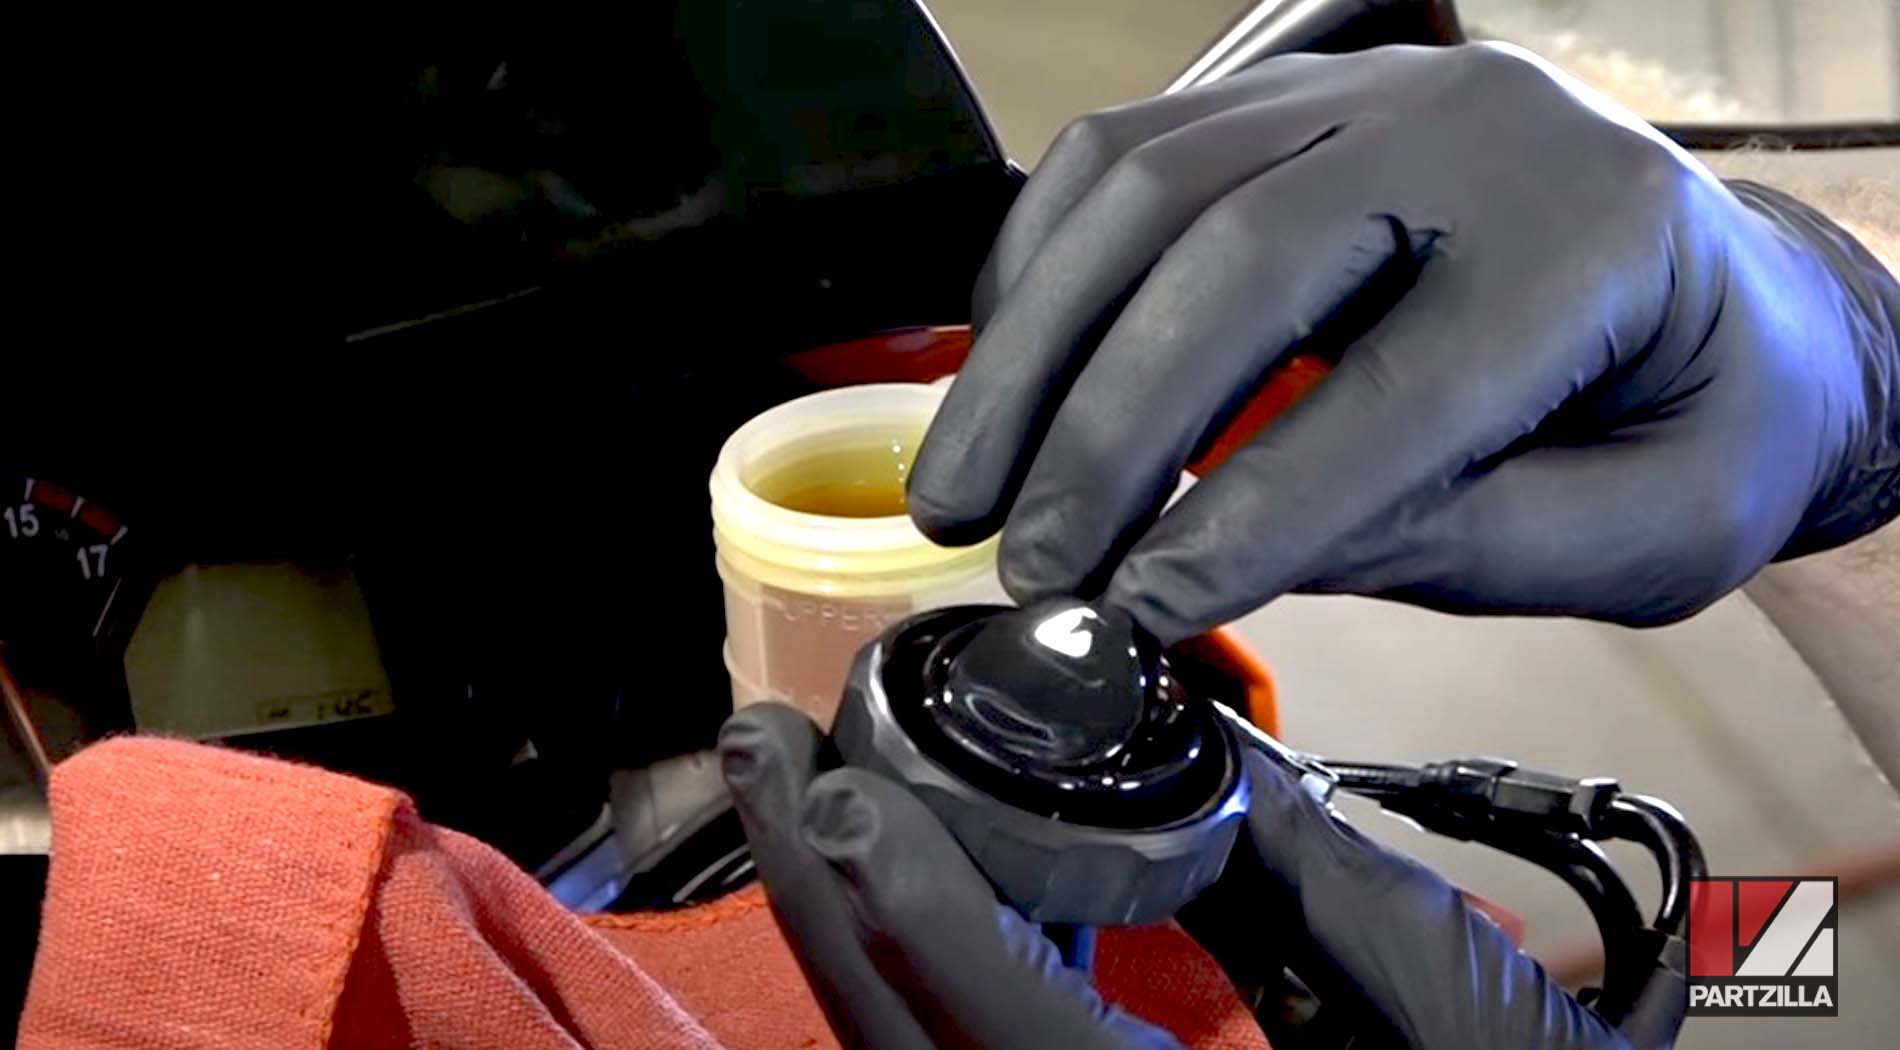
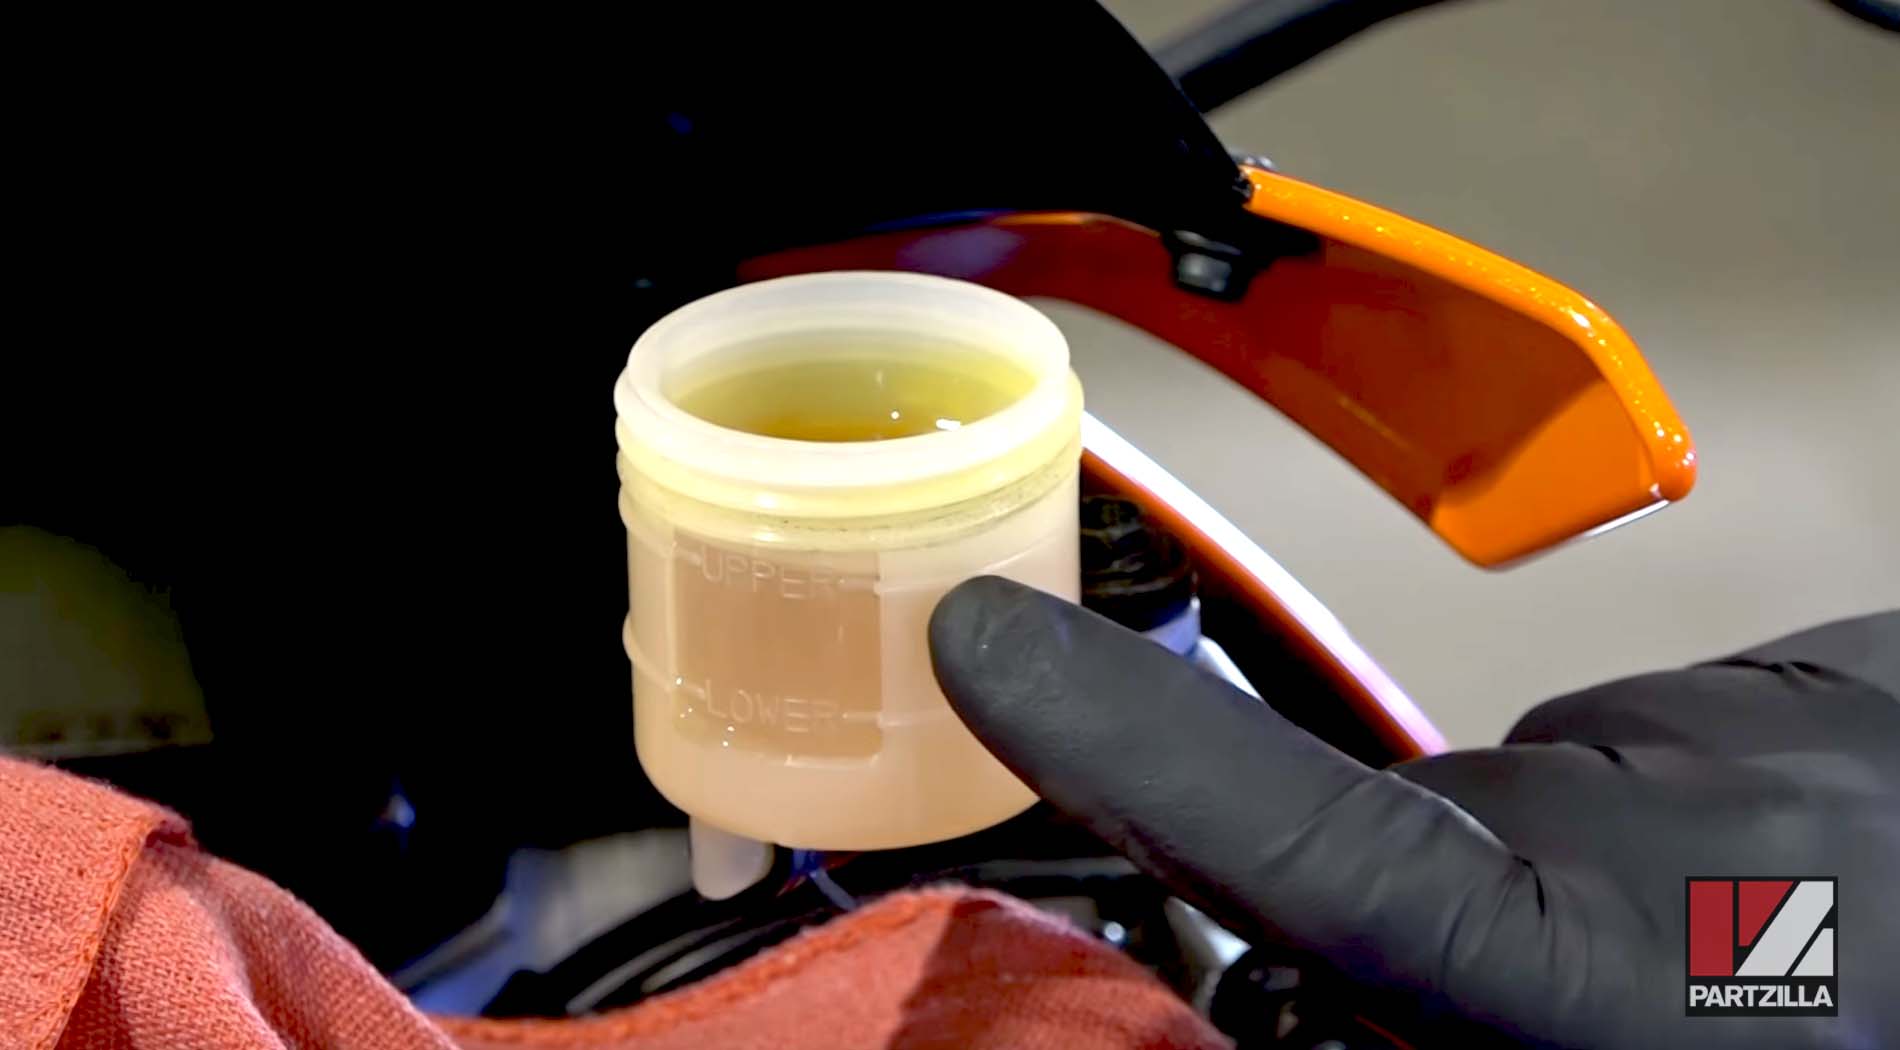
Step 1. Remove the two covers and the diaphragm from the rear brake reservoir. Top off the reservoir with DOT 4 brake fluid if necessary.
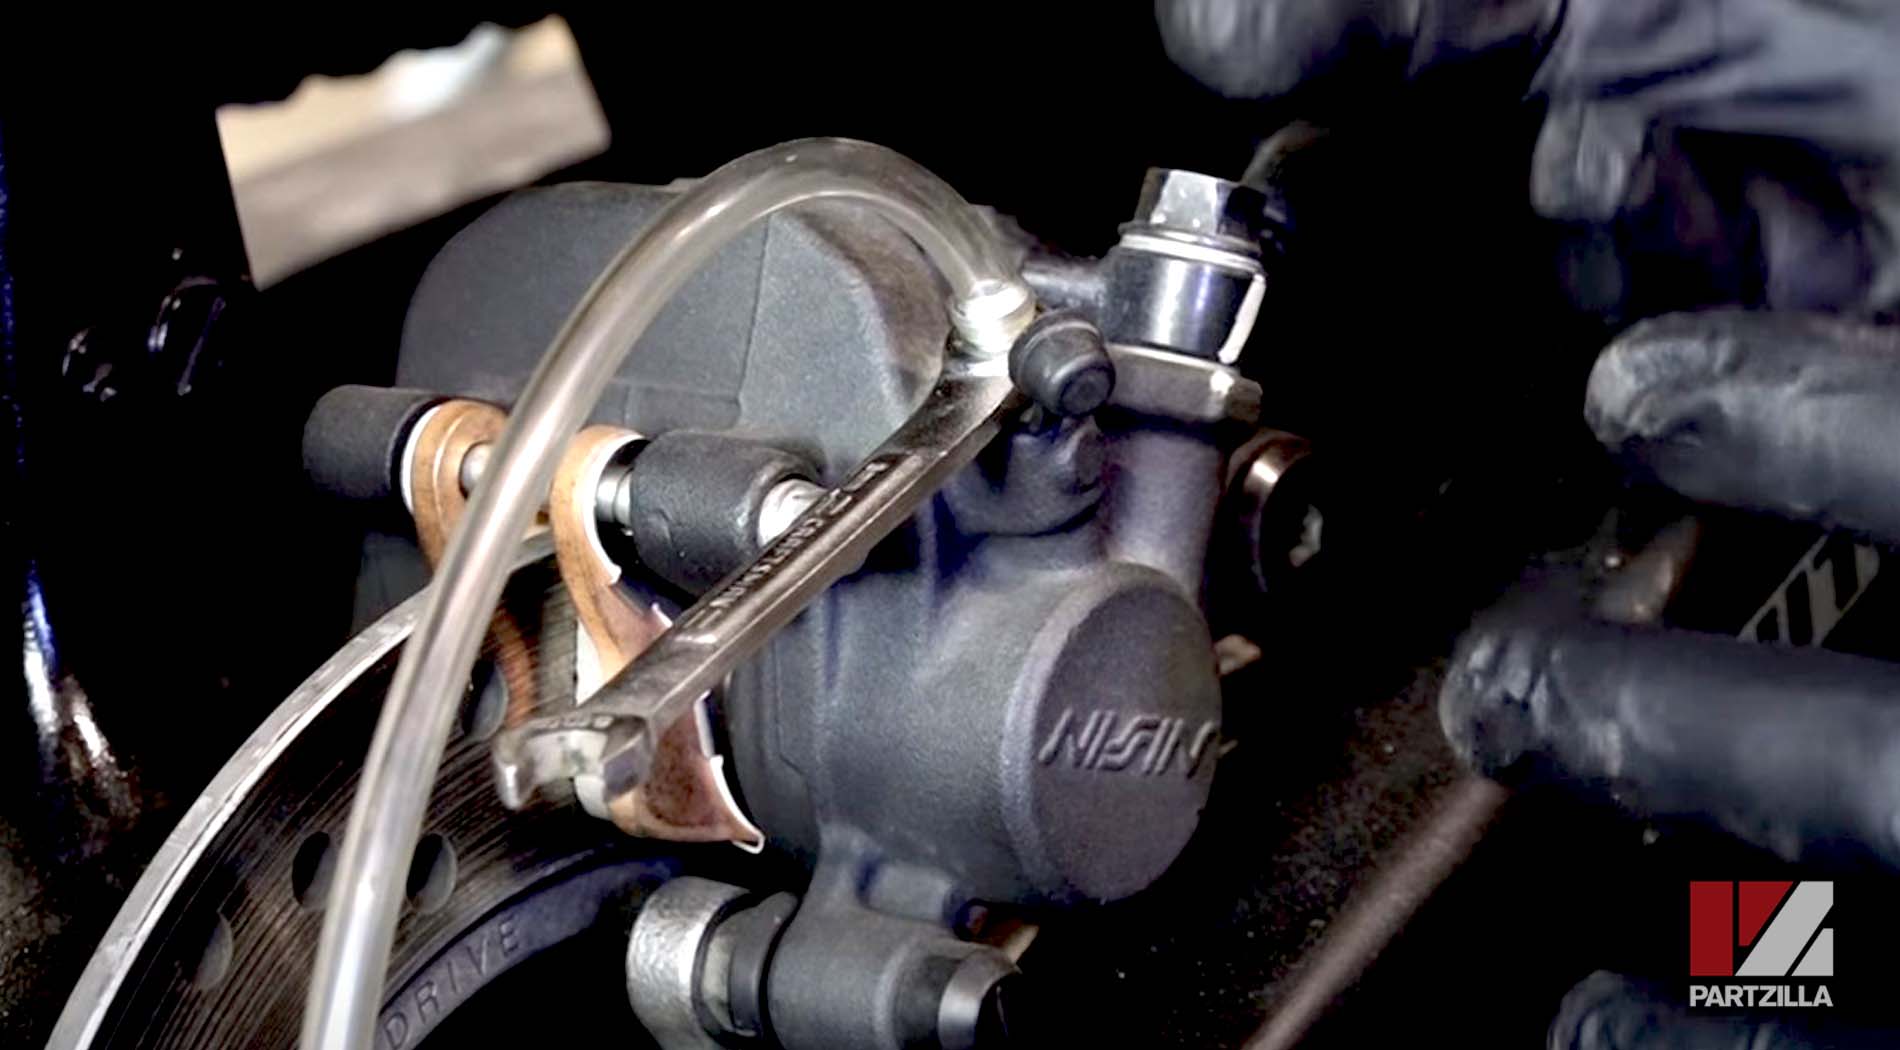
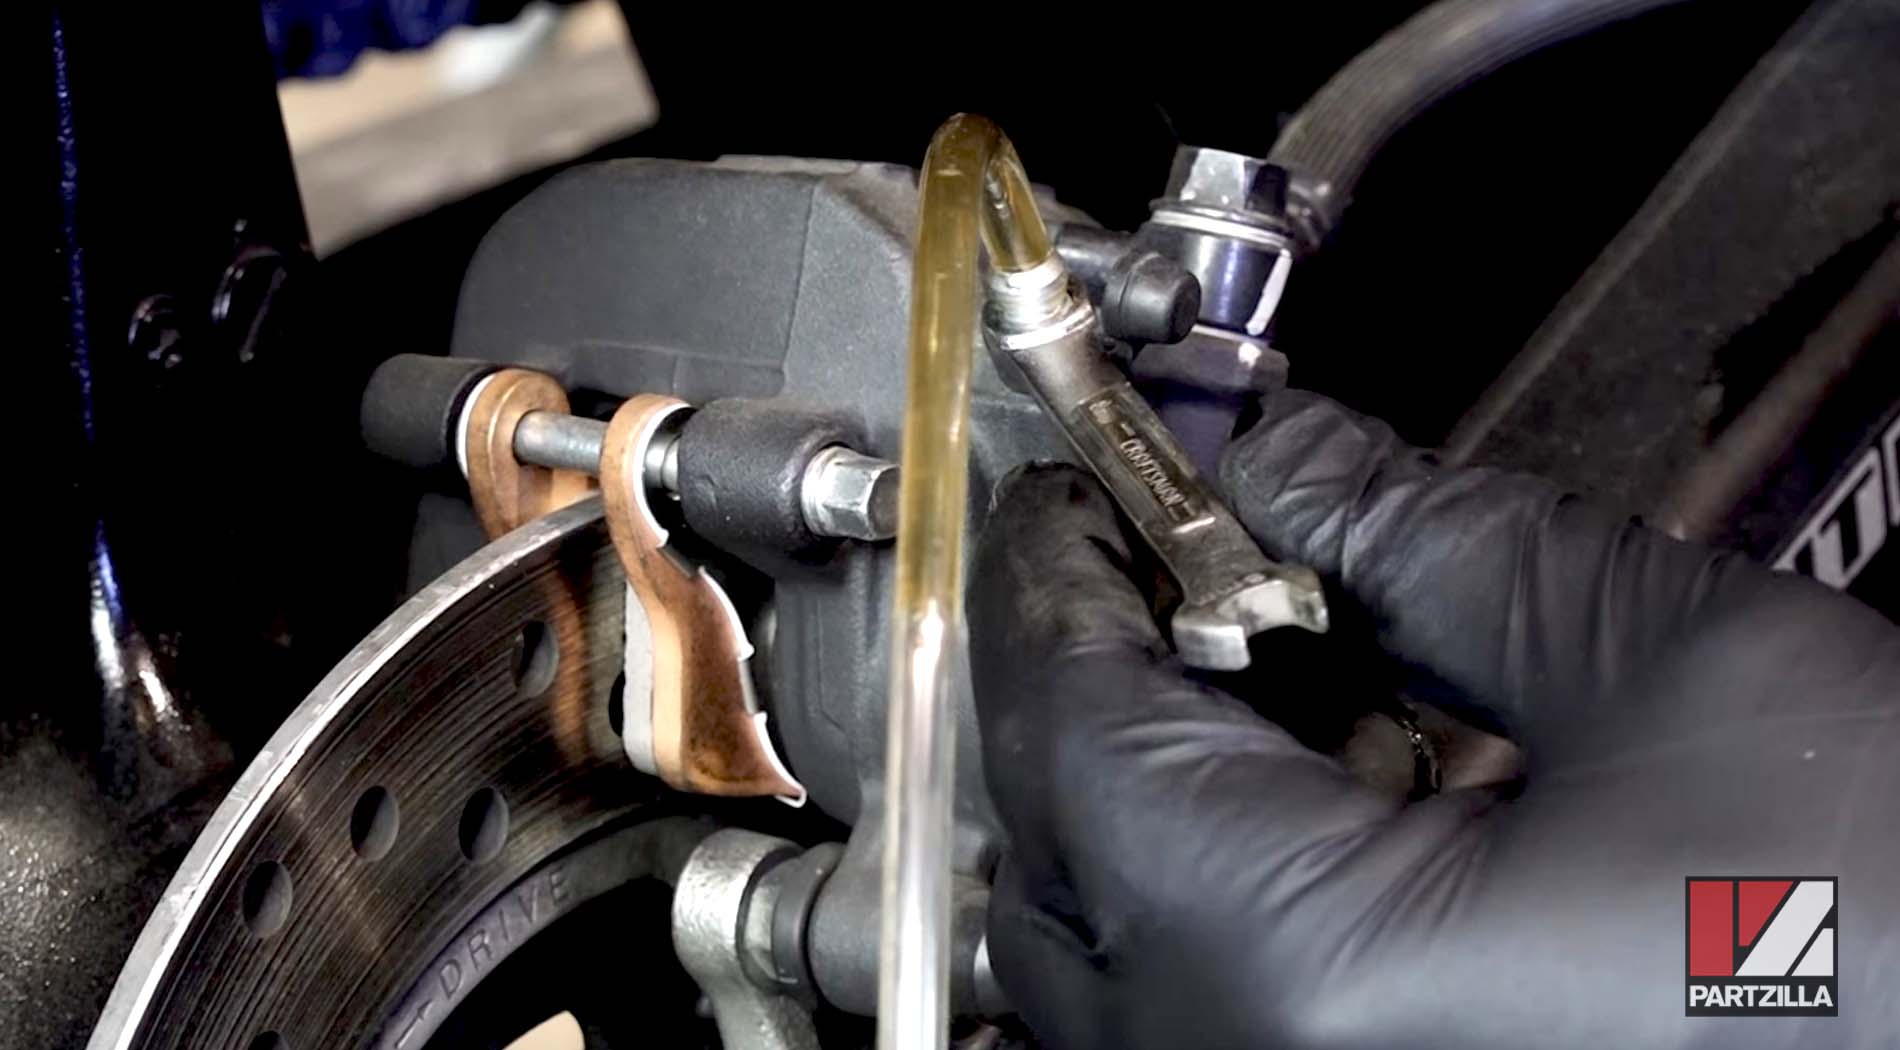
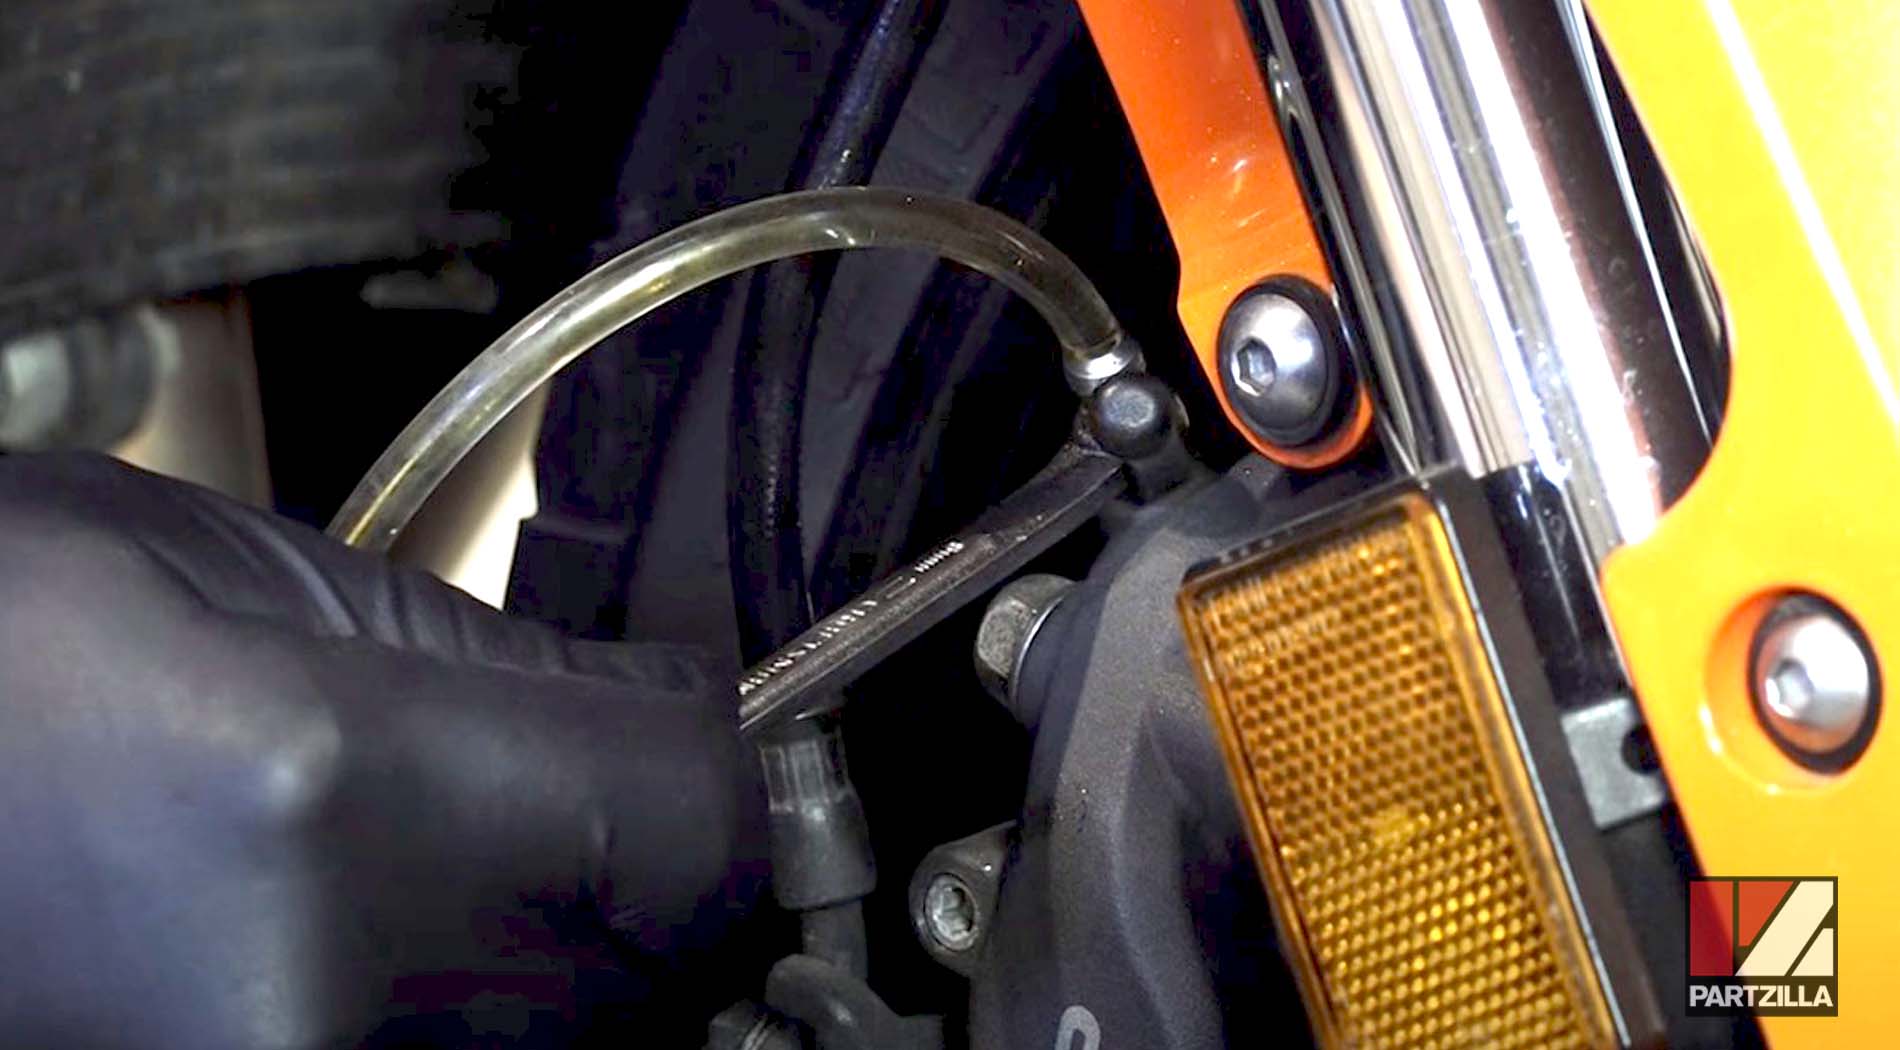
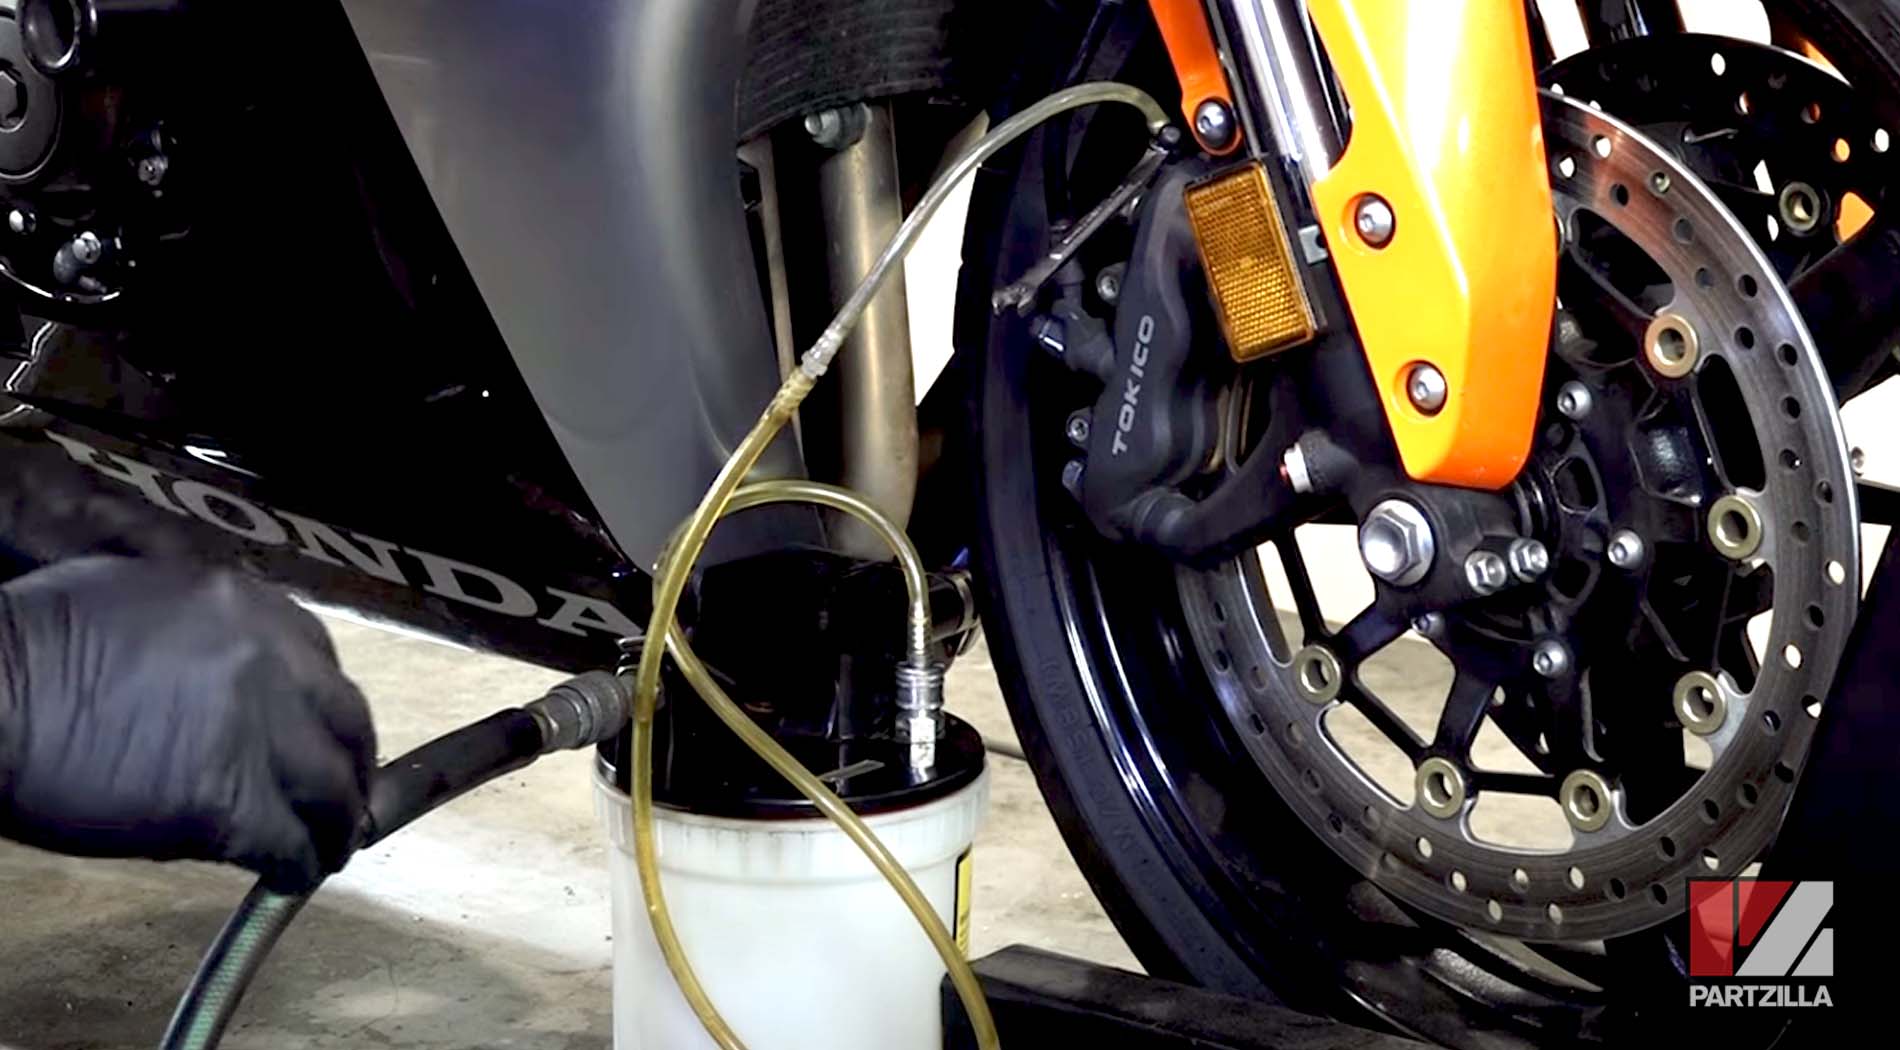
Step 2. Remove the rubber cap from the rear brake caliper bleed screw, and put an 8mm wrench and a 3/16” x 5/16” hose over the bleed screw. Put the other end of the hose into a container to catch the old brake fluid.
Step 3. Pump the rear brake pedal, then hold it down and release the rear brake caliper bleed screw. You’ll see old brake fluid begin to pump out into the hose.
Step 4. Keep the brake pedal held down and tighten the bleed screw.
Step 5. Repeat steps 3-4 until fresh brake fluid is coming out from the reservoir.
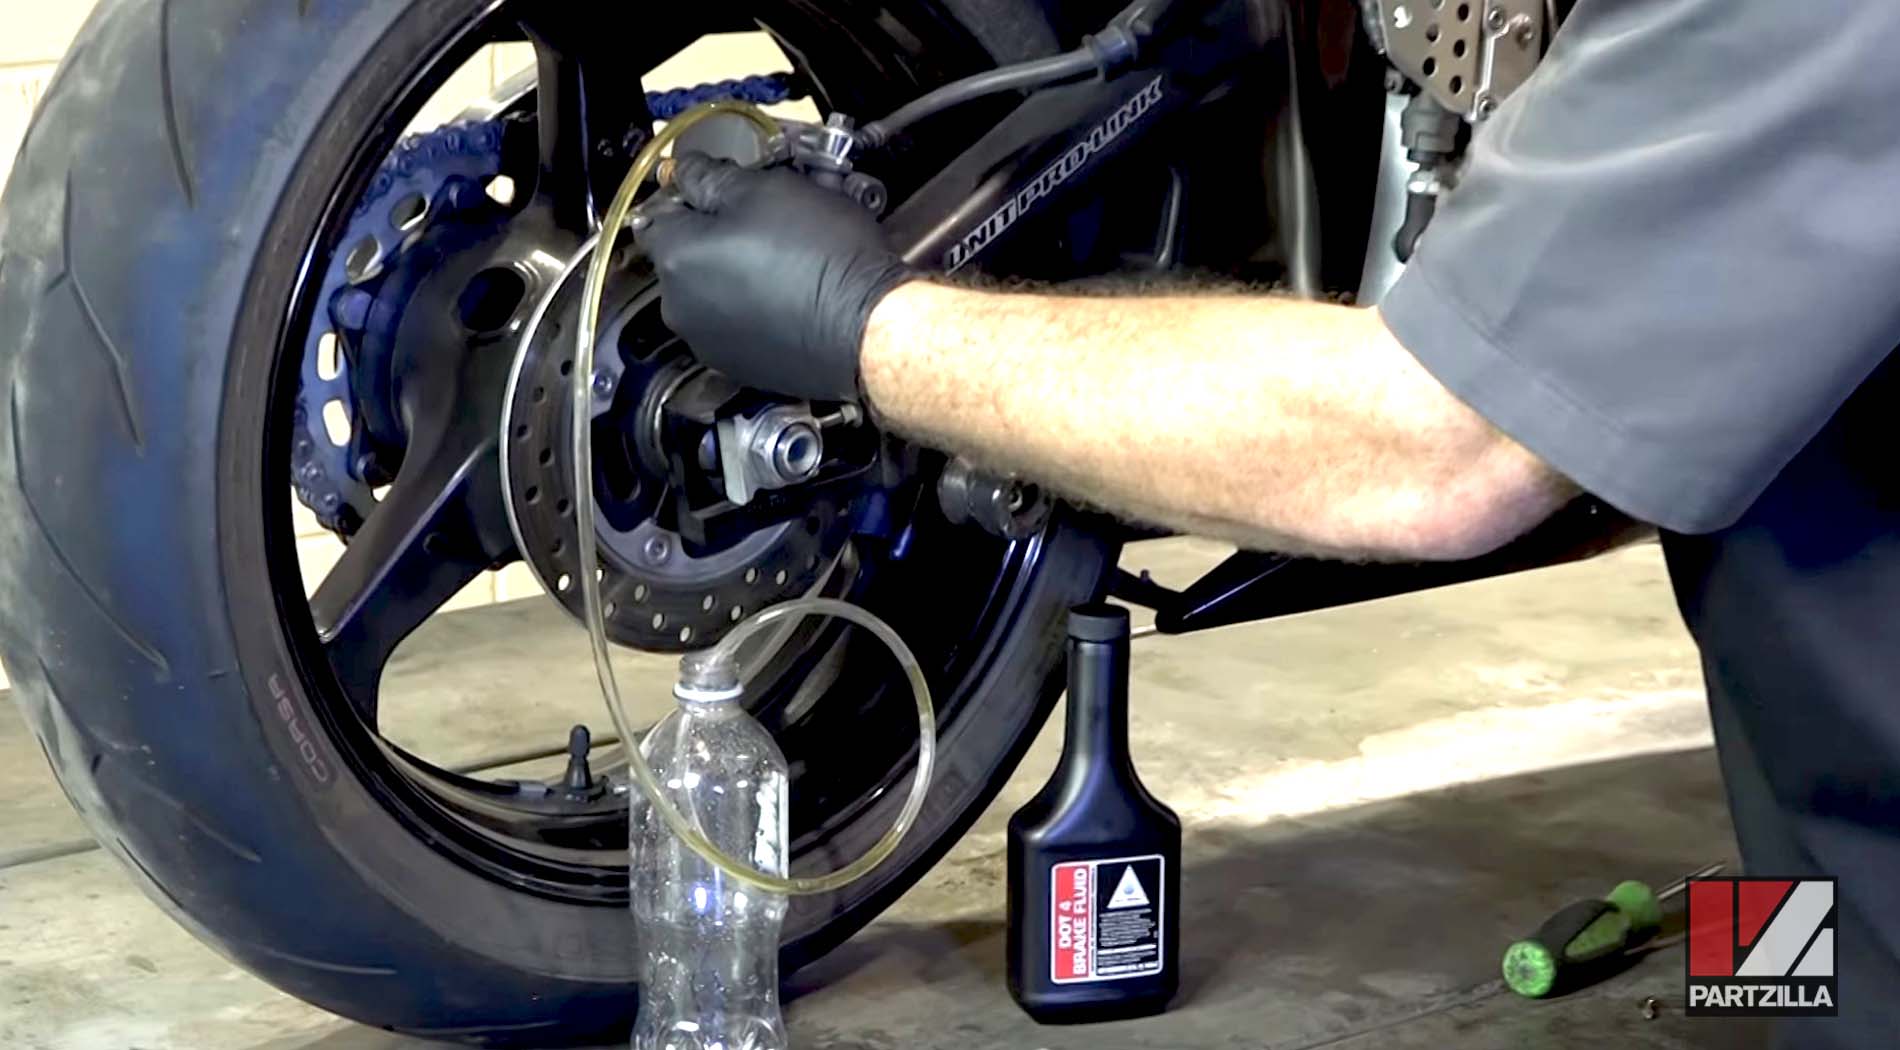
NOTE: You can tell fresh brake fluid from old brake fluid because fresh fluid is clear. Keep an eye on the brake fluid level in the brake reservoir as you bleed the system, and pause to refill the reservoir before it runs dry. If you let air enter the brake system, you’ll have to bleed it through again to completely remove the trapped air.
Step 6. Make sure the bleed screw is fully tightened, then remove the hose and the 8mm wrench, and place the rubber cap back over the bleed screw.
Step 7. Make sure the reservoir is topped off to the maximum fill line, then replace the diaphragm and two reservoir covers.
Step 8. Pump the rear brake pedal a few times to check that the brakes feel solid, and inspect the bleed screw for signs of leaks. Tighten the bleed screw if necessary.
Honda CBR600RR Rear Brake Bleed: Vacuum Method
Step 1. Remove the two covers and the diaphragm from the rear brake reservoir. Top off the reservoir with DOT 4 brake fluid if necessary.
Step 2. Remove the rubber cap from the rear brake caliper bleed screw, and put an 8mm wrench and a brake bleeder over the bleed screw.
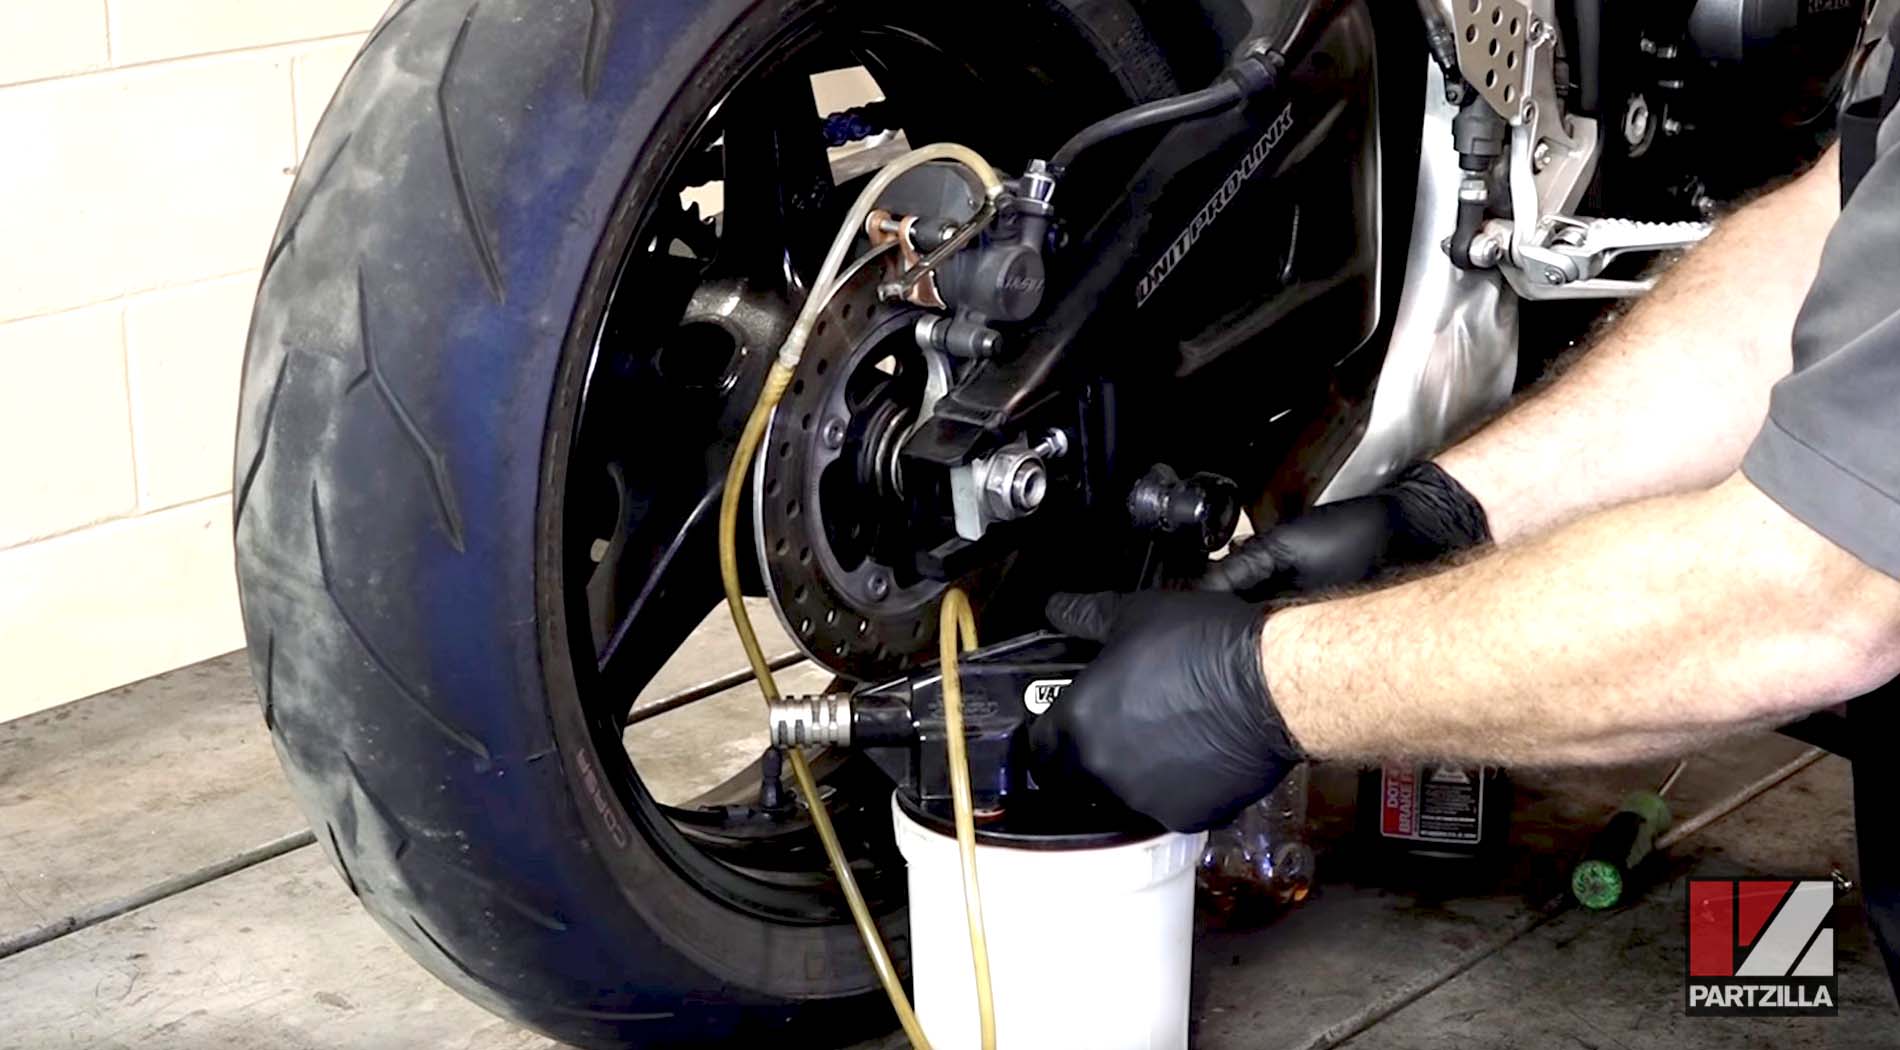
Step 3. Start the vacuum brake bleeder, and release the rear brake caliper bleed screw.
Step 4. Draw fluid out through the brake system with the vacuum bleeder until fresh brake fluid flows from the reservoir, then tighten the bleed screw. Continue drawing out fluid, then tighten the bleed screw again.
NOTE: Keep an eye on the brake fluid level in the brake reservoir, and close the bleed screw and refill the reservoir before it runs dry.
Step 5. Make sure the bleed screw is fully tightened, then remove the vacuum brake bleeder and the 8mm wrench, and place the rubber cap back over the bleed screw.
Step 6. Make sure the reservoir is topped off to the maximum fill line, then replace the diaphragm and two reservoir covers.
Step 7. Pump the rear brake pedal a few times to check that the brakes feel solid, and inspect the bleed screw for signs of leaks. Tighten the bleed screw if necessary.
Honda CBR600RR Front Brakes Bleed: Manual Method
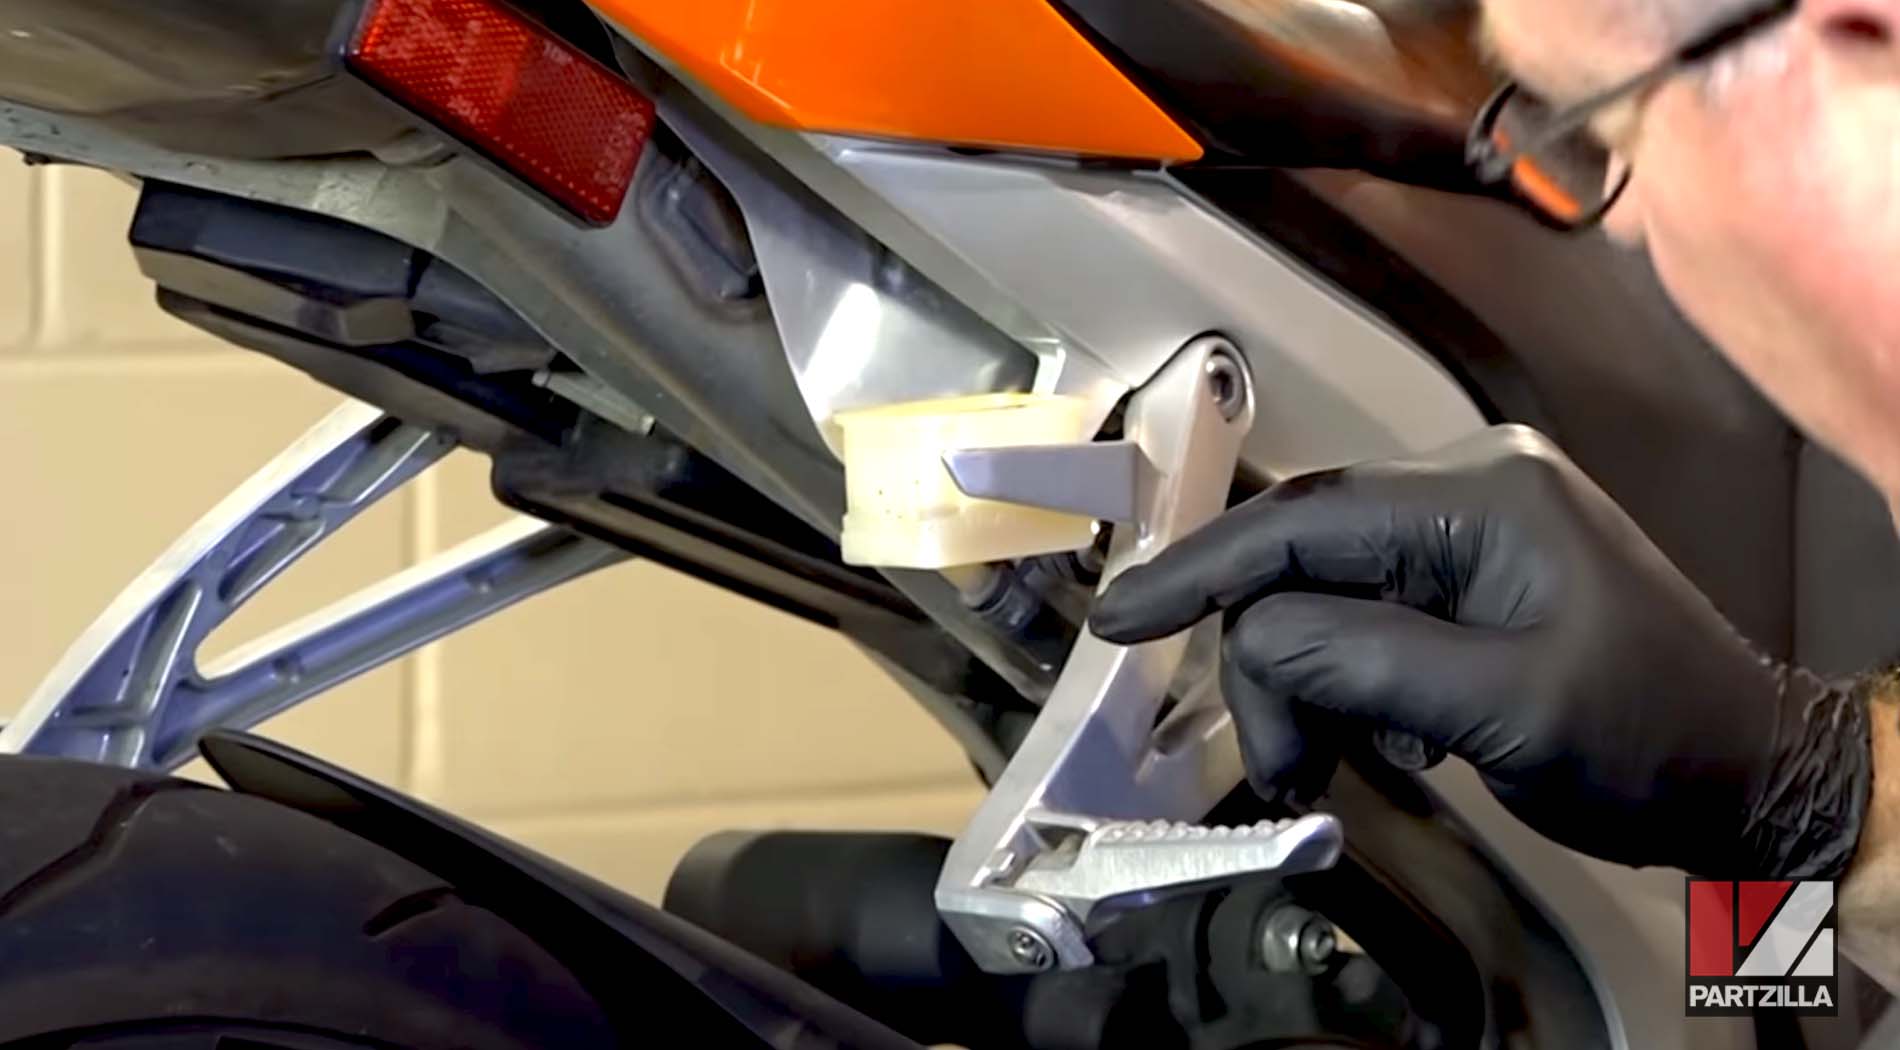
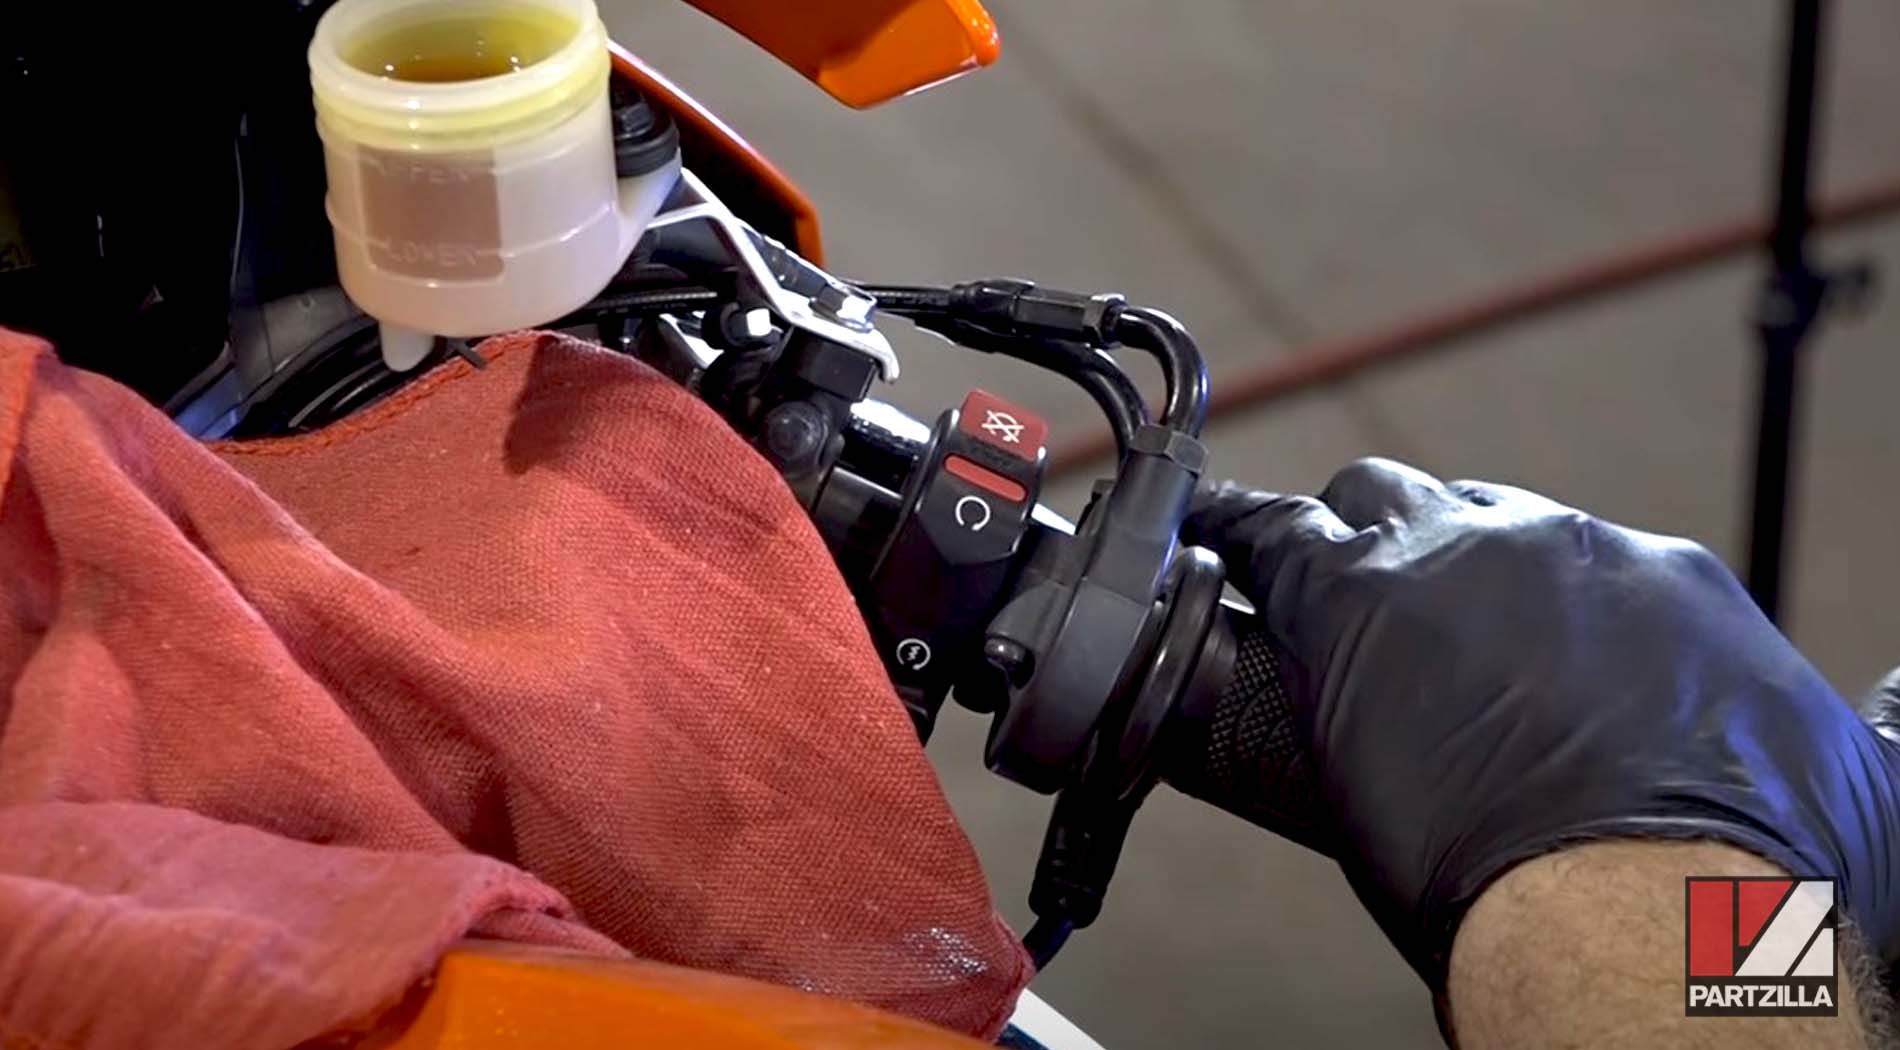
Step 1. Remove the small metal bracket securing the front brake reservoir cover, then remove the cover, the diaphragm plate and the diaphragm beneath it. Top off the reservoir with DOT 4 brake fluid if necessary.
Step 2. Remove the rubber cap from the front brake caliper bleed screw, and put an 8mm wrench and a 3/16” x 5/16” hose over the bleed screw. Put the other end of the hose into a container to catch the old brake fluid.
Step 3. Pump the front brake lever, then hold it down and release the front brake caliper bleed screw. You’ll see old brake fluid pump out into the hose.
Step 4. Keep the brake lever held down and tighten the bleed screw.
Step 5. Repeat steps 3-4 until fresh brake fluid is coming from the reservoir.
NOTE: Keep an eye on the brake fluid level in the brake reservoir, and pause to refill the reservoir before it runs dry.
Step 6. Make sure the bleed screw is fully tightened, then remove the hose and the 8mm wrench and place the rubber cap back over the bleed screw.
Step 7. Repeat steps 2-6 for the front brake caliper on the other side of the wheel.
Step 8. Make sure the reservoir is topped off to the maximum fill line, and replace the diaphragm, diaphragm plate, cover and metal bracket.
Step 9. Pump the front brake lever a few times to check that the brakes feel solid, and inspect the bleed screw for signs of leaks. Tighten the bleed screw if necessary.
Honda CBR600RR Front Brakes Bleed: Vacuum Method
Step 1. Remove the small metal bracket securing the front brake reservoir cover, then remove the cover, the diaphragm plate and the diaphragm beneath it. Top off the reservoir with DOT 4 brake fluid if necessary.
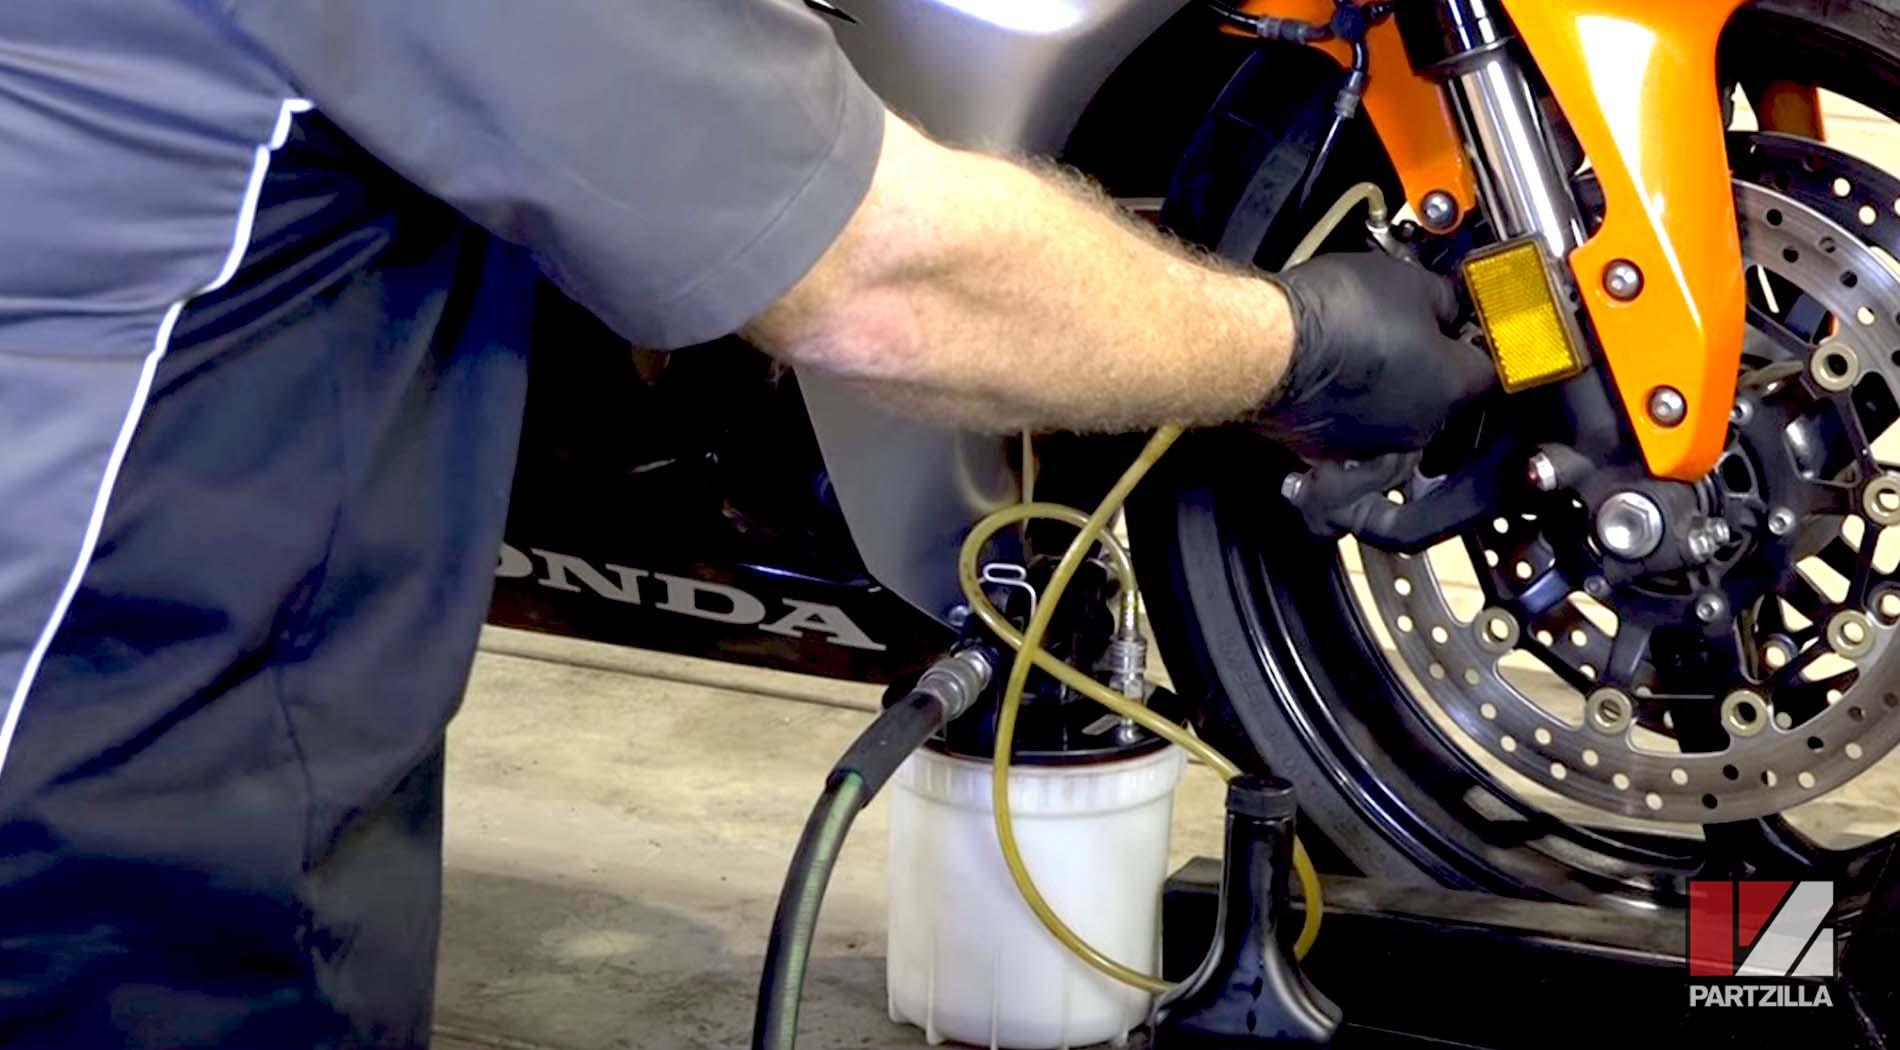
Step 2. Remove the rubber cap from the front brake caliper bleed screw, and put an 8mm wrench and a brake bleeder over the bleed screw.
Step 3. Start the vacuum brake bleeder and release the front brake caliper bleed screw.
Step 4. Draw fluid out through the brake system with the vacuum bleeder until fresh brake fluid flows from the reservoir, then tighten the bleed screw. Continue drawing out fluid, then tighten the bleed screw again.
NOTE: Keep an eye on the brake fluid level in the brake reservoir, and close the bleed screw and refill the reservoir before it runs dry.
Step 5. Make sure the bleed screw is fully tightened, then remove the vacuum brake bleeder and the 8mm wrench, and place the rubber cap back over the bleed screw.
Step 6. Repeat steps 2-5 for the front brake caliper on the other side of the wheel.

Step 7. Make sure the reservoir is topped off to the maximum fill line, then replace the diaphragm, diaphragm plate, cover and metal bracket.
Step 8. Pump the front brake lever a few times to check that the brakes feel solid, and inspect the bleed screws for signs of leaks. Tighten the bleed screws if necessary and you’re done.